Sign In
Upload
Download
Table of Contents
Contents
Add to my manuals
Delete from my manuals
Share
URL of this page:
HTML Link:
Bookmark this page
Add
Manual will be automatically added to "My Manuals"
Print this page
×
Bookmark added
×
Added to my manuals
Manuals
Brands
gefran Manuals
Temperature Controller
850
Installation and instruction manual
gefran 850 Installation And Instruction Manual
Double pid temperature controller
Hide thumbs
1
2
Table Of Contents
3
4
5
6
7
8
9
10
11
12
13
14
15
16
17
18
19
20
21
22
23
24
25
26
27
28
29
30
31
32
33
34
35
36
37
38
39
40
41
42
43
44
45
46
47
48
49
50
51
52
53
54
55
56
57
58
59
60
61
62
63
64
65
66
67
68
69
70
71
72
73
74
75
76
77
78
79
80
81
82
83
84
85
86
87
88
89
90
91
92
93
94
95
96
97
98
99
100
101
102
103
104
105
106
107
108
109
110
111
112
113
114
115
116
117
118
119
120
121
122
123
124
125
126
127
128
129
130
131
132
133
134
135
136
137
138
139
140
141
142
143
144
145
146
147
148
149
150
151
152
153
154
155
156
157
158
159
160
161
162
163
164
165
166
167
168
169
170
171
172
173
174
175
176
177
178
179
180
181
182
183
184
185
186
187
188
189
190
191
192
193
194
195
196
197
198
199
200
201
202
203
204
205
206
207
208
209
210
211
212
213
214
215
216
217
218
219
220
221
222
223
224
225
226
227
228
229
230
231
232
233
234
235
236
237
238
239
240
241
242
243
244
245
246
247
248
249
250
251
252
253
254
255
256
257
258
259
260
261
262
263
264
265
266
267
268
269
270
271
272
273
274
275
276
277
278
279
280
281
282
283
284
285
286
page
of
286
Go
/
286
Contents
Table of Contents
Troubleshooting
Bookmarks
Table of Contents
80209C_MHW_850-1650-1850_20-2020_Eng_Pag
Contents
Table of Contents
Device Data
Introduction
Warnings and Safety
Glossary
Typographical Conventions Used in this Manual
Copyright
Disclaimer
1 General Description
Profile
Differences Among Models
Controller
Display and Keys
Drilling Dimensions and Templates
1650 Controller
Display and Keys
Drilling Dimensions and Templates
1850 Controller
Display and Keys
Drilling Dimensions and Templates
2 Installation
Mounting the Controller
General Installation Rules
Drilling Dimensions
Protection against Infiltration of Dust
Water
Vibrations
Minimum Space for Ventilation
Positioning
Fastening to the Panel
Connections
General Rules for Connections
Electromagnetic Compatibility (EMC)
Cables
Power Supply
Connecting Inputs and Outputs
Connection Diagrams
General Diagram
Power Supply
Inputs
Outputs
Digital Inputs
Serial Line
CT Inputs
Auxiliary Inputs
Auxiliary Outputs
1650 Connection Diagrams
General Diagram
Inputs
Power Supply
Outputs
Digital Inputs
Serial Line
CT Inputs
Auxiliary Inputs
Analog Outputs
1850 Connection Diagrams
General Diagram
Power Supply
Inputs
Outputs
Digital Inputs
Serial Line
CT Inputs
Auxiliary Input
Third Analogue Input (Aux2)
Analog Outputs
With Optional (N) =10, 01,11
RS485 Serial Connection Diagram
Ethernet Port Wiring Diagram
3 Commissioning
Information on Displays and Use of Keys
Navigating the Menus
Displays
Display Characters
Scrolling Messages
Sequence at Power-On
First Power-On
Fast Configuration
Setting up Quick Configuration
Setting up the Alarm
Setting up the Heater Break Alarm
Setting up the PID
4 Configuration
Programming/Configuration Menu
First: Know What You're Doing
Passwords
Password in the User Menu
Main Menu
Functional Schema
Legend for Submenus and Parameters
Submenu
Parameter
Submenu INFO - Information Display
SW.VER - Software Version
CODE - Identifying Code of Controller
ERR.1 - Main Input Error
ERR.2 - Auxiliary Input Error
ERR.3 - Auxiliary Input Error 2 (IN3)
M.err.X* - Math Function Block X* Error
SAP.C - SAP Code
SER.N - Serial Number of Controller
Model of Controller
Type of Controller
FUNC.B - Logic and Math Functions Option Available
CALEN - Calendar Available
IN.AUX - Auxiliary Input Available
I.AUX2 - Auxiliary Input 2 Available
OUT.AN - Analog Output Available
Ctx - Current Transformer Input Available
X.in.dg - Digital Input Available
RS485 - RS485 Serial Port Available
MAC.E - Controller Ethernet Address
IO.AUX - Auxiliary Digital I/Os Available
IO.RELE - Auxiliary Relays Available
PS.MAI - Sensor Power Supply Available for Main Input
PS.AUX - Sensor Power Supply Available for Auxiliary Input
OUT1 - Type of Output 1
OUT2 - Type of Output 2
OUT3 - Type of Output 3
OUT4 - Type of Output 4
OUT1.S - Number of Switchings Output 1
OUT2.S - Number of Switchings Output 2
OUT3.S - Number of Switchings Output 3
OUT4.S - Number of Switchings Output 4
INDG.S - Digital Input Switchings Number
T.DAYS - Total Working Days
P.DAYS - Partial Working Days
T.INT - Internal Temperature of Controller
T.MIN - Minimum Internal Temperature of the Controller
T.MAX - Maximum Internal Temperature of the Controller
TIME - Internal Time
DATE - Internal Date
INFO.E Submenu - Displaying Ethernet Information
VERS.E - Ethernet Software Version
TY.S.E - Ethernet Assignment Mode Status
CON.E - Ethernet Connection Status
LIN.E - Ethernet Link Status
SPD.E - Ethernet Speed Status
IP.E - Ethernet IP Address
SUB.E - Subnet Mask Ethernet
GAT.E - Ethernet Gateway Address
STA.E - Ethernet Network Status
MASTER Submenu - Display of Master Modbus Communication Information and Values
STAT - Master Communication Status
Mas.XX - Master Communication Value XX
RECP.N - Selecting a Recipe
Submenu PR.OPT - Configuring Programs
STP - Number of First Step Assigned to Program
Submenu PR.STP - Configuration of Program Steps
Pr.num
PR.ST.N - Programming Step
ST.END - End Step of the Program Configuration
REFE - Step Reference Programmer
SETP - Programming Step Setpoint
RAMP.T - Step Time Ramp
HOLD.T - Hold Time in Step
HBB - Enable Hold Back Band Function
BAND - Maximum Deviation for HBB
HBB.R - Enabling HBB During Ramp
HBB.H - Enabling HBB During Hold
HBB2 - Enabling HBB with Respect to the Auxiliary Input
S.SP.EN - Enabling Retransmission of Setpoint to Analog Output
SUB.SP - Setpoint Value of Slaved Controller
S.RM.EN - Enabling Ramp for Slaved Controller
ENBL.1 - Consent 1 to Execute Step
ENBL.2 - Consent 2 to Execute Step
ENBL.3 - Consent 3 to Execute Step
ENBL.4 - Consent 4 to Execute Step
ST.N - Other Programmer Step as Consent to Execute Step
EVN.R.1 - Event 1 During Step Ramp
EVN.R.2 - Evento 2 Durante la Rampa del Passo
EVN.R.3 - Event 3 During Step Ramp
EVN.R.4 - Event 4 During Step Ramp
EVN.H.1 - Event 1 During Step Hold
EVN.H.2 - Event 2 During Step Hold
EVN.H.3 - Event 3 During Step Hold
EVN.H.4 - Event 4 During Step Hold
GROP.R - Group of Parameters Assigned to Ramp
GROP.H - Group of Parameters Assigned to Hold
MSG.R - Message Associated with the Ramp
MSG.H - Message Associated with the Maintenance
Submenu INPUT - Configuring Analog Inputs
Functional Schema
INP.N - Selecting the Analog Input
TYPE - Selecting Sensor Type
SBR.E - Enabling SBR Error
LIN - Selecting Linearization Type
UNIT - Selecting the Displayed Unit of Measurement
FILT - Digital Filter
FILT.D - Digital Filter on PV Display
DEC.P - Number of Decimals Displayed
LO.SCL - Lower Limit of Scale
HI.SCL - Upper Limit of Scale
OF.SCL - Scale Offset Correction
LO.SP - Lower Limit for Setpoint
HI.SP - Upper Limit for Setpoint
LO.AL - Lower Limit for Alarms
HI.AL - Upper Limit for Alarms
MSG.LO - Selecting the Message Assigned to Low
MSG.HI - Selecting the Message Assigned to HIGH
MSG.ER - Selecting the Message Assigned to Err
MSG.SB - Selecting the Message Assigned to Sbr
Submenu IN.CT - Configuration of Current Inputs
Functional Diagram
IN.CT.N - Configuring Current Transformers
FILT - Digital Filter
HI.SCL - Maximum Scale Limit
OF.SCL - Scale Offset Correction
Submenu ALARM - Configuration of Alarms
Functional Diagram
ALARM -Selecting the Alarm to be Configured
REFE - Selecting the Alarm Reference
DI.IN - Selecting Direct or Inverse Alarm
AB.RE - Selecting Absolute or Deviation Alarm
SY - Method for Applying Hysteresis
PWON.E - Disabling the Alarm at Power-On
LATCH - Memorizing the Alarm
HYSTE - Hysteresis
DELAY - Alarm Trip Delay
MSG.AL - Message Associated with Tripping of Alarm
BLK.AL - Flashing of PV Display
Submenu AL.HB - Configuring the Heater Break Alarm
Functional Diagram
LOW.ON - Alarm Due to Insufficient Current Draw
HIG.ON - Alarm Due to Excessive Current Draw
HI.OFF - Alarm Due to Excessive Current Draw
TIME - HB Alarm Trip Delay
THR.PE - Percentage of HB Current Compared to Calibration
OUT - Control Output Associated with HB Alarm
LOAD - Selecting Type of Connected Load
MSG.HB - Message Associated with Tripping of HB Alarm
BLK.HB - Flashing of PV Display
Submenu AL.PW - Configuring Power Alarm
Functional Diagram
AL.PW - Select the Power Alarm to Configure
PV.BND - Process Variable Stability Band
PW.BND - Power Stability Band
TIME - Power Alarm Trip Delay
MSG.PW - Message Associated with Tripping of Power Alarm
BLK.PW - Flashing of PV Display When Power Alarm Trips
Submenu PID - Configuring Control Parameters
Functional Diagram
PID.N - PID Configuration
S.TUNE - Enabling Self-Tuning
SOFT.S - Enabling Soft-Start
SOFT.T - Soft-Start Time
A.TUNE - Enabling Auto-Tuning
AUT.T - Selecting Type of Auto-Tuning
CNTR - Selecting Type of Control
DERV.S - Derivative Sampling Time
H.PB - Proportional Heating Band or Hysteresis in ON-OFF Control
H.IT - Integral Heating Time
H.DT - Derivative Heating Time
H.P.HI - Maximum Limit of Heating Power
H.P.LO - Minimum Limit of Heating Power
COOL - Selecting Cooling Fluid
C.SP - Cooling Setpoint with Respect to Heating Setpoint
C.PB - Proportional Cooling Band or Hysteresis in ON-OFF Control
C.IT - Integral Cooling Time
C.DT - Derivative Cooling Time
C.P.HI - Maximum Limit of Cooling Power
C.P.LO - Minimum Limit of Cooling Power
RESET - Manual Reset
P.RST - Power Reset
A.RST - Antireset
FEEDF - Feedforward Power
DEAD.B - Deadband
FAULT - Fault Action Power
GRAD.I - Setpoint Gradient in Increase
GRAD.D - Gradiente DI Setpoint in Decremento
UNIT - Unit of Measurement of Gradient
GRAD.O - Gradient of Control Output
LBA.TM - Tripping Delay
LBA.PW - Power Delivered When LBA Alarm Trips
Submenu PID.GR - Configuring Groups of Control Parameters
PID.N - Selecting PID for Parameters to be Configured
PID.G.N - Selecting PID for Parameters Group to be Configured
H.PB - Proportional Heating Band or Hysteresis in ON-OFF Control
H.IT - Integral Heating Time
H.DT - Derivative Heating Time
H.P.HI - Maximum Heating Power
H.P.LO - Minimum Limit of Heating Power
C.PB - Proportional Cooling Band or Hysteresis in ON-OFF Control
C.IT - Integral Cooling Time
C.DT - Derivative Cooling Time
C.P.HI - Maximum Limit of Cooling Power
C.P.LO - Minimum Limit of Cooling Power
PV.THR - Threshold PV for the Activation of the Group of PID Parameters
Submenu IN.DIG - Configuring Digital Inputs
Functional Diagram
I.DIG.N - Selecting the Digital Input
STAT - Defining the Input State
F.IN - Selecting the Assigned Function
ST.EN.N - Setting Assigned Consent Number
PRE.SW - Prescaler Setting for Number of Input Switchings
SWTCH - Number of Input Switching Setting for Signaling
MSG.IN - Selecting the Digital Input Message
Submenu OUTPU - Configuring Outputs
Functional Diagram
OUT.N - Selecting the Output
STAT - Defining the Output State
F.OUT - Selecting the Function Assigned to Relay, Logic or Triac Output
TYPE - Defining the Type of Continuous Output
F.OU.C - Selecting the Function Assigned to Continuous Output
EVNT.N - Setting the Event Number
FB.O.N - Setting the Function Block Output Number
IN.DG.N - Setting the Digital Input Number
MAST.N - Setting the Master Communication Parameter Number
SWTCH - Setting the Number of Switchings for Signal
FAULT - State of Output with Broken Input
MSG.OU - Selecting the Output Message
LO.C - Low Limit for Continuous Output / HI.C
HI.C - Massimo DI Scala Per Uscita Continua
CY.TIM - Cycle Time of Output
Submenu OUT.AN - Configuring the Analog Retransmission Output
Functional Diagram
OU.AN.N - Selecting the Output
STAT - Defining the State of the Analog Output
TYPE - Defining the Type of Analog Output
FUNC - Selecting the Function Assigned to the Analog Output
MAST.N - Setting the Master Communication Parameter Number
CY.TIM - Output Cycle Time
LO.SCL - Scale Minimum
HI.SCL - Scale Maximum
Submenu VALVE - Configuring Valve Parameters
FUNC - Defining Valve Function
KEY.MO - Enabling Valve Operation with Keys
TRAVL - Valve Actuator Travel Time
TIM.LO - Minimum Power Change for Valve Drive
TIM.HI - Impulse Mode Setpoint
TIM.ON - Minimum Valve Impulse Time or on Time in Impulse Mode
TIM.OF - off Time in Impulse Mode
DEAD.B - Deadzone Symmetrical to Setpoint
Submenu EN.FUN - Configuration of Enablings
PID2.E - Enabling PID.2
APP.T - PID Control Application Type
CAS.R - Cascade Control Reference
PROGR - Enabling the Setpoint Programmer
RECP.N - Number of Parameters Recipes
ALRM.N - Number of Alarms Enabled
ON.OF - Enabling Software On/Off
DIG - Defining Type of Digital Inputs
T.SAMP - Main and Auxiliary Input Sample Time
FREQZ - Defining Power Line Frequency
S.PROG - Enabling Simplified Programming Mode
EDI - Enabling Editor CONFIGURATOR MENU
WEB.EN - Enabling Webserver Mode
CAL.EN - Enabling Calendar Mode
Submenu MODE - Configuring Functioning Mode
MODE.N - Selecting Function Mode
PID.G.N - Number of Groups of Control Parameters
MA.AU - Defining Transition from Manual to Automatic
AU.MA - Defining Transition from Automatic to Manual
LO.RE - Defining Transition from Remote SP to Local SP
MA.P.L - Enabling Manual Power Latch
MAN.P - Enabling Change of Manual Power Value
TMER - Enabling Timer Function
MUL.SP - Enabling Multiset Function
SP.REM - Enabling the Remote Setpoint
SPR.T - Defining Absolute or Deviation Remote Setpoint
T.PRO - Setting the Programmer Base Time
ENERG - Enabling the Energy Counter Function
Submenu TIMER - Configurazione Parametri Timer
Functional Diagram
TIME.N - Selecting Timer
FUNC - Selecting Timer Function Mode
ST.ST - Selecting the Start/Stop Timer Command
Defining the Start/Stop Timer Command Logic
RESE - Selecting the Reset Timer Command
RES.T - Defining the Timer Reset Command Logic
BAND - Band for Timer Count
END - Selecting the Function Activated at End of Count
TIMER - Timer Value
MSG.TM - Selecting Message Assigned to End of Count
Submenu ENERG - Configuring Energy Counter Parameters
Functional Diagram
ENRG.N - Selecting Energy Counter
ENERG - Selecting the Output for Energy Calculation
V.LINE - Nominal Line Voltage
P.LOAD - Nominal Power of Load
E.COST - Nominal Cost Per Kwh
Submenu SERIA - Configuring Serial Communication
CODE - Identification Code
KBAUD - Selecting Communication Speed
PAR - Selecting Parity
SCANR - Setting Delay between Two Consecutive Modbus Communications to Slave Nodes in Serial Connection
ETHER Submenu - Ethernet Parameter Configuration
TYP.E - Network Parameter Assignment Method
CODE.E - Ethernet Identification Code
IP.AD1 - Address IP 1
IP.AD2 - Address IP 2
IP.AD3 - Address IP 3
IP.AD4 - Address IP 4
SUB.M1 - Subnet Mask 1
SUB.M2 - Subnet Mask 2
SUB.M3 - Subnet Mask 3
SUB.M4 - Subnet Mask 4
GT.AD1 - Gateway Address 1
GT.AD2 - Gateway Address 2
GT.AD3 - Gateway Address 3
GT.AD4 - Gateway Address 4
TIM.NT - Network Time Protocol Server Update Time
IP.NT1 - IP Address 1 for Network Time Protocol Server
IP.NT2 - IP Address 2 for Network Time Protocol Server
IP.NT3 - IP Address 3 for Network Time Protocol Server
IP.NT4 - IP Address 4 for Network Time Protocol Server
BRO.NT - Broadcast Definition for Network Time Protocol Server
GMT.OF - Offset in Relation to GMT (Greenwich Mean Time)
Submenu HMI - Display Configurationy
HOM.S - Selecting Home Page
BAR.E - Enable Bargraph Display on Home Menus
LANG - Selecting Language for Messages
SPEED - Message Scrolling Speed
BACKL - Backlighting Level
QUICK - Quick Configuration Menu
Submenu HOME - Configuration of Display and Keyboard in Home1 and Home2
HOME - Selecting Home
BUT.1 - Selecting Function Key 1
BUT.2 - Selecting Function Key 2
BUT.3 - Selecting Function Key 3
DS.SP - Selecting the SV Display
DS.F - Selecting the F Display
BAR.1 - Selecting Bargraph 1 Display
BAR.2 - Selecting Bargraph 2 Display
BAR.3 - Selecting Bargraph 3 Display
LED.1 - Enable RUN Led Flashing
LED.2 - Enabling MANUAL Led
LED.3 - Enabling TUNE Led
LED.4 - Enabling RAMP Led
LED.5 - Enabling REMOTE Led
LED.6 - Enabling SP1/2 Led
Submenu LNR.4.P - Permits Configuration of Custom Linearisation 4 Points
LNR.4.N - Selection of Custom Linearisation
MD.4P - Four Point Linearisation Method
X1 - Abscissa of First Linearisation Point
Y1- Ordinate of the First 4-Point Linearisation Point
X2 - Abscissa of Second Linearisation Point
Y2- Ordinate of the Second 4-Point Linearisation Point
Submenu LINRZ - Configuring Custom Linearization
LNRZ.N - Selecting Custom Linearization
Stp.XX - Value of Step XX
MV.STA - Setting MV at Start of Scale
MV.FUL - Setting MV at Full Scale
MV.50C - Setting MV at Temperature of 50 °C
Submenu US.CAL - Calibrazioni Utente
U.CAL - Selecting the User Calibration
CAL - Resetting the Factory Calibration
C.LOW - Calibrating Minimum Current / Voltage
C.HIGH - Calibrating Maximum Current / Voltage
RTD.LO - Calibrating Minimum Resistance Value
RTD.HI - Calibrating Maximum Resistance Value
HOUR - Setting Hours
MIN - Setting Minutes
SEC - Setting Seconds
DAY - Setting Day of Week
DATE - Setting Day
MONT - Setting Month
YEAR - Setting Year
C.LO - Setting Analog Output Minimum
C.HIG - Setting Analog Output Maximum
PASC0 - Setting Level Password 0
PASC1 - Setting Level 1 Password
PASC2 - Setting Level 2 Password
CFG - Entering the Reset Code
Advertisement
Quick Links
1
Programming/Configuration Menu
Download this manual
850 - 1650 - 1850
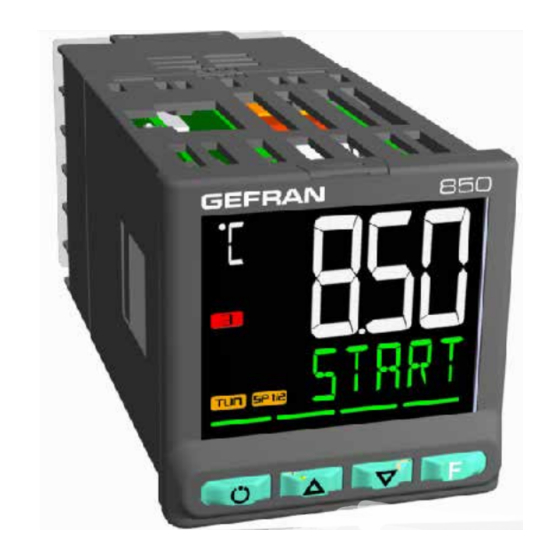
Double PID temperature controller
INSTALLATION AND
INSTRUCTION MANUAL
code: 80209C - 01-2020
Table of
Contents
Previous
Page
Next
Page
1
2
3
4
5
Advertisement
Table of Contents
Need help?
Do you have a question about the 850 and is the answer not in the manual?
Ask a question
Questions and answers
Related Manuals for gefran 850
Temperature Controller gefran 1650 Installation And Instruction Manual
Double pid temperature controller (286 pages)
Temperature Controller gefran 1200 Instructions For Use Manual
(40 pages)
Temperature Controller gefran 650 Abbreviated Manual
(78 pages)
Temperature Controller gefran 1000 User Manual
Configurable temperature controllers (52 pages)
Temperature Controller gefran 400 User Manual
Single display temperature controller with universal input (13 pages)
Temperature Controller gefran 650 Manual
1/16 & 1/8 din pid temperature controllers (27 pages)
This manual is also suitable for:
1650
1850
Table of Contents
Save PDF
Print
Rename the bookmark
Delete bookmark?
Delete from my manuals?
Login
Sign In
OR
Sign in with Facebook
Sign in with Google
Upload manual
Upload from disk
Upload from URL


Need help?
Do you have a question about the 850 and is the answer not in the manual?
Questions and answers