Sign In
Upload
Download
Table of Contents
Contents
Add to my manuals
Delete from my manuals
Share
URL of this page:
HTML Link:
Bookmark this page
Add
Manual will be automatically added to "My Manuals"
Print this page
×
Bookmark added
×
Added to my manuals
Manuals
Brands
Muratec Manuals
All in One Printer
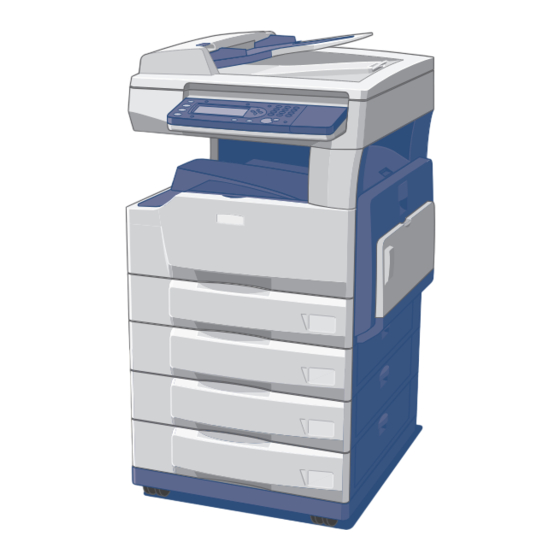
mfx-2200
User manual
Muratec mfx-2200 User Manual
Hide thumbs
1
2
3
Table Of Contents
4
5
6
7
8
9
10
11
12
13
14
15
16
17
18
19
20
21
22
23
24
25
26
27
28
29
30
31
32
33
34
35
36
37
38
39
40
41
42
43
44
45
46
47
48
49
50
51
52
53
54
55
56
57
58
59
60
61
62
63
64
65
66
67
68
69
70
71
72
73
74
75
76
77
78
79
80
81
82
83
84
85
86
87
88
89
90
91
92
93
94
95
96
97
98
99
100
101
102
103
104
105
106
107
108
109
110
111
112
113
114
115
116
117
118
119
120
121
122
123
124
125
126
127
128
129
130
131
132
133
134
135
136
137
138
139
140
141
142
143
144
145
146
147
148
149
150
151
152
153
154
155
156
157
158
159
160
161
162
163
164
165
166
167
168
169
170
171
172
173
174
175
176
177
178
179
180
181
182
183
184
185
186
187
188
189
190
191
192
193
194
195
196
197
198
199
200
201
202
203
204
205
206
207
208
209
210
211
212
213
214
215
216
217
218
219
220
221
222
223
224
225
226
227
228
229
230
231
232
233
234
235
236
237
238
239
240
241
242
243
244
245
246
247
248
249
250
251
252
253
254
255
256
257
258
259
260
261
262
263
264
265
266
267
268
269
270
271
272
273
274
275
276
277
278
279
280
281
282
283
284
285
286
287
288
289
290
291
292
293
294
295
296
297
298
299
300
301
302
303
304
305
306
307
308
309
310
311
312
313
314
315
316
317
318
319
320
321
322
323
324
325
326
327
328
329
330
331
332
333
334
335
336
337
338
339
340
341
342
343
344
345
346
347
348
349
350
351
352
353
354
355
356
357
358
359
360
361
362
363
364
365
366
367
368
369
370
371
372
373
374
375
376
377
378
379
380
381
382
page
of
382
Go
/
382
Contents
Table of Contents
Troubleshooting
Bookmarks
Table of Contents
Table of Contents
How to Read this Manual
Symbols
Key Descriptions
Energy Star
Trademarks
Precautions
Installing the Machine
Caution Labels and Indicators
Transporting the Machine
Consumables
Routine Maintenance
Ventilation
Dialing Method
Disposal of Used Batteries
Chapter 1 Getting Started
Main Features
Useful Operation Functions
Useful Fax Functions
Useful Copy Functions
Introducing Useful Optional Products
Part Names and Functions
MFP Part Names and Functions
Internal Parts
Control Panel Part Names and Functions
Lcd
Changing the Screen
Copy Screen
Fax Screen
Scanner Screen
Displayed Icons
Key Displays and Functions on the LCD
Power Switch and Energy Save Mode
Power Switch
Energy Save Mode
Voice Guidance
Voice Guidance Items
Operation Guidance Mode
Setting the Voice Guidance
Situations When Voice Guidance Is Given
Calling the Functions
Entering a Function Number (Shortcut)
Searching for a Function Onscreen
Entering Characters
Keys Used for Entering Characters
Character Entry Screen
Switching the Entry Mode
Assigning the Characters
Entering Alphabet Characters
Entering Numbers
Entering Symbols
Entering Spaces
Modifying Characters
User Install
Basic Settings (User Install)
Displaying the User Install Screen
Setting the Language
Setting the Current Time
Setting the Daylight Saving
Setting the Fax Reception Mode
Setting the Dial Tone Detection
Registering Sender Names (Ttis)
Registering the Standard TTI
Registering TTI Numbers
Paper
Acceptable Paper
Paper Cassette
Bypass Tray
Unacceptable Paper
Printing Area
Automatic Paper Supply Function
Loading Paper
Precautions When Loading Paper
Loading Paper in the Paper Cassette
Setting the Other Paper Size
Loading Paper in the Bypass Tray
Loading Postcards in the Bypass Tray
Loading Envelopes in the Bypass Tray
Setting Bypass Paper
Registering Custom Sizes
Document
Acceptable Document Sizes
Unacceptable Documents
Scanning Range
Loading Documents
Loading Documents on the Document Glass
Loading Documents on the ADF
Chapter 2 Copy Functions
Basic
Before Copying
Automatic Document Size Detection
Resetting the Settings
Memory Overflow During Copying
Rotate Copy
Copy Procedure
Basic Copy
Scanning the Next Documents
Basic Functions
Setting the Number of Copies
Selecting the Paper before Copying
Setting the Document Type/Contrast
Zoom Copy
Sort Copy
Copy Reservation
Advanced
Advanced Functions
Combined Copy
Series Copy
Repeat Copy
MIX Copy
Margin
Erase Center
Duplex Copy
Booklet Copy
Interrupt Copy
Card Copy
Function Combination
Copy Function Combination List
Display for Advanced Functions that Cannot be Combined
Canceling Combined Advanced Functions Separately
Chapter 3 Basic Fax Functions
Transmission
Before Transmitting
Automatic Document Size Detection
Memory Overflow During Transmission
Transmitting Faxes
Basic Transmission
Scanning the Next Documents
Using the Address Book
Manual Transmission
Redial
Manual Redial
Auto Redial
Useful Transmission Functions
Setting the Resolution/Contrast
Setting the Transmission Method (Memory Transmission/Real Time Transmission)
Quick Memory Transmission
Dialing Symbols
Setting a Sender Name (TTI)
Attaching the Sender Name
Setting the Stamp (Option)
Job Confirmation/Fax Cancel
Canceling/Checking Fax
Canceling/Checking the Broadcast Transmission and Group Transmission by Destination
Reception
Receiving Faxes
Auto Receiving Mainly for the Fax (Fax Mode)
Auto Receiving with Priority Given to the Phone (Tel/Fax Mode)
Receiving Phone Calls with Priority Given to Fax (Fax/Tel Mode)
Using both the Answering Machine and Fax (Answering/Fax Mode)
Primarily Using the Phone (Tel Mode)
Operations During Reception
Display During Reception
Out-Of-Paper Reception
Recording Received Documents
Reduction Margin
Page Division
Paper Saving Reception
Rotate Reception
Duplex Reception
Recording List
Paper Size Priority
Communication Management
Managing Communications
Printing a Journal Report
Printing a Journal Report Automatically
Reading a Journal Report
Printing a Journal Daily Report
Setting the Transmission Confirmation Report Temporarily
Setting the Transmission Confirmation Report
Reading a Transmission Confirmation Report
Displaying the Communication History and Printing the Communication Result
Printing a Command List
Printing Command Documents
Phone Call
Making a Phone Call
Receiving a Phone Call
Advanced Fax Functions
Chapter 4 Advanced Fax Functions
Broadcast
Broadcast Transmission
Group Transmission
Delayed Transmission
Dial Prefix
Registering Prefix Numbers
Transmitting a Cover Page with Documents
Registering Cover Pages
Printing a Cover Page
Setting a Cover Page
Polling Communications
Storing Polling Documents
Deleting Polling Documents
Printing Polling Documents
Retrieving Documents from the Remote Machine (Polling)
F-Code Communications
What Are F-Code Communications
Sub-Addresses and Passwords
Functions Available with F-Code Communications
Registering an F-Code Box
Registering an F-Code Security Box
Registering an F-Code Bulletin Box
Registering an F-Code Relay Box
Deleting an F-Code Box
Printing a List of F-Code Boxes
Transmission Using a Sub-Address (F-Code Transmission)
Reception Using a Sub-Address (F-Code Polling)
Storing Documents in a Bulletin Box
Printing Stored Documents
Deleting Stored Documents
Printing a List of Stored Documents
Fax & Copy
Enlarge Transmission
Scan Size
Fax Forward
Registering Forwarding Conditions
Checking/Deleting Forwarding Destination Numbers
Deleting Forwarding Conditions
Printing a List of Forwarding Conditions (Fax Forward List)
Setting the Fax Forwarding
Chapter 5 Operation Management
Managing Operating Conditions by Department
Registering Copy Charge (Cost Management)
Registering Department Codes and Names
Deleting Department Codes and Names
Setting the Department Management Function
Faxing and Copying When the Department Management Function Is on
Printing a List of Department Management Conditions
Deleting Accumulated Data
Checking the Number of Printed Pages
Checking the Waiting Print Jobs
Chapter 6 Security Function
Closed Communication
Setting the Closed Transmission
Performing the Closed Transmission
Setting the Closed Reception
Registering a Passcode
Registering a Passcode
Passcode and Communication Range
ID Check Transmission
Setting the ID Check Transmission
Performing the ID Check Transmission
Check Broadcast Destination
Setting the Broadcast Destination Check
Transmission after the Broadcast Destination Check
Dial Double-Push
Setting the Dial Double-Push
Performing the Dial Double-Push Transmission
Security Reception
Setting the Security Reception
Printing Security Reception Documents
Blocking Junk Faxes
Registration
Deleting Registered Numbers
Printing a Block-Junk-Fax List
Protect Settings
Chapter 7 Scanner and Printer Driver
Scanning
Scanning
Using the Scanner Function
How to Scan
Importing a Scanned Document into the PC
Printing from the PC
Using the Printer Function
Printing
Canceling Printing
Chapter 8 Entering/Editing Functions
Fax Function Settings
Entering/Editing Speed Dials
Entering/Editing
Entering Method 1: Entering Directly into an Unregistered Speed Dial
Entering Method 2: Entering a Number from the Numeric Keys
Deleting a Speed Dial
Moving a Speed-Dial Number
Replacing Speed-Dial Numbers
Limitations on Deleting/Moving/Replacing
Printing a Speed-Dial List
Entering Group Dials
Entering/Editing
Entering/Editing Group Names
Printing a Group List
Transmission Default Settings
Setting the Default
Fax Transmission Default Settings List
Other Settings
Setting Procedure
Other Settings List
Printing a Fax Settings List
Copy Function Settings
Copy Default Settings
Setting the Default
Copy Default Settings List
Other Settings
Copy Reservation Settings
Printing a Copy Settings List
Scanner Function Settings
Scanner Default Settings
Setting the Default
Scanner Default Settings List
Scan Box Settings
Setting a Scan Box Name and I.D. Code
Printing a Scanner Settings List
Paper Settings
Setting Procedure
Paper Settings List
Protect Passcode
Management Settings
Setting Procedure
Management Settings List
Printing a System Setting List
Printing a List of Stored Documents
Clearing the User Data
Macros
Programming a Macro
Changing a Macro Name
Deleting a Macro
Printing a Macro List
Running a Macro Program
Setting the Running Speed for Macros
Changing Soft Keys
Entering/Editing the Touch Panel Keys
Entering/Editing
Entering from a Blank Touch Panel Key
Deleting a Touch Panel Key
Initializing the Touch Panel Keys
Advertisement
Quick Links
1
Installing the Machine
Download this manual
User's Guide
2007
Part Number: DB2-90290-60
Table of
Contents
Previous
Page
Next
Page
1
2
3
4
5
Advertisement
Table of Contents
Troubleshooting
Troubleshooting
339
Troubleshooting
353
Need help?
Do you have a question about the mfx-2200 and is the answer not in the manual?
Ask a question
Questions and answers
Related Manuals for Muratec mfx-2200
All in One Printer Muratec MFX-1450 Installation Manual
Muratec mfx-1450: install guide (24 pages)
All in One Printer Muratec MFX-1450 Software Manual
Pc user’s guide (204 pages)
All in One Printer Muratec MFX-1450 User Manual
Muratec mfx-1450: user guide (488 pages)
All in One Printer Muratec MFX-2830 User Manual
Muratec mfx-2830: user guide (128 pages)
All in One Printer Muratec MFX-2500 Field Engineering Manual
(453 pages)
All in One Printer Muratec MFX-2550 Specification
Innovative desktop document solutions (6 pages)
All in One Printer Muratec MFX-2550 User Manual
Plain-paper digital scanner/printer/copier/fax (129 pages)
All in One Printer Muratec MFX-2570 Administrator's Manual
Plain-paper digital scanner/printer/copier/fax (177 pages)
All in One Printer Muratec MFX-2550 Field Engineering Manual
(415 pages)
All in One Printer Muratec MFX-2590 Brochure & Specs
Muratec mfx-2590 mfp brochure & specs (6 pages)
All in One Printer Muratec MFX-2590 Administrator's Manual
Plain-paper digital fax/copier/printer/scanner (165 pages)
All in One Printer Muratec F-520 Quick Reference
Muratec fax machine quick reference mfx-2030, mfx-1430, f-560, f-520 (28 pages)
All in One Printer Muratec MFX-1430 Specifications
Muratec mfx-1430: product brochure (6 pages)
All in One Printer Muratec MFX-1430 Network Manual
Plain-paper digital fax/copier/printer/scanner (111 pages)
All in One Printer Muratec MFX-1430 User Manual
Plain-paper digital fax/copier/printer/scanner (396 pages)
All in One Printer Muratec MFX-2550 User Manual
Plain-paper digital scanner/printer/copier/fax scanner and fax guide (327 pages)
This manual is also suitable for:
Mfx-2700
Table of Contents
Print
Rename the bookmark
Delete bookmark?
Delete from my manuals?
Login
Sign In
OR
Sign in with Facebook
Sign in with Google
Upload manual
Upload from disk
Upload from URL


Need help?
Do you have a question about the mfx-2200 and is the answer not in the manual?
Questions and answers