Sign In
Upload
Manuals
Brands
MacDon Manuals
Farm Equipment
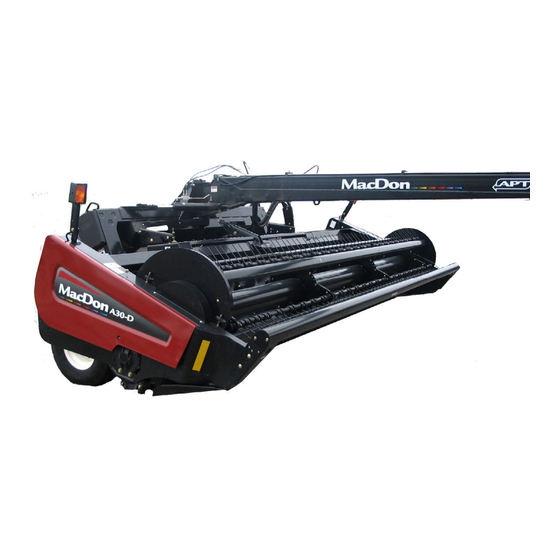
A30-D
MacDon A30-D Manuals
Manuals and User Guides for MacDon A30-D. We have
8
MacDon A30-D manuals available for free PDF download: Operator's Manual, Assembly Instructions Manual, Unloading And Assembly Instructions, Supplement Operators Manual
MacDon A30-D Operator's Manual (173 pages)
Pull-Type Mower Conditioners, Self-Propelled Auger Headers
Brand:
MacDon
| Category:
Farm Equipment
| Size: 45 MB
Table of Contents
Introduction
3
Table of Contents
4
Safety
9
Safety Alert Symbol
9
Signal Words
9
Safety Signs
9
Safety Sign Installation
9
Safety Sign Locations Pull-Type
10
Safety Sign Locations Self-Propelled
13
General Safety
14
Acronyms and Abbreviations
16
Component Identification
17
Specifications
20
Pull-Type Headers
20
Self-Propelled Headers
22
Operation
24
Owner/Operator Responsibilities
24
Operational Safety
24
Tractor Setup - Pull-Type
25
Tractor Requirements
25
Drawbar Adjustment
25
Drawbar Hitch Set-Up
25
Point Hitch (Cat. II, III, or IIIN) Set-Up
27
Mower Conditioner/ Tractor Hookup - Pull-Type
28
Drawbar Hook-Up
28
Point Hitch (Cat. II, III, or IIIN) Hook-Up
29
Hydraulic Connections
31
Mower Conditioner / Tractor Unhook - Pull-Type
32
Drawbar Hitch Unhook
32
3-Point Hitch Unhook
33
Header Attachment - Self-Propelled
35
A30-S and A30-D Attachment
35
A40-D Attachment
36
Header Detachment - Self-Propelled
38
A30-S and A30-D Detachment
38
A40-D Detachment
39
Transporting Mower Conditioner
41
Self-Propelled
41
Pull-Type - Towing
41
Transporting with a Tractor
41
Transporting with a Truck
42
Preparing Windrower for Transport
43
Pull-Type - Flatbed
44
Loading - Pull-Type
44
Unloading - Pull-Type
46
Break-In Period
48
Pre-Season Check
48
Daily Start-Up Check
48
Shutdown Procedure
49
Engaging the Pto - Pull-Type
49
Lift Cylinder Lock-Outs
49
Self-Propelled
49
Pull-Type
49
Steering - Pull-Type
50
Right Side Operation - Pull-Type
50
LH Side Operation - Pull-Type
51
Avoiding Obstacles
51
Square Corners
51
Degree Turn
52
Unplugging the Windrower
53
Unplugging Conditioner - Pull Type
53
Unplugging Conditioner - Self-Propelled A30-S and A30-D
53
Unplugging Sickle
53
Header Operation
54
Lean Bar Position
54
Auger Speed
54
Auger Speed, A30-S and A30-D
54
Auger Speed, A40-D
55
Reel Speed
55
Reel Speed, A30-S and A30-D
55
Reel Speed, A40-D
55
Auger Position
56
Auger Fore-Aft Adjustment - A30-S
56
Auger Vertical Adjustment - A30-S
58
Auger Fore-Aft Adjustment - A30-D
60
Auger Vertical Adjustment - A30-D
62
Auger Fore-Aft Adjustment - A40-D
64
Auger Vertical Adjustment - A40-D
64
Reel Position
65
Reel Fore-Aft Position, A30-S and A30-D
65
Reel Vertical Position, A30-S and A30-D
66
Reel Fore-Aft Position A40-D
68
Reel Vertical Position A40-D
68
Tine Aggressiveness Adjustment
70
Cutting Height
70
Cutting Height Adjustment
71
Header Angle
72
Header Angle - Self-Propelled
72
Header Angle - Pull-Type
72
Header Flotation
73
Flotation Adjustment - Self-Propelled
73
Flotation Adjustment - Pull-Type
73
Feed Pan / Rock-Drop Tine Position
73
Hay Conditioner
74
Roll Gap
74
Roll Timing and Alignment
75
Roll Tension
77
Forming Shields
78
Side Deflectors
78
Rear Deflector (Fluffer Shield)
79
Ground Speed
80
Grass Seed Windrowing
81
Stub Guards and Hold-Downs
81
Special Auger Design
81
Seven-Bat Reel
81
Auger Pan Extensions
81
Windrow Forming Rods
82
Haying Tips
83
Curing
83
Topsoil Moisture
83
Weather and Topography
83
Windrow Characteristics
83
Driving on Windrow
83
Raking and Tedding
83
Chemical Drying Agents
83
Storage
84
Maintenance/Service
85
Preparation for Servicing
85
Recommended Safety Procedures
85
Maintenance Specifications
86
Recommended Torques
86
SAE Bolts
86
Metric Bolts
86
Flare Type Hydraulic Fittings
87
O-Ring Type Hydraulic Fittings
87
Recommended Fluids and Lubricants
88
Conversion Chart
89
Drive Shields
90
Lift Cylinder Lock-Outs
90
Self-Propelled
90
Pull-Type
90
Lubrication
91
Greasing Procedure
91
Lubrication Points
91
A30-S Headers
92
A30-D Headers
94
A40-D Headers
96
Hay Conditioner
98
Pull Type Carrier Frame
99
Drivelines
100
Oiling Requirements
101
Sealed Bearing Installation
103
Hydraulics
104
Hydraulics - Self-Propelled
104
Hydraulics - Pull-Type
104
Reservoir
104
Oil Level
104
Adding Hydraulic Oil
104
Changing Hydraulic Oil
104
Changing Hydraulic Oil Filter
105
Pressure Relief Valve
105
Hoses and Lines
105
Sickle and Sickle Drive
106
Sickle Section Replacement
106
Sickle Removal
107
Sickle Installation
108
Sickle Head Bearing Removal
108
Sickle Head Bearing Installation
108
Spare Sickle
109
Sickle Guards
110
Guard Alignment
110
Guard Replacement
110
Sickle Hold-Downs
114
Sickle Hold-Down Adjustment -Pointed Guards
114
Sickle Hold-Down Adjustment -Stub Guards
114
Sickle Drive Belt - A30-S
115
Tension Adjustment
115
Removal - A30-S Sickle Drive Belt
115
Installation - A30-S Sickle Drive Belt
116
Sickle Drive Belts - A30-D
117
Tension Adjustment- LH Sickle Drive, A30-D
117
Removal - LH Sickle Drive Belt, A30-D
117
Installation - LH Sickle Drive Belt, A30-D
118
Tension Adjustment - RH Sickle Drive Belt, A30-D
120
Removal - RH Sickle Drive Belt, A30-D
120
Installation - RH Sickle Drive Belt, A30-D
121
Sickle Drive Belts - A40-D
122
Tension Adjustment- LH Sickle Drive Belts, A40-D
122
Removal - LH Sickle Drive Belts, A40-D
122
Installation -LH Sickle Drive Belts, A40-D
123
Tension Adjustment - RH Sickle Drive Belts, A40-D
124
Removal - RH Sickle Drive Belt, A40-D
124
Installation -RH Sickle Drive Belt, A40-D
125
Sickle Drive Timing Adjustment
126
Wobble Box
128
Mounting Bolts
128
Wobble Box Removal
128
Wobble Box Installation
128
Pulley Removal
129
Pulley Installation
129
Changing Wobble Box Oil
130
Reel and Reel Drive - A30-Sand A30-D
131
Reel Drive Chain, A30-S and A30-D
131
Tension
131
Removal
131
Installation
131
Reel Drive Belts, A30-S and A30-D
132
Tension Adjustment
132
Removal
132
Installation
132
Reel Tines and Tine Bar Bearings, A30-S and A30-D
133
Removal -Tines and Bearings, Cam End
133
Installation -Tines and Bearings, Cam End
133
Removal -Tines and Bearings, Opposite Cam End
134
Installation -Tines and Bearings, Opposite Cam End
134
Reel and Reel Drive - A40-D
135
Reel Drive - A40-D
135
Reel Tines and Tine Bar Bearings, A40-D
135
Tine and Bearing Replacement, Cam End - Disc #1
135
Tine and Bearing Replacement, Centre Section X
137
Tine and Bearing Replacement, Opposite Cam - Section y
138
Tine Replacement, Tine Bar Extension - Section Z
139
Auger and Auger Drive, A30-S and A30-D
140
Auger Drive Chain, A30-S
140
Tension
140
Removal
140
Installation
140
Auger Drive Chain, A30-D
141
Tension
141
Removal
141
Installation
141
Auger Drive Belts, A30-S
142
Tension
142
Removal
142
Installation
142
Auger Drive Belts, A30-D
143
Tension
143
Removal
143
Installation
144
Auger Pans
145
Rubber Fingers
145
Stripper Bars
145
Stripper Bar Removal
145
Stripper Bar Replacement
146
Stripper Bar Extensions
146
Auger and Auger Drive, A40-D
146
Conditioner
147
Hydraulic Drive Motor Removal - All Models
147
Hydraulic Drive Motor Installation - All Models
147
Gearbox Removal - A30-S
147
Gearbox Installation - A30-S
149
Gearbox Removal - A30-D
151
Gearbox Installation - A30-D
154
Gearbox Removal - A40-D
156
Gearbox Installation - A40-D
157
Changing Gearbox Oil
158
Wheels, Tires, and Hitch - Pull-Type
159
Wheel Bolts
159
Wheel Removal
159
Installation
159
Tire Inflation
160
Skid Shoe Wear Plate Replacement
160
Electrical
160
Maintenance Schedule
161
Self-Propelled
161
Break-In Inspection - SP
161
Interval Maintenance - SP
161
Maintenance Record - SP
162
Pull-Type Mower Conditioner
163
Break-In Inspection - PT
163
Interval Maintenance - PT
163
Maintenance Record - PT
164
Troubleshooting
165
Windrower Performance
165
Mechanical
168
Options and Attachments
170
Hydraulic Header Angle Kits-Pull-Type
170
Additional Skid Shoes
170
Gauge Roller Kit
170
Replacement Reel Bat Kits- A30-S & A30-D
170
Stub Guard Conversion Kit
170
Tall Crop Divider Kit
170
Unloading and Assembly
171
Index
172
Advertisement
MacDon A30-D Operator's Manual (192 pages)
Pull-Type Mower Conditioners, Self-Propelled Auger Headers
Brand:
MacDon
| Category:
Farm Equipment
| Size: 12 MB
Table of Contents
Introduction
3
Table of Contents
4
Safety
8
Safety Alert Symbol
8
Signal Words
8
Safety Signs
8
Safety Sign Installation
8
3-Panel Safety Sign Locations: Pull-Type
9
3-Panel Safety Sign Locations: Self-Propelled
12
2-Panel Safety Sign Locations: Self-Propelled
14
General Safety
16
Definitions
18
Component Identification
19
Pull-Type
19
Self-Propelled
22
Specifications
23
Pull-Type Headers
23
Self-Propelled Headers
25
Operation
27
Owner/Operator Responsibilities
27
Operational Safety
27
Tractor Setup: Pull-Type
28
Tractor Requirements
28
Drawbar Adjustment
28
Drawbar Hitch Set-Up
29
Point Hitch (Cat. II, III or IIIN) Set-Up
30
Mower Conditioner / Tractor Hookup: Pull-Type
31
Drawbar Hook-Up
31
Point Hitch (Cat. II, III, or IIIN) Hook-Up
32
Hydraulic Connections
33
Mower Conditioner / Tractor Unhook: Pull-Type
34
Drawbar Hitch Unhook
34
3-Point Hitch Unhook
36
Header Attachment: Self-Propelled
37
A30-S, A30-D
37
A40-D
39
Configure Reverser Valve Jumper Hose
48
Header Detachment: Self-Propelled
50
A30-S, A30-D Detachment
50
A40-D Detachment
51
Transporting Mower Conditioner
53
Self-Propelled
53
Pull-Type: Towing
53
Pull-Type: Flatbed
56
Break-In Period
61
Pre-Season Check
61
Daily Start-Up Check
61
Shutdown Procedure
62
Engaging the Pto: Pull-Type
62
Lift Cylinder Lock-Outs
62
Self-Propelled
62
Pull-Type
62
Steering: Pull-Type
63
Right Side Operation: Pull-Type
63
Left Side Operation: Pull-Type
64
Avoiding Obstacles
64
Square Corners
64
Degree Turn
65
Unplugging the Header / Mower Conditioner
66
Unplugging Conditioner: Pull Type
66
Unplugging Conditioner: Self-Propelled - A30-S and A30-D
66
Unplugging Sickle
66
Header Operation
67
Lean Bar Position
67
Auger Speed
68
Reel Speed
69
Auger Position
70
Reel Position
79
Tine Aggressiveness Adjustment
83
Cutting Height
84
Header Angle
85
Header Flotation
86
Feed Pan / Rock-Drop Tine Position
87
Hay Conditioner
88
Roll Tension
91
Forming Shields
92
Tall Crop Dividers
94
Ground Speed
95
Grass Seed Windrowing
96
Haying Tips
98
Curing
98
Topsoil Moisture
98
Weather and Topography
98
Windrow Characteristics
98
Driving on Windrow
98
Raking and Tedding
98
Chemical Drying Agents
98
Storage
99
Maintenance and Servicing
100
Preparation for Servicing
100
Recommended Safety Procedures
100
Maintenance Specifications
101
Recommended Torques
101
Recommended Fluids and Lubricants
104
Conversion Chart
105
Driveshields
106
Lift Cylinder Lock-Outs
106
Self-Propelled
106
Pull-Type
106
Lubrication
107
Greasing Procedure
107
Lubrication Points
107
Oiling
117
Sealed Bearing Installation
119
Hydraulics
120
Hydraulics: Self-Propelled
120
Hydraulics: Pull-Type
120
Hoses and Lines
121
Sickle and Sickle Drive
122
Sickle Section Replacement
122
Sickle Removal
122
Sickle Installation
123
Sickle Head Bearing Removal
123
Sickle Head Bearing Installation
123
Spare Sickle
124
Sickle Guards
124
Sickle Hold-Downs
129
Sickle Drive Belt: A30-S
131
Sickle Drive Belts: A30-D
133
Sickle Drive Belts: A40-D
138
Sickle Drive Timing Adjustment
142
Wobble Box
144
Reel and Reel Drive: A30-S, A30-D
147
Reel Drive Chain: A30-S, A30-D
147
Reel Drive Belts: A30-S, A30-D
148
Reel Tines and Tine Bar Bearings: A30-S, A30-D
149
Reel and Reel Drive: A40-D
151
Reel Drive: A40-D
151
Reel Tines and Tine Bar Bearings: A40-D
151
Auger and Auger Drive: A30-S, A30-D
156
Auger Drive Chain: A30-S
156
Auger Drive Chain: A30-D
157
Auger Drive Belt: A30-S
158
Auger Drive Belts: A30-D
159
Auger Pans
160
Rubber Fingers
160
Stripper Bars
160
Auger and Auger Drive: A40-D
161
Conditioner
162
Changing Gearbox Oil
162
Forming Shield Removal
162
Disassemble Forming Shield
163
Assemble Forming Shield
163
Install Forming Shield
163
Hydraulic Drive Motor Removal: All Models
164
Hydraulic Drive Motor Installation: All Models
164
Gearbox Removal: A30-S
165
Gearbox Installation: A30-S
166
Gearbox Removal: A30-D
168
Gearbox Installation: A30-D
170
Gearbox Removal: A40-D
172
Gearbox Installation: A40-D
173
Wheels, Tires, and Hitch: Pull-Type
175
Wheel Bolts
175
Wheel Removal
175
Wheel Installation
175
Tire Inflation
176
Skid Shoe Wear Plate Replacement
177
Gauge Rollers
178
Electrical
178
Maintenance Schedule
179
Self-Propelled Mower Conditioner
179
Pull-Type Mower Conditioner
181
Troubleshooting
183
Windrower Performance
183
Mechanical
186
Options and Attachments
188
Hydraulic Header Angle Kits: Pull-Type
188
Additional Skid Shoes
188
Gauge Roller Kit
188
Replacement Reel Bat Kits: A30-S, A30-D
188
Stub Guard Conversion Kit
188
Tall Crop Divider Kit
188
Unloading and Assembly
189
Index
190
MacDon A30-D Operator's Manual (182 pages)
Pull-Type Mower Conditioner and Self-Propelled Auger Header
Brand:
MacDon
| Category:
Farm Equipment
| Size: 13 MB
Table of Contents
Introduction
5
Table of Contents
7
Safety
11
Safety Alert Symbol
11
Signal Words
11
Safety Signs
11
Safety Sign Installation
11
2-Panel Safety Sign Locations: Pull-Type
12
2-Panel Safety Sign Locations: Self-Propelled
15
Safety Sign Interpretations
17
General Safety
22
Definitions
24
Component Identification
25
Pull-Type
25
Self-Propelled
28
Specifications
29
Pull-Type Headers
29
Self-Propelled Headers
31
Operation
33
Owner/Operator Responsibilities
33
Operational Safety
33
Tractor Setup: Pull-Type
34
Tractor Requirements
34
Drawbar Adjustment
34
Drawbar Hitch Set-Up
35
Point Hitch (Cat. II, III or IIIN) Set-Up
36
Mower Conditioner / Tractor Hookup: Pull-Type
37
Drawbar Hook-Up
37
Point Hitch (Cat. II, III, or IIIN) Hook-Up
38
Hydraulic Connections
39
Mower Conditioner / Tractor Unhook: Pull-Type
40
Drawbar Hitch Unhook
40
3-Point Hitch Unhook
42
Header Attachment: Self-Propelled
43
A40-D
43
Reverser Valve Jumper Hose
52
Header Detachment: Self-Propelled
53
A40-D Detachment
53
Transporting Mower Conditioner
55
Self-Propelled
55
Pull-Type: Towing
55
Pull-Type: Flatbed
58
Break-In Period
63
Pre-Season Check
63
Daily Start-Up Check
63
Shutdown Procedure
64
Engaging the Power Take-Off (Pto): Pull-Type
64
Lift Cylinder Lock-Outs
64
Self-Propelled
64
Pull-Type
64
Steering: Pull-Type
65
Right Side Operation: Pull-Type
65
Left Side Operation: Pull-Type
66
Avoiding Obstacles
66
Square Corners
66
Degree Turn
67
Unplugging the Header / Mower Conditioner
68
Unplugging Conditioner: Pull-Type
68
Unplugging Knife
68
Header Operation
69
Lean Bar Position
69
Auger Speed
70
Reel Speed
71
Auger Position
72
Reel Position
77
Tine Aggressiveness Adjustment
81
Reel Tine to Header Pan Clearance
82
Cutting Height
82
Header Angle
83
Header Flotation
84
Feed Pan / Rock-Drop Tine Position
85
Hay Conditioner
86
Roll Tension
89
Forming Shields
90
Tall Crop Dividers
92
Ground Speed
93
Grass Seed Windrowing
94
Recommended Settings
96
Haying Tips
97
Curing
97
Topsoil Moisture
97
Weather and Topography
97
Windrow Characteristics
97
Driving on Windrow
97
Raking and Tedding
97
Chemical Drying Agents
97
Storage
98
Maintenance and Servicing
99
Preparation for Servicing
99
Recommended Safety Procedures
99
Maintenance Specifications
100
Recommended Torques
100
Recommended Fluids and Lubricants
104
Conversion Chart
105
Driveshields
106
Lift Cylinder Lock-Outs
106
Self-Propelled
106
Pull-Type
106
Lubrication
107
Greasing Procedure
107
Lubrication Points
107
Oiling
115
Installing Sealed Bearing
116
Hydraulics
117
Hydraulics: Self-Propelled
117
Hydraulics: Pull-Type
117
Hoses and Lines
118
Knife and Knife Drive
119
Replacing Knife Section
119
Removing Knife
119
Installing Knife
120
Removing Knife Head Bearing
120
Installing Knife Head Bearing
120
Spare Knife
121
Knife Guards
121
Knife Hold-Downs
124
Knife Drive Belts: A30-D
126
Knife Drive Belts: A40-D
131
Adjusting Knife Drive Timing
135
Knife Drive Box
137
Reel and Reel Drive: A30-D
140
Reel Drive Chain: A30-D
140
Reel Drive Belts: A30-D
141
Reel Tines and Tine Bar Bearings: A30-D
142
Reel and Reel Drive: A40-D
144
Reel Drive: A40-D
144
Reel Tines and Tine Bar Bearings: A40-D
144
Auger and Auger Drive: A30-D
149
Auger Drive Chain: A30-D
149
Auger Drive Belts: A30-D
150
Auger Pans
151
Rubber Fingers
151
Stripper Bars
151
Auger and Auger Drive: A40-D
152
Conditioner
153
Changing Gearbox Oil
153
Removing Forming Shield
153
Disassembling Forming Shield
154
Assembling Forming Shield
154
Installing Forming Shield
154
Removing Hydraulic Drive Motor: All Models
155
Installing Hydraulic Drive Motor: All Models
155
Removing Gearbox: A30-D
156
Installing Gearbox: A30-D
158
Removing Gearbox: A40-D
160
Installing Gearbox: A40-D
161
Wheels, Tires, and Hitch: Pull-Type
163
Wheel Bolts
163
Removing Wheel
163
Installing Wheel
163
Inflating Tire
164
Replacing Skid Shoe Wear Plate
165
Gauge Rollers
166
Electrical
166
Maintenance Schedule
167
Self-Propelled Mower Conditioner
167
Pull-Type Mower Conditioner
169
Troubleshooting
171
Windrower Performance
171
Mechanical
174
Options and Attachments
176
Hydraulic Header Angle Kits: Pull-Type
176
Additional Skid Shoes
176
Gauge Roller Kit
176
Replacement Reel Bat Kits: A30-D
176
Stub Guard Conversion Kit
176
Tall Crop Divider Kit
176
Unloading and Assembly
177
Index
178
Advertisement
MacDon A30-D Unloading And Assembly Instructions (56 pages)
Pull-Type Mower Conditioner
Brand:
MacDon
| Category:
Farm Equipment
| Size: 4 MB
Table of Contents
Introduction
3
Table of Contents
3
General Safety
5
Recommended Torques
7
General
7
Sae Bolts
7
Metric Bolts
7
Hydraulic Fittings
8
Conversion Table
10
Definitions
10
Step 1. Unload Articulating Power Tongue (Apt)
11
Truck Flatbed
11
Container
11
Step 2. Unload Header
12
Truck Flatbed
12
Container
12
Step 3. Remove Side Deflectors
13
STEP 4. INSTALL GAUGE ROLLERS (Optional)
13
STEP 5. INSTALL ADDITIONAL SKID SHOES (Optional)
13
Step 6. Lower Mower Conditioner
14
Step 7. Install Wheels
15
Step 8. Remove Shipping Channels and Blocking
16
Step 9. Unpack Apt
17
Step 10. Attach Apt
18
Step 11. Connect Hoses
19
Step 12. Attach Mower Conditioner to Tractor
20
Drawbar Type Hitch
20
3-POINT HITCH (Cat. II, III, IIIN)
23
Step 13. Attach Hydraulics and Electrical
25
Step 14. Install Steering Cylinder
27
Step 15. Install Roll Opener Links
29
Step 16. Install Forming Shield Cover
30
Step 17. Install Side Deflectors
30
Step 18. Adjust Center-Link
32
Mechanical Link
32
Hydraulic Link
32
Step 19. Adjust Float Springs
32
Step 20. Reposition Sickle Drive Box Breather
33
Step 21. Adjust Lean Bar
33
Step 22. Adjust Transport Lights
33
Step 23. Install Options
34
Gauge Rollers
34
Skid Shoes
35
Stub Guards
35
Hydraulic Header Angle
36
Tall Crop Divider Kit
36
Step 24. Lubricate Mower Conditioner
37
Header Drive: A30-S
38
Header Drive: A30-S
39
Header Drive: A30-D
40
Header Drive: A30-D
41
Hay Conditioner: A30-S
42
Hay Conditioner: A30-D
43
Carrier
44
Articulating Power Tongue (Apt)
45
Step 25. Perform Pre-Delivery Checks
46
Drive Belts and Chains
46
Auger Stripper Bar Clearance
48
Reel Tine to Header Pan Clearance
48
Header Flotation
48
Conditioner Rolls
49
Skid Shoes/Gauge Rollers
50
Lights
50
Run-Up Mower Conditioner
51
Knife
52
Manuals
52
MacDon A30-D Unloading And Assembly Instructions (51 pages)
Pull-Type Mower Conditioner
Brand:
MacDon
| Category:
Farm Equipment
| Size: 11 MB
Table of Contents
Table of Contents
3
Introduction
4
General Safety
5
Recommended Torques
7
General
7
Sae Bolts
7
Metric Bolts
7
Hydraulic Fittings
8
Conversion Table
10
Definitions
10
Step 1. Unload Articulating Power Tongue (Apt)
11
Truck Flatbed
11
Container
11
Step 2. Unload Header
12
Truck Flatbed
12
Container
12
Step 3. Remove Side Deflectors
13
STEP 4. INSTALL GAUGE ROLLERS (Optional)
13
STEP 5. INSTALL ADDITIONAL SKID SHOES (Optional)
13
Step 6. Lower Mower Conditioner
14
Step 7. Install Wheels
15
Step 8. Remove Shipping Channels and Blocking
16
Step 9. Unpack Articulating Power Tongue (Apt)
17
Step 10. Attach Articulating Power Tongue (Apt)
18
Step 11. Connect Hoses
19
Step 12. Attach Mower Conditioner to Tractor
20
Drawbar Type Hitch
20
THREE-POINT HITCH (Cat. II, III, IIIN)
23
Step 13. Attach Hydraulics and Electrical
25
Step 14. Install Steering Cylinder
27
Step 15. Install Roll Opener Links
29
Step 16. Install Forming Shield Cover
30
Step 17. Install Side Deflectors
30
Step 18. Adjust Center-Link
32
Mechanical Link
32
Hydraulic Link
32
Step 19. Adjust Float Springs
32
Step 20. Reposition Knife Drive Box Breather
33
Step 21. Adjust Lean Bar
33
Step 22. Adjust Transport Lights
33
Step 23. Install Options
34
Gauge Rollers
34
Skid Shoes
35
Stub Guards
35
Hydraulic Header Angle
36
Tall Crop Divider Kit
36
Step 24. Lubricate Mower Conditioner
37
Header Drive: A30-D
38
Header Drive: A30-D
39
Hay Conditioner: A30-D
40
Carrier
41
Articulating Power Tongue (Apt)
42
Step 25. Perform Predelivery Checks
43
Drive Belts and Chains
43
Auger Stripper Bar Clearance
44
Reel Tine to Header Pan Clearance
44
Header Flotation
44
Conditioner Rolls
45
Skid Shoes/Gauge Rollers
46
Lights
46
Run-Up Mower Conditioner
47
Knife
48
Manuals
48
MacDon A30-D Assembly Instructions Manual (56 pages)
Auger Self-Propelled Windrower Header
Brand:
MacDon
| Category:
Farm Equipment
| Size: 20 MB
Table of Contents
Introduction
2
Table of Contents
3
General Safety
4
Recommended Torques
6
General
6
Sae Bolts
6
Metric Bolts
6
Hydraulic Fittings
7
English/Metric Equivalents
8
Definitions
8
Step 1. Unload Header
9
Step 2. Remove Underside Shipping Stand
10
Step 3. Install Additional Skid Shoes
10
Step 4. Install Gauge Rollers
11
Step 5. Lower Header
12
Step 6. Remove Shipping Stands
13
Step 7. Install Tall Crop Divider
14
Step 8. Adjust Lean Bar
15
Step 9. Adjust Pan Extensions - Grass Seed Special
15
Step 10. Adjust Lights
15
Step 11. Assemble Forming Shield
16
Step 12. Install Forming Shield
17
Step 13. Attach Header to Windrower
18
Step 14. Modify Hydraulics
21
A30-S and A30-D
21
Step 15. Configure Reverser Valve Jumper Hose
27
Step 16. Attach Hydraulics
29
A30-S, A30-D
29
M100, M150, M200, M205
29
Step 17. Configure Hose Routing
34
Step 18. Reposition Wobble Box Breather
34
Step 19. Lubricate the Header
35
Step 20. Perform Pre-Delivery Checks
44
Drive Belts and Drive Chains
44
A30-S Single Knife
44
A30-D Double Knife
44
A40-D Double Knife
45
Auger Stripper Bar Clearance
46
Reel Tine to Header Pan Clearance
46
Header Flotation
47
Header Levelling
48
Conditioner Rolls
49
Skid Shoes/Gauge Rollers
50
Lights
50
Run-Up the Header
51
Knife
52
Manuals
52
MacDon A30-D Assembly Instructions Manual (46 pages)
Auger Self-Propelled Windrower Header
Brand:
MacDon
| Category:
Farm Equipment
| Size: 17 MB
Table of Contents
Table of Contents
3
Introduction
3
General Safety
4
Recommended Torques
6
General
6
Sae Bolts
6
Metric Bolts
6
Hydraulic Fittings
7
Conversion Chart
8
Accronyms and Abbreviations
8
Step 1. Unload Header
9
Step 2. Remove Underside Shipping Stand
10
Step 3. Install Additional Skid Shoes
10
Step 4. Install Gauge Rollers
11
Step 5. Lower Header
12
Step 6. Remove Shipping Stands
13
Step 7. Reposition Wobble Box Breather
14
Step 8. Install Tall Crop Divider
14
Step 9. Adjust Lean Bar
15
Step 10. Adjust Pan Extensions - Grass Seed Special
15
Step 11. Adjust Transport Lights
15
Step 12. Assemble Forming Shield
16
Step 13 Install Forming Shield
17
Step 14. Attach Header to Tractor
18
Step 15. Attach Hydraulics
20
A30-S and A30-D Headers
20
A40-D Header
21
Step 16. Lubricate the Header
26
Step 17. Perform Pre-Delivery Checks
35
Drive Belts and Drive Chains
35
A30-S Single Knife
35
A30-D Double Knife
35
A40-D Double Knife
36
Auger Stripper Bar Clearance
37
Reel Tine to Header Pan Clearance
37
Header Flotation
37
Level the Header
38
Conditioner Rolls
39
Skid Shoes/Gauge Rollers
40
Lights
40
Wobble Box
40
Run-Up the Header
41
Manuals
41
MacDon A30-D Supplement Operators Manual (16 pages)
Pull-Type Mower Conditioner and Self-Propelled Auger Header
Brand:
MacDon
| Category:
Farm Equipment
| Size: 2 MB
Advertisement
Related Products
MacDon A40-D
MacDon A40DX
MacDon A30-S
MacDon 1000
MacDon 170642
MacDon 2000-B
MacDon 268040
MacDon 3020
MacDon 311882
MacDon 338109
MacDon Categories
Farm Equipment
Tractor
Tractor Accessories
Lawn Mower
Lawn and Garden Equipment
More MacDon Manuals
Login
Sign In
OR
Sign in with Facebook
Sign in with Google
Upload manual
Upload from disk
Upload from URL