MacDon A30-D Unloading And Assembly Instructions
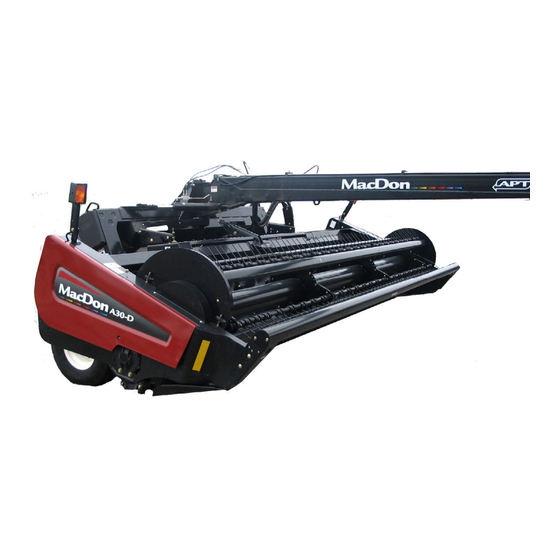
Pull-type mower conditioner
Hide thumbs
Also See for A30-D:
- Operator's manual (182 pages) ,
- Supplement operators manual (16 pages) ,
- Assembly instructions manual (56 pages)

Related Manuals for MacDon A30-D


Summary of Contents for MacDon A30-D
- Page 1 A30-D Pull-Type Mower Conditioner Unloading and Assembly Instructions Published: October, 2013 Original Instruction 169001 Revision F...
- Page 2 INTRODUCTION This instructional manual describes the unloading, set-up, and predelivery requirements for Model A30-D Pull-Type Mower Conditioner. Use the Table of Contents to guide you to specific areas. CAREFULLY READ ALL THE MATERIAL PROVIDED BEFORE ATTEMPTING TO UNLOAD, ASSEMBLE, OR USE THE MACHINE.
-
Page 3: Table Of Contents
TABLE OF CONTENTS INTRODUCTION ................................ 2 GENERAL SAFETY ..............................3 RECOMMENDED TORQUES ........................... 5 GENERAL ............................5 SAE BOLTS ............................5 METRIC BOLTS ..........................5 HYDRAULIC FITTINGS ........................6 CONVERSION TABLE .............................. 8 DEFINITIONS ................................8 STEP 1. UNLOAD ARTICULATING POWER TONGUE (APT) ................9 TRUCK FLATBED .......................... -
Page 4: Introduction
STEP 24. LUBRICATE MOWER CONDITIONER ....................35 HEADER DRIVE: A30-D ........................36 HEADER DRIVE: A30-D ........................37 HAY CONDITIONER: A30-D ......................38 CARRIER ............................39 ARTICULATING POWER TONGUE (APT) ..................40 STEP 25. PERFORM PREDELIVERY CHECKS ....................41 DRIVE BELTS AND CHAINS ......................41 AUGER STRIPPER BAR CLEARANCE ................... -
Page 5: General Safety
SAFETY GENERAL SAFETY CAUTION following general farm safety precautions that should part your • Provide a first-aid kit for use in case of operating procedure for all types of machinery. emergencies. • Keep a fire extinguisher on the machine. Protect yourself. Be sure the extinguisher is properly maintained and be familiar with its proper use. - Page 6 SAFETY • Use only service and repair parts made approved equipment manufacturer. Substituted parts may not meet strength, design, safety requirements. • modify machine. Unauthorized modifications may impair the function and/or safety and affect machine life. • Stop engine, and remove key from ignition before leaving operator’s seat for any reason.
-
Page 7: Recommended Torques
RECOMMENDED TORQUES RECOMMENDED TORQUES C. METRIC BOLTS Std coarse bolt torque* A. GENERAL Bolt dia. 10.9 “A” • Tighten all bolts to the torques specified in lbf·ft N·m lbf·ft N·m chart (unless otherwise noted throughout this manual). • Check tightness of bolts periodically, using bolt torque chart as a guide. -
Page 8: Hydraulic Fittings
RECOMMENDED TORQUES O-RING TYPE D. HYDRAULIC FITTINGS Fitting Locknut FLARE TYPE Washer Flare O-ring Groove Seat Body Flare seat a. Check flare and flare seat for defects that might cause leakage. b. Align tube with fitting before tightening. a. Inspect O-ring seat dirt... - Page 9 RECOMMENDED TORQUES a. Check components to ensure that the sealing O-RING FACE SEAL (ORFS) HYDRAULIC surfaces and fitting threads are free of burrs, FITTINGS nicks, and scratches, or any foreign material. b. Apply lubricant (typically Petroleum Jelly) to O-ring and threads. If O-ring is not already installed, install O-ring.
-
Page 10: Conversion Table
CONVERSION TABLE / DEFINITIONS CONVERSION TABLE Inch-pound units Si units (metric) Quantity Factor Unit name Abbr. Unit name Abbr. Area acres acres x 0.4047 = hectares Flow US gallons per minute x 3.7854 = liters per minute L/min Force pounds force x 4.4482 = Newton inch... -
Page 11: Step 1. Unload Articulating Power Tongue (Apt)
UNLOADING AND ASSEMBLY e. Take to storage or set-up area, and set APT STEP 1. UNLOAD ARTICULATING down securely on level ground. POWER TONGUE (APT) Repeat for second APT if required. g. Check for shipping damage and missing parts. CAUTION B. -
Page 12: Step 2. Unload Header
UNLOADING AND ASSEMBLY b. Approach mower conditioner from either its STEP 2. UNLOAD HEADER underside or topside, and slide forks in underneath lifting framework as far as possible. CAUTION NOTE When possible, approach from underside minimize potential To avoid injury to bystanders from being scratching the unit. -
Page 13: Step 3. Remove Side Deflectors
UNLOADING AND ASSEMBLY STEP 4. INSTALL GAUGE ROLLERS (Optional) NOTE This kit may be installed later in the header assembly sequence, but it may be easier prior to laying the header down. If kit not supplied, Refer to • STEP 5. INSTALL ADDITIONAL SKID SHOES (Optional), page 11 Otherwise Refer to •... -
Page 14: Step 6. Lower Mower Conditioner
UNLOADING AND ASSEMBLY STEP 6. LOWER MOWER CAUTION CONDITIONER Ensure spreader bar or chain is secured to the forks so that it cannot slide off the forks or towards the mast as the header is lowered to the ground. Overhead lifting quality Chain type (1/2 In.) Minimum working load... -
Page 15: Step 7. Install Wheels
UNLOADING AND ASSEMBLY Check tires are inflated to 30 psi (207 kPa). STEP 7. INSTALL WHEELS a. Remove wheel bolts from wheel hub. Mast perpendicular to ground CAUTION When installing wheel be sure to use the holes that are countersunk to match bolt head profile. -
Page 16: Step 8. Remove Shipping Channels And Blocking
UNLOADING AND ASSEMBLY STEP 8. REMOVE SHIPPING CAUTION CHANNELS AND Keep feet clear when removing banding. BLOCKING d. Remove banding at ends of shipping beam, and let beam fall to ground. a. Remove bolts (A) and (B), and remove banded link and arm (C) from shipping channel (D) at each float spring mount. -
Page 17: Step 9. Unpack Articulating Power Tongue (Apt)
UNLOADING AND ASSEMBLY STEP 9. UNPACK ARTICULATING POWER TONGUE (APT) 1000 RPM 540 RPM c. Remove banding and shipping wire from jack driveline half-shaft. driveline IMPORTANT half shaft aside. If there is more than one machine to be d. Remove pin (A) securing jack to APT, and assembled, and they are different PTO remove jack from shipping position. -
Page 18: Step 10. Attach Articulating Power Tongue (Apt)
UNLOADING AND ASSEMBLY NOTE STEP 10. ATTACH ARTICULATING Pin may need to be tapped into final position with a hammer due to the tight POWER TONGUE (APT) clearances. CAUTION Keep hands clear when lowering APT. c. Secure pivot pin (A) to frame by installing six 5/8 x 1.75 long Gr. -
Page 19: Step 11. Connect Hoses
UNLOADING AND ASSEMBLY STEP 11. CONNECT HOSES Low pressure hose (Return) IMPORTANT Hoses should be routed so there are no twists or sharp bends, and no locations where contact with the frame is likely. Ensure that there is sufficient length of hose and wiring in span to accommodate full swing of Articulating Power Tongue (APT) in both directions. -
Page 20: Step 12. Attach Mower Conditioner To Tractor
UNLOADING AND ASSEMBLY ATTACH DRAWBAR EXTENSION STEP 12. ATTACH MOWER a. Secure tractor drawbar so the hitch-pin hole is CONDITIONER TO directly below the driveline. TRACTOR CAUTION Shut off tractor, engage parking brake and remove key before working around hitch. A. - Page 21 UNLOADING AND ASSEMBLY c. Remove pin (C). g. Assemble PTO driveline male half (G) onto PTO shaft (H) on APT. Push male half so that PTO shaft is at its fully compressed length. h. Locate PTO shaft in hook (J). III.
- Page 22 UNLOADING AND ASSEMBLY IMPORTANT Adjust safety chain length to remove all slack—except what is needed for turns. h. Raise jack (D), pull pin (J), and move jack to storage position on side of APT. Secure jack with pin (J). Refer to STEP 13. ATTACH HYDRAULICS AND ELECTRICAL, page 23.
-
Page 23: Three-Point Hitch (Cat. Ii, Iii, Iiin)
UNLOADING AND ASSEMBLY 3. Flip outer plate (F) and inner plate (G) on B. THREE-POINT HITCH each arm. (CAT. II, III, IIIN) IMPORTANT The inner plate (G) has a smaller joggle than the outer plate (F). Always maintain INSTALL THREE-POINT HITCH YOKE the proper locations. - Page 24 UNLOADING AND ASSEMBLY Check distance ‘X’ between tractor PTO shaft ATTACH MOWER CONDITIONER TO (D) and implement input shaft (E) (without the TRACTOR front half of the driveline attached). g. The measurement must exceed dimensions listed below. Category II and IIIN configuration ‘X’...
-
Page 25: Step 13. Attach Hydraulics And Electrical
UNLOADING AND ASSEMBLY STEP 13. ATTACH HYDRAULICS AND ELECTRICAL WARNING Do NOT use remote hydraulic system pressures over 3000 psi (20684 kPa). Check your tractor operator’s manual for remote system pressure. a. Install quick disconnect couplers onto hydraulic hoses at front of Articulating Power Tongue (APT) as per following table. - Page 26 UNLOADING AND ASSEMBLY Connect the mower conditioner wiring harness connector (E) to tractor. Connector is designed to fit tractors equipped with a round seven-pin receptacle (SAE J560). IMPORTANT Older model tractors will have pin #4 (F) energized as an accessory circuit. The mower conditioner uses this pin position (G) for brake lights.
-
Page 27: Step 14. Install Steering Cylinder
UNLOADING AND ASSEMBLY STEP 14. INSTALL STEERING CYLINDER DANGER Never start or move the machine until you sure bystanders have cleared the area. c. Start tractor. d. Stroke the cylinder to full extension and retraction three or four times to ensure that cylinder and hydraulic lines are fully charged with oil. - Page 28 UNLOADING AND ASSEMBLY Rotate cylinder rod with wrench on stroke control (G) to dimension ‘Y’ in following table. Tighten clamping bolt on clevis (C). k. Loosen clamping bolt on stroke control (G), and rotate stroke control to dimension ‘X’ in the following table: Dimension ‘X’...
-
Page 29: Step 15. Install Roll Opener Links
UNLOADING AND ASSEMBLY STEP 15. INSTALL ROLL OPENER LINKS a. Remove banding securing conditioner roll opener arm (A) to rear link (B). d. Attach lower end of rear link (B) to arm (F) with bolt (G) that was removed in STEP 8a. Torque to 150 ft·lbf (203 N·m). -
Page 30: Step 16. Install Forming Shield Cover
UNLOADING AND ASSEMBLY e. Install two 3/8 in. x .75 carriage bolts (D) at STEP 16. INSTALL FORMING center support. SHIELD COVER Fasten forming shield to frame with 3/8 in. x .75 carriage bolts serrated nuts eight places. g. Tighten all hardware. STEP 17. - Page 31 UNLOADING AND ASSEMBLY g. Secure each adjuster bar (F) to forming shield with pin (M) and hairpin. Use same hole location on both sides. e. Locate adjuster bars (F) through openings (K) in forming shield. h. Adjust fluffer shield (N) to middle position. Loosen bolts (O) if required.
-
Page 32: Step 18. Adjust Center-Link
UNLOADING AND ASSEMBLY STEP 18. ADJUST CENTER-LINK STEP 19. ADJUST FLOAT SPRINGS Float springs were factory-set to provide the A. MECHANICAL LINK minimum width for shipping, and need to be readjusted prior to use. a. Lower header so that cutter bar is resting on the ground. -
Page 33: Step 20. Reposition Knife Drive Box Breather
UNLOADING AND ASSEMBLY STEP 20. REPOSITION KNIFE DRIVE STEP 21. ADJUST LEAN BAR BOX BREATHER Lean bar is fully retracted for shipping. Remove hardware on both sides, and install lean bar in field position at a position suitable for the crop a. -
Page 34: Step 23. Install Options
UNLOADING AND ASSEMBLY e. Attach clips (B) with bolts and nuts removed at step c. to secure roller assembly to cutterbar. STEP 23. INSTALL OPTIONS Tighten nuts. A. GAUGE ROLLERS NOTE Use a socket and ratchet wrench to a. Unpack gauge roller bundle. access the nuts. -
Page 35: Skid Shoes
UNLOADING AND ASSEMBLY B. SKID SHOES a. Unpack skid shoe bundle. e. Attach clips (B) with bolts and nuts removed at step c. to secure skid shoe to cutterbar. NOTE Use a socket and ratchet wrench to access the nuts. Tighten nuts. -
Page 36: Hydraulic Header Angle
UNLOADING AND ASSEMBLY D. HYDRAULIC HEADER ANGLE Refer to installation and adjustment instructions in the kit. E. TALL CROP DIVIDER KIT a. Unpack kit, disassemble hardware from divider. b. Remove lean bar from header. c. Attach extension angles (A) to each end of lean bar (B) with four 1/2 x 1.0 in. -
Page 37: Step 24. Lubricate Mower Conditioner
Replace fitting if necessary. offset the effects of weather during outside storage and transport, and to familiarize the Dealer with the machine. Applicable page numbers Model Header drive Hay conditioner Carrier A30-D 36 - 37 169001 Revision F... -
Page 38: Header Drive: A30-D
PRE-DELIVERY CHECKS A. HEADER DRIVE: A30-D High temperature extreme pressure (EP2) performance with 1% max Molybdenum Disulphide (NLGI Grade 2) lithium base. Cross shaft bearing (one place) Auger shaft bearing (one place) SAE 30 SAE 30 Auger drive chain (one place) -
Page 39: Header Drive: A30-D
PRE-DELIVERY CHECKS B. HEADER DRIVE: A30-D SAE 30 Reel drive chain (one place) Reel shaft bearing (one place) High temperature extreme Knife drive bearing (one place) pressure (EP2) performance with 1% max Molybdenum Disulphide (NLGI Grade 2) lithium base. Auger shaft bearing (one place) -
Page 40: Hay Conditioner: A30-D
PRE-DELIVERY CHECKS C. HAY CONDITIONER: A30-D SAE 85-140 Cross shaft (one place) Gearbox oil level with header in working position - oil runs out of check plug High temperature extreme pressure (EP2) performance with 1% max Molybdenum Disulphide (NLGI Grade 2) lithium base. -
Page 41: Carrier
PRE-DELIVERY CHECKS D. CARRIER High temperature extreme pressure (EP2) performance with 1% max Molybdenum Disulphide (NLGI Grade 2) lithium base. Float link (three places - both sides) Hitch pivot (one place) Wheel bearings Lift cylinder attach (one place - both sides) (one place - LH side) 169001 Revision F... -
Page 42: Articulating Power Tongue (Apt)
PRE-DELIVERY CHECKS E. ARTICULATING POWER TONGUE (APT) High temperature extreme pressure (EP2) performance with 1% max Molybdenum Disulphide (NLGI Grade 2) lithium base. APT swivel 10% moly grease is recommended for driveline shaft slip joint only APT driveline 169001 Revision F... -
Page 43: Step 25. Perform Predelivery Checks
PRE-DELIVERY CHECKS A30-D DOUBLE KNIFE STEP 25. PERFORM PREDELIVERY a. Open shield on header RH side. CHECKS WARNING Stop tractor engine, and remove key before making adjustments to machine. A child or even a pet could engage the drive. IMPORTANT To avoid machine damage, check that no shipping dunnage has fallen into cutterbar. -
Page 44: Auger Stripper Bar Clearance
PRE-DELIVERY CHECKS B. AUGER STRIPPER BAR C. REEL TINE TO HEADER PAN CLEARANCE CLEARANCE FLEX TINE BACK 2/25 in. (2 mm) 2/25–2/5 in. (2–10 mm) IMPORTANT The above dimensions are provided as guidelines only. Tines may slightly contact the guards, but not the knife sections or the auger pan. -
Page 45: Conditioner Rolls
PRE-DELIVERY CHECKS ROLL TIMING E. CONDITIONER ROLLS WARNING Stop tractor engine, and remove key before making adjustments to machine. A child or even a pet could engage the drive. a. Lower header fully, stop engine, remove key. ROLL GAP = 1/2 in. (12 mm) Roll gap Crop a. -
Page 46: Skid Shoes/Gauge Rollers
PRE-DELIVERY CHECKS F. SKID SHOES/GAUGE G. LIGHTS ROLLERS Tail light Hazard /Signal (both sides) (both sides) WARNING To avoid bodily injury or death from unexpected start-up fall raised machine, stop engine, remove key and engage safety props before going under machine for any reason. -
Page 47: Run-Up Mower Conditioner
PRE-DELIVERY CHECKS H. RUN-UP MOWER CONDITIONER CAUTION • Never start or move the machine until you are sure all bystanders have cleared the area. • Clear the area of other persons, pets etc. c. Check actual speed of knife drive box pulley Keep children away from machinery. -
Page 48: Knife
1. Check gap between knifehead and pitman arm. A business card should slide easily • A30-D Pull-Type Mower Conditioners through the gap. If not, then adjust gap by Unloading and Assembly Instructions, loosening bolt, and tapping knifehead with a MD #169001 hammer. - Page 49 NOTES 169001 Revision F...
- Page 50 MacDon Inc. 10708 N. Pomona Avenue Kansas City, Missouri United States, 64153-1924 t. (816) 891-7313 f. (816) 891-7323 MacDon Australia Pty. Ltd. A.C.N. 079 393 721 P.O. Box 243 Suite 3, 143 Main Street Greensborough, Victoria Australia 3088 t. 03 9432 9982 f.
- Page 51 A30-D Pull-Type Mower Conditioner Predelivery Checklist Perform these checks and adjustments prior to delivery to your customer. See the Unloading and Assembly Instructions for details. The completed checklist should be retained either by the Operator or the Dealer. CAUTION: Carefully follow the instructions given. Be alert for safety related messages which bring your attention to hazards and unsafe practices.
Need help?
Do you have a question about the A30-D and is the answer not in the manual?
Questions and answers
how to install the knife