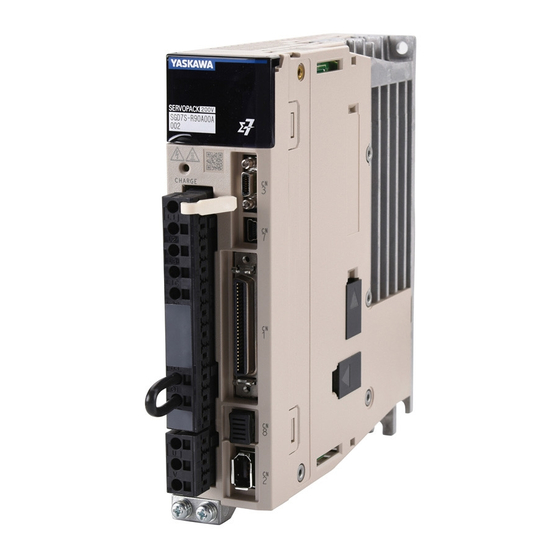
YASKAWA SGD7S series Product Manual
Sigma-7s servopack with
ft/ex specification
for cutting application
feed shaft motor
Hide thumbs
Also See for SGD7S series:
- Product manual (629 pages) ,
- Selection manual (337 pages) ,
- Product manual (549 pages)
Table of Contents
Advertisement
Quick Links
Download this manual
See also:
Product Manual
-7-Series AC Servo Drive
-7S SERVOPACK with
FT/EX Specification
for Cutting Application
Feed Shaft Motor
Product Manual
Model: SGD7S-A20AF21
MANUAL NO. SIEP S800002 10B
Basic Information on
SERVOPACKs
Selecting a SERVOPACK
Wiring and Connecting
SERVOPACKs
Clearance Control
Tuning
Adjusting the Feed Shaft Servo Gain
for Cutting Applications
Servo Gain Adjustments for
High-speed and High-precision Control
Monitoring
Maintenance
Parameter Lists
Appendices
1
2
3
4
5
6
7
8
9
10
11
Advertisement
Table of Contents
Troubleshooting

Related Manuals for YASKAWA SGD7S series


Summary of Contents for YASKAWA SGD7S series
- Page 1 -7-Series AC Servo Drive -7S SERVOPACK with FT/EX Specification for Cutting Application Feed Shaft Motor Product Manual Model: SGD7S-A20AF21 Basic Information on SERVOPACKs Selecting a SERVOPACK Wiring and Connecting SERVOPACKs Clearance Control Tuning Adjusting the Feed Shaft Servo Gain for Cutting Applications Servo Gain Adjustments for High-speed and High-precision Control Monitoring...
- Page 2 Yaskawa. No patent liability is assumed with respect to the use of the informa- tion contained herein. Moreover, because Yaskawa is constantly striving to improve its high-quality products, the information contained in this manual is sub- ject to change without notice.
-
Page 3: Outline Of Manual
About this Manual This manual describes the feed shaft motor drive of the Σ-7-Series AC Servo Drive Σ-7S SERVO- PACKs for cutting applications. Read and understand this manual to ensure correct usage of the Σ-7-Series AC Servo Drives. Keep this manual in a safe place so that it can be referred to whenever necessary. Outline of Manual The contents of the chapters of this manual are described in the following table. - Page 4 Continued from previous page. Σ -7S SERVOPACK with MECHATROLINK-III This Item Communications References Manual Product Manual (Manual No.: SIEP S800001 28) Application Functions – Chapter 6 Trial Operation and Actual Operation – Chapter 7 Tuning Chapter 5 – Adjusting the Feed Shaft Servo Gain for Cutting Applications Chapter 6 –...
-
Page 5: Related Documents
Related Documents The relationships between the documents that are related to the Servo Drives are shown in the following figure. The numbers in the figure correspond to the numbers in the table on the following pages. Refer to these documents as required. System Components Machine Controllers... - Page 6 Classification Document Name Document No. Description Describes the features and applica- Machine Controller and tion examples for combinations of Machine Controller AC Servo Drive KAEP S800001 22 MP3000-Series Machine Control- and Servo Drive lers and Σ-7-Series AC Servo Solutions Catalog General Catalog Drives.
- Page 7 Continued from previous page. Classification Document Name Document No. Description Σ-7-Series AC Servo Drive Σ-7S SERVOPACK with MECHATROLINK-III SIEP S800001 28 Communications References Product Manual Σ-7-Series AC Servo Drive Σ-7S SERVOPACK with MECHATROLINK-II SIEP S800001 27 Communications References Product Manual Σ-7-Series AC Servo Drive Σ-7S SERVOPACK with Analog Voltage/Pulse Train...
- Page 8 Continued from previous page. Classification Document Name Document No. Description Σ-7-Series AC Servo Drive Σ-7S SERVOPACK with SIEP S800001 84 FT/EX Specification for Indexing Application Product Manual Σ-7-Series AC Servo Drive Σ-7S SERVOPACK with SIEP S800001 89 FT/EX Specification for Tracking Application Product Manual ...
- Page 9 Continued from previous page. Classification Document Name Document No. Description Σ-7-Series AC Servo Drive Provides detailed information on MECHATROLINK-II the MECHATROLINK-II communi- SIEP S800001 30 Communications cations commands that are used for a Σ-7-Series Servo System. Command Manual Σ-7-Series MECHATROLINK Σ-7-Series AC Servo Drive Communications Provides detailed information on...
-
Page 10: Using This Manual
Using This Manual Technical Terms Used in This Manual The following terms are used in this manual. Term Meaning A Σ-7-Series Rotary Servomotor, Direct Drive Servomotor, or Linear Servomotor. Servomotor A generic term used for a Σ-7-Series Rotary Servomotor (SGM7J, SGM7A, SGM7P, or Rotary Servomotor SGM7G) or a Direct Drive Servomotor (SGMCS or SGMCV). - Page 11 Notation Used in this Manual Notation for Reverse Signals The names of reverse signals (i.e., ones that are valid when low) are written with a forward slash (/) before the signal abbreviation. Notation Example BK is written as /BK. ...
- Page 12 Trademarks • QR code is a trademark of Denso Wave Inc. • MECHATROLINK is a trademark of the MECHATROLINK Members Association. • Other product names and company names are the trademarks or registered trademarks of the respective company. “TM” and the ® mark do not appear with product or company names in this manual.
-
Page 13: Safety Precautions
Safety Precautions Safety Information To prevent personal injury and equipment damage in advance, the following signal words are used to indicate safety precautions in this document. The signal words are used to classify the hazards and the degree of damage or injury that may occur if a product is used incorrectly. Information marked as shown below is important for safety. - Page 14 Safety Precautions That Must Always Be Observed General Precautions DANGER Read and understand this manual to ensure the safe usage of the product. Keep this manual in a safe, convenient place so that it can be referred to whenever necessary. Make sure that it is delivered to the final user of the product.
- Page 15 NOTICE Do not attempt to use a SERVOPACK or Servomotor that is damaged or that has missing parts. Install external emergency stop circuits that shut OFF the power supply and stops operation immediately when an error occurs. In locations with poor power supply conditions, install the necessary protective devices (such as AC reactors) to ensure that the input power is supplied within the specified voltage range.
- Page 16 NOTICE Do not hold onto the front cover or connectors when you move a SERVOPACK. There is a risk of the SERVOPACK falling. A SERVOPACK or Servomotor is a precision device. Do not drop it or subject it to strong shock. There is a risk of failure or damage.
-
Page 17: Wiring Precautions
NOTICE Do not install or store the product in any of the following locations. • Locations that are subject to direct sunlight • Locations that are subject to ambient temperatures that exceed product specifications • Locations that are subject to relative humidities that exceed product specifications •... - Page 18 Whenever possible, use the Cables specified by Yaskawa. If you use any other cables, confirm the rated current and application environment of your model and use the wiring materials specified by Yaskawa or equivalent materials. Securely tighten cable connector screws and lock mechanisms.
- Page 19 Operation Precautions WARNING Before starting operation with a machine connected, change the settings of the switches and parameters to match the machine. Unexpected machine operation, failure, or personal injury may occur if operation is started before appropriate settings are made. ...
- Page 20 NOTICE When you adjust the gain during system commissioning, use a measuring instrument to monitor the torque waveform and speed waveform and confirm that there is no vibration. If a high gain causes vibration, the Servomotor will be damaged quickly. ...
- Page 21 Troubleshooting Precautions DANGER If the safety device (molded-case circuit breaker or fuse) installed in the power supply line oper- ates, remove the cause before you supply power to the SERVOPACK again. If necessary, repair or replace the SERVOPACK, check the wiring, and remove the factor that caused the safety device to operate.
- Page 22 We will update the document number of the document and issue revisions when changes are made. Any and all quality guarantees provided by Yaskawa are null and void if the customer modifies the product in any way. Yaskawa disavows any responsibility for damages or losses that are caused by modified products.
-
Page 23: Warranty
• Events for which Yaskawa is not responsible, such as natural or human-made disasters Limitations of Liability • Yaskawa shall in no event be responsible for any damage or loss of opportunity to the customer that arises due to failure of the delivered product. - Page 24 • It is the customer’s responsibility to confirm conformity with any standards, codes, or regulations that apply if the Yaskawa product is used in combination with any other products. • The customer must confirm that the Yaskawa product is suitable for the systems, machines, and equipment used by the customer.
-
Page 25: Compliance With Ul Standards, Eu Directives, And Other Safety Standards
Compliance with UL Standards, EU Directives, and Other Safety Standards Certification marks for the standards for which the product has been certified by certification bodies are shown on nameplate. Products that do not have the marks are not certified for the standards. ... - Page 26 European Directives Product Model European Directive Harmonized Standards Machinery Directive EN ISO13849-1: 2008/AC: 2009 2006/42/EC EN 55011 group 1, class A EMC Directive EN 61000-6-2 SERVOPACKs SGD7S 2004/108/EC EN 61000-6-4 EN 61800-3 Low Voltage Directive EN 50178 2006/95/EC EN 61800-5-1 EN 55011 group 1, class A EMC Directive EN 61000-6-2...
- Page 27 Safety Parameters Item Standards Performance Level IEC 61508 SIL3 Safety Integrity Level IEC 62061 SILCL3 PFH = 4.04 × 10 IEC 61508 [1/h] Probability of Dangerous Failure per Hour IEC 62061 (4.04% of SIL3) Performance Level EN ISO 13849-1 PLe (Category 3) Mean Time to Dangerous Failure of Each Channel EN ISO 13849-1 MTTFd: High...
-
Page 28: Table Of Contents
Contents About this Manual ..........iii Outline of Manual . - Page 29 Wiring and Connecting SERVOPACKs Basic Wiring Diagrams ....... . 3-2 I/O Signal Connections .
- Page 30 Estimating the Moment of Inertia ..... . . 5-11 5.4.1 Outline ........... .5-11 5.4.2 Restrictions .
- Page 31 Adjusting the Feed Shaft Servo Gain for Cutting Applications Introduction to Feed Shaft Servo Gain Adjustment ..6-2 Flow of Feed Shaft Servo Gain Adjustments ....6-3 Pre-adjustment Checks .
- Page 32 Maintenance Alarm Displays ........9-2 9.1.1 List of Alarms .
- Page 33 Basic Information on SERVOPACKs This chapter provides information required to select SERVOPACKs, such as SERVOPACK models and combi- nations with Servomotors. Product Introduction ....1-2 Model Designations .
-
Page 34: Product Introduction
1.1 Product Introduction Product Introduction The FT21 SERVOPACKs uses mode (gain) switching, predictive control, and quadrant projec- tion correction to improve trajectory tracking performance. They are designed for use in con- touring and other metal processing. Clearance control that uses a gap sensor has also been implemented to enable applications with laser processing machines. -
Page 35: Model Designations
1.2 Model Designations 1.2.1 Interpreting SERVOPACK Model Numbers Model Designations 1.2.1 Interpreting SERVOPACK Model Numbers SGD7S - R70 14th 1st+2nd+3rd 5th+6th 8th+9th+10th 11th+12th+13th Σ-7-Series digit digit digit digits digits digits digits Σ-7S SERVOPACKs Hardware Options Maximum Applicable 1st+2nd+3rd digits 4th digit 8th+9th+10th digits Voltage Specification... -
Page 36: Combinations Of Servopacks And Servomotors
1.3 Combinations of SERVOPACKs and Servomotors Combinations of SERVOPACKs and Servomotors Refer to the following manuals for information on combinations with Σ-7-Series Servomotors. Σ -7-Series Rotary Servomotor Product Manual (Manual No.: SIEP S800001 36) Σ -7-Series Linear Servomotor Product Manual (Manual No.: SIEP S800001 37) Σ... -
Page 37: Functions
1.4 Functions Functions This section lists the functions provided by SERVOPACKs. Functions given inside bold lines in the functions tables are restricted for the SERVOPACKs described in this manual. Refer to the following section for details on restrictions to these func- tions. - Page 38 1.4 Functions • Functions Related to the Host Controller Function Reference Electronic Gear Settings I/O Signal Allocations Servo Alarm (ALM) Signal Warning Output (/WARN) Signal Rotation Detection (/TGON) Signal /S-RDY (Servo Ready) Signal Speed Coincidence Detection (/V-CMP) Signal Positioning Completion (/COIN) Signal Σ-7-Series Σ-7S SERVOPACK with MECHATROLINK-III Near (/NEAR) Signal Communications References Product Manual (Manual...
- Page 39 1.4 Functions • Functions for Inspection and Maintenance Function Reference Write Prohibition Setting for Parameters Initializing Parameter Settings Automatic Detection of Connected Motor Σ-7-Series Σ-7S SERVOPACK with MECHATROLINK-III Monitoring Product Information Communications References Product Manual (Manual No.: SIEP S800001 28) Monitoring Product Life Alarm History Display Alarm Tracing...
-
Page 40: Restrictions
Restrictions 1.5.1 Function Application Restrictions Restrictions This section describes restrictions that apply when using the SERVOPACKs described in this manual. 1.5.1 Function Application Restrictions The following functional restrictions apply when the SERVOPACKs described in this manual are used. Function Restriction Current Control Mode Selection Speed Detection Method Selec- These functions cannot be used. -
Page 41: Sigmawin
1.6 SigmaWin+ SigmaWin+ To use the SigmaWin+, a model information file for the SERVOPACK must be added to Sig- maWin+ version 7.10 or higher. Contact your Yaskawa representative for the model information file. -
Page 42: Combining The Servopacks With Mp-Series Machine Controllers And The Mpe720 Engineering Tool
1.7 Combining the SERVOPACKs with MP-Series Machine Controllers and the MPE720 Engineering Tool Combining the SERVOPACKs with MP-Series Machine Controllers and the MPE720 Engineering Tool If you combine the SERVOPACK with an MP-Series Machine Controller or the MPE720 Engi- neering Tool, it will be recognized as a SERVOPACK with standard specifications. To use the parameters that have been added or changed for the SERVOPACKs described in this manual, use the SigmaWin+. -
Page 43: Selecting A Servopack
Selecting a SERVOPACK This chapter provides information required to select SERVOPACKs, such as specifications, block diagrams, dimensional drawings, and connection examples. Ratings ......2-2 2.1.1 Three-Phase, 200 VAC . -
Page 44: Ratings
2.1 Ratings 2.1.1 Three-Phase, 200 VAC Ratings This section gives the ratings of SERVOPACKs. 2.1.1 Three-Phase, 200 VAC Model SGD7S- R70A R90A 1R6A 2R8A 3R8A 5R5A 7R6A 120A 180A 200A 330A Maximum Applicable 0.05 0.75 Motor Capacity [kW] Continuous Output Cur- 0.66 0.91 11.6... -
Page 45: Single-Phase, 200 Vac
2.1 Ratings 2.1.2 Single-Phase, 200 VAC Model SGD7S- 470A 550A 590A 780A Maximum Applicable Motor Capacity [kW] Continuous Output Current [Arms] 46.9 54.7 58.6 78.0 Instantaneous Maximum Output Current [Arms] Power Supply 200 VAC to 240 VAC, -15% to +10%, 50 Hz/60 Hz Main Circuit Input Current [Arms]... -
Page 46: 270 Vdc
2.1 Ratings 2.1.3 270 VDC 2.1.3 270 VDC Model SGD7S- R70A R90A 1R6A 2R8A 3R8A 5R5A 7R6A 120A Maximum Applicable Motor Capacity [kW] 0.05 0.75 Continuous Output Current [Arms] 0.66 0.91 11.6 Instantaneous Maximum Output Current 11.0 16.9 17.0 28.0 [Arms] Power Supply 270 VDC to 324 VDC, -15% to +10%... -
Page 47: Servopack Overload Protection Characteristics
Note: The above overload protection characteristics do not mean that you can perform continuous duty operation with an output of 100% or higher. For a Yaskawa-specified combination of SERVOPACK and Servomotor, maintain the effective torque within the continuous duty zone of the torque-motor speed characteristic of the Servomotor. -
Page 48: Specifications
2.3 Specifications Specifications This section gives the general specifications of the SERVOPACKs. Item Specification Drive Method IGBT-based PWM control, sine wave current drive Serial encoder: 17 bits (absolute encoder) With Rotary 20 bits or 24 bits (incremental encoder/absolute Servomotor encoder) 22 bits (absolute encoder) Feedback •... - Page 49 2.3 Specifications Continued from previous page. Item Specification Encoder Divided Phase A, phase B, phase C: Line-driver output Pulse Output Number of divided output pulses: Any setting is allowed. Number of input points: 1 Gap Sensor Signal Input Input voltage range (± 12 V) Allowable voltage range: 24 VDC ±20% Number of input points: 7 Input method: Sink inputs or source inputs...
- Page 50 2.3 Specifications Continued from previous page. Item Specification Position, speed, or torque control with MECHATROLINK-III communi- Performance cations Reference MECHATROLINK-III commands (sequence, motion, data setting, data Method Reference Input access, monitoring, adjustment, etc.) Profile MECHATROLINK-III standard servo profile Rotary switch (S1 and S2) positions: 16 MECHATROLINK-III Communica- tions Setting Switches Number of DIP switch (S3) pins: 4...
-
Page 51: Wiring And Connecting
Wiring and Connecting SERVOPACKs This chapter provides information on wiring and connecting SERVOPACKs to power supplies and peripheral devices. Basic Wiring Diagrams ....3-2 I/O Signal Connections ....3-4 3.2.1 I/O Signal Connector (CN1) Names and Functions . - Page 52 Connect these when using an absolute encoder. If the Encoder Cable with a Battery Case is connected, do not connect a backup battery. The 24-VDC power supply is not provided by Yaskawa. Use a 24-VDC power supply with double insulation or reinforced insulation.
-
Page 53: 3.1 Basic Wiring Diagrams
3.1 Basic Wiring Diagrams Refer to the following manual if you use a safety function device. Σ Σ -7-Series -7S SERVOPACK with MECHATROLINK-III Communications References Product Manual (Manual No.: SIEP S800001 If you do not use the safety function, insert the Safety Jumper Connector (provided as an accessory) into CN8 when you use the SERVO- PACK. -
Page 54: I/O Signal Connections
Inputs the sequence input signal power supply. Sequence Input Signal Power Allowable voltage range: 24 VDC ±20% The 24- +24VIN Supply Input VDC power supply is not provided by Yaskawa. Battery for Absolute Encoder These are the pins to connect the absolute BAT+ encoder backup battery. - Page 55 3.2 I/O Signal Connections 3.2.1 I/O Signal Connector (CN1) Names and Functions Output Signals Default settings are given in parentheses. Signal Pin No. Name Function ALM+ Servo Alarm Output Turns OFF (opens) when an error is detected. ALM- /SO1+ You can allocate the output signal to use with a param- General-purpose (/BK+) eter.
-
Page 56: I/O Signal Connector (Cn1) Pin Arrangement
3.2 I/O Signal Connections 3.2.2 I/O Signal Connector (CN1) Pin Arrangement 3.2.2 I/O Signal Connector (CN1) Pin Arrangement The following figure gives the pin arrangement of the of the I/O signal connector (CN1) for the default set- tings. General- Battery for /SO1+ purpose General-... -
Page 57: Connecting The Gap Sensor
Connecting the Gap Sensor Connecting the Gap Sensor The input signal from the gap sensor amplifier is connected to pins 5 (A-FB) and 16 (SG) on the CN1 connector. Type Signal Name Remarks A-FB Gap Sensor Signal Input Inputs Connected to the gap sensor amplifier. Signal ground The input specifications are as follows: •... -
Page 58: Clearance Control
Clearance Control This chapter describes clearance control. Introduction ......4-2 4.1.1 Function Overview ..... . . 4-2 4.1.2 Recommended Gap Sensor Specifications . -
Page 59: Introduction
4.1 Introduction 4.1.1 Function Overview Introduction 4.1.1 Function Overview Clearance control is used to maintain a distance (gap) between a processing head and the sur- face of the workpiece it is processing to match the offset specified by the host controller. Input the analog signal from the gap sensor into the SERVOPACK to control the distance between the processing head and workpiece surface. -
Page 60: Mechatrolink-Iii Command
4.2 MECHATROLINK-III Command 4.2.1 CLC_CTRL (Clearance Control) Command (CF Hex) MECHATROLINK-III Command This section gives the command and option monitors for clearance control. 4.2.1 CLC_CTRL (Clearance Control) Command (CF Hex) Phases in Which the Com- Command Clas- Vendor-specific Asynchronous 2 and 3 command command mand Can Be Executed... -
Page 61: Precautions
4.3 Precautions 4.3.1 Switching between Normal Control and Clearance Control Precautions 4.3.1 Switching between Normal Control and Clearance Con- trol To change to clearance control, execute the CLC_CTRL (Clearance Control) command while clearance control is enabled (Pn6E8 = n. The positioning position will change according to the setting of CLC_OFS (Clearance Offset Reference). -
Page 62: Overtravel During Clearance Control
4.3 Precautions 4.3.4 Overtravel during Clearance Control 4.3.4 Overtravel during Clearance Control If the P-OT (Forward Drive Prohibit Input) signal or N-OT (Reverse Drive Prohibit Input) signal is activated while clearance control is in progress, the SERVOPACK stops the motor with the ... -
Page 63: Parameter Setting Procedure
4.4 Parameter Setting Procedure 4.4.1 Flowchart Parameter Setting Procedure 4.4.1 Flowchart The following flowchart gives the parameter setting procedure for clearance control. START Gap Sensor Application Settings Initial Parameter Settings Gap Sensor-Related Parameters Tuning the Servo Gains 4.4.2 Gap Sensor Application Settings ... -
Page 64: Initial Parameter Settings
4.4 Parameter Setting Procedure 4.4.3 Initial Parameter Settings 4.4.3 Initial Parameter Settings Use the following procedure to set the parameters. Setting the Clearance Control Selection Switch To enable clearance control, set Pn6E8 to n. 1 and turn the power supply OFF and ON again. CAUTION ... - Page 65 4.4 Parameter Setting Procedure 4.4.3 Initial Parameter Settings Setting the Maximum Clearance Offset Set Pn6F2 (Maximum Clearance Offset) to the maximum value for the clearance offset reference. If the clearance offset reference is greater than the maximum clearance offset, the maximum clearance offset is used.
-
Page 66: Gap Sensor-Related Parameters
4.4 Parameter Setting Procedure 4.4.4 Gap Sensor-Related Parameters 4.4.4 Gap Sensor-Related Parameters The analog voltage that is output by the gap sensor amplifier is converted to a digital signal in the SERVOPACK. The digital value that results from converting an analog signal is called the AD value. -
Page 67: Tuning The Servo Gains
4.4 Parameter Setting Procedure 4.4.5 Tuning the Servo Gains 4.4.5 Tuning the Servo Gains The servo gain settings during clearance control are the same as the settings during normal control. Adjust the servo gains with normal control. Adjust the following parameters to improve response. •... -
Page 68: Tuning
Tuning This chapter provides information on the flow of tuning, details on tuning functions, and related operating proce- dures. Overview and Flow of Tuning ... 5-3 5.1.1 Tuning Functions ......5-4 5.1.2 Diagnostic Tool . - Page 69 5.5.6 Automatically Adjusted Function Settings ..5-26 5.5.7 Related Parameters ..... .5-28 Autotuning with a Host Reference ..5-29 5.6.1 Outline .
-
Page 70: Overview And Flow Of Tuning
5.1 Overview and Flow of Tuning Overview and Flow of Tuning Tuning is performed to optimize response by adjusting the servo gains in the SERVOPACK. The servo gains are set using a combination of parameters, such as parameters for the speed loop gain, position loop gain, filters, friction compensation, and moment of inertia ratio. -
Page 71: Tuning Functions
5.1 Overview and Flow of Tuning 5.1.1 Tuning Functions 5.1.1 Tuning Functions The following table provides an overview of the tuning functions. Applicable Con- Tuning Function Outline Reference trol Methods The moment of inertia ratio is calculated by operat- Speed control, Moment of Inertia ing the Servomotor a few times. -
Page 72: Diagnostic Tool
5.1 Overview and Flow of Tuning 5.1.2 Diagnostic Tool 5.1.2 Diagnostic Tool You can use the following tools to measure the frequency characteristics of the machine and set notch filters. Applicable Diagnostic Tool Outline Reference Control Methods The machine is subjected to vibration to detect Speed control, Mechanical Analysis resonance frequencies. -
Page 73: Monitoring Methods
5.2 Monitoring Methods Monitoring Methods You can use the data tracing function of the SigmaWin+ or the analog monitor signals of the SERVOPACK for monitoring. If you perform custom tuning or manual tuning, always use the above functions to monitor the machine operating status and SERVOPACK signal waveform while you adjust the servo gains. -
Page 74: Precautions To Ensure Safe Tuning
5.3 Precautions to Ensure Safe Tuning 5.3.1 Overtravel Settings Precautions to Ensure Safe Tuning CAUTION Observe the following precautions when you perform tuning. • Do not touch the rotating parts of the motor when the servo is ON. • Before starting the Servomotor, make sure that an emergency stop can be performed at any time. - Page 75 5.3 Precautions to Ensure Safe Tuning 5.3.3 Setting the Position Deviation Overflow Alarm Level Position Deviation Overflow Alarm Level (Pn520) [setting unit: reference units] • Rotary Servomotors Maximum motor speed [min Encoder resolution Pn210 × × × (1.2 to 2) Pn520 >...
-
Page 76: Vibration Detection Level Setting
5.3 Precautions to Ensure Safe Tuning 5.3.4 Vibration Detection Level Setting Related Warnings Warning Number Warning Name Meaning Position Deviation This warning occurs if the position deviation exceeds the specified A.900 Overflow percentage (Pn520 × Pn51E/100). 5.3.4 Vibration Detection Level Setting You can set the vibration detection level (Pn312) to more accurately detect A.520 alarms (Vibration Alarm) and A.911 warnings (Vibration) when vibration is detected during machine operation. - Page 77 5.3 Precautions to Ensure Safe Tuning 5.3.5 Setting the Position Deviation Overflow Alarm Level at Servo ON Refer to the following manual for information on troubleshooting alarms. Σ Σ -7-Series -7S SERVOPACK with MECHATROLINK-III Communications References Product Manual (Manual No.: SIEP S800001 28) Related Warnings Warning Number...
-
Page 78: Estimating The Moment Of Inertia
5.4 Estimating the Moment of Inertia 5.4.1 Outline Estimating the Moment of Inertia This section describes how the moment of inertia is calculated. The moment of inertia ratio that is calculated here is used in other tuning functions. You can also estimate the moment of inertia during autotuning without a host reference. -
Page 79: Applicable Tools
5.4 Estimating the Moment of Inertia 5.4.3 Applicable Tools • When proportional control is used Note:If you specify calculating the moment of inertia, an error will occur if V_PPI in the servo command output signals (SVCMD_IO) changes to specify the proportional action during moment of inertia estimation. •... - Page 80 5.4 Estimating the Moment of Inertia 5.4.4 Operating Procedure Select Tuning in the Menu Dialog Box. The Tuning Dialog Box will be displayed. Click the Cancel Button to cancel tuning. Click the Execute Button. Click the Execute Button. Set the conditions as required. ...
- Page 81 5.4 Estimating the Moment of Inertia 5.4.4 Operating Procedure Speed Loop Setting Area Make the speed loop settings in this area. If the speed loop response is too bad, it will not be possible to measure the moment of inertia ratio accurately.
- Page 82 5.4 Estimating the Moment of Inertia 5.4.4 Operating Procedure When Measurement Is Not Correct Information Estimating the moment of inertia ratio cannot be performed correctly if the torque limit is activated. Adjust the limits or reduce the acceleration rate in the reference selection so that the torque limit is not activated.
- Page 83 5.4 Estimating the Moment of Inertia 5.4.4 Operating Procedure Click the Forward Button. The shaft will rotate in the forward direction and the measurement will start. After the measurement and data transfer have been completed, the Reverse Button will be displayed in color. Click the Reverse Button.
- Page 84 5.4 Estimating the Moment of Inertia 5.4.4 Operating Procedure Click the Writing Results Button. Identified Moment of Inertia Ratio Box The moment of inertia ratio that was found with operation and measurements is dis- played here.
-
Page 85: Autotuning Without Host Reference
5.5 Autotuning without Host Reference 5.5.1 Outline Autotuning without Host Reference This section describes autotuning without a host reference. • Autotuning without a host reference performs adjustments based on the setting of the speed loop gain (Pn100). Therefore, precise adjustments cannot be made if there is vibration when adjustments are started. -
Page 86: Restrictions
5.5 Autotuning without Host Reference 5.5.2 Restrictions Rated motor speed Movement 2/3 speed References Time t Responses Rated motor speed 2/3 Motor rated torque: Approx. 100% SERVOPACK Travel Distance Servomotor Time t Motor rated torque: Note: Execute autotuning without a host reference after jogging to Approx. -
Page 87: Applicable Tools
5.5 Autotuning without Host Reference 5.5.3 Applicable Tools Preparations Always check the following before you execute autotuning without a host reference. • The main circuit power supply must be ON. • There must be no overtravel. • The servo must be OFF. •... - Page 88 5.5 Autotuning without Host Reference 5.5.4 Operating Procedure Confirm that the moment of inertia ratio (Pn103) is set correctly. Click the Servo Drive Button in the workspace of the Main Window of the Sig- maWin+. Select Tuning in the Menu Dialog Box. The Tuning Dialog Box will be displayed.
- Page 89 5.5 Autotuning without Host Reference 5.5.4 Operating Procedure Set the conditions in the Switching the load moment of inertia (load mass) identifica- tion Box, the Mode selection Box, the Mechanism selection Box, and the Distance Box, and then click the Next Button. •...
- Page 90 5.5 Autotuning without Host Reference 5.5.4 Operating Procedure Click the Servo ON Button. Click the Start tuning Button. 5-23...
-
Page 91: Troubleshooting Problems In Autotuning Without A Host Reference
5.5 Autotuning without Host Reference 5.5.5 Troubleshooting Problems in Autotuning without a Host Reference Confirm safety around moving parts and click the Yes Button. The motor will start operating and tuning will be executed. Vibration that occurs during tuning will be detected automatically and suitable settings will be made for that vibration. - Page 92 5.5 Autotuning without Host Reference 5.5.5 Troubleshooting Problems in Autotuning without a Host Reference When an Error Occurs during Execution of Autotuning without a Host Reference Error Possible Cause Corrective Action • Increase the setting of the positioning completed width (Pn522). •...
-
Page 93: Automatically Adjusted Function Settings
5.5 Autotuning without Host Reference 5.5.6 Automatically Adjusted Function Settings 5.5.6 Automatically Adjusted Function Settings You can specify whether to automatically adjust the following functions during autotuning. Automatic Notch Filters Normally, set Pn460 to n.1 (Adjust automatically) (default setting). Vibration will be detected during autotuning without a host reference and a notch filter will be adjusted. - Page 94 5.5 Autotuning without Host Reference 5.5.6 Automatically Adjusted Function Settings Parameter Function When Enabled Classification n. 0 Disable friction compensation. (default setting) Pn408 Immediately Setup n. 1 Enable friction compensation. Refer to the following manual for details. Σ Σ...
-
Page 95: Related Parameters
5.5 Autotuning without Host Reference 5.5.7 Related Parameters 5.5.7 Related Parameters The following parameters are automatically adjusted or used as reference when you execute autotuning without a host reference. Do not change the settings while autotuning without a host reference is being executed. Parameter Name Automatic Changes... -
Page 96: Autotuning With A Host Reference
5.6 Autotuning with a Host Reference 5.6.1 Outline Autotuning with a Host Reference This section describes autotuning with a host reference. Autotuning with a host reference makes adjustments based on the set speed loop gain (Pn100). Therefore, precise adjustments cannot be made if there is vibration when adjustments are started. -
Page 97: Restrictions
5.6 Autotuning with a Host Reference 5.6.2 Restrictions 5.6.2 Restrictions Systems for Which Adjustments Cannot Be Made Accurately Adjustments will not be made correctly for autotuning with a host reference in the following cases. Use custom tuning. • When the travel distance for the reference from the host controller is equal to or lower than the setting of the positioning completed width (Pn522) •... - Page 98 5.6 Autotuning with a Host Reference 5.6.4 Operating Procedure Confirm that the moment of inertia ratio (Pn103) is set correctly. Click the Servo Drive Button in the workspace of the Main Window of the Sig- maWin+. Select Tuning in the Menu Dialog Box. The Tuning Dialog Box will be displayed.
- Page 99 5.6 Autotuning with a Host Reference 5.6.4 Operating Procedure Set the conditions in the Mode selection Box and the Mechanism selection Box, and then click the Next Button. If you select the Start tuning using the default settings Check Box in the Tuning parameters Area, the tuning parameters will be returned to the default settings before tuning is started.
- Page 100 5.6 Autotuning with a Host Reference 5.6.4 Operating Procedure Input the correct moment of inertia ratio and click the Next Button. Turn ON the servo, enter a reference from the host controller, and then click the Start tuning Button. Confirm safety around moving parts and click the Yes Button. The motor will start operating and tuning will be executed.
-
Page 101: 5.6.5 Troubleshooting Problems In Autotuning With A Host Reference
5.6 Autotuning with a Host Reference 5.6.5 Troubleshooting Problems in Autotuning with a Host Reference When tuning has been completed, click the Finish Button. The results of tuning will be set in the parameters and you will return to the Tuning Dialog Box. This concludes the procedure to perform autotuning with a host reference. -
Page 102: Related Parameters
5.6 Autotuning with a Host Reference 5.6.7 Related Parameters 5.6.7 Related Parameters The following parameters are automatically adjusted or used as reference when you execute autotuning with a host reference. Do not change the settings while autotuning with a host reference is being executed. Parameter Name Automatic Changes... -
Page 103: Custom Tuning
5.7 Custom Tuning 5.7.1 Outline Custom Tuning This section describes custom tuning. 5.7.1 Outline You can use custom tuning to manually adjust the servo during operation using a speed or position reference input from the host controller. You can use it to fine-tune adjustments that were made with autotuning. -
Page 104: Applicable Tools
5.7 Custom Tuning 5.7.3 Applicable Tools 5.7.3 Applicable Tools The following table lists the tools that you can use to perform custom tuning and the applicable tool functions. Tool Function Operating Procedure Reference Σ-7-Series Digital Operator Operating Digital Operator Fn203 Manual (Manual No.: SIEP S800001 33) −... - Page 105 5.7 Custom Tuning 5.7.4 Operating Procedure Click the Execute Button. Click the Advanced adjustment Button. When the following dialog box is displayed, click the OK Button and then confirm that the Information correct moment of inertia ratio is set in Pn103 (Moment of Inertia Ratio). Click the Custom tuning Button.
- Page 106 5.7 Custom Tuning 5.7.4 Operating Procedure Set the Tuning mode Box and Mechanism selection Box, and then click the Next But- ton. Tuning mode Box Mode Selection Description This setting gives priority to stability and preventing overshooting. In addi- 0: Set servo gains tion to gain adjustment, notch filters with priority given and anti-resonance control (except...
- Page 107 5.7 Custom Tuning 5.7.4 Operating Procedure Turn ON the servo, enter a reference from the host controller, and then click the Start tuning Button. Tuning Mode 0 or 1 Tuning Mode 2 or 3 Use the Buttons to change the tuning level. Click the Back Button during tuning to restore the setting to its original value.
- Page 108 5.7 Custom Tuning 5.7.4 Operating Procedure When tuning has been completed, click the Completed Button. The values that were changed will be saved in the SERVOPACK and you will return to the Tuning Dia- log Box. This concludes the procedure to set up custom tuning. 5-41...
- Page 109 5.7 Custom Tuning 5.7.4 Operating Procedure Vibration Suppression Functions Notch Filters and Automatic Anti-resonance Setting If the vibration frequency that occurs when you increase the servo gains is at 1,000 Hz or higher, notch filters are effective to suppress vibration. If the vibration is between 100 Hz and 1,000 Hz, anti-resonance control is effective.
-
Page 110: Automatically Adjusted Function Settings
5.7 Custom Tuning 5.7.5 Automatically Adjusted Function Settings 5.7.5 Automatically Adjusted Function Settings You cannot use vibration suppression functions at the same time. Other automatic function set- tings are the same as for autotuning without a host reference. Refer to the following section. 5.5.6 Automatically Adjusted Function Settings on page 5-26 5.7.6 Tuning Example for Tuning Mode 2 or 3... -
Page 111: Related Parameters
5.7 Custom Tuning 5.7.7 Related Parameters 5.7.7 Related Parameters The following parameters are automatically adjusted or used as reference when you execute custom tuning. Do not change the settings while custom tuning is being executed. Parameter Name Automatic Changes Pn100 Speed Loop Gain Pn101 Speed Loop Integral Time Constant... -
Page 112: Anti-Resonance Control Adjustment
5.8 Anti-Resonance Control Adjustment 5.8.1 Outline Anti-Resonance Control Adjustment This section describes anti-resonance control. 5.8.1 Outline Anti-resonance control increases the effectiveness of vibration suppression after custom tun- ing. Anti-resonance control is effective for suppression of continuous vibration frequencies from 100 to 1,000 Hz that occur when the control gain is increased. -
Page 113: Applicable Tools
5.8 Anti-Resonance Control Adjustment 5.8.3 Applicable Tools 5.8.3 Applicable Tools The following table lists the tools that you can use to perform anti-resonance control adjust- ment and the applicable tool functions. Tool Function Operating Procedure Reference Σ-7-Series Digital Operator Operating Man- Digital Operator Fn204 ual (Manual No.: SIEP S800001 33) - Page 114 5.8 Anti-Resonance Control Adjustment 5.8.4 Operating Procedure Perform steps 1 to 7 of the procedure for custom tuning. Refer to the following section for details. 5.7.4 Operating Procedure on page 5-37 Click the Anti-res Ctrl Adj Button. The rest of the procedure depends on whether you know the vibration frequency. If you do not know the vibration frequency, click the Auto Detect Button.
-
Page 115: Related Parameters
5.8 Anti-Resonance Control Adjustment 5.8.5 Related Parameters When the adjustment has been completed, click the Finish Button. The values that were changed will be saved in the SERVOPACK and you will return to the Tuning Dia- log Box. This concludes the procedure to set up anti-resonance control. 5.8.5 Related Parameters The following parameters are automatically adjusted or used as reference when you execute... - Page 116 5.8 Anti-Resonance Control Adjustment 5.8.6 Suppressing Different Vibration Frequencies with Anti-resonance Control Required Parameter Settings The following parameter settings are required to use anti-resonance control for more than one vibration frequency. When Classifi- Parameter Description Enabled cation Do not use anti-resonance control. After (default setting) Pn160...
-
Page 117: Vibration Suppression
5.9 Vibration Suppression 5.9.1 Outline Vibration Suppression This section describes vibration suppression. 5.9.1 Outline You can use vibration suppression to suppress transient vibration at a low frequency from 1 Hz to 100 Hz, which is generated mainly when the machine vibrates during positioning. This is effective for vibration frequencies for which notch filters and anti-resonance control adjustment are not effective. -
Page 118: Preparations
5.9 Vibration Suppression 5.9.2 Preparations The vibration frequencies that are automatically detected may vary somewhat with each posi- Information tioning operation. Perform positioning several times and make adjustments while checking the effect of vibration suppression. 5.9.2 Preparations Always check the following before you execute vibration suppression. •... - Page 119 5.9 Vibration Suppression 5.9.4 Operating Procedure Frequency detection will not be performed if there is no vibration or if the vibration frequency is outside the range of detectable frequencies. If a vibration frequency is not detected, pro- vide a means of measuring the vibration frequency. Important Click the Set Button.
-
Page 120: Setting Combined Functions
5.9 Vibration Suppression 5.9.5 Setting Combined Functions 5.9.5 Setting Combined Functions You can also use the feedforward function when you execute vibration suppression. In the default settings, feedforward (Pn109), the speed feedforward input (VFF), and the torque feedforward input (TFF) are disabled. To use the speed feedforward input (VFF), the torque feedforward input (TFF), and model fol- lowing control from the host controller in the system, set Pn140 to n.1... -
Page 121: Additional Adjustment Functions
5.10 Additional Adjustment Functions 5.10 Additional Adjustment Functions This section describes the functions that you can use to make adjustments after you perform autotuning without a host reference, autotuning with a host reference, and custom tuning. Function Applicable Control Methods Reference Position control, speed control, or Mode (Gain) Switching... - Page 122 Adjusting the Feed Shaft Servo Gain for Cutting Applications This chapter describes servo gain adjustments with a cut- ting application that are necessary for high-speed, high- precision trajectory tracking. Introduction to Feed Shaft Servo Gain Adjustment . . 6-2 Flow of Feed Shaft Servo Gain Adjustments . . 6-3 Pre-adjustment Checks .
-
Page 123: Introduction To Feed Shaft Servo Gain Adjustment
6.1 Introduction to Feed Shaft Servo Gain Adjustment Introduction to Feed Shaft Servo Gain Adjustment To adjust the feed shaft servo gains, we recommend that you use custom tuning and prioritize stable high-speed high-precision trajectory tracking. The following servo gains are adjusted with a position reference or speed reference input from the host controller while the machine is in operation. -
Page 124: Flow Of Feed Shaft Servo Gain Adjustments
6.2 Flow of Feed Shaft Servo Gain Adjustments Flow of Feed Shaft Servo Gain Adjustments The flow of adjusting the servo gains of a feed shaft is given below. START Pre-adjustment Checks on page 6-4 6.3 Pre-adjustment Checks Setting the Moment of Inertia Ratio Gain Adjustment for Cutting Operations •... -
Page 125: Pre-Adjustment Checks
6.3 Pre-adjustment Checks 6.3.1 Selection of Speed Loop Control Method Pre-adjustment Checks 6.3.1 Selection of Speed Loop Control Method Make sure that Pn10B is set to n. (I-P control). The speed loop control methods include PI control and I-P control. For feed shafts in cutting applications, we recommend setting I-P control. -
Page 126: Mode (Gain) Selection
6.4 Mode (Gain) Selection 6.4.1 Mode (Gain) Selection Specifications Mode (Gain) Selection 6.4.1 Mode (Gain) Selection Specifications This SERVOPACK lets you perform gain selection for feed shafts that combine cutting opera- tion, rapid feed operation, and other shaft feeding, as well as with operations performed when stopped. -
Page 127: Confirming The Set Gain Bank
6.4 Mode (Gain) Selection 6.4.2 Servo Command I/O Signals (SVCMD_IO) Gain Adjustment in Each Gain Bank Perform adjustments that are appropriate to each operation for the gain banks given in the fol- lowing table. Gain Bank Parameter Name Speed Loop Gain (Kv) Pn100 Pn104 Pn12B... -
Page 128: Tuning The Servo Gains
6.5 Tuning the Servo Gains 6.5.1 Parameters That Are Adjusted for Cutting Feeding (G01) and Rapid Feeding (G00) Tuning the Servo Gains 6.5.1 Parameters That Are Adjusted for Cutting Feeding (G01) and Rapid Feeding (G00) The parameters that require adjustment are given in the following table. Parameter Description When Enabled... - Page 129 6.5 Tuning the Servo Gains 6.5.1 Parameters That Are Adjusted for Cutting Feeding (G01) and Rapid Feeding (G00) Continued from previous page. Torque Anti-resonance Damping Gain Speed Position Pn163 Setting Range Setting Unit Default Setting When Enabled Classification 0 to 300 Immediately Tuning ...
-
Page 130: Cutting Feed (G01) Servo Gain Adjustment
6.5 Tuning the Servo Gains 6.5.2 Cutting Feed (G01) Servo Gain Adjustment 6.5.2 Cutting Feed (G01) Servo Gain Adjustment This section describes the servo gain adjustment procedure for cutting feeding. Use the follow- ing procedure. START Selection of Feed Shaft to Adjust Feed shaft 1 Feed shaft 2 Feed shaft 3... -
Page 131: 6.5.2 Cutting Feed (G01) Servo Gain Adjustment
6.5 Tuning the Servo Gains 6.5.2 Cutting Feed (G01) Servo Gain Adjustment Step 1: Pre-adjustment Checks for Servo Gains Step 1 is used to perform pre-adjustment checks for servo gains. Confirmation of Control Method Check that Pn10B is set to n. (Speed Control Method: I-P Control). - Page 132 6.5 Tuning the Servo Gains 6.5.2 Cutting Feed (G01) Servo Gain Adjustment START Start custom tuning. Operate the adjustment program at the maximum cutting feed speed. Increase the tuning Any vibration (humming) level by 10. in the machine? Both notch filter and anti-resonance control applied? Click Vibration Detection.
- Page 133 6.5 Tuning the Servo Gains 6.5.2 Cutting Feed (G01) Servo Gain Adjustment Step 3: Torque Ripple Check at Constant Speed In step 3, the torque ripple (which is a cause of vibration) is adjusted at a constant speed so that it is within 5% of the rated torque (the allowable range). A flowchart of the procedure to confirm the torque ripple at a constant speed is given below.
- Page 134 6.5 Tuning the Servo Gains 6.5.2 Cutting Feed (G01) Servo Gain Adjustment Step 5: Verification between Synchronized Shafts In step 5, the related gain parameters are aligned between shafts that require synchronization. A flowchart of the procedure for aligning the synchronized shafts is provided below. START Check the gain of the feed shaft with the lowest tuning level.
-
Page 135: Rapid Feed (G00) Servo Gain Adjustment
6.5 Tuning the Servo Gains 6.5.3 Rapid Feed (G00) Servo Gain Adjustment 6.5.3 Rapid Feed (G00) Servo Gain Adjustment This section describes the servo gain adjustment procedure for rapid feeding. Use the following procedure. After you complete the adjustments for the first shaft, make similar adjustments for the other shafts. - Page 136 6.5 Tuning the Servo Gains 6.5.3 Rapid Feed (G00) Servo Gain Adjustment Step 3: Rapid Feed Operation Check (Waveform Confirma- tion) In step 3, make sure that there are no problems during rapid feed operations. The items to con- firm are as follows: •...
- Page 137 Servo Gain Adjustments for High-speed and High-precision Control This chapter describes servo gain adjustments that facili- tate faster and more-precise operations for machines. It describes how to perform faster and more-precise opera- tions after making adjustments in ordinary tuning or in servo gain tuning for cutting application feed shafts.
-
Page 138: Parameter Adjustments For Predictive Control
7.1 Parameter Adjustments for Predictive Control 7.1.1 Overview of Predictive Control Parameter Adjustments for Predictive Control The related parameter settings and adjustment procedures necessary to use predictive control for cutting applications are given below. Applying predictive control has the following merits. •... -
Page 139: Effects Of Related Parameters
7.1 Parameter Adjustments for Predictive Control 7.1.3 Effects of Related Parameters 7.1.3 Effects of Related Parameters The effects of the related parameters are described below. Parameter Number Parameter Name Effects Function Selection during Cutting Feeding, Using predictive control will normally shorten positioning time ... - Page 140 7.1 Parameter Adjustments for Predictive Control 7.1.4 Adjustment Methods After the arc reduction is mostly eliminated, check for overshooting. During cutting feed feeding, check the position deviation near where the motor stops. If there is overshooting that is greater than the required specifications, increase the predictive control speed feedforward gain (Pn154) by 10 at a time and measure the amount of overshooting.
-
Page 141: Adjustments For Friction Compensation
7.2 Adjustments for Friction Compensation 7.2.1 Related Parameters Adjustments for Friction Compensation If the amount of quadrant projection when executing arc cutting programs exceeds the allow- able range, you can make adjustments with this function to reduce the amount of projection. Friction compensation is useful in rapid feeding, cutting feeding, and tap processing. -
Page 142: Effects Of Related Parameters
7.2 Adjustments for Friction Compensation 7.2.2 Effects of Related Parameters 7.2.2 Effects of Related Parameters The effects of the related parameters are described below. Parameter Recommended Parameter Name Description Number Value Friction Compen- Pn121 100 to 1,000 [%] This gain is used for friction compensation. sation Gain The product of the friction estimate and Pn123 is added Friction Compen-... - Page 143 7.2 Adjustments for Friction Compensation 7.2.3 Adjustment Methods Adjustment Flowchart An adjustment flowchart is provided below. The setting of the parameters related to friction compensation do not have to be the same for all shafts. START Set Pn408 to n.1 (enable friction compensation).
-
Page 144: Monitoring
Monitoring This chapter provides information on monitoring SERVO- PACK product information and SERVOPACK status. Monitoring SERVOPACK Status ..8-2 8.1.1 Servo Drive Status ..... . . 8-2 8.1.2 Monitoring Status and Operations . -
Page 145: Monitoring Servopack Status
8.1 Monitoring SERVOPACK Status 8.1.1 Servo Drive Status Monitoring SERVOPACK Status 8.1.1 Servo Drive Status Use the following procedure to display the Servo Drive status. • Start the SigmaWin+. The Servo Drive status will be automatically displayed when you go online with a SERVOPACK. - Page 146 8.1 Monitoring SERVOPACK Status 8.1.2 Monitoring Status and Operations Monitor Items The items that you can monitor on the Status Monitor Window and Motion Monitor Window are listed below. • Status Monitor Window Monitor Items • Main Circuit • /S-ON (Servo ON Input Signal) •...
-
Page 147: Monitoring Machine Operation Status And Signal Waveforms
8.2 Monitoring Machine Operation Status and Signal Waveforms 8.2.1 Using the SigmaWin+ Monitoring Machine Operation Status and Signal Waveforms To monitor waveforms, use the SigmaWin+ trace function or a measuring instrument, such as a memory recorder. 8.2.1 Using the SigmaWin+ This section describes how to trace data and I/O with the SigmaWin+. -
Page 148: Using A Measuring Instrument
Connect a measuring instrument, such as a memory recorder, to the analog monitor connector (CN5) on the SERVOPACK to monitor analog signal waveforms. The measuring instrument is not provided by Yaskawa. Refer to the following manual for details on connection. - Page 149 8.2 Monitoring Machine Operation Status and Signal Waveforms 8.2.2 Using a Measuring Instrument Description Parameter Monitor Signal Output Unit Remarks n.00 (default • Rotary Servomotor: 1 V/1,000 min Motor Speed – • Linear Servomotor: 1 V/1,000 mm/s setting of Pn007) •...
- Page 150 8.2 Monitoring Machine Operation Status and Signal Waveforms 8.2.2 Using a Measuring Instrument Changing the Monitor Factor and Offset You can change the monitor factors and offsets for the output voltages for analog monitor 1 and analog monitor 2. The relationships to the output voltages are as follows: Analog Monitor 1 Signal Analog Monitor 1 Analog Monitor 1...
- Page 151 8.2 Monitoring Machine Operation Status and Signal Waveforms 8.2.2 Using a Measuring Instrument Adjustment Example An example of adjusting the output of the motor speed monitor is provided below. Offset Adjustment Gain Adjustment Analog monitor output voltage Analog monitor output voltage 1 [V] Gain adjustment...
- Page 152 8.2 Monitoring Machine Operation Status and Signal Waveforms 8.2.2 Using a Measuring Instrument • Gain Adjustment Tool Function Operating Procedure Reference Σ-7-Series Digital Operator Operating Manual Digital Operator Fn00D (Manual No.: SIEP S800001 33) Setup - Analog Monitor Out- SigmaWin+ Operating Procedure on page 8-9 put Adjustment...
-
Page 153: Monitoring The Clearance Control Status
Monitoring the Clearance Control Status 8.3.1 Analog Monitors Monitoring the Clearance Control Status You can monitor the following signals related to clearance control through analog monitors or through MECHATROLINK-III communications option monitors. 8.3.1 Analog Monitors Parameter Description Output Unit 0.05 V/Reference ... -
Page 154: Maintenance
Maintenance This chapter provides information on the meaning of, causes of, and corrections for alarms and warnings. Alarm Displays ..... . 9-2 9.1.1 List of Alarms . -
Page 155: Alarm Displays
9.1 Alarm Displays 9.1.1 List of Alarms Alarm Displays If an error occurs in the SERVOPACK, an alarm number will be displayed on the panel display. If there is an alarm, the display will change in the following order. Example: Alarm A.E60 Status Not lit. - Page 156 9.1 Alarm Displays 9.1.1 List of Alarms Continued from previous page. Servo- Alarm motor Alarm Reset Alarm Name Alarm Meaning Stop- Number Possi- ping ble? Method Parameter Combination The combination of some parameters exceeds A.042 Gr.1 the setting range. Error Semi-Closed/Fully-Closed The settings of the Option Module and Pn002 = A.044...
-
Page 157: 9.1.1 List Of Alarms
9.1 Alarm Displays 9.1.1 List of Alarms Continued from previous page. Servo- Alarm motor Alarm Reset Alarm Name Alarm Meaning Stop- Number Possi- ping ble? Method Internal Temperature Error The surrounding temperature of the control PCB A.7A1 1 (Control Board Tempera- Gr.2 is abnormal. - Page 158 9.1 Alarm Displays 9.1.1 List of Alarms Continued from previous page. Servo- Alarm motor Alarm Reset Alarm Name Alarm Meaning Stop- Number Possi- ping ble? Method Internal program error 6 occurred in the SERVO- A.bF6 System Alarm 6 Gr.1 PACK. Internal program error 7 occurred in the SERVO- A.bF7 System Alarm 7...
- Page 159 9.1 Alarm Displays 9.1.1 List of Alarms Continued from previous page. Servo- Alarm motor Alarm Reset Alarm Name Alarm Meaning Stop- Number Possi- ping ble? Method If position deviation remains in the deviation counter, the setting of Pn529 or Pn584 (Speed Position Deviation Over- Limit Level at Servo ON) limits the speed when A.d02...
- Page 160 9.1 Alarm Displays 9.1.1 List of Alarms Continued from previous page. Servo- Alarm motor Alarm Reset Alarm Name Alarm Meaning Stop- Number Possi- ping ble? Method The Servomotor did not operate or power was Servomotor Main Circuit not supplied to the Servomotor even though the A.F50 Gr.1 SV_ON (Servo ON) command was input when the...
-
Page 161: Troubleshooting Alarms
9.1.2 Troubleshooting Alarms 9.1.2 Troubleshooting Alarms The causes of and corrections for the alarms are given in the following table. Contact your Yaskawa representative if you cannot solve a problem with the correction given in the table. Alarm Number: Possible Cause Confirmation... - Page 162 9.1 Alarm Displays 9.1.2 Troubleshooting Alarms Continued from previous page. Alarm Number: Possible Cause Confirmation Correction Reference Alarm Name A.024: System Alarm The SERVOPACK may be A failure occurred in (An internal pro- faulty. Replace the SER- – – the SERVOPACK. gram error VOPACK.
- Page 163 9.1 Alarm Displays 9.1.2 Troubleshooting Alarms Continued from previous page. Alarm Number: Possible Cause Confirmation Correction Reference Alarm Name The speed of program jogging went below Check to see if the the setting range Decrease the setting of when the electronic the electronic gear ratio detection conditions gear ratio (Pn20E/...
- Page 164 9.1 Alarm Displays 9.1.2 Troubleshooting Alarms Continued from previous page. Alarm Number: Possible Cause Confirmation Correction Reference Alarm Name Set the parameters for a Linear Servomotor and A Rotary Servomotor reset the motor type was removed and a A.070: – alarm.
- Page 165 9.1 Alarm Displays 9.1.2 Troubleshooting Alarms Continued from previous page. Alarm Number: Possible Cause Confirmation Correction Reference Alarm Name Check the regenerative load ratio in the Sig- The regenerative pro- maWin+ Motion Monitor Recheck the operating cessing capacity was Tab Page to see how conditions and load.
- Page 166 9.1 Alarm Displays 9.1.2 Troubleshooting Alarms Continued from previous page. Alarm Number: Possible Cause Confirmation Correction Reference Alarm Name The Main Circuit Cable is not wired Check the wiring. Correct the wiring. correctly or there is faulty contact. Check for short-circuits There is a short-circuit across cable phases U, The cable may be short-...
- Page 167 9.1 Alarm Displays 9.1.2 Troubleshooting Alarms Continued from previous page. Alarm Number: Possible Cause Confirmation Correction Reference Alarm Name Pn600 (Regenerative Resistor Capacity) is not set to 0 and an Connect an External External Regenerative Check it see if an Exter- Regenerative Resistor, or Resistor is not con- nal Regenerative Resis-...
- Page 168 9.1 Alarm Displays 9.1.2 Troubleshooting Alarms Continued from previous page. Alarm Number: Possible Cause Confirmation Correction Reference Alarm Name The power supply Set the power supply volt- Measure the power voltage exceeded the age within the specified – supply voltage. specified range.
- Page 169 9.1 Alarm Displays 9.1.2 Troubleshooting Alarms Continued from previous page. Alarm Number: Possible Cause Confirmation Correction Reference Alarm Name If you are using the regen- The regenerative erative resistor built into resistor was discon- Measure the resistance the SERVOPACK, replace nected when the of the regenerative the SERVOPACK.
- Page 170 9.1 Alarm Displays 9.1.2 Troubleshooting Alarms Continued from previous page. Alarm Number: Possible Cause Confirmation Correction Reference Alarm Name The power supply Set the AC/DC power Measure the power voltage exceeded the supply voltage within the – supply voltage. specified range. specified range.
- Page 171 9.1 Alarm Displays 9.1.2 Troubleshooting Alarms Continued from previous page. Alarm Number: Possible Cause Confirmation Correction Reference Alarm Name The order of phases U, V, and W in the Check the wiring of the Make sure that the Servo- – motor wiring is not Servomotor.
- Page 172 9.1 Alarm Displays 9.1.2 Troubleshooting Alarms Continued from previous page. Alarm Number: Possible Cause Confirmation Correction Reference Alarm Name The wiring is not cor- Make sure that the Servo- rect or there is a faulty Check the wiring. motor and encoder are contact in the motor correctly wired.
- Page 173 9.1 Alarm Displays 9.1.2 Troubleshooting Alarms Continued from previous page. Alarm Number: Possible Cause Confirmation Correction Reference Alarm Name Check the surrounding temperature using a Decrease the surround- thermostat. Or, check ing temperature by The surrounding tem- the operating status improving the SERVO- perature is too high.
- Page 174 9.1 Alarm Displays 9.1.2 Troubleshooting Alarms Continued from previous page. Alarm Number: Possible Cause Confirmation Correction Reference Alarm Name Remove foreign matter A.7Ab: from the SERVOPACK. If The fan inside the Check for foreign matter an alarm still occurs, the SERVOPACK SERVOPACK –...
- Page 175 9.1 Alarm Displays 9.1.2 Troubleshooting Alarms Continued from previous page. Alarm Number: Possible Cause Confirmation Correction Reference Alarm Name Turn the power supply to the SERVOPACK OFF and ON again. If an alarm still The encoder malfunc- – occurs, the Servomotor or –...
- Page 176 9.1 Alarm Displays 9.1.2 Troubleshooting Alarms Continued from previous page. Alarm Number: Possible Cause Confirmation Correction Reference Alarm Name The surrounding air Reduce the surrounding Measure the surround- temperature around air temperature of the ing air temperature – the Servomotor is too Servomotor to 40°C or A.860: around the Servomotor.
- Page 177 9.1 Alarm Displays 9.1.2 Troubleshooting Alarms Continued from previous page. Alarm Number: Possible Cause Confirmation Correction Reference Alarm Name A failure occurred in Replace the external – – the external encoder. encoder. A.8A1: External Encoder A failure occurred in Replace the Serial Con- Module Error the Serial Converter –...
- Page 178 9.1 Alarm Displays 9.1.2 Troubleshooting Alarms Continued from previous page. Alarm Number: Possible Cause Confirmation Correction Reference Alarm Name Turn the power supply to the SERVOPACK OFF and A.bF2: A failure occurred in ON again. If an alarm still – –...
- Page 179 9.1 Alarm Displays 9.1.2 Troubleshooting Alarms Continued from previous page. Alarm Number: Possible Cause Confirmation Correction Reference Alarm Name The order of phases U, V, and W in the Check the Servomotor Make sure that the Servo- – motor wiring is not wiring.
- Page 180 9.1 Alarm Displays 9.1.2 Troubleshooting Alarms Continued from previous page. Alarm Number: Possible Cause Confirmation Correction Reference Alarm Name The settings of Pn282 (Linear Encoder Scale Check the linear Pitch) and Pn080 = The parameter set- encoder specifications n.X (Motor Phase tings are not correct.
- Page 181 9.1 Alarm Displays 9.1.2 Troubleshooting Alarms Continued from previous page. Alarm Number: Possible Cause Confirmation Correction Reference Alarm Name Wire the overtravel sig- A.C51: nals. Execute polarity The overtravel signal Check the overtravel detection at a position Overtravel was detected during position.
- Page 182 9.1 Alarm Displays 9.1.2 Troubleshooting Alarms Continued from previous page. Alarm Number: Possible Cause Confirmation Correction Reference Alarm Name There is a faulty con- tact in the connector Reconnect the encoder Check the condition of or the connector is connector and check the the encoder connector.
- Page 183 9.1 Alarm Displays 9.1.2 Troubleshooting Alarms Continued from previous page. Alarm Number: Possible Cause Confirmation Correction Reference Alarm Name Noise entered on the Implement countermea- signal line from the – sures against noise for the encoder. encoder wiring. Reduce machine vibra- Excessive vibration or Check the operating tion.
- Page 184 9.1 Alarm Displays 9.1.2 Troubleshooting Alarms Continued from previous page. Alarm Number: Possible Cause Confirmation Correction Reference Alarm Name The encoder is wired Make sure that the Check the wiring of the incorrectly or there is encoder is correctly encoder. faulty contact.
- Page 185 9.1 Alarm Displays 9.1.2 Troubleshooting Alarms Continued from previous page. Alarm Number: Possible Cause Confirmation Correction Reference Alarm Name The cable between the Serial Converter Correctly wire the cable Unit and SERVOPACK Check the wiring of the between the Serial Con- is not wired correctly external encoder.
- Page 186 9.1 Alarm Displays 9.1.2 Troubleshooting Alarms Continued from previous page. Alarm Number: Possible Cause Confirmation Correction Reference Alarm Name The servo was turned ON after the position A.d01: deviation exceeded Optimize the setting of Check the position Position Devia- the setting of Pn526 Pn526 (Position Deviation deviation while the tion Overflow...
- Page 187 9.1 Alarm Displays 9.1.2 Troubleshooting Alarms Continued from previous page. Alarm Number: Possible Cause Confirmation Correction Reference Alarm Name Remove the cause of The MECHATROLINK transmission cycle fluctu- transmission cycle – – ation at the host control- fluctuated. ler. A.E02: MECHATROLINK Turn the power supply to Internal Synchro-...
- Page 188 9.1 Alarm Displays 9.1.2 Troubleshooting Alarms Continued from previous page. Alarm Number: Possible Cause Confirmation Correction Reference Alarm Name Correct the Check the MECHATROLINK Com- MECHATROLINK wir- MECHATROLINK wir- munications Cable wiring. – ing is not correct. ing. Correctly connect the ter- minator.
- Page 189 9.1 Alarm Displays 9.1.2 Troubleshooting Alarms Continued from previous page. Alarm Number: Possible Cause Confirmation Correction Reference Alarm Name There is a faulty con- Check the connection nection between the between the SERVO- Correctly connect the – SERVOPACK and the PACK and the Safety Safety Option Module.
- Page 190 9.1 Alarm Displays 9.1.2 Troubleshooting Alarms Continued from previous page. Alarm Number: Possible Cause Confirmation Correction Reference Alarm Name Execute the SV_ON or Check the motor status SENS_ON command only when the command is – when the motor is not executed.
- Page 191 9.1 Alarm Displays 9.1.2 Troubleshooting Alarms Continued from previous page. Alarm Number: Possible Cause Confirmation Correction Reference Alarm Name FL-1 System Alarm FL-2 System Alarm Turn the power supply to FL-3 the SERVOPACK OFF and System Alarm A failure occurred in ON again.
- Page 192 9.1 Alarm Displays 9.1.2 Troubleshooting Alarms • Linear Servomotor If either of the following conditions is detected, an alarm will occur. 1/3 Rated motor speed [mm/s] Resolution of Serial Converter Unit Pn20E Pn210 Linear encoder pitch [m] Pn385 [100 mm/s] Resolution of Serial Converter Unit Pn20E...
-
Page 193: Warning Displays
9.2 Warning Displays 9.2.1 List of Warnings Warning Displays If a warning occurs in the SERVOPACK, a warning number will be displayed on the panel dis- play. Warnings are displayed to warn you before an alarm occurs. This section provides a list of warnings and the causes of and corrections for warnings. 9.2.1 List of Warnings The list of warnings gives the warning name and warning meaning in order of the warning num-... - Page 194 9.2 Warning Displays 9.2.1 List of Warnings Continued from previous page. Warning Warning Name Meaning Resetting Number Data Setting Warning 4 Automatically A.94d The data sizes do not match. reset.* (Parameter Size) Data Setting Warning 5 A.94E A latch mode error was detected. Required.
-
Page 195: Troubleshooting Warnings
9.2.2 Troubleshooting Warnings 9.2.2 Troubleshooting Warnings The causes of and corrections for the warnings are given in the following table. Contact your Yaskawa representative if you cannot solve a problem with the correction given in the table. Warning Number: Possible Cause Confirmation... - Page 196 9.2 Warning Displays 9.2.2 Troubleshooting Warnings Continued from previous page. Warning Number: Possible Cause Confirmation Correction Reference Warning Name The difference between the clearance offset Operate the system so that Check the amount of reference and gap Pn6F0 is not exceeded. Or, deviation during clear- –...
- Page 197 9.2 Warning Displays 9.2.2 Troubleshooting Warnings Continued from previous page. Warning Number: Possible Cause Confirmation Correction Reference Warning Name Check the surrounding temperature using a Decrease the surrounding The surrounding thermostat. Or, check temperature by improving temperature is too the operating status the SERVOPACK installa- high.
- Page 198 9.2 Warning Displays 9.2.2 Troubleshooting Warnings Continued from previous page. Warning Number: Possible Cause Confirmation Correction Reference Warning Name The power supply Set the power supply volt- voltage exceeded Measure the power age within the specified – the specified supply voltage. range.
- Page 199 9.2 Warning Displays 9.2.2 Troubleshooting Warnings Continued from previous page. Warning Number: Possible Cause Confirmation Correction Reference Warning Name Reset the speed ripple – compensation value on the The speed ripple SigmaWin+. compensation Set Pn423 to n.1 (Do information stored not detect A.942 alarms).
- Page 200 9.2 Warning Displays 9.2.2 Troubleshooting Warnings Continued from previous page. Warning Number: Possible Cause Confirmation Correction Reference Warning Name A.95F: An undefined Check the command Do not send undefined Command Warning command was that caused the warn- page 9-49 commands. 6 (Undefined Com- sent.
- Page 201 One of the con- A.9b0: Replace the part. Contact sumable parts has – your Yaskawa representa- Preventative Mainte- reached the end tive for replacement. nance Warning of its service life. Refer to the following manual for details.
-
Page 202: Troubleshooting Based On The Operation And Conditions Of The Servomotor
9.3 Troubleshooting Based on the Operation and Conditions of the Servomotor Troubleshooting Based on the Operation and Conditions of the Servomotor This section provides troubleshooting based on the operation and conditions of the Servomo- tor, including causes and corrections. Turn OFF the Servo System before troubleshooting the items shown in bold lines in the table. Problem Possible Cause Confirmation... - Page 203 9.3 Troubleshooting Based on the Operation and Conditions of the Servomotor Continued from previous page. Problem Possible Cause Confirmation Correction Reference A failure occurred in the SER- Replace the SERVO- – – VOPACK. PACK. Check the setting of Correct the parameter Pn080 =n.X (Polar- setting.
- Page 204 9.3 Troubleshooting Based on the Operation and Conditions of the Servomotor Continued from previous page. Problem Possible Cause Confirmation Correction Reference The setting of Pn001 = n.X (Motor Stopping Check the setting of Set Pn001 = n.X Method for Servo OFF and –...
- Page 205 9.3 Troubleshooting Based on the Operation and Conditions of the Servomotor Continued from previous page. Problem Possible Cause Confirmation Correction Reference • Rotary Servomotors: The Encoder Cable length must be 50 m max. • Linear Servomotors: Noise interference occurred Make sure that the Check the length of the because the Encoder Cable Serial Converter Unit...
- Page 206 9.3 Troubleshooting Based on the Operation and Conditions of the Servomotor Continued from previous page. Problem Possible Cause Confirmation Correction Reference Check to see if the servo Perform autotuning The servo gains are not bal- gains have been cor- without a host refer- page 5-18 anced.
- Page 207 9.3 Troubleshooting Based on the Operation and Conditions of the Servomotor Continued from previous page. Problem Possible Cause Confirmation Correction Reference Check the Encoder Cable to see if it satisfies speci- fications. Use shielded Noise interference occurred twisted-pair cables or Use cables that satisfy because of incorrect Encoder –...
- Page 208 9.3 Troubleshooting Based on the Operation and Conditions of the Servomotor Continued from previous page. Problem Possible Cause Confirmation Correction Reference Absolute Check the error detec- Correct the error detec- tion section of the host tion section of the host Encoder –...
- Page 209 9.3 Troubleshooting Based on the Operation and Conditions of the Servomotor Continued from previous page. Problem Possible Cause Confirmation Correction Reference The limit switch position and Install the limit switch at Improper dog length are not appropri- – the appropriate posi- –...
- Page 210 9.3 Troubleshooting Based on the Operation and Conditions of the Servomotor Continued from previous page. Problem Possible Cause Confirmation Correction Reference Check the I/O signal cables to see if they sat- isfy specifications. Use Noise interference occurred shielded twisted-pair Use cables that satisfy because of incorrect I/O sig- –...
-
Page 211: Parameter Lists
Parameter Lists This chapter provides information on the parameters. 10.1 List of Servo Parameters ....10-2 10.1.1 Interpreting the Parameter Lists ... . 10-2 10.1.2 List of Servo Parameters . -
Page 212: List Of Servo Parameters
10.1 List of Servo Parameters 10.1.1 Interpreting the Parameter Lists 10.1 List of Servo Parameters 10.1.1 Interpreting the Parameter Lists The types of motors to which the parameter applies. All: The parameter is used for both Rotary Servomotors and Linear Servomotors. “After restart”... -
Page 213: List Of Servo Parameters
10.1 List of Servo Parameters 10.1.2 List of Servo Parameters 10.1.2 List of Servo Parameters The following table lists the parameters. Note: Do not change the following parameters from their default settings. • Reserved parameters • Parameters not given in this manual •... - Page 214 10.1 List of Servo Parameters 10.1.2 List of Servo Parameters Continued from previous page. Parameter Setting Setting Default Applicable When Classi- Refer- Name Range Unit Setting Motors Enabled fication ence Application Function 0000 to After – 0000 Setup – Selections 1 1142 restart Motor Stopping Method for Servo OFF and Group 1 Alarms...
- Page 215 10.1 List of Servo Parameters 10.1.2 List of Servo Parameters Continued from previous page. Parameter Setting Setting Default Applicable When Classi- Refer- Name Range Unit Setting Motors Enabled fication ence Application Function 0000 to After – 0011 – Setup – Selections 2 4213 restart...
- Page 216 10.1 List of Servo Parameters 10.1.2 List of Servo Parameters Continued from previous page. Parameter Setting Setting Default Applicable When Classi- Refer- Name Range Unit Setting Motors Enabled fication ence Application Function 0000 to Immedi- page – 0002 Setup Selections 6 105F ately Analog Monitor 1 Signal Selection...
- Page 217 10.1 List of Servo Parameters 10.1.2 List of Servo Parameters Continued from previous page. Parameter Setting Setting Default Applicable When Classi- Refer- Name Range Unit Setting Motors Enabled fication ence Application Function 0000 to Immedi- page – 0000 Setup Selections 7 105F ately Analog Monitor 2 Signal Selection...
- Page 218 10.1 List of Servo Parameters 10.1.2 List of Servo Parameters Continued from previous page. Parameter Setting Setting Default Applicable When Classi- Refer- Name Range Unit Setting Motors Enabled fication ence Application Function 0000 to After – 4000 Rotary Setup – Selections 8 7121 restart...
- Page 219 10.1 List of Servo Parameters 10.1.2 List of Servo Parameters Continued from previous page. Parameter Setting Setting Default Applicable When Classi- Refer- Name Range Unit Setting Motors Enabled fication ence Application Function 0000 to After – 0001 Setup – Selections B 1121 restart Operator Parameter Display Selection...
- Page 220 10.1 List of Servo Parameters 10.1.2 List of Servo Parameters Continued from previous page. Parameter Setting Setting Default Applicable When Classi- Refer- Name Range Unit Setting Motors Enabled fication ence Application Function 0000 to After – – 0000 Setup Selections F 2011 restart Preventative Maintenance Warning Selection...
- Page 221 10.1 List of Servo Parameters 10.1.2 List of Servo Parameters Continued from previous page. Parameter Setting Setting Default Applicable When Classi- Refer- Name Range Unit Setting Motors Enabled fication ence Application Function 0000 to After – 0000 Linear Setup – Selections 80 1111 restart...
- Page 222 10.1 List of Servo Parameters 10.1.2 List of Servo Parameters Continued from previous page. Parameter Setting Setting Default Applicable When Classi- Refer- Name Range Unit Setting Motors Enabled fication ence Gain Application Selec- 0000 to – 0004 – Setup – tions 5334 When...
- Page 223 10.1 List of Servo Parameters 10.1.2 List of Servo Parameters Continued from previous page. Parameter Setting Setting Default Applicable When Classi- Refer- Name Range Unit Setting Motors Enabled fication ence Model Following Con- 0000 to Immedi- – 0000 Tuning – trol-Related Selections 1120 ately...
- Page 224 10.1 List of Servo Parameters 10.1.2 List of Servo Parameters Continued from previous page. Parameter Setting Setting Default Applicable When Classi- Refer- Name Range Unit Setting Motors Enabled fication ence Predictive Control 0000 to After page – 0012 Setup Selection Switches 0014 restart Predictive Control Model Response Time Constant Selection...
- Page 225 10.1 List of Servo Parameters 10.1.2 List of Servo Parameters Continued from previous page. Parameter Setting Setting Default Applicable When Classi- Refer- Name Range Unit Setting Motors Enabled fication ence Anti-Resonance Con- 0000 to Immedi- – 0010 Tuning – trol-Related Selections 0011 ately Anti-Resonance Control Selection...
- Page 226 10.1 List of Servo Parameters 10.1.2 List of Servo Parameters Continued from previous page. Parameter Setting Setting Default Applicable When Classi- Refer- Name Range Unit Setting Motors Enabled fication ence 1 scale Number of External 4 to pitch/ After Pn20A 32768 Rotary Setup...
- Page 227 10.1 List of Servo Parameters 10.1.2 List of Servo Parameters Continued from previous page. Parameter Setting Setting Default Applicable When Classi- Refer- Name Range Unit Setting Motors Enabled fication ence Speed Feedforward Immedi- Pn30C Average Movement 0 to 5,100 0.1 ms Setup ately Time...
- Page 228 10.1 List of Servo Parameters 10.1.2 List of Servo Parameters Continued from previous page. Parameter Setting Setting Default Applicable When Classi- Refer- Name Range Unit Setting Motors Enabled fication ence Torque-Related Func- 0000 to – 0000 – Setup – tion Selections 1111 When Notch Filter Selection 1...
- Page 229 10.1 List of Servo Parameters 10.1.2 List of Servo Parameters Continued from previous page. Parameter Setting Setting Default Applicable When Classi- Refer- Name Range Unit Setting Motors Enabled fication ence Torque-Related Func- 0000 to Immedi- – 0000 Setup tion Selections 2 1111 ately Notch Filter Selection 3...
- Page 230 10.1 List of Servo Parameters 10.1.2 List of Servo Parameters Continued from previous page. Parameter Setting Setting Default Applicable When Classi- Refer- Name Range Unit Setting Motors Enabled fication ence Torque Feedforward Immedi- Pn426 Average Movement 0 to 5,100 0.1 ms Setup ately Time...
- Page 231 10.1 List of Servo Parameters 10.1.2 List of Servo Parameters Continued from previous page. Parameter Setting Setting Default Applicable When Classi- Refer- Name Range Unit Setting Motors Enabled fication ence Acceleration Rate 0000 to After – 0000 Setup – 0001 restart Correction Switch Acceleration Rate Correction Quadrant Projection Correction Selection...
- Page 232 10.1 List of Servo Parameters 10.1.2 List of Servo Parameters Continued from previous page. Parameter Setting Setting Default Applicable When Classi- Refer- Name Range Unit Setting Motors Enabled fication ence Forward Acceleration Rate Correction Projec- Immedi- Pn4C5 0 to 30,000 0.01% Tuning –...
- Page 233 10.1 List of Servo Parameters 10.1.2 List of Servo Parameters Continued from previous page. Parameter Setting Setting Default Applicable When Classi- Refer- Name Range Unit Setting Motors Enabled fication ence Input Signal Selections 0000 to After – 8882 Setup – FFFF restart N-OT (Reverse Drive Prohibit) Signal Allocation...
- Page 234 10.1 List of Servo Parameters 10.1.2 List of Servo Parameters Continued from previous page. Parameter Setting Setting Default Applicable When Classi- Refer- Name Range Unit Setting Motors Enabled fication ence Output Signal Selec- 0000 to After – 0000 Setup – tions 1 6666 restart...
- Page 235 10.1 List of Servo Parameters 10.1.2 List of Servo Parameters Continued from previous page. Parameter Setting Setting Default Applicable When Classi- Refer- Name Range Unit Setting Motors Enabled fication ence 0000 to Output Signal Selec- After – 0000 Setup – tions 3 restart 0666...
- Page 236 10.1 List of Servo Parameters 10.1.2 List of Servo Parameters Continued from previous page. Parameter Setting Setting Default Applicable When Classi- Refer- Name Range Unit Setting Motors Enabled fication ence Input Signal Selections 0000 to After – 6543 Setup FFFF restart /DEC (Origin Return Deceleration Switch Input) Signal Allocation Active when CN1-13 input signal is ON (closed).
- Page 237 10.1 List of Servo Parameters 10.1.2 List of Servo Parameters Continued from previous page. Parameter Setting Setting Default Applicable When Classi- Refer- Name Range Unit Setting Motors Enabled fication ence Output Signal Inverse 0000 to After – 0000 Setup Settings 1111 restart Output Signal Inversion for CN1-1 and CN1-2 Terminals...
- Page 238 10.1 List of Servo Parameters 10.1.2 List of Servo Parameters Continued from previous page. Parameter Setting Setting Default Applicable When Classi- Refer- Name Range Unit Setting Motors Enabled fication ence Input Signal Selections 0000 to After – 8888 Setup – FFFF restart FSTP (Forced Stop Input) Signal Allocation...
- Page 239 10.1 List of Servo Parameters 10.1.2 List of Servo Parameters Continued from previous page. Parameter Setting Setting Default Applicable When Classi- Refer- Name Range Unit Setting Motors Enabled fication ence Base Current Derating After Pn52C at Motor Overload 10 to 100 Setup restart Detection...
- Page 240 10.1 List of Servo Parameters 10.1.2 List of Servo Parameters Continued from previous page. Parameter Setting Setting Default Applicable When Classi- Refer- Name Range Unit Setting Motors Enabled fication ence Immedi- Pn581 Zero Speed Level 1 to 10,000 1 mm/s Linear Setup ately...
- Page 241 10.1 List of Servo Parameters 10.1.2 List of Servo Parameters Continued from previous page. Parameter Setting Setting Default Applicable When Classi- Refer- Name Range Unit Setting Motors Enabled fication ence Clearance Control 0000 to After page Selection Application – 0000 Setup 0131 restart...
- Page 242 10.1 List of Servo Parameters 10.1.2 List of Servo Parameters Continued from previous page. Parameter Setting Setting Default Applicable When Classi- Refer- Name Range Unit Setting Motors Enabled fication ence Communications Con- 0000 to Immedi- – 1040 Setup – trols 1FF3 ately MECHATROLINK Communications Check Mask for Debugging...
- Page 243 10.1 List of Servo Parameters 10.1.2 List of Servo Parameters Continued from previous page. Parameter Setting Setting Default Applicable When Classi- Refer- Name Range Unit Setting Motors Enabled fication ence -1,073,741,823 1 refer- 107374 Immedi- Pn804 Forward Software Limit ence Setup 1823 ately...
- Page 244 10.1 List of Servo Parameters 10.1.2 List of Servo Parameters Continued from previous page. Parameter Setting Setting Default Applicable When Classi- Refer- Name Range Unit Setting Motors Enabled fication ence Input Signal Monitor 0000 to Immedi- – 0000 Setup Selections 7777 ately IO12 Signal Mapping...
- Page 245 10.1 List of Servo Parameters 10.1.2 List of Servo Parameters Continued from previous page. Parameter Setting Setting Default Applicable When Classi- Refer- Name Range Unit Setting Motors Enabled fication ence Option Monitor 1 Selec- 0000 to Immedi- – 0000 – Setup tion FFFF...
- Page 246 10.1 List of Servo Parameters 10.1.2 List of Servo Parameters Continued from previous page. Parameter Setting Setting Default Applicable When Classi- Refer- Name Range Unit Setting Motors Enabled fication ence Setting Monitor Applicable Motors Communications Module Only Previous value of latched feedback position (LPOS1) [encoder 0080 hex pulses] Pn824...
- Page 247 10.1 List of Servo Parameters 10.1.2 List of Servo Parameters Continued from previous page. Parameter Setting Setting Default Applicable When Classi- Refer- Name Range Unit Setting Motors Enabled fication ence Option Field Allocations 0000 to After – 1813 Setup 1E1E restart ACCFIL Allocation (Option) Allocate bits 0 and 1 to ACCFIL.
- Page 248 10.1 List of Servo Parameters 10.1.2 List of Servo Parameters Continued from previous page. Parameter Setting Setting Default Applicable When Classi- Refer- Name Range Unit Setting Motors Enabled fication ence Option Field Allocations 0000 to After – 1D1C Setup 1F1F restart V_PPI Allocation (Option) Allocate bit 0 to V_PPI.
- Page 249 10.1 List of Servo Parameters 10.1.2 List of Servo Parameters Continued from previous page. Parameter Setting Setting Default Applicable When Classi- Refer- Name Range Unit Setting Motors Enabled fication ence Option Field Allocations 0000 to After – 0000 Setup 1F1C restart BANK_SEL1 Allocation (Option) Allocate bits 0 to 3 to BANK_SEL1.
- Page 250 10.1 List of Servo Parameters 10.1.2 List of Servo Parameters Continued from previous page. Parameter Setting Setting Default Applicable When Classi- Refer- Name Range Unit Setting Motors Enabled fication ence Option Field Allocations 0000 to After – 0000 Setup 1D1F restart ...
- Page 251 10.1 List of Servo Parameters 10.1.2 List of Servo Parameters Continued from previous page. Parameter Setting Setting Default Applicable When Classi- Refer- Name Range Unit Setting Motors Enabled fication ence 10,000 refer- Immedi- Second Stage Linear 1 to Pn83C Setup ence Deceleration Constant 2 20,971,520...
- Page 252 10.1 List of Servo Parameters 10.1.2 List of Servo Parameters Continued from previous page. Parameter Setting Setting Default Applicable When Classi- Refer- Name Range Unit Setting Motors Enabled fication ence Latch Sequence 5 to 8 0000 to Immedi- – 0000 Setup Settings 3333...
- Page 253 10.1 List of Servo Parameters 10.1.2 List of Servo Parameters Continued from previous page. Parameter Setting Setting Default Applicable When Classi- Refer- Name Range Unit Setting Motors Enabled fication ence SVCMD_IO Input Signal 0000 to Immedi- – 0000 Setup Monitor Allocations 2 1717 ately Input Signal Monitor Allocation for CN1-8 (SVCMD_IO)
- Page 254 10.1 List of Servo Parameters 10.1.2 List of Servo Parameters Continued from previous page. Parameter Setting Setting Default Applicable When Classi- Refer- Name Range Unit Setting Motors Enabled fication ence SVCMD_IO Output Sig- 0000 to Immedi- nal Monitor Allocations – 0000 Setup 1717...
- Page 255 10.1 List of Servo Parameters 10.1.2 List of Servo Parameters Continued from previous page. Parameter Setting Setting Default Applicable When Classi- Refer- Name Range Unit Setting Motors Enabled fication ence Communications Con- 0000 to Immedi- – 0000 Setup trols 2 0001 ately MECHATROLINK Communications Error Holding Brake Signal Setting...
-
Page 256: List Of Mechatrolink-Iii Common Parameters
10.2 List of MECHATROLINK-III Common Parameters 10.2.1 Interpreting the Parameter Lists 10.2 List of MECHATROLINK-III Common Parameters 10.2.1 Interpreting the Parameter Lists The types of motors to which the parameter applies. All: The parameter is used for both Rotary Servomotors and Linear Servomotors. Indicates when a change to the Rotary: The parameter is used for only Rotary Servomotors. -
Page 257: 10.2 List Of Mechatrolink-Iii Common Parameters
10.2 List of MECHATROLINK-III Common Parameters 10.2.2 List of MECHATROLINK-III Common Parameters 10.2.2 List of MECHATROLINK-III Common Parameters The following table lists the common MECHATROLINK-III parameters. These common parame- ters are used to make settings from the host controller via MECHATROLINK communications. Do not change the settings with the Digital Operator or any other device. - Page 258 10.2 List of MECHATROLINK-III Common Parameters 10.2.2 List of MECHATROLINK-III Common Parameters Continued from previous page. Parameter Setting Unit Default Applicable When Classi- Size Name Setting Range [Resolution] Setting Motors Enabled fication Electronic Gear Ratio 1 to After – (Numerator) 1,073,741,824 restart PnA42...
- Page 259 10.2 List of MECHATROLINK-III Common Parameters 10.2.2 List of MECHATROLINK-III Common Parameters Continued from previous page. Parameter Setting Unit Default Applicable When Classi- Size Name Setting Range [Resolution] Setting Motors Enabled fication Position Base Unit Selection (Set the value of n After from the following –...
- Page 260 10.2 List of MECHATROLINK-III Common Parameters 10.2.2 List of MECHATROLINK-III Common Parameters Continued from previous page. Parameter Setting Unit Default Applicable When Classi- Size Name Setting Range [Resolution] Setting Motors Enabled fication 1,000 to 0.001 Hz Immedi- Speed Loop Gain 40000 2,000,000 [0.1 Hz]...
- Page 261 10.2 List of MECHATROLINK-III Common Parameters 10.2.2 List of MECHATROLINK-III Common Parameters Continued from previous page. Parameter Setting Unit Default Applicable When Classi- Size Name Setting Range [Resolution] Setting Motors Enabled fication Fixed Monitor Selec- Immedi- 0 to F – tion 2 ately 0000 to...
- Page 262 10.2 List of MECHATROLINK-III Common Parameters 10.2.2 List of MECHATROLINK-III Common Parameters Continued from previous page. Parameter Setting Unit Default Applicable When Classi- Size Name Setting Range [Resolution] Setting Motors Enabled fication SEL_MON (CMN1) Immedi- 0 to 9 – Monitor Selection 1 ately 0000 hex TPOS (target position in reference coordinate system)
- Page 263 10.2 List of MECHATROLINK-III Common Parameters 10.2.2 List of MECHATROLINK-III Common Parameters Continued from previous page. Parameter Setting Unit Default Applicable When Classi- Size Name Setting Range [Resolution] Setting Motors Enabled fication SEL_MON (CMN2) Immedi- 0 to 9 – Monitor Selection 2 ately 0000 to PnB14...
- Page 264 10.2 List of MECHATROLINK-III Common Parameters 10.2.2 List of MECHATROLINK-III Common Parameters Continued from previous page. Parameter Setting Unit Default Applicable When Classi- Size Name Setting Range [Resolution] Setting Motors Enabled fication Servo Status Field Enable/Disable 0FFF3F33 – – Selections (read only) Bit 0 CMD_PAUSE_CMP (1: Enabled)
- Page 265 10.2 List of MECHATROLINK-III Common Parameters 10.2.2 List of MECHATROLINK-III Common Parameters Continued from previous page. Parameter Setting Unit Default Applicable When Classi- Size Name Setting Range [Resolution] Setting Motors Enabled fication Input Bit Enable/Dis- FF0FFEFE able Selections (read – –...
-
Page 266: Parameter Recording Table
10.3 Parameter Recording Table 10.3 Parameter Recording Table Use the following table to record the settings of the parameters. Parameter When Default Setting Name Enabled Pn000 0000 Basic Function Selections 0 After restart Application Function Selec- Pn001 0000 After restart tions 1 Application Function Selec- Pn002... - Page 267 10.3 Parameter Recording Table Continued from previous page. Parameter When Default Setting Name Enabled Position Integral Time Con- Pn11F Immediately stant Pn121 Friction Compensation Gain Immediately Friction Compensation Pn123 Immediately Coefficient Friction Compensation Fre- Pn124 Immediately quency Correction Friction Compensation Gain Pn125 Immediately Correction...
- Page 268 10.3 Parameter Recording Table Continued from previous page. Parameter When Default Setting Name Enabled Predictive Control Torque Pn156 Feedforward Filter Time Immediately Constant Predictive Control Parame- Pn157 Immediately ter Kph (C) Predictive Control Parame- Pn158 Immediately ter Cd Predictive Control Parame- Pn159 Immediately ter α...
- Page 269 10.3 Parameter Recording Table Continued from previous page. Parameter When Default Setting Name Enabled Deceleration Time for Servo Pn30A Immediately OFF and Forced Stops Speed Feedforward Aver- Pn30C Immediately age Movement Time Vibration Detection Selec- Pn310 0000 Immediately tions Vibration Detection Sensi- Pn311 Immediately tivity...
- Page 270 10.3 Parameter Recording Table Continued from previous page. Parameter When Default Setting Name Enabled Torque-Related Function Pn416 0000 Immediately Selections 2 Third Stage Notch Filter Pn417 5000 Immediately Frequency Third Stage Notch Filter Q Pn418 Immediately Value Third Stage Notch Filter Pn419 Immediately Depth...
- Page 271 10.3 Parameter Recording Table Continued from previous page. Parameter When Default Setting Name Enabled Polarity Detection Confir- Pn495 Immediately mation Force Reference Polarity Detection Allowable Pn498 Immediately Error Range Speed Ripple Compensa- Pn49F Immediately tion Enable Speed Acceleration Rate Correc- Pn4B0 0000 After startup...
- Page 272 10.3 Parameter Recording Table Continued from previous page. Parameter When Default Setting Name Enabled Forward Acceleration Rate Pn4C5 Correction Projection Cor- Immediately rection Limit Clamp Value Reverse Acceleration Rate Pn4C6 Correction Projection Cor- Immediately rection Limit Clamp Value Pn502 Rotation Detection Level Immediately Speed Coincidence Detec- Pn503...
- Page 273 10.3 Parameter Recording Table Continued from previous page. Parameter When Default Setting Name Enabled Program Jogging Move- Pn533 Immediately ment Speed Program Jogging Accelera- Pn534 Immediately tion/Deceleration Time Program Jogging Waiting Pn535 Immediately Time Program Jogging Number Pn536 Immediately of Movements Analog Monitor 1 Offset Pn550 Immediately...
- Page 274 10.3 Parameter Recording Table Continued from previous page. Parameter When Default Setting Name Enabled Pn6F2 Maximum Clearance Offset Immediately Pn6F4 Minimum Clearance Offset Immediately Pn6F6 AD Input Gain Immediately Pn6F8 AD Zero Adjustment Immediately Position Loop Differential Pn6F9 Immediately Time Constant Analog Feedback Filter Pn6FA Immediately...
- Page 275 10.3 Parameter Recording Table Continued from previous page. Parameter When Default Setting Name Enabled Pn825 0000 Option Monitor 2 Selection Immediately Immedi- Linear Deceleration Con- Pn827 stant 1 for Stopping ately SVOFF Waiting Time (for Pn829 SVOFF at Deceleration to Immediately Stop) Pn82A...
- Page 276 10.3 Parameter Recording Table Continued from previous page. Parameter When Default Setting Name Enabled Station Address Monitor Pn880 Immediately (for maintenance, read only) Set Transmission Byte Pn881 Count Monitor [bytes] (for Immediately maintenance, read only) Transmission Cycle Setting Monitor [× 0.25 μs] (for Pn882 Immediately maintenance, read only)
- Page 277 10.3 Parameter Recording Table Continued from previous page. Parameter When Default Setting Name Enabled Electronic Gear Ratio After restart (Numerator) PnA42 Electronic Gear Ratio After restart (Denominator) PnA44 Immedi- Absolute Encoder Origin Offset PnA46 ately 65535 Multiturn Limit Setting After restart PnA48 0000 hex Limit Setting...
- Page 278 10.3 Parameter Recording Table Continued from previous page. Parameter When Default Setting Name Enabled External Positioning Final Immediately Travel Distance PnB06 × 5,000 reference units/s converted to Origin Approach Speed Immediately PnB08 × 500 reference units/s converted to Origin Return Creep Speed Immediately PnB0A Final Travel Distance for...
-
Page 279: Appendices
Appendices The appendix provides information on interpreting panel displays, and tables of corresponding SERVOPACK and SigmaWin+ function names. 11.1 Corresponding SERVOPACK and SigmaWin+ Function Names . . 11-2 11.1.1 Corresponding SERVOPACK Utility Function Names ....... 11-2 11.1.2 Corresponding SERVOPACK Monitor Display Function Names . -
Page 280: Corresponding Servopack And Sigmawin+ Function Names
11.1 Corresponding SERVOPACK and SigmaWin+ Function Names 11.1.1 Corresponding SERVOPACK Utility Function Names 11.1 Corresponding SERVOPACK and SigmaWin+ Function Names This section gives the names and numbers of the utility functions and monitor display functions used by the SERVOPACKs and the names used by the SigmaWin+. 11.1.1 Corresponding SERVOPACK Utility Function Names SigmaWin+ SERVOPACK... -
Page 281: Corresponding Servopack Monitor Display Function Names
11.1 Corresponding SERVOPACK and SigmaWin+ Function Names 11.1.2 Corresponding SERVOPACK Monitor Display Function Names 11.1.2 Corresponding SERVOPACK Monitor Display Function Names SigmaWin+ SERVOPACK Menu Bar Name [Unit] Un No. Name [Unit] Button Un000 Motor Speed [min Motor Speed [min Un001 Speed Reference [min Speed Reference [min Torque Reference [%]... - Page 282 11.1 Corresponding SERVOPACK and SigmaWin+ Function Names 11.1.2 Corresponding SERVOPACK Monitor Display Function Names Continued from previous page. SigmaWin+ SERVOPACK Menu Bar Name [Unit] Un No. Name [Unit] Button Power Consumption [W] Un032 Power Consumption [W] Consumed Power [0.001 Wh] Un033 Consumed Power [0.001 Wh] Cumulative Power Consumption...
- Page 283 Index Index list of MECHATROLINK-III common parameters - - - - - - 10-46 list of parameters - - - - - - - - - - - - - - - - - - - - - - - - - - - -10-2 MECHATROLINK-III common parameters - - - - - - - 10-46 list of warnings...
-
Page 284: Revision History
Revision History The revision dates and numbers of the revised manuals are given on the bottom of the back cover. MANUAL NO. SIEP S800002 10B <1> Revision number Published in Japan June 2016 Date of publication Date of Rev. Section Revised Contents Publication June 2016... - Page 285 Phone 81-4-2962-5151 Fax 81-4-2962-6138 http://www.yaskawa.co.jp YASKAWA AMERICA, INC. 2121, Norman Drive South, Waukegan, IL 60085, U.S.A. Phone 1-800-YASKAWA (927-5292) or 1-847-887-7000 Fax 1-847-887-7310 http://www.yaskawa.com YASKAWA ELÉTRICO DO BRASIL LTDA. 777, Avenida Piraporinha, Diadema, São Paulo, 09950-000, Brasil Phone 55-11-3585-1100 Fax 55-11-3585-1187 http://www.yaskawa.com.br...
Need help?
Do you have a question about the SGD7S series and is the answer not in the manual?
Questions and answers