Sign In
Upload
Manuals
Brands
Pitney Bowes Manuals
Digital Mailing system
Connect+ 2000
Pitney Bowes Connect+ 2000 Manuals
Manuals and User Guides for Pitney Bowes Connect+ 2000. We have
4
Pitney Bowes Connect+ 2000 manuals available for free PDF download: Operator's Manual
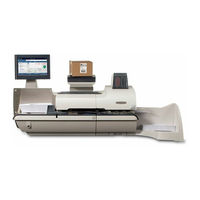
Pitney Bowes Connect+ 2000 Operator's Manual (367 pages)
Brand:
Pitney Bowes
| Category:
Digital Mailing system
| Size: 17.45 MB
Table of Contents
Table of Contents
4
1 Safety
7
Safety Information
8
2 Getting Started
14
What Does this Machine Do
14
USPS Requirements
16
Postal Security Device
17
Logging in and out of the System
18
The Home Screen
19
Parts of the Mailing and Shipping System
20
Manual Adjustments
31
How to Properly Shut down Your System
32
System Specifications
33
3 Using Jobs
38
All about Jobs
38
Opening a Job
40
Previewing Jobs
41
Creating a New Job
42
Editing a Job
44
Deleting a Job
45
Job Options
46
Renaming a Job
47
Reloading a Job
48
Job Types
49
Printing a Date Correction
51
Printing a Postage Correction
51
Printing the Received Date and Time
52
Printing a Permit
53
Sealing Envelopes Without Printing Postage
54
Saving Changes to a Job
56
Closing All Jobs
57
4 Running Mail
59
Preparing and Correctly Feeding the Mail Pieces
60
Reviewing the Mail Piece Specifications
61
Determining the Correct Postage Method
63
Shape Based Rating
64
Running Mail - Quick Start
65
Run Mail Options
67
Changing or Selecting the Weighing Method
68
Changing the Sealing Method
70
Step-By-Step Running Mail
73
Running a Manual Weight Entry Job
75
Running an Attached Scale Job
76
Running a WEIGH-ON-THE-WAY® (W-O-W®) Job
77
Running a WEIGH-ON-THE-WAY® (W-O-W®) - First Piece Only Job
78
Running Mail with Different Shapes and Weights
79
Running a Differential Weighing Mail Job
80
Key in Postage
83
Running Mail Using a Barcode Scanner
84
How to Use the Combined ZIP Code and Customer Reference Number Barcode Label
85
Running Mail with the Residual Rate Surcharge
87
Running Mail with the DI900™/DI950™ Inserting System Interface
89
Inserting System Interface
89
Running Mail with Sendsuite Xpress™ or Ascent
90
Checking or Changing the Postage Amount on the Run Mail Screen
91
Changing the Envelope or Tape Quantity
92
Changing the Date
93
Changing the Machine Speed
94
Printing a Sample Mail Piece
95
Counting Mail
96
Adding Graphics, Return Addresses, Messages, and Inscriptions to Your Mail
97
Return Address
98
Changing or Adding an Inscription
104
Changing or Adding a Text Message or Return Address
105
Changing Envelope Size
109
Changing the Envelope Print Area
110
Changing the Color Print Quality
111
What Are Tracking Services
112
Delivery Confirmation
113
Signature Confirmation
113
Certified Mail
113
Selecting a Tracking Service
114
Creating a Combined Barcode Label Job
117
Running Mail with a Combined Barcode Label Job
119
Using Presortxtra Services
121
Setting up Presortxtra Service Jobs
122
Adding the Drop Ship Authorization Meter Text
123
Running a Presortxtra Job
124
Saving the Presortxtra Job
125
5 Sendpro Shipping
127
Getting Started
128
Address Book
132
Settings
135
Shipping/Carriers
139
Transactions
153
Troubleshooting
157
6 Ship a Package
159
What Is Ship a Package
160
Logging into Ship a Package
161
Setting up a Payment Method
162
Setting up and Using Cost Accounts
165
Setting up a Funds Account
168
Adding Postage to Your Ship a Package Account
169
Setting the Auto Postage Refill Amount
170
Using the Address Book
171
Creating and Printing a Shipping Label - Overview
177
Transactions
190
Request a Refund
196
7 Receive a Package
199
Getting Started
199
Receive
204
Edit
206
Packages
207
Settings
208
Troubleshooting
210
8 Accounting
221
All about Accounting
222
Acceptable Special Characters for Account Names
224
Creating, Editing or Deleting an Account
227
Creating a Sub Account or Sub Sub Account
229
Changing the Account Status to Inactive
230
Editing an Account
231
Deleting an Account
233
Turning Account Passwords on and off
234
Accounting Options When Running Mail
235
Changing Account Search Criteria
236
Choosing the Columns that Appear When Viewing Accounts
236
Searching for an Account
237
Viewing Unlocked Accounts Only
238
Clearing an Account While Running Mail
239
Ending a Batch
239
All about Transactions
240
Viewing Transactions
241
Editing Transactions
242
Filtering the Transaction List
243
All about Surcharges
248
Selecting a Surcharge While Running Mail
249
All about Job Ids
252
Selecting Job Ids While Running Mail
253
All about Accounting Reports
254
Printing Accounting Reports
255
Exporting Accounting Reports
256
Viewing Accounting Reports
257
Viewing and Printing the Daily Snapshot Report
258
Setting up the Default Reporting Period for Accounting Reports
259
Setting Account Report Preferences
260
Saving a Copy of an Accounting Report
261
Deleting Accounting Reports
261
9 Reports
263
All about Reports
263
Printing a Report
264
All about Funds and Refill Reports
265
Confirmation Services Receipt
267
10 Refilling Your Meter
269
All about Postage
269
Pitney Bowes Postage Account
270
Your Postage Meter
271
Refilling Your Meter
272
Checking Your Balance at Pitney Bowes
273
Postage Remaining
274
Postage Refill Settings
275
Viewing the Refill History
276
Viewing the Meter Information
277
Finding Your Postage Account Number
278
Uploading Postal Information
279
Withdrawing the Meter
280
11 Rates and Updates
282
Checking for Rates and Updates Automatically
282
Using the Rates and Updates Scheduler
283
Checking for Rates and Software Updates
284
Viewing the Update History
285
12 System Setup
287
Personal Settings
287
Calibrating the Touchscreen
288
Application Settings
289
Internet and Network Settings
291
System Settings
294
Postal Information Upload Warning
295
Setting the System Clock
296
Setting System Timeouts
301
User Roles and Access Rights
303
Hardware Settings
310
Zeroing the Scale
311
Resetting the Localization Value
311
Setting the Waiting for Envelope Timeout
313
13 Maintenance
315
Installing a New Tape Roll
315
Refilling the Envelope Sealant Bottle
318
Refilling the Tape Sealant Bottle
319
Moistener Maintenance
320
Adjusting the Wetness of the Sealer
323
Cleaning or Replacing the Moistener Wick
324
Printer Maintenance
326
Cleaning the Print Heads
327
Low Ink Warning
328
Out of Ink Warning
329
Replacing the Ink Cartridges
330
Replacing the Print Heads
333
Aligning the Print Heads
337
Replacing the Ink Pad in the Waste Ink Tray
341
14 - Troubleshooting
347
How to Resolve Envelope Feeding Issues
348
How to Resolve Envelope Sealing Issues
355
How to Resolve Tape Feeding Issues
357
How to Resolve Printing Issues
360
How to Resolve Postage Refill Issues
361
How to Resolve Touchscreen Response Issues
362
Contacting Pitney Bowes
363
Advertisement
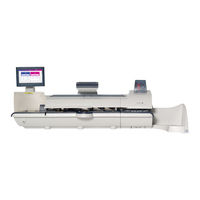
Pitney Bowes Connect+ 2000 Operator's Manual (349 pages)
Brand:
Pitney Bowes
| Category:
Postal Equipment
| Size: 16.25 MB
Table of Contents
Table of Contents
4
1 Safety
8
Safety Information
9
2 Getting Started
15
What Does this Machine Do
15
Postal Security Device
17
Logging in and out of the System
18
The Home Screen
19
Parts of the Mailing and Shipping System
20
Manual Adjustments
33
How to Properly Shut down Your System
34
System Specifications
35
3 Using Jobs
41
All about Jobs
41
Opening a Job
43
Previewing Jobs
44
Creating a New Job
45
Editing a Job
47
Deleting a Job
48
Job Options
49
Job Types
52
Saving Changes to a Job
59
Closing All Jobs
60
4 Running Mail
62
Determining the Correct Postage Method
63
Preparing and Correctly Feeding the Mail Pieces
65
Reviewing the Mail Piece Specifications
66
Running Mail - Quick Start
69
Changing the Class, Carrier, or Special Services
72
Changing the Sealing Method
74
Changing or Selecting the Weighing Method
75
Possible Errors When Running Mail
76
Step-By-Step Running Mail
77
Running a Manual Weight Entry Job
79
Weighing Methods
80
Running an Attached Scale Job
81
Zeroing the Scale While Running Mail
82
Running a WEIGH-ON-THE-WAY® (W-O-W®) Job
83
Running a WEIGH-ON-THE-WAY® (W-O-W®) - First Piece Only Job
84
Running Mail with Different Shapes and Weights85
85
Running Mail with Different Shapes and Weights
85
Running a Differential Weighing Mail Job
86
Running Mail Using a Barcode Scanner
89
Changing the Envelope or Tape Quantity
90
Changing the Date
91
Changing the Machine Speed
92
Printing a Sample Mail Piece
93
Counting Mail
94
Adding Graphics, Return Addresses, Messages, and Inscriptions to Your Mail
95
Changing or Adding a Graphic
97
Postal Inscriptions
104
Changing or Adding a Text Message or Return Address
105
Changing Envelope Size
109
Changing the Envelope Print Area
110
5 Sendpro® Shipping
111
What Is Sendpro® Shipping
113
Getting Started with Sendpro® Shipping
114
Adding Postage to Your Sendpro® Shipping Account
115
Tracking a Shipment in Sendpro
116
Adding an Address to the Address Book
117
Changing the Sender's Address
118
Creating a Label from an Address
119
Editing or Deleting an Address
120
Verifying a Canada Post Address
121
Voiding a Shipping Label
122
Managing Your Email Notifications
123
Setting up a Fedex Account
124
Setting up a UPS Account
125
Weighing Your Shipment with a Scale in Sendpro
126
Adding a Shipment Memo in Sendpro
127
Using Your Own Packaging for Canada Post Shipments128
128
Using Your Own Packaging for Fedex and UPS Canada Shipments
129
Using Your Own Packaging for Fedex and UPS
129
Creating a Canada Post Shipping Label
130
Creating a Canada Fedex or UPS Shipping Label
132
Printing a Fedex Manifest
134
What Is a Residential Surcharge
135
Creating a Canada Post Return Label
136
Printing a Shipping Label
137
Setting up Shipping Label Printing Defaults
138
Reprinting a Canada Post Shipping Label
139
Reprinting a Fedex or UPS Shipping Label
140
Measuring Your Shipment Dimensions in Sendpro
141
Enabling Cost Accounts
142
Searching for a Shipment in Sendpro
143
Message "We Were Unable to Print Your Label
144
6 Receive a Package
146
All about Receive a Package
146
Setting up a Cable-Connected Scanner
147
Receiving a Package
149
The Packages Screen
150
Find a Package
151
Package Notifications
152
Managing Contacts
153
7 Accounting
154
All about Accounting
155
Creating, Editing or Deleting an Account
160
Accounting Options When Running Mail
168
All about Transactions
173
All about Surcharges
181
All about Job Ids
184
All about Accounting Reports
186
8 Reports
193
All about Mailing Reports
194
Printing a Mailing Report
195
All about Funds and Refill Reports
196
9 Refilling Your Meter
199
All about Postage
199
Pitney Bowes Postage Account
200
Your Postage Meter
201
Refilling Your Meter
202
Checking Your Balance at Pitney Bowes
203
Postage Remaining
204
Postage Refill Settings
205
Viewing the Refill History
206
Viewing the Meter Information
207
Uploading Postal Information
209
Withdrawing the Meter
210
10 Rates and Updates
212
Checking for Rates and Updates Automatically
212
Using the Rates and Updates Scheduler
213
Checking for Rates and Software Updates
214
Viewing the Update History
215
11 System Setup
217
Personal Settings
217
Application Settings
219
Internet and Network Settings
220
System Settings
223
Hardware Settings
239
12 Maintenance
244
Installing a New Tape Roll
244
Refilling the Envelope and Tape Sealant Bottle
247
Printing a Test Pattern
248
Cleaning the Print Heads
249
Low Ink Warning
250
Out of Ink Warning
251
Replacing the Ink Cartridges
252
Replacing the Print Heads
256
Aligning the Print Heads
261
13 - Troubleshooting
265
Clearing the Mail Piece Path on Your Connect+® 1000 / Sendpro® P1000
267
Clearing the Mail Piece Path on Your Connect+® 500W / Sendpro® P1500 / Connect+® 2000 / Sendpro® P2000
270
Clearing the Mail Piece Path on Your Connect+® 3000 / Sendpro® P3000
273
Paper Path Maintenance on Your Connect+® 1000 / Sendpro® P1000
276
Paper Path Maintenance on Your Connect+® 500W / Sendpro® P1500 / Connect+® 2000 / Sendpro® P2000
286
Paper Path Maintenance on Your Connect+® 3000 / Sendpro® P3000
295
Sealer Maintenance on Your Connect+® 1000 / Sendpro® P1000
305
Sealer Maintenance on Your Connect+® 500W / Sendpro® P1500 / Connect+® 2000 / Sendpro® P2000
312
Sealer Maintenance on Your Connect+® 3000 / Sendpro® P3000
319
How to Fix W-O-W Related Errors on Your Connect+® 500W / Sendpro® P1500 / Connect+® 2000 / Sendpro® P2000 and Connect+® 3000 / Sendpro® P3000
327
Printer Error on Your Connect+® Series / Sendpro® P-Series
335
How to Resolve Tape Feeding Issues
342
How to Clear a Tape Stoppage
344
How to Resolve Printing Issues
346
How to Resolve Postage Refill Issues
347
How to Resolve Touchscreen Response Issues
348
Contacting Pitney Bowes
349
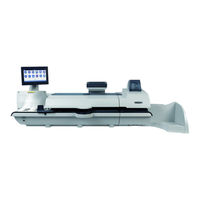
Pitney Bowes Connect+ 2000 Operator's Manual (234 pages)
Connect+ Series digital envelope and mail printing system
Brand:
Pitney Bowes
| Category:
Digital Mailing system
| Size: 27 MB
Table of Contents
Table of Contents
3
Getting Started
5
What Does this Machine Do
6
The Home Screen
6
Parts of the Mailing System
7
Envelope Sealant Bottle
11
Tape
11
Your System's Specifications
20
Safety Information
23
Postal Security Device
26
WEIGH-ON-THE-WAY® (W-O-W®)/Shape Based Rating
27
USPS Requirements
27
2 ● Creating and Managing Jobs
30
Creating and Managing Jobs
30
All about Jobs
31
About Job Properties
31
The Default Job
32
Opening a Job
32
Previewing Jobs
32
Creating a New Job
33
Editing a Job
34
Deleting a Job
34
Job Options
35
Creating a Duplicate Job
35
Setting the Default Job
35
Renaming a Job
36
Reloading a Job
36
Job Types
37
Weighing Methods
37
Printing Only a Graphic Ad
38
Printing a Date Correction
39
Printing a Postage Correction
39
Printing the Received Date and Time
40
Printing a Permit
41
Sealing Envelopes Without Printing Postage
41
Counting Mail Without Printing Postage
42
Weighing, Rating and Counting Mail Without Printing Postage
43
Moving between Open Jobs
44
Saving Changes to a Job
44
Closing All Jobs
44
3 ● Running Mail
45
Running Mail
45
Determining the Correct Postage Method
48
Preparing and Correctly Feeding the Mail Pieces
50
Reviewing the Mail Piece Specifications
51
Shape Based Rating
53
Running Mail
53
Run Mail Screen Icons and Buttons
54
Run Mail Options
56
Step-By-Step Running Mail
56
Running Mail with the DI900™/DI950™ Inserting System Interface
57
Running Mail with Sendsuite Xpress™ or Ascent
58
Graphics and Permit-Only Printing
60
Changing the Class, Carrier, or Special Services
61
Selecting a ZIP or Zone
62
Selecting a Country
62
Changing or Selecting the Weighing Method
63
Zeroing the Scale While Running Mail
63
Running a Manual Weight Entry Job
64
Running an Attached Scale Job
64
Running a WEIGH-ON-THE-WAY® (W-O-W®) Job
65
Loading Mail for a WEIGH-ON-THE-WAY® (W-O-W®) Job
65
Running a WEIGH-ON-THE-WAY® (W-O-W®) - First Piece Only Job
65
Running Mail with Different Shapes and Weights
66
Running a Differential Weighing Mail Job
67
Changing the Sealing Method
69
Checking or Changing the Postage Amount on the Run Mail Screen
70
Key in Postage
70
Changing the Date
71
Changing the Envelope or Tape Quantity
71
Chapter 3
71
Changing the Machine Speed
72
Counting Mail
72
Printing a Sample Mail Piece
72
Adding Graphics, Return Addresses, Messages, and Inscriptions to Your Mail
73
Graphic Ad
74
Changing or Adding a Graphic to a Mail Piece
75
Return Address
75
Viewing Available Graphics
75
Adding a Graphic
76
Positioning a Graphic/Message
77
How Markers Are Added/Dropped
79
About Mygraphics™ Designer
80
Changing the Image/Message Drop Order
80
Add a New Graphic Using Mygraphics™ Designer
81
Prerequisites for Using Mygraphics™ Designer
81
Check Status of Graphic Images
83
Graphic Formats for Mygraphics™ Designer
84
How to Create a New Custom Graphic
84
Changing or Adding an Indicia
85
Changing or Adding an Inscription
85
Changing or Adding a Text Message or Return Address
86
Postal Inscriptions
86
Adding a Message or Return Address
87
Viewing Available Messages/Return Addresses
87
Creating a New Message or Return Address
88
Changing or Selecting the Envelope Characteristics
89
Changing the Envelope Print Area
89
Changing the Color Print Quality
90
Changing Envelope Size
91
What Are Tracking Services
91
Delivery Confirmation
92
Certified Mail
93
Signature Confirmation
93
Selecting a Tracking Service
94
Electronic Return Receipt (ERR)
95
Customer Reference Number
96
How to Use Electronic Return Receipt (ERR)
96
USPS® Mailer ID
96
Creating a Combined Barcode Label Job
98
Running Mail with a Combined Barcode Label Job
99
Using Presortxtra Services
100
Qualifications for Presortxtra Service
101
Setting up Presortxtra Service Jobs
101
Adding the Drop Ship Authorization Meter Text
102
Running a Presortxtra Job
103
Saving the Presortxtra Job
104
4 ● Accounting
106
Accounting
106
Using a Multi-Level Account Structure
108
Acceptable Special Characters for Account Names
110
Uploading Connect+™ Postal and Transactional Information for Business Manager
112
Creating, Editing or Deleting an Account
112
Creating an Account
113
Creating a Sub Account or Sub Sub Account
114
Changing the Account Status to Inactive
115
Editing an Account
116
Deleting an Account
117
Turning Account Passwords on and off
117
Selecting an Account While Running Mail
119
Changing Account Search Criteria
119
Choosing the Columns that Appear When Viewing Accounts
120
Searching for an Account
120
Viewing Unlocked Accounts Only
121
Clearing an Account While Running Mail
122
Ending a Batch
122
All about Transactions
122
Viewing Transactions
123
Editing Transactions
124
Filtering the Transaction List
125
Creating a Transaction Filter
126
Editing a Transaction Filter
127
Deleting a Transaction Filter
128
All about Surcharges
128
Setting up and Editing Global Surcharges
129
Chapter 4
130
Selecting a Surcharge While Running Mail
130
All about Job Ids
131
Requiring and Autoclearing Job Ids
131
Selecting Job Ids While Running Mail
132
All about Accounting Reports
133
Printing Accounting Reports
133
Exporting Accounting Reports
134
Viewing Accounting Reports
135
Setting up the Default Reporting Period for Accounting Reports
136
Viewing and Printing the Daily Snapshot Report
136
Saving a Copy of an Accounting Report
138
Setting Account Report Preferences
138
Account Detail by Class Report
139
Account Detail Report
139
Deleting Accounting Reports
139
Account List Report
140
Account Summary Report
140
Daily Snapshot Report
140
Quick Profile Report
140
Transaction Log Detail Report
140
Transaction Log Report
140
Weight Break by Account Report
141
Weight Break by Carrier Report
141
Weight Break by Job ID 1 Report
141
5 ● Reports
142
Reports
142
Printing a Report
143
Funds and Refill Reports
143
Funds Report
144
Last 5 Refills Report (Refill Summary)
144
Refill Receipt Report
145
6 ● Adding Postage
147
Adding Postage
147
Pitney Bowes Postage Account
148
Your Postage Meter
148
Adding Postage
149
Checking Your Balance at Pitney Bowes
150
Postage Remaining
151
Postage Refill Settings
151
Setting the Low Funds Warning and the Default Refill Amount
151
Viewing the Refill History
152
Viewing the Meter Information
152
Finding the Minimum and Maximum Postage Values
153
Finding Your Postage Account Number
153
Uploading Postal Information
153
Withdrawing the Meter
154
7 ● Rates and Updates
156
Rates and Updates
156
Checking for Rates and Updates Automatically
157
Using the Rates and Updates Scheduler
158
Update Status Icons
158
Checking for Rates and Software Updates
159
Viewing the Update History
160
8 ● System Setup
161
System Setup
161
Personal Settings
163
Changing Your Password or Password Hint
163
Adjusting the Touchscreen Brightness and Contrast
164
Calibrating the Touchscreen
164
Application Settings
164
Enabling Tracking Services Prompts
165
Entering the USPS® Mailer ID
165
Internet and Network Settings
165
Viewing Intellilink® Settings
166
System Settings
167
Advancing the Date Automatically
168
Postal Information Upload Warning
169
Enabling/Disabling the Postal Information Upload Warning and Setting the Threshold
169
Setting the System Clock
170
Setting System Timeouts
170
Energy Star
172
User Roles and Access Rights
173
Enabling User Logins
174
Creating, Editing and Deleting Users
174
Creating a User
174
User Role Setup
175
Editing a User
176
Deleting a User
177
Turning off User Logins
178
Viewing the Status of Rates, Software, Features, and Graphic Updates
178
Hardware Settings
179
Changing the Scale Vibration Setting
179
Chapter 8
179
Resetting the Localization Value
180
Setting the WEIGH-ON-THE-WAY® (W-O-W®) Weight Limit
180
Zeroing the Scale
180
Setting the Waiting for Envelope Timeout
181
Setting the WEIGH-ON-THE-WAY® (W-O-W®) Mode
181
9 ● Maintenance
183
Maintenance
183
Installing a New Tape Roll
184
Refilling the Envelope Sealant Bottle
186
Cleaning or Replacing the Moistener Pad Assembly
187
Moistener Maintenance
187
Refilling the Tape Sealant Bottle
187
Adjusting the Wetness of the Sealer
190
Cleaning or Replacing the Moistener Wick
191
Printer Maintenance
192
Printing a Test Sample
192
Cleaning the Print Heads
193
Low Ink Warning
193
Out of Ink Warning
194
Replacing the Ink Cartridges
195
Replacing the Print Heads
198
Aligning the Print Heads
202
Replacing the Ink Pad in the Waste Ink Tray
206
Turning off Spot Black (#2) Printing
209
Reactivating Spot Black (#2) Printing
210
10 ● Troubleshooting
212
Troubleshooting: Envelope Feeding
213
Clearing an Envelope Stoppage
216
Troubleshooting: Envelope Sealing
220
Troubleshooting: Tape Feeding
222
Clearing a Tape Stoppage
223
Troubleshooting: Printing
224
Troubleshooting: Postage Refills
225
Error Messages
226
Troubleshooting: Touchscreen Response
226
Contacting Pitney Bowes
227
A ● Glossary
229
Advertisement
Pitney Bowes Connect+ 2000 Operator's Manual (230 pages)
Connect+ Series
Brand:
Pitney Bowes
| Category:
Digital Mailing system
| Size: 42 MB
Table of Contents
Table of Contents
3
Getting Started
5
What Does this Machine Do
7
The Home Screen
7
Parts of the Mailing System
8
Envelope Sealant Bottle
12
Tape
12
Your System's Specifications
21
Safety Information
25
Postal Security Device
29
Weigh-On-The-Way® (W-O-W®)
29
Canada Post Requirements
29
2 ● Creating and Managing Jobs
31
Creating and Managing Jobs
31
All about Jobs
33
About Job Properties
33
System
33
The Default Job
34
Opening a Job
34
Previewing Jobs
34
Running
34
Creating a New Job
35
Editing a Job
36
Deleting a Job
36
Job Options
37
Creating a Duplicate Job
37
Setting the Default Job
37
Renaming a Job
38
Reloading a Job
38
Job Types
39
Printing Only a Graphic Ad
39
Printing a Date Correction
40
Printing a Postage Correction
40
Statement of Manifest
41
Printing the Received Date and Time
42
Printing a Permit
42
Sealing Envelopes Without Printing Postage
43
Counting Mail Without Printing Postage
44
Weighing, Rating and Counting Mail Without Printing Postage
44
Moving between Open Jobs
45
Saving Changes to a Job
45
Closing All Jobs
46
3 ● Running Mail
47
Running Mail
47
Adding
47
Determining the Correct Postage Method
49
Preparing and Correctly Feeding the Mail Pieces
50
Reviewing the Mail Piece Specifications
51
Running Mail
54
Run Mail Screen Icons and Buttons
54
Step-By-Step Running Mail
57
Running Mail with Ascent
58
Changing the Class, Carrier, or Special Services
59
Selecting a Zone or Postal Code
60
Selecting a Country
60
Changing or Selecting the Weighing Method
61
Weighing Methods
61
Running a Manual Weight Entry Job
62
Running an Attached Scale Job
62
Running a WEIGH-ON-THE-WAY® (W-O-W®) Job
63
Loading Mail for a WEIGH-ON-THE-WAY® (W-O-W®) Job
64
Running a WEIGH-ON-THE-WAY® (W-O-W®) - First Piece Only Job
64
Running Mail with Different Shapes and Weights
64
Running a Differential Weighing Mail Job
65
Zeroing the Scale While Running Mail
67
Changing the Sealing Method
68
Changing the Date
68
Printing a Sample Mail Piece
69
Counting Mail
69
Adding Graphics, Return Addresses, Messages, and Inscriptions to Your Mail
70
Ad Graphics
71
Return Address
72
Postal Inscriptions
72
Adding Addressed Admail to Your Mail Pieces
72
Chapter 3
72
Changing or Adding a Graphic to a Mail Piece
73
Viewing Available Graphics
73
Adding a Graphic
74
Positioning a Graphic/Message
75
How Markers Are Added/Dropped
77
About Mygraphics™ Designer
78
Changing the Image/Message Drop Order
78
Graphic Formats for Mygraphics™ Designer
79
Prerequisites for Using Mygraphics™ Designer
79
Add a New Graphic Using Mygraphics™ Designer
80
Rate and
81
Check Status of Graphic Images
82
How to Create a New Custom Graphic
82
Changing or Adding an Indicia
83
Changing or Adding an Inscription
83
Changing or Adding a Text Message or Return Address
84
Viewing Available Messages/Return Addresses
84
Adding a Message or Return Address
85
Creating a New Message or Return Address
85
Changing or Selecting the Envelope Characteristics
86
Changing the Colour Print Quality
87
Changing the Envelope Print Area
87
Changing Envelope Size
88
Changing the Envelope or Tape Quantity
89
Changing the Machine Speed
89
4 ● Accounting
91
Accounting
91
Using a Multi-Level Account Structure
93
Acceptable Special Characters for Account Names
95
Creating, Editing or Deleting an Account
97
Creating an Account
97
Creating a Sub Account or Sub Sub Account
99
Changing the Account Status to Inactive
100
Editing an Account
100
Deleting an Account
101
Turning Account Passwords on and off
102
Selecting an Account While Running Mail
103
Changing Account Search Criteria
104
Choosing the Columns that Appear When Viewing Accounts
104
Searching for an Account
105
Viewing Unlocked Accounts Only
106
Clearing an Account While Running Mail
106
Ending a Batch
106
All about Transactions
107
Viewing Transactions
107
Editing Transactions
109
Filtering the Transaction List
110
Creating a Transaction Filter
110
Editing a Transaction Filter
112
Deleting a Transaction Filter
112
All about Surcharges
113
Setting up and Editing Global Surcharges
114
Selecting a Surcharge While Running Mail
114
All about Job Ids
115
Chapter 4
115
Requiring and Autoclearing Job Ids
116
Selecting Job Ids While Running Mail
116
All about Accounting Reports
117
Exporting Accounting Reports
118
Printing Accounting Reports
118
Setting up the Default Reporting Period for Accounting Reports
120
Viewing Accounting Reports
120
Saving a Copy of an Accounting Report
122
Setting Account Report Preferences
122
Account Detail by Class Report
123
Account Detail Report
123
Account List Report
123
Deleting Accounting Reports
123
Account Summary Report
124
Quick Profile Report
124
Transaction Log Detail Report
124
Transaction Log Report
124
Weight Break by Account Report
124
Weight Break by Carrier Report
124
Weight Break by Job ID 1 Report
125
5 ● Reports
127
Reports
127
Printing a Report
129
Funds and Refill Reports
129
Funds Report
130
Last 5 Refills Report (Refill Summary)
130
Refill Receipt Report
131
6 ● Adding Postage
133
Adding Postage
133
Pitney Bowes Postage Account
135
Your Postage Meter
135
Adding Postage
136
Checking Your Balance at Pitney Bowes
137
Postage Remaining
138
Postage Refill Settings
138
Setting the Low Funds Warning and the Default Refill Amount
138
Getting
138
Viewing the Refill History
139
Viewing the Meter Information
139
Finding the Minimum and Maximum Postage Values
140
Finding Your Postage Account Number
140
Uploading Postal Information
140
Withdrawing the Meter
141
7 ● Rates and Updates
143
Rates and Updates
143
Checking for Rates and Software Updates
145
Checking for Rates and Updates Automatically
145
Using the Rates and Updates Scheduler
146
Update Status Icons
147
Viewing the Update History
148
8 ● System Setup
149
System Setup
149
Application Settings
150
Discount Codes on Record
150
Personal Settings
151
Changing Your Password or Password Hint
151
Adjusting the Touchscreen Brightness and Contrast
152
Calibrating the Touchscreen
152
Internet and Network Settings
152
Viewing Intellilink® Settings
153
System Settings
154
Advancing the Date Automatically
155
Setting the System Clock
156
Setting System Timeouts
156
Energy Star
157
User Roles and Access Rights
159
Enabling User Logins
159
Creating, Editing and Deleting Users
160
Creating a User
160
Editing a User
161
Deleting a User
161
User Role Setup
162
Turning off User Logins
163
Viewing the Status of Rates, Software, Features, and Graphic Updates
164
Hardware Settings
164
Changing the Scale Vibration Setting
165
Zeroing the Scale
165
9 ● Maintenance
169
Maintenance
169
Installing a New Tape Roll
171
Refilling the Envelope Sealant Bottle
174
Refilling the Tape Sealant Bottle
175
Moistener Maintenance
176
Cleaning or Replacing the Moistener Pad Assembly
176
Adjusting the Wetness of the Sealer
179
Cleaning or Replacing the Moistener Wick
180
Printer Maintenance
181
Printing a Test Sample
181
Cleaning the Print Heads
182
Low Ink Warning
182
Out of Ink Warning
182
Replacing the Ink Cartridges
183
Replacing the Print Heads
186
Aligning the Print Heads
190
Replacing the Ink Pad in the Waste Ink Tray
194
10 ● Troubleshooting
199
Troubleshooting: Envelope Feeding
201
Clearing an Envelope Stoppage
204
Troubleshooting: Envelope Sealing
208
Troubleshooting: Tape Feeding
210
Clearing a Tape Stoppage
211
Troubleshooting: Printing
212
Troubleshooting Postage Refills
213
Troubleshooting: Touchscreen Response
213
Error Messages
214
Contacting Pitney Bowes
215
A ● Glossary
217
A ● Index
221
Advertisement
Related Products
Pitney Bowes Connect+ Series
Pitney Bowes SendPro C400
Pitney Bowes SendPro C200
Pitney Bowes SendPro C300
Pitney Bowes Connect+ 1000
Pitney Bowes Connect+ 3000
Pitney Bowes Connect+ 500W
Pitney Bowes Connect+ 500W-3000
Pitney Bowes DM100i Series
Pitney Bowes DM1100
Pitney Bowes Categories
Digital Mailing system
Postal Equipment
Printer
Measuring Instruments
Document Inserting Systems
More Pitney Bowes Manuals
Login
Sign In
OR
Sign in with Facebook
Sign in with Google
Upload manual
Upload from disk
Upload from URL