Xerox Phaser 3010 Service Manual
Hide thumbs
Also See for Phaser 3010:
- User manual (76 pages) ,
- Manual (4 pages) ,
- Installation manual (2 pages)

Related Manuals for Xerox Phaser 3010


Summary of Contents for Xerox Phaser 3010
-
Page 1: Service Manual
Phaser 3010/3040 ® WorkCentre ® 3045 Printer Phaser 3010/3040 ® WorkCentre 3045 ® Service Manual Xerox Internal-Use Only... - Page 3 The following servicing instructions are for use by qualified service personnel only. To avoid personal injury, do not perform any servicing other than that contained in the operating instructions, unless you are qualified to do so. First Printing: September 2011 Xerox Internal Use Only...
- Page 4 Xerox technical training materials and service manuals are intended for use by authorized Xerox service technicians and service partners only and are not for resale. These materials may not be distributed, copied, or otherwise reproduced without prior written consent from Xerox Corporation.
-
Page 5: Table Of Contents
Logging ..................1-31 Phaser 3010/3040/WorkCentre 3045 Service... - Page 6 Phaser 3010/3040 Sensor Test Procedures ........
- Page 7 K CRU Life Over................2-108 Phaser 3010/3040/WorkCentre 3045 Service...
- Page 8 Guaranteed Print Areas ............... .3-35 Xerox Internal Use Only Phaser 3010/3040/WorkCentre 3045 Service...
- Page 9 Phaser 3010/3040 Xerographics ........
- Page 10 Document Cover................4-117 viii Xerox Internal Use Only Phaser 3010/3040/WorkCentre 3045 Service...
- Page 11 Scanner Adjustment ..................6-7 Phaser 3010/3040/WorkCentre 3045 Service...
- Page 12 Phaser 3010/3045 Plug/Jack Designators ........
- Page 13 About this Service Manual The Phaser 3010/3040/WorkCentre 3045 Service Manual is the primary document used for repairing, maintaining, and troubleshooting the printer. Use this manual as your primary resource for understanding the operational characteristics of the printer and all available options. This manual describes specifications and the diagnosis and repair of problems occurring in the printer and attached options.
-
Page 14: Manual Organization
Manual Organization The Phaser 3010/3040/WorkCentre 3045 Service Manual contains these sections: Introductory, Safety, and Regulatory Information: This section contains important safety information and regulatory requirements. Chapter 1 - General Information: This section contains an overview of the printer’s operation, configuration, specifications, and consumables. -
Page 15: Symbols Marked On The Product
Caution: A personal injury hazard exists that may not be apparent. For example, a panel may cover the hazardous area. Danger: A personal injury hazard exists in the area where you see the sign. Phaser 3010/3040/WorkCentre 3045 Service Xerox Internal Use Only... -
Page 16: Power Source
• if the printer is dropped or damaged, • if you suspect that the product needs servicing or repair, • whenever you clean the product. Xerox Internal Use Only Phaser 3010/3040/WorkCentre 3045 Service... - Page 17 • Handle ICs and Erasable Programmable Read-Only Memories (EPROM’s) carefully to avoid bending pins. • Pay attention to the direction of parts when mounting or inserting them on Circuit Boards. Phaser 3010/3040/WorkCentre 3045 Service Xerox Internal Use Only xvii...
-
Page 18: General Guidelines
If you must service the printer with power applied, be aware of the potential for electrical shock. Warning Do not touch any electrical component unless you are instructed to do so by a service procedure. xviii Xerox Internal Use Only Phaser 3010/3040/WorkCentre 3045 Service... -
Page 19: Servicing Mechanical Components
This printer uses heat to fuse the image to the media. During operating, the Fuser is very hot. Allow the Fuser to cool before you attempt to service the Fuser or adjacent components. Phaser 3010/3040/WorkCentre 3045 Service Xerox Internal Use Only... - Page 20 • Consult the dealer or an experienced radio/television technician for help. Any changes or modifications not expressly approved by Xerox could void the user's authority to operate the equipment. To ensure compliance with Part 15 of the FCC rules, use shielded interface cables.
-
Page 21: European Union
European Union The CE mark applied to this product symbolizes Xerox’s declaration of conformity with the following applicable Directives of the European Union as of the dates indicated: December 12, 2006: Low Voltage Directive 2006/95/EC December 15, 2004: Electromagnetic Compatibility Directive 2004/108/EC... - Page 22 Xerox Internal Use Only Phaser 3010/3040/WorkCentre 3045 Service...
-
Page 23: General Information
General Information In this chapter... • Introduction and Overview • Configurationss • Parts of the Printer • Consumables • Consumables • Specifications Chapter... -
Page 24: Introduction And Overview
General Information Introduction and Overview The Phaser 3010, 3040 and WorkCentre 3045B/N incorporate a single-pass LED architecture, offering mono print speeds of up to 24/24-ppm, and resolutions up to 1200 x 1200 dots-per-inch (dpi). The Phaser 3010/3040 provides a 150-sheet Main Tray supporting specialty media, card stock, and envelopes. -
Page 25: Configurations
General Information Configurations The tables list Phaser 3010/3040/WorkCentre 3045B/N configuration Single-Function Printer (SFP) Configuration Features Phaser 3010/3040 Processor Speed 150 MHz Memory Configuration 64 MB Print Speed (A-size) 20/20, / 24/24 Print Resolutions (dpi) Standard 600 x 600 1200 x 1200 High USB 2.0 Support... -
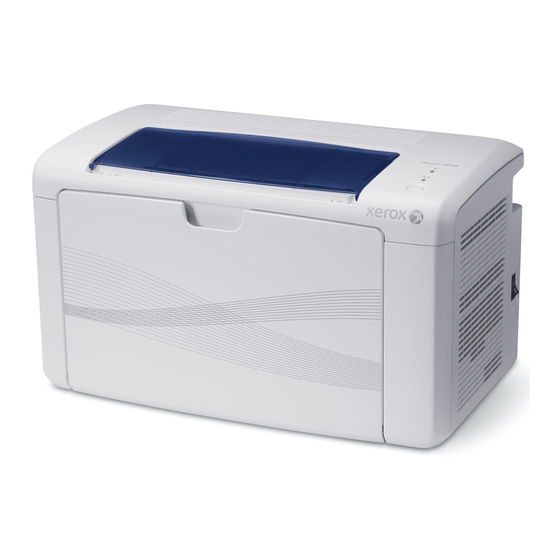
Page 26: Parts Of The Printer
Status LED Toner Door Start/Pause Toner Cartridge 3010/3040 Rear and Side Views s3040-019 Fuser Jam Levers Rear Door Drum Rear Door Latch Feed Roller Power connection Paper Chute USB connector Transfer Roller Xerox Internal Use Only Phaser 3010/3040/WorkCentre 3045 Service... -
Page 27: 3045B Front Views
Media Guides Media Dust Cover/Support Power Switch USB Thumbdrive Connector Toner Door Control Panel Bypass Tray Center Output Tray Feed Roller Output Tray Extension Length Guide Document Cover Main Tray Extension Platen Phaser 3010/3040/WorkCentre 3045 Service Xerox Internal Use Only... -
Page 28: 3045N Front View
Media Dust Cover/Support Power Switch USB Thumbdrive Connector Toner Door Control Panel Bypass Tray Center Output Tray Feed Roller Output Tray Extension Length Guide Automatic Document Feeder (ADF) Main Tray Extension Platen Xerox Internal Use Only Phaser 3010/3040/WorkCentre 3045 Service... -
Page 29: Control Panel
These buttons are used to navigate the menu system, perform functions, and select modes of operation. 3010/3040 Control Panel Button Descriptions s3040-022 Error LED Displays errors or warnings. Ready or Processing Status. Start/Pause Start/Stop current job Phaser 3010/3040/WorkCentre 3045 Service Xerox Internal Use Only... -
Page 30: 3045B Control Panel Button Descriptions
Data LED Indicates status – power and ready-to-print. Error LED When illuminated, indicates an error. Clear button Clears all text, numbers or instructions. Back button Move back to previous screen. Display Four-line LCD Xerox Internal Use Only Phaser 3010/3040/WorkCentre 3045 Service... -
Page 31: 3045N Control Panel Button Descriptions
Deletes entries made on the Control Panel Address Book Move to Address Book menu for Fax and Email. button Back button Move back to previous screen. Indicates printer status, warnings, and error messages. Phaser 3010/3040/WorkCentre 3045 Service Xerox Internal Use Only... -
Page 32: Media Path
Bypass Tray are positioned nearer the Feed Roller, and have higher priority in feeding if both the Main Tray and Bypass Tray contain media. Feed Roller Paper (PSI) Paper (MFP) Holder Assembly Pad Bottom Plate s3040-107 1-10 Xerox Internal Use Only Phaser 3010/3040/WorkCentre 3045 Service... -
Page 33: Adf
The exit roller is driven by torque from the ADF Motor. : Paper Transfer Feed Roller Nudger Roller : Paper Sensors Takeaway Roller Exit Roller Feed Sensor Document Sensor ADF Separator Pad Home Position (CVT Position) s3040-108 Phaser 3010/3040/WorkCentre 3045 Service Xerox Internal Use Only 1-11... -
Page 34: 3010/3045 Jam Locations
3010/3045 Jam Locations s3040-109 Output Tray Rear Door Fuser Levers Front Door Drum Main Tray 3045B Jam Locations s3040-110 Output Tray Front Door Fuser Levers Main Tray Drum Bypass Tray Rear Door 1-12 Xerox Internal Use Only Phaser 3010/3040/WorkCentre 3045 Service... -
Page 35: N Jam Locations
General Information 3045N Jam Locations s3040-111 Output Tray Front Door Drum Main Tray Fuser Levers Bypass Tray Rear Door ADF Jam Locations s3040-112 ADF feed ADF pick ADF exit Phaser 3010/3040/WorkCentre 3045 Service Xerox Internal Use Only 1-13... -
Page 36: Major Components
Rear Door is opened. • Toner Cartridge CRUM Monitors print quanity to alert the user when Toner Cartridge level is low. Rear Door Exit Sensor Interlock Feed Roller Registration Sensor Feed Solenoid s3040-113 1-14 Xerox Internal Use Only Phaser 3010/3040/WorkCentre 3045 Service... -
Page 37: Drive
Provides drive to supply toner to the xerographics assembly. • Feed Solenoid Transmits the torque from the Main Drive Assembly to the Feed Roller. Main Drive Toner Motor Main Drive Motor Assembly Transfer Roller s3040-114 Phaser 3010/3040/WorkCentre 3045 Service Xerox Internal Use Only 1-15... -
Page 38: Electrical
Power switch and AC inlet harness providing AC to the LVPS and Fuser. • USB Board Porvides a USB interface for thumbdrives. • Wireless Interface Board IEEE wireless ethernet interface board. • FAX Board FAX MODEM board for FAX transmissions. 1-16 Xerox Internal Use Only Phaser 3010/3040/WorkCentre 3045 Service... - Page 39 MCU Board Power Switch Assembly LVPS HVPS s3040-115 3045NI Electrical Locations LVPS HVPS MCU Board WiFi Bracket Assembly Interlock Switch Front USB Board Power Switch Assembly IP Board Fax Board s3040-116 Phaser 3010/3040/WorkCentre 3045 Service Xerox Internal Use Only 1-17...
-
Page 40: Consumables
700 pages Standard Capacity 1,000 pages High Capacity 2,300 pages Note Starter capacity cartridges are packaged with the printer when shipped from the factory. These starter cartridges are not available for order. 1-18 Xerox Internal Use Only Phaser 3010/3040/WorkCentre 3045 Service... -
Page 41: Specifications
Less than 25 seconds from Power On Operating System Windows 2003/2008 Server/ XP/ Vista/ Windows7 Macintosh OS 10.5 and greater Linux Redhat and SuSe * Assumes a 30 day month of printing. Phaser 3010/3040/WorkCentre 3045 Service Xerox Internal Use Only 1-19... -
Page 42: Scanning Specifications
Off, Normal, Higher (1, 2) Scan to Desktop via Up to 6 SMB servers Scan to FTP Up to 6 FTP servers Scan to E-mail Yes (no individual user log in) 1-20 Xerox Internal Use Only Phaser 3010/3040/WorkCentre 3045 Service... -
Page 43: Copy Specifications
Number of Copies 1-99 Multiple Up (N to 1) Off, Auto, ID Copy, Manual Duplex Copy On, Off Poster 2x2, 3x3, 4x4 Auto Fit On, Off Cloning On, Off Collate (max pages) Phaser 3010/3040/WorkCentre 3045 Service Xerox Internal Use Only 1-21... -
Page 44: Fax Specifications
Super Fine: 400 x 400 dpi Driver GDI driver - supported Color Not supported Delayed Start Up to 24 hours Broadcast Sending Up to 30 destinations Zoom 25%-400% (same as printer driver) 1-22 Xerox Internal Use Only Phaser 3010/3040/WorkCentre 3045 Service... -
Page 45: Memory Specifications
Power Saver Mode 8 W or less 8 W or less Standby Mode (Fuser On) 37 W or less 37 W or less Continuous Printing 310W or less 310W or less Phaser 3010/3040/WorkCentre 3045 Service Xerox Internal Use Only 1-23... -
Page 46: Environmental Specifications
LCD - Backlight: On LED - Ready LED is On. Ready Mode The printer is in standby, ready to run. Recording The system is at Pause. Fusing The system maintains standby temperature. 1-24 Xerox Internal Use Only Phaser 3010/3040/WorkCentre 3045 Service... -
Page 47: First Print Output Time
Paper is A size Short Edge Feed (SEF) • The original is on the document glass or in the ADF • Process control time is not included Mode FCOT (sec.) Mono 23.0 sec. or less Phaser 3010/3040/WorkCentre 3045 Service Xerox Internal Use Only 1-25... -
Page 48: Physical Dimensions And Clearances
584 mm (23 in) Height with 250-Sheet Feeder 690 mm (27.1 in.) Width 430 mm (16.9 in.) Depth 544 mm (21.4 in.) Weight (base printer with consumables) 28.8 kg (63.5 lb.) 1-26 Xerox Internal Use Only Phaser 3010/3040/WorkCentre 3045 Service... - Page 49 (10.4 in.) s3040-117 90.5 cm (35.6 in.) 10 cm 67 cm (3.9 in.) (26.4 in.) 10 cm (3.9 in.) 20 cm (7.9 in.) 10 cm (3.9 in.) 61 cm (24 in.) s3040-118 Phaser 3010/3040/WorkCentre 3045 Service Xerox Internal Use Only 1-27...
-
Page 50: Mounting Surface Specifications
7 mm. 10° or 7mm 10° or 7mm s3040-120 Failure to adhere to the mounting specifications void all guarantees of print- quality and/or performance. 1-28 Xerox Internal Use Only Phaser 3010/3040/WorkCentre 3045 Service... -
Page 51: Media And Tray Specifications
Length: 127 to 355.6 mm (5 to 14 in.) Maximum width of 220 mm for envelope (DL LEF) Minimum length of 98.4 mm for envelope (Monarch LEF) The following table lists supported media types for the Phaser 3010/3040 printers. Phaser 3010/3040 Supported Media Types Weight (g/... - Page 52 148.0 mm (5.83") Max: Fast scan direction 215.9 mm (8.5") x Slow scan direction 355.6 mm (14") Paper Weight 60 g/m to 105 g/m Feeding Order Top to bottom feed 1-30 Xerox Internal Use Only Phaser 3010/3040/WorkCentre 3045 Service...
-
Page 53: Job Control
• PV counter when jam has occurred • Name of jam Fatal error log includes the following information: • PV counter when jam has occurred • Error code Phaser 3010/3040/WorkCentre 3045 Service Xerox Internal Use Only 1-31... -
Page 54: Error History Report
Manual print: Report is printed by instructing from the operation panel. Auto print: Not supported. Print Volume Report This report shows Print Volume. Manual print: Report is printed by instructing from the operation panel. Auto print: Not supported. 1-32 Xerox Internal Use Only Phaser 3010/3040/WorkCentre 3045 Service... -
Page 55: Error Troubleshooting
Error Troubleshooting In this chapter... • Introduction • Servicing Instructions • Error Messages and Troubleshooting Procedures • Service Diagnostics • Service Diagnostic Tests • Service Diagnostic Test Procedures • Error Troubleshooting • Abnormal Noises • Power Supply Troubleshooting Chapter... -
Page 56: Introduction
If a job did not print correctly or incorrect characters were printed, check the following: 1. Check that the printer is in a “Ready” state before sending a print job. 2. Check the loaded media. 3. Check the print driver. Xerox Internal Use Only Phaser 3010/3040/WorkCentre 3045 Service... -
Page 57: Copy/Scan Problems
4. Ensure that the document guides are adjusted properly. 5. Ensure that the number of document sheets do not exceed the maximum capacity of the ADF. 6. Ensure that the document is not curled. Phaser 3010/3040/WorkCentre 3045 Service Xerox Internal Use Only... -
Page 58: Fax Problems
4. Try loading paper from a fresh ream, fan the paper, and then insert into the tray or flip existing paper over. 5. Check the tray’s Separator Roller for damage. 6. Clean the Feed Rollers with a clean, dry, lint-free wipe. 7. Replace the Feed Rollers. Xerox Internal Use Only Phaser 3010/3040/WorkCentre 3045 Service... -
Page 59: Skewed Image
1. Check the media path for obstructions or debris. 2. Check that the media guides are set correctly. 3. Test envelopes from other manufacturers to find the best result. Phaser 3010/3040/WorkCentre 3045 Service Xerox Internal Use Only... - Page 60 6. If debris is visible, clean the printer with a clean, dry, lint-free wipe. 7. Turn the printer off and then back on. The exit roller in the Fuser should turn for a few seconds. Xerox Internal Use Only Phaser 3010/3040/WorkCentre 3045 Service...
-
Page 61: Servicing Instructions
2. Use the Disassembly procedures to replace the part. Step 5: Final Checkout Test the printer to be sure you have corrected the initial problem and there are no additional problems present. Phaser 3010/3040/WorkCentre 3045 Service Xerox Internal Use Only... -
Page 62: Error Messages And Troubleshooting Procedures
Transfer Belt Black MACaddress Media Access Control Address Machine Control Unit Non-Volatile Memory. Used instead of NVRAM. NVRAM Non-Volatile Random Access Memory Page Description Language Random Access Memory REGI Registration Read Only Memory Xerox Internal Use Only Phaser 3010/3040/WorkCentre 3045 Service... -
Page 63: Error History Report
Paper Jam History contains: Date, Time, Chain-Link code and Paper Jam Type. Printing the Error History Report with the Printer Settings Utility 1. From the Start Menu, select Programs > Xerox Office Printing >Phaser 3010/3040 > Printer Settings Utility. 2. On the Printer Settings Report tab, select Information Pages. -
Page 64: Phaser 3010/3040 Error Codes
Error Troubleshooting Phaser 3010/3040 Error Codes The Phaser 3010/3040 Error Message Summary table lists possible errors, along with the corresponding code, and page reference for the corrective procedure. • The Code column lists the code associated with the error. •... - Page 65 Error Troubleshooting Phaser 3010/3040 Error Message Summary Code Error Message Error Description Go to page 744 016-744 Download Format Check USB or Format Error Error network cable Invalid Data Invalid code to be connection. If the Press Ok downloaded. error persists, go to page 2-63.
- Page 66 Error Troubleshooting Phaser 3010/3040 Error Message Summary Code Error Message Error Description Go to page 100 075-100 No Paper/Jam Set to match Tray or Paper Jam Tray is out of paper, remove the jam. If Jam at Feed or Regi sensor is not...
- Page 67 Error Troubleshooting Phaser 3010/3040 Error Message Summary Code Error Message Error Description Go to page 651 092-651 CTD (ADC) sensor 2-106 Restart Printer error Contact Support If Message Returns 661 092-661 Environment Sensor 2-107 Restart Printer Error Contact Support The Environment...
- Page 68 Error Troubleshooting Phaser 3010/3040 Error Message Summary Code Error Message Error Description Go to page 355 116-355 ESS Network Fatal 2-113 Restart Printer Error. Contact Support Error during the on- If Message Return board network check. 331 117-331 ESS-related error...
-
Page 69: Workcentre 3045 Error Codes
If Message Returns 016-502 Write Flash Error Verify Flash Error 2-59 016-502 System Contact Support If Message Returns 016-503 SMTP Error E-mail Error 2-60 016-504 016-50X Scan 016-506 Job Failure 016-507 Phaser 3010/3040/WorkCentre 3045 Service Xerox Internal Use Only 2-15... - Page 70 016-930 System Unsupported Device Remove from USB Port 016-981 Collate Full Collate Full 2-69 016-981 Printer Job too Large 016-985 Mail Size Limits Mail Size Limits Error 2-70 016-985 Scan Job Failure 2-16 Xerox Internal Use Only Phaser 3010/3040/WorkCentre 3045 Service...
- Page 71 USB Memory Write Protect Error 2-77 026-722 Scan Job Failure 026-723 File Path Limit File Path Limit Error 2-77 026-723 Scan Job Failure 026-750 Communication Fail Scan Communication Fail 2-78 026-751 026-75X Scan 026-752 Job Failure Phaser 3010/3040/WorkCentre 3045 Service Xerox Internal Use Only 2-17...
- Page 72 FTP Connection Error 2-82 031-578 031-57X Scan Login Failed 031-574 FTP Error FTP Error 2-83 031-574 Scan Name Resolve Error 031-575 FTP Error FTP Error 2-83 031-575 Scan Server Address Error 2-18 Xerox Internal Use Only Phaser 3010/3040/WorkCentre 3045 Service...
- Page 73 033-787 Memory Full Fax Job Failure 2-87 033-787 Fax Job Failure 033-788 Memory Full Memory Full 2-85 033-788 Fax Job Failure 034-700 Busy Fax Busy Error 2-88 034-700 Fax Job Failure Phaser 3010/3040/WorkCentre 3045 Service Xerox Internal Use Only 2-19...
- Page 74 077-108 Printer Jam at Exit 077-109 Paper Jam Exit Off Jam 2-101 077-109 Printer Jam at Exit 077-304 Close Rear Cover Rear Door Open 2-102 077-304 Printer Rear Cover is Open 2-20 Xerox Internal Use Only Phaser 3010/3040/WorkCentre 3045 Service...
- Page 75 Contact Support If Message Return 116-326 116-326 System NVRAM Error 2-59 Restart Printer Contact Support If Message Returns 116-335 116-335 System Checksum Error (Network) 2-112 Restart Printer Contact Support If Message Returns Phaser 3010/3040/WorkCentre 3045 Service Xerox Internal Use Only 2-21...
- Page 76 ASIC Failure 2-115 Restart Printer 134-211 134-211 System Modem Error 2-116 Restart Printer Contact Support If Message Returns 191-310 191-310 Xero Life Over 2-117 Restart Printer Contact Support If Message Returns 2-22 Xerox Internal Use Only Phaser 3010/3040/WorkCentre 3045 Service...
-
Page 77: Service Diagnostics
For parameters, pressing OK after selecting an item from the menu displays the current value of the item. On the Phaser 3010/3040, use the CE Diagnostic software to access the diagnostic tests. See “Using CE Diagnostic Software” on page A-2 for instructions on how to use the CE Diagnostic software. -
Page 78: Entering Service Diagnostics
To exit Diagnostics mode: 1. Scroll to Fax/Scanner > Complete, press OK. 2. Press OK when Complete Exit Fax/Scanner Diag is displayed. 3. Press OK when Exit Fax/Scanner Diag Start is displayed. 2-24 Xerox Internal Use Only Phaser 3010/3040/WorkCentre 3045 Service... -
Page 79: Service Diagnostic Tests
FB Side Offset Adjustment SCAN Counter Clear Parameter FB Home Sensor Backup Data All Clear ADF Scan Sensor User & System Clear Complete ADF Document Sensor System Data Init ADF Cover Sensor s3040-168 Phaser 3010/3040/WorkCentre 3045 Service Xerox Internal Use Only 2-25... -
Page 80: Diagnostic Test Summary
This test checks the lamp on the ■ Lamp-Off scanner carriage. ■ Scanner Test 1 Carriage Motor-On This test checks the motor system for ■ Carriage Motor-Off scanner carriage movement. ■ 2-26 Xerox Internal Use Only Phaser 3010/3040/WorkCentre 3045 Service... - Page 81 TR2+ ON TR2- ON CR ON MOB LED ON ADC LED ON 24V ON HV CLK ON NVM Settings Edits, saves, loads, and prints NVM information. Phaser 3010/3040/WorkCentre 3045 Service Xerox Internal Use Only 2-27...
- Page 82 Regi Value X Margin -137 to 137 Adjusts registration in the feed ■ direction. Y Margin -3780 to 3780 Adjusts registration in the scan ■ direction. 2-28 Xerox Internal Use Only Phaser 3010/3040/WorkCentre 3045 Service...
-
Page 83: Fax/Scanner Diagnostic Tests
-2.0 mm ~ 2.0 mm, Adjusts Registration of the ADF in 0.1 mm Steps leading edge. Regi ADF Side -1.0 mm ~ 1.0 mm, Adjusts Registration of the ADF side in 0.1 mm Steps edge. Phaser 3010/3040/WorkCentre 3045 Service Xerox Internal Use Only 2-29... - Page 84 4:- 4 dB, 5: -5 dB DTMF Dialing 0: 70 ms, 1: 80 ms, 2: 85 ms, Speed (ms) 3: 90 ms, 4: 95 ms, 5: 100 ms, 6: 105 ms, 7: 110 ms 2-30 Xerox Internal Use Only Phaser 3010/3040/WorkCentre 3045 Service...
- Page 85 4: 39 dB, 5: 40 dB, 6: 41 dB, 7: 42 dB, 8: 43 dB, 9: 44 dB, 10: 45 dB, 11: 46 dB, 12: 47 dB, 13: 48 dB, 14: 49 dB, 15: 50 dB Phaser 3010/3040/WorkCentre 3045 Service Xerox Internal Use Only 2-31...
- Page 86 Clears stored document data, address Clear information, communication management data, the history. Initializes the system data. System Data Init Initializes the system data. Complete Exits diagnostics and returns to normal operation. 2-32 Xerox Internal Use Only Phaser 3010/3040/WorkCentre 3045 Service...
-
Page 87: Service Diagnostic Test Procedures
NVRAM access. When a PC is available, use CE Dagnostic software tests to diagnose problems and isolate which component or sub assembly needs replacement. Procedures for testing each sensor in the Phaser 3010/3040 using CE Diagnostics. • Exit Sensor •... -
Page 88: Exit Sensor
3. Operate the actuator to check sensor function. 4. Confirm the display indicates the sensor functions correctly. 5. Press the Cancel button to stop the test. Actuator Exit Sensor Paper Paper s6000-143 2-34 Xerox Internal Use Only Phaser 3010/3040/WorkCentre 3045 Service... -
Page 89: Registration Sensor
4. Operate the actuator to check sensor function. 5. Confirm the display indicates the sensor functions correctly. 6. Press the Cancel button to stop the test. 7. Close the Rear Door. Actuator Registration Sensor s3040-172 Phaser 3010/3040/WorkCentre 3045 Service Xerox Internal Use Only 2-35... - Page 90 3. Open and close the Rear Door to actuate the switch. 4. Confirm the display indicates the sensor functions correctly. 5. Press the Cancel button to stop the test. 6. Close the Rear Door. s3040-173 2-36 Xerox Internal Use Only Phaser 3010/3040/WorkCentre 3045 Service...
-
Page 91: Phaser 3010/3040 Motor Test Procedures
Error Troubleshooting Phaser 3010/3040 Motor Test Procedures These tests check whether the Digital Output (DO) components (motor s and solenoid) operate. When the interlock is opened during a Motor Test the component stops. When a paper jam or PQ problem occurs, or an error message or code is displayed, these test help to pinpoint the faulty part. -
Page 92: Main Motor
Main Motor 1. Enter CE Diagnostics (page A-2). 2. Run the Main Motor (Full) test. 3. Check that the Exit Roller rotates. 4. Press the Cancel button to stop the test. s3040-171 2-38 Xerox Internal Use Only Phaser 3010/3040/WorkCentre 3045 Service... -
Page 93: Feed Solenoid
4. Check that the Feed Roller rotates. 5. Press the Cancel button to stop the Feed Solenoid test. 6. Press Cancel to stop the motor test. 7. Replace the Bypass Tray. Feed Roller s3040-170 Phaser 3010/3040/WorkCentre 3045 Service Xerox Internal Use Only 2-39... -
Page 94: Workcentre 3045 Sensor Test Procedures
Parameters for the Digital Input tests are as shown in the following table. Code Component DI-3 K CRUM DI-4 Exit Sensor DI-5 Registration Sensor DI-7 Rear Door Interlock Switch 2-40 Xerox Internal Use Only Phaser 3010/3040/WorkCentre 3045 Service... - Page 95 4. Check sensor function by removing and replacing the Toner Cartridge. 5. Confirm the number shown on the display increases each time the toner cartridge is removed. 6. Press the Stop button to stop the test. s3040-156 Phaser 3010/3040/WorkCentre 3045 Service Xerox Internal Use Only 2-41...
- Page 96 3. Operate the actuator to check sensor function. 4. Confirm the number shown on the display increases every time the actuator is operated. 5. Press the Stop button to stop the test. Actuator Exit Sensor Paper s3040-157 2-42 Xerox Internal Use Only Phaser 3010/3040/WorkCentre 3045 Service...
- Page 97 4. Operate the actuator to check sensor function. 5. Confirm the number shown on the display increases every time the actuator is operated. 6. Press the Stop button to stop the test. Actuator Registration Sensor s3040-158 Phaser 3010/3040/WorkCentre 3045 Service Xerox Internal Use Only 2-43...
- Page 98 3. Open and close the Rear Door to actuate the switch. 4. Confirm the number shown on the display increases every time the actuator is operated. 5. Press the Stop button to stop the test. 6. Close the Rear Door. s3040-159 2-44 Xerox Internal Use Only Phaser 3010/3040/WorkCentre 3045 Service...
-
Page 99: Workcentre 3045 Motor Test Procedures
• Feed Solenoid • Toner Motor Toner Motor Feed Solenoid Main Motor s3040-160 Code Component DO-1 Main Motor (Full Rotation) DO-2 Main Motor (Slow Rotation) DO-6 Feed Solenoid DO-9 Toner Motor Phaser 3010/3040/WorkCentre 3045 Service Xerox Internal Use Only 2-45... - Page 100 2. Use the Up and Down Arrow buttons to select Printer > IOT Diag > Digital Output > DO-1. 3. Check that the Exit Roller rotates. 4. Press the Stop button to stop the test. Exit Roller s3040-161 2-46 Xerox Internal Use Only Phaser 3010/3040/WorkCentre 3045 Service...
- Page 101 5. Press the Stop button to stop the Feed Solenoid test. 6. Use the Down Arrow to scroll to the motor test and press Stop to stop the motor test. Feed Roller s3040-162 Phaser 3010/3040/WorkCentre 3045 Service Xerox Internal Use Only 2-47...
-
Page 102: Toner Motor
4. Run the Toner Motor test: Printer > IOT Diag > Digital Output > DO-9 5. Check that the toner auger rotates. 6. Press the Stop button to stop the test. Auger Gear s3040-163 2-48 Xerox Internal Use Only Phaser 3010/3040/WorkCentre 3045 Service... -
Page 103: Workcentre 3045 Fax/Scanner Diagnostic Test Procedures
3. Release the buttons when CE Mode Please wait appears on the display. 4. Press OK at Fax/Scanner. Information Select this menu item to display the value of the scan counter. Phaser 3010/3040/WorkCentre 3045 Service Xerox Internal Use Only 2-49... -
Page 104: Scanner Maintenance
Tests the flatbed home position sensor. Tests the ADF scan sensor. ADF Scan Sensor Tests the Feed sensor. ADF Document Sensor Tests the ADF cover sensor ADF Cover Sensor a.3-in-1 model does not have an ADF. 2-50 Xerox Internal Use Only Phaser 3010/3040/WorkCentre 3045 Service... -
Page 105: Workcentre 3045 4-In-1 Parameters
0: 500ms, 1: 600ms, 2: 700ms, 3: 800ms, 4: 900ms, 5: 1000ms, 6: 1100ms, 7: 1200ms, 8: 1300ms, 9: 1400ms, 10: 1500ms, 11: 1600ms, 12: 1700ms, 13: 1800ms, 14: 1900ms, 15: 2000ms Phaser 3010/3040/WorkCentre 3045 Service Xerox Internal Use Only 2-51... - Page 106 12: -15 dB, 13: -16 dB, 14: -17 dB, 15: -18 dB External High voltage High (20 ~ 40 V) Hook Medium voltage Medium (10 ~ 19 V) Threshold Low voltage Low (10 ~ 19 V) 2-52 Xerox Internal Use Only Phaser 3010/3040/WorkCentre 3045 Service...
- Page 107 Initializes the system data. System Data Init: Initializes the system data. Complete Exits the diagnostics and returns to normal operation, taking the changes of the data into effect. Phaser 3010/3040/WorkCentre 3045 Service Xerox Internal Use Only 2-53...
-
Page 108: Error Troubleshooting
Do the feed rollers rotate smoothly? (page 4-111). Replace the IP Board (page 4-103). Replace the Complete. Does the error persist? ADF Cover (page 4-113) and ADF Separator Pad (page 4-114). 2-54 Xerox Internal Use Only Phaser 3010/3040/WorkCentre 3045 Service... -
Page 109: Adf Cover Open
Reseat P/J1, P/J6, and P/J16 on the Go to Step 6. Complete. IP Board. Does the error persist? Replace the ADF (page 4-111). Replace the IP Complete. Does the error persist? Board (page 4-103). Phaser 3010/3040/WorkCentre 3045 Service Xerox Internal Use Only 2-55... -
Page 110: Fuser Error
2. Disconnect P/J18 and P/J20 from the MCU Board and P/J201 from the LVPS. Is the harness damaged? Replace the Fuser (page 4-38). Replace the Complete. Does the error persist? MCU Board (page 4-43). 2-56 Xerox Internal Use Only Phaser 3010/3040/WorkCentre 3045 Service... -
Page 111: Ip Rom Check Error
Reseat all connectors on the IP and Go to Step 2. Complete. MCU Boards. Does the error persist? Replace the IP Board (page 4-45). Replace the Complete. Does the error persist? MCU Board (page 4-43). Phaser 3010/3040/WorkCentre 3045 Service Xerox Internal Use Only 2-57... -
Page 112: Fax Memory Allocation Error
Reseat all connectors on the IP and Go to Step 2. Complete. MCU Boards. Does the error persist? Replace the IP Board (page 4-45). Replace the Complete. Does the error persist? MCU Board (page 4-43). 2-58 Xerox Internal Use Only Phaser 3010/3040/WorkCentre 3045 Service... -
Page 113: Firmware Errors
Reseat all connectors on the IP and Go to Step 2. Complete. MCU Boards. Does the error persist? Replace the IP Board (page 4-45). Replace the Complete. Does the error persist? MCU Board (page 4-43). Phaser 3010/3040/WorkCentre 3045 Service Xerox Internal Use Only 2-59... -
Page 114: Email Errors
Reseat all connectors on the IP and Go to Step 2. Complete. MCU Boards. Does the error persist? Replace the IP Board (page 4-45). Replace the Complete. Does the error persist? MCU Board (page 4-43). 2-60 Xerox Internal Use Only Phaser 3010/3040/WorkCentre 3045 Service... -
Page 115: Memory Overflow
Replace the IP Board (page 4-45). Go to Step 4. Complete. Does the error persist? Replace the MCU Board (page 4-43). Contact your Complete. Does the error persist? designated field support for assistance. Phaser 3010/3040/WorkCentre 3045 Service Xerox Internal Use Only 2-61... -
Page 116: Decode Error
Replace the IP Board (page 4-45). Go to Step 3. Complete. Does the error persist? Replace the MCU Board (page 4-43). Contact your Complete. Does the error persist? designated field support for assistance. 2-62 Xerox Internal Use Only Phaser 3010/3040/WorkCentre 3045 Service... -
Page 117: Download Errors
Replace the IP Board (page 4-45). Go to Step 3. Complete. Does the error persist? Replace the MCU Board (page 4-43). Contact your Complete. Does the error persist? designated field support for assistance Phaser 3010/3040/WorkCentre 3045 Service Xerox Internal Use Only 2-63... -
Page 118: Pdl/Pjl Error
Replace the IP Board (page 4-45). Go to Step 4. Complete. Does the error persist? Replace the MCU Board (page 4-43). Contact your Complete. Does the error persist? designated field support for assistance. 2-64 Xerox Internal Use Only Phaser 3010/3040/WorkCentre 3045 Service... -
Page 119: Email Errors
Replace the IP Board (page 4-45). Go to Step 3. Complete. Does the error persist? Replace the MCU Board (page 4-43). Contact your Complete. Does the error persist? designated field support for assistance. Phaser 3010/3040/WorkCentre 3045 Service Xerox Internal Use Only 2-65... -
Page 120: Usb Memory Removal Error
Replace the IP Board (page 4-45). Go to Step 4. Complete. Does the error persist? Replace the MCU Board (page 4-43). Contact your Complete. Does the error persist? designated field support for assistance. 2-66 Xerox Internal Use Only Phaser 3010/3040/WorkCentre 3045 Service... -
Page 121: Wireless Error
Replace the IP Board (page 4-45). Go to Step 4. Complete. Does the error persist? Replace the MCU Board (page 4-43). Contact your Complete. Does the error persist? designated field support for assistance. Phaser 3010/3040/WorkCentre 3045 Service Xerox Internal Use Only 2-67... -
Page 122: Usb Host Error
Replace the IP Board (page 4-45). Go to Step 3. Complete. Does the error persist? Replace the MCU Board (page 4-43). Contact your Complete. Does the error persist? designated field support for assistance. 2-68 Xerox Internal Use Only Phaser 3010/3040/WorkCentre 3045 Service... -
Page 123: Collate Full
Replace the IP Board (page 4-45). Go to Step 3. Complete. Does the error persist? Replace the MCU Board (page 4-43). Contact your Complete. Does the error persist? designated field support for assistance. Phaser 3010/3040/WorkCentre 3045 Service Xerox Internal Use Only 2-69... -
Page 124: Mail Size Limits Error, Pcscan Time Out, Memory Full
Replace the IP Board (page 4-45). Go to Step 3. Complete. Does the error persist? Replace the MCU Board (page 4-43). Contact your Complete. Does the error persist? designated field support for assistance. 2-70 Xerox Internal Use Only Phaser 3010/3040/WorkCentre 3045 Service... -
Page 125: Report File Open/Close Error
Replace the IP Board (page 4-45). Go to Step 3. Complete. Does the error persist? Replace the MCU Board (page 4-43). Contact your Complete. Does the error persist? designated field support for assistance. Phaser 3010/3040/WorkCentre 3045 Service Xerox Internal Use Only 2-71... -
Page 126: Firmware Error 024-340
If the problem persists, use the following procedure. Troubleshooting Reference Table Applicable Parts Wiring and Plug/Jack Map References MCU Board, PL7.1.3 “Phaser 3010/3040 System Wiring” on page 7-12 ■ ■ “WorkCentre 3045 System Wiring” on page 7-20 ■ Troubleshooting Procedure Table... -
Page 127: Download Error
If the problem persists, use the following procedure. Troubleshooting Reference Table Applicable Parts Wiring and Plug/Jack Map References MCU Board, PL7.1.3 “Phaser 3010/3040 System Wiring” on page 7-12 ■ ■ “WorkCentre 3045 System Wiring” on page 7-20 ■ Troubleshooting Procedure Table... -
Page 128: Mcu Comm Error
Replace the IP Board (page 4-45). Go to Step 3. Complete. Does the error persist? Replace the MCU Board (page 4-43). Contact your Complete. Does the error persist? designated field support for assistance. 2-74 Xerox Internal Use Only Phaser 3010/3040/WorkCentre 3045 Service... -
Page 129: Paper Size Mismatch
Is the harness damaged? Disconnect the MCU Board P/J23. Replace the Replace the Is the voltage across ground and Registration MCU Board J23-1 +3.3 VDC? Sensor (page 4-43). (page 4-30). Phaser 3010/3040/WorkCentre 3045 Service Xerox Internal Use Only 2-75... -
Page 130: No Suitable Paper
Complete. Does the error persist? Disconnect the MCU Board P/J23. Replace the Replace the Is the voltage across ground and Registration MCU Board J23-1 +3.3 VDC? Sensor (page 4-43). (page 4-30). 2-76 Xerox Internal Use Only Phaser 3010/3040/WorkCentre 3045 Service... -
Page 131: Usb Memory Write Error
Replace the IP Board (page 4-45). Go to Step 3. Complete. Does the error persist? Replace the MCU Board (page 4-43). Contact your Complete. Does the error persist? designated field support for assistance. Phaser 3010/3040/WorkCentre 3045 Service Xerox Internal Use Only 2-77... -
Page 132: Scan Communication Fail
Replace the IP Board (page 4-45). Go to Step 3. Complete. Does the error persist? Replace the MCU Board (page 4-43). Contact your Complete. Does the error persist? designated field support for assistance. 2-78 Xerox Internal Use Only Phaser 3010/3040/WorkCentre 3045 Service... -
Page 133: Smb Error
Replace the IP Board (page 4-45). Go to Step 3. Complete. Does the error persist? Replace the MCU Board (page 4-43). Contact your Complete. Does the error persist? designated field support for assistance. Phaser 3010/3040/WorkCentre 3045 Service Xerox Internal Use Only 2-79... -
Page 134: Smb Write Error
Replace the IP Board (page 4-45). Go to Step 3. Complete. Does the error persist? Replace the MCU Board (page 4-43). Contact your Complete. Does the error persist? designated field support for assistance. 2-80 Xerox Internal Use Only Phaser 3010/3040/WorkCentre 3045 Service... -
Page 135: Smb Connection Error
Replace the IP Board (page 4-45). Go to Step 3. Complete. Does the error persist? Replace the MCU Board (page 4-43). Contact your Complete. Does the error persist? designated field support for assistance. Phaser 3010/3040/WorkCentre 3045 Service Xerox Internal Use Only 2-81... -
Page 136: Ftp Connection Error
Replace the IP Board (page 4-45). Go to Step 3. Complete. Does the error persist? Replace the MCU Board (page 4-43). Contact your Complete. Does the error persist? designated field support for assistance. 2-82 Xerox Internal Use Only Phaser 3010/3040/WorkCentre 3045 Service... -
Page 137: Ftp Error
Replace the IP Board (page 4-45). Go to Step 3. Complete. Does the error persist? Replace the MCU Board (page 4-43). Contact your Complete. Does the error persist? designated field support for assistance. Phaser 3010/3040/WorkCentre 3045 Service Xerox Internal Use Only 2-83... - Page 138 Replace the IP Board (page 4-45). Go to Step 3. Complete. Does the error persist? Replace the MCU Board (page 4-43). Contact your Complete. Does the error persist? designated field support for assistance. 2-84 Xerox Internal Use Only Phaser 3010/3040/WorkCentre 3045 Service...
-
Page 139: Memory Error
Replace the IP Board (page 4-45). Go to Step 3. Complete. Does the error persist? Replace the MCU Board (page 4-43). Contact your Complete. Does the error persist? designated field support for assistance. Phaser 3010/3040/WorkCentre 3045 Service Xerox Internal Use Only 2-85... -
Page 140: Fax Errors
Replace the IP Board (page 4-45). Go to Step 3. Complete. Does the error persist? Replace the MCU Board (page 4-43). Contact your Complete. Does the error persist? designated field support for assistance. 2-86 Xerox Internal Use Only Phaser 3010/3040/WorkCentre 3045 Service... -
Page 141: Fax Job Failure
Replace the IP Board (page 4-45). Go to Step 4. Complete. Does the error persist? Replace the MCU Board (page 4-43). Contact your Complete. Does the error persist? designated field support for assistance. Phaser 3010/3040/WorkCentre 3045 Service Xerox Internal Use Only 2-87... -
Page 142: Fax Busy
Replace the IP Board (page 4-45). Go to Step 4. Complete. Does the error persist? Replace the MCU Board (page 4-43). Contact your Complete. Does the error persist? designated field support for assistance. 2-88 Xerox Internal Use Only Phaser 3010/3040/WorkCentre 3045 Service... -
Page 143: Communication Error
Replace the IP Board (page 4-45). Go to Step 4. Complete. Does the error persist? Replace the MCU Board (page 4-43). Contact your Complete. Does the error persist? designated field support for assistance. Phaser 3010/3040/WorkCentre 3045 Service Xerox Internal Use Only 2-89... -
Page 144: Fax Transmit Error
Go to Step 2. Complete. Board, IP Board and the MCU Board. Does the error persist? Replace the Fax Board (page 4-105). Go to Step 3. Complete. Does the error persist? 2-90 Xerox Internal Use Only Phaser 3010/3040/WorkCentre 3045 Service... -
Page 145: Rx Communication Errors
Replace the IP Board (page 4-45). Go to Step 4. Complete. Does the error persist? Replace the MCU Board (page 4-43). Contact your Complete. Does the error persist? designated field support for assistance. Phaser 3010/3040/WorkCentre 3045 Service Xerox Internal Use Only 2-91... -
Page 146: Nvram Error
If the problem persists, use the following procedure. Troubleshooting Reference Table Applicable Parts Wiring and Plug/Jack Map References MCU Board, PL7.1.3 “Phaser 3010/3040 System Wiring” on page 7-12 ■ ■ “WorkCentre 3045 System Wiring” on page 7-20 ■ Troubleshooting Procedure Table... -
Page 147: Lph Failure
Replace the IP Board (page 4-45). Go to Step 4. Complete. Does the error persist? Replace the MCU Board (page 4-43). Contact your Complete. Does the error persist? designated field support for assistance. Phaser 3010/3040/WorkCentre 3045 Service Xerox Internal Use Only 2-93... -
Page 148: Carriage Motor Error
■ ■ Troubleshooting Procedure Table Step Actions and Questions Reseat the Scanner connectors on Replace the Complete. the IP Board and cycle system Scanner power. (page 4-109). Does the error persist? 2-94 Xerox Internal Use Only Phaser 3010/3040/WorkCentre 3045 Service... -
Page 149: Copy Limit
Go to Step 2. Complete. Does the error persist? Reseat the Scanner connectors on Replace the Complete. the IP Board and cycle system Scanner power. (page 4-109). Does the error persist? Phaser 3010/3040/WorkCentre 3045 Service Xerox Internal Use Only 2-95... -
Page 150: Misfeed Jam
Go to Step 4. Replace the Does the Feed Solenoid function Feed Solenoid correctly? (page 4-32). Replace the MCU Board (page 4-43). Contact your Complete. Does the error persist? designated field support for assistance. 2-96 Xerox Internal Use Only Phaser 3010/3040/WorkCentre 3045 Service... -
Page 151: Waiting For Continue Key To Be Pressed After Reloading Paper
Replace the IP Board (page 4-45). Go to Step 3. Complete. Does the error persist? Replace the MCU Board (page 4-43). Contact your Complete. Does the error persist? designated field support for assistance. Phaser 3010/3040/WorkCentre 3045 Service Xerox Internal Use Only 2-97... -
Page 152: Reg On Early Jam
Go to Step 2. Replace the Does the Registration Sensor Registration function correctly? Sensor (page 4-30). Replace the MCU Board (page 4-43). Contact your Complete. Does the error persist? designated field support for assistance. 2-98 Xerox Internal Use Only Phaser 3010/3040/WorkCentre 3045 Service... -
Page 153: Reg Off Jam
Go to Step 3. Replace the Does the motor function correctly? Main Drive Motor (page 4-41).. Replace the MCU Board (page 4-43). Contact your Complete. Does the error persist? designated field support for assistance. Phaser 3010/3040/WorkCentre 3045 Service Xerox Internal Use Only 2-99... -
Page 154: Exit On Jam
Go to Step 3. Replace the Does the motor function correctly? Main Drive Motor (page 4-41).. Replace the MCU Board (page 4-43). Contact your Complete. Does the error persist? designated field support for assistance. 2-100 Xerox Internal Use Only Phaser 3010/3040/WorkCentre 3045 Service... -
Page 155: Exit Off Early Jam
Check P/J18 on the MCU Board. Go to Step 2. Secure P/J18. Is P/J18 connected securely. Replace the Fuser (page 4-38). Replace the Complete. Does the error persist? MCU Board (page 4-43). Phaser 3010/3040/WorkCentre 3045 Service Xerox Internal Use Only 2-101... -
Page 156: Rear Door Open
Test the Rear Door Interlock Switch. Go to Step 3. Replace the Does the switch function correctly? switch (page 4-44). Replace the LVPS (page 4-48). Replace the Complete. Does the error persist? MCU Board (page 4-43). 2-102 Xerox Internal Use Only Phaser 3010/3040/WorkCentre 3045 Service... -
Page 157: Exit Jam
Check P/J18 on the MCU Board. Go to Step 2. Secure P/J18. Is P/J18 connected securely. Replace the Fuser (page 4-38). Replace the Complete. Does the error persist? MCU Board (page 4-43). Phaser 3010/3040/WorkCentre 3045 Service Xerox Internal Use Only 2-103... -
Page 158: Remain Registration Jam
Go to Step 2. Replace the Does the Registration Sensor Registration function correctly? Sensor (page 4-30). Replace the MCU Board (page 4-43). Contact your Complete. Does the error persist? designated field support for assistance. 2-104 Xerox Internal Use Only Phaser 3010/3040/WorkCentre 3045 Service... -
Page 159: Xero Near Life
Actions and Questions Turn the printer off and then on. Replace the Complete. Does the error persist? MCU Board (page 4-43). Does the error persist? Contact your Complete. designated field support for assistance. Phaser 3010/3040/WorkCentre 3045 Service Xerox Internal Use Only 2-105... -
Page 160: Adc Sensor Error
Go to Step 2. Secure the MCU Board and xerographics connections. assembly. Are the connnections secure? Replace the MCU Board (page 4-43). Contact your Complete. Does the error persist? designated field support for assistance. 2-106 Xerox Internal Use Only Phaser 3010/3040/WorkCentre 3045 Service... -
Page 161: Env Sensor Error
Wiring and Plug/Jack Map References MCU Board, PL7.1.3 ■ ■ Troubleshooting Procedure Table Step Actions and Questions Replace the MCU Board (page 4-43). Contact your Complete. Does the error persist? designated field support for assistance. Phaser 3010/3040/WorkCentre 3045 Service Xerox Internal Use Only 2-107... -
Page 162: K Cru Life Over
Check P/J21 on the MCU Board. Go to Step 4. Secure P/J21. Is the connector secure? Replace the MCU Board (page 4-43). Contact your Complete. Does the error persist? designated field support for assistance. 2-108 Xerox Internal Use Only Phaser 3010/3040/WorkCentre 3045 Service... -
Page 163: K Crum Id Error
Check P/J21 on the MCU Board. Go to Step 4. Secure P/J21. Is the connector secure? Replace the MCU Board (page 4-43). Contact your Complete. Does the error persist? designated field support for assistance. Phaser 3010/3040/WorkCentre 3045 Service Xerox Internal Use Only 2-109... -
Page 164: K Cru Detached
Check P/J21 on the MCU Board. Go to Step 4. Secure P/J21. Is the connector secure? Replace the MCU Board (page 4-43). Contact your Complete. Does the error persist? designated field support for assistance. 2-110 Xerox Internal Use Only Phaser 3010/3040/WorkCentre 3045 Service... -
Page 165: System Usb Port Error
Replace the IP Board (page 4-45). Go to Step 3. Complete. Does the error persist? Replace the MCU Board (page 4-43). Contact your Complete. Does the error persist? designated field support for assistance. Phaser 3010/3040/WorkCentre 3045 Service Xerox Internal Use Only 2-111... -
Page 166: Checksum Error
Replace the IP Board (page 4-45). Go to Step 3. Complete. Does the error persist? Replace the MCU Board (page 4-43). Contact your Complete. Does the error persist? designated field support for assistance. 2-112 Xerox Internal Use Only Phaser 3010/3040/WorkCentre 3045 Service... -
Page 167: On Board Network Fatal Error
Replace the IP Board (page 4-45). Go to Step 3. Complete. Does the error persist? Replace the MCU Board (page 4-43). Contact your Complete. Does the error persist? designated field support for assistance. Phaser 3010/3040/WorkCentre 3045 Service Xerox Internal Use Only 2-113... -
Page 168: System Restart
Are the connections secure? connectors, then go to Step 2. Does the error persist? Go to Step 3. Complete. Replace the IP Board (page 4-45). Complete. Does the error persist? 2-114 Xerox Internal Use Only Phaser 3010/3040/WorkCentre 3045 Service... -
Page 169: Asic Failure
Replace the IP Board (page 4-45). Go to Step 3. Complete. Does the error persist? Replace the MCU Board (page 4-43). Contact your Complete. Does the error persist? designated field support for assistance. Phaser 3010/3040/WorkCentre 3045 Service Xerox Internal Use Only 2-115... -
Page 170: Fax Board Modem Error
Replace the IP Board (page 4-45). Go to Step 4. Complete. Does the error persist? Replace the MCU Board (page 4-43). Contact your Complete. Does the error persist? designated field support for assistance. 2-116 Xerox Internal Use Only Phaser 3010/3040/WorkCentre 3045 Service... -
Page 171: Xero Life Over
Actions and Questions Turn the printer off and then on. Replace the Complete. Does the error persist? MCU Board (page 4-43). Does the error persist? Contact your Complete. designated field support for assistance. Phaser 3010/3040/WorkCentre 3045 Service Xerox Internal Use Only 2-117... -
Page 172: Abnormal Noises
Go to step 4. Complete. Does the electrical noise error still occur? Check system ground points. Reseat the Clean or repair Are the contacts clean and connectors on ground undamaged? the HVPS. contacts. 2-118 Xerox Internal Use Only Phaser 3010/3040/WorkCentre 3045 Service... -
Page 173: Power Supply Troubleshooting
Does the printer now work? Disconnect the power cord and wait Complete. Replace the 1 minute. Reseat the AC Inlet LVPS Harness, and then turn the printer (page 4-48). Does the printer now work? Phaser 3010/3040/WorkCentre 3045 Service Xerox Internal Use Only 2-119... -
Page 174: Dc Power Troubleshooting
Processor Board. Board Does the error persist? (page 4-45) and Control Panel (page 4-116). Reseat the connectors on the MCU Replace the Complete. Board. LVPS Does the error persist? (page 4-48). 2-120 Xerox Internal Use Only Phaser 3010/3040/WorkCentre 3045 Service... -
Page 175: Image Quality
Image Quality In this chapter... • Image Quality Overview • Checklist Before Troubleshooting Print-Quality • Print-Quality Troubleshooting • Test Prints • Image Specifications Chapter... -
Page 176: Image Quality Overview
Refer to “Media and Tray Specifications” on page 1-29 for supported and specialty media that have been tested and approved for use in the Phaser 3010/3040/WorkCentre 3045s. Use paper from a fresh ream that is acclimated to room temperature and humidity. -
Page 177: Repeating Defects
If the toner is low, replace the cartridge. Toner that is not genuine Xerox toner can also cause print-quality problems. If the toner is not Xerox toner, replace the Toner Cartridge and recheck the print-quality issue. -
Page 178: Symptom Checklist
Check the Toner Cartridge to make sure that it is installed correctly. The toner may be low. Change the Toner Cartridge. Blank Print Black Output Check the amount of toner remaining in the cartridge. Black Print Xerox Internal Use Only Phaser 3010/3040/WorkCentre 3045 Service... - Page 179 Spots On Page and Printing Blurred Check the Toner Cartridge to ensure correct installation. Clean the inside of the printer. Random Spots Streaks On Page Check the amount of toner remaining in the cartridge. Vertical Stripes Phaser 3010/3040/WorkCentre 3045 Service Xerox Internal Use Only...
- Page 180 Adjust the transfer bias (see page 6-5). Adjust the Fuser temperature (see page 6-5). Residual Image/Ghosting Background Contamination There is toner contamination on all or most of the page. Test the Toner Motor. Background Contamination Xerox Internal Use Only Phaser 3010/3040/WorkCentre 3045 Service...
- Page 181 Verify that the paper guides are set correctly. Verify that the correct print media is being used. Skew 2 Horizontal Streaks The toner may be low. Change the Toner Cartridge. Horizontal Stripes Phaser 3010/3040/WorkCentre 3045 Service Xerox Internal Use Only...
-
Page 182: Print-Quality Troubleshooting
The toner is not completely fused. 3-28 Incorrect The image is distorted. 3-29 Magnification ADF Lines or Streaks Vertical lines or Streaks appear on copies. 3-30 Spots from ADF Spots appear on copies. 3-31 Xerox Internal Use Only Phaser 3010/3040/WorkCentre 3045 Service... -
Page 183: Light Or Undertone Print
Test the Toner Motor. Go to Step 7. Replace the The Toner Motor rotates. Toner Motor (page 4-37). Replace the Transfer Roller Replace the Complete. (page 4-10). HVPS Does the error persist? (page 4-42). Phaser 3010/3040/WorkCentre 3045 Service Xerox Internal Use Only... -
Page 184: Blank Print
Check the Toner Cartridge. Go to Step 6. Replace the The Toner Cartridge is installed Toner correctly. Cartridge. Replace the Transfer Roller Replace the Complete. (page 4-10). HVPS The error persists. (page 4-42). 3-10 Xerox Internal Use Only Phaser 3010/3040/WorkCentre 3045 Service... -
Page 185: Black Print
(page 4-109), go to Step 4. Does the image print correctly? Complete. Go to Step 5. Replace the Transfer Roller Replace the Complete. (page 4-10). HVPS The error persists. (page 4-42). Phaser 3010/3040/WorkCentre 3045 Service Xerox Internal Use Only 3-11... -
Page 186: Toner Smears
Reseat P/J18 on the MCU Board, Complete. Go to Step 2. and P/J201 on the LVPS. Does the image print correctly? Replace the Fuser (page 4-38). Complete. Replace the Does the image print correctly? Transfer Roller. 3-12 Xerox Internal Use Only Phaser 3010/3040/WorkCentre 3045 Service... -
Page 187: Random Spots
Go to Step 4. patterns indicating a contaminated page 3-15. component. The spot pattern repeats. Replace the Transfer Roller Replace the Complete. (page 4-10). Fuser The spots continue to appear. (page 4-38). Phaser 3010/3040/WorkCentre 3045 Service Xerox Internal Use Only 3-13... -
Page 188: Streaks
Reseat and lock the Toner Cartridge. Complete. Go to Step 5. Does the image print correctly? Replace the Transfer Roller Complete. Replace the (page 4-10). Fuser Does the image print correctly? (page 4-38). 3-14 Xerox Internal Use Only Phaser 3010/3040/WorkCentre 3045 Service... -
Page 189: Repeating Spots Or Voids
Actions and Questions Measure the pitch. Replace the Contact your Does the pitch match any shown in corresponding designated the Repeating Defects Table? See parts. field support for page 3-3. assistance. Phaser 3010/3040/WorkCentre 3045 Service Xerox Internal Use Only 3-15... -
Page 190: Vertical Blank Lines
Go to Step 3. Replace the Transfer Roller Complete. Go to Step 4. (page 4-10). Does the image print correctly? Replace the Fuser (page 4-38). Complete. Contact your designated field support for assistance. 3-16 Xerox Internal Use Only Phaser 3010/3040/WorkCentre 3045 Service... -
Page 191: Residual Image Or Ghosting
Actions and Questions Replace the Transfer Roller Complete. Go to Step 2. (page 4-10). Does the image print correctly? Replace the Fuser (page 4-38). Complete. Contact your designated field support for assistance. Phaser 3010/3040/WorkCentre 3045 Service Xerox Internal Use Only 3-17... -
Page 192: Background Contamination
Example Print Transfer Roller, PL1.1.11 ■ Background Contamination Troubleshooting Procedure Table Step Actions and Questions Replace the Transfer Roller. Complete. Contact your Does the image print correctly? designated field support for assistance. 3-18 Xerox Internal Use Only Phaser 3010/3040/WorkCentre 3045 Service... -
Page 193: Jagged Characters
Chrysanthemum x morifolium nthemum x nthemum x Fuzzy Text Troubleshooting Procedure Table Step Actions and Questions Replace the IP Board. Contact your Complete. Does the error persist? designated field support for assistance. Phaser 3010/3040/WorkCentre 3045 Service Xerox Internal Use Only 3-19... -
Page 194: Horizontal Band, Voids, Or Streaks
Compare defect spacing to the Replace the Contact your Repeating Defects table (page 3-3). corresponding designated Do any of the horizontal bands parts. field support for match? assistance. 3-20 Xerox Internal Use Only Phaser 3010/3040/WorkCentre 3045 Service... -
Page 195: Auger Mark
Example Print Transfer Roller, PL1.1.11 ■ s3040-121 Troubleshooting Procedure Table Step Actions and Questions Replace the Image Transfer Board. Complete. Contact your Does the image print correctly? designated field support for assistance. Phaser 3010/3040/WorkCentre 3045 Service Xerox Internal Use Only 3-21... -
Page 196: Damaged Media
Go to Step 4. contamination or debris. media path, Is there contamination or debris in and then go to the paper path? Step 3. Does the image print correctly? Complete. Go to Step 4. 3-22 Xerox Internal Use Only Phaser 3010/3040/WorkCentre 3045 Service... - Page 197 Right Feed Roller Cams (page 4-17). Does the image print correctly? Replace the MCU Board (page 4-43). Complete. Contact your Does the image print correctly? designated field support for assistance. Phaser 3010/3040/WorkCentre 3045 Service Xerox Internal Use Only 3-23...
-
Page 198: Image Not Centered
“Using Service Diagnostics” on page 2-23). Do the Registration Roller and the Registration Pinch Roller rotate? Replace the Main Drive Motor Complete. Go to Step 3. (page 4-41). Does the image print correctly? 3-24 Xerox Internal Use Only Phaser 3010/3040/WorkCentre 3045 Service... - Page 199 Complete. Go to Step 5. (page 4-23). Does the image print correctly? Replace the MCU Board (page 4-43). Complete. Contact your Does the image print correctly? designated field support for assistance. Phaser 3010/3040/WorkCentre 3045 Service Xerox Internal Use Only 3-25...
-
Page 200: Skew
Main Drive Motor (see “Using Service Diagnostics” on page 2-23). Do the rollers rotate? Replace the Main Drive Motor Complete. Go to Step 3. (page 4-41). Does the image print correctly? 3-26 Xerox Internal Use Only Phaser 3010/3040/WorkCentre 3045 Service... - Page 201 Replace the Separator Pad Complete. Go to Step 7. (page 4-74). Does the image print correctly? Replace the MCU Board (page 4-43). Complete. Contact field Does the image print correctly? support for assistance. Phaser 3010/3040/WorkCentre 3045 Service Xerox Internal Use Only 3-27...
-
Page 202: Unfused Image
Does the image print correctly? Complete. Go to Step 3. Check the Toner type. Replace toner, Go to Step 5. Is non-Xerox Toner in use? then go to Step 4. Does the image print correctly? Complete. Go to Step 5. -
Page 203: Incorrect Magnification
Is the ADF closed against the Go to Step 3. Close the ADF. document glass completely? Perform Scanner Calibration Replace the Complete. procedure (“Scanner Adjustment” on Scanner page 6-7). (page 4-109). Does the error still occur? Phaser 3010/3040/WorkCentre 3045 Service Xerox Internal Use Only 3-29... -
Page 204: Adf Lines Or Streaks
Go to Step 3. glass? document glass using a lint-free cloth. Does the image quality improve? Complete. Go to Step 4. Are there scratches on the Replace the Complete. document glass? Scanner (page 4-109). 3-30 Xerox Internal Use Only Phaser 3010/3040/WorkCentre 3045 Service... -
Page 205: Spots From Adf
Clean the Go to Step 3. glass and the CVT window. document glass Is there any debris? using a lint-free cloth. Does the image quality improve? Complete. Replace the Scanner (page 4-109). Phaser 3010/3040/WorkCentre 3045 Service Xerox Internal Use Only 3-31... -
Page 206: Test Prints
6. Press OK. 7. Use the Down Arrow and Up Arrow buttons to select the desired test print. Paper Size Sets the paper size in which the test print is printed. 3-32 Xerox Internal Use Only Phaser 3010/3040/WorkCentre 3045 Service... -
Page 207: Testpatasic[Iot] Test Print
Compare the print with the sample. If the test print does not match the test print shown here, check the MCU Board. If the test print is OK, check that the printer is connected correctly. s3040-177 Phaser 3010/3040/WorkCentre 3045 Service Xerox Internal Use Only 3-33... -
Page 208: Image Specifications
180 mm ± 0.5 mm 200 mm ± 0.5 mm Vertical 280 mm ± 0.5 mm 260 mm ± 0.5 mm Registration Leading Edge ≤ ± 2.0 mm ≤ ± 2.5 mm Side Edge 3-34 Xerox Internal Use Only Phaser 3010/3040/WorkCentre 3045 Service... -
Page 209: Guaranteed Print Areas
4 mm 4 mm 4 mm 355.6 mm 347.6 mm (14 inch) Guaranteed Printing Area 351.6 mm 207.9 mm 4 mm 210.9 mm 215.9 mm (8.5 inch) Guaranteed and Maximum Area Phaser 3010/3040/WorkCentre 3045 Service Xerox Internal Use Only 3-35... - Page 210 Image Quality 3-36 Xerox Internal Use Only Phaser 3010/3040/WorkCentre 3045 Service...
-
Page 211: Service Parts Disassembly
Service Parts Disassembly In this chapter... • Overview • Consumable • Phaser 3010/3040 Covers • Phaser 3010/3040 Feeder • Phaser 3010/3040 Xerographics • Phaser 3010/3040 Drive • Phaser 3010/3040 Electrical • WorkCentre 3045 Covers • WorkCentre 3045 Feeder • WorkCentre 3045 Xerographics •... -
Page 212: Overview
When needed, the orientation of the printer is called out in the procedure as an aid for locating the printer parts. The following figure identifies the Front, Rear, Left, and Right sides of the printer. Left Rear Front Right s3040-014 Xerox Internal Use Only Phaser 3010/3040/WorkCentre 3045 Service... -
Page 213: Preparation
• The notation “(tap, plastic, 10 mm)” or “(metal, 6 mm)” refer to the type of screw being removed. Replacement Note Provides information specific to the replacement of parts or assemblies. Phaser 3010/3040/WorkCentre 3045 Service Xerox Internal Use Only... -
Page 214: Fastener Types
Always use the correct type and size screw. Using the wrong screw can damage tapped holes. Do not use excessive force to remove or install either a screw or a printer part. Xerox Internal Use Only Phaser 3010/3040/WorkCentre 3045 Service... -
Page 215: Consumable
The Toner Cartridge is the only consumable. Toner Cartridge PL4.1.13 1. Open the Main Tray Door 2. Open the Toner Door. 3. Turn the Toner Cartridge handle CCW to release the lock and remove the cartridge. s3040-013 Phaser 3010/3040/WorkCentre 3045 Service Xerox Internal Use Only... -
Page 216: Phaser 3010/3040 Covers
Service Parts Disassembly Phaser 3010/3040 Covers Output Tray Extension PL1.1.1 1. Open the Output Tray Extension. 2. Release the boss of the Output Tray Extension from the hole on the Top Cover. s3040-015 Xerox Internal Use Only Phaser 3010/3040/WorkCentre 3045 Service... -
Page 217: Top Cover
6. Remove the Output Tray Extension (page 4-6). 7. Release the front tabs, and carefully lift the Top Cover from the right and disconnect P/J220 on the Control Panel to remove the Top Cover. s3040-023 Phaser 3010/3040/WorkCentre 3045 Service Xerox Internal Use Only... -
Page 218: Rear Door
Service Parts Disassembly Rear Door PL1.1.8 1. Open the Rear Door. 2. Release the boss from the right hinge and remove the Rear Door. s3040-017 Xerox Internal Use Only Phaser 3010/3040/WorkCentre 3045 Service... -
Page 219: Transfer Roller Bearings
PL1.1.9, 1.1.10 1. Open the Rear Door. 2. Release the bearing locks and rotate the bearings to align the key with the notch and remove the bearings from the Transfer Roller shaft. s3040-024 Phaser 3010/3040/WorkCentre 3045 Service Xerox Internal Use Only... -
Page 220: Transfer Roller
Service Parts Disassembly Transfer Roller PL1.1.11 1. Open the Rear Door. 2. Remove the right side Transfer Roller bearing (page 4-9) and remove the Transfer Roller from the Rear Door. s3040-024 4-10 Xerox Internal Use Only Phaser 3010/3040/WorkCentre 3045 Service... -
Page 221: Rear Cover
6. Lift the Fuser levers. 7. Remove the 4 screws (silver, tap, 8 mm) that secure the Rear Cover. 8. Release several hooks that secure the cover to the Top Cover and chassis. s3040-025 Phaser 3010/3040/WorkCentre 3045 Service Xerox Internal Use Only 4-11... -
Page 222: Right Cover
2. Open the Rear Door. 3. Release the 2 bosses on the bottom of the Right Cover. 4. Release several hooks that secure the cover to the Top Cover and chassis. s3040-026 4-12 Xerox Internal Use Only Phaser 3010/3040/WorkCentre 3045 Service... -
Page 223: Main Tray
Service Parts Disassembly Main Tray PL1.1.14 1. Open the Main Tray. 2. Release the boss on the Main Tray from the hole in the Front Cover, and then remove the Tray. s3040-027 Phaser 3010/3040/WorkCentre 3045 Service Xerox Internal Use Only 4-13... -
Page 224: Hipot Cover
2. Open the Toner Door. 3. Starting on the left edge, release the hooks on both sides of the cover. There is 1 hook on the left, 2 hooks on the right. s3040-052 4-14 Xerox Internal Use Only Phaser 3010/3040/WorkCentre 3045 Service... -
Page 225: Front Cover
3. Starting on the bottom side, release the hooks on both sides of the printer, and remove the Front Cover. There are 2 hooks per side, and 2 on the top. Hooks Hooks s3040-016 Phaser 3010/3040/WorkCentre 3045 Service Xerox Internal Use Only 4-15... -
Page 226: Left Cover
2. Open the Rear Door. 3. Release the 2 bosses on the bottom of the Left Cover. 4. Release several hooks that secure the cover to the Top Cover and chassis. s3040-028 4-16 Xerox Internal Use Only Phaser 3010/3040/WorkCentre 3045 Service... -
Page 227: Phaser 3010/3040 Feeder
19. Remove the IP Board and LVPS brackets (page 4-49). 20. Remove the Rear Door Interlock Switch (page 4-44). 21. Remove the xerographics assembly (page 4-33). 22. Remove the Feed Gear and Spring (page 4-25). Phaser 3010/3040/WorkCentre 3045 Service Xerox Internal Use Only 4-17... - Page 228 Service Parts Disassembly 23. Remove 4 screws (silver, tap, 8 mm), that secure the lower plate to the chassis. s3040-029 4-18 Xerox Internal Use Only Phaser 3010/3040/WorkCentre 3045 Service...
- Page 229 24. Release the left Feed Roller Cam latch and slide the cam towards the center of the shaft. 25. Move the Feed Roll Assembly left to release the shaft from the chassis. s3040-030 Phaser 3010/3040/WorkCentre 3045 Service Xerox Internal Use Only 4-19...
-
Page 230: Bottom Plate
19. Remove the Rear Door Interlock Switch (page 4-44). 20. Remove the xerographics assembly (page 4-33). 21. Remove the Feed Gear and Spring (page 4-25). 22. Remove the Feed Roller (page 4-17). 23. Remove the bottom chute s3040-053 4-20 Xerox Internal Use Only Phaser 3010/3040/WorkCentre 3045 Service... - Page 231 Service Parts Disassembly 24. Release the hook that secures the cam follwer bearings and remove the bearings and followers from the chassis. s3040-031 Phaser 3010/3040/WorkCentre 3045 Service Xerox Internal Use Only 4-21...
- Page 232 Service Parts Disassembly 25. Flex the Bottom Plate to release one end from the chassis and remove. s3040-122 Replacement Note Attach the spring to the Bottom Plate before installing the followers. 4-22 Xerox Internal Use Only Phaser 3010/3040/WorkCentre 3045 Service...
-
Page 233: Separator Pad Assembly
1. Remove the Rear Door (page 4-8). 2. Press inward on the left side retainer to release the left side boss and remove the lower chute. s3040-032 3. Remove the Registration Sensor Actuator (page 4-28). Phaser 3010/3040/WorkCentre 3045 Service Xerox Internal Use Only 4-23... - Page 234 Service Parts Disassembly 4. Release the boss hook at each side of the housing to release the assembly from the chassis. s3040-033 4-24 Xerox Internal Use Only Phaser 3010/3040/WorkCentre 3045 Service...
-
Page 235: Feed Gear And Spring
2. Remove the Main Drive Assembly (page 4-40). 3. Release the spring from the hook on the chassis. 4. Release the hook that secures the Feed Gear to the shaft. s3040-054 Phaser 3010/3040/WorkCentre 3045 Service Xerox Internal Use Only 4-25... -
Page 236: Registration Pinch Roller
9. Remove the IP Board and LVPS brackets (page 4-49). 10. Remove the registration springs and bearings from the ends of the pinch roller shaft and remove the shaft from the chassis. s3040-034 4-26 Xerox Internal Use Only Phaser 3010/3040/WorkCentre 3045 Service... -
Page 237: Registration Roller
12. Remove the registration gear, clutch and spring from the Registration Roller shaft. 13. Remove the bearing from each end of the roller shaft, then remove the roller from the chassis. s3040-035 Phaser 3010/3040/WorkCentre 3045 Service Xerox Internal Use Only 4-27... -
Page 238: Registration Sensor Actuator
Registration Sensor Actuator PL2.3.9 1. Remove the Rear Door (page 4-8). 2. Press inward on the left side retainer to release the left side boss and remove the lower chute. s3040-032 4-28 Xerox Internal Use Only Phaser 3010/3040/WorkCentre 3045 Service... - Page 239 Service Parts Disassembly 3. Remove the Registration Sensor Actuator by releasing the left end from the chassis and s3040-036 Replacement Note Install the spring as shown below. s3040-037 Phaser 3010/3040/WorkCentre 3045 Service Xerox Internal Use Only 4-29...
-
Page 240: Registration Sensor
1. Open the Rear Door. 2. Press inward on the left side retainer to release the left side boss and remove the lower chute. s3040-032 3. Remove the Registration Sensor Actuator (page 4-28). 4-30 Xerox Internal Use Only Phaser 3010/3040/WorkCentre 3045 Service... - Page 241 Service Parts Disassembly 4. Release the 3 hooks that secure the Registration Sensor to the chassis. 5. Disconnect P/J230 to remove the sensor from the chassis. P/J230 s3040-038 Phaser 3010/3040/WorkCentre 3045 Service Xerox Internal Use Only 4-31...
-
Page 242: Feed Solenoid
6. Release the solenoid and Registration Sensor harnesses from the feed solenoid cover, then remove the cover. 7. Remove 1 screw (silver, tap, 8 mm), and remove the Feed Solenoid from the printer. P/J10 s3040-039 4-32 Xerox Internal Use Only Phaser 3010/3040/WorkCentre 3045 Service... -
Page 243: Phaser 3010/3040 Xerographics
16. Remove the IP Board (page 4-45). 17. Remove the LVPS (page 4-48). 18. Remove the IP Board and LVPS brackets (page 4-49). 19. Remove the Rear Door Interlock Switch (page 4-44). Phaser 3010/3040/WorkCentre 3045 Service Xerox Internal Use Only 4-33... - Page 244 21. Release the hook that secures the FFC cover to the Upper Plate. 22. Remove the ribbon cable from the upper plate guide. 23. Remove 2 screws (silver, tapping. 8mm) that secure the upper plate to the xerographics assembly. s3040-040 4-34 Xerox Internal Use Only Phaser 3010/3040/WorkCentre 3045 Service...
- Page 245 Service Parts Disassembly 24. Remove the 3 screws (silver, tap, 8 mm), to remove the xerographics assembly from the printer. s3040-041 Replacement Note Inspect the Feed and Separator Roller assemblies. Replace if worn. Phaser 3010/3040/WorkCentre 3045 Service Xerox Internal Use Only 4-35...
-
Page 246: Toner Dispense Assembly
9. Remove 3 screws (silver, metal, 6mm) that secure the Dispense Assembly to the chassis. 10. Disconnect the CRUM reader from the Dispense Assembly to remove the assembly. P/J20 P/J21 P/J203 s3040-042 4-36 Xerox Internal Use Only Phaser 3010/3040/WorkCentre 3045 Service... -
Page 247: Toner Motor
4. Remove 1 screw (silver, tap, 8 mm) that secures the motor and ground wire to the chassis. 5. Rotate the motor CCW to release the mounting tab from the retainer. P/J150 s3040-043 Replacement Note Capture the ground wire between the screw and motor mounting tab. Phaser 3010/3040/WorkCentre 3045 Service Xerox Internal Use Only 4-37... -
Page 248: Fuser
7. Disconnect P/J201 on the LVPS, and release the harness from the guide. 8. Disconnect P/J18 from the MCU Board. 9. Remove 3 screws (hex-head, tap, 10mm) that secure the Fuser to the chassis. P/J18 P/J201 s3040-103 4-38 Xerox Internal Use Only Phaser 3010/3040/WorkCentre 3045 Service... - Page 249 Service Parts Disassembly Replacement Note Install the Fuser wiring in the harness guides as shown. Side s3040-153 Phaser 3010/3040/WorkCentre 3045 Service Xerox Internal Use Only 4-39...
-
Page 250: Phaser 3010/3040 Drive
3. Remove the Left Side Cover (page 4-16). 4. Remove the 2 screws (silver, metal, 6 mm), and 1 screw (silver, tap, 8mm) that secure the Main Drive Assembly to the chassis. s3040-086 4-40 Xerox Internal Use Only Phaser 3010/3040/WorkCentre 3045 Service... -
Page 251: Main Drive Motor
6. Disconnect P/J10, P/J13 and P/J23 from the MCU Board 7. Remove the 2 screws (silver, metal, 6 mm), and 3 screws (silver, tap, 8mm) that secure the Main Drive Motor to the chassis. P/J13 P/J10 P/J23 s3040-044 Phaser 3010/3040/WorkCentre 3045 Service Xerox Internal Use Only 4-41... -
Page 252: Phaser 3010/3040 Electrical
6. Remove the Toner Motor (page 4-37). 7. Remove the Toner Dispense Assembly (page 4-36). 8. Remove the MCU Board (page 4-43). 9. Remove 4 screws (silver, metal, 6 mm) that secure the HVPS. s3040-045 4-42 Xerox Internal Use Only Phaser 3010/3040/WorkCentre 3045 Service... -
Page 253: Mcu Board
3. Disconnect all connections on the MCU Board. 4. Remove 4 screws (silver, metal, 6 mm) that secure the MCU Board. P/J14 P/J15 P/J16 P/J17 P/J10 P/J25 P/J13 P/J18 P/J20 P/J21 P/J23 P/J22 s3040-046 Phaser 3010/3040/WorkCentre 3045 Service Xerox Internal Use Only 4-43... -
Page 254: Rear Door Interlock Switch
8. Remove the IP Board (page 4-45). 9. Remove the LVPS (page 4-48). 10. Remove the IP Board and LVPS brackets (page 4-49). 11. Release the 2 hooks that secure the switch to the chassis. P/J204 s3040-047 4-44 Xerox Internal Use Only Phaser 3010/3040/WorkCentre 3045 Service... -
Page 255: Image Processor Board
Replacement Note After replacing the IP Board, restore these customer settings: • Control Panel language • Default paper size • Time zone, clock and date formats • Preferred unit (mm or inch) Phaser 3010/3040/WorkCentre 3045 Service Xerox Internal Use Only 4-45... -
Page 256: Power Switch Assembly
9. Disconnect P/J200 from the LVPS and remove 1 screw (silver, metal with washer 6mm) and 1 screw (silver metal, 6mm) that secure the Power Switch Assembly. P/J201 P/J200 AC Inlet Holder s3040-136 4-46 Xerox Internal Use Only Phaser 3010/3040/WorkCentre 3045 Service... - Page 257 Service Parts Disassembly Replacement Note Assemble the Power Switch Assembly into the holder as illustrated. Capture the ground wire under the lower screw. s3040-049 Phaser 3010/3040/WorkCentre 3045 Service Xerox Internal Use Only 4-47...
-
Page 258: Lvps
4. Remove the Top Cover (page 4-7). 5. Disconnect all connections to the LVPS. 6. Remove 4 screws (silver, metal, 6mm) that secure the LVPS. P/J203 P/J201 P/J202 P/J204 P/J200 s3040-051 4-48 Xerox Internal Use Only Phaser 3010/3040/WorkCentre 3045 Service... -
Page 259: Ip Board And Lvps Brackets
7. Remove the Power Switch Assembly (page 4-46). 8. Remove the IP Board (page 4-45. 9. Remove the LVPS (page 4-48). 10. Release 1 hook to remove the front guide harness. 11. Remove the LVPS insulator. s3040-050 Phaser 3010/3040/WorkCentre 3045 Service Xerox Internal Use Only 4-49... - Page 260 12. Remove 5 screws (silver, tap, 8mm) and 4 screws (silver metal, 6mm) that secure the brackets. 13. Release the Rear Door Interlock Switch harness to remove the brackets. s3040-056 Replacement Note Install the ground spring when replacing the bracket. s3040-057 4-50 Xerox Internal Use Only Phaser 3010/3040/WorkCentre 3045 Service...
-
Page 261: Workcentre 3045 Covers
5. Remove 2 screws (silver, tap, 8mm) that secure the Holder Assemblies, then slide the Holder Assemblies forward to release the hooks and carefully lift the Scanner to remove the assemblies. s3040-058 Phaser 3010/3040/WorkCentre 3045 Service Xerox Internal Use Only 4-51... -
Page 262: Top Cover
9. Remove the WiFi bracket if present (page 4-66). 10. Remove 2 screws (silver, tap, 8mm) at the rear, 4 screws (silver, metal, 6mm) and release 3 hooks that secure the Top Cover. s3040-059 4-52 Xerox Internal Use Only Phaser 3010/3040/WorkCentre 3045 Service... -
Page 263: Rear Door
Service Parts Disassembly Rear Door PL1.1.7 1. Open the Rear Door. 2. Release the boss from the left hinge and remove the Rear Door. s3040-060 Phaser 3010/3040/WorkCentre 3045 Service Xerox Internal Use Only 4-53... -
Page 264: Transfer Roller Bearings
1. Open the Rear Door. 2. Release the bearing lock and rotate the bearing to align the key with the notch and remove the bearing from the Transfer Roller shaft. s3040-061 4-54 Xerox Internal Use Only Phaser 3010/3040/WorkCentre 3045 Service... -
Page 265: Transfer Roller
Service Parts Disassembly Transfer Roller PL1.1.11 1. Open the Rear Door. 2. Remove the right side Transfer Roller bearing (page 4-9) and remove the Transfer Roller from the Rear Door. s3040-061 Phaser 3010/3040/WorkCentre 3045 Service Xerox Internal Use Only 4-55... -
Page 266: Rear Cover
9. Remove the Top Cover (page 4-52). 10. Lift the Fuser levers. 11. Remove the 4 screws (silver, tap, 8 mm) that secure the Rear Cover. 12. Release several hooks that secure the cover. s3040-062 4-56 Xerox Internal Use Only Phaser 3010/3040/WorkCentre 3045 Service... -
Page 267: Right Cover
4. Remove the Inner Front Cover (page 4-62). 5. Release the 2 bosses on the bottom of the Right Cover. 6. Release several hooks that secure the cover to the Top and Rear Covers. s3040-063 Phaser 3010/3040/WorkCentre 3045 Service Xerox Internal Use Only 4-57... -
Page 268: Main Tray
Service Parts Disassembly Main Tray PL1.1.14 1. Open the Main Tray. 2. Release the boss on the Main Tray from the hole in the Front Cover, and then remove the Tray. s3040-064 4-58 Xerox Internal Use Only Phaser 3010/3040/WorkCentre 3045 Service... -
Page 269: Hipot Cover
2. Remove the Front Cover (page 4-60). 3. Starting on the left edge, release the hooks on both sides of the cover. There is 1 hook on the left, 2 hooks on the right. s3040-052 Phaser 3010/3040/WorkCentre 3045 Service Xerox Internal Use Only 4-59... -
Page 270: Front Cover
Service Parts Disassembly Front Cover PL1.1.20 1. Remove the Main Tray (page 4-58). 2. Release the bosses from the left hinge and remove the Front Cover. s3040-137 4-60 Xerox Internal Use Only Phaser 3010/3040/WorkCentre 3045 Service... -
Page 271: Usb Cover
USB Cover PL1.1.23 1. Starting on the right edge, release the hooks on both sides of the cover. There is 2 hooks on the bottom and 2 hooks on the right. s3040-123 Phaser 3010/3040/WorkCentre 3045 Service Xerox Internal Use Only 4-61... -
Page 272: Inner Front Cover
4. Remove the 2 screws (silver, tap, 8 mm) that secure the Rear Cover. 5. Lift the cover at the upper corners to release 2 hooks that secure the cover. s3040-065 4-62 Xerox Internal Use Only Phaser 3010/3040/WorkCentre 3045 Service... -
Page 273: Output Tray Extension
3. Remove the Front Cover (page 4-60). 4. Remove the Inner Front Cover (page 4-62). 5. Release the bosses that secure the Output Tray Extension to the inner Front Cover. s3040-066 Phaser 3010/3040/WorkCentre 3045 Service Xerox Internal Use Only 4-63... -
Page 274: Left Cover
4. Remove the Inner Front Cover (page 4-62). 5. Release the 2 bosses on the bottom of the Left Cover. 6. Release several hooks that secure the cover to the Top and Rear Covers. s3040-067 4-64 Xerox Internal Use Only Phaser 3010/3040/WorkCentre 3045 Service... -
Page 275: Front Usb Board
5. Remove the Left Cover (page 4-64). 6. Disconnect P/J7601 on the Front USB Board. 7. Remove the 2 screws (silver, tap, 8 mm) that secure the Front USB Board to the Top Cover. P/J7601 s3040-068 Phaser 3010/3040/WorkCentre 3045 Service Xerox Internal Use Only 4-65... -
Page 276: Wifi Adaptor (3045N)
4. Remove the Inner Front Cover (page 4-62). 5. Remove the Left Cover (page 4-64). 6. Disconnect P/J6501 on the IP Board. 7. Release 2 hooks that secure the WiFi Adaptor. P/J6501 s0340-069 4-66 Xerox Internal Use Only Phaser 3010/3040/WorkCentre 3045 Service... -
Page 277: Workcentre 3045 Feeder
Service Parts Disassembly WorkCentre 3045 Feeder Bypass Tray PL2.1.99 1. Release 2 hooks, one on each side, that secure the bypass tray in the chassis. s3040-070 Phaser 3010/3040/WorkCentre 3045 Service Xerox Internal Use Only 4-67... -
Page 278: Feed Roll Assembly
22. Remove the IP Board bracket (page 4-106). 23. Remove the Main Drive Assembly (page 4-40). 24. Remove the Main Drive Motor (page 4-41). 25. Remove the xerographics assembly (page 4-33). 4-68 Xerox Internal Use Only Phaser 3010/3040/WorkCentre 3045 Service... - Page 279 28. Release the left Feed Roller Cam latch and slide the cam towards the center of the shaft., and move the Feed Shaft to the left side of the printer. 29. Move the Feed Roll Assembly left to release the shaft from the chassis. Phaser 3010/3040/WorkCentre 3045 Service Xerox Internal Use Only 4-69...
- Page 280 Service Parts Disassembly s3040-072 4-70 Xerox Internal Use Only Phaser 3010/3040/WorkCentre 3045 Service...
-
Page 281: Bottom Plate
22. Remove the Rear Door Interlock Switch (page 4-44). 23. Remove the xerographics assembly (page 4-33). 24. Remove the Feed Gear and Spring (page 4-25). 25. Remove the Feed Roller (page 4-17). Phaser 3010/3040/WorkCentre 3045 Service Xerox Internal Use Only 4-71... - Page 282 Service Parts Disassembly 26. Remove the bottom chute. s3040-053 27. Release the hook that secures the cam follwer bearings and remove the bearings and followers from the chassis. s3040-031 4-72 Xerox Internal Use Only Phaser 3010/3040/WorkCentre 3045 Service...
- Page 283 Service Parts Disassembly 28. Flex the Bottom Plate to release one end from the chassis and remove. s3040-122 Replacement Note Attach the spring to the Bottom Plate before installing the followers. Phaser 3010/3040/WorkCentre 3045 Service Xerox Internal Use Only 4-73...
-
Page 284: Separator Pad Assembly
1. Remove the Rear Door (page 4-8). 2. Press inward on the left side retainer to release the left side boss and remove the lower chute. s3040-074 3. Remove the Registration Sensor Actuator (page 4-28). 4-74 Xerox Internal Use Only Phaser 3010/3040/WorkCentre 3045 Service... - Page 285 Service Parts Disassembly 4. Release the hook at each side of the housing to release the assembly from the chassis. s3040-033 Phaser 3010/3040/WorkCentre 3045 Service Xerox Internal Use Only 4-75...
-
Page 286: Feed Gear And Spring
14. Remove the Main Drive Assembly (page 4-40). 15. Release the spring from the hook on the chassis. 16. Release the hook that secures the Feed Gear to the shaft. s3040-054 4-76 Xerox Internal Use Only Phaser 3010/3040/WorkCentre 3045 Service... -
Page 287: Registration Pinch Roller
11. Remove the IP Board (page 4-103). 12. Remove the Fax Board if present (page 4-105). 13. Remove the IP Board Bracket (page 4-106). 14. Remove the LVPS (page 4-48). 15. Remove the LVPS bracket (page 4-107). Phaser 3010/3040/WorkCentre 3045 Service Xerox Internal Use Only 4-77... - Page 288 Service Parts Disassembly 16. Remove the registration springs and bearings from the ends of the pinch roller shaft and remove the shaft from the chassis. s3040-034 4-78 Xerox Internal Use Only Phaser 3010/3040/WorkCentre 3045 Service...
-
Page 289: Registration Roller
15. Remove the LVPS (page 4-48). 16. Remove the LVPS bracket (page 4-107). 17. Remove the registration pinch roller (page 4-77). 18. Remove the registration gear, clutch and spring from the Registration Roller shaft. Phaser 3010/3040/WorkCentre 3045 Service Xerox Internal Use Only 4-79... - Page 290 Service Parts Disassembly 19. Remove the bearing from each end of the roller shaft, then remove the roller from the chassis. s3040-077 4-80 Xerox Internal Use Only Phaser 3010/3040/WorkCentre 3045 Service...
-
Page 291: Registration Sensor Actuator
Registration Sensor Actuator PL2.3.9 1. Remove the Rear Door (page 4-53). 2. Press inward on the left side retainer to release the left side boss and remove the lower chute. s3040-074 Phaser 3010/3040/WorkCentre 3045 Service Xerox Internal Use Only 4-81... - Page 292 Service Parts Disassembly 3. Remove the Registration Sensor Actuator by releasing the left end from the chassis and s3040-036 Replacement Note Install the spring as shown below. s3040-079 4-82 Xerox Internal Use Only Phaser 3010/3040/WorkCentre 3045 Service...
-
Page 293: Registration Sensor
2. Press inward on the left side retainer to release the left side boss and remove the lower chute. s3040-074 3. Release the 3 hooks that secure the Registration Sensor to the chassis. Phaser 3010/3040/WorkCentre 3045 Service Xerox Internal Use Only 4-83... - Page 294 Service Parts Disassembly 4. Rotate the Registration Actuator and disconnect P/J230 to remove the sensor from the chassis. P/J230 s3040-138 4-84 Xerox Internal Use Only Phaser 3010/3040/WorkCentre 3045 Service...
-
Page 295: Feed Solenoid
16. Release the solenoid and Registration Sensor harnesses from the feed solenoid cover, then remove the cover. 17. Remove 1 screw (silver, tap, 8 mm), and remove the Feed Solenoid from the printer. P/J10 s3040-081 Phaser 3010/3040/WorkCentre 3045 Service Xerox Internal Use Only 4-85... -
Page 296: Workcentre 3045 Xerographics
21. Remove the Fax Board if present (page 4-105). 22. Remove the IP Board bracket (page 4-106). 23. Remove the Main Drive Assembly (page 4-40). 24. Remove the Main Drive Motor (page 4-41). 4-86 Xerox Internal Use Only Phaser 3010/3040/WorkCentre 3045 Service... - Page 297 Service Parts Disassembly 25. Remove the FFC cover. 26. Remove 2 screws (silver, tapping. 8mm) that secure the upper plate to the xerographics assembly. s3040-040 Phaser 3010/3040/WorkCentre 3045 Service Xerox Internal Use Only 4-87...
- Page 298 Service Parts Disassembly 27. Remove the 3 screws (silver, tap, 8 mm), to remove the xerographics assembly from the printer. s3040-041 Replacement Note Inspect the Feed and Separator Roller assemblies. Replace if worn. 4-88 Xerox Internal Use Only Phaser 3010/3040/WorkCentre 3045 Service...
-
Page 299: Toner Dispense Assembly
Dispense Assembly harness guide. 14. Remove 3 screws (silver, metal, 6mm) that secure the Dispense Assembly to the chassis. 15. Disconnect the CRUM reader to remove the assembly. P/J20 P/J21 P/J203 s3040-083 Phaser 3010/3040/WorkCentre 3045 Service Xerox Internal Use Only 4-89... -
Page 300: Toner Motor
12. Remove 1 screw (silver, tap, 8 mm) that secures the motor and ground wire to the chassis. 13. Rotate the motor CCW to release the mounting tab from the retainer. 4-90 Xerox Internal Use Only Phaser 3010/3040/WorkCentre 3045 Service... - Page 301 Service Parts Disassembly P/J150 s3040-043 Replacement Note Capture the ground wire between the screw and motor mounting tab. Phaser 3010/3040/WorkCentre 3045 Service Xerox Internal Use Only 4-91...
-
Page 302: Fuser
13. Disconnect P/J201 on the LVPS, and release the harness from the guide. 14. Disconnect P/J18 from the MCU Board. 15. Remove 3 screws (hex-head, tap, 10mm) that secure the Fuser to the chassis. 4-92 Xerox Internal Use Only Phaser 3010/3040/WorkCentre 3045 Service... - Page 303 Service Parts Disassembly P/J18 P/J201 s3040-085 Replacement Note Install the Fuser wiring in the harness guides as shown. Phaser 3010/3040/WorkCentre 3045 Service Xerox Internal Use Only 4-93...
- Page 304 Service Parts Disassembly Side s3040-153 4-94 Xerox Internal Use Only Phaser 3010/3040/WorkCentre 3045 Service...
-
Page 305: Workcentre 3045 Drive
10. Remove the Rear Cover (page 4-56). 11. Remove the IP Board (page 4-103). 12. Remove the Fax Board if present (page 4-105). 13. Remove the IP Board bracket (page 4-106). Phaser 3010/3040/WorkCentre 3045 Service Xerox Internal Use Only 4-95... - Page 306 Service Parts Disassembly 14. Remove the 2 screws (silver, metal, 6 mm), and 1 screw (silver, tap, 8mm) that secure the Main Drive Assembly to the chassis. s3040-086 4-96 Xerox Internal Use Only Phaser 3010/3040/WorkCentre 3045 Service...
-
Page 307: Main Drive Motor
15. Disconnect P/J10 and P/J23 from the MCU Board 16. Remove the 2 screws (silver, metal, 6 mm), and 3 screws (silver, tap, 8mm) that secure the Main Drive Motor to the chassis. P/J13 P/J10 P/J23 s3040-044 Phaser 3010/3040/WorkCentre 3045 Service Xerox Internal Use Only 4-97... -
Page 308: Workcentre 3045 Electrical
10. Remove the Toner Motor (page 4-37). 11. Remove the Toner Dispense Assembly (page 4-36). 12. Remove the MCU Board (page 4-43). 13. Remove 4 screws (silver, metal, 6 mm) that secure the HVPS. s3040-087 4-98 Xerox Internal Use Only Phaser 3010/3040/WorkCentre 3045 Service... -
Page 309: Mcu Board
10. Disconnect all connections on the MCU Board. 11. Remove 4 screws (silver, metal, 6 mm) that secure the MCU Board. P/J14 P/J15 P/J16 P/J17 P/J10 P/J25 P/J13 P/J18 P/J20 P/J21 P/J23 P/J22 s3040-088 Phaser 3010/3040/WorkCentre 3045 Service Xerox Internal Use Only 4-99... -
Page 310: Rear Door Interlock Switch
11. Remove the Power Switch Assembly (page 4-101) 12. Remove the LVPS (page 4-48). 13. Remove the LVPS bracket (page 4-107). 14. Release the 2 hooks that secure the switch to the chassis. P/J204 s3040-047 4-100 Xerox Internal Use Only Phaser 3010/3040/WorkCentre 3045 Service... -
Page 311: Power Switch Assembly
13. Disconnect P/J200 from the LVPS and remove 1 screws (silver, metal with washer 6mm) and 2 screws (silver metal, 6mm) that secure the Power Switch Assembly. P/J200 s3040-089 Replacement Note Capture the ground wire with the screw and washer. Phaser 3010/3040/WorkCentre 3045 Service Xerox Internal Use Only 4-101... -
Page 312: Lvps
4. Remove the Right Cover (page 4-57). 5. Disconnect all connections to the LVPS. 6. Remove 4 screws (silver, metal, 6mm) that secure the LVPS. P/J201 P/J200 P/J203 P/J202 P/J204 s3040-090 4-102 Xerox Internal Use Only Phaser 3010/3040/WorkCentre 3045 Service... -
Page 313: Ip Board
7. Remove 4 screws (silver, metal, 6 mm) that secure the MCU Board. SJ12 SJ11 SJ911 SJ20 SJ23 SJ21 SJ18 SJ22 SJ19 s3040-091 Replacement Note After replacing the IP Board, check/change the following settings: • FAX Settings > Country • Control Panel language Phaser 3010/3040/WorkCentre 3045 Service Xerox Internal Use Only 4-103... - Page 314 Service Parts Disassembly • Default paper size • Time zone, clock and date formats • Preferred unit (mm or inch) Also adjust the Scanner using “Scanner Adjustment” on page 6-7. 4-104 Xerox Internal Use Only Phaser 3010/3040/WorkCentre 3045 Service...
-
Page 315: Fax Board
3. Remove the Inner Front Cover (page 4-62). 4. Remove the Left Cover (page 4-64). 5. Disconnect P/J102 from the Fax Board. 6. Remove 4 screws (silver, metal, 6mm) to remove the Fax Board. P/J102 s3040-092 Phaser 3010/3040/WorkCentre 3045 Service Xerox Internal Use Only 4-105... -
Page 316: Ip Board Bracket
13. Release hooks that secure the 2 harness guides and feed the harnesses and guides through the holes in the bracket. 14. Remove 1 screw (silver, tap, 8mm) and 4 screws (silver metal, 6mm) that secure the bracket. s3040-093 4-106 Xerox Internal Use Only Phaser 3010/3040/WorkCentre 3045 Service... -
Page 317: Lvps Bracket
11. Remove the Power Switch Assembly (page 4-101) 12. Remove the LVPS (page 4-102). 13. Release 2 hooks that secure the front harness guide and remove the guide and LVPS insulator. s3040-094 Phaser 3010/3040/WorkCentre 3045 Service Xerox Internal Use Only 4-107... - Page 318 14. Remove 5 screw (silver, tap, 8mm) and 4 screws (silver metal, 6mm) that secure the bracket. s3040-095 Replacement Note Install the ground spring before securing the bracket to the chassis. s3040-057 4-108 Xerox Internal Use Only Phaser 3010/3040/WorkCentre 3045 Service...
-
Page 319: Workcentre 3045 Scanner And Adf
4. Remove the Left Cover (page 4-64). 5. Remove the Right Cover (page 4-57). 6. Disconnect P/J5, 6, 18, 19, 20, 21, 22, and 23 from the IP Board. SJ20 SJ23 SJ21 SJ22 SJ19 SJ18 s3040-096 Phaser 3010/3040/WorkCentre 3045 Service Xerox Internal Use Only 4-109... - Page 320 7. Remove 1 screw that secures the ADF ground wire. s3040-154 8. Remove the Holder Assemblies (page 4-51). 9. Lift the Scanner/ADF till vertical, pull the harnesses through the hole in the Top Cover and remove the Scanner Assembly. 4-110 Xerox Internal Use Only Phaser 3010/3040/WorkCentre 3045 Service...
-
Page 321: Adf Assembly
5. Remove the Right Cover (page 4-57). 6. Disconnect P/J19, 20, 21, 22, from the IP Board. SJ20 SJ23 SJ21 SJ22 SJ19 SJ18 s3040-096 7. Remove 1 screw that secures the ADF ground wire. s3040-154 Phaser 3010/3040/WorkCentre 3045 Service Xerox Internal Use Only 4-111... - Page 322 Leave adaquate slack in the ADF harness to allow the ADF to open and close without restriction. The ADF harness protective covering should extend all the way through the Scanner into the chassis. 4-112 Xerox Internal Use Only Phaser 3010/3040/WorkCentre 3045 Service...
-
Page 323: Adf Top Cover
Service Parts Disassembly ADF Top Cover PL8.1.3 1. Open the ADF Top Cover. 2. Release the ADF Top Cover from the bosses on the ADF Assembly. s3040-098 Phaser 3010/3040/WorkCentre 3045 Service Xerox Internal Use Only 4-113... -
Page 324: Adf Separator Pad
Service Parts Disassembly ADF Separator Pad PL8.1.4 1. Open the ADF Cover 2. Release the hook on the Separator Pad and remove it. s3040-139 4-114 Xerox Internal Use Only Phaser 3010/3040/WorkCentre 3045 Service... -
Page 325: Adf Input Tray
2. Bend the Input Tray rear side hinge to release the boss from the hole in the ADF Assembly. 3. Release the front side boss of the Input Tray to remove it. s3040-099 Phaser 3010/3040/WorkCentre 3045 Service Xerox Internal Use Only 4-115... -
Page 326: Control Panel
Service Parts Disassembly Control Panel PL8.1.10 1. Lift the Scanner Assembly. 2. Remove 2 screws (silver, with flange, tap, 8 mm). s3040-100 3. Close the Scanner Assembly and remove the Control Panel. 4-116 Xerox Internal Use Only Phaser 3010/3040/WorkCentre 3045 Service... -
Page 327: Document Cover
Service Parts Disassembly Document Cover PL9.1.2 1. Open the Document Cover. 2. Release the hooks that secure the hinges to the Scanner. Phaser 3010/3040/WorkCentre 3045 Service Xerox Internal Use Only 4-117... - Page 328 Service Parts Disassembly 4-118 Xerox Internal Use Only Phaser 3010/3040/WorkCentre 3045 Service...
-
Page 329: Parts Lists
Parts Lists In this chapter... • Serial Number Location and Range • Using the Parts List • Phaser 3010/3040 Parts Lists • WorkCentre 3045 Parts Lists • Xerox Supplies and Accessories • Hardware Kit Chapter... -
Page 330: Serial Number Location And Range
Parts Lists Serial Number Location and Range Changes to Xerox products are made to accommodate improved components. When ordering parts include this information: • Component's part number • Product type or model number • Serial Number of the printer The serial number is located on the Rear Door. -
Page 331: Using The Parts List
Jack 1 is attached to one end of the wire harness and connector J2 is attached to the other end that is plugged into P2. Note Only parts with part numbers are available for ordering. Parts without part numbers are available on the parent assembly. Phaser 3010/3040/WorkCentre 3045 Service Xerox Internal Use Only... -
Page 332: Phaser 3010/3040 Parts Lists
Parts Lists Phaser 3010/3040 Parts Lists Parts List 1.0 Covers 4 (with 5-7) 1 (with 2,3) 20 (with 21,22) Front 14 (with 15-18) s3040-001 Xerox Internal Use Only Phaser 3010/3040/WorkCentre 3045 Service... - Page 333 Cover Assy MSI (with 15-18) (Main Tray) 676K11680 Cover MSI Tray MSI Extension Lever Guide End Guide End Cover Hipot 848E66960 Cover Assy Front (With 21,22, label) 676K11671 Cover Front Cover Window TNR Cover Side L 848E78620 Phaser 3010/3040/WorkCentre 3045 Service Xerox Internal Use Only...
-
Page 334: Parts List 2.1 Feeder (1/3)
Parts Lists Parts List 2.1 Feeder (1/3) Front s3040-002 Xerox Internal Use Only Phaser 3010/3040/WorkCentre 3045 Service... - Page 335 Parts Lists Parts List 2.1 Feeder (1/3) Item Name Part Number Plate Lower Rack Side Guide Gear Pinion Guide Side MSI L Guide Side MSI R Foot Assy Phaser 3010/3040/WorkCentre 3045 Service Xerox Internal Use Only...
-
Page 336: Parts List 2.2 Feeder (2/3)
Parts Lists Parts List 2.2 Feeder (2/3) 1 (with 2-7) 8 (with 9,10) Front s3040-003 Xerox Internal Use Only Phaser 3010/3040/WorkCentre 3045 Service... - Page 337 Plate BTM Holder BTM L Holder BTM R Follower L Follower R Housing Assy Pad (Separator Pad Assembly) 848K49666 Arm MSI R Spring NF Arm MSI L Feed Gear 807E36162 Spring Feed Phaser 3010/3040/WorkCentre 3045 Service Xerox Internal Use Only...
-
Page 338: Parts List 2.3 Feeder (3/3)
Parts Lists Parts List 2.3 Feeder (3/3) 2 (with 3-5) (J23) (J230) (P230) (J10) Front s3040-004 5-10 Xerox Internal Use Only Phaser 3010/3040/WorkCentre 3045 Service... - Page 339 Bearing REGI Earth Bearing REGI Metal Earth Spring Turn Bearing REGI Metal Bearing REGI Spring REGI Clutch Flange REGI Clutch Gear REGI Clutch Cover Solenoid Feed Solenoid 121E22993 Harness Assy REG SNS Phaser 3010/3040/WorkCentre 3045 Service Xerox Internal Use Only 5-11...
-
Page 340: Parts List 3.1 Xerographics (1/2)
Parts Lists Parts List 3.1 Xerographics (1/2) (PL3.2) (J22) 2 (with 3,4) Front s3040-006 5-12 Xerox Internal Use Only Phaser 3010/3040/WorkCentre 3045 Service... - Page 341 Parts List 3.1 Xerographics (1/2) Item Name Part Number Plate Upper Spring Assy Track AD (With 3,4) Holder Spring Spring Track AD Housing Assy Deve High Gear D3 Bracket Assy Gear D3 Phaser 3010/3040/WorkCentre 3045 Service Xerox Internal Use Only 5-13...
-
Page 342: Parts List 3.2 Xerographics (2/2)
Parts Lists Parts List 3.2 Xerographics (2/2) Front s3040-007 5-14 Xerox Internal Use Only Phaser 3010/3040/WorkCentre 3045 Service... - Page 343 Part Number HSG Assy Xero High Spring FG D A4M Spring FG AD A4M Head Assy R Spring LPH AD A4M Spring LPH D A4M Cover FFC A4M Core Ferrite Cable FFC Phaser 3010/3040/WorkCentre 3045 Service Xerox Internal Use Only 5-15...
-
Page 344: Parts List 4.1 Toner Dispense
Parts Lists Parts List 4.1 Toner Dispense (J21) (P150) Front s3040-008 5-16 Xerox Internal Use Only Phaser 3010/3040/WorkCentre 3045 Service... - Page 345 Parts List 4.1 Toner Dispense Item Name Part Number Toner Dispenser Assy 094K93230 Toner Motor 127K61370 Wire Earth Motor Screw M3x6B Toner Cartridge See “Xerox Supplies and Accessories” on page 54 Harness Assy DCRA Phaser 3010/3040/WorkCentre 3045 Service Xerox Internal Use Only 5-17...
-
Page 346: Parts List 5.1 Fuser
Parts Lists Parts List 5.1 Fuser (J18) (J201) Front s3040-009 5-18 Xerox Internal Use Only Phaser 3010/3040/WorkCentre 3045 Service... - Page 347 Parts Lists Part List 5.1 Fuser Item Name Part Number Fuser 110V 126K30073 Fuser 220V 126K30083 Phaser 3010/3040/WorkCentre 3045 Service Xerox Internal Use Only 5-19...
-
Page 348: Parts List 6.1 Drive
Parts Lists Parts List 6.1 Drive Front s3040-010 5-20 Xerox Internal Use Only Phaser 3010/3040/WorkCentre 3045 Service... - Page 349 Parts Lists Parts List 6.1 Drive Item Name Part Number Main Drive Motor 007K18000 Main Drive Assembly 007K18011 Phaser 3010/3040/WorkCentre 3045 Service Xerox Internal Use Only 5-21...
-
Page 350: Parts List 7.1 Electrical (1/2)
Parts List 7.1 Electrical (1/2) (P14) (P15) (P16) (P17) (P25) (P10) (P18) (P20) (P13) (P21) (P22) (P23) Front (J14) (J209) (J202) (J15) 3 (REF) (J150) (J25) (J20) (J250) (J205) (J203) s3040-011 5-22 Xerox Internal Use Only Phaser 3010/3040/WorkCentre 3045 Service... - Page 351 Part Number Upper Harness Guide HVPS 105K30870 MCU Board 960K61093 FFC Assy Main MOT FFC Assy MC-HV FFC Assy MC-ES DISP MOT Harness LV-MC Harness LV-MCES Harness MC-LP Harness Screw M3x6B Phaser 3010/3040/WorkCentre 3045 Service Xerox Internal Use Only 5-23...
-
Page 352: Parts List 7.1 Electrical (2/2)
Parts Lists Parts List 7.1 Electrical (2/2) (J204) (SJ13) (SJ8) (J250) (J1) (J200) 9 (with 10,11) (P201) (P200) (P203) (P202) (P204) Front s3040-012 5-24 Xerox Internal Use Only Phaser 3010/3040/WorkCentre 3045 Service... - Page 353 PSLV RIC Assy (with 10,11) SW Assy RIC (Power Switch Assembly) LVPS 110V 105E19900 LVPS 220V 105E19910 LVPS Insulator Plate LVPS Screw S+M4x6B Screw M3x6B Power Cord DAO 675K 17830 Power Cord B220V 675K 17660 Phaser 3010/3040/WorkCentre 3045 Service Xerox Internal Use Only 5-25...
-
Page 354: Workcentre 3045 Parts Lists
Parts Lists WorkCentre 3045 Parts Lists Parts List 1.1 Covers 1 (with 3-5) 2 (with 3,4,6) (J7501) (J7601) 25 (with 26,27) 20 (with 21,22) Front 14 (with 15-18) s3040-124 5-26 Xerox Internal Use Only Phaser 3010/3040/WorkCentre 3045 Service... - Page 355 Inner Front Cover 848E78510 Output Tray Extension (with 26,27) 050K69050 Tray-Ext A Tray-Ext B Left Cover 848E67072 Front USB Board 960K47000 Harness Assy USB Front Bracket Assy WIFI Harness Assy WIFI Screw M3X6B Phaser 3010/3040/WorkCentre 3045 Service Xerox Internal Use Only 5-27...
-
Page 356: Parts List 2.1 Feeder (1/3)
Parts Lists Parts List 2.1 Feeder (1/3) 3 (with 4-8) Front s3040-002 5-28 Xerox Internal Use Only Phaser 3010/3040/WorkCentre 3045 Service... - Page 357 Guide Side PSI L Guide Side PSI R Tray PSI Rack Guide Side Gear Pinion Guide Side MSI L Guide Side MSI R Foot Assy Kit, Bypass Tray Assembly (with 2, 3) 676K11730 Phaser 3010/3040/WorkCentre 3045 Service Xerox Internal Use Only 5-29...
-
Page 358: Parts List 2.2 Feeder (2/3)
Parts Lists Parts List 2.2 Feeder (2/3) 1 (with 2-7) 8 (with 9,10) Front s3040-003 5-30 Xerox Internal Use Only Phaser 3010/3040/WorkCentre 3045 Service... - Page 359 Pad MSI Plate BTM Holder BTM L Holder BTM R Follower L Follower R Separator Pad Assembly 848K49666 Arm MSI R Spring NF Arm MSI L Feed Gear 807E36162 Spring Feed Phaser 3010/3040/WorkCentre 3045 Service Xerox Internal Use Only 5-31...
-
Page 360: Parts List 2.3 Feeder (3/3)
Parts Lists Parts List 2.3 Feeder (3/3) 2 (with 3-5) (J23) (J230) (P230) (J10) Front s3040-004 5-32 Xerox Internal Use Only Phaser 3010/3040/WorkCentre 3045 Service... - Page 361 Bearing REGI Earth Bearing REGI Metal Earth Spring Turn Bearing REGI Metal Bearing REGI Spring REGI Clutch FLANGE REGI Clutch GEAR REGI Clutch Cover Solenoid Feed Solenoid 121E22993 Harness Assy REG SNS Phaser 3010/3040/WorkCentre 3045 Service Xerox Internal Use Only 5-33...
-
Page 362: Parts List 3.1 Xerographics (1/2)
Parts Lists Parts List 3.1 Xerographics (1/2) (PL3.2) (J22) 2 (with 3,4) Front s3040-006 5-34 Xerox Internal Use Only Phaser 3010/3040/WorkCentre 3045 Service... - Page 363 Parts List 3.1 Xerographics (1/2) Item Name Part Number Plate Upper Spring Assy Track Ad (with 3,4) Holder Spring Spring Track Ad Housing Assy Deve High Gear D3 Bracket Assy Gear D3 Phaser 3010/3040/WorkCentre 3045 Service Xerox Internal Use Only 5-35...
-
Page 364: Parts List 3.2 Xerographics (2/2)
Parts Lists Parts List 3.2 Xerographics (2/2) Front s3040-007 5-36 Xerox Internal Use Only Phaser 3010/3040/WorkCentre 3045 Service... - Page 365 Part Number HSG Assy XERO High Spring FG D A4M Spring FG AD A4M Head Assy R Spring LPH AD A4M Spring LPH D A4M Cover FFC A4M Core Ferrite Cable FFC Phaser 3010/3040/WorkCentre 3045 Service Xerox Internal Use Only 5-37...
-
Page 366: Parts List 4.1 Toner Dispense
Parts Lists Parts List 4.1 Toner Dispense (J21) (P150) Front s3040-008 5-38 Xerox Internal Use Only Phaser 3010/3040/WorkCentre 3045 Service... - Page 367 Parts List 4.1 Toner Dispense Item Name Part Number Toner Dispenser Assy 094K93230 Toner Motor 127K61370 Wire Earth Motor Screw M3x6B Toner Cartridge See “Xerox Supplies and Accessories” on page 54 Harness Assy DCRA Phaser 3010/3040/WorkCentre 3045 Service Xerox Internal Use Only 5-39...
-
Page 368: Parts List 5.1 Fuser
Parts Lists Parts List 5.1 Fuser (J18) (J201) Front s3040-009 5-40 Xerox Internal Use Only Phaser 3010/3040/WorkCentre 3045 Service... - Page 369 Parts Lists Part List 5.1 Fuser Item Name Part Number Fuser 110V 126K30095 Fuser 220V 126K30105 Phaser 3010/3040/WorkCentre 3045 Service Xerox Internal Use Only 5-41...
-
Page 370: Parts List 6.1 Drive
Parts Lists Parts List 6.1 Drive Front s3040-010 5-42 Xerox Internal Use Only Phaser 3010/3040/WorkCentre 3045 Service... - Page 371 Parts Lists Parts List 6.1 Drive Item Name Part Number Main Drive Motor 007K18000 Main Drive Assembly 007K18011 Phaser 3010/3040/WorkCentre 3045 Service Xerox Internal Use Only 5-43...
-
Page 372: Parts List 7.1 Electrical (1/3)
Parts List 7.1 Electrical (1/3) (P14) (P15) (P16) (P17) (P25) (P10) (P18) (P20) (P13) (P21) (P22) (P23) Front (J14) (J209) (J250) (J202) (J25) (J15) 3 (REF) (J150) (J20) (J205) (J203) s3040-125 5-44 Xerox Internal Use Only Phaser 3010/3040/WorkCentre 3045 Service... - Page 373 FFC Assy Main MOT FFC Assy MC-HV FFC Assy MC-ES AIO Harness Assy DISP MOT Harness Assy LV-MC Harness Assy LV-MCES Harness Assy MC-LP Guide Harness LPH Guide Harness Upper AIO Screw M3x6B Phaser 3010/3040/WorkCentre 3045 Service Xerox Internal Use Only 5-45...
-
Page 374: Parts List 7.2 Electrical (2/3)
Parts Lists Parts List 7.2 Electrical (2/3) (J204) (J200) (P201) (P200) Front (P203) (P202) (P204) s3040-126 5-46 Xerox Internal Use Only Phaser 3010/3040/WorkCentre 3045 Service... - Page 375 Guide Harness FR Guide Harness IL Plate LVPS Guide Inlet Power Switch Assembly Insulator LVPS LVPS (110V) 105E19920 LVPS (220V) 105E19930 Screw M3X6B Screw S+M4X6B Power Cord DAO 675K17830 Power Cord B220V 675K17660 Phaser 3010/3040/WorkCentre 3045 Service Xerox Internal Use Only 5-47...
-
Page 376: Parts List 7.3 Electrical (3/3)
Parts Lists Parts List 7.3 Electrical (3/3) Front (SJ5) 3 (REF) (SJ6) (SJ12) (SJ15) (SJ9) (SJ11) (SJ13) (SJ8) (SJ20) (SJ23) (J1) (SJ21) (SJ2) (SJ18) (SJ22) (SJ19) s3040-127 5-48 Xerox Internal Use Only Phaser 3010/3040/WorkCentre 3045 Service... - Page 377 PWBA ESS 3045NI US/EU (4in1 IP Board) 676K10973 PWBA ESS 3045NI Ru/In (4in1 IP Board) 676K10983 Fax Board 101K62530 Harness Assy FAX Plate ESS Plate Stay Rear Plate Earth L Screw M3X6B Phaser 3010/3040/WorkCentre 3045 Service Xerox Internal Use Only 5-49...
-
Page 378: Parts List 8.1 Adf / Scanner / Control Panel 3045N
Parts Lists Parts List 8.1 ADF / Scanner / Control Panel 3045N 1 (with 2,8,10-12) 99 (with 4,5) 2 (with 3-7) 8 (with 9) [Ref PL1.1.34] [Ref PL1.1.33] Front s3040-128 5-50 Xerox Internal Use Only Phaser 3010/3040/WorkCentre 3045 Service... - Page 379 ADF Separator Pad (with 5) 604K65560 Spring Retard ADF Input Tray 604K65530 Hinge Assy ADF IIT Assy (with 9) Speaker Control Panel (3045NI) Cover SSB Rail IIT FB Control Panel Board Control Panel LCD Display Phaser 3010/3040/WorkCentre 3045 Service Xerox Internal Use Only 5-51...
-
Page 380: Parts List 8.2 Scanner / Control Panel 3045B
Parts Lists Parts List 8.2 Scanner / Control Panel 3045B 2 (with 7) 1 (with 2,8,10-12) 8 (with 9) [Ref PL1.1.34] [Ref PL1.1.33] Front s3040-129 5-52 Xerox Internal Use Only Phaser 3010/3040/WorkCentre 3045 Service... - Page 381 Scanner Assy (with 2,8,10-12) (3045B) 604K70931 Document Cover (with 7) (3045B) Hinge Assy ADF IIT Assy (with 9) Speaker Control Panel (3045B) Cover SSB Rail IIT FB Control Panel Board Control Panel LCD Display Phaser 3010/3040/WorkCentre 3045 Service Xerox Internal Use Only 5-53...
-
Page 382: Xerox Supplies And Accessories
Hardware Kit Description Part Number Hardware Kit 604K60070 Screw For Plastic, Tapping - ST1 Screw For Plastic, Tapping - ST4 Screw For Plastic, Tapping W/flange ST-10 Screw For Metal Sheet SM2 5-54 Xerox Internal Use Only Phaser 3010/3040/WorkCentre 3045 Service... -
Page 383: Maintenance
Maintenance In this chapter... • Adjusting the Transfer Roller • Adjusting the Fuser • Adjusting Altitude Chapter... -
Page 384: Service Maintenance Procedure
6. Remove any debris or foreign objects from inside of the printer. 7. Clean the trays, media guides and extensions. 8. Clean all rubber rollers with a lint-free cloth slightly dampened with cold water. Xerox Internal Use Only Phaser 3010/3040/WorkCentre 3045 Service... -
Page 385: Cleaning The Platen And Document Cover
Maintenance Cleaning the Platen and Document Cover Use a dry, lint-free cloth to lean the platen glass and document cover. s3040-164 s3040-165 Phaser 3010/3040/WorkCentre 3045 Service Xerox Internal Use Only... -
Page 386: Moving The Printer
Tilting the printer more than 10 degrees may cause toner spillage. Caution Failure to properly repackage the printer for shipment can result in damage not covered by the warranty, Service Agreement, or Total Satisfaction Guarantee. Xerox Internal Use Only Phaser 3010/3040/WorkCentre 3045 Service... -
Page 387: Adjusting The Transfer Roller
2. Check the corresponding Paper Type is selected in the print driver Printing Preferences. 3. On your computer, click Start > All Programs > Xerox Office Printing > Phaser 3010/3040 > Printer Setting Utility. 4. Click the Printer Maintenance tab, then select Adjust BTR from the list. -
Page 388: Adjusting Altitude
To adjust altitude: 1. On your computer, click Start > All Programs > Xerox Office Printing > Phaser 3010/3040 > Printer Setting Utility. 2. Click the Printer Maintenance tab, then select Adjust Altitude from the list. -
Page 389: Scanner Adjustment
IP Board. s3040-167 Note The canner driver for the target printer must be installed on the computer running the Gap Writer software. Verify adjustment by copying a test print and evaluating the result. Phaser 3010/3040/WorkCentre 3045 Service Xerox Internal Use Only... - Page 390 Maintenance Xerox Internal Use Only Phaser 3010/3040/WorkCentre 3045 Service...
-
Page 391: Wiring
Wiring In this chapter... • Printer Plug/Jack Designations • Phaser 3010/3045 Plug/Jack Locations • Wiring Diagrams Chapter... -
Page 392: Printer Plug/Jack Designations
3. Use the coordinates to locate the connection indicated on the map by its P/J designation number. 4. The Remarks column provides a brief description of each connection. Phaser 3010/3045 Plug/Jack Designators Phaser 3010/3040 Plug and Jack Designators Map Coordinates Remarks H-122 IP Board‚ Harness LV MCES (PL7.1.9) H-121 IP Board‚... -
Page 393: Phaser 3010/3045 Plug/Jack Locations
Wiring Phaser 3010/3045 Plug/Jack Locations Map 1 s3040-130 Phaser 3010/3040/WorkCentre 3045 Service Xerox Internal Use Only... - Page 394 Wiring Map 2 s3040-131 Xerox Internal Use Only Phaser 3010/3040/WorkCentre 3045 Service...
-
Page 395: Workcentre 3045 Plug/Jack Designators
LVPS‚ Rear Door Interlock Switch G-123 E-109 Registration Sensor‚ Registration Sensor Harness H-142 IP Board‚ Harness MC LP 6601 3 E-135 WiFi Bracket Assembly‚ Harness WiFi 7601 3 I-136 Front USB Board‚ Harness USB Front Phaser 3010/3040/WorkCentre 3045 Service Xerox Internal Use Only... -
Page 396: Workcentre 3045 Plug/Jack Locations
Wiring WorkCentre 3045 Plug/Jack Locations Map 1 s3040-132 Xerox Internal Use Only Phaser 3010/3040/WorkCentre 3045 Service... - Page 397 Wiring Map 2 - MCU Board and LVPS s3040-133 Phaser 3010/3040/WorkCentre 3045 Service Xerox Internal Use Only...
- Page 398 Wiring Map 3 - IP Board 6601 7601 SJ12 SJ11 SJ911 SJ20 SJ18 SJ23 SJ21 SJ22 SJ19 s3040-134 Xerox Internal Use Only Phaser 3010/3040/WorkCentre 3045 Service...
-
Page 399: Wiring Diagrams
PL X.Y.Z implies the item “Z” of plate (PL) “X.Y” Fuser in Parts List. PL X.Y.Z Subassembly 1 Denotes functional parts attached with functional parts name. Heater Subassembly 2 Denotes the control and its outline in the Board. Control Subassembly 3 Phaser 3010/3040/WorkCentre 3045 Service Xerox Internal Use Only... - Page 400 Denotes a connection between wires. Connection of Wires Denotes a Clutch or Solenoid. Solenoid/Clutch Denotes a Motor. Motor Denotes a Photo Sensor. Optic Sensor Denotes an LED. Denotes a Safety Interlock Switch. Safety Interlock Switch 7-10 Xerox Internal Use Only Phaser 3010/3040/WorkCentre 3045 Service...
- Page 401 Denotes an NPN Photo-transistor. I/L +24 VDC Denotes DC voltage when the Interlock Switch in MCU Board turns On. +5 VDC Denotes DC voltage. +3.3 VDC Denotes signal ground. Denotes analog ground. Denotes return. Phaser 3010/3040/WorkCentre 3045 Service Xerox Internal Use Only 7-11...
-
Page 402: Phaser 3010/3040 System Wiring
Wiring Phaser 3010/3040 System Wiring IP Board PL7.2.8 LPH Head Assembly P/J30 SP/J9 Rear Door PL3.2.4 Interlock Switch P/J250 PL7.2.1 P/J1 LVPS MCU Board PL7.2.11 PL7.1.3 P/J204 P/J25 SP/J8 P/J17 P/J202 P/J14 Feed Solenoid P/J10 PL2.3.21 P/J200 Registration Sensor P/J230 P/J23 PL2.3.10... -
Page 403: Lvps
P/J1 +5VDC +5VDC +5VDC MCU Board ON/OFF PL7.1.3 P/J14 I/L +24VDC To Fusing I/L +24VDC To Main Motor P/J203 P/J20 +5VDC SLEEP SLEEP To IP Board LV MC Harness PL7.1.8 s3040-140 Phaser 3010/3040/WorkCentre 3045 Service Xerox Internal Use Only 7-13... -
Page 404: Drive
REGI PAPER SENSED(L)+5VDC Main Drive Motor Main Motor FFC Assembly PL6.1.1 PL7.1.4 From Power P/J14 P/J13 P/J130 I/L +24VDC I/L +24VDC Main MAIN MOTOR ON Motor MAIN MOTOR CLOCK MAIN MOTOR GAIN s3040-141 7-14 Xerox Internal Use Only Phaser 3010/3040/WorkCentre 3045 Service... -
Page 405: Xerographics
VDATA3N VDATA2P VDATA2N VDATA1P VDATA1N VDATA0P VDATA0N VCC 5V VCLKP VCLKN VCC 5V HSYNC MODE READY VCC 5V VCC 1.5V VCC 1.5V VCC 1.5V VCC 1.5V VCC 1.5V VCC 1.5V s3040-142 Phaser 3010/3040/WorkCentre 3045 Service Xerox Internal Use Only 7-15... -
Page 406: Hvps
PL7.1.3 PL7.1.2 PL7.1.5 P/J16 P/J160 TR IMON CR DA TR+ DA DEV DC DA HV CLK +3.3VDC +3.3VDC I/L+24VDC I/L +24VDC I/L +24VDC TH D1 Drum Magnet Roller DEVE BIAS s3040-143 7-16 Xerox Internal Use Only Phaser 3010/3040/WorkCentre 3045 Service... -
Page 407: Toner Dispense
PL3.1.5 +5VDC P/J22 +5VDC Sensor Toner Motor Dispense Motor Harness Assembly PL4.1.2 PL7.1.7 P/J15 P/J150 Toner Cartridge DCRA Harness Assembly PL4.1.5 PL4.1.6 +3.3VDC P/J21 P/J210 DATA +3.3VDC Toner CLOCK CRUM s3040-144 Phaser 3010/3040/WorkCentre 3045 Service Xerox Internal Use Only 7-17... -
Page 408: Fuser
EXIT PAPER SENSED(L)+5VDC Exit Sensor +5VDC STS2 STS1 LVPS PL7.2.11 STS1 STS2 From Power P/J201 P/J200 LINE Heater P/J20 P/J203 RELAY HEAT Heater Thermostat Control P/J205 LV MC Harness Assembly PL7.1.8 s3040-145 7-18 Xerox Internal Use Only Phaser 3010/3040/WorkCentre 3045 Service... -
Page 409: Ip Board
Wiring IP Board MCU Board IP Board PL7.1.3 PL7.2.8 MC ES FFC Assembly PL7.1.6 From Power P/J20 P/J17 SP/J8 SLEEP VSYNC SRDY CRDY s3040-146 Phaser 3010/3040/WorkCentre 3045 Service Xerox Internal Use Only 7-19... -
Page 410: Workcentre 3045 System Wiring
P/J130 PL6.1.1 HVPS P/J16 P/J160 PL7.1.2 Developer Housing Assembly P/J22 (ATC Sensor) PL3.1.5 Toner Motor P/J15 P/J150 PL4.1.2 Toner Cartridge P/J21 P/J210 PL4.1.5 P/J203 P/J20 Fuser P/J205 P/J18 PL5.1.1 P/J201 s3040-147 7-20 Xerox Internal Use Only Phaser 3010/3040/WorkCentre 3045 Service... -
Page 411: Power
+24VDC +5VDC +5VDC +5VDC MCU Board ON/OFF PL7.1.3 P/J14 I/L +24VDC To Fusing I/L +24VDC To Main Motor P/J203 P/J20 +5VDC SLEEP SLEEP To ESS LV MC Harness Assembly PL7.1.8 s3040-148 Phaser 3010/3040/WorkCentre 3045 Service Xerox Internal Use Only 7-21... -
Page 412: Drive
REGI PAPER SENSED(L)+5VDC Main Drive Motor Main Motor FFC Assembly PL6.1.1 PL7.1.4 From Power P/J14 P/J13 P/J130 I/L +24VDC I/L +24VDC Main MAIN MOTOR ON Motor MAIN MOTOR CLOCK MAIN MOTOR GAIN s3040-141 7-22 Xerox Internal Use Only Phaser 3010/3040/WorkCentre 3045 Service... -
Page 413: Xerographics
VDATA3N VDATA2P VDATA2N VDATA1P VDATA1N VDATA0P VDATA0N VCC 5V VCLKP VCLKN VCC 5V HSYNC MODE READY VCC 5V VCC 1.5V VCC 1.5V VCC 1.5V VCC 1.5V VCC 1.5V VCC 1.5V s3040-149 Phaser 3010/3040/WorkCentre 3045 Service Xerox Internal Use Only 7-23... -
Page 414: Hvps
PL7.1.3 PL7.1.2 PL7.1.5 P/J16 P/J160 TR IMON CR DA TR+ DA DEV DC DA HV CLK +3.3VDC +3.3VDC I/L+24VDC I/L +24VDC I/L +24VDC TH D1 Drum Magnet Roller DEVE BIAS s3040-143 7-24 Xerox Internal Use Only Phaser 3010/3040/WorkCentre 3045 Service... -
Page 415: Toner Dispense
PL3.1.5 +5VDC P/J22 +5VDC Sensor Toner Motor Dispense Motor Harness Assembly PL4.1.2 PL7.1.7 P/J15 P/J150 Toner Cartridge DCRA Harness Assembly PL4.1.5 PL4.1.6 +3.3VDC P/J21 P/J210 DATA +3.3VDC Toner CLOCK CRUM s3040-144 Phaser 3010/3040/WorkCentre 3045 Service Xerox Internal Use Only 7-25... -
Page 416: Fuser
EXIT PAPER SENSED(L)+5VDC Exit Sensor +5VDC STS2 STS1 LVPS PL7.2.8 STS1 STS2 From Power P/J201 P/J200 LINE Heater P/J20 P/J203 RELAY HEAT Heater Thermostat Control P/J205 LV MC Harness Assembly PL7.1.8 s3040-150 7-26 Xerox Internal Use Only Phaser 3010/3040/WorkCentre 3045 Service... -
Page 417: Ip Board
P/J6601 SP/J12 PL1.1.32 VBUS PL1.1.31 Fax Harness Assembly Fax Board P/J102 PL7.3.5 SP/J11 PL7.3.4 +3.3VDC FAX SPK PWM FAX IRQ FAX SPIDI FAX SPICS1 FAX SPICLK FAX SPID0 FAX RESET s3040-151 Phaser 3010/3040/WorkCentre 3045 Service Xerox Internal Use Only 7-27... -
Page 418: Scanner
Wiring Scanner IP Board Scanner Assembly PL7.3.3 PL8.1.1 SP/J5 SP/J6 SP/J18 SP/J19 SP/J20 SP/J21 SP/J22 SP/J23 s3040-152 7-28 Xerox Internal Use Only Phaser 3010/3040/WorkCentre 3045 Service... -
Page 419: Reference
Reference In this chapter... • Using CE Diagnostic Software • Acronyms and Abbreviations Appendix... -
Page 420: Using Ce Diagnostic Software
Two versions of the CE Diags Tool are available. One for the Phaser 3010/3040, and another for the WorkCentre 3045. Both versions have these system requirements. -
Page 421: Ce Diags Menu Tree
Print Settings Installation Set Serial No. Pixel Counter Print Counter Clear All NVM Clear Job History Test Print Test Pat ASIC [IOT] Test Pattern LPH K [IOT] Parameter Registration Machine/Toner Print Parameters s3040-169 Phaser 3010/3040/WorkCentre 3045 Service Xerox Internal Use Only... -
Page 422: Ce Diagnostics Screen
Note Open the CE Diag tab by entering Control_C, -E simultanusly in the Printer Setting Utilities screen. Select the menu in this screen. s3040-178 Xerox Internal Use Only Phaser 3010/3040/WorkCentre 3045 Service... -
Page 423: Ess Diagnostics
To stop the operation, click Stop. Component tests availabe under Digital Output are: • Main Motor Normal • Main Motor Slow • Feed Solenoid On • Dispense Motor On Phaser 3010/3040/WorkCentre 3045 Service Xerox Internal Use Only... -
Page 424: Nvm Operations
Displays values of the printer’s counters and sets service tags. To apply changes, click the Apply New Settings button, or the Restart printer to apply new settings button. Screen Purpose Serial Number Serial number of the printer. Pixel Counter Pixel count values. (read only) Xerox Internal Use Only Phaser 3010/3040/WorkCentre 3045 Service... -
Page 425: Test Print
Counter of Total PV K Toner Pixel Counter of Toner Pixel Life K Toner Dispense Time Counter of Toner Dispense Time Life K Toner Waste toner count Counter of Toner Waste toner count Phaser 3010/3040/WorkCentre 3045 Service Xerox Internal Use Only... -
Page 426: Acronyms And Abbreviations
DDR2 DIMM Double Data Rate Dual In-Line Memory Module Developer DHCP Dynamic Host Configuration Protocol Dots Per Inch Drive Duplex Duplex 2-sided printing Emulsion Aggregation (Toner) EEPROM Electrically Erasable Programmable Read-Only Memory Xerox Internal Use Only Phaser 3010/3040/WorkCentre 3045 Service... - Page 427 Long-Edge Feed Line Printer Daemon Line Printer Remote Letter Size Paper (8.5 x 11 inches) LVPS Low-Voltage Power Supply Mega Byte Machine Control Unit (Engine Control Board) Mega Hertz Management Information Base Phaser 3010/3040/WorkCentre 3045 Service Xerox Internal Use Only...
- Page 428 Raster Output Scanner - Laser Unit Short-Edge Feed Server Message Block SNMP Simple Network Management Protocol Sensor Solenoid Start of Scan Toner Density Control Toner User Interface Universal Serial Bus WINS Wireless Integrated Network Sensor A-10 Xerox Internal Use Only Phaser 3010/3040/WorkCentre 3045 Service...
- Page 430 Copyright © 2011, Xerox Corporation. All rights reserved. Unpublished rights reserved under the copyright laws of the United States. Part#: 702P00125...
Need help?
Do you have a question about the Phaser 3010 and is the answer not in the manual?
Questions and answers