Sign In
Upload
Download
Table of Contents
Contents
Add to my manuals
Delete from my manuals
Share
URL of this page:
HTML Link:
Bookmark this page
Add
Manual will be automatically added to "My Manuals"
Print this page
×
Bookmark added
×
Added to my manuals
Manuals
Brands
Omron Manuals
Robotics
Viper 650
User manual
Omron Viper 650 User Manual
Robot with ethercat
Hide thumbs
Also See for Viper 650
:
User manual
(148 pages)
1
2
Table Of Contents
3
4
5
6
7
8
9
10
11
12
13
14
15
16
17
18
19
20
21
22
23
24
25
26
27
28
29
30
31
32
33
34
35
36
37
38
39
40
41
42
43
44
45
46
47
48
49
50
51
52
53
54
55
56
57
58
59
60
61
62
63
64
65
66
67
68
69
70
71
72
73
74
75
76
77
78
79
80
81
82
83
84
85
86
87
88
89
90
91
92
93
94
95
96
97
98
99
100
101
102
103
104
105
106
107
108
109
110
111
112
113
114
115
116
117
118
119
120
121
122
123
124
125
126
127
128
129
130
131
132
133
134
135
136
137
138
139
140
141
142
143
144
145
146
147
148
149
page
of
149
Go
/
149
Contents
Table of Contents
Bookmarks
Table of Contents
Table of Contents
Chapter 1: Introduction
Related Manuals
Intended Audience
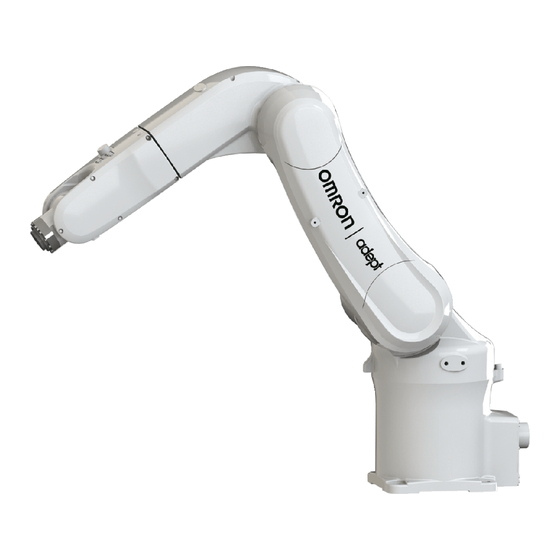
Robot Overview
Robot Amplifier and Controller
IP54/65 and Cleanroom Versions
Robot Features
Robot Links and Joints
Robot Connections
Ecs-ECAT Interface Panel
Robot Options
IO Blox
T20 Pendant
IPC Application Controller
Front Panel
Optional Cables
Chapter 2: Safety
Dangers, Warnings, and Cautions
Alert Levels
Alert Icons
Special Information
Safety Precautions
What to Do in an Emergency
Stopping the Robot
Fire Response
Entrapment and Brake Release Box
Robot Behavior
Hardstops
Limiting Devices
Singularities
Intended Use of the Robot
Additional Safety Information
Manufacturer's Declarations
Robot Safety Guide
T20 Pendant (Option)
Disposal
How Can I Get Help
Chapter 3: Robot Installation
Robot Installation Overview
Basic Installation Steps
Mounting a Viper Robot
Mounting Surface
Mounting Surface Preparation
Mounting Procedure for Upright Viper
Mounting Procedure for Ceiling Mount
Robot Mounting Torque
Mounting the Ecs-ECAT
Installing the Front Panel
Connecting the Front Panel
Front Panel Schematic
Air Lines and Signal Wiring
Installing User-Supplied Safety Equipment
Contacts on XUSR Connector
Contacts on XFP Connector
Remote Pendant Signals on the XMCP Connector
E-Stop Circuits on XUSR and XFP Connectors
Emergency Stop Circuits
Remote Manual Mode
User Manual/Auto Indication
Remote High Power on / off Control
Using a User-Supplied Control Panel
Remote Pendant Usage
Setting the Ethercat Node ID
Setting the Ethercat Node ID Using Hardware Switches
Installing Joint Labels
Chapter 4: System Cable Installation
Basic System Cable Layout
List of Cables and Parts
Cable Installation Steps
XBELT IO Belt Encoder y Adapter Cable
Connecting Digital I/O to the System
Optional I/O Products
Digital I/O Signal Configuration
XIO Connector Signals
Connecting Cable from the Ecs-ECAT to the Robot
Connecting the 24 VDC Cable to the Ecs-ECAT
VDC Power Supply Connector
Making the 24 VDC Power Supply Cable
Connecting the 24 VDC Cable
Connecting 200-240 VAC Power Cable
AC Power Diagrams
AC Power Supply Connector
Making the 200-240 VAC Power Supply Cable
Connecting the AC Power Supply Cable
Grounding the Robot System
Grounding the Robot Base
Ground Point on Ecs-ECAT
Grounding Robot-Mounted Equipment
Chapter 5: Optional Equipment Installation
Installing End-Effectors
Mounting Locations for External Equipment
Chapter 6: System Operation
Verifying Installation
Mechanical Checks
System Cable Checks
User-Supplied Safety Equipment Checks
Switch Position Checks
Status LED and Display Panel
General Robot States
Ethercat Communications Description
System Behavior with Ethercat Communication Errors
Brakes
Brake Release Connector
Installing and Using the Brake Release Box
Robot Control Modes
Manual Mode
Automatic Mode
Operation Mode
Service Mode
Manually Jogging the Robot
Enabling Robot High Power
High Power Safety Timeout
High Power and Faults
High Power Request Methods
Disabling Robot High Power
Chapter 7: Maintenance
Periodic Maintenance
Periodic Maintenance Schedule
Checking Safety Systems
Checking Robot Mounting Bolts and Cover Plates
Checking Safety and Warning Labels
Replacing the Encoder Batteries
Non-Periodic Maintenance
Field-Replaceable Parts
Replacing the Ecs-ECAT Amplifier Chassis
Remove and Replace a Microsd Card
Chapter 8: Technical Specifications
Robot Physical Dimension Drawings
General Robot Specifications
Performance Specifications
General Performance Information
Stopping Distances and Times
Electrical Specifications
Solenoid Valve Specifications
External Connection Specifications
Environment and Facility Specifications
Other Specifications
Connector Specifications
Power Consumption Specifications
Tool Flange Dimensions
Front Panel Dimensions
Ethercat Communications Specifications
Chapter 9: IP54/65 Option Considerations
IP54/65 Option Classification
Differences from Standard Robot Model
Robot Connector Panel
Cable Clearance
Replacing Encoder Backup Battery
Chapter 10: Cleanroom Option Considerations
Differences from Standard Robot Model
Cleanroom Robot Connections
Cleanroom CN22 Cable
Air Lines and Signal Wiring
Cleanroom Cover at J6 Flange
Cleanroom Technical Specifications
Cable Clearance
Replacing Encoder Backup Battery
Chapter 11: Status Codes
Ecs-ECAT Display Panel
Status Codes Table
Appendix
Unpacking and Inspecting the Equipment
Before Unpacking
After Unpacking
Inspecting the Equipment
Repacking for Relocation
Transportation and Storage of Robot
Transportation and Storage Environment
Precautions When Transporting Robot
Transport Procedure
Advertisement
Quick Links
1
Robot Connections
Download this manual
Viper 650 and 850
Robot with EtherCAT
User's Manual
I654-E-01
Table of
Contents
Previous
Page
Next
Page
1
2
3
4
5
Advertisement
Table of Contents
Need help?
Do you have a question about the Viper 650 and is the answer not in the manual?
Ask a question
Questions and answers
Related Manuals for Omron Viper 650
Robotics Omron Viper 650 User Manual
Robot with emb-60r (148 pages)
Robotics Omron V500-R2 Series Manual
Code reader/ocr (25 pages)
Robotics Omron V500-R2CF Manual
Code reader/ocr (25 pages)
Robotics Omron Viper 850 ePLC Quick Setup Manual
(15 pages)
Robotics Omron Viper 850 User Manual
Robot with ethercat (149 pages)
Robotics Omron Adept Viper s1300 User Manual
(52 pages)
Robotics Omron Techman Robot Safety Manual
Safety system 3.3 (54 pages)
Robotics Omron Techman Robot TM12 Series Hardware Installation Manual
Medium & heavy payload (82 pages)
Robotics Omron Regular Payload Hardware Installation Manual
(79 pages)
Robotics Omron TM Robot TM12 Series Hardware Installation Manual
Medium & heavy payload series (82 pages)
Robotics Omron LD-250 User Manual
Platform (207 pages)
Robotics Omron MD Series User Manual
Autonomous mobile robot (258 pages)
Robotics Omron TM Robot S Series Hardware Installation Manual
(82 pages)
Robotics Omron LD Series User Manual
Platform (306 pages)
Robotics Omron TM5M-700 Quick Start Manual
Collaborative robot. safety laser scanner installation. (12 pages)
Robotics Omron TM5-700 Manual
(12 pages)
This manual is also suitable for:
Viper 850
Table of Contents
Print
Rename the bookmark
Delete bookmark?
Delete from my manuals?
Login
Sign In
OR
Sign in with Facebook
Sign in with Google
Upload manual
Upload from disk
Upload from URL


Need help?
Do you have a question about the Viper 650 and is the answer not in the manual?
Questions and answers