Table of Contents
Advertisement
Quick Links
Advertisement
Table of Contents
Troubleshooting

Related Manuals for Honda 2010 CBX 250


Summary of Contents for Honda 2010 CBX 250
- Page 1 WORKSHOP MANUAL...
-
Page 2: Table Of Contents
How to Use This MANUAL GENERAL INDEX In this Manual of Shop the technical characterist- GENERAL INFORMATION ics and the procedures of service are described for the motorcycle CBX250. CHASSIS / FAIRING / EXHAUST SYSTEM MAINTENANCE To guarantee perfect conditions of operation of the vehicle, follow the recommendations of the Chart of Maintenance (Section 3). - Page 3 CBX250 GENERAL INFORMATION SYMBOLS The symbols used in this manual indicated procedures of service. The additional information relating to those symbols will be explained specifically in the text, without the use of the same. Replace(s) piece(s) by a new before mounting. NUEVA Use the motor oil recommended, unless otherwise specified another.
- Page 4 1. GENERAL INFORMATION CBX250 SAFETY STANDARDS Gear, outfit, kit SERVICE STANDARDS LUBRICATION POINTS AND SEALS 1-16 IDENTIFICATION OF THE MODEL CABLES AND WIRING 1-18 SPECIFICATIONS SYSTEMS OF CONTROL OF EMISSION 1-24 VALUES OF TIGHTENING torque 1-13 SAFETY STANDARDS CARBON MONOXIDE In case of that is necessary to ASBESTOS Never use a air hose or a dry brush to clean make some service with the engine running, make sure up the sets of brake.
-
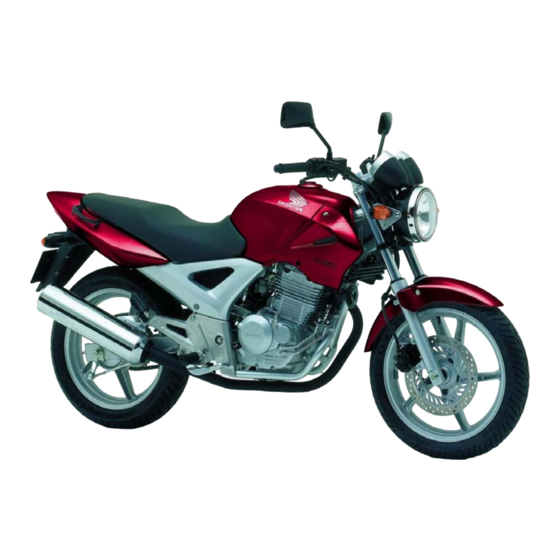
Page 5: Motorcycle
GENERAL INFORMATION SERVICE STANDARDS 1. Use only spare parts, oils and lubricants genuine HONDA or recommended by HONDA or their equivalents. The spare parts that do not respond to the specifications of HONDA can damage the motorcycle. 2. Use the tools specially designed for this vehicle, for which prevent damage or incorrect fitting. - Page 6 CBX250 GENERAL INFORMATION IDENTIFICATION OF THE MODEL SERIAL NUMBER OF THE Chassis SERIAL NUMBER OF THE ENGINE The number of series of chassis is recorded in the right The number of series of the engine is recorded in the side of the steering column. left side of the casing of the engine.
-
Page 7: Specifications
CBX250 GENERAL INFORMATION SPECIFICATIONS GENERAL Item Specifications Dimensions Total Length 2.031 mm Total Width 746 mm Total Height 1.057 mm Wheelbase 1.369 mm Height of the saddle 782 mm Minimum ground clearance 162 mm Dry Weight 135 kg Weight in running order 154 kg Capacity of maximum load 150 kg... - Page 8 CBX250 GENERAL INFORMATION GENERAL (Continued) Item Specifications Carburettor Type Constant speed Diameter of the venturi 30,1 mm Transmission Clutch system Clutch with multiple drives oil bath Operating System of clutch Mechanical Transmission 6 Gears constantly geared Primary Reduction 3,100 (62/20) Final Reduction 2,846 (37/13) Gear Ratio...
- Page 9 CBX250 GENERAL INFORMATION LUBRICATION SYSTEM Unit: mm Item Quantity Limit of Use Oil capacity of the To drain 1,5 l — motor To change the filter 1,5 l — To disassemble 1,8 l — Recommended MOBIL SUPERMOTO 4T motor oil Classification the Service API: SF —...
- Page 10 CBX250 GENERAL INFORMATION CYLINDER HEAD/Valves Units mm Item Value Service Limit Compression of the cylinder 1.128 kPa (11,5 kgf/cm — 163,6 psi) a 400 rpm Twist the cylinder head — 0,10 Camshaft Height of lobe of Camshaft 37,00 – 37,24 36,94 37,03 –...
- Page 11 CBX250 GENERAL INFORMATION CYLINDER / PISTON Units: mm Item Value Service Limit Cylinder Inside diameter 73,000 – 73,010 73,11 Ovalization — 0,05 Conicity — 0,05 Warp— 0,05 Piston and Brand of leadership of piston Mark IN oriented toward the — parts of the side of intake piston...
- Page 12 CBX250 GENERAL INFORMATION ALTERNATOR/CLUTCH START Units: mm Item Value Service Limit D. E. of highlight the spiral commanded the start 45,660 – 45,673 45,63 TRANSMISSION Units: mm Item Value Service Limit Transmission D.I. of the spring 20,000 – 20,021 20,08 23,000 –...
- Page 13 CBX250 GENERAL INFORMATION CRANKSHAFT/FLYWHEEL Units: mm Item Value Service Limit Connecting Slack Side of the head of the crank 0,05 – 0,50 Slack radial of the head of the crank 0 – 0,008 0,05 Eccentricity of the crankshaft — 0,02 FRONT WHEEL/SUSPENSION/STEERING Units: mm Item...
- Page 14 CBX250 GENERAL INFORMATION HYDRAULIC BRAKE Units: mm Item Value Service Limit Fluid brake specified DOT 4 — Wear indicator of the pads of the brake — Until the slot Thickness of brake disc 3,8 – 4,2 Twist of brake disc —...
- Page 15 CBX250 GENERAL INFORMATION IGNITION SYSTEM Item Specifications Spark plug Value CR8EH-9 Electrode gap 0,8 – 0,9 mm Voltage of peak of the ignition coil Minimum de 100 V Voltage peak pulse generator power Minimum de 0,7 V Point ignition (Mark “F”) 8°...
-
Page 16: Clutch/Gear Selector
CBX250 GENERAL INFORMATION VALUES OF TIGHTENING torque Torque Torque Type of fixing Type of fixing N.m (kg.m) N.m (kg.m) Screw hexagonal nut 5 mm 5 (0,5) Screw 5 mm 4 (0,4) Screw and hexagonal nut 6 mm 10 (1,0) Screw 6 mm 9 (0,9) (Including the screw with flange SH) Bolt flange and nut 6 mm... -
Page 17: Transmission
CBX250 GENERAL INFORMATION CHASSIS Diameter of Torque Item Number Notes thread (mm) N.m (kg.m) Chassis/Fairing/exhaust System Union Nut of the exhaust pipe 18 (1,8) Dismantling/engine Installation Bolt/nut striker higher from the engine 44 (4,4) Bolts /nuts from support striker superior of the engine 26 (2,6) Bolt/nut lower front engine 44 (4,4) -
Page 18: Special Tools
CBX250 GENERAL INFORMATION SPECIAL TOOLS Part number Section Description Notes de ref. Accessory, 24 x 26 mm 07746-0010700 9, 14 Accessory, 28 x 30 mm 07946-1870100 Accessory, 32 x 35 mm 07746-0010100 Accessory, 37 x 40 mm 07746-0010200 12, 14 Accessory, 42 x 47 mm 07746-0010300 11, 13, 14... - Page 19 CBX250 GENERAL INFORMATION POINTS OF LUBRICATION AND SEALS MOTOR Location Material Notes Stumps and lobes of the camshaft failure surfaces of external actuating the valve Solución de aceite a base Stem from the valve (area of slip of the guide de bisulfuro de molibdeno of the valve and extremity of offspring of the valve) (mezcla de 50% de aceite...
- Page 20 (suspension) O ring of bolt top of the fork Internal surfaces of the grip of rubber of the handlebars Adhesive Honda A o Contact Surface of the box of air filter/tube of connection equivalent Cemedine Thread of bolt of disk on the front brake...
- Page 21 CBX250 GENERAL INFORMATION LAYOUT OF THE cables and wiring WIRING OF THE SWITCHES OF THE HANDLEBARS LEFT WIRING OF THE SWITCHES OF THE HANDLEBARS RIGHT WIRING BREAKER THE CABLE OF THE LIGHT OF CHOKE front brake CABLES OF THE ACCELERATOR CABLE CLUTCH WIRING OF LEFT...
- Page 22 CBX250 GENERAL INFORMATION CABLE OF THE VALVE OF ENRICHMENT OF START (IS) MAIN WIRING WIRING OF THE Horn CABLE OF THE SPEEDOMETER CABLE SPARK PLUG CABLE OF THE IGNI- TION COIL...
- Page 23 CBX250 GENERAL INFORMATION CABLE OF THE VALVE OF ENRICHMENT OF START (IS) CLUTCH CABLE HOSE front brake CABLES OF THE ACCELERATOR 1-20...
- Page 24 CBX250 GENERAL INFORMATION MAIN WIRING WIRING RECTIFIER/ REGULATOR CABLES BREAKER MAG- NETIC START CABLE OF THE VALVE OF ENRICHMENT OF START (IS) WIRING OF THE Horn BREATHER TUBE FROM THE CASING OF THE ENGINE Positive (+) TERMIN- AL OF THE BATTERY WIRING BREAKER OF SIDE STAND CABLE FROM THE PULSE GENERATOR...
- Page 25 CBX250 GENERAL INFORMATION WIRING BREAKER OF THE LIGHT CLUTCH CABLE OF rear brake BREATHER TUBE CARBURETTOR CABLES OF THE ACCELERATOR DRAINAGE BREATHER TUBE FROM DRAINAGE TUBE OF THE CARBURETOR THE CASING OF THE ENGINE 1-22...
- Page 26 CBX250 GENERAL INFORMATION WIRING OF THE REAR/LIGHT OF brake WIRING OF INDICATOR REAR RIGHT MAIN WIRING WIRING OF INDICATOR REAR LEFT FUSE BOX WIRING RECTIFIER/REGULATOR...
- Page 27 The carbon monoxide does not react in the same way. Still, is toxic. Motor Honda da Amazonian Ltd. used mix settings of poor carburetor, as other procedures, in order to reduce the emission of carbon monoxide and hydrocarbons.
- Page 28 Chassis/FAIRING/ EXHAUST SYSTEM CBX250 INFORMATION SERVICE REAR FENDERS RESEARCH OF BREAKDOWNS PLATE SIDE PIT SEAT FUEL TANK TOP SIDE FRONT FENDERS REAR GRIP SILENCER TAIL PIECE INFORMATION SERVICE GENERAL Instructions •The petrol (gasoline) is extremely flammable and explosive under certain conditions. Keep out of the reach of chil- dren.
- Page 29 CBX250 Chassis/FAIRING/EXHAUST SYSTEM SEAT SEAT DISMANTLING Unlock the saddle using the key to the ignition of agreement with the illustration KEY TO THE Push the saddle backward, away the IGNITION hooks of the saddle hooks of the INSTALLATION Install the saddle, aligning the hooks of the saddle with hooks of the chassis Push the extremity rear seat forward and firmly way down.
- Page 30 CBX250 Chassis/FAIRING/EXHAUST SYSTEM REAR FENDERS CONNECTOR DISMANTLING Remove the tail piece (page 2-2). Disconnect the connector of the rear / REAR / LIGHT light of brake. Remove the three nuts, OF brake NUT/WASHER washers and the connector of the rear / light of brake.
-
Page 31: Fuel Tank
CBX250 Chassis/FAIRING/EXHAUST SYSTEM FUEL TANK • The petrol (gasoline) is extremely flammable and explosive under certain conditions. Keep out of the reach of children. •Immediately Clean petrol (gasoline) in case of bloodshed. •Work on a local well ventilated. The presence of cigarettes, flames or sparks in the local labour or where stocks petrol (gasoline) can... - Page 32 CBX250 Chassis/FAIRING/EXHAUST SYSTEM SILENCER WASHER DISMANTLING BOLT Not to make services in the exhaust system while the same is hot. NUTS OF UNION Remove the nuts and bolts of union of the exhaust pipe. Exhaust pipe/ Remove the two bolts / nuts of fixing and the exhaust pipe / SILENCER SCREW/NUT silencer.
- Page 33 CBX250 Chassis/FAIRING/EXHAUST SYSTEM NOTES...
- Page 34 3. MAINTENANCE CBX250 INFORMATION SERVICE BRAKE FLUID 3-18 TABLE OF MAINTENANCE BRAKE PAD WEAR / BRAKE SHOE WEAR 3-18 FUEL LINE BRAKING SYSTEM 3-19 FUEL FILTER SWITCH OF THE LIGHT OF brake 3-19 OPERATION OF THE ACCELERATOR3-5 ES- HEADLIGHT ADJUSTMENT 3-20 TRANGULADOR CLUTCH SYSTEM...
- Page 35 CBX250 MAINTENANCE Item Specification Recommended motor oil MOBIL SUPERMOTO 4T Classification de service: API SF Viscosity: SAE 20W-50 Oil capacity Drain 1,5 l Drain with new oil filter 1,5 l 1,8 l Idle speed 1.400 ± 100 rpm Slack in the drive chain 15 –...
-
Page 36: Maintenance Table
CBX250 MAINTENANCE MAINTENANCE TABLE Period Item Operations 1.000 km 3.000 km 6.000 km a cada...km Fuel hoses Check 3.000 Fuel Filter Clean 3.000 Accelerator Check & adjust 3.000 Choke Check & adjust 3.000 Air filter Clean (note 1) 3.000 Replace 18.000 Respiro del motor Clean (note 2) -
Page 37: Fuel Line
CBX250 MAINTENANCE FUEL LINE FUEL LINE Inspect the line of fuel and connections with regard to deterioration, damage and leaks. Replace the line if necessary. FUEL TAP FUEL FILTER • The petrol (gasoline) is highly inflammable and explosive under certain conditions. Keep out of the reach of children. - Page 38 CBX250 MAINTENANCE OPERATION OF THE ACCELERATOR Check the cables of the accelerator and replace in the event that they are damaged, bent or damaged. Check if the grip of the accelerator operates smoothly. Check if the same returns in a complete and automatic, since the full open position, in all the positions of the handlebars.
-
Page 39: Air Filter
CBX250 MAINTENANCE CHOKE LEVER OF CHOKE Inspect the cable of choke and replace in the event that is worn, twisted or damaged. Check if the lever of choke operates smoothly. If necessary, lubricate the cable of choke. AIR FILTER BOLT Do not allow the entry of foreign materials inside the box of air filter. -
Page 40: Spark Plug
CBX250 MAINTENANCE DRAINAGE BREATHER TUBE ENGINE BREATHER NOTE Perform services more frequent when driven in rain, with maximum acceleration or after washing or dump motorcycle. Make services in the event that the level of deposits can be seen in the section of transparent drainage breather tube. -
Page 41: Valve Clearances
CBX250 MAINTENANCE To prevent damage in the cylinder head, tighten manually spark plug power before using the keys to spark plugs to tight- en the pair specified. Install again spark plug in the cylinder head and tighten manually. Then, tighten the pair specified. TORQUE: 12 N.m (1,2 kg.m) REPLACEMENT OF THE SPARK PLUG LAYER SUPPRESSIVE NOISE... - Page 42 CBX250 MAINTENANCE Turn the crankshaft clockwise and align the mark T in the INDICATOR steering wheel of the engine with the notch indicator at the NOTCH top left side of the housing from the engine. Make sure that the piston is in the top dead in the race of compression. MARK “T”...
- Page 43 CBX250 MAINTENANCE Calculate the thickness of the new shim using the equation: A = (B – C) + D A: Thickness of the new fit B: Slack annotated valve C: Slack specified valve D: Thickness of old fit 1,825 mm 1,80 mm 1,85 mm 1,875 mm...
- Page 44 CBX250 MAINTENANCE Check the terms of the rings o. Install the covers of the holes in O RINGS sync and the crankshaft. Tighten the lids to the openings of timing and the crankshaft to value specified. TORQUE: Top of the hole of synchronisation 10 N.m (1,0 kg.m) Cover the hole in the stork 8 N.m (0,8 kg.m)
- Page 45 CBX250 MAINTENANCE CHANGING THE ENGINE OIL NOTE The oil change should be done with warm engine and with the motorcycle supported in the bracket, to ensure a drainage rapid and complete. • In the event that is necessary to make services with the engine running, make sure that the local work is well ventilated.
-
Page 46: Oil Filter
CBX250 MAINTENANCE OIL FILTER/SPRING OIL FILTER Drain the engine oil (page 3-12). Remove the following components: – Bolts of the lid of oil filter – Top of filter of oil and o ring – Oil Filter – Spring Apply motor oil in the new o ring. Install it into the groove on top of filter of oil. - Page 47 CBX250 MAINTENANCE TRANSMISSION CHAIN INSPECTION OF THE SLACK IN THE CHAIN Never inspect or adjusted the slack in the drive chain with the engine running. Stop the power switch, support the motorcycle in its central support on a surface and change the impasse. Check the slack in the chain in the lower section, in the mid-point between the crown and the pinion of transmission.
- Page 48 CBX250 MAINTENANCE LUBRICATION LUBRICATION Lubricate the drive chain with oil gear SAE 80 90 or with a lubricant specially developed for chains with rings o. Remove excess oil or lubricant. OIL GEAR SAE 80 or 90 LUBRICANT FOR chains of transmission INSPECTION OF THE CROWN AND SPROCKET OF TRANSMISSION Inspect the teeth of the crown and sprocket of...
- Page 49 CBX250 MAINTENANCE Locate the extremes riveted to the pins link master in the external side of the chain. Remove the link using tool of the MASTER LINK drive chain. Special Tool: Special Tool de la ca- dena de transmisión 07HMH–MR10103 Remove the drive chain.
- Page 50 CBX250 MAINTENANCE Rivet the smugglers of master link using the tool MASTER LINK specified. Special Tool: Special Tool de la ca- dena de transmisión 07HMH–MR10103 NOTE To prevent a riveting rivet excessive gradually the pins, checking the diameter of the area riveted with a foot of underground.
- Page 51 CBX250 MAINTENANCE BRAKE FLUID SCREWS FIXING PLATE DIAPHRAM • Do not mix different types of fluid, since they may not be compatible. •Does Not allow foreign material enter- ing the brake system during the supply of deposit. •Avoid fluid drizzle in pieces painted, plastic or rubber. Place a cloth on these parts, provided that perform services in the brake system.
-
Page 52: Braking System
CBX250 MAINTENANCE BRAKING SYSTEM SCREWS FIXING PLATE FRONT BRAKE DIAPHRAM Tap firmly the brake forward and make sure that there is no penetration of air in the system. In the event that the lever is too soft or elastic to be applied, carried the purge of air of the system. -
Page 53: Clutch System
CBX250 MAINTENANCE ADJUSTING THE AIM OF THE HEADLIGHT REFERENCE LINE An incorrect adjustment of the headlamp may impair vision of other drivers and even not illuminate the road to a safe distance. NOTE BOLT Adjust the focus of the light in accordance with the laws and standards of local transit. -
Page 54: Side Stand
CBX250 MAINTENANCE Greater adjustments are made through the nut lower adjustment in the arm of actuating the clutch, located in the engine. Loosen against and turn the adjustment nut with a view to adjust the free play of the clutch. Set firmly the adjustment nut while tighten the. - Page 55 CBX250 MAINTENANCE INSPECTION OF THE REAR SUSPENSION Support motorcycle firmly on a proper support and to lift the rear wheel of the soil. To verify the bearings of the artic- ulation with regard to wear, hold the swing arm and trying move laterally the rear wheel.
- Page 56 CBX250 MAINTENANCE WHEELS/TYRES To verify if the bearings of the wheels are worn. For that lock the wheels front / back and try move laterally. Replace the bearings in the event that loose (refer to Section 13 or 14). Hold the fork. Raise of the front wheel of soil and inspect with regard to idle.
- Page 57 CBX250 MAINTENANCE BEARING OF THE steering column NOTE Check to see if the control cables do not interfere in the movement of the handlebars. Support motorcycle firmly and lift the front wheel of the soil. Check to see if the handlebars moves freely from one side to another.
- Page 58 CBX250 MAINTENANCE NOTES...
- Page 59 4. LUBRICATION SYSTEM CBX250 DIAGRAM OF LUBRICATION SEIVE FILTER SYSTEM OIL RADIATOR INFORMATION SERVICE TUBE OF OIL RADIATOR/ RESEARCH OF BREAKDOWNS TUBE OF OIL FROM THE CYLINDER HEAD 4-9 OIL PUMP INFORMATION SERVICE GENERAL INSTRUCTIONS •In case of that is necessary to make services with the engine running, make sure that the local work is well ventilated.
- Page 60 CBX250 LUBRICATION SYSTEM DIAGRAM OF LUBRICATION SYSTEM...
- Page 61 CBX250 LUBRICATION SYSTEM RESEARCH OF BREAKDOWNS Oil Level too low • Normal Consumption of oil • External Leakage of oil • Wear or incorrect installation of the rings of the piston • Wear of the guide or catch of oil of offspring of the valve Low oil pressure •...
-
Page 62: Oil Pump
CBX250 LUBRICATION SYSTEM GEAR COMMANDED OF THE OIL Pump OIL PUMP DISMANTLING Drain the engine oil (page 3-12). Remove the cover right side of the casing of the engine (page 9-3). Remove the gear commanded of the oil pump and the axle. AXLE OIL PUMP Remove the three bolts and the whole of the oil pump. - Page 63 CBX250 LUBRICATION SYSTEM Remove the three bolts and the lid of the oil pump. BOLT LOCATORS INTERNAL ROTOR Remove the rotors internally and externally. Remove the two tenons guide. EXTERNAL ROTOR INSPECTION Clean completely all the parts removed. Install tem- porarily the rotors internal and external in the casing of the oil pump.
- Page 64 CBX250 LUBRICATION SYSTEM Measure the slack between the rotors and flank of the casing of the bomb, using a gauge of thicknesses and a rule of precision. Service Limit 0,12 mm NOTE In the event that some component of the oil pump is eroded beyond the limits of service, replace the pump as a whole.
- Page 65 CBX250 LUBRICATION SYSTEM GUIDE DOWELS Install the ears of guide and the lid of the oil pump. Install the three bolts and tighten firmly. BOLT Install the two tenons guide. GUIDE DOWELS Install the whole of the oil pump. Install the three bolts and tighten firmly.
- Page 66 CBX250 LUBRICATION SYSTEM Install the axle of the pump aligning the flat surfaces of the axle and the rotor. AXLE OF THE OIL Pump Install the gear commanded of the oil pump, aligning the flat surfaces of the hole gear and the axle of the pump. GEAR COMMANDED OF THE OIL Pump O-RING GUIDE...
- Page 67 CBX250 LUBRICATION SYSTEM OIL RADIATOR FIXING BOLTS/Spacers BOLTS/TUBES Be careful not to damage the fins of the radiator. DISMANTLING Remove the plates baffles side (page 2-3). The drainage of engine oil (page 3-12). Release bolts and the connections su- periors of the tubes of oil of the radiator, removing the two bolts.
- Page 68 CBX250 LUBRICATION SYSTEM TUBE OF OIL RADIATOR/ TUBE OF OIL FROM THE CYLINDER HEAD DISMANTLING The drainage of engine oil (page 3-12). Remove the plates baffles side (page 2-3). TUBE OF OIL RADIATOR Remove the bolts of the connections superiors of the tubes of oil BOLTS/TUBES OF OIL/RINGS O of the radiator (next to the oil cooler / page 4-8).
- Page 69 5. FUEL SYSTEM CBX250 SERVICE INFORMATION ASSEMBLY OF THE CARBURETOR INVESTIGATION OF FAULTS INSTALLATION OF THE CARBURETOR 5-13 BOX OF AIR FILTER CHOKE VALVE 5-14 DISMANTLING OF THE CARBURETOR SETTING THE idle screw 5-14 DISASSEMBLY/INSPECTION OF THE CARBURETOR SERVICE INFORMATION GENERAL INSTRUCTIONS •Petrol (gasoline) is highly inflammable and explosive under certain conditions.
- Page 70 CBX250 FUEL SYSTEM...
- Page 71 CBX250 FUEL SYSTEM SPECIFICATIONS Item Specifications Identification Number of the carburetor VEA2A Main Pump Supplier of idling Initial Opening of the idle screw 2 1/4 Turns out Level of float 18,5 mm Rotation of idling 1.400 ± 100 rpm Free Play of the grip of the accelerator 2 –...
- Page 72 CBX250 FUEL SYSTEM INVESTIGATION OF PROBLEMS The engine turn, but not starts • fuel is not in the tank The engine stall, starts with difficulty or presents idling irreg- • There is no fuel in the carburetor fuel Filter ular •Restriction on the line of fuel •Mixture of fuel too rich / obstructed Line of fuel obstructed Level of float in- •poor Fuel contaminated / deteriorated •false Penetration of air in the intake •Idling maladjusted •idle screw...
- Page 73 CBX250 FUEL SYSTEM BOLT BOX OF AIR FILTER DISMANTLING/Installation Remove the following components: Fuel tank (page 2-4) Fenders rear (page 2-3) Battery (page 16-4) Switch magnetic start (page 18-11) Remove the fuse box. Remove the two bolts and accommodation of the battery.
- Page 74 CBX250 FUEL SYSTEM CHOKE BOLT DISMANTLING OF THE CARBURETOR Remove the following components: Fuel tank (page 2-4) Resonator (page 5-4) Remove the valve enrichment of start (IT). Remove the breather tube from the fund of air filter (page 5-4). SCREW ON THE TUBE CLAMP RESONATOR CARBURETOR Loosen the screws of the clamp insulator and tube clamp of...
- Page 75 CBX250 FUEL SYSTEM SCREW VACUUM CHAMBER Remove the four screws, the supports of the tubes and the lid of the vacuum chamber. NOTE The compression spring is very long. To remove the lid, be careful to the spring not jump the carburetor. SCREWS Compression SPRING Remove the compression spring and the diaphragm /...
- Page 76 CBX250 FUEL SYSTEM SUPPORT FOR SCREWS THE ADJUSTOR CABLES VALVE OF COURT OF AIR Remove the two screws and the support of the adjusters cables. Remove the cover of the valve, the spring and the diaphragm. NOTE •The spring of the valve of court of air is under pressure. • To remove the lid, be careful to the spring not jump.
- Page 77 CBX250 FUEL SYSTEM PLATE PIT Remove the plate pit. FLOAT FASTENER Remove the bolt of float, the float and its valve. Check the float with regard to damage, deformation or presence of fuel. VALVE IN THE FLOAT VALVE IN THE FLOAT Check the following: Valve and seat of the valve with regard to scratches, obstruc- tion or damage.
- Page 78 CBX250 FUEL SYSTEM O-RING Remove the idle screw, the spring, the washer and the o SEAT OF THE ring. SPRING Check the jets with regard to wear or damage. Replace, if SPRING necessary. Check the idle screw with regard to wear or damage. Clean the jets with a cleaning solvent and blow out with SUPPLIER compressed air.
- Page 79 CBX250 FUEL SYSTEM O-RING FLOAT CHAMBER SEAT OF NUEVO SPRING Install the idle screw and retract toward its original position, according to the data recorded during the SPRING dismantling. In the event that has installed a new idle screw, carries out its setting (page 5-15). IDLE SCREW ATOMIZER...
- Page 80 CBX250 FUEL SYSTEM O-RING FLOAT CHAMBER Install the new o ring in the slot of the vial of float. NUEVO SCREW FLOAT CHAMBER Install the vial of float and tighten the four screws. SPRING DIAPHRAGM/VALVE OF COURT OF AIR Install the diaphragm / valve of court of air and spring. Install and maintain fixed the lid of the valve.
- Page 81 CBX250 FUEL SYSTEM SUPPORTS FOR SCREWS THE ADJUSTOR CABLES Setting the support of the adjusters the wires in the correct position, according to the illustration. Tighten the two screws. DIAPHRAGM PISTON/VACUUM VACUUM CHAMBER NEEDLE Install the needle into the piston vacuum. Install the spring in support of the needle.
- Page 82 CBX250 FUEL SYSTEM SCREW Install the lid, the supports of the tubes and tighten the four screws. SUPPORTING SCREWS DRAINAGE TUBE Connect the tube of fuel, the tube of breathing space and the drainage tube. BOLT OF ACCELLERATION Install the bolt of acceleration. INSTALLATION OF THE CARBURETOR Install the body of the carburetor to the insulator and to the tube of connection.
- Page 83 CBX250 FUEL SYSTEM CHOKE VALVE Install the following components: BOLT Resonator (page 5-4) Fuel tank (page 2-4) SCREW ON THE RESONATOR TUBE OF THE CLAMP CHOKE CHOKE VALVE Remove the valve enrichment of start (IS) (page 5-5). Inspect the valve enrichment of start (IS) with regard to brands, scratches or wear.
- Page 84 CBX250 FUEL SYSTEM 1. Turn the idle screw clockwise, until nodding slightly. Then turn it against opening hours, until it reaches the specification. If it is pressed excessively the idle screw, your seat may be damaged. Initial Opening: 2 1/4 laps oriented outside. 2.
-
Page 85: Crankshaft/Flywheel
DISMANTLING & INSTALLATION CBX250 OF THE ENGINE SERVICE INFORMATION DISMANTLING/ENGINE Installation DISMANTLING OF SPROCKET OF TRANSMISSION 6-3 Installing the SPROCKET OF TRANSMISSION SERVICE INFORMATION GENERAL INSTRUCTIONS •Used a crane or a proper support to support the motorcycle during dismantling and installation of the engine. •Use a cat of flat or other support adjustable to support and bosoms motor. - Page 86 CBX250 DISMANTLING AND INSTALLING THE ENGINE 44 N.m (4,4 kg.m) 44 N.m (4,4 kg.m) 44 N.m (4,4 kg.m) 26 N.m (2,6 kg.m) 44 N.m (4,4 kg.m) 44 N.m (4,4 kg.m) 26 N.m (2,6 kg.m) 26 N.m (2,6 kg.m)
-
Page 87: Torque Values
CBX250 DISMANTLING AND INSTALLING THE ENGINE SPECIFICATIONS Item Specifications Weight of the engine (dry) 35,3 kg Oil Capacity of the engine to dismantle 1,8 l TORQUE VALUES Bolt to the plate of fixing the sprocket of transmission 10 N.m (1,0 kg.m) Bolt/nut striker higher from the engine 44 N.m (4,4 kg.m) Bolts/nuts from support striker superior of the engine... - Page 88 CBX250 DISMANTLING AND INSTALLING THE ENGINE BOLTS PROTECTOR OF THE CHAIN DISMANTLING OF SPROCKET OF TRANSMISSION Remove the two bolts, the cover of sprocket and the pro- tector of the drive chain. TOP SPROCKET Through the left flank of the motorcycle, Loosen the nut of ADJUSTMENT NUT the rear axle, against and the adjustment nut of the drive chain.
- Page 89 CBX250 DISMANTLING AND INSTALLING THE ENGINE DISMANTLING AND INSTALLING THE ENGINE DISMANTLING NOTE Refer to the page 6-1 to obtain information with respect to the parts that must be removed before the dismant- ling of the engine. Locate a cat of flat or other support adjustable below the engine.
- Page 90 CBX250 DISMANTLING AND INSTALLING THE ENGINE INSTALLATION NOTE •Locate the cat of flat or other support adjustable below the engine. •Must be adjusted continually the height of the cat of flat, with the aim to alleviate the pressure and facilitate the installation of the bolts. Place the engine in the chassis.
- Page 91 CBX250 DISMANTLING AND INSTALLING THE ENGINE BOLTS CHAIN PROTECTOR Install the protector of the chain and the lid of sprocket of transmission. Tighten bolts of the lid of sprocket. TOP SPROCKET Install parts removed (page 6-1). ADJUSTMENT NUT Setting the slack in the drive chain (page 3-14). Install the stem rear brake (page 14-8).
- Page 92 CBX250 DISMANTLING AND INSTALLING THE ENGINE NOTES...
- Page 93 7. CYLINDER HEAD/Valves CBX250 SERVICE INFORMATION REPLACEMENT OF GUIDES TO valve 7-12 INVESTIGATION OF PROBLEMS INSPECTION/RECTIFICATION OF VALVE SEATS 7-13 Compression OF THE CYLINDER ASSEMBLY WITH THE CYLINDER HEAD 7-16 DISMANTLING OF THE LID OF THE CYLINDER HEAD 7-5 INSTALLATION OF THE CYLINDER HEAD 7-19 DISMANTLING OF CAMSHAFT Installing the CAMSHAFT 7-19...
- Page 94 CBX250 CYLINDER HEAD/Valves 12 N.m (1,2 kg.m) 12 N.m (1,2 kg.m) 12 N.m (1,2 kg.m) 45 N.m (4,5 kg.m)
- Page 95 CBX250 CYLINDER HEAD/VALVES SPECIFICATIONS Unit: mm Item Value Service Limit Compression of the cylinder 1.128 kPa (11,5 kgf/cm — 163,6 psi) a 400 rpm Twist of the cylinder head — 0,10 Camshaft Height of the lobes 37,00 – 37,24 36,94 37,03 –...
- Page 96 CBX250 CYLINDER HEAD/VALVES SPECIAL TOOLS 07757-0010000 Valve spring compressor Accessory of the compressor of springs 07959-KM30101 Driving guide of valves, 5.0 mm 07942-MA60000 Protector of the accommodation of accinador, 24 x 25.5 mm 07HMG-MR70002 Reamer of guides to valve, 5.0 mm 07984-MA60001 Valve seats –...
- Page 97 CBX250 CYLINDER HEAD/VALVES Compression OF THE CYLINDER LAYER SUPPRESSIVE NOISE In the event that is necessary to make services with the engine running, make sure that the local work is well ventilated. Never put the engine running in closed areas. The exhaust containing carbon monoxide poison, which can cause loss of consciousness and even death.
- Page 98 CBX250 CYLINDER HEAD/VALVES TOP OF THE CYLINDER HEAD DISMANTLING THE TOP OF THE CYLYINDER HEAD BOLT/ WASHER Remove the following components: Fuel tank (page 2-4) Tube of oil radiator (page 4-9) Remove the noise dampening layer of the spark plug. Remove the bolts of the lid, the washers of rubber and the cov er of the cylinder head.
- Page 99 CBX250 CYLINDER HEAD / VALVES ACUTATOR PLUG BOLTS Loosen the screw cap on the trigger for the tensile, but not yet remove it. Remove the trigger for the tensile distribution chain and the gasket, loosening alternately two bolts. TRIGGER FOR THE TENSILE/GASKET GUIDE TO THE DISTRIBUTION CHAIN Remove the three bolts and the guide to the distribution chain.
- Page 100 CBX250 CYLINDER HEAD/VALVES INSPECTION SUPPORTS OF THE CAMSHAFT Camshafts Inspect the surface of the stumps of the supports of camshaft with regard to excoriations, scratches or signs of lubrication deficient. Inspect the holes of oil from the stands with regard to obstruction.
- Page 101 CBX250 CYLINDER HEAD/VALVES NOTE Do not turn the camshaft during the inspection. Install carefully the supports of the camshafts and guide to the supply chain. Tighten bolts in sequence crusade, in several steps. TORQUE 12 N.m (1,2 kg.m) Remove the supports of the camshafts and measure the width of each plastigage compressed.
- Page 102 CBX250 CYLINDER HEAD/VALVES GUIDE TO THE DISTRIBUTION CHAIN GASKET Remove the guide to the chain of distribution of the cylinder. Remove the gasket and the ears of guide. SPIKES OF GUIDE Remove the pins and the insulator of the carburetor. INSULATOR BOLTS DISMANTLED/INSPECTION OF CYLINDER HEAD...
- Page 103 CBX250 CYLINDER HEAD/VALVES Remove the keys of the valves, retainers springs, springs and valves, using the special tools, according to the illustration. Special tool: Valve compressor 07757–0010000 Accessory to valve compressor 07959–KM30101 To avoid loss of tension, not compress the springs more than was necessary to remove the keys.
- Page 104 CBX250 CYLINDER HEAD/VALVES ACCOMMODATION OF ACTUATING THE valve Check the accommodation of each actuating the valve with regard to scratches, damage or abnormal wear. Measure the D. I. of each accommodation of follower of tumbler. Service Limit 26,06 mm ACTUATING THE valve Check every actuating the valve with regard to scratches, dam age or abnormal wear.
- Page 105 CBX250 CYLINDER HEAD/VALVES REAMER OF GUIDES TO valve Use the reamer of guides to valve to eliminate potential deposits of carbon, before measuring the guides. Insert the reamer in the cylinder head on the side of the camshafts. Turn the reamer always clockwise.
- Page 106 CBX250 CYLINDER HEAD/VALVES Advocate of guides to valve • Do not use torch to flame to heat the cylinder head, because this can cause the twist in the same. •Be careful not to damage the contact surfaces of the cylinder head. Support for the cylinder head and use the special tools to remove the guides to valve and the rings o their accommodations, from the side of the combustion chamber of the cylinder head.
- Page 107 CBX250 CYLINDER HEAD/VALVES Remove the valve and inspect the surface of your seat. The surface of the seat of the valve must be in agreement com the width specified and uniform in all its circumference. The valves may not be rectified. If a valve is burned or SURFACE DAMAGED excessively worn down, or presents unequal contact with the seat, replace it.
- Page 108 CBX250 CYLINDER HEAD/VALVES It recommends the use of strawberries / rectifiers spe- CONTACT SURFACE TOO Previous cific to valve seats, for the correction of seats worn. HIGH WIDTH OF The Rectification of the seat of the valve with a THE SEAT strawberry 45°...
- Page 109 CBX250 CYLINDER HEAD/VALVES Using a strawberry finished 45 degrees, rectify the seat to the wide specified. Be sure to have removed any roughness and WIDTH OF irregularities. Rectified once again the seat of the valve, if THE SEAT necessary. NOTE The correct location of the seat with regard to the surface contact of the valve is essential to ensure a good seal.
- Page 110 CBX250 CYLINDER HEAD/VALVES Clean the whole of the cylinder head with solvent and blow with compressed air through each through oil. VALVE SEAT OF THE SPRING Install the seats of the springs of valves. Install the new checkpoints of oil from the shoots. Lubricate the surfaces of slip of the shoots of valves with motor oil.
- Page 111 CBX250 CYLINDER HEAD/VALVES NOTE Grease applies to the keys to facilitate the installation. Install the keys in the valves using the special tools in accordance with the illustration. Special tool: Valve compressor 07757–0010000 Accessory for valve compressor 07959–KM30101 To avoid loss of tension not compress the springs more than was necessary to install the keys.
- Page 112 CBX250 CYLINDER HEAD/VALVES DISTRIBUTION GASKET CHAIN GUIDE INSTALLATION OF CYLINDER HEAD NUEVA Remove any waste material from gasket of the contact surfaces of the cylinder. Install the guide to the distribution chain in the cylinder head. Make sure that the projections of the guide to the distribution chain will fit into the slots in the casing of the engine and the cylinder.
- Page 113 CBX250 CYLINDER HEAD/VALVES Slowly Turn the crank in the sense against opening hours, INDICATOR holding the distribution chain, to align the mark T in the steer- NOTCH ing wheel of the engine with the notch indicator of the hole of synchronisation in the top side of the casing of the engine.
- Page 114 CBX250 CYLINDER HEAD/VALVES Installing the TRIGGER FOR THE TENSILE DISTRIBU- TION CHAIN Remove the cap the trigger for the tensile. Check the functioning of trigger for the tensile: The axle of tensor should not enter the body, when pressed. When revolved clockwise, with a screwdriver, the axle of tensor should retract into the body.
- Page 115 CBX250 CYLINDER HEAD/VALVES O-RING Remove the tool of limiting trigger for the tensile. NUEVO Install a new o ring in the accommodation of trigger for the tensile. Install the screw cap on the trigger for the tensile. Tighten the screw cap on the trigger for the tensile. BOLTS ACTUATOR PLUG ACTUATOR PLUG...
- Page 116 CBX250 CYLINDER HEAD/VALVES GASKET Install a new gasket at the top of the cylinder head. NUEVA HEAD COVER WASHER RUBBER/BOLT Install the new washers of rubber and tighten the bolts of the lid of the cylinder head to the specified torque. NUEVA TORQUE: 12 N.m (1,2 kg.m) Install the noise dampening layer of the spark plug.
- Page 117 8. PISTON/CYLINDER CBX250 SERVICE INFORMATION DISMANTLING THE PISTON INVESTIGATION OF FAULTS INSTALLING THE PISTON DISMANTLING THE CYLINDER INSTALLING THE CYLINDER SERVICE INFORMATION GENERAL INSTRUCTIONS •Before services of repair in the cylinder / piston remove the engine. •Be careful not to damage the cylinder wall and the piston. •When using a screwdriver to remove the cylinder, be careful not to damage the contact surfaces.
- Page 118 CBX250 PISTON/CYLINDER...
- Page 119 CBX250 PISTON/CYLINDER INVESTIGATION OF FAULTS Compression too low, start difficult or poor performance at low rotation •Cylinder head gasket damaged •Rings of the piston worn, damaged or stuck •Cylinder piston or worn or damaged •Twist valves, or valve seats damaged Compression too high, overheating or timing •...
- Page 120 CBX250 PISTON/CYLINDER CYLINDER DISMANTLING THE CYLINDER Remove the cylinder head (Section 7). Remove the cylinder. Not hit the cylinder excessively. When using a screwdriver during the dismantling, be careful not to damage the surface contact. Avoid damage the contact surfaces of the gasket. Clean completely the upper part of the cylinder.
- Page 121 CBX250 PISTON/CYLINDER Use a rule of precision and a gauge of thicknesses to verify the upper part of the cylinder with regard to twist. Service Limit 0,05 mm PISTON DISMANTLING THE PISTON NOTE Before the dismantling, place a clean cloth around the crank to prevent the clips of cotter pin fall within the casing of the engine.
- Page 122 CBX250 PISTON/CYLINDER INSPECTION Inspect the piston with regard to cracks or other damage. Inspect slots in the piston with regard to excessive wear and formation of deposits of cinder. Measure the D. E. of piston. NOTE Measure external diameter of the piston in a point to 16 mm from the base of the skirt and 90 from the hole in the cotter pin.
-
Page 123: Installing The Piston
CBX250 PISTON/CYLINDER NOTE Replace always rings of the piston as a whole. Inspect the rings of the piston and replace, if they are worn. Reinstall temporarily rings of the piston (page 8-7) in their respective slots. Press the ring of the piston until its external surface is practically leveled with a piston. - Page 124 CBX250 PISTON/CYLINDER NOTE •Be careful not to confuse the upper ring with the MARK ring secondary. The width of upper ring is lower than the width of the ring secondary. •After installation, the rings should turn freely in the slots, without becoming bogged down. •Separates the extremities of the rings to 120°.
- Page 125 CBX250 PISTON/CYLINDER Install the new clips of cotter pin Always use clips new. Never reuse the clips, because it can cause serious damage to the engine. NOTE •Make sure that the clips of cotter pin are firmly es- tablished. •Not align the extremities of the clips of the NUEVO cotter pin with the lowering of the piston.
- Page 126 CBX250 PISTON/CYLINDER NOTES...
- Page 127 CLUTCH/GEAR SELECTOR CBX250 SERVICE INFORMATION GEAR PRIMARY COMMAND 9-10 INVESTIGATION OF FAULTS GEAR SELECTOR/BOX 9-11 DISMANTLING THE COVER OF THE RHS INSTALLATION OF THE COVER ON RHS CASING OF THE ENGING CASING OF THE ENGINE 9-12 CLUTCH SERVICE INFORMATION GENERAL INSTRUCTIONS •Services of repair in the clutch and selector gears can make with the engine installed in the chassis.
- Page 128 CBX250 CLUTCH/GEAR SELECTOR 108 N.m (10,8 kg.m) 12 N.m (1,2 kg.m) 108 N.m (10,8 kg.m)
- Page 129 CBX250 CLUTCH/GEAR SELECTOR INVESTIGATION OF FAULTS Lever clutch too hard • Cable of the clutch dirty, stuck or damaged •Actualization incorrect cable of the clutch •Damage to the mechanism for operating the clutch •Bearing the clutch defective •incorrect installation of the guide for operating the clutch The clutch not decouples or motorcycle vibrates with the clutch decoupled •Free Play too much in the lever of clutch •Twist the plates of clutch...
- Page 130 CBX250 CLUTCH/GEAR SELECTOR CLUTCH CABLE DISMANTLING OF THE LID RIGHT SIDE OF THE CASING OF THE ENGINE Drain the engine oil (page 3-12). Remove the cable clutch. Remove the following components: Support of the pedal support right (page 14-18) Tubes of oil radiator (page 4-9) OIL RADIATOR TUBES BOLT BOLT...
- Page 131 CBX250 CLUTCH/GEAR SELECTOR RETURN ACTUATING ARM OF THE SPRING CLUTCH ARM OF ACTUATING THE CLUTCH Inspection Remove the arm of actuating the clutch and spring for the return of the lid right side of the casing of the engine. Check the spindle arm of actuating the clutch with regard to wear or damage.
- Page 132 CBX250 CLUTCH/GEAR SELECTOR WASHER BODY OF CLUTCH Remove the washer conical and washer. Remove the body of clutch. WASHER conical DISKS/PLATES OF CLUTCH Remove the disks of friction and the plates of the clutch. SUPPORT WASHER BELL CLUTCH Remove the bell clutch, the plate and pressure washer of support.
- Page 133 CBX250 CLUTCH/GEAR SELECTOR CLUTCH OPERATING PLATE CLUTCH BEARING INSPECTION Clutch Bearing NUEVO Inspect the bearing of clutch with regard to damage. Turn the internal track bearing the finger. The bearing must turn si- lently and soft, without noises or excessive play. Make sure that the track outside this play excessive in the plate of actuating the clutch.
- Page 134 CBX250 CLUTCH/GEAR SELECTOR Clutch plates Check the plates of clutch with regard to discolourment. Check the twist the plates of the clutch in a flat surface, using a gauge of thicknesses. Service Limit 0,30 mm NOTE Replace the disks bearings and license plates as a whole. Clutch plate Body of clutch Body of clutch...
- Page 135 CBX250 CLUTCH/GEAR SELECTOR GUIDE TO THE BELL OF THE CLUTCH IINSTALLATION Apply motor oil to the guide to the bell clutch and install it on the main axle. SUPPORT WASHER PRESSURE PLATE Install the bell of the clutch. Install the plate and pressure washer of support.
- Page 136 CBX250 CLUTCH/GEAR SELECTOR TAB AND CUTOUT LESS DEEP NOTE Install the tabs of the disk to external in the rebated less deep in the hood of the clutch. DISK OF EXTERNAL CLUTCH MARK BODY OF WASHER "OUT SIDE" THE CLUTCH Install the body of clutch.
- Page 137 CBX250 CLUTCH/GEAR SELECTOR BOLT/SPRING PLATE OPERATED Install the springs of clutch, the plate operated and the respective bolts on the plate of pressure. Tighten bolts in sequence, mixed in several steps. Then, tighten firmly. Install the lid right side of the casing of the engine (page 9-12).
- Page 138 CBX250 CLUTCH/GEAR SELECTOR WASHER Install the washer Apply motor oil to the thread and to the surface of settlement of the nut primary gear command. Then, install it on the crankshaft. Using the spe- NUT PRIMARY GEAR COMMAND cial tool fasten the nut gear primary command to the specified torque.
- Page 139 CBX250 CLUTCH/GEAR SELECTOR ARM LIMITER OF Align CHANGING gears Lift the arm limiter using a screwdriver. Install the ear of guide and the plate of leva of changing gears. NOTE Align the hole in the bolt on the plate leva, with the ear of guide of the drum of gears.
- Page 140 CBX250 CLUTCH/GEAR SELECTOR GASKET GUIDE SPIKES Install the gear commanded of the oil pump in the axle of the bomb, aligning its flat surfaces. Apply motor oil to the new o NUEVA ring and install it into the slot of the oil pump. Install the ears of guide and a new gasket.
- Page 141 ALTERNATOR /CLUTCH CBX250 SERVICE INFORMATION 10-1 DISMANTLING OF THE FLY WHEEL 10-3 INVESTIGATION OF FAULTS 10-1 CLUTCH START 10-4 ALTERNATOR STATOR 10-2 INSTALLING THE FLY WHEEL 10-6 SERVICE INFORMATION GENERAL INSTRUCTIONS •Services submitted in this section can be made with the engine installed in the chassis. •In this section describes pro- cedures of service of stator alternator, driving the engine and clutch start.
- Page 142 CBX250 ALTERNATOR 103 N.m (10,3 kg.m) 10-0...
- Page 143 CBX250 ALTERNATOR BOLT ALTERNATOR STATOR DISMANTLING OF THE LID LEFT SIDE OF THE CAR- CASS OF THE ENGINE Remove the three bolts and the lid of intermediate gear boot. TOP GEAR IN- TERMEDIATE BOOT INTERMEDIATE GEAR BOOT GASKET Remove the gasket. Remove the gear intermediate boot and the respective axle of the lid left side of the casing of the engine.
- Page 144 CBX250 ALTERNATOR SPIRAL OF REDUCTION IN GASKET THE BOOT/WASHERS Remove the gasket and the ears of guide. Remove the spiral of reduction in the boot and the washer. GUIDE SPIKES STATOR BOLT HUB OF RUBBER DISMANTLING THE STATOR/pulse generator power Remove the screw the pin of cables and the pin.
- Page 145 CBX250 ALTERNATOR SPACER BALL NEEDLES Remove the bearing of needles, the spacer and cotter Woodruff of the crankshaft. WASHER CLUTCH BOOT DISMANTLING Remove the steering wheel of the engine (page 10-3). Remove the gear commanded the boot, turning in the sense against opening hours.
- Page 146 CBX250 ALTERNATOR Check the spiral of reduction with respect to wear or damage. GEAR REDUCTION CLUTCH UNIDIRECTIONAL Check the bell clutch boot and clutch unidirectional with regard to abnormal wear, damage or irregular movements. Inspect the inner surface of contact at the bell clutch unidirectional with regard to abnormal wear or damage.
- Page 147 CBX250 ALTERNATOR BOLT TORX Clean and implement locks chemistry to the bolt threads TRABA Torx of fixing the clutch boot. Install the whole of clutch boot on the steering wheel of the engine. Install the bolts Torx. Hold the wheel of the engine, us- ing the special tool.
- Page 148 CBX250 ALTERNATOR BOLT/WASHER SPECIAL Apply oil to the thread and to the surface of settlement of bolt the wheel of the engine. Then, install the washer special and the bolt. Hold the wheel of the engine, using the special tool. Then tighten the bolt to the spe- cified torque.
- Page 149 CBX250 ALTERNATOR O-RING Lubricate a new o ring with motor oil and install it into the slot on the starter motor. NUEVO Install the lid left side of the casing of the engine. The cover of alternator (stator) is fixed magnetically be- hind the wheel of the engine.
- Page 150 CBX250 ALTERNATOR O-RING Lubricate a new o ring with motor oil and install in the top gear the boot. NUEVO Install the lid of intermediate gear boot and tighten the four bolts. TOP GEAR INTERMEDIATE BOOT CONNECTOR 3P FROM THE PULSE GENERATOR POWER/SWITCH DEADLOCK Guide correctly the wiring to the alternator (page 1-21).
- Page 151 11. TRANSMISSION CBX250 SERVICE INFORMATION 11-1 DISASSEMBLY OF THE THE TRANSMISSION 11 4 INVESTIGATION OF FAULTS 11-2 ASSEMBLY OF THE TRANSMISSION 11-8 SEPARATION OF THE CASING OF THE ENGINE ASSEMBLY OF THE CASING OF THE ENGINE11-11 11-3 SERVICE INFORMATION GENERAL INSTRUCTIONS •In this section describes procedures of transmission service, even the forks, the drum selector and the spindle of changing gears.
- Page 152 CBX250 TRANSMISSION 11-0...
- Page 153 CBX250 TRANSMISSION Item Value Service Limit Gear change D.I. of the gear change fork 13,000 – 13,021 13,05 fork, axle of the Thickness of the claw of the gear 4,90 – 5,00 forks and drum change fork R, C 4,93 – 5,00 selector D.
- Page 154 CBX250 TRANSMISSION SEPARATION OF THE CASING OF THE MOTOR Remove the starter motor (page 18-4) and the cylinder head (page 7-8). Remove the bolts of the lower connections of the tube of oil from the cylinder head, washers and sealing the tube of oil from the cylinder head.
- Page 155 CBX250 TRANSMISSION GUIDE SPIKES Remove the gasket and the ears of guide. GASKET DISMANTLING THE TRANSMISSION DISMANTLING Release the plate gear selector of the drum of gears, separating the drum and removing the spindle of gears. PLATE OF THE GEAR SELECTOR DRUM OF THE GEARS AXLE OF THE FORKS Pull the axle of the forks, away from the forks of the...
- Page 156 CBX250 TRANSMISSION INSPECTION Gears Inspect the projections and rebated coupling of the gears with regard to excessive wear or damage. Inspect the teeth of the gears with regard to excessive wear or damage. Measure the D. I. of each gear. 20,08 mm 23,07 mm 23,07 mm...
- Page 157 CBX250 TRANSMISSION Inspect the stump drum of changing gears in the right half of the casing of the engine, with regard to excessive wear or damage. Measure the D. I. the stump drum. Service Limit 20,07 mm Axle of the forks of the change of gears Check the axle of the forks of the change of gears with regard to damage and twist.
- Page 158 CBX250 TRANSMISSION Bearing of the transmission Turn the internal track of each bearing the finger. The turning should rotate smooth and noise. Also check if the track outside of each ball is firmly em- bedded in the casing of the engine. Replace the bearings, in case of need.
- Page 159 CBX250 TRANSMISSION BALL NEEDLES Inspect the bearing of needles with regard to wear or damage. Replace, in case of need. TREAD After installing the bearings, install the new checkpoint of oil in the countershaft. Inspect the checkpoint of oil spindle of gearbox with regard to wear or damage.
- Page 160 CBX250 TRANSMISSION MAIN AXLE GEAR M2 (17D) GEAR M6 (27D) GEAR M4 (24D) GEAR M3 (21D) WASHER Support GEAR M5 (26D) RING OF PRESSURE WASHER stripe RING OF PRESSURE RING OF PRESSURE ADDRESS OF THE WASHER AND SUPPORT OF THE RING OF pressure: WASHER STRIPE MAIN AXLE...
- Page 161 CBX250 TRANSMISSION MAIN AXLE AND COUNTERSHAFT In case of the crankshaft has been removed, install first, together with the flywheel (page 12-5). Apply motor oil to the retaining lips oil countershaft. Install the main axle and the countershaft as a whole, on the left half of the casing of the engine.
- Page 162 CBX250 TRANSMISSION RETURN SPRING Install the rings of pressure, the spring of return and the spring of replenishment in spindle gearbox, according to the illustration. RING OF PRESSURE BOLT Spike Lubricate the checkpoint of oil spindle of gears with engine oil.
- Page 163 CBX250 TRANSMISSION BOLT TO THE CASING OF THE ENGINE Make sure that the contact surfaces of the casing of the engine are supported in a uniform manner. Install the bolts on the left half of the casing of the engine. Tighten in sequence, mixed in several steps.
- Page 164 CBX250 TRANSMSSION Install the distribution chain in the chain of command. DISTRIBUTION CHAIN BOLT Install the following components: Engine Flywheel (page 10-6) Oil pump (page 4-5) Clutch and gear primary command (9-10) Selector gears (page 9-11) Piston and cylinder (page 8-6) Cylinder head (page 7-19) NUEVA Install the tube of oil from the cylinder head together with the...
- Page 165 12. CRANKSHAFT/FLYWHEEL CBX250 SERVICE INFORMATION 12-1 DISMANTLING OF THE CRANKSHAFT 12-2 INVESTIGATION OF FAULTS 12-1 INSTALLATION OF THE CRANKSHAFT 12-5 SERVICE INFORMATION GENERAL INSTRUCTIONS •In this section describes procedures for service in the crankshaft and in the flywheel. •Separates the two halves of the casing of the engine, to make services of repair in the crankshaft and in the flywheel.
- Page 166 CBX250 CRANKSHAFT/FLYWHEEL 12-0...
- Page 167 CBX250 CRANKSHAFT/FLYWHEEL DISMANTLING OF THE CRANKSHAFT FLYWHEEL Separates the two halves of the casing of the engine and remove the transmission (Section 11). Use a hydraulic press to remove the crankshaft and flywheel the left half of the cover of the engine. Support for the whole so as not to fall.
- Page 168 CBX250 CRANKSHAFT/FLYWHEEL Slack Radial in the Head of the Crank Measure the slack radial in the head of the crank using an indicator of quadrant. Service Limit 0,05 mm GEAR FLYWHEEL Gear Flywheel Check the machinery of flywheel with regard to wear or damage.
- Page 169 CBX250 CRANKSHAFT/FLYWHEEL EXTRACTOR THE BEARING FLYWHEEL Use the special tools to remove the bearings of flywheel. AXLE OF EXTRACTOR Special tools: Bearing on the right side Whole extractor of bearings, 12 mm 07936-1660001 Weight of extractor 07741-0010201 Bearing on the left side Whole extractor of bearing, 12 mm 07936-1660001 Weight of extractor...
- Page 170 CBX250 CRANKSHAFT/FLYWHEEL INSTALLATION OF THE CRANKSHAFT LEFT HALF OF THE CAS- ING OF THE ENGINE Clean contact surfaces of the casing of the engine. In- spect with regard to wear or damage, prior to the assembly. CRANKSHAFT NOTE In case of the contact surfaces of the casing of the engine submit small irregularities or roughness, rectify with a stone of sharpening with oil.
- Page 171 FRONT WHEEL/ SUSPENSION/ CBX250 STEERING SERVICE INFORMATION 13-1 FRONT WHEEL 13-8 INVESTIGATION OF FAULTS 13-2 FRONT SUSPENSION 13-14 HANDLEBARS 13-3 STEERING COLUMN 13-22 SERVICE INFORMATION GENERAL INSTRUCTIONS •Driving motorcycle with tires or damaged rays can affect the security. •A disk or brake pads contaminated reduce the performance of braking.
- Page 172 CBX250 FRONT WHEEL/SUSPENSION/STEERING 24 N.m (2,4 kg.m) 22 N.m (2,2 kg.m) 22 N.m (2,2 kg.m) 59 N.m (5,9 kg.m) 39 N.m (3,9 kg.m) 13-0...
- Page 173 CBX250 FRONT WHEEL/SUSPENSION/STEERING SPECIAL TOOLS Key to nuts 07HMA-MR70100 Head extractor of bearing, 17 mm 07746-0050500 Axle extractor 07746-0050100 Driver 07749-0010000 Accessory, 52 x 55 mm 07746-0010400 Accessory, 42 x 47 mm 07746-0010300 Pilot, 17 mm 07746-0040400 Driving force behind the checkpoint of oil from the fork 07747-0010100 Accessory of driver catch of oil from the fork 07747-0010600...
- Page 174 CBX250 FRONT WHEEL/SUSPENSION/STEERING HANDLEBARS REARVIEW MIRRORS DISMANTLING Remove the clamps band of electrical wiring. Remove the rearview mirrors. CLAMPS BAND OF electric- al wiring TORNILLO Remove the screws and two balances of the handlebars. COUNTERWEIGHT OF THE HANDLEBARS SUPPORT OF THE BRACKET WIRING SWITCH CLUTCH Release the connectors of the wiring breaker clutch.
- Page 175 CBX250 FRONT WHEEL/SUSPENSION/STEERING LEVER OF CHOKE Release the cable lever choke and remove the switches on the left side of the handlebars. CHOKE CABL MASTER CYLINDER SWITCH OF THE LIGHT OF front brake Release the connector breaker of the light of front brake. Remove the bolts of support, the support and the whole of master cylinder of front brake.
- Page 176 TORQUE: 24 N.m (2,4 kg.m) In case of any of the handles has been removed, clean your inner surface and the outer surface of the handlebars or tube accelerator. Apply Adhesive Honda TO or equivalent to the PUNCH MARK SUPPORTS inner surface of the grip and the outer surface of the handle- bars or tube accelerator.
- Page 177 CBX250 FRONT WHEEL/SUSPENSION/STEERING ACCELERATOR CABLES Connect the accelerator in the flange of the grip of the accelerator. Install the fund of the accelerator switches on the right side of the handlebars, aligning the bolt of position with the hole in the handlebars. BOLT OF POSITION BOX OF THE ACCELERATOR/ SWITCHES THE SIDE RIGHT OF THE HANDLEBARS...
- Page 178 CBX250 FRONT WHEEL/SUSPENSION/STEERING First tightening the screw front and then the rear screw. SCREWS SUPPORT FOR THE LEVER CLUTCH PUNZÓN Install the whole of the lever clutch, aligning the tip of the stand with the mark punch in the handlebars. Install the support of the whole of the lever clutch with the mark UP ori- ented upwards.
-
Page 179: Front Wheel
CBX250 FRONT WHEEL/SUSPENSION/STEERING Install the clamps band of electrical wiring. REARVIEW MIRRORS Install mirrors. CLAMPS BAND OF electric- al wiring CABLE OF THE SPEEDOMETER FRONT WHEEL DISMANTLING Support motorcycle firmly in a proper support and to lift the front wheel of the soil. Remove the screw of the cable of the speedometer and disconnect the cable. - Page 180 CBX250 FRONT WHEEL/SUSPENSION/STEERING Gear Box OF THE SPEEDOMETER Remove the gear box of the speedometer of the left side of the body of the wheel. INSPECTION Axle Support for the front axle on two blocks in V . Turn the front axle and measuring its twist, using an indicator of quadrant.
- Page 181 CBX250 FRONT WHEEL/SUSPENSION/STEERING VALVE Balance of the wheel The balance of the wheel directly affects the stability, driving and, above all, the security of the motorcycle. Always check the balance of the wheel after the assembly of the tire. NOTE To reach an optimum balance of the tire, the mark of balance (point painted on the flank of the same) will be BRAND OF BALANCE...
- Page 182 CBX250 FRONT WHEEL/SUSPENSION/STEERING BOLT Remove the dust on the right side of the body of the wheel. Remove the bolts and fixing the brake disc. NOTE Check the brake disc with regard to twist (refer to page 15-6). BRAKE DISK AXLE EXTRACTOR OF BEARING Replacement of the BEARING OF THE WHEEL Install the head extractor of bearings in the bearing.
- Page 183 CBX250 FRONT WHEEL/SUSPENSION/STEERING DRIVER Grease applies to the cavities of the new bearing. Use the special tools to install the new bearing the left side, with his side sealed oriented toward the outside. Install the sleeve separator. Then, use the special tools to install the new bear- ing on the right side, with his side sealed oriented toward the outside.
- Page 184 CBX250 FRONT WHEEL/SUSPENSION/STEERING Gear Box OF THE SPEEDOMETER Apply grease to lip of the new dust. Then, install the same in the left side of the body of the wheel. Lubricate the gear box of the speedometer with grease. Install the gear box of the speedometer in the body of the wheel, align- ing the tabs of retainer with the slots in the gear box of the speedometer.
-
Page 185: Front Suspension
CBX250 FRONT WHEEL/SUSPENSION/STEERING FRONT SUSPENSION DISMANTLING Remove the following components: Front wheel (page 13-8) Clamp front brake (page 15-4) Fenders front page (2-4) FIXING BOLT BOLT TOP OF THE FORK Do not let the clamp to hang in the hose of the brake. Loosen the bolts superiors of the forks, but not yet the remove. - Page 186 CBX250 FRONT WHEEL/SUSPENSION/STEERING SPRING OF THE FORK Remove the spring of the fork. Drain the fluid in the fork, pumping the tube of the fork several times. SLIDE OF THE FORK Not tighten the slide of the fork. Hold the slide in a vise whose jaws are soft or protected with pieces of wood or cloths.
- Page 187 CBX250 FRONT WHEEL/SUSPENSION/STEERING NOTE Make sure that the tube of the fork to move gently in the slide. Otherwise, inspect the tube with regard to twist or damage. Also check the hubs with regard to wear or damage. Through from movements fast and successive, bid the tube of the fork out of the slide.
- Page 188 CBX250 FRONT WHEEL/SUSPENSION/STEERING INSPECTION Spring of the fork Place the spring in a flat surface and measure the free length of the spring. Service Limit 428,4 mm TUBE OF THE FORK PISTON FORK Tube / Corredera / Piston fork Inspect the tube of the fork, the slide, the vedador of oil and the piston of the fork with regard to dashes, marks or abnormal wear/excessive.
- Page 189 CBX250 FRONT WHEEL/SUSPENSION/STEERING ASSEMBLY PISTON FORK RING SPACER OF SPRING NUEVO PISTON DUST COVER SUPPORT RING LIMITER RING BOLT TOP OF THE NUEVO FORK OIL RING O-RING SUPPORT RING NUEVO SLIDER HUB NUEVO HUB OF TUBE GUIDE OF THE FORK SPRING OF VEDADOR THE FORK...
- Page 190 CBX250 FRONT WHEEL/SUSPENSION/STEERING HUB OF TUBE GUIDE OF THE Fork Install the vedador of oil in the tip of the piston of the fork. Bathe the hub of tube guide of the fork with the fluid for suspension recommended. Install the tube of the fork in the slide.
- Page 191 CBX250 FRONT WHEEL/SUSPENSION/STEERING DUST COVER Apply the fluid for suspension recommended to the lip of the new dust and install in the slide of the fork. NUEVO SLIDE Supplying the tube of the fork with the specified amount of fluid to suspension. Fluid recommended: Fluid for suspension (ATF) Capacity of fluid: 296 ±...
- Page 192 CBX250 FRONT WHEEL/SUSPENSION/STEERING SPACER OF SPRING Install the seat and the spacer of spring. SEAT OF THE SPRING O-RING SEAT OF THE SPRING Bathe the new o ring with the fluid for suspension re- commended and install it into the slot on the bolt top NUEVO of the fork.
- Page 193 CBX250 FRONT WHEEL/SUSPENSION/STEERING Tighten the fixing bolts the higher bridge to the spe- cified torque. TORQUE: 22 N.m (2,2 kg.m) FIXING BOLTS BOLT TOP OF THE FORK In the event that has removed the bolt top of the fork, install and push the pair specified. TORQUE: 22 N.m (2,2 kg.m) Install the following components: Fenders front page (2-4)
- Page 194 CBX250 FRONT WHEEL/SUSPENSION/STEERING HIGHER BRIDGE Remove the steering column, the higher bridge and the sup- port of the casing of the headlight. SUPPORT FOR THE CASING OF THE HEADLIGHT TAB OF THE WASHER Locks Straighten the tabs of the washer locks. LOCKNUT Using the special tool, remove the against and the washer KEY TO NUTS...
- Page 195 CBX250 FRONT WHEEL/SUSPENSION/STEERING HIGHER BEARING INTERNAL TRACK BEARING HIGHER Hold the steering column. Then, remove the internal track bearing higher and the bearing higher. Steering column Remove the steering column of the head of direction. Check the track internal and the track outside of the bearing bottom of the steering column with regard to wear or damage.
- Page 196 CBX250 FRONT WHEEL/SUSPENSION/STEERING DUST COVER Install the nut on the steering column, to prevent damage to the thread to remove the internal track bearing lower. Remove the internal track bearing lower, using a slitting or an equivalent tool. Be careful not to damage the steering column.
- Page 197 CBX250 FRONT WHEEL/SUSPENSION/STEERING INSTALLATION LOCKNUT LOWER NUEVO WASHER BEARING NUEVA Locks GRASA ADJUSTMENT NUT UPPER DUST INTERNAL TRACK NUEVO COVER NUEVA BEARING LOWER INTERNAL TRACK BEARING HIGHER NUEVA HIGHER BEARING LOWER DUST NUEVO GRASA NUEVO COVER EXTERNAL TRACK BEAR- NUEVA ING HIGHER STEERING COLUMN...
- Page 198 CBX250 FRONT WHEEL/SUSPENSION/STEERING Install the adjustment nut of the steering column and KEY TO NUTS tighten manually. Then, tighten the pair of initial pinch. ADJUSTMENT Tool: 07HMA-MR70100 Key to nuts TORQUE: 25 N.m (2,5 kg.m) Turn the steering column to the right and left, from one ex- treme to another, at least five times, for which the bearings are settled.
- Page 199 CBX250 FRONT WHEEL/SUSPENSION/STEERING Install the support of the casing of the headlight and the higher bridge. NOTE Guide correctly the cables and wiring. Install the washer and nut of the steering column. Install temporarily the forks. Using the special tool, tighten the nut of the steering column to the specified torque.
- Page 200 CBX250 FRONT WHEEL/SUSPENSION/STEERING NOTES...
- Page 201 •To make services of repair and maintenance in the rear wheel, swing arm or the absorber, support the motorcycle in easel or adequate support. •Refer to Section 15 to obtain information to respect the brake system. •Use nuts and bolts of replacement original Honda in all the joints and fixing points of the suspension. SPECIFICATIONS...
- Page 202 CBX250 REAR WHEEL/BRAKE/SUSPENSION 36 N.m (3,6 kg.m) 88 N.m (8,8 kg.m) 36 N.m (3,6 kg.m) 88 N.m (8,8 kg.m) 14-0...
- Page 203 CBX250 REAR WHEEL/BRAKE/SUSPENSION TORQUE VALUES Nut of the rear axle 88 N.m (8,8 kg.m) Nut U Nut of the crown of transmission 64 N.m (6,4 kg.m) Nut U Nut superior of the damper 36 N.m (3,6 kg.m) Nut U Nut lower buffer 36 N.m (3,6 kg.m) Nut U Nut pivot swing arm...
- Page 204 CBX250 REAR WHEEL/BRAKE/SUSPENSION BOLTS REAR WHEEL DISMANTLING Place the engine on an easel or adequate support and lift the rear wheel of the soil. Remove the bolts and the cover of the drive chain swing arm. Remove the adjustment nut rear brake, the stem the PLATE OF THE AXLE BOLT rear NUT OF THE...
- Page 205 CBX250 REAR WHEEL/BRAKE/SUSPENSION Ball the wheel Turn the internal track of each bearing the finger. The bearings must be turning smoothly and without noise. Also check if the track outside of the bearing fits firmly in the body of the wheel. In the event that tracks not rotated soft and silent, or that the bearing loose in the body, remove and descártelos.
- Page 206 CBX250 REAR WHEEL/BRAKE/SUSPENSION ALL OF THE PANEL OF THE brake DISMANTLING Remove the whole of the panel of the brake of the body right of the wheel. COLLAR SIDE Remove the collar side of the flange of the crown of transmission. FLANGE OF THE CROWN Loosen the nuts and bolts of the crown of transmission.
- Page 207 CBX250 REAR WHEEL/BRAKE/SUSPENSION Head extractor of bearing Dismantling of the bearing of the body of the wheel Install the head extractor in the bearing. From the opposite side, install the axle extractor and remove the bearing of the body of the wheel. Remove the collar side and the other bearing.
- Page 208 CBX250 REAR WHEEL/BRAKE/SUSPENSION DRIVER ACCESSORY Installation of the bearing of the body of the wheel Apply grease to the cavities of bearing. Never reuse a ball used. Replace provided by a new one, after remove it. Using the special tools, install the new bearing on the left side perpendicular to the wheel, with his side sealed oriented toward the outside.
- Page 209 CBX250 REAR WHEEL/BRAKE/SUSPENSION RUBBER BUFFER Apply grease to new o ring. Install the gums cushioned in the body of the wheel. Install the new o ring. NUEVO GRASA O-RING BOLT Install the whole of the flange of the crown in the body left of the wheel.
- Page 210 CBX250 REAR WHEEL/BRAKE/SUSPENSION Highlight/SLOT INSTALLATION Locate the rear wheel between the swing arm, aligning the slot on the panel of brake, with the highlight in the swing arm. Locate the rear wheel in the chassis. BOLT rear PLATE OF Insert the rear axle from the left side, through the adjuster THE AXLE axle left of the drive chain, the collar left side and the...
-
Page 211: Rear Brake
CBX250 REAR WHEEL/BRAKE/SUSPENSION REAR BRAKE DISMANTLING Remove the rear wheel (page 14-3). Remove the panel rear brake (page 14-5). INSPECTION Measure the D. I. drum rear brake. Service Limit 131,0 mm SHOES DISMANTLING NOTE •Before removing the brake pads, tag for after armálas in its original position. - Page 212 CBX250 REAR WHEEL/BRAKE/SUSPENSION ASSEMBLY ARM TRIGGER FOR THE brake BOLT VEDADOR DEL CAME INDICATOR PLATE WEAR CAME DEL FRENO GRASA 10 N.m (1,0 kg.m) SPRINGS BRAKE SHOES VEDADOR DEL CAME Install the new hubs on the panel of the brake. Install the vedador cmea, aligning the highlight of the panel of brake, with the carvings of vedador cmea.
- Page 213 CBX250 REAR WHEEL/BRAKE/SUSPENSION INDICATOR PLATE WEAR Install the plate indicator of attrition in the cmea, aligning its striated more width with the slot wide came from the brake. STRIATED WIDE/SLOT WIDE CAME FROM THE brake ARM TRIGGER FOR THE brake Install the arm of brake, aligning the marks of punch in the arm and in the came from the brake.
- Page 214 CBX250 REAR WHEEL/BRAKE/SUSPENSION INSPECTION DAMPER Inspect the damper with regard to damage. Check the following components: Unit of the damper, with regard to deformation or leakage Hub of rubber, with regard to wear or damage Spring, with regard to damage inspect all the other parts with regard to wear or damage.
-
Page 215: Swing Arm
CBX250 REAR WHEEL/BRAKE/SUSPENSION BOLT/NUT PIVOT SWING ARM DISMANTLING Remove the following components: Silencer (page 2-5) Rear wheel (page 14-3) Bolt and nut lower damper (page 14-12) Remove the nut pivot swing arm. From the left side, remove the bolt pivot and swing arm. SWING ARM ADJUSTERS IN THE DRIVE CHAIN DISMANTLED... - Page 216 CBX250 REAR WHEEL/BRAKE/SUSPENSION PIVOT SWING ARM Remove the dust pivot swing arm. DUST GUARD PIVOT SWING ARM Remove the ring of pressure pivot swing arm. Remove the two ball fields. BALL Fields RING OF PRESSURE Remove the bearing of needles swing arm, using the special DRIVING AXLE BALL tools.
- Page 217 CBX250 REAR WHEEL/BRAKE/SUSPENSION REPLACEMENT OF THE BEARINGS OF THE JOINT Turn the track of each ball fields of pivot swing arm with his finger. The bearing must turn gently, without noises or excessive play. Make sure that the external track bearing is not with ex- cessive play in the pivot swing arm.
- Page 218 CBX250 REAR WHEEL/BRAKE/SUSPENSION ASSEMBLY SPACER OF THE NUEVO GRASA JOINT DUST COVERS NUEVO GRASA DUST COVERS BALL GRASA NEEDLES NUEVO GRASA BALL Fields ADJUSTERS IN SCREWS THE DRIVE 4 N.m (0,4 kg.m) CHAIN SPACERS OF THE JOINT GRASA WASHER BALL NUEVO GRASA NEEDLES...
- Page 219 CBX250 REAR WHEEL/BRAKE/SUSPENSION ARTICULATION OF THE DAMPER DUST COVERS Apply grease to lip of the new coveralls and install NUEVO in the articulation of the damper. GRASA GUIDE TO THE DRIVE CHAIN PROJECTIONS Install the guide to the drive chain in the swing arm, aligning its projections with openings in the swing arm.Install the guide to the drive chain in the swing arm, aligning its projections with openings in the swing arm.
-
Page 220: Brake Pedal
CBX250 REAR WHEEL/BRAKE/SUSPENSION ADJUSTERS IN THE DRIVE CHAIN Install adjusters the drive chain. INSTALLATION BOLT/NUT PIVOT SWING ARM Apply a thin layer of grease to the surface of settlement of bolt pivot swing arm. Install the swing arm in the chassis. From the left side of the motorcycle, install the bolt pivot swing arm. - Page 221 CBX250 REAR WHEEL/BRAKE/SUSPENSION INSTALLATION SUPPORT OF THE BRAKE FOOT PEDAL PEDAL Install the bolt; mount it into the stem from the brake and arm intermediate, with a new bolt cleft. PUNCH CLEFT MARK GROOVE BOLT Coupling the spring of return in the stem of the brake and in INTERMEDIATE support of the foot pedal.
- Page 222 CBX250 REAR WHEEL/BRAKE/SUSPENSION NOTES...
-
Page 223: Hydraulic Brake
15. HYDRAULIC BRAKE CBX250 SERVICE INFORMATION 15-1 DISK/brake pads 15-4 INVESTIGATION OF FAULTS 15-2 MASTER CYLINDER 15-6 CHANGE OF FLUID BRAKE CLAMP brake 15-10 / PURGA DEL AIRE 15-3 SERVICE INFORMATION GENERAL INSTRUCTIONS Disks or brake pads contaminated reduce the performance of braking. Discard the pills contaminated and wipe the disk with a degreasing agent of brake of high quality. - Page 224 CBX250 HYDRAULIC BRAKE 12 N.m (1,2 kg.m) 1 N.m (0,1 kg.m) 34 N.m (3,4 kg.m) 6 N.m (0,6 kg.m) 6 N.m (0,6 kg.m) 1 N.m (0,1 kg.m) 34 N.m (3,4 kg.m) 5 N.m (0,5 kg.m) 18 N.m (1,8 kg.m) 2 N.m (0,2 kg.m) 22 N.m (2,2 kg.m) 18 N.m (1,8 kg.m) 15-0...
- Page 225 CBX250 HYDRAULIC BRAKE SPECIAL TOOL Pliers for rings of pressure 07914-3230001 INVESTIGATION OF FAULTS Lever brake too soft or elastic •Presence of air in the hydraulic system •Leakage of fluid in the hydraulic system •Pads/disc brake contaminated •Stamps piston calliper worn •Checkpoints of piston master cylinder worn •Pills/disc brake •worn Clamp •contaminated The clamp not slips correctly •low level of fluid brake Ducts •passenger the fluid obstructed •brake disc deformed/leaf...
- Page 226 CBX250 HYDRAULIC BRAKE CHANGING THE FLUID BRAKE/PURGE OF THE AIR DRAINAGE BRAKE FLUID •To supply, do not allow pollutants (dirt, water, etc. ) entering the deposit open. •Avoid shed fluid brake on painted surfaces, surfaces of plastic or in parts of rubber.
- Page 227 CBX250 HYDRAULIC BRAKE PURGE VALVE PURGE OF AIR Connect a hose of plastic in the valve to purge of the clamp. Pump the brake until there is no more air bubbles in the fluid from the cylinder master, and that the lever offered resistance.
- Page 228 CBX250 HYDRAULIC BRAKE Clean the clip of the brake, especially the area around the pistons. Remove the smugglers of pads. Then, remove the pads. PASADORES DE PADS BRAKE PADS SPRINGS OF THE PADS Make sure that the spring of the pads is located in accordance with the illustration.
-
Page 229: Master Cylinder
CBX250 HYDRAULIC BRAKE FIXING BOLTS THE CLIP OF THE brake Install the clip of the brake in the fork left, so that the disc brake is located between the pads. NOTE Be careful not to damage the pads. Install and tighten the new fixing bolts the clip of the brake. TORQUE VALUE: 26 N.m (2,6 kg.m) Tighten the smugglers of pads. - Page 230 CBX250 HYDRAULIC BRAKE SCREW SWITCH Remove the screw and switch on the light of front brake. PIVOT OF HANDLE Remove the nut, bolt pivot the brake and the lever of front brake. BOLT BRAKE HANDLE Remove the protective rubber of piston master cylinder. RUBBER PROTECTOR PLIERS FOR RINGS OF PRESSURE...
- Page 231 CBX250 HYDRAULIC BRAKE SPRING Remove the piston master cylinder and spring. Clean the cylinder master and deposit with fluid brake again. INSPECTION PISTON MASTER CYLINDER Inspect the protector of rubber and the checkpoints primary and secondary with regard to wear, deteriora- tion, fatigue or damage.
- Page 232 CBX250 HYDRAULIC BRAKE PRIMARY CHECKPOINT SECONDARY CHECKPOINT The piston master cylinder, the checkpoints, the spring, the ring of pressure and the protective rubber should be replaced as a whole. Do not replace com- ponents individually. Before the assembly, bathe all the pieces with fluid brake again.
- Page 233 CBX250 HYDRAULIC BRAKE SWITCH Install the switch of the light of front brake cylinder Align master, aligning the highlight the switch and the hole in the master cylinder. Align Install and tighten the screw breaker of the light of front brake.
- Page 234 CBX250 HYDRAULIC BRAKE DISMANTLING Remove the spring of pads. SPRING OF PADS BODY OF PROTECTIVE RUBBER CLAMP THE BOLT CLAMP Remove the support of the clip of the brake. Remove, the support of the clamp, the protective rubber of bolt clamp. Remove from the body of the clamp, the protective rubber of bolt of support.
- Page 235 CBX250 HYDRAULIC BRAKE INSPECTION Inspect the cylinders of the clip with regard to ex- coriations, scratches or damage. Measure the D. I. cylinder of the clamp. Service Limit 25,460 mm Inspect the pistons of the clip with regard to excor- iations, scratches or damage.
- Page 236 CBX250 HYDRAULIC BRAKE DUST COVERS Lubricate the new stamps of the pistons with fluid brake again. Lubricate the new coveralls with grease based on silicone. In- stall the stamps of the pistons and the dust in the slots of PISTONS the body of the clamp.
- Page 237 16. BATTERY/CHARGING SYSTEM CBX250 DIAGRAM OF CHARGING SYSTEM 16-0 BATTERY 16-4 SERVICE INFORMATION 16-1 INSPECTION OF THE CHARGING SYSTEM 16-6 INVESTIGATION OF FAULTS 16-3 REGULATOR/RECTIFIER 16-7 SERVICE INFORMATION GENERAL INSTRUCTIONS •The battery produces explosive gases. Keep away from sparks and lit cigarettes. Provide adequate ventil- ation to the reload or use the battery in a local closed.
- Page 238 CBX250 BATTERY/CHARGING SYSTEM DIAGRAM OF CHARGING SYSTEM REGULATOR/RECTIFIER BATTERY ALTERNATOR MAIN FUSE 20 A BATTERY 12 V – 6 Ah Yelllow REGULATOR ALTERNATOR G: Green /RECTIFIER W: White 16-0...
- Page 239 CBX250 BATTERY/CHARGING SYSTEM The covers of the battery should not be removed. If you are removed the covers of sealing of the cells, the battery can be damaged. Charging the battery This model comes equipped with a battery maintenance free (FM). Remember the following about the batteries MF: Use only the electrolyte that comes with the battery;...
- Page 240 CBX250 BATTERY/CHARGING SYSTEM INVESTIGATION OF FAULTS Battery damaged or with insufficient charge Remove the battery (page 16-4). Check Incorrect the conditions of the battery, using • Battery fault. the tester recommended. Correct Install the battery (page 16-4). Check the leakage of the battery (Proof of leakage: Incorrect page 16-6).
- Page 241 CBX250 BATTERY/CHARGING SYSTEM BOLT/NEGATIVE BOLT/POSITIVE TERMINAL (–) TERMINAL (+) BATTERY DISMANTLING NOTE •Always disconnect the power switch, before remov- ing or install the battery. •Release first cable negative ( ) and then, the cable positive (+) battery. Remove the cover right side (page 2-2). Remove the bolt and disconnect the negative terminal ( ) of BATTERY BOLT/FIXING BAND...
- Page 242 CBX250 BATTERY/CHARGING SYSTEM INSPECTION OF THE VOLTAGE Measure the voltage of the battery, using a digital multitest- er commercially available. Voltage (a 20° C): Charged More than 12,8 V In need of charging Less than 12,3 V Tool: Digital Multitester commercially available CHARGING OF THE BATTERY •The battery produces explosive gases.
- Page 243 CBX250 BATTERY/CHARGING SYSTEM INSPECTING THE CHARGING SYSTEM NOTE •To inspect the system of loading, check the components and lines of the system step by step, according to the investigation of breakdowns submitted on page 16-3. •In case of the capacity of the circuit far exceeds the capacity of measurement of multitester, this should be damaged.
- Page 244 CBX250 BATTERY/CHARGING SYSTEM Activate the engine and heat, until it reaches its normal operating temperature. Stop the engine and connect the multitester between the terminals positive (+) and negative ( ) of the battery. NOTE Make sure that the battery is in good condition, before this test.
- Page 245 CBX250 BATTERY/CHARGING SYSTEM Charging circuit NOTE Do not need to remove the coil of stator, for which this test. Measure the resistance between the terminals connector 5P. Connection: Yellow to Yellow 0,1 – 1,0 Ω (a 20 Value: In case of the resistance of the coil is out of the specifications, replace the stator (page 10-2).
- Page 246 CBX250 BATTERY/CHARGING SYSTEM NOTES...
-
Page 247: Ignition System
17. IGNITION SYSTEM CBX250 DIAGRAM OF THE SYSTEM 17-0 IGNITION COIL 17-7 SERVICE INFORMATION 17-1 PUNTO DE ENCENDIDO 17-7 INVESTIGATION OF FAULTS 17-3 IGNITION CONTROL MODULE (ICM) 17-8 INSPECTION OF THE IGNITION SYSTEM 17-4 SERVICE INFORMATION GENERAL INSTRUCTIONS In the event that is necessary to make services with the engine running, make sure that the local work is well ventilated. - Page 248 CBX250 IGNITION SYSTEM DIAGRAM OF THE SYSTEM IGNITION COIL IGNITION CONTROL MODULE (ICM) SPARK PLUG Bl: Black Yellow G: Green W: White Bu: Blue Lg: Light green 17-0...
- Page 249 CBX250 IGNITION SYSTEM SPECIFICATIONS Item Specifications Spark plug Value CR8EH-9 Spark plug gap 0,8 – 0,9 mm Voltage of peak of the ignition coil 100 V Minimum Voltage peak pulse generator power 0,7 V Minimum Mark F of the point of ignition 8°...
- Page 250 CBX250 IGNITION SYSTEM INVESTIGATION OF FAULTS • Before carrying out the diagnosis of breakdowns of the system, inspect the following: defect in the spark plug Connection inadequate noise dampening layer or spark plug Penetration of water in the layer suppressive noise (leakage of winder secondary ignition coil) • In case that there are no sparks in the cylinder, replace the ignition coil temporarily on the other which is in good condition.
- Page 251 CBX250 IGNITION SYSTEM INSPECTION OF THE IGNI- MULTITESTER DIGITAL (IMPEDANCIA MÍNIMA TION SYSTEM DE 10 MΩ/VCC) NOTE •If there is no sparks in the spark plug, check all connections with regard to contacts loose or inadequate, before measuring the voltage of peak. •Use a digital multitester recommended, commer- cially available, with a minimum impedance of 10 M /Vcc.
- Page 252 CBX250 IGNITION SYSTEM With the winder primary of the ignition coil connected, IGNITION COIL connect the adapter from the voltage of peak or the test of testator Imrie to earth and in the terminal of winder primary of the ignition coil. NOTE No disconnect cables from winder primary of the ignition coil.
- Page 253 CBX250 IGNITION SYSTEM INSPECTION OF THE VOLTAGE OF PEAK FROM THE pulse generator power NOTE Check the compression in the cylinder and make sure that the spark plug is properly installed. Release the connector 8P of Control Module Ignition (ICM). Connect the adapter from the voltage of peak or the tips of evidence that the tester Imrie in terminals.
-
Page 254: Ignition Coil
CBX250 IGNITION SYSTEM IGNITION COIL DISMANTLING/Installation BOLTS/WASHERS Remove the fuel tank (page 2-4). CONNECTOR Release the noise dampening layer of the spark plug. Disconnect cables in the ignition coil. Remove the two bolts, washers and the ignition coil. Install the parts in reverse order dismantling. NOTE Install correctly the cable spark plug. - Page 255 CBX250 IGNITION SYSTEM The point of power is correct if the mark F in the rotor from MARK “F” the pulse generator power is aligned with the notch reference in the lid from the engine, in accordance with the illustration. Bathe a new o ring with motor oil and install in the cover of O-RING the hole of synchronisation.
- Page 256 CBX250 IGNITION SYSTEM NOTES...
-
Page 257: System Of Electric Starter
SYSTEM OF ELECTRIC STARTER CBX250 DIAGRAM OF THE SYSTEM 18-0 STARTER MOTOR 18-4 SERVICE INFORMATION 18-1 MAGNETIC SWITCH OF THE STARTER 18-10 INVESTIGATION OF FAULTS 18-2 CLUTCH DIODE 18-11 SERVICE INFORMATION GENERAL INSTRUCTIONS Before services in the starter motor, turn the power switch. Otherwise, the engine can operate suddenly, causing serious injuries. - Page 258 CBX250 ELECTRIC STARTING SYSTEM DIAGRAM OF THE SYSTEM MAGNETIC START SWITCH STARTER MOTOR Bl: Negro Amarillo G: Verde W: White Lg: Verde Light Br: Marrón 18-0...
- Page 259 CBX250 ELECTRIC STARTING SYSTEM INVESTIGATION OF FAULTS The starter motor not turn. • Check if the main fuse (20) or the auxillary fuse (15) is burned. • Make sure that the battery is fully charged and in good condition. Inspect the cable from the battery with Abnormal regard to circuit interrupted or contact •Contact inadequate cable of the...
- Page 260 CBX250 ELECTRIC STARTING SYSTEM From page 18-2 Abnormal Measure the voltage breaker magnetic start •Power switch defective. (page 18-11). •Fuse. •Switch emergency defective. •Switch defective start. •Connector or loose contact inadequate. Normal •Circuit interrupted in the cabling. Abnormal Check the functioning of magnetic switch •...
-
Page 261: Starter Motor
CBX250 ELECTRIC STARTING SYSTEM BREATHER TUBE STARTER MOTOR DISMANTLING Before services in the starter motor, turn the power switch. Otherwise, the engine can operate suddenly, causing serious injuries. Disconnect the breather tube from the casing of the engine. DRAINAGE TUBE Remove the protective rubber of the terminal. - Page 262 CBX250 ELECTRIC STARTING SYSTEM O-RING DISMANTLED Remove the o ring of starter motor. Remove the bolts of the casing for the starter motor, the plates of fixing and rings o. BOLTS/PLATES OF FIXING/ RINGS O FRONT FLAP Remove the front flap, the washers for support, the washer locks and the o ring.
- Page 263 CBX250 ELECTRIC STARTING SYSTEM BAR OF THE Collector INSPECTION Inspect the bars of the collector of induced with regard to discolourment. Pairs of bars discoloured indicated reels in short-circuit with the earth. In this case should be replaced the starter motor. NOTE Do not use sandpaper or emery in the collector.
- Page 264 CBX250 ELECTRIC STARTING SYSTEM WASHER CARRIES Brushes Remove the following components: Nut Washer Shims o ring Whole carries brushes SHIMS O-RING Remove the brushes off of carries brushes. Service Limit 8,5 mm Measure the length of each brush. ASSEMBLY SHIMS WASHER O-RING BACK...
- Page 265 CBX250 ELECTRIC STARTING SYSTEM BRUSH CARRIER Install the brushes on the carries brushes. Install the whole carries brushes in the lid rear, aligning its tongue with the slot in the lid back. NOTE Install correctly the shims, in accordance with what you have observed during the dismantling.
- Page 266 CBX250 ELECTRIC STARTING SYSTEM O RING/PLATE OF FIXING/BOLT Align the reference marks of the casing for the starter motor and the tapas front and rear. NUEVO Install the plates of fixing and the new rings o in the bolts of the casing of the engine.
- Page 267 CBX250 ELECTRIC STARTING SYSTEM DRAINAGE TUBE Install firmly the protective rubber on the terminal starter motor. Install the drainage tube of the carburetor. RUBBER PROTECTORS BREATHER TUBE Install the breather tube from the casing of the engine. MAGNETIC START SWITCH INSPECTION NOTE Prior to inspect the switch magnetic to start,...
- Page 268 CBX250 ELECTRIC STARTING SYSTEM CONNECTOR 4P Voltage breaker magnetic start Plug the connector 4P breaker magnetic start. Place the transmission in neutral. Measure the voltage between the terminal of the cable yellow/red (+), in the connector 4P breaker magnetic to start, and the earth ( ).
- Page 269 CBX250 ELECTRIC STARTING SYSTEM INSPECTION DIODE Check the continuity between the terminals of the diode. In case of continuity, recorded a small value of resistance. Normal Address: there must be continuity. Reverse Direction: There should be no continuity. In case of con- tinuity only in one direction, this indicates that the diode is normal.
- Page 270 CBX250 ELECTRIC STARTING SYSTEM NOTES...
- Page 271 LIGHTS/INDICATORS/ SWITCHES CBX250 DIAGRAM OF THE SYSTEM 19- 0 LIGHT SWITCH 19- 9 SERVICE INFORMATION 19- 1 SWITCHES OF THE HANDLEBARS 19- 10 INVESTIGATION OF FAULTS 19- 2 SWITCH OF THE LIGHT OF brake 19- 11 HEADLIGHT 19- 4 CLUTCH SWITCH 19- 12 INDICADOR INTERMITENTE DE DIRECCIÓN 19- 5...
- Page 272 CBX250 LIGHTS/INDICATORS/SWITCHES LOCATION OF THE SYSTEMS SWITCHES ON THE RIGHT SIDE OF THE HANDLEBARS IGNITION SWITCH SWITCH OF THE LIGHT OF rear brake SWITCH OF THE LIGHT OF front brake SWITCHES ON THE LEFT SIDE OF THE HANDLEBARS CLUTCH SWITCH SWITCH DEADLOCK SIDE STAND...
- Page 273 CBX250 LIGHTS/INDICATORS/SWITCHES SPECIFICATIONS Item Specifications Light bulbs Headlight High 12 V – 35 W 12 V – 35 W Rear/light of brake 12 V – 5/21 W Indicator front direction 12 V – 15 W x 2 Indicators rear 12 V – 15 W x 2 Light of the instruments Indicator of indicator Indicator of the headlight high...
- Page 274 CBX250 LIGHTS/INDICATORS/SWITCHES The picture of instruments does not work Check the fuse main (20), the auxillary fuse Fuse blown (15) and the fuse in the clock / kilometer (10) • Replace the fuse in the fuse box. Normal Remove the connector 16 of the table of instruments and measure the voltage between the connector cable Black / Abnormal...
- Page 275 CBX250 LIGHTS/INDICATORS/SWITCHES HEADLIGHT CONNECTOR 3P COLLARS LAMP REPLACEMENT •Halogen lamp of the light is heated too while the headlight is switched on and stays hot for some time, after which turns the headlight. •Make sure that the lamp has cooled, before making services.
- Page 276 CBX250 LIGHTS/INDICATORS/SWITCHES DIRECTION INDICATORS LENS REPLACEMENT OF THE bulbs Remove the screw and the lens of indicator. SCREW Turn the socket bulb counter-clockwise and off. Replace the bulb for a new. Install the parts in reverse order SOCKET dismantling. NOTE •Make sure that the gasket of the lens is in good condition and properly installed.
-
Page 277: Instrument Panel
CBX250 LIGHTS/INDICATORS/SWITCHES NUTS/BOLTS HEADLIGHT UNIT INSTRUMENT PANEL DISMANTLING/Installation Remove the two bolts and the collars. Release the connector 3P headlamp. Remove the two screws, nuts and the casing of the headlight. Remove the clamp. CASING OF THE HEADLIGHT SCREWS Disconnect the cable of the speedometer. Disconnect the connector 16 of the table of instruments. - Page 278 CBX250 LIGHTS/INDICATORS/SWITCHES INSPECTION Remove the casing of the light (page 19-4). Remove the connector 16 of the table of instruments and measure the voltage between the terminal of the cable Black / Brown and Bl/Br the terminal of the cable Green, from the side of the wiring. The voltage of the battery must submit to the power switch activated (ON position).
- Page 279 CBX250 LIGHTS/INDICATORS/SWITCHES SPEED SENSOR W/Bu INSPECTION Remove the casing of the light (page 19-4). For a test of the sensor of speed, the system should be turned on, or is: ignition operated (ON) and the connector 16 connected to the dashboard. Levante and support the motorcycle in a proper support.
-
Page 280: Ignition Switch
CBX250 LIGHTS/INDICATORS/SWITCHES INSPECTION OF THE INDICATOR OF FUEL EMPTY FULL LEVEL Plug the connector 2P (Black) of the sensor of fuel level to the cabling and move the float from the position of tank empty until the position of tank full . This will verify the functioning of the indicator of fuel level. - Page 281 CBX250 LIGHTS/INDICATORS/SWITCHES Check to see if there is a continuity between the terminals of the connectors of the ignition switch, in all the positions. The continuity must obey the c code that occurs in the table below: IGNITION SWITCH Activated Deactivated IGNITION Lock...
- Page 282 CBX250 LIGHTS/INDICATORS/SWITCHES SWITCH OF LIGHTING BI/R Br/Bu Br/W • H (High) SWITCHES ON THE LEFT SIDE OF THE HANDLEBARS CONNECTOR 9P Release the connector 9P of the switches on the left CONNECTOR 9P OF THE side of the handlebars. SWITCHES ON THE LEFT SIDE OF THE HANDLEBARS SWITCH OF THE HEADLIGHT H (High)
-
Page 283: Sidestand Switch
CBX250 LIGHTS/INDICATORS/SWITCHES CLUTCH SWITCH CLUTCH SWITCH Release the connector 2P breaker clutch and verify if there is a continuity between the terminals of the switch. There must be continuity when operated lever clutch and there must be continuity when released the lever clutch. SWITCH DEADLOCK WASHER Remove the cover of sprocket of transmission (page... - Page 284 CBX250 LIGHTS/INDICATORS/SWITCHES DISMANTLING/Installation Release the connector 3P breaker of side stand. Remove the bolt and the switch of side stand. Install the switch of bracket, aligning the following: the bolt breaker with the hole in the support the slot on the switch with the bolt fixing of the spring of return of side stand.
- Page 285 CBX250 LIGHTS/INDICATORS/SWITCHES In case of light is turn: Verify if there is a continuity between the terminal of Gray cable connector relay and the earth of the chassis. • If there is a continuity, inspect with regard to: Connections inadequate Relay of indicator defective. • But there is a continuity, verify if the circuit of Gray cable is interrupted.
-
Page 286: Electrical Diagram
20. ELECTRICAL DIAGRAM CBX250 Bu: Blue Lg: Light green Bl: Black O: Orange Br: Brown Pink G: Green R: Red Gr: Grey W: White Lb: Light blue Y: Yellow COMBINACIÓN DE COLORES: TIERRA/MARCACIÓN 0030Z-KPFA-9000... - Page 287 CBX250 ELECTRICAL DIAGRAM NOTES 20-2...
-
Page 288: Fault Finding
21. FAULT FINDING CBX250 THE ENGINE DOES NOT UNDER PERFORMANCE AT HIGH REVS 21-4 21-1 START/ START DIFFICULT DIRECTABILITY DEFICIENT 21-4 THE ENGINE HAS NO POWER 21-2 UNDER PERFORMANCE AT LOW REVS OR IN THE IDLE 21-3 THE ENGINE DOES NOT START/START DIFFICULT Probable Causes The fuel does not arrive at... - Page 289 CBX250 FAULT FINDING THE ENGINE HAS NO POWER Probable Causes The wheels not rotate freely. 1. Lift the wheels off the ground and •Brake rough •Bearing wheels worn or turn manually. damaged. •Drive chain too tight. The wheels Pressure too rotate freely.
- Page 290 CBX250 FAULT FINDING From page 21-2. Overheating 11. Check if the engine is heated. •Deposit excessive cinder in the combustion chamber. •Fuel Usage of low quality. •Clutch slipping. •Mixture of air/fuel poor. •Fuel Type inadequate. Not overheating The engine is at fault . 12.
- Page 291 CBX250 FAULT FINDING UNDER PERFORMANCE AT HIGH ROTATIONS Probable Causes Flow of fuel restricted. 1. Release the tube of fuel of the •Line of fuel obstructed. •Valve fuel obstructed. carburetor. •Fuel Filter obstructed. •Relief fuel tank The fuel flowing obstructed. normally Blockages 2.