Polycom VSX Series Administrator's Manual
Hide thumbs
Also See for VSX Series:
- Administrator's manual (248 pages) ,
- Integrator's reference manual (156 pages) ,
- Getting started manual (48 pages)

Subscribe to Our Youtube Channel
Related Manuals for Polycom VSX Series


Summary of Contents for Polycom VSX Series
- Page 1 Administrator’s Guide for the VSX Series March, 2005 Edition 3725-20235-007/A VSX Version 7.5 VideoVoiceDataWeb Connect. Any Way You Want.
- Page 2 As between the parties, Polycom, Inc. retains title to, and ownership of, all proprietary rights with respect to the software contained within its products. The software is protected by United States copyright laws and international treaty provision.
- Page 3 About this Guide The Administrator’s Guide for the VSX Series covers the VSX 6000, VSX 7000, and VSX 8000, collectively referred to as VSX room systems. The VSX 3000 executive desktop model is also covered. This guide is for administrators of VSX systems who need to: ❑...
- Page 4 Administrator’s Guide for the VSX Series www.polycom.com/videodocumentation...
- Page 5 Contents Chapter 1 - Introducing the VSX Series Key Features ............................1 - 2 Breakthrough Video Quality ......................1 - 2 Industry-Leading Audio Quality ....................1 - 2 Rich Conference Experience ......................1 - 3 Enhanced User Experience ......................1 - 3 Easy Installation ..........................
- Page 6 Administrator’s Guide for the VSX Series Connecting and Positioning Speakers for use with VSX Room Systems ....2 - 26 Connecting and Positioning Speakers to Receive Stereo ..........2 - 27 Setting the Volume for External Speakers ................ 2 - 29 Connecting a Mixer and Powered Microphones ..............
- Page 7 Configuring General Audio Settings ..................4 - 15 Configuring StereoSurround Settings ..................4 - 18 Configuring a Polycom Vortex Mixer with VSX Room Systems .......... 4 - 20 Configuring Microphones Connected to Balanced Audio Inputs on a VSX 8000 ..... 4 - 21 Configuring RS-232 Equipment ......................
- Page 8 Administrator’s Guide for the VSX Series Chapter 5 - Managing the System Remotely Using VSX Web ............................. 5 - 2 Accessing VSX Web ........................5 - 2 Room and Call Monitoring with VSX Web ................5 - 3 Managing System Profiles with VSX Web ................. 5 - 4 Managing Directories with VSX Web ..................
- Page 9 Contents Actions that Cause the System to Restart ................Appendix - 3 Port Usage ..........................Appendix - 4 Q.850 Cause Codes ....................... Appendix - 6 PathNavigator Error Codes ....................Appendix - 10 Safety and Legal Notices Index © Polycom, Inc.
- Page 10 Administrator’s Guide for the VSX Series www.polycom.com/videodocumentation...
- Page 11 Introducing the VSX Series Your Polycom video conferencing system is a state-of-the-art visual collaboration tool. With crisp, clean video and crystal-clear sound, VSX systems provide natural video conferencing interaction through the most advanced video communications technology. When you use a VSX system for meetings, you can exchange ideas and share documents with people anywhere in the world, as if they were all in the room with you.
- Page 12 This feature enhances intelligibility by giving conference participants a better spatial understanding of far site rooms. ❑ Integrated voice and video solution — Integrate the Polycom Vortex® audio mixer with the VSX room systems for custom-designed speaker and microphone configurations that ensure the highest quality audio in all VSX system video calls.
- Page 13 Chapter 1 - Introducing the VSX Series Rich Conference Experience ❑ Integrated video system and conference phone — Get the most out of your conference room equipment by integrating your VSX video conferencing system with the SoundStation® VTX™ 1000 conference phone.
- Page 14 Administrator’s Guide for the VSX Series Easy Installation ❑ Firewall (UPnP™) support — VSX systems offer support for routers that support UPnP (Universal Plug and Play) NAT traversal, extending the reach of video conferencing systems into homes and small businesses.
- Page 15 SNMP Reporting — VSX systems send SNMP reports to indicate a total of 31 conditions. Options Available for VSX Systems To extend what you do with your VSX system, additional options may be available. For information about ordering these options, please see your Polycom distributor. Network ❑...
- Page 16 ❑ PowerCam™ or other additional camera — Show a second view of the room, or show close-up views of documents and small objects by adding a Polycom PowerCam, document camera, or other S-video device. (VSX 7000 and VSX 8000 only) ❑...
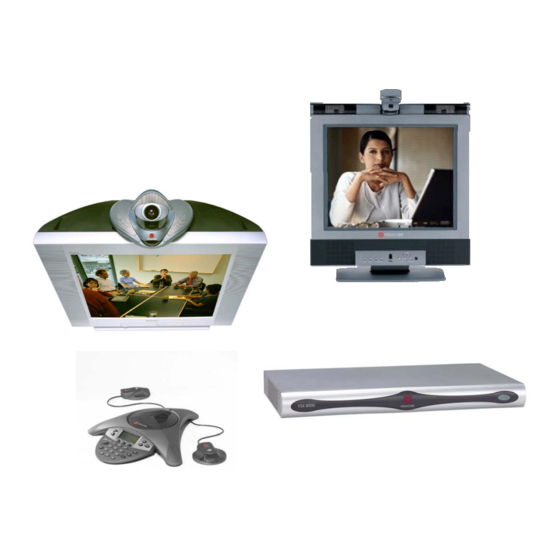
- Page 17 Chapter 1 - Introducing the VSX Series VSX Models This section describes the standard components that come with the VSX Series systems. Models with additional options are also available. For more information, please contact your Polycom distributor. VSX 3000 Two models of VSX 3000 are available — IP only, and IP with ISDN.
- Page 18 Administrator’s Guide for the VSX Series Name Component Description Power supply The power supply connects power to the system. Documentation Read Me First Setting Up the VSX 3000 System VSX documentation CD VSX 6000 The VSX 6000 system includes the following components:...
- Page 19 Chapter 1 - Introducing the VSX Series Name Component Description Hardware kit The hardware kit includes: • Reusable cable ties • Cable tie mounts • Disks of hook-and-loop material • Vinyl feet • Batteries for the remote control Documentation Read Me First...
- Page 20 Administrator’s Guide for the VSX Series Name Component Description S-Video cable Connect a monitor with the S-video cable. Conference link Connect the microphone pod or the cable optional Visual Concert VSX data collaboration unit with the conference link cable. Hardware kit The hardware kit includes: •...
- Page 21 Chapter 1 - Introducing the VSX Series VSX 8000 The VSX 8000 system includes the following components: Name Component Description VSX 8000 The VSX 8000 system is a compact rack-mount system for custom integration. S-Video cable Connect a monitor with the S-video cable.
- Page 22 Administrator’s Guide for the VSX Series Name Component Description Rack-mount Attach the brackets to the system if you brackets and need to mount it in a rack. screws Adapters Use the composite video adapters with Composite Null-modem VCR cables. video...
- Page 23 Chapter 1 - Introducing the VSX Series Other Equipment You Can Use with the VSX System In addition to the accessories that come with your system, you can connect your choice of the following equipment: VSX 3000 ❑ DVD or VCR — Play material during a call.
- Page 24 Administrator’s Guide for the VSX Series 1 - 14 www.polycom.com/videodocumentation...
-
Page 25: Table Of Contents
Connecting to the Network Connecting Video Equipment 2-13 Connecting Audio Equipment 2-21 Connecting Data Collaboration Equipment 2-33 Connecting the VSX 3000 to a Computer 2-35 Connecting Control Devices 2-36 Powering On the System 2-37 © Polycom, Inc. 2 - 1... -
Page 26: System Back Panel Views
Administrator’s Guide for the VSX Series System Back Panel Views VSX 3000 Back Panel The connectors face downward on the VSX 3000 system. This is a view from underneath the system. Audio connectors Optional: Connect Composite video connector VCR/DVD audio outputs... - Page 27 VTX 1000, or Visual audio input to record calls, composite TV monitors): Concert VSX or connect to external Connect VCR video input to speaker system record calls, or to composite LAN connector monitor Required: Connect to LAN © Polycom, Inc. 2 - 3...
- Page 28 Administrator’s Guide for the VSX Series VSX 7000 Back Panel RS-232 port VCR/DVD inputs Optional: Connect a touch-panel, Optional: Connect VCR/DVD output to play second camera control, or other content into calls RS-232 device VGA output Optional: Connect additional S-Video input...
- Page 29 Optional: Connect Connect to LAN second monitor touch-panel, camera control, or other VGA output RS-232 device Optional (required for Audio outputs single-monitor VGA Optional: Connect installations): Connect external speaker VGA monitor or projector system © Polycom, Inc. 2 - 5...
-
Page 30: Positioning The System
Administrator’s Guide for the VSX Series Positioning the System The VSX 3000 system is designed as a free-standing personal video conferencing system for the desktop. A 17-inch monitor, two microphones, and two speakers are built into the system. The VSX 6000 and VSX 7000 systems are designed to be placed on top of a monitor. - Page 31 To prevent injury when installing the VSX 8000 system in the Executive Collection Floor System, one person should hold the mounting tray open while a second person installs the system. © Polycom, Inc. 2 - 7...
-
Page 32: Connecting To The Network
If you set up the VSX system as ISDN-only, it does not require a LAN connection to operate. You do need to connect the system to a LAN, however, to use the Global Directory Server, the VSX Web, and to update system software using the Polycom Softupdate program. - Page 33 If you do not connect BRI cables to all four ports, connect the ports in ascending order. Connect the BRI cables to the ISDN or to the NT-1 device. If you are using an NT-1 device, connect it to the ISDN. © Polycom, Inc. 2 - 9...
- Page 34 Administrator’s Guide for the VSX Series Installing and Connecting a Network Interface If you received a network interface module with the VSX 7000 or VSX 8000 system, you may find it convenient to install it before positioning the system. In conjunction with this procedure, refer to the installation sheet that you received with the network interface module.
- Page 35 5. Tighten the captive screws to secure the network interface module in the system. Note: If your deployment requires additional equipment such as an NT-1 device, ensure that it is available, along with all cables required. © Polycom, Inc. 2 - 11...
- Page 36 Administrator’s Guide for the VSX Series The following table describes how to connect each network interface available for the VSX 7000 and VSX 8000 systems. To connect the network interface: For this interface... Do this Quad BRI 1. Ensure that the system is powered off.
-
Page 37: Connecting Video Equipment
Document second PTZ second PTZ Other NTSC NTSC compatible • Sony® EVI-D30 • Sony EVI-D30 cameras • Sony EVI-D100 • Sony EVI-D100 • Sony EVI-D31 • Sony EVI-D31 • Sony EVI-D100P • Sony EVI-D100P © Polycom, Inc. 2 - 13... - Page 38 Administrator’s Guide for the VSX Series To connect Camera 1 to the VSX 8000 system: For this camera... Do this PowerCam 1. Connect one end of the video and control cable to the S-video Plus connector and the DB-15 connector on the PowerCam Plus camera.
- Page 39 4. Connect the camera’s power pack or cord to a power outlet. After you have finished setting up the system, you will need to configure the camera’s behavior. Refer to Configuring Camera Settings and Video Quality Options on page 4-2. © Polycom, Inc. 2 - 15...
- Page 40 The VSX 8000 system allows you to connect both an additional TV monitor and a VGA monitor. Polycom recommends using television monitors to show people. For high-resolution presentations, Polycom recommends using a VGA (computer) monitor or a projector. 2 - 16 www.polycom.com/videodocumentation...
- Page 41 2. Use the audio cable to connect the monitor’s audio inputs to the system’s audio outputs. After you have finished setting up the system, you will need to configure the monitor’s behavior. Refer to Configuring Monitors on page 4-6. © Polycom, Inc. 2 - 17...
- Page 42 Administrator’s Guide for the VSX Series To connect an additional monitor to a VSX room system: For this system... Do this VSX 6000 1. Connect the additional display adapter cable option to the VGA output on the rear panel of the VSX system. The adapter allows you to VSX 7000 connect a VGA, S-video, or composite video cable.
- Page 43 After you have finished setting up the system, you will need to configure the behavior of the VSX system when using a VCR or DVD player. Refer to Configuring VCR/DVD Player Settings on page 4-12. © Polycom, Inc. 2 - 19...
- Page 44 Administrator’s Guide for the VSX Series Connecting a Projector If you have a VSX room system, you can connect a projector to display presentation materials from a computer. To connect a projector to a VSX room system: For this system...
-
Page 45: Connecting Audio Equipment
Visual Concert VSX Microphone Microphone VSX System Microphone Visual Concert VSX VSX 7000, VSX 8000 Microphone VSX System Microphone Microphone VSX System Microphone Microphone Microphone VSX System Stereo is not available with three microphone pods connected. © Polycom, Inc. 2 - 21... - Page 46 Administrator’s Guide for the VSX Series Positioning Microphones To connect microphones: Connect the end of the conference link cable with a ferrite bead to the system’s conference link connector. The microphone pod has two identical receptacles for cables. You may connect the conference link cable to either connector.
- Page 47 The VSX room systems allow you to send stereo using one or two microphone pods. Polycom recommends using two microphone pods with VSX 7000 and VSX 8000 systems in large rooms. The microphone pod contains a microphone array. If you connect a single...
- Page 48 Administrator’s Guide for the VSX Series The following illustrations show microphone placement for different room types. In all room configurations, the logo on each microphone pod should be pointing toward the monitor. The microphone pod closest to the monitor should be parallel with, or in front of, the person nearest the monitor.
- Page 49 To enhance the sound quality in large rooms, you can connect an external speaker system to a VSX room system. A StereoSurround option kit designed for use with VSX systems is available from Polycom. This kit includes two speakers and a subwoofer.
- Page 50 You may connect external speakers to the VSX room system to take full advantage of Polycom’s StereoSurround feature, or to enhance the sound in large rooms. After you have finished setting up the system, you will need to configure the behavior of the external speaker system.
- Page 51 To connect an external speaker system and position the speakers to receive stereo: If you are using the Polycom StereoSurround kit, connect the speakers and subwoofer as shown in the setup sheet provided with the StereoSurround kit. If you are using a third-party external speaker system, connect the VSX system’s audio outputs to the external speaker system’s CD or auxiliary line...
- Page 52 Administrator’s Guide for the VSX Series Place the speaker connected to the audio system’s right channel on the right side of the system, and the other speaker on the left side. For best results, place the speakers about 60° apart as seen from the center of the conference table.
- Page 53 VSX 8000 system. The VSX 8000 is designed to work with the Polycom Vortex mixer. For this configuration, you need Vortex firmware 2.5.2 or later, Conference Composer™ version 2.7.0 or later, and VSX system software version 7.5 or later.
- Page 54 Administrator’s Guide for the VSX Series After you have finished setting up the system, you will need to configure the mixer’s behavior. Refer to Designing Audio Behaviors on page 4-15. You will also need to configure the mixer according to the documentation supplied with it.
- Page 55 The VTX 1000 contains a microphone array. When StereoSurround is enabled, one microphone element picks up audio from the left side of the room, one picks up the right side of the room, and the third is disabled, as shown in the following diagram. © Polycom, Inc. 2 - 31...
- Page 56 Administrator’s Guide for the VSX Series Stereo using a Stereo using a VTX 1000 with VTX 1000 satellite mics left right right right left left To connect and position a VTX 1000 conference phone to send stereo: >> Position the VTX 1000 to send stereo, as shown in the following illustrations.
-
Page 57: Connecting Data Collaboration Equipment
The screen resolutions and refresh rates of the connected laptop and the Visual Concert VSX must be set the same. If they are not the same, other people may not see the entire image. © Polycom, Inc. 2 - 33... - Page 58 Administrator’s Guide for the VSX Series Refer to Setting up the Visual Concert VSX for additional set up information. The Quick Tips for Visual Concert VSX provides information for people using the device in meetings. Connecting an ImageShare II If you have purchased the ImageShare II device for use with the VSX 8000 system,...
-
Page 59: Connecting The Vsx 3000 To A Computer
VGA connector on your computer. To use the system’s built-in speakers for your computer’s audio, connect an audio cable from your computer to the audio input connector on the left side of the VSX 3000 system. © Polycom, Inc. 2 - 35... -
Page 60: Connecting Control Devices
Administrator’s Guide for the VSX Series Connecting Control Devices Connecting RS-232 Devices The VSX 7000 system provides an RS-232 port; the VSX 8000 system provides two. You can use the RS-232 interface to: ❑ Control the system through a touch-panel using the API ❑... -
Page 61: Powering On The System
Do not use any power supply other than the one supplied with your VSX system. Using the wrong power supply will void the warranty and may damage your system. The VSX 7000 system comes with a separate subwoofer. Power to the system is supplied through the subwoofer. © Polycom, Inc. 2 - 37... - Page 62 Administrator’s Guide for the VSX Series Do not connect the power cord to a wall outlet until you have connected all standard and optional equipment to the system. To connect power and power on the system: For this system... Do this: VSX 3000 1.
- Page 63 Configuring LAN Properties Configuring IP Network Support Configuring ISDN Support 3-13 Configuring Call Preferences 3-23 Configuring the Global Directory 3-25 Placing a Test Call 3-26 Checking System Status 3-27 Keeping your Software Current 3-27 © Polycom, Inc. 3 - 1...
-
Page 64: Getting The Network Ready
Administrator’s Guide for the VSX Series Getting the Network Ready Before you begin configuring the network options, you must make sure your network is ready for video conferencing. To begin, refer to the Preparing Your Network for Collaboration document, available at www.polycom.com/videodocumentation. -
Page 65: Configuring With The Setup Wizard
❑ From a remote location — Use a web browser to access VSX Web. To do this, you need to know the IP address of the system. Polycom recommends using Microsoft ®... -
Page 66: Configuring Lan Properties
Administrator’s Guide for the VSX Series Configuring LAN Properties If your system is part of a LAN, use this section to configure the system to work with the LAN. To configure LAN properties: Go to System > Admin Settings > LAN Properties. - Page 67 Note: Be sure that the device and the switch settings match. Typically, selecting Auto for both is sufficient. The LAN speed setting for the VSX system and the router must match. Polycom strongly recommends that you do not select Auto for either just the VSX system or just the router;...
-
Page 68: Configuring Ip Network Support
Administrator’s Guide for the VSX Series Configuring IP Network Support Use the following sections to configure the system so that users can place and receive video calls using IP on your LAN or WAN: ❑ H.323 Settings, includes Gatekeeper and Gateway ❑... - Page 69 The default H.323 Extension is based on the system serial number, but it can be changed. Your organization’s dial plan may define the extensions you can use. © Polycom, Inc. 3 - 7...
- Page 70 VSX 8000 Using PathNavigator’s Conference on Demand Feature If your organization uses Polycom’s PathNavigator™, you can use PathNavigator’s Conference on Demand feature to place multipoint calls with up to 10 sites. In order to place calls using PathNavigator, you need to: •...
- Page 71 Associating prefixes and suffixes with particular bandwidths on your gateway can optimize the use of bandwidth by your organization. Be sure to configure the gateway to use the same prefixes and suffixes you define for the system. © Polycom, Inc. 3 - 9...
- Page 72 Administrator’s Guide for the VSX Series Specifying SIP Settings If your network supports the Session Initiation Protocol (SIP), you can use SIP to connect IP calls. To specify SIP Settings: Go to System > Admin Settings > Network > IP > SIP Settings.
- Page 73 Type of Service Specifies the IP Precedence or Diffserv value for Video, Audio, Value and Far End Camera Control. Enable PVEC Allows the system to use PVEC (Polycom Video Error Concealment) if packet loss occurs. Select and configure these settings: Setting...
- Page 74 Administrator’s Guide for the VSX Series Configuring the System for Use with a Firewall or NAT A firewall protects an organization’s network by controlling data traffic from outside the network. Unless the firewall is designed to work with H.323 video conferencing equipment, you must configure the system and the firewall to allow video conferencing traffic to pass in and out of the network.
-
Page 75: Configuring Isdn Support
Global Directory private address in the Global Directory. Systems deployed outside a firewall are potentially vulnerable to unauthorized access. Visit the Polycom Security Center at www.polycom.com for timely security information. You can also register to receive periodic email updates and advisories. - Page 76 Administrator’s Guide for the VSX Series This section describes the settings for all optional network interfaces and identifies the settings that are available only for specific network interfaces. You can configure a network interface option only if the corresponding network interface module is installed.
- Page 77 SPIDs, make sure the system is connected and that the ISDN numbers you entered are correct. If you do not have the SPIDs from your service provider, you can click Start to Auto Detect SPIDs. © Polycom, Inc. 3 - 15...
- Page 78 Administrator’s Guide for the VSX Series Configuring the PRI Network Interface To use the PRI network interface, you must configure the following: ❑ PRI network support ❑ PRI channels ❑ PRI information Your ISDN service provider can tell you which protocol your network uses. If you later change the Country setting, the PRI switch protocols available may also change, and you may be prompted to configure a different PRI switch protocol.
- Page 79 Channels to Dial You can specify up to eight channels. If you experience network in Parallel problems, decrease the number. Restore Defaults Resets all values on this screen. This does not affect other PRI settings. © Polycom, Inc. 3 - 17...
- Page 80 Administrator’s Guide for the VSX Series To access PRI Information: Go to System > Admin Settings > Network > ISDN. Select three times to go to the ISDN PRI Info screen where you can view the following read-only information: Setting...
- Page 81 Custom Calling Profile. For information about required prefixes and suffixes, see the documentation that came with the device. If you choose a predefined Calling Profile, this information is supplied for you. © Polycom, Inc. 3 - 19...
- Page 82 Administrator’s Guide for the VSX Series Select and configure these settings: Setting Description Lets you specify the signaling required by the external device connected to the system. Specify normal or inverted, as appropriate. In most cases, normal signaling is appropriate.
- Page 83 Enter the telephone number of the room where the system is Number located. System Telephone Specifies the analog phone number of the VSX 8000 system, Number including country and area codes for the system’s location. VSX 8000 © Polycom, Inc. 3 - 21...
- Page 84 Administrator’s Guide for the VSX Series Setting Description VTX Telephone Specifies the number of the VTX 1000 conference phone that is Number connected to the system. VSX 6000 VSX 7000 VSX 8000 Outside Line Specifies the dialing prefix used to call outside the network.
-
Page 85: Configuring Call Preferences
Network Dialing screen and specify the Dialing Order preference for the available choices. If the sites in your directory have both IP and ISDN numbers, these settings determine your network preferences for placing the call. © Polycom, Inc. 3 - 23... - Page 86 Administrator’s Guide for the VSX Series Select to go to the Preferred Speeds screens and configure these settings: Setting Description Preferred Speed Determines the speeds that will be used for calls from this system for Placing Calls when: • Call Quality is set to Auto on the home screen and Directory screen, or •...
-
Page 87: Configuring The Global Directory
Chapter 3 - Configuring Network Use Configuring the Global Directory If your organization uses the Polycom Global Management System™, you can configure your system to use the Global Directory. The Global Directory provides a list of other system that are registered with the Global Directory Server and available for calls. -
Page 88: Placing A Test Call
Administrator’s Guide for the VSX Series Configure these settings: Setting Description Always Dial Area Specifies that calls to sites in the same area code must include Code the area code. Dial 1+ for all USA Specifies that calls to systems in the United States must include calls a “1”... -
Page 89: Checking System Status
If you have Internet access and a software key, you can use the web-based Softupdate application to update the VSX Series software. If you do not have Internet access, your reseller can supply you with the VSX Series software update on CD-ROM. - Page 90 Administrator’s Guide for the VSX Series 3 - 28 www.polycom.com/videodocumentation...
- Page 91 What’s in this Chapter? Page Designing Video Behaviors Designing Audio Behaviors 4-15 Configuring RS-232 Equipment 4-22 Designing the User Experience 4-24 Configuring Streaming Calls 4-47 Configuring Closed Captioning 4-49 Helping Users Get Started 4-53 © Polycom, Inc. 4 - 1...
-
Page 92: Designing Video Behaviors
Administrator’s Guide for the VSX Series Designing Video Behaviors You can configure the following video behaviors to accommodate your environment: ❑ Camera Settings and Video Quality ❑ Monitors ❑ Content Display ❑ VCR/DVD Player Settings Configuring Camera Settings and Video Quality Options The Cameras and Video Quality screens let you specify camera and video settings, as appropriate for the equipment you are using. - Page 93 50/60 fields per second interlaced video for TV-like quality at higher bandwidths. The VSX 3000 system offers Pro-Motion for the DVD/VCR video input only. The VSX 6000 can receive Pro-Motion video but cannot transmit it. © Polycom, Inc. 4 - 3...
- Page 94 Administrator’s Guide for the VSX Series To configure a second camera (VSX 3000, VSX 7000, VSX 8000): Go to this screen: Configure these settings: Cameras • Designate this as the Primary Camera, if desired. • Set Camera Direction to specify which way the System >...
- Page 95 Any existing preset stored at the number you enter is replaced. To delete all presets: If a call is connected, press Near to choose a near-site video source. Press Preset on the remote control. Press Delete to delete all presets. © Polycom, Inc. 4 - 5...
- Page 96 Administrator’s Guide for the VSX Series Configuring Monitors The VSX system allows you to customize displays to suit your room and equipment configuration, including choosing the monitor for presenting content. To configure monitors: Do one of the following: • VSX room systems Go to System >...
- Page 97 Do not use this option if you want the user to control the return to live video. Dual Monitor Specifies whether both sites are displayed in a split-screen mode Emulation when using one monitor. © Polycom, Inc. 4 - 7...
- Page 98 Administrator’s Guide for the VSX Series Using Dual Monitor Emulation Dual Monitor Emulation is designed for rooms or offices with one monitor only. Users see both near and far sites on one monitor in two different views. During presentations, users see content and the near and far sites.
- Page 99 A Visual Concert VSX data collaboration unit with a VSX 6000 or VSX 7000 system ❑ An ImageShare II device with a VSX 8000 system For information about ordering the Visual Concert VSX unit, ImageShare II device, or People+Content IP option, please contact your Polycom distributor. © Polycom, Inc. 4 - 9...
- Page 100 For information about purchasing the People+Content IP option, please contact your Polycom distributor. To enable People+Content IP on a VSX system: On a computer, open a web browser and go to the Polycom Resource Center Video Downloads page at http://extranet.polycom.com. Enter the license number you received when you purchased the People+Content IP option.
- Page 101 Enter the People+Content IP software activation key. To install People+Content IP on a computer: On the computer, open a web browser and go to the Polycom Resource Center Video Downloads page at http://extranet.polycom.com. Locate the People+Content IP application and click the link to download the file locally.
- Page 102 Administrator’s Guide for the VSX Series Setting Description VGA Resolution Specifies the VGA resolution for your monitor. Select the maximum VGA resolution that your monitor or projector can support. Consult the user manual provided with the VGA monitor or projector for performance information.
- Page 103 Allows you to record a call using one VCR or DVD, while playing Out Always On recorded content into the call from a second VCR or DVD. Do not select this setting if you have only one VCR or DVD player connected. © Polycom, Inc. 4 - 13...
- Page 104 Administrator’s Guide for the VSX Series To configure VCR/DVD audio settings for playing a videotape or DVD: Go to this screen: Configure these settings: VSX 3000 No additional configuration is required. Audio Levels Ensure that Midrange Speaker is On. VSX 6000, VSX 7000 System >...
-
Page 105: Designing Audio Behaviors
General audio settings ❑ Settings for Polycom StereoSurround ❑ Settings for the Polycom Vortex mixer ❑ Settings for microphones connected directly to the balanced audio inputs Configuring General Audio Settings The Audio Settings screens let you specify the settings appropriate for the equipment you are using. - Page 106 Mixer, echo cancellation is enabled on a line set for Audio Mixer, and stereo is enabled. Enable Polycom Specifies that Polycom StereoSurround is used for all calls. StereoSurround To send or receive stereo audio, make sure your VSX system is...
- Page 107 Description Echo Canceller Lets you specify whether to use the system’s built-in echo canceller. Do not enable this option if you have connected a Polycom Vortex mixer or you are using the Polycom StereoSurround feature. Enable Phantom Allows the system to supply power to microphones connected Power directly to the balanced audio inputs.
- Page 108 Connecting Audio Equipment on page 2-21. Then configure the system to use Polycom StereoSurround, test the system configuration, and place a test call. If you are in a call with a far site that is sending audio in stereo mode, you can receive in stereo.
- Page 109 To make a test call in stereo: >> Select Polycom Austin Stereo from the directory, or enter stereo.polycom.com in the dialing field and press Call on the remote control. The Polycom Austin Stereo site demonstrates the stereo feature with an entertaining and informative presentation.
- Page 110 For example, it allows you to provide a microphone for each call participant in a boardroom. The VSX 8000 is designed to work with the Polycom Vortex mixer. For this configuration, you need Vortex firmware 2.5.2 or later, Conference Composer version 2.7.0 or later, and VSX system software version 7.5 or later.
- Page 111 Audio > Audio Settings > Next • Select Echo Canceller. • Select Enable Phantom Power to supply power to microphones. The Audio screen, where you choose Audio Settings or Stereo Settings, is not present unless stereo is enabled. © Polycom, Inc. 4 - 21...
-
Page 112: Configuring Rs-232 Equipment
The VSX 7000 system provides one RS-232 port; the VSX 8000 system provides two. You can use the RS-232 port to: ❑ Provide control signals to a PTZ camera or a Polycom Vortex mixer ❑ Receive control signals from a touch-panel control ❑... - Page 113 Set the baud rate to the same value as the modem. RS-232 Mode Select Closed Caption. Configure the modem for 8 bits, no parity. You may also need to configure the modem to ignore DTR and to answer automatically. © Polycom, Inc. 4 - 23...
-
Page 114: Designing The User Experience
Administrator’s Guide for the VSX Series Designing the User Experience You can configure the following general system behaviors to accommodate the needs of your organization: ❑ User Access to Settings and Features ❑ Passwords and Security Options ❑ AES Encryption ❑... - Page 115 Set an administrator’s password to restrict who can: ❑ Make changes other than those in the User Settings screen ❑ Upgrade the VSX Series system software ❑ Perform remote management using the VSX Web To set or change the Admin Password: Go to System >...
- Page 116 Administrator’s Guide for the VSX Series Screens that Require the Admin Password for Access Only screens within Admin Settings require the administrator’s password. Admin Settings Diagnostics System Information Utilities User Settings General Access General Settings Network Monitors Cameras Audio LAN Properties...
- Page 117 Allow Directory Changes — If you do not want users to save changes to the local directory of the system, go to System > Admin Settings > General Settings > System Settings > Directory and clear this option. © Polycom, Inc. 4 - 27...
- Page 118 Administrator’s Guide for the VSX Series Using the System for Specialized Applications You can customize the system to show only a specific set of numbers to call. This mode, also known as “kiosk mode,” can be used for specialized applications, such as customer query stations or systems used for calling the same numbers on a regular basis.
- Page 119 AES encryption is a standard feature on all VSX systems. When it is enabled, the system automatically encrypts calls to other AES-capable systems. To enable AES encryption: >> Go to System > Admin Settings > General Settings > Security and select AES Encryption. © Polycom, Inc. 4 - 29...
- Page 120 Administrator’s Guide for the VSX Series Configuring Call Settings The Call Settings screens provide access to high-level options for the entire system. For convenience, some of the User Settings options are repeated on these screens. To configure call settings: Go to System > Admin Settings > General Settings > System Settings > Call Settings.
- Page 121 Do Not Disturb – Refuses incoming calls automatically. The caller receives a message that the site is unavailable. If you have a VSX 3000 system that you are using as your PC monitor, Polycom recommends that you set up the system so that you have to answer calls manually.
- Page 122 VSX room systems have internal MCUs and can initiate multipoint calls. These systems can also use the Conference on Demand feature of Polycom’s Path Navigator for multipoint calling. The VSX 6000 system does not have an internal MCU and can participate in a multipoint call but cannot initiate one.
- Page 123 Full Screen — The site that is speaking is shown in full screen to all other sites. This mode is also called voice-activated switching. © Polycom, Inc. 4 - 33...
- Page 124 Administrator’s Guide for the VSX Series Configuring with PathNavigator’s Conference on Demand Feature If your organization uses Polycom’s PathNavigator, you can use PathNavigator’s Conference on Demand feature to place multipoint calls with up to 10 sites, including the site that places the call.
- Page 125 Ask each far site to call up to two additional sites. Along with these two sites, each far site in the original multipoint call can add an audio-only site. © Polycom, Inc. 4 - 35...
- Page 126 Administrator’s Guide for the VSX Series Configuring Directory Settings You can customize the behavior of the Directory on the Directory screen. To configure system settings: Go to System > Admin Settings > General Settings > System Settings > Directory. Configure these settings:...
- Page 127 • Local Time – Displays the local time on the screen during a call. • Off – Time is not displayed. Time Server Specifies connection to a time server for automatic system time settings. © Polycom, Inc. 4 - 37...
- Page 128 Administrator’s Guide for the VSX Series Customizing the Workspace Appearance You can customize your VSX system workspace appearance to suit the users’ environment functionally and aesthetically. For example, by customizing the home screen into kiosk mode, users only have to select a site and press the Call button on the remote control to place a call.
- Page 129 Provide additional options for advanced video conferencing users: • Call Quality Add more • Multipoint dialing features as • User Settings, Diagnostics, and System users gain experience Information • Speed Dial list of frequently called sites © Polycom, Inc. 4 - 39...
- Page 130 Administrator’s Guide for the VSX Series To design the home screen: Go to System > Admin Settings > General Settings > Home Screen Settings. Configure these settings: Setting Description Dialing Display Specifies which dialing option to display: • Dialing entry field — Allows users to enter numbers manually.
- Page 131 Sites screen. Select Add and choose the sites to add from the directory. Select either Speed Dial or Contacts as the name you want to appear on the button. © Polycom, Inc. 4 - 41...
- Page 132 Administrator’s Guide for the VSX Series Adding Marquee Text You can create marquee text to display in the dialing entry field on the home screen. You can create context-specific instructions for your users or, if the home screen has Site buttons, the marquee text can provide information that helps users choose which site to call.
- Page 133 Enter the user name and administrator’s password, if a password has been established. Click System Setup > Utilities > Screen Saver, and click News Feed. Select a stream content, click Submit, and close the stream content window. Click Update. © Polycom, Inc. 4 - 43...
- Page 134 Administrator’s Guide for the VSX Series Changing System Appearance Different system appearance options are available, allowing you to coordinate the system interface with the meeting room décor. To change the system appearance: Go to System > Admin Settings > General Settings > System Settings >...
- Page 135 Go to System > Admin Settings > Audio. Select Enable Internal Ringer to specify an additional ring tone when receiving an incoming call. The ringer is built into the system and will alert you to incoming calls. © Polycom, Inc. 4 - 45...
- Page 136 Administrator’s Guide for the VSX Series Configuring Remote Control Behavior You can customize the behavior of the remote control to support the users’ environment. To configure remote control behavior: Go to System > Admin Settings > General Settings > System Settings >...
-
Page 137: Configuring Streaming Calls
IP Multicast Specifies the multicast address used for the stream. The default Address address is based on your system serial number but can be changed, if required. © Polycom, Inc. 4 - 47... - Page 138 Administrator’s Guide for the VSX Series To stream a conference: Go to System > Utilities > Streaming. Select the Start Streaming option to begin streaming. Place the video call to other participants. You can also start streaming after you place the call.
-
Page 139: Configuring Closed Captioning
Remotely, via a dial-up connection to the system’s serial RS-232 port, ❑ In the room using equipment connected directly to the serial port, ❑ In the room or remotely, using VSX Web, or ❑ In the room or remotely, using a Telnet session. © Polycom, Inc. 4 - 49... - Page 140 Administrator’s Guide for the VSX Series Via a Dial-Up Connection to the Systems’ Serial RS-232 Port Closed captioners can provide captions from inside the conference room, or from a remote location, via a dial-up connection to the serial port of the VSX system, as shown in the following diagram.
- Page 141 To supply closed captions for a conference using VSX Web: On a PC, open a web browser. In the browser address line, enter the IP address of the system, for example, , to go to the system’s web interface. http://255.255.255.255 © Polycom, Inc. 4 - 51...
- Page 142 Administrator’s Guide for the VSX Series Go to System Setup > Utilities > Closed Caption. Log in using this information: User Name: Your name. Password: Meeting password defined for your video conferencing system. In the Closed Caption screen, type the caption text into the text field. Text wraps to the next line after 59 characters.
-
Page 143: Helping Users Get Started
The following resources are available for users: ❑ Getting Started Guide for the VSX Series— This guide is for all users, from beginners to the more experienced. It covers meeting basics, different ways to place calls, how to use the remote control, and how to deliver presentations. - Page 144 Administrator’s Guide for the VSX Series 4 - 54 www.polycom.com/videodocumentation...
- Page 145 Managing the System Remotely You configure, manage, and monitor the system from a remote computer using the system’s web interface, VSX Web. You can also use the Polycom Global ™ Management System , SNMP, or the API commands. Your choice of management tool depends on your network environment: ❑...
- Page 146 Administrator’s Guide for the VSX Series Using VSX Web You can use VSX Web to perform most of the calling and configuration tasks you can perform on the local system. Accessing VSX Web To configure your browser to use VSX Web: Be sure that you use Microsoft Internet Explorer 6.0 or later as your web...
- Page 147 Mute and unmute the microphones You can view near and far sites without opening Web Director by clicking on System Setup then clicking on the monitor icon in the top right corner of the browser window. © Polycom, Inc. 5 - 3...
- Page 148 Option keys ❑ System behaviors Polycom recommends using profiles as a way to back up system settings. Attempting to edit a stored profile or upload it to a different system can result in unexpected problems. To store a profile: In VSX Web, go to System Setup > Utilities > Profile Center.
- Page 149 In VSX Web, go to System Setup > Utilities > Import Directory. Click PC —> VSX. Click Browse and browse to the location of the .csv file on your PC. Click Export Directory to upload the .csv file to the VSX system. © Polycom, Inc. 5 - 5...
- Page 150 Administrator’s Guide for the VSX Series Configuring Global Services If your organization uses the Polycom Global Management System, you can configure, manage, and monitor the VSX system using the Global Management System (GMS) server. GMS is a web-based client/server software tool that allows administrators to manage a network of video conferencing systems.
- Page 151 Go to System > Admin Settings > Global Services > My Information. Enter the contact information for the GMS administrator for technical support. The following section illustrates the interaction between GMS and the system you are configuring. © Polycom, Inc. 5 - 7...
- Page 152 Administrator’s Guide for the VSX Series Requesting Technical Support from the GMS Administrator 1. From the Place A Call screen, press on the remote. 2. Select Support and press on the remote. You see the following message: Tech Support will be alerted to phone you at the following number.
- Page 153 In order to allow your SNMP management console application to resolve SNMP traps and display human readable text descriptions for those traps, you need to install Polycom MIBs (Management Information Base) on the computer you intend to use as your network management station.
- Page 154 Administrator’s Guide for the VSX Series Configuring for SNMP Management To configure the VSX system for SNMP Management: Access the SNMP configuration screen either in VSX Web or on the VSX system. In VSX Web go to System Setup > Admin Settings > Global Services >...
- Page 155 The VSX system provides various screens that allow you to review information about calls made by the system and to review network usage and performance. What’s in this Chapter? Page Call Summary Call Statistics Call Status Recent Calls Call Detail Report © Polycom, Inc. 6 - 1...
-
Page 156: Call Summary
Administrator’s Guide for the VSX Series Call Summary The Call Summary screen provides details about the calls placed by the system, including: ❑ Duration of the last call ❑ Total number of calls placed and received ❑ Number, total time, and percentage of IP calls ❑... -
Page 157: Call Statistics
To view the Call Statistics screen: >> Go to System > Diagnostics > Call Statistics and then select You can view Call Statistics and Call Summary during a call by pressing Help on the remote. © Polycom, Inc. 6 - 3... -
Page 158: Call Status
Administrator’s Guide for the VSX Series Call Status The Call Status screen provides call connection information. The spheres on the screen provide details for each line. When you place a call, you’ll see the status change as the call connects. -
Page 159: Recent Calls
Select on the remote to place the call. If you need even more detail about calls, you can download the Call Detail Report (CDR) from VSX Web. For more information about the CDR, see Call Detail Report on page 6-6. © Polycom, Inc. 6 - 5... -
Page 160: Call Detail Report
Administrator’s Guide for the VSX Series Call Detail Report The Call Detail Report (CDR) provides the system’s call history. You can view the CDR from VSX Web, and you can download the data in CSV format for sorting and formatting. - Page 161 Audio Protocol The audio protocol transmitted to the far site, such as G.728 or (Tx) Siren™ 14. Audio Protocol The audio protocol received from the far site, such as G.728 or (Rx) G.722. © Polycom, Inc. 6 - 7...
- Page 162 Administrator’s Guide for the VSX Series Data Description Video Protocol The video protocol transmitted to the far site, such as H.263 or (Tx) H.264. Video Protocol The video protocol received from the far site, such as H.261 or (Rx) H.263.
- Page 163 Conference numbering restarts at 1 after the system assigns conference number 100,000. To get an archived CDR: From your computer, open an FTP client. FTP into the VSX system. Enter this FTP command: GET localcdr_archive.csv Close your FTP session. © Polycom, Inc. 6 - 9...
- Page 164 Administrator’s Guide for the VSX Series 6 - 10 www.polycom.com/videodocumentation...
- Page 165 Web, enter your system’s IP address in a web browser and browse to the required diagnostic tool. What’s in this Chapter? Page Sending a Message System Screens Quick Reference Diagnostic Screens General Troubleshooting How to Contact Technical Support 7-29 © Polycom, Inc. 7 - 1...
- Page 166 Administrator’s Guide for the VSX Series Sending a Message If you are experiencing difficulties with connectivity or audio, you may want to send a message to the system that you are managing. Only the near site can see the message; it is not broadcast to all the sites in the call.
- Page 167 Call Detail Report. System Information Identifying information. Utilities Call scheduler and calendar. VSX 6000, VSX 7000, and VSX 8000 systems also include a streaming utility. User Settings System behavior and appearance. © Polycom, Inc. 7 - 3...
- Page 168 Administrator’s Guide for the VSX Series Diagnostic Screens You can view network statistics and perform diagnostic tests from the VSX system’s Diagnostics screens. To access the Diagnostics screens on the system: >> Go to System > Diagnostics. To access the Diagnostics screens from the VSX Web: On a PC, open a web browser.
- Page 169 Not available. Select Utilities > Call Detail Report. Displays the current Call Detail Report (CDR) and provides access to the For more information about this screen, see Call Detail Report on archived CDR. page 6-6. © Polycom, Inc. 7 - 5...
- Page 170 Administrator’s Guide for the VSX Series Network Tools Diagnostic Tool In the system’s user interface In the VSX Web Near End Loop test 1. On the Diagnostics screen, 1. Select Diagnostics > select Network. Network > Near End Loop. Tests whether your system is able to make 2.
- Page 171 4. To check far-site audio, ask a participant at the far site to speak. 5. To check a VCR or DVD, connect it to the VCR inputs and play the VCR or DVD to test the audio. © Polycom, Inc. 7 - 7...
- Page 172 Administrator’s Guide for the VSX Series Reset and Restart Diagnostic Tool In the system’s user interface In the VSX Web Reset System 1. On the Diagnostics screen, 1. Select Diagnostics > Reset select Reset System. System. Cycles power to the system.
- Page 173 This section presents problems, likely causes, and corrective actions. Problems are grouped as follows: ❑ Power and Start-up ❑ Controls ❑ Access to Screens and Systems ❑ Calling ❑ Displays ❑ Cameras ❑ Audio ❑ Error Indications ❑ System Lights ❑ Network Interface Lights © Polycom, Inc. 7 - 9...
- Page 174 If the outlet is active, the problem is in the system’s power supply. In this case, call Polycom Technical Support and arrange to return the system for service. The system starts in the The system software is Load the system software from your PC.
- Page 175 Baud Rate is set to the same value on the system as on the touch-panel. • RS-232 Mode is set to Control. • VSX 8000: The touch-panel is connected to the port that is configured as a touch-panel port. © Polycom, Inc. 7 - 11...
- Page 176 Administrator’s Guide for the VSX Series Access to Screens and Systems Symptom Problem Corrective action Cannot navigate to The Home screen is not Access the system remotely using VSX Web, FTP, Telnet, Admin screens — configured to display the or SNMP.
- Page 177 ISDN that is connected to an call immediately after Adtran Atlas 800 Plus starting the system. module. After power on, the Adtran module must complete channel restarts before the system can complete ISDN calls. © Polycom, Inc. 7 - 13...
- Page 178 Administrator’s Guide for the VSX Series Symptom Problem Corrective action ISDN: Line Status icons The system is not Check the ISDN line connections. do not go away so video connected to an ISDN. calls cannot be made. The ISDN number is Check the ISDN numbers with your service provider.
- Page 179 Being able to dial non-bonded but unable to dial bonded yellow.) to all locations is usually a switch protocol issue. Verify your ISDN provisioning with the telephone service provider. © Polycom, Inc. 7 - 15...
- Page 180 Administrator’s Guide for the VSX Series Symptom Problem Corrective action Dialing a remote site in The far site may be unable Go to the Call Status screen. Highlight each of the circles calls above some to accept calls above this for each of the channels dialed.
- Page 181 Pan the camera. It adjusts for the lighting whenever it is too dark or too light in the changed within the past moved. PIP. few minutes. During calls, the camera adjusts for the lighting at five-minute intervals. © Polycom, Inc. 7 - 17...
- Page 182 Administrator’s Guide for the VSX Series Symptom Problem Corrective action The system does not The modem is not Verify that the modem is connected correctly according to receive closed captions connected correctly, or is the installation procedure in the section Connecting correctly.
- Page 183 Change the Pro-Motion Video setting to the desired minimum call speed. VSX 3000 and VSX 6000 This is normal. systems send Pro-Motion video for content only. No picture in the PIP The lens cover is closed. Open the lens cover. window. © Polycom, Inc. 7 - 19...
- Page 184 Administrator’s Guide for the VSX Series Symptom Problem Corrective action Blue screen in the PIP The VCR input is selected Select a different camera or play a tape on the VCR. window. and the VCR is not running. Most VCRs...
- Page 185 Symptom Problem Corrective action The camera does not Stereo is enabled in the Clear the Enable Polycom StereoSurround selection on track to the person who is user interface. This is the Admin Settings > Audio > Audio Settings screen. speaking.
- Page 186 Administrator’s Guide for the VSX Series Audio Symptom Problem Corrective action No audio at your site The far site is muted. Look for the far site Mute icon. Ask the far site to unmute the microphone. Note: The far site’s microphone may be muted even if you do not see a far site Mute icon.
- Page 187 VSX 8000: Your system’s microphone is not connected, or is connected incorrectly. Your system’s microphone Contact your Polycom reseller. does not work. Not enough volume The people at the far site Ask the people at the far site to move closer to the during a call.
- Page 188 Administrator’s Guide for the VSX Series Symptom Problem Corrective action You can hear yourself on The far site microphone is At the far site, make sure the microphone is placed away your system’s monitor or too close to the system’s from the system’s audio speaker.
- Page 189 Speakers are connected Connect the speaker on the left to the system’s white incorrectly. audio output connector, and the speaker on the right to the red audio output connector. © Polycom, Inc. 7 - 25...
- Page 190 Administrator’s Guide for the VSX Series Symptom Problem Corrective action The VTX 1000 This is normal. Use the VSX system remote control to adjust the system conference phone’s in video calls. controls do not adjust volume in video calls. The Audio Meter screen Echo cancellation is in use.
- Page 191 Green indicator blinks The remote control has been picked up or set down. Red indicator turns on The system is powering off. momentarily Mute indicator on the The system microphone is muted. microphone pod is red © Polycom, Inc. 7 - 27...
- Page 192 Administrator’s Guide for the VSX Series Network Interface Lights On VSX 7000 and VSX 8000 systems, the Quad BRI network interface lights are located on the network interface module. On the VSX 3000 system, the lights are located on the back of the system near the BRI connectors.
- Page 193 How to Contact Technical Support If you are not able to make test calls successfully and you have verified that the equipment is installed and set up correctly, contact Polycom Technical Support by telephone or Internet as described below. By Telephone Before calling Polycom Technical Support, please have the following information ready.
- Page 194 Administrator’s Guide for the VSX Series 7 - 30 www.polycom.com/videodocumentation...
- Page 195 PIP shows: Monitor 1 Graphics Near video None Graphics Far video Monitor 2 Far video Graphics Graphics Graphics Near video Projector Far video Near video None Graphics None © Polycom, Inc. Appendix - 1...
- Page 196 Administrator’s Guide for the VSX Series Multipoint Dialing Speed Information In a multipoint call, all parties must be connected at the same speed. The following table shows the maximum allowable dialing speeds for the number of sites, including the main site, in a call.
- Page 197 Changing the Web Access Port on the Security screen ❑ Changing any setting on the SNMP screen: • Enable SNMP • Community • Contact Name • Location Name • System Description • Console IP Address © Polycom, Inc. Appendix - 3...
- Page 198 TCP Audio call control (must be bidirectional) 8080-Static TCP HTTP server push (optional) 1024-65535 Dynamic TCP H245. Can be set to “Fixed Ports” on Polycom systems. 1024-65535 Dynamic UDP - RTP (video data). Can be set to “Fixed Ports” on Polycom systems.
- Page 199 Appendix The following table shows other VSX port usage. Port Function (FTP) Software upgrades and GMS provisioning (Telnet) For diagnostics (FTP) API control © Polycom, Inc. Appendix - 5...
- Page 200 Administrator’s Guide for the VSX Series Q.850 Cause Codes The following table describes codes that the ISDN switch sends to the VSX system to indicate call status. Although the codes are standardized, each ISDN service provider defines them differently. Because of this, the definitions in the table may not exactly match the messages that you see.
- Page 201 Service or option not An unspecified problem prevents the network or remote available, equipment from providing the requested service or unspecified option. This might be a subscription problem. © Polycom, Inc. Appendix - 7...
- Page 202 Administrator’s Guide for the VSX Series Code Cause Definition Bearer capability not The network is not capable of providing the bearer implemented capability requested by the user. Channel type not The requested channel type is not supported by the implemented equipment sending this code.
- Page 203 States or Canada) a SPID assignment problem. ISDN switch/network inactive ISDN command The ISDN signaling code has encountered an error processing error processing an ISDN action. ISDN adapter busy-wait and retry. © Polycom, Inc. Appendix - 9...
- Page 204 Administrator’s Guide for the VSX Series PathNavigator Error Codes The following table lists PathNavigator error codes. Code Cause Description No Network The network does not have enough resources to Resources complete your call. Try calling at a lower rate, or try the call again later.
- Page 205 Gatekeeper Your call could not be completed due to gatekeeper Problems problems. Try the call again later. Invalid Address The address you entered is not valid. Check the calling information and try again. © Polycom, Inc. Appendix - 11...
- Page 206 Administrator’s Guide for the VSX Series Code Cause Description Gatekeeper Your call could not be completed due to gatekeeper Problems problems. Try the call again later. Invalid Address The address you entered is not valid. Check the calling information and try again.
- Page 207 Sublicense Agreement without Polycom’s prior consent. Title to all Subject Programs shall at all times remain and vest solely with Polycom, Inc. and its licensors. Buyer acknowledges Polycom’s claim that the Subject Programs are its trade secret and confidential property, and shall treat them as such.
- Page 208 Administrator’s Guide for the VSX Series replaced item will be shipped to Customer, at Polycom's expense, not later than thirty (30) days after Polycom receives the defective product, and Polycom will retain risk of loss or damage until the item is delivered to Customer.
- Page 209 For repair or warranty information, please contact Polycom Inc. at 1-888-248-4143 or 4750 Willow Road, Pleasanton, CA 94588-2708, USA. Contact information may also be found at http://www.polycom.com. If the system is causing harm to the network, the telephone company may request that you disconnect it until the problem is corrected.
- Page 210 89/336/EEC, 73/23/EEC 1999/5/EC. A full copy of the Declaration of Conformity can be obtained from Polycom Ltd., 270 Bath Road, Slough UK SL1 4DX. Declaration of Conformity: Hereby, Polycom Ltd. declares that this VSX system is in compliance with the essential requirements and other relevant provisions of Directive 1999/5/EC. Konformitetserklæring: Hermed erklærer Polycom Ltd., at indestående VSX system er i overensstemmelse med de grundlæggende krav...
- Page 211 Polycom Ltd. vakuuttaa täten, että VSX system on direktiivin 1999/5/EC keskeisten vaatimusten ja sen muiden tätä koskevien säännösten mukainen. Déclaration de conformité: Par la présente, Polycom Ltd. déclare que ce VSX system est conforme aux conditions essentielles et à toute autre modalité pertinente de la Directive 1999/5/CE. Dichiarazione di conformità: Con la presente Polycom Ltd.
- Page 212 Administrator’s Guide for the VSX Series Underwriters Laboratories Statement The system is intended to be powered only by the supplied power supply unit. Special Safety Instructions Follow existing safety instructions and observe all safeguards as directed. Installation Instructions Installation must be performed in accordance with all relevant national wiring rules.
- Page 213 3-26, 4-36 multicast 4-47, 7-16 aspect ratio NAT public (WAN) 3-13 monitor 1 4-6 SIP proxy server 3-10 monitor 2 4-7 SIP registrar server 3-10 WINS server 3-5 audio cables 1-11 © Polycom, Inc. Index - 1...
- Page 214 Administrator’s Guide for the VSX Series call recording volume 4-13 battery icon 7-26 configuring 4-15, 4-16, 4-17 Baud Rate (selection) 4-23 configuring equipment type 4-16 Baud Rate (setting) 4-22 from ImageShare II or Visual Concert VSX 4-12, baud rate, modem 2-36...
- Page 215 4-16 deleting 4-5 call answering mode 4-31 general information 4-4 call preferences 3-23 setting 4-5 call settings 4-30 Camera Settings (screen) 4-4 cameras 4-2, 4-3, 4-4 cameras content display 4-11, 4-12 additional, configuring 4-4 © Polycom, Inc. Index - 3...
- Page 216 Administrator’s Guide for the VSX Series directory settings 4-36 ISDN 7-14 dual monitor emulation 4-7 microphones 2-22 firewalls 3-12 mixer 2-29 for UPnP 3-13 modem, for receiving closed captions 2-36 for VPN 3-13 monitors 2-17, 2-18 ImageShare II 4-11, 4-12, 4-13...
- Page 217 See Vortex mixer Directory Numbers (setting) 3-15 Enable Analog Phone (setting) 3-23 Directory Servers screen 3-25 Enable Broadcast Mode (setting) 3-21 Display Global Addresses (setting) 3-25 Enable H.239 (setting) 3-23, 4-12 Display H.323 Extension (setting) 3-6 © Polycom, Inc. Index - 5...
- Page 218 Administrator’s Guide for the VSX Series Enable Internal Ringer (setting) 4-15 single-monitor VGA 1-3 SNMP reporting 1-5 Enable IP H.323 (setting) 3-6, 3-23 StereoSurround 1-2 Enable ISDN H.320 (setting) 3-16, 3-23 system customization 1-3 Enable People+Content (setting) 3-21 UPnP support 1-4...
- Page 219 3-14, 3-17 ImageShare II, connecting 2-34 connecting VSX 3000 2-9 Import Directory (utility) 5-5 enabling IMUX, See Quad BRI network interface enabling lines 3-15 Incoming Video Call (setting) 4-15 network hardware requirements 2-10 © Polycom, Inc. Index - 7...
- Page 220 Administrator’s Guide for the VSX Series network interface modules 1-5 system 7-27 numbers, displaying 4-40 Line Build Out (setting) 3-17 Q.850 cause codes Appendix-6 Line Input (settings) 4-14 SPIDs 3-15 audio switch protocol 3-15, 3-17 line in level 4-16 troubleshooting 7-14, 7-15...
- Page 221 Number of ISDN Channels to Dial in Parallel Multipoint Setup (screen) 4-33 (setting) 3-14, 3-17 Mute Auto-Answer Calls (setting) 4-15 Number of Router Hops 4-47 muting Numbering Plan (setting) 3-17 Polycom microphones 4-16 My Contacts list 4-41 © Polycom, Inc. Index - 9...
- Page 222 Administrator’s Guide for the VSX Series enabling 4-10 general information 4-10 Obtain IP Address Automatically (setting) 3-4 installing on a PC 4-11 on-screen instructions, providing 4-42 requirements 4-10 optional equipment picture-in-picture, See PIP additional microphone pods 1-6 PING screen 7-6, 7-13...
- Page 223 PTZ cameras, See cameras network hardware for ISDN BRI 2-10 Pulse Width (setting) 3-20 network hardware for ISDN PRI 2-10 network hardware for serial PVEC (Polycom Video Error Concealment) 3-11 V.35/RS-449/RS-530 2-10 requirements, web browser 3-3 reset system 7-8 Reset System (screen) 4-25 Q.850 cause codes Appendix-6...
- Page 224 Administrator’s Guide for the VSX Series actions that cause 3-4, 3-5, 4-29, A-3 Serial Ports (screen) 4-20 Restore Defaults (setting) 3-17 serial V.35/RS-449/RS-530 network interface configuring 3-19, 3-20, 3-21 ring tones connecting 2-12 setting 4-15, 4-45 crypto resync pulse 3-20...
- Page 225 S-video to BNC adapter 1-11, 2-14 elapsed, displaying 4-30, 4-37 Switch Protocol (setting) 3-17 maximum call duration 4-27, 4-30 screen saver 4-44 switch protocol, ISDN 3-14, 3-15 setting 4-36 switch, power 2-38 to display far site name 4-31 © Polycom, Inc. Index - 13...
- Page 226 Administrator’s Guide for the VSX Series Time Between Pulses (setting) 3-20 muting auto-answer calls 4-15 PIP 4-7 Time Difference from GMT (setting) 4-37 User Settings screen, allowing access 4-28 Time Format (setting) 4-37 utilities 4-48, 7-3 Time Server (setting) 4-37...
- Page 227 VSX web interface accessing diagnostic screens 7-4 Call Detail Report 6-6 sending message 7-2 VTX 1000 conference phone connecting 2-31 positioning for stereo 2-32 telephone number 3-22 valid configurations 2-30 Web Access Port (setting) 4-29 © Polycom, Inc. Index - 15...
- Page 228 Administrator’s Guide for the VSX Series Index - 16 www.polycom.com/videodocumentation...
Need help?
Do you have a question about the VSX Series and is the answer not in the manual?
Questions and answers