Polycom VSX Series Administrator's Manual
Hide thumbs
Also See for VSX Series:
- Administrator's manual (248 pages) ,
- Integrator's reference manual (156 pages) ,
- Getting started manual (48 pages)

Related Manuals for Polycom VSX Series


Summary of Contents for Polycom VSX Series
- Page 1 Administrator’s Guide for the VSX Series Version 8.6.2 for SCCP April 2007 Edition 3725-24332-002/A VSX Version 8.6.2...
- Page 2 As between the parties, Polycom, Inc. retains title to, and ownership of, all proprietary rights with respect to the software contained within its products. The software is protected by United States copyright laws and international treaty provision.
- Page 3 About This Guide The Administrator’s Guide for the VSX Series is for administrators who need to configure, customize, manage, and troubleshoot VSX™ systems. The guide covers the VSX 3000A, VSX 5000, VSX 6000A,VSX 7000s, VSX 7000e, and VSX 8000 systems.
- Page 4 Administrator’s Guide for the VSX Series...
-
Page 5: Table Of Contents
Contents 1 Introducing the VSX Series ......1-1 VSX Models ..............1-1 VSX 3000A Desktop Systems . - Page 6 General Audio Settings ........... . . 4-6 VSX Systems Settings for a Polycom Vortex Mixer ......4-10 Settings for Microphones Connected to Audio Inputs .
- Page 7 Contents 6 Calling and Answering ......6-1 Configuring Call Settings ............6-1 Setting the Call Answering Mode .
- Page 8 Administrator’s Guide for the VSX Series 10 Control Devices ....... . 10-1 Connecting Control and Accessibility Equipment .
- Page 9 Contents B Video Source Output Examples for Multiple Monitors ..B-1 C Port Usage ........C-1 Index .
- Page 10 Administrator’s Guide for the VSX Series...
-
Page 11: Introducing The Vsx Series
VSX Models This section describes the standard components that come with the VSX Series systems. For technical specifications and detailed descriptions of features available for VSX models, please refer to the product literature available at www.polycom.com. -
Page 12: Vsx 5000 Set-Top System
Administrator’s Guide for the VSX Series VSX 5000 Set-top System The VSX 5000 is a compact, entry-level system with an all-electronic, built-in camera. VSX 6000A Set-top Systems The VSX 6000A systems are entry-level video conferencing systems for IP and SIP networks only. -
Page 13: Positioning Desktop Systems
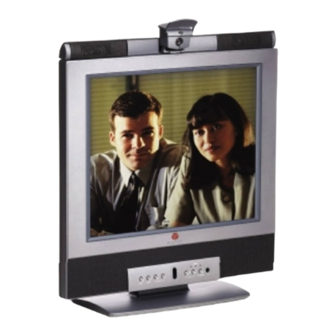
Introducing the VSX Series Place the camera and display together so that people at your site face the camera when they face the far site display. Positioning Desktop Systems The VSX 3000A systems are personal video conferencing systems for the desktop. -
Page 14: Positioning Set-Top Systems
Administrator’s Guide for the VSX Series Positioning Set-top Systems The VSX 5000, VSX 6000A, and VSX 7000s systems are designed to be placed on top of a monitor. You can order a shelf that can be mounted on a wall or placed on top of a flat-panel monitor. -
Page 15: Powering On
Introducing the VSX Series To position the system: 1. Install the mounting brackets on the system if you need to mount it in an equipment rack, or install the self-adhesive feet if you will place the system on a table or shelf. -
Page 16: Configuring With The Setup Wizard
If Security Mode is enabled, the room password is required to access the Reset System screen. If you forget the room password while the system is in Security Mode, contact your Polycom distributor or Polycom Technical Support. You can run the setup wizard or view the configuration screens in either of these two ways. -
Page 17: Networks
To begin, refer to the Preparing Your Network for Video Conferencing document, available at www.polycom.com/videodocumentation. This document contains information you need to prepare your network, such as worksheets that will help you order ISDN. -
Page 18: Configuring Lan Properties
Administrator’s Guide for the VSX Series • Use People+Content IP • Update system software using the Polycom Softupdate program Configuring LAN Properties To configure LAN properties: 1. Go to System > Admin Settings > LAN Properties. 2. Configure these settings:... - Page 19 Note: Be sure that the device and the switch settings match. Typically, selecting Auto for both is sufficient. The LAN Speed setting for the VSX system and the switch must match. Polycom strongly recommends that you do not select Auto for either just the VSX system or just the switch;...
-
Page 20: Configuring The Vsx System To Use Sccp
SCCP-enabled system by entering the system’s extension on the Place a Call screen. Polycom VSX software release 8.6.2 supporting the Cisco SCCP protocol has been certified with Cisco CallManager 4.2(3) and 5.1(1). Additionally, Polycom has successfully deployed VSX software version 8.6.2 with other versions of the Cisco CallManager, including versions 4.1(x) and 5.0(x). -
Page 21: Configuring The Cisco Callmanager For Use With The Vsx System
To configure the Cisco CallManager: 1. In the Cisco CallManager, go to the Phone Configuration > Directory Number Configuration screen. 2. Provision these settings for each Polycom Video Extension: — Maximum Number of Calls: 1 — Busy Trigger: 1 After you have configured the VSX system and installed the plug-in, you can place SCCP calls. - Page 22 Administrator’s Guide for the VSX Series 2 - 6...
-
Page 23: Displays And Cameras
Displays and Cameras Connecting Monitors and Projectors If you have a set-top or component system, you need to connect a monitor to the system to see the people at the far site. Refer to your system’s setup sheet for connection details. The following table shows the different ways you can connect monitors to a VSX system. -
Page 24: Connecting Monitors To Component Systems
Administrator’s Guide for the VSX Series Connecting Monitors to Component Systems You can connect either a TV monitor or a VGA monitor to your VSX system. The component systems provide S-video connections for the main TV monitor. On the VSX 8000 system, the main monitor uses BNC connectors. -
Page 25: Configuring Monitor And Projector Settings
Displays and Cameras Configuring Monitor and Projector Settings To configure monitors: 1. Go to System > Admin Settings > Monitors > Monitors. 2. Configure these settings: Setting Description Monitor 1 Specifies the monitor’s aspect ratio: VSX 5000 • 4:3 — Select if you are using a regular TV monitor. VSX 6000A •... - Page 26 Administrator’s Guide for the VSX Series Setting Description Monitor 2 Specifies the second monitor’s aspect ratio: VSX 5000 • Off — Select if you do not have a second monitor. VSX 6000A • 4:3 — Select if you are using a regular TV monitor as the VSX 7000s second monitor.
- Page 27 Displays and Cameras 3. Select and configure these settings: Setting Description Monitor 1 Select the video source(s) to display on Monitor 1. For more information about how this setting can affect your display, refer to VSX 5000 Video Source Output Examples for Multiple Monitors on page VSX 7000 B-1.
- Page 28 Administrator’s Guide for the VSX Series Setting Description Specifies PIP (Picture-in-Picture) behavior: • Camera — The PIP window is displayed when the call is first connected and when a user moves the camera, uses presets, or switches to a different camera source.
-
Page 29: Using Dual Monitor Emulation
Displays and Cameras Using Dual Monitor Emulation Dual Monitor Emulation is designed for rooms or offices with one monitor only. Users see both near and far sites on one monitor in two different views. During presentations, users see content and the near and far sites. What you see during a call can depend on factors such as the VSX system monitor configuration, the number of sites in the call, and whether content is being shared. -
Page 30: Adjusting The Monitor's Color Balance, Sharpness, And Brightness
Administrator’s Guide for the VSX Series Adjusting the Monitor’s Color Balance, Sharpness, and Brightness In most cases, the monitor you connect to your system may be set to a configuration that is appropriate for video conferencing applications. Depending on your environment and model of monitor, however, the video may exhibit one of these problems: •... -
Page 31: Preventing Monitor Burn-In
Displays and Cameras Preventing Monitor Burn-In Monitors and VSX systems provide display settings to help prevent image burn-in. Plasma televisions can be particularly vulnerable to this problem. Refer to your monitor’s documentation or manufacturer for specific recommendations and instructions. The following guidelines help prevent image burn-in: Set Output upon Screen Saver Activation to Black. -
Page 32: Connecting Cameras To Component Systems
VSX 8000 system provides the S-video signal to the main camera through BNC connectors. Refer to the release notes for a list of supported PTZ cameras. You can configure a VSX 7000e or VSX 8000 system with a Polycom PowerCam Plus to track to the speaker’s voice or to camera presets. - Page 33 Displays and Cameras Setting Description Far Control of Specifies whether the far site can control the position of the Near Camera near-site camera. When this option is selected, a user at the far site can control the framing and angle of the camera for VSX 5000 the best view of the near site.
- Page 34 Administrator’s Guide for the VSX Series — Sharpness — The picture will be sharp and clear, but motion will not be smooth. Choose this setting for document cameras. Sharpness is available in point-to-point H.263 calls only. 6. Set Pro-Motion Video to specify when to use Pro-Motion for video inputs set for motion.
-
Page 35: Configuring Automatic Camera Tracking
Displays and Cameras Configuring Automatic Camera Tracking You can configure a VSX 7000e or VSX 8000 with a Polycom PowerCam Plus to track to the speaker’s voice or to camera presets. During a call, users can press Auto on the remote control to toggle between Automatic Camera Tracking, Automatic Camera Tracking to Presets, and Automatic Camera Tracking Off. - Page 36 Administrator’s Guide for the VSX Series To store a preset: 1. If you are in a call, press Near or Far on the remote control to choose a near-site or far-site camera or other video source. 2. If you selected a camera that supports electronic pan, tilt, and zoom, you can adjust the camera’s position:...
-
Page 37: Microphones And Speakers
Microphones and Speakers Connecting Microphones SoundStation VTX 1000 Polycom microphones each contain three microphone elements for 360° coverage. Microphone elements in the Polycom microphone Microphone coverage shown from above Monaural operation 4 - 1... -
Page 38: Connecting Polycom Microphones To Set-Top Or Component Systems
You may place the microphones on the table, or you may mount them to the ceiling. A ceiling mount kit is available for Polycom microphones. You can connect two additional Polycom microphones to a VSX 7000s or component VSX system. - Page 39 Microphones and Speakers The following diagram shows microphone connection options for VSX set-top systems. Any set-top or component system Any component system Any component system 30 ft (9 m) 30 ft (9 m) 50 ft (15 m) 2457-20910-003 2457-20910-003 2457-20910-050 or 10 ft (3 m) or 10 ft (3 m) or 30 ft (9 m)
-
Page 40: Connecting Powered Microphones To A Set-Top System
For example, it allows you to provide a microphone for each call participant in a boardroom. The VSX 8000 is designed to work with Polycom Vortex mixers. For top performance, you need Vortex firmware 2.5.2 or later, Conference Composer™... -
Page 41: Connecting Speakers To Component Systems
You must connect at least one speaker to play audio from the far site. You can use the speakers built into the main monitor, or you can connect an external speaker system such as the Polycom StereoSurround kit to provide more volume and richer sound in large rooms. Refer to your system’s setup sheet for connection details. -
Page 42: Configuring Audio Settings
Administrator’s Guide for the VSX Series Configuring Audio Settings General Audio Settings To configure general audio settings: 1. Go to System > Admin Settings > Audio Settings. 2. Configure these settings: Setting Description Sound Effects Sets the volume level of the ring tone and user alert tones. - Page 43 Lets you specify whether to use the system’s built-in echo canceller. Do not enable this option if you have connected a Polycom Vortex mixer. This option is not available on some systems when the line input type is set to VCR.
- Page 44 Administrator’s Guide for the VSX Series Setting Description Enable Phantom Allows the system to supply power to microphones Power connected directly to the balanced audio inputs. VSX 8000 Note: This selection is only available when you set Input Type to Microphone.
- Page 45 Microphones and Speakers Setting Description VCR/DVD Out Level Sets the volume at which the call is recorded. VCR/DVD Audio Allows you to record a call using one VCR or DVD, while Out Always On playing recorded content into the call from a second VCR or DVD.
-
Page 46: Vsx Systems Settings For A Polycom Vortex Mixer
4. Go to System > Admin Settings > General Settings > Serial Ports. Set RS-232 Mode to Vortex Mixer for the appropriate port. Refer to the Polycom Vortex documentation for details on configuring the mixer. Settings for Microphones Connected to Audio Inputs... -
Page 47: Settings For Microphones Connected To Balanced Audio Inputs On A
Microphones and Speakers Settings for Microphones Connected to Balanced Audio Inputs on a VSX 8000 System To configure the VSX 8000 system to use microphones connected directly to the balanced audio inputs: 1. Go to System > Admin Settings > Audio > Audio Settings > Next. Configure Balanced In: Set Input type to Microphone. - Page 48 Administrator’s Guide for the VSX Series 4 - 12...
-
Page 49: Content And Closed Captions
Content and Closed Captions You can present content during calls on a TV monitor when you use: • A VCR or DVD player connected directly to a Polycom VSX system. • A Visual Concert VSX data collaboration unit, with any VSX set-top system •... -
Page 50: Configuring Vcr/Dvd Player Settings
Administrator’s Guide for the VSX Series Configuring VCR/DVD Player Settings Playing a Videotape or DVD The VCR/DVD inputs are active when you select the camera source configured as VCR. The microphone inputs remain active while the VCR/DVD is playing. Call participants may wish to mute the microphones while playing VCR/DVD content. -
Page 51: Connecting A Visual Concert Vsx To Set-Top Systems
Connecting a Visual Concert VSX to Set-top Systems To show material from your computer, you may connect a Visual Concert VSX unit to any set-top system in the VSX series. Refer to Setting up the Visual Concert VSX for connection details. -
Page 52: Connecting An Imageshare Ii To Component Systems
Connecting an ImageShare II to Component Systems To show material from your computer, you may connect an ImageShare II unit to any component system in the VSX series. The ImageShare II gives you control over whether others can see what is displayed on your computer. -
Page 53: Configuring Content Display With A Visual Concert Vsx Or Imageshare Ii
Content and Closed Captions Configuring Content Display with a Visual Concert VSX or ImageShare II To configure the content display: 1. Go to System > Admin Settings > Monitors > Graphics VGA. 2. Configure these settings: Setting Description VGA Output with Indicates that the screen appears black when there is no No Graphics content to display. -
Page 54: Configuring Content Display With People+Content Ip
Polycom distributor. To enable People+Content IP on a VSX system: 1. On a computer, open a web browser. Go to www.polycom.com/support, and navigate to your product page. 2. Enter the license number you received when you purchased the People+Content IP option. -
Page 55: Configuring Closed Captioning
Content and Closed Captions To install People+Content IP on a computer: 1. On a computer, open a web browser. Go to www.polycom.com/support, and navigate to your product page. 2. Locate the People+Content IP application and click the link to download the file locally. -
Page 56: Via A Dial-Up Connection To The Systems' Rs-232 Serial Port
Administrator’s Guide for the VSX Series Via a Dial-Up Connection to the Systems’ RS-232 Serial Port Closed captioners can provide captions from inside the conference room, or from a remote location, via a dial-up connection to the serial port of the VSX system, as shown in the following diagram. -
Page 57: Via The System's Serial Rs-232 Port
Content and Closed Captions Via the System’s Serial RS-232 Port Closed captioners can provide captions from inside the conference room, using equipment connected directly to the serial port of the VSX system, as shown in the following diagram. VSX System RS-232 Serial Stenograph... -
Page 58: Via A Telnet Session
Administrator’s Guide for the VSX Series To supply closed captions for a conference using VSX Web: 1. On a computer, open a web browser. 2. In the browser address line, enter the IP address of the system, for example, , to go to the system’s web interface. -
Page 59: Calling And Answering
Calling and Answering Configuring Call Settings The Call Settings screens provide access to high-level options for the entire system. For convenience, some of the User Settings options are repeated on these screens. To configure call settings: 1. Go to System > Admin Settings > General Settings > System Settings > Call Settings. -
Page 60: Setting The Call Answering Mode
If you have a VSX 3000A system that you are using as your computer monitor, Polycom recommends that you set up the system so that you have to answer calls manually. If you receive a call while using the system as a computer, you hear a ringing sound and you can switch to video to answer the call manually. -
Page 61: Configuring Directory Settings
Calling and Answering not connect, thereby preventing the caller from seeing or hearing you at your desk. Configuring Directory Settings To configure system settings: 1. Go to System > Admin Settings > General Settings > System Settings > Directory. 2. Configure these settings: Setting Description System Name... -
Page 62: Enabling Call Forwarding
Administrator’s Guide for the VSX Series Enabling Call Forwarding You can allow users to forward all calls to another system. Users can forward calls from the Do Not Disturb icon on the Place a Call screen. To enable call forwarding: 1. - Page 63 Calling and Answering To upload VSX system directory entries: 1. On a computer, open a web browser. 2. In the browser address line, enter the system’s IP address, for example, http://10.11.12.13, to go to VSX Web. 3. Go to Utilities > Import/Export Directory. 4.
- Page 64 Administrator’s Guide for the VSX Series 6 - 6...
-
Page 65: Appearance And Tones
Appearance and Tones Setting Date, Time, and Location You can update the system with regional settings, including the location-specific language and calling parameters. To set the date, time, and location: 1. Go to System > Admin Settings > General Settings > Location. 2. - Page 66 Administrator’s Guide for the VSX Series 4. Select and configure these settings: Setting Description Auto Adjust for Specifies the daylight savings time setting. When you enable Daylight Saving this setting, the system clock automatically changes for Time daylight saving time.
-
Page 67: Designing The Home Screen
Appearance and Tones Customizing the Home Screen Designing the Home Screen Customize the system functionality according to your users’ needs, skill levels, and environments. Include a short list Infrequent Users (Kiosk Mode) of specific items for Provide a simple workspace so no training users to select is needed: •... - Page 68 Administrator’s Guide for the VSX Series To design the home screen: 1. Go to System > Admin Settings > General Settings > Home Screen Settings. 2. Configure these settings: Setting Description Dialing Display Specifies which dialing option to display: •...
-
Page 69: Displaying Contacts On The Home Screen
When selected, all calls can be viewed through VSX Web and downloaded as a .csv file. Note: If this setting is disabled, applications such as the Polycom Global Management System will not be able to retrieve Call Detail Report (CDR) records. Recent Calls Specifies whether to display the Recent Calls button on the home screen. -
Page 70: Adding Marquee Text
Administrator’s Guide for the VSX Series To display the contact list home screen: 1. Go to System > Admin Settings > General > Home Screen Settings. 2. Select Contact List. Adding Marquee Text You can create marquee text to display in the dialing entry field on the home screen. -
Page 71: Changing System Appearance
Appearance and Tones Changing System Appearance Different system appearance options are available, allowing you to coordinate the system interface with the meeting room décor. To change the system appearance: 1. Go to System > Admin Settings > General Settings > System Settings > Appearance. -
Page 72: Customizing Camera Names And Icons
Administrator’s Guide for the VSX Series Customizing Camera Names and Icons Customizing the way cameras appear on screen helps users select the correct camera input during a call. You can enter camera names and assign icons. You can choose camera icons from categories including Corporate, Education, Justice, Manufacturing, and Medical. -
Page 73: Adding A Screen Saver News Feed
6. Click Update. Adding a Screen Saver Logo You can customize the VSX system to display your own logo instead of the Polycom logo. To upload a screen saver logo: 1. On a computer, open a web browser. 2. In the browser address line, enter the system’s IP address, for example, , to go to VSX Web. -
Page 74: Changing The Screen Saver Wait Time
Administrator’s Guide for the VSX Series 4. Click Utilities > Screen Saver, click Next, and follow the onscreen instructions for uploading a logo file. Changing the Screen Saver Wait Time To change the screen saver wait time: 1. Go to System > Admin Settings > General Settings > System Settings >... - Page 75 Configures the system to accept input from a Remote programmable, non-Polycom remote control. In most cases the Polycom remote works as designed, even when this feature is enabled. However, try disabling this feature if you experience difficulty with the Polycom remote. For more information about VSX system IR codes, refer to the Integrator Reference Manual for the VSX Series.
- Page 76 Administrator’s Guide for the VSX Series 7 - 12...
-
Page 77: Security
Security Screens that Require the Room Password for Access The following illustration shows which screens require the room password. Admin Settings Diagnostics* System Information Utilities User Settings General Access General Settings Network Monitors Cameras Audio LAN Properties Monitors System Settings Graphics VGA Home Screen Settings Security... -
Page 78: Configuring Security Options
Administrator’s Guide for the VSX Series Configuring Security Options To set passwords and security options: 1. Go to System > Admin Settings > General Settings > Security. 2. Configure these settings: Setting Description Security Mode Specifies whether the system uses Security Mode, which prevents unsecured access to the system. -
Page 79: Setting The Room And Remote Access Passwords
You can set the room password to restrict who can configure system Admin Settings using the remote control. You can set the remote access password to restrict who can upgrade the VSX Series system software or perform other remote management from a computer. - Page 80 If Security Mode is enabled, the room password is required to access the Reset System screen. If you forget the room password while the system is in Security Mode, contact your Polycom distributor or Polycom Technical Support. 3. Enter the system’s serial number and select Delete System Settings.
-
Page 81: Managing User Access To Settings And Features
Security Managing User Access to Settings and Features You can manage user access to settings and features by using passwords and by configuring the system to show only those options you want your users to see. To maintain this security level: You can allow users to: High Call only the numbers you specify on the home screen. -
Page 82: Limiting What Users Can Do With The System
Administrator’s Guide for the VSX Series • Far Site Name Display Time • Dual Monitor Emulation • Allow Video Display on Web Limiting What Users Can Do With the System You can limit what you allow users to do with the system by configuring the following: •... - Page 83 Global Management System™ and ReadiManager™ SE200 are not compatible with VSX systems in Security Mode. • Software images for version 8.5 and later are digitally signed by Polycom. To install an earlier version of system software, you must disable Security Mode. •...
- Page 84 Administrator’s Guide for the VSX Series 8 - 8...
-
Page 85: Managing The System Remotely
VSX Web requires only a web browser. • For more information about the API commands, refer to the Integrator’s Reference Manual for the VSX Series. Using VSX Web You can use VSX Web to perform most of the calling and configuration tasks you can perform on the local system. -
Page 86: Monitoring A Room Or Call With Vsx Web
Administrator’s Guide for the VSX Series 3. Enter admin as the user name, and enter the remote access password, if one is set. You can use VSX Web to configure all of the system settings except the remote management settings. For security reasons, these settings must be configured on the local system by an administrator. -
Page 87: Managing System Profiles With Vsx Web
• Passwords are not included when you store a profile. Polycom recommends using profiles only as a way to back up system settings. Attempting to edit a stored profile or upload it to more than one system on the network can result in instability or unexpected problems. -
Page 88: Keeping Your Software Current
Keeping your Software Current If you have Internet access and a software key, you can use the web-based Softupdate application to update the VSX Series software. If you do not have Internet access, your reseller can supply you with the VSX Series software update on CD-ROM. - Page 89 If you install version 8.5 or later on a VSX system that has Security Mode enabled, the system verifies that the software being installed is authentic Polycom software. To install a version earlier than 8.5, you must disable Security Mode on the VSX system.
- Page 90 Administrator’s Guide for the VSX Series 9 - 6...
-
Page 91: Control Devices
You can connect an AMX or Crestron control panel to the system’s RS-232 serial port as part of a custom room installation. You will need to program the control panel. Refer to the Integrator’s Reference Manual for the VSX Series for information about the API commands. -
Page 92: Configuring Rs-232 Serial Port Settings
Administrator’s Guide for the VSX Series The VSX 8000 system is compatible with the following IR sensors: • Xantech® 480-00 • Xantech 490-90 • Xantech 780-80 • Xantech 780-90 The VSX 8000 system is not compatible with the external IR sensor for the VS4000™... -
Page 93: Statistics And Diagnostics
Statistics and Diagnostics The VSX system provides various screens that allow you to review information about calls made by the system and to review network usage and performance. Diagnostic Screens To access the Diagnostics screens on the system: Go to System > Diagnostics. To access the Diagnostics screens from the VSX Web: 1. - Page 94 Administrator’s Guide for the VSX Series The following diagnostic screens and tools are available. Status Tools Diagnostic Tool In the system’s user interface In the VSX Web System Status screen On the Diagnostics screen, select Select Diagnostics > System System Status.
- Page 95 Statistics and Diagnostics Network Tools Diagnostic Tool In the system’s user interface In the VSX Web Near End Loop test On the Diagnostics screen, Select Diagnostics > Network select Network. > Near End Loop. Tests the internal audio encoders and decoders, the external Select Near End Loop to start Click Near End Loop to start microphones and speakers, the...
- Page 96 Administrator’s Guide for the VSX Series Video and Audio Tools Diagnostic Tool In the system’s user interface In the VSX Web Color Bar test On the Diagnostics screen, Select Diagnostics > Video. select Video. Tests the color settings of your Click the Color Bars icon to monitor for optimum picture quality.
-
Page 97: Checking System Status
Statistics and Diagnostics Reset and Restart Diagnostic Tool In the system’s user interface In the VSX Web Reset System On the Diagnostics screen, Select Diagnostics > Reset select Reset System. System. Cycles power to the system. Enter the system’s serial Click the Reset System icon. -
Page 98: Call Summary
Administrator’s Guide for the VSX Series To get information about a status message: Select the status message and press on the remote control. Call Summary The Call Summary screen provides details about the calls placed by the system, including: •... -
Page 99: Call Status
Statistics and Diagnostics To view the Call Statistics screen: • Go to System > Diagnostics > Call Statistics and then select • View Call Statistics during a call by pressing Help on the remote. • Press the Snap button on the remote if it is configured to display the Call Statistics screen. -
Page 100: Call Detail Report (Cdr)
Administrator’s Guide for the VSX Series • Call in or out The Recent Calls list shows incoming and outgoing calls that connect, as well as outgoing calls that do not connect. If Do Not Disturb has been enabled, any incoming calls attempted by other sites will not be listed. -
Page 101: Information In The Cdr
Statistics and Diagnostics 3. Enter admin as the user name, and the admin password, if a password has been established. 4. Click Utilities > Call Detail Report to view the details of the file. 5. Click Save and then specify a location on your computer to save the file. Information in the CDR The following table describes the data fields in the CDR. - Page 102 Administrator’s Guide for the VSX Series Data Description Call ID Identifies individual calls within the same conference. Endpoint Alias The alias of the far site. Endpoint Additional An additional alias of the far site. Alias Endpoint Type Terminal, gateway, or MCU.
-
Page 103: Call Detail Report Archives
Statistics and Diagnostics Data Description Average Latency The average latency of packets transmitted during an H.323 (Tx) call based on round-trip delay, calculated from sample tests done once per minute. Average Latency The average latency of packets received during an H.323 (Rx) call based on round-trip delay, calculated from sample tests done once per minute. - Page 104 Administrator’s Guide for the VSX Series 11 - 12...
-
Page 105: Troubleshooting
Troubleshooting This chapter covers the diagnostic screens of the VSX system. It is organized by category to help you troubleshoot any issue. General Troubleshooting This section presents problems, likely causes, and corrective actions. • Power and Start-up • Controls • Access to Screens and Systems •... -
Page 106: Power And Start-Up
3. Go to Admin Settings > Network > Call Preference. 4. Select Enable Basic Mode. To enable Basic Mode in the Polycom VSX system interface: 1. Go to System > Admin Settings > Network > Call Preferences. 2. Select Basic Mode. - Page 107 Troubleshooting Symptom Problem Corrective action The system starts in the The power switch was To power up the system, press and release the software update screen. pressed for too long. power button. (VSX 7000e, VSX 8000) This is normal. The system software is Load the system software from your computer.
-
Page 108: Controls
Administrator’s Guide for the VSX Series Controls Symptom Problem Corrective action The system does not No, low, or dead batteries Install three AAA batteries in the remote control. respond to the remote in the remote control. control. The batteries are installed Insert the batteries in the correct +/- position. -
Page 109: Access To Screens And Systems
Troubleshooting Access to Screens and Systems Symptom Problem Corrective action Cannot navigate to Admin The home screen is not Press the button on the remote and select screens — System button configured to display the System at the end of the help message, or access is not displayed. -
Page 110: Calling
Administrator’s Guide for the VSX Series Symptom Problem Corrective action Cannot manage the system You have not entered the Enter the correct user name and remote access remotely. correct password. password. Note: For web access, the user name is admin, and the default password is the unit’s serial number. -
Page 111: Displays
Problem Corrective action Screen is blank; start music The system is starting. This No action required. plays and Polycom logo is normal. appears briefly. Monitor goes blank after The system goes to “sleep” The system is sleeping. The system wakes up on displaying the splash after a period of inactivity. - Page 112 Administrator’s Guide for the VSX Series Symptom Problem Corrective action Video is in black and white. The monitor is connected Go to Admin Settings > Monitors > Monitors and using the composite change the setting to Composite. monitor connector, but it is configured as S-Video.
- Page 113 Troubleshooting Symptom Problem Corrective action Edges of picture are cut off Graphics from the far site Use a VGA monitor to display graphics. when viewing graphics. are displayed on an NTSC monitor. The laptop’s display Be sure the laptop’s refresh rate is set to 60 Hz, and resolution or refresh rate that the laptop and the Visual Concert VSX use the does not match the settings...
-
Page 114: Cameras
Administrator’s Guide for the VSX Series Symptom Problem Corrective action No picture in the PIP VSX 3000A, VSX 5000: Open the privacy shutter. window. The privacy shutter is closed. Blue screen in the PIP The VCR input is selected Select a different camera or play a tape on the VCR. - Page 115 Verify that the room is small enough for automatic alcove can interfere with camera tracking to work properly. Polycom voice tracking. recommends that you use this feature only if the room is 20 x 25 x 9 feet (6.1 x 7.6 x 2.7 m) or smaller.
-
Page 116: Audio
Administrator’s Guide for the VSX Series Audio Symptom Problem Corrective action No audio at your site. The far site is muted. Look for the far site Mute icon. Ask the far site to unmute the microphone. Note: The far site’s microphone may be muted even if you do not see a far site Mute icon. - Page 117 Check to be sure the microphone is installed is not connected, or is correctly. connected incorrectly. Check the Polycom Mic or Line Input meter on the Audio Meter screen under Diagnostics > Audio to determine whether your system is sending audio. Your system’s microphone...
- Page 118 Administrator’s Guide for the VSX Series Symptom Problem Corrective action Sound effects such as the The sound effects volume Adjust the sound effects volume on the Audio incoming call ring are too is not set at desired level. Settings screen. If you do not want to hear sound loud or too soft.
-
Page 119: Error Indications
The Audio Meter screen Echo cancellation is in use. This is normal. shows a reading for The system displays the Polycom Mic but no audio line input level in this microphone is connected - case. the system receives local audio from a mixer. -
Page 120: System Lights
Administrator’s Guide for the VSX Series System Lights The system lights are located on the front of your VSX system. Model When the VSX system... It means... VSX 3000A Indicators are off No power to the system. VSX 5000 Green indicator blinks slowly The system is sleeping. -
Page 121: How To Contact Technical Support
How to Contact Technical Support If you are not able to make test calls successfully and you have verified that the equipment is installed and set up correctly, contact your Polycom distributor or Polycom Technical Support. To contact Polycom Technical Support, go to www.polycom.com/support. - Page 122 Administrator’s Guide for the VSX Series 12 - 18...
-
Page 123: Regulatory Notices
40°C (104° F). You may need to provide forced cooling to keep the equipment within its operating temperature range. SAVE THESE INSTRUCTIONS. Electrical Specifications Polycom VSX 3000A System: 100-240V, 47-63Hz, 1.9A, 80W max Polycom VSX 5000 System: (Potrans) 100-240VAC, 50-60Hz, 1.8A (Ault power supply) 100-240VAC, 50-60Hz, 1.3A Polycom VSX 7000 System: (Subwoofer) 100-240VAC, 50/60Hz, 1.1A... - Page 124 Sublicense Agreement without Polycom’s prior consent. Title to all Subject Programs shall at all times remain and vest solely with Polycom, Inc. and its licensors. Buyer acknowledges Polycom’s claim that the Subject Programs are its trade secret and confidential property, and shall treat them as such.
- Page 125 Authorized Reseller for information about support and service agreements applicable to your product. For information on Polycom service, go to the Polycom web site www.polycom.com, products and services menu, or call 1-800-765-9266, outside the US call 1-408-526-9000, or your local Polycom Office, as listed on the Polycom Web site.
- Page 126 For repair or warranty information, please contact Polycom Inc. at 1-888-248-4143 or 4750 Willow Road, Pleasanton, CA 94588-2708, USA. Contact information may also be found at http://www.polycom.com. If the system is causing harm to the network, the telephone company may request that you disconnect it until the problem is corrected.
- Page 127 Regulatory Notices Regulatory Notices FCC compliant telephone cords and modular plugs are provided with this equipment. This equipment is designed to be connected to the telephone network or premises’ wiring using a compatible modular jack, which is Part 68 compliant. See installation instructions for details. WHEN PROGRAMMING EMERGENCY NUMBERS AND/OR MAKING TEST CALLS TO EMERGENCY NUMBERS: 1) Remain on the line and briefly explain to the dispatcher the reason for the call.
- Page 128 Polycom Ltd. vakuuttaa täten, että VSX system on direktiivin 1999/5/EC keskeisten vaatimusten ja sen muiden tätä koskevien säännösten mukainen. Déclaration de conformité: Par la présente, Polycom Ltd. déclare que ce VSX system est conforme aux conditions essentielles et à toute autre modalité pertinente de la Directive 1999/5/CE. Dichiarazione di conformità: Con la presente Polycom Ltd.
- Page 129 Regulatory Notices Regulatory Notices Declaração de Conformidade: Através da presente, a Polycom Ltd. declara que este VSX system se encontra em conformidade com os requisitos essenciais e outras disposições relevantes da Directiva 1999/5/CE. Declaración de conformidad: Por la presente declaración, Polycom Ltd. declara que este VSX system cumple los requisitos esenciales y otras cláusulas importantes de la directiva 1999/5/CE.
- Page 130 Administrator’s Guide for the VSX Series Regulatory Notices - 8...
-
Page 131: A System Back Panel Views
System Back Panel Views VSX 3000A Connector Panel The connectors face downward on the VSX 3000A systems. This is a view from underneath the system. Audio input to system Composite video input to system LAN port For audio from VCR/DVD For video from camera or VCR/DVD For IP, People+Content IP,... -
Page 132: Vsx 5000 Back Panel
Administrator’s Guide for the VSX Series VSX 5000 Back Panel Conference link For Polycom microphone, SoundStation VTX 1000, or VCR/DVD input to system Visual Concert VSX For VCR/DVD to play content into calls RS-232 serial port For RS-232 device S-Video output from system... -
Page 133: Vsx 6000A Back Panel
System Back Panel Views VSX 6000A Back Panel Conference link VCR/DVD input to system For Polycom microphone, For VCR/DVD to play SoundStation VTX 1000, or content into calls Visual Concert VSX RS-232 serial port For RS-232 device S-Video output from system... -
Page 134: Vsx 7000E Back Panel
Administrator’s Guide for the VSX Series VSX 7000e Back Panel S-Video input to system VCR/DVD input to Camera 1 control For main camera system connector For VCR/DVD to For camera 1 PTZ S-Video input to play content into control system... -
Page 135: Vsx 8000 Back Panel
For external audio equipment VCR/DVD output from system For VCR/DVD to Conference link record For Polycom microphone SoundStation VTX 1000 RS-232 serial ports For touch panel, camera control, or LAN port other RS-232 device For IP calls,... - Page 136 Administrator’s Guide for the VSX Series A - 6...
- Page 137 Video Source Output Examples for Multiple Monitors The following tables show how the monitor settings on your VSX system can affect what you see on your displays. You can configure the video sources for your displays in many ways; these tables show only a few typical configurations that are available on certain systems for point-to-point calls.
- Page 138 Administrator’s Guide for the VSX Series Select this: To see this: Monitor 1 and PIP Monitor 2 Not in a call Home screen with near Near video Near Far Content video Monitor 1 Monitor 2 In a call Far video...
- Page 139 Video Source Output Examples for Multiple Monitors Select this: To see this: Monitor 1 and PIP Monitor 2 Not in a call Home screen with near Black screen Near Far Content video Monitor 1 Monitor 2 In a call Far video and near video Black screen without content In a call with...
- Page 140 Administrator’s Guide for the VSX Series Select this: To see this: Monitor 1 and PIP Monitor 2 Not in a call Home screen Black screen Near Far Content Monitor 1 Monitor 2 In a call Near video Far video without content...
- Page 141 Video Source Output Examples for Multiple Monitors Select this: To see this: Monitor 1 and PIP Monitor 2 Not in a call Home screen Black screen Near Far Content Monitor 1 Monitor 2 In a call Near video Black screen without content In a call with Near video...
- Page 142 Administrator’s Guide for the VSX Series B - 6...
- Page 143 Dynamic UDP - RTP (video data). Can be set to “Fixed Ports” on Polycom systems. 1024-65535 Dynamic UDP - RTP (audio data). Can be set to “Fixed Ports” on Polycom systems. 1024-65535 Dynamic UDP - RTCP (control information). Can be set to “Fixed Ports” on Polycom systems. C - 1...
- Page 144 Administrator’s Guide for the VSX Series The following table shows Global Management System port usage. Port Function (FTP) Software upgrades and provisioning for VSX systems and ViewStations (FTP) FTP Telnet trace log (HTTP) Pulling VSX system, ViewStation, and VS4000 information (HTTP) Software upgrades and provisioning for iPower™...
- Page 145 Visual Concert VSX or ImageShare II 4-8 basic mode 12-1 data rate (call statistics) 11-6 Basic Mode (setting) 12-2 diagnostics 11-4 bass adjustment 4-9 guidelines for using Polycom microphones 4-2 battery icon 12-16 guidelines for using SoundStation VTX 1000 Index – 1...
- Page 146 Administrator’s Guide for the VSX Series Baud Rate (setting) 10-2 camera presets deleting 3-14 brightness, camera 3-11 setting 3-14 browser, configuring to use VSX Web 9-1 tracking to 3-13 burn-in prevention for monitors 3-8 Camera Settings (screen) 3-11 cameras additional, configuring 3-12...
- Page 147 Date Format (setting) 7-1 ImageShare II 5-5 daylight saving time adjustment 7-2 LAN properties 2-2, 2-3 Default Gateway (setting) 2-3 microphones diagnostics Polycom 4-6 audio 11-4 powered 4-7, 4-8, 4-10, 4-11 call statistics 11-2 modem call summary 11-2 to receive closed captions 5-8...
- Page 148 Administrator’s Guide for the VSX Series Do Not Disturb Icon (setting) 7-5 Home Screen Settings (screen) 7-4, 7-5, 7-6 Domain Name (setting) 2-2 Host Name (setting) 2-2 DTMF tones 7-10 dual monitor emulation configuring 3-7 icons description 3-7 camera 3-11, 7-8...
- Page 149 Index lighting monitors backlight compensation 3-11 aspect ratio, specifying 3-3, 3-4 brightness 3-11 brightness adjustment 3-8 burn-in prevention 3-8 lights color balance adjustment 3-8 power switch 1-6 configuring 3-3–3-8 system 12-17 configuring content display 3-5 Line Input (setting) 4-7, 4-8, 4-10, 5-2, 5-5 configuring for dual monitor emulation 3-7 Line Out 2 Phono (setting) 4-7, 4-8 for showing content 3-1, 3-2...
- Page 150 Administrator’s Guide for the VSX Series rear panel view VSX 3000A A-1 packet loss (call statistics) 11-6 VSX 5000 A-2 passwords VSX 6000A A-3 deleting 11-5 VSX 7000 A-3 remote access 8-4 VSX 7000e A-4 remote access, setting and deleting 8-2...
- Page 151 Index ring tones sharing content setting 4-6, 7-7 by connecting a computer to a VSX system 5-4 volume 4-6 configuring audio 5-5 VSX 3000 4-6, 7-7, A-1 configuring display 5-5 VSX 3000A 4-6, 7-7 specifying when to display 5-5 using ImageShare II 5-4 ringer, internal (VSX 3000) 4-6, 7-7, A-1 using People+Content IP 5-6 ringer, internal (VSX 3000A) 4-6, 7-7...
- Page 152 Administrator’s Guide for the VSX Series system tones configuration, initial 1-6 alert 4-6, 7-7 lights 1-6, 12-17 DTMF, generating 7-10 name, displaying 7-4 internal ringer (VSX 3000) 4-6, 7-7, A-1 name, displaying in Simplified Chinese 6-3 internal ringer (VSX 3000A) 4-6, 7-7...
- Page 153 Index VGA resolution VSX Web for People+Content IP 5-6 accessing 9-1 for Visual Concert VSX 5-3 accessing diagnostic screens 11-1 accessing in Security Mode 8-6 VGA Resolution (setting) 5-5 Call Detail Report, downloading 11-8 video configuring browser 9-1 brightness adjustment 3-8 managing directories 6-4 color balance adjustment 3-8 managing system profiles 9-3...
- Page 154 Administrator’s Guide for the VSX Series Index–10...
Need help?
Do you have a question about the VSX Series and is the answer not in the manual?
Questions and answers