Table of Contents
Advertisement
Quick Links
Advertisement
Table of Contents

Related Manuals for Keysight N9320B


Summary of Contents for Keysight N9320B
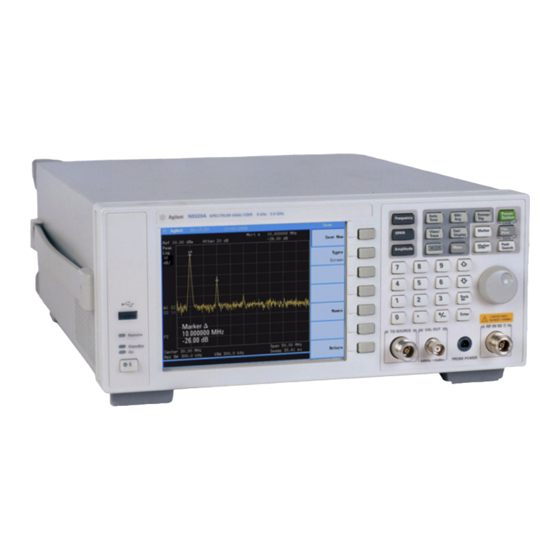
- Page 1 Keysight N9320B Spectrum Analyzer Programmer’s Guide...
-
Page 2: Safety Notices
PERFORMANCE OF THIS to the public to use, modify, DOCUMENT OR ANY INFORMATION reproduce, release, perform, CONTAINED HEREIN. SHOULD display, or disclose commercial KEYSIGHT AND THE USER HAVE A computer software or SEPARATE WRITTEN AGREEMENT commercial computer software WITH WARRANTY TERMS... -
Page 3: Table Of Contents
Getting Started 1 Remotely Operating Your N9320B 2 Computer Requirement for Remote Operation 2 Connecting the N9320B to a PC via the USB Port 3 Connecting the N9320B to a PC via the LAN Port 6 Using Socket to Send Commands 8... - Page 4 Contents What are Status Register SCPI Commands 25 How to use the Status Registers 26 Status Register Examples 27 Status Register System 28 Setting and Querying the Status Register 29 The Status Byte Register 30 Standard Event Status Register 32 STATus:OPERation Ragister 34 STATus:OPERation Condition and Event Enable Registers 36 STATus:QUEStionable:INTegrity Registers 37...
- Page 5 Contents CALCulate:MARKer Subsection 70 CALCulate:NTData Subsection 81 CALibration Subsystem 82 CONFigure Subsystem 84 DANalyse Subsystem 86 DANalyse:AM/FM Subsection 88 DANalyse:ASK/FSK Subsection 95 Demod Subsystem 102 DISPlay Subsystem 103 FETCh Subsystem 108 INITiate Subsystem 111 MMEMory Subsystem 113 OUTPut Subsystem 117 READ Subsystem 118 SENSe Subsystem 122 [:SENSe]:ACPower Subsection 122...
- Page 6 Contents [:SENSe]:SWEep Subsection 152 SOURce Subsystem 153 STATus Subsystem 156 STATus:QUEStionable:INTegrity Subsection 157 SYSTem Subsystem 158 TRACe Subsystem 163 TRIGger Subsystem 166 UNIT Subsystem 169...
-
Page 7: Getting Started
Getting Started Getting Started The purpose of this chapter is to serve as a reminder of SCPI (Standard Commands for Programmable Instruments) fundamentals to those who have previous experience in programming SCPI. This chapter is not intended to teach you everything about the SCPI programming language. If you are using an optional programming compatibility modes, you should refer to the manual that came with the option. -
Page 8: Remotely Operating Your N9320B
Getting Started Remotely Operating Your N9320B Remotely Operating Your N9320B The signal generator provides USB and LAN connections and allows you to set up a remote operation environment via the USB/LAN interface with a controller computer. Computer Requirement for Remote Operation... -
Page 9: Connecting The N9320B To A Pc Via The Usb Port
No extra driver is required to connect the N9320B via the USB port to a PC. All you need is the keysight IO libraries suite and you can find this IO libraries suite in the documentation CD in the shipment along with your N9320B. - Page 10 Getting Started Remotely Operating Your N9320B After a while, the PC finds your N9320B as a new hardware and prompts a message saying “Found new hardware...”. A Found New Hardware Wizard is initiated immediately. Select Display a list...
- Page 11 Measurement Device” displays in the pop-up window. Select it and press Next. The wizard will guide you through the rest of installation till the driver is installed. Run Keysight IO libraries suite, the N9320B will be detected automatically. If not, press Refresh All.
-
Page 12: Connecting The N9320B To A Pc Via The Lan Port
No extra driver is required to connect the N9320B via the LAN port to a PC. All you need is the Keysight IO libraries suite and you can find this IO libraries suite in the Product CD N9320B Help Kit in the shipment. - Page 13 Getting Started Remotely Operating Your N9320B Check “Use socket connection” if you want to use socket to send commands. Or you can ignore this step and leave the Use socket connection box unchecked. The socket port number is default to 5025.
-
Page 14: Using Socket To Send Commands
N9320B implements a socket Applications Programming Interface (API) compatible with Berkeley sockets, Winsock, and other standard sockets APIs. You can use sockets to control N9320B by sending SCPI commands to a socket connection. You can program by only the socket function or the VISA function. Both the VISA assistant and the IO libraries suite is available for remote control. - Page 15 Public void test() InitialSA("192.168.0.111", 5025); SendSA("*RST"); SendSA(":FREQuency:SPAN 100mhz"); String result=ReadSA("*IDN?"); SAClose(); N9320B supports serveral end flag in programming, such as '\r', '\r\n', '\n', '\ N O T E n\r'. please maker sure use the listed end flag in the program.
-
Page 16: Using Telnet To Send Commands
<IP address> <Port number> Send Command: SCPI> KM2 SCPI command The maximum connections N9320B allowed at one time is 5 connections. N O T E Attempt to setup more connections will be refused. Please refer to the procedures below to use this function based on LAN connection. - Page 17 Getting Started Remotely Operating Your N9320B the script is also allowed in the telnet programming. Please find the script example as below: set sh=WScript.CreateObject("WScript.Shell") sh.run "telnet 146.208.209.171 5025" WScript.Sleep 300 sh.SendKeys ":init:cont off;:freq:center 582.057 MHz;:freq:span 3000 Hz;:band:RES 30 Hz" sh.SendKeys "{ENTER}"...
- Page 18 Getting Started Remotely Operating Your N9320B Special telnet character N9320B provides some combination keys as special telnet cahracter. Please refer to the lis as below: Ctrl+c Enter this character to clear the device registers. The device registers would be cleared and <Device Clear> will be returned.
-
Page 19: Programming Fundamentals
Programming Fundamentals Programming Fundamentals The purpose of this chapter is to serve as a reminder of SCPI (Standard Commands for Programmable Instruments) fundamentals to those who have previous experience in programming SCPI. This chapter is not intended to teach you everything about the SCPI programming language. If you are using an optional programming compatibility modes, you should refer to the manual that came with the option. -
Page 20: Overview
Programming with SCPI requires knowledge of: • Computer programming languages, such as C, C++, and MicrosoftâVisual Basicâ. • The language of your instrument. The N9320B employs SCPI as its programming language. The semantic requirements of your controller’s language determine how the programming commands and responses are handled in your application program. - Page 21 Programming Fundamentals Overview Common Terms used in this Book Terms Description Controller Any computer used to communicate with an instrument. A controller can be a personal computer (PC), a minicomputer, or a plug-in card in a card cage. Some intelligent instruments can also function as controllers.
-
Page 22: Command Categories
Programming Fundamentals Command Categories Command Categories The SCPI command falls into two categories: • Subsystem commands that simulate front panel keystrokes • Common commands that are unique and have no front panel equivalent Use a computer to control the instrument (but operate the power/standby switch manually). -
Page 23: Command Syntax
Programming Fundamentals Command Syntax Command Syntax A command consists of mnemonics (keywords), parameters and punctuation. Before you start to program your signal generator, familiarize yourself with the standard notation of each of them. Command Many commands have both a long and a short form: use either one. (a combination of Mnemonics the two is not allowed). -
Page 24: Command Statement Rules Overview
Programming Fundamentals Command Syntax Command Statement Rules Overview Besides the standard notation of SCPI described above, please remember the following rules in programming: • command statements read from left to right • use either long form or short form of keywords, but do not use both •... -
Page 25: Creating Valid Commands
Programming Fundamentals Creating Valid Commands Creating Valid Commands Commands are not case sensitive and there are often many different ways of writing a particular command. These are examples of valid commands for a given command syntax: Command Syntax Sample Valid Commands [:SENSe]:BANDwidth[:RESolution]<freq>... -
Page 26: Program And Response Messages
Programming Fundamentals Program and Response Messages Program and Response Messages To understand how your instrument and controller communicate using SCPI, you must understand the concepts of program and response messages. Program Messages Program messages are the formatted data sent from the controller to the instrument. -
Page 27: Parameters In Commands
Programming Fundamentals Parameters in Commands Parameters in Commands There are four basic types of parameters: boolean, key words, variables and arbitrary block program data. Boolean The expression OFF|ON|0|1 is a two state boolean-type parameter. The numeric value 0 is equivalent to OFF. Any numeric value other than 0 is equivalent to ON. - Page 28 Programming Fundamentals Parameters in Commands Variable Parameters <ampl>, The <ampl> (amplitude) parameter and the <rel_ampl> (relative <rel_ampl> amplitude) parameter consist of a rational number followed by optional units. Acceptable units for <ampl> include: V, mV, V, dBm, dBmV, dBuV, Watts, W. <rel_ampl> units are given in dB. <file_name>...
-
Page 29: Status Registers
Status Registers Status Registers Overview How to use the Status Registers Status Register System This chapter contains a comprehensive description of status registers explaining what status registers are and how to use them so you can use a program to monitor the instrument. Information about all of the bits of the status registers is also provided. -
Page 30: Overview
Status Registers Overview Overview When you are programming the instrument you may need to monitor instrument status to check for error conditions or monitor changes. You need to determine the state of certain instrument events/conditions by programming the status register system. IEEE common commands (those beginning with *) access the higher-level summary registers. -
Page 31: What Are Status Register Scpi Commands
Status Registers Overview Access the status registers There are two different methods to access the status registers: • Common commands accesses and controls • Status subsystem commands What are Status Register SCPI Commands Most monitoring of the instrument conditions is done at the highest level using the IEEE common commands indicated below. -
Page 32: How To Use The Status Registers
Status Registers How to use the Status Registers How to use the Status Registers A program often needs to detect and manage error conditions or changes in instrument status. The polling method for you to programmatically access the information in status registers. In the polling method, the instrument has a passive role. -
Page 33: Status Register Examples
Status Registers How to use the Status Registers • Monitor a particular type of change in a condition (bit). — The transition registers are preset to register if the condition goes from 0 to 1 (false to true, or a positive transition). —... -
Page 34: Status Register System
See the following diagram of the status system for information about the bit assignments and status register interconnections. Figure 1 Keysight N9320B Status Register System Status Byte Register (*STB?) Unused Unused Error/Event Queue Summary... -
Page 35: Setting And Querying The Status Register
Status Registers Status Register System Setting and Querying the Status Register Each bit in a register is represented by a numerical value based on its location. This number is sent with the command to enable a particular bit. To enable more than one bit, send the sum of all of the bits involved. -
Page 36: The Status Byte Register
Status Registers Status Register System The Status Byte Register Status Byte Register Unused Unused Error/Event Queue Summary Bit Unused Message Available (MAV) Standard Event Summary Bit Unused Operation Status Summary Bit & & & & & & & Service Request 0 1 2 3 4 5 6 7 Enable Register The RQS bit is read and reset by a serial poll. - Page 37 Status Registers Status Register System The status byte register contains the following bits: Description 0,1 Unused: These bits are always set to 0. 2 Error/Event Queue Summary Bit: A 1 in this bit position indicates that the SCPI error queue is not empty. The SCPI error queue contains at least one error message.
-
Page 38: Standard Event Status Register
Status Registers Status Register System Standard Event Status Register The standard event status register is used to determine the specific event that sets bit 5 in the status byte register. The standard event status register does not have negative and positive transition registers, nor a condition register. - Page 39 Status Registers Status Register System The standard event status register contains following bits: Bit Description 0 Unused 1 Request Bus Control: This bit is always set to 0. (The analyzer does not request control.) 2 Query Error: A 1 in this bit position indicates that a query error has occurred. Query errors have SCPI error numbers from 499 to 400.
-
Page 40: Status:operation Ragister
Description This bit is not used by the analyzer, but is for future use with other 0 Reserved: Keysight products. This bit is not used by the analyzer, but is for future use with other 1 Reserved: Keysight products. - Page 41 Status Register System Description Reserved: This bit is not used by the analyzer, but is for future use with other Keysight products. Reserved: This bit is not used by the analyzer, but is for future use with other Keysight products.
-
Page 42: Status:operation Condition And Event Enable Registers
Status Registers Status Register System STATus:OPERation Condition and Event Enable Registers The STATus:OPERation condition register continuously monitors the hardware and firmware status of the analyzer, and is read-only. To query the register, send:STATus:OPERation:CONDition? command. The response will be the decimal sum of the bits that are set to 1. -
Page 43: Status:questionable:integrity Registers
Status Registers Status Register System STATus:QUEStionable:INTegrity Registers STATus:QUEStionable:INTegrity register monitors the overall analyzer condition. They are accessed with:STATus:OPERation and :STATus:QUEStionable:INTegrity commands in the :STATus command subsystem. The STATus:QUEStionable:INTegrity register also monitors the analyzer to see if there are any questionable events that occurred. These registers look for anything that may cause an error or that may induce a faulty measurement. - Page 44 Status Registers Status Register System...
-
Page 45: Programming Example
Programming Example Programming Example This chapter provides some programming conventions and examples for your further reference. -
Page 46: Overview
You have a royalty-free right to use, modify, reproduce and distribute the sample application files in any way you find useful, provided that you agree that Keysight has no warranty, obligations, or liability for any sample application files. -
Page 47: Programming In C Using The Vtl
Programming in C using the VTL This section includes some basic information about programming in the C language using Keysight VISA transition library (VTL). Note that some of this information may not be relevant to your particular application. For example, if you are not using VXI instruments, the VXI references will not be relevant. -
Page 48: Example Program
Programming Example Programming in C using the VTL This function synchronously reads raw data from the session specified by the vi parameter and viRead stores the result in location where buf is pointing. Only one synchronous read operation can occur at any one time. -
Page 49: Including The Visa Declarations File
Programming Example Programming in C using the VTL printf("Instrument identification string: %s\n", buf); /* Close the sessions */ viClose(viN9320B); viClose(defaultRM); Including the VISA Declarations File For C and C++ programs, you must include the visa.h header file at the beginning of every file that contains VTL function calls: #include “visa.h”... -
Page 50: Opening A Session
Programming Example Programming in C using the VTL Opening a Session A session is a channel of communication. Sessions must first be opened on the default resource manager, and then for each device you will be using. The following is a summary of sessions that can be opened: •... - Page 51 Programming Example Programming in C using the VTL Next, you open a session with a specific device with the viOpen function. This function uses the session returned from viOpenDefaultRM and returns its own session to identify the device session. The following shows the function syntax: viOpenDefaultRM (sesn);...
-
Page 52: Addressing A Session
Programming Example Programming in C using the VTL Addressing a Session As seen in the previous section, the rsrcName parameter in the viOpen function is used to identify a specific device. This parameter is made up of the VTL interface name and the device address. The interface name is determined when you run the VTL Configuration Utility. -
Page 53: Checking Usb Connection
ViStatus status; static ViSession defaultRM; static ViSession inst_N9320B; static ViUInt32 rcount; static unsigned char buffer[BufferSize]; int main(void) /* Connect N9320B and read its "IDN". */ status = viOpenDefaultRM (&defaultRM); status = viOpen (defaultRM, "USB0::2391::8472::0000000000::0::INSTR", VI_NULL, VI_NULL, &inst_N9320B); if (status != VI_SUCCESS) return -1;... -
Page 54: Using C With Marker Peak Search And Peak Excursion
/************************************************************/ /* Using Marker Peak Search and Peak Excursion */ /* */ /* This example is for the N9320B Spectrum Analyzer. /* */ /* This C programming example does the following. */ /* The SCPI instrument commands used are given as reference. */... - Page 55 Programming Example Using C with Marker Peak Search and Peak Excursion #include <stdio.h> #include <stdlib.h> #include <math.h> #include <ctype.h> #include <string.h> #include "visa.h" ViSession defaultRM, viN9320B; ViStatus errStatus; ViChar cIdBuff[256]= {0}; char cEnter = 0; int iResult = 0; /*Set the input port to 50MHz amplitude reference*/ void Route50MHzSignal() viQueryf(viN9320B, "*IDN?\n", "%t", &cIdBuff);...
- Page 56 Programming Example Using C with Marker Peak Search and Peak Excursion /*Open a USB session.*/ viStatus=viOpenDefaultRM(&defaultRM); viStatus=viOpen(defaultRM,"USB0::2391::8472::0000000000::0::INSTR",V I_NULL,VI_NULL,&viN9320B); if(viStatus) printf("Could not open a session to USB device\n"); exit(0); /*Clear the instrument*/ viClear(viN9320B); /*Reset the instrument*/ viPrintf(viN9320B,"*RST\n"); /*Set Y-Axis units to dBm*/ viPrintf(viN9320B,"UNIT:POW DBM\n");...
- Page 57 Programming Example Using C with Marker Peak Search and Peak Excursion /*Set the peak excursion*/ viPrintf(viN9320B,"CALC:MARK:PEAK:EXC %1fDB \n",fPeakExcursion); /*Set the peak thresold */ viPrintf(viN9320B,"CALC:MARK:PEAK:THR -90 \n"); /*Trigger a sweep and wait for completion*/ viPrintf(viN9320B,"INIT:IMM \n"); /*Set the marker to the maximum peak*/ viPrintf(viN9320B,"CALC:MARK:MAX \n");...
-
Page 58: Using Marker Delta Mode And Marker Minimum Search
/************************************************************/ /* Using Marker Delta Mode and Marker Minimum Search */ /* */ /* This example is for the N9320B Spectrum Analyzers */ /* */ /* This C programming example does the following. */ /* The SCPI instrument commands used are given as reference. */... - Page 59 Programming Example Using Marker Delta Mode and Marker Minimum Search #include <stdio.h> #include <stdlib.h> #include <math.h> #include <ctype.h> #include <string.h> #include "visa.h" ViSession defaultRM, viN9320B; ViStatus errStatus; ViChar cIdBuff[256] ={0}; char cEnter = 0; int iResult =0; /*Set the input port to the 50MHz amplitude reference*/ void Route50MHzSignal() viQueryf(viN9320B, "*IDN?\n", "%t", &cIdBuff);...
- Page 60 Programming Example Using Marker Delta Mode and Marker Minimum Search /* Open an USB session*/ viStatus=viOpenDefaultRM(&defaultRM); viSta- tus=viOpen(defaultRM,"USB0::2391::8472::9876543210::0::INSTR",VI _NULL,VI_NULL,&viN9320B); if(viStatus) printf("Could not open a session to USB device!\n"); exit(0); /*Clear the instrument*/ viClear(viN9320B); /*Reset the instrument*/ viPrintf(viN9320B,"*RST\n"); /*Display the program heading */ printf("\n\t\t Marker Delta Program \n\n"...
- Page 61 Programming Example Using Marker Delta Mode and Marker Minimum Search /*Set the analyzer to the values given by the user*/ //viPrintf(viN9320B,"SENS:FREQ:STAR %lf //MHZ;:SENS:FREQ:STOP %lf MHZ\n",dStartFreq,dStopFreq); viPrintf(viN9320B,":SENS:FREQ:STAR %lf MHz\n",dStart- Freq); viPrintf(viN9320B,":SENS:FREQ:STOP %lf MHZ\n",dStopFreq); /*Trigger a sweep, delay for completion*/ viPrintf(viN9320B,"INIT:IMM\n"); //delay(1); /*Set the marker to the maximum peak*/ viPrintf(viN9320B,"CALC:MARK:MAX\n");...
-
Page 62: Measuring Phase Noise
/************************************************************/ /* Measuring Phase Noise */ /* */ /* This example is for the N9320B Spectrum Analyzers */ /* */ /* This C programming example does the following. */ /* The SCPI instrument commands used are given as reference. */... - Page 63 Programming Example Measuring Phase Noise ViSession defaultRM, viN9320B; ViStatus errStatus; ViChar cIdBuff[256]= {0}; char cEnter = 0; int iResult = 0; /*Set the input port to 50 MHz amplitude reference*/ void Route50MHzSignal() viQueryf(viN9320B, "*IDN?\n", "%t", &cIdBuff); /* prompt the user*/ /* to connect the amplitude reference output to the input*/ printf ("Connect CAL OUT to the RF IN \n");...
- Page 64 Programming Example Measuring Phase Noise /*Reset the Instrument*/ viPrintf(viN9320B,"*RST\n"); /*Display the program heading */ printf("\n\t\t Noise Program \n\n" ); /* Check for the instrument model number and route the 50 MHz signal accordingly*/ Route50MHzSignal(); /*Set the analyzer center frequency to 50 MHz*/ viPrintf(viN9320B,"SENS:FREQ:CENT 50e6\n");...
-
Page 65: Command Reference
Command Reference Command Reference This chapter contains SCPI (Standard Commands for Programmable Instruments) programming commands for the spectrum analyzer core operation. -
Page 66: Ieee Common Commands
The first few pages of this chapter contain common commands specified in IEEE Standard 488.2-1992, IEEE Standard Codes, Formats, Protocols and Common Commands for Use with ANSI/IEEE Std 488.1-1987. New York, NY, 1992. Following these commands, the Keysight N9320B spectrum analyzers SCPI commands are listed. Clear Status *CLS Clears the status byte register. - Page 67 The response is organized into four fields separated by commas. The field definitions are manufacturer, model, serial number and software version. Example: *IDN? returns instrument information, such as: Keysight Technologies, N9320B, 45310116, A.01.02 Key access: > More > Show system Preset/ System...
- Page 68 Command Reference IEEE Common Commands *OPC and *OPC? are currently effective only when immediately preceded by either the :INITiate:IMMediate or a :CALibration command. Reset *RST This command presets the instrument to a factory defined condition that is appropriate for remote programming operation. *RST is equivalent to performing the two commands :SYSTem:PRESet and *CLS.
- Page 69 Command Reference IEEE Common Commands Status Byte Query *STB? Returns the value of the status byte register without erasing its contents. Range: Integer, 0 to 255 Example: If a 16 is returned, it indicates that bit 5 is set and one of the conditions monitored in the standard event status register is set.
-
Page 70: Calculate Subsystem
Command Reference CALCulate Subsystem CALCulate Subsystem This subsystem is used to perform post-acquisition data processing. In effect, the collection of new data triggers the CALCulate subsystem. In this instrument, the primary functions in this subsystem are markers and limits. CALCulate subsystem commands used for measurements in the MEAS menus are located in "SENSe Subsystem“... - Page 71 Command Reference CALCulate Subsystem NdBresults :CALCulate:BWIDth|BANDwidth:RESult? Returns the measured bandwidth at the power level defined by . 0 is returned if :CALCulate:BWIDth:NDB? is off, or when a :CALCulate:BWIDth|BANDwidth[:STATe] result is not available. Refer to for further explanation CALCulate:BWIDth|BANDwidth[:STATe] of this marker function. Default Unit: >...
-
Page 72: Calculate:lline Subsection
Command Reference CALCulate Subsystem CALCulate:LLINe Subsection Limit lines can be defined for your measurement. You can then have the instrument compare the data to your defined limits and indicate a pass/fail condition. Delete All Limit Lines in Memory :CALCulate:LLINe:ALL:DELete Deletes all limit lines in volatile memory. Limits >... - Page 73 Command Reference CALCulate Subsystem Remarks: If two amplitude values are entered for the same frequency, a single vertical line is the result. In this case, if an upper line is chosen, the amplitude of lesser frequency (amplitude 1) is tested. If a lower line is chosen, the amplitude of greater frequency (amplitude 2) is tested.
- Page 74 Command Reference CALCulate Subsystem Display the Limit Line :CALCulate:LLINe[1]|2:DISPlay OFF|ON|0|1 :CALCulate:LLINe[1]|2:DISPlay? Controls the display of the current limit line. *RST: Limits > Limit 1|2 > Limit On Off Key access: > Det/ Display Test the Data Against the Limit Line :CALCulate:LLINe[1]|2:FAIL? Queries the status of the limit line testing.
- Page 75 Command Reference CALCulate Subsystem Display the Limit Margin :CALCulate:LLINe[1]|2:MARGin:STATe OFF|ON|0|1 :CALCulate:LLINe[1]|2:MARGin:STATe? Displays a measurement margin that is added to the designated limit line to do secondary testing of the data. *RST: Limits > Limit 1|2 > Margin On Off Key access: >...
-
Page 76: Calculate:marker Subsection
Command Reference CALCulate Subsystem CALCulate:MARKer Subsection Markers All Off on All Traces :CALCulate:MARKer:AOFF Turns off all markers on all the traces. > All Off Key access: Marker Continuous Peaking Marker Function :CALCulate:MARKer[n]:CPEak[:STATe] OFF|ON|0|1 :CALCulate:MARKer[n]:CPEak[:STATe]? Turns on or off continuous peaking. It continuously puts the selected marker on the highest displayed signal peak. - Page 77 Command Reference CALCulate Subsystem Frequency Counter Marker Automatic Resolution :CALCulate:MARKer:FCOunt:RESolution:AUTO OFF|ON|0|1 :CALCulate:MARKer:FCOunt:RESolution:AUTO? Sets the resolution of the marker frequency counter so it is automatically coupled to the frequency span, generating the fastest accurate count. *RST: > Function > Freq Counter > Resolution Auto Man Key access: Marker Frequency Counter Marker...
- Page 78 Command Reference CALCulate Subsystem Marker Peak (Maximum) Search :CALCulate:MARKer[n]:MAXimum Performs a peak search based on the search mode settings of :CALCulate:MARKer:PEAK:SEARch:MODE > Peak Search Key access: Peak Search Marker Peak (Maximum) Left\Right Search :CALCulate:MARKer[n]:MAXimum:LEFT :CALCulate:MARKer[n]:MAXimum:RIGHt Places the selected marker on the next highest signal peak to the left/right of the current marked peak.
- Page 79 Command Reference CALCulate Subsystem Marker Peak (Minimum) Search :CALCulate:MARKer[n]:MINimum Places the selected marker on the lowest point on the trace that is assigned to that particular marker number. > Min Search Key access: Peak Search Marker Mode :CALCulate:MARKer[n]:MODE POSition|DELTa :CALCulate:MARKer[n]:MODE? Selects the type of markers that you want to activate.
- Page 80 Command Reference CALCulate Subsystem Define Peak Search :CALCulate:MARKer:PEAK:SEARch:MODE PARameter|MAXimum :CALCulate:MARKer:PEAK:SEARch:MODE? Sets the peak search mode. *RST: MAXimum Remarks: If mode is set to MAXimum, peak search will place the marker at the maximum amplitude in the trace. If mode is set to PARameter, peak search will place the marker at the highest peak that rises and falls by at least the peak excursion above the peak threshold.
- Page 81 Command Reference CALCulate Subsystem Threshold Hidden :CALCulate:MARKer:PEAK:THReshold:STATe OFF|ON|0|1 :CALCulate:MARKer:PEAK:THReshold:STATe? Turns on or off the threshold. Selecting Off will hide the threshold line and turn off its function. *RST: > More > Search Criteria > Peak Threshold Key access: Peak Search Peak to Peak Delta Markers :CALCulate:MARKer[n]:PTPeak Positions delta markers on the highest and lowest points on the...
- Page 82 Command Reference CALCulate Subsystem Set the Phase Noise Offset :CALCulate:MARKer:PHNoise:OFFSet 1kHz|-1kHz|10kHz|-10kHz|20kHz|-20kHz|30kHz|-30kH z|50kHz|-50kHz|100kHz|-100kHz|1MHz|-1MHz Set the maker frequency offset in phase noise measurement. > Functions > Phase Noise > Offset Key access: Marker Optimize Phase Noise :CALCulate:MARKer:PHNoise:OPTimize ON|OFF|1|0 This is only Turns on/off the phase noise optimization function. available when SPAN is set less than 50 MHz.
- Page 83 Command Reference CALCulate Subsystem Set Center Frequency to the Marker Value :CALCulate:MARKer[n][:SET]:CENTer Sets the center frequency equal to the specified marker frequency, which moves the marker to the center of the screen. In delta marker mode, the center frequency is set to the marker delta value. This command is not available in zero span.
- Page 84 Command Reference CALCulate Subsystem Set Stop Frequency to the Marker Value :CALCulate:MARKer[n][:SET]:STOP Sets the stop frequency to the value of the active marker frequency. In delta marker mode, the stop frequency is set to the marker delta value. This command is not available in zero span. >...
- Page 85 Command Reference CALCulate Subsystem Marker to Trace Auto :CALCulate:MARKer[n]:TRACe:AUTO OFF|ON|0|1 :CALCulate:MARKer[n]:TRACe:AUTO? Turns on or off the automatic marker to trace function. *RST: AUTO > More > Marker Trace Auto 1 2 3 4 Key access: Marker Continuous Signal Tracking Function :CALCulate:MARKer[n]:TRCKing[:STATe] OFF|ON|0|1 :CALCulate:MARKer[n]:TRCKing[:STATe]? Turns on or off marker signal tracking.
- Page 86 Command Reference CALCulate Subsystem Span Markers Center Frequency X Value :CALCulate:MARKer[n]:X:CENTer <param> :CALCulate:MARKer[n]:X:CENTer? Position the center frequency, of the designated span-type marker pair, at the specified trace X value. The value is in the X-axis units (which is often frequency or time). The query returns the current X value center frequency of the designated markers.
-
Page 87: Calculate:ntdata Subsection
Command Reference CALCulate Subsystem Span Markers Span X Value :CALCulate:MARKer[n]:X:SPAN <param> :CALCulate:MARKer[n]:X:SPAN? Change the frequency span of the designated span-type marker pair to position the markers at the desired trace X values. The value is in the X-axis units (which is usually frequency or time). The query returns the current X value frequency span of the designated markers. -
Page 88: Calibration Subsystem
Command Reference CALibration Subsystem CALibration Subsystem These commands control the self-alignment processes. Align All Instrument Assemblies :CALibration[:ALL] :CALibration[:ALL]? Performs an alignment of all the assemblies within the instrument, except for the tracking generator. Before executing this command, connect a cable between front panel CAL OUT and RF IN connector. - Page 89 Command Reference CALibration Subsystem Select the Source State for Calibration :CALibration:SOURce:STATe OFF|ON|0|1 :CALibration:SOURce:STATe? Controls the state of the 50 MHz alignment signal. Connect a cable between front panel CAL OUT and the RF IN connector before N O T E performing a calibration.
-
Page 90: Configure Subsystem
Command Reference CONFigure Subsystem CONFigure Subsystem ACP measurement State :CONFigure:ACPower This command places the analyzer in Adjacent Channel Power measurement state. > ACP Key access: Meas Channel Power measurement State :CONFigure:CHPower This command places the analyzer in Channel Power measurement state. - Page 91 Command Reference CONFigure Subsystem Third Order Intermodulation measurement State :CONFigure:TOI This command places the analyzer in Third Order Intermodulation measurement state. > TOI Key access: Meas AM/FM/ASK/FSK Modulation Analysis State :CONFigure:AM|FM|ASK|FSK This command places the analyzer in AM/FM/ASK/FSK modulation analysis state. >...
-
Page 92: Danalyse Subsystem
Command Reference DANalyse Subsystem DANalyse Subsystem This subsystem provides you the SCPI command reference for the AM/FM modulation analysis function (option AMA) and ASK/FSK modulation analysis function (option DMA). Carrier Frequency DANalyse:CARR:FREQuency <freq> DANalyse:CARR:FREQuency? Sets the carrier frequency for the modulated signal. *RST: 1.5 GHz >... - Page 93 Command Reference DANalyse Subsystem Preamp On/Off DANalyse:POWer:GAIN OFF|ON|0|1 DANalyse:POWer:GAIN? Sets the preamplifier on or off. *RST: > AM/FM/FSK/ASK Modulation Analysis > More > More > Key access: MODE Preamp Attenuation DANalyse:POWer:ATTenuation <value> DANalyse:POWer:ATTenuation? Sets the attenuation value when the attenuation is in manual mode.
-
Page 94: Danalyse:am/Fm Subsection
Command Reference DANalyse Subsystem Restart Sweep DANalyse:IMMediate To restart the current sweep or measurement, or set of averaged/held sweeps or measurements. This function first aborts the current sweep/measurement as quickly as possible. It then resets the sweep and trigger systems, sets up the measurement and initiates a new data measurement sequence with a new data acquisition (sweep) taken once the trigger condition is met. - Page 95 Command Reference DANalyse Subsystem Average On/Off DANalyse:AM|FM:AVERage ON|OFF|1|0 DANalyse:AM|FM:AVERage? Turns the average function on or off. *RST: > AM/FM Modulation Analysis > More > Average On/Off Key access: MODE Average Point Number DANalyse:AM|FM:AVERage:COUNt <integer> DANalyse:AM|FM:AVERage:COUNt? To specify the number of measurement averages used when the Average is set to on.
- Page 96 Command Reference DANalyse Subsystem IFBW DANalyse:AM|FM:IFBWidth <freq> DANalyse:AM|FM:IFBWidth? Specifies the IF bandwidth value in demodulation measurement. *RST: 1.2 MHz > AM/FM Modulation Analysis > IFBW Key access: MODE IFBW Auto DANalyse:AM|FM:IFBWidth:AUTO OFF|ON|0|1 DANalyse:AM|FM:IFBWidth:AUTO? Sets the IF bandwidth coupled automatically or manually. *RST: 1.2 MHz >...
- Page 97 Command Reference DANalyse Subsystem Limit On/Off DANalyse:AM|FM:LIMit OFF|ON|0|1 DANalyse:AM|FM:LIMit? Turns the limit function on or off. *RST: > AM/FM Modulation Analysis > More > Limit Key access: MODE FM Carrier Power Upper Limit DANalyse:FM:LIMit:POWer:UPPer <ampl> DANalyse:FM:LIMit:POWer:UPPer? Specifies the carrier power upper limit for the FM signal. *RST: 0 dBm >...
- Page 98 Command Reference DANalyse Subsystem Carrier Frequency Offset Upper Limit DANalyse:FM:LIMit:FOFFset:UPPer <freq> DANalyse:FM:LIMit:FOFFset:UPPer? Specifies the carrier frequency offset upper limit for the FM signal. *RST: 10 kHz > FM Modulation Analysis > More > Limit > CarrFreOff Up Key access: MODE AM Carrier Power Upper Limit DANalyse:AM:LIMit:POWer:UPPer <ampl>...
- Page 99 Command Reference DANalyse Subsystem Carrier Frequency Offset Upper Limit DANalyse:AM:LIMit:FOFFset:UPPer <freq> DANalyse:AM:LIMit:FOFFset:UPPer? Specifies the carrier frequency offset upper limit for the AM signal. *RST: 10 kHz > AM Modulation Analysis > More > Limit > CarrFreOff Up Key access: MODE X Scale/Division DANalyse:AM|FM:VIEW:X:PDIVision <time>...
- Page 100 Command Reference DANalyse Subsystem Y Scale Reference Value DANalyse:AM|FM:VIEW:Y:RVALue <value> DANalyse:AM|FM:VIEW:Y:RVALue? Specifies the reference value of the Y scale. > AM/FM Modulation Analysis > Y Scale > Ref Value Key access: MODE Y Scale Reference Value DANalyse:AM|FM:VIEW:Y:PDIVision <value> DANalyse:AM|FM:VIEW:Y:PDIVision? Specifies the time for every division of Y scale. >...
-
Page 101: Danalyse:ask/Fsk Subsection
Command Reference DANalyse Subsystem DANalyse:ASK/FSK Subsection Average On/Off DANalyse:ASK|FSK:AVERage[:STATe] ON|OFF|1|0 DANalyse:ASK|FSK:AVERage[:STATe]? Turns the average function on or off. *RST: > ASK/FSK Modulation Analysis > More > Average On/Off Key access: MODE Average Point Number DANalyse:ASK|FSK:AVERage:COUNt <integer> DANalyse:ASK|FSK:AVERage:COUNt? To specify the number of measurement averages used when the Average is set to on. - Page 102 Command Reference DANalyse Subsystem Reference Filter DANalyse:ASK|FSK:RADio:STANdard:FILTer:REFerence NONE|RNYQuist|NYQuist|GAUSsian DANalyse:ASK|FSK:RADio:STANdard:FILTer:REFerence? Specifies the reference filter type for the ASK/FSK signals. > ASK/FSK Modulation Analysis > Filter Setup > Ref filter Key access: MODE Filter Symbols DANalyse:ASK|FSK:RADio:STANdard:FILTer:SYMBol <integer> DANalyse:ASK|FSK:RADio:STANdard:FILTer:SYMBol? Sets the symbol numbers for the selected filter. >...
- Page 103 Command Reference DANalyse Subsystem Trigger Source DANalyse:ASK|FSK:TRIGger:SOURce IMMediate|RFBurst|EXTPositive|EXTNegative DANalyse:ASK|FSK:TRIGger:SOURce? Sets the trigger source type for the measurement. > ASK/FSK Modulation Analysis > More > Trigger Key access: MODE RF Trigger DANalyse:ASK|FSK:TRIGger:LEVel:ABSolute <ampl> DANalyse:ASK|FSK:TRIGger:LEVel:ABSolute? Set the trigger level for the RF burst trigger. >...
- Page 104 Command Reference DANalyse Subsystem Limit On/Off DANalyse:ASK|FSK:LIMit OFF|ON|0|1 DANalyse:ASK|FSK:LIMit? Turns the limit function on or off. *RST: > ASK/FSK Modulation Analysis > More > Limit Key access: MODE Frequency Deviation Upper Limit DANalyse:FSK:LIMit:FDEViation:UPPer <frequency> DANalyse:FSK:LIMit:FDEViation:UPPer? Specifies the frequency deviation upper limit for the FM signal. *RST: 1 kHz >...
- Page 105 Command Reference DANalyse Subsystem Depth Upper Limit DANalyse:ASK:LIMit:AMDepth:UPPer <percent> DANalyse:ASK:LIMit:AMDepth:UPPer? Specifies the ASK modulation depth upper limit for the ASK signal. *RST: > ASK Modulation Analysis > More > Limit > FreqDev Up Key access: MODE Depth Lower Limit DANalyse:ASK:LIMit:AMDepth:LOWer <percent> DANalyse:ASK:LIMit:AMDepth:LOWer? Specifies the frequency deviation lower limit for the ASK signal.
- Page 106 Command Reference DANalyse Subsystem X Scale Reference Value DANalyse:ASK|FSK:VIEW:X:RVALue <time> DANalyse:ASK|FSK:VIEW:X:RVALue? Specifies the reference value of the X scale. > ASK/FSK Modulation Analysis > X Scale > Ref Value Key access: MODE X Scale Reference Position DANalyse:ASK|FSK:VIEW:X:RPOSition LEFT|CENTer|RIGHt DANalyse:ASK|FSK:VIEW:X:RPOSition? Sets the reference position of the X scale. >...
- Page 107 Command Reference DANalyse Subsystem Y Scale Reference Position DANalyse:ASK|FSK:VIEW:Y:RPOSition TOP|CENTer|BOTTom DANalyse:ASK|FSK:VIEW:Y:RPOSition? Sets the reference position of the Y scale. > ASK/FSK Modulation Analysis > Y Scale > Ref Position Key access: MODE Y Scale Auto DANalyse:ASK|FSK:VIEW:Y:AUTO Triggers a sweep and sets the Y scale according to the test result automatically.
-
Page 108: Demod Subsystem
Command Reference Demod Subsystem Demod Subsystem AM On Off :DEMod:AM:STATe OFF|ON|0|1 :DEMod:AM:STATe? Turns on the AM demodulation on or off. *RST: > Demod > AM On/Off Key access: SPAN FM On Off :DEMod:FM:STATe OFF|ON|0|1 :DEMod:FM:STATe? Turns on the FM demodulation on or off. *RST: >... -
Page 109: Display Subsystem
Command Reference DISPlay Subsystem DISPlay Subsystem The DISPlay subsystem controls the selection and presentation of textual, graphical, and trace information. Within a display, information may be separated into individual windows. Active Function Area :DISPlay:AFUnction:POSition CENTer|TOP|BOTTom :DISPlay:AFUnction:POSition? Changes the position of the active function block. *RST: Center >... - Page 110 Command Reference DISPlay Subsystem Turn the Entire Display On/Off :DISPlay:ENABle OFF|ON|0|1 :DISPlay:ENABle? Turns the display on or off. Having the display turned off may increase repetitive measurement rate. Pressing (local) key will turn display enable back on. Preset/ System Trace X-Axis Scale Offset :DISPlay:WINDow:TRACe:X[:SCALe]:OFFSet <freq>...
- Page 111 Command Reference DISPlay Subsystem Display Line On/Off :DISPlay:WINDow:TRACe:Y:DLINe:STATe OFF|ON|0|1 :DISPlay:WINDow:TRACe:Y:DLINe:STATe? Turns the display line on or off. *RST: > Display Line On Off Key access: Det/ Display Normalized Reference Level :DISPlay:WINDow:TRACe:Y[:SCALe]:NRLevel <rel_ampl> :DISPlay:WINDow:TRACe:Y[:SCALe]:NRLevel? Sets the normalized reference level. See command :CALCulate:NTData[STATe] OFF|ON|0|1 *RST: 0 dB...
- Page 112 Command Reference DISPlay Subsystem Trace Y-Axis Amplitude Scaling :DISPlay:WINDow:TRACe:Y[:SCALe]:PDIVision <rel_ampl> :DISPlay:WINDow:TRACe:Y[:SCALe]:PDIVision? Sets the per-division display scaling for the y-axis when y-axis units are set to amplitude units. *RST: 10 dB Range: 1 to 10 dB > Scale/Div Key access: Amplitud Trace Y-Axis Reference Level :DISPlay:WINDow:TRACe:Y[:SCALe]:RLEVel <ampl>...
- Page 113 Command Reference DISPlay Subsystem individual limits when initially set. For example, if the reference level is (first) set to –20 dBm, then the reference level offset can be set to values of –307.6 dB to 327.6 dB. In the case of a 327.6 dB reference level offset, the resultant reference level value changes to 307.6 dBm.
-
Page 114: Fetch Subsystem
Command Reference FETCh Subsystem FETCh Subsystem This command puts selected data from the most recent measurement into the output buffer. Use FETCh if you have already made a good measurement and you want to return scalar data from a single measurement. FETCh saves you the time of re-making the measurement. - Page 115 Command Reference FETCh Subsystem :FETCh:CHPower:DENSity? This command returns the value of the channel power density in amplitude units/Hz. > Channel Power Key access Meas OBW measurement :FETCh:OBWidth? This returns the bandwidth of the carrier signal. :FETCh:OBWidth:OBWidth? This returns scalar results of occupied bandwidth, and transmit frequency error.
- Page 116 Command Reference FETCh Subsystem TOI measurement :FETCh:TOIntercept? Returns 18 scalar results, in the following order. 1. The lower base frequency value in Hz. 2. The lower base power value in dBm. 3. The lower base power value in dBc. 4. The upper base frequency value in Hz. 5.
-
Page 117: Initiate Subsystem
Command Reference INITiate Subsystem INITiate Subsystem The INITiate subsystem is used to control the initiation of the trigger. Refer to the TRIGger subsystems for related commands. Continuous or Single Measurements :INITiate:CONTinuous OFF|ON|0|1 :INITiate:CONTinuous? Selects whether the trigger system is continuously initiated or not. This command affects sweep if not in a measurement, and affects trigger when in a measurement. - Page 118 Command Reference INITiate Subsystem • The query returns 1 or 0 into the output buffer. 1 is returned when in a continuous measurement state. 0 is returned when there is only a single measurement. *RST: Continuous > Sweep Cont Single Key access: Sweep/ Trig...
-
Page 119: Mmemory Subsystem
MMEMory Subsystem The purpose of the MMEMory subsystem is to provide access to internal or external disk drives. Keysight N9320B spectrum analyzers use instrument internal local storage device. The MMEMory command syntax term <file_name> is a specifier having the form: name.ext, where the “name” is a file name of up to 29 characters, letters (A-Z, a-z) and numbers (0-9) only (lower case letters are read as uppercase). - Page 120 Command Reference MMEMory Subsystem Load a Limit Line from Memory to the Instrument :MMEMory:LOAD:LIMit LLINE1|LLINE2,’<file_name>’ Loads a limit line, from the specified file in mass storage to the instrument. Loading a time limit line deletes any frequency limit lines. Similarly, loading a frequency limit line deletes any time limit lines.
- Page 121 Command Reference MMEMory Subsystem Load a Trace From a File to the Instrument :MMEMory:LOAD:TRACe ‘<file_name>’ The contents of the file are loaded into TRACE1. The file name must have a file extension of :trc. The file extension determines whether a trace is loaded, or a trace with its state, are loaded. The :trc extension is for files that include both trace and state data.
- Page 122 Command Reference MMEMory Subsystem Store a Screen Image in a Graphic File :MMEMory:STORe:SCReen ‘<file_name>’ Saves the current instrument screen image, as a graphic file, to the specified file in memory. The file must have a jpg file extension. The specified file extension determines which file format the instrument will use to save the image.
-
Page 123: Output Subsystem
Command Reference OUTPut Subsystem OUTPut Subsystem The OUTPut subsystem controls the characteristics of the tracking generator output port. Refer to the"SOURce Subsystem“ on page 153, which also contains commands that control the characteristics of the tracking generator. Turn Output On/Off :OUTPut[:STATe] OFF|ON|0|1 :OUTPut[:STATe]? Controls the tracking generator output. -
Page 124: Read Subsystem
Command Reference READ Subsystem READ Subsystem Does not preset the measurement to the factory default settings. For example, if you have previously initiated the ACP measurement and you send READ:ACP? it will initiate a new measurement using the same instrument settings. •... - Page 125 Command Reference READ Subsystem Channel Power measurement :READ:CHPower? Returns two values that correspond to the Channel Power and Power Spectral Density. :READ:CHPower:CHPower? Returns a single value that corresponds to the Channel Power. :READ:CHPower:DENSity? Returns a single value that corresponds to the Power Spectral Density.
- Page 126 Command Reference READ Subsystem SEM measurement :READ:SEMask? Returns 20 scalar results, each five in a array, in the following order: 1. The emission mask offset of lower value displayed. Used for store the lower statistical result for power(or PSD) offset. 2.
- Page 127 Command Reference READ Subsystem 17. The upper Output Intercept Power value in dBc. 18. The upper Output Intermod Point in Hz. > TOI Key access Meas Read the TOI (IP 3) :READ:TOIntercept:IP3? Returns the worst case Output Intercept Power value in dBm. >...
-
Page 128: Sense Subsystem
Command Reference SENSe Subsystem SENSe Subsystem Sets the instrument state parameters so that you can measure the input signal. SENSe subsystem commands used for measurements in the MEAS menus. These commands may be used only to set parameters of a specific measurement when the measurement is active. - Page 129 Command Reference SENSe Subsystem Select the Avg Mode [:SENSe]:ACPower:AVERage:TCONtrol EXPonential|REPeat [:SENSe]:ACPower:AVERage:TCONtrol? Select the type of termination control used for the averaging function as either Exp or Repeat. This determines the averaging action after the specified number of measurements (average count) is reached.
- Page 130 Command Reference SENSe Subsystem Set ACP Reference Auto [:SENSe]:ACPower:CARRier:AUTO[:STATe] OFF|ON|0|1 [:SENSe]:ACPower:CARRier:AUTO[:STATe]? Enables you to set the adjacent channel power reference to automatic or manual. When set to automatic, the carrier power result reflects the measured value in the carrier. When set to manual, the last measured value is captured and held, or may be entered by the user.
- Page 131 Command Reference SENSe Subsystem *RST: Example: ACP:LIM 1 > ACP > More > Limits Key access: Meas Set the Measurement Method [:SENSe]:ACPower:METHod IBW|RBW [:SENSe]:ACPower:METHod? Enables you to set the measurement method. The resolution bandwidth method is most useful for measuring the signals the bandwidths of which is approximate to the RBW of the Analyzer;...
- Page 132 Command Reference SENSe Subsystem Set:LIST[:FREQuency] [:SENSe]:ACPower:OFF- are used to set an entire array of values. The Set:LIST:STATe Table 1 shows the default array. Example: Sending fewer than 6 items to these commands will leave the values of the unspecified offsets unchanged. If you don’t send settings for all 6 offsets, it will set all the offsets that you specified, then it will set any remaining offsets to the same setting as the last offset that you sent.
-
Page 133: [:Sense]:Chpower Subsection
Command Reference SENSe Subsystem Set the Measurement Type [:SENSe]:ACPower:TYPE TPRef|PSDRef [:SENSe]:ACPower:TYPE? Press Meas Type to specify the reference for the measurement, either Total Pwr Ref or PSD Ref. Relative values can be displayed referenced to either the total power (Total Pwr Ref) or the power spectral density (PSD Ref) measured in the main channel. - Page 134 Command Reference SENSe Subsystem Turn Averaging On/Off [:SENSe]:CHPower:AVERage:TCONrol EXPonential|REPeat [:SENSe]:CHPower:AVERage:TCONrol? Press Avg Mode to select the type of termination control used for the averaging function to either Exp or Repeat. This determines the averaging action after the specified number of measurements (average count) is reached.
-
Page 135: [:Sense]:Correction Subsection
Command Reference SENSe Subsystem Set the Channel Power Span [:SENSe]:CHPower:FREQuency:SPAN <freq> [:SENSe]:CHPower:FREQuency:SPAN? Press Chan Pwr Span to set the analyzer span for the channel power measurement. *RST: 3.0 GHz Range: Current integration bandwidth to 10 times the integration bandwidth or span of your analyzer. Example: CHP:FREQ:SPAN 2 MHz >... -
Page 136: [:Sense]:Demod Subsection
Command Reference SENSe Subsystem hardware to 50 ohm. This affects the results when the y axis unit is voltage or current units (dBmV, dBmV, V, A) but not when it is power units (dBm, W). *RST: > More > Impendance Key access: Amplitud [:SENSe]:DEMod Subsection... -
Page 137: [:Sense]:Obwidth Subsection
Command Reference SENSe Subsystem [:SENSe]:OBWidth Subsection Set the Average Number On/Off [:SENSe]:OBWidth:AVERage:COUNt <integer> [:SENSe]:OBWidth:AVERage:COUNt? [:SENSe]:OBWidth:AVERage[:STATe] OFF|ON|0|1 [:SENSe]:OBWidth:AVERage[:STATe]? To specify the number of measurement averages used when calculating the measurement result set Avg Number to ON. The average will be displayed at the end of each sweep. Setting Avg Number to OFF disables measurement averaging. - Page 138 Command Reference SENSe Subsystem Set OBW Span [:SENSe]:OBWidth:FREQuency:SPAN <freq> [:SENSe]:OBWidth:FREQuency:SPAN? Enables you to specify the range of integration used in calculating the total power from which the percent occupied bandwidth is then calculated. The analyzer span will be set to the same value as the OBW Span for the measurement.
- Page 139 Command Reference SENSe Subsystem Set the Occ BW% Pwr [:SENSe]:OBWidth:PERCent <percent> [:SENSe]:OBWidth:PERCent? Enables you to change the percentage of signal power used when determining the occupied bandwidth. *RST: 99.0% Range: 10% - 99.99% Example: OBW:PERC 50 > Occupied BW > Occ BW% Pwr Key access: Set the X dB value [:SENSe]:OBWidth:XDB <dB value>...
-
Page 140: [:Sense]:Toi Subsection
Command Reference SENSe Subsystem [:SENSe]:TOI Subsection Set the Average [:SENSe]:TOI:AVERage:COUNt <integer> [:SENSe]:TOI:AVERage:COUNt? [:SENSe]:TOI:AVERage[:STATe] OFF|ON|0|1 [:SENSe]:TOI:AVERage[:STATe]? To specify the number of measurement averages used when calculating the measurement result set Avg Number to ON. The average will be displayed at the end of each sweep. Setting Avg Number to OFF disables measurement averaging. - Page 141 Command Reference SENSe Subsystem Set the Max Mixer Lvl [:SENSe]:TOI:FREQuency:MIXer:RANGe[:UPPer] <number> [:SENSe]:TOI:FREQuency:MIXer:RANGe[:UPPer]? [:SENSe]:TOI:FREQuency:MIXer:RANGe:AUTO OFF|ON|0|1 [:SENSe]:TOI:FREQuency:MIXer:RANGe:AUTO? Enables you to set the relationship between the highest signal that can be displayed (the reference level) and the input attenuation. The relationship applies whenever the Attenuation is set to Auto. The relationship is that the attenuation is given by reference level minus the max mixer level.
-
Page 142: [:Sense]:Semask Subsection
Command Reference SENSe Subsystem [:SENSe]:SEMask Subsection Set the Average [:SENSe]:SEMask:AVERage:COUNt <integer> [:SENSe]:SEMask:AVERage:COUNt? [:SENSe]:SEMask:AVERage[:STATe] OFF|ON|0|1 [:SENSe]:SEMask:AVERage[:STATe]? To specify the number of measurement averages used when calculating the measurement result set Avg Number to ON. The average will be displayed at the end of each sweep. *RST: 10/Off Range:... - Page 143 Command Reference SENSe Subsystem Set the Channel Res BW [:SENSe]:SEMask:BANDwidth|BWIDth[:RESolution]:AUTO OFF|ON|0|1 [:SENSe]:SEMask:BANDwidth|BWIDth[:RESolution]:AUTO? [:SENSe]:SEMask:BANDwidth|BWIDth[:RESolution] <freq> [:SENSe]:SEMask:BANDwidth|BWIDth[:RESolution]? Specifies the resolution bandwidth used in measuring and the power in the main channel. *RST: 30 kHz Range: 10% to 100% of the setting of Chan Span Example: SEM:BAND 4 MHz >...
- Page 144 Command Reference SENSe Subsystem Specifies the resolution bandwidth used in measuring the offset pair. When set to Auto, the RBW from the default tables are used. When set to Man, the range of settings is the range of available RBWs, except the maximum is further limited to not exceed (Stop Freq - Start Freq).
- Page 145 Command Reference SENSe Subsystem Set the Stop Freq [:SENSe]:SEMask:OFFSet:LIST:FREQuency:STOP <freq>,...[<freq>] (up to five values) [:SENSe]:SEMask:OFFSet:LIST:FREQuency:STOP? Specifies the inner limit (frequency closest to the carrier) for both segments of the specified offset pair. When Start Freq (Off) is selected, the offset pair is not measured. Offsets that are turned off, for the currently selected offset will return a -999.0 when queried.
- Page 146 Command Reference SENSe Subsystem Set the Abs Start [:SENSe]:SEMask:OFFSet:LIST:STARt:ABSolute <ampl>,...[<ampl>] (up to five values) [:SENSe]:SEMask:OFFSet:LIST:STARt:ABSolute? Enables you to enter an absolute level limit at Start Freq for the currently selected offset ranging from –200.00 to +50.00 dBm with 0.01 dB resolution. *RST: Dependent upon Offset selected.
- Page 147 Command Reference SENSe Subsystem Set the Abs Stop [:SENSe]:SEMask:OFFSet:LIST:STARt:ABSolute <ampl>,...[<ampl>] (up to five values) [:SENSe]:SEMask:OFFSet:LIST:STARt:ABSolute? [:SENSe]:SEMask:OFFSet:LIST:STOP:ABSolute:COUPle OFF|ON|0|1,...OFF|ON|0|1 (up to five values) [:SENSe]:SEMask:OFFSet:LIST:STOP:ABSolute:COUPle? Enables you to enter an absolute level limit at Stop Freq for the currently offset ranging from –200.00 to +50.00 dBm with 0.01 dB resolution, and to toggle this function between Couple and Man.
- Page 148 Command Reference SENSe Subsystem *RST: Dependent upon Offset selected, please refer to the User’s Guide for more details. Range: –150 dB to 50 dB Example: – SEM:OFFS:LIST:STOP:RCAR 20 dB SEM:OFFS:LIST:STOP:RCAR:COUP 0 > More > Spectrum Emission Mask > Offset/Limits > More > Key access: Meas Rel Stop...
-
Page 149: [:Sense]:Average Subsection
Command Reference SENSe Subsystem Set the Meas Type [:SENSE]:SEMask:TYPE TPRef|PSDRef [:SENSE]:SEMask:TYPE? Displays a menu where you can select a measurement reference type, Total Pwr Ref or PSD Ref. *RST: Total Pwr Ref Example: SEM:TYPE TPRef or SEM:TYPE PSDRef > More> Spectrum Emission Mask > Meas Type Key access: Meas [:SENSe]:AVERage Subsection... - Page 150 Command Reference SENSe Subsystem Turn Automatic Averaging On/Off [:SENSe]:AVERage:TYPE:AUTO OFF|ON|0|1 [:SENSe]:AVERage:TYPE:AUTO? Sets the averaging to be automatically set to the appropriate type for the current measurement setup. Or allows you to manually choose the type of averaging by [:SENSe]:AVERage:TYPE When AUTO is On: If the Y Axis Scale is not Linear or Log, then average type is Video (Y Axis Scale) Averaging.
-
Page 151: [:Sense]:Bandwidth Subsection
Command Reference SENSe Subsystem [:SENSe]:BANDwidth Subsection Resolution Bandwidth [:SENSe]:BANDwidth|BWIDth[:RESolution] <freq> [:SENSe]:BANDwidth|BWIDth[:RESolution]? Specifies the resolution bandwidth. Example: BAND 1 kHz Range: 10 Hz to 3 MHz > Resolution BW Auto Man Key access: Resolution Bandwidth Automatic [:SENSe]:BANDwidth|BWIDth[:RESolution]:AUTO OFF|ON|0|1 [:SENSe]:BANDwidth|BWIDth[:RESolution]:AUTO? Couples the resolution bandwidth to the frequency span. *RST: Example: BWID:AUTO On... - Page 152 Command Reference SENSe Subsystem Video Bandwidth Automatic [:SENSe]:BANDwidth|BWIDth:VIDeo:AUTO OFF|ON|0|1 [:SENSe]:BANDwidth|BWIDth:VIDeo:AUTO? Couples the video bandwidth to the resolution bandwidth. *RST: > Video BW Auto Man Key access: Video to Resolution Bandwidth Ratio [:SENSe]:BANDwidth|BWIDth:VIDeo:RATio <number> [:SENSe]:BANDwidth|BWIDth:VIDeo:RATio? Specifies the ratio of the video bandwidth to the resolution bandwidth.
-
Page 153: [:Sense]:Detector Subsection
Command Reference SENSe Subsystem [:SENSe]:DETector Subsection Automatic Detection Type Selected [:SENSe]:DETector:AUTO OFF|ON|0|1 [:SENSe]:DETector:AUTO? Switches automatically to the optimum detection type for typical measurements using the current instrument settings. The detector type is average if any of these are on: • Trace averaging when the Average Type is Power (RMS). The detector type is sample if any of the following conditions are true: •... -
Page 154: [:Sense]:Frequency Subsection
Command Reference SENSe Subsystem > Avg Type. The method is controlled by • Negative peak detection displays the lowest sample taken during the interval being displayed. • Positive peak detection displays the highest sample taken during the interval being displayed. •... - Page 155 Command Reference SENSe Subsystem Center Frequency Step Size Automatic [:SENSe]:FREQuency:CENTer:STEP:AUTO OFF|ON|0|1 [:SENSe]:FREQuency:CENTer:STEP:AUTO? Specifies whether the step size is set automatically based on the span. *RST: > CF Step Auto Man Key access: Frequenc Center Frequency Step Size [:SENSe]:FREQuency:CENTer:STEP[:INCRement] <freq> [:SENSe]:FREQuency:CENTer:STEP[:INCRement]? Specifies the center frequency step size.
-
Page 156: [:Sense]:Power Subsection
Command Reference SENSe Subsystem Last Frequency Span [:SENSe]:FREQuency:SPAN:PREVious Set the frequency span to the previous span setting. > Last Span Key access: SPAN Start Frequency [:SENSe]:FREQuency:STARt <freq> [:SENSe]:FREQuency:STARt? Set the start frequency. *RST: 0 Hz Range: –80 MHz - 3.080 GHz >... - Page 157 Command Reference SENSe Subsystem Input Port Attenuator Auto [:SENSe]:POWer[:RF]:ATTenuation:AUTO OFF|ON|0|1 [:SENSe]:POWer[:RF]:ATTenuation:AUTO? Select the input port attenuator range to be set either automatically (On) by the Reference Level Setting or manually (Off). *RST: > Attenuation Key access: Amplitud Attenuation Limit [:SENSe]:POWer[:RF]:ATTLimit:STATe OFF|ON|0|1 [:SENSe]:POWer[:RF]:ATTLimit:STATe? Toggles the attenuation limit function between On and Off.
-
Page 158: [:Sense]:Sweep Subsection
Command Reference SENSe Subsystem [:SENSe]:SWEep Subsection Sweep Time [:SENSe]:SWEep:TIME <time> [:SENSe]:SWEep:TIME? Specifies the time in which the instrument sweeps the display. *RST: 100.2 ms Remarks: A span value of 0 Hz causes the analyzer to enter zero span mode. In zero span the X-axis represents time rather than frequency. >... -
Page 159: Source Subsystem
Command Reference SOURce Subsystem SOURce Subsystem The SOURce subsystem controls the signal characteristics of the tracking generator. Refer also to the "OUTPut Subsystem“ on page 117 which contains a command that controls the tracking generator output. Sets the Output Power Offset Correction :SOURce:CORRection:OFFSet <rel_ampl>... - Page 160 Command Reference SOURce Subsystem Automatic Source Attenuation :SOURce:POWer:ATTenuation:AUTO OFF|ON|0|1 :SOURce:POWer:ATTenuation:AUTO? Selects if the source output level attenuator will be set automatically, or manually. *RST: > Tracking Generator > Attenuation Auto Man Key access: MODE Sets the Output Power :SOURce:POWer[:LEVel][:IMMediate][:AMPLitude] <ampl> :SOURce:POWer[:LEVel][:IMMediate][:AMPLitude]? Specifies the source output power level.
- Page 161 Command Reference SOURce Subsystem Set the Source Sweep Power Range :SOURce:POWer:SWEep <rel_ampl> :SOURce:POWer:SWEep? Specifies the range of power levels through which the source output will sweep. Use to set the power level :SOURce:POWer:STARt at the start of the power sweep. See also :SOURce:POWer:SPAN *RST: 0 dB...
-
Page 162: Status Subsystem
Command Reference STATus Subsystem STATus Subsystem The STATus subsystem controls the SCPI-defined status-reporting structures. Operation Condition Query :STATus:OPERation:CONDition? This query returns the decimal value of the sum of the bits in the Status operation condition register. Operation Enable :STATus:OPERation:ENABle <integer> :STATus:OPERation:ENABle? This command determines which bits in the Operation Condition Register will set bits in the Operation Event register, which also... -
Page 163: Status:questionable:integrity Subsection
Command Reference STATus Subsystem STATus:QUEStionable:INTegrity Subsection This subsection controls the SCPI-defined status-reporting structures. Questionable Integrity Condition :STATus:QUEStionable:INTegrity:CONDition? This query returns the decimal value of the sum of the bits in the Questionable Integrity Condition register. Questionable Integrity Enable :STATus:QUEStionable:INTegrity:ENABle <integer> :STATus:QUEStionable:INTegrity:ENABle? This command determines which bits in the Questionable Integrity Condition Register will set bits in the Questionable Integrity Event... -
Page 164: System Subsystem
Command Reference SYSTem Subsystem SYSTem Subsystem This subsystem is used to set the controls and parameters associated with the overall system communication. These functions are not related to instrument performance. Brightness :SYSTem:BRIGhtness HIGH|MIDDLE|LOW :SYSTem:BRIGhtness? Sets and queries the brightness of the LCD display. >... - Page 165 Command Reference SYSTem Subsystem Display the Hardware Configuration :SYSTem:CONFigure:HARDware:STATe OFF|ON|0|1 :SYSTem:CONFigure:HARDware:STATe? Shows the current hardware configuration of the instrument on the display. *RST: > More > Show Hardware Key access: Preset/ System Software Configuration Query :SYSTem:CONFigure:SOFTware? Returns string of information about the current software in the instrument.
- Page 166 Command Reference SYSTem Subsystem Display System Configuration :SYSTem:CONFigure[:SYSTem]:STATe OFF|ON|0|1 :SYSTem:CONFigure[:SYSTem]:STATe? Shows the current system configuration of the instrument on the display. *RST: > More > Show System Key access: Preset/ System Set Date :SYSTem:DATE <year>,<month>,<day> :SYSTem:DATE? Sets the date of the real-time clock of the instrument. Year is a 4-digit integer.
- Page 167 Command Reference SYSTem Subsystem Power on Type :SYSTem:PON:TYPE PRESet|LAST :SYSTem:PON:TYPE? Returns the instrument to a set of defined conditions. The particular set is selected by :SYSTem:PRESet:TYPE. This command does not change any persistent parameters. The term persistent means that the command retains the setting previously selected, even through a power cycle.
- Page 168 Command Reference SYSTem Subsystem Preset Type :SYSTem:PRESet:TYPE FACTory|USER|LAST Selects the preset state to be either factory-defined or user-defined preset conditions. *RST: The factory default is Factory. This parameter is persistent, which means that it retains the setting previously selected, even through a power cycle.
-
Page 169: Trace Subsystem
Command Reference TRACe Subsystem TRACe Subsystem The TRACe subsystem controls access to the internal trace memory of the analyzer. Transfer Trace Data :TRACe[:DATA]? <trace_name> This command transfers trace data from the instrument to the controller. <trace_name> is TRACE1|2|3|4. Example: :TRAC:DATA? TRACE1 Remarks: Commands :MMEM:STOR:TRAC and :MMEM:LOAD:TRAC are used to transfer trace data to, or from, the internal drive. - Page 170 Command Reference TRACe Subsystem Add/Subtract Trace Math :TRACe:MATH:ADD|SUBTract <destina- tion_trace>,<source_trace1>,<source_trace2> :TRACe:MATH? Add or subtract the selected source traces and display the result as destination trace. Source_trace1, 2 are variable between trace1, 2, 3, 4 and the display line. Destination_trace is variable between trace1, 2, 3, and 4. Note that a trace math mode is an enumeration;...
- Page 171 Command Reference TRACe Subsystem Trace Mode :TRACe1|2|3|4:MODE WRITe|MAXHold|MINHold|AVERage :TRACe1|2|3|4:MODE? Selects the display mode for the selected trace. Write puts the trace in the normal mode, updating the data. Maximum hold displays the highest measured trace value for all the data that has been measured since the function was turned on. Minimum hold displays the lowest measured trace value for all the data that has been measured since the function was turned on.
-
Page 172: Trigger Subsystem
Command Reference TRIGger Subsystem TRIGger Subsystem The TRIGger subsystem is used to set the controls and parameters associated with triggering the data acquisitions. Other trigger-related commands are found in the INITiate and ABORt subsystems. External Trigger Slope :TRIGger[:SEQuence]:EXTernal[1]:SLOPe POSitive|NEGa- tive :TRIGger[:SEQuence]:EXTernal[1]:SLOPe? This command activates the trigger condition that allows the next sweep to start when the external voltage (connected to EXT TRIG... - Page 173 Command Reference TRIGger Subsystem offset value results in the display of trace data prior to the trigger event. A positive trigger offset value results in an effective delay in the display of trace data after the trigger event. The trigger offset value used when the feature is enable will depend on the following parameters: •...
- Page 174 Command Reference TRIGger Subsystem Video Trigger Level Amplitude :TRIGger[:SEQuence]:VIDeo:LEVel <ampl> :TRIGger[:SEQuence]:VIDeo:LEVel? Specifies the level at which a video trigger will occur. *RST: 2.5 divisions below reference level Range: 10 display divisions below reference level to reference level Default Unit: current amplitude units Remarks: Video is adjusted using this command, but must also be selected using the command...
-
Page 175: Unit Subsystem
Command Reference UNIT Subsystem UNIT Subsystem Select Power Units of Measure :UNIT:POWer DBM|DBMV|DBUV|DBUA|V|W|A :UNIT:POWer? Specifies amplitude units for the input, output and display. *RST: dBm in log amplitude scale Volts in linear amplitude scale > More > Y Axis Key access: Amplitud... - Page 176 This information is subject to change without notice. © Keysight Technologies 2008-2019 Edition 5 December 2018 N9320-90029 www.keysight.com...
Need help?
Do you have a question about the N9320B and is the answer not in the manual?
Questions and answers