
Related Manuals for GRASS VALLEY JUPITER L - V2.1.0


Summary of Contents for GRASS VALLEY JUPITER L - V2.1.0
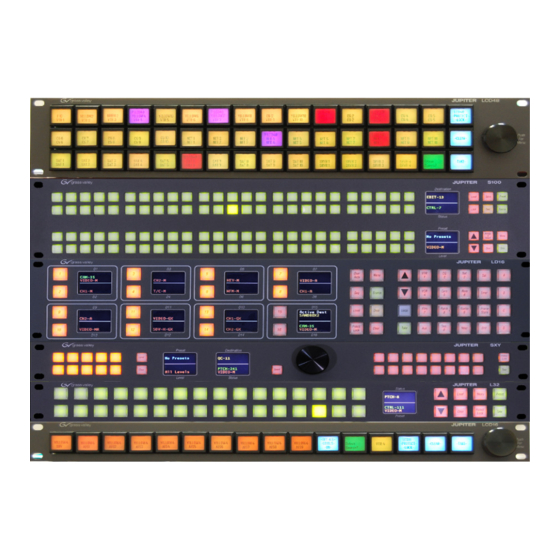
- Page 1 JUPITER L, S, and LCD Series Control Panels Instruction Manual Software Version 2.1.0 071853605 OCTOBER 2010...
- Page 2 Affiliate with the N.V. KEMA in The Netherlands CERTIFICATE Certificate Number: 510040.001 The Quality System of: Thomson Inc, and it’s wordwide Grass Valley division affiliates DBA GRASS VALLEY Headquarters 15655 SW Greystone Ct. 10 Presidential Way 400 Providence Mine Rd...
- Page 3 JUPITER L, S, and LCD Series Control Panels Instruction Manual Software Version 2.1.0 071853605 OCTOBER 2010...
- Page 4 Benelux/Belgium: +32 (0) 2 334 90 30 Benelux/Netherlands: +31 (0) 35 62 38 42 1 N. Europe: +45 45 96 88 70 Germany, Austria, Eastern Europe: +49 6150 104 444 UK, Ireland, Israel: +44 118 923 0499 Copyright © Grass Valley, Inc. All rights reserved. This product may be covered by one or more U.S. and foreign patents.
-
Page 5: Table Of Contents
Contents Preface ..............About This Manual . - Page 6 Contents SXY Panels ............Button Configuration Overview.
- Page 7 Contents L32 ............. . LD4 .
- Page 8 Contents Undo (L64 Only) ........... Front-Panel Service Modes .
- Page 9 Contents L64 Panel Similarities and Differences ....... . . Basic S100 Operation..........Alternate Mode Operation .
- Page 10 Contents Section 8 — LCD Hardware Installation ......Rack Mounting ............Power Supplies .
- Page 11 Contents Ordering Information ..........Installation Instructions .
- Page 12 Contents JUPITER L-S and LCD Series Control Panel Instruction Manual...
-
Page 13: Preface
• Jupiter Getting Started Guide. Software update and network configuration of the L-S panels requires installation of the Thomson Grass Valley NetConfig application. See the separate NetConfig Instruction manual for specific information. Software only, Windows OS based Jupiter Soft Panels are also available. - Page 14 Preface JUPITER L-S and LCD Series Control Panel Instruction Manual...
-
Page 15: Safety Summary
Safety Summary Read and follow the important safety information below, noting especially those instructions related to risk of fire, electric shock or injury to persons. Additional specific warnings not listed here may be found throughout the manual. WARNING Any instructions in this manual that require opening the equipment cover or enclosure are for use by qualified service personnel only. -
Page 16: Symbols On The Product
Safety Summary Symbols on the Product The following symbols may appear on the product: Indicates that dangerous high voltage is present within the equipment enclosure that may be of sufficient magnitude to constitute a risk of electric shock. Indicates that user, operator or service technician should refer to product manual for important operating, maintenance, or service instructions. -
Page 17: Cautions
Safety Summary — Use only the power cord supplied or specified for Use proper power cord this product. — Connect the grounding conductor of the power cord to Ground product earth ground. — Do not operate this Operate only with covers and enclosure panels in place product when covers or enclosure panels are removed. - Page 18 Safety Summary — If mains switch is not provided, the power cord(s) Ensure mains disconnect of this equipment provide the means of disconnection. The socket outlet must be installed near the equipment and must be easily accessible. Verify that all mains power is disconnected before installing or removing power supplies and/or options.
- Page 19 Safety Summary Sicherheit – Überblick Lesen und befolgen Sie die wichtigen Sicherheitsinformationen dieses Abschnitts. Beachten Sie insbesondere die Anweisungen bezüglich Brand-, Stromschlag- und Verletzungsgefahren. Weitere spezifische, hier nicht aufgeführte Warnungen finden Sie im gesamten Handbuch. WARNUNG Alle Anweisungen in diesem Handbuch, die das Abnehmen der Geräteabdeckung oder des Gerätegehäuses erfordern, dürfen nur von qualifiziertem Servicepersonal ausgeführt werden.
- Page 20 Safety Summary Symbole am Produkt Die folgenden Symbole können sich am Produkt befinden: Weist auf eine gefährliche Hochspannung im Gerätegehäuse hin, die stark genug sein kann, um eine Stromschlaggefahr darzustellen. Weist darauf hin, dass der Benutzer, Bediener oder Servicet- echniker wichtige Bedienungs-, Wartungs- oder Servicean- weisungen in den Produkthandbüchern lesen sollte.
- Page 21 Safety Summary — Berühren Sie bei eingeschalteter Strom- Keine offen liegenden Leiter berühren zufuhr keine offen liegenden Leitungen, Komponenten oder Schaltungen. — Verwenden Sie nur das mitgelieferte Netzk- Richtiges Netzkabel verwenden abel oder ein Netzkabel, das den Spezifikationen für dieses Produkt entspricht.
- Page 22 Safety Summary weisungen belüftet werden. Legen Sie kein Papier unter das Gerät. Es könnte die Belüftung behindern. Platzieren Sie das Gerät auf einer ebenen Oberfläche. — Es gibt statisch empfindliche Kompo- Antistatische Vorkehrungen treffen nenten, die durch eine elektrostatische Entladung beschädigt werden kön- nen.
- Page 23 Safety Summary Consignes de sécurité Il est recommandé de lire, de bien comprendre et surtout de respecter les informations relatives à la sécurité qui sont exposées ci-après, notamment les consignes destinées à prévenir les risques d’incendie, les décharges élec- triques et les blessures aux personnes. Les avertissements complémen- taires, qui ne sont pas nécessairement repris ci-dessous, mais présents dans toutes les sections du manuel, sont également à...
- Page 24 Safety Summary Symboles apposés sur le produit Les symboles suivants peut être apposés sur le produit: Signale la présence d’une tension élevée et dangereuse dans le boîtier de l’équipement ; cette tension peut être suffisante pour constituer un risque de décharge électrique. Signale que l’utilisateur, l’opérateur ou le technicien de main- tenance doit faire référence au(x) manuel(s) pour prendre con- naissance des instructions d’utilisation, de maintenance ou...
- Page 25 Safety Summary — Avant de procéder à une intervention d’entretien, Retirez tous vos bijoux retirez tous vos bijoux, notamment les bagues, la montre ou tout autre objet métallique. — Évitez tout contact avec les connex- Évitez tout contact avec les circuits exposés ions, les composants ou les circuits exposés s’ils sont sous tension.
- Page 26 Safety Summary — Pour éviter toute surchauffe du produit, Assurez une ventilation adéquate assurez une ventilation de l’équipement conformément aux instructions d’installation. Ne déposez aucun document sous l’appareil — ils peuvent gêner la ventilation. Placez l’appareil sur une surface plane. - Les composants sensibles à...
-
Page 27: Regulatory Notices
Changes or modifications not expressly approved by Grass Valley Inc. can affect emission compliance and could void the user’s authority to operate this equipment. -
Page 28: Canadian Certified Power Cords
Regulatory Notices Canadian Certified Power Cords Canadian approval includes the products and power cords appropriate for use in the North America power network. All other power cords supplied are approved for the country of use. Canadian Certified AC Adapter Canadian approval includes the AC adapters appropriate for use in the North America power network. - Page 29 Regulatory Notices Category Standard Designed/tested for compliance with: EMC Directive 2004/108/EC Audio, Video and Entertainment Lighting Control for the European Community. via EN 55103-1 and 2 EN 55103-1 Emission stan- Electromagnetic compatibility. dards Product family standard for audio, video, audio-visual and entertainment lighting control apparatus for professional use.
- Page 30 Regulatory Notices JUPITER L-S and LCD Series Control Panel Instruction Manual...
-
Page 31: Section 1 - L-S Series Introduction
Overview The Jupiter L-S series Control panels are designed to control television matrix routers through a Grass Valley Jupiter CM-4000 (or CM-4400) Control System running the AccuSwitch application. Although the panels are primarily intended to control Concerto, Trinix, Apex, and Venus routers, any matrix router that can be controlled by an AccuSwitch can also be controlled by these panels. -
Page 32: L Series Control Panel Features
Section 1 — L-S series Introduction L Series Control Panel Features Figure 1. L32 Control Panel Destination Preset Status The L32 is a button-per-signal control panel equipped with a Destination/ Status color bitmap display. Features include: • Assignable buttons on the front panel, •... -
Page 33: Ld4
L Series Control Panel Features Figure 3. LD4 Control Panel Buttons #1 - 5 Buttons #11 - 13 Buttons #6 - 10 Buttons #14 - 16 Note The buttons are numbered 1-5 on the top row and 6-0 on the bottom row. The LD4 is a 16-category, full-matrix control panel. - Page 34 Section 1 — L-S series Introduction top-level status and control of multiple Destinations (“MD Control”). Fea- tures include: • Eight color bitmap displays showing up to 16 Destinations/page, • 20 category buttons for direct category selection, • Locking protecting Destinations, •...
-
Page 35: S Series Control Panel Features
S Series Control Panel Features S Series Control Panel Features S25/S50 Figure 5. S25 Control Panel Figure 6. S50 Control Panel The S25 (Figure 5) and S50 (Figure 6) panels provide button-per-Source routing switcher control with 25 (or 50 respectively) Source buttons and an eight-button Destination / level selection cluster. -
Page 36: Sxy
Section 1 — L-S series Introduction for scrolling through every available Source or Destination, plus a button level selection. Features include: • Assignable buttons on the front panel, • Locking protecting Destinations, • Scroll up/down Source/Destination selection, • Preset mode, •... -
Page 37: Specifications
Specifications Specifications For mechanical, connection, power, and environmental specifications, refer to Appendix A-L-S and LCD Panel Specifications. JUPITER L-S and LCD Series Control Panel Instruction Manual37... -
Page 38: Ordering Information
Section 1 — L-S series Introduction Ordering Information JUP-CP-L32 Series Control Panels JUP-CP-L32-AC 32 button per Source control panel, with the ability to choose any Source or Destination included in the input or output table. Includes one display. Rack or desk mounted 1 RU. Includes AC power supply (JUP-ACPS-1RU). - Page 39 Ordering Information JUP-CP-SXY Series Control Panels JUP-CP-SXY-AC XY, multiple level control panel. Category entry, quick-pick or Scroll Wheel for Source, Destination or level selection, with two displays for obtaining the status of: DESTINA- TIONS, presets, levels and current status. Includes AC power supply (JUP-ACPS-1RU). JUP-CP-SXY-DC XY, multiple level control panel.
- Page 40 Section 1 — L-S series Introduction JUPITER L-S and LCD Series Control Panel Instruction Manual...
-
Page 41: Section 2 - Hardware Installation
Section Hardware Installation This section describes hardware installation procedures for the L-S series hardware panels. Rack Mounting Jupiter L-S panels mount into a standard 19 in. equipment rack. Panels are 1 or 2 rack units high (Figure 9). Figure 9. Panel Rack Mounting 44 mm 1 RU Panel 1.75 in. -
Page 42: Network Wiring
WARNING Do not connect any external power supply other than the approved “JUP- DCPS” unit supplied by Thomson Grass Valley. The AC power supply is contained in a module that mounts on the rear of the panel (Figure 10). -
Page 43: Button Labels
See Keycap Transparency Labels on page • Microsoft Word files are available for creating custom labels. For more information, contact Grass Valley Technical Support. L32/L64/S100 Panels The L32 and L64 panels have 32 or 64 buttons respectively, on the left side of the panel that can be used for Button-per-Source operation. -
Page 44: Ld4 Panels
Section 2 — Hardware Installation If the button assignments are more or less permanent, you may want to label them more specifically. An example is shown in Figure 12. See Source Button Configuration on page 45 for more information. LD4 Panels The LD4 panels have a cluster of 16 buttons on the right side that can be used for category/number operation. -
Page 45: S25/S50
Button Labels It is also possible to configure the panel with a custom category set. See Cat- egory Button Configuration on page 46 for more information. S25/S50 The S25 and S50 panels have 25 or 50 buttons on the left side of the panel that can be used for “Button-per-Source”... -
Page 46: Category Button Configuration
Section 2 — Hardware Installation of button numbers and the name of the router input associated with each button. The CP Input set is assigned to the panel using the MPK Devices table. For more information about button configuration, see CP Input and CP Output Sets on page Category Button Configuration... - Page 47 Button Labels Figure 18. Pre-Cut Transparency Keycap Labels Tally/ Assign Film Patch Server Studio Test Audio Level Shift Level & Select Film Patch Server Studio Test Panel Over Lock Source Enable Ride Film Patch Server Studio Test Panel Level Chop Menu Still Config...
- Page 48 Section 2 — Hardware Installation JUPITER L-S and LCD Series Control Panel Instruction Manual...
-
Page 49: Section 3 - Software Installation & Ip Addresses
Section Software Installation & IP Addresses Introduction The L-S series panels operate with the Jupiter AccuSwitch control system using Ethernet LAN or Serial connections. This functionality requires com- patible software versions and IP addresses must be used by all Jupiter system devices on the network. -
Page 50: Software Installation
Section 3 — Software Installation & IP Addresses Software Installation NetConfig Installation The Grass Valley NetConfig application is supplied on the L-S Panels Soft- ware CD that is shipped with the panel. 1. Insert the Jupiter L-S Panels Software CD into the Jupiter file server computer. - Page 51 Software Installation 2. Click and follow the instructions shown on the screens, accepting Next the defaults (Figure 20). Figure 20. NetConfig Installation Screens 3. After NetConfig has successfully installed, click Finish JUPITER L-S and LCD Series Control Panel Instruction Manual51...
-
Page 52: L-S Panels Installation (On Jupiter File Server)
Section 3 — Software Installation & IP Addresses L-S Panels Installation (on Jupiter File Server) 1. After NetConfig has been installed, the L-S Panels installation application will launch. This program loads files from the CD onto the computer running the installer program. You can later use NetConfig to install the software directly on the L-S series panels (Figure 21). -
Page 53: Network Ip Addresses
Network IP Addresses 3. Click when the L-S Panels software installation completes. Finish Network IP Addresses This section describes IP (LAN) addressing procedures for the L-S series hardware panels. IP connection and configuration allows Ethernet operation and provides a downloading path for software upgrades. The L-S panel, Jupiter System controller (CM-4000 or CM-4400), and Jupiter file server PC must be on the same IP network, or be connected through a network router/gateway. -
Page 54: Multi-Network Ip Configuration
Section 3 — Software Installation & IP Addresses Multi-Network IP Configuration A “remote” L-S panel can be placed on a network separate from the other Jupiter devices. For example, L-S panel can be placed on a facility LAN. In Figure 24, an IP router serves as a gateway between two networks. -
Page 55: Network Configuration Procedure (Netconfig)
Network IP Addresses Network Configuration Procedure (NetConfig) The network configuration procedure requires the Grass Valley NetConfig application v2.0.9 or newer. NetConfig is supplied on the CD shipped with the panel (see NetConfig Installation on page 50). The network configuration procedure consists of two parts: •... -
Page 56: Setting Jupiter Values For L-S Panels
Section 3 — Software Installation & IP Addresses b. Select the “Set IP” button along the top of the NetConfig window. You should see the “Change IP Addresses” menu. c. In the “Select Device Type” field, select “All Devices.” d. Select the panel requiring an address change. e. -
Page 57: Finding The Physical Location Of A Panel
Finding the Physical Location of a Panel c. ES-LAN/Serial Device #: Each panel connected to an AccuSwitch controller must be given a unique number. • Enter a number from 1 to 64 for a LAN only system. • Enter a number from 1 to 16 for a Serial only system. The “Device #”... -
Page 58: L-S Panel Software Update
Section 3 — Software Installation & IP Addresses L-S Panel Software Update Note NetConfig and the Jupiter Control Center use the same TFTP port. Only one will own the port at a time. When updating control panel software the Jupiter Control Center should be shut down, and NetConfig must be closed to send any Jupiter configuration changes. -
Page 59: Section 4 - Jupiter System Configuration
Section Jupiter System Configuration The following overview of L-S series panel configuration assumes that the reader is familiar with the Jupiter Facility Control System. Please refer to the Jupiter CM-4000 Installation and Operating manual or the Jupiter CM-4400 Installation and Operating manual for specific information. MPK Table Entries The Jupiter MPK table is used for configuration purposes. - Page 60 Section 4 — Jupiter System Configuration : This field is not used during a LAN-only installation. Port : Panel address from 01 to 64 (01 to 16 for Serial). This address must Address be unique for panels that are associated with the same Control module. L-S panels are normally shipped with a panel address of “01.”...
-
Page 61: Control Panel Sets
Control Panel Sets - (Does not apply to S25 and S50. Optional for all other L-S Override Set panels.) Select a CP Override set name. A CP Override set can be used to define a set of Sources and level combinations that can be quickly applied to a panel controlled Destination. -
Page 62: Sequence Set
Section 4 — Jupiter System Configuration For example, the LD4 panel provides a maximum of 16 categories; therefore categories 17 through 98 (as shown by the Jupiter editor) will not be sup- ported. The CP Input and Output sets are also the Source of the eight-char- acter mnemonics displayed on the panel. -
Page 63: Disabling The Configuration And Setup Menus On The Control Panel
Control Panel Sets The sequence set must be assigned to the panel on the Jupiter MPK Devices table. For additional information regarding Jupiter sequences and assigning them to control panels, refer to either the Jupiter CM-4000 Installation and Operating manual or Jupiter CM-4400 Installation and Operating manual. Note Sequences are executed in slightly different ways, depending on the buttons available on each panel type. -
Page 64: Compiling
Section 4 — Jupiter System Configuration Follow these steps to disable the buttons for a Source or Destination on the Control panel: 1. Open the CP Output table. 2. Enter the text, “BLANK” in the mnemonic column (see Figure 28). Figure 28. -
Page 65: Section 5 - Connecting The L-S, Lcd Panel
Section Connecting the L-S, LCD Panel The L-S and LCD Panels can be connected to the AccuSwitch System Con- troller via a 115k Baud serial bus (Cannot be greater than 2000 feet); or via a Cat 5 Ethernet connection (Cannot be greater than 329 feet per segment). Note An Ethernet connection is required for software upgrade purposes. - Page 66 Section 5 — Connecting the L-S, LCD Panel Figure 29. L-S and LCD Panel Serial Connection Serial bus Serial Serial bus Ports AccuSwitch CM-4000 System Controller 100baseT Jupiter LAN to Jupiter IP switch File Server Serial data cable (see page LAN (Cat 5 Ethernet) cable.
-
Page 67: Hardware Installation
Hardware Installation Hardware Installation The L-S and LCD Panels can be connected to the AccuSwitch System Con- troller via a 115k Baud serial bus or via a Cat 5 Ethernet connection. It is also possible to combine these methods by connecting some panels through a Serial port and others through the LAN. - Page 68 Section 5 — Connecting the L-S, LCD Panel Figure 30. Serial system addressing (example). Panel ID Panel IP 16 L-S panels per “16” “192.168.253.116” serial bus maximum Panel ID Panel IP “02” “192.168.253.102” Panel ID Panel IP “01” “192.168.253.101” Serial buses Panel ID Panel IP...
-
Page 69: Serial Data Cables
Thomson serial data cables use only 5 of the 9 pins that are described in the ESbus specification. The following cables are available, with 9-pin D male connectors installed, already made from Grass Valley (VDE cables include ferrite cores): Table 2. 1 meter (3.3 ft.) 8 meters (26.2 ft.) -
Page 70: Vde Emi/Rfi Modifications To Serial Data Cables
Section 5 — Connecting the L-S, LCD Panel VDE EMI/RFI Modifications to Serial Data Cables User-supplied serial data cables for VDE installations require a ferrite core placed over each end of the cable, and adjacent to the connector (see Figure 32 below). -
Page 71: Ip Configuration Procedure
Serial Data Cables IP Configuration Procedure 1. A Control panel only needs an IP address if it is using the LAN for NetConfig (Software updates). Determine the present IP address of the 1st panel. This step will be different for each panel, see the previous chapters in this manual for your specific panel’s information. -
Page 72: Panel Network Configuration
Section 5 — Connecting the L-S, LCD Panel Figure 33. The L-S or LCD Panels Web Page The Panel Information fields are system generated. Panel Network Configuration Follow these steps to configure the Panel Network. JUPITER L-S and LCD Series Control Panel Instruction Manual... -
Page 73: Network Mode Selection - Enable Dhcp If Box Checked
Serial Data Cables Net-1 IP Settings Figure 34. Net-1 IP Settings 1. Enter a unique value in the Ethernet IP field. This IP address must be within the same network as the AccuSwitch controller. For example, if a CM-4000 address is 192.168.253.10, then the L-S or LCD Panels address should be changed to reside in the 192.168.253.x network (such as “192.168.253.101”). -
Page 74: Connection Type
Section 5 — Connecting the L-S, LCD Panel Connection Type There are different types of connections. Follow these steps to set the con- nection settings for the different types: LAN Systems Figure 36. Example of the LAN Connection Type 1. Select the radio button for a LAN only system. -
Page 75: Forcing The Panel To Reset - If Box Is Checked
Serial Data Cables Forcing the Panel to Reset - if Box is Checked 1. Select the check box. This will force the panel to reset and use Do Reset the new settings. 2. Click the Save New Settings button. Clicking the Cancel Changes button will close the page without saving any changes. -
Page 76: Serial Protocol Table Entries
Section 5 — Connecting the L-S, LCD Panel Serial Protocol Table Entries When an L-S or LCD Panels is connected to a Control module (CM-4000 or CM-4400) serial port (and operated in Serial mode), the Control module serial port must be configured for “ESCP” protocol using the Serial Pro- tocol table. -
Page 77: Special Entries Needed To Upgrade Serial Panels
Serial Protocol Table Entries Address: The panel address from 1 to 16. This address must be unique for panels sharing the same Control module’s serial port. Panels are normally shipped with a panel address of “01.” This number is referred to as the “Device Number” on the IP configuration page and “ID” within the L-S or LCD Panels MENU system. -
Page 78: Changing The Connection Type Using The Panel's Menu
Section 5 — Connecting the L-S, LCD Panel Changing the Connection Type Using the Panel’s Menu The panel’s connection type can be changed using the panel’s menu. The steps needed to change the connection for each type of panel is explained below. -
Page 79: Ld16
Changing the Connection Type Using the Panel’s Menu 3. Press the button. Take 4. Press the or the Arrows to scroll to the Connection Type? Down option. 5. Press the button. The Connection menu will then appear Take (Figure 41). Note The example in Figure 41... - Page 80 Section 5 — Connecting the L-S, LCD Panel Follow these steps to change the Connection Type setting using the LD16 panel’s menu: 1. Press the button. The displayed items will change; look at the D9 Menu Display window (the bottom left-hand display window). 2.
-
Page 81: S25 Or S50
Changing the Connection Type Using the Panel’s Menu 4. Press the or the Arrows to change the Connection type in the Down N: field to Serial. button in the lower Right-hand corner will turn green Take (Figure 43). 5. Press the button to apply the change. - Page 82 Section 5 — Connecting the L-S, LCD Panel Follow these steps to change the Connection Type setting using the S25 or the S50 panel’s menu: 1. Press the button that is in the upper-right corner and the Destination button in the lower-left corner at the same time, for Destination approximately three (3) seconds (Figure...
-
Page 83: L32
Changing the Connection Type Using the Panel’s Menu Figure 49. L32 Control Panel Destination Preset Status Follow these steps to change the Connection Type setting using the L32 panel’s menu: 1. Press the button. The items will then change, look at the Menu Destination/ Status display window. -
Page 84: Ld4
Section 5 — Connecting the L-S, LCD Panel Figure 51. L32 Connection Menu - Connection - C: Lan N: Lan 6. Press the or the Arrows to change the Connection type in the Down N: field to Serial. button will then turn green. Take 7. - Page 85 Changing the Connection Type Using the Panel’s Menu Figure 53. LD4 Control Panel Menu Menu Button Take Button Display Windows UP and Down Buttons 4. Press the or the Arrows to scroll to the Connection Type? Down option. 5. Press the # button to select the Connection Type? option.
-
Page 86: S100
Section 5 — Connecting the L-S, LCD Panel Note Press the Clear button at any time to exit the menu without making changes to the current settings. Press the Menu button at any time to exit from the current location without making changes to the current settings but remain in the menu. - Page 87 Changing the Connection Type Using the Panel’s Menu 4. Press the or the Arrows to scroll to the Connection Type? Down option. 5. Press the button. The Connection menu will then appear Take (Figure 57). Note The example in Figure 57 is for reference only, it is not meant to be an exact replica of the displayed contents.
-
Page 88: Sxy
Section 5 — Connecting the L-S, LCD Panel Figure 58. SXY Control Panel Protect/ Level Lock Clear Follow these steps to change the Connection Type setting using the SXY panel’s menu: 1. Press the button. The displayed items will change; look at the Select Preset/Level Display window (the far-left display window). - Page 89 Changing the Connection Type Using the Panel’s Menu Figure 60. SXY Connection Menu - Connection - C: Lan N: Lan 6. Use the Scroll wheel to change the Connection type in the N: field to Serial. button will then turn green (Figure 61).
-
Page 90: Lcd16
Section 5 — Connecting the L-S, LCD Panel LCD16 Figure 62. LCD16 Control Panel Scroll Wheel Buttons #1-16 Button #1 Follow these steps to change the Connection Type setting using the LCD16 panel’s menu: 1. Press the Scroll wheel to access the Panels’ Main menu. 2. - Page 91 Changing the Connection Type Using the Panel’s Menu 4. Use the Scroll wheel to change the Connection type in the N: field to Serial. button will then turn green. Connection 5. Press the button to apply the change. You will then be given Connection an option to change the Device ID.
-
Page 92: Lcd48
Section 5 — Connecting the L-S, LCD Panel LCD48 Figure 64. LCD48 Control Panel Scroll Wheel Buttons #1-16 Buttons #17-32 Buttons #33-48 Follow these steps to change the Connection Type setting using the LCD48 panel’s menu: 1. Press the Scroll wheel to access the Panels’ Main menu. 2. - Page 93 Changing the Connection Type Using the Panel’s Menu Figure 65. LCD48 Connection Menu Display Windows Connection C: Lan N: Lan Scroll Wheel 4. Use the Scroll wheel to change the Connection type in the N: field to Serial. button will then turn green (Figure 65).
-
Page 94: Lan + Serial System
Section 5 — Connecting the L-S, LCD Panel LAN + Serial System In this example, one or more L-S or LCD Panels are operated in Serial mode, while the other L-S or LCD Panels are operated in LAN mode. All L- S or LCD Panels that are operated in Serial mode will still require a LAN connection for software upgrades. -
Page 95: Section 6 - L-S Series Panel Operation
Section L-S Series Panel Operation Introduction This section assumes panels have been properly installed and configured for operation at your facility. Buttons are configured to control Sources and Destinations using the Jupiter CP Input and Output sets, Levels are deter- mined with CP Level sets, and these sets are assigned to the panel using the MPK Devices table (see Section 4-Jupiter System Configuration). -
Page 96: Preset/Level
Section 6 — L-S Series Panel Operation Preset/Level Typically reports the name of the Source or Destination selected for the next action, and the currently selected level. D1 - D16 Reports an individual Destination name, and its current Source, or reports the levels and Sources for a single Destination, depending on panel oper- ating mode. -
Page 97: Basic Panel Operations
Introduction Basic Panel Operations Taking a Source to a Destination (Take) The most basic operation of any router control panel consists of selecting a router Destination, followed by selecting a router Source. This connects the router Source input signal to the router Destination output. Advise Router Option When the Advise flag option has been set in the Jupiter Control system and an attempt is made to switch control to a new device, the switch will not... -
Page 98: Breakaway
Section 6 — L-S Series Panel Operation Breakaway Routing matrices are usually organized into levels, where multiple signal paths will normally switch simultaneously (for example, video and audio). A breakaway switches levels independently from their normal association, for example, switching video without also switching audio. Sticky Levels Mode When Sticky Levels mode is ON, after a breakaway only the levels that were selected for that breakaway will remain activated. -
Page 99: Disabling Specific Buttons On The L32, L64, And S100 Control Panels
Introduction Note Overrides define the Source and which levels to switch. An override could be used as a breakaway switch. Disabling Specific Buttons on the L32, L64, and S100 Control Panels You can disable the buttons for a Source or Destination on the L32, L64, and S100 Control panels. -
Page 100: L32/L64 Control Panels
Section 6 — L-S Series Panel Operation L32/L64 Control Panels For a summary of L32/L64 functions see page Figure 67. L32 Control Panel Destination Preset Status Figure 68. L64 Control Panel Level Menu Preset Protect/ Undo Lock Clear Take L32 and L64 Panel Differences The most significant differences between these two panels, besides the number of buttons that are on the left side of the panel (either 32 or 64), are: •... -
Page 101: Clearing Panel Modes
L32/L64 Control Panels Clearing Panel Modes L32 and L64 panels can be placed into various modes for item and menu selection. Buttons on the panel behave differently, depending on what panel mode is currently active. If a button is lit, pressing it will clear that panel operating Level Preset mode. -
Page 102: Menu Selection Method
Section 6 — L-S Series Panel Operation Menu Selection Method 1. Clear the panel ( , and buttons OFF). Level Menu Preset 2. Press the button. The window will display configuration modes. Menu 3. If necessary, use the arrow buttons to scroll to the Up/Down Select mode. -
Page 103: Direct Selection With Preset
L32/L64 Control Panels Direct Selection with Preset Preset allows you to confirm the identity of the Source before it is switched to the Destination. 1. Press Preset so it is illuminated. 2. Press the low green button for the desired Source. The Source will NOT be taken to that Destination. -
Page 104: Locking A Destination
Section 6 — L-S Series Panel Operation Note This protects only the levels this control panel can control (as defined on the CP Level set assigned to the panel). • If another panel selects this Destination for control, that panel's button will illuminate steady amber. -
Page 105: Breakaway Switching
L32/L64 Control Panels To Unlock a Destination: 1. Confirm the Destination to be unlocked appears in yellow in the Destination window (accomplished with Direct or Menu Destination selection described earlier). The button will blink red. Protect/Lock 2. Press . The button will stop blinking and the button will Protect/Lock Take... -
Page 106: Breakaway Source Status
Section 6 — L-S Series Panel Operation 2. Press the button to activate level access operation. Level Each level displayed in the bottom of the display will now have an asterisk ( ) that indicates it is active (selected for control). •... -
Page 107: Executing A Sequence (Salvo)
L32/L64 Control Panels Executing a Sequence (Salvo) After a sequence is created and downloaded (see Setting Up a Salvo with a Sequence Set on page 62) it can be executed as follows: Direct Execution In order to directly execute a sequence, that must be assigned to a panel button (see Button Assignment on page 108). -
Page 108: Button Assignment
Section 6 — L-S Series Panel Operation Blue in the preset window), and pressing the Take button returns the Des- tination to that previous Source. 1. Press the button, use the arrow buttons to scroll to Menu Up/Down Panel and then press Config? Take. -
Page 109: Front-Panel Service Modes
L32/L64 Control Panels above, pressing when it is illuminated restores the last Source to Undo preset, and by pressing repeatedly you can swap back and Undo Take forth between two Sources. Front-Panel Service Modes These modes are provided for panel maintenance and troubleshooting. They are not normally used by the operator. -
Page 110: Ld4 Control Panel
Section 6 — L-S Series Panel Operation LD4 Control Panel For a summary of LD4 functions see page Figure 69. LD4 Control Panel LD4 Operating Modes The LD4 has two distinct operating modes, Single Destination and Mul- tiple Destinations. • When operated in the Single Destination mode, one Destination is selected for control and the display windows show the Source for each defined level of that Destination (video, left audio, right audio, etc.). -
Page 111: Selecting A Destination To Be Controlled (Single Destination Mode)
LD4 Control Panel Selecting a Destination to be Controlled (Single Destination Mode) Page Selection Method 1. Press and push the soft button for the D3 Menu Select Destination? window. The D1 window will display and the other Destination? windows will display a page of Destinations. 2. -
Page 112: Breakaways (Ld4 Panel)
Section 6 — L-S Series Panel Operation Direct Category Button Method This is the fastest method to take a Source to Destination on this panel. 1. Confirm the desired active Destination is shown in yellow in the Destination window. 2. Press a Category (For example, “VTR”) and unit number (For example, “2”) button combination. - Page 113 LD4 Control Panel 2. Press the soft button for . The mode will toggle to the other Level Select state and the panel will exit Menu mode. Breakaways can be disabled on the CP Level Set table by setting the Break Flag for each level to `N.' Deselect Levels Method 1.
-
Page 114: Sticky Levels Mode (Ld4 Panel)
Section 6 — L-S Series Panel Operation Sticky Levels Mode (LD4 Panel) If Sticky Levels mode is ON, the level(s) involved in a breakaway Take remain selected for subsequent Takes. To turn on Sticky Levels mode: 1. Press Menu . The display windows will display various modes. 2. -
Page 115: Selecting A Source (Multiple Destination Mode)
LD4 Control Panel Selecting a Source (Multiple Destination Mode) Once Destination(s) to be controlled are selected, the Source is switched in basically the same was as in Single Destination mode (see Selecting a Source (Single Destination Mode) on page 111 for detailed information). -
Page 116: Protecting Or Locking A Destination
Section 6 — L-S Series Panel Operation The window(s) just programmed will indicate the Destination name in yellow and the current Source for that Destination in green. Protecting or Locking a Destination 1. Confirm that the desired Destination(s) are selected. In Single Destination mode the Destination appears in the Destination window. -
Page 117: Source Swap Mode (Ld4 Panel)
LD4 Control Panel Source Swap Mode (LD4 Panel) If the Source Swap mode has been turned ON, the display windows will preset to the previously-selected Source, shown in Blue after each Take. This permits flip-flop switching on the LD4 panel using just the button. -
Page 118: Sequence (Salvo) Switching (Ld4 Panel)
Section 6 — L-S Series Panel Operation Sequence (Salvo) Switching (LD4 Panel) Pre-built Jupiter sequences can be executed after they have been created and downloaded (see Setting Up a Salvo with a Sequence Set on page 62). 1. Press , use the arrow buttons to display in the D1 Menu... -
Page 119: Ld16 Control Panel
LD16 Control Panel LD16 Control Panel For a summary of LD16 functions see page Figure 70. LD16 Control Panel Override Source LD16 Operating Modes The LD16 has two distinct operating modes, Single Destination and Mul- tiple Destination. • When operated in single Destination mode, one Destination is selected for control and the display windows show the Source for each defined level of that Destination (video, left audio, right audio, etc.). -
Page 120: Selecting A Destination To Be Controlled (Single Destination Mode)
Section 6 — L-S Series Panel Operation Selecting a Destination to be Controlled (Single Destination Mode) Page Selection Method 1. Press . The D1 window will display and the other Dest Destination? windows will display a page of Destinations. 2. Use the arrow buttons to scroll through the available pages of Up/Down Destinations (For example,... -
Page 121: Breakaway
LD16 Control Panel Direct Category Button Method This is the fastest method to take a Source to Destination on this panel. 1. Confirm the desired active Destination is shown in yellow in the D15 window 2. Press a Category (For example, “VTR”) and unit number (For example, “2”) button combination. - Page 122 Section 6 — L-S Series Panel Operation Changing Level Select Mode The LD16 panel has a button which can also be used to directly toggle Level between the Level Select mode ALL ON and ALL OFF settings. When the button is ON the All OFF setting is active. When the button is Level Level...
-
Page 123: Sticky Levels Mode
LD16 Control Panel 2. Press the button so it is illuminated. All levels will be deselected LEVEL and their soft buttons will turn off. 3. Toggle ON the soft button corresponding to the level(s) to be switched. To move beyond the first 14 levels, use the arrow buttons. -
Page 124: Selecting A Destination To Control (Multiple Destination Mode)
Section 6 — L-S Series Panel Operation 2. Press the soft button. The D1 window will display Multiple Destination? the page number of the display (For example, ). The D1-D16 windows’ first line contains the status of 16 Destinations. • If Destinations are undefined, the windows will show a series of dashes. -
Page 125: Protecting Or Locking A Destination
LD16 Control Panel Note Destinations that have been defined in the panel's CP Output set using the Jupiter Configuration Editor cannot be changed using the panel itself. If such an attempt is made, the panel will display the following message: “????” 1. -
Page 126: Un-Protecting Or Unlocking A Destination
Section 6 — L-S Series Panel Operation 3. Press to protect or lock the Destination(s). The button Take Protect/Lock will blink, which indicates that panel has been protected or locked. • If another panel selects this Destination for control, that panel's button will illuminate steady amber or red. -
Page 127: To Execute An Override
LD16 Control Panel in which the overrides are listed on the CP Override set table will be the order in which they appear on the panel. To Execute an Override 1. Select the desired Destination. 2. Press . The D1window will display . -
Page 128: S25/S50 Control Panels
Section 6 — L-S Series Panel Operation S25/S50 Control Panels For a summary of S25/S50 functions see page Figure 71. S25 Control Panel Figure 72. S50 Control Panel The S25 and S50 are Button-per-Source Control panels configurable for various combinations of Destinations and levels. The buttons on the left select Sources. -
Page 129: Basic Operation
S25/S50 Control Panels Basic Operation With all available levels toggled ON (high amber), press a Source button (light green). Selecting the Source completes the switch to the Destination. Breakaway Switching Select only the level button(s) on the right that you wish to switch before selecting a Source. -
Page 130: 5/6/7/8 Destinations
Section 6 — L-S Series Panel Operation 5/6/7/8 Destinations With five, six, seven, or eight Destinations defined, the eight-button cluster on the right is used to select the Destination. Breakaway switching is not available with this configuration. An example is shown in Figure Figure 75. -
Page 131: Changing Between The Normal And The Sticky Level Modes
S25/S50 Control Panels With Sticky mode, the S25/S50 panel will retain the last selected levels that were selected even after the source take occurs. Normal or Sticky Level mode will be retained after a power cycle. Changing Between the Normal and the Sticky Level Modes Follow these steps to change the S25/S50 panel between the Normal and the Sticky level modes: 1. -
Page 132: S100 Control Panel
Section 6 — L-S Series Panel Operation S100 Control Panel For a summary of S100 functions see page Figure 76. S100 Control Panel Panel Protect/ Lock L64 Panel Similarities and Differences The S100 panel layout and operating procedures are nearly identical to the L64 panel. -
Page 133: Alternate Mode Operation
S100 Control Panel • Locking a Destination on page 104 • Breakaway Switching on page 105 • Sticky Levels Mode on page 98 • Executing a Sequence (Salvo) on page 107 • Source Swap Mode on page 107 • Button Assignment on page 108 •... - Page 134 Section 6 — L-S Series Panel Operation Activating Multiple Destination Mode 1. Press Menu 2. Use the arrow buttons to scroll to and press Up/Down PanelConfig? Take. 3. Use the arrow buttons to scroll to . The window will Up/Down Mult Outp report its current status (OFF or ON).
-
Page 135: Sxy Control Panel
SXY Control Panel SXY Control Panel For a summary of SXY functions see page Figure 78. SXY Control Panel Protect/ Level Lock Clear Category Buttons (16) Level Buttons (10) Selecting a Destination to be Controlled Selector Knob Method 1. Press to take the panel to its home state. -
Page 136: Selecting A Source
Section 6 — L-S Series Panel Operation 3. Use the Category buttons to enter the number of that Destination. Alternatively, you can use the Selector knob to scroll through the available Destinations. If the entry is valid, the name of the Source will appear in the Preset window in yellow, and the category/number for the Source will be shown in blue. -
Page 137: Source Swap Mode
SXY Control Panel Source Swap Mode When Source Swap is ON, the panel will preset its previous Source after a Take. This permits flip-flop switching. 1. Press . The display windows will display various modes. Select 2. Rotate the selector knob to and press Panel Config? Select... -
Page 138: Multi Source Breakaway
Section 6 — L-S Series Panel Operation Multi Source Breakaway The following procedure is used to switch multiple Sources as a single-take breakaway. For example, switching to video from one Source and left and right audio from another Source with one Take. 1. -
Page 139: Sticky Levels Mode
SXY Control Panel 2. The name of the level and its current Source is shown in the Status window. Sticky Levels Mode If breakaway switching is performed often, you may want to leave sticky mode ON. To turn on Sticky Levels mode: 1. -
Page 140: Un-Protecting Or Unlocking A Destination
Section 6 — L-S Series Panel Operation Un-protecting or Unlocking a Destination The panel that originally imposed a protect or lock on a Destination can clear those states for that Destination. 1. Confirm the desired Destination appears in the Destination window. If not, see Selecting a Destination to be Controlled on page 135. -
Page 141: Scroll Take Mode
SXY Control Panel 3. Rotate the selector knob to choose and press . The Preset Override? Select window will display the names of overrides for that panel. 4. Use the selector knob to scroll through and select the desired override. 5. - Page 142 Section 6 — L-S Series Panel Operation JUPITER L-S and LCD Series Control Panel Instruction Manual...
-
Page 143: Section 7 - Lcd Introduction
Overview The Jupiter LCD series Control panels are designed to control matrix routers through a Grass Valley Jupiter CM-4000 (or CM-4400) Control System that is running the AccuSwitch application. Although the panels are intended to control Concerto, Trinix, Apex, and Venus routers, any matrix router that can be controlled by AccuSwitch can also be controlled by these panels. -
Page 144: Lcd Series Control Panel Features
• All key panel parameters are saved in non-volatile memory. • Is compatible with Grass Valley Net Config Application. • Includes key control sets that can be changed from Jupiter without causing the CM to reboot or any Jupiter system interruptions. -
Page 145: Lcd Panel Components
LCD Panel Components LCD Panel Components The following figures display each component of the specified panel. The names that are shown in the figure will be used in the rest of the manual. Each panel is configured using the Jupiter Configuration editor. The buttons are numbered from left to right. -
Page 146: Use Of Color
Section 7 — LCD Introduction Use of Color The LCD panel buttons have color capabilities (green, yellow, red, and amber in varying intensities). Color displays are available on all LCD panels and can display up to 3 lines of 10 characters. Specifically, the buttons use color to indicate the following functionality: Table 5. -
Page 147: Destination Button
Standard Button Display Destination Button The following information is available for each Destination button. Line # 1 Miscellaneous information will be shown on Line #1. This information can be Page or Status information. Page Numbers The following information will only be displayed on Button #1 and will time out after approximately 5 seconds. -
Page 148: Source Button
Section 7 — LCD Introduction Source Button The following information is available for each Source button. Line # 1 Specific status information will be shown on Line #1: Page Numbers The following information will only be displayed on Button #1 and will time out after approximately 5 seconds. -
Page 149: Line #3
Menu Modes Line #3 The Direct entry digit number will be shown on line #3. Menu Modes The Menu provides access to different modes or functionality of the LCD panels. Most menu options are self explanatory. The “Main Menu” is accessed by pressing the Scroll wheel on the front panel. -
Page 150: Panel Config Button
Section 7 — LCD Introduction Panel Config Button The Panel Configuration menu will appear when the Panel Config button pressed. The Configuration menu is comprised of the following: • Sticky Level button : This button is in the #1 location. Pressing the Sticky will turn sticky levels ON. -
Page 151: Panel Info Button
Menu Modes Panel Info Button The Panel Information menu will appear when the Panel Info button pressed. There is nothing to select in the Panel Information menu, these buttons are for information only. The Information is broken up into three different “pages.”... - Page 152 Section 7 — LCD Introduction : This button is in the #16 location. This button is for infor- Information button mation only. PAGE #2 : This button is in the #1 location. The button dis- Net-1 MAC button Net-1 MAC plays the physical MAC-1 address that is assigned to the panel.
- Page 153 Menu Modes : This button is in the #3 location. The version of the Re- Re-Loader button loader application’s version, also known as the “Safe” application, which is currently being used, is displayed. : This button is in the #16 location and is for information Information button only.
-
Page 154: Panel Is Offline
Section 7 — LCD Introduction Panel is Offline The following conditions will be displayed when the panel is offline: • Button #1 will be Red and will display the phrase: “-Panel- is offline”. • Button #2 will be White and will indicate the current “Panel ID“ •... -
Page 155: Ordering Information
Ordering Information Ordering Information JUP-CP-LCD16 Series Control Panels JUP-CP-LCD16-AC Jupiter 16 soft labeled RGB LCD button control panel. Configurable as BPS, XY Status panel & Category entry for up to 20 input/output categories. Scroll wheel operations. With AC power supply. (JUP-ACPS-1RU). JUP-CP-LCD16-DC Jupiter 16 soft labeled RGB LCD button control panel. - Page 156 Section 7 — LCD Introduction JUPITER L-S and LCD Series Control Panel Instruction Manual...
-
Page 157: Section 8 - Lcd Hardware Installation
WARNING Do not connect any external power supply other than the approved “JUP- DCPS” unit supplied by Thomson Grass Valley. The AC power supply is contained in a module that mounts on the rear of the panel (Figure 84). -
Page 158: Network Wiring
Section 8 — LCD Hardware Installation Figure 84. Control Panel Dimensions with Options Network Wiring The LCD series panels are connected to the AccuSwitch System Controller by either an Ethernet or Serial connection. Maximum length of a LAN (Cat5 cable) connection is 329 feet (100 meters). The Serial connection cannot be greater than 2000 feet. -
Page 159: Buttons
Buttons operations, and each Ethernet segment (hub to panel) has a 100 meter limit. See Figure 85. Figure 85. LAN only system connections. 64 LAN-operated LCD panels per CM maximum CM-4000 System Controller (AccuSwitch) LAN 1 (Cat 5 Ethernet) cable. Max. recommended length per segment = 100 meters (329 ft) 100baseT Jupiter LAN to Jupiter... -
Page 160: Level Button Configuration
Section 8 — LCD Hardware Installation For more information about button configuration, see the Panel Category Buttons table on page Level Button Configuration The CP Level set is assigned to the panel using the MPK Devices table. For more information about level button configuration, see CP Level Set page JUPITER L-S and LCD Series Control Panel Instruction Manual... -
Page 161: Section 9 - Lcd Software Installation & Ip Addresses
Section LCD Software Installation & IP Addresses Introduction The LCD series panels operate with the Jupiter AccuSwitch control system using either an Ethernet LAN connection or a Serial connection. This func- tionality requires compatible software versions and IP addresses must be used by all Jupiter system devices on the network. - Page 162 Section 9 — LCD Software Installation & IP Addresses JUPITER L-S and LCD Series Control Panel Instruction Manual...
-
Page 163: Section 10 - Lcd Configuration
Section LCD Configuration See the Jupiter System Configuration section in this manual for Configuration instructions. Please refer to the Jupiter CM-4000 Installation and Operating manual or Jupiter CM-4400 Installation and Operating manual for more information. JUPITER L-S and LCD Series Control Panel Instruction Manual... - Page 164 Section 10 — LCD Configuration JUPITER L-S and LCD Series Control Panel Instruction Manual...
-
Page 165: Section 11 - Lcd Series Panel Operation
Section LCD Series Panel Operation Introduction This section assumes that the LCD panels have been properly installed and configured for operation at your facility. Buttons are configured to control Sources and Destinations using the Jupiter CP Input and Output sets. Levels are determined with CP Level sets. -
Page 166: Xy Mode
Section 11 — LCD Series Panel Operation The switch to a new device will not be executed until the destination that is using the source is either: • Switched to a different source. • Switched to the “SAFE” input. Note The Advise and Enforce options do not work when you are using Sequences or Multiple-destination switching when the same source is being routed to more than one destination. -
Page 167: Multiple Destination Mode
Basic Panel Operations levels that are associated with the selected Destination. You must be in the main menu to see the button. After making the switch Single Destination Mode you will remain on the same page. The page number can be found in the top left corner of the Single Destination Mode menu. -
Page 168: Category Entry Mode
Section 11 — LCD Series Panel Operation Figure 86. Multi-Selection Displayed Source SRC-002 Destination OUT-017 9. Select the button. The Take request is immediately sent to the host. Take The panel will then show the new current Source on line 2 of the button. The Multiple Destination mode also supports “Sticky Destinations.”... - Page 169 Basic Panel Operations Figure 88. LCD48 - Category Entry Mode Command Buttons Destination Buttons Source Buttons The Category Entry mode functions as a single Source can be assigned to a single destination and will switch all levels. The ability to do a Lock or Protect is allowed and will occur on all levels of the selected destination.
-
Page 170: Level Mode
Section 11 — LCD Series Panel Operation 7. Press the button to make the selection active. The button will now TAKE return to the original color and the switch will then occur. Level Mode The Level mode is designed to provide access to each level that is assigned to a Destination, which makes breakaway switches easier to complete. - Page 171 Basic Panel Operations Setting levels for a breakaway switch Follow these steps to set levels for a breakaway switch: 1. Press the Scroll wheel to go to the Main menu. 2. Press the button. Level Mode? 3. Select the preferred Destination. For steps to select a destination, see the Select Destination Mode section.
-
Page 172: B.p.s Mode
Section 11 — LCD Series Panel Operation Follow these steps to set all levels either on or off. 1. Press the button. All the available levels associated with the Set All Levels selected destinations are now highlighted white including any levels that are on different pages. -
Page 173: Protection
Basic Panel Operations 3. Press the preferred Destination button in the Destination button area. For an example, see Figure 91 Figure 92. Destination buttons are yellow. Note These figure are for example only, the number of Destinations are configu- rable. Pressing more than one button will select multiple Destinations. -
Page 174: Locking
Section 11 — LCD Series Panel Operation Protecting a Destination To protect a Destination: 1. Select the Destination that you wish to Protect by pressing the button. Note In the Multiple Destination mode, Destinations are locked or protected on a per page basis. -
Page 175: Selection Options
Basic Panel Operations 2. Press the button in the Command buttons section twice. The Protect/Lock button will then turn a solid red. 3. Press the button in the Command buttons section. The Take Destination‘s button color will then change to red and the Protect/Lock button will blink red. - Page 176 Section 11 — LCD Series Panel Operation Selecting the Destination using the Direct Entry Method Follow these steps to select a Destination using the Direct Entry method: 1. Scroll through the available Destinations using the Scroll wheel. The Destinations will change. 2.
-
Page 177: Selecting The Destination From The Level Menu
Basic Panel Operations Figure 96. LCD48 - Select Destination Mode Category Buttons Entry Buttons 4. Select a Category from the Category side or right-hand side. The Entries that are assigned to the Category will then appear on the left -hand side. 5. -
Page 178: Select Sequence Mode
Section 11 — LCD Series Panel Operation Selecting the Source using the Category Entry Method Follow these steps to select a Source using the Category Entry method: 1. Press the category name and then scroll through the available Source using the Scroll wheel. 2. - Page 179 Basic Panel Operations The panel will NOT revert back to the previous panel mode after each selected override. This feature allows you to do several overrides within a single session. Press the Scroll wheel to go to the Main menu to exit. JUPITER L-S and LCD Series Control Panel Instruction Manual179...
- Page 180 Section 11 — LCD Series Panel Operation JUPITER L-S and LCD Series Control Panel Instruction Manual...
-
Page 181: Appendix A - L-S And Lcd Panel Specifications
Appendix L-S and LCD Panel Specifications Mechanical Specifications Table 6. Mechanical Specifications Rack Model Depth Width Height Weight Units L32, LD4 S25, S50, SXY Basic panel 30.5 mm 0.77 kg 1.199 in. 1.7 lbs with GPIO option 38.4 mm 483 mm 44.4 mm 0.83 kg 1.511 in. -
Page 182: Connection, Power, And Environmental Specifications
Appendix A — L-S and LCD Panel Specifications Table 6. Mechanical Specifications - (continued) Rack Model Depth Width Height Weight Units LCD48 Basic panel 37.7 mm 1.1 kg 1.486 in. 2.6 lbs with GPIO option 45.7 mm 483 mm 88.9 mm 1.2 kg 1.798 in. - Page 183 Connection, Power, and Environmental Specifications Table 7. - (continued)Connection, Power, and Environmental Specifications Power Supply, External Type Tabletop GV model number JUP-DCPS OEM model number XP AED45US12 (subject to change) Input 100-240 VAC, 1.5 A, 50-60 Hz, auto-sensing Output 12 VDC, 3.75 A Power Consumption 20 W nominal, 30 W maximum Power Supply, Internal...
- Page 184 Appendix A — L-S and LCD Panel Specifications JUPITER L-S and LCD Series Control Panel Instruction Manual...
-
Page 185: Appendix B - L-S Front-Panel Service Modes
Appendix L-S Front-Panel Service Modes These modes are provided for panel maintenance and troubleshooting. They are not normally used by the operator. Note S25 & S50 panels do not have displays. Information for these panels is accessible via their web pages. Accessing Service Modes Note On SXY panels the Select button is used instead of the Menu button, and the... - Page 186 Appendix B — L-S Front-Panel Service Modes Panel ID • Name of the panel (Source:”MPK Devices” Name column on MPK Devices table • Device ID number Application Version, ReLoader Version V:xx.yyy.zzz ...where xx = the major release number, yyy = the minor release number, zzz = the documentation number, and nn = the build number.
-
Page 187: Panel Setup Mode
Panel Setup Mode Panel Setup Mode Panel setup mode is used for service and troubleshooting only. Change ID Procedure 1. Access Panel Setup mode. 2. Scroll to The window will display the following: Change ID? -Change ID- From: xx To: xx CAUTION The Panel ID shown here must agree with the ID displayed in the Address column on MPK Devices table, and the Device # on the Panel Network Con- figuration web page. - Page 188 Appendix B — L-S Front-Panel Service Modes JUPITER L-S and LCD Series Control Panel Instruction Manual...
-
Page 189: Appendix C - Gpi/O
Appendix GPI/O Overview The new Jupiter S, L and LCD Control panels now offer GPI/O function- ality for every panel. GPI/O operations help customers to trigger other 3 party devices and can be triggered by other 3 party devices. GPI/O oper- ations can be: •... -
Page 190: Ordering Information
Appendix C — GPI/O Ordering Information Table 8. GPIO Model Number and Description JUP-GPIO-1RU Jupiter General Purpose Input/Output connector panel with 24 Inputs and 4 Outputs. For use with 1RU JUP Control panels: S25, S50, SXY, LD4, L32, LCD16 JUP-GPIO-2RU Jupiter General Purpose Input/Output connector panel with 24 Inputs and 4 Outputs. -
Page 191: Installation Instructions
Installation Instructions Installation Instructions Hardware Installation The following instructions will guide the customer in the installation of the GPI/O accessory. The Installation procedure will require you to remove the protective cover and then install the GPI/O in place of the cover. To add the GPI/O to the S, L, or LCD control panel: 1. - Page 192 Appendix C — GPI/O 3. Align the GPI/O accessory to the S, L panel by aligning the notch in the GPI/O and the stud on the S, L panel. Figure 99. Notch Alignment Align the “notch” 4. Replace the four screws in the panel, securing the GPI/O accessory to the panel.
-
Page 193: Configuration Instructions
GPI/O accessory so it can be accessed, how to configure a GPI setting, and how to configure a GPO setting. Note Grass Valley recommends that you do not use either “<--” or “-->” in the Source/Sequence names, as the name will be ignored and may not be dis- played correctly. -
Page 194: Configuring A Gpi Setting
Appendix C — GPI/O Click the GPIO Configuration hyperlink to start configuring the GPI/O (Figure 102). Figure 102. The GPIO Configuration Hyperlink Location The GPIO settings page will then appear. Configuring a GPI Setting There are four possible types or options for a GPI setting, Disabled, Non- Latching, Latching, and Sequence (or Salvo). - Page 195 Configuration Instructions 3. Select the Source from the Index drop-down list, see Figure 104. Figure 104. The Source for the GPI 4. Click the Save New Settings button at the bottom of the page when you are finished (Figure 105). Figure 105.
-
Page 196: Configuring A Gpo Setting
Appendix C — GPI/O Configuring a GPO Setting There are three possible types or options for a GPO setting, Disabled, GPO On, and GPO Pulse. The difference between a GPO On and a GPO Pulse is that when a GPO On is triggered, the Relay contact closure will stay closed until another Source is taken. - Page 197 Configuration Instructions Note A GPO On setting is similar to the above steps, except you omit the “time” setting. JUPITER L-S and LCD Series Control Panel Instruction Manual...
-
Page 198: Gpi/O Pin Mapping
Appendix C — GPI/O GPI/O Pin Mapping The tables and figures in this section will help you when configuring the GPI/O to know the GPI and GPO locations. The GPI/O panel has one GPO and six GPI connectors (Figure 110). The actual pin placement and location are described below in Table 9 Table... -
Page 199: Gpi
Configuration Instructions Table 9. Jupiter GPO Accessory Pin Mapping Connector 2, 3 4, 5 6, 7 8, 9 The following information is about the GPI. The schematic is shown in Figure 113. Table 10 shows the GPI’s pin mapping. Only one GPI is shown however, the other five GPIs will be the same. -
Page 200: Optoelectronic Relays
Appendix C — GPI/O Table 10. Jupiter GPI Accessory Pin Mapping Connector 2, 3 4, 5 6, 7 2, 3 4, 5 6, 7 2, 3 4, 5 6, 7 2, 3 4, 5 6, 7 2, 3 4, 5 6, 7 2, 3 4, 5... -
Page 201: Optical Couplers
Configuration Instructions Optical Couplers (Reference Figure 113) The optical coupler inputs respond to a differential voltage between the two input pins. The signal leg contains a series current- limiting resistors that were selected to provide between 1.75mA and 13.6mA of LED drive current at voltages of 5 to 28 volts (AC or DC). Electrical Limitations The GPI/O has the following limitations: •... - Page 202 Appendix C — GPI/O JUPITER L-S and LCD Series Control Panel Instruction Manual...
-
Page 203: Glossary
Glossary audio modes Note: terms set in are defined SMALL CAPS within this glossary. In Jupiter systems, special stereo switching modes, For example, left-only, right-only, 10/100BaseT mix, and reverse. configuration that uses twisted ETHERNET pair wiring (typically Cat 5 UTP un-shielded twisted pair cable with RJ45 8-pin connec- tors) to transmit data up to 100 Mbps. - Page 204 Glossary Control Point Language. Protocol used to Digital signal processor. control Trinix router through Encore / SMS 7000 Ethernet connection to NR-33000 Broadlinx board. crosspoint Distribution switcher circuit where input sig- European Broadcasting Union. Internet ad- nal can be connected to output bus. dress: http://www.ebu.ch/.
- Page 205 Glossary ESswitch protocol FPGA (a.k.a. “ESW”). Protocol used for control of a Field Programmable Gate Array. routing switcher by a third-party computer. full-matrix control It is described in Thomson document “ESs- witch Serial Routing Switcher Control Proto- Ability to select any Source for any Destina- col, Enhanced Version.”...
- Page 206 Glossary Multiple Document Interface. MIDI Musical Instrument Digital Interface. Serial level interface bus used in Triton switchers. Historically, a switcher matrix that carries mnemonic one type of signal, as determined by DIP switch settings on crosspoint boards. Exam- Abbreviation, usually four characters long, ple: level 1 for video, levels 2 and 4 for left for a particular input or output.
- Page 207 Glossary numeric set Pmem Factory-supplied configuration set used to Battery-protected memory. set up and operate the routing switcher in the pPPM minimum possible time. Peak program meter. protect On Jupiter/ series panels with a PROTECT button: after a given Source has been OUTPUT MONITOR switched to a given Destination, and PRO- TECT is pressed, the Source for that Destina-...
- Page 208 Glossary RS-422 bus SMPTE 269M-1999 Television standard - “Fault Reporting in SERIAL BUS Television Systems.” SMPTE 274M-1998 Television standard: “1920 x 1080 Scanning salvo and Analog and Parallel Digital Interfaces for Multiple Picture Rates.” Single-command switching of Sources to multiple Destinations. SMPTE 292M-1998 Television standard: “Bit-Serial Digital Inter- face for High-Definition Television Sys-...
- Page 209 Glossary Sticky Destinations tie line The Sticky Destinations option is ONLY val- PATH FINDING id when using a "multi destination mode" such as "multiple destination mode" or "BPS mode". Sticky Destinations is used to remem- Time Domain Multiplexing. ber the currently selected destinations. When ON, the destinations that are selected tributary remain active (selected) after the "take"...
- Page 210 Glossary JUPITER L-S and LCD Series Control Panel Instruction Manual...
-
Page 211: Index
Index Symbols bandwidth .cfg file Basic Panel Operations Belden Numerics 8723 bitmap display 10/100BaseT colors defined bootp Break Flag 113, Breakaway defined AC power supply disabling on CP Level Set table 113, accuswch.sys general description AccuSwitch version needed for LCD panels version needed for L-S panels LD16 Address... - Page 212 Index custom LAN Systems transparency CP Input Set Button-per-input button assignment Defined type CP Level Set type CP Output Set Category type Button Display Category Entry Mode defined Take Crosspoint Category/number Defined Defined Crosspoint bus Change ID defined Panel Setup Mode cycle power Changing the Connection Type Using the Panel’s Menu...
- Page 213 FPGA Image button system software update FPGA Image Version VM-3000 frequently asked questions Jupiter Configuration Editor Full-matrix control jupiter.sys Defined JupiterXPress gateware keycaps defined see button labeling Gateway Defined Grass Valley web site JUPITER L-S and LCD Series Control Panel Instruction Manual...
- Page 214 Index Breakaway LCD Rack Mounting Breakaway source status LCD Series Control Panel Features button assignment LCD Software Installation & IP Addresses clear panel LCD16 destination selection overview differences from L64 LCD48 features overview lock LD16 operation Breakaway overview button assignment protect category selection Sequence...
- Page 215 Index Defined MPK Table Entries Serial Level Button Configuration Mult. Dest. Cntl. On ? Level Mode LD16 114, Take Multiple Level Select Mode changing (LD16) Multiple Destination Mode Take Level Select mode multiple destination mode LD16 Lock general description S100 lock multiple destination operation LD16...
- Page 216 Index online documentation operating mode selection Defined LD16 Preset used for source selection defined Preset Mode ordering information general description Output monitoring Preset/Level window defined Pri. Host IP button Override Primary Host IP Defined Protect LD16 general description protect LD16 panel dimensions installation in rack...
- Page 217 Index LD16 120, 111, 114, S100 Alternate Mode Select Destination Mode basic operation Select Override Mode button assignment select source differences from L64 features multiple destination mode LD16 120, overview Breakaway Selecting the Destination features Selecting the Destination using the Category general description Entry Method multiiple destination operation...
- Page 218 Index Server menu defined using Preset Service Modes accessing source status Breakaway Set Memory to Defaults Source Swap Mode Set Memory to defaults button general description Setup Menu button Setup Panel ID button show button assignment LD16 single destination mode specifications LD16 dimensions...
- Page 219 VM-3000 Source Swap Mode Sticky Levels Mode web site documentation web site FAQ database Take web site Grass Valley Button Per Source web site software download Category Entry mode weight general description Level Mode Multiple Destination mode...
- Page 220 Index JUPITER L-S and LCD Series Control Panel Instruction Manual...
Need help?
Do you have a question about the JUPITER L - V2.1.0 and is the answer not in the manual?
Questions and answers