HindlePower Atevo Series Operating/Service Instructions Manual
Microprocessor-controlled float battery charger three phase input 16-1000 adc output
Hide thumbs
Also See for Atevo Series:
- Operating/service instructions manual (164 pages) ,
- Operations (173 pages) ,
- Operating/service instructions manual (316 pages)
Table of Contents
Advertisement
Quick Links
Advertisement
Table of Contents

Related Manuals for HindlePower Atevo Series


Summary of Contents for HindlePower Atevo Series
- Page 2 ATevo O&SI - 3PH Input (16-1000 Adc) 1.1 — Last update: 19 September 2023 HindlePower Inc Copyright HindlePower Inc. 2021...
-
Page 3: Table Of Contents
Table of Contents 1. 1. R R eceiving & Mounting eceiving & Mounting ............................................9 9 1.1. Storing ATevo ......................11 1.2. Receiving ATevo ......................12 1.3. Unpacking & Inspecting ATevo ..................13 1.4. Reporting Damage or Shortage ................... 14 1.5. - Page 4 3.2. Display........................60 3.2.1. Home Screen ....................... 61 3.2.2. Configuration Screens ..................62 3.2.3. Status Screens ....................63 3.2.4. Hindle Health System Screens ................64 3.2.5. Other Screens...................... 65 3.3. Main Menu & Navigation ..................... 66 3.3.1. Menu and Arrow Buttons..................67 3.3.2.
- Page 5 4.5.2. Configuring Auxiliary I/O Board Relays .............. 108 4.6. Disabling Alarms in Common Alarm List ..............109 4.7. Configuring Serial Communications Adapter.............. 110 4.8. Configuring Ethernet Adapter ..................111 4.9. Enabling/Disabling High Level Detect ................ 112 4.10. Configuring Ground Alarms ..................113 4.10.1.
- Page 6 7.1. Legacy AT30 Alarms & Indicators ................160 7.2. Common Alarm Indicator & Other Alarm Triggers ............161 7.3. Alarm LED Summary Table ..................162 7.4. Viewing Alarms ......................164 7.5. Advanced Alarms ...................... 166 7.6. Resetting Latched Alarm Relays ................169 7.7.
- Page 7 12.1.3. Analog Inputs ....................213 12.2. Connections to Auxiliary I/O Board ................214 12.2.1. System Connections ..................215 12.2.2. Wiring Relay Connections ................216 12.2.3. Wiring Binary Input Connections ..............217 12.2.4. Wiring Analog Input Connections ..............219 12.3. Hardware Configuration................... 220 12.4.
- Page 8 13.9. Auto-Equalize with Forced Load Sharing ..............261 13.10. Firmware Updates with Forced Load Sharing............262 13.11. Troubleshooting Forced Load Sharing ATevos ............263 14. Maintenance Maintenance ................................................ 264 14.1. Performing Routine Maintenance ................265 14.2. Ordering Replacement Parts ..................267 14.3.
- Page 9 BEFORE BEFORE YOU YOU START START • Review your 5-Year Standard Warranty. • Familiarize yourself with ALL Safety Instructions. • Download our Quick Setup Sheet for a checklist containing graphical instructions on Copyright HindlePower Inc. 2021 Page 9 of 311...
-
Page 10: Storing Atevo
ATevo Quick Setup Instructions online video. SECTION SECTION TOPICS TOPICS Storing ATevo Receiving ATevo Unpacking & Inspecting ATevo Reporting Damage or Shortage Returning Damaged Equipment Moving ATevo Mounting ATevo Last modified: 13 September 2023 Copyright HindlePower Inc. 2021 Page 10 of 311... - Page 11 50 °C are acceptable. Storage should not exceed two (2) years due to limited shelf life of dc filter capacitors when they are not in service. Last modified: 3 August 2023 Copyright HindlePower Inc. 2021 Page 11 of 311...
- Page 12 The manufacturer does not assume any liability for damage during transportation or handling. Therefore, upon receipt of ATevo (or related products) immediately unpack, inspect for damage or shortage (Section 1.3). Report issues found (Section 1.4). Last modified: 3 August 2023 Copyright HindlePower Inc. 2021 Page 12 of 311...
- Page 13 • Printed circuit boards are firmly seated on their standoffs. • Hardware is tight. • Wire terminations are secure. • User’s Manual is included. • Includes all items on packing list. Last modified: 3 August 2023 Copyright HindlePower Inc. 2021 Page 13 of 311...
-
Page 14: Reporting Damage Or Shortage
The manufacturer does not assume any liability for damage during transportation or handling. Should the products require an inspection by (or return to) the manufacturer, please contact your sales representative for further instructions. Last modified: 3 August 2023 Copyright HindlePower Inc. 2021 Page 14 of 311... -
Page 15: Returning Damaged Equipment
Returned material must be packed in compliance with shipping regulations. It is preferable to use all original shipping materials if possible. Mark the outside of the shipping container with manufacturer’s Return Material Authorization (RMA) number. Last modified: 3 August 2023 Copyright HindlePower Inc. 2021 Page 15 of 311... -
Page 16: Moving Atevo
Three phase ATevo enclosures do not feature top-lifting eyes for moving. Using a forklift, relocate ATevo using the supplied shipping pallet. Lift ATevo enclosures from the bottom, between the mounting legs, into a final floor-mount installation. Last modified: 18 September 2023 Copyright HindlePower Inc. 2021 Page 16 of 311... -
Page 17: Mounting Atevo
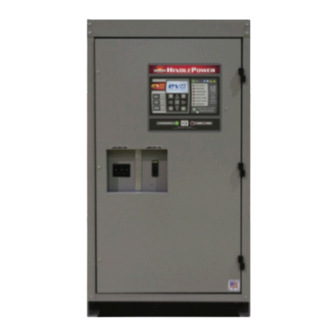
Mount ATevo so you can easily access the front panel AC Input (CB1) and DC Output (CB2) Circuit Breakers. Choose from the following mounting methods: • Floor-Mounting • Wall-Mounting • Rack-Mounting Last modified: 13 September 2023 Copyright HindlePower Inc. 2021 Page 17 of 311... -
Page 18: Floor-Mounting (All Enclosures)
Overall W Overall Width idth 504mm 762mm 1073mm 1473mm 18.55in 19.14in 25.06in 30.00in Overall Depth Overall Depth 471mm 486mm 637mm 762mm 17.87in 27.95in 40.50in 52.01in Mounting Mounting WW 505mm 710mm 1029mm 1321mm Copyright HindlePower Inc. 2021 Page 18 of 311... - Page 19 1/2-13 1/2-13 Mounting Har Mounting Hardwar dware e 6.4mm 9.5mm 12.7mm 12.7mm Model ~ R Model ~ Range ange 16-100 Adc 100-300 Adc 250-600 Adc 600-1000 Adc Last modified: 13 September 2023 Copyright HindlePower Inc. 2021 Page 19 of 311...
-
Page 20: Wall-Mounting (Style-5070)
To wall-mount the ATevo Style-5070 enclosure, a special mounting accessory (p/n EI5008-50 EI5008-50) is required. The kit includes two (2) mounting brackets, appropriate hardware, and Installation Instructions (JE5122-50) for the wall-mounting procedure. Last modified: 7 September 2023 Copyright HindlePower Inc. 2021 Page 20 of 311... -
Page 21: Rack-Mounting (Style-5070)
To rack-mount the ATevo Style-5070 enclosure, a special mounting accessory (p/n EI0193-51 EI0193-51) is required. The kit includes two (2) mounting brackets, appropriate hardware, and Installation Instructions (JA0091-53) for the rack-mounting procedure. Last modified: 7 September 2023 Copyright HindlePower Inc. 2021 Page 21 of 311... -
Page 22: W W Iring Iring
Mechanical Diagram and Component Location Removing Protective Safety Shield Retapping Power Isolation Transformer Making AC Input Connections Making DC Output Connections Remote Voltage Sense Wiring ATevo Common Alarm Wiring Relays on Auxiliary I/O Board Copyright HindlePower Inc. 2021 Page 22 of 311... -
Page 23: Wiring Temperature Compensation Probe
Wiring Temperature Compensation Probe Wiring Serial Communications Adapters Wiring Ethernet Adapter Download our Quick Setup Sheet for a checklist containing graphical instructions on placement, wiring, startup, & configuration. Last modified: 8 September 2023 Copyright HindlePower Inc. 2021 Page 23 of 311... - Page 24 (ac) power to direct current (dc) for the battery. Remote Temperature Probe (A10) – optional Remote Temperature Probe (A10) – optional The battery temperature compensation, or ‘TempCo’, probe (A10) contains a temperature- Copyright HindlePower Inc. 2021 Page 24 of 311...
- Page 25 ATevo O&SI - 3PH Input (16-1000 Adc) - 1.1_en dependent resistor in an epoxy module. When used, this probe is installed on the battery and is connected to the Power Board (A2) at TB8. Last modified: 13 September 2023 Copyright HindlePower Inc. 2021 Page 25 of 311...
- Page 26 Mounted on the inside of the ATevo front panel door. It contains the front display, push buttons, and alarm LEDs. It is responsible for battery charger controls. Last modified: 7 September 2023 Copyright HindlePower Inc. 2021 Page 26 of 311...
- Page 27 Mounted to the rectifier heat sink, along the left side of ATevo. It contains most power electronic connections, and terminal blocks for remote sense / optional TempCo wiring. Last modified: 7 September 2023 Copyright HindlePower Inc. 2021 Page 27 of 311...
- Page 28 • Independently-isolated Binary Inputs can be configured to report ON/OFF status of four (4) controls • Analog Inputs include input scaling and can report the status of four (4) analog controls referenced to the dc bus Last modified: 7 September 2023 Copyright HindlePower Inc. 2021 Page 28 of 311...
- Page 29 • ATevo units rated 75-1000Adc utilize a bank of discrete capacitors (C1x). The light blue can-shaped components are hardwired to the Power Board (A2) with bolted connections. In these units, a Bleeder Resistor (R9) is supplied across the filter caps. Last modified: 13 September 2023 Copyright HindlePower Inc. 2021 Page 29 of 311...
- Page 30 Mounted near the AC Input Breaker (CB1), it contains ac input surge suppression and filtering. The MOV Board (A9) is located for easy access, examination, and replacement in case an input transient event should occur. Last modified: 13 September 2023 Copyright HindlePower Inc. 2021 Page 30 of 311...
- Page 31 Main Control Board (A1) at locations, P10, P11, and P12. • Supports DNP3 and Modbus protocols (A12), and can be configured to support 2-wire or 4-wire RS-232 connections, or 2-wire or 4-wire RS-485 connections. Last modified: 7 September 2023 Copyright HindlePower Inc. 2021 Page 31 of 311...
- Page 32 ATevo O&SI - 3PH Input (16-1000 Adc) - 1.1_en 2.1.7. 2.1.7. Forced Load Sharing Comm Forced Load Sharing Comm Adapter (A13) – optional Adapter (A13) – optional Mounted similarly to Serial Communications Adapter (A12). Last modified: 7 September 2023 Copyright HindlePower Inc. 2021 Page 32 of 311...
- Page 33 Adapter (A22) – optional Plugged into the bottom left-side edge of the Main Control Board (A1) at P13. It supports DNP3 and Modbus protocols via 10/100 copper Ethernet connection. Last modified: 7 September 2023 Copyright HindlePower Inc. 2021 Page 33 of 311...
- Page 34 Eliminator Capacitor (C2) – optional optional Mounted to the rear base of the phenolic mounting panel. These light blue, can-shaped components provide additional ripple filtering required for the ‘eliminator’ option. Last modified: 13 September 2023 Copyright HindlePower Inc. 2021 Page 34 of 311...
- Page 35 2.1.10. AC Input Circuit Breaker (CB1) AC Input Circuit Breaker (CB1) Located left of center. This device protects ATevo ac wiring, and can be used to disconnect ATevo from its ac source. Last modified: 13 September 2023 Copyright HindlePower Inc. 2021 Page 35 of 311...
- Page 36 DC Output Circuit Breaker (CB2) Located to the right of CB1. This device protects ATevo dc wiring, and can be used to disconnect ATevo from the battery and system load. Last modified: 13 September 2023 Copyright HindlePower Inc. 2021 Page 36 of 311...
- Page 37 2.1.12. Main Filter Inductor (L1) Main Filter Inductor (L1) Mounted to rear base, often on the right side. It is part of the dc filter, lowering ripple. Last modified: 13 September 2023 Copyright HindlePower Inc. 2021 Page 37 of 311...
- Page 38 2.1.13. Secondary Filter Inductor (L2) Secondary Filter Inductor (L2) Mounted to rear base, and stacked on top of L2 in Style-5030. It is the second stage of the dc filter. Last modified: 13 September 2023 Copyright HindlePower Inc. 2021 Page 38 of 311...
- Page 39 Power Isolation Transformer (T1) (T1) The largest and heaviest component in ATevo, bottom-mounted to the base. It provides isolation, and converts ac voltage to appropriate levels prior to rectification. Last modified: 7 September 2023 Copyright HindlePower Inc. 2021 Page 39 of 311...
- Page 40 • Reverse procedure for reinstalling the safety shields. 2.2.3 Style-163 & Style-198 Enclosures 2.2.3 Style-163 & Style-198 Enclosures • Larger units not not supplied with safety shields. Last modified: 13 September 2023 Copyright HindlePower Inc. 2021 Page 40 of 311...
- Page 41 Three phase (16-1000 Adc) ATevo models do not feature a multi-tap input terminal block for the Power Isolation Transformer (T1). However, transformers for certain models can be re-tapped in the field, to switch between connected input voltages. See special Service Instruction (JD5026-53). Last modified: 13 September 2023 Copyright HindlePower Inc. 2021 Page 41 of 311...
- Page 42 5. Using a flat-blade screwdriver, securely tighten lugs for L1, L2, L3, and GROUND connections. 6. Check all ac input connections, and reinstall safety shield. 2.4.1 I/O Connections (Style-5070) 2.4.1 I/O Connections (Style-5070) Copyright HindlePower Inc. 2021 Page 42 of 311...
- Page 43 HindlePower Inc ATevo O&SI - 3PH Input (16-1000 Adc) - 1.1_en 2.4.2 I/O Connections (Style-5030) 2.4.2 I/O Connections (Style-5030) Copyright HindlePower Inc. 2021 Page 43 of 311...
- Page 44 HindlePower Inc ATevo O&SI - 3PH Input (16-1000 Adc) - 1.1_en 2.4.3 I/O Connections (Style-163/198) 2.4.3 I/O Connections (Style-163/198) Last modified: 13 September 2023 Copyright HindlePower Inc. 2021 Page 44 of 311...
- Page 45 2. Use a dc disconnect switch or circuit breaker between ATevo and the dc bus. This device should have lockout capability to allow ATevo to be disconnected from the dc bus for maintenance. Copyright HindlePower Inc. 2021 Page 45 of 311...
- Page 46 6. Using a flat-blade screwdriver, securely tighten lugs for pos(+) and neg(-) connections. 7. Check all dc output connections, and reinstall safety shield. 2.5.1 I/O Connections (Style-5070) 2.5.1 I/O Connections (Style-5070) 2.5.2 I/O Connections (Style-5030) 2.5.2 I/O Connections (Style-5030) Copyright HindlePower Inc. 2021 Page 46 of 311...
- Page 47 HindlePower Inc ATevo O&SI - 3PH Input (16-1000 Adc) - 1.1_en 2.5.3 I/O Connections (Styles 163/198) 2.5.3 I/O Connections (Styles 163/198) Copyright HindlePower Inc. 2021 Page 47 of 311...
- Page 48 HindlePower Inc ATevo O&SI - 3PH Input (16-1000 Adc) - 1.1_en Last modified: 13 September 2023 Copyright HindlePower Inc. 2021 Page 48 of 311...
- Page 49 You can wire ATevo to regulate output voltage at the battery terminals instead of at the battery charger dc output terminals (CB2+/-). See Section 13, Remote Sense for information and wiring instructions. Last modified: 3 August 2023 Copyright HindlePower Inc. 2021 Page 49 of 311...
- Page 50 3. Use two (2) wire ties and allow a 4-6in / 102-153mm loop for the hinge. 4. Trim wires to length to connect to alarm terminal block (A1-TB6), and strip 0.25in / 6.4mm of insulation. 5. Make connections at A1-TB6 and tighten compression screws. Copyright HindlePower Inc. 2021 Page 50 of 311...
- Page 51 4. If user alarm contacts (A1-TB6) are to drive inductive dc loads (e.g. a larger dc relay) an external protective diode must be installed at the dc relay to avoid equipment damage. Refer to Application Note Application Note (JD5011-00). Last modified: 3 August 2023 Copyright HindlePower Inc. 2021 Page 51 of 311...
- Page 52 When provided, the optional Auxiliary Alarm I/O Board (A4) is mounted to the heat sink, above the Power Board (A2) on the left side of the ATevo. Section 12, Auxiliary Inputs/Outputs for more information and wiring instructions. Last modified: 3 August 2023 Copyright HindlePower Inc. 2021 Page 52 of 311...
- Page 53 The battery temperature compensation, or ‘TempCo’, probe (A10) contains a temperature- dependent resistor in an epoxy module. When used, this probe is installed on the battery. Section 12, Battery Temperature Compensation for more information and wiring instructions. Last modified: 3 August 2023 Copyright HindlePower Inc. 2021 Page 53 of 311...
- Page 54 Communications Manual (JA0102-54). This document also details communication hardware, defines communication capabilities, and lists ATevo front panel configuration. Finally, it catalogs DNP3 and Modbus communication registers. Last modified: 6 September 2023 Copyright HindlePower Inc. 2021 Page 54 of 311...
- Page 55 Communications Manual (JA0102-54). This document also details communication hardware, defines communication capabilities, and lists ATevo front panel configuration. Finally, it catalogs DNP3 and Modbus communication registers. Last modified: 6 September 2023 Copyright HindlePower Inc. 2021 Page 55 of 311...
-
Page 56: Front Panel Controls & Indicators
ATevo O&SI - 3PH Input (16-1000 Adc) - 1.1_en 3. 3. Controls & Navigation Controls & Navigation SECTION SECTION TOPICS TOPICS Front Panel Controls and Indicators Display Main Menu and Navigation Last modified: 8 September 2023 Copyright HindlePower Inc. 2021 Page 56 of 311... - Page 57 ATevo O&SI - 3PH Input (16-1000 Adc) - 1.1_en 3.1. 3.1. Front Panel Controls & Indicators Front Panel Controls & Indicators ATevo front panel controls and indicators are organized into six (6) major groups or sections. Copyright HindlePower Inc. 2021 Page 57 of 311...
- Page 58 Section 3.1.6 AC Input and DC Output Breakers 3.1.6 AC Input and DC Output Breakers Molded case circuit breaker protection devices are accessible via actuator cut-outs on the front panel door. Copyright HindlePower Inc. 2021 Page 58 of 311...
- Page 59 ATevo output from the dc bus (battery) voltage. There still may be live dc power connected to some of ATevo’s internal boards (this will include any relays wetted by the battery voltage). Last modified: 13 September 2023 Copyright HindlePower Inc. 2021 Page 59 of 311...
-
Page 60: Home Screen
ATevo screens can be grouped, by function, into four (4) basic types. • Home Screen • Configuration Screens • Status Screens • Hindle Health System Screens • Other Screens Last modified: 19 July 2023 Copyright HindlePower Inc. 2021 Page 60 of 311... - Page 61 • If a Temperature Compensation (TempCo) Probe option is installed and enabled, the present battery temperature and normalized voltage set point will also appear on the display (see Section 10 for more details on the TempCo option and display). Last modified: 19 July 2023 Copyright HindlePower Inc. 2021 Page 61 of 311...
- Page 62 These screens are used for changing ATevo set points and configuration. Many of these screens will be described in Section 4, Startup and Configuration. Other configuration screens for installed options will be described later in their respective installed option sections. Last modified: 19 July 2023 Copyright HindlePower Inc. 2021 Page 62 of 311...
- Page 63 Operation. The HOME screen can be thought of as a ‘special’ Status Screen in that it can indicate dc output voltage (Vdc), dc output current (Adc), and status of Equalize/Float mode and method. Last modified: 19 July 2023 Copyright HindlePower Inc. 2021 Page 63 of 311...
- Page 64 ATevo enters a user-assisted self-diagnostic mode. Screens prompt the user to participate in a series of tests that confirm that ATevo is operating correctly. For more information on the Hindle Health System, see Section Last modified: 19 July 2023 Copyright HindlePower Inc. 2021 Page 64 of 311...
- Page 65 Accessible from the DISPLAY MODE button, and read-only alternates to HOME, three (3) other screens are available in ATevo: • Date and Time • Ground Meter (see also JA5124-09) • Rectifier Temperature Last modified: 19 July 2023 Copyright HindlePower Inc. 2021 Page 65 of 311...
-
Page 66: Main Menu & Navigation
ATevo screens and menus. This system is intuitive to most people as it is similar to universally-adopted television remote control navigation buttons. • Menu and Arrow Buttons • EDIT/ENTER Button • Navigation Conventions in this Manual • Escape (ESC) Button Last modified: 3 August 2023 Copyright HindlePower Inc. 2021 Page 66 of 311... - Page 67 Further Displayed Main Menu Icons Further Displayed Main Menu Icons Refer to Section 6.1 for descriptions of each. Last modified: 3 August 2023 Copyright HindlePower Inc. 2021 Page 67 of 311...
- Page 68 This indicates that pressing either LEFT or RIGHT arrow buttons will show additional screens. LEFT and RIGHT arrow buttons are also used when moving between numbers when setting parameters or between characters when setting passwords. Last modified: 3 August 2023 Copyright HindlePower Inc. 2021 Page 68 of 311...
- Page 69 MENU > EVENT LOGS > ‘View event log’. Screen Convention: een Convention: In the same way that the character ‘>’ is used between commands in a sequence, the same character appears between a sequence of screens. Copyright HindlePower Inc. 2021 Page 69 of 311...
- Page 70 HindlePower Inc ATevo O&SI - 3PH Input (16-1000 Adc) - 1.1_en Last modified: 3 August 2023 Copyright HindlePower Inc. 2021 Page 70 of 311...
- Page 71 • If Main Menu displayed: ESC will return to HOME screen. • If in SYSTEM SETTINGS screen, pressing ESC will return to Main Menu. Pressing ESC again will return to the HOME screen. Last modified: 3 August 2023 Copyright HindlePower Inc. 2021 Page 71 of 311...
-
Page 72: Startup & Configuration Startup & Configuration
Enabling/Disabling High Level Detect Configuring Ground Alarms Configuring Battery Settings Download our Quick Setup Sheet for a checklist containing graphical instructions on placement, wiring, startup, & configuration. Last modified: 8 September 2023 Copyright HindlePower Inc. 2021 Page 72 of 311... - Page 73 4.1. Startup Startup The startup procedure is shown below by means of (1) a video and (2) a graphic. Startup: Video Instruction Startup: Video Instruction https://www.youtube.com/embed/VjuwjKU7Kt4?rel=0&start=39&end=82 https://www.youtube.com/embed/VjuwjKU7Kt4?rel=0&start=39&end=82 Startup: Graphic Instruction Startup: Graphic Instruction Copyright HindlePower Inc. 2021 Page 73 of 311...
- Page 74 HindlePower Inc ATevo O&SI - 3PH Input (16-1000 Adc) - 1.1_en Startup procedure for the ATevo is the reverse of the legacy AT30 series chargers. Last modified: 3 August 2023 Copyright HindlePower Inc. 2021 Page 74 of 311...
- Page 75 These settings may be changed after startup if necessary. • Take about fifteen (15) seconds to start. Control circuitry will “soft start” ATevo, such that DC output voltage and current increase gradually to rated values. Last modified: 3 August 2023 Copyright HindlePower Inc. 2021 Page 75 of 311...
- Page 76 Float V Float Voltage oltage 44.00 58.00 52.00 Volts Equalize V Equalize Voltage oltage 46.80 61.00 * 56.00 Volts Curr r ent Limit ent Limit 50% rating 110% rating 110% rating Amperes Copyright HindlePower Inc. 2021 Page 76 of 311...
- Page 77 Ground F ound Fault ault POS POS[+] [+] 1 kOhms Ground F ound Fault ault NEG NEG[-] kOhms * 149.0 Vdc High Range Set Point considered “extended equalize”. Unit may not meet +/-0.25% Copyright HindlePower Inc. 2021 Page 77 of 311...
- Page 78 Ground F ound Fault ault NEG NEG[-] kOhms * 298.0 Vdc High Range Set Point considered “extended equalize”. Unit may not meet +/-0.25% regulation, beyond 290.0 Vdc. Last modified: 1 August 2023 Copyright HindlePower Inc. 2021 Page 78 of 311...
- Page 79 • You check that ac input supply voltage and battery voltage match information on ATevo nameplate. • Open the front panel • Check battery polarity at DC Output Circuit Breaker (CB2+/-). Last modified: 8 September 2023 Copyright HindlePower Inc. 2021 Page 79 of 311...
- Page 80 If any error codes or alarms appear on the Main ATevo Display and/or Alarm Indicator LEDs, refer to Section 8, Alarms & Indicators to interpret the origin and resolution of the indication before proceeding. Last modified: 3 August 2023 Copyright HindlePower Inc. 2021 Page 80 of 311...
- Page 81 ATevo will automatically switch back to the HOME screen if no buttons are pushed for ten (10) minutes, or by pressing ESC one or more times. Each press of ESC returns one level until HOME is reached. Last modified: 3 August 2023 Copyright HindlePower Inc. 2021 Page 81 of 311...
- Page 82 ATevo. This section details how to configure basic ATevo set points and alarms found also on legacy AT30 chargers. The process is shown by both (1) video and (2) instructions with screenshots. Instructions by Video Instructions by Video https://www.youtube.com/embed/VjuwjKU7Kt4?rel=0&start=39&end=82 https://www.youtube.com/embed/VjuwjKU7Kt4?rel=0&start=39&end=82 https://www.youtube.com/embed/VjuwjKU7Kt4?rel=0&start=107&end=185 Copyright HindlePower Inc. 2021 Page 82 of 311...
- Page 83 Setting Float Voltage • Setting Equalize Voltage • Setting Equalize Timer • Setting High DC Alarm Voltage • Setting Low DC Alarm Voltage • Setting Current Limit Level Last modified: 8 September 2023 Copyright HindlePower Inc. 2021 Page 83 of 311...
- Page 84 If you are interrupted while adjusting settings and do not press a front panel key for 10 minutes, Edit Mode ends automatically without saving adjustments to any setting not previously saved with the EDIT/ENTER key. Last modified: 19 July 2023 Copyright HindlePower Inc. 2021 Page 84 of 311...
- Page 85 ‘Float Voltage (V)’ at the top of the display. The present set point is displayed. To set this parameter, follow the steps in Section 4.2.1. Last modified: 19 July 2023 Copyright HindlePower Inc. 2021 Page 85 of 311...
- Page 86 From the HOME screen, press EDIT/ENTER twice, until the Edit Equalize Voltage Screen is visible ‘Equalize Voltage (V)’ on top of display. To set this parameter follow the steps in Section 4.2.1. Last modified: 19 July 2023 Copyright HindlePower Inc. 2021 Page 86 of 311...
- Page 87 From the HOME screen, press EDIT/ENTER three (3) times, until the Edit Equalize Timer Screen is visible, ‘Eqlz. Time(hours)’, on top of display. To set this parameter follow the steps in Section 4.2.1. Last modified: 19 July 2023 Copyright HindlePower Inc. 2021 Page 87 of 311...
- Page 88 From the HOME screen, press EDIT/ENTER four (4) times, until the Edit High DC Alarm Voltage Screen is visible, ‘High DC Alarm (V)’, on top of display. To set this parameter follow the steps Section 4.2.1. Last modified: 19 July 2023 Copyright HindlePower Inc. 2021 Page 88 of 311...
- Page 89 From the HOME screen, press EDIT/ENTER five (5) times, until the Edit Low DC Alarm Voltage Screen is visible, ‘Low DC Alarm (V)’, on top of display. To set this parameter follow the steps in Section 4.2.1. Last modified: 19 July 2023 Copyright HindlePower Inc. 2021 Page 89 of 311...
- Page 90 After setting the Current Limit level to the desired value and pressing EDIT/ENTER to save the set point, configuration of Basic ATevo Set Points and Alarms is complete and the display returns to the HOME screen. Last modified: 19 July 2023 Copyright HindlePower Inc. 2021 Page 90 of 311...
- Page 91 • How to Configure Advanced Settings • Setting High Voltage Shutdown • Setting High Level Detect • Setting Low Voltage Level Detect • Setting Ripple Alarm Last modified: 8 September 2023 Copyright HindlePower Inc. 2021 Page 91 of 311...
- Page 92 • Press LEFT and RIGHT to navigate to any digit to be modified. • Press UP and DOWN to change setting value. • Once desired setting is displayed, press EDIT/ENTER to store it. Last modified: 19 July 2023 Copyright HindlePower Inc. 2021 Page 92 of 311...
- Page 93 Setting High Voltage Shutdown To access and change the High Voltage Shutdown status for the High Voltage Shutdown feature (covered in Section 5.2), follow the steps in Section 4.3.1. Last modified: 27 July 2023 Copyright HindlePower Inc. 2021 Page 93 of 311...
- Page 94 Setting High Level Detect To access and change the High Level Detect set point for the High Level Detect feature (covered in Section 5.4), follow the steps in Section 4.3.1. Last modified: 27 July 2023 Copyright HindlePower Inc. 2021 Page 94 of 311...
- Page 95 Setting Low Voltage Level Detect To access and change the Low Level Detect set point for the Low Level Detect feature (covered Section 5.3), follow the steps in Section 4.3.1. Last modified: 27 July 2023 Copyright HindlePower Inc. 2021 Page 95 of 311...
- Page 96 4.3.5. Setting Ripple Alarm Setting Ripple Alarm To access and change the set point for the AC Ripple Alarm (covered in Section 7.5.4), follow the steps in Section 4.3.1. Last modified: 1 August 2023 Copyright HindlePower Inc. 2021 Page 96 of 311...
- Page 97 Setting System Time • Setting System Date • Setting Display Backlight Control • Setting Display Contrast • Setting Display Backlight Intensity • Setting Display Reverse Image Control Last modified: 19 July 2023 Copyright HindlePower Inc. 2021 Page 97 of 311...
- Page 98 • Press LEFT and RIGHT to navigate to the digit to be modified • Press UP and DOWN to change setting value. • Once desired setting is displayed, press EDIT/ENTER to store it. Last modified: 19 July 2023 Copyright HindlePower Inc. 2021 Page 98 of 311...
- Page 99 To access and change the System Time, follow the steps in Section 4.4.1. MENU > SYSTEM SETTINGS > ‘Time’ ATevo uses a 24-hour clock (e.g. 2:30 PM is 14:30) Last modified: 19 July 2023 Copyright HindlePower Inc. 2021 Page 99 of 311...
- Page 100 4.4.3. 4.4.3. Setting System Date Setting System Date To access and change the System Date, follow the steps in Section 4.4.1. MENU > SYSTEM SETTINGS > ‘Date’ Last modified: 19 July 2023 Copyright HindlePower Inc. 2021 Page 100 of 311...
- Page 101 4.4.4. Setting Display Backlight Control Setting Display Backlight Control To change the LCD Backlight setting (ON/OFF), follow the steps in Section 4.4.1. MENU > SYSTEM SETTINGS > ‘Backlight’ Last modified: 19 July 2023 Copyright HindlePower Inc. 2021 Page 101 of 311...
- Page 102 ATevo O&SI - 3PH Input (16-1000 Adc) - 1.1_en 4.4.5. 4.4.5. Setting Display Contrast Setting Display Contrast To change the LCD Display Contrast, follow the steps in Section 4.4.1. MENU > SYSTEM SETTINGS > ‘Contrast’ Last modified: 19 July 2023 Copyright HindlePower Inc. 2021 Page 102 of 311...
- Page 103 4.4.6. Setting Display Backlight Setting Display Backlight Intensity Intensity To change the LCD Display Backlight Intensity, follow the steps in Section 4.4.1. MENU > SYSTEM SETTINGS > ‘Backlight Intensity’ Last modified: 19 July 2023 Copyright HindlePower Inc. 2021 Page 103 of 311...
- Page 104 4.4.7. Setting Display Reverse Image Setting Display Reverse Image Control Control To change the LCD Display Image preference, follow the steps in Section 4.4.1. MENU > SYSTEM SETTINGS > ‘LCD color’ Last modified: 19 July 2023 Copyright HindlePower Inc. 2021 Page 104 of 311...
- Page 105 Auxiliary I/O boards are available, each supplying six (6) additional relays. ATevo will support up to four (4) optional Auxiliary I/O boards (24 relays total). • Configuring Common Alarm Relay • Configuring Auxiliary I/O Board Relays Last modified: 19 July 2023 Copyright HindlePower Inc. 2021 Page 105 of 311...
- Page 106 Section for instructions on how to clear (or reset) latched relays. To change the Common Alarm Relay configuration: MENU > RELAYS > ‘Main board relay’ To change the relay’s assigned fault condition: Copyright HindlePower Inc. 2021 Page 106 of 311...
- Page 107 ‘Fault’ > select desired condition To change the relay’s latching status: ‘Latching’ > select desired status To change the relay time delay: ‘Delay’ > increment/decrement to set point value Last modified: 19 July 2023 Copyright HindlePower Inc. 2021 Page 107 of 311...
- Page 108 Alarm Relay configuration on the Main Control Board (A1). This is because the Auxiliary I/O Board Relays have the same three (3) configuration parameters. Refer to Section 12.4 configuration instructions. Last modified: 1 August 2023 Copyright HindlePower Inc. 2021 Page 108 of 311...
- Page 109 If an ‘[X]’ appears to the left of the alarm, it will activate the COMMON ALARM. If ‘[ ]’ appears, it will not activate the COMMON ALARM. Last modified: 3 August 2023 Copyright HindlePower Inc. 2021 Page 109 of 311...
- Page 110 • be used as a standard communications interface to connect to external serial devices • be used in various applications (such as Forced Load Sharing) Instructions on how to configure Serial Communications Adapters are found in JA0102-54. Last modified: 26 July 2023 Copyright HindlePower Inc. 2021 Page 110 of 311...
- Page 111 For configuration details, refer to the supplementary ATevo Communications Manual (JA0102-54). This document details communication hardware / wiring, defines communication capabilities, and lists ATevo front panel configuration. Finally, it catalogs DNP3 and Modbus communication registers. Last modified: 26 July 2023 Copyright HindlePower Inc. 2021 Page 111 of 311...
- Page 112 ‘DIS’ to disable the High Level Detect Shutdown 6. Close the front panel door. 7. Turn ON (close) both Circuit Breakers (CB1/CB2). Section 5.4 for more information on the High Level Detect feature. Last modified: 3 August 2023 Copyright HindlePower Inc. 2021 Page 112 of 311...
-
Page 113: Setting Up Ground Fault Alarm Sensitivity
Likewise, each ground alarm type features two (2) levels of notification priority (alarm ‘warning’ & alarm ‘critical’). • Setting Up Ground Fault Alarm Sensitivity • Setting Up Ground Imbalance Alarm Last modified: 26 July 2023 Copyright HindlePower Inc. 2021 Page 113 of 311... - Page 114 • Repeat process for Gr Ground F ound Fault Critical ault Critical. To increase the ground alarm sensitivity, lower the kOhm value. To decrease the sensitivity, raise the kOhm value. Last modified: 26 July 2023 Copyright HindlePower Inc. 2021 Page 114 of 311...
- Page 115 • Repeat process for Vgnd Imbalance Critical Vgnd Imbalance Critical. For further information regarding ATevo ground alarms, including instructions for locating and identifying faults, refer to supplemental instructions (JA5124-09 and/or JD5032-00). Last modified: 26 July 2023 Copyright HindlePower Inc. 2021 Page 115 of 311...
-
Page 116: Configuring Battery Settings
End of Discharge alarm level (Vdc), and optional Battery Temperature Probe. • Selecting Battery Type • Setting End of Discharge (EOD) Alarm • Setting Up the Battery Temperature Probe Last modified: 26 July 2023 Copyright HindlePower Inc. 2021 Page 116 of 311... - Page 117 • Select it with EDIT/ENTER. • Press UP and DOWN to change type (Lead Acid / NiCd). • Once desired setting is displayed, press EDIT/ENTER to store it. Last modified: 3 August 2023 Copyright HindlePower Inc. 2021 Page 117 of 311...
- Page 118 • Press LEFT and RIGHT to navigate to the digit to be modified. • Press UP and DOWN to change setting value. • Once desired setting is displayed, press EDIT/ENTER to store it. Last modified: 3 August 2023 Copyright HindlePower Inc. 2021 Page 118 of 311...
- Page 119 • Select it with EDIT/ENTER. • Press UP and DOWN to change status (off / on). • Once desired setting is displayed, press EDIT/ENTER to store it. Last modified: 3 August 2023 Copyright HindlePower Inc. 2021 Page 119 of 311...
-
Page 120: Basic Operation Basic Operation
ATevo O&SI - 3PH Input (16-1000 Adc) - 1.1_en 5. 5. Basic Operation Basic Operation SECTION SECTION TOPICS TOPICS ATevo Operating Modes High Voltage Shutdown Low Level Detect High Level Detect Disabling Ground Detection Last modified: 3 August 2023 Copyright HindlePower Inc. 2021 Page 120 of 311... -
Page 121: Changing Display Mode
(DISPLAY MODE, CHARGE MODE, and EQUALIZE METHOD) at the far left of the control panel. • Changing Display Mode • Changing Charge Mode • Changing Equalize Method • Lamp Test & Display of Firmware Versions • Resetting Latched Relays Last modified: 3 August 2023 Copyright HindlePower Inc. 2021 Page 121 of 311... - Page 122 The DISPLAY MODE button is in the same relative location as the METER MODE button on legacy AT30 chargers. Its functionality is equivalent in that it determines which measurements are to be shown on the HOME screen. Last modified: 8 September 2023 Copyright HindlePower Inc. 2021 Page 122 of 311...
- Page 123 When ATevo is in EQUALIZE mode, the charger will: • Ramp up to the EQUALIZE VOLTAGE set point. • Start the EQUALIZE TIMER. • Alternate display between showing the HOME screen and a screen that shows the EQUALIZE TIME REMAINING. Copyright HindlePower Inc. 2021 Page 123 of 311...
- Page 124 The CHARGE MODE button is in the same relative location as the CHGR MODE button on legacy AT30 chargers. Its functionality is equivalent in that it changes charge mode between EQUALIZE and FLOAT. Last modified: 8 September 2023 Copyright HindlePower Inc. 2021 Page 124 of 311...
- Page 125 AT30 chargers. Functionality is equivalent in that when pressed, it changes the equalize method. The Manual Equalize Method (no timer) available in legacy AT30 chargers is not supported by ATevo. Last modified: 8 September 2023 Copyright HindlePower Inc. 2021 Page 125 of 311...
- Page 126 When DOWN is released, ATevo will briefly display the charger’s installed firmware versions, then return to the HOME screen and resume normal operation. The ATevo Lamp Test is identical to the Lamp Test on legacy AT30 Series battery chargers. Last modified: 8 September 2023 Copyright HindlePower Inc. 2021 Page 126 of 311...
-
Page 127: Resetting Latched Relays (Legacy Method)
AT30 chargers. To select between clearing individual relays, or all relays, use the RELAYS menu icon as described in Section 7.6, Resetting Latched Alarm Relays. Last modified: 8 September 2023 Copyright HindlePower Inc. 2021 Page 127 of 311... -
Page 128: High Voltage Shutdown
The High Voltage Shutdown feature can be enabled or disabled as described in Section 4.3.2. ATevo also has a har hardwar dware e High Level Detect (analog) feature that is described in Section 5.4. Last modified: 8 September 2023 Copyright HindlePower Inc. 2021 Page 128 of 311... -
Page 129: Low Level Detect
ATevo’s front panel door to view the Analog Low Voltage Alarm LED. Refer to Section 4.3.4 for instructions on how to configure the threshold for the Low Level Detect feature. Last modified: 8 September 2023 Copyright HindlePower Inc. 2021 Page 129 of 311... -
Page 130: High Level Detect
Voltage Shutdown alarm LED. Refer to the following sections to learn about: • Section 4.9, Enabling/Disabling High Level Detect • Section 4.3.3, Setting High Level Detect Threshold Last modified: 3 August 2023 Copyright HindlePower Inc. 2021 Page 130 of 311... -
Page 131: Disabling Ground Detection
4. Identify the 3-pin shorting block (JP102), marked ‘GROUND DETECT’ on A2. 5. Move the 2-pin jumper from the ENABLED to DISABLED position. 6. Restart ATevo with ground detection disabled. Last modified: 3 August 2023 Copyright HindlePower Inc. 2021 Page 131 of 311... -
Page 132: A A Dvanced Operation Dvanced Operation
ATevo O&SI - 3PH Input (16-1000 Adc) - 1.1_en 6. 6. Advanced Operation Advanced Operation SECTION SECTION TOPICS TOPICS ATevo Main Menu Alarms Button Health Button Security & Passwords SD Memory Card Features Last modified: 3 August 2023 Copyright HindlePower Inc. 2021 Page 132 of 311... - Page 133 Selecting this icon is equivalent to pressing EDIT/ENTER from the HOME screen – the direct path to Basic Set Points and Alarms screens, a feature that ensures backward compatibility with legacy AT30 Series battery chargers. Copyright HindlePower Inc. 2021 Page 133 of 311...
- Page 134 6.1.6 Alarm Triggers Icon 6.1.6 Alarm Triggers Icon Used to exclude alarms from the Common Alarm activation list. By default, all alarms, when active, will annunciate the Common Alarm. See Section 4.6 instructions. Copyright HindlePower Inc. 2021 Page 134 of 311...
- Page 135 Permits a system backup or restore using an optional SD memory card. All configuration set points, alarm thresholds, and communications settings can be stored on and retrieved from SD memory card. See Section 6.5 for instructions. Copyright HindlePower Inc. 2021 Page 135 of 311...
- Page 136 • Vdc/Adc (charger output) • Firmware version • Display version • PGA version • AUX versions (4) • Time since last reset • Charger ID • MAC Last modified: 26 July 2023 Copyright HindlePower Inc. 2021 Page 136 of 311...
- Page 137 Not all ATevo alarms have a dedicated LED alarm indicator on the front panel. Alarms without a dedicated LED indicator will light the COMMON alarm LED on the front panel. Last modified: 3 August 2023 Copyright HindlePower Inc. 2021 Page 137 of 311...
- Page 138 Test results are logged with a time and date stamp. The health test can be aborted at any point by pressing the ESC button. See Section 8 for instructions on how to run the Hindle Health System test. Last modified: 3 August 2023 Copyright HindlePower Inc. 2021 Page 138 of 311...
-
Page 139: Three (3) Levels Of Password Protection
Three (3) Levels of Password Protection • Access Security Features & Configure Passwords • Setting Passwords • Setting Default Access • Logging into a Password Authorization Level • Logging Out Last modified: 3 August 2023 Copyright HindlePower Inc. 2021 Page 139 of 311... - Page 140 ◦ changing charger’s configuration and all set points except for passwords. • ADMINISTRATOR is the highest level; it permits you to use and/or configure all charger functions, features, set points and passwords. Last modified: 27 July 2023 Copyright HindlePower Inc. 2021 Page 140 of 311...
- Page 141 To access the security features and password configuration: MENU > SECURITY ATevo Security Screen prompts you to choose from one of the security and password configuration selections. Last modified: 3 August 2023 Copyright HindlePower Inc. 2021 Page 141 of 311...
- Page 142 To change passwords, refer to Section 6.4.2 and ensure you have ADMINISTRATOR privilege then: “Set passwords”> select from three (3) password authorization levels > set characters for that authorization level’s password Last modified: 3 August 2023 Copyright HindlePower Inc. 2021 Page 142 of 311...
- Page 143 The DEFAULT ACCESS setting determines the authorization and password level when there is no log in. If you do not wish to implement password security, DEFAULT ACCESS should be set to ADMINISTRATOR, the default factory setting. Last modified: 3 August 2023 Copyright HindlePower Inc. 2021 Page 143 of 311...
- Page 144 If the entry is correct, you will be able to access all features at the privilege level. However, if no buttons are pushed for more than ten minutes, ATevo will switch back to DEFAULT ACCESS level. Last modified: 3 August 2023 Copyright HindlePower Inc. 2021 Page 144 of 311...
- Page 145 To LOG OUT of the present privilege level, select ‘LOG OUT’. The user will receive a confirmation message and return to DEFAULT ACCESS privilege level. ATevo automatically logs out of any authorization level above DEFAULT ACCESS after ten (10) minutes of inactivity. Last modified: 3 August 2023 Copyright HindlePower Inc. 2021 Page 145 of 311...
-
Page 146: Sd Memory Card Features
ATevo provides a socket for an SD Memory Card on the Main Control Board (A1). To access it, open the front panel door. Locate the socket at the top-left corner of the Main Control Board’s back side. Last modified: 3 August 2023 Copyright HindlePower Inc. 2021 Page 146 of 311... -
Page 147: Installing Sd Memory Card
‘click’. To remove, gently press the card further into the socket then allow it to ‘snap’ back to disengage from the locking mechanism. Pull the SD card out. Last modified: 3 August 2023 Copyright HindlePower Inc. 2021 Page 147 of 311... -
Page 148: Storing Event Log File To Sd Card
Each time the event log file is stored it is written to a new file whereby ‘xx’ increments by one. This prevents previous event log files stored on the SD Memory Card from being overwritten. Last modified: 13 September 2023 Copyright HindlePower Inc. 2021 Page 148 of 311... - Page 149 • clone configuration to a similar charger to eliminate need to set up parameters manually. • configure a replacement Main Control Board (A1) automatically. To copy ATevo Configuration from SD Memory Card to the Main Control Board (A1): MENU > SAVE:RESET SETTINGS >’Restore from Memory Card’ Copyright HindlePower Inc. 2021 Page 149 of 311...
- Page 150 ATevo O&SI - 3PH Input (16-1000 Adc) - 1.1_en The screen will briefly confirm the file was copied successfully. The charger will restart with the restored configuration settings. Last modified: 13 September 2023 Copyright HindlePower Inc. 2021 Page 150 of 311...
- Page 151 • Press RESET button (SW13) located 3in / 76mm below RE-FLASH JUMPER. • If mainapp.bin is stored on the card, the message below will appear. • Select ‘Yes’ if desired. A message will confirm that the Main Application program has updated. Copyright HindlePower Inc. 2021 Page 151 of 311...
- Page 152 A A : : No. If your ATevo runs firmware prior to v2.7.0, contact the manufacturer and request the two old-format firmware upgrade files, then follow the directions above. Q: What if new and old format firmware files are on a memory card used to update an ATevo? Copyright HindlePower Inc. 2021 Page 152 of 311...
- Page 153 If they are found, the UI will offer to update using them. To learn about the enhanced features that firmware v2.7.0 has brought to the ATevo, see Appendix topic, Firmware v2.7.0 Enhancements. Last modified: 3 August 2023 Copyright HindlePower Inc. 2021 Page 153 of 311...
- Page 154 0 for consistency. The extension “hpb” is an acronym for Hindle Power Binary. Here are some firmware filename examples that use this convention: ATevo firmware filename examples ATevo firmware filename examples • ev020606.hpb – v2.6.6 • ev020502.hpb – v2.5.2 Copyright HindlePower Inc. 2021 Page 154 of 311...
- Page 155 The screen below will list all available firmware updates from the latest to the earliest. Use the UP/DOWN arrow keys to select the update to apply, then press ENTER. Copyright HindlePower Inc. 2021 Page 155 of 311...
- Page 156 If the verify step fails, you will need to follow the instructions shown in the following screen. c. Once the verify step passes, update screens are the same as in previous versions. The sequence of screens and how to proceed is explained in the graphic below. Copyright HindlePower Inc. 2021 Page 156 of 311...
- Page 157 NORM position as instructed on the screen below. 8. Remove the memory card and press the RESET button. 9. Verify the the new firmware is installed by observing the new version displayed on the splash screen. Copyright HindlePower Inc. 2021 Page 157 of 311...
- Page 158 ESC rather than choosing one of the new file types it will then check for the older file types. If they are found, the UI will offer to update using them. Last modified: 3 August 2023 Copyright HindlePower Inc. 2021 Page 158 of 311...
-
Page 159: Legacy At30 Alarms & Indicators
Common Alarm Indicator & Other Alarm Triggers Alarm LED Summary Table Viewing Alarms Advanced Alarms Resetting Latched Alarm Relays Battery Open Test AC Metering – optional Battery Discharge Alarm / Meter – optional Last modified: 13 September 2023 Copyright HindlePower Inc. 2021 Page 159 of 311... - Page 160 Alarms will also be reported by any installed optional protocol communications board and may also be configured to activate a discrete relay on optional Auxiliary I/O Boards. Section 12.4 gives instructions on how to configure relays. Last modified: 13 September 2023 Copyright HindlePower Inc. 2021 Page 160 of 311...
- Page 161 TRIGGERS icon instead of the COMMON ALARM icon, and will be able to configure the triggers for these new alarms in the same menu that the common alarm is configured. This is described further in Appendix topic, Firmware v2.7.0 Enhancements. Last modified: 3 August 2023 Copyright HindlePower Inc. 2021 Page 161 of 311...
- Page 162 Sect. 4.10 connections Common Common One or Any one (1) legacy alarm in Can set which Common Any of above Alar Alarm m more previous six (6) rows, or Advanced Alarm Copyright HindlePower Inc. 2021 Page 162 of 311...
- Page 163 HindlePower Inc ATevo O&SI - 3PH Input (16-1000 Adc) - 1.1_en Alarms Legacy or advanced alarms that do not activate Advanced have a dedicated LED Common Alarms Alarm Last modified: 7 September 2023 Copyright HindlePower Inc. 2021 Page 163 of 311...
- Page 164 Alarms are system events that are stored in ATevo’s event log with a time and date stamp. The same is true for alarm clearing (return to non-alarm state). Section 9 contains information on Copyright HindlePower Inc. 2021 Page 164 of 311...
- Page 165 HindlePower Inc ATevo O&SI - 3PH Input (16-1000 Adc) - 1.1_en event logs. Last modified: 3 August 2023 Copyright HindlePower Inc. 2021 Page 165 of 311...
- Page 166 7.5.3 End of Discharge ( 7.5.3 End of Discharge (EOD EOD) Alarm ) Alarm This alarm is activated when the dc bus voltage sensed by the Main Control Board (A1) is lower Copyright HindlePower Inc. 2021 Page 166 of 311...
- Page 167 7.5.9 Open DC Breaker Alarm This alarm is activated when the Main Control Board (A1) senses that the DC Output Circuit Breaker (CB2) is open. The set point for this alarm is not adjustable. Copyright HindlePower Inc. 2021 Page 167 of 311...
- Page 168 This alarm is activated when the Main Control Board (A1) detects that the Rectifier Assembly (A6) is not working. This may indicate a defective SCR or issues with the SCR firing control or driver. Set points are not adjustable. Last modified: 27 July 2023 Copyright HindlePower Inc. 2021 Page 168 of 311...
- Page 169 To reset an individual latched alarm relay: MENU > RELAYS > ‘Unlatch selected relays’ > select latched relay from list To reset all latched alarm relays: MENU > RELAYS > ‘Unlatch all relays (x)’, where ‘x’ represents the number of presently latched relays. Copyright HindlePower Inc. 2021 Page 169 of 311...
- Page 170 ATevo O&SI - 3PH Input (16-1000 Adc) - 1.1_en After executing this command the number between ‘( )’ will change to ‘0’ indicating all latched relays are cleared. Last modified: 3 August 2023 Copyright HindlePower Inc. 2021 Page 170 of 311...
-
Page 171: Battery Open Test Settings
If the test fails, a Battery Open alarm is generated and can only be cleared by the Unlatch Battery Open Alarm control. • Battery Open Test Settings • Running Battery Open Tests Periodically • Running Battery Open Test Manually • Resetting Battery Open Alarm Last modified: 3 August 2023 Copyright HindlePower Inc. 2021 Page 171 of 311... - Page 172 ‘Run test for up to:’ > adjust duration To configure the voltage set point at which to terminate the test if no battery is present: ‘Setpoint’ > adjust voltage Last modified: 3 August 2023 Copyright HindlePower Inc. 2021 Page 172 of 311...
- Page 173 Running Battery Open Tests Periodically Periodically To schedule periodic Battery Open Tests: MENU > TESTING > ‘Test Settings’ > ‘Run periodically:’ > ‘Enabled’ ‘Every:’ > change desired digits Last modified: 27 July 2023 Copyright HindlePower Inc. 2021 Page 173 of 311...
- Page 174 7.7.3. 7.7.3. Running Battery Open Test Running Battery Open Test Manually Manually To run the Battery Open Test manually on demand: MENU > TESTING > ‘Run now’ Last modified: 27 July 2023 Copyright HindlePower Inc. 2021 Page 174 of 311...
- Page 175 Unlatch Battery Open Alarm control. To initiate the Unlatch Battery Open Alarm control and reset the Battery Open Alarm: MENU > TESTING > ‘Unlatch battery open’ Last modified: 3 August 2023 Copyright HindlePower Inc. 2021 Page 175 of 311...
-
Page 176: Ac Metering - Optional
If an optional ac metering module is supplied with ATevo, voltage level(s) and current flow from the ac input power source can be measured. For further information regarding ATevo ac metering, refer to supplemental instructions (JA5124-03). Last modified: 27 July 2023 Copyright HindlePower Inc. 2021 Page 176 of 311... - Page 177 With this feature installed, the firmware logic can trigger a battery discharge alarm, and/or measure battery current (+/- Adc). For further information regarding ATevo battery shunt, refer to supplemental instructions (JA5124-07) Last modified: 27 July 2023 Copyright HindlePower Inc. 2021 Page 177 of 311...
-
Page 178: Hindle Health System Hindle Health System
8. 8. Hindle Health System Hindle Health System SECTION SECTION TOPICS TOPICS Hindle Health System – Overview Hindle Health System – Components Hindle Health System – Screens Hindle Health+ – Optional Last modified: 27 July 2023 Copyright HindlePower Inc. 2021 Page 178 of 311... - Page 179 The Hindle Health System (HHS) is a powerful, user friendly, standard feature that tests and reports on ATevo’s operational health. Some portions of the HHS continuously run in the background. Other parts require user intervention. Last modified: 27 July 2023 Copyright HindlePower Inc. 2021 Page 179 of 311...
- Page 180 Solid Solid – ATevo requires attention, but the condition is not critical. In most cases, LCD display will operate and be able to report the issue and give instructions on how to Copyright HindlePower Inc. 2021 Page 180 of 311...
- Page 181 RED LED is illuminated when ATevo detects any error condition, when any alarm is active, or when the Hindle Health System detects any non-normal operating condition. Last modified: 27 July 2023 Copyright HindlePower Inc. 2021 Page 181 of 311...
- Page 182 After the initial introduction and safety screens, a screen prompts the user to select the tests to run. There are two (2) test selections. The second will not test alarms or relays: • Operation, Set points, Alarms • Operation, Set points Copyright HindlePower Inc. 2021 Page 182 of 311...
- Page 183 The result status will indicate that each test PASSED, FAILED, or was NOT RUN. The resulting log file can be used to prove NERC compliance requirements for things such as verifying correct float voltage. Last modified: 27 July 2023 Copyright HindlePower Inc. 2021 Page 183 of 311...
- Page 184 Unrelated to the Hindle Health System, ATevo can also communicate with an optional external dc ‘smart shunt’ (p/n EJ5178-00). This provides remote battery monitoring. For further details, refer to supplemental HindleHealth+ user instructions (JA5136-00). Last modified: 27 July 2023 Copyright HindlePower Inc. 2021 Page 184 of 311...
-
Page 185: Event Log Types
9. 9. Event Logs Event Logs SECTION SECTION TOPICS TOPICS Event Log Types Viewing Event Log Viewing Hindle Health Log Clearing Event Logs Copying Event Logs to SD Memory Card Last modified: 3 August 2023 Copyright HindlePower Inc. 2021 Page 185 of 311... - Page 186 In addition to the logs, there are two (2) controls associated with event logging: • Clearing the event log • Saving the event log to SD memory card. Last modified: 1 August 2023 Copyright HindlePower Inc. 2021 Page 186 of 311...
- Page 187 The log will show the date and time the event occurred, the event name, and the status change that created the event. For more information on the alarms listed in the charger event log, see Section Last modified: 3 August 2023 Copyright HindlePower Inc. 2021 Page 187 of 311...
- Page 188 The most recent event or test stored will appear, but you can scroll through them with the RIGHT/LEFT arrows. The log will show the date and time the event occurred, the event name, and the pass or fail status of the test. Last modified: 3 August 2023 Copyright HindlePower Inc. 2021 Page 188 of 311...
- Page 189 ‘Clear Event Log’ which will clear both the Event Log and the Hindle Health Log. To clear the logs: MENU > EVENT LOGS > ‘Clear event log’ > ‘Yes’ to confirm Last modified: 3 August 2023 Copyright HindlePower Inc. 2021 Page 189 of 311...
- Page 190 MENU > EVENT LOGS > ‘Copy event log to SD Card’. The log files are now stored on SD memory card. If no card is present in ATevo, an error message will appear. Last modified: 3 August 2023 Copyright HindlePower Inc. 2021 Page 190 of 311...
-
Page 191: Atevo Battery Temperature Compensation
ATevo O&SI - 3PH Input (16-1000 Adc) - 1.1_en 10. Battery Temperature Compensation Battery Temperature Compensation SECTION SECTION TOPICS TOPICS ATevo Battery Temperature Compensation Installing the TempCo Option Using the TempCo Option Temperature Compensation Curves Last modified: 1 August 2023 Copyright HindlePower Inc. 2021 Page 191 of 311... - Page 192 The bagged TempCo accessory also contains a separate user Installation & Operating Instructions (p/n JA5015-51). An abbreviated version of that text is listed in the following sections. Last modified: 3 August 2023 Copyright HindlePower Inc. 2021 Page 192 of 311...
- Page 193 • Make sure all wiring conforms to NEC, local, and site requirements 10. Route the interconnection cable to ATevo signal terminal block (TB8) marked ‘BA BAT T T T TEMP TEMP’ as shown in the images below: Copyright HindlePower Inc. 2021 Page 193 of 311...
- Page 194 HindlePower Inc ATevo O&SI - 3PH Input (16-1000 Adc) - 1.1_en Style-5070 Enclosure Style-5070 Enclosure Copyright HindlePower Inc. 2021 Page 194 of 311...
- Page 195 12. At the battery, connect the quick-connect terminals to the TempCo probe (A10). Connection points are not polarity sensitive. 13. Coil up and wire-tie any excess wire to prevent damage. 14. Confirm that: • All connections are secure. Copyright HindlePower Inc. 2021 Page 195 of 311...
- Page 196 ATevo will need to be configured to enable the TempCo probe (A10) and to select the battery type. Refer to Section 4.11 Configuring Battery Settings for both. Last modified: 13 September 2023 Copyright HindlePower Inc. 2021 Page 196 of 311...
- Page 197 • Present battery temperature (in °C) appears in small font to the right of the actual charger voltage. • The charger set point voltage (at 25 °C) appears in small font directly below the present battery temperature. Copyright HindlePower Inc. 2021 Page 197 of 311...
- Page 198 HindlePower Inc ATevo O&SI - 3PH Input (16-1000 Adc) - 1.1_en Last modified: 2 August 2023 Copyright HindlePower Inc. 2021 Page 198 of 311...
- Page 199 97% of the 77 °F voltage. If the float voltage is set on the front panel to 132 Vdc, the actual output voltage will be: 132 × 0.97 = 128 Vdc Last modified: 3 August 2023 Copyright HindlePower Inc. 2021 Page 199 of 311...
-
Page 200: R R Emote Sense Emote Sense
SECTION SECTION TOPICS TOPICS ATevo Remote Voltage Sense Remote Sense Connection Procedure for Wiring Remote Sense Configuring Remote Sense Jumpers Disabling Remote Sense Enabling Remote Sense Compensation Last modified: 2 August 2023 Copyright HindlePower Inc. 2021 Page 200 of 311... - Page 201 This feature is useful when long battery cables, causing resistive voltage-drop, connect ATevo to the battery. All ATevo chargers can be wired to utilize this feature. Last modified: 1 August 2023 Copyright HindlePower Inc. 2021 Page 201 of 311...
- Page 202 ATevo cannot protect against short circuits in remote sense wiring. Install a 1.0A fuse at the battery or dc bus end of each remote sense cable. Last modified: 3 August 2023 Copyright HindlePower Inc. 2021 Page 202 of 311...
- Page 203 • Route other end of twisted pair remote sense wiring to ATevo 3-position REMOTE SENSE terminal block. Style-5070 Style-5070 • Remote Sense terminals are on located on the center-front I/O panel pcb (A9), next to the 2-position BATT TEMP terminal block. Copyright HindlePower Inc. 2021 Page 203 of 311...
- Page 204 ATevo O&SI - 3PH Input (16-1000 Adc) - 1.1_en Style-5030, -163, and -198 Style-5030, -163, and -198 • Remote Sense terminals are on located on the Power Board (A2), next to the 2-position BATT TEMP terminal block. Copyright HindlePower Inc. 2021 Page 204 of 311...
- Page 205 Notes Notes • Maximum current is 150mA. • Run the twisted-pair cable with the sense leads in a dedicated conduit. • Fuse each of the sense wires. Last modified: 13 September 2023 Copyright HindlePower Inc. 2021 Page 205 of 311...
- Page 206 Jumper configuration will have both Remote Sense SHORTING BLOCKs (JP103 and JP104) at the LOCAL SENSE side of the pin headers. SHORTING BLOCKS will be installed on the two (2) pins farthest from the edge of the board. Last modified: 2 August 2023 Copyright HindlePower Inc. 2021 Page 206 of 311...
- Page 207 If Remote Sense is to be disabled for extended periods of time or permanently disabled, it is highly recommended that the sense leads (the twisted pair cable) be disconnected from both the battery and terminal block (A2-TB1). Last modified: 2 August 2023 Copyright HindlePower Inc. 2021 Page 207 of 311...
- Page 208 Sense Enable using UP and DOWN. • Select it with EDIT/ENTER. • Press UP and DOWN to change setting to on • Once desired setting is displayed, press EDIT/ENTER to store it. Last modified: 1 August 2023 Copyright HindlePower Inc. 2021 Page 208 of 311...
-
Page 209: Auxiliary Inputs/Outputs Auxiliary Inputs/Outputs
SECTION TOPICS TOPICS Auxiliary Input/Output (I/O) Board Connections to Auxiliary I/O Board Hardware Configuration Software Configuration for Relays Software Configuration for Binary Inputs Software Configuration for Analog Inputs Last modified: 1 August 2023 Copyright HindlePower Inc. 2021 Page 209 of 311... - Page 210 Main Control Board (A1) and the Auxiliary I/O Board (A4), the relays will switch to the alarm state. For component details of the Auxiliary I/O Board (A4), refer to the appropriate Standard Drawings Binder in Appendix Last modified: 13 September 2023 Copyright HindlePower Inc. 2021 Page 210 of 311...
- Page 211 Each relay is configurable to: • change states based on any alarm condition or status point • be latching or non-latching • switch to active state after a pre-programmed delay Last modified: 3 August 2023 Copyright HindlePower Inc. 2021 Page 211 of 311...
- Page 212 (such as ‘2% Hydrogen’, or ‘Vent Fan Fail’). ATevo will report all activity of the input (status, alarms or log files) by the generic default name or the custom configured name. Last modified: 1 August 2023 Copyright HindlePower Inc. 2021 Page 212 of 311...
- Page 213 Threshold and range values are configurable, and are entered in the primary units (such as °F) based on scaling configuration. Last modified: 1 August 2023 Copyright HindlePower Inc. 2021 Page 213 of 311...
-
Page 214: Wiring Relay Connections
12.2. Connections to Auxiliary I/O Board Connections to Auxiliary I/O Board • System Connections • Wiring Relay Connections • Wiring Binary Input Connections • Wiring Analog Input Connections Last modified: 1 August 2023 Copyright HindlePower Inc. 2021 Page 214 of 311... - Page 215 The Auxiliary I/O Board (A4) plugs into the top of the Power Board (A2). All system connections are factory wired when the Auxiliary I/O option is ordered with the ATevo. Last modified: 1 August 2023 Copyright HindlePower Inc. 2021 Page 215 of 311...
- Page 216 • If user alarm contacts (A4-TB4) are to drive inductive dc loads (e.g. a larger dc relay) an external protective diode must be installed at the dc relay to avoid equipment damage. Refer to Application Note Application Note (JD5011-00). Last modified: 12 September 2023 Copyright HindlePower Inc. 2021 Page 216 of 311...
- Page 217 1. De-energize and lock out all ac and dc voltages to ATevo. 2. Allow internal voltages to dissipate, and check with a voltmeter. 3. Remove safety shield. 4. Route Binary Input wiring to Auxiliary I/O Board (A4) through an unused enclosure knockout. Copyright HindlePower Inc. 2021 Page 217 of 311...
- Page 218 • Binary Inputs are configurable for 12Vdc, 24Vdc, 48Vdc, or 130Vdc. • Terminal block (A4-TB1) is compression type, accepting #22-14 AWG wire. • Correct polarization is required. Last modified: 1 August 2023 Copyright HindlePower Inc. 2021 Page 218 of 311...
- Page 219 • Terminal block is compression type and accepts #22-14 AWG. • All Analog Inputs (AN1, AN2, AN3, AN4) must be referenced to the ATevo negative(-) bus voltage (COM) terminal. Last modified: 1 August 2023 Copyright HindlePower Inc. 2021 Page 219 of 311...
- Page 220 Each Binary Input has an associated input voltage configuration jumper. The configuration jumpers (P3, P4, P6, and P7) are located adjacent to the Binary Input Terminal Block (A4-TB1) on the Auxiliary I/O Board. The voltage jumper for Binary Input #1 is shown below. Copyright HindlePower Inc. 2021 Page 220 of 311...
- Page 221 (12, 24, 48, or 130). Repeat this process for the remaining three (3) Binary Inputs using the associated configuration jumpers for Binary Input #2, #3, and #4. Last modified: 1 August 2023 Copyright HindlePower Inc. 2021 Page 221 of 311...
-
Page 222: Software Configuration For Relays
“A4” board number plus relay number on the associated board. For example: ‘Aux 1 relay 3’ specifies Relay #3 on Auxiliary I/O Board #1. Last modified: 1 August 2023 Copyright HindlePower Inc. 2021 Page 222 of 311... - Page 223 To make changes to parameters for a relay on an Aux I/O Board: MENU > RELAYS > ‘Relay Configuration’ > select relay from options > select parameter (refer to Sections 12.4.2 through 12.4.4) Last modified: 1 August 2023 Copyright HindlePower Inc. 2021 Page 223 of 311...
- Page 224 To change the alarm condition assigned to the relay: MENU > RELAYS > ‘Relay Configuration’ > select relay from options (refer to Section 12.4.1) > ‘Fault:’ > select condition from list Last modified: 1 August 2023 Copyright HindlePower Inc. 2021 Page 224 of 311...
- Page 225 To change the latching control configuration for a relay on the Auxiliary I/O Board: MENU > RELAYS > ‘Relay Configuration’ > select relay from options (refer to Section 12.4.1) > ‘Latching:’ > select from 2 latching options Last modified: 3 August 2023 Copyright HindlePower Inc. 2021 Page 225 of 311...
- Page 226 To change the delay time configuration for a relay on the Auxiliary I/O Board: MENU > RELAYS > ‘Relay Configuration’ > select relay from options (refer to Section 12.4.1) > ‘Delay:’ > set digits as desired Last modified: 1 August 2023 Copyright HindlePower Inc. 2021 Page 226 of 311...
- Page 227 30 seconds . #4 Low AC Supply disabled 30 seconds . #5 Positive Ground Fault disabled 30 seconds . #6 Negative Ground Fault disabled 30 seconds Last modified: 1 August 2023 Copyright HindlePower Inc. 2021 Page 227 of 311...
- Page 228 (see Section 12.3.1), and binary input number on the associated board. For example: ‘Aux 1 input B2’ specifies binary input #2 on Auxiliary I/O Board #1. Last modified: 1 August 2023 Copyright HindlePower Inc. 2021 Page 228 of 311...
-
Page 229: Binary Input Configuration
To make changes to parameters for any binary input on the Auxiliary I/O Board: MENU > AUX INPUTS > ‘Binary Input Configuration’ > select input from options > select parameter (refer to Sections 12.5.2 through 12.5.5) Last modified: 1 August 2023 Copyright HindlePower Inc. 2021 Page 229 of 311... -
Page 230: Binary Input Name Assignment
To change the name of a binary input on the Auxiliary I/O Board: MENU > AUX INPUTS > ‘Binary Input Configuration’ > select input from options (refer to Section 12.5.1) > ‘Name:’ > set characters as desired Last modified: 1 August 2023 Copyright HindlePower Inc. 2021 Page 230 of 311... -
Page 231: Binary Active State Assignment
To change the active state of a binary input on the Auxiliary I/O Board: MENU > AUX INPUTS > ‘Binary Input Configuration’ > select input from options (refer to Section 12.5.1) > ‘Active State’ > select from 2 alarmed states Last modified: 2 August 2023 Copyright HindlePower Inc. 2021 Page 231 of 311... -
Page 232: Binary Input Alarm Enable
To enable or disable the Binary Input Alarm function: MENU > AUX INPUTS > ‘Binary Input Configuration’ > select input from options (refer to Section 12.5.1) > ‘Alarm:’ > select from 2 alarmed states Last modified: 1 August 2023 Copyright HindlePower Inc. 2021 Page 232 of 311... -
Page 233: Binary Input Action Assignment
Midway through 2021, ATevo chargers began shipping with firmware v2.7.0 which includes a new action called “Disable Equalize” which is described further in the Appendix topic, Firmware v2.7.0 Enhancements. Last modified: 3 August 2023 Copyright HindlePower Inc. 2021 Page 233 of 311... - Page 234 State A A ction ction A A ctive State ctive State BI1-1 disabled none high BI1-2 disabled none high BI1-3 disabled none high BI1-4 disabled none high Last modified: 1 August 2023 Copyright HindlePower Inc. 2021 Page 234 of 311...
- Page 235 (see Section 12.3.1), and analog input number on the associated board. For example: ‘Aux 1 input AN2’ specifies analog input #2 on Auxiliary I/O Board #1. Last modified: 1 August 2023 Copyright HindlePower Inc. 2021 Page 235 of 311...
-
Page 236: Analog Input Configuration
To make changes to parameters for any analog input on the Auxiliary I/O Board: MENU > AUX INPUTS > ‘Analog Input Configuration’ > select input > select parameter (refer to Sections 12.6.2 through 12.6.7). Last modified: 1 August 2023 Copyright HindlePower Inc. 2021 Page 236 of 311... -
Page 237: Analog Input Name Assignment
To change the name of an analog input on an Auxiliary I/O Board: MENU > AUX INPUTS > ‘Analog Input Configuration’ > select input (refer to Section 12.6.1) > ‘Name:’ > set characters desired Last modified: 1 August 2023 Copyright HindlePower Inc. 2021 Page 237 of 311... - Page 238 To change the name of the primary measurement unit of an analog input on the Auxiliary I/O Board (A4): MENU > AUX INPUTS > ‘Analog Input Configuration’ > select input (refer to Section 12.6.1) > ‘Units:’ > set desired characters Last modified: 1 August 2023 Copyright HindlePower Inc. 2021 Page 238 of 311...
- Page 239 To change the high scale value assigned to the analog input: ‘10V=:’ > set desired digits This number must represent the primary value when the input value is 10.0 Vdc. If no scaling is required, set 10. Copyright HindlePower Inc. 2021 Page 239 of 311...
- Page 240 HindlePower Inc ATevo O&SI - 3PH Input (16-1000 Adc) - 1.1_en Last modified: 1 August 2023 Copyright HindlePower Inc. 2021 Page 240 of 311...
- Page 241 To assign an alarm trigger to an analog input: MENU > AUX INPUTS > ‘Analog Input Configuration’ > select input (refer to Section 12.6.1) > ‘Trigger:’ > select desired option Last modified: 2 August 2023 Copyright HindlePower Inc. 2021 Page 241 of 311...
- Page 242 ‘Trigger:’ >’High threshold:’ > set digits This number may be in primary values based on the scaling settings for the associated analog input. The threshold set point configured will be scaled by the associated analog input scaling. Copyright HindlePower Inc. 2021 Page 242 of 311...
- Page 243 HindlePower Inc ATevo O&SI - 3PH Input (16-1000 Adc) - 1.1_en Last modified: 1 August 2023 Copyright HindlePower Inc. 2021 Page 243 of 311...
-
Page 244: Analog Input Action Assignment
Midway through 2021, ATevo chargers began shipping with firmware v2.7.0 which includes a new action called “Disable Equalize” which is described further in the Appendix topic, Firmware v2.7.0 Enhancements. Last modified: 3 August 2023 Copyright HindlePower Inc. 2021 Page 244 of 311... - Page 245 A A ction ction AN1-1 V 0.0V 10.0V off none AN1-2 V 0.0V 10.0V off none AN1-3 V 0.0V 10.0V off none AN1-4 V 0.0V 10.0V off none Last modified: 1 August 2023 Copyright HindlePower Inc. 2021 Page 245 of 311...
-
Page 246: Forced Load Sharing - Introduction
Battery Open Alarm for Forced Load Sharing Timed Equalize with Forced Load Sharing Auto-Equalize with Forced Load Sharing Firmware Updates with Forced Load Sharing Troubleshooting Forced Load Sharing ATevos Last modified: 3 August 2023 Copyright HindlePower Inc. 2021 Page 246 of 311... - Page 247 Installation & Operating Instructions (p/n JA5054-50). An abbr abbreviated eviated version of that text is listed in the following sections. Last modified: 2 August 2023 Copyright HindlePower Inc. 2021 Page 247 of 311...
- Page 248 Requirements Requirements • All battery chargers must be ATevo Series. The ATevo forced load sharing feature will not operate with legacy AT10.1 and AT30 Series battery chargers. • All connected chargers must have the same voltage settings, have the same dc output current rating, and have the same version of ATevo Main Control Board (A1) firmware.
- Page 249 The jumpers on the Serial Communications Adapter (A13) must be configured to operate in 2-WIRE RS-485 mode. 2- 2-W W ir ire RS-485 Settings e RS-485 Settings Jumper(s) Jumper(s) Label Label Setting Setting Copyright HindlePower Inc. 2021 Page 249 of 311...
- Page 250 HindlePower Inc ATevo O&SI - 3PH Input (16-1000 Adc) - 1.1_en RXCTRL MEDIA P4, P5 485-TERM OFF P6, P7 #WIRES Last modified: 2 August 2023 Copyright HindlePower Inc. 2021 Page 250 of 311...
- Page 251 Cable Cable W W ir ire e A A T T evo evo-A -A A A T T evo evo-B -B RA(-) RA(-) RB(+) RB(+) GND GND Last modified: 2 August 2023 Copyright HindlePower Inc. 2021 Page 251 of 311...
- Page 252 MENU > COMMUNICATION > Port ‘X’ setup > Charger ID > select (A, B, C, or D) • Typically assign Primary charger as ‘A’ and Secondary chargers as ‘B’, ‘C’, and ‘D’ • Example below shows Secondary charger that’s assigned ID ‘B’. Copyright HindlePower Inc. 2021 Page 252 of 311...
- Page 253 If a port setting was changes, the ATevo will prompt to RESET. Select YES to RESET the ATevo. The new port settings will not become active until after the ATevo is RESET. Last modified: 2 August 2023 Copyright HindlePower Inc. 2021 Page 253 of 311...
- Page 254 In similar manner, the Primary ATevo will show ‘(P)’ with the load- share indicator. • Secondary ATevos display the same charger mode as the Primary controlling them. Last modified: 2 August 2023 Copyright HindlePower Inc. 2021 Page 254 of 311...
- Page 255 ◦ open DC Output Circuit Breaker (CB2) ◦ HLD or HVDC present When the issue is corrected the ATevos resume load sharing and again display the load-share indicator next to charger mode. Last modified: 2 August 2023 Copyright HindlePower Inc. 2021 Page 255 of 311...
- Page 256 1.0 Ampere, and the Primary ATevo itself is supplying at least 0.4 Amperes. While in Virtual Independent mode, the ATevo will display ‘Loadshare Indep. Mode’ on the last line of the display. Last modified: 2 August 2023 Copyright HindlePower Inc. 2021 Page 256 of 311...
- Page 257 • ‘Loadshare Comm Failure’ – displays when an ATevo configured for Forced Load Sharing is not receiving any load share messages • ‘Loadshare Indep Mode’ – indicates virtual independence between Forced Load Sharing ATevos, only reported on the Primary ATevo Last modified: 2 August 2023 Copyright HindlePower Inc. 2021 Page 257 of 311...
- Page 258 The recommended practice for an ATevo Forced Load Sharing application, which uses temperature compensation, is for each ATevo to have a battery temperature probe (A10) and have temperature compensation initiated. Last modified: 2 August 2023 Copyright HindlePower Inc. 2021 Page 258 of 311...
- Page 259 Secondary chargers when a scheduled test runs. It is always possible to manually start a Battery Open Test from a Primary or Secondary when load sharing is active. Last modified: 2 August 2023 Copyright HindlePower Inc. 2021 Page 259 of 311...
- Page 260 Secondary ATevo will continue in equalize mode until the Primary ATevo come back on-line. The Primary ATevo and all Secondary ATevos will switch back to float mode after the Primary ATevo resets. Last modified: 2 August 2023 Copyright HindlePower Inc. 2021 Page 260 of 311...
- Page 261 If desired, Auto-Equalize mode only needs to be configured on the Primary ATevo. Secondary ATevos can also enable Auto-Equalize mode, but it will only matter if the Primary ATevo is offline. Last modified: 2 August 2023 Copyright HindlePower Inc. 2021 Page 261 of 311...
- Page 262 The recommended order to update firmware on ATevos sharing load is to update Secondary chargers first, and Primary chargers last. If a communications issue occurs after the upgrade, reset the Primary ATevo or rerun discover mode on the Primary ATevo. Last modified: 2 August 2023 Copyright HindlePower Inc. 2021 Page 262 of 311...
- Page 263 YELLOW and GREEN LED that light briefly when the ATevo is sending or receiving data respectively. These LEDs can be used to identify the problem source. • Verify the voltage cabilbration of all ATevos connected in Forced Load Sharing. Last modified: 2 August 2023 Copyright HindlePower Inc. 2021 Page 263 of 311...
-
Page 264: Maintenance Maintenance
HindlePower Inc ATevo O&SI - 3PH Input (16-1000 Adc) - 1.1_en 14. Maintenance Maintenance SECTION SECTION TOPICS TOPICS Performing Routine Maintenance Ordering Replacement Parts Replacing Defective Components Last modified: 2 August 2023 Copyright HindlePower Inc. 2021 Page 264 of 311... - Page 265 If you wired ATevo for remote sense, check the signal connections to the battery or load, making sure insulation is in satisfactory condition. If there is a failure of the remote sense signal wiring, ATevo will generate an alarm. Copyright HindlePower Inc. 2021 Page 265 of 311...
- Page 266 If the battery Ampere-hour capacity is at least four (4) times the output current rating of ATevo, the ripple voltage should be no higher than the value featured in the specifications in Appendix A. Last modified: 2 August 2023 Copyright HindlePower Inc. 2021 Page 266 of 311...
- Page 267 HindlePower Inc ATevo O&SI - 3PH Input (16-1000 Adc) - 1.1_en 14.2. 14.2. Ordering Replacement Parts Ordering Replacement Parts All ATevo Series battery chargers ship with a supplemental P P arts Data P arts Data Pack ackage R age Report eport, itemizing all components within the unit.
-
Page 268: Removing Safety Shield
Replacing Eliminator Filter Capacitor (C2) – optional • Replacing Circuit Breakers • Replacing Power Isolation Transformer • Replacing Filter Inductors • Replacing DC Power Supply • Replacing MOV Surge Suppressor Board Last modified: 3 August 2023 Copyright HindlePower Inc. 2021 Page 268 of 311... - Page 269 HindlePower Inc ATevo O&SI - 3PH Input (16-1000 Adc) - 1.1_en 14.3.1. 14.3.1. Removing Safety Shield Removing Safety Shield Refer to Section 2.2 Last modified: 2 August 2023 Copyright HindlePower Inc. 2021 Page 269 of 311...
- Page 270 Test to check dc voltmeter accuracy. If installation’s parameters (float voltage, etc.) are different from ATevo factory preset values, these values will need to be re-entered or restored via SD memory card. Last modified: 2 August 2023 Copyright HindlePower Inc. 2021 Page 270 of 311...
- Page 271 To replace any Serial Communications Adapters (A12 or A13), refer to Section 14.3.2 Replacing the Main Board (A1). The Main Control Board (A1) must be removed to replace a Serial Communications Adapter board. Last modified: 2 August 2023 Copyright HindlePower Inc. 2021 Page 271 of 311...
- Page 272 To replace the Ethernet Communications Adapter (A22). Refer to Section 14.3.2 for Replacing the Main Control Board (A1). The Main Control Board (A1) must be removed to replace the Ethernet Communications Adapter board. Last modified: 2 August 2023 Copyright HindlePower Inc. 2021 Page 272 of 311...
- Page 273 • Install mounting bolts on top and bottom of heat sink extrusion. • Reconnect wires to rectifier and Power Board (A2). • Replace safety shield and close front panel door. • Restart ATevo. Last modified: 13 September 2023 Copyright HindlePower Inc. 2021 Page 273 of 311...
- Page 274 To replace the Power Board (A2), refer to Section 14.3.5 for Replacing Rectifier / Heat Sink Assembly. The Heat Sink Assembly (A6) must be removed in order to replace the Power Board. Last modified: 2 August 2023 Copyright HindlePower Inc. 2021 Page 274 of 311...
- Page 275 Heat Sink Assembly. • Install (4) mounting screws through board and into standoffs. • Replace safety shield, close front panel door. • Restart ATevo. Last modified: 2 August 2023 Copyright HindlePower Inc. 2021 Page 275 of 311...
- Page 276 • Remove the screws attaching the capacitor to connection wires and/or bus bar. • Loosen the screw on the capacitor bracket at the bottom of the capacitor mounting. • Make note of polarization ± of the capacitor screw terminals. • Remove capacitor(s) from bracket(s). Copyright HindlePower Inc. 2021 Page 276 of 311...
- Page 277 • Reconnect the connection wires and/or bus bars in the same location using the capacitor terminal screws. • Replace safety shield, and close front panel door. • Restart ATevo. Last modified: 12 September 2023 Copyright HindlePower Inc. 2021 Page 277 of 311...
- Page 278 For ATevo models rated 75-100 Adc: The C2 filter is mounted next to the C1 filter capacitor(s), and connects to the C1 capacitor with a bus bar. • See also Service Instruction (JD5078-03). Copyright HindlePower Inc. 2021 Page 278 of 311...
- Page 279 HindlePower Inc ATevo O&SI - 3PH Input (16-1000 Adc) - 1.1_en Follow instructions in Section 14.3.8, for replacing both C1 and C2 caps together together. Last modified: 13 September 2023 Copyright HindlePower Inc. 2021 Page 279 of 311...
-
Page 280: Replacing Circuit Breakers (Cb1/Cb2)
• Position new breaker onto breaker bracket and install nuts on back of breaker bracket. • Reconnect wires with same polarity as removed breaker. • Replace safety shield and close front panel door. • Restart ATevo. Last modified: 12 September 2023 Copyright HindlePower Inc. 2021 Page 280 of 311... - Page 281 • Route Y1 and Y2 wires from transformer to terminal block on Power Board (A2). • Install wires into terminal block and tighten screws. • Replace safety shield, and close front panel door. • Restart ATevo. Copyright HindlePower Inc. 2021 Page 281 of 311...
- Page 282 HindlePower Inc ATevo O&SI - 3PH Input (16-1000 Adc) - 1.1_en Last modified: 12 September 2023 Copyright HindlePower Inc. 2021 Page 282 of 311...
-
Page 283: Replacing Dc Power Supply (P/S-A2)
• Gently press the new DC Power Supply Board (P/S-A2) onto Power Board (A2) until it mates. • Replace safety shield, and close the front panel door. • Restart ATevo. Last modified: 12 September 2023 Copyright HindlePower Inc. 2021 Page 283 of 311... - Page 284 • Reinstall three (3) screws through lugs that connect MOV Board (A9) to primary wires, and tighten nuts. • Replace safety shield, and close front panel door. • Restart ATevo. Last modified: 13 September 2023 Copyright HindlePower Inc. 2021 Page 284 of 311...
-
Page 285: Appendices & Drawings Appendices & Drawings
ATevo O&SI - 3PH Input (16-1000 Adc) - 1.1_en 15. Appendices & Drawings Appendices & Drawings APPENDICES APPENDICES Appendix A – Specifications Appendix B – Documentation & Drawings Appendix C – Document Control Information Last modified: 3 August 2023 Copyright HindlePower Inc. 2021 Page 285 of 311... - Page 286 ANSI C37.90.1-1989 no erroneous outputs Capability Reverse Current from ac input power failure (tbd) Battery average for four (4) sides, 5 ft / 1.5m Audible Noise less than 65 dBA from enclosure Copyright HindlePower Inc. 2021 Page 286 of 311...
- Page 287 94.9% 96.2% 250-400 Adc, full load (%) 88.6% 85.7% 94.4% 94.8% 500-600 Adc, full load (%) 84.5% 85.7% 93.8% 800-1000 Adc, full load (%) 88.3% 89.0% 93.5% Last modified: 13 September 2023 Copyright HindlePower Inc. 2021 Page 287 of 311...
-
Page 288: Manuals & Technical Documents
15.2. Appendix B – Documentation & Appendix B – Documentation & Drawings Drawings The manufacturer of ATevo Series Microprocessor-controlled float battery chargers maintains a brand-agnostic web site to support this product. http://www.atseries.net/ATevo/ http://www.atseries.net/ATevo/ It stores in Adobe Acrobat (*.pdf) format, the latest revisions of user documentation, including: •... - Page 289 ATevo Startup Procedure • JD5011-00 AT External Relay Free-Wheeling Diode Application Note • JD5026-53 ATevo 3PH Transformer Re-Tapping • JD5032-00 Ground Fault Detection In The Real World Last modified: 13 September 2023 Copyright HindlePower Inc. 2021 Page 289 of 311...
- Page 290 JH0012-23 (opt) JH0012-23 (opt) JH0012-04 (std) JH0012-04 (std) JH0012-04 (std) 125 A 125 Adc JH0012-24 (opt) JH0012-24 (opt) JH0012-24 (opt) 150 A 150 Adc JH0012-04 (std) JH0012-04 (std) JH0012-04 (std) JH0013-01 (std) Copyright HindlePower Inc. 2021 Page 290 of 311...
-
Page 291: Internal Component Layout Drawings
/ data nameplate detail, enclosure outline, itemized internal component layout, electrical schematic with component ratings, and a full connection diagram. Contact your Sales Representative for drawing availability from the battery charger manufacturer. Last modified: 19 September 2023 Copyright HindlePower Inc. 2021 Page 291 of 311... - Page 292 HindlePower Inc ATevo O&SI - 3PH Input (16-1000 Adc) - 1.1_en 15.2.2.1. 15.2.2.1. Enclosure Outline Drawings Enclosure Outline Drawings standard (http://www.atseries.net/PDFs/JE5251-01.pdf) optional (http://www.atseries.net/PDFs/JE5251-21.pdf) Last modified: 13 September 2023 Copyright HindlePower Inc. 2021 Page 292 of 311...
- Page 293 100A – standard JE5332-10 JE5338-10 16-50A – optional 100A – optional JE5332-19 JE5338-19 75-100A – standard 125-300A – standard JE5332-20 JE5338-20 75-100A – optional 125-300A – optional JE5332-29 JE5338-29 Last modified: 13 September 2023 Copyright HindlePower Inc. 2021 Page 293 of 311...
- Page 294 Portable Document Format (PDF), they are readily available for downloading and printing. If revision levels differ between the drawings embedded in this manual and the full online PDF drawings, refer to document with the higher revision level. For document availability of private- Copyright HindlePower Inc. 2021 Page 294 of 311...
- Page 295 HindlePower Inc ATevo O&SI - 3PH Input (16-1000 Adc) - 1.1_en labeled manuals and/or standard drawings, please contact your sales representative. Last modified: 3 August 2023 Copyright HindlePower Inc. 2021 Page 295 of 311...
-
Page 296: Alarm Triggers
Section 6.5.4 or 6.5.5, depending on the ATevo product you purchased: • Originally supplied with firmware v2.6.6 or earlier • Originally supplied with firmware v2.7.0 or later Last modified: 3 August 2023 Copyright HindlePower Inc. 2021 Page 296 of 311... - Page 297 Alarm” and “Low Priority Alarm” displays are similar. Also new in v2.7.0 is that alarms are listed in alphabetical order. In addition, alarm types that depend on optional hardware are only displayed if Copyright HindlePower Inc. 2021 Page 297 of 311...
- Page 298 Section 6.5.4 or 6.5.5, depending on the ATevo product you purchased: • Originally supplied with firmware v2.6.6 or earlier • Originally supplied with firmware v2.7.0 or later Last modified: 3 August 2023 Copyright HindlePower Inc. 2021 Page 298 of 311...
-
Page 299: Disable Equalize
For more information about how to upgrade firmware, see either Section 6.5.4 or 6.5.5, depending on the ATevo product you purchased: • Originally supplied with firmware v2.6.6 or earlier • Originally supplied with firmware v2.7.0 or later Copyright HindlePower Inc. 2021 Page 299 of 311... - Page 300 HindlePower Inc ATevo O&SI - 3PH Input (16-1000 Adc) - 1.1_en Last modified: 3 August 2023 Copyright HindlePower Inc. 2021 Page 300 of 311...
-
Page 301: Menu Changes
Section 6.5.4 or 6.5.5, depending on the ATevo product you purchased: • Originally supplied with firmware v2.6.6 or earlier • Originally supplied with firmware v2.7.0 or later Last modified: 3 August 2023 Copyright HindlePower Inc. 2021 Page 301 of 311... -
Page 302: Safety Instructions Safety Instructions
Safety Instructions to avoid equipment damage, serious injury, or accidental death. accidental death. SECTION SECTION TOPICS TOPICS Safety Symbols Equipment Misuse DANGER WARNING CAUTION Last modified: 10 May 2023 Copyright HindlePower Inc. 2021 Page 302 of 311... - Page 303 SERVICING IS TO BE DONE ONLY BY QUALIFIED SERVICE PERSONNEL. Allow at least 3 minutes for internal components to discharge to a safe level after performing lockout tagout to prevent exposure to DANGEROUS HIGH VOLTAGE. Copyright HindlePower Inc. 2021 Page 303 of 311...
- Page 304 Never smoke, use an open flame, or create arcs in the vicinity of the ATevo or the battery. Do not operate equipment without all guards and/or covers in place. Last modified: 10 May 2023 Copyright HindlePower Inc. 2021 Page 304 of 311...
- Page 305 Do not operate this equipment without all guards and covers in place. Do not operate this equipment from any power source that does not match voltage rating stamped on equipment. Refer to Manufacturer’s Identification Label for operational requirements. Last modified: 10 May 2023 Copyright HindlePower Inc. 2021 Page 305 of 311...
- Page 306 During normal operation, batteries may produce EXPLOSIVE GAS! Never smoke, use an open flame, or create arcs in the vicinity of ATevo, or the battery. Last modified: 10 May 2023 Copyright HindlePower Inc. 2021 Page 306 of 311...
- Page 307 Turn OFF ATevo before connecting or disconnecting the battery to avoid electrical shock hazards, arcing, burning, and/or equipment damage. De-energize and lock out all ac and dc power sources to ATevo before servicing. Copyright HindlePower Inc. 2021 Page 307 of 311...
- Page 308 ATevo O&SI - 3PH Input (16-1000 Adc) - 1.1_en Do not disassemble ATevo. Only qualified service personnel should attempt repairs. Incorrect reassembly could result in explosion, electrical shock or fire. Last modified: 10 May 2023 Copyright HindlePower Inc. 2021 Page 308 of 311...
- Page 309 Maintain at least 6in / 152mm of free air on all vented surfaces for cooling. Allow sufficient clearance to open the front panel for servicing. This manual contains important safety and operating instructions, and therefore should be filed for easy access. Last modified: 10 May 2023 Copyright HindlePower Inc. 2021 Page 309 of 311...
- Page 310 All costs related to removal, reinstallation and transportation will be paid by the purchaser/ customer and/or operator of the product. Evaluation, repair and/or replacement of any defective part(s) are FOB manufacturer’s factory. Copyright HindlePower Inc. 2021 Page 310 of 311...
-
Page 311: W W Ar Arranty Ranty
& pricing regarding returns or warranty claims. Returns that do not follow this procedure will not be honored. Election to any of the above offered extended warranties must be done within the terms of the initial standard warranty. Last modified: 10 May 2023 Copyright HindlePower Inc. 2021 Page 311 of 311...
Need help?
Do you have a question about the Atevo Series and is the answer not in the manual?
Questions and answers