Table of Contents
Advertisement
Quick Links
Advertisement
Table of Contents
Troubleshooting

Related Manuals for Xerox WorkCentre series


Summary of Contents for Xerox WorkCentre series
-
Page 1: User Guide
Version 0.2 DRAFT March 2014 ® ® Xerox WorkCentre xxxx User Guide ... - Page 2 ® ® ©2014 Xerox Corporation. All rights reserved. Xerox and Xerox and Design trademarks of Xerox Corporation in the United States and/or other countries. Version 0.2 DRAFT March 2014...
-
Page 3: Table Of Contents
® Contents WorkCentre XXXX Contents Safety and Regulations Notices and Safety ..............11 Safety Labels and Symbols . - Page 4 ® Contents WorkCentre XXXX Power On and Off ..............37 Powering the Device On .
- Page 5 ® Contents WorkCentre XXXX Output Format ..............107 Making Copies into a Booklet .
- Page 6 Remote Scan ..............294 Scanning an image using the Xerox TWAIN Scan Driver ..... . . 294 Accessing the TWAIN Scan Driver Help Pages .
- Page 7 ® Contents WorkCentre XXXX Saving an E-mail address as a Favorite........516 Setting the Output Color for an E-mail Attachment .
- Page 8 ® Contents WorkCentre XXXX Changing the paper tray settings..........645 Loading Tray 2 and Changing the Tray Settings .
- Page 9 ® Contents WorkCentre XXXX Avoiding Poor Quality Output ..........684 Understanding Faults.
- Page 10 ® Contents WorkCentre XXXX User Guide...
-
Page 11: Safety And Regulations
Please read the following instructions carefully before operating the device. Refer to them as needed to ensure the continued safe operation of your device. Your Xerox device and supplies have been designed and tested to meet strict safety requirements. These include safety agency evaluation and certification, and compliance with electromagnetic regulations and established environmental standards. -
Page 12: Electrical Supply
® Safety and Regulations WorkCentre XXXX Electrical Supply This document provides important electrical supply safety information that you should read before installing or using the device. Read the information in the following sections: • Power Outlet Electrical Safety • Power Cord Electrical Safety •... -
Page 13: Emergency Power Off
Always locate the device in an area that has adequate ventilation and room for servicing. Note: Your Xerox device is equipped with an energy saving function to conserve power when the device is not in use. The device may be left on continuously. -
Page 14: Maintenance Information
® Safety and Regulations WorkCentre XXXX Disconnect Device The power cable is the disconnect device for this device. It is attached to the back of the machine as a plug-in device. To remove all electrical power from the device, disconnect the power cable from the electrical outlet. -
Page 15: Basic Regulations
Connect the device into an outlet on a circuit different from that to which the receiver is connected. • Consult the dealer or an experienced radio/television technician for help. Any changes or modifications not expressly approved by Xerox could void the user's authority to operate the device. User Guide... -
Page 16: Canada (Regulations)
To ensure compliance with European Union regulations, use shielded interface cables. A signed copy of the Declaration of Conformity for this device can be obtained from Xerox. European Union Lot 4 Imaging Equipment Agreement Environmental Information... -
Page 17: Turkey Rohs Regulation
Some Xerox models below these speed bands may also be enabled with 2-sided printing settings defaulted on at the time of install. Continuing to use the duplex function will reduce the environmental impact of your work. -
Page 18: Copy Regulations
® Safety and Regulations WorkCentre XXXX Copy Regulations United States Congress, by statute, has forbidden the reproduction of the following subjects under certain circumstances. Penalties of fine or imprisonment may be imposed on those guilty of making such reproductions. 1. Obligations or Securities of the United States Government, such as: •... -
Page 19: Canada
® Safety and Regulations WorkCentre XXXX • Earnings or Income • Court Record • Physical or mental condition • Dependency Status • Previous military service Exception: United States military discharge certificates may be photographed. 10. Badges, Identification Cards, Passes, or Insignia carried by military personnel, or by members of the various Federal Departments, such as FBI, Treasure, etc. -
Page 20: Other Countries
® Safety and Regulations WorkCentre XXXX Other Countries Copying certain documents may be illegal in your country. Penalties of fine or imprisonment may be imposed on those found guilty of making such reproductions: • Currency notes • Bank notes and cheques •... -
Page 21: Canada
If this Xerox device causes harm to the telephone network, the Telephone Company will notify you in advance that temporary discontinuance of service may be required. But if advance notice is not practical, the Telephone Company will notify the customer as soon as possible. -
Page 22: Europe
Malta, Netherlands, Poland, Portugal, Romania, Slovakia, Slovenia, Spain, Sweden, United Kingdom, Iceland, Liechtenstein, Norway. In the event of problems, you should contact your local Xerox representative in the first instance.This product has been tested to and is compliant with TBR21 OR ES 103 021-1/2/3 or ES 203 021-1/2/3, technical specifications for terminal equipment for use on analogue-switched telephone networks in the European Economic Area.The product may be configured to be... -
Page 23: New Zealand
® Safety and Regulations WorkCentre XXXX New Zealand The grant of a Telepermit for any item of terminal equipment indicates only that Telecom has accepted that the item complies with minimum conditions for connection to its network. It indicates no endorsement of the product by Telecom, it does not provide any sort of warranty, and it does not imply that any Telepermitted product is compatible with all Telecom network services. -
Page 24: Product Recycling And Disposal
If you are managing the disposal of your Xerox device, please note that the device may contain lead, mercury, perchlorate, and other materials whose disposal may be regulated due to environmental considerations. The presence of these materials is fully consistent with global regulations applicable at the time that the device was placed on the market. -
Page 25: Canada
Power Save Mode, please consider that this device may then only switch to a lower energy level after a longer period of time or not at all.To learn more about Xerox’s participation in sustainability initiatives, please visit our site at: http://www.xerox.com/about-xerox/environment/enus.html... -
Page 26: Germany
Environment, Health and Safety Contact Information For more information on Environment, Health, and Safety in relation to this Xerox device and supplies, please contact the customer help line for your area. Device safety information is also available on the Xerox website www.xerox.com/about-xerox/... - Page 27 ® Safety and Regulations WorkCentre XXXX Canada: For Environment, Health, and Safety information call 1-800 ASK-XEROX Europe: For Environment, Health, and Safety information call +44 1707 353 434 User Guide...
- Page 28 ® Safety and Regulations WorkCentre XXXX User Guide...
-
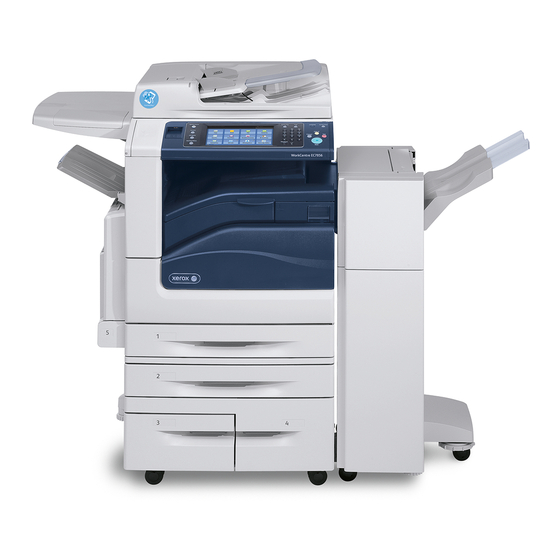
Page 29: Getting Started
There are several configurations available which provide either 45 or 55 copies or prints a minute. All configurations are fully upgradable so as to meet any future requirements you may have. Please contact your local Xerox representative for further information. 1. Document Feeder and Document Glass: Used for scanning single or multiple documents. -
Page 30: Locating The Serial Number For Your Device
If you require further assistance, call our experts at the Xerox Support Center, or contact your local representative. When telephoning please quote the machine serial number. The Xerox Support Center or local representative telephone number is provided when the device is installed. -
Page 31: Services And Options
® Getting Started WorkCentre XXXX 1. Lift the handle to open the door on the left side of the device. Gently lower the door until it comes to rest at a 45° angle from the device. 2. The serial number is located at the very top of the area exposed when the door opens. Services and Options Identifying the WorkCentre 5945 Standard and Optional Services There are a number of services and options available for use with your device. - Page 32 ® Getting Started WorkCentre XXXX Optional • Envelope Tray this tray is fitted instead of paper tray 2 to enable envelope printing. Up to 55 #10 Envelope s (4.1"x 9.5") can be loaded in the tray. • Paper Tray Lock Kit locks the trays so that paper cannot be removed, this is a useful feature in libraries.
-
Page 33: Identifying The Workcentre 5955 Standard And Optional Services
Unicode International Printing Kit enables unicode characters to be printed. Wireless Print Kit enables connection to a wireless network. • Xerox Secure Access provides a card reading device to restrict access to the device. • • Network Accounting enables the tracking of device usage for Print, Copy and Scan jobs from multiple devices over the network. - Page 34 ® Getting Started WorkCentre XXXX Optional • Envelope Tray this tray is fitted instead of paper tray 2 to enable envelope printing. Up to 55 #10 Envelope s (4.1"x 9.5") can be loaded in the tray. • Paper Tray Lock Kit locks the trays so that paper cannot be removed, this is a useful feature in libraries.
-
Page 35: Describing The Finishing Devices
Unicode International Printing Kit enables unicode characters to be printed. Wireless Print Kit enables connection to a wireless network. • Xerox Secure Access provides a card reading device to restrict access to the device. • • Network Accounting enables the tracking of device usage for Print, Copy and Scan jobs from multiple devices over the network. -
Page 36: Identifying The Control Panel Buttons
® Getting Started WorkCentre XXXX Identifying the Control Panel Buttons 1. Services Home: Provides access to the services available on the device. 2. Services: Returns the display to the previous Copy, Fax, or Scan feature screen when the Job Status screen or Machine Status screen is displayed. 3. -
Page 37: Power On And Off
® Getting Started WorkCentre XXXX Power On and Off Powering the Device On 1. Ensure that your device is connected to a suitable power supply and that the power cord is fully plugged in to the electrical outlet of the device. 2. -
Page 38: Using The Energy Saver Option
® Getting Started WorkCentre XXXX More Information Using the Energy Saver Option Using the Energy Saver Option Energy Saver ends the current session and keeps the device running on low power. When in Energy Saver Mode, press the Power button to wake up the device. 1. -
Page 39: Making Copies
® Getting Started WorkCentre XXXX 1. Load your documents face up in the document feeder input tray. Adjust the guide to just touch the documents. Lift up the document feeder. Place the document face down onto the document glass and register it to the arrow at the top left corner. -
Page 40: Print
Printing a Document using the PostScript Print Driver You can print to the device from your computer through a print driver. There are a variety of Xerox print drivers available for the device to support all the popular operating systems. The Xerox print drivers allow you to use the specific features available on your device. - Page 41 In addition to the drivers designed specifically for your device, you can also use the Xerox Global Print Driver or the Xerox Mobile Express Driver. These drivers will not give you access to all the features available with the device specific drivers.
-
Page 42: Printing A Document Using The Pcl Print Driver
Printing a Document using the PCL Print Driver You can print to the device from your computer through a print driver. There are a variety of Xerox print drivers available for the device to support all the popular operating systems. The Xerox print drivers allow you to use the specific features available on your device. - Page 43 3. Select the Xerox PCL driver from the list of print drivers available. 4. Open the print driver Properties window - the method will vary depending on the application you are printing from.
-
Page 44: Printing A Document Using The Mac Print Driver
WorkCentre XXXX Printing a Document using the Mac Print Driver You can print to the device from your computer through a print driver. The Xerox Mac print driver allows you to use the specific features available on your device. Note: The device is enabled for AirPrint. -
Page 45: Printing A Document Using The Xps Print Driver
Printing a Document using the XPS Print Driver You can print to the device from your computer through a print driver. There are a variety of Xerox print drivers available for the device to support all the popular operating systems. The Xerox print drivers allow you to use the specific features available on your device. - Page 46 3. Select the Xerox XPS driver from the list of print drivers available. 4. Open the print driver Properties window - the method will vary depending on the application you are printing from.
-
Page 47: Fax
® Getting Started WorkCentre XXXX Explaining the Fax Options There are three Fax services which can be installed or enabled on your device, Fax (Embedded Fax), Internet Fax and Server Fax. If the Fax (Embedded Fax) service is installed, your device is connected directly to a telephone line and therefore gives you direct control over your fax transmissions. - Page 48 Using a User ID to Log In at the Device Explaining the Fax Options Using Internet Services to find System Administrator Contact Details System Administrator Guide www.xerox.com/support. Using Dialing Characters in a Fax number (Embedded Fax) Sending an Internet Fax Internet Fax is similar to the E-mail feature in that it sends documents across the internet or intranet using e-mail addresses.
- Page 49 More Information Using the Internet Fax Address Book Using a User ID to Log In at the Device Sending an E-mail Explaining the Fax Options Using Internet Services to find System Administrator Contact Details System Administrator Guide www.xerox.com/support. User Guide...
- Page 50 More Information Using Dialing Characters in a Fax Number (Server Fax) Using a User ID to Log In at the Device Explaining the Fax Options Using Internet Services to find System Administrator Contact Details System Administrator Guide www.xerox.com/support. User Guide...
-
Page 51: Faxing From Your Computer
Sending a Fax using the PostScript Print Driver You can print to the device from your computer through a print driver. There are a variety of Xerox print drivers available for the device to support all the popular operating systems. The Xerox print drivers allow you to use the specific features available on your device. - Page 52 ® Getting Started WorkCentre XXXX Note: The recipient’s details are saved on your computer’s hard drive, in your personal address book. • Click the OK button. • Click the Add From Phonebook button to add a recipient stored in the address book. •...
- Page 53 Sending a Fax using the PCL Print Driver You can print to the device from your computer through a print driver. There are a variety of Xerox print drivers available for the device to support all the popular operating systems. The Xerox print drivers allow you to use the specific features available on your device.
- Page 54 (if you include a cover sheet generated by the print driver). 3. Select the Xerox PCL driver from the list of print drivers available. 4. Open the print driver Properties window - the method will vary depending on the application you are printing from.
- Page 55 ® Getting Started WorkCentre XXXX LDAP Phonebook contains contacts listed in your LDAP (Lightweight Directory Access Protocol) address book. LDAP address books are usually maintained by IT teams as they are often used as company address books and for network authentication and authorization.
- Page 56 Sending a Fax using the Mac Print Driver You can print to the device from your computer through a print driver. There are a variety of Xerox print drivers available for the device to support all the popular operating systems. The Xerox print drivers allow you to use the specific features available on your device.
- Page 57 3. Select the Xerox driver from the list of print drivers available. 4. Select Xerox Features from the print driver properties menu - the name of the menu will vary depending on the application you are printing from. From most applications select the dropdown menu that states Copies and Pages, or that states the application name.
- Page 58 If required, click the OK button to confirm. More Information Printing a Document using the Mac Print Driver Using the Job Type Feature with the PostScript Print Driver System Administrator Guide www.xerox.com/support. Using Internet Services to find System Administrator Contact Details User Guide...
- Page 59 Sending a Fax using the XPS Print Driver You can print to the device from your computer through a print driver. There are a variety of Xerox print drivers available for the device to support all the popular operating systems. The Xerox print drivers allow you to use the specific features available on your device.
- Page 60 ® Getting Started WorkCentre XXXX Click the OK button. • • Click the Add From Phonebook button to add a recipient stored in the address book. • Select the option required. Personal Phonebook displays contacts you have added to the phonebook using your print driver.
- Page 61 More Information Printing a Document using the XPS Print Driver Using the Job Type Feature with the XPS Print Driver System Administrator Guide www.xerox.com/support. Using Internet Services to find System Administrator Contact Details Using Workflow Scanning Workflow Scanning converts hard copy documents into electronic images and saves them into network filing destinations (repositories).
-
Page 62: Using Workflow Scanning
Scanning a Document to your Computer or Network using Single-Touch Scan Creating a New Template in Internet Services Using Internet Services to find System Administrator Contact Details System Administrator Guide www.xerox.com/support. Assigning Descriptive Data to a Workflow Scanning Job Sending an E-mail Use the E-mail feature to scan images and send them to a recipient as an attachment to an e-mail. - Page 63 ® Getting Started WorkCentre XXXX If Authentication or Accounting has been enabled on your device you may have to enter login details to access the E-mail features. 1. Load your documents face up in the document feeder input tray. Adjust the guide to just touch the documents.
-
Page 64: Saved Jobs
Saving Jobs using the PostScript Print Driver You can print to the device from your computer through a print driver. There are a variety of Xerox print drivers available for the device to support all the popular operating systems. The Xerox print drivers allow you to use the specific features available on your device. - Page 65 Saving Jobs using the PCL Print Driver You can print to the device from your computer through a print driver. There are a variety of Xerox print drivers available for the device to support all the popular operating systems. The Xerox print drivers allow you to use the specific features available on your device.
- Page 66 Saving Jobs using the Mac Print Driver You can print to the device from your computer through a print driver. There are a variety of Xerox print drivers available for the device to support all the popular operating systems. The Xerox print drivers allow you to use the specific features available on your device.
- Page 67 3. Select the Xerox driver from the list of print drivers available. 4. Select Xerox Features from the print driver properties menu - the name of the menu will vary depending on the application you are printing from. From most applications select the dropdown menu that states Copies and Pages, or that states the application name.
- Page 68 Saving Jobs using the XPS Print Driver You can print to the device from your computer through a print driver. There are a variety of Xerox print drivers available for the device to support all the popular operating systems. The Xerox print drivers allow you to use the specific features available on your device.
-
Page 69: Printing Saved Jobs
Printing a Saved Job using the Print From Feature Printing Saved Jobs from Internet Services Creating a New Folder for Saved Jobs in Internet Services System Administrator Guide www.xerox.com/support. Using Internet Services to find System Administrator Contact Details Printing Saved Jobs Printing a Saved Job using the Print From Feature The Print From feature prints jobs which have been saved on the device or on a USB stick. - Page 70 Printing Saved Jobs from Internet Services Using the Job Type Feature with the PostScript Print Driver Using a User ID to Log In at the Device System Administrator Guide www.xerox.com/support. Using Internet Services to find System Administrator Contact Details Printing Saved Jobs from Internet Services Internet Services uses the embedded web server on the device.
-
Page 71: Enhancing Productivity
Saving Jobs using the PostScript Print Driver Printing a Saved Job using the Print From Feature Using Internet Services to find System Administrator Contact Details System Administrator Guide www.xerox.com/support. Viewing Active Jobs using the Job Status Menu Logging in to Internet Services... -
Page 72: Maintenance And Consumables
More Information Viewing the Progress and Details of a Job using the Job Status Menu Using Internet Services to find System Administrator Contact Details System Administrator Guide www.xerox.com/support. Maintenance and Consumables Identifying the Replaceable Units There are several consumables on the device that need replenishing or replacing, such as paper, staples, and customer replaceable units. -
Page 73: Cleaning The Document Glass And Constant Velocity Transport Glass
2. Wipe away any residue with a clean cloth or paper towel. 3. Use a lint-free cloth, lightly dampened with water, Xerox cleaning fluid or Xerox film remover to clean the under side of the document cover or document feeder and the complete circumference of the Constant Velocity Transport roll. -
Page 74: Help
If Accounting has been enabled you may have to enter login details at the print driver before you can send your job. Use the help button to open the Xerox online help. You will need to be connected to the internet to use this help feature. -
Page 75: Accessing The Help Features On The Device
If Accounting has been enabled you may have to enter login details at the print driver before you can send your job. Use the help button to open the Xerox online help. You will need to be connected to the internet to use this help feature. -
Page 76: Accessing The Pcl Print Driver Help
WorkCentre XXXX Use the help button to open the Xerox online help. You will need to be connected to the internet to use this help feature. 1. Open the document to be printed. From most applications select File, then select Print from the file menu. -
Page 77: Using The Internet Services Help Feature
For any additional help visit our customer web site at www.xerox.com or contact the Xerox Support Center quoting the machine serial number. The Xerox Support Center will want to know the nature of the problem, the machine serial number, the fault code (if any) plus the name and location of your company. - Page 78 ® Getting Started WorkCentre XXXX User Guide...
-
Page 79: Copy
Copy Making Copies When you press the Start button to make a copy, the device scans your originals and temporarily stores the images. It then prints the images based on the selections made. If Authentication or Accounting has been enabled on your device you may have to enter login details to access the Copy features. -
Page 80: Copy Options
® Copy WorkCentre XXXX Copy Options Reduce or Enlarge Reducing or Enlarging Copies When you press the Start button to make a copy, the device scans your originals and temporarily stores the images. It then prints the images based on the selections made. If Authentication or Accounting has been enabled on your device you may have to enter login details to access the Copy features. - Page 81 ® Copy WorkCentre XXXX 6. Select the Reduce / Enlarge option required. • Use the + and - buttons to set the exact reduce / enlarge % (or use the numeric keypad to type in the ratio required). 100 % will keep your output image the same size as your original. This option is useful if •...
- Page 82 ® Copy WorkCentre XXXX 4. Select the Copy button on the touch screen. 5. If required, select the Copy tab. This is usually the active tab when the Copy service opens. 6. Select the More... button at the bottom of the Reduce / Enlarge section to access the Reduce / Enlarge options not listed on the main page.
- Page 83 ® Copy WorkCentre XXXX The Independent X-Y% selection enables you to set different reduction or enlargement ratios for the X (width) and the Y (length) of the image. This will produce a distorted copy of your original. 1. Load your documents face up in the document feeder input tray. Adjust the guide to just touch the documents.
-
Page 84: Setting The Paper Supply For Copies
® Copy WorkCentre XXXX Viewing the Progress and Details of a Job using the Job Status Menu Setting the Paper Supply for Copies Setting the Paper Supply for Copies When you press the Start button to make a copy, the device scans your originals and temporarily stores the images. -
Page 85: Making 2 Sided Copies Or Copying 2 Sided Originals
® Copy WorkCentre XXXX 12. If your job remains held in the Active Jobs list, the device needs you to supply additional resources, such as paper or staples before it can complete the job. To find out what resources are needed, select the job and then select the Details button. Once the resources are available the job will print. -
Page 86: Copy Output
® Copy WorkCentre XXXX 11. If your job remains held in the Active Jobs list, the device needs you to supply additional resources, such as paper or staples before it can complete the job. To find out what resources are needed, select the job and then select the Details button. Once the resources are available the job will print. -
Page 87: Collating Copies
® Copy WorkCentre XXXX 4. Select the Copy button on the touch screen. 5. If required, select the Copy tab. This is usually the active tab when the Copy service opens. 6. If required, select the More... button at the bottom of the Copy Output section to access all the finishing options. -
Page 88: Stapling Copies
® Copy WorkCentre XXXX Use the collation options to sort your copies into sets (1,2,3 1,2,3 1,2,3) or stacks (1,1,1 2,2,2 3,3,3). 1. Load your documents face up in the document feeder input tray. Adjust the guide to just touch the documents. - Page 89 ® Copy WorkCentre XXXX Use the stapling options to staple your document. The options available are dependent on the finishing device installed. The basic stapling options are Off, 1 Staple, 2 Staples and Multi-Staple. 1. Load your documents face up in the document feeder input tray. Adjust the guide to just touch the documents.
- Page 90 ® Copy WorkCentre XXXX Hole Punching Copies When you press the Start button to make a copy, the device scans your originals and temporarily stores the images. It then prints the images based on the selections made. If Authentication or Accounting has been enabled on your device you may have to enter login details to access the Copy features.
- Page 91 ® Copy WorkCentre XXXX 14. Press the Job Status button on the device control panel to view the job list and check the status of the job. 15. If your job remains held in the Active Jobs list, the device needs you to supply additional resources, such as paper or staples before it can complete the job.
-
Page 92: Image Quality
® Copy WorkCentre XXXX Folded & Stapled will staple and fold the output along the center margin to produce • stapled booklets. • Fold Only will fold the output along the center margin to produce loose leaf booklets. • None select this option if you do not want the device to fold and staple your output. 10. - Page 93 ® Copy WorkCentre XXXX If Authentication or Accounting has been enabled on your device you may have to enter login details to access the Copy features. Use the Original Type options to enhance the quality of your output based on the type of original images and how they were produced.
-
Page 94: Image Options
® Copy WorkCentre XXXX More Information Using a User ID to Log In at the Device Viewing the Progress and Details of a Job using the Job Status Menu Image Options Choosing the Image Options for Copies When you press the Start button to make a copy, the device scans your originals and temporarily stores the images. -
Page 95: Lightening Or Darkening Copies
® Copy WorkCentre XXXX Viewing the Progress and Details of a Job using the Job Status Menu Lightening or Darkening Copies Lightening or Darkening Copies When you press the Start button to make a copy, the device scans your originals and temporarily stores the images. - Page 96 ® Copy WorkCentre XXXX Changing the Sharpness of Copies When you press the Start button to make a copy, the device scans your originals and temporarily stores the images. It then prints the images based on the selections made. If Authentication or Accounting has been enabled on your device you may have to enter login details to access the Copy features.
-
Page 97: Image Enhancement
® Copy WorkCentre XXXX Image Enhancement Choosing an Image Enhancement Option for Copies When you press the Start button to make a copy, the device scans your originals and temporarily stores the images. It then prints the images based on the selections made. If Authentication or Accounting has been enabled on your device you may have to enter login details to access the Copy features. - Page 98 ® Copy WorkCentre XXXX Setting the Background Suppression for Copies When you press the Start button to make a copy, the device scans your originals and temporarily stores the images. It then prints the images based on the selections made. If Authentication or Accounting has been enabled on your device you may have to enter login details to access the Copy features.
- Page 99 ® Copy WorkCentre XXXX Setting the Copy Contrast When you press the Start button to make a copy, the device scans your originals and temporarily stores the images. It then prints the images based on the selections made. If Authentication or Accounting has been enabled on your device you may have to enter login details to access the Copy features.
-
Page 100: Layout Adjustment
® Copy WorkCentre XXXX Layout Adjustment Setting the Original Orientation for Copies When you press the Start button to make a copy, the device scans your originals and temporarily stores the images. It then prints the images based on the selections made. If Authentication or Accounting has been enabled on your device you may have to enter login details to access the Copy features. -
Page 101: Specifying The Size Of The Original To Be Copied
® Copy WorkCentre XXXX More Information Using a User ID to Log In at the Device Viewing the Progress and Details of a Job using the Job Status Menu Specifying the Size of the Original to be Copied When you press the Start button to make a copy, the device scans your originals and temporarily stores the images. -
Page 102: Copying Book Pages
® Copy WorkCentre XXXX More Information Using a User ID to Log In at the Device Viewing the Progress and Details of a Job using the Job Status Menu Copying Book Pages When you press the Start button to make a copy, the device scans your originals and temporarily stores the images. -
Page 103: Using The Image Shift Feature To Reposition The Copy Image
® Copy WorkCentre XXXX Off applies no binding edge erase to the output. • • Both Pages scans both pages, the left page of the book will be scanned first. Use the arrow buttons to specify an amount from 0 to 50mm (0 to 2”) to be deleted from the center of the book image. -
Page 104: Erasing Edges From Copies
® Copy WorkCentre XXXX 7. Select the Image Shift option required. • Off removes any previous Image Shift settings. This option is useful if you are programming a complex job and want to cancel any image shift settings without cancelling other settings you have made. •... - Page 105 ® Copy WorkCentre XXXX Use the Edge Erase options to specify the scan area so that only a specific section of your document is scanned. This is useful if you want to remove the marks caused by punched holes or staples in your original.
-
Page 106: Creating Copies With An Inverted Image
® Copy WorkCentre XXXX Check the Mirror Side 1 entry checkbox to reverse the side 1 settings on side 2. Depending on • the page orientation the left and right or top and bottom settings will be reversed. 8. Select the OK button. 9. -
Page 107: Output Format
® Copy WorkCentre XXXX 9. Select the OK button. 10. Enter the number of prints required using the numeric keypad on the control panel. 11. Press the Start button on the control panel to scan the original. 12. Remove the original from the document feeder or document glass when scanning has completed. -
Page 108: Special Pages
® Copy WorkCentre XXXX • 1-Sided Originals • 2-Sided Originals 9. Set the Paper Supply required for the job. If stapling and / or folding is required a Short Edge Feed (SEF) paper supply must be selected. Note: SEF is Short Edge Feed (where the short edge of the paper is the leading edge when the paper is fed into the device). - Page 109 ® Copy WorkCentre XXXX Use the Inserts option to add blank pages on a different media into your document, or to specify pages to be printed on a different media. Up to two sources of media can be used for the inserts. If inserting blank pages, a blank sheet must be inserted in the appropriate place in your original document.
- Page 110 ® Copy WorkCentre XXXX Adding Covers to Copies When you press the Start button to make a copy, the device scans your originals and temporarily stores the images. It then prints the images based on the selections made. If Authentication or Accounting has been enabled on your device you may have to enter login details to access the Copy features.
- Page 111 ® Copy WorkCentre XXXX 14. Select the Paper Supply required for the selected covers. If required, select the More... button to access options not listed on the main page. 15. Select the OK button. 16. Select the OK button. 17. Enter the number of prints required using the numeric keypad on the control panel. 18.
- Page 112 ® Copy WorkCentre XXXX 7. Select the Output Format tab. 8. Select the Special Pages button. 9. Select the Chapter Starts... button. 10. Select the Page Number entry box and use the numeric keypad to enter the page number of the original where you want a chapter to start.
- Page 113 ® Copy WorkCentre XXXX 4. Select the Copy button on the touch screen. 5. If required, select the Copy tab. This is usually the active tab when the Copy service opens. Note: This feature is not available until a specific paper tray has been selected. It is not available if the paper Auto Select option is active.
- Page 114 ® Copy WorkCentre XXXX Loading the Bypass Tray and Changing the Tray Settings Loading Different Types of Media Selecting Exceptions within Copy Sets When you press the Start button to make a copy, the device scans your originals and temporarily stores the images.
-
Page 115: Annotations
® Copy WorkCentre XXXX 20. Remove the original from the document feeder or document glass when scanning has completed. The job enters the job list ready for processing. More Information Using a User ID to Log In at the Device Viewing the Progress and Details of a Job using the Job Status Menu Annotations Choosing Copy Annotation Options... - Page 116 ® Copy WorkCentre XXXX 3. Press the Services Home button. 4. Select the Copy button on the touch screen. 5. Select the Output Format tab. 6. Select the Annotations button. 7. Select the Annotations option(s) required. More than one option can be selected, but a different location must be selected for each option.
- Page 117 ® Copy WorkCentre XXXX 3. Press the Services Home button. 4. Select the Copy button on the touch screen. 5. Select the Output Format tab. 6. Select the Annotations button. 7. Select the Page Numbers button. 8. Select the On button to apply page numbers to your output. •...
- Page 118 ® Copy WorkCentre XXXX More Information Using a User ID to Log In at the Device Viewing the Progress and Details of a Job using the Job Status Menu Adding Comments to Copies When you press the Start button to make a copy, the device scans your originals and temporarily stores the images.
- Page 119 ® Copy WorkCentre XXXX 16. Select the Side 2 Option required. • Same as Side 1 applies the same settings to both Side 1 and Side 2 of your output. • Mirror Side 1 Flip on Horizontal output will open from right to left like a book, with the binding edge on the left.
- Page 120 ® Copy WorkCentre XXXX 5. Select the Output Format tab. 6. Select the Annotations button. 7. Select the Date button. 8. Select the On button to apply dates to your output. • If required, select the Off button to produce output without a date. 9.
- Page 121 Using a User ID to Log In at the Device Using Internet Services to find System Administrator Contact Details System Administrator Guide www.xerox.com/support. Viewing the Progress and Details of a Job using the Job Status Menu Printing a Bates Stamp on Copies When you press the Start button to make a copy, the device scans your originals and temporarily stores the images.
-
Page 122: Using Transparency Separators Within Copy Sets
® Copy WorkCentre XXXX 13. Select the OK button. After an annotation has been programmed the Format and Style button becomes visible. 14. Select the Format and Style button. 15. Select the Text Background option required. Opaque creates solid annotations placed on top of the copy output with no image visible •... -
Page 123: Copying Multiple Pages Or Repeat Images Onto A Page
® Copy WorkCentre XXXX Note: The size and orientation of the separators must be the same as the transparency sheets. 1. Load your documents face up in the document feeder input tray. Adjust the guide to just touch the documents. Lift up the document feeder. - Page 124 ® Copy WorkCentre XXXX Up to 36 images can be fitted onto 1 sheet of paper. The page layout feature can produce several output formats. • 4 originals using 2 rows and 2 columns. • 6 originals using 3 rows and 2 columns. •...
-
Page 125: Job Assembly
® Copy WorkCentre XXXX Job Assembly Building a Copy Job with Multiple Page or Segment Settings When you press the Start button to make a copy, the device scans your originals and temporarily stores the images. It then prints the images based on the selections made. If Authentication or Accounting has been enabled on your device you may have to enter login details to access the Copy features. -
Page 126: Printing A Sample Of Build Job Copy Set
® Copy WorkCentre XXXX 14. Press the Start button on the control panel to scan the original. 15. Remove the first segment originals after they have been scanned. The Build Job screen displays the first segment in the list. 16. If required, select the options for the segment. Sample Last Segment produces a proof print of the last segment scanned. - Page 127 ® Copy WorkCentre XXXX When copying a large number of sets, use the Sample Job feature to review a proof copy to ensure that all the print settings are correct before printing the remaining sets. 1. Load your documents face up in the document feeder input tray. Adjust the guide to just touch the documents.
-
Page 128: Saving Current Settings For Copying
® Copy WorkCentre XXXX Saving Current Settings for Copying When you press the Start button to make a copy, the device scans your originals and temporarily stores the images. It then prints the images based on the selections made. If Authentication or Accounting has been enabled on your device you may have to enter login details to access the Copy features. -
Page 129: Retrieving Saved Settings For Copying
® Copy WorkCentre XXXX Retrieving Saved Settings for Copying When you press the Start button to make a copy, the device scans your originals and temporarily stores the images. It then prints the images based on the selections made. If Authentication or Accounting has been enabled on your device you may have to enter login details to access the Copy features. - Page 130 ® Copy WorkCentre XXXX If Authentication or Accounting has been enabled on your device you may have to enter login details to access the Copy features. Use the Delete Settings option to delete saved settings from the device memory. Only 10 sets of settings can be saved, so you may occasionally need to delete old sets.
-
Page 131: Fax (Embedded Fax)
Fax (Embedded Fax) Sending a Fax (Embedded Fax) There are three Fax services which can be installed or enabled on your device, Fax (Embedded Fax), Internet Fax and Server Fax. Use the Fax (Embedded Fax) service to scan your documents and send them to most types of fax machines that are connected to the telephone network. -
Page 132: Fax
® WorkCentre XXXX System Administrator Guide www.xerox.com/support. Using Dialing Characters in a Fax number (Embedded Fax) Using Dialing Characters in a Fax number (Embedded Fax) Use the Fax (Embedded Fax) service to scan your documents and send them to most types of fax machines that are connected to the telephone network. - Page 133 Explaining the Fax Options Using Internet Services to find System Administrator Contact Details System Administrator Guide www.xerox.com/support. Sending a Fax to a Number Saved as a Favorite (Embedded Fax) Use the Fax (Embedded Fax) service to scan your documents and send them to most types of fax machines that are connected to the telephone network.
- Page 134 Explaining the Fax Options Using Internet Services to find System Administrator Contact Details System Administrator Guide www.xerox.com/support. Saving an Address Book Number as a Favorite (Embedded Fax) Use the Fax (Embedded Fax) service to scan your documents and send them to most types of fax machines that are connected to the telephone network.
-
Page 135: Address Book
XXXX Explaining the Fax Options Creating a New Fax Address Book Contact (Embedded Fax) System Administrator Guide www.xerox.com/support. Address Book Sending a Fax using the Address Book (Embedded Fax) Use the Fax (Embedded Fax) service to scan your documents and send them to most types of fax machines that are connected to the telephone network. - Page 136 Explaining the Fax Options Creating a Fax Address using Internet Services Using Internet Services to find System Administrator Contact Details System Administrator Guide www.xerox.com/support. Address Book Creating a New Fax Address Book Contact (Embedded Fax) Use the Fax (Embedded Fax) service to scan your documents and send them to most types of fax machines that are connected to the telephone network.
- Page 137 Creating a Fax Address using Internet Services Using Internet Services to find System Administrator Contact Details System Administrator Guide www.xerox.com/support. Adding To an Existing Fax Address Book Contact (Embedded Fax) Use the Fax (Embedded Fax) service to scan your documents and send them to most types of fax machines that are connected to the telephone network.
- Page 138 ® WorkCentre XXXX Faxing 2-Sided Originals (Embedded Fax) Use the Fax (Embedded Fax) service to scan your documents and send them to most types of fax machines that are connected to the telephone network. Note: This option must be made available by your System Administrator. If Authentication or Accounting has been enabled on your device you may have to enter login details to access the Fax features.
- Page 139 ® WorkCentre XXXX System Administrator Guide www.xerox.com/support. Setting the Original Type for Faxes (Embedded Fax) Use the Fax (Embedded Fax) service to scan your documents and send them to most types of fax machines that are connected to the telephone network.
- Page 140 WorkCentre XXXX Using Internet Services to find System Administrator Contact Details System Administrator Guide www.xerox.com/support. Specifying the Fax Resolution (Embedded Fax) Use the Fax (Embedded Fax) service to scan your documents and send them to most types of fax machines that are connected to the telephone network.
- Page 141 Explaining the Fax Options Using Internet Services to find System Administrator Contact Details System Administrator Guide www.xerox.com/support. Adding a Fax Cover Sheet (Embedded Fax) Use the Fax (Embedded Fax) service to scan your documents and send them to most types of fax machines that are connected to the telephone network.
-
Page 142: Image Quality
More Information Using a User ID to Log In at the Device Explaining the Fax Options Using Internet Services to find System Administrator Contact Details System Administrator Guide www.xerox.com/support. Image Quality Image Options Choosing the Image Options for Faxes (Embedded Fax) Use the Fax (Embedded Fax) service to scan your documents and send them to most types of fax machines that are connected to the telephone network. - Page 143 Specifying the Fax Resolution (Embedded Fax) Using Internet Services to find System Administrator Contact Details System Administrator Guide www.xerox.com/support. Lightening or Darkening Faxes (Embedded Fax) Use the Fax (Embedded Fax) service to scan your documents and send them to most types of fax machines that are connected to the telephone network.
- Page 144 Explaining the Fax Options Using Internet Services to find System Administrator Contact Details System Administrator Guide www.xerox.com/support. Changing the Sharpness of Faxes (Embedded Fax) Use the Fax (Embedded Fax) service to scan your documents and send them to most types of fax machines that are connected to the telephone network.
- Page 145 Using a User ID to Log In at the Device Explaining the Fax Options Using Internet Services to find System Administrator Contact Details System Administrator Guide www.xerox.com/support. Image Enhancement Choosing an Image Enhancement Option for Faxes (Embedded Fax) Use the Fax (Embedded Fax) service to scan your documents and send them to most types of fax machines that are connected to the telephone network.
- Page 146 Explaining the Fax Options Using Internet Services to find System Administrator Contact Details System Administrator Guide www.xerox.com/support. Adding or Removing the Background Suppression for Faxes (Embedded Fax) Use the Fax (Embedded Fax) service to scan your documents and send them to most types of fax machines that are connected to the telephone network.
- Page 147 Explaining the Fax Options Using Internet Services to find System Administrator Contact Details System Administrator Guide www.xerox.com/support. Setting the Fax Contrast (Embedded Fax) Use the Fax (Embedded Fax) service to scan your documents and send them to most types of fax machines that are connected to the telephone network.
-
Page 148: Layout Adjustment
Using a User ID to Log In at the Device Explaining the Fax Options Using Internet Services to find System Administrator Contact Details System Administrator Guide www.xerox.com/support. Layout Adjustment Specifying the Size of the Original to be Faxed (Embedded Fax) Use the Fax (Embedded Fax) service to scan your documents and send them to most types of fax machines that are connected to the telephone network. - Page 149 Setting a Fax to Reduce Size or Split when Received (Embedded Fax) Using a User ID to Log In at the Device Explaining the Fax Options Using Internet Services to find System Administrator Contact Details System Administrator Guide www.xerox.com/support. User Guide...
- Page 150 Specifying the Size of the Original to be Faxed (Embedded Fax) Faxing Book Pages (Embedded Fax) Using a User ID to Log In at the Device Explaining the Fax Options Using Internet Services to find System Administrator Contact Details System Administrator Guide www.xerox.com/support. User Guide...
- Page 151 ® WorkCentre XXXX Faxing Book Pages (Embedded Fax) Use the Fax (Embedded Fax) service to scan your documents and send them to most types of fax machines that are connected to the telephone network. Note: This option must be made available by your System Administrator. If Authentication or Accounting has been enabled on your device you may have to enter login details to access the Fax features.
-
Page 152: Fax Options
Explaining the Fax Options Setting the Original Type for Faxes (Embedded Fax) Using Internet Services to find System Administrator Contact Details System Administrator Guide www.xerox.com/support. Building a Fax Job with Multiple Page or Segment Settings (Embedded Fax) Fax Options Printing a Fax Confirmation Report (Embedded Fax) Use the Fax (Embedded Fax) service to scan your documents and send them to most types of fax machines that are connected to the telephone network. - Page 153 Explaining the Fax Options Using Internet Services to find System Administrator Contact Details System Administrator Guide www.xerox.com/support. Setting the Fax Starting Rate (Embedded Fax) Use the Fax (Embedded Fax) service to scan your documents and send them to most types of fax machines that are connected to the telephone network.
- Page 154 Explaining the Fax Options Using Internet Services to find System Administrator Contact Details System Administrator Guide www.xerox.com/support. Using a Timer to Send a Fax (Embedded Fax) Use the Fax (Embedded Fax) service to scan your documents and send them to most types of fax machines that are connected to the telephone network.
- Page 155 Using a User ID to Log In at the Device Explaining the Fax Options Using Internet Services to find System Administrator Contact Details System Administrator Guide www.xerox.com/support. Mailboxes Sending a Fax to a Remote Mailbox (Embedded Fax) Use the Fax (Embedded Fax) service to scan your documents and send them to most types of fax machines that are connected to the telephone network.
- Page 156 Explaining the Fax Options Using Internet Services to find System Administrator Contact Details System Administrator Guide www.xerox.com/support. Storing a Fax in a Local Mailbox (Embedded Fax) Use the Fax (Embedded Fax) service to scan your documents and send them to most types of fax machines that are connected to the telephone network.
- Page 157 Printing Faxes Stored in the Local Mailbox (Embedded Fax) Deleting Faxes Stored in the Local Mailbox (Embedded Fax) Using a User ID to Log In at the Device Explaining the Fax Options Using Internet Services to find System Administrator Contact Details System Administrator Guide www.xerox.com/support. User Guide...
- Page 158 Storing a Fax in a Local Mailbox (Embedded Fax) Deleting Faxes Stored in the Local Mailbox (Embedded Fax) Using a User ID to Log In at the Device Explaining the Fax Options Using Internet Services to find System Administrator Contact Details System Administrator Guide www.xerox.com/support. User Guide...
- Page 159 Storing a Fax in a Local Mailbox (Embedded Fax) Printing Faxes Stored in the Local Mailbox (Embedded Fax) Using a User ID to Log In at the Device Explaining the Fax Options Using Internet Services to find System Administrator Contact Details System Administrator Guide www.xerox.com/support. User Guide...
-
Page 160: Local Polling
Using a User ID to Log In at the Device Explaining the Fax Options Using Internet Services to find System Administrator Contact Details System Administrator Guide www.xerox.com/support. Local Polling Distributing Documents using Non-Secure Fax Polling (Embedded Fax) Use the Fax (Embedded Fax) service to scan your documents and send them to most types of fax machines that are connected to the telephone network. - Page 161 Using a User ID to Log In at the Device Explaining the Fax Options Using Internet Services to find System Administrator Contact Details System Administrator Guide www.xerox.com/support. Using Secure Fax Polling (Embedded Fax) Deleting Non-Secure Fax Polling Documents (Embedded Fax) Use the Fax (Embedded Fax) service to scan your documents and send them to most types of fax machines that are connected to the telephone network.
- Page 162 Explaining the Fax Options Using Internet Services to find System Administrator Contact Details System Administrator Guide www.xerox.com/support. Printing Non-Secure Fax Polling Documents (Embedded Fax) Use the Fax (Embedded Fax) service to scan your documents and send them to most types of fax machines that are connected to the telephone network.
-
Page 163: Remote Polling
Using a User ID to Log In at the Device Explaining the Fax Options Using Internet Services to find System Administrator Contact Details System Administrator Guide www.xerox.com/support. Printing Non-Secure Fax Polling Documents (Embedded Fax) Remote Polling Polling a Remote Fax Machine (Embedded Fax) Use the Fax (Embedded Fax) service to scan your documents and send them to most types of fax machines that are connected to the telephone network. - Page 164 Using Secure Fax Polling (Embedded Fax) Using Internet Services to find System Administrator Contact Details System Administrator Guide www.xerox.com/support. Polling a Remote Fax Mailbox (Embedded Fax) Use the Fax (Embedded Fax) service to scan your documents and send them to most types of fax machines that are connected to the telephone network.
-
Page 165: Building A Fax Job With Multiple Page Or Segment Settings (Embedded Fax)
Using a User ID to Log In at the Device Explaining the Fax Options Using Internet Services to find System Administrator Contact Details System Administrator Guide www.xerox.com/support. Building a Fax Job with Multiple Page or Segment Settings (Embedded Fax) Use the Fax (Embedded Fax) service to scan your documents and send them to most types of fax machines that are connected to the telephone network. - Page 166 ® WorkCentre XXXX 4. Select the Fax button on the touch screen. 5. If required, select the Fax tab. This is usually the active tab when the Fax service opens. 6. Select the Enter Fax Number entry box and use the numeric keypad, or the touch screen keypad to enter the recipient’s fax number.
-
Page 167: Server Fax
Using a User ID to Log In at the Device Explaining the Fax Options Using Internet Services to find System Administrator Contact Details System Administrator Guide www.xerox.com/support. Server Fax Sending a Server Fax There are three Fax services which can be installed or enabled on your device, Fax (Embedded Fax), Internet Fax and Server Fax. -
Page 168: Sending A Server Fax Using The Workflow Scanning Feature
Explaining the Fax Options Using Internet Services to find System Administrator Contact Details System Administrator Guide www.xerox.com/support. Sending a Server Fax using the Workflow Scanning Feature There are three Fax services which can be installed or enabled on your device, Fax (Embedded Fax), Internet Fax and Server Fax. - Page 169 ® WorkCentre XXXX Use the Dialing Characters options to add special characters such as Dial Pause, Pulse to Tone, Mask Data, or Wait for Dial Tone characters into fax numbers. More than one dialing character can be inserted into a fax number. 1.
-
Page 170: Fax Directory
Using a User ID to Log In at the Device Explaining the Fax Options Using Internet Services to find System Administrator Contact Details System Administrator Guide www.xerox.com/support. Fax Directory Sending a Fax Using the Fax Directory (Server Fax) Server Fax scans your documents and sends them to any type of fax machine that is connected to a telephone network. - Page 171 Explaining the Fax Options Using Internet Services to find System Administrator Contact Details System Administrator Guide www.xerox.com/support. Adding a Number to the Fax Directory (Server Fax) Server Fax scans your documents and sends them to any type of fax machine that is connected to a telephone network.
- Page 172 Explaining the Fax Options Using Internet Services to find System Administrator Contact Details System Administrator Guide www.xerox.com/support. Faxing 2-Sided Originals (Server Fax) Server Fax scans your documents and sends them to any type of fax machine that is connected to a telephone network.
- Page 173 Explaining the Fax Options Using Internet Services to find System Administrator Contact Details System Administrator Guide www.xerox.com/support. Setting the Original Type for Faxes (Server Fax) Server Fax scans your documents and sends them to any type of fax machine that is connected to a telephone network.
- Page 174 Explaining the Fax Options Using Internet Services to find System Administrator Contact Details System Administrator Guide www.xerox.com/support. Specifying the Fax Resolution (Server Fax) Server Fax scans your documents and sends them to any type of fax machine that is connected to a telephone network.
-
Page 175: Image Quality
Using a User ID to Log In at the Device Explaining the Fax Options Using Internet Services to find System Administrator Contact Details System Administrator Guide www.xerox.com/support. Image Quality Choosing the Image Options for Server Faxes Server Fax scans your documents and sends them to any type of fax machine that is connected to a telephone network. - Page 176 Adding or Removing the Background Suppression for Server Faxes Explaining the Fax Options Using Internet Services to find System Administrator Contact Details System Administrator Guide www.xerox.com/support. Image Enhancement Choosing the Image Enhancement Options for Server Faxes Server Fax scans your documents and sends them to any type of fax machine that is connected to a telephone network.
- Page 177 Explaining the Fax Options Using Internet Services to find System Administrator Contact Details System Administrator Guide www.xerox.com/support. Adding or Removing the Background Suppression for Server Faxes Server Fax scans your documents and sends them to any type of fax machine that is connected to a telephone network.
- Page 178 Choosing the Image Enhancement Options for Server Faxes Choosing the Image Options for Server Faxes Using a User ID to Log In at the Device Explaining the Fax Options Using Internet Services to find System Administrator Contact Details System Administrator Guide www.xerox.com/support. User Guide...
- Page 179 ® WorkCentre XXXX Setting the Server Fax Contrast Server Fax scans your documents and sends them to any type of fax machine that is connected to a telephone network. Your images are sent from your device to a third party fax server, which relays them over the telephone network to the fax number of your choice.
-
Page 180: Layout Adjustment
Using a User ID to Log In at the Device Explaining the Fax Options Using Internet Services to find System Administrator Contact Details System Administrator Guide www.xerox.com/support. Layout Adjustment Setting the Original Orientation for Server Faxes Server Fax scans your documents and sends them to any type of fax machine that is connected to a telephone network. - Page 181 Explaining the Fax Options Using Internet Services to find System Administrator Contact Details System Administrator Guide www.xerox.com/support. Specifying the Size of the Original to be Faxed (Server Fax) Server Fax scans your documents and sends them to any type of fax machine that is connected to a telephone network.
-
Page 182: Using A Timer To Send A Server Fax
Explaining the Fax Options Using Internet Services to find System Administrator Contact Details System Administrator Guide www.xerox.com/support. Using a Timer to Send a Server Fax Server Fax scans your documents and sends them to any type of fax machine that is connected to a telephone network. -
Page 183: Building A Server Fax Job With Multiple Page Or Segment Settings
Explaining the Fax Options Using Internet Services to find System Administrator Contact Details System Administrator Guide www.xerox.com/support. Building a Server Fax Job with Multiple Page or Segment Settings Server Fax scans your documents and sends them to any type of fax machine that is connected to a telephone network. - Page 184 ® WorkCentre XXXX Note: This option must be made available by your System Administrator. If Authentication or Accounting has been enabled on your device you may have to enter login details to access the Server Fax features. Use the Build Job option to build a job that requires different settings for each page, or for groups of pages (segments) of your document.
-
Page 185: Internet Fax
Using a User ID to Log In at the Device Explaining the Fax Options Using Internet Services to find System Administrator Contact Details System Administrator Guide www.xerox.com/support. Internet Fax Sending an Internet Fax Internet Fax is similar to the E-mail feature in that it sends documents across the internet or intranet using e-mail addresses. -
Page 186: Internet Fax
Sending an E-mail Explaining the Fax Options Using Internet Services to find System Administrator Contact Details System Administrator Guide www.xerox.com/support. Internet Fax Using the Internet Fax Address Book Internet Fax is similar to the E-mail feature in that it sends documents across the internet or intranet using e-mail addresses. - Page 187 Using a User ID to Log In at the Device Sending an E-mail Explaining the Fax Options Creating an Internet Fax Address using Internet Services Using Internet Services to find System Administrator Contact Details System Administrator Guide www.xerox.com/support. User Guide...
- Page 188 ® WorkCentre XXXX Adding a Subject to an Internet Fax Internet Fax is similar to the E-mail feature in that it sends documents across the internet or intranet using e-mail addresses. There are several key differences between Internet Fax and the E-mail feature.
- Page 189 Explaining the Fax Options Using Internet Services to find System Administrator Contact Details System Administrator Guide www.xerox.com/support. Setting the Output Color for an Internet Fax Internet Fax is similar to the E-mail feature in that it sends documents across the internet or intranet using e-mail addresses.
- Page 190 Explaining the Fax Options Using Internet Services to find System Administrator Contact Details System Administrator Guide www.xerox.com/support. Using Internet Fax to send 2-Sided Originals Internet Fax is similar to the E-mail feature in that it sends documents across the internet or intranet using e-mail addresses.
- Page 191 ® WorkCentre XXXX Note: This option must be made available by your System Administrator. If Authentication or Accounting has been enabled on your device you may have to enter login details to access the Internet Fax features. Use the 2-Sided Scanning options to scan both sides of your document. The second side can be rotated.
- Page 192 Explaining the Fax Options Using Internet Services to find System Administrator Contact Details System Administrator Guide www.xerox.com/support. Setting the Original Type for Internet Faxes Internet Fax is similar to the E-mail feature in that it sends documents across the internet or intranet using e-mail addresses.
- Page 193 15. Press the Job Status button on the device control panel to view the job list and check the status of the job. More Information Using a User ID to Log In at the Device Sending an E-mail Explaining the Fax Options Using Internet Services to find System Administrator Contact Details System Administrator Guide www.xerox.com/support. User Guide...
-
Page 194: Advanced Settings
® WorkCentre XXXX Advanced Settings Image Options Choosing the Image Options for Internet Faxes Internet Fax is similar to the E-mail feature in that it sends documents across the internet or intranet using e-mail addresses. There are several key differences between Internet Fax and the E-mail feature. - Page 195 Explaining the Fax Options Using Internet Services to find System Administrator Contact Details System Administrator Guide www.xerox.com/support. Lightening or Darkening Internet Faxes Internet Fax is similar to the E-mail feature in that it sends documents across the internet or intranet using e-mail addresses.
- Page 196 ® WorkCentre XXXX Use the Lighten / Darken options to manually adjust the lightness or darkness of the image. Light originals containing pencil images may produce better output if the darkness is increased. Dark originals such as halftones or documents with colored backgrounds may need to be lightened. 1.
- Page 197 Explaining the Fax Options Using Internet Services to find System Administrator Contact Details System Administrator Guide www.xerox.com/support. Changing the Sharpness of Internet Faxes Internet Fax is similar to the E-mail feature in that it sends documents across the internet or intranet using e-mail addresses.
- Page 198 Explaining the Fax Options Using Internet Services to find System Administrator Contact Details System Administrator Guide www.xerox.com/support. Setting the Saturation for Internet Faxes Internet Fax is similar to the E-mail feature in that it sends documents across the internet or intranet using e-mail addresses.
- Page 199 ® WorkCentre XXXX Note: If you select black and white output rather than color output the saturation option will not be available. 1. Load your documents face up in the document feeder input tray. Adjust the guide to just touch the documents.
- Page 200 Sending an E-mail Explaining the Fax Options Using Internet Services to find System Administrator Contact Details System Administrator Guide www.xerox.com/support. Image Enhancement Choosing an Image Enhancement Option for Internet Faxes Internet Fax is similar to the E-mail feature in that it sends documents across the internet or intranet using e-mail addresses.
- Page 201 Explaining the Fax Options Using Internet Services to find System Administrator Contact Details System Administrator Guide www.xerox.com/support. Adding or Removing the Background Suppression for Internet Faxes Internet Fax is similar to the E-mail feature in that it sends documents across the internet or intranet using e-mail addresses.
- Page 202 ® WorkCentre XXXX Use the Background Suppression option to enhance originals that have colored backgrounds, by reducing or eliminating the background on the output. This option is useful when your original is on colored paper. 1. Load your documents face up in the document feeder input tray. Adjust the guide to just touch the documents.
- Page 203 Explaining the Fax Options Using Internet Services to find System Administrator Contact Details System Administrator Guide www.xerox.com/support. Setting the Internet Fax Contrast Internet Fax is similar to the E-mail feature in that it sends documents across the internet or intranet using e-mail addresses.
- Page 204 Explaining the Fax Options Using Internet Services to find System Administrator Contact Details System Administrator Guide www.xerox.com/support. Specifying the Internet Fax Resolution Internet Fax is similar to the E-mail feature in that it sends documents across the internet or intranet using e-mail addresses.
- Page 205 ® WorkCentre XXXX If Authentication or Accounting has been enabled on your device you may have to enter login details to access the Internet Fax features. Use the Resolution options to balance the quality of the image against the transmission time if the image is to be sent across a network.
- Page 206 Setting the Quality or File Size for Internet Faxes Using Internet Services to find System Administrator Contact Details System Administrator Guide www.xerox.com/support. Setting the Quality or File Size for Internet Faxes Internet Fax is similar to the E-mail feature in that it sends documents across the internet or intranet using e-mail addresses.
- Page 207 ® WorkCentre XXXX Use the Quality / File Size options to choose between scan image quality and file size. You can select the highest quality, the smallest files or adjust the settings to balance quality against file size. • A small file size delivers slightly reduced image quality but is better when sharing the file over a network.
-
Page 208: Layout Adjustment
® WorkCentre XXXX • Move the indicator towards Highest Quality / Largest File Size to produce the largest files with the maximum image quality. Large files are not ideal for sharing and transmitting over a network. 14. Select the OK button. 15. - Page 209 Specifying the Size of the Original to be sent by Internet Fax Using a User ID to Log In at the Device Sending an E-mail Explaining the Fax Options Using Internet Services to find System Administrator Contact Details System Administrator Guide www.xerox.com/support. User Guide...
- Page 210 ® WorkCentre XXXX Specifying the Size of the Original to be sent by Internet Fax Internet Fax is similar to the E-mail feature in that it sends documents across the internet or intranet using e-mail addresses. There are several key differences between Internet Fax and the E-mail feature.
-
Page 211: Internet Fax Options
Sending an E-mail Explaining the Fax Options Using Internet Services to find System Administrator Contact Details System Administrator Guide www.xerox.com/support. Internet Fax Options Adding a Message to an Internet Fax Internet Fax is similar to the E-mail feature in that it sends documents across the internet or intranet using e-mail addresses. - Page 212 ® WorkCentre XXXX Use the Message option to add a brief message to the file that will be sent. 1. Load your documents face up in the document feeder input tray. Adjust the guide to just touch the documents. Lift up the document feeder. Place the document face down onto the document glass and register it to the arrow at the top left corner.
- Page 213 Explaining the Fax Options Using Internet Services to find System Administrator Contact Details System Administrator Guide www.xerox.com/support. Adding a Reply To Address to an Internet Fax Internet Fax is similar to the E-mail feature in that it sends documents across the internet or intranet using e-mail addresses.
- Page 214 Explaining the Fax Options Using Internet Services to find System Administrator Contact Details System Administrator Guide www.xerox.com/support. Printing an Internet Fax Acknowledgment Report Internet Fax is similar to the E-mail feature in that it sends documents across the internet or intranet using e-mail addresses.
- Page 215 ® WorkCentre XXXX If Authentication or Accounting has been enabled on your device you may have to enter login details to access the Internet Fax features. Use the Acknowledgment Report option to print a confirmation report, indicating the delivery status of the internet fax. This is useful for audit purposes as, unlike e-mail, there is proof of delivery. 1.
-
Page 216: Building An Internet Fax Job With Multiple Page Or Segment Settings
Sending an E-mail Explaining the Fax Options Using Internet Services to find System Administrator Contact Details System Administrator Guide www.xerox.com/support. Building an Internet Fax Job with Multiple Page or Segment Settings Internet Fax is similar to the E-mail feature in that it sends documents across the internet or intranet using e-mail addresses. - Page 217 ® WorkCentre XXXX 9. If required, select Cc from the To: dropdown menu to copy a recipient on the e-mail. Use the touch screen keyboard to enter the recipient details and then select the Add button. Note: At least one To address must be selected, documents cannot be sent to a Cc address alone.
- Page 218 ® WorkCentre XXXX More Information Using a User ID to Log In at the Device Sending an E-mail Explaining the Fax Options Using Internet Services to find System Administrator Contact Details System Administrator Guide www.xerox.com/support. User Guide...
-
Page 219: Scan
Scan Workflow Scanning Explaining What Workflow Scanning Does and How It Works The standard Workflow Scanning option enables the electronic images to be stored and retrieved from a server or workstation on the network. Two further options are available: • Scan to Mailbox will store the image on the device hard disk and the user can retrieve the file using Internet Services. -
Page 220: Using Workflow Scanning
® Scan WorkCentre XXXX Templates Use the Templates feature when you want to scan or fax jobs using the Workflow Scanning service on your device. Templates contain information to tell the device where to file a scanned document. They also contain settings, such as image quality and file format. Templates help you scan images more quickly because the template contains all the pre-programmed settings for your scan. -
Page 221: Workflow Scanning
Scanning a Document to your Computer or Network using Single-Touch Scan Creating a New Template in Internet Services Using Internet Services to find System Administrator Contact Details System Administrator Guide www.xerox.com/support. Assigning Descriptive Data to a Workflow Scanning Job Workflow Scanning... - Page 222 Explaining What Workflow Scanning Does and How It Works Using a User ID to Log In at the Device Using Internet Services to find System Administrator Contact Details System Administrator Guide www.xerox.com/support. Assigning Descriptive Data to a Workflow Scanning Job Using Workflow Scanning to send 2-Sided Originals Workflow Scanning converts hard copy documents into electronic images and saves them into network filing destinations (repositories).
- Page 223 Explaining What Workflow Scanning Does and How It Works Using a User ID to Log In at the Device Using Internet Services to find System Administrator Contact Details System Administrator Guide www.xerox.com/support. Assigning Descriptive Data to a Workflow Scanning Job Creating a New Template in Internet Services...
- Page 224 ® Scan WorkCentre XXXX Use the Original Type options to define the type of original being scanned. Making the correct selection enhances the quality of your output image. 1. Load your documents face up in the document feeder input tray. Adjust the guide to just touch the documents.
- Page 225 Explaining What Workflow Scanning Does and How It Works Using a User ID to Log In at the Device Using Internet Services to find System Administrator Contact Details System Administrator Guide www.xerox.com/support. Assigning Descriptive Data to a Workflow Scanning Job Creating a New Template in Internet Services...
- Page 226 Explaining What Workflow Scanning Does and How It Works Using a User ID to Log In at the Device Using Internet Services to find System Administrator Contact Details System Administrator Guide www.xerox.com/support. Assigning Descriptive Data to a Workflow Scanning Job Creating a New Template in Internet Services...
- Page 227 Explaining What Workflow Scanning Does and How It Works Using a User ID to Log In at the Device Using Internet Services to find System Administrator Contact Details System Administrator Guide www.xerox.com/support. Assigning Descriptive Data to a Workflow Scanning Job Creating a New Template in Internet Services...
- Page 228 Explaining What Workflow Scanning Does and How It Works Using a User ID to Log In at the Device Using Internet Services to find System Administrator Contact Details System Administrator Guide www.xerox.com/support. Assigning Descriptive Data to a Workflow Scanning Job Creating a New Template in Internet Services...
- Page 229 ® Scan WorkCentre XXXX Note: This option must be made available by your System Administrator. If Authentication or Accounting has been enabled on your device you may have to enter login details to access the Workflow Scanning features. Use Scan to Mailbox to scan hard copy originals and store them in a folder on the device. You can retrieve your stored documents at the device using the Print From feature, or at your computer using Internet Services.
- Page 230 Downloading Documents from your Mailbox using Internet Services Printing From a Mailbox using the Print From Feature Using Internet Services to find System Administrator Contact Details System Administrator Guide www.xerox.com/support. Assigning Descriptive Data to a Workflow Scanning Job Creating a New Template in Internet Services...
- Page 231 More Information Using a User ID to Log In at the Device Using Internet Services to find System Administrator Contact Details System Administrator Guide www.xerox.com/support. Assigning Descriptive Data to a Workflow Scanning Job Creating a New Template in Internet Services...
-
Page 232: Advanced Settings
More Information Using a User ID to Log In at the Device Using Internet Services to find System Administrator Contact Details System Administrator Guide www.xerox.com/support. Assigning Descriptive Data to a Workflow Scanning Job Creating a New Template in Internet Services... - Page 233 Explaining What Workflow Scanning Does and How It Works Using a User ID to Log In at the Device Using Internet Services to find System Administrator Contact Details System Administrator Guide www.xerox.com/support. Assigning Descriptive Data to a Workflow Scanning Job Creating a New Template in Internet Services...
- Page 234 Using a User ID to Log In at the Device Setting the Background Suppression for Workflow Scans Using Internet Services to find System Administrator Contact Details System Administrator Guide www.xerox.com/support. Assigning Descriptive Data to a Workflow Scanning Job Creating a New Template in Internet Services...
- Page 235 ® Scan WorkCentre XXXX Changing the Sharpness of Workflow Scans Workflow Scanning converts hard copy documents into electronic images and saves them into network filing destinations (repositories). A Template must be used when a scan is made - the template contains the filing destination address and other scan settings such as the image quality.
- Page 236 Explaining What Workflow Scanning Does and How It Works Using a User ID to Log In at the Device Using Internet Services to find System Administrator Contact Details System Administrator Guide www.xerox.com/support. Assigning Descriptive Data to a Workflow Scanning Job Creating a New Template in Internet Services...
- Page 237 Explaining What Workflow Scanning Does and How It Works Using a User ID to Log In at the Device Using Internet Services to find System Administrator Contact Details System Administrator Guide www.xerox.com/support. Assigning Descriptive Data to a Workflow Scanning Job Creating a New Template in Internet Services...
- Page 238 Explaining What Workflow Scanning Does and How It Works Using a User ID to Log In at the Device Using Internet Services to find System Administrator Contact Details System Administrator Guide www.xerox.com/support. Assigning Descriptive Data to a Workflow Scanning Job Creating a New Template in Internet Services...
- Page 239 Using a User ID to Log In at the Device Lightening or Darkening Workflow Scans Using Internet Services to find System Administrator Contact Details System Administrator Guide www.xerox.com/support. Assigning Descriptive Data to a Workflow Scanning Job Creating a New Template in Internet Services...
- Page 240 Explaining What Workflow Scanning Does and How It Works Using a User ID to Log In at the Device Using Internet Services to find System Administrator Contact Details System Administrator Guide www.xerox.com/support. Assigning Descriptive Data to a Workflow Scanning Job Creating a New Template in Internet Services...
- Page 241 ® Scan WorkCentre XXXX Setting the Workflow Scanning Scan Presets Workflow Scanning converts hard copy documents into electronic images and saves them into network filing destinations (repositories). A Template must be used when a scan is made - the template contains the filing destination address and other scan settings such as the image quality.
- Page 242 Explaining What Workflow Scanning Does and How It Works Using a User ID to Log In at the Device Using Internet Services to find System Administrator Contact Details System Administrator Guide www.xerox.com/support. Assigning Descriptive Data to a Workflow Scanning Job Creating a New Template in Internet Services...
- Page 243 Explaining What Workflow Scanning Does and How It Works Using a User ID to Log In at the Device Using Internet Services to find System Administrator Contact Details System Administrator Guide www.xerox.com/support. Assigning Descriptive Data to a Workflow Scanning Job Creating a New Template in Internet Services...
- Page 244 Explaining What Workflow Scanning Does and How It Works Using a User ID to Log In at the Device Using Internet Services to find System Administrator Contact Details System Administrator Guide www.xerox.com/support. Assigning Descriptive Data to a Workflow Scanning Job Creating a New Template in Internet Services...
- Page 245 Explaining What Workflow Scanning Does and How It Works Using a User ID to Log In at the Device Using Internet Services to find System Administrator Contact Details System Administrator Guide www.xerox.com/support. Assigning Descriptive Data to a Workflow Scanning Job Creating a New Template in Internet Services...
-
Page 246: Layout Adjustment
® Scan WorkCentre XXXX Layout Adjustment Setting the Original Orientation for Workflow Scanning Workflow Scanning converts hard copy documents into electronic images and saves them into network filing destinations (repositories). A Template must be used when a scan is made - the template contains the filing destination address and other scan settings such as the image quality. - Page 247 Explaining What Workflow Scanning Does and How It Works Using a User ID to Log In at the Device Using Internet Services to find System Administrator Contact Details System Administrator Guide www.xerox.com/support. Creating a New Template in Internet Services Assigning Descriptive Data to a Workflow Scanning Job...
- Page 248 Explaining What Workflow Scanning Does and How It Works Using a User ID to Log In at the Device Using Internet Services to find System Administrator Contact Details System Administrator Guide www.xerox.com/support. Assigning Descriptive Data to a Workflow Scanning Job Creating a New Template in Internet Services...
- Page 249 Explaining What Workflow Scanning Does and How It Works Using a User ID to Log In at the Device Using Internet Services to find System Administrator Contact Details System Administrator Guide www.xerox.com/support. Assigning Descriptive Data to a Workflow Scanning Job Creating a New Template in Internet Services...
- Page 250 Erasing Edges from Workflow Scans Setting the Background Suppression for Workflow Scans Using Internet Services to find System Administrator Contact Details System Administrator Guide www.xerox.com/support. Assigning Descriptive Data to a Workflow Scanning Job Creating a New Template in Internet Services...
-
Page 251: Filing Options
® Scan WorkCentre XXXX Filing Options Setting a File Format for Workflow Scans Workflow Scanning converts hard copy documents into electronic images and saves them into network filing destinations (repositories). A Template must be used when a scan is made - the template contains the filing destination address and other scan settings such as the image quality. - Page 252 Explaining What Workflow Scanning Does and How It Works Using a User ID to Log In at the Device Using Internet Services to find System Administrator Contact Details System Administrator Guide www.xerox.com/support. Assigning Descriptive Data to a Workflow Scanning Job Creating a New Template in Internet Services...
- Page 253 Explaining What Workflow Scanning Does and How It Works Using a User ID to Log In at the Device Using Internet Services to find System Administrator Contact Details System Administrator Guide www.xerox.com/support. Assigning Descriptive Data to a Workflow Scanning Job Creating a New Template in Internet Services...
- Page 254 ® Scan WorkCentre XXXX If Authentication or Accounting has been enabled on your device you may have to enter login details to access the Workflow Scanning features. Use the Document Management option to assign descriptive data (metadata) to a scanned job. The data can be accessed by other software applications to search, index and the automate the processing of scanned documents.
- Page 255 Modifying a Template using Internet Services Using a User ID to Log In at the Device Using Internet Services to find System Administrator Contact Details System Administrator Guide www.xerox.com/support. Creating a New Template in Internet Services Adding Additional Workflow Scanning File Destinations Workflow Scanning converts hard copy documents into electronic images and saves them into network filing destinations (repositories).
-
Page 256: Building A Workflow Scanning Job With Multiple Page Or Segment Settings
Explaining What Workflow Scanning Does and How It Works Using a User ID to Log In at the Device Using Internet Services to find System Administrator Contact Details System Administrator Guide www.xerox.com/support. Assigning Descriptive Data to a Workflow Scanning Job Creating a New Template in Internet Services... - Page 257 ® Scan WorkCentre XXXX 4. Select the Workflow Scanning button on the touch screen. Note: If your System Administrator has added mandatory fields to the default template you will be asked to complete the required document information as soon as you select the Workflow Scanning button.
-
Page 258: Scan To
Explaining What Workflow Scanning Does and How It Works Using a User ID to Log In at the Device Using Internet Services to find System Administrator Contact Details System Administrator Guide www.xerox.com/support. Assigning Descriptive Data to a Workflow Scanning Job Creating a New Template in Internet Services... -
Page 259: Scanning To A Favorite Address Using The Scan To Feature
Using a User ID to Log In at the Device Using Internet Services to find System Administrator Contact Details System Administrator Guide www.xerox.com/support. Scanning to a Favorite Address using the Scan To Feature Use the Scan To... Feature to scan a document and store it in a folder on your computer or network. - Page 260 ® Scan WorkCentre XXXX Color produces full color output. • 10. Select the 2-Sided Scanning option required. • 1-Sided use this option if your originals are printed on 1 side. • 2-Sided use this option if your originals are 2-sided. The document feeder must be used to scan your originals with this option.
-
Page 261: Scan To
More Information Using a User ID to Log In at the Device Using Internet Services to find System Administrator Contact Details System Administrator Guide www.xerox.com/support. Scan To Setting the Output Color using the Scan To Feature Use the Scan To... Feature to scan a document and store it in a folder on your computer or network. - Page 262 Using a User ID to Log In at the Device Using Internet Services to find System Administrator Contact Details System Administrator Guide www.xerox.com/support. Using the Scan To Feature to send 2-Sided Originals Use the Scan To... Feature to scan a document and store it in a folder on your computer or network.
- Page 263 Using a User ID to Log In at the Device Using Internet Services to find System Administrator Contact Details System Administrator Guide www.xerox.com/support. Setting the Original Type using the Scan To Feature Use the Scan To... Feature to scan a document and store it in a folder on your computer or network.
- Page 264 12. Press the Job Status button on the device control panel to view the job list and check the status of the job. More Information Using a User ID to Log In at the Device Using Internet Services to find System Administrator Contact Details System Administrator Guide www.xerox.com/support. User Guide...
- Page 265 ® Scan WorkCentre XXXX Specifying a File Name using the Scan To Feature Use the Scan To... Feature to scan a document and store it in a folder on your computer or network. To use Scan To you need to create an entry in the Device Address Book which contains the path to the location that you want to scan to.
-
Page 266: Advanced Settings
® Scan WorkCentre XXXX System Administrator Guide www.xerox.com/support. Advanced Settings Image Options Choosing the Image Options when using the Scan To Feature Use the Scan To... Feature to scan a document and store it in a folder on your computer or network. - Page 267 More Information Using a User ID to Log In at the Device Using Internet Services to find System Administrator Contact Details System Administrator Guide www.xerox.com/support. Using the Scan To Feature Lightening or Darkening Documents using the Scan To Feature Changing the Sharpness of Scan To Documents...
- Page 268 More Information Using a User ID to Log In at the Device Using Internet Services to find System Administrator Contact Details System Administrator Guide www.xerox.com/support. Using the Scan To Feature Setting the Background Suppression using the Scan To Feature Changing the Sharpness of Scan To Documents Use the Scan To...
- Page 269 More Information Using a User ID to Log In at the Device Using Internet Services to find System Administrator Contact Details System Administrator Guide www.xerox.com/support. Using the Scan To Feature Changing the Saturation of Scan To Documents Use the Scan To... Feature to scan a document and store it in a folder on your computer or network.
- Page 270 More Information Using a User ID to Log In at the Device Using Internet Services to find System Administrator Contact Details System Administrator Guide www.xerox.com/support. Using the Scan To Feature Image Enhancement Choosing an Image Enhancement Option when using the Scan To Feature Use the Scan To...
- Page 271 More Information Using a User ID to Log In at the Device System Administrator Guide www.xerox.com/support. Using the Scan To Feature Setting the Background Suppression using the Scan To Feature Setting the Contrast using the Scan To Feature Setting the Background Suppression using the Scan To Feature Use the Scan To...
- Page 272 More Information Using a User ID to Log In at the Device Using Internet Services to find System Administrator Contact Details System Administrator Guide www.xerox.com/support. Using the Scan To Feature Lightening or Darkening Documents using the Scan To Feature Setting the Contrast using the Scan To Feature Use the Scan To...
- Page 273 More Information Using a User ID to Log In at the Device Using Internet Services to find System Administrator Contact Details System Administrator Guide www.xerox.com/support. Using the Scan To Feature Setting the Scan Presets using the Scan To Feature Use the Scan To... Feature to scan a document and store it in a folder on your computer or network.
- Page 274 More Information Using a User ID to Log In at the Device Using Internet Services to find System Administrator Contact Details System Administrator Guide www.xerox.com/support. Using the Scan To Feature Specifying the Resolution using the Scan To Feature Use the Scan To... Feature to scan a document and store it in a folder on your computer or network.
- Page 275 ® Scan WorkCentre XXXX To use Scan To you need to create an entry in the Device Address Book which contains the path to the location that you want to scan to. The Scan To button is grayed out on the device touch screen if there are no Scan To entries in the Device Address Book.
- Page 276 More Information Using a User ID to Log In at the Device Using Internet Services to find System Administrator Contact Details System Administrator Guide www.xerox.com/support. Using the Scan To Feature Setting the Quality or File Size using the Scan To Feature Use the Scan To...
-
Page 277: Layout Adjustment
More Information Using a User ID to Log In at the Device Using Internet Services to find System Administrator Contact Details System Administrator Guide www.xerox.com/support. Using the Scan To Feature Layout Adjustment Setting the Original Orientation using the Scan To Feature Use the Scan To... - Page 278 Using a User ID to Log In at the Device Using Internet Services to find System Administrator Contact Details System Administrator Guide www.xerox.com/support. Using the Scan To Feature Specifying the Size of the Original to be Scanned using the Scan To Feature Use the Scan To...
- Page 279 15. Press the Job Status button on the device control panel to view the job list and check the status of the job. More Information Using a User ID to Log In at the Device Using Internet Services to find System Administrator Contact Details System Administrator Guide www.xerox.com/support. User Guide...
- Page 280 ® Scan WorkCentre XXXX Using the Scan To Feature Erasing Edges from Documents using the Scan To Feature Use the Scan To... Feature to scan a document and store it in a folder on your computer or network. To use Scan To you need to create an entry in the Device Address Book which contains the path to the location that you want to scan to.
- Page 281 More Information Using a User ID to Log In at the Device Using Internet Services to find System Administrator Contact Details System Administrator Guide www.xerox.com/support. Using the Scan To Feature Removing Blank Pages from Originals During Scanning using the Scan To Feature Use the Scan To...
-
Page 282: Filing Options
More Information Using a User ID to Log In at the Device Using Internet Services to find System Administrator Contact Details System Administrator Guide www.xerox.com/support. Using the Scan To Feature Filing Options Setting a File Format using the Scan To Feature Use the Scan To... - Page 283 More Information Using a User ID to Log In at the Device Using Internet Services to find System Administrator Contact Details System Administrator Guide www.xerox.com/support. Using the Scan To Feature Determining How the Device Processes Duplicate File Names when using the Scan To Feature Use the Scan To...
-
Page 284: Feature
More Information Using a User ID to Log In at the Device Using Internet Services to find System Administrator Contact Details System Administrator Guide www.xerox.com/support. Using the Scan To Feature Building a Job with Multiple Page or Segment Settings using the Scan To Feature Use the Scan To... - Page 285 ® Scan WorkCentre XXXX To use Scan To you need to create an entry in the Device Address Book which contains the path to the location that you want to scan to. The Scan To button is grayed out on the device touch screen if there are no Scan To entries in the Device Address Book.
-
Page 286: Scanning To A Usb Memory Stick Using The Scan To Feature
More Information Using a User ID to Log In at the Device Using Internet Services to find System Administrator Contact Details System Administrator Guide www.xerox.com/support. Using the Scan To Feature Scanning to a USB Memory Stick using the Scan To Feature Use the Scan To... -
Page 287: Single-Touch Scan
More Information Using a User ID to Log In at the Device Printing From USB using the Print From Feature System Administrator Guide www.xerox.com/support. Using Internet Services to find System Administrator Contact Details Single-Touch Scan Scanning a Document to your Computer or Network using Single-... -
Page 288: Building A Single-Touch Scan Job With Multiple Settings
7. Press the Job Status button on the device control panel to view the job list and check the status of the job. More Information Using a User ID to Log In at the Device System Administrator Guide www.xerox.com/support. Using Internet Services to find System Administrator Contact Details Using Workflow Scanning Building a Single-Touch Scan Job with Multiple Settings The Single-Touch Scan feature is a fast and convenient way to scan a document and send it to a predefined scan destination on your computer or network location. -
Page 289: Setting The Output Color For A Single-Touch Scan
More Information Using a User ID to Log In at the Device System Administrator Guide www.xerox.com/support. Using Internet Services to find System Administrator Contact Details Setting the Output Color for a Single-Touch Scan The Single-Touch Scan feature is a fast and convenient way to scan a document and send it to a predefined scan destination on your computer or network location. -
Page 290: Using Single-Touch Scan To Send 2-Sided Originals
More Information Using a User ID to Log In at the Device System Administrator Guide www.xerox.com/support. Using Internet Services to find System Administrator Contact Details Using Single-Touch Scan to Send 2-Sided Originals The Single-Touch Scan feature is a fast and convenient way to scan a document and send it to a predefined scan destination on your computer or network location. -
Page 291: Setting The Original Type For Single-Touch Scans
More Information Using a User ID to Log In at the Device System Administrator Guide www.xerox.com/support. Using Internet Services to find System Administrator Contact Details Setting the Original Type for Single-Touch Scans The Single-Touch Scan feature is a fast and convenient way to scan a document and send it to a predefined scan destination on your computer or network location. - Page 292 10. Press the Job Status button on the device control panel to view the job list and check the status of the job. More Information Using a User ID to Log In at the Device System Administrator Guide www.xerox.com/support. Using Internet Services to find System Administrator Contact Details User Guide...
-
Page 293: Specifying A File Name For Single-Touch Scans
9. Press the Job Status button on the device control panel to view the job list and check the status of the job. More Information Using a User ID to Log In at the Device System Administrator Guide www.xerox.com/support. Using Internet Services to find System Administrator Contact Details User Guide... -
Page 294: Remote Scan
Scanning an image using the Xerox TWAIN Scan Driver The Xerox TWAIN scan driver scans images directly to your computer. The TWAIN driver can be used by many popular software applications to import scanned images. The scan driver allows you to use the specific features available on your device. -
Page 295: Accessing The Twain Scan Driver Help Pages
6. If required, select the device required from the list of scanners available. 7. If required, select the Xerox TWAIN driver from the list of drivers available. 8. Click the ? button. You will be directed to the Xerox online help in your default internet browser. More Information System Administrator Guide www.xerox.com/support. - Page 296 ® Scan WorkCentre XXXX User Guide...
-
Page 297: Print
Printing a Document using the PCL Print Driver You can print to the device from your computer through a print driver. There are a variety of Xerox print drivers available for the device to support all the popular operating systems. The Xerox print drivers allow you to use the specific features available on your device. - Page 298 3. Select the Xerox PCL driver from the list of print drivers available. 4. Open the print driver Properties window - the method will vary depending on the application you are printing from.
-
Page 299: Tab Menu
Using the Job Type Feature with the PCL Print Driver You can print to the device from your computer through a print driver. There are a variety of Xerox print drivers available for the device to support all the popular operating systems. The Xerox print drivers allow you to use the specific features available on your device. - Page 300 Printing a Normal Print Job using the PCL Print Driver You can print to the device from your computer through a print driver. There are a variety of Xerox print drivers available for the device to support all the popular operating systems. The Xerox print drivers allow you to use the specific features available on your device.
- Page 301 Printing a Secure Print Job using the PCL Print Driver You can print to the device from your computer through a print driver. There are a variety of Xerox print drivers available for the device to support all the popular operating systems. The Xerox print drivers allow you to use the specific features available on your device.
- Page 302 3. Select the Xerox PCL driver from the list of print drivers available. 4. Open the print driver Properties window - the method will vary depending on the application you are printing from.
- Page 303 Printing a Sample Set Job using the PCL Print Driver You can print to the device from your computer through a print driver. There are a variety of Xerox print drivers available for the device to support all the popular operating systems. The Xerox print drivers allow you to use the specific features available on your device.
- Page 304 Printing a Delay Print Job using the PCL Print Driver You can print to the device from your computer through a print driver. There are a variety of Xerox print drivers available for the device to support all the popular operating systems. The Xerox print drivers allow you to use the specific features available on your device.
- Page 305 Saving Jobs using the PCL Print Driver You can print to the device from your computer through a print driver. There are a variety of Xerox print drivers available for the device to support all the popular operating systems. The Xerox print drivers allow you to use the specific features available on your device.
- Page 306 Sending a Fax using the PCL Print Driver You can print to the device from your computer through a print driver. There are a variety of Xerox print drivers available for the device to support all the popular operating systems. The Xerox print drivers allow you to use the specific features available on your device.
- Page 307 (if you include a cover sheet generated by the print driver). 3. Select the Xerox PCL driver from the list of print drivers available. 4. Open the print driver Properties window - the method will vary depending on the application you are printing from.
- Page 308 ® Print WorkCentre XXXX If the contact list is long, click in the Search... entry box and use your keyboard to enter • the contact details. • Click the OK button to see the search results. Select the Add button. Click the OK button.
- Page 309 Specifying a Paper Type using the PCL Print Driver You can print to the device from your computer through a print driver. There are a variety of Xerox print drivers available for the device to support all the popular operating systems. The Xerox print drivers allow you to use the specific features available on your device.
- Page 310 3. Select the Xerox PCL driver from the list of print drivers available. 4. Open the print driver Properties window - the method will vary depending on the application you are printing from.
- Page 311 Printing 2-Sided using the PCL Print Driver You can print to the device from your computer through a print driver. There are a variety of Xerox print drivers available for the device to support all the popular operating systems. The Xerox print drivers allow you to use the specific features available on your device.
- Page 312 Choosing a Finishing Option when using the PCL Print Driver You can print to the device from your computer through a print driver. There are a variety of Xerox print drivers available for the device to support all the popular operating systems. The Xerox print drivers allow you to use the specific features available on your device.
- Page 313 Stapling using the PCL Print Driver You can print to the device from your computer through a print driver. There are a variety of Xerox print drivers available for the device to support all the popular operating systems. The Xerox print drivers allow you to use the specific features available on your device.
- Page 314 Hole Punching using the PCL Print Driver You can print to the device from your computer through a print driver. There are a variety of Xerox print drivers available for the device to support all the popular operating systems. The Xerox print drivers allow you to use the specific features available on your device.
- Page 315 3. Select the Xerox PCL driver from the list of print drivers available. 4. Open the print driver Properties window - the method will vary depending on the application you are printing from.
- Page 316 Folding using the PCL Print Driver You can print to the device from your computer through a print driver. There are a variety of Xerox print drivers available for the device to support all the popular operating systems. The Xerox print drivers allow you to use the specific features available on your device.
- Page 317 Stapling and Hole Punching using the PCL Print Driver You can print to the device from your computer through a print driver. There are a variety of Xerox print drivers available for the device to support all the popular operating systems. The Xerox print drivers allow you to use the specific features available on your device.
- Page 318 3. Select the Xerox PCL driver from the list of print drivers available. 4. Open the print driver Properties window - the method will vary depending on the application you are printing from.
- Page 319 Creating a Booklet Layout using the PCL Print Driver You can print to the device from your computer through a print driver. There are a variety of Xerox print drivers available for the device to support all the popular operating systems. The Xerox print drivers allow you to use the specific features available on your device.
- Page 320 Folding Booklets using the PCL Print Driver You can print to the device from your computer through a print driver. There are a variety of Xerox print drivers available for the device to support all the popular operating systems. The Xerox print drivers allow you to use the specific features available on your device.
- Page 321 System Administrator Guide www.xerox.com/support. Using Internet Services to find System Administrator Contact Details Viewing the Progress and Details of a Job using the Job Status Menu Logging into a Print Driver using Xerox Standard Accounting or Network Accounting User Guide...
- Page 322 Folding and Stapling Booklets using the PCL Print Driver You can print to the device from your computer through a print driver. There are a variety of Xerox print drivers available for the device to support all the popular operating systems. The Xerox print drivers allow you to use the specific features available on your device.
- Page 323 Setting the Print Quality using the PCL Print Driver You can print to the device from your computer through a print driver. There are a variety of Xerox print drivers available for the device to support all the popular operating systems. The Xerox print drivers allow you to use the specific features available on your device.
- Page 324 Choosing an Output Destination when using the PCL Print Driver You can print to the device from your computer through a print driver. There are a variety of Xerox print drivers available for the device to support all the popular operating systems. The Xerox print drivers allow you to use the specific features available on your device.
-
Page 325: Document Options
Printing more than one Page on a Sheet using the PCL Print Driver You can print to the device from your computer through a print driver. There are a variety of Xerox print drivers available for the device to support all the popular operating systems. The Xerox print drivers allow you to use the specific features available on your device. - Page 326 3. Select the Xerox PCL driver from the list of print drivers available. 4. Open the print driver Properties window - the method will vary depending on the application you are printing from.
- Page 327 Creating a Booklet Layout using the PCL Print Driver Layout Options You can print to the device from your computer through a print driver. There are a variety of Xerox print drivers available for the device to support all the popular operating systems. The Xerox print drivers allow you to use the specific features available on your device.
- Page 328 Folding Booklets using the PCL Print Driver Layout Options You can print to the device from your computer through a print driver. There are a variety of Xerox print drivers available for the device to support all the popular operating systems. The Xerox print drivers allow you to use the specific features available on your device.
- Page 329 Folding and Stapling Booklets using the PCL Print Driver Layout Options You can print to the device from your computer through a print driver. There are a variety of Xerox print drivers available for the device to support all the popular operating systems. The Xerox print drivers allow you to use the specific features available on your device.
- Page 330 3. Select the Xerox PCL driver from the list of print drivers available. 4. Open the print driver Properties window - the method will vary depending on the application you are printing from.
- Page 331 Choosing a Special Pages Option using the PCL Print Driver You can print to the device from your computer through a print driver. There are a variety of Xerox print drivers available for the device to support all the popular operating systems. The Xerox print drivers allow you to use the specific features available on your device.
- Page 332 Adding Covers using the PCL Print Driver You can print to the device from your computer through a print driver. There are a variety of Xerox print drivers available for the device to support all the popular operating systems. The Xerox print drivers allow you to use the specific features available on your device.
- Page 333 3. Select the Xerox PCL driver from the list of print drivers available. 4. Open the print driver Properties window - the method will vary depending on the application you are printing from.
- Page 334 Adding Inserts using the PCL Print Driver You can print to the device from your computer through a print driver. There are a variety of Xerox print drivers available for the device to support all the popular operating systems. The Xerox print drivers allow you to use the specific features available on your device.
- Page 335 Setting Exceptions using the PCL Print Driver You can print to the device from your computer through a print driver. There are a variety of Xerox print drivers available for the device to support all the popular operating systems. The Xerox print drivers allow you to use the specific features available on your device.
- Page 336 Designing and Applying a Watermark to Prints using the PCL Print Driver You can print to the device from your computer through a print driver. There are a variety of Xerox print drivers available for the device to support all the popular operating systems. The Xerox print drivers allow you to use the specific features available on your device.
- Page 337 3. Select the Xerox PCL driver from the list of print drivers available. 4. Open the print driver Properties window - the method will vary depending on the application you are printing from.
- Page 338 Setting the Orientation of a Print Job using the PCL Print Driver You can print to the device from your computer through a print driver. There are a variety of Xerox print drivers available for the device to support all the popular operating systems. The Xerox print drivers allow you to use the specific features available on your device.
- Page 339 Adding a Job ID using the PCL Driver You can print to the device from your computer through a print driver. There are a variety of Xerox print drivers available for the device to support all the popular operating systems. The Xerox print drivers allow you to use the specific features available on your device.
- Page 340 Removing a Job ID using the PCL Print Driver You can print to the device from your computer through a print driver. There are a variety of Xerox print drivers available for the device to support all the popular operating systems. The Xerox print drivers allow you to use the specific features available on your device.
- Page 341 3. Select the Xerox PCL driver from the list of print drivers available. 4. Open the print driver Properties window - the method will vary depending on the application you are printing from.
-
Page 342: Menu At The Bottom Of The Tabs
Using Saved Print Settings using the PCL Print Driver You can print to the device from your computer through a print driver. There are a variety of Xerox print drivers available for the device to support all the popular operating systems. The Xerox print drivers allow you to use the specific features available on your device. - Page 343 Saving Print Settings using the PCL Print Driver You can print to the device from your computer through a print driver. There are a variety of Xerox print drivers available for the device to support all the popular operating systems. The Xerox print drivers allow you to use the specific features available on your device.
- Page 344 Saving Print Settings as Application Defaults using the PCL Print Driver You can print to the device from your computer through a print driver. There are a variety of Xerox print drivers available for the device to support all the popular operating systems. The Xerox print drivers allow you to use the specific features available on your device.
- Page 345 Renaming Saved Print Settings using the PCL Print Driver You can print to the device from your computer through a print driver. There are a variety of Xerox print drivers available for the device to support all the popular operating systems. The Xerox print drivers allow you to use the specific features available on your device.
- Page 346 Deleting Saved Print Settings using the PCL Print Driver You can print to the device from your computer through a print driver. There are a variety of Xerox print drivers available for the device to support all the popular operating systems. The Xerox print drivers allow you to use the specific features available on your device.
- Page 347 If Accounting has been enabled you may have to enter login details at the print driver before you can send your job. Use the help button to open the Xerox online help. You will need to be connected to the internet to use this help feature.
- Page 348 Setting Earth Smart Print Settings using the PCL Print Driver You can print to the device from your computer through a print driver. There are a variety of Xerox print drivers available for the device to support all the popular operating systems. The Xerox print drivers allow you to use the specific features available on your device.
-
Page 349: Viewing The Device Status Using The Pcl Print Driver
Viewing the Device Status using the PCL Print Driver You can print to the device from your computer through a print driver. There are a variety of Xerox print drivers available for the device to support all the popular operating systems. The Xerox print drivers allow you to use the specific features available on your device. -
Page 350: Postscript Print Driver
Printing a Document using the PostScript Print Driver You can print to the device from your computer through a print driver. There are a variety of Xerox print drivers available for the device to support all the popular operating systems. The Xerox print drivers allow you to use the specific features available on your device. - Page 351 In addition to the drivers designed specifically for your device, you can also use the Xerox Global Print Driver or the Xerox Mobile Express Driver. These drivers will not give you access to all the features available with the device specific drivers.
-
Page 352: Tab Menu
Using the Job Type Feature with the PostScript Print Driver You can print to the device from your computer through a print driver. There are a variety of Xerox print drivers available for the device to support all the popular operating systems. The Xerox print drivers allow you to use the specific features available on your device. - Page 353 3. Select the Xerox PS driver from the list of print drivers available. 4. Open the print driver Properties window - the method will vary depending on the application you are printing from.
- Page 354 Printing a Normal Print Job using the PostScript Driver You can print to the device from your computer through a print driver. There are a variety of Xerox print drivers available for the device to support all the popular operating systems. The Xerox print drivers allow you to use the specific features available on your device.
- Page 355 Printing a Secure Print Job using the PostScript Driver You can print to the device from your computer through a print driver. There are a variety of Xerox print drivers available for the device to support all the popular operating systems. The Xerox print drivers allow you to use the specific features available on your device.
- Page 356 Printing a Sample Set Job using the PostScript Driver You can print to the device from your computer through a print driver. There are a variety of Xerox print drivers available for the device to support all the popular operating systems. The Xerox print drivers allow you to use the specific features available on your device.
- Page 357 Printing a Delay Print Job using the PostScript Driver You can print to the device from your computer through a print driver. There are a variety of Xerox print drivers available for the device to support all the popular operating systems. The Xerox print drivers allow you to use the specific features available on your device.
- Page 358 Saving Jobs using the PostScript Print Driver You can print to the device from your computer through a print driver. There are a variety of Xerox print drivers available for the device to support all the popular operating systems. The Xerox print drivers allow you to use the specific features available on your device.
- Page 359 3. Select the Xerox PS driver from the list of print drivers available. 4. Open the print driver Properties window - the method will vary depending on the application you are printing from.
- Page 360 Sending a Fax using the PostScript Print Driver You can print to the device from your computer through a print driver. There are a variety of Xerox print drivers available for the device to support all the popular operating systems. The Xerox print drivers allow you to use the specific features available on your device.
- Page 361 ® Print WorkCentre XXXX Click the Add From Phonebook button to add a recipient stored in the address book. Select the option required. Personal Phonebook displays contacts you have added to the phonebook using your print driver. Shared Phonebook lists contacts you have added, but also contacts added by other people.
- Page 362 Specifying a Paper Type using the PostScript Print Driver You can print to the device from your computer through a print driver. There are a variety of Xerox print drivers available for the device to support all the popular operating systems. The Xerox print drivers allow you to use the specific features available on your device.
- Page 363 From most Microsoft applications select the Properties or Preferences button to open the window. 4. Select the Xerox PS driver from the list of print drivers available. 5. If required, click the Printing Options tab. This is usually the active tab when the print driver opens.
- Page 364 Printing 2-Sided using the PostScript Print Driver You can print to the device from your computer through a print driver. There are a variety of Xerox print drivers available for the device to support all the popular operating systems. The Xerox print drivers allow you to use the specific features available on your device.
- Page 365 Choosing a Finishing Option when using the PostScript Print Driver You can print to the device from your computer through a print driver. There are a variety of Xerox print drivers available for the device to support all the popular operating systems. The Xerox print drivers allow you to use the specific features available on your device.
- Page 366 Stapling using the PostScript Print Driver You can print to the device from your computer through a print driver. There are a variety of Xerox print drivers available for the device to support all the popular operating systems. The Xerox print drivers allow you to use the specific features available on your device.
- Page 367 Hole Punching using the PostScript Print Driver You can print to the device from your computer through a print driver. There are a variety of Xerox print drivers available for the device to support all the popular operating systems. The Xerox print drivers allow you to use the specific features available on your device.
- Page 368 3. Select the Xerox PS driver from the list of print drivers available. 4. Open the print driver Properties window - the method will vary depending on the application you are printing from.
- Page 369 Folding using the PostScript Print Driver You can print to the device from your computer through a print driver. There are a variety of Xerox print drivers available for the device to support all the popular operating systems. The Xerox print drivers allow you to use the specific features available on your device.
- Page 370 Stapling and Hole Punching using the PostScript Print Driver You can print to the device from your computer through a print driver. There are a variety of Xerox print drivers available for the device to support all the popular operating systems. The Xerox print drivers allow you to use the specific features available on your device.
- Page 371 3. Select the Xerox PS driver from the list of print drivers available. 4. Open the print driver Properties window - the method will vary depending on the application you are printing from.
- Page 372 Creating a Booklet Layout using the PostScript Print Driver You can print to the device from your computer through a print driver. There are a variety of Xerox print drivers available for the device to support all the popular operating systems. The Xerox print drivers allow you to use the specific features available on your device.
- Page 373 Folding Booklets using the PostScript Print Driver You can print to the device from your computer through a print driver. There are a variety of Xerox print drivers available for the device to support all the popular operating systems. The Xerox print drivers allow you to use the specific features available on your device.
- Page 374 3. Select the Xerox PS driver from the list of print drivers available. 4. Open the print driver Properties window - the method will vary depending on the application you are printing from.
- Page 375 Folding and Stapling Booklets using the PostScript Print Driver You can print to the device from your computer through a print driver. There are a variety of Xerox print drivers available for the device to support all the popular operating systems. The Xerox print drivers allow you to use the specific features available on your device.
- Page 376 ® Print WorkCentre XXXX 4. Open the print driver Properties window - the method will vary depending on the application you are printing from. From most Microsoft applications select the Properties or Preferences button to open the window. 5. If required, click the Printing Options tab. This is usually the active tab when the print driver opens.
- Page 377 Setting the Print Quality using the PostScript Print Driver You can print to the device from your computer through a print driver. There are a variety of Xerox print drivers available for the device to support all the popular operating systems. The Xerox print drivers allow you to use the specific features available on your device.
- Page 378 Choosing an Output Destination when using the PostScript Print Driver You can print to the device from your computer through a print driver. There are a variety of Xerox print drivers available for the device to support all the popular operating systems. The Xerox print drivers allow you to use the specific features available on your device.
- Page 379 Adjusting the Lightness of your Print using the PostScript Driver You can print to the device from your computer through a print driver. There are a variety of Xerox print drivers available for the device to support all the popular operating systems. The Xerox print drivers allow you to use the specific features available on your device.
- Page 380 Adjusting the Contrast of your Print using the PostScript Driver You can print to the device from your computer through a print driver. There are a variety of Xerox print drivers available for the device to support all the popular operating systems. The Xerox print drivers allow you to use the specific features available on your device.
- Page 381 Printing more than one Page on a Sheet using the PostScript Print Driver You can print to the device from your computer through a print driver. There are a variety of Xerox print drivers available for the device to support all the popular operating systems. The Xerox print drivers allow you to use the specific features available on your device.
- Page 382 Creating a Booklet Layout using the PostScript Print Driver Layout Options You can print to the device from your computer through a print driver. There are a variety of Xerox print drivers available for the device to support all the popular operating systems. The Xerox print drivers allow you to use the specific features available on your device.
- Page 383 3. Select the Xerox PS driver from the list of print drivers available. 4. Open the print driver Properties window - the method will vary depending on the application you are printing from.
- Page 384 Folding Booklets using the PostScript Print Driver Layout Options You can print to the device from your computer through a print driver. There are a variety of Xerox print drivers available for the device to support all the popular operating systems. The Xerox print drivers allow you to use the specific features available on your device.
- Page 385 System Administrator Guide www.xerox.com/support. Using Internet Services to find System Administrator Contact Details Viewing the Progress and Details of a Job using the Job Status Menu Logging into a Print Driver using Xerox Standard Accounting or Network Accounting User Guide...
- Page 386 Folding and Stapling Booklets using the PostScript Print Driver Layout Options You can print to the device from your computer through a print driver. There are a variety of Xerox print drivers available for the device to support all the popular operating systems. The Xerox print drivers allow you to use the specific features available on your device.
- Page 387 Choosing a Special Pages Option using the PostScript Print Driver You can print to the device from your computer through a print driver. There are a variety of Xerox print drivers available for the device to support all the popular operating systems. The Xerox print drivers allow you to use the specific features available on your device.
- Page 388 3. Select the Xerox PS driver from the list of print drivers available. 4. Open the print driver Properties window - the method will vary depending on the application you are printing from.
- Page 389 Adding Covers using the PostScript Print Driver You can print to the device from your computer through a print driver. There are a variety of Xerox print drivers available for the device to support all the popular operating systems. The Xerox print drivers allow you to use the specific features available on your device.
- Page 390 Adding Inserts using the PostScript Print Driver You can print to the device from your computer through a print driver. There are a variety of Xerox print drivers available for the device to support all the popular operating systems. The Xerox print drivers allow you to use the specific features available on your device.
- Page 391 3. Select the Xerox PS driver from the list of print drivers available. 4. Open the print driver Properties window - the method will vary depending on the application you are printing from.
- Page 392 Setting Exceptions using the PostScript Print Driver You can print to the device from your computer through a print driver. There are a variety of Xerox print drivers available for the device to support all the popular operating systems. The Xerox print drivers allow you to use the specific features available on your device.
- Page 393 Designing and Applying a Watermark to Prints using the PostScript Print Driver You can print to the device from your computer through a print driver. There are a variety of Xerox print drivers available for the device to support all the popular operating systems. The Xerox print drivers allow you to use the specific features available on your device.
- Page 394 Setting the Orientation of a Print Job using the PostScript Print Driver You can print to the device from your computer through a print driver. There are a variety of Xerox print drivers available for the device to support all the popular operating systems. The Xerox print drivers allow you to use the specific features available on your device.
- Page 395 3. Select the Xerox PS driver from the list of print drivers available. 4. Open the print driver Properties window - the method will vary depending on the application you are printing from.
- Page 396 Adding a Job ID using the PostScript Print Driver You can print to the device from your computer through a print driver. There are a variety of Xerox print drivers available for the device to support all the popular operating systems. The Xerox print drivers allow you to use the specific features available on your device.
- Page 397 Removing a Job ID using the PostScript Print Driver You can print to the device from your computer through a print driver. There are a variety of Xerox print drivers available for the device to support all the popular operating systems. The Xerox print drivers allow you to use the specific features available on your device.
-
Page 398: Menu At The Bottom Of The Tabs
Using Saved Print Settings using the PostScript Print Driver You can print to the device from your computer through a print driver. There are a variety of Xerox print drivers available for the device to support all the popular operating systems. The Xerox print drivers allow you to use the specific features available on your device. - Page 399 3. Select the Xerox PS driver from the list of print drivers available. 4. Open the print driver Properties window - the method will vary depending on the application you are printing from.
- Page 400 Saving Print Settings using the PostScript Print Driver You can print to the device from your computer through a print driver. There are a variety of Xerox print drivers available for the device to support all the popular operating systems. The Xerox print drivers allow you to use the specific features available on your device.
- Page 401 Applying Saved Print Settings using the PostScript Print Driver You can print to the device from your computer through a print driver. There are a variety of Xerox print drivers available for the device to support all the popular operating systems. The Xerox print drivers allow you to use the specific features available on your device.
- Page 402 Renaming Saved Print Settings using the PostScript Print Driver You can print to the device from your computer through a print driver. There are a variety of Xerox print drivers available for the device to support all the popular operating systems. The Xerox print drivers allow you to use the specific features available on your device.
- Page 403 Deleting Saved Print Settings using the PostScript Print Driver You can print to the device from your computer through a print driver. There are a variety of Xerox print drivers available for the device to support all the popular operating systems. The Xerox print drivers allow you to use the specific features available on your device.
- Page 404 If Accounting has been enabled you may have to enter login details at the print driver before you can send your job. Use the help button to open the Xerox online help. You will need to be connected to the internet to use this help feature.
- Page 405 Setting Earth Smart Print Settings using the PostScript Print Driver You can print to the device from your computer through a print driver. There are a variety of Xerox print drivers available for the device to support all the popular operating systems. The Xerox print drivers allow you to use the specific features available on your device.
-
Page 406: Viewing The Device Status Using The Postscript Print Driver
Viewing the Device Status using the PostScript Print Driver You can print to the device from your computer through a print driver. There are a variety of Xerox print drivers available for the device to support all the popular operating systems. The Xerox print drivers allow you to use the specific features available on your device. -
Page 407: Xps Print Driver
Printing a Document using the XPS Print Driver You can print to the device from your computer through a print driver. There are a variety of Xerox print drivers available for the device to support all the popular operating systems. The Xerox print drivers allow you to use the specific features available on your device. - Page 408 In addition to the drivers designed specifically for your device, you can also use the Xerox Global Print Driver or the Xerox Mobile Express Driver. These drivers will not give you access to all the features available with the device specific drivers.
-
Page 409: Tab Menu
Using the Job Type Feature with the XPS Print Driver You can print to the device from your computer through a print driver. There are a variety of Xerox print drivers available for the device to support all the popular operating systems. The Xerox print drivers allow you to use the specific features available on your device. - Page 410 3. Select the Xerox XPS driver from the list of print drivers available. 4. Open the print driver Properties window - the method will vary depending on the application you are printing from.
- Page 411 Printing a Normal Print Job using the XPS Print Driver You can print to the device from your computer through a print driver. There are a variety of Xerox print drivers available for the device to support all the popular operating systems. The Xerox print drivers allow you to use the specific features available on your device.
- Page 412 Printing a Secure Print Job using the XPS Print Driver You can print to the device from your computer through a print driver. There are a variety of Xerox print drivers available for the device to support all the popular operating systems. The Xerox print drivers allow you to use the specific features available on your device.
- Page 413 Printing a Sample Set Job using the XPS Print Driver You can print to the device from your computer through a print driver. There are a variety of Xerox print drivers available for the device to support all the popular operating systems. The Xerox print drivers allow you to use the specific features available on your device.
- Page 414 Printing a Delay Print Job using the XPS Print Driver You can print to the device from your computer through a print driver. There are a variety of Xerox print drivers available for the device to support all the popular operating systems. The Xerox print drivers allow you to use the specific features available on your device.
- Page 415 Saving Jobs using the XPS Print Driver You can print to the device from your computer through a print driver. There are a variety of Xerox print drivers available for the device to support all the popular operating systems. The Xerox print drivers allow you to use the specific features available on your device.
- Page 416 3. Select the Xerox XPS driver from the list of print drivers available. 4. Open the print driver Properties window - the method will vary depending on the application you are printing from.
- Page 417 Sending a Fax using the XPS Print Driver You can print to the device from your computer through a print driver. There are a variety of Xerox print drivers available for the device to support all the popular operating systems. The Xerox print drivers allow you to use the specific features available on your device.
- Page 418 ® Print WorkCentre XXXX If required, select the Telephone Number entry box and use your keyboard to enter the recipient’s telephone number. If required, select the E-mail Address entry box and use your keyboard to enter the recipient’s e-mail address. If required, select the Mailbox entry box and use your keyboard to enter the recipient’s mailbox number.
- Page 419 Printing a Document using the XPS Print Driver Using the Job Type Feature with the XPS Print Driver System Administrator Guide www.xerox.com/support. Using Internet Services to find System Administrator Contact Details Logging into a Print Driver using Xerox Standard Accounting or Network Accounting User Guide...
- Page 420 Specifying a Paper Type using the XPS Print Driver You can print to the device from your computer through a print driver. There are a variety of Xerox print drivers available for the device to support all the popular operating systems. The Xerox print drivers allow you to use the specific features available on your device.
- Page 421 Printing 2-Sided using the XPS Print Driver You can print to the device from your computer through a print driver. There are a variety of Xerox print drivers available for the device to support all the popular operating systems. The Xerox print drivers allow you to use the specific features available on your device.
- Page 422 Choosing a Finishing Option when using the XPS Print Driver You can print to the device from your computer through a print driver. There are a variety of Xerox print drivers available for the device to support all the popular operating systems. The Xerox print drivers allow you to use the specific features available on your device.
- Page 423 Stapling using the XPS Print Driver You can print to the device from your computer through a print driver. There are a variety of Xerox print drivers available for the device to support all the popular operating systems. The Xerox print drivers allow you to use the specific features available on your device.
- Page 424 From most Microsoft applications select the Properties or Preferences button to open the window. 4. Select the Xerox XPS driver from the list of print drivers available. 5. If required, click the Printing Options tab. This is usually the active tab when the print driver opens.
- Page 425 Hole Punching using the XPS Print Driver You can print to the device from your computer through a print driver. There are a variety of Xerox print drivers available for the device to support all the popular operating systems. The Xerox print drivers allow you to use the specific features available on your device.
- Page 426 Folding using the XPS Print Driver You can print to the device from your computer through a print driver. There are a variety of Xerox print drivers available for the device to support all the popular operating systems. The Xerox print drivers allow you to use the specific features available on your device.
- Page 427 Stapling and Hole Punching using the XPS Print Driver You can print to the device from your computer through a print driver. There are a variety of Xerox print drivers available for the device to support all the popular operating systems. The Xerox print drivers allow you to use the specific features available on your device.
- Page 428 3. Select the Xerox XPS driver from the list of print drivers available. 4. Open the print driver Properties window - the method will vary depending on the application you are printing from.
- Page 429 Creating a Booklet Layout using the XPS Print Driver You can print to the device from your computer through a print driver. There are a variety of Xerox print drivers available for the device to support all the popular operating systems. The Xerox print drivers allow you to use the specific features available on your device.
- Page 430 System Administrator Guide www.xerox.com/support. Using Internet Services to find System Administrator Contact Details Viewing the Progress and Details of a Job using the Job Status Menu Logging into a Print Driver using Xerox Standard Accounting or Network Accounting User Guide...
- Page 431 Folding Booklets using the XPS Print Driver You can print to the device from your computer through a print driver. There are a variety of Xerox print drivers available for the device to support all the popular operating systems. The Xerox print drivers allow you to use the specific features available on your device.
- Page 432 Folding and Stapling Booklets using the XPS Print Driver You can print to the device from your computer through a print driver. There are a variety of Xerox print drivers available for the device to support all the popular operating systems. The Xerox print drivers allow you to use the specific features available on your device.
- Page 433 3. Select the Xerox XPS driver from the list of print drivers available. 4. Open the print driver Properties window - the method will vary depending on the application you are printing from.
- Page 434 Setting the Print Quality using the XPS Print Driver You can print to the device from your computer through a print driver. There are a variety of Xerox print drivers available for the device to support all the popular operating systems. The Xerox print drivers allow you to use the specific features available on your device.
- Page 435 Choosing an Output Destination when using the XPS Print Driver You can print to the device from your computer through a print driver. There are a variety of Xerox print drivers available for the device to support all the popular operating systems. The Xerox print drivers allow you to use the specific features available on your device.
- Page 436 Printing more than one Page on a Sheet using the XPS Print Driver You can print to the device from your computer through a print driver. There are a variety of Xerox print drivers available for the device to support all the popular operating systems. The Xerox print drivers allow you to use the specific features available on your device.
- Page 437 3. Select the Xerox XPS driver from the list of print drivers available. 4. Open the print driver Properties window - the method will vary depending on the application you are printing from.
- Page 438 Creating a Booklet Layout using the XPS Print Driver Layout Options You can print to the device from your computer through a print driver. There are a variety of Xerox print drivers available for the device to support all the popular operating systems. The Xerox print drivers allow you to use the specific features available on your device.
- Page 439 Folding Booklets using the XPS Print Driver Layout Options You can print to the device from your computer through a print driver. There are a variety of Xerox print drivers available for the device to support all the popular operating systems. The Xerox print drivers allow you to use the specific features available on your device.
- Page 440 3. Select the Xerox XPS driver from the list of print drivers available. 4. Open the print driver Properties window - the method will vary depending on the application you are printing from.
- Page 441 Folding and Stapling Booklets using the XPS Print Driver Layout Options You can print to the device from your computer through a print driver. There are a variety of Xerox print drivers available for the device to support all the popular operating systems. The Xerox print drivers allow you to use the specific features available on your device.
- Page 442 Details button. Once the resources are available the job will print. More Information Printing a Document using the XPS Print Driver Choosing a Finishing Option when using the XPS Print Driver System Administrator Guide www.xerox.com/support. User Guide...
- Page 443 Choosing a Special Pages Option using the XPS Print Driver You can print to the device from your computer through a print driver. There are a variety of Xerox print drivers available for the device to support all the popular operating systems. The Xerox print drivers allow you to use the specific features available on your device.
- Page 444 Adding Covers using the XPS Print Driver You can print to the device from your computer through a print driver. There are a variety of Xerox print drivers available for the device to support all the popular operating systems. The Xerox print drivers allow you to use the specific features available on your device.
- Page 445 3. Select the Xerox XPS driver from the list of print drivers available. 4. Open the print driver Properties window - the method will vary depending on the application you are printing from.
- Page 446 Adding Inserts using the XPS Print Driver You can print to the device from your computer through a print driver. There are a variety of Xerox print drivers available for the device to support all the popular operating systems. The Xerox print drivers allow you to use the specific features available on your device.
- Page 447 Setting Exceptions using the XPS Print Driver You can print to the device from your computer through a print driver. There are a variety of Xerox print drivers available for the device to support all the popular operating systems. The Xerox print drivers allow you to use the specific features available on your device.
- Page 448 Designing and Applying a Watermark to Prints using the XPS Print Driver You can print to the device from your computer through a print driver. There are a variety of Xerox print drivers available for the device to support all the popular operating systems. The Xerox print drivers allow you to use the specific features available on your device.
- Page 449 3. Select the Xerox XPS driver from the list of print drivers available. 4. Open the print driver Properties window - the method will vary depending on the application you are printing from.
- Page 450 Setting the Orientation of the Print Job using the XPS Print Driver You can print to the device from your computer through a print driver. There are a variety of Xerox print drivers available for the device to support all the popular operating systems. The Xerox print drivers allow you to use the specific features available on your device.
- Page 451 Adding a Job ID using the XPS Print Driver You can print to the device from your computer through a print driver. There are a variety of Xerox print drivers available for the device to support all the popular operating systems. The Xerox print drivers allow you to use the specific features available on your device.
- Page 452 3. Select the Xerox XPS driver from the list of print drivers available. 4. Open the print driver Properties window - the method will vary depending on the application you are printing from.
- Page 453 Removing a Job ID using the XPS Print Driver You can print to the device from your computer through a print driver. There are a variety of Xerox print drivers available for the device to support all the popular operating systems. The Xerox print drivers allow you to use the specific features available on your device.
-
Page 454: Menu At The Bottom Of The Tabs
Using Saved Print Settings using the XPS Print Driver You can print to the device from your computer through a print driver. There are a variety of Xerox print drivers available for the device to support all the popular operating systems. The Xerox print drivers allow you to use the specific features available on your device. - Page 455 Saving Print Settings using the XPS Print Driver You can print to the device from your computer through a print driver. There are a variety of Xerox print drivers available for the device to support all the popular operating systems. The Xerox print drivers allow you to use the specific features available on your device.
- Page 456 Saving Print Settings as Application Defaults using the XPS Print Driver You can print to the device from your computer through a print driver. There are a variety of Xerox print drivers available for the device to support all the popular operating systems. The Xerox print drivers allow you to use the specific features available on your device.
- Page 457 Applying Saved Print Settings using the XPS Print Driver You can print to the device from your computer through a print driver. There are a variety of Xerox print drivers available for the device to support all the popular operating systems. The Xerox print drivers allow you to use the specific features available on your device.
- Page 458 Renaming Saved Print Settings using the XPS Print Driver You can print to the device from your computer through a print driver. There are a variety of Xerox print drivers available for the device to support all the popular operating systems. The Xerox print drivers allow you to use the specific features available on your device.
- Page 459 Note: To print an XPS document, your device needs to have the optional XPS feature installed. Use the help button to open the Xerox online help. You will need to be connected to the internet to use this help feature.
- Page 460 Resetting Defaults using the XPS Print Driver You can print to the device from your computer through a print driver. There are a variety of Xerox print drivers available for the device to support all the popular operating systems. The Xerox print drivers allow you to use the specific features available on your device.
-
Page 461: Viewing The Device Status Using The Xps Print Driver
Viewing the Device Status using the XPS Print Driver You can print to the device from your computer through a print driver. There are a variety of Xerox print drivers available for the device to support all the popular operating systems. The Xerox print drivers allow you to use the specific features available on your device. - Page 462 1. Open the document to be printed. From most applications select the Office button or select File, then select Print from the file menu. 2. Select the Xerox XPS driver from the list of print drivers available. 3. Open the print driver Properties window - the method will vary depending on the application you are printing from.
-
Page 463: Mac Print Driver
Mac Print Driver Printing a Document using the Mac Print Driver You can print to the device from your computer through a print driver. The Xerox Mac print driver allows you to use the specific features available on your device. -
Page 464: Xerox Features Menu
Job Type Using the Job Type Feature with the Mac Print Driver You can print to the device from your computer through a print driver. The Xerox Mac print driver allows you to use the specific features available on your device. - Page 465 3. Select the Xerox driver from the list of print drivers available. 4. Select Xerox Features from the print driver properties menu - the name of the menu will vary depending on the application you are printing from. From most applications select the dropdown menu that states Copies and Pages, or that states the application name.
- Page 466 Logging into a Print Driver using Xerox Standard Accounting or Network Accounting Printing a Normal Print Job using the Mac Print Driver You can print to the device from your computer through a print driver. The Xerox Mac print driver allows you to use the specific features available on your device.
- Page 467 Logging into a Print Driver using Xerox Standard Accounting or Network Accounting Printing a Secure Print Job using the Mac Print Driver You can print to the device from your computer through a print driver. The Xerox Mac print driver allows you to use the specific features available on your device.
- Page 468 Logging into a Print Driver using Xerox Standard Accounting or Network Accounting Printing a Delay Print Job using the Mac Print Driver You can print to the device from your computer through a print driver. The Xerox Mac print driver allows you to use the specific features available on your device.
- Page 469 Logging into a Print Driver using Xerox Standard Accounting or Network Accounting Printing a Sample Set Job using the Mac Print Driver You can print to the device from your computer through a print driver. The Xerox Mac print driver allows you to use the specific features available on your device.
- Page 470 Logging into a Print Driver using Xerox Standard Accounting or Network Accounting Saving Jobs using the Mac Print Driver You can print to the device from your computer through a print driver. The Xerox Mac print driver allows you to use the specific features available on your device.
- Page 471 Logging into a Print Driver using Xerox Standard Accounting or Network Accounting Sending a Fax using the Mac Print Driver You can print to the device from your computer through a print driver. The Xerox Mac print driver allows you to use the specific features available on your device.
- Page 472 3. Select the Xerox driver from the list of print drivers available. 4. Select Xerox Features from the print driver properties menu - the name of the menu will vary depending on the application you are printing from. From most applications select the dropdown menu that states Copies and Pages, or that states the application name.
- Page 473 ® Print WorkCentre XXXX 7. If you want to add a cover sheet to your fax job, click the Cover Sheet tab. 8. Select Print a Cover Sheet from the Cover Sheet Options menu. • Click the Cover Sheet Notes button. Click the Cover Sheet Notes entry box and use your keyboard to enter your note.
- Page 474 Logging into a Print Driver using Xerox Standard Accounting or Network Accounting Specifying a Paper Type using the Mac Print Driver You can print to the device from your computer through a print driver. The Xerox Mac print driver allows you to use the specific features available on your device.
- Page 475 Logging into a Print Driver using Xerox Standard Accounting or Network Accounting Printing 2-Sided using the Mac Print Driver You can print to the device from your computer through a print driver. The Xerox Mac print driver allows you to use the specific features available on your device.
- Page 476 Logging into a Print Driver using Xerox Standard Accounting or Network Accounting Setting the Print Quality using the Mac Print Driver You can print to the device from your computer through a print driver. The Xerox Mac print driver allows you to use the specific features available on your device.
- Page 477 Finishing Choosing a Finishing Option when using the Mac Print Driver You can print to the device from your computer through a print driver. The Xerox Mac print driver allows you to use the specific features available on your device.
- Page 478 3. Select the Xerox driver from the list of print drivers available. 4. Select Xerox Features from the print driver properties menu - the name of the menu will vary depending on the application you are printing from. From most applications select the dropdown menu that states Copies and Pages, or that states the application name.
- Page 479 3. Select the Xerox driver from the list of print drivers available. 4. Select Xerox Features from the print driver properties menu - the name of the menu will vary depending on the application you are printing from. From most applications select the dropdown menu that states Copies and Pages, or that states the application name.
- Page 480 3. Select the Xerox driver from the list of print drivers available. 4. Select Xerox Features from the print driver properties menu - the name of the menu will vary depending on the application you are printing from. From most applications select the dropdown menu that states Copies and Pages, or that states the application name.
- Page 481 XXXX Folding using the Mac Print Driver You can print to the device from your computer through a print driver. The Xerox Mac print driver allows you to use the specific features available on your device. If Authentication has been enabled on your device you may have to login at the device to see or release your jobs.
- Page 482 Booklet Creation Folding Booklets using the Mac Print Driver You can print to the device from your computer through a print driver. The Xerox Mac print driver allows you to use the specific features available on your device. If Authentication has been enabled on your device you may have to login at the device to see or release your jobs.
- Page 483 3. Select the Xerox driver from the list of print drivers available. 4. Select Xerox Features from the print driver properties menu - the name of the menu will vary depending on the application you are printing from. From most applications select the dropdown menu that states Copies and Pages, or that states the application name.
- Page 484 XXXX Folding and Stapling Booklets using the Mac Print Driver You can print to the device from your computer through a print driver. The Xerox Mac print driver allows you to use the specific features available on your device. If Authentication has been enabled on your device you may have to login at the device to see or release your jobs.
- Page 485 Logging into a Print Driver using Xerox Standard Accounting or Network Accounting Choosing an Output Destination when using the Mac Print Driver You can print to the device from your computer through a print driver. The Xerox Mac print driver allows you to use the specific features available on your device.
-
Page 486: Special Pages
Special Pages Choosing a Special Pages Option using the Mac Print Driver You can print to the device from your computer through a print driver. The Xerox Mac print driver allows you to use the specific features available on your device. - Page 487 WorkCentre XXXX 4. Select Xerox Features from the print driver properties menu - the name of the menu will vary depending on the application you are printing from. From most applications select the dropdown menu that states Copies and Pages, or that states the application name.
- Page 488 3. Select the Xerox driver from the list of print drivers available. 4. Select Xerox Features from the print driver properties menu - the name of the menu will vary depending on the application you are printing from. From most applications select the dropdown menu that states Copies and Pages, or that states the application name.
- Page 489 Logging into a Print Driver using Xerox Standard Accounting or Network Accounting Adding Inserts using the Mac Print Driver You can print to the device from your computer through a print driver. The Xerox Mac print driver allows you to use the specific features available on your device.
- Page 490 Logging into a Print Driver using Xerox Standard Accounting or Network Accounting Setting Exceptions using the Mac Print Driver You can print to the device from your computer through a print driver. The Xerox Mac print driver allows you to use the specific features available on your device.
- Page 491 Adjusting the Lightness of your Print using the Mac Print Driver You can print to the device from your computer through a print driver. The Xerox Mac print driver allows you to use the specific features available on your device.
- Page 492 3. Select the Xerox driver from the list of print drivers available. 4. Select Xerox Features from the print driver properties menu - the name of the menu will vary depending on the application you are printing from. From most applications select the dropdown menu that states Copies and Pages, or that states the application name.
- Page 493 3. Select the Xerox driver from the list of print drivers available. 4. Select Xerox Features from the print driver properties menu - the name of the menu will vary depending on the application you are printing from. From most applications select the dropdown menu that states Copies and Pages, or that states the application name.
- Page 494 3. Select the Xerox driver from the list of print drivers available. 4. Select Xerox Features from the print driver properties menu - the name of the menu will vary depending on the application you are printing from. From most applications select the dropdown menu that states Copies and Pages, or that states the application name.
- Page 495 Folding and Stapling Booklets using the Mac Print Driver Booklet / Watermark Options You can print to the device from your computer through a print driver. The Xerox Mac print driver allows you to use the specific features available on your device.
- Page 496 Designing and Applying a Watermark to Prints using the Mac Print Driver You can print to the device from your computer through a print driver. The Xerox Mac print driver allows you to use the specific features available on your device.
- Page 497 System Administrator Guide www.xerox.com/support. Using Internet Services to find System Administrator Contact Details Viewing the Progress and Details of a Job using the Job Status Menu Logging into a Print Driver using Xerox Standard Accounting or Network Accounting User Guide...
- Page 498 Advanced Adding a Job ID using the Mac Print Driver You can print to the device from your computer through a print driver. The Xerox Mac print driver allows you to use the specific features available on your device. If Authentication has been enabled on your device you may have to login at the device to see or release your jobs.
- Page 499 Viewing the Progress and Details of a Job using the Job Status Menu Removing a Job ID using the Mac Print Driver You can print to the device from your computer through a print driver. The Xerox Mac print driver allows you to use the specific features available on your device.
- Page 500 Viewing the Progress and Details of a Job using the Job Status Menu Changing the Booklet Image Order using the Mac Print Driver You can print to the device from your computer through a print driver. The Xerox Mac print driver allows you to use the specific features available on your device.
-
Page 501: Other Options
If Accounting has been enabled you may have to enter login details at the print driver before you can send your job. Use the help button to open the Xerox online help. You will need to be connected to the internet to use this help feature. - Page 502 2. Select the Xerox driver from the list of print drivers available. 3. Select Xerox Features from the print driver properties menu - the name of the menu will vary depending on the application you are printing from. From most applications select the dropdown menu that states Copies and Pages, or that states the application name.
- Page 503 3. Select the Xerox driver from the list of print drivers available. 4. Select Xerox Features from the print driver properties menu - the name of the menu will vary depending on the application you are printing from. From most applications select the dropdown menu that states Copies and Pages, or that states the application name.
-
Page 504: Print From
® Print WorkCentre XXXX Print From Printing a Saved Job using the Print From Feature The Print From feature prints jobs which have been saved on the device or on a USB stick. This is a useful feature if you have documents that you need to print regularly. Note: This option must be made available by your System Administrator. -
Page 505: Printing From A Mailbox Using The Print From Feature
Using the Job Type Feature with the PostScript Print Driver Using a User ID to Log In at the Device System Administrator Guide www.xerox.com/support. Using Internet Services to find System Administrator Contact Details Printing From a Mailbox using the Print From Feature The Print From feature prints jobs which have been saved on the device or on a USB stick. -
Page 506: Printing From Usb Using The Print From Feature
Using the Scan to Mailbox Templates in Workflow Scanning Creating a Mailbox using Internet Services Using a User ID to Log In at the Device System Administrator Guide www.xerox.com/support. Using Internet Services to find System Administrator Contact Details Printing From USB using the Print From Feature The Print From feature prints jobs which have been saved on the device or on a USB stick. -
Page 507: Print To File
Print to File is not a Xerox or Xerox driver specific feature. The instructions provided will work with many operating systems, but not Macs. If you can’t print to file from your system contact your IT support team or System Administrator for help. -
Page 508: Print Login
Submitting a Print Job using Internet Services System Administrator Guide www.xerox.com/support. Using Internet Services to find System Administrator Contact Details Logging into a Print Driver using Xerox Standard Accounting or Network Accounting Print Login Logging into a Print Driver using Xerox Standard Accounting or... - Page 509 2. Open your web browser. 3. In the URL field, use your keyboard to enter http://www.xerox.com/support. 4. Press the Enter button on your keyboard to load the page. 5. If required, click the Support & Drivers menu link. This is usually the default page when the Support section opens.
- Page 510 Select the OK button. Double-click the Xerox Print Driver icon. If required, click the Continue button on the security warning message. Click the Continue button in the Xerox Printer Installer window. Click the Continue button to accept the license. Click the Agree button.
-
Page 511: Configuring A Print Driver In Windows 7 Including Editing The Default Print
® Print WorkCentre XXXX Configuring a Print Driver in Windows 7 including editing the Default Print Settings You can configure your print driver to add features or set default print settings such as 2-sided printing. Your System Administrator can lock this feature. 1. - Page 512 ® Print WorkCentre XXXX User Guide...
-
Page 513: E-Mail
E-Mail Sending an E-mail Use the E-mail feature to scan images and send them to a recipient as an attachment to an e-mail. Note: This option must be made available by your System Administrator. If Authentication or Accounting has been enabled on your device you may have to enter login details to access the E-mail features. -
Page 514: E-Mail
More Information Using a User ID to Log In at the Device Using Internet Services to find System Administrator Contact Details System Administrator Guide www.xerox.com/support. E-Mail Sending an E-mail to an Address Book Contact Use the E-mail feature to scan images and send them to a recipient as an attachment to an e-mail. -
Page 515: Sending An E-Mail To A Recipient Saved As A Favorite
Using a User ID to Log In at the Device Using Internet Services to find System Administrator Contact Details System Administrator Guide www.xerox.com/support. Sending an E-mail to a Recipient Saved as a Favorite Use the E-mail feature to scan images and send them to a recipient as an attachment to an e-mail. -
Page 516: Saving An E-Mail Address As A Favorite
Using a User ID to Log In at the Device Using Internet Services to find System Administrator Contact Details System Administrator Guide www.xerox.com/support. Saving an E-mail address as a Favorite Use the E-mail feature to scan images and send them to a recipient as an attachment to an e-mail. -
Page 517: Setting The Output Color For An E-Mail Attachment
Sending an E-mail to a Recipient Saved as a Favorite Using Internet Services to find System Administrator Contact Details System Administrator Guide www.xerox.com/support. Setting the Output Color for an E-mail Attachment Use the E-mail feature to scan images and send them to a recipient as an attachment to an e-mail. - Page 518 18. Press the Job Status button on the device control panel to view the job list and check the status of the job. More Information Using a User ID to Log In at the Device Using Internet Services to find System Administrator Contact Details System Administrator Guide www.xerox.com/support. User Guide...
-
Page 519: Using E-Mail To Send 2-Sided Originals
® E-Mail WorkCentre XXXX Using E-mail to send 2-Sided Originals Use the E-mail feature to scan images and send them to a recipient as an attachment to an e-mail. Note: This option must be made available by your System Administrator. If Authentication or Accounting has been enabled on your device you may have to enter login details to access the E-mail features. -
Page 520: Setting The Original Type For E-Mails
Using a User ID to Log In at the Device Using Internet Services to find System Administrator Contact Details System Administrator Guide www.xerox.com/support. Setting the Original Type for E-mails Use the E-mail feature to scan images and send them to a recipient as an attachment to an e-mail. - Page 521 ® E-Mail WorkCentre XXXX 6. Select the New Recipient... button. 7. Use the touch screen keyboard to enter the e-mail address of the recipient. • The number of alphanumeric characters that can be entered depends on the size of the characters chosen.
-
Page 522: Specifying A File Name For E-Mail Attachments
Using a User ID to Log In at the Device Using Internet Services to find System Administrator Contact Details System Administrator Guide www.xerox.com/support. Specifying a File Name for E-mail Attachments Use the E-mail feature to scan images and send them to a recipient as an attachment to an e-mail. -
Page 523: Advanced Settings
Using a User ID to Log In at the Device Setting a File Format for E-mail Attachments Using Internet Services to find System Administrator Contact Details System Administrator Guide www.xerox.com/support. Advanced Settings Image Options Choosing the Image Options for E-mails Use the E-mail feature to scan images and send them to a recipient as an attachment to an e-mail. - Page 524 ® E-Mail WorkCentre XXXX Use the Lighten / Darken options to manually adjust the lightness or darkness of the image. Light originals containing pencil images may produce better output if the darkness is increased. Dark originals such as halftones or documents with colored backgrounds may need to be lightened. Use the Sharpness option to manually control the sharpness of the scanned images.
- Page 525 Using a User ID to Log In at the Device Using Internet Services to find System Administrator Contact Details System Administrator Guide www.xerox.com/support. Lightening or Darkening E-mails Use the E-mail feature to scan images and send them to a recipient as an attachment to an e-mail.
- Page 526 ® E-Mail WorkCentre XXXX 7. Use the touch screen keyboard to enter the e-mail address of the recipient. • The number of alphanumeric characters that can be entered depends on the size of the characters chosen. Once the end of the entry box has been reached no more characters can be added.
- Page 527 Setting the Background Suppression for E-mails Using Internet Services to find System Administrator Contact Details System Administrator Guide www.xerox.com/support. Changing the Sharpness of E-mail Attachments Use the E-mail feature to scan images and send them to a recipient as an attachment to an e-mail.
- Page 528 Using a User ID to Log In at the Device Using Internet Services to find System Administrator Contact Details System Administrator Guide www.xerox.com/support. Changing the Saturation of E-mail Attachments Use the E-mail feature to scan images and send them to a recipient as an attachment to an e-mail.
- Page 529 ® E-Mail WorkCentre XXXX 4. Select the E-mail button on the touch screen. 5. If required, select the E-mail tab. This is usually the active tab when the E-mail service opens. 6. Select the New Recipient... button. 7. Use the touch screen keyboard to enter the e-mail address of the recipient. •...
-
Page 530: Image Enhancement
Changing the Sharpness of E-mail Attachments Using a User ID to Log In at the Device Using Internet Services to find System Administrator Contact Details System Administrator Guide www.xerox.com/support. Image Enhancement Choosing an Image Enhancement Option for E-mails Use the E-mail feature to scan images and send them to a recipient as an attachment to an e-mail. - Page 531 Using a User ID to Log In at the Device Using Internet Services to find System Administrator Contact Details System Administrator Guide www.xerox.com/support. Setting the Background Suppression for E-mails Use the E-mail feature to scan images and send them to a recipient as an attachment to an e-mail.
- Page 532 ® E-Mail WorkCentre XXXX Use the Background Suppression option to enhance originals that have colored backgrounds, by reducing or eliminating the background on the output. This option is useful when your original is on colored paper. 1. Load your documents face up in the document feeder input tray. Adjust the guide to just touch the documents.
- Page 533 Lightening or Darkening E-mails Using Internet Services to find System Administrator Contact Details System Administrator Guide www.xerox.com/support. Setting the E-mail Contrast Use the E-mail feature to scan images and send them to a recipient as an attachment to an e-mail.
- Page 534 More Information Choosing an Image Enhancement Option for E-mails Setting the Background Suppression for E-mails Using a User ID to Log In at the Device Using Internet Services to find System Administrator Contact Details System Administrator Guide www.xerox.com/support. User Guide...
-
Page 535: Setting The E-Mail Scan Presets
® E-Mail WorkCentre XXXX Setting the E-mail Scan Presets Use the E-mail feature to scan images and send them to a recipient as an attachment to an e-mail. Note: This option must be made available by your System Administrator. If Authentication or Accounting has been enabled on your device you may have to enter login details to access the E-mail features. -
Page 536: Specifying The E-Mail Scan Resolution
Using a User ID to Log In at the Device Using Internet Services to find System Administrator Contact Details System Administrator Guide www.xerox.com/support. Specifying the E-mail Scan Resolution Use the E-mail feature to scan images and send them to a recipient as an attachment to an e-mail. - Page 537 ® E-Mail WorkCentre XXXX 4. Select the E-mail button on the touch screen. 5. If required, select the E-mail tab. This is usually the active tab when the E-mail service opens. 6. Select the New Recipient... button. 7. Use the touch screen keyboard to enter the e-mail address of the recipient. •...
-
Page 538: Setting The Quality Or File Size For E-Mail Attachments
Using a User ID to Log In at the Device Using Internet Services to find System Administrator Contact Details System Administrator Guide www.xerox.com/support. Setting the Quality or File Size for E-mail Attachments Use the E-mail feature to scan images and send them to a recipient as an attachment to an e-mail. - Page 539 20. Press the Job Status button on the device control panel to view the job list and check the status of the job. More Information Using a User ID to Log In at the Device Using Internet Services to find System Administrator Contact Details System Administrator Guide www.xerox.com/support. User Guide...
-
Page 540: Layout Adjustment
® E-Mail WorkCentre XXXX Layout Adjustment Setting the Original Orientation for E-mails Use the E-mail feature to scan images and send them to a recipient as an attachment to an e-mail. Note: This option must be made available by your System Administrator. If Authentication or Accounting has been enabled on your device you may have to enter login details to access the E-mail features. -
Page 541: Specifying The Size Of The Original To Be E-Mailed
Using a User ID to Log In at the Device Using Internet Services to find System Administrator Contact Details System Administrator Guide www.xerox.com/support. Specifying the Size of the Original to be E-mailed Use the E-mail feature to scan images and send them to a recipient as an attachment to an e-mail. - Page 542 ® E-Mail WorkCentre XXXX 3. Press the Services Home button. 4. Select the E-mail button on the touch screen. 5. If required, select the E-mail tab. This is usually the active tab when the E-mail service opens. 6. Select the New Recipient... button. 7.
-
Page 543: Erasing Edges From E-Mail Attachments
Using a User ID to Log In at the Device Using Internet Services to find System Administrator Contact Details System Administrator Guide www.xerox.com/support. Erasing Edges from E-mail Attachments Use the E-mail feature to scan images and send them to a recipient as an attachment to an e-mail. -
Page 544: Removing Blank Pages From E-Mail Originals During Scanning
Using a User ID to Log In at the Device Using Internet Services to find System Administrator Contact Details System Administrator Guide www.xerox.com/support. Removing Blank Pages from E-mail Originals During Scanning Use the E-mail feature to scan images and send them to a recipient as an attachment to an e-mail. - Page 545 ® E-Mail WorkCentre XXXX Use the Blank Page Management option to ignore the non-imaged pages in your originals when scanning. The Background Suppression and Edge Erase features may improve Remove Blank Pages performance. 1. Load your documents face up in the document feeder input tray. Adjust the guide to just touch the documents.
-
Page 546: E-Mail Options
Erasing Edges from E-mail Attachments Using a User ID to Log In at the Device Using Internet Services to find System Administrator Contact Details System Administrator Guide www.xerox.com/support. E-mail Options Setting a File Format for E-mail Attachments Use the E-mail feature to scan images and send them to a recipient as an attachment to an e-mail. - Page 547 ® E-Mail WorkCentre XXXX 7. Use the touch screen keyboard to enter the e-mail address of the recipient. • The number of alphanumeric characters that can be entered depends on the size of the characters chosen. Once the end of the entry box has been reached no more characters can be added.
-
Page 548: Adding A Message To An E-Mail
Specifying a File Name for E-mail Attachments Using Internet Services to find System Administrator Contact Details System Administrator Guide www.xerox.com/support. Adding a Message to an E-mail Use the E-mail feature to scan images and send them to a recipient as an attachment to an e-mail. - Page 549 20. Press the Job Status button on the device control panel to view the job list and check the status of the job. More Information Using a User ID to Log In at the Device Using Internet Services to find System Administrator Contact Details System Administrator Guide www.xerox.com/support. User Guide...
-
Page 550: Adding A Reply To Address To An E-Mail
® E-Mail WorkCentre XXXX Adding a Reply To Address to an E-mail Use the E-mail feature to scan images and send them to a recipient as an attachment to an e-mail. Note: This option must be made available by your System Administrator. If Authentication or Accounting has been enabled on your device you may have to enter login details to access the E-mail features. -
Page 551: Building An E-Mail Job With Multiple Page Or Segment Settings
More Information Using a User ID to Log In at the Device Using Internet Services to find System Administrator Contact Details System Administrator Guide www.xerox.com/support. Building an E-mail Job with Multiple Page or Segment Settings Use the E-mail feature to scan images and send them to a recipient as an attachment to an e-mail. - Page 552 ® E-Mail WorkCentre XXXX Lift up the document feeder. Place the document face down onto the document glass and register it to the arrow at the top left corner. Close the document feeder. 3. Press the Clear All button on the control panel to cancel any previous programming selections. 4.
- Page 553 34. Press the Job Status button on the device control panel to view the job list and check the status of the job. More Information Using a User ID to Log In at the Device Using Internet Services to find System Administrator Contact Details System Administrator Guide www.xerox.com/support. User Guide...
- Page 554 ® E-Mail WorkCentre XXXX User Guide...
-
Page 555: Id Card Copy
ID Card Copy Making Copies of ID Cards If Authentication or Accounting has been enabled on your device you may have to enter login details to access the ID Card Copy features. ID Card Copy enables you to scan each side of an ID card onto one side of a single sheet of paper. The ID card is placed on the document glass and the first side is scanned. - Page 556 ® ID Card Copy WorkCentre XXXX ID Card Copy enables you to scan each side of an ID card onto one side of a single sheet of paper. The ID card is placed on the document glass and the first side is scanned. When prompted, the card is turned over and the other side is scanned.
- Page 557 ® ID Card Copy WorkCentre XXXX Note: This option must be made available by your System Administrator. A variety of options are available on your device to enable you to reduce or enlarge the output from your original. You can input a specific reduction or enlargement ratio, or choose from a selection of pre-defined options.
-
Page 558: Setting The Paper Supply For Id Card Copying
® ID Card Copy WorkCentre XXXX A variety of options are available on your device to enable you to reduce or enlarge the output from your original. You can input a specific reduction or enlargement ratio, or choose from a selection of pre-defined options. -
Page 559: Image Quality
® ID Card Copy WorkCentre XXXX Use the Paper Supply options to select a specific paper tray for your job. 1. Lift up the document feeder. Place the ID Card face down onto the document glass and register it to the arrow at the top left rear corner. Close the document feeder. 2. -
Page 560: Lightening Or Darkening Copies Of Id Cards
® ID Card Copy WorkCentre XXXX Use the Original Type options to enhance the quality of your output based on the type of original images and how they were produced. For example, if you use a text setting for the original type your device will produce output with sharper edges than if you selected a photo setting - this will make text documents easier to read, but will reduce the quality of photo images where there are lightness and darkness gradations not found in text. -
Page 561: Setting The Background Suppression For Id Card Copying
® ID Card Copy WorkCentre XXXX Use the Lighten / Darken options to manually adjust the lightness or darkness of the image. Light originals containing pencil images may produce better output if the darkness is increased. Dark originals such as halftones or documents with colored backgrounds may need to be lightened. 1. - Page 562 ® ID Card Copy WorkCentre XXXX 5. Select the Image Quality Side 1 tab. 6. Select Auto Suppression from the Background Suppression menu to automatically suppress unwanted background. • If required, select Off to turn the Background Suppression feature off. The Off option is particularly useful when the Darken adjustment does not produce a satisfactory output from light originals, the original has a gray or colored border, such as a certificate, or you want to bring out fine detail that was lost due to a dark edge when using bound originals.
-
Page 563: Internet Services
Each device must have the same system software version to support the cloning feature. Note: This feature is for System Administrator use only. Refer to the System Administrator Guide for further information. More Information Using Internet Services to find System Administrator Contact Details System Administrator Guide www.xerox.com/support. User Guide... - Page 564 This feature is for System Administrator use only. Refer to the System Administrator Guide for further information. More Information System Administrator Guide www.xerox.com/support. Using the Install Later button in Internet Services Internet Services uses the embedded web server on the device. This allows you to communicate with the device over the internet or intranet through your web browser.
- Page 565 The install option provides an easy way to install your print drivers. By default the link goes to Xerox.com to find the latest drivers for your device. Your System Administrators can change the Install Print / Scan Drivers link to another location, such as an internal site, if required. They can also hide the link.
- Page 566 Location is entered by your System Administrator and may identify the service room or floor where the device is located. • Machine Model displays the Xerox model of your device. • Serial Number displays the serial number of your device.
- Page 567 Note: If you need to provide regular billing information for your device you may find the SMart eSolutions feature helpful. SMart eSolutions automatically sends meter readings to Xerox so you don’t have to collect them manually. 1. At your computer, open your web browser.
- Page 568 If you leave the page open for a while click the Refresh button to display the latest data. More Information Using Internet Services to find System Administrator Contact Details System Administrator Guide www.xerox.com/support. Viewing the status of SMart eSolutions in Internet Services Downloading the Usage Counter Data using Internet Services...
- Page 569 7. If required, click the Print Configuration Page button to print a copy of the Configuration Report. More Information Using Internet Services to find System Administrator Contact Details System Administrator Guide www.xerox.com/support. Printing the Information Pages from the Machine Status Menu User Guide...
- Page 570 If you leave the page open for a while click the Refresh button to display the latest data. • 6. Click the Details... button to see the date the components were installed and their Xerox Reorder Numbers. More Information...
- Page 571 ® Internet Services WorkCentre XXXX 3. Press the Enter button on your keyboard to load the page. 4. If required, click the Status tab. This is usually the active tab when Internet Services opens. 5. Click Trays from the Status menu on the left of the page. The paper tray and output tray status will display.
-
Page 572: Smart Esolutions
Xerox so that the replacement units can be sent to you. Use the Supplies Assistant screen to see the date and time of the last communication with Xerox and the life remaining for each unit. - Page 573 4. If required, click the Status tab. This is usually the active tab when Internet Services opens. 5. Select SMart eSolutions from the Status menu on the left of the page. 6. Click the Meter Assistant tab. The date and time of the last transmission to Xerox and the status of Meter E-mail alerts are displayed.
- Page 574 Xerox so that the replacement units can be sent to you. Use the Supplies Assistant screen to see the date and time of the last communication with Xerox and the life remaining for each unit.
-
Page 575: Jobs
Use your mouse button to right-click on the UsageLog.csv link and select Save Target As... to save the file to your computer. Your Xerox Service Representative may ask you to send them the file to help troubleshoot problems on the device. - Page 576 ® Internet Services WorkCentre XXXX Use the Delete option to remove a job from the list. If the job is a Secure Print job you will be able to delete it without System Administrator rights. You can delete other people’s jobs as well as your own jobs.
- Page 577 ® Internet Services WorkCentre XXXX Use the Sample Set option to print one copy of a multiple-copy print job. When you collect the print you can check it has printed as you expected before approving the rest of the job for printing. If the first copy is not correct you can cancel the rest of the copies and resubmit the job with different print settings.
- Page 578 ® Internet Services WorkCentre XXXX Use the print driver to make more advanced selections, not included in the print ready document, such as adding watermarks. 1. At your computer, open your web browser. 2. In the URL field, use your keyboard to enter http:// followed by the IP Address of the device. For example: If the IP Address is 192.168.100.100, enter http://192.168.100.100.
- Page 579 Saving Jobs using the PostScript Print Driver Printing a Saved Job using the Print From Feature Using Internet Services to find System Administrator Contact Details System Administrator Guide www.xerox.com/support. Viewing Active Jobs using the Job Status Menu Logging in to Internet Services...
- Page 580 Printing Saved Jobs from Internet Services Saving Jobs using the PostScript Print Driver Using Internet Services to find System Administrator Contact Details System Administrator Guide www.xerox.com/support. Logging in to Internet Services Printing the Information Pages from the Machine Status Menu Moving a Saved Job to a Different Folder using Internet Services Internet Services uses the embedded web server on the device.
- Page 581 Saving Jobs using the PostScript Print Driver Logging in to Internet Services Using Internet Services to find System Administrator Contact Details System Administrator Guide www.xerox.com/support. Printing the Information Pages from the Machine Status Menu Copying Saved Jobs using Internet Services Internet Services uses the embedded web server on the device.
- Page 582 Saving Jobs using the PostScript Print Driver Using Internet Services to find System Administrator Contact Details Logging in to Internet Services System Administrator Guide www.xerox.com/support. Printing the Information Pages from the Machine Status Menu Deleting Saved Jobs Folders using Internet Services Internet Services uses the embedded web server on the device.
- Page 583 Creating a New Folder for Saved Jobs in Internet Services Logging in to Internet Services Using Internet Services to find System Administrator Contact Details System Administrator Guide www.xerox.com/support. Printing the Information Pages from the Machine Status Menu Renaming Saved Jobs Folders using Internet Services Internet Services uses the embedded web server on the device.
- Page 584 Creating a New Folder for Saved Jobs in Internet Services Logging in to Internet Services Using Internet Services to find System Administrator Contact Details System Administrator Guide www.xerox.com/support. Printing the Information Pages from the Machine Status Menu Changing Saved Job Folder Permissions using Internet Services Internet Services uses the embedded web server on the device.
-
Page 585: Print
More Information Creating a New Folder for Saved Jobs in Internet Services Using Internet Services to find System Administrator Contact Details System Administrator Guide www.xerox.com/support. Printing the Information Pages from the Machine Status Menu Print Submitting a Print Job using Internet Services Internet Services uses the embedded web server on the device. - Page 586 The install option provides an easy way to install your print drivers. By default the link goes to Xerox.com to find the latest drivers for your device. Your System Administrators can change the Install Print / Scan Drivers link to another location, such as an internal site, if required. They can also hide the link.
- Page 587 12. The program creates the print queue and installs your print driver. More Information Using Internet Services to find System Administrator Contact Details System Administrator Guide www.xerox.com/support. Printing a Document using the PostScript Print Driver Installing Optional Services using the Tools Menu...
- Page 588 ® Internet Services WorkCentre XXXX Use the Internet Services Job Submission page to send print-ready documents for printing. You can print PDF, PCL, PostScript, TXT, JPEG, TIFF and XPS file formats from the Job Submission page. Note: You can select general print features, such as 2-sided printing and stapling when you submit your job in Internet Services.
-
Page 589: Job Type
® Internet Services WorkCentre XXXX Job Type Sending a Job for Normal Printing using Internet Services Internet Services uses the embedded web server on the device. This allows you to communicate with the device over the internet or intranet through your web browser. If Authentication or Accounting has been enabled on your device you may have to enter login details to access this feature. - Page 590 ® Internet Services WorkCentre XXXX Sending a Job for Secure Printing using Internet Services Internet Services uses the embedded web server on the device. This allows you to communicate with the device over the internet or intranet through your web browser. If Authentication or Accounting has been enabled on your device you may have to enter login details to access this feature.
- Page 591 ® Internet Services WorkCentre XXXX More Information Accessing Your Personal Secure Jobs List using the Job Status Menu Viewing Active Jobs using the Job Status Menu Using Internet Services to find System Administrator Contact Details Viewing the Progress and Details of a Job using the Job Status Menu Printing the Information Pages from the Machine Status Menu Printing a Sample or Proof Print using Internet Services Internet Services uses the embedded web server on the device.
- Page 592 ® Internet Services WorkCentre XXXX 11. Print jobs are usually shown in the Active Jobs list, however if your System Administrator has enabled the Hold All Jobs feature, your job will be listed in either the Held Print Jobs or the Unidentified Print Jobs list.
- Page 593 ® Internet Services WorkCentre XXXX 6. Select the file you want to print. Either double-click the file to select it, or click on the file once and then click the Open button. The file name and path will be shown in the File Name box. 7.
- Page 594 ® Internet Services WorkCentre XXXX Use the Delay Print option to print your document at a specified time, up to 24 hours after the original job submission. This is useful if you want to print large jobs during quiet times in your office, or if you want all your jobs to print at the same time.
- Page 595 ® Internet Services WorkCentre XXXX Note: You can select general print features, such as 2-sided printing and stapling when you submit your job in Internet Services. If you want to select advanced print features, such as watermarks and booklet layout, you must select these in your print driver before you create your print-ready file. Note: To print an XPS document, your device needs to have the optional XPS feature installed.
- Page 596 Note: Some media types, sizes, and weights cannot be automatically printed on both sides. Refer to www.xerox.com for information. 1. At your computer, open your web browser.
- Page 597 ® Internet Services WorkCentre XXXX 10. Press the Job Status button on the device control panel to view the job list and check the status of the job. 11. Print jobs are usually shown in the Active Jobs list, however if your System Administrator has enabled the Hold All Jobs feature, your job will be listed in either the Held Print Jobs or the Unidentified Print Jobs list.
- Page 598 ® Internet Services WorkCentre XXXX 8. Click the Submit Job button. 9. Collect your job from the device. 10. Press the Job Status button on the device control panel to view the job list and check the status of the job. 11.
- Page 599 ® Internet Services WorkCentre XXXX 7. Select the Orientation option required. • Auto uses the settings programmed in the print-ready file. • Portrait orientates your document so that you can read the text while holding the long edge of the paper. •...
- Page 600 ® Internet Services WorkCentre XXXX Note: To find out the IP Address of your device, print a configuration report or ask your System Administrator. 3. Press the Enter button on your keyboard to load the page. 4. Click the Print tab. 5.
- Page 601 ® Internet Services WorkCentre XXXX Use the Hole Punch option if you want the device to punch holes in each page after it is printed. Each sheet will be punched individually so there is no limit to the number of pages you can have in a set.
- Page 602 ® Internet Services WorkCentre XXXX If Authentication or Accounting has been enabled on your device you may have to enter login details to access this feature. Use the Internet Services Job Submission page to send print-ready documents for printing. You can print PDF, PCL, PostScript, TXT, JPEG, TIFF and XPS file formats from the Job Submission page.
- Page 603 ® Internet Services WorkCentre XXXX Printing the Information Pages from the Machine Status Menu Changing the Output Destination when Printing Using Internet Services Internet Services uses the embedded web server on the device. This allows you to communicate with the device over the internet or intranet through your web browser. If Authentication or Accounting has been enabled on your device you may have to enter login details to access this feature.
-
Page 604: Scan
® Internet Services WorkCentre XXXX More Information Using Internet Services to find System Administrator Contact Details Viewing Active Jobs using the Job Status Menu Viewing the Progress and Details of a Job using the Job Status Menu Printing the Information Pages from the Machine Status Menu Scan Templates Creating a New Template in Internet Services... - Page 605 ® Internet Services WorkCentre XXXX 7. Click in the Template Name entry box and use your keyboard to enter a name for your template. 8. Click in the Template Description entry box and use your keyboard to enter a description. 9.
- Page 606 Modifying a Template using Internet Services Copying a Template in Internet Services Using Internet Services to find System Administrator Contact Details System Administrator Guide www.xerox.com/support. Printing the Information Pages from the Machine Status Menu Templates Deleting a Template in Internet Services Internet Services uses the embedded web server on the device.
- Page 607 More Information Using Workflow Scanning Using Internet Services to find System Administrator Contact Details System Administrator Guide www.xerox.com/support. Printing the Information Pages from the Machine Status Menu Copying a Template in Internet Services Internet Services uses the embedded web server on the device. This allows you to communicate with the device over the internet or intranet through your web browser.
- Page 608 Using Workflow Scanning Modifying a Template using Internet Services Using Internet Services to find System Administrator Contact Details System Administrator Guide www.xerox.com/support. Printing the Information Pages from the Machine Status Menu Changing a Template Description or Owner in Internet Services Internet Services uses the embedded web server on the device.
- Page 609 Creating a New Template in Internet Services Using Internet Services to find System Administrator Contact Details System Administrator Guide www.xerox.com/support. Modifying a Template using Internet Services Internet Services uses the embedded web server on the device. This allows you to communicate with the device over the internet or intranet through your web browser.
- Page 610 ® Internet Services WorkCentre XXXX 5. Select the template required from the Templates list. 6. Select the Destination Services option required. • Check the File checkbox to scan to a specific folder location when you use this template. • Check the Fax checkbox to send your document to a specific fax number when you use this template.
- Page 611 ® Internet Services WorkCentre XXXX 10. Select the Workflow Scanning options required. This area allows you to change the basic scanning options. • Select the Edit button. • Select the Output Color option required. Auto Detect allows the device to select the most appropriate color setting. Color produces full color output.
- Page 612 ® Internet Services WorkCentre XXXX Select Auto Suppression from the Background Suppression menu to automatically • suppress unwanted background. • If required, select No Suppression to turn the Background Suppression feature off. The No Suppression option is particularly useful when the Darken adjustment does not produce a satisfactory output from light originals, the original has a gray or colored border, such as a certificate, or you want to bring out fine detail that was lost due to a dark edge when using bound originals.
- Page 613 ® Internet Services WorkCentre XXXX Mixed Size Originals scans documents containing different sized pages. The pages must • be the same width, such as A4 (8.5 x 11”) LEF and A3 (11 x 17”) SEF, other combinations are shown on the device touchscreen. The device detects the size of the documents and will produce different output depending on the combinations selected.
- Page 614 Using Workflow Scanning Creating a New Template in Internet Services Using Internet Services to find System Administrator Contact Details System Administrator Guide www.xerox.com/support. Printing the Information Pages from the Machine Status Menu Adding a Destination to a Template using Internet Services Internet Services uses the embedded web server on the device.
- Page 615 ® Internet Services WorkCentre XXXX If Authentication or Accounting has been enabled on your device you may have to enter login details to access this feature. Use the Templates feature when you want to scan or fax jobs using the Workflow Scanning service on your device.
- Page 616 Workflow Scanning feature and select your template in the Templates list. More Information Using Workflow Scanning Using Internet Services to find System Administrator Contact Details System Administrator Guide www.xerox.com/support. Creating a New Template in Internet Services Printing the Information Pages from the Machine Status Menu Mailboxes Creating a Mailbox using Internet Services Internet Services uses the embedded web server on the device.
- Page 617 More Information Using the Scan to Mailbox Templates in Workflow Scanning Using Internet Services to find System Administrator Contact Details System Administrator Guide www.xerox.com/support. Printing the Information Pages from the Machine Status Menu Downloading Documents from your Mailbox using Internet Services Internet Services uses the embedded web server on the device.
- Page 618 More Information Using the Scan to Mailbox Templates in Workflow Scanning Using Internet Services to find System Administrator Contact Details System Administrator Guide www.xerox.com/support. Printing the Information Pages from the Machine Status Menu Printing Documents from your Mailbox using Internet Services Internet Services uses the embedded web server on the device.
- Page 619 10. Click the OK button. More Information Using the Scan to Mailbox Templates in Workflow Scanning Using Internet Services to find System Administrator Contact Details System Administrator Guide www.xerox.com/support. Printing the Information Pages from the Machine Status Menu User Guide...
- Page 620 ® Internet Services WorkCentre XXXX Modifying Mailbox Template Settings using Internet Services Internet Services uses the embedded web server on the device. This allows you to communicate with the device over the internet or intranet through your web browser. Use Scan to Mailbox to scan hard copy originals and store them in a folder on the device. You can retrieve your stored documents at the device using the Print From feature, or at your computer using Internet Services.
- Page 621 ® Internet Services WorkCentre XXXX • Select the 2-Sided Scanning option required. 1-Sided use this option if your originals are printed on 1 side. 2-Sided use this option if your originals are 2-sided. The document feeder must be used to scan your originals with this option. 2-Sided, Rotate Side 2 use this option if your originals are 2-sided and open up like a calendar.
- Page 622 ® Internet Services WorkCentre XXXX • Select the Resolution option required. 72 dpi produces the smallest file size and is recommended for output displayed on a computer. 100 dpi delivers low image quality and is recommended for low quality text documents.
- Page 623 ® Internet Services WorkCentre XXXX • Select the Edge Erase option required. Border Erase erases an equal amount from all the edges. Use the arrow buttons to adjust the amount to be erased from 3 mm (0.1”) to 50 mm (2.0”) or select the entry field and use your keyboard to enter the amount required.
- Page 624 More Information Using the Scan to Mailbox Templates in Workflow Scanning Using Internet Services to find System Administrator Contact Details System Administrator Guide www.xerox.com/support. Printing the Information Pages from the Machine Status Menu Changing a Mailbox Password using Internet Services Internet Services uses the embedded web server on the device.
- Page 625 More Information Using the Scan to Mailbox Templates in Workflow Scanning Using Internet Services to find System Administrator Contact Details System Administrator Guide www.xerox.com/support. Printing the Information Pages from the Machine Status Menu Deleting a Mailbox using Internet Services Internet Services uses the embedded web server on the device. This allows you to communicate with the device over the internet or intranet through your web browser.
-
Page 626: Address Book
More Information Using the Scan to Mailbox Templates in Workflow Scanning Using Internet Services to find System Administrator Contact Details System Administrator Guide www.xerox.com/support. Printing the Information Pages from the Machine Status Menu Address Book Creating an E-mail Address using Internet Services Internet Services uses the embedded web server on the device. - Page 627 More Information Sending an E-mail Using Internet Services to find System Administrator Contact Details System Administrator Guide www.xerox.com/support. Printing the Information Pages from the Machine Status Menu Creating a Fax Address using Internet Services Internet Services uses the embedded web server on the device. This allows you to communicate with the device over the internet or intranet through your web browser.
- Page 628 More Information Sending a Fax (Embedded Fax) Using Internet Services to find System Administrator Contact Details System Administrator Guide www.xerox.com/support. Printing the Information Pages from the Machine Status Menu Creating a Scan To Address using Internet Services Internet Services uses the embedded web server on the device. This allows you to communicate with the device over the internet or intranet through your web browser.
- Page 629 ® Internet Services WorkCentre XXXX Use the Address Book tab to create and manage the Device Address Book. You can add E-mail, Fax, Internet Fax and Scan To Destination addresses to the Device Address Book. You can then access these address when you use the E-mail, Fax, Internet Fax and Scan To services at the device. Note: This option must be made available by your System Administrator.
- Page 630 More Information Using the Scan To Feature Using Internet Services to find System Administrator Contact Details System Administrator Guide www.xerox.com/support. Printing the Information Pages from the Machine Status Menu Creating an Internet Fax Address using Internet Services Internet Services uses the embedded web server on the device. This allows you to communicate with the device over the internet or intranet through your web browser.
-
Page 631: Using The Properties Page In Internet Services
If Authentication or Accounting has been enabled on your device you may have to enter login details to access this feature. Use the Xerox.com link to open a Xerox web site where you can find information about the latest software solutions available to support your device. - Page 632 4. Click the Support tab. 5. If required, click the General tab. This is usually the active tab when the Support page opens. 6. Click the Xerox.com link. The Xerox.com Software and Solutions page opens in a new window. More Information Using Internet Services to find System Administrator Contact Details System Administrator Guide www.xerox.com/support.
- Page 633 12. The program creates the print queue and installs your print driver. More Information Using Internet Services to find System Administrator Contact Details System Administrator Guide www.xerox.com/support. Printing a Document using the PostScript Print Driver Installing Optional Services using the Tools Menu...
- Page 634 If Authentication or Accounting has been enabled on your device you may have to enter login details to access this feature. Use the Xerox Support area of the Internet Services Support page to find the contact details for customer support, service and supplies if you need assistance with your device. Xerox Support contact details are entered by your System Administrator.
- Page 635 5. If required, click the General tab. This is usually the active tab when the Support page opens. 6. The Xerox Support area displays the contact details if they have been added. You can also find information and support at www.xerox.com.
- Page 636 Use the Maintenance Assistant to provide fault history and usage information to the Xerox support team to help them resolve problems more quickly. Your Xerox support team will let you know when they need you to use the Maintenance Assistant.
- Page 637 A3 or tabloid. The images can either be tracked as one large image or multiple smaller images. You should only use this feature if advised to do so by your Xerox Representative. Before you begin You will need information from your Xerox Representative.
-
Page 638: Top Right Menu
9. When you have finished, click the Close button to close the Remote Control Panel window. More Information Using Internet Services to find System Administrator Contact Details System Administrator Guide www.xerox.com/support. Viewing Machine Information from the Machine Status Menu Viewing Active Jobs using the Job Status Menu... -
Page 639: Logging Out Of Internet Services
More Information Logging out of Internet Services Using Internet Services to find System Administrator Contact Details System Administrator Guide www.xerox.com/support. Printing the Information Pages from the Machine Status Menu Logging out of Internet Services Internet Services uses the embedded web server on the device. This allows you to communicate with the device over the internet or intranet through your web browser. -
Page 640: Using The Site Map In Internet Services
More Information Using the Home link in Internet Services Using Internet Services to find System Administrator Contact Details System Administrator Guide www.xerox.com/support. Printing the Information Pages from the Machine Status Menu Using the Site Map in Internet Services Internet Services uses the embedded web server on the device. This allows you to communicate with the device over the internet or intranet through your web browser. -
Page 641: Using The Home Link In Internet Services
More Information Using the Home link in Internet Services Using Internet Services to find System Administrator Contact Details System Administrator Guide www.xerox.com/support. Printing the Information Pages from the Machine Status Menu Using the Home link in Internet Services Internet Services uses the embedded web server on the device. This allows you to communicate with the device over the internet or intranet through your web browser. - Page 642 4. Select the Help link at the top right hand corner of the screen. 5. Select the option(s) required. More Information Using Internet Services to find System Administrator Contact Details System Administrator Guide www.xerox.com/support. Printing the Information Pages from the Machine Status Menu User Guide...
-
Page 643: Paper And Media
LEF is Long Edge Feed (where the paper is oriented so that the long edge is fed into the device first). Detailed media specifications for your device are provided at www.xerox.com. The trays automatically detect when the media they are loaded with is in low supply, or when they are empty. - Page 644 ® Paper and Media WorkCentre XXXX Only use the types of media specified for use in the tray. • Plain • Bond • Recycled • Punched • Letterhead and Pre-printed • Cardstock • Up to 200 gsm (53 lb). Only feed the media specified for this particular tray. The Bypass Tray can feed all the media types listed for the device and the optional Envelope Tray can be used in place of Tray 2 for envelopes.
-
Page 645: Changing The Paper Tray Settings
LEF is Long Edge Feed (where the paper is oriented so that the long edge is fed into the device first). Detailed media specifications for your device are provided at www.xerox.com. The trays automatically detect when the media they are loaded with is in low supply, or when they are empty. - Page 646 ® Paper and Media WorkCentre XXXX Note: Only the System Administrator can change the media attributes for a dedicated tray. If the tray is set as a Dedicated tray, the media requested must be loaded in the tray and the settings cannot be adjusted.
-
Page 647: Changing The Paper Tray Settings
This is a high capacity paper tray used for media size A4 LEF (8.5 x 11" LEF). Detailed media specifications for your device are provided at www.xerox.com. The trays automatically detect when the media they are loaded with is in low supply, or when they are empty. -
Page 648: Loading Tray 4
Using Internet Services to find System Administrator Contact Details Loading Tray 4 This is a high capacity paper tray used for media size A4 LEF (8.5 x 11" LEF). Detailed media specifications for your device are provided at www.xerox.com. User Guide... - Page 649 ® Paper and Media WorkCentre XXXX The trays automatically detect when the media they are loaded with is in low supply, or when they are empty. A warning message is displayed on the touch screen when a tray needs loading. Always use the information labels in the tray for guidance on loading orientations and maximum fill information.
-
Page 650: Loading The Bypass Tray And Changing The Tray Settings
® Paper and Media WorkCentre XXXX Using Internet Services to find System Administrator Contact Details Loading the Bypass Tray and Changing the Tray Settings This tray is used for non-standard printing media from A6 SEF (4.25 x 5.5" SEF) to 432 mm (17") wide. -
Page 651: Changing The Paper Tray Settings
® Paper and Media WorkCentre XXXX Note: Labels can only be printed 1-sided. 1. Make sure the tray is in the down position. For larger media, use the tray extension. 2. Place the media in the tray. Media must be positioned against the left side of the tray. Paper must not be loaded above the maximum fill line. -
Page 652: Loading Different Types Of Media
If a coating of oil remains on the transparency after printing, remove it with a lint free cloth. Labels Labels that have been designed for laser devices, such as Xerox Labels are supported. The adhesives are designed to withstand the higher temperatures of these devices without bleeding and causing spotting or damage to the internal components. - Page 653 ® Paper and Media WorkCentre XXXX Note: Do not feed window, board backed, gusset type, padded or peal and seal envelopes, or envelopes with triangular flaps. More Information Storing Paper and Other Media Loading Tray 1 and Changing the Tray Settings Loading Tray 2 and Changing the Tray Settings Loading Tray 3 Loading Tray 4...
- Page 654 ® Paper and Media WorkCentre XXXX User Guide...
-
Page 655: Machine And Job Status
Machine and Job Status Job Status Active Jobs Viewing Active Jobs using the Job Status Menu The Job Status button gives you access to job information. You can use this to check the progress of active jobs or display detailed information about jobs you have completed. You can also release held jobs or secure print jobs you have sent to the device. - Page 656 ® Machine and Job Status WorkCentre XXXX Deleted the job has been deleted from the job list. • • Completed with Errors the job was completed with errors. 1. Press the Job Status button on the Control Panel. 2. If required, select the Active Jobs tab on the touch screen. This is usually the active tab when the Job Status feature opens.
- Page 657 ® Machine and Job Status WorkCentre XXXX Job Progress shows the current status of the job. • Select the option required. Select the Close button. • Details provides information about the job depending on the type of job, for example the submission time, image quality settings, secure print setting, finishing options and sender’s E-mail address.
- Page 658 Sending a Job for Secure Printing using Internet Services Releasing Jobs Held in a Public Queue using the Job Status Menu System Administrator Guide www.xerox.com/support. Using Internet Services to find System Administrator Contact Details Releasing a Secure Fax Job using the Job Status Menu The Job Status button gives you access to job information.
- Page 659 Sending a Job for Secure Printing using Internet Services Releasing Jobs Held in a Public Queue using the Job Status Menu System Administrator Guide www.xerox.com/support. Using Internet Services to find System Administrator Contact Details Releasing Jobs Held in a Public Queue using the Job Status Menu The Job Status button gives you access to job information.
- Page 660 10. Press the Log In / Out button on the Control Panel. 11. At the confirmation screen, select the Logout button. More Information System Administrator Guide www.xerox.com/support. Using Internet Services to find System Administrator Contact Details Using a User ID to Log In at the Device Viewing the Unidentified Held Jobs Queue using the Job Status Menu The Job Status button gives you access to job information.
-
Page 661: Accessing Your Personal Secure Jobs List Using The Job Status Menu
Releasing Jobs Held in a Public Queue using the Job Status Menu Releasing Jobs Held in a Private Queue using the Job Status Menu System Administrator Guide www.xerox.com/support. Using Internet Services to find System Administrator Contact Details Accessing Your Personal Secure Jobs List using the Job Status Menu The Job Status button gives you access to job information. -
Page 662: Machine Status
The machine information is displayed in different sections. • Customer Support provides information about where to find additional help for the device. • Machine Model displays the Xerox model of your device. • Serial Number displays the serial number of your device. •... -
Page 663: Viewing The Status Of Paper Trays From The Machine Status Menu
• Installed Options displays the services installed on the device and their status. • Maintenance Assistant allows you to send information to Xerox about the device to assist with troubleshooting. More Information Using Internet Services to find System Administrator Contact Details System Administrator Guide www.xerox.com/support. -
Page 664: Viewing The Status Of Installed Options Using The Machine Status Menu
Use the Maintenance Assistant to provide fault history and usage information to the Xerox support team to help them resolve problems more quickly. Your Xerox support team will let you know when they need you to use the Maintenance Assistant. -
Page 665: Faults And Alerts
Machine and Job Status WorkCentre XXXX More Information System Administrator Guide www.xerox.com/support. Using Internet Services to find System Administrator Contact Details Viewing the status of SMart eSolutions in Internet Services Faults and Alerts Viewing Faults using the Machine Status Menu The Machine Status button gives you access to useful information about the machine, including the serial number and model. -
Page 666: Checking The Status Of Supplies Using The Machine Status Menu
If you need to reduce the amount of time you spend managing the replaceable units for your ® device you may find the SMart eSolutions Supplies Assistant feature helpful. The Supplies ® Assistant automatically orders replacement units from Xerox so you don’t have to manage them manually. • Toner Cartridge • Print Cartridge •... - Page 667 Note: If you need to provide regular billing information for your device you may find the SMart eSolutions feature helpful. SMart eSolutions automatically sends meter readings to Xerox so you don’t have to collect them manually. Refer to the System Administrator Guide for further information.
- Page 668 ® Machine and Job Status WorkCentre XXXX User Guide...
-
Page 669: Administration And Accounting
6. Select the Done button. More Information Using Internet Services to find System Administrator Contact Details System Administrator Guide www.xerox.com/support. Logging out at the Device Authentication is used to manage access to the device or specific features. Accounting is used to record numbers of prints or scans produced at the device. -
Page 670: Accessing The Tools Menu
A3 or tabloid. The images can either be tracked as one large image or multiple smaller images. You should only use this feature if advised to do so by your Xerox Representative. User Guide... - Page 671 5. Select the Billing Impression Mode button. 6. Note the Sequence and Serial Number shown on the screen. You will need to provide this information to your Xerox Representative before they can give you a PIN to change the billing impression mode.
-
Page 672: Adjusting The Display Brightness Using The Tools Menu
SWAP website to receive a Feature Installation Key. To obtain the kit for an optional service you want to install please refer to your Xerox Representative. Refer to the System Administrator Guide for further information. -
Page 673: Troubleshooting
This option must be made available by your System Administrator. Use the Echo Test option to check the device is connected to your network. This feature is only likely to be needed by your System Administrator or Xerox support team. Refer to the System Administrator Guide for further information. - Page 674 ® Administration and Accounting WorkCentre XXXX User Guide...
-
Page 675: Feature Installation
SWAP website to receive a Feature Installation Key. To obtain the kit for an optional service you want to install please refer to your Xerox Representative. Use the Feature Installation screen to install optional services on your device, for example the XPS (XML Paper Specification) feature, which enables the device to print XML Paper Specification files. - Page 676 ® Feature Installation WorkCentre XXXX User Guide...
-
Page 677: General Care And Troubleshooting
General Care and Troubleshooting General Care Customer Replaceable Units Identifying the Replaceable Units There are several consumables on the device that need replenishing or replacing, such as paper, staples, and customer replaceable units. 1. Toner Cartridge 2. Print Cartridge The device will display a message on the touch screen when any of the units need to be re-ordered. This message is a warning that the unit is nearing the end of its life. -
Page 678: Replacing The Toner Cartridge
3. Remove the used toner cartridge from the device and dispose of the toner cartridge. Note: For the latest recycling information, visit www.xerox.com. 4. Unpack the new toner cartridge from its box. 5. Shake the new cartridge gently from side to side to loosen the toner. Keep the cartridge upright to avoid spilling any toner. -
Page 679: Staple Cartridges And Hole Punch Waste
® General Care and Troubleshooting WorkCentre XXXX WARNING: When replacing consumables do NOT remove the covers or guards that are fas- tened with screws. You cannot maintain or service any of the parts that are behind these cov- ers and guards. Do NOT attempt any maintenance procedure that is NOT specifically described in the documentation supplied with your device. - Page 680 ® General Care and Troubleshooting WorkCentre XXXX 4. Grasp the cartridge by the orange handle and pull it out of the device. 5. Check you have removed the paper tab from the new staple cartridge. 6. Insert the new cartridge by pushing it straight into the device until it clicks into place. Note: For more detailed instructions see the device touch screen or the instructions provided with the new staples.
-
Page 681: Cleaning The Document Glass And Both Constant Velocity Transport Glass
Velocity Transport roll may show through the document and appear on your scanned images. 1. Open the document feeder (as if you were about to copy a document using the document glass). 2. Lightly dampen a lint-free cloth with water, Xerox cleaning fluid or Xerox film remover. User Guide... -
Page 682: Cleaning The Print Head
® General Care and Troubleshooting WorkCentre XXXX 3. Clean the under side of the document handler and the complete circumference of the Constant Velocity Transport roll (the white pad on the underside of the document handler). 4. Clean the large glass area. Do not pour the cleaning liquid directly on to the glass. 5. -
Page 683: Cleaning The Control Panel, Touch Screen, Document Feeder And Output Trays
Stack reams of paper carefully on top of one another to avoid crushing the edges. Do not stack more than five reams on top of each other. Note: For more information on paper storage see the Xerox website www.xerox.com/printer- supplies/paper It is important for optimum printing that paper is stored and loaded correctly. -
Page 684: Troubleshooting
The fault display generated for each fault depends on the category of that fault. If rebooting the device does not resolve the problem, use the instructions on this site to identify and solve the problem. If you still cannot fix the problem, contact the Xerox Support Center for advice. User Guide... -
Page 685: Fault Displays
® General Care and Troubleshooting WorkCentre XXXX Hard Down Faults Hard Down faults prevent a subsystem, module or component from functioning properly. There are three categories of Hard Down faults. Low Level Fault this occurs when a subsystem or module is unable to function correctly. For •... -
Page 686: Paper Jams
® General Care and Troubleshooting WorkCentre XXXX The type of fault screen presented depends on the type of fault occurring. Some fault displays present the user with fault recovery options. A selection of buttons allow you to choose a fault recovery option. - Page 687 WorkCentre XXXX Follow the instructions provided on the Control Panel. If you are unable to resolve the problem, contact the Xerox Support Center. Note: If your original document has previously been stapled the corners of the leading edge of the pages fed into the device may be very bent.
- Page 688 The message on the device touch screen reads: Misfeed in Document Feeder. Lift the Document Feeder. Follow the instructions provided on the Control Panel. If you are unable to resolve the problem, contact the Xerox Support Center. Note: If your original document has previously been stapled the corners of the leading edge of the pages fed into the device may be very bent.
- Page 689 Document Feeder Top Cover. Follow the instructions provided on the Control Panel. If you are unable to resolve the problem, contact the Xerox Support Center. Note: If your original document has previously been stapled the corners of the leading edge of the pages fed into the device may be very bent.
- Page 690 Document Feeder Top Cover. Follow the instructions provided on the Control Panel. If you are unable to resolve the problem, contact the Xerox Support Center. Note: If your original document has previously been stapled the corners of the leading edge of the pages fed into the device may be very bent.
- Page 691 Door. This finisher and some of its’ components are optional and may not be fitted to your device. If you are unable to resolve the problem, contact the Xerox Support Center. 1. Open the finisher door. 2. Rotate knob 5a anti-clockwise.
- Page 692 Cover. This finisher and some of its’ components are optional and may not be fitted to your device. If you are unable to resolve the problem, contact the Xerox Support Center. 1. Open the cover on top of the finisher.
- Page 693 This finisher and some of its’ components are optional and may not be fitted to your device. If you are unable to resolve the problem, contact the Xerox Support Center. 1. Pull any jammed pages free from the output tray. Pull the pages from the device in the direction they were travelling, not at an angle (or the page may tear).
- Page 694 XXXX This finisher and some of its’ components are optional and may not be fitted to your device. If you are unable to resolve the problem, contact the Xerox Support Center. 1. Open the finisher front door. 2. Rotate knob 5a anti-clockwise.
- Page 695 XXXX This finisher and some of its’ components are optional and may not be fitted to your device. If you are unable to resolve the problem, contact the Xerox Support Center. 1. Open the cover on top of the finisher.
- Page 696 This finisher and some of its’ components are optional and may not be fitted to your device. If you are unable to resolve the problem, contact the Xerox Support Center. 1. Pull any jammed pages free from the output tray. Pull the pages from the device in the direction they were travelling, not at an angle (or the page may tear).
- Page 697 XXXX This finisher and some of its’ components are optional and may not be fitted to your device. If you are unable to resolve the problem, contact the Xerox Support Center. 1. Open the finisher front door. 2. Rotate the indented green knob above label R8 anti-clockwise until the handle is in the unlocked position.
- Page 698 XXXX This finisher and some of its’ components are optional and may not be fitted to your device. If you are unable to resolve the problem, contact the Xerox Support Center. 1. Open the finisher door. 2. Rotate the indented green knob above label R8 anti-clockwise until the handle is in the unlocked position.
- Page 699 This finisher and some of its’ components are optional and may not be fitted to your device. If you are unable to resolve the problem, contact the Xerox Support Center. 1. Open the finisher transport cover. This is located underneath the touch screen.
- Page 700 This output tray is only present on your device if you do not have a finisher fitted. If you are unable to resolve the problem, contact the Xerox Support Center. 1. Lift the handle to open the door on the left side of the device. Gently lower the door until it comes to rest at a 45°...
-
Page 701: Left Door
® General Care and Troubleshooting WorkCentre XXXX More Information Identifying the Parts of Your Device Repeated paper jams, misfeeds or multi sheet feeds Clearing Jams in the Paper Path for 1-Sided Jobs Clearing Jams in the Paper Path for 2-Sided Jobs Left Door Clearing Jams in the Paper Path for 1-Sided Jobs The device displays the status code 81-200-00. - Page 702 ® General Care and Troubleshooting WorkCentre XXXX The message on the device touch screen reads: Paper Jam Inside Left Side Door. 1. Lift the handle to open the door on the left side of the device. Gently lower the door until it comes to rest at a 45°...
- Page 703 ® General Care and Troubleshooting WorkCentre XXXX 1. Open tray 1. 2. Remove any misfed pages. 3. Check the tray guides are set correctly for the size of media loaded in the tray. 4. If the paper keeps jamming open a new pack and load fresh paper, or if the paper is still relatively new refresh the existing stack.
- Page 704 ® General Care and Troubleshooting WorkCentre XXXX 1. Open tray 1. 2. Remove any misfed pages. 3. Check the tray guides are set correctly for the size of media loaded in the tray. 4. If the paper keeps jamming open a new pack and load fresh paper, or if the paper is still relatively new refresh the existing stack.
- Page 705 ® General Care and Troubleshooting WorkCentre XXXX 1. Open tray 2. 2. Remove any misfed pages. 3. Check the tray guides are set correctly for the size of media loaded in the tray. 4. If the paper keeps jamming open a new pack and load fresh paper, or if the paper is still relatively new refresh the existing stack.
- Page 706 ® General Care and Troubleshooting WorkCentre XXXX 1. Open tray 2. 2. Remove any misfed pages. 3. Check the tray guides are set correctly for the size of media loaded in the tray. 4. If the paper keeps jamming open a new pack and load fresh paper, or if the paper is still relatively new refresh the existing stack.
- Page 707 ® General Care and Troubleshooting WorkCentre XXXX 1. Lift the handle to open the door on the left side of the device. Gently lower the door until it comes to rest at a 45° angle from the device. 2. Remove any jammed pages that are sticking out from the device. Pages may be jammed at the top, middle and bottom of the device.
- Page 708 ® General Care and Troubleshooting WorkCentre XXXX Clearing Jams in Tray 3 (4 Tray Device) The device displays the status code 81-203-00. The message on the device touch screen reads: Paper Jam Inside Left Side Door. 1. Lift the handle to open the door on the left side of the device. Gently lower the door until it comes to rest at a 45°...
- Page 709 ® General Care and Troubleshooting WorkCentre XXXX Clearing Jams in Tray 3 (3 Tray Device) Clearing Jams in Tray 1 (4 Tray Device) Clearing Jams in Tray 2 (4 Tray Device) Repeated paper jams, misfeeds or multi sheet feeds Clearing Jams in Tray 4 The device displays the status code 81-204-00.
- Page 710 ® General Care and Troubleshooting WorkCentre XXXX Clear Tray 4 1. Open tray 4. 2. If required, lift the handle to open the transport cover. 3. Remove any misfed pages. 4. If the paper keeps jamming open a new pack and load fresh paper, or if the paper is still relatively new refresh the existing stack.
-
Page 711: Troubleshooting Tips
® General Care and Troubleshooting WorkCentre XXXX 1. Remove any misfed pages. 2. Fan the media to ensure no pages are stuck together. 3. Check the tray guides are set correctly for the size of media loaded in the tray. More Information Identifying the Parts of Your Device Repeated paper jams, misfeeds or multi sheet feeds... - Page 712 If you clear a jam only to see the device jam again, there are some steps you can try before contacting the Xerox Support Centre. 1. Check the paper path for obstructions. If paper repeatedly jams at the same place, check the path immediately after that position in case part of a jammed sheet is still blocking the path.
-
Page 713: Paper Curls
® General Care and Troubleshooting WorkCentre XXXX Loading Tray 4 Loading the Bypass Tray and Changing the Tray Settings Powering the Device Off Powering the Device On Repeated Check Tray messages • Adjust the edge guides against the stack of paper in the tray. •... - Page 714 ® General Care and Troubleshooting WorkCentre XXXX • Check the correct paper size has been selected for the paper loaded in the tray. • Check that the printer is not positioned near a source of draft. • Check the correct paper type, such as the weight, has been selected for the paper loaded in the tray.
- Page 715 ® General Care and Troubleshooting WorkCentre XXXX • Check the correct paper type, such as the weight, has been selected for the paper loaded in the tray. More Information Loading Tray 1 and Changing the Tray Settings Loading Tray 2 and Changing the Tray Settings Loading Tray 3 Loading Tray 4 Loading the Bypass Tray and Changing the Tray Settings...
- Page 716 ® General Care and Troubleshooting WorkCentre XXXX There are streaks, lines or spots on the prints • Clean the document glass and, if using the document feeder, also clean the Constant Velocity Transport glass (the thin strip of glass to the left of the document glass), especially near the plastic ramp on the glass.
- Page 717 ® General Care and Troubleshooting WorkCentre XXXX • Use Original Size to specify the size of the original. • Clean the Charge Scorotron and Transfer Corotron, if available on your device. • Clean the document glass and if using the document feeder also clean the Constant Velocity Transport Glass (the thin strip of glass to the left of the document glass), especially near the plastic ramp on the glass.
- Page 718 Note: This feature is for System Administrator use only. More Information System Administrator Guide www.xerox.com/support. The device answers incoming fax calls but does not accept incoming data • If the job contains several graphics, the device may not have enough memory. The device will not answer if memory is low.
-
Page 719: Fault Messages Will Not Clear
® General Care and Troubleshooting WorkCentre XXXX Fault messages will not clear • There may be occasions when a fault is cleared but the message will not clear. Reboot your device by powering OFF and ON using the button on the control panel. •... -
Page 720: Getting Further Assistance
For any additional help visit our customer web site at www.xerox.com or contact the Xerox Support Center quoting the machine serial number. The Xerox Support Center will want to know the nature of the problem, the machine serial number, the fault code (if any) plus the name and location of your company.
Need help?
Do you have a question about the WorkCentre series and is the answer not in the manual?
Questions and answers