MacDon M155 Unloading And Assembly Instructions
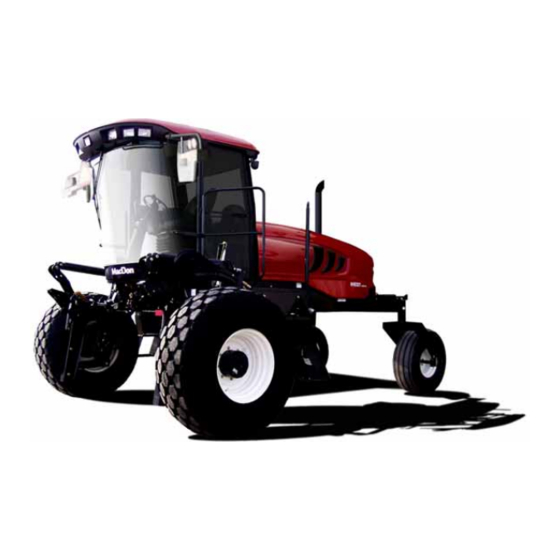
Self-propelled windrower
Hide thumbs
Also See for M155:
- Operator's manual (510 pages) ,
- Unloading and assembly instructions (308 pages) ,
- Installation instructions manual (70 pages)

Related Manuals for MacDon M155


Summary of Contents for MacDon M155
- Page 1 M155 and M205 Self-Propelled Windrower Unloading and Assembly Instructions (Container Shipments) 214298 Revision A 2018 Model Year Original Instruction The harvesting specialists.
- Page 2 ® ® Featuring the Dual Direction and Ultra Glide suspension on the M155 and M205. Published in June 2017...
- Page 3 Introduction This instruction manual describes the unloading, setup, and predelivery requirements for the MacDon M155 and M205 Self-Propelled Windrowers shipped in containers. Carefully read all the material provided before attempting to unload, assemble, or use the machine. Retain this instruction for future reference.
- Page 4 List of Revisions The following list provides an account of major changes from the previous version of this document. Summary of Change Location New EC Declaration of Conformity • EC Declaration of Conformity—Windrower Lift Sling, page iii • EC Declaration of Conformity—Windrower Assembly Supports, page v •...
-
Page 5: Ec Declaration Of Conformity-Windrower Lift Sling
EC Declaration of Conformity—Windrower Lift Sling Figure 1. EC Declaration of Conformity – Windrower Lift Sling (Page 1 of 2) 214298 Revision A... - Page 6 Figure 2. EC Declaration of Conformity – Windrower Lift Sling (Page 2 of 2) 214298 Revision A...
-
Page 7: Ec Declaration Of Conformity-Windrower Assembly Supports
EC Declaration of Conformity—Windrower Assembly Supports Figure 3. EC Declaration of Conformity – Windrower Assembly Supports (Page 1 of 2) 214298 Revision A... - Page 8 Figure 4. EC Declaration of Conformity – Windrower Assembly Supports (Page 2 of 2) 214298 Revision A...
-
Page 9: Table Of Contents
3.4 Installing Drive Wheels ........................35 3.5 Installing Caster Wheels ........................37 3.6 Installing Hydraulics ...........................41 3.6.1 Installing Hydraulics on an M205 ....................41 3.6.2 Installing Hydraulics on an M155 ....................44 3.7 Removing Battery Shipping Shield ......................54 3.8 Unpacking Ignition Keys ........................55 3.9 Installing Platforms..........................57 3.10 Installing Steps ..........................61... - Page 10 4.2.8 Activating the Double Windrow Attachment (DWA) ..............152 4.2.9 Activating the Hydraulic Center-Link on an M155 ............... 154 4.2.10 Activating the Rotary Header Drive Hydraulics on an M155 ............155 4.2.11 Setting the Header Cut Width ....................156 4.2.12 Activating the Hay Conditioner ....................157 4.2.13 Displaying Reel Speed......................
- Page 11 TABLE OF CONTENTS 4.3.2 Activating the Header Float Control Lockout ................163 4.3.3 Activating the Reel Fore-Aft Control Lockout ................165 4.3.4 Activating the Draper Speed Control Lockout ................166 4.3.5 Activating the Auger Speed Control Lockout................168 4.3.6 Activating Knife Speed Control Lockout ..................169 4.3.7 Activating Rotary Disc Speed Control Lockout ................
- Page 12 5.11.4 Checking Gauges and Cab Display Module (CDM) Display............230 5.11.5 Checking Electrical System ....................230 5.11.6 Checking Operator's Presence System ................... 231 5.11.7 Checking Exterior Lights on an M155/M205 ................233 5.11.8 Checking Horn ........................235 5.11.9 Checking Interior Lights ......................236 5.11.10 Checking Air Conditioning (A/C) and Heater ................
-
Page 13: Chapter 1: Safety
1 Safety 1.1 Signal Words Three signal words, DANGER, WARNING, and CAUTION, are used to alert you to hazardous situations. The appropriate signal word for each situation has been selected using the following guidelines: DANGER Indicates an imminently hazardous situation that, if not avoided, will result in death or serious injury. WARNING Indicates a potentially hazardous situation that, if not avoided, could result in death or serious injury. -
Page 14: General Safety
SAFETY 1.2 General Safety CAUTION The following are general farm safety precautions that should be part of your operating procedure for all types of machinery. Protect yourself. • When assembling, operating, and servicing machinery, wear all protective clothing and personal safety devices that could be necessary for job at hand. - Page 15 SAFETY • Wear close-fitting clothing and cover long hair. Never wear dangling items such as scarves or bracelets. • Keep all shields in place. NEVER alter or remove safety equipment. Make sure driveline guards can rotate independently of shaft and can telescope freely. •...
-
Page 16: Battery Safety
SAFETY 1.3 Battery Safety WARNING • Keep all sparks and flames away from batteries, as a gas given off by electrolyte is explosive. • Ventilate when charging in enclosed space. Figure 1.7: Safety around Batteries WARNING • Wear safety glasses when working near batteries. •... -
Page 17: Safety Signs
Replace safety signs that are missing or become illegible. • If original parts on which a safety sign was installed are replaced, be sure repair part also bears current safety sign. • Safety signs are available from your MacDon Dealer. Figure 1.10: Operator’s Manual Decal 214298 Revision A... -
Page 19: Chapter 2: Unloading The Windrower
2 Unloading the Windrower Perform all procedures in this chapter in the order in which they are listed. 2.1 Unloading Container CAUTION To prevent injury to bystanders and avoid striking them with machinery, do NOT allow people to stand in the unloading area. -
Page 20: Moving To Assembly Area
Equipment used for unloading must meet or exceed the requirements specified in this section. Using inadequate equipment may result in chain breakage, vehicle tipping, or machine damage. Lift Sling Type MacDon Part #163871 Maximum Working Load 12,884 kg (28,404 lb.) Chain Overhead 1/2 in. - Page 21 UNLOADING THE WINDROWER 1. Attach chains or cables to the four lifting points on the lift sling (MD #163871), and connect the loop ends to the crane hook. IMPORTANT: Use cables or chains with a minimum lifting capacity of 3221 kg (7100 lb.). Figure 2.3: Lift Sling A - 1500 mm (59 in.) Minimum B - 2120 mm (83.5 in.) Typical...
-
Page 22: Moving To Assembly Area: Forklift Method
UNLOADING THE WINDROWER 4. Lower assembly onto 127–152 mm (5–6 in.) blocks (A) as shown. 5. Remove chains from shipping frame. 6. Check for shipping damage and missing parts. Figure 2.5: Windrower Shipping Assembly on Blocks 2.2.2 Moving to Assembly Area: Forklift Method CAUTION To prevent injury to bystanders and avoid striking them with machinery, do NOT allow people to stand in the unloading area. - Page 23 UNLOADING THE WINDROWER 1. Approach the windrower from the hood end and slide the forks underneath the lifting framework. 2. Raise the windrower off the platform and move to the assembly area. Figure 2.6: Forklift Method Lifting Points 3. Lower assembly onto 127–152 mm (5–6 in.) blocks (A) as shown.
-
Page 24: Removing Wheel And Step Assembly
UNLOADING THE WINDROWER 2.3 Removing Wheel and Step Assembly 1. Remove shipping wire (A) and bolt securing the hose support to the shipping frame, and remove the hose support. 2. Lay hose support off to the side. Figure 2.8: Shipping Frame 3. - Page 25 UNLOADING THE WINDROWER 4. Remove the 25.4 mm (1 in.) pin (A) from the center-link. Figure 2.10: Center-Link 5. Remove the four (two per side) carriage bolts from the rear of the wheel/step assembly. Figure 2.11: Rear of Wheel/Step Assembly 214298 Revision A...
- Page 26 UNLOADING THE WINDROWER 6. Remove the plastic cable tie (A) and shipping wire (B) securing the hose bundles to the frame. Figure 2.12: Hose Bundles on Frame Figure 2.13: Hose Bundles on Frame 214298 Revision A...
- Page 27 UNLOADING THE WINDROWER 7. Attach a chain to the wheel/step assembly (A) and a lifting device, and pull away from the shipping assembly. Figure 2.14: Wheel/Step Shipping Assembly 8. Lift center-link (A) until it clears the wheel/step assembly frame (B). Figure 2.15: Wheel/Step Assembly Frame 9.
-
Page 28: Removing Drive Wheels
UNLOADING THE WINDROWER 2.4 Removing Drive Wheels IMPORTANT: Remove the drive wheels as a pair from above the hood. 1. Remove the two bolts (A) from the front cross member over the hood. Figure 2.17: Front Cross Member on Hood 2. - Page 29 UNLOADING THE WINDROWER 4. Carefully lift the wheels off the frame. IMPORTANT: Ensure the tire is guided away from the cab roof when lifting wheels to prevent damaging the cab. The chain on the forward wheel should be snug, and the chain on the aft wheel should be loose.
-
Page 30: Removing Platforms
UNLOADING THE WINDROWER 2.5 Removing Platforms 1. Remove the two support tubes on both sides of the hood. 2. Attach two slings and a chain to the platform at the locations shown to prevent damaging the paint. 3. Attach opposite ends of slings and chain to a lifting device with a minimum lifting capacity of 2268 kg (5000 lb.) and a lift height of 4 m (13 ft.). - Page 31 UNLOADING THE WINDROWER 9. Unhook the remaining sling. Figure 2.24: Platforms 214298 Revision A...
-
Page 32: Removing Hand Rails And Exhaust Stack
UNLOADING THE WINDROWER 2.6 Removing Hand Rails and Exhaust Stack 1. Cut the plastic cable ties and move the hose bundle clear of the platform. Figure 2.25: Hand Rails and Exhaust Stack Shipping Assembly 2. Remove shipping wire and foam from the exhaust stack (A). -
Page 33: Removing Leg Assemblies
UNLOADING THE WINDROWER 2.7 Removing Leg Assemblies 1. Ensure the lift bar is attached to the leg assembly as shown and the clevis pin is installed with the head on near side. 2. Attach the chain (A) to the lifting bar (B) on the leg assembly, and connect the chain to a lifting device with a minimum lifting capacity of 2268 kg (5000 lb.). - Page 34 UNLOADING THE WINDROWER 4. Remove two bolts (A) from the shipping channel located at the top of the leg. Figure 2.29: Shipping Channel on Leg 5. Remove bars (A) from leg. NOTE: Insert cardboard or foam between the leg assembly and the hood to prevent damaging the hood.
- Page 35 UNLOADING THE WINDROWER 6. Lift off the leg assembly (A), and securely set the assembly on level ground as shown (B). 7. Repeat the above steps for the second leg assembly. Figure 2.31: Leg Assembly Positioning 214298 Revision A...
-
Page 36: Removing Wheel And Platform Support
UNLOADING THE WINDROWER 2.8 Removing Wheel and Platform Support 1. Remove the cross brace (A) and the two upright supports (B) and (C) from the frame. Figure 2.32: Wheel and Platform Support 2. Remove the cross member from above the hood (A). Figure 2.33: Wheel and Platform Support 214298 Revision A... - Page 37 UNLOADING THE WINDROWER 3. Remove the two uprights (A) on both sides of the hood. Figure 2.34: Wheel and Platform Support 214298 Revision A...
-
Page 39: Chapter 3: Assembling The Windrower
3 Assembling the Windrower Perform all procedures in this chapter in the order in which they are listed. 3.1 Assembling Support Stand Special stands for assembling the windrower are available from the factory. If the stands are not available, use an equivalent support system. -
Page 40: Lifting Windrower Onto Stand
Equipment used for unloading must meet or exceed the requirements specified in this section. Using inadequate equipment may result in chain breakage, vehicle tipping, or machine damage. Lift Sling Type MacDon Part #163871 Maximum Working Load 12,884 kg (28,404 lb.) Chain Type Overhead 1/2 in. - Page 41 ASSEMBLING THE WINDROWER 1. Attach chains or cables to the four lifting points (A) on the lift sling (MD #163871), and connect the loop ends to the crane hook. IMPORTANT: Use cables or chains with a minimum lifting capacity of 3221 kg (7100 lb.).
-
Page 42: Lifting Windrower Onto Stand: Forklift Method
ASSEMBLING THE WINDROWER 3.2.2 Lifting Windrower onto Stand: Forklift Method CAUTION To prevent injury to bystanders and avoid striking them with machinery, do NOT allow people to stand in the unloading area. CAUTION Equipment used for unloading must meet or exceed the requirements specified in this section. Using inadequate equipment may result in chain breakage, vehicle tipping, or machine damage. - Page 43 ASSEMBLING THE WINDROWER 2. Raise the windrower and lower onto the support stand. 3. Back away forklift. Figure 3.7: Windrower on Support Stand 214298 Revision A...
-
Page 44: Installing Legs
ASSEMBLING THE WINDROWER 3.3 Installing Legs 1. Remove the front leg bolts (A) and pins (B) and set aside for reinstallation. Remove carriage bolt (C) and remove lifting plate (D). Figure 3.8: Lifting Plate 2. Attach the front leg to a lifting device using lifting bar (A). - Page 45 ASSEMBLING THE WINDROWER 4. Feed the hydraulic hose bundle (A) into the frame and through the hole (B) at the center of the frame. Figure 3.10: Hydraulic Hoses 5. Insert the leg into the frame and line up the holes in the frame and the leg at the first position (widest tread with one exposed hole [A]).
- Page 46 ASSEMBLING THE WINDROWER 8. Use the lifting device to slightly lift the header lift arms, and remove the lifting bars (A) from the legs. 9. Relocate the spring locking pins (B) to the front of the lift arms. Figure 3.12: Header Lift 214298 Revision A...
-
Page 47: Installing Drive Wheels
ASSEMBLING THE WINDROWER 3.4 Installing Drive Wheels NOTE: If using the factory stand, proceed to Step 1, page 35; otherwise, skip to Step 5, page 1. Ensure the three (one at rear, two at front) lift locks are activated on the lift mechanism. NOTE: Lock is activated when keeper (A) is vertical and latch (B) is free to move back and forth. - Page 48 ASSEMBLING THE WINDROWER 6. Position the wheels against the hubs so the air valves (A) are on the outside and the tire tread points forward. NOTE: For turf tires (diamond tread), be sure arrow on sidewall points in forward rotation with windrower in cab-forward orientation.
-
Page 49: Installing Caster Wheels
ASSEMBLING THE WINDROWER 3.5 Installing Caster Wheels 1. Remove two guide plates (A) from the ends of the walking beam. Figure 3.18: Guide Plate on Walking Beam 2. Support the shipping frame channel and remove the bolts attaching the shipping frame to the walking beam and mainframe side rail. - Page 50 ASSEMBLING THE WINDROWER 4. Remove tie bar (A) between the two caster wheels. Figure 3.20: Caster Wheel Shipping Assembly 5. Remove the two caster supports (A) from the caster wheels and frame. Retain bolts for attaching caster to walking beam. Figure 3.21: Caster Supports 214298 Revision A...
- Page 51 ASSEMBLING THE WINDROWER 6. Attach a chain to the right caster and support caster with lifting device. Figure 3.22: Lifting Device on Caster 7. Remove the five remaining bolts (A) securing the caster to the shipping frame. Retain bolts for attaching caster to walking beam.
- Page 52 ASSEMBLING THE WINDROWER 8. Lift caster assembly off shipping frame and position at end of walking beam (A). 9. Insert right caster extension into walking beam and position for desired tread. Figure 3.24: Walking Beam 10. Install six 3/4 in. bolts (A) and hardened washers into walking beam and caster beam.
-
Page 53: Installing Hydraulics
• 3.6.1 Installing Hydraulics on an M205, page 41 • 3.6.2 Installing Hydraulics on an M155, page 44 3.6.1 Installing Hydraulics on an M205 1. Retrieve all capped hoses from inside the frame. 2. Locate the three hoses with capped tees extending from the valve block. - Page 54 ASSEMBLING THE WINDROWER 12. Position the two smaller hoses (MD #111323) (A) and the two larger hoses (MD #111328, MD #111557) (B) against the support as shown, and secure with plastic ties. Figure 3.28: Hydraulic Hose Routing 13. Remove clamp (A) from round plastic hose block (case drain hose is preinstalled in block).
- Page 55 ASSEMBLING THE WINDROWER 16. Reinstall clamp (A). Figure 3.31: Hose Routing 17. Remove caps and attach hoses with short elbows (A) to respective side of pump (either yellow or no tie). Tighten fittings. Figure 3.32: Pump 18. Remove caps and attach hoses with long elbows (A) to respective side of pump (either red or no tie).
-
Page 56: Installing Hydraulics On An M155
Figure 3.34: Hose Routing 25. Secure hoses with cable ties (A) as required. Figure 3.35: Hose Routing 3.6.2 Installing Hydraulics on an M155 1. Locate hose clip (A) under the cab and remove the clip. Figure 3.36: Hose Clip 214298... - Page 57 ASSEMBLING THE WINDROWER 2. Position hose (MD #111323 [orange tie]) (D) and hose (MD #111324 [white tie]) (E) with tee under the center of the clip as shown, and loosely install two bolts and nuts. NOTE: Part numbers are marked on the hoses. 3.
- Page 58 ASSEMBLING THE WINDROWER 13. Locate two hoses (red ties) (A) inside frame. 14. Route right hose behind bundle. 15. Remove caps, make connection, and tighten fitting. 16. Position hoses into frame. Figure 3.40: Hose Routing 17. Retrieve long hose (MD #119328 [white tie]) (A) and route through the hole in the left frame.
- Page 59 ASSEMBLING THE WINDROWER 19. Remove the caps from three fittings (blue [A], orange [B], and yellow [C] ties) on the valve block from the inboard side of the frame. Figure 3.43: Valve Block 20. Loosen bolts (A) and move valve block (B) to improve access through the hole in the frame in order to insert wrenches and tighten fittings.
- Page 60 ASSEMBLING THE WINDROWER 23. Remove clamp (A) from round plastic hose block (case drain hose is preinstalled in block). Figure 3.46: Hose Block NOTE: Case drain hose (C) is preinstalled in block. 24. Insert two left traction drive hoses (A) into hose block as shown.
- Page 61 ASSEMBLING THE WINDROWER 28. Remove caps and attach hoses with long elbows (A) to respective side of pump (either red or no tie). Tighten fittings. Figure 3.49: Pump 29. Retrieve the two motor case drain hoses (MD #111312) at the front frame and the 7/8 in. tee fitting (B) on the hose from the pump.
- Page 62 ASSEMBLING THE WINDROWER 31. Remove one cap from tee fitting (A) and quickly attach hose to minimize oil spillage. 32. Remove second cap from tee (A) and quickly connect other hose. 33. Tighten fittings. Figure 3.51: Tee Fitting 34. Position hose bundle (A) from the valve blocks on the left side of the frame onto the tire.
- Page 63 ASSEMBLING THE WINDROWER 36. Undo strap (A), cut plastic cable ties (B), and move harness (C) away from the hose bundle. Figure 3.53: Electric Harness and Hose Bundle 37. Route the hose bundle (A) through the hose support and lay hose bundle on the tire. 38.
- Page 64 ASSEMBLING THE WINDROWER 39. Attach harness (A) to hose support with hose clip (B). Figure 3.55: Hose Support 40. Secure harness (C) to hose bundle with strap (A) and new plastic cable ties (B). Ensure harness is clear of pinch and friction points. Figure 3.56: Electric Harness and Hose Bundle 214298 Revision A...
- Page 65 ASSEMBLING THE WINDROWER 41. Disengage and rotate hook (A) to fully up position. 42. Position hose bundle (B) over hose support and under hook. Figure 3.57: Hook Positioning 43. Lower hook (A) and engage in bracket in down position. Figure 3.58: Hook Positioning 44.
-
Page 66: Removing Battery Shipping Shield
ASSEMBLING THE WINDROWER 3.7 Removing Battery Shipping Shield 1. Loosen nut (A) on the battery clamp. 2. Slide shield (B) out from under the battery and discard. 3. Tighten nut (A) on the battery clamp. Figure 3.60: Battery Shipping Shield 4. -
Page 67: Unpacking Ignition Keys
ASSEMBLING THE WINDROWER 3.8 Unpacking Ignition Keys The fuse box is mounted on the right (cab-forward) side of the frame under the platform. Figure 3.63: Fuse Box Location 1. Remove wing nut (A) from fuse box cover (B) and remove cover. Figure 3.64: Fuse Box 214298 Revision A... - Page 68 ASSEMBLING THE WINDROWER 2. Remove tape and keys (A) from inside the cover. 3. Unlock cab doors and place keys on console. 4. Close cab doors. 5. Install fuse box cover (B) and secure with wing nut. Figure 3.65: Fuse Cover 214298 Revision A...
-
Page 69: Installing Platforms
ASSEMBLING THE WINDROWER 3.9 Installing Platforms NOTE: Procedure for left side installation is shown, right side installation is similar. 1. Remove the two 1/2 x 3/4 in. bolts (A) securing the rails to the shipping beam, and remove the rails. Retain hardware. - Page 70 ASSEMBLING THE WINDROWER 5. Attach the main beam of the platform to the side frame using three 1/2 x 1-1/4 in. long carriage bolts (A). Ensure the bolt heads face inboard, and tighten just enough to permit adjustment. Figure 3.69: Left Platform – Main Beam 6.
- Page 71 ASSEMBLING THE WINDROWER 9. Slowly close the platform and check that the vertical rail tubes are parallel with the cab posts when viewing from the rear. Figure 3.72: Left Platform 10. Laterally adjust the king pin mounting (A) as required. Figure 3.73: Left Platform –...
- Page 72 ASSEMBLING THE WINDROWER 12. Ensure the front of the platform is contacting the guide (A). Figure 3.75: Left Platform – Guide 13. Adjust the platform horizontally with the 1/2 x 2-1/4 in. bolt (A) as required. Figure 3.76: Left Platform – Main Beam 14.
-
Page 73: Installing Steps
ASSEMBLING THE WINDROWER 3.10 Installing Steps NOTE: Procedure for left side installation shown–right side installation similar. 1. Remove the two existing upper bolts (A). 2. Ensure the two lower bolts (B) are not threaded in fully. Figure 3.78: Left Platform 3. -
Page 74: Installing Exhaust Stack
ASSEMBLING THE WINDROWER 3.11 Installing Exhaust Stack 1. Open the engine compartment hood. 2. Retrieve the exhaust stack (A) and clamp (B) (unpacked in 2.6 Removing Hand Rails and Exhaust Stack, page 20). 3. Loosen the clamp (B) on the exhaust stack (A). Figure 3.80: Exhaust Stack 4. - Page 75 ASSEMBLING THE WINDROWER 6. Tighten both clamps (A) just enough to permit the stack (B) to move. Figure 3.83: Exhaust Stack under Hood 7. Close the hood slowly so the stack (A) enters the hole (B) in the hood. Adjust the position of the stack as required to clear the hole in the hood.
-
Page 76: Positioning Light And Mirror Assemblies
ASSEMBLING THE WINDROWER 3.12 Positioning Light and Mirror Assemblies 1. Remove the nut and bolt (A) securing the light and mirror assembly in the shipping position. 2. Swing the light and mirror assembly (B) forwards and upwards. Figure 3.86: Light and Mirror Assembly in Shipping Position 3. -
Page 77: Connecting Batteries
ASSEMBLING THE WINDROWER 3.13 Connecting Batteries DANGER To avoid bodily injury or death from unexpected startup of the machine, always stop the engine and remove the key from the ignition before leaving the operator’s seat for any reason. 1. Stop engine and remove key from ignition. 2. -
Page 78: Priming Hydraulic System
• 3.14.1 Priming Hydraulic System on an M205, page 66 • 3.14.2 Priming Hydraulic System on an M155, page 67 3.14.1 Priming Hydraulic System on an M205 1. Open the left (cab-forward) platform. 2. Disconnect the brake engage solenoid plug (P44) (A) at the multifunction block on the left side of the windrower. -
Page 79: Priming Hydraulic System On An M155
5.5 Checking Hydraulic Oil, page 221. 9. Close the left (cab-forward) platform. 3.14.2 Priming Hydraulic System on an M155 1. Shut down the engine, and remove the key from the ignition. 2. Remove the hydraulic oil reservoir filler cap/dipstick (A). - Page 80 ASSEMBLING THE WINDROWER 4. From underneath the machine, locate plug (A) on the side of the header drive pump housing. 5. Loosen plug (A) to bleed the pump housing. Retighten the plug once oil starts to run out. Figure 3.93: Header Drive Pump Housing 6.
- Page 81 ASSEMBLING THE WINDROWER 8. From above the machine, locate plug (A) on the top of the traction drive pump housing. 9. Loosen plug (A) to bleed the pump housing. Retighten the plug once oil starts to run out. 10. Replace the hydraulic oil reservoir filler cap. Figure 3.95: Traction Drive Pump Housing 11.
- Page 82 ASSEMBLING THE WINDROWER 13. Disconnect the electrical connection (A) at the fuel pump on the right side of the engine. Figure 3.97: Fuel Pump Location 14. Open the maintenance platform on the right (cab-forward) side. 15. Open the circuit breaker/fuse box (A), and remove the engine control module (ECM) ignition fuse (5A) (B).
- Page 83 ASSEMBLING THE WINDROWER 20. Check the hydraulic oil level in the reservoir (remove filler cap/dipstick (A) and add SAE 15W-40 oil if necessary). Refer to 5.5 Checking Hydraulic Oil, page 221. 21. Close the platforms. Figure 3.99: Filler Cap/Dipstick 214298 Revision A...
-
Page 84: Starting Engine
ASSEMBLING THE WINDROWER 3.15 Starting Engine 1. Ensure there is sufficient fuel for a 15 minute run. 2. Ensure lock (A) is engaged at the cab-forward or engine-forward position. Figure 3.100: Operator Console 3. Move the ground speed lever (GSL) (A) into the N-DETENT position. - Page 85 ASSEMBLING THE WINDROWER WARNING If starter engages with steering wheel unlocked, ground speed lever out of NEUTRAL, or header clutch engaged, do NOT start engine. Refer to the technical manual. d. Turn ignition key (B) to START position until engine starts and then release the key.
- Page 86 ASSEMBLING THE WINDROWER Table 3.1 Engine Start Troubleshooting (continued) Problem Solution Crankcase oil too heavy • Use recommended oil • Test the battery Low battery output • Check battery electrolyte level • Clean and tighten loose connections Poor battery connection Faulty starter •...
-
Page 87: Checking Traction Drive
ASSEMBLING THE WINDROWER 3.16 Checking Traction Drive CAUTION Check to be sure all bystanders have cleared the area. 1. Move the ground speed lever (GSL) (A) out of N-DETENT and slowly move the GSL forwards. Ensure the wheels are rotating in the forward direction and at the same speed. -
Page 88: Removing Windrower From Stand
ASSEMBLING THE WINDROWER 3.17 Removing Windrower from Stand The procedure for removing the windrower from the support stand differs depending on whether you are using a factory-built stand or a field-constructed stand. Refer to the following procedures according to for your specific stand: •... -
Page 89: Removing Windrower From Field Stand
ASSEMBLING THE WINDROWER 3.17.2 Removing Windrower from Field Stand 1. Position a jack under the jack point of each drive wheel leg and under the rear hitch. 2. Raise the jacks to take the weight off the stands, and remove the stands. 3. -
Page 90: Installing Am/Fm Radio
ASSEMBLING THE WINDROWER 3.18 Installing AM/FM Radio Windrowers are designed to accept a DIN E style AM/FM radio with a depth (X) of 161 mm and having a 5 mm threaded stud (A) centered on the rear for support. Adjustments are possible if the radio falls outside these parameters. - Page 91 ASSEMBLING THE WINDROWER 5. Remove the cutout by cutting the tabs (A) in the panel. Remove sharp edges from the panel. Figure 3.109: Panel 6. Position receptacle (A) (supplied with radio) into opening and secure by bending tabs (B) on receptacle against panel.
- Page 92 ASSEMBLING THE WINDROWER 8. Ensure the radio has a six-pin connector (Packard #2977042) and a terminal arrangement as shown at right. This enables the radio to connect to the windrower’s six-pin radio connector wiring harness. 9. Attach the following two additional wires from the wiring harness to the radio: a.
- Page 93 ASSEMBLING THE WINDROWER 16. Remove protective cover (A) from antenna mount on cab roof and thread antenna onto base until hand tight. NOTE: Store protective cover in cab and reinstall to protect antenna mount if antenna needs to be removed. 17.
-
Page 94: Installing Beacons
ASSEMBLING THE WINDROWER 3.19 Installing Beacons 1. Retrieve the two beacons from the shipment. 2. Remove the hardware and rubber base from one of the beacons as shown. Figure 3.116: Beacon Light 3. Feed the connectors from the harness through the center hole in the rubber base. - Page 95 ASSEMBLING THE WINDROWER 7. Fit the beacon onto the base making sure the beacon is oriented with the point on the lens facing forward (cab-forward) as shown. Figure 3.119: Beacon Light Orientation 8. Mount the beacon to the base using the lock washers and nuts (A) supplied with the beacon.
-
Page 96: Installing The Slow Moving Vehicle (Smv) Sign
ASSEMBLING THE WINDROWER 3.20 Installing the Slow Moving Vehicle (SMV) Sign 1. Install the SMV sign (A) (shipped inside the cab) onto the windrower in accordance with the instructions supplied with the sign. SMV signs must be visible when travelling on the road. Figure 3.121: Engine-Forward Location Figure 3.122: Cab-Forward Location Figure 3.123: Alternate Location (Cab-Forward) -
Page 97: Attaching Headers
ASSEMBLING THE WINDROWER 3.21 Attaching Headers 3.21.1 Attaching Headers Attaching Header Boots Header boots are required to attach a D Series draper header to the windrower. Attach header boots (supplied with header) to windrower lift linkage if not already installed. CAUTION To prevent damage to the lift system when lowering header lift linkages without a header or weight box... -
Page 98: Attaching A D Series Header
4. Repeat for opposite side. Figure 3.126: Header Boot Attaching a D Series Header D50, D60, and D65 headers can be attached to an M155 or M205 Self-Propelled Windrower. For attachment procedures, refer to the section for your specific windrower model. M155 Self-Propelled Windrower The M155 Self-Propelled Windrower is factory-equipped to run a D Series Draper Header. - Page 99 ASSEMBLING THE WINDROWER M205 Self-Propelled Windrower To operate a D Series header, the M205 Self-Propelled Windrower must be equipped with a Draper Drive Basic kit and a Completion kit. Windrowers equipped with D Series hydraulics have four header drive hoses on the left cab-forward side and up to five reel drive hoses on the right side.
- Page 100 ASSEMBLING THE WINDROWER Attaching a D Series Header: Hydraulic Center-Link with Optional Self-Alignment NOTE: Draper header boots must be installed onto the windrower lift linkage before starting this procedure. Refer to Attaching Header Boots, page DANGER To avoid bodily injury or death from unexpected startup of the machine, always stop the engine and remove the key from the ignition before leaving the operator’s seat for any reason.
- Page 101 ASSEMBLING THE WINDROWER 3. Activate the REEL UP switch (A) on the GSL to raise the center-link until the hook is above the attachment pin on the header. IMPORTANT: If the center-link is too low, it may contact the header as the windrower approaches the header for hookup.
- Page 102 ASSEMBLING THE WINDROWER 7. Adjust position of the center-link cylinder (A) with the REEL UP, REEL DOWN, AND HEADER TILT switches on the GSL until the hook is above the header attachment pin. IMPORTANT: Hook release must be down to enable self-locking mechanism.
- Page 103 ASSEMBLING THE WINDROWER 12. Engage safety props on both lift cylinders as follows: a. Stop engine and remove key from ignition. b. Pull lever (A) and rotate towards the header to release and lower safety prop (B) onto the lift cylinder.
- Page 104 ASSEMBLING THE WINDROWER 15. Remove clevis pin from storage position (B) in linkage and insert into hole (A) to engage float springs. Secure with hairpin. Figure 3.138: Header Float Linkage 16. Disengage safety prop by turning lever (A) downwards to release and lower stop until lever locks into vertical position.
- Page 105 ASSEMBLING THE WINDROWER 20. Connect header drive hoses (A) and electrical harness (B) to header. Refer to the draper header operator’s manual. Figure 3.141: Header Drive Hoses and Harness 21. Connect reel hydraulics (A) at right cab-forward side of windrower. Refer to the draper header operator’s manual.
- Page 106 ASSEMBLING THE WINDROWER Attaching a D Series Header: Hydraulic Center-Link without Self-Alignment NOTE: Draper header boots must be installed onto the windrower lift linkage before starting this procedure. Refer to Attaching Header Boots, page DANGER To avoid bodily injury or death from unexpected startup of the machine, always stop the engine and remove the key from the ignition before leaving the operator’s seat for any reason.
- Page 107 ASSEMBLING THE WINDROWER 3. Relocate pin (A) in frame linkage as required to raise the center-link (B) until the hook is above the attachment pin on the header. IMPORTANT: If the center-link is too low, it may contact the header as the windrower approaches the header for hookup.
- Page 108 ASSEMBLING THE WINDROWER 8. Push down on rod end of link cylinder (B) until hook engages and locks onto header pin. IMPORTANT: Hook release must be down to enable self-locking mechanism. If the release is open (up), manually push it down after hook engages header pin.
- Page 109 ASSEMBLING THE WINDROWER 13. Engage safety props on both lift cylinders as follows: a. Stop engine and remove key from ignition. b. Pull lever (A) and rotate towards the header to release and lower safety prop (B) onto the lift cylinder.
- Page 110 ASSEMBLING THE WINDROWER 16. Remove clevis pin from storage position (B) in linkage and insert into hole (A) to engage float springs. Secure with hairpin. Figure 3.152: Header Float Linkage 17. Disengage safety prop by turning lever (A) downwards to release and lower stop until lever locks into vertical position.
- Page 111 ASSEMBLING THE WINDROWER 21. Connect header drive hoses (A) and electrical harness (B) to header. Refer to the draper header operator’s manual. Figure 3.155: Header Drive Hoses and Harness 22. Connect reel hydraulics (A) at right cab-forward side of windrower. Refer to the draper header operator’s manual.
- Page 112 ASSEMBLING THE WINDROWER Attaching a D Series Header: Mechanical Center-Link NOTE: Draper header boots must be installed onto the windrower lift linkage before starting this procedure. Refer to Attaching Header Boots, page DANGER To avoid bodily injury or death from unexpected startup of the machine, always stop the engine and remove the key from the ignition before leaving the operator’s seat for any reason.
- Page 113 ASSEMBLING THE WINDROWER 3. Drive the windrower slowly forward until the boots (A) enter the header legs (B). Continue driving slowly forward until lift linkages contact the support plates in the header legs and the header nudges forward. 4. Ensure the lift linkages are properly engaged in the header legs and are contacting the support plates.
- Page 114 ASSEMBLING THE WINDROWER 12. Engage safety props on both lift cylinders as follows: a. Stop engine and remove key from ignition. b. Pull lever (A) and rotate towards the header to release and lower safety prop (B) onto the lift cylinder.
- Page 115 ASSEMBLING THE WINDROWER 15. Remove clevis pin from storage position (B) in linkage and insert into hole (A) to engage float springs. Secure with hairpin. Figure 3.164: Header Float Linkage 16. Disengage safety prop by turning lever (A) downwards to release and lower stop until lever locks into vertical position.
- Page 116 ASSEMBLING THE WINDROWER 20. Connect header drive hoses (A) and electrical harness (B) to header. Refer to the draper header operator’s manual. Figure 3.167: Header Drive Hoses and Harness 21. Connect reel hydraulics (A) at right cab-forward side of windrower. Refer to the draper header operator’s manual.
-
Page 117: Attaching An A Series Header
ASSEMBLING THE WINDROWER Attaching an A Series Header A30-D, A30-S, and A40-D headers can be attached to an M155 or M205 Self-Propelled Windrower. For attachment procedure, refer to the section for your specific windrower model. M155 Self-Propelled Windrower The M155 Self-Propelled Windrower is factory-equipped to run an A Series Auger Header. - Page 118 ASSEMBLING THE WINDROWER Attaching an A Series Header: Hydraulic Center-Link with Optional Self-Alignment DANGER To avoid bodily injury or death from unexpected startup of the machine, always stop the engine and remove the key from the ignition before leaving the operator’s seat for any reason. 1.
- Page 119 ASSEMBLING THE WINDROWER 3. Activate the REEL UP switch (A) on the GSL to raise the center-link until the hook is above the attachment pin on the header. IMPORTANT: If the center-link is too low, it may contact the header as the windrower approaches the header for hookup.
- Page 120 ASSEMBLING THE WINDROWER 6. Adjust position of the center-link cylinder (A) with the REEL UP and REEL DOWN switches on the GSL until the hook is positioned above the header attachment pin. IMPORTANT: Hook release must be down to enable self-locking mechanism.
- Page 121 ASSEMBLING THE WINDROWER 11. Engage safety props on both lift cylinders as follows: a. Stop engine and remove key from ignition. b. Pull lever (A) and rotate towards the header to release and lower safety prop (B) onto the lift cylinder.
- Page 122 ASSEMBLING THE WINDROWER 13. Remove lynch pin from clevis pin (A) in stand (B). 14. Hold stand (B) and remove pin (A). 15. Move stand (B) to storage position by inverting and relocating onto bracket as shown. Reinsert clevis pin (A) and secure with lynch pin. Figure 3.181: Header Stand 16.
- Page 123 ASSEMBLING THE WINDROWER CAUTION Check to be sure all bystanders have cleared the area. 19. Start the engine and activate the HEADER DOWN switch (A) on the GSL to fully lower the header. 20. Stop engine and remove key from ignition. Figure 3.184: Ground Speed Lever 21.
- Page 124 ASSEMBLING THE WINDROWER CAUTION To prevent damage to the lift system when lowering header lift linkages without a header or weight box attached to the windrower, ensure the float engagement pin is installed in storage position (B) and NOT in engaged position (A).
- Page 125 ASSEMBLING THE WINDROWER 4. Drive the windrower slowly forward until the windrower feet (A) enter the header supports (B). Continue driving slowly forward until the feet engage the supports and the header nudges forward. Figure 3.190: Header Support 5. Use the following ground speed lever functions to position the center-link hook above the header attachment pin: •...
- Page 126 ASSEMBLING THE WINDROWER CAUTION Check to be sure all bystanders have cleared the area. 9. Start the engine. 10. Press the HEADER UP switch (A) to raise header to maximum height. 11. If one end of the header does NOT fully raise, rephase the lift cylinders as follows: a.
- Page 127 ASSEMBLING THE WINDROWER 13. Install clevis pin (A) through support and foot and secure with hairpin. Repeat for opposite support. IMPORTANT: Ensure clevis pin (A) is fully inserted and hairpin is installed behind bracket. Figure 3.195: Header Support 14. Remove lynch pin from clevis pin (A) in stand (B). 15.
- Page 128 ASSEMBLING THE WINDROWER 18. Disengage safety prop by turning lever (A) downwards to release and lower stop until lever locks into vertical position. 19. Repeat for opposite safety prop. Figure 3.198: Safety Prop CAUTION Check to be sure all bystanders have cleared the area. 20.
- Page 129 ASSEMBLING THE WINDROWER Attaching an A Series Header: Mechanical Center-Link DANGER To avoid bodily injury or death from unexpected startup of the machine, always stop the engine and remove the key from the ignition before leaving the operator’s seat for any reason. 1.
- Page 130 ASSEMBLING THE WINDROWER 3. Drive the windrower slowly forward until the windrower feet (A) enter the header supports (B). Continue driving slowly forward until the feet engage the supports and the header nudges forward. Figure 3.204: Header Support 4. Stop engine and remove key from ignition. 5.
- Page 131 ASSEMBLING THE WINDROWER 11. Engage safety props on both lift cylinders as follows: a. Stop engine and remove key from ignition. b. Pull lever (A) and rotate towards the header to release and lower safety prop (B) onto the lift cylinder.
- Page 132 ASSEMBLING THE WINDROWER 13. Remove lynch pin from clevis pin (A) in stand (B). 14. Hold stand (B) and remove pin (A). 15. Move stand (B) to storage position by inverting and relocating onto bracket as shown. Reinsert clevis pin (A) and secure with lynch pin. Figure 3.209: Header Stand 16.
- Page 133 ASSEMBLING THE WINDROWER CAUTION Check to be sure all bystanders have cleared the area. 19. Start the engine and activate the HEADER DOWN switch (A) on the GSL to fully lower the header. 20. Stop engine and remove key from ignition. Figure 3.212: Ground Speed Lever 21.
-
Page 134: Attaching An R Series Header
ASSEMBLING THE WINDROWER Attaching an R Series Header Only a 13-foot R Series Rotary Disc Header can be attached to an M155 Self-Propelled Windrower. Certain 13- and 16-foot R Series Rotary Disc Headers can be attached to an M205 Self-Propelled Windrower. - Page 135 ASSEMBLING THE WINDROWER M205 Self-Propelled Windrower The M205 Self-Propelled Windrower is factory-equipped with hydraulics and connections to run the R Series Rotary Disc Headers. The R85 16-foot header is factory-equipped with the hydraulic connections for attachment to the windrower. The R85 13-foot header and the R80 13- and 16-foot headers are shipped without the motor and hoses installed and the installation of a separate motor and hose bundle is necessary.
- Page 136 ASSEMBLING THE WINDROWER CAUTION To prevent damage to the lift system when lowering header lift linkages without a header or weight box attached to the windrower, ensure the float engagement pin is installed in storage position (B) and NOT in engaged position (A).
- Page 137 ASSEMBLING THE WINDROWER 4. Drive the windrower slowly forward until the windrower feet (A) enter the header supports (B). Continue driving slowly forward until the feet engage the supports and the header nudges forward. Figure 3.220: Header Support 5. Use the following GSL functions to position the center-link hook above the header attachment pin: •...
- Page 138 ASSEMBLING THE WINDROWER 9. Press the HEADER UP switch (A) to raise header to maximum height. 10. If one end of the header does NOT fully raise, rephase the lift cylinders as follows: a. Press and hold the HEADER UP switch until both cylinders stop moving.
- Page 139 ASSEMBLING THE WINDROWER 12. Install clevis pin (A) through support and windrower lift member, and secure with hairpin (B). Repeat for opposite side. IMPORTANT: Ensure clevis pin (A) is fully inserted and hairpin is installed behind bracket. Figure 3.225: Header Support 13.
- Page 140 ASSEMBLING THE WINDROWER CAUTION Check to be sure all bystanders have cleared the area. 16. Start the engine and activate the HEADER DOWN switch (A) on the GSL to fully lower the header. 17. Stop engine and remove key from ignition. Figure 3.228: Ground Speed Lever 18.
- Page 141 ASSEMBLING THE WINDROWER Attaching an R Series Header: Hydraulic Center-Link without Self-Alignment DANGER To avoid bodily injury or death from unexpected startup of the machine, always stop the engine and remove the key from the ignition before leaving the operator’s seat for any reason. 1.
- Page 142 ASSEMBLING THE WINDROWER 3. Relocate pin (A) in frame linkage as required to raise the center-link (B) until the hook is above the attachment pin on the header. IMPORTANT: If the center-link is too low, it may contact the header as the windrower approaches the header for hookup.
- Page 143 ASSEMBLING THE WINDROWER 7. Push down on rod end of link cylinder (B) until hook engages and locks onto header pin. IMPORTANT: Hook release must be down to enable self-locking mechanism. If the release is open (up), manually push it down after hook engages header pin.
- Page 144 ASSEMBLING THE WINDROWER 12. Engage safety props on both lift cylinders as follows: a. Stop engine and remove key from ignition. b. Pull lever (A) and rotate towards the header to release and lower safety prop (B) onto the lift cylinder.
- Page 145 ASSEMBLING THE WINDROWER 14. Remove clevis pin from storage position (B) in linkage and insert into hole (A) to engage float springs. Secure with hairpin. Figure 3.241: Header Float Linkage 15. Disengage safety prop by turning lever (A) downwards to release and lower stop until lever locks into vertical position.
- Page 146 ASSEMBLING THE WINDROWER 19. Connect header drive hoses (A) and electrical harness (B) to header. Refer to the rotary disc header operator’s manual. Figure 3.244: Header Drive Hoses and Harness 20. Connect the header drive hoses and electrical harness (A) to the header. Refer to the rotary disc header operator’s manual.
- Page 147 ASSEMBLING THE WINDROWER Attaching an R Series Header: Mechanical Center-Link DANGER To avoid bodily injury or death from unexpected startup of the machine, always stop the engine and remove the key from the ignition before leaving the operator’s seat for any reason. 1.
- Page 148 ASSEMBLING THE WINDROWER 3. Drive the windrower slowly forward until the windrower feet (A) enter the header supports (B). Continue driving slowly forward until the feet engage the supports and the header nudges forward. Figure 3.249: Header Support 4. Stop engine and remove key from ignition. 5.
- Page 149 ASSEMBLING THE WINDROWER 11. Engage safety props on both lift cylinders as follows: a. Stop engine and remove key from ignition. b. Pull lever (A) and rotate towards the header to release and lower safety prop (B) onto the lift cylinder.
- Page 150 ASSEMBLING THE WINDROWER 13. Remove clevis pin from storage position (B) in linkage and insert into hole (A) to engage float springs. Secure with hairpin. Figure 3.254: Header Float Linkage 14. Disengage safety prop by turning lever (A) downwards to release and lower stop until lever locks into vertical position.
- Page 151 ASSEMBLING THE WINDROWER 18. Connect header drive hoses (A) and electrical harness (B) to header. Refer to the rotary disc header operator’s manual. Figure 3.257: Header Drive Hoses and Harness 214298 Revision A...
-
Page 152: Lubricating The Windrower
ASSEMBLING THE WINDROWER 3.22 Lubricating the Windrower For grease specification, refer to the inside back cover of this book for quick reference. 3.22.1 Lubrication Procedure DANGER To avoid bodily injury or death from unexpected startup of the machine, always stop the engine and remove the key from the ignition before leaving the operator’s seat for any reason. -
Page 153: Lubrication Points
ASSEMBLING THE WINDROWER 3.22.2 Lubrication Points Figure 3.258: Lubrication Points A - Forked Caster Wheel Bearing (Two Places) (Outer – Both Wheels) B - Top-Link (Two Places) (Both Sides) C - Lubrication Decal (MD #183411) D - Caster Pivot (Both Sides) E - Forked/Formed Caster Wheel Bearing (Two Places) (Inner –... -
Page 155: Chapter 4: Cab Display Module (Cdm)
• Upper line – C### (CDM) • Lower line – M### or X### (WCM) NOTE: M### is for M155 and X### is for M205. Main Display: Displays menu item and selection • Upper line – Menu item • Lower line – Selection Select Switch: Places monitor into Program Mode with PROGRAM switch. - Page 156 CAB DISPLAY MODULE (CDM) Menu Item Scroll Forward: Displays value under menu item. • Push to scroll forward • Hold down for fast scroll Menu Item Scroll Backward: Displays value under menu item. • Push to scroll backward • Hold down for fast scroll Program Switch: Places monitor into Program Mode.
-
Page 157: Configuring The Windrower
4. Press left (B) or right (C) arrows to select knife speed. Press SELECT (D). 5. Press PROGRAM (A) to exit Programming Mode or press SELECT (D) to proceed to next WINDROWER SETUP action. Figure 4.3: M155 Knife Speed Shown – M205 Similar 214298 Revision A... -
Page 158: Setting The Knife Overload Speed
5. Press left (B) or right (C) arrows to set knife overload speed. Press SELECT (D). 6. Press PROGRAM (A) to exit Programming Mode or press SELECT (D) to proceed to next WINDROWER SETUP action. Figure 4.5: M155 Knife Overload Speed Shown – M205 Similar 214298 Revision A... -
Page 159: Setting The Rotary Disc Overload Speed
5. Press left (B) or right (C) arrows to set disc overload speed. Press SELECT (D). 6. Press PROGRAM (A) to exit Programming Mode or press SELECT (D) to proceed to next WINDROWER SETUP action. Figure 4.7: M155 Disc Overload Speed Shown – M205 Similar 214298 Revision A... -
Page 160: Setting The Hydraulic Overload Pressure
3. Press right arrow (B) to select YES. Press SELECT (C). • SET KNIFE SPEED? is displayed. Figure 4.8: M155 CDM Programming Buttons Shown – M205 Similar 4. Press SELECT (D) until OVERLOAD PRESSURE? is displayed on the upper line. -
Page 161: Setting The Header Index Mode
5. Press left (B) or right (C) arrows to set Header Index Mode. Press SELECT (D). 6. Press PROGRAM (A) to exit Programming Mode or press SELECT (D) to proceed to next WINDROWER SETUP action. Figure 4.11: M155 Header Index Mode Shown – M205 Similar 214298 Revision A... -
Page 162: Setting The Return To Cut Mode
5. Press left (B) or right (C) arrows to select RETURN TO CUT MODE. Press SELECT (D). 6. Press PROGRAM (A) to exit Programming Mode or press SELECT (D) to proceed to next WINDROWER SETUP action. Figure 4.13: M155 Return to Cut Mode Shown – M205 Similar 214298 Revision A... -
Page 163: Setting The Auto Raise Height
5. Press left arrow (B) or right arrow (C) to change auto raise height. 6. Press PROGRAM (A) to exit Programming Mode or press SELECT (D) to proceed to next WINDROWER SETUP action. Figure 4.15: M155 Auto Raise Height Shown – M205 Similar 214298 Revision A... -
Page 164: Activating The Double Windrow Attachment (Dwa)
CAB DISPLAY MODULE (CDM) 4.2.8 Activating the Double Windrow Attachment (DWA) NOTE: • Follow this procedure if installing the DWA; however, refer to the DWA manual if you require additional installation instructions. • The DWA cannot be activated if the swath compressor is enabled. •... - Page 165 CAB DISPLAY MODULE (CDM) 6. SWAP DWA CONTROLS? is displayed on the upper line. • NO/YES is displayed on the lower line. NOTE: This step swaps the DWA controls from the console switch to the ground speed lever (GSL) reel fore-aft buttons.
-
Page 166: Activating The Hydraulic Center-Link On An M155
CAB DISPLAY MODULE (CDM) 4.2.9 Activating the Hydraulic Center-Link on an M155 NOTE: • This procedure requires installation of the optional Hydraulic Center-Link (MD #B4650). 1. Turn ignition key to RUN, or start the engine. Refer to 3.15 Starting Engine, page 2. -
Page 167: Activating The Rotary Header Drive Hydraulics On An M155
CAB DISPLAY MODULE (CDM) 4.2.10 Activating the Rotary Header Drive Hydraulics on an M155 NOTE: This procedure requires installation of the optional Rotary Header Drive Hydraulics (MD #B5510). For more information, refer to the rotary disc header operator’s manual. 1. Turn ignition key to RUN, or start the engine. Refer to 3.15 Starting Engine, page... -
Page 168: Setting The Header Cut Width
5. Press left (B) or right (C) arrows to change the header cut width. Press SELECT (D). 6. Press PROGRAM (A) to exit Programming Mode or press SELECT (D) to proceed to next WINDROWER SETUP action. Figure 4.25: M155 Header Cut Width Shown – M205 Similar 214298 Revision A... -
Page 169: Activating The Hay Conditioner
3. Press right arrow (B) to select YES. Press SELECT (C). • SET KNIFE SPEED? is displayed on the upper line. Figure 4.26: M155 CDM Programming Buttons Shown – M205 Similar 4. Press SELECT (C) until HAY CONDITIONER? is displayed on the upper line. -
Page 170: Displaying Reel Speed
5. Press left (B) or right (C) arrow to select either Imperial or Metric units. Press SELECT (D). 6. Press PROGRAM (A) to exit Programming Mode or press SELECT (D) to proceed to next WINDROWER SETUP action. Figure 4.29: M155 Reel Speed Display Shown – M205 Similar 214298 Revision A... -
Page 171: Setting The Windrower's Tire Size
• 18.4 x 26 TURF • 18.4 x 26 BAR • 23.1 x 26 TURF • 600 – 65 R28 Figure 4.31: M155 Tire Size Shown – M205 5. Press left (B) or right (C) arrow and select tire size. Similar Press SELECT (D). -
Page 172: Setting The Engine Intermediate Speed Control (Isc) Rpm
PRESS HAZARD TO SET is displayed on the upper line. • ISC RPM #### is displayed on the lower line. Table 4.1 ISC Settings ISC and RPM Figure 4.33: M155 Engine ISC RPM Shown – High Idle (M155) 2200 2000 1800 M205 Similar... -
Page 173: Clearing Sub-Acres
NO/YES is displayed on the lower line. 8. Press right arrow (C) to select YES. Press SELECT (D). 9. Press PROGRAM (A) to exit Programming Mode. Figure 4.34: M155 ISC RPM Shown – M205 Similar 4.2.16 Clearing Sub-Acres 1. With the key in the ON position, and the operator’s... -
Page 174: Activating Cab Display Lockouts
4. Press SELECT (B) until SET CONTROL LOCKS? is displayed on the upper line. • NO/YES is displayed on the lower line. 5. Press right arrow (A) to select YES. Press SELECT (B). Figure 4.37: M155 Control Locks Shown – M205 Similar 214298 Revision A... -
Page 175: Activating The Header Float Control Lockout
8. Press PROGRAM (A) to exit Programming Mode, or press SELECT (D) to proceed to next WINDROWER SETUP action. Figure 4.38: M155 Header Tilt Control Lock Shown – M205 Similar 4.3.2 Activating the Header Float Control Lockout NOTE: The header MUST be attached to the windrower to perform this procedure. The cab display module (CDM) automatically adjusts its programming for each header. - Page 176 • NO/YES is displayed on the lower line. 5. Press right arrow (A) to select YES. Press SELECT (B). Figure 4.40: M155 Control Locks Shown – M205 Similar 6. Press SELECT (D) until HEADER FLOAT is displayed on the upper line.
-
Page 177: Activating The Reel Fore-Aft Control Lockout
4. Press SELECT (B) until SET CONTROL LOCKS? is displayed on the upper line. • NO/YES is displayed on the lower line. 5. Press right arrow (A) to select YES. Press SELECT (B). Figure 4.43: M155 Control Locks Shown – M205 Similar 214298 Revision A... -
Page 178: Activating The Draper Speed Control Lockout
8. Press PROGRAM (A) to exit Programming Mode, or press SELECT (D) to proceed to next WINDROWER SETUP action. Figure 4.44: M155 Reel Fore-Aft Control Lock Shown – M205 Similar 4.3.4 Activating the Draper Speed Control Lockout NOTE: •... - Page 179 • NO/YES is displayed on the lower line. 5. Press right arrow (A) to select YES. Press SELECT (B). Figure 4.46: M155 Control Locks Shown – M205 Similar 6. Press SELECT (D) until DRAPER SPEED is displayed on the upper line.
-
Page 180: Activating The Auger Speed Control Lockout
4. Press SELECT (B) until SET CONTROL LOCKS? is displayed on the upper line. • NO/YES is displayed on the lower line. 5. Press right arrow (A) to select YES. Press SELECT (B). Figure 4.49: M155 Control Locks Shown – M205 Similar 214298 Revision A... -
Page 181: Activating Knife Speed Control Lockout
8. Press PROGRAM (A) to exit Programming Mode, or press SELECT (D) to proceed to next WINDROWER SETUP action. Figure 4.50: M155 Auger Control Lock Shown – M205 Similar 4.3.6 Activating Knife Speed Control Lockout NOTE: The header MUST be attached to the windrower to perform this procedure. The cab display module (CDM) automatically adjusts its programming for each header. - Page 182 • NO/YES is displayed on the lower line. 5. Press right arrow (A) to select YES. Press SELECT (B). Figure 4.52: M155 Control Locks Shown – M205 Similar 6. Press SELECT (D) until KNIFE SPEED is displayed on the upper line.
-
Page 183: Activating Rotary Disc Speed Control Lockout
4. Press SELECT (B) until SET CONTROL LOCKS? is displayed on the upper line. • NO/YES is displayed on the lower line. 5. Press right arrow (A) to select YES. Press SELECT (B). Figure 4.55: M155 Control Locks Shown – M205 Similar 214298 Revision A... -
Page 184: Activating The Reel Speed Control Lockout
8. Press PROGRAM (A) to exit Programming Mode or press SELECT (D) to proceed to next WINDROWER SETUP action. Figure 4.56: M155 Disc Speed Control Lock Shown – M205 Similar 4.3.8 Activating the Reel Speed Control Lockout NOTE: The header MUST be attached to the windrower to perform this procedure. - Page 185 • NO/YES is displayed on the lower line. 5. Press right arrow (A) to select YES. Press SELECT (B). Figure 4.58: M155 Control Locks Shown – M205 Similar 6. Press SELECT (D) until REEL SPEED is displayed on the upper line.
-
Page 186: Displaying Activated Cab Display Lockouts
HEADER TILT is displayed on the upper line. • The control switch status is displayed on the lower line. The hours displayed indicate when a switch was enabled or locked. Figure 4.61: M155 Control Locks Shown – M205 Similar 214298 Revision A... - Page 187 • REEL FORE/AFT • DRAPER SPEED • AUGER SPEED • KNIFE SPEED • DISK SPEED • REEL SPEED Figure 4.62: M155 Control Locks Shown – M205 Similar NOTE: Not all control locks apply to every header. 7. Press SELECT (D). •...
-
Page 188: Cab Display Options
The procedures listed in this section are current for cab display module (CDM) software version C512 and windrower control module (WCM) X116 (for the M205) or M236 (for the M155). The WCM is supplied preloaded with the latest released version of the operating software. Any subsequent updates will be made available via internet download from the MacDon Dealer Portal (https://portal.macdon.com). -
Page 189: Changing The Windrower Display Units
NO/YES is displayed on the lower line. 4. Press right arrow (A) to select YES. Press SELECT (B). • DISPLAY LANGUAGE? is displayed on the upper line. Figure 4.67: M155 Cab Display Setup Shown – M205 Similar 214298 Revision A... -
Page 190: Adjusting The Cab Display Buzzer Volume
7. Press PROGRAM (A) to exit Programming Mode or press SELECT (D) to proceed to next CAB DISPLAY SETUP? action. Figure 4.68: M155 Display Units Shown – M205 Similar 4.5.3 Adjusting the Cab Display Buzzer Volume 1. Turn ignition key to RUN, or start the engine. -
Page 191: Adjusting The Cab Display Backlighting
7. Press PROGRAM (A) to exit Programming Mode or press SELECT (D) to proceed to next CAB DISPLAY SETUP? action. Figure 4.71: M155 Buzzer Volume Shown – M205 Similar 4.5.4 Adjusting the Cab Display Backlighting The backlighting feature brightens the display screen helping you read the cab display module (CDM) in low light situations. -
Page 192: Adjusting The Cab Display Contrast
4. Press right arrow (A) to select YES. Press SELECT (B). • DISPLAY LANGUAGE? is displayed on the upper line. Figure 4.73: M155 Cab Display Setup Shown – M205 Similar 5. Press SELECT (D) until BACKLIGHTING is displayed on the upper line. - Page 193 4. Press right arrow (A) to select YES. Press SELECT (B). • DISPLAY LANGUAGE? is displayed on the upper line. Figure 4.76: M155 Cab Display Setup Shown – M205 Similar 5. Press SELECT (D) until DISPLAY CONTRAST is displayed on the upper line.
-
Page 194: Calibrating The Header Sensors
3. Press SELECT (B) until CALIBRATE SENSORS? is displayed on the upper line. • NO/YES is displayed on the lower line. Figure 4.78: M155 CDM Programming Buttons Shown – M205 Similar 4. Press right arrow (B) to select YES. Press SELECT (C). •... - Page 195 CAB DISPLAY MODULE (CDM) CAUTION Check to be sure all bystanders have cleared the area. 6. Press and hold the HEADER UP button (C) on the ground speed lever (GSL). • CALIBRATING HEIGHT is displayed on the upper line. • RAISE HEADER HOLD is displayed on the lower line.
-
Page 196: Calibrating The Header Tilt Sensor
Press SELECT (C). • HDR TILT SENSOR CAL is displayed on the upper line. • EXTEND TILT TO START is displayed on the lower line. Figure 4.83: M155 Header Tilt Shown – M205 Similar 214298 Revision A... - Page 197 CAB DISPLAY MODULE (CDM) CAUTION Check to be sure all bystanders have cleared the area. 6. Press and hold the HEADER TILT EXTEND button (B) on the ground speed lever (GSL). • CALIBRATING TILT is displayed on the upper line. •...
-
Page 198: Calibrating The Header Float Sensors
WINDROWER SETUP? is displayed on the upper line. 3. Press SELECT (B) until CALIBRATE SENSORS? is displayed on the upper line. • NO/YES is displayed on the lower line. Figure 4.87: M155 CDM Programming Buttons Shown – M205 Similar 214298 Revision A... - Page 199 PRESS FLOAT + TO START is displayed on the lower line. CAUTION Check to be sure all bystanders have cleared the area. Figure 4.88: M155 Header Float Display Shown – M205 Similar 6. Press and hold FLOAT + button (A) on the CDM. •...
-
Page 200: Troubleshooting Windrower Problems
9. Press right arrow (C) to select YES. Press SELECT (D). • VIEW ENGINE CODES is displayed on the upper line. • NO/YES is displayed on the lower line. Figure 4.93: M155 Windrower Codes Shown – M205 Similar 214298 Revision A... -
Page 201: Switching The Installed Header Sensors On Or Off
13. Press PROGRAM (A) to exit Programming Mode or press SELECT (D) to proceed to next DIAGNOSTIC MODE. Figure 4.94: M155 Engine Codes Shown – M205 Similar 4.7.2 Switching the Installed Header Sensors ON or OFF You can selectively enable or disable header sensors in the event of a malfunction or as part of a troubleshooting routine. - Page 202 • KNIFE SPEED SENSOR • REEL SPEED SENSOR • HEADER FLOAT SENSOR • OVERLOAD PRESSURE Figure 4.97: M155 Header Sensors Shown – • HYD OIL TEMP SENSOR M205 Similar When sensors have been modified, press SELECT (D) to display the EXIT SENSOR SETUP? selection.
-
Page 203: Displaying Header Sensor Input Signals
WINDROWER SETUP? is displayed on the upper line. • NO/YES is displayed on the lower line. Figure 4.98: M155 CDM Programming Buttons Shown – M205 Similar 3. Press SELECT (B) until DIAGNOSTIC MODE? is displayed on the upper line. •... -
Page 204: Forcing A Header Id
10. Press PROGRAM (A) to exit Programming Mode or press SELECT (D) to proceed to next DIAGNOSTIC MODE. Figure 4.100: M155 Header Sensors Shown – M205 Similar 4.7.4 Forcing a Header ID The header must be attached to the windrower to troubleshoot certain issues. If damage has occurred to the header wiring or no header is available, you can force the windrower control module (WCM) to read a header ID. - Page 205 SELECT HEADER TYPE is displayed on the upper line. • DISK HEADER is displayed on the lower line. Figure 4.103: M155 Header Type Shown – M205 Similar 7. Press left (A) or right (B) arrow to cycle through list of header types.
-
Page 206: Troubleshooting Header Problems
(CDM) to enter Programming Mode. Press SELECT (B). • WINDROWER SETUP? is displayed on the upper line. Figure 4.105: M155 CDM Programming Buttons Shown – M205 Similar 3. Press SELECT (B) until DIAGNOSTIC MODE? is displayed in upper line. •... - Page 207 6. Press right arrow (A) to select YES. Press SELECT (B). CAUTION Check to be sure all bystanders have cleared the area. Figure 4.107: M155 Functions Shown – M205 Similar 7. Press SELECT (D) until ACTIVATE HEADER HT is displayed on the upper line.
-
Page 208: Testing The Reel Up/Down Activate Function Using The Cab Display Module (Cdm)
(CDM) to enter Programming Mode. Press SELECT (B). • WINDROWER SETUP? is displayed on the upper line. Figure 4.109: M155 CDM Programming Buttons Shown – M205 Similar 3. Press SELECT (B) until DIAGNOSTIC MODE? is displayed in upper line. •... - Page 209 8. Press and hold left arrow (B) to lower reel. Press and hold right arrow (C) to raise reel. IMPORTANT: Verify reel is functioning properly. Figure 4.112: M155 Reel Height Shown – M205 9. Press PROGRAM (A) to exit Programming Mode or press SELECT (D) to proceed to next ACTIVATE Similar FUNCTION.
-
Page 210: Testing The Header Tilt Activate Function Using The Cab Display Module (Cdm)
2. Press PROGRAM (A) and SELECT (B) on cab display module (CDM) to enter Programming Mode. • WINDROWER SETUP? is displayed on the upper line. Figure 4.113: M155 CDM Programming Buttons Shown – M205 Similar 3. Press SELECT (B) until DIAGNOSTIC MODE? is displayed in upper line. •... - Page 211 Press and hold right arrow (C) to increase header tilt. IMPORTANT: Verify header is functioning properly. 9. Press PROGRAM (A) to exit Programming Mode or press SELECT (D) to proceed to next ACTIVATE FUNCTION. Figure 4.116: M155 Header Tilt Angle Shown – M205 Similar 214298 Revision A...
-
Page 212: Testing The Knife Drive Circuit Using The Cab Display Module (Cdm)
(CDM) to enter Programming Mode. Press SELECT (B). • WINDROWER SETUP? is displayed on the upper line. Figure 4.117: M155 CDM Programming Buttons Shown – M205 Similar 3. Press SELECT (B) until DIAGNOSTIC MODE? is displayed in upper line. •... - Page 213 Press left arrow (B) to decrease knife speed. • Press right arrow (D) to increase knife speed. IMPORTANT: Figure 4.120: M155 Knife Drive Shown – M205 Verify the knife drive is functioning properly. Similar 9. Release the HAZARD (C) button. The knife will stop.
-
Page 214: Testing The Draper Drive Circuit Activate Function Using The Cab Display Module (Cdm)
2. Press PROGRAM (A) and SELECT (B) on cab display module (CDM) to enter Programming Mode. • WINDROWER SETUP? is displayed on the upper line. Figure 4.121: M155 CDM Programming Buttons Shown – M205 Similar 3. Press SELECT (B) until DIAGNOSTIC MODE? is displayed in upper line. •... - Page 215 Press left arrow (B) to decrease draper speed. • Press right arrow (D) to increase draper speed. IMPORTANT: Figure 4.124: M155 Draper Drive Shown – M205 Verify the draper drive is functioning properly. Similar 9. Release the HAZARD (C) button. The drapers will stop.
-
Page 216: Testing The Reel Drive Circuit Activate Function Using The Cab Display Module (Cdm)
2. Press PROGRAM (A) and SELECT (B) on cab display module (CDM) to enter Programming Mode. • WINDROWER SETUP? is displayed on the upper line. Figure 4.125: M155 CDM Programming Buttons Shown – M205 Similar 3. Press SELECT (B) until DIAGNOSTIC MODE? is displayed in upper line. •... - Page 217 Press left arrow (B) to decrease reel speed. • Press right arrow (D) to increase reel speed. IMPORTANT: Figure 4.128: M155 Reel Drive Shown – M205 Verify the reel drive is functioning properly. Similar 9. Release the HAZARD (C) button. The reel will stop.
-
Page 218: Testing The Rotary Disc Drive Circuit Activate Function Using The Cab Display Module (Cdm)
2. Press PROGRAM (A) and SELECT (B) on cab display module (CDM) to enter Programming Mode. • WINDROWER SETUP? is displayed on the upper line. Figure 4.129: M155 CDM Programming Buttons Shown – M205 Similar 3. Press SELECT (B) until DIAGNOSTIC MODE? is displayed in upper line. •... - Page 219 Press left arrow (B) to decrease disc speed. • Press right arrow (D) to increase disc speed. IMPORTANT: Figure 4.132: M155 Disc Drive Shown – M205 Verify the disc drive is functioning properly. Similar 9. Release the HAZARD (C) button. The disc drive will stop.
-
Page 220: Testing The Double Windrower Attachment (Dwa) Drive Activate Function Using The Cab Display Module (Cdm)
(CDM) to enter Programming Mode. Press SELECT (B). • WINDROWER SETUP? is displayed on the upper line. Figure 4.133: M155 CDM Programming Buttons Shown – M205 Similar 3. Press SELECT (B) until DIAGNOSTIC MODE? is displayed in upper line. •... - Page 221 • Press left arrow (B) to decrease DWA drive speed. • Press right arrow (D) to increase DWA drive speed. Figure 4.136: M155 DWA Drive Shown – M205 IMPORTANT: Similar Verify the DWA drive is functioning properly. 8. Release the HAZARD (C) button. The DWA drive will stop.
-
Page 222: Testing The Reel Fore-Aft Activate Function Using The Cab Display Module (Cdm)
2. Press PROGRAM (A) and SELECT (B) on cab display module (CDM) to enter Programming Mode. • WINDROWER SETUP? is displayed on the upper line. Figure 4.137: M155 CDM Programming Buttons Shown – M205 Similar 3. Press SELECT (B) until DIAGNOSTIC MODE? is displayed in upper line. •... - Page 223 Press and hold right arrow (C) to move reel backward. b. Press PROGRAM (A) to exit Programming Mode or press SELECT (D) to proceed to next ACTIVATE FUNCTION. Figure 4.140: M155 Reel Fore-Aft Shown – M205 Similar 214298 Revision A...
-
Page 224: Activating The Hydraulic Purge Using The Cab Display Module (Cdm)
2. Press PROGRAM (A) and SELECT (B) on cab display module (CDM) to enter Programming Mode. • WINDROWER SETUP? is displayed on the upper line. Figure 4.141: M155 CDM Programming Buttons Shown – M205 Similar 3. Press SELECT (B) until DIAGNOSTIC MODE? is displayed in upper line. •... - Page 225 ACTIVATE HEADER HT is displayed on the upper line. • DOWN/UP is displayed on the lower line. Figure 4.143: M155 Functions Shown – M205 Similar 7. Press SELECT (B) until ACTIVATE HYD PURGE? is displayed on the upper line. •...
-
Page 227: Chapter 5: Performing Predelivery Checks
1. The windrower serial number plate (A) is located on the left side of the main frame near the walking beam as shown. Figure 5.1: M155/M205 Serial Number Location 2. The engine serial number plate (A) is located on top of the engine cylinder head cover as shown. -
Page 228: Checking And Adding Wheel Drive Lubricant Level
PERFORMING PREDELIVERY CHECKS 5.2 Checking and Adding Wheel Drive Lubricant Level 1. Park the windrower on level ground. 2. Position windrower so plugs (A) and (B) are horizontally aligned with the center (C) of the hub. 3. Stop the engine, and remove the key. 4. -
Page 229: Checking Tire Pressures And Adding Tire Ballast
PERFORMING PREDELIVERY CHECKS 5.3 Checking Tire Pressures and Adding Tire Ballast 5.3.1 Checking Tire Pressures Check tire pressures with a gauge. • Bar: 221 kPa (32 psi). • Turf: 138 kPa (20 psi). • Caster: 69 kPa (10 psi). 5.3.2 Adding Tire Ballast When using large headers on windrower, adding fluid ballast to rear caster tires will improve machine stability. - Page 230 PERFORMING PREDELIVERY CHECKS Table 5.2 Recommended Ballast (continued) Recommended Ballast Level Ground Hills Per Tire Per Tire Recommended Both Tires Both Tires Type Size liters (U.S. liters (U.S. Tire Size kg (lb.) kg (lb.) Gal.) Gal.) 30 ft. double reel Level ground: (with steel fingers and 10 x 16...
-
Page 231: Checking Engine Air Intake
Figure 5.4: M205 Air Intake System Figure 5.5: M155 Air Intake System 2. M155 only: Check the constant torque spring clamp (A) at the back of the air cleaner. Hold a 0.46 mm (0.018 in.) gauge between the middle coils, tighten the clamp until the gauge is snug, and remove the gauge. - Page 232 PERFORMING PREDELIVERY CHECKS 3. M205 only: Check the constant torque clamp (A) on air intake duct (B) and air cleaner (C). Torque to 4 Nm (35 lbf·in.). Figure 5.7: M205 Air Intake System 214298 Revision A...
-
Page 233: Checking Hydraulic Oil
PERFORMING PREDELIVERY CHECKS 5.5 Checking Hydraulic Oil DANGER To avoid bodily injury or death from unexpected startup of the machine, always stop the engine and remove the key from the ignition before leaving the operator’s seat for any reason. 1. Clean filler cap (A) and surrounding area. 2. -
Page 234: Checking Fuel Separator
PERFORMING PREDELIVERY CHECKS 5.6 Checking Fuel Separator 1. Place a container under the filter drain (A). 2. Turn drain valve (A) by hand 1-1/2 to 2 turns counterclockwise until fuel begins draining. 3. Drain the filter sump of water and sediment until clear fuel is visible. -
Page 235: Checking Engine Coolant
Tank should be at least half full. 2. If necessary, add coolant. Refer to windrower operator’s manual for procedure specifications. 3. Ensure coolant concentration in the radiator is rated for temperatures of -34°C (-30°F). Figure 5.11: M155/M205 Coolant Recovery Tank 214298 Revision A... -
Page 236: Checking Gearbox Lubricant Level
PERFORMING PREDELIVERY CHECKS 5.8 Checking Gearbox Lubricant Level 1. Remove plug (A) and ensure lubricant is visible or slightly running out. 2. If lubricant is required, add gearbox oil. Refer to the windrower operator’s manual for procedure specifications. 3. Replace plug (A) and tighten. Figure 5.12: Gearbox 214298 Revision A... -
Page 237: Checking Air Conditioning (A/C) Compressor Belts
PERFORMING PREDELIVERY CHECKS 5.9 Checking Air Conditioning (A/C) Compressor Belts 1. Ensure A/C compressor belt (A) is tensioned so that a force of 35–55 N (8–12 lbf) on belt deflects belt 5 mm (3/16 in.) at its midspan. Figure 5.13: A/C Compressor Belt 214298 Revision A... -
Page 238: Checking Safety System
PERFORMING PREDELIVERY CHECKS 5.10 Checking Safety System Ensure the battery disconnect switch is in the POWER ON position. Refer to 5.11 Performing Operational Checks, page 228. A properly functioning system should operate as follows: • The starter should engage only when the ground speed lever (GSL) is in N-DETENT, the steering wheel is locked in the center position, and the header drive switch is in the OFF position. - Page 239 PERFORMING PREDELIVERY CHECKS 2. Shut down the engine and perform the following safety system checks: a. Open engine compartment hood. b. Pry the steering interlock away from pintle arms (A) by inserting a wedge or pry bar between one of the interlock channels (B) and pintle arm.
-
Page 240: Performing Operational Checks
PERFORMING PREDELIVERY CHECKS 5.11 Performing Operational Checks DANGER To avoid bodily injury or death from unexpected startup of the machine, always stop the engine and remove the key from the ignition before leaving the operator’s seat for any reason. The battery disconnect switch (A) is located on the right (cab-forward) frame rail behind the maintenance platform and can be accessed by moving the platform rearwards. -
Page 241: Checking Windrower Startup
3. Move throttle to maximum rpm position. 4. Check engine speed on CDM (A) and compare to value in table below. Table 5.3 Engine Speed Model Idle Maximum rpm (No Load) M155 2320–2350 1100 M205 2250–2340 Figure 5.18: Cab Display Module (CDM) 214298... -
Page 242: Checking Gauges And Cab Display Module (Cdm) Display
PERFORMING PREDELIVERY CHECKS 5.11.4 Checking Gauges and Cab Display Module (CDM) Display 1. Ensure the engine temperature gauge (A) and fuel gauge (B) are working. Figure 5.19: Temperature and Fuel Gauges 2. Ensure the CDM display (A) is working by pushing the SELECT (B) button on the CDM or the SELECT (C) button on the ground speed lever (GSL). -
Page 243: Checking Operator's Presence System
PERFORMING PREDELIVERY CHECKS Table 5.4 Battery and Alternator Condition Ignition Engine Reading Indicated Condition 13.8–15.0 Normal >16.0 (see note) Regulator out of adjustment Running Alternator not working <12.5 (see note) Regulator out of adjustment Shut down 12.0 Battery normal NOTE: Display flashes voltage reading accompanied by a single loud tone every 30 minutes until condition is fixed. - Page 244 PERFORMING PREDELIVERY CHECKS 5. Start the engine and position the GSL (A) in NEUTRAL and in N-DETENT. a. Swivel the operator’s station but do NOT lock into position. b. Move the GSL out of N-DETENT. The engine should shut down and the lower display will flash LOCK SEAT BASE —>...
-
Page 245: Checking Exterior Lights On An M155/M205
PERFORMING PREDELIVERY CHECKS 5.11.7 Checking Exterior Lights on an M155/M205 1. Rotate the operator’s seat to cab-forward mode. 2. Turn field light switch (A) to the ON position and ensure the front field lights (B) and rear swath lights (C) are functioning. - Page 246 PERFORMING PREDELIVERY CHECKS 3. Turn the road light switch (A) to the ON position and ensure the front road lights (B) and rear red tail/brake lights (C) (if equipped) are functioning. 4. Activate the high/low switch (D) and check lights. 5.
-
Page 247: Checking Horn
PERFORMING PREDELIVERY CHECKS 7. Turn beacon switch (A) to the ON position and ensure the amber beacons (B) are functioning. Figure 5.25: Exterior Lights – Beacons 5.11.8 Checking Horn 1. Push HORN button (A) and listen for horn. Figure 5.26: Horn Button 214298 Revision A... -
Page 248: Checking Interior Lights
PERFORMING PREDELIVERY CHECKS 5.11.9 Checking Interior Lights 1. Switch road and field lights ON and OFF using switch (A). NOTE: Ambient light in roof liner (B) and interior light (C) work only when road or field lights (A) are switched ON. Figure 5.27: Interior Lights 214298 Revision A... -
Page 249: Checking Air Conditioning (A/C) And Heater
PERFORMING PREDELIVERY CHECKS 5.11.10 Checking Air Conditioning (A/C) and Heater Figure 5.28: A/C and Heater Controls • Blower switch (A): Controls blower speed. Switch settings are OFF, LO, MEDIUM, and HI. • Air conditioning switch (B): Controls A/C system. When set to ON, A/C operates if blower switch (A) is switched ON. -
Page 250: Checking Manuals
PERFORMING PREDELIVERY CHECKS 5.12 Checking Manuals Manuals are stored in the manual storage case (A) behind the operator’s seat. Figure 5.29: Manual Storage Case 1. Ensure the following manuals are included with the windrower: • Operator’s Manual • Parts Catalog •... -
Page 251: Performing Final Steps
PERFORMING PREDELIVERY CHECKS 5.13 Performing Final Steps 1. Remove plastic covering from cab display module (CDM), and seats after predelivery checks are complete. 2. Locate bag inside the cab containing the GPS mount kit, and install kit in accordance with the instructions in the kit. -
Page 253: Chapter 6: Reference
6 Reference 6.1 Torque Specifications The following tables provide correct torque values for various bolts, cap screws, and hydraulic fittings. • Tighten all bolts to torque values specified in charts (unless otherwise noted throughout this manual). • Replace hardware with same strength and grade of bolt. •... - Page 254 REFERENCE Table 6.2 SAE Grade 5 Bolt and Grade F Distorted Thread Nut Torque (lbf·ft) Torque (Nm) Nominal (*lbf·in) Size (A) Min. Max. Min. Max. 1/4-20 5/16-18 16.7 18.5 *149 *164 3/8-16 7/16-14 1/2-13 9/16-12 Figure 6.2: Bolt Grades 5/8-11 A - Nominal Size B - SAE-8 C - SAE-5...
-
Page 255: Metric Bolt Specifications
REFERENCE Table 6.4 SAE Grade 8 Bolt and Grade 8 Free Spinning Nut Torque (lbf·ft) Torque (Nm) Nominal (*lbf·in) Size (A) Min. Max. Min. Max. 1/4-20 16.8 18.6 *150 *165 5/16-18 3/8-16 7/16-14 1/2-13 9/16-12 Figure 6.4: Bolt Grades 5/8-11 A - Nominal Size B - SAE-8 C - SAE-5... - Page 256 REFERENCE Table 6.6 Metric Class 8.8 Bolts and Class 9 Distorted Thread Nut Torque (lbf·ft) Torque (Nm) Nominal (*lbf·in) Size (A) Min. Max. Min. Max. 3-0.5 3.5-0.6 4-0.7 5-0.8 6-1.0 8-1.25 18.8 20.8 *167 *185 Figure 6.6: Bolt Grades 10-1.5 12-1.75 14-2.0 16-2.0...
- Page 257 REFERENCE Table 6.8 Metric Class 10.9 Bolts and Class 10 Distorted Thread Nut Torque (lbf·ft) Torque (Nm) Nominal (*lbf·in) Size (A) Min. Max. Min. Max. 3-0.5 3.5-0.6 4-0.7 5-0.8 6-1.0 10.7 11.8 *105 8-1.25 Figure 6.8: Bolt Grades 10-1.5 12-1.75 14-2.0 16-2.0 20-2.5...
-
Page 258: Metric Bolt Specifications Bolting Into Cast Aluminum
REFERENCE 6.1.3 Metric Bolt Specifications Bolting into Cast Aluminum Table 6.9 Metric Bolt Bolting into Cast Aluminum Bolt Torque Nominal 10.9 Size (A) (Cast Aluminum) (Cast Aluminum) lbf·ft lbf·ft – – – – – – – Figure 6.9: Bolt Grades –... - Page 259 REFERENCE Table 6.10 Flare-Type Hydraulic Tube Fittings (continued) Torque Value Flats from Finger Tight (FFFT) SAE Dash Size Thread Size (in.) Swivel Nut or lbf·ft Tube Hose 9/16–18 30–33 22–24 1-1/2 3/4–16 57–63 42–46 1-1/2 7/8–14 81–89 60–66 1-1/2 1-1/2 113–124 83–91 1-1/16–12...
-
Page 260: O-Ring Boss (Orb) Hydraulic Fittings (Adjustable)
REFERENCE 6.1.5 O-Ring Boss (ORB) Hydraulic Fittings (Adjustable) 1. Inspect O-ring (A) and seat (B) for dirt or obvious defects. 2. Back off lock nut (C) as far as possible. Ensure that washer (D) is loose and is pushed toward lock nut (C) as far as possible. - Page 261 REFERENCE Table 6.11 O-Ring Boss (ORB) Hydraulic Fittings (Adjustable) Torque Value SAE Dash Size Thread Size (in.) lbf·ft (*lbf·in) 5/16–24 6–7 *53–62 3/8–24 12–13 *106–115 7/16–20 19–21 14–15 1/2–20 21–33 15–24 9/16–18 26–29 19–21 3/4–16 46–50 34–37 7/8–14 75–82 55–60 1-1/16–12 120–132 88–97...
-
Page 262: O-Ring Boss (Orb) Hydraulic Fittings (Non-Adjustable)
REFERENCE 6.1.6 O-Ring Boss (ORB) Hydraulic Fittings (Non-Adjustable) 1. Inspect O-ring (A) and seat (B) for dirt or obvious defects. 2. Check that O-ring (A) is NOT on threads and adjust if necessary. 3. Apply hydraulic system oil to O-ring. 4. -
Page 263: O-Ring Face Seal (Orfs) Hydraulic Fittings
REFERENCE 6.1.7 O-Ring Face Seal (ORFS) Hydraulic Fittings 1. Check components to ensure that sealing surfaces and fitting threads are free of burrs, nicks, scratches, or any foreign material. Figure 6.14: Hydraulic Fitting 2. Apply hydraulic system oil to O-ring (B). 3. -
Page 264: Tapered Pipe Thread Fittings
REFERENCE Table 6.13 O-Ring Face Seal (ORFS) Hydraulic Fittings (continued) Torque Value SAE Dash Size Thread Size (in.) Tube O.D. (in.) lbf·ft – – Note 1-7/16 150–165 111–122 1-11/16 1-1/4 205–226 151–167 1–2 1-1/2 315–347 232–256 2-1/2 510–561 376–414 6.1.8 Tapered Pipe Thread Fittings Assemble pipe fittings as follows: 1. -
Page 265: Conversion Chart
REFERENCE 6.2 Conversion Chart Table 6.15 Conversion Chart SI Units (Metric) Inch-Pound Units Factor Quantity Unit Name Abbreviation Unit Name Abbreviation acres acres Area hectares x 2.4710 = US gallons Flow liters per minute L/min x 0.2642 = per minute Force Newtons x 0.2248 =... -
Page 266: Definitions
A hydraulic cylinder or manually adjustable turnbuckle type link between header and Center-link machine used to change header angle CGVW Combined vehicle gross weight D Series header MacDon D50, D60, and D65 rigid draper headers Double knife Double-knife drive Double-draper drive Double Windrow Attachment Engine control module... - Page 267 This style of fitting is also commonly called ORS, which stands for O-ring seal Revolutions per minute R Series header MacDon R80 and R85 disc headers RoHS (Reduction of A directive by the European Union to restrict use of certain hazardous substances...
- Page 268 REFERENCE Term Definition Windrower Power unit of a self-propelled header Windrower control module 214298 Revision A...
-
Page 269: Lubricants, Fluids, And System Capacities
REFERENCE 6.4 Lubricants, Fluids, and System Capacities CAUTION To avoid injury or death, do not allow ANY machine fluids to enter the body. Table 6.16 M155 System Capacities Lubricant/Fluid Location Description Capacity SAE multi-purpose high temperature extreme pressure (EP2) performance As required unless —... - Page 270 REFERENCE Table 6.17 M205 System Capacities Location Description Lubricant/Fluid Capacity SAE multi-purpose high temperature As required unless extreme pressure (EP2) performance — Grease otherwise specified with 1% max Molybdenum Disulphide (NLGI Grade 2) lithium base Diesel Grade No. 2, or Diesel Grade No. 1 and 2 mix ;...
- Page 271 REFERENCE The additive package must be part of one of the following coolant mixtures: • Ethylene glycol or propylene glycol base prediluted (40–60%) heavy duty coolant. • Ethylene glycol or propylene glycol base heavy duty coolant concentrate in a 40–60% mixture of concentrate with quality water.
-
Page 272: Fuel Specifications
REFERENCE 6.5 Fuel Specifications Table 6.18 Fuel Specification Water and Sulphur Fuel Specification Sediment Cetane No. Lubricity (by weight) (by volume) 40°C (104°F) Grade no. 2 ASTM D975 0.5% maximum 0.05% maximum 520 Microns minimum 45–55°C 1% maximum (113–131°F) Grade no. 1 0.5% maximum 0.1% maximum 460 Microns... -
Page 273: Predelivery Checklist
Carefully follow the instructions given. Be alert for safety related messages that bring your attention to hazards and unsafe practices. Windrower Serial Number: Engine Serial Number: Table .19 M155/M205 Series Self-Propelled Windrower Predelivery Checklist – Export ü ü Item Reference Check for shipping damage or missing parts. Be sure all —... - Page 274 REFERENCE Table .19 M155/M205 Series Self-Propelled Windrower Predelivery Checklist – Export (continued) ü ü Item Reference 5.11.10 Checking Air Conditioning (A/C) and Check that air conditioning is functioning properly. Heater, page 237 5.11.10 Checking Air Conditioning (A/C) and Check that heater is functioning properly.
-
Page 275: Lubricants, Fluids, And System Capacities
Gear lubricant SAE 75W-90, API service class GL-5. 1.4 liters Fully synthetic gear lubricant, (SAE Wheel drive (1.5 US quarts) J2360 preferred) M155: 27.5 liters ASTM D-6210 and Fleetguard ES Engine cooling (7.3 US gallons) ® Antifreeze Compleat ; refer to 6.4 Lubricants,... - Page 276 10708 N. Pomona Avenue Kansas City, Missouri United States 64153-1924 t. (816) 891-7313 f. (816) 891-7323 MacDon Australia Pty. Ltd. A.C.N. 079 393 721 P.O. Box 243, Suite 3, 143 Main Street Greensborough, Victoria, Australia 3088 t. 03 9432 9982 f.
Need help?
Do you have a question about the M155 and is the answer not in the manual?
Questions and answers