MacDon M155 Unloading And Assembly Instructions
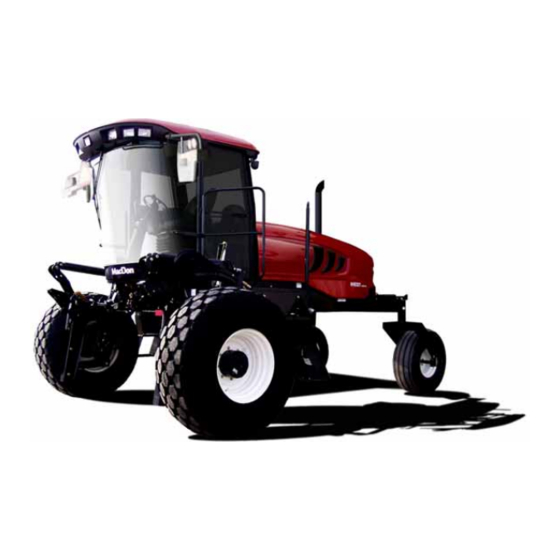
Self-propelled windrower
Hide thumbs
Also See for M155:
- Operator's manual (510 pages) ,
- Unloading and assembly instructions (308 pages) ,
- Installation instructions manual (70 pages)

Related Manuals for MacDon M155


Summary of Contents for MacDon M155
- Page 1 M155 and M205 Self-Propelled Windrower Unloading and Assembly Instructions (North America) 169885 Revision A Original Instruction The harvesting specialists worldwide.
- Page 2 ® ® Featuring the Dual Direction and Ultra Glide suspension on the M155 and M205. Published in June, 2014...
- Page 3 Introduction This instructional manual describes the unloading, setup, and pre-delivery requirements for MacDon M155 and M205 Self-Propelled Windrowers. Use the Table of Contents to guide you to specific areas. Retain this instruction for future reference. CAREFULLY READ ALL THE MATERIAL PROVIDED BEFORE ATTEMPTING TO UNLOAD, ASSEMBLE, OR USE THE MACHINE.
- Page 4 List of Revisions The following list provides an account of major changes from the previous version of this document. Summary of Change Location Added Signal Words in Safety Section. 1 Safety, page 1 More terminologies added to Definitions Section. 4 Definitions, page 19 Updated drive wheel images and added references to •...
-
Page 5: Table Of Contents
TABLE OF CONTENTS Introduction ............................i List of Revisions ..........................ii Safety ..............................1 Signal Words........................... 1 General Safety ..........................2 Safety Signs ............................ 4 Recommended Torques ........................5 Torque Specifications ........................5 2.1.1 SAE Bolt Torque Specifications ....................5 2.1.2 Metric Bolt Specifications ...................... - Page 6 TABLE OF CONTENTS 6.13.2 M155 Detailed Programming Menu Flow Chart ...............104 Performing Predelivery Checks......................109 Recording Serial Numbers ......................109 Checking Wheel Drive Lubricant Level ................... 110 Tire Pressures and Ballast Requirements ..................111 7.3.1 Checking Tire Pressures......................111 7.3.2 Checking Tire Ballast......................111 Checking Engine Air Intake ......................
-
Page 7: Safety
1 Safety 1.1 Signal Words Three signal words, DANGER, WARNING, and CAUTION, are used to alert you to hazardous situations. The appropriate signal word for each situation has been selected using the following guidelines: DANGER Indicates an imminently hazardous situation that, if not avoided, will result in death, or serious injury. WARNING Indicates a potentially hazardous situation that, if not avoided, could result in death, or serious injury. -
Page 8: General Safety
SAFETY 1.2 General Safety CAUTION The following are general farm safety precautions that should be part of your operating procedure for all types of machinery. Protect yourself • When assembling, operating, and servicing machinery, wear all the protective clothing and personal safety devices that COULD be necessary for the job at hand. - Page 9 SAFETY • Wear close fitting clothing and cover long hair. Never wear dangling items such as scarves or bracelets. • Keep all shields in place. Never alter or remove safety equipment. Make sure driveline guards can rotate independently of the shaft and can telescope freely. •...
-
Page 10: Safety Signs
SAFETY 1.3 Safety Signs • Keep safety signs clean and legible at all times. • Replace safety signs that missing become illegible. • If original parts on which a safety sign was installed are replaced, be sure the repair part also bears the current safety sign. -
Page 11: Recommended Torques
2 Recommended Torques 2.1 Torque Specifications The following tables give correct torque values for various bolts, cap screws, and hydraulic fittings. • Tighten all bolts to the torques specified in chart (unless otherwise noted throughout this manual). • Replace hardware with the same strength and grade bolt. •... - Page 12 RECOMMENDED TORQUES Table 2.2 SAE Grade 5 Bolt and Grade 5 Distorted Thread Nut Torque (ft·lbf) Nominal Torque (N·m) (*in·lbf) Size Min. Max. Min. Max. 1/4-20 5/16-18 *149 *164 16.7 18.5 3/8-16 7/16-14 1/2-13 9/16-12 5/8-11 3/4-10 7/8-9 Table 2.3 SAE Grade 8 Bolt and Grade 8 Distorted Thread Nut Torque (ft·lbf) Nominal...
-
Page 13: Metric Bolt Specifications
RECOMMENDED TORQUES Table 2.4 SAE Grade 8 Bolt and Grade 8 Free Spinning Nut Torque (ft·lbf) Nominal Torque (N·m) (*in·lbf) Size Min. Max. Min. Max. 1/4-20 *150 *165 16.8 18.6 5/16-18 3/8-16 7/16-14 1/2-13 9/16-12 5/8-11 3/4-10 7/8-9 1165 1288 2.1.2 Metric Bolt Specifications Table 2.5 Metric Class 8.8 Bolts and Class 9 Free Spinning Nut... - Page 14 RECOMMENDED TORQUES Table 2.6 Metric Class 8.8 Bolts and Class 9 Distorted Thread Nut Torque (ft·lbf) Torque (N·m) Nominal (*in·lbf) Size Min. Max. Min. Max. 3-0.5 3.5-0.6 4-0.7 5-0.8 6-1.0 8-1.25 *167 *185 18.8 20.8 10-1.5 12-1.75 14-2.0 16-2.0 20-2.5 24-3.0 Table 2.7 Metric Class 10.9 Bolts and Class 10 Free Spinning Nut...
- Page 15 RECOMMENDED TORQUES Table 2.8 Metric Class 10.9 Bolts and Class 10 Distorted Thread Nut Torque (ft·lbf) Torque (N·m) Nominal (*in·lbf) Size Min. Max. Min. Max. 3-0.5 3.5-0.6 4-0.7 5-0.8 6-1.0 *105 10.7 11.8 8-1.25 10-1.5 12-1.75 14-2.0 16-2.0 20-2.5 24-3.0 169885 Revision A...
-
Page 16: Metric Bolt Specifications Bolting Into Cast Aluminum
RECOMMENDED TORQUES 2.1.3 Metric Bolt Specifications Bolting into Cast Aluminum Table 2.9 Metric Bolt Bolting into Cast Aluminum Bolt Torque Nominal 10.9 (Cast Size (Cast Aluminum) Aluminum) N·m N·m ft·lbf ft·lbf Figure 2.4: Bolt Grades A - Nominal Size 2.1.4 Flare-Type Hydraulic Fittings 1. - Page 17 RECOMMENDED TORQUES Table 2.10 Flare-Type Hydraulic Tube Fittings Flats from Finger Tube Nut Size Torque Value Thread Tight (FFFT) SAE No. Size O.D. across Size (in.) (in.) Flats (in.) ft·lbf N·m Flats Turns 3/16 7/16 7/16 9/16 5/16 9/16 11/16 1-1/16 1-1/4 1-3/8...
-
Page 18: O-Ring Boss (Orb) Hydraulic Fittings (Adjustable)
RECOMMENDED TORQUES 2.1.5 O-Ring Boss (ORB) Hydraulic Fittings (Adjustable) 1. Inspect O-ring (A) and seat (B) for dirt or obvious defects. 2. Back off the lock nut (C) as far as possible. Ensure that washer (D) is not loose and is pushed toward the lock nut (C) as far as possible. - Page 19 RECOMMENDED TORQUES Table 2.11 O-Ring Boss (ORB) Hydraulic Fittings (Adjustable) Torque Value SAE Dash Size Thread Size (in.) ft·lbf (*in·lbf) N·m 3/8-24 *106–115 12–13 7/16–20 14–15 19–21 1/2–20 15–24 21–33 9/16–18 19–21 26–29 3/4–16 34–37 46–50 7/8–14 55–60 75–82 1-1/16-12 88–97 120–132 1-3/8-12...
-
Page 20: O-Ring Boss (Orb) Hydraulic Fittings (Non-Adjustable)
RECOMMENDED TORQUES 2.1.6 O-Ring Boss (ORB) Hydraulic Fittings (Non-Adjustable) 1. Inspect O-ring (A) and seat (B) for dirt or obvious defects. 2. Check that O-ring (A) is NOT on the threads, adjust if necessary. 3. Apply hydraulic system oil to the O-ring. 4. -
Page 21: O-Ring Face Seal (Orfs) Hydraulic Fittings
RECOMMENDED TORQUES 2.1.7 O-Ring Face Seal (ORFS) Hydraulic Fittings To tighten O-ring face seal (ORFS) hydraulic fittings, follow these steps: 1. Check components to ensure that the sealing surfaces and fitting threads are free of burrs, nicks, and scratches or any foreign material. Figure 2.9: Hydraulic Fitting 2. - Page 22 RECOMMENDED TORQUES Table 2.13 O-Ring Face Seal (ORFS) Hydraulic Fittings Torque Value Thread Dash ft·lbf Size (in.) Size (*in·lbf) N·m Note – – 9/16–18 18–21 25–28 Note – – 11/16-16 29–32 40–44 13/16-16 41–45 55–61 1–14 59–65 80–88 1-3/16-12 85–94 115–127 –...
-
Page 23: Conversion Chart
3 Conversion Chart Inch-Pound Units SI Units (Metric) Quantity Factor Unit Name Abbreviation Unit Name Abbreviation acres acres Area x 0.4047 = hectares US gallons per liters per Flow x 3.7854 = L/min minute minute Force pounds force x 4.4482 = Newtons inch x 25.4 =... -
Page 25: Definitions
4 Definitions The following terms and acronyms may be used in this manual. Term Definition A-Series header MacDon auger header. American Petroleum Institute. Articulated Power Turn. ASTM American Society of Testing and Materials. Bolt A headed and externally threaded fastener that is designed to be paired with a nut. - Page 26 This style of fitting is also commonly called ORS, which stands for O-ring seal. Power Take-Off. Revolutions per minute. R-Series header MacDon rotary disc header. RoHS (Reduction of A directive by the European Union to restrict the use of certain hazardous Hazardous Substances) substances (such as hexavalent chromium used in some yellow zinc platings).
-
Page 27: Unloading The Windrower
5.2 Using One Forklift to Unload Windrower, page 5.1 Using Two Forklifts to Unload Windrower Figure 5.1: M155 Shown, M205 Looks Similar CAUTION To avoid injury to bystanders from being struck by machinery, do NOT allow people to stand in unloading area. - Page 28 UNLOADING THE WINDROWER 2. Set forklift tines to the widest possible setting. 3. Position one forklift on either side of trailer and position forks under windrower frame. NOTE: Windrower center of gravity is approximately 55 in. (1397 mm) rearward of drive wheel center. 4.
-
Page 29: Using One Forklift To Unload Windrower
UNLOADING THE WINDROWER 5.2 Using One Forklift to Unload Windrower Two different methods can be used to unload the windrower using one forklift. Refer to 5.2.1 Method 1, page 23 5.2.2 Method 2, page 5.2.1 Method 1 CAUTION Equipment used for unloading must meet or exceed the requirements specified below. Using inadequate equipment may result in chain breakage, vehicle tipping, or machine damage. -
Page 30: Method 2
UNLOADING THE WINDROWER 5.2.2 Method 2 CAUTION Equipment used for unloading must meet or exceed the requirements specified below. Using inadequate equipment may result in chain breakage, vehicle tipping, or machine damage. Table 5.4 Lifting Vehicle Minimum Capacity 11,000 lb (4994 kg) Minimum Fork Length 78 in. -
Page 31: Assembling The Windrower
6 Assembling the Windrower Follow each of the procedures in this chapter in order. 6.1 Repositioning Right-Hand Leg The right cab-forward leg requires repositioning from shipping to field configuration as follows: 1. Support front of the windrower with stand (or equivalent) so that the right-hand leg is off the ground. - Page 32 ASSEMBLING THE WINDROWER 4. Adjust jack height while observing pin (A) position in bore. When pin (A) is loose, tap out pin (A) with hammer or use tool (MD #B5442) to extract pin. 5. Repeat for second pin. Figure 6.3: Windrower Frame 6.
-
Page 33: Installing Drive Wheel
ASSEMBLING THE WINDROWER 6.2 Installing Drive Wheel 1. Position drive wheel (A) against wheel drive hub (B), so that air valve (C) are on the outside and tire tread (D) points forward, when windrower is in cab forward. For Turf tires (diamond tread), be sure arrow on sidewall points in forward rotation, when windrower in cab forward. -
Page 34: Repositioning Caster Wheels
ASSEMBLING THE WINDROWER 6.3 Repositioning Caster Wheels As an option, the rear casters can be adjusted to a narrow tread width to allow loading and shipping without having to remove them. A NARROW TREAD width also suits smaller headers by allowing more space to the uncut crop and provides more manoeuvrability around poles, irrigation inlets, and other obstacles. - Page 35 ASSEMBLING THE WINDROWER IMPORTANT: Caster wheels must be equidistant from center of windrower. Figure 6.9: Widest Tread Width Shown 4. Position bracket (A) and install bolts (B). The two shorter bolts are installed at the back inboard locations. Torque as follows: a.
-
Page 36: Unpacking Ignition Keys
ASSEMBLING THE WINDROWER 6.4 Unpacking Ignition Keys 1. Remove wing nut (A) from fuse box cover (B) and remove cover. Figure 6.11: Fuse Box 2. Remove tape and keys (A) from inside cover. Discard tape. 3. Unlock cab doors and place key on console. 4. -
Page 37: Installing Steps
ASSEMBLING THE WINDROWER 6.5 Installing Steps NOTE: Procedure for left-hand installation is shown, right-hand installation is similar. 1. Remove two bolts (A) securing steps to platform and remove steps. 2. Remove the remaining lower bolt (B). Figure 6.13: LH Steps Shipping Position 3. -
Page 38: Connecting Batteries
ASSEMBLING THE WINDROWER 6.6 Connecting Batteries 1. Open right-hand (cab-forward) maintenance platform. 2. The battery main disconnect switch (A) is located on the right-hand frame rail beside the batteries. Ensure battery switch (A) is switched to POWER OFF position. 3. Remove cable ties securing battery cables to battery clamp. -
Page 39: Starting Engine
ASSEMBLING THE WINDROWER 6.7 Starting Engine 1. Check fuel level and if required, add sufficient fuel for a 15 minute run. 2. Lock (A) should be engaged at cab-forward or engine-forward position. 3. Move ground speed lever (GSL) (B) into N-DETENT. 4. - Page 40 60°F (16°C). a. Set throttle to START position (A)—fully back. b. Sound horn (C)three times. NOTE: For M155 and M205, horn is located on the headliner. c. Turn ignition key (B) to RUN position. Single loud tone sounds, engine warning lights...
- Page 41 ASSEMBLING THE WINDROWER 7. Cold Start: engine temperature below 40°F (5°C). NOTE: Engines are not equipped with cold start assist system. a. Follow Step 6., page Engine will cycle through a period where it appears to labour until engine warms up. NOTE: Throttle is nonresponsive during this time as engine is in WARM UP mode.
-
Page 42: Installing Am/Fm Radio
ASSEMBLING THE WINDROWER 6.8 Installing AM/FM Radio Provision has been made for installation of an AM/FM radio. The mounting is designed to fit a DIN E style radio with a depth of ‘X’ = 161 mm and having a 5 mm threaded stud (A) centered on the rear for support. - Page 43 ASSEMBLING THE WINDROWER 5. Remove the cut-out by cutting the tabs (A) in the panel. Remove sharp edges on panel. Figure 6.23: Panel 6. Position receptacle (A) (supplied with radio) in opening and secure by bending tabs (B) on receptacle against panel.
- Page 44 ASSEMBLING THE WINDROWER 8. A six-pin connector for the radio is included in the wiring harness. In order to mate properly with this connector, the radio must have a six-pin connector (Packard #2977042) and have a terminal arrangement as shown at right. 9.
- Page 45 ASSEMBLING THE WINDROWER 16. Remove protective cover (A) from antenna mount on cab roof and thread antenna onto base until hand tight. NOTE: Store protective cover in cab to protect antenna mount if antenna needs to be removed. 17. Turn ignition key to ACC, switch radio ON, and check operation in accordance with instructions supplied with the radio.
-
Page 46: Installing Slow Moving Vehicle (Smv) Sign
ASSEMBLING THE WINDROWER 6.9 Installing Slow Moving Vehicle (SMV) Sign 1. Install SMV sign (A) (shipped in cab) on windrower in accordance with instructions supplied with the sign. SMV signs must be visible when travelling on the road. Figure 6.30: Engine-Forward Figure 6.31: Cab-Forward 169885 Revision A... -
Page 47: Attaching Header Boots
ASSEMBLING THE WINDROWER 6.10 Attaching Header Boots Header boots are required to attach a D-Series Draper Header to the windrower. CAUTION To prevent damage to the lift system when lowering header lift linkages without a header or weight box attached to windrower, ensure that float engagement pin is installed in storage location (B) and NOT installed at hole location (A). -
Page 48: Attaching Headers
ASSEMBLING THE WINDROWER 6.11 Attaching Headers 6.11.1 Attaching a D-Series Header The D-Series header can be attached to an M155 or M205 Self-propelled Windrower. For attachment procedure, refer to the specific windrower model. M155 Self-Propelled Windrower To operate a D-Series draper header, The M155 Self-propelled Windrower must be fitted with a Base Draper... -
Page 49: Attaching A D-Series Header: Hydraulic Center-Link With Optional Self-Alignment
NOTE: This topic assumes that draper header boots have already been attached to the windrower lift linkage. If that is not the case, refer to 6.10 Attaching Header Boots, page To attach a D-Series header to an M155 or M205 Self-propelled Windrower equipped with a hydraulic center-link and optional self-alignment, follow these steps: DANGER Stop engine and remove key from ignition before leaving operator's seat for any reason. - Page 50 ASSEMBLING THE WINDROWER 1. Remove the hairpin (A) from pins (B) and remove the pins from the header legs. Figure 6.37: Header Leg CAUTION Check to be sure all bystanders have cleared the area. IMPORTANT: Remove protective cover from exhaust stack prior to starting engine.
- Page 51 ASSEMBLING THE WINDROWER 4. Slowly drive the windrower forward so the boots (A) enter the header legs (B). Continue to drive slowly forward until lift linkages contact the support plates in the header legs and the header nudges forward. 5. Ensure that lift linkages are properly engaged in header legs, contacting the support plates.
- Page 52 ASSEMBLING THE WINDROWER CAUTION Check to be sure all bystanders have cleared the area. 10. Press the HEADER UP switch (A) to raise header to maximum height. NOTE: If one end of the header does NOT raise fully, rephase the lift cylinders as follows: a.
- Page 53 ASSEMBLING THE WINDROWER 12. Install pin (B) through the header leg, (engaging U-bracket in lift linkage) on both sides and secure with a hairpin (A). 13. Raise header stand (D) to storage position by pulling spring pin (C) and lifting stand into uppermost position. Release spring pin (C).
- Page 54 ASSEMBLING THE WINDROWER CAUTION Check to be sure all bystanders have cleared the area. 17. Start engine and activate HEADER DOWN switch on GSL to lower header fully. 18. Stop engine and remove key. Figure 6.48: GSL 19. Connect header drive hoses (A) and electrical harness (B) to header.
-
Page 55: Attaching A D-Series Header: Hydraulic Center-Link Without Self-Alignment
NOTE: This topic assumes that draper header boots have already been attached to the windrower lift linkage. If that is not the case, refer to 6.10 Attaching Header Boots, page To attach a D-Series header to an M155 or M205 Self-propelled Windrower equipped with a hydraulic center-link without the self-alignment kit, follow these steps: DANGER Stop engine and remove key from ignition before leaving operator's seat for any reason. - Page 56 ASSEMBLING THE WINDROWER 3. If necessary, relocate the pin (A) at the frame linkage as required to raise the center-link (B) so that the hook (B) is above the attachment pin on the header. IMPORTANT: If the center-link is too low, it may contact the header as the windrower approaches the header for hookup.
- Page 57 ASSEMBLING THE WINDROWER 8. Push down on rod end of link cylinder (B), until hook engages pin on header and is locked. IMPORTANT: Hook release must be down to enable self-locking mechanism. If the release is open (up), manually push it down after hook engages header pin.
- Page 58 ASSEMBLING THE WINDROWER 11. Engage safety props on both lift cylinders as follows: a. Stop engine and remove key from ignition. b. Pull lever (A) and rotate toward header to release and lower the cylinder stop (B) onto cylinder. c. Repeat for the opposite lift cylinder. Figure 6.58: Cylinder Stop 12.
- Page 59 ASSEMBLING THE WINDROWER 14. Remove clevis pin from storage position (B) in linkage and insert in hole (A) to engage float springs. Secure with hairpin. Figure 6.60: Header Lift Linkage 15. Disengage safety prop by turning lever (A) downward to release and lower stop until lever locks into vertical position.
-
Page 60: Attaching A D-Series Header: Mechanical Center-Link
NOTE: This topic assumes that draper header boots have already been attached to the windrower lift linkage. If that is not the case, refer to 6.10 Attaching Header Boots, page To attach a D-Series header to an M155 Self-propelled Windrower equipped with a mechanical center-link, follow these steps: DANGER Stop engine and remove key from ignition before leaving operator's seat for any reason. - Page 61 ASSEMBLING THE WINDROWER 1. Remove the hairpin (A) from pins (B) and remove the pins from header legs. Figure 6.65: Header Leg CAUTION Check to be sure all bystanders have cleared the area. IMPORTANT: Remove protective cover from exhaust stack prior to starting engine.
- Page 62 ASSEMBLING THE WINDROWER 6. Loosen nut (A) and rotate barrel (B) to adjust length so that the link lines-up with header bracket. 7. Install clevis pin (C) and secure with cotter pin (D). 8. Adjust link to required length for proper header angle by rotating barrel (B).
- Page 63 ASSEMBLING THE WINDROWER 10. Engage safety props on both lift cylinders as follows: a. Stop engine and remove key from ignition. b. Pull lever (A) and rotate toward header to release and lower the safety prop (B) onto cylinder. c. Repeat for the opposite lift cylinder. Figure 6.70: Cylinder Stop 11.
- Page 64 ASSEMBLING THE WINDROWER 13. Remove clevis pin from storage position (B) in linkage and insert in hole (A) to engage float springs. Secure with hairpin. Figure 6.72: Header Lift Linkage 14. Disengage safety prop by turning lever (A) downward to release and lower stop until lever locks into vertical position.
- Page 65 ASSEMBLING THE WINDROWER 18. Connect header drive hoses (A) and electrical harness (B) to header. Refer to the draper header operator’s manual. Figure 6.75: Header Drive Hoses and Harness 19. Connect reel hydraulics (A) at right-hand side of windrower. Refer to the draper header operator’s manual.
-
Page 66: Attaching An A-Series Header
ASSEMBLING THE WINDROWER 6.11.2 Attaching an A-Series Header The A-Series header can be attached to an M155 or M205 Self-propelled Windrower. For attachment procedure, refer to the specific windrower model. M155 Self-Propelled Windrower The M155 Self-propelled Windrower is factory-equipped to run an A-Series Auger Header. -
Page 67: Attaching An A-Series Header: Hydraulic Center-Link And Optional Self-Alignment Kit
ASSEMBLING THE WINDROWER Attaching an A-Series Header: Hydraulic Center-Link and Optional Self-Alignment Kit To attach an A-Series header to an M155 or M205 Self-propelled Windrower equipped with a hydraulic center-link and optional self-alignment, follow these steps: DANGER Stop engine and remove key from ignition before leaving operator's seat for any reason. A child or even a pet could engage an idling machine. - Page 68 ASSEMBLING THE WINDROWER CAUTION Check to be sure all bystanders have cleared the area. IMPORTANT: Remove protective cover from exhaust stack prior to starting engine. 2. Start the engine and activate HEADER DOWN button (A) on the ground speed lever (GSL) to fully retract header lift cylinders.
- Page 69 ASSEMBLING THE WINDROWER 5. Use the following GSL functions to position the center-link hook above the header attachment pin: • Reel up (A) to raise the center-link • Reel down (B) to lower the center-link • Header tilt up (C) to retract the center-link •...
- Page 70 ASSEMBLING THE WINDROWER 10. Safety props are located on both of the windrower’s header lift cylinders. Engage safety props on both lift cylinders as follows: a. Stop engine and remove key from ignition. b. Pull lever (A) and rotate toward header to release and lower the safety prop (B) onto cylinder.
- Page 71 ASSEMBLING THE WINDROWER 12. Remove lynch pin from clevis pin (A) in stand (B). 13. Hold stand (B) and remove pin (A). 14. Position stand to storage position by inverting stand and relocating on bracket as shown. Reinsert clevis pin (A) and secure with lynch pin. Figure 6.89: Header Stand 15.
-
Page 72: Attaching An A-Series Header: Hydraulic Center-Link Without Self-Alignment Kit
Figure 6.93: Header Drive Hoses and Harness Attaching an A-Series Header: Hydraulic Center-Link without Self-Alignment Kit To attach an A-Series header to an M155 or M205 Self-propelled Windrower equipped with a hydraulic center-link without the self-alignment kit, follow these steps: DANGER Stop engine and remove key from ignition before leaving operator's seat for any reason. - Page 73 ASSEMBLING THE WINDROWER 1. Remove hairpin (A) from clevis pin (B) and remove the clevis pin from left and right header boots (C) on header. Figure 6.94: Header Boot CAUTION To prevent damage to the lift system when lowering header lift linkages without a header or weight box attached to windrower, ensure that float engagement pin is installed in storage location (B) and NOT installed at hole location (A).
- Page 74 ASSEMBLING THE WINDROWER 3. If necessary, relocate pin (A) at the frame linkage as required to raise the center-link (B) so that the hook is above the attachment pin on the header.. IMPORTANT: If the center-link is too low, it may contact the header as the windrower approaches the header for hookup.
- Page 75 ASSEMBLING THE WINDROWER 7. Push down on rod end of link cylinder (B), until hook engages pin on header and is locked. IMPORTANT: Hook release must be down to enable self-locking mechanism. If the release is open (up), manually push it down after hook engages header pin.
- Page 76 ASSEMBLING THE WINDROWER 10. Engage safety props on both lift cylinders as follows: a. Stop engine and remove key from ignition. b. Pull lever (A) and rotate toward header to release and lower the safety prop (B) onto cylinder. c. Repeat for the opposite lift cylinder. Figure 6.102: Cylinder Stop 11.
- Page 77 ASSEMBLING THE WINDROWER 12. Remove lynch pin from clevis pin (A) in stand (B). 13. Hold stand (B) and remove pin (A). 14. Position stand to storage position by inverting stand and relocating on bracket as shown. Reinsert clevis pin (A) and secure with lynch pin. Figure 6.104: Header Stand 15.
-
Page 78: Attaching An A-Series Header: Mechanical Center-Link
Figure 6.108: Header Drive Hoses and Harness Attaching an A-Series Header: Mechanical Center-Link To attach an A-Series header to an M155 Self-propelled Windrower equipped with a mechanical center-link, follow these steps: DANGER Stop engine and remove key from ignition before leaving operator's seat for any reason. A child or even a pet could engage an idling machine. - Page 79 ASSEMBLING THE WINDROWER 1. Remove hairpin (A) from clevis pin (B) and remove pin from left and right header boots (C) on header. Figure 6.109: Header Boot CAUTION To prevent damage to the lift system when lowering header lift linkages without a header or weight box attached to windrower, ensure that float engagement pin is installed in storage location (B) and NOT installed at hole location (A).
- Page 80 ASSEMBLING THE WINDROWER 3. Slowly drive the windrower forward so the feet (A) on the windrower enter the boots (B) on the header. Continue to drive slowly forward until the feet engage the boots and the header nudges forward. Figure 6.112: Header Boot 4.
- Page 81 ASSEMBLING THE WINDROWER 9. Engage safety props on both lift cylinders as follows: a. Stop engine and remove key from ignition. b. Pull lever (A) and rotate toward header to release and lower the safety prop (B) onto cylinder. c. Repeat for the opposite lift cylinder. Figure 6.115: Cylinder Stop 10.
- Page 82 ASSEMBLING THE WINDROWER 11. Remove lynch pin from clevis pin (A) in stand (B). 12. Hold stand (B) and remove pin (A). 13. Position stand to storage position by inverting stand and relocating on bracket as shown. Reinsert clevis pin (A) and secure with lynch pin. Figure 6.117: Header Stand 14.
- Page 83 ASSEMBLING THE WINDROWER CAUTION Check to be sure all bystanders have cleared the area. 17. Start engine and activate HEADER DOWN switch (A) on GSL to lower header fully. Stop engine and remove key. Figure 6.120: GSL 18. Connect header drive hoses (A) and electrical harness (B) to header.
-
Page 84: Attaching An R-Series Header
ASSEMBLING THE WINDROWER 6.11.3 Attaching an R-Series Header The R-Series header can be attached to an M155 or M205 windrower. For attachment procedure, refer to the specific windrower model. M155 Self-Propelled Windrower The M155 Self-propelled windrower can operate ONLY 13-foot R80 and R85 Rotary Disc Headers. These headers... -
Page 85: Attaching An R-Series Header: Hydraulic Center-Link With Optional Self-Alignment
Hydraulic Center-Link without Self-Alignment, page 84 Attaching an R-Series Header: Hydraulic Center-Link with Optional Self-Alignment To attach an R-Series header to an M155 or M205 Self-propelled Windrower equipped with a hydraulic center-link and optional self-alignment, follow these steps: DANGER Stop engine and remove key from ignition before leaving operator's seat for any reason. A child or even a pet could engage an idling machine. - Page 86 ASSEMBLING THE WINDROWER CAUTION To prevent damage to the lift system when lowering header lift linkages without a header or weight box attached to windrower, ensure that float engagement pin is installed in storage location (B) and NOT installed at hole location (A). Figure 6.125: Header Lift Linkage CAUTION Check to be sure all bystanders have cleared the area.
- Page 87 ASSEMBLING THE WINDROWER 4. Slowly drive windrower forward so that feet (A) on windrower enter boots (B) on the header. Continue to drive slowly forward until feet engage the boots and header nudges forward. Figure 6.128: Header Boot 5. Use the following GSL functions to position the center-link hook above the header attachment pin: •...
- Page 88 ASSEMBLING THE WINDROWER 9. Start engine and press HEADER UP switch (A) to raise header to maximum height. NOTE: If one end of the header does NOT raise fully, the lift cylinders require re-phasing. If re-phasing is needed, proceed as follows: a.
- Page 89 ASSEMBLING THE WINDROWER 11. Install clevis pin (A) through each boot and foot, and secure with hairpin (B). Do this to both sides. IMPORTANT: Ensure clevis pin (A) is fully inserted and hairpin is installed behind bracket. Figure 6.133: Header Boot 12.
-
Page 90: Attaching An R-Series Header: Hydraulic Center-Link Without Self-Alignment
Figure 6.137: Header Drive Hoses and Harness Attaching an R-Series Header: Hydraulic Center-Link without Self-Alignment To attach an R-Series header to an M155 or M205 Self-propelled Windrower equipped with a non-self-aligning hydraulic center-link, follow these steps: DANGER Stop engine and remove key from ignition before leaving operator's seat for any reason. A child or even a pet could engage an idling machine. - Page 91 ASSEMBLING THE WINDROWER 1. Remove hairpin (B) from clevis pin (A) and remove pin from left and right header boots (C) on header. Figure 6.138: Header Boot CAUTION To prevent damage to the lift system when lowering header lift linkages without a header or weight box attached to windrower, ensure that float engagement pin is installed in storage location (B) and NOT installed at hole location (A).
- Page 92 ASSEMBLING THE WINDROWER CAUTION Check to be sure all bystanders have cleared the area. IMPORTANT: Remove protective cover from exhaust stack prior to starting engine. 2. Start the engine and activate HEADER DOWN button (A) on the ground speed lever (GSL) to fully retract header lift cylinders.
- Page 93 ASSEMBLING THE WINDROWER 5. Activate HEADER TILT cylinder switches on ground speed lever (GSL) to extend or retract center-link cylinder so that the hook lines up with the header attachment pin. 6. Stop engine and remove key from ignition. Figure 6.143: GSL 7.
- Page 94 ASSEMBLING THE WINDROWER 10. Safety props are located on both of the windrower’s header lift cylinders. Engage safety props on both lift cylinders as follows: a. Stop engine and remove key from ignition. b. Pull lever (A) and rotate toward header to release and lower the safety prop (B) onto cylinder.
- Page 95 ASSEMBLING THE WINDROWER 12. Remove clevis pin from storage position (B) in linkage, and insert in hole (A) to engage float springs. Secure with hairpin. Figure 6.148: Header Lift Linkage 13. Disengage safety prop by turning lever (A) downward to release and lower safety prop until lever locks into vertical position.
-
Page 96: Attaching An R-Series Header: Mechanical Center-Link
Figure 6.151: Header Drive Hoses and Harness Attaching an R-Series Header: Mechanical Center-Link To attach an R-Series header to an M155 Self-propelled Windrower with the mechanical center-link option, follow these steps: DANGER Stop engine and remove key from ignition before leaving operator's seat for any reason. A child or even a pet could engage an idling machine. - Page 97 ASSEMBLING THE WINDROWER CAUTION To prevent damage to the lift system when lowering header lift linkages without a header or weight box attached to windrower, ensure that float engagement pin is installed in storage location (B) and NOT installed at hole location (A). Figure 6.153: Header Lift Linkage CAUTION Check to be sure all bystanders have cleared the area.
- Page 98 ASSEMBLING THE WINDROWER 4. Stop engine and remove the key. 5. Loosen nut (A) and rotate barrel (B) to adjust length so that the link lines up with header bracket. 6. Install pin (C) and secure with cotter pin (D). 7.
- Page 99 ASSEMBLING THE WINDROWER 9. Safety props are located on both of the windrower’s header lift cylinders. Engage safety props on both lift cylinders as follows: a. Stop engine and remove key from ignition. b. Pull lever (A) and rotate toward header to release and lower the safety prop (B) onto cylinder.
- Page 100 ASSEMBLING THE WINDROWER 11. Remove clevis pin from storage position (B) in linkage, and insert in hole (A) to engage float springs. Secure with hairpin. Figure 6.160: Header Lift Linkage 12. Disengage safety prop by turning lever (A) downward to release and lower safety prop until lever locks into vertical position.
- Page 101 ASSEMBLING THE WINDROWER 15. Connect header drive hoses (A) and electrical harness (B) to header. Refer to the rotary disc header operator’s manual. Figure 6.163: Header Drive Hoses and Harness 169885 Revision A...
-
Page 102: Lubricating The Windrower
ASSEMBLING THE WINDROWER 6.12 Lubricating the Windrower Table 6.2 Recommended Lubricant Spec. Description SAE Multi-Purpose High Temperature, Extreme Pressure (EP2) As required unless otherwise Performance With 1% Max Molybdenum specified. Disulphide (NLGI Grade 2) Lithium Base 6.12.1 Lubrication Procedure DANGER Stop engine and remove key from ignition before leaving operator's seat for any reason. -
Page 103: Lubrication Points
ASSEMBLING THE WINDROWER 6.12.2 Lubrication Points Refer to the following illustrations to identify various locations that require lubrication. Figure 6.164: Lubrication Points A - Forked Caster Wheel Bearing (2 Places) (Outer—Both Wheels) B - Forked/Formed Caster Wheel Bearing (2 Places) C - Top Link (2 Places) (Both Sides) (Inner—Both Wheels) (50 Hrs/250 Hrs) D - Lubrication Decal (MD #183411) -
Page 104: Cab Display Module (Cdm) Programming
ASSEMBLING THE WINDROWER 6.13 Cab Display Module (CDM) Programming Figure 6.165: CDM A - Side Display B - Main Display C - Select Switch D - Menu Item Scroll Forward E - Menu Item Scroll Backward F - Program Switch A –... - Page 105 ASSEMBLING THE WINDROWER NOTE: Contact your MacDon Dealer for information regarding software updates to the electronic modules. Your Dealer will have the necessary interface tools and access to the latest software upgrades. IMPORTANT: Header must be attached to the windrower so that the CDM can detect the type of header (Header ID) and adjust the programming mode accordingly.
-
Page 106: M205 Detailed Programming Menu Flow Chart
ASSEMBLING THE WINDROWER 6.13.1 M205 Detailed Programming Menu Flow Chart The programming menu flow chart is current for cab display module (CDM) software 315 and windrower control module (WCM) software V109. 169885 Revision A... - Page 107 ASSEMBLING THE WINDROWER 169885 Revision A...
- Page 108 ASSEMBLING THE WINDROWER 169885 Revision A...
- Page 109 ASSEMBLING THE WINDROWER 169885 Revision A...
-
Page 110: M155 Detailed Programming Menu Flow Chart
ASSEMBLING THE WINDROWER 6.13.2 M155 Detailed Programming Menu Flow Chart The programming menu flow chart is current for cab display module (CDM) software 315 and windrower control module (WCM) software 214. 169885 Revision A... - Page 111 ASSEMBLING THE WINDROWER 169885 Revision A...
- Page 112 ASSEMBLING THE WINDROWER 169885 Revision A...
- Page 113 ASSEMBLING THE WINDROWER 169885 Revision A...
- Page 114 ASSEMBLING THE WINDROWER 169885 Revision A...
-
Page 115: Performing Predelivery Checks
7.1 Recording Serial Numbers 1. Record windrower and engine serial numbers on the Checklist. Figure 7.1: M155/M205 Serial Number Location A - Serial Number Plate Figure 7.2: Engine Serial Number Location A - Serial Number Plate... -
Page 116: Checking Wheel Drive Lubricant Level
PERFORMING PREDELIVERY CHECKS 7.2 Checking Wheel Drive Lubricant Level Check the wheel drive lubricant level every 200 hours or annually. NOTE: The windrower should be on level ground when checking lubricant level. 1. Position windrower so that plugs (A) and (B) are horizontally aligned with the center (C) of the hub. -
Page 117: Tire Pressures And Ballast Requirements
PERFORMING PREDELIVERY CHECKS 7.3 Tire Pressures and Ballast Requirements 7.3.1 Checking Tire Pressures Measure tire pressure with a gauge: Tire Type Size Pressure 18.4–26 32 psi (221 kPa) 600/65R28 26 psi (179 kPa) Turf 18.4–26 35 psi (241 kPa) 23.1–26 20 psi (138 kPa) 580/70R26 24 psi (165 kPa) - Page 118 PERFORMING PREDELIVERY CHECKS Table 7.1 M155 and M205 Windrower Recommended Ballast Header Description Level Ground Hills Rec. Tire Per Tire Both Tires Per Tire Both Tires Size Type Size U.S. Gal. U.S. Gal. lb (kg) lb (kg) (liters) (liters) A-Series, all...
-
Page 119: Checking Engine Air Intake
PERFORMING PREDELIVERY CHECKS 7.4 Checking Engine Air Intake 1. Check that air cleaner cap is firmly attached and that latches (A) and clamps (B) are secure. Figure 7.4: M205 Air Intake System Figure 7.5: M155 Air Intake System 169885 Revision A... - Page 120 PERFORMING PREDELIVERY CHECKS 2. M155 only: Check constant torque spring clamp (A) at back of air cleaner. Hold 0.018 in. (0.46 mm) gauge between middle coils and tighten clamp until gauge is snug. Remove gauge. Figure 7.6: Air Intake System 3.
- Page 121 PERFORMING PREDELIVERY CHECKS 4. Check constant torque clamps (A) on charge air cooling duct connections at turbocharger outlet and engine air intake. Hold 0.018 in. (0.46 mm) gauge between middle coils of clamp and tighten clamp until gauge is snug. Remove gauge. Figure 7.8: Air Intake System Figure 7.9: Air Intake System 169885...
-
Page 122: Checking Hydraulic Oil
PERFORMING PREDELIVERY CHECKS 7.5 Checking Hydraulic Oil Follow these steps to check the hydraulic oil: 1. Stand on left (cab-forward side) platform to access the filler pipe. 2. Turn filler cap (A) counterclockwise to unlock cap and remove dipstick. Figure 7.10: Engine Hood 3. -
Page 123: Checking Fuel Separator
PERFORMING PREDELIVERY CHECKS 7.6 Checking Fuel Separator 1. Place a container under the filter drain (A). 2. Turn drain valve by hand 1-1/2 to 2 turns counterclockwise, until draining occurs. 3. Drain the filter sump of water and sediment, until clear fuel is visible. -
Page 124: Checking Engine Coolant
1. Check the coolant level in the coolant recovery tank (A). Tank should be at least one-half full. 2. Check coolant concentration in the radiator. Coolant shall be rated for temperatures of -30°F (-34°C). Figure 7.13: M155/M205 Coolant Recovery Tank 169885 Revision A... -
Page 125: Checking Gearbox Lubricant Level
PERFORMING PREDELIVERY CHECKS 7.8 Checking Gearbox Lubricant Level 1. Remove plug (A). The lubricant should be visible through the hole or slightly running out. 2. Replace plug and tighten. Figure 7.14: Gearbox 169885 Revision A... -
Page 126: Checking Air Conditioning (A/C) Compressor Belt
PERFORMING PREDELIVERY CHECKS 7.9 Checking Air Conditioning (A/C) Compressor Belt Tension on A/C compressor belt (A) should be such that a force of 8–12 lbf (35–55 N) deflects the belt 3/16 in. (5 mm) at mid-span. Figure 7.15: A/C Compressor Belt 169885 Revision A... -
Page 127: Checking Safety System
PERFORMING PREDELIVERY CHECKS 7.10 Checking Safety System Ensure battery main disconnect switch is switched to POWER ON position. Refer to 7.11 Operational Checks, page 123. A properly functioning system should operate as follows: • The starter should engage ONLY when the ground speed lever (GSL) is in N-DETENT, the steering wheel is locked in the CENTER position, and the HEADER DRIVE switch is in the OFF position. - Page 128 PERFORMING PREDELIVERY CHECKS 3. With the engine shut down, steering wheel centered, and the GSL in NEUTRAL but not in N-DETENT, try to start the engine. The CDM should flash “CENTER STEERING” on the upper line and “PLACE GSL INTO N” on the lower line accompanied by a short beep with each flash and the engine should not turn over.
-
Page 129: Operational Checks
Ensure switch is switched to POWER ON position. Figure 7.17: M155/M205 Battery Switch 7.11.1 Checking Engine Warning Lights 1. Turn ignition key (A) to RUN position. single loud tone beeps and the engine warning lights (B) illuminate. -
Page 130: Checking Engine Startup
Figure 7.19: Operator Console 7.11.3 Checking Engine Speed Check engine speed on cab display module (CDM) (A). Idle Maximum rpm (No Load) M155 2320–2350 1075–1150 M205 2250–2340 Figure 7.20: CDM 7.11.4 Checking Gauges and Cab Display Module (CDM) Display 1. -
Page 131: Checking Electrical System
PERFORMING PREDELIVERY CHECKS 3. Check that CDM display (A) is working by pushing SELECT (B) on the CDM or the SELECT button (C) on the ground speed lever (GSL). Figure 7.22: CDM 7.11.5 Checking Electrical System Push the SELECT button on the ground speed lever (GSL) or the SELECT switch on the cab display module (CDM) to display VOLTS. -
Page 132: Checking Exterior Lights
PERFORMING PREDELIVERY CHECKS 4. With the engine running, position the GSL (A) in NEUTRAL and in N-DETENT: a. Swivel the operator’s station, but do NOT lock into position. b. Move GSL out of N-DETENT. The engine should shutdown, and the lower display will flash “LOCK SEAT BASE —>... - Page 133 PERFORMING PREDELIVERY CHECKS Figure 7.25: Front: Cab-Forward Mode A - Field Lights B - High/Low Road Lights (Optional) Figure 7.26: Rear: Cab-Forward Mode A - Field Lights B - Swath Lights—High/Low 3. Switch ROAD lights (B) ON and check that all lights are functioning as shown at right.
- Page 134 PERFORMING PREDELIVERY CHECKS Figure 7.28: Front: Cab-Forward Mode A - High/Low Road Lights B - Turn Signals, Hazard Warning Lights—Amber Figure 7.29: Rear: Cab-Forward Mode A - Turn Signals, Hazard Warning Lights—Amber B - SMV Sign C - Tail Lights—Red (If Installed) 7.
- Page 135 PERFORMING PREDELIVERY CHECKS Figure 7.31: Front: Engine-Forward Mode A - Turn Signals, Hazard Warning Lights—Amber B - High/Low Road Lights Figure 7.32: Rear: Engine-Forward Mode A - Tail/Brake Lights—Red B - Turn Signals, Hazard Warning Lights—Amber 11. Switch beacons (A) ON and check that they are working properly.
-
Page 136: Checking Horn
PERFORMING PREDELIVERY CHECKS Figure 7.34: Rear: Engine-Forward Mode A - Beacon Lights—Amber 7.11.8 Checking Horn 1. Push HORN button (A) and listen for horn. Figure 7.35: Horn Location 169885 Revision A... -
Page 137: Checking Interior Lights
Figure 7.36: Interior Lights and Switches A - Ambient Light in Roof Liner B - Interior Light 7.11.10 Checking Air Conditioning (A/C) and Heater Figure 7.37: M155/M205 A/C controls A - Blower Switch B - Air Conditioning Switch C - Outside Air Switch D - Temperature Control •... - Page 138 PERFORMING PREDELIVERY CHECKS • Outside air switch – Controls air source. When set to FRESH AIR, starts booster fan and filtered outside air is drawn into the cab. When set to RECIRCULATE, stops booster fan and air inside cab is recirculated. •...
-
Page 139: Manuals
7.12 Manuals The following manuals are stored in the manual storage case (A) behind the operator’s seat: Figure 7.38: Manual Storage Case Figure 7.39: Manuals and Quick Card Macdon Part Number Model Operator’s Manuals Parts Catalogs Quick Cards Engine Manuals... -
Page 140: Final Steps
PERFORMING PREDELIVERY CHECKS 7.13 Final Steps 1. Once all predelivery checks are complete, remove plastic coverings from cab display module (CDM) and seats. 2. Locate Trimble Display Mount kit and Label (GPS completion kit) that is in a bag in cab. If not yet for installation, place kit in toolbox for safekeeping. -
Page 141: Predelivery Checklist
Carefully follow the instructions given. Be alert for safety related messages that bring your attention to hazards and unsafe practices. Windrower Serial Number: Engine Serial Number: Table 1 M155 and M205 Self-Propelled Windrower Predelivery Checklist Item Reference — Check for shipping damage or missing parts. Be sure all shipping dunnage is removed. - Page 142 PREDELIVERY CHECKLIST Item Reference Check that heater is functioning properly. 7.11.10 Checking Air Conditioning (A/C) and Heater, page 131 Check that instrument console gauge lights and interior 7.11.4 Checking Gauges and Cab Display lights are functioning properly. Module (CDM) Display, page 124 7.11.9 Checking Interior Lights, page 131 Check maximum (no load) engine speed at CDM.
- Page 144 10708 N. Pomona Avenue Kansas City, Missouri United States 64153-1924 t. (816) 891-7313 f. (816) 891-7323 MacDon Australia Pty. Ltd. A.C.N. 079 393 721 P.O. Box 243, Suite 3, 143 Main Street Greensborough, Victoria, Australia 3088 t. 03 9432 9982 f.
Need help?
Do you have a question about the M155 and is the answer not in the manual?
Questions and answers