
Related Manuals for Avaya Media Processing Server 500


Summary of Contents for Avaya Media Processing Server 500
- Page 1 Avaya Media Processing Server 500 Hardware Installation and Maintenance Release 4.1 NN44100-302 Issue 01.01 October 2014...
- Page 2 Avaya can be a criminal, as well as a civil offense document without the obligation to notify any person or organization under the applicable law.
-
Page 3: Table Of Contents
.................... 31 System Installation Checklist ...................... 32 Installing MPS Cabinets .................. 32 Preparing Equipment For Installation ........................ 32 25 RU Cabinet .................... 33 25 RU Hole Cutout with Grounds October 2014 Avaya Media Processing Server 500 Hardware Installation and Maintenance Comments? infodev@avaya.com... - Page 4 .................... 50 Seagate Drives SCSI ID Settings ................ 51 Installing a Customer Supplied USB Modem ...................... 52 Software Installation ................. 52 Installing the MPS Manager Workstation ...................... 52 Single-Site Installations Avaya Media Processing Server 500 Hardware Installation and Maintenance October 2014 Comments? infodev@avaya.com...
- Page 5 .................... 99 Configuring the binding order ..................... 99 Configuring Redundant Ethernet .................. 100 Enabling Redundant Ethernet Mode .............. 100 Configuring IPMP for Windows Based Processors ........................... 100 HP DL360 October 2014 Avaya Media Processing Server 500 Hardware Installation and Maintenance Comments? infodev@avaya.com...
- Page 6 Troubleshooting System Initialization ........................ 143 Alarm Categories .................... 143 Monitoring TMS System Alarms ........................ 143 Alarm Retrieval ........................ 144 Alarm Categories ......................... 145 TMS Diagnostics ...................... 145 TMS System Status Avaya Media Processing Server 500 Hardware Installation and Maintenance October 2014 Comments? infodev@avaya.com...
- Page 7 Removing and Replacing a TMS ........................ 186 Installing a TMS ........................ 187 TMS Assembly .................... 187 Replacing an Ethernet Switch .................... 188 Replacing a Windows Server .................. 189 Replacing a SPARC-Based Server October 2014 Avaya Media Processing Server 500 Hardware Installation and Maintenance Comments? infodev@avaya.com...
- Page 8 Application Processor and LAN Configuration (Site specific) .................. 210 Application Processor System Testing ........................ 210 System Backup ........................ 211 Sign-Off Page Chapter 10: MPS 100 to MPS 500 Upgrade................. 213 ........................ 213 Preupgrade Tests Avaya Media Processing Server 500 Hardware Installation and Maintenance October 2014 Comments? infodev@avaya.com...
- Page 9 Contents .................. 213 Upgrading the Software and Hardware ................. 215 Replacing the MPS 100/500 Top Cover Chapter 11: MPS 500 Sample Configurations.............. 217 October 2014 Avaya Media Processing Server 500 Hardware Installation and Maintenance Comments? infodev@avaya.com...
-
Page 10: Chapter 1: Mps 500 System Hardware Overview
MPS 500 Server Layout Hardware Overview The Avaya Media Processing Server (MPS) 500 system consists of up to two chassis and two application processors per cabinet. The MPS 500 has a capacity of 8 spans for a maximum of 192 (T1) or 240 (E1/VOIP) lines. - Page 11 Each system configuration varies depending on the options chosen. You can order a second 52-inch 25 RU cabinet to house optional equipment. Figure 1: 25 RU (52) Cabinet Front view October 2014 Avaya Media Processing Server 500 Hardware Installation and Maintenance Comments? infodev@avaya.com...
- Page 12 MPS 500 System Hardware Overview Figure 2: 25 RU (52) Cabinet Rear View For additional images of the MPS 500, see MPS 500 Sample Configurations on page 217. Avaya Media Processing Server 500 Hardware Installation and Maintenance October 2014 Comments? infodev@avaya.com...
-
Page 13: Mps 500 Components
PCM interface, a SIP/RTP interface, and an SS7 interface. Figure 3: TMS Assembly Front View October 2014 Avaya Media Processing Server 500 Hardware Installation and Maintenance Comments? infodev@avaya.com... -
Page 14: Telephone Line Interfaces
The card ID on your system may not match the card IDs in this example. However, the last digit in the first series of numbers (1 in CARD_ID 503647401) is a 1 on boards with echo cancellation and a 2 on boards without echo cancellation. Avaya Media Processing Server 500 Hardware Installation and Maintenance October 2014 Comments? infodev@avaya.com... -
Page 15: Resources
(cascaded) can provide redundant connectivity. Redundant Ethernet provides automatic failover to the slave connection in the event of a failure in the primary network. October 2014 Avaya Media Processing Server 500 Hardware Installation and Maintenance Comments? infodev@avaya.com... -
Page 16: Computer Telephony (Ct) Bus
• A greater degree of complex logic functionality can be achieved in a relatively smaller board space with fewer circuit components, compared to where Avaya Media Processing Server 500 Hardware Installation and Maintenance October 2014 Comments? infodev@avaya.com... -
Page 17: Terminal Server (Optional)
The Keyboard/Video/Mouse (KVM) system has an integrated 15-inch LCD monitor with a keyboard and mouse that is supplied in a one RU slide-out assembly. The servers are interconnected by a set October 2014 Avaya Media Processing Server 500 Hardware Installation and Maintenance Comments? infodev@avaya.com... -
Page 18: Tape Storage Unit
Seagate Scorpion 40 DDS-4 19" 3U rack mount drive. The following illustrations show the configurations. One RU Servers Overview The Avaya Speech Server platform is an expandable server platform designed to provide a range of services that include various forms of Speech Recognition, Speech Verification, and Text-To- Speech. -
Page 19: Ibm Xseries 3550
IBM x3550 HP DL360 G5 HP DL360 G7 IBM xSeries 3550 The following diagrams show the front and rear view of the IBM x3550 type 7978 server. October 2014 Avaya Media Processing Server 500 Hardware Installation and Maintenance Comments? infodev@avaya.com... -
Page 20: Hp Dl360 G5 Speech Server
Refer to the online Installation Guide for the IBM x3550 at http://www.ibm.com HP DL360 G5 Speech Server The following diagram shows the HP ProLiant DL360 Generation 5p (G5p). Avaya Media Processing Server 500 Hardware Installation and Maintenance October 2014 Comments? infodev@avaya.com... -
Page 21: Hp Dl360 G7 Speech Server
Refer to the online Installation Guide for the DL360 G5 at http://www.hp.com/ HP DL360 G7 Speech Server The following diagram shows the HP DL360 G7 Speech Server. October 2014 Avaya Media Processing Server 500 Hardware Installation and Maintenance Comments? infodev@avaya.com... -
Page 22: Sparc-Based Servers
SPARC-Based Servers Supporte the following Oracle server models through Solaris 2.10: • V Series (V215, V245) • T Series (T2000, T5120, T5220, T4-1) • Netra 240 Avaya Media Processing Server 500 Hardware Installation and Maintenance October 2014 Comments? infodev@avaya.com... -
Page 23: Power Distribution Unit
The AC Power Distribution Panels provide connectivity between cabinet-based items and the main power. Avaya offers two types of AC power; front-end power distribution units (FE PDU) and back- end power distribution units (BE PDU). The following sections describe these PDU. -
Page 24: Pdu Position
Definition Package for the exact location of the PDU in your installation. Back-end PDU overview The following diagram shows two back end power distribution units (BE PDU). Avaya Media Processing Server 500 Hardware Installation and Maintenance October 2014 Comments? infodev@avaya.com... - Page 25 15 amp maximum, regardless of voltage. Redundant Power Supplies Back end PDU supporting redundant power supplies must be attached to different front end PDU as shown in the following example. October 2014 Avaya Media Processing Server 500 Hardware Installation and Maintenance Comments? infodev@avaya.com...
- Page 26 Therefore, if you have multiple power sources providing power to different PDU, ensure the fans are split between two separate power sources where ever possible as shown in the following example. Avaya Media Processing Server 500 Hardware Installation and Maintenance October 2014...
-
Page 27: Dc Power Distribution Unit
The fuse panel without fail-over capability is for servers with dual power supplies, such as the x3550 the Netra 240. Figure 11: DC Fuse Panel with Fail-Over Capability Front View Figure 12: DC Fuse Panel with Fail-Over Capability Rear View October 2014 Avaya Media Processing Server 500 Hardware Installation and Maintenance Comments? infodev@avaya.com... -
Page 28: Cooling
The front is a ventilated door, and the back door has six 6-inch fans to remove the air from the cabinet. The fans are wired as two separate circuits, one containing two fans and one containing four. Avaya Media Processing Server 500 Hardware Installation and Maintenance October 2014 Comments? infodev@avaya.com... -
Page 29: Network Attached Storage
SIP and RTP interface from MPS is possible by using a CCSS SIP Server and Card set consisting of a DCC/ CTPM and TPM (Trunk Pack Module). For more details on SIP offering on MPS refer to document NN44100-130 Avaya Media Processing Server SIP Features Manual. - Page 30 MPS 500 System Hardware Overview Figure 18: Rack Mount Options Avaya Media Processing Server 500 Hardware Installation and Maintenance October 2014 Comments? infodev@avaya.com...
-
Page 31: Chapter 2: Installing Hardware And Configuring Connectivity
Avaya strongly recommends only qualified personnel make system configuration changes. System Installation Checklist Perform the steps in the following procedure to install the Avaya Media Processing Server (MPS) 500 system. Use the Final Installation Checklist to ensure your installation is complete, see... -
Page 32: Installing Mps Cabinets
7. Configure the system for the site environment and perform the startup tests. Installing MPS Cabinets The MPS 500 Pre installation Site Survey document, which can be obtained from the Avaya Support Portal site, contains installation specifications and instructions on developing the equipment room floor plan. -
Page 33: 25 Ru Hole Cutout With Grounds
25 RU Hole Cutout with Grounds 25 RU Hole Cutout with Grounds The following diagram shows the hole cutouts and grounding points required for installation of the MPS 500 cabinet. October 2014 Avaya Media Processing Server 500 Hardware Installation and Maintenance Comments? infodev@avaya.com... -
Page 34: Installing Cables And Connecting Power
The resistance must be less than 0.1 ohms. If the resistance is greater than 0.1 ohms, check the power cord connections. Avaya Media Processing Server 500 Hardware Installation and Maintenance October 2014... -
Page 35: Installing Ac Power
Both power cords must be utilized for proper system operation, see AC Electrical Specifications on page 193. Note: Do not use ground fault circuit interrupt (GFCI) devices on MPS 500 AC power feeds. October 2014 Avaya Media Processing Server 500 Hardware Installation and Maintenance Comments? infodev@avaya.com... -
Page 36: Equipment Grounding Requirements
Note: Avaya recommends that you use, at minimum, #12 AWG wire and an approved connector to the 10-32" copper grounding studs (one of four studs for 52" cabinet). The wire must be 2 meters or less, where possible, and connected to a point referenced to the Building Principal Ground. -
Page 37: Dc Pdu Power Connector
A qualified electrician must connect the DC power and grounding and provide all power feed cabling and connectors required. 1. Assemble the following tools. • #2 Phillips screwdriver • 7/16 (11mm) socket wrench October 2014 Avaya Media Processing Server 500 Hardware Installation and Maintenance Comments? infodev@avaya.com... -
Page 38: Dc Input Terminal Block
This block is intended to be wired with #4 wire and a compression terminal such as AMP #52043-3 or equivalent. This block is normally used to supply devices that have supply failure redundancy. Avaya Media Processing Server 500 Hardware Installation and Maintenance October 2014... -
Page 39: System Warning Label Locations
Appropriate consideration of equipment nameplate ratings should be used with addressing this concern. October 2014 Avaya Media Processing Server 500 Hardware Installation and Maintenance Comments? infodev@avaya.com... -
Page 40: Installing The Mps 500 Standalone Chassis
Note: Refer to Physical Specifications on page 191 for MPS 500 physical specifications. Cabling Lines and Trunks RJ48-M The following diagram shows an RJ48-M connection. Avaya Media Processing Server 500 Hardware Installation and Maintenance October 2014 Comments? infodev@avaya.com... -
Page 41: Rj48-C
Receive Transmit T1 (Tip) R1 (Ring) T (Tip) R (Ring) RJ48-C The following diagram shows RJ48-C connection. The following table shows RJ48-C pinouts. Signal R1 (receive, ring) October 2014 Avaya Media Processing Server 500 Hardware Installation and Maintenance Comments? infodev@avaya.com... -
Page 42: Connecting Local Area Networks
An Ethernet switch is used to provide connectivity between the internal cabinet devices. The standard setup is as a private LAN and is not normally incorporated as part of an Avaya server subnet (formerly named CLAN). MPS 500 supports Ethernet Switch ERS 4850GTS. -
Page 43: Sparc Sun Fire/Netra-Based Processor Rear Panel
The following diagram shows the SPARC-based processor rear panel. Speech Server Rear Panel The following diagram shows a speech server rear panel. IBM x3550 Rear Panel The following diagram shows an x3550 rear panel. October 2014 Avaya Media Processing Server 500 Hardware Installation and Maintenance Comments? infodev@avaya.com... -
Page 44: Sparc Server Maintenance Serial Connection
2. Verify that all cable connectors are secured. 3. Set all circuit breakers to OFF. Note: Keep all external LAN cables unplugged until you have completed the site IP networking configurations on the servers. Avaya Media Processing Server 500 Hardware Installation and Maintenance October 2014 Comments? infodev@avaya.com... -
Page 45: Connecting Power
Caution: If you require remote access to this network you are responsible for any security related issues that occur. Avaya does not supply a firewall or other security enhancing software. KVM Console Sharing The Speech Server and Windows AP servers are interconnected with a set of control cables that... -
Page 46: Server Control Connections
KVM and the Windows nodes. Reconnect the KVM cabling to the Windows nodes and reboot the nodes to resolve this issue. Refer to the MPS Speech Server Reference Guide for connection instructions. Avaya Media Processing Server 500 Hardware Installation and Maintenance October 2014 Comments? infodev@avaya.com... -
Page 47: Kvm Connections With Dc Power
Refer to the MPS Speech Server Reference Guide for connection instructions. Speech or Application Server Controls and Indicators Figure 22: Front View October 2014 Avaya Media Processing Server 500 Hardware Installation and Maintenance Comments? infodev@avaya.com... -
Page 48: Server Attached Storage
Table 1: JOBD Power Requirements Type Voltage Current Power 100-240VAC at 50/60 Hz, single- 4A maximum per input 100W typical phase -48VDC or -60VDC 8A maximum per input 100W typical Avaya Media Processing Server 500 Hardware Installation and Maintenance October 2014 Comments? infodev@avaya.com... -
Page 49: Installing A Raid Unit
Seagate Drives Operating System Configuration Settings Make the following changes to the switch settings to use the Seagate Scorpion drives on the UNIX operating system: 1. Remove power from the drive. October 2014 Avaya Media Processing Server 500 Hardware Installation and Maintenance Comments? infodev@avaya.com... -
Page 50: Seagate Drives Scsi Id Settings
1. If you have a desktop drive, change the SCSI ID thumb wheel switch to ID 4. If you have a rack mount drive, change the SCSI ID jumper settings to ID 4. Avaya Media Processing Server 500 Hardware Installation and Maintenance October 2014... -
Page 51: Installing A Customer Supplied Usb Modem
USB modem can be used. Avaya has not tested, nor does it endorse, any particular model of powered USB modem. If a powered USB modem is not available, Avaya has successfully tested the use of a powered USB hub (for example, Belkin Model October 2014 Avaya Media Processing Server 500 Hardware Installation and Maintenance Comments? infodev@avaya.com... -
Page 52: Software Installation
MPS Manager functions as a separate workstation. Note: Avaya recommends a standalone MPS Manager workstation upgrade for systems where the administrative interface is not in the same location as the MPS 500. In cases where the administrative station is not in the same location as the application processor controlling the MPS 500, the keyboard, monitor, and mouse are replaced with an additional Ethernet LAN for connection to a remotely located workstation. - Page 53 MPS 500 LAN or for the common shared LAN. The MPS LAN is shown connected to the common LAN in the following diagram. October 2014 Avaya Media Processing Server 500 Hardware Installation and Maintenance Comments? infodev@avaya.com...
- Page 54 This second network interface is used for connection to the site network and not the MPS 500 LAN. The following illustration shows the gateway MPS Manager server configuration. Avaya Media Processing Server 500 Hardware Installation and Maintenance October 2014 Comments? infodev@avaya.com...
-
Page 55: Multiple-Site Installations
MPS Manager workstations, they can be located on the WAN or on any of the MPSLAN networks. The following diagram shows a typical multisite installation with a single MPS Manager Server system. October 2014 Avaya Media Processing Server 500 Hardware Installation and Maintenance Comments? infodev@avaya.com... - Page 56 Figure 31: Multiple-Site Networked Installation Note: The WAN must be an IP network. Generally, a minimum of 56 Kb/s bandwidth must be available for use by the MPS Manager system. Avaya Media Processing Server 500 Hardware Installation and Maintenance October 2014 Comments? infodev@avaya.com...
-
Page 57: Chapter 3: Configuration (Part I)
2. Configuring the Terminal Server Overview This chapter contains information on system configuration and maintenance. Avaya field personnel initially configure and test your system. The information in this chapter allows organizations with qualified staff to supplement field service and tech support arrangements. -
Page 58: Configuring The Dcc Boot Rom
LAN IP address will be obtained from etc/bootptab file LAN interface's subnet mask is 0xffff0000 HARDWARE PARAMETERS: Serial channels will use a baud rate of 9600 This board's Ethernet hardware address is 00:80:01:80:01:9C Avaya Media Processing Server 500 Hardware Installation and Maintenance October 2014 Comments? infodev@avaya.com... -
Page 59: Configuring The Application Processor (Ap) Network
You must modify a number of system files to boot load the TMS hardware. Caution: Only qualified Avaya field engineers can make the following modifications to system files. If done incorrectly, the system does not reboot properly. 1. Configure the /etc/hosts files to provide an IP for each TMS card in the system. -
Page 60: Netmasks
# Internet Domain Routing guidelines. # Both the network-number and the netmasks are specified in # "decimal dot" notation, e.g: 128.32.0.0 255.255.255.0 #10.10.173.0255.255.255.0 10.0.0.0 255.255.255.0 47.0.0.0 255.255.255.0 Avaya Media Processing Server 500 Hardware Installation and Maintenance October 2014 Comments? infodev@avaya.com... -
Page 61: Executing The Netinstall Configuration Script
Backplane Slot : [4]4 Ethernet Address : [00:80:01:80:00:8a]00:8a Save changes (y/n)? : [n] y Install another card (y/n)? : [n] y Chassis : [1]1 Backplane Slot : [7]7 October 2014 Avaya Media Processing Server 500 Hardware Installation and Maintenance Comments? infodev@avaya.com... - Page 62 # MPS in this file. Remember to change update /etc/ethers also 192.84.100.1 ppp-DialIn 192.84.100.2 ppp-DialOut 10.7.1.1 dtc1-a tms1 10.7.1.2 dtc2-a tms2 10.7.1.3 dtc3-a tms3 10.7.1.4 dtc4-a tms4 10.7.1.7 nic1-a 10.7.0.1 Enet_A_Gateway Avaya Media Processing Server 500 Hardware Installation and Maintenance October 2014 Comments? infodev@avaya.com...
-
Page 63: Configuration Files
For Windows 2008 R2: C:\Program Files (x86)\Avaya\SelfService The installation also defines the environment variable MPSHOME to refer to this home directory. In most cases: $MPSHOME = /opt/vps October 2014 Avaya Media Processing Server 500 Hardware Installation and Maintenance Comments? infodev@avaya.com... - Page 64 When you log on as user peri, /opt/home/peri (Solaris) or C:\home\peri (Windows) is your home directory. The following illustrations depict the directory structure of MPS software packages on both the Solaris and Windows platforms. Avaya Media Processing Server 500 Hardware Installation and Maintenance October 2014 Comments? infodev@avaya.com...
- Page 65 MPSHOME Figure 32: MPS Solaris Directory Structure October 2014 Avaya Media Processing Server 500 Hardware Installation and Maintenance Comments? infodev@avaya.com...
- Page 66 Figure 33: MPS Windows Directory Structure (continued) Note: The location of the configuration files described in the following sections applies to both Solaris ($MPSHOME) and Windows (%MPSHOME%) platforms. Avaya Media Processing Server 500 Hardware Installation and Maintenance October 2014 Comments? infodev@avaya.com...
-
Page 67: Mpshome/Common
MPSHOME/common MPSHOME/common $MPSHOME/common/ contains files common to all TMS or other components defined on the Avaya Media Processing Server Series system node. Key configuration files in this directory include: • tms.cfg is located in the $MPSHOME/common/etc/tms directory and sets up the... -
Page 68: Mpshome/Mpsn/Apps
• $MPSHOME/packages/tmsx.x.x/site-cfg contains a clean copy of the tms.cfg file. • The base directory for Avaya MPS software is $MPSHOME. • Clean copies of configuration files are stored in the packages directory. • $MPSHOME/common/ contains files common to all components and TMS on the Avaya MPS Series node. -
Page 69: Sip/Rtp
Add one of the following hardware packages to the TMS for your required number of SIP/RTP channels: Channels Supported 3000 (P/N 5036437-01 or 5036474-01) 3000 (P/N 5036437-01 or 5036474-01) CTPM TPM 200 TPM 800 TPM 1100-72 TPM 800 TPM 1100-240 TPM 1100-240 October 2014 Avaya Media Processing Server 500 Hardware Installation and Maintenance Comments? infodev@avaya.com... -
Page 70: Configuring Bootp Daemon
• sm - specifies the subnet mask. • td - (target directory) specifies the directory on the boot server from which to obtain images and initialization files. Avaya Media Processing Server 500 Hardware Installation and Maintenance October 2014 Comments? infodev@avaya.com... -
Page 71: Loading Spans
• The TPM800 supports eight spans for a total of 240 channels. The following is a sample of a tms.cfg file: ;----------------------------------------------------------------------------------------- ------------- ;DTC Span svc-type VpsNum Outline Pool/class Protocol ;Num Slot ;----------------------------------------------------------------------------------------- October 2014 Avaya Media Processing Server 500 Hardware Installation and Maintenance Comments? infodev@avaya.com... -
Page 72: Configuring Dcc
Use a TIP connection to the DCC to modify the settings as shown in the following sample output. DCC-3000 Rom $Revision: 1.8 $, Checksum = 0x192740c9 dcc3k_rom.elf, Release ROM-5.0 [05/06/05 05:31:50 PM] Copyright (C) 2013, Avaya Inc. All rights reserved -------------------------------------------------------------------------- Avaya Media Processing Server 500 Hardware Installation and Maintenance October 2014 Comments? infodev@avaya.com... - Page 73 Do you want to change the board's Ethernet address? [N] n ROM BOOTLOADER PARAMETERS: STARTUP DELAY: How long (in seconds) to delay before starting up? [5] ---------------------------------------------------------- STARTUP MODE: Run Application NETWORK INTERFACE PARAMETERS: TMS is present October 2014 Avaya Media Processing Server 500 Hardware Installation and Maintenance Comments? infodev@avaya.com...
-
Page 74: Testing The Dcc And Tpm Configuration
HostIp is 10.7.20.124 This board's IP is 10.7.20.34 Boot file image is / IP address of default gateway to other networks is 10.7.20.124 Subnet mask set to: 255.255.0.0 Avaya Media Processing Server 500 Hardware Installation and Maintenance October 2014 Comments? infodev@avaya.com... - Page 75 {1} -> srp -status NODE:PORT USER LINE STATE ENTERED STATE FLAGS CMDLINE MPSAP1-248-a:5999 root 18897 RECOVERING Jul 11 08:31:34 C srp Component: #common.0,gen/MPSAP1-248-a MPSAP1-248-a:60964 root 18898 RUNNING Jul 10 16:47:31 October 2014 Avaya Media Processing Server 500 Hardware Installation and Maintenance Comments? infodev@avaya.com...
- Page 76 4. From the Application Processor, execute a ping command to the TPM. 5. From the Application Processor, execute a ping command to the VoIP/DCC. 6. From the agent workstation, ping the TPM and AP-to-TMS IP addresses. Avaya Media Processing Server 500 Hardware Installation and Maintenance October 2014 Comments? infodev@avaya.com...
-
Page 77: Configuring For Application Support
Speech Server101-4 10.7.101.4 Speech Server101-3 10.7.101.3 Speech Server101-2 10.7.101.2 Speech Server101-1 10.7.101.1 COM1 Diag port MpsAp1 10.7.200.1 2100 2300 ttyb MpsAp2 10.7.200.2 2200 2400 ttyb MpsAp3 10.7.200.3 2500 October 2014 Avaya Media Processing Server 500 Hardware Installation and Maintenance Comments? infodev@avaya.com... -
Page 78: Telnet Port Access
MPS 500 Console Cable MPS/VRC #2 Console MPS 500 Console Cable BPS-2000 Serial Port Ethernet W/DB9 Adapter 10/100 Ethernet Port BPS-2000 Ethernet Port Standard. Ethernet Cable, 1 to 1 Avaya Media Processing Server 500 Hardware Installation and Maintenance October 2014 Comments? infodev@avaya.com... -
Page 79: Initial Setup
4. To begin the initial network setup, enter the command setup. 5. Enter y at the prompt. 6. When the server prompts for the root password, enter the default password system. October 2014 Avaya Media Processing Server 500 Hardware Installation and Maintenance Comments? infodev@avaya.com... -
Page 80: Default Network Settings
7. The parameter selection screen appears. 8. Enter the number of the item you want to modify and follow the prompts. Default Network Settings The following screen shows the default network configuration. Avaya Media Processing Server 500 Hardware Installation and Maintenance October 2014 Comments? infodev@avaya.com... -
Page 81: Changing The Network Settings
4. When the Login: prompt displays, the server is ready to accept network traffic. 5. Display the network settings. Run the command show interface 1 charact October 2014 Avaya Media Processing Server 500 Hardware Installation and Maintenance Comments? infodev@avaya.com... -
Page 82: Testing The Server Network Interface
A response similar to the following screen appears. If there are any errors, check that the Ethernet connection is in place. Avaya Media Processing Server 500 Hardware Installation and Maintenance October 2014... -
Page 83: Terminal Server Graphical User Interface
• MPS4.1 supports Java 6 and Java 7 Avaya recommends that Java 6 or later be in place to support the next generation of the MRV firmware. Usually, the first OSCAR in the MPS 500 is used for the HyperTerm and the browser. - Page 84 You cannot make Ethernet changes through the web browser interface. Use the diagnostic port. 6. Set up the Async ports. Select the Ports menu on the left and click Async. The following window appears. Avaya Media Processing Server 500 Hardware Installation and Maintenance October 2014 Comments? infodev@avaya.com...
- Page 85 11. The Copy window appears. To copy the parameters to multiple ports, select the desired ports on the left and click >>. Do not copy ports 3, 4 and 17. October 2014 Avaya Media Processing Server 500 Hardware Installation and Maintenance Comments? infodev@avaya.com...
- Page 86 13. Select the copy destination ports using the << key. 14. Configure ports 3 and 4 as shown in the following screen. Click Apply when the configuration is complete. Avaya Media Processing Server 500 Hardware Installation and Maintenance October 2014 Comments? infodev@avaya.com...
- Page 87 17. Do not modify the Telnet-to-Async port mapping unless specifically instructed to do so. To change the port mapping; a. Click Interface, and then select Port Mapping. October 2014 Avaya Media Processing Server 500 Hardware Installation and Maintenance Comments? infodev@avaya.com...
- Page 88 Port 0 is the diagnostic port used for initial configuration and Port 17 is the internal V.90 modem. 18. When you complete your changes, select REBOOT and enter y to confirm. 19. The server reboots and returns to service in about 1 minute. Avaya Media Processing Server 500 Hardware Installation and Maintenance October 2014 Comments? infodev@avaya.com...
-
Page 89: Creating The Perippp User Account Using The Gui
3. Select New at the top of the window. 4. Enter perippp for the new subscriber name and select OK. 5. Double-click new perippp subscriber in the list. The configuration GUI appears. October 2014 Avaya Media Processing Server 500 Hardware Installation and Maintenance Comments? infodev@avaya.com... - Page 90 8. Set the Security Level to Shell. 9. Click Adjust to the right of Password for Login and enter pPCON#1 10. Select Apply, and then click OK. Avaya Media Processing Server 500 Hardware Installation and Maintenance October 2014 Comments? infodev@avaya.com...
-
Page 91: Configuring And Updating The Terminal Server Through Tftp
Configuring and Updating the Terminal Server through TFTP Avaya recommends you use the following method to configure the terminal server. The simplest method is to put the software and configuration files into the /tftpboot directory on the MPS October 2014 Avaya Media Processing Server 500 Hardware Installation and Maintenance Comments? infodev@avaya.com... - Page 92 1. Log on to the server through a serial connection using the user IDs and passwords shown. Welcome to MRV Communications, In-Reach Product Division. Port 0 Speed 9600 Login: InReach Avaya Media Processing Server 500 Hardware Installation and Maintenance October 2014 Comments? infodev@avaya.com...
- Page 93 5 Domain Name Suffix 6 Superuser Password Not Changed Is this information correct? (y/n) : y Save this information to Flash memory? (y/n) : y Saving to flash..... October 2014 Avaya Media Processing Server 500 Hardware Installation and Maintenance Comments? infodev@avaya.com...
- Page 94 Run the update software command. Check which version of software you have by running the show version command. The default IP address for MpsAp1 is 10.7.200.1. Substitute your IP address, if it is different. Login: InReach Password: ****** (access) InReach:0 >enable Avaya Media Processing Server 500 Hardware Installation and Maintenance October 2014 Comments? infodev@avaya.com...
- Page 95 Memory usage (in KB): 1 min Avg usage 3 Total Memory 64561 5 min. Avg usage 1 Cached Memory 15 min. Avg usage 0 Free Memory 34344 October 2014 Avaya Media Processing Server 500 Hardware Installation and Maintenance Comments? infodev@avaya.com...
- Page 96 To check the configuration files, start the Linux shell and get a listing of the /config directory. Verify that M_startppp and M_pppopts are present. InReach:0 >>shell BusyBox v0.60.1 (2003.07.09-15:14+0000) Built-in shell (ash) Enter 'help' for a list of built-in commands. In-Reach:/# cd /config Avaya Media Processing Server 500 Hardware Installation and Maintenance October 2014 Comments? infodev@avaya.com...
- Page 97 Do you really want to proceed? y/n y Restarting System!... Please wait for system to restart...... Initialization complete Welcome to MRV Communications, In-Reach Product Division. Port 0 Speed 9600 Login: October 2014 Avaya Media Processing Server 500 Hardware Installation and Maintenance Comments? infodev@avaya.com...
-
Page 98: Configuring The Hosts File
Enter the IP addresses used in the bootptab file for the TPM and DCC into the /etc/hosts file. Using the Terminal Server Refer to the online documentation on the MRV Communications Inc. web site for the most current operating instructions. http://www.mrv.com/ Avaya Media Processing Server 500 Hardware Installation and Maintenance October 2014 Comments? infodev@avaya.com... -
Page 99: Chapter 4: Configuration (Part Ii)
Configuring Redundant Ethernet Redundant Ethernet provides a second Ethernet switch with fail-over capability so that the loss of a single Ethernet Switch does not compromise system operation. October 2014 Avaya Media Processing Server 500 Hardware Installation and Maintenance Comments? infodev@avaya.com... -
Page 100: Enabling Redundant Ethernet Mode
Configuring IPMP for Windows Based Processors HP DL360 Use the following procedure to install the HP Ethernet control driver on an HPDL360 with the Windows Server 2008 R2 operating system. Avaya Media Processing Server 500 Hardware Installation and Maintenance October 2014 Comments? infodev@avaya.com... -
Page 101: October 2014 Avaya Media Processing Server 500 Hardware Installation And Maintenance
Select Internet Protocol (TCP/IP), and click the Properties tab. d. Select Use the following IP address on the General tab, and fill in the IP address, Subnet mask and Default gateway. October 2014 Avaya Media Processing Server 500 Hardware Installation and Maintenance Comments? infodev@avaya.com... -
Page 102: Configuring Ipmp For Solaris Based Processors
2. Team together Ethernet network interfaces of the same type. 3. All interfaces of the multipathing group must be connected to the same IP subnet. For example, bge0, bge1 for node name MPSAP1-a. Avaya Media Processing Server 500 Hardware Installation and Maintenance October 2014 Comments? infodev@avaya.com... - Page 103 Run the following command to check that the in.mpathd daemon is running. root@mpsap1 {10} ps -ef | grep in.mpathd root 130 1 0 11:55:08 ? 0:00 /usr/lib/inet/in.mpathd -a 9. Check the configuration by issuing the following command: October 2014 Avaya Media Processing Server 500 Hardware Installation and Maintenance Comments? infodev@avaya.com...
- Page 104 /usr/bin/echo "Removing static routes for use as IPMP targets" for target in $TARGETS; do /usr/sbin/route delete -host $target $target done esac ---------------- end of the script ipmp.targets -------------------- 11. Edit the new script ipmp.targets. Avaya Media Processing Server 500 Hardware Installation and Maintenance October 2014 Comments? infodev@avaya.com...
- Page 105 Execute the ifconfig -a command. Compare your results with the following sample: lo0: flags=2001000849<UP,LOOPBACK,RUNNING,MULTICAST, IPv4,VIRTUAL> mtu 8232 index 1 inet 127.0.0.1 netmask ff000000 bge0: flags=19000802<BROADCAST,MULTICAST,IPv4,NOFAILOVER ,FAILED> mtu 0 index 2 inet 0.0.0.0 netmask 0 October 2014 Avaya Media Processing Server 500 Hardware Installation and Maintenance Comments? infodev@avaya.com...
- Page 106 • It takes approximately 10 seconds to detect and recover from a failure with the default configuration. • The configuration of the IP Networking Multipathing daemon is set in the /etc/default/ mpathd file. Avaya Media Processing Server 500 Hardware Installation and Maintenance October 2014 Comments? infodev@avaya.com...
-
Page 107: Configuring Server Attached Storage
Refer to the online documentation for the SANnet II Blade JBOD unit at: http://www.dothill.com/index.asp RAID Avaya recommends that you verify your RAID configuration. To do this, you connect to RAID by serial interface or TCP/IP Ethernet. The following procedures show how to connect to RAID and how to verify the configuration. - Page 108 7. Save your IP modifications. In the RAID DH - HyperTermial window, select view and edit Configuration parameters, Communication Parameters, Internet Protocol (TCP/IP), <your IP address information>, Change/Set IP Address? Avaya Media Processing Server 500 Hardware Installation and Maintenance October 2014 Comments? infodev@avaya.com...
- Page 109 10. Ping the RAID platform from a server platform on the same subnet. (10.7.x.x). Example: ping 10.7.210.1 (RAID 1) TCP/IP access to the RAID is now available. You can now telnet to the RAID platform. 1. Select VT100 emulation. October 2014 Avaya Media Processing Server 500 Hardware Installation and Maintenance Comments? infodev@avaya.com...
- Page 110 Ensure each screen shot matches your platform. If screen shots do not match, contact Avaya Customer Support. 2. Telnet to the RAID controller – No password is required. 3. View and edit logical drives. Avaya Media Processing Server 500 Hardware Installation and Maintenance October 2014 Comments? infodev@avaya.com...
- Page 111 RAID 4. View and edit logical volumes – none are required. 5. View and edit Host Luns. 6. View and edit drives. 7. View and edit channels. October 2014 Avaya Media Processing Server 500 Hardware Installation and Maintenance Comments? infodev@avaya.com...
- Page 112 Configuration (Part II) 8. View and edit configuration parameters. 9. View and edit configuration parameter. 10. View system information. Avaya Media Processing Server 500 Hardware Installation and Maintenance October 2014 Comments? infodev@avaya.com...
- Page 113 RAID 11. Check event log for errors. 12. Clear the event log. The RAID configuration is verified. October 2014 Avaya Media Processing Server 500 Hardware Installation and Maintenance Comments? infodev@avaya.com...
-
Page 114: Enabling Remote Desktop Connection On Windows Systems Only
Caution: Symantec pcAnywhere cannot be installed, for any reason, on a node where the SFU utilities reside. There is a conflict between pcAnywhere and the Avaya software that produces system errors. • By default, nodes installed with the SFU utilities display the following shortcut on the desktop. - Page 115 2. Click Next to continue. 3. Enter information in the First name, Last name, and E-mail address fields of the following screen. 4. Click Next to continue. October 2014 Avaya Media Processing Server 500 Hardware Installation and Maintenance Comments? infodev@avaya.com...
- Page 116 Configuration (Part II) 5. Select Local Area Network, and then click Next to continue. 6. Select both check boxes, and then click Next to continue. Avaya Media Processing Server 500 Hardware Installation and Maintenance October 2014 Comments? infodev@avaya.com...
-
Page 117: Setting Up And Configuring Remote Desktop Sharing
Use the following procedure to set up and configure Remote Desktop Sharing in NetMeeting and remotely access a Windows PC. 1. Double-click the NetMeeting icon from desktop. October 2014 Avaya Media Processing Server 500 Hardware Installation and Maintenance Comments? infodev@avaya.com... - Page 118 Configuration (Part II) 2. From the Tools menu within NetMeeting, select Remote Desktop Sharing. The Remote Desktop Sharing Wizard appears. Avaya Media Processing Server 500 Hardware Installation and Maintenance October 2014 Comments? infodev@avaya.com...
- Page 119 Setting up and Configuring Remote Desktop Sharing 3. Click Next to continue. October 2014 Avaya Media Processing Server 500 Hardware Installation and Maintenance Comments? infodev@avaya.com...
- Page 120 Configuration (Part II) 4. Click Next to continue. 5. Select No, I will do this later, then click Next to continue. 6. Click Finish to complete the setup. Avaya Media Processing Server 500 Hardware Installation and Maintenance October 2014 Comments? infodev@avaya.com...
- Page 121 7. In the system tray, click the NetMeeting icon and select Activate Remote Desktop Sharing from the menu. 8. Start NetMeeting. 9. From the Tools menu, select Remote Desktop Sharing. October 2014 Avaya Media Processing Server 500 Hardware Installation and Maintenance Comments? infodev@avaya.com...
- Page 122 12. Click on the Security tab. 13. Select the checkbox for I prefer to receive secure incoming calls. Accept only secure calls when I'm not in a meeting. Avaya Media Processing Server 500 Hardware Installation and Maintenance October 2014 Comments? infodev@avaya.com...
-
Page 123: Verifying And Modifying Boot Rom Settings
Whenever you install a new system and add or replace assemblies, the boot ROM must be verified and, if necessary, modified. When you replace or add assemblies, you need only check the boot ROM on the associated TMS. October 2014 Avaya Media Processing Server 500 Hardware Installation and Maintenance Comments? infodev@avaya.com... -
Page 124: Dcc Boot Rom
Configuration (Part II) Caution: Avaya strongly recommends that system configuration changes be made only by qualified service personnel. If necessary, consult with Avaya technical support or field service engineering. Verify the new assemblies in the following order. 1. Verify or modify the boot ROM settings for the new DCC. See Verifying and Modifying Boot ROM Settings. - Page 125 How long (in seconds) to delay before starting up? [5] a. The original verify screen displays the new values. To make additional changes, select Modify again. To save the changes, select Continue. October 2014 Avaya Media Processing Server 500 Hardware Installation and Maintenance Comments? infodev@avaya.com...
-
Page 126: Tms Boot Rom
4. Verify the rest of the ROM settings. Select Modify to change the settings or Continue to accept the settings. (M)odify any of this or (C)ontinue? [C] m Avaya Media Processing Server 500 Hardware Installation and Maintenance October 2014 Comments? infodev@avaya.com... - Page 127 Connecting to Host 192.168.212.2 (port#5500)..ESTABLISHED Detecting Cards: Card Revision SlotCardType ----------------------------------------------- 5036484011_ TMS-2500 5036484011_ MDM/TMS-2500 503643701E_.503643601B_ 4 DCC-2000-T1 Loading FPGAs: Loading TMS-2500 in slot 0, card 0 with TMS484a.sm ........... October 2014 Avaya Media Processing Server 500 Hardware Installation and Maintenance Comments? infodev@avaya.com...
-
Page 128: Interpreting System Self Tests
There are 16 green LEDs labeled 0 through 15 on the front of each TMS. They provide visual indication of the boot sequence during the TMS startup process. The LEDs are numbered as shown in the following diagram. Avaya Media Processing Server 500 Hardware Installation and Maintenance October 2014 Comments? infodev@avaya.com... - Page 129 If the LEDs indicate that multiple corrective action is needed, perform the tasks in the order listed and retest after each task until the system boots normally. If the recommended solutions fail to correct the problem, contact Avaya Technical Support or Field Service. Use the following table to diagnose your system.
- Page 130 Activity toggles with each 32 Kb resources have stabilized. downloaded. The duration depends on • Check for an incorrect image the size of the download. definition file (.idf) specified. See Avaya Media Processing Server 500 Hardware Installation and Maintenance October 2014 Comments? infodev@avaya.com...
-
Page 131: Simple System Tests
Whenever you reconfigure the system, add or replace components, or the system software is upgraded, Avaya recommends you verify the operation of the new hardware, software, and configuration. This section contains confidence tests that can be run offline to check end-to-end system operation. -
Page 132: Span Loop-Back Test
COUNT = 48 ; number of resources of this class to load CLASS_NAME = dtmf ; this field is optional to override class in CDF = dtmf.cdf Avaya Media Processing Server 500 Hardware Installation and Maintenance October 2014 Comments? infodev@avaya.com... - Page 133 Save and close the TMS.cfg file. 5. Run the following command to stop SRP. /etc/rc3.d/S20vps.startup stop Wait for SRP to shut down. October 2014 Avaya Media Processing Server 500 Hardware Installation and Maintenance Comments? infodev@avaya.com...
-
Page 134: Debug Terminal Connection Settings
You must determine the COM assignment of the port used and perform some configuration. Establish the connection using the HyperTerminal utility included with all versions of Microsoft Avaya Media Processing Server 500 Hardware Installation and Maintenance October 2014 Comments? infodev@avaya.com... -
Page 135: Connection From The System Console
6. Enter the command tip hardwire (default, for port B) or tip hardwirea (for port A). Note: When you close the tip session, permissions on the symbolic links return to their original state. October 2014 Avaya Media Processing Server 500 Hardware Installation and Maintenance Comments? infodev@avaya.com... -
Page 136: Final Check
Configuration (Part II) Final Check Use the Installation Checklist on page 207 and verify that all tasks are successfully completed. Avaya Media Processing Server 500 Hardware Installation and Maintenance October 2014 Comments? infodev@avaya.com... -
Page 137: Chapter 5: Operation And Administration
Media Processing Server 500 Operating Procedures This chapter contains the most common procedures and considerations for daily operation of the Avaya Media Processing Server (MPS). For information about MPS operation, refer to the MPS System Operator's Guide. You perform almost all administrative operations from the MPS Manager workstation that runs the MPS Manager suite of tools. - Page 138 123 and Debug Terminal Connection Settings on page 134.) Ethernet connection A 100 MB connection for Speech LAN Other connectors and Reserved for future enhancement. indicators Avaya Media Processing Server 500 Hardware Installation and Maintenance October 2014 Comments? infodev@avaya.com...
-
Page 139: Ethernet Hub Indicators
Performing a Routine MPS 500 Startup MPS configuration files automate the routine startup of each system in the network. During on-site installation, Avaya staff customize these configuration files for your system. To perform a routine startup of the MPS 500: 1. -
Page 140: Logging Off
4. The system prompts you to confirm the exit. Select OK. The login screen appears. 5. To log back on to the workstation, see Performing a Routine MPS 500 Startup on page 139. Avaya Media Processing Server 500 Hardware Installation and Maintenance October 2014 Comments? infodev@avaya.com... -
Page 141: Shutting The System Down
Shutting the System Down After Avaya personnel start your system for the first time, you rarely need to shut down or restart the system. You can make most changes to the applications and Multimedia files while the system is in normal operation. -
Page 142: Emergency Shutdown
2. Run the following command: /etc/rc3.d/S20vps.startup stop 3. Wait for SRP to shut down. To Start the system 1. Log on as root. 2. Run the following command: /etc/rc3.d/S20vps.startup start Avaya Media Processing Server 500 Hardware Installation and Maintenance October 2014 Comments? infodev@avaya.com... -
Page 143: Troubleshooting System Initialization
Two commands are provided: the first retrieves only active alarms on the system; the second retrieves all alarms, active and inactive. This full report maintains a history of how many times an October 2014 Avaya Media Processing Server 500 Hardware Installation and Maintenance Comments? infodev@avaya.com... -
Page 144: Alarm Categories
• clock source not available • resources not responding • temperature above threshold • power supplies above or below operating threshold (temperature, voltage, and current) • memory allocation failing Avaya Media Processing Server 500 Hardware Installation and Maintenance October 2014 Comments? infodev@avaya.com... -
Page 145: Tms Diagnostics
Use a serial console output to isolate a configuration error from defective hardware. Start the tip console to determine if the problem is a hardware or software loading issue, see Connection from the System Console on page 135. October 2014 Avaya Media Processing Server 500 Hardware Installation and Maintenance Comments? infodev@avaya.com... -
Page 146: Tms Runtime Alarms
The TMS resources does not respond due to the following conditions: • Faulty hardware • Undetected software error • Hardware software race condition • Faulty protocol • System configuration Avaya Media Processing Server 500 Hardware Installation and Maintenance October 2014 Comments? infodev@avaya.com... -
Page 147: Tms Span Alarms
• spans are not enabled or are taken out of service Troubleshooting TMS Span Alarms Check the system alarm report. It detects any span that is not in service (green). October 2014 Avaya Media Processing Server 500 Hardware Installation and Maintenance Comments? infodev@avaya.com... -
Page 148: Tms Memory Alarms
Configure the system clocks in the tms.cfg file (unique to each installation). Each clock can be derived from any of the spans on the TMS DCC, although only one span is used at any given time. Avaya Media Processing Server 500 Hardware Installation and Maintenance October 2014... -
Page 149: Tms Hardware Initialization Errors
Any hardware error detected affects the usability of the TMS card. Most hardware initialization errors prevent the TMS from loading its runtime image or configure resources required by the application. October 2014 Avaya Media Processing Server 500 Hardware Installation and Maintenance Comments? infodev@avaya.com... - Page 150 Use the serial console output to isolate a configuration error from defective hardware. (See Figure 36: TMS Front Panel on page 138 and Debug Terminal Connection Settings on page 134.) Avaya Media Processing Server 500 Hardware Installation and Maintenance October 2014 Comments? infodev@avaya.com...
-
Page 151: Chapter 6: System Validation
1. Hardware Validation 2. Field Factory Test Hardware Validation Avaya Media Processing Server (MPS) 500 hardware validation consists of running a series of field factory tests. Field Factory Test These diagnostic tests verify the functionality of an MPS 500 platform. The Field Factory Test (FFT) is a series of test applications and configuration files used to test the MPS 500 hardware and software components at the system level. -
Page 152: Field Factory Test Documentation
The PC must be on the same network as the MPS application processor. 1. Using Exceed, connect to the MPS AP and redirect the display to the PC: setenv DISPLAY <PC IP address> :0 Avaya Media Processing Server 500 Hardware Installation and Maintenance October 2014 Comments? infodev@avaya.com... - Page 153 PERIfft is patched. a. cd $MPSHOME/PERIfft/fftests/docs b. bin (for binary transfer) c. get <document_filename.pdf> or mget 0136* Use Acrobat Reader on the PC to open FFT documents. October 2014 Avaya Media Processing Server 500 Hardware Installation and Maintenance Comments? infodev@avaya.com...
-
Page 154: Chapter 7: Maintenance
• The cable supplied with each system (with Sun #530-2889-03 adapter) terminates with a DB-25 male and requires the use of a DB-25 to DB-9 male adapter. Avaya Media Processing Server 500 Hardware Installation and Maintenance October 2014 Comments? infodev@avaya.com... -
Page 155: Crash Recovery
Avaya recommends you inform Avaya Technical Support before installation. Avaya does not assume any responsibility for data loss other than the restoration of the original system software. The installation of third-party software to provide network backup, while not a violation of warranty, is done at the customer's risk. -
Page 156: Solaris-Based Systems
The following procedures describe how to use the clone.pl script to back up data from one disk to another on non-mirrored systems where no tape drive is present and a backup disk is available. Perform the backup when the system is as quiet as possible. Avaya recommends that you run backups in single-use mode, if possible. -
Page 157: Executing Clone.pl
Either specify the target drive in the command line or configure it in the clone.cfg file. The following example shows the backup drive specified in the command line. #perl clone.pl -f full -d c0t1d0 October 2014 Avaya Media Processing Server 500 Hardware Installation and Maintenance Comments? infodev@avaya.com... - Page 158 (system up) as tar can copy open files. #perl clone.pl -p '/ /var /opt /usr /mmf' -L 4 -d c0t0d Note: Avaya recommends that you make the backup during low system traffic so as not to impact system performance. 3. Recover partitions using tar.
-
Page 159: Configuring Clone.cfg
Mon Mar 15 14:56:55 2004: OPTION -D DAT logging level set to DETAIL Mon Mar 15 14:56:55 2004: Current directory:/var Mon Mar 15 14:56:55 2004: tar cvf - . 2>/opt/vps/common/log/tarc.out|(cd /mnt/c0t1d0s4; October 2014 Avaya Media Processing Server 500 Hardware Installation and Maintenance Comments? infodev@avaya.com... - Page 160 New logging files are created for future use. Avaya Media Processing Server 500 Hardware Installation and Maintenance October 2014 Comments? infodev@avaya.com...
-
Page 161: World Wide Name Syntax And Mapping
So if partitions are not in order, the copy will fail. Example: boot –s disk0 (HDD0 is the known working HDD to be copied) Procedure 1. Type: # diskinfo –a October 2014 Avaya Media Processing Server 500 Hardware Installation and Maintenance Comments? infodev@avaya.com... - Page 162 2. Continue only when both HDDs are available to the diskinfo command. 3. Execute: /etc/WWNcopyHDD. Use only 16-hexadecimal-digits. Disk to Disk Copy completes in approximately 45 minutes. Avaya Media Processing Server 500 Hardware Installation and Maintenance October 2014 Comments? infodev@avaya.com...
- Page 163 World Wide Name Syntax and Mapping 4. Halt and boot –s disk0. HDD0 is the known working HDD. 5. Execute: /etc/WWNupdateVFSTAB . Use only 16-hexadecimal-digits. October 2014 Avaya Media Processing Server 500 Hardware Installation and Maintenance Comments? infodev@avaya.com...
- Page 164 Maintenance New vfstab on Target HDD Complete. Halt System - Boot Newly Built HDD1 (disk1). Avaya Media Processing Server 500 Hardware Installation and Maintenance October 2014 Comments? infodev@avaya.com...
-
Page 165: Alternate Solaris Backup Procedure
The dd command changes the geometry of the backup disk if it is not the same as the system disk. The following format command shows the same type disks, as shown by the data between the angled brackets (<>). # format Searching for disks...done October 2014 Avaya Media Processing Server 500 Hardware Installation and Maintenance Comments? infodev@avaya.com... - Page 166 If Swap is part of slice1, it does not need to be backed up. Use swap -l to Avaya Media Processing Server 500 Hardware Installation and Maintenance October 2014...
- Page 167 10. Based on the preceding list of mounted /dev/[x], run the following command to create mount points on the backup root slice mounted on /mnt. # mkdir -p /mnt/usr /mnt/var /mnt/opt /mnt/proc /mnt/etc/ mnttab /mnt/var/run October 2014 Avaya Media Processing Server 500 Hardware Installation and Maintenance Comments? infodev@avaya.com...
- Page 168 The following command creates a tar file to standard output from /opt/home/peri. The output is piped to another tar command that changes Avaya Media Processing Server 500 Hardware Installation and Maintenance October 2014 Comments? infodev@avaya.com...
-
Page 169: Alternate Solaris Recovery
# tar cf - . | (cd /opt/bin; tar xfBp - ) 5. Unmount the backup slice. # cd / # umount /mnt October 2014 Avaya Media Processing Server 500 Hardware Installation and Maintenance Comments? infodev@avaya.com... -
Page 170: Performing A Dvd Rollout (Wim)
2. If system prompts for "Press any key to boot from CD or DVD...", press the Enter or Return key. 3. In cmd.exe, perform one of the following steps: • For 2008: wim-DVD-rollout • For 2003: wim-DVD-rollout_w2k3 Avaya Media Processing Server 500 Hardware Installation and Maintenance October 2014 Comments? infodev@avaya.com... -
Page 171: Performing The Post Rollout Steps
• For 2003, go to Performing post rollout steps for Windows 2003 on page 174 Performing the post rollout steps Procedure 1. Reboot to new system, setup runs and reboots. October 2014 Avaya Media Processing Server 500 Hardware Installation and Maintenance Comments? infodev@avaya.com... - Page 172 4. To configure network, use the following steps: a. Name the first interface MPS_Private. b. Set as a Work (Private) network. c. Name the second interface Public. Avaya Media Processing Server 500 Hardware Installation and Maintenance October 2014 Comments? infodev@avaya.com...
- Page 173 \sysprep /oobe /shutdown or with GUI if it is active. 4. Pack and ship to customer site. 5. Set Country, Time, and Keyboard. 6. Accept license and start. 7. Set the initial administrator password. October 2014 Avaya Media Processing Server 500 Hardware Installation and Maintenance Comments? infodev@avaya.com...
-
Page 174: Performing Post Rollout Steps For Windows 2003
3. Click Accept License and click Next. 4. Modify Regional and Language options and click Next. 5. Click Name > Multimedia Applications > Organization > Avaya. 6. Enter the product key located on attached Certificate of Authenticity (COA). Use KM8FW-3TRWM-DXBXP-FRHBR-TVCTM if none is available, this code passes the startup but will not activate. -
Page 175: Activating Windows 2008
3. Type the Product key from Certificate of Authenticity (COA) and click Next. 4. Click OK. 5. Do see one of the following: • If you have internet access it will activate as follows: October 2014 Avaya Media Processing Server 500 Hardware Installation and Maintenance Comments? infodev@avaya.com... - Page 176 You are done; go to the end of this document to verify the Activation. • If you do not have internet access, you must to use the phone activation. Avaya Media Processing Server 500 Hardware Installation and Maintenance October 2014...
- Page 177 Performing a DVD rollout (WIM) October 2014 Avaya Media Processing Server 500 Hardware Installation and Maintenance Comments? infodev@avaya.com...
- Page 178 Maintenance 6. Select Show me other ways to activate. Avaya Media Processing Server 500 Hardware Installation and Maintenance October 2014 Comments? infodev@avaya.com...
- Page 179 Performing a DVD rollout (WIM) 7. Select Use the automated phone system to activate. October 2014 Avaya Media Processing Server 500 Hardware Installation and Maintenance Comments? infodev@avaya.com...
- Page 180 Confirmation ID again split into 9 groups of 6 digits by the activation phone system. Note this confirmation ID on a piece of paper or on your computer, for example, use the Notepad application. Avaya Media Processing Server 500 Hardware Installation and Maintenance October 2014 Comments? infodev@avaya.com...
- Page 181 1. After the Windows 2008 activation is successfully completed, the message on the System Control Panel screen display as "Windows is activated". 2. Click Start. 3. Click Computer to open Computer folder and then click System Properties on the taskbar. October 2014 Avaya Media Processing Server 500 Hardware Installation and Maintenance Comments? infodev@avaya.com...
- Page 182 1. To see how much time is still available for activation, click Start > All Programs > Accessories . Right-click on Command Prompt and select Run as administrator. 2. Type: slmgr -dli 3. To extend the timer for 30 days, type: slmgr -rearm. Avaya Media Processing Server 500 Hardware Installation and Maintenance October 2014 Comments? infodev@avaya.com...
-
Page 183: Drive Setup And Configuration
Protocol(TCP/IP) > Properties. Modify the IP address to that of the failed Windows server. Do not restart. b. Change the Windows server node name to the node name of the failed Windows server. October 2014 Avaya Media Processing Server 500 Hardware Installation and Maintenance Comments? infodev@avaya.com... - Page 184 Change the value of Server Name to the node name of the failed Windows server. This is the same name used in step on page 183. 8. Reboot. Avaya Media Processing Server 500 Hardware Installation and Maintenance October 2014 Comments? infodev@avaya.com...
-
Page 185: Field Replaceable Units
Remove the two screws securing the module mounting bracket to the TMS front panel. b. Carefully lift the module connector out of the mating connector in the TMS riser board. October 2014 Avaya Media Processing Server 500 Hardware Installation and Maintenance Comments? infodev@avaya.com... -
Page 186: Installing A Tms
3. Secure the TMS to the chassis with two screws. 4. Connect the telephone line input cable to the RJ48M connector on the front of the DCC. Avaya Media Processing Server 500 Hardware Installation and Maintenance October 2014 Comments? infodev@avaya.com... -
Page 187: Tms Assembly
TMS Assembly TMS Assembly Figure 37: TMS Top Side view Replacing an Ethernet Switch Figure 38: Ethernet Switch Front View October 2014 Avaya Media Processing Server 500 Hardware Installation and Maintenance Comments? infodev@avaya.com... -
Page 188: Replacing A Windows Server
2. Loosen the two retaining screws and slide the unit out on rails. 3. Replace with a new unit. 4. Replace the retaining screws and reconnect all cables and the power cord. Avaya Media Processing Server 500 Hardware Installation and Maintenance October 2014 Comments? infodev@avaya.com... -
Page 189: Replacing A Sparc-Based Server
Exercise caution when removing the top cover as the 50-pin ribbon cable is attached to it (the cable runs from the TMS to the backplane). 9. Unplug the DC power cable from the backplane. October 2014 Avaya Media Processing Server 500 Hardware Installation and Maintenance Comments? infodev@avaya.com... -
Page 190: Replacing A Cooling Fan
Cooling fans are hot-swappable. You do not need to shut the MPS system down to replace a fan. 1. Turn off the power to the fan. 2. Remove the fan and replace it with a new unit. 3. Turn the power back on. Avaya Media Processing Server 500 Hardware Installation and Maintenance October 2014 Comments? infodev@avaya.com... -
Page 191: Chapter 8: Technical Specifications
This appendix contains tabular listings of the physical, electrical, environmental, and interface specifications of the Avaya Media Processing Server (MPS) 500 platform. The information provided is for typical configurations. Use this data to determine the facility requirements and site location for your particular configuration. -
Page 192: Electrical Specifications
0 to 10000 ft 0 to 3048 m 0 to 40,000 ft 0 to 12,192 m Heat Dissipation 1020 BTU/Hr (typical) 2040 BTU/Hr (maximum) Noise Level Less than 40 dBA SPL 0 dBA Avaya Media Processing Server 500 Hardware Installation and Maintenance October 2014 Comments? infodev@avaya.com... -
Page 193: Mps 500 25 Ru Chassis
12 Amps typical per feed 45 Amps 6 Amps typical per feed 25 Amps maximum (Total all feeds) maximum (Total all feeds) Total Power 5400 VA (Maximum Configuration) October 2014 Avaya Media Processing Server 500 Hardware Installation and Maintenance Comments? infodev@avaya.com... -
Page 194: Dc Electrical Specifications
0 to 8000 ft. 0 to 2439 m 0 to 40,000 ft. 0 to 12,190 m Heat Dissipation 16000 BTU/Hr Note: Heat dissipation calculated by specific configuration. Avaya Media Processing Server 500 Hardware Installation and Maintenance October 2014 Comments? infodev@avaya.com... -
Page 195: Network Telephone Interfaces
T1 or E1 spans. The digital interface connections for span/line 1 are shown in the following illustration. Connections for all spans are listed in the following table. October 2014 Avaya Media Processing Server 500 Hardware Installation and Maintenance Comments? infodev@avaya.com... - Page 196 The transmit channel connections are designated T (tip) and R (ring). The receive channel connections are designated T1 and R1. For T1, each span handles 24 separate phone lines. Avaya Media Processing Server 500 Hardware Installation and Maintenance October 2014 Comments? infodev@avaya.com...
- Page 197 Line (Span) Receive Line (Span) Transmit T1 (Tip) R1 (Ring) T (Tip) R (Ring) Figure 41: Partial Loopback Connector Showing Span 1 connected to Span 2 October 2014 Avaya Media Processing Server 500 Hardware Installation and Maintenance Comments? infodev@avaya.com...
-
Page 198: Rj48C
A standard direct feed cable with RJ48C connectors is connected at both ends in accordance with the preceding table. Each pin of either connector is connected to the corresponding pin of the other. Avaya Media Processing Server 500 Hardware Installation and Maintenance October 2014... - Page 199 6 and 3, respectively. These shields must be connected to the chassis ground at the terminating equipment driving the signal. Refer to the following interconnection diagram. October 2014 Avaya Media Processing Server 500 Hardware Installation and Maintenance Comments? infodev@avaya.com...
-
Page 200: Db-9 To Rj-45 Serial Adapter
Connections between the Speech Server serial port and the SPARC-based processor require the use of DB-9 to RJ-45F adapter and a 1-to-1 standard 8 wire Ethernet cable. SPARC Adapter Wiring Diagram Avaya Media Processing Server 500 Hardware Installation and Maintenance October 2014 Comments? infodev@avaya.com... -
Page 201: Terminal Server Adapter Wiring Diagram (350-0308)
Terminal Server Cable The R0120102 cable connects a SPARC-based server or a Speech Server to the terminal server. This cable contains an RJ-45 male connector on each end. October 2014 Avaya Media Processing Server 500 Hardware Installation and Maintenance Comments? infodev@avaya.com... -
Page 202: Mps Terminal Cable
The MPS terminal cable has a 9-pin mini DIN connector on one end and an RJ-45 male connector on the other. It can be connected between a terminal server and SPARC-based server to monitor the MPS 500. Avaya Media Processing Server 500 Hardware Installation and Maintenance October 2014 Comments? infodev@avaya.com... -
Page 203: Chapter 9: Mps System Checklist And Report
Order And Contact Information Date Customer Name Site Address Site City/State/Zip Customer Contact Name Customer Contact Title Customer Contact Phone Order Number Field Engineer Account Executive Project Manager October 2014 Avaya Media Processing Server 500 Hardware Installation and Maintenance Comments? infodev@avaya.com... -
Page 204: Completion Instructions
7. Any approved diagnostic is run on all application processors installed to assure they are fully operational. 8. The system can be networked internally to other Avaya products and to the customer LAN according to the LAN diagram provided by the customer. -
Page 205: Hardware Installation
List any deviations below including back orders. If the order is not in accordance with the SDP, was field management notified for escalation? □ Yes □ No Manager: October 2014 Avaya Media Processing Server 500 Hardware Installation and Maintenance Comments? infodev@avaya.com... -
Page 206: Site Status
What could have been done on this installation to make it more productive and easier to install for you or the customer? Avaya Media Processing Server 500 Hardware Installation and Maintenance October 2014 Comments? infodev@avaya.com... -
Page 207: Installation Checklist
If this Installation Checklist is in soft copy form, please notify the appropriate party by e-mail that the checklist has been completed. Form reviewed by: Date: Installation Checklist Customer: Systems #: Sales Orders #: Field Engineer: October 2014 Avaya Media Processing Server 500 Hardware Installation and Maintenance Comments? infodev@avaya.com... -
Page 208: Unpack And Inventory Order
- GROUND TO NEUTRAL VOLTS - GROUND TO LINE VOLTS - LINE TO NEUTRAL VOLTS Notify the customer of any discrepancies. Avaya Media Processing Server 500 Hardware Installation and Maintenance October 2014 Comments? infodev@avaya.com... -
Page 209: Powering Up The System
• Verify that the tape unit is operational with a sample tar, if applicable. • Verify that the CD-ROM drive is functioning by reading a CD. • Verify the licensing matches the SDP for licenses ordered. October 2014 Avaya Media Processing Server 500 Hardware Installation and Maintenance Comments? infodev@avaya.com... -
Page 210: Application Processor And Lan Configuration (Site Specific)
MPS 500 Installation and Commissioning Guide. • List any additional tests that were completed and their results. System Backup Backup type (check all types used): Avaya Media Processing Server 500 Hardware Installation and Maintenance October 2014 Comments? infodev@avaya.com... -
Page 211: Sign-Off Page
A separate sign-off sheet is issued for any additional systems or services purchased. This sign-off is for: Customer: System #: Sales Order #: Brief description of work performed: October 2014 Avaya Media Processing Server 500 Hardware Installation and Maintenance Comments? infodev@avaya.com... - Page 212 If this Installation Checklist is in soft copy form, please notify the appropriate party by e-mail that the checklist has been completed. Please send a copy to fax #: Field Service Manager at: @Avaya.com Avaya Media Processing Server 500 Hardware Installation and Maintenance October 2014 Comments? infodev@avaya.com...
-
Page 213: Chapter 10: Mps 100 To Mps 500 Upgrade
1. Install all of the following components from the T1/E1 replacement kit into the MPS 100. For detailed installation procedures see Removing, Replacing, and Adding Assemblies page 185. October 2014 Avaya Media Processing Server 500 Hardware Installation and Maintenance Comments? infodev@avaya.com... - Page 214 Port MPS Developer 2.30 applications to MPS Developer 3.00. 5. Upgrade to MPS 3.5. Refer to the MPS 3.0 to MPS 3.5 Upgrade Guide for detailed instructions. Avaya Media Processing Server 500 Hardware Installation and Maintenance October 2014 Comments? infodev@avaya.com...
- Page 215 5. Lift the cover up and away from the enclosure. 6. Inspect and remove any loose debris from inside the enclosure. 7. Install the new cover, reconnect the cables, and install the screws. October 2014 Avaya Media Processing Server 500 Hardware Installation and Maintenance Comments? infodev@avaya.com...
- Page 216 MPS 100 to MPS 500 Upgrade Caution: To avoid breaking off screws, tighten them first by hand, then tighten as necessary. Avaya Media Processing Server 500 Hardware Installation and Maintenance October 2014 Comments? infodev@avaya.com...
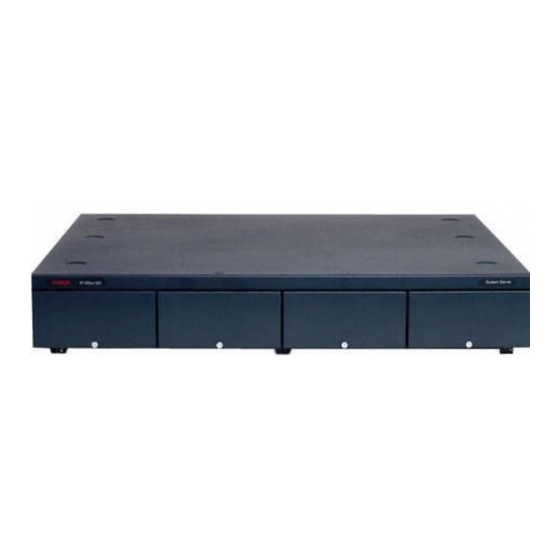
- Page 217 Chapter 11: MPS 500 Sample Configurations This appendix shows images of a standalone MPS 500 and an MPS 500 25 RU cabinet. Figure 44: Standalone MPS 500 October 2014 Avaya Media Processing Server 500 Hardware Installation and Maintenance Comments? infodev@avaya.com...
-
Page 218: Chapter 11: Mps 500 Sample Configurations
MPS 500 Sample Configurations Figure 45: MPS 500 25 RU Cabinet Avaya Media Processing Server 500 Hardware Installation and Maintenance October 2014 Comments? infodev@avaya.com... - Page 219 ........137 removing, replacing, and adding components ....removing, replacing, and adding components:MPS 500 power supply ..............189 removing, replacing, and adding components:TMS ..October 2014 Avaya Media Processing Server 500 Hardware Installation and Maintenance Comments? infodev@avaya.com...
- Page 220 TMS:boot ROM ..............126 TMS:removing and replacing ..........185 upgrade, MPS 100 to MPS 500 ......... VoIP ..................WIM ................... Windows directory structure ..........World Wide Name Syntax ..........161 Avaya Media Processing Server 500 Hardware Installation and Maintenance October 2014 Comments? infodev@avaya.com...