Canon imagePROGRAF W8400 User Manual
Canon imageprograf w8400: users guide
Hide thumbs
Also See for imagePROGRAF W8400:
- Driver manual (24 pages) ,
- Brochure & specs (4 pages) ,
- Manual (84 pages)
Table of Contents
Advertisement
Quick Links
User's Guide
Quick Menu
Loading Roll Media
Unexpected Printing Results
Removing Media Jams
Message Is Displayed
Ink in a Tank Run Out
Operation Panel Setting List
Printer Driver
Options
• Setup the Media Take-up Unit
• Cutter Unit
How to Use This Guide
i
Chapter 1 Basic Use
Chapter 2 Using Various Media
Chapter 3 Printing by Objective
Chapter 4 Maintenance
Chapter 5 Using the Printer in a Network
Environment
Chapter 6 Troubleshooting
Chapter 7 Operating the Function Menu
imagePROGRAF Print Plug-In for Photoshop Guide
Windows
Macintosh
imagePROGRAF HDI Driver Guide
Windows
Media Configuration Tool Guide
Windows
Macintosh
TOP
Chapter 1
Basic Use
Chapter 2
Using Various Media
Chapter 3
Printing by Objective
Chapter 4
Maintenance
Chapter 5
Using the Printer
in a Network
Environment
Chapter 6
Troubleshooting
Chapter 7
Operating the
Function Menu
Contents
Index
Advertisement
Chapters
Table of Contents

Subscribe to Our Youtube Channel
Related Manuals for Canon imagePROGRAF W8400


Summary of Contents for Canon imagePROGRAF W8400
-
Page 1: Chapter 4 Maintenance
Chapter 3 Printing by Objective Printing by Objective User’s Guide Chapter 4 Chapter 4 Maintenance Maintenance Chapter 5 Quick Menu Chapter 5 Using the Printer in a Network Using the Printer in a Network Environment Loading Roll Media Environment Unexpected Printing Results Chapter 6... -
Page 2: How To Use This Guide
How to Use This Guide Chapter 1 Basic Use How to Use the Top Page • Move to top page, chapter contents pages, contents pages, and indexed pages. Chapter 2 • Move to the previous/next page. Using Various Media • Return to the previous screen. - Page 3 Set as Default Printer. We recommend that you specify the Click on blue text to move to the refer- printer you want to print on in Set as Default Printer and print on enced pages. A4 size plain paper.
-
Page 4: Table Of Contents
Chapter 1 Basic Use Chapter 1 You can print the items that have been checked. Basic Use Printer Part Names ..................1-2 Printer Main Unit ....................1-2 Chapter 2 Switching the Printer On and Off ..............1-7 Using Various Media Switching the Printer On ..................1-7 Switching the Printer Off .................. -
Page 5: Printer Part Names
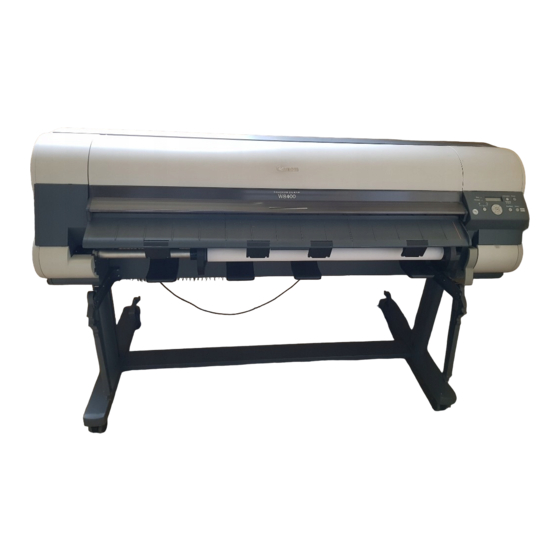
Printer Part Names Printer Part Names Chapter 1 Basic Use e Holder Stopper Printer Main Unit The part that fastens the roll media to the roll holder. Chapter 2 (→ P.2-28) Front View Using Various Media f Spool Prevention Stay... -
Page 6: Back View
Chapter 4 This is a table designed specially for this printer. Casters Maintenance are attached to the legs to make it easy to move. An a Moving Handles optional Media Take-up Unit can also be installed. Grasp the moving handles provided on the base of the... - Page 7 Printer Part Names Inside the Top Cover g Standard Cutter Unit This guide is used to feed paper. Remove this part if Chapter 1 mounting an optional cutter unit. Basic Use Chapter 2 Using Various Media Chapter 3 Printing by Objective...
- Page 8 The cutter unit that cuts print media automatically. (→ P.4-27) Contents f Printhead Height Adjustment Lever Use to adjust the height of the printhead. You will need to adjust the height of the printhead for high quality printing and printing on special media. (→ P.2-43) Index...
- Page 9 C Ink Tank Cover Operating the Function Menu j PM Ink Tank Cover k M Ink Tank Cover l Y Ink Tank Cover Contents These covers lock and protect the ink tanks. Open this cover to replace an ink tank. Index 1- 6...
-
Page 10: Switching The Printer On And Off
Switching the Printer On Chapter 6 Troubleshooting If the Message lamp is flashing, read the message Switch on the printer before you execute a print job from the on the printer operation display and take the computer. appropriate action. “Message Is Displayed”... -
Page 11: Switching The Printer Off
Chapter 7 are no remaining print jobs. Operating the Function Menu If a print job is in progress, wait for the print job to complete before switching off the printer. Contents Index 1- 8... -
Page 12: Online And Offline
ON/OFF timing. If This printer has three operation modes: online, offline Use Power Save is set to ON, you can set the time and menu mode. Each mode is described below. Chapter 2 until sleep with Sleep Timer. - Page 13 In online mode, Online is displayed on the operation Function Menu panel, and the Online lamp lights. If no media is loaded, or if a message is displayed on the operation panel, the printer will not enter online mode even if you press the Online button. The printer...
-
Page 14: Print Job Processing
Line 2: Chapter 6 Displays the currently selected menu item. Troubleshooting A right arrow at the right end of the line indicates that Online there are more options. A down arrow at the right end of the line indicates that... -
Page 15: Using The Operation Panel Buttons
Online mode: In some cases you can continue printing once a message Press to switch the printer offline. has been displayed to notify you that the printer needs user Offline mode: intervention. When the Message lamp lights, press any Chapter 7 Press to switch the printer to menu mode. - Page 16 Offline mode: prescribed order. Press and hold this button for 3 seconds If you are using the roll feed, this functions as a manual feed to start Head Cleaning A. (→ P.4-39) button that reverse feeds the paper back onto the roll.
-
Page 17: Reading Operation Panel Lamps
Maintenance If the printer is printing, this indicates that the printer is receiving or processing a print job. If the printer is not printing, the printer is either in pause Chapter 5 Using the Printer mode and has a paused job, or the printer has received... -
Page 18: Function Menus
Function Menus Chapter 1 Basic Use You can use the operation panel to access and use all the functions built into the printer. You can use the menus to make system settings, set up options, clean the printhead, and make Chapter 2 test prints, etc. - Page 19 Chapter 6 Troubleshooting Chapter 7 Displayed only when Enable is selected as the Take-up Reel. Displayed only when Print Length is selected as the Feed Priority. Displayed only when media is loaded. Operating the Displayed only when Network board is installed.
-
Page 20: How To Perform Menu Settings
Making Settings Offline Menu Using Various Media This section explains how to set the sleep timer as an example of how to use the operation panel buttons. The next level of the menu is displayed. Chapter 3 Printing by Objective... - Page 21 (3 sec.) Stop/Eject (1 sec.) Online Offline Menu Chapter 2 Using Various Media The Online lamp lights and the printer is ready to print. Chapter 3 Printing by Objective Chapter 4 Maintenance Chapter 5 Using the Printer in a Network...
-
Page 22: Menu Settings Summary Tables
Function Menus Menu Settings Summary Tables Chapter 1 Each menu has the functions described below. Setting values marked with an asterisk “*” are the default settings for the Basic Use corresponding menu items. MAIN MENU Chapter 2 Menu Item Setting Values... - Page 23 Chapter 5 Scan Wait Time Off, 1 sec., 3 sec., 5 sec., 7 sec., 9 sec. The amount of time that printhead pauses after Using the Printer each printing pass (scan) to wait for the ink to...
- Page 24 This item is Troubleshooting enabled for the standard cutter only. Off*, On A line is printed at the cut line in order to reduce CutDustReduct. the amount of dust generated by film and other Chapter 7 media during cutting.
- Page 25 Using the Printer ChangeBkInkType No, Yes If you want to change the type of black ink, use in a Network this setting to make the printer perform the Environment necessary processing so that you can change Chapter 6 the black ink tank.
- Page 26 Standard Adj., however, and consumes more ink. Fine Tuning -3 ~ 0* ~ +3 Allows manual entry of a value to fine tune the Chapter 7 banal adjustment of the media selected for Operating the printing.
- Page 27 No, Yes Returns all colors to default settings (2). Color Adj. PM 1, 2*, 3 You can adjust the density of PM Y, M, C, K, PM, PC one by one and perform the Color Adj. PC 1, 2*, 3 Chapter 2 corrections.
- Page 28 Sets the method of communication for the network Chapter 5 interface board. After configuring all of the settings, Using the Printer select Store Setting to save the settings and enable in a Network Environment them. This menu is displayed only when the network interface is installed.
- Page 29 Head Ht. Wrning ON*, OFF, Check Head Hght Determines whether a prompt is issued when Chapter 4 the printhead is not at the correct height for the Maintenance print media. Med.type Wrning On*, Off...
- Page 30 Menu Item Setting Values Function Chk Remain.Roll Off, On* If set to On, a bar code is printed when the roll Chapter 1 is removed in order to keep track of the amount Basic Use of media remaining on each roll.
- Page 31 Details changed using the Media Configuration Tool are restored to the default values. Contents Test Print Status Print Prints the printer information and setting values. Menu Map Prints a list of all the items on the MAIN MENU. Index 1- 28...
- Page 32 Troubleshooting Print Time Displays the time elapsed for the print job. Print Size Displays the size of the media used in the print job. Chapter 7 Media Type Displays name of the media type used in the print job. Operating the Interface Displays the job interface.
- Page 33 Setting Values Function Basic Use Ink: The center of the display shows the remaining amount of ink in each ink tank from the 7 levels Chapter 2 of (100%, 80%, 60%, 40%, 20%, 0%), and no Using Various Media ink.
-
Page 34: Printer Driver
Printer Driver Printer Driver Chapter 1 Basic Use The computer uses the printer driver to send print jobs to the printer. This section describes the functions of the printer driver. Chapter 2 Using Various Media What the Printer Driver Can Do... - Page 35 Preview Display images to print multiple pages on each sheet. Use this feature to save paper Chapter 3 when you want to check the content of a Displays a graphical representation of Printing by Objective printout. (→ P.3-24, P.3-90) what the printout will look like by showing the effects of the printer driver settings.
- Page 36 Using Various Media document. You can easily performing printing that meets the purpose of the job. Further, you can register the settings that Chapter 3 you have made on each sheet under a Printing by Objective name.
-
Page 37: Main Sheet
Chapter 5 Long Format (Banner): Using the Printer Best for long print jobs with mixed text in a Network and illustrations, such as for vertical Environment hangings and horizontal banners. Chapter 6... - Page 38 Maintenance item depends on the paper type and type of black ink. Color: Chapter 5 Uses all the inks to print the job in color. Using the Printer Monochrome (Photo): in a Network Environment Provides stable monochrome photo...
-
Page 39: Page Setup Sheet
Printer Driver Page Setup Sheet Page Size Sets the size of the page for the print data. Chapter 1 Prints the image with no margin at the The Page Setup sheet provides the following settings. Basic Use Borderless four edges of the sheet. There are... -
Page 40: Layout Sheet
Function Menu centered so the margins are even. Rotate 180 degrees This feature rotates the image 180 degrees. No Spaces at When the image to be printed is smaller than Top or Bottom... -
Page 41: Print Operations
In the software application, select Print... Chapter 2 Printing From Windows Using Various Media from the File menu. To print a job from a Windows software application, use the Print... command in the File menu. Chapter 3 Printing by Objective Important... - Page 42 Not Enough Ink alert. If you see this message, replace the ink tank that is low on ink. If you reinstall an ink tank that is Contents nearly out of ink, this may also cause the print quality to deteriorate.
-
Page 43: Printing From A Macintosh
If you are using Mac OS 8.6 or Mac OS 9.x, select the Troubleshooting printer with the Chooser. This printer will not be displayed in the list if it is not switched on, or if the printer cable is disconnected. Start the print job after you Chapter 7 confirm that the printer is in working order. -
Page 44: Setup Utility
If the printer is connected to a network, make sure that Basic Use not be displayed in the list if it is not switched on, or if the Active is selected for AppleTalk. printer cable is disconnected. Start the print job after you... - Page 45 Chapter 4 This printer can be connected and operated with Maintenance Zeroconf of Mac OS X. If you are using Mac OS X Ver. click the Add button. If you are using Mac OS X Ver. 10.2.5 or later with a...
- Page 46 Printing Print Operations If you are using Mac OS X, set the Copies & Pages panel and the Main panel. Chapter 1 In the software application select Print from Basic Use Click the Print button. the File menu. The print job starts.
-
Page 47: Canceling A Print Job
Note Individual jobs that are currently printing and queued jobs can Chapter 7 also be canceled by selecting the job using the Job sheet. If the print in progress display on the printer Operating the does not go off and Online lamp is flashing,... -
Page 48: Canceling A Print Job From Macintosh
Chapter 2 Using Various Media Note On Mac OS X all jobs print in the background. Printing cannot be done in the foreground. Chapter 3 Printing by Objective Canceling a Background Print Job During background printing you can check the status of print jobs and cancel them. - Page 49 Next, turn the printer OFF and Chapter 7 then ON again. Operating the All of the print data currently processing in the printer Function Menu is lost after the printer is switched off. Restart any print jobs that you need.
- Page 50 Function Menu The print job in progress is canceled. Important Contents A print job that has already been sent to the printer cannot be canceled. If you want to cancel other remaining jobs, cancel them with the GARO Printmonitor. Index...
- Page 51 Canceling a Print Job Canceling a Foreground Print Job Select the name of the printer in the Printer Setup Utility, and then click the Set icon to open the remote If you are printing in the foreground with Mac OS 8.6/9.x, Chapter 1...
- Page 52 Stop/Eject (1 sec.) Online Printing by Objective Offline Menu All of the print data currently processing in the printer Chapter 4 is lost after the printer is turned OFF. Restart any Maintenance print jobs that you need. Chapter 5 Using the Printer...
-
Page 53: Cutter Unit
This is a high-performance cutter blade with long service Using Various Media are using roll media. This is convenient for printing long life that can cut more types of media than the flat blade, prints or performing continuous printing. which is mounted as standard. -
Page 54: Ieee1394 Expansion Board
Options Network Interface Expansion Board Roll Holder Sets The interface board that allows you to add a LAN board. This set contains the roll holder and holder stoppers. If Chapter 1 Canon Network Interface Board NB-15FB you need different types of media and different widths,... -
Page 55: Print Media
Print surface: Front side Flame-Resistant Cloth Fabric Banner Cut Sheets CAD Plain Paper Sizes: Photo 6P (203.2 x 254.0 mm) to poster (44 x 62 inch) Contents CAD Tracing Paper (1117.6 x 1574.8 mm) CAD: CAD Translucent Matte Film CAD Clear film... -
Page 56: Maintenance Cartridge
Chapter 2 purchased the printer. Using Various Media Ink Tanks The following seven types of ink tanks are used in this Chapter 3 printer. Printing by Objective Ink Tanks for the W8400... -
Page 57: Cutter Blade
Consumables Printhead Cutter Blade The product number of the printhead that can be used on The product number of the cutter blade that can be used Chapter 1 the printer is: on the printer is: Basic Use Printhead BC-1350 Cutter Blade CT-02... -
Page 58: Specifications
Interface Chapter 3 USB Interface Printing by Objective (If the computer port, operating system, or USB cable does not support USB 2.0 High Speed (USB 2.0 Standard) Mode, you will not be able to use High Speed Mode.) Network Interface... - Page 59 Thickness Maintenance Plain Paper, CAD Plain Paper, Plain Paper (High Quality), Recycled Coated Paper, Coated Paper, Heavy Coated Paper, Premium Matte Paper, Extra Heavyweight Coated Paper, Photo Glossy Paper, Photo Semi- Glossy Paper, Heavyweight Glossy Paper, Heavyweight Semi-Glossy Photo Paper, Synthetic Paper,...
- Page 60 Borderless Size may be at the left and right edges only. *6. If oversize has been selected, set media 10 mm min. wider than the media size selected, and set the roll height 10 mm min. higher than the roll media, or 28 mm min. higher than the cut sheet.
-
Page 61: Basic Environmental Performance
Product Safety Total Configuration: No special unburnable bromide materials (PBB, PBDE) used. Chapter 5 Content of Harmful Materials External Cover Plastic: No heavy metals (Pb, Hg, Cr (VI), Cd) or Halogen Using the Printer unburnable materials used. in a Network... - Page 62 Settings for Using the Media Take-up Unit ............2-47 in a Network Attaching Roll Media .................... 2-47 Environment Removing Media that Has Finished Printing ............2-53 Chapter 6 Settings to Not Use the Media Take-up Unit ............2-56 Troubleshooting Chapter 7 Operating the Function Menu Contents Start Print →...
-
Page 63: Media You Can Use
Troubleshooting You can select either photo black ink or matte black ink as the printer black ink to use. The two types of black ink differ Chapter 7 in their suitability for different media types, and in their Operating the characteristics. - Page 64 Media You Can Use Black Ink Characteristics Chapter 1 Usable Ink Types Basic Use Print Media Type Photo Matte Application Black Black Chapter 2 Glossy Photo Paper Using Various Media Semi-Glossy Photo Paper Photo Heavyweight Glossy Photo Paper Heavyweight SemiGlos Photo Paper...
-
Page 65: Paper Type
Using Various Media Borderless only with optional cutter : Borderless printing not Note possible Media types with the “ * ” mark are products set as Chapter 3 : Auto Cut Possible Canon recommended paper. Printing by Objective Auto Cut... -
Page 66: Plain Paper
Characteristics Characteristics This inkjet media is highly economical. Chapter 2 such as research presentations, etc. Due to the low cost, this media can also be Using Various Media used for test prints. Print Application Generic... - Page 67 Media You Can Use Plain Paper (High Quality)* Recycled Coated Paper Chapter 1 Basic Use Thin coated paper. Ideal for outputting It is a plain paper that is comparatively Characteristics Characteristics presentation data, path diagrams, maps, Chapter 2 thick and with good whiteness.
-
Page 68: Coated Paper
Heavyweight Coated Paper* Chapter 1 Basic Use Coated paper based on thick paper. Fine Thin coated paper. Ideal for outputting printing of full color images that are mostly Characteristics presentation data, path diagrams, maps, Characteristics graphics can be performed. Enables Chapter 2 and line drawings. - Page 69 Characteristics differentiated from thick coated paper due Characteristics Chapter 2 texture free of reflective glare for a tranquil feel. to differences in texture, with a feel when Suitable for wide-ranging applications from Using Various Media handled similar to textured paper.
- Page 70 Semi-Glossy Photo Paper* Chapter 1 Basic Use Glossy feeling similar to the photographic A soft and settled finish is achieved with paper used with silver nitrate photographs. no sense of oiliness using white gloss to Suitable for high-quality photo images.
- Page 71 Heavyweight Glossy Photo Paper Heavyweight SemiGlos Photo Paper Chapter 1 Glossy feeling similar to the photographic A soft and settled finish is achieved with no Basic Use paper used with silver nitrate photographs. sense of oiliness using white gloss to Suitable for high-quality photo images.
-
Page 72: Adhesive Synthetic Paper
Characteristics Characteristics polypropylene film suited to posters for Chapter 2 suited to posters for display. If laminated, it display. If laminated, it can be displayed can be displayed outdoors. Using Various Media outdoors. Print Application... - Page 73 Flame-Resistant Cloth Chapter 1 Basic Use Prints on the rear surface of glossy translucent film so that the beauty of the A cloth roll for indoor use, with excellent printed images are brought out when service life and flame-resistant effects. If...
- Page 74 Proofing Paper* Chapter 1 Basic Use A highly waterproof cloth for outdoor use, Covers the range of colors that can be it can be displayed for short periods reproduced by offset printing to give color Characteristics outdoors even without being laminated.
- Page 75 Borderless printing is to the right and left Requires the use of optional RIP software Comments Comments edges only when you use the standard to print. cutter, and to all four edges only when you use the optional cutter blade. Index 2- 14...
- Page 76 Comments edges only when you use the standard edges only when you use the standard cutter, and to all four edges only when you cutter, and to all four edges only when you use the optional cutter blade. use the optional cutter blade.
-
Page 77: Canvas Matte
Basic Use A matte cloth based on polyester fibers A matte cloth based on polyester fibers with a unique feel. This media is ideal for Characteristics with a unique feel. This media is ideal for creating oil painting reproductions and... -
Page 78: Colored Coated Paper
Basic Use This media combines suitability for ink jet printing with the texture of Japanese Paper This media is ideal for pop art productions Washi. This media is suited to warm, settled such as storefront price displays, etc. This Characteristics... -
Page 79: Cad Tracing Paper
CAD Tracing Paper CAD Translucent Matte Film Chapter 1 Basic Use This is a translucent film for CAD (line) This is a tracing for color printing, which is drawings. It is ideal for highly accurate Characteristics Characteristics Chapter 2 ideal for CAD (line) drawings. -
Page 80: Cad Clear Film
Media You Can Use CAD Clear film Chapter 1 Basic Use A translucent film for CAD (line) drawings, Characteristics it is mainly used for multiple overlapping Chapter 2 diagrams. Using Various Media Print Application Chapter 3 Indoors Printing by Objective... -
Page 81: Media Size
This table lists roll media with maximum diameters of Using Various Media Non-category 14” 14 x 17 150 mm (5.1 in.) and media core inside diameters of 2 or Width: 355.6 mm (14 in.) ANSI Legal 3 inches that can be used in this printer. -
Page 82: Cut Sheet
Cut Sheet Size (Width) Dimensions ARCH D 609.6 x 914.4 mm (24 x 36 inch) Cut sheets up to 1,117.6 mm wide (44 inche) can be Chapter 1 ARCH C 457.2 x 609.6 mm (18 x 24 inch) used. Basic Use ARCH B 304.8 x 457.2 mm (12 x 18 inch) -
Page 83: Media Type Sizes And Print Area
Display Series. paper. Chapter 4 Maintenance Normal Size Print results can be obtained for the same size as the paper Media Size Media to Load size. All paper sizes and types can be printed. The resulting Chapter 5 Roll Media... - Page 84 Printable Basic Use photo 8 x 10, and user-defined paper sizes at the top margin of the media, or the printhead may Paper Sizes from 203.2 x 203.2 mm to 1117.6 x 1600 mm scratch the surface of the print. Further, ink may...
-
Page 85: Borderless Printing
Media You Can Use Borderless Printing Allowed Printing Area of Media Size Borderless printing can be performed on all paper sizes. Chapter 1 0 mm Media on which borderless printing can be performed, Basic Use Media Size however, have the following limitations. For borderless printing, refer to Chapter 3 “Printing Photos and... - Page 86 Data created the same size as Media Size. With oversize media, printing can be performed on the Chapter 1 full surface of the media size. All media types can be Basic Use printed. If printing using oversize, it is necessary to load Scale to fit the paper that is larger than the media size.
- Page 87 Size of Printing may be misaligned if the end of the roll media loaded Troubleshooting has come off the core. Take care that the end of the roll cut sheet media is not within the printing area. Chapter 7 Operating the...
-
Page 88: Handling Paper And Other Print Media
Print Results Chapter 3 Printing by Objective Important You cannot use Oversize to print poster 44 x 62 inch Chapter 4 and other sizes wider than 1,107.6 mm. Maintenance Handling Paper and Other Print Media Chapter 5... -
Page 89: Loading Roll Media
1 second or more to light the Roll Media On the operation panel, select the roll media source. Printing by Objective lamp. (→ P.2-28) Load the roll media in the roll holder slot. (→ P.2-29) Information Power Data Chapter 4 Offline... -
Page 90: Loading The Roll Media
Loading the Roll Media If there is any roll media still present, rotate the top of the holder stopper towards the Load the roll media into the roll holder slot using the Chapter 1 back, then rewind the media onto the roll and following procedure. - Page 91 Chapter 5 Important Using the Printer in a Network If the edge of the roll paper is not straight, take up the Important Environment roll paper until the edge is straight before loading it. If the edge of the roll paper is not straight, or there is...
- Page 92 Basic Use grooves (c) and load the roll holder. it makes contact with the paperweight (e). If the roll paper is wide and its edge is not straight, Chapter 2 take up the roll slack until the edges are straight then Using Various Media set it.
- Page 93 Chapter 1 If the release lever is open, the platen paper suction Basic Use can be adjusted. If it is difficult to load the paper, adjust the suction using the [ ] button (stronger) and [ button (weaker) on the operation panel.
- Page 94 If the roll media remaining amount detection Japanese Paper Washi JPN Paper Washi function is turned ON, the barcode, which is at the edge Index Colored Coated Paper Colored Coated of the roll paper, will be cut off after it has been read. 2- 33...
-
Page 95: Selecting The Media Type
ON, press [ ] or [ ] to detect the length If you have loaded paper into the printer, make sure to Chapter 1 of the loaded media, then press the OK set the paper type using the operation panel. You cannot Basic Use button. -
Page 96: Removing A Roll
Removing a Roll media type then press the OK button. Chapter 1 If you are removing roll media that has already been loaded, or if Basic Use Media Type you are using a paper type that cannot be cut automatically, HW Coated perform the following procedure. - Page 97 Network Cut accurately along the guideline. If the cutting Environment not be able to keep track of the amount of media position is misaligned by 30 mm or greater from the remaining. guideline, subsequent printing may not be performed Chapter 6 accurately.
- Page 98 Chapter 3 Important Printing by Objective If the ink drying time has been set, cutting cannot be performed by pressing the Stop/Eject button until the ink drying time has elapsed. Chapter 4 Close the ejection guide, and then close the...
-
Page 99: Selecting The Paper Source
Important Store unused cut sheets in the original package. Store If you load a cut sheet with roll paper loaded in the the package in a cool, dry location that is not exposed printer, this may cause a jam. Before loading a cut Contents to direct sunlight. - Page 100 Chapter 2 Using Various Media Chapter 3 Printing by Objective When you set the cut sheet with roll paper loaded in Important the printer, the media may be damaged. Do not touch any areas other than those indicated. Your Loading Cut Sheets hands could get dirty or this could damage the printer.
- Page 101 Basic Use If the same type of media already matches the alignment line on the right of the platen. If the paper is loaded media, just press the OK button. loaded at an angle, an error will occur. If this happens, reload the paper straight.
- Page 102 Chapter 3 Important Coated Paper Coated Paper Printing by Objective If the paper is loaded at an angle, an error will occur. If Heavyweight Coated Paper HW Coated this happens, reload the paper from step 1. Premium Matte Paper Premium Matte Make sure to set the correct media type.
-
Page 103: Removing A Cut Sheet
Printing with Cut Sheets Removing a Cut Sheet Chapter 1 Follow the procedure below to remove a cut sheet from the Basic Use printer. Chapter 2 Hold down the Stop/Eject button for at least Using Various Media 1 second. Online... -
Page 104: Change The Height Of The Printhead
Change the height of the printhead Change the height of the printhead Chapter 1 Basic Use It is possible to achieve the higher print quality by adjusting Changing Printhead Height the height of the printhead. Follow the procedure below to operate. - Page 105 CAD translucent matte film, set the lever to the down position (a). If printing on semi-glossy Chapter 2 canvas, set the lever to the up position (c), and if Using Various Media printing any other type of media, set the lever to the middle (standard) position (b).
-
Page 106: Aligning The Printhead
Using Various Media Changing Printhead Height Again Chapter 3 After a print job is finished and you want to perform the next Printing by Objective job on a different type of media, repeat the procedure to adjust the height of the printhead “Changing Printhead... -
Page 107: Using The Media Take-Up Unit
• Glossy Photo Paper Maintenance Important • Canvas Semi- • Semi-Glossy Photo Paper If you are using the media take-up unit, do not tread on Glossy • Heavyweight SemiGlos Photo Paper the sensor, or place any object between the sensor • Japanese Paper •... -
Page 108: Attaching Roll Media
Environment press the OK button. Chapter 6 Take-up Reel Troubleshooting Enable (=) will be displayed to the left of the set value, and Chapter 7 the media take-up unit will be set. Operating the Function Menu Contents Index... - Page 109 Insert the tube into the spool holder axis. Chapter 7 Operating the Function Menu Contents Important Make sure to use roll media for spooling that is the same Index size as the tube installed in the media take-up unit. 2- 48...
- Page 110 Auto Feed in a Network Environment Chapter 6 (=) will be displayed to the left of the set value, and Troubleshooting the roll media will be fed to the media take-up unit. Important Take care not to catch the slide holder release lever (g) while you are pushing the slide holder.
- Page 111 Chapter 5 Using the Printer in a Network While taking care that the roll media does not Environment go slack, fix the left and right lead edges of Chapter 6 the roll media using tape. Troubleshooting Chapter 7 Operating the...
- Page 112 Network Environment Chapter 6 Troubleshooting Important Chapter 7 Spool the paper until the tube has completed two full Operating the rotations. If the spooled amount is less than two full Function Menu rotations, repeat Steps 12 and 13.
- Page 113 Environment the roll media out of alignment. Chapter 6 Note Troubleshooting The weight roll top surface (b, c, d) can be used only Press the Online button to display Online on for assembly. the printer display. Chapter 7 Operating the...
- Page 114 Removing Media that Has Finished take-up unit to Auto. Chapter 1 Printing Basic Use When printing has finished, use the following procedure to remove paper from the media take-up unit. Chapter 2 Using Various Media Press the Online button to display Offline on the printer display.
- Page 115 Chapter 4 The roll media will be cut. Maintenance Important If you are cutting roll media, make sure to hold the Chapter 5 trailing edge of the printed paper. If cutting is Using the Printer performed without holding the paper, the paper may...
- Page 116 Important Important Using the Printer in a Network Take care not to damage the printed surface. Mount the tube even if you are not Using the Media Environment Take-up Unit. Failure to do so may cause misfeeds. Chapter 6 Troubleshooting...
- Page 117 Disable Chapter 7 stacker, causing the printed surface to become dirty. (=) will be displayed to the left of the set value, and Operating the Use the second rod holder from the back as a the seeder will be set to Disable.
- Page 118 Enlarging and Reducing the Original ..............3-6 Using Various Media Printing Photos and Illustrations without Borders (Borderless Printing) ....3-13 Rotating the Page 90 Degrees for Printing (Conserve Paper) ......3-23 Printing Several Pages on One Sheet (Page Layout) ......... 3-24 Chapter 3 Printing Posters (Page Layout) ................
- Page 119 POP, digital Chapter 3 This section describes functions for which advanced cameras, or CAD, etc. Simply select the type of print job Printing by Objective knowledge is useful if using this printer driver. Make sure to by objective from the list to perform optimal printing.
-
Page 120: Print Types
Saturation Default drawings with fine lines. Chapter 3 *1. The black ink loaded on the printer is photo black ink (BK). Printing by Objective *2. The black ink loaded on the printer is matte black ink (MBK). Chapter 4 Note... - Page 121 (Settings Preview) Chapter 1 Basic Use The current printer driver settings details are displayed in Setting Preview Description preview. To change the manuscript size, print orientation or paper feed method, the settings details are displayed The following settings are shown in the Preview image.
- Page 122 Printing from Windows Confirming the Print Image (Print Preview) During printing, the PageComposer is displayed. Select the name of the document to be printed, and check the Preview also includes a function to display the Chapter 1 image displayed in Preview.
- Page 123 Preview screen. Check that Chapter 1 the name of the document to be printed has been The original can be printed at a larger or smaller size. Basic Use selected using PageComposer, and then perform There are three methods for enlargement and reduction.
- Page 124 Page Size. Size of the Media Chapter 1 Basic Use By setting the size of the media actually loaded for printing, you can automatically enlarge or reduce the print automatically to match the size of the loaded media. Chapter 2...
- Page 125 Chapter 5 Using the Printer in a Network Environment Note Chapter 6 To obtain the correct print results, it is recommended to Troubleshooting check the print preview screen before printing. For the print preview screen display, refer to “Before You Begin”...
- Page 126 Enlarge/Reduce to Fit Roll Paper Width Select the size of the original created in the software application using Page Size. You can enlarge or reduce the entire size of the original Chapter 1 so it fits the width of the roll.
- Page 127 Maintenance Note During printing, check that the width of the roll media loaded to the printer is the same as the width of the roll Chapter 5 media set using the printer drivers. If the width of the Using the Printer...
- Page 128 Select the size of the original created in the software application using Page Size. Printing Chapter 1 Basic Use You can enter the rate of magnification directly if you need to scale the enlargement or reduction for a desired effect. Chapter 2 Using Various Media...
- Page 129 Contents ratio entry field. You can do a setting that is larger than the size of the media loaded in the printer, but some portions of the will be cut off and not printed.
- Page 130 Normally a printed document has white space around its If a flat cutter has been loaded to the printer in use, the edges (margins), but a borderless print for a photograph or following types of paper cannot be cut, so borderless Chapter 2 created image has no white space at its borders;...
- Page 131 If using an application for which margins can be set, printing. such as MSWord, etc., set the margins to 0 mm. For Chapter 3 the settings methods, refer to the software application...
- Page 132 Borderless Printing Method in Scale to fit the Page Function Menu Size. 3 Check that the Media Source is the same size as the roll media, Contents or that the document size is the same as the roll media width.
- Page 133 Click the Print button in the Print dialog box. Note The print job starts. Chapter 1 If you change the page size to any other size that Basic Use allows borderless printing, the setting for the width of Note the roll changes automatically to a roll width that If Borderless Printing Method is set to Scale to fit matches the original width.
- Page 134 Printing from Windows More About Borderless Printing Methods If performing borderless printing to images for which there are blanks at the top and bottom of the print data, There are two ways to create a document for borderless Chapter 1...
- Page 135 Printing from Windows Create the original in the software application so it matches the size of the media used for printing. Chapter 1 Open the printer driver dialog box from the Print dialog box of the application. Basic Use Note...
- Page 136 Select a document size compatible with borderless printing, and select the Borderless Printing checkbox. The Chapter 6 following dialog box will be displayed. Select the width of the roll media loaded to the printer, and then press the OK Troubleshooting button.
- Page 137 If printing having set Borderless Printing Method in configuration will be covered, and borderless printing Chapter 6 either Scale to fit the Page Size or Scale to fit Roll will be performed. Parts that protrude beyond the 3 Troubleshooting Paper Width, depending on the printer driver, mm area at the edges will not be printed.
- Page 138 Basic Use Note Example: If the media size is JIS B2 (515 x 728 mm), set the dimensions for the original as 521 x 734 mm. Chapter 2 If you are using MS-Word or another Microsoft application, before you create the original select Page Setup... from the Using Various Media File menu and select the Page Size and Orientation.
- Page 139 Network Environment Note Chapter 6 To obtain the correct print results, it is recommended to check the print preview screen before printing. For the print Troubleshooting preview screen display, refer to “Confirming the Print Image (Print Preview)” “Before You Begin”.
- Page 140 Printing (Conserve Paper) Basic Use Note If the page to be printed has been fits the roll media width, a For more details about how to open the printer driver page created vertically can be rotated 90 degrees and Chapter 2 dialog box, please refer to “Printing”...
-
Page 141: Printing Several Pages On One Sheet
Chapter 1 (Page Layout) Basic Use You can reduce the size of the image and print 2 to 16 pages on one sheet. For example, if printing multiple-page Chapter 2 documents two pages at a time, half the paper is sufficient. -
Page 142: Chapter 2 Using Various Media Chapter
Operating the Function Menu Contents The Preview shows you want the printed page will look like with the number of pages selected for one sheet, then click the Set... button in the lower right corner of the Page Layout group. Index... -
Page 143: Chapter 3 Printing By Objective Chapter
Note Chapter 7 Operating the If you select a border line to print, the image is sized Function Menu down by 5% to allow for the border line. As soon as you select a border line, you will see this reflected in the Preview. - Page 144 Printing Posters (Page Layout) Chapter 1 After the image is enlarged and divided into several Basic Use sections, you can print the print the sections and paste them together to assemble one large poster. Chapter 2 Using Various Media Chapter 3...
- Page 145 Note Press the Invert button to select and deselect the Chapter 4 check mark. In the preview print image, an icon will be Maintenance displayed for the pages selected to be printed, and for pages selected not to be printed, the area will be blank Chapter 5 and no icon will be displayed.
-
Page 146: Using Watermarks
Printing from Windows Select the Layout sheet. Using Watermarks Chapter 1 Add a mark (Watermarks) to documents that are to be Basic Use handled particularly for printing. A range of stamps (Confidential, copying prohibited, etc.) have been prepared Chapter 2 as standard. - Page 147 Basic Use The watermark that you selected will appear in the Note Preview on the left. To obtain the correct print results, it is recommended to Chapter 2 check the print preview screen before printing. For the Using Various Media print preview screen display, refer to “Confirming the...
- Page 148 Here we will describe as an example how to take a 100 Chapter 3 Microsoft Word. mm x 500 mm original and enlarge to fit a 24 inch roll Printing by Objective (approximately 610 mm wide), and then print it as a banner (609.6 mm x 3,273.4 mm).
- Page 149 Chapter 2 Using Various Media Chapter 3 Printing by Objective Chapter 4 Maintenance Chapter 5 Click the Size Options... button to open the Media Size Options dialog box. Using the Printer in a Network Environment Chapter 6 Troubleshooting Chapter 7...
- Page 150 Maintenance Note If the details have been saved using the Media Size Options dialog box, the custom media size name and media size Chapter 5 will be added to the Media Size List display. For details of the Media Size Options dialog box, refer to “About Size...
- Page 151 <If you are using Microsoft Word...> The custom size temporarily sets the user-defined paper size between the application software and the a Select the Paper Size sheet, then for the Paper Chapter 1 printer driver. Consequently, when the software Basic Use...
- Page 152 Printing from Windows <If you are using Microsoft Excel...> c Click the OK button to close the Page Setup dialog box. a Display the Page sheet, then for the Paper size Chapter 1 Note Basic Use select the size you defined and registered in the Click Zoom...
- Page 153 Scale to fit paper in the Print dialog box the On the Menu bar, select Insert, then Picture, and then Using Various Media driver will size the page to fit the media loaded in the Word Art..., and then select the desired style and printer.
- Page 154 Chapter 3 Printing by Objective Chapter 4 Maintenance Chapter 5 Select the Page Setup sheet and do the settings for a long print. Using the Printer in a Network Environment Chapter 6 1 From the Page Size list, select the name of the paper Troubleshooting saved in the customized settings.
- Page 155 Click the FineZoom Settings list, and then select Yes Printing by Objective to enable printing. If you cannot do the print job with Windows NT 4.0, you may be able to enable printing by selecting Chapter 4 Standard or Draft under Print Quality on the Main Maintenance sheet.
- Page 156 Margins (Conserve Paper) Basic Use Note If there are blank areas at the top and bottom of the print data, For more details about how to open the printer driver delete the blank areas before printing. Paper will not feed for...
- Page 157 (Conserve Paper). Chapter 1 Customizing Print Quality Basic Use To set the print quality and print sit combinations, select Custom Settings in Print Quality to set the print quality Chapter 2 and resolution according to the application, using the Using Various Media Custom Settings dialog box.
- Page 158 Using Various Media Chapter 3 Printing by Objective Chapter 4 Maintenance Chapter 5 A Settings... button appears in the lower left corner Using the Printer in a Network of the Print Quality group. Environment Click the Setting... button in the Print...
- Page 159 Chapter 6 the image after printing. settings. Troubleshooting The print quality that can be selected depends on the type of Print Quality Resolution Content paper set. The Highest of Print Quality can be selected The higher the resolution, Chapter 7 the slower the print speed.
-
Page 160: Fine Adjusting Color For Printing
Resolution will be set to “Quick (300 dpi)”. Basically the color settings of the software application Premium Matte Paper, Backlit Film, Fine Art Photo, have priority, but if the results of a print job are not want Fine Art Heavyweight Photo, Fine Art Textured, Chapter 2 Canvas Matte, Canvas Semi-Glossy, CAD Plain you want you can also adjust color in the printer driver. -
Page 161: Line
Network Important Environment Monochrome (Photo) can be selected for Color Mode Chapter 6 only if one of the following types of paper is selected: Troubleshooting Glossy Photo Paper/Semi-Glossy Photo Paper/ Heavyweight Glossy Photo Paper/Heavyweight SemiGlos Photo Paper/Fine Art Photo/Fine Art... -
Page 162: Basic Use
Printing from Windows Select Manual Color Settings then click the The Color Settings dialog box opens. Color Settings button. Chapter 1 Basic Use Chapter 2 Using Various Media Chapter 3 Printing by Objective Chapter 4 Maintenance Chapter 5 Using the Printer... -
Page 163: Printing By Objective
Chapter 2 Using Various Media Chapter 3 Printing by Objective Note Note that for this printer driver all the items (Image, Chapter 4 Graphics, Text) are selected as the default settings. Maintenance Click the OK button to close the Object Chapter 5 Adjustment dialog box. -
Page 164: Chapter 5 Using The Printer
Printing from Windows Color Matching Note When you print an image captured with a scanner or a Chapter 1 Color Adjustment presents the following items for selection. digital camera, sometimes the appearance of the printout Basic Use does not match what you see on the screen. - Page 165 Color. Important in a Network Environment Monochrome (Photo) can be selected for Color Mode only if one of the following types of paper is selected: Chapter 6 Glossy Photo Paper/Semi-Glossy Photo Paper/ Troubleshooting Heavyweight Glossy Photo Paper/Heavyweight SemiGlos Photo Paper/Fine Art Photo/Fine Art...
- Page 166 Printing from Windows Select Manual Color Settings then click the Color Settings... button. Chapter 1 Basic Use Chapter 2 Using Various Media Chapter 3 Printing by Objective Chapter 4 Maintenance Chapter 5 Using the Printer Note in a Network Manual Color Settings are enabled when Color,...
- Page 167 Printing by Objective Chapter 4 Maintenance Chapter 5 Using the Printer in a Network Note Environment Here is a list of the available matching modes. Chapter 6 Troubleshooting Matching Mode Content Driver Calibrates color using the original Matching Chapter 7 color profile of the printer driver.
- Page 168 No button. If you want to do different settings for Graphics and If the No button is clicked, Driver ICM Mode and Host Text, then you must cancel the selection of Use the Chapter 7 ICM Mode cannot be selected.
- Page 169 This mode is ideal for photos. Note Perceptual Results close to the colors displayed Contents A print profile can be selected only when ICC Matching (Photographic) on the monitor, and smooth gradations, can be obtained. Mode is selected under the Matching Mode.
-
Page 170: About Size Options
Chapter 1 Creating Custom Sizes Basic Use Click the Size Options... in the Page Setup sheet on the printer driver. The Media Size Options dialog box will be Chapter 2 displayed. Use this dialog box to create and save unique Using Various Media customized paper. - Page 171 4 Click the Add button. Chapter 4 Maintenance After you click the Add button, the user-defined media name registered in the Media Size List of the Medial Size Options dialog box and the media size are displayed. Chapter 5 Using the Printer...
- Page 172 Printing from Windows Click the OK button to close the dialog box. Note Chapter 1 As soon as you select the name of a media size from Note Basic Use the Media Size List, the Width and Height settings of You can define up to 50 custom sizes for media.
- Page 173 Printing from Windows Selecting a Media Display Series Note You can select a size series for Display Series that will Chapter 1 If oversize is selected in Display Series, Oversize will display for the Page Size and Media Size on the Page...
-
Page 174: Software Provided For Windows
This software is required to print using this printer. Printing by Objective Make sure it is installed on the PC to be used with the printer driver open the Main sheet and then in the lower printer. Many functions can be used in addition to the... -
Page 175: Using The Printer On A Network
Maintenance Remote UI Creating Posters Easily This function displays the printer status using a web browser on a PC on the network, and can set printers PosterArtist Chapter 5 and delete jobs. It is built into the printer network Using the Printer This software can be used to create and print posters interface. -
Page 176: Select The Media Type
Images can also be edited easily if the object driver for clearly and accurately printing diagrams Chapter 2 photographed is dark due to backlight, or red eye and created using AutoCAD, which is CAD software. In Using Various Media moire occur, and the color brightness and contrast can normal printing, picture accuracy may be lost if printing be adjusted. -
Page 177: Before You Begin
Chapter 2 Using Various Media Before You Begin This section describes functions for which advanced knowledge is useful if using this printer driver. Make sure to read this Chapter 3 section before performing printing by objective. Printing by Objective Basic Settings to Meet Your Needs (Print Type) To perform optimal printing, it is necessary to set the color adjustment corresponding to the intended text in advance. -
Page 178: Best For Reproduction Of Scanned Photographs With Color Faithful To The Quality Of
No Correction setting for color matching Chapter 5 *1. The black ink loaded on the printer is photo black ink (BK). Using the Printer *2. The black ink loaded on the printer is matte black ink (MBK). in a Network... - Page 179 Printing from a Macintosh To make the print settings, first open the Main panel of the printer driver, and then in Print Preferences, select the type of printing that you want to perform. Chapter 1 Basic Use Chapter 2 Using Various Media...
- Page 180 Printing from a Macintosh Printer Driver Settings at a Glance (Media Preview) The current printer driver settings details are displayed in preview. To change the manuscript size, print orientation or Chapter 1 paper feed method, the settings details are displayed in preview, so the details can be checked easily.
- Page 181 Printing from a Macintosh When you select the Size tab, the details about the Media Size are displayed. Chapter 1 Basic Use Chapter 2 Using Various Media Chapter 3 Printing by Objective Chapter 4 Maintenance Chapter 5 Using the Printer...
- Page 182 Troubleshooting When the Viewer starts you can visually check the preview display. Chapter 7 Operating the Once you have confirmed that the image layout on the media is correct, you can print from the preview screen. Function Menu Contents Index...
- Page 183 Printing by Objective Enlarging or Reducing Printing to Fit the Size of the Media By setting the size of the media actually loaded for printing, you can automatically enlarge or reduce the print automatically to match the size of the loaded media.
- Page 184 Chapter 5 Using the Printer in a Network Environment Chapter 6 For Page Size on the Finishing (Page Setup for OS 8/9) sheet select the size of the original Troubleshooting created in the software application. Chapter 7 Operating the Function Menu...
- Page 185 Printing from a Macintosh Select Enlarged/Reduced Printing. Chapter 1 Basic Use Chapter 2 Using Various Media Chapter 3 Printing by Objective Chapter 4 Maintenance Chapter 5 Using the Printer in a Network Environment Chapter 6 Troubleshooting Chapter 7 Operating the...
- Page 186 Operating the Function Menu Important If the landscape or portrait orientation of the original page size and the print media are different, part of the image may not print on the media. Contents Check the settings using the paper preview, and then click the Print button.
- Page 187 Printing from a Macintosh Enlarge/Reduce to Fit Roll Paper Width You can enlarge or reduce the entire size of the original so it fits the width of the roll. Chapter 1 Basic Use Chapter 2 Using Various Media Chapter 3...
- Page 188 Chapter 5 Using the Printer in a Network Environment Chapter 6 For Page Size on the Finishing (Page Setup for OS 8/9) sheet select the size of the original Troubleshooting created in the software application. Chapter 7 Operating the Function Menu...
- Page 189 Chapter 6 Under Enlarged/Reduced Printing select Fit Roll Paper Width (Fit Roll Width Size for OS 8/9). Troubleshooting Important If Rotate Page 90 degrees is selected on the Finishing panel, this function cannot be used. Chapter 7 Operating the Function Menu...
- Page 190 Note Chapter 1 If Fit Roll Paper Width (Fit Roll Width Size for OS 8/9) is selected in Enlarged/Reduced Printing, the Media Size Basic Use setting will be changed to the Roll Width Size. Check the value displayed in Roll Paper Width.
- Page 191 Printing from a Macintosh Selecting the Magnification Rate for Printing You can enter the rate of magnification directly if you need to scale the enlargement or reduction for a desired effect. Chapter 1 Basic Use Chapter 2 Using Various Media...
- Page 192 Chapter 5 Using the Printer in a Network Environment Chapter 6 For Page Size on the Finishing (Page Setup for OS 8/9) sheet select the size of the original Troubleshooting created in the software application. Chapter 7 Operating the Function Menu...
- Page 193 Printing from a Macintosh Select Enlarged/Reduced Printing. Chapter 1 Basic Use Chapter 2 Using Various Media Chapter 3 Printing by Objective Chapter 4 Maintenance Chapter 5 Using the Printer in a Network Environment Chapter 6 Troubleshooting Chapter 7 Operating the...
- Page 194 1%. The range of possible ratio settings is displayed to the right of the ratio entry field. Operating the You can do a setting that is larger than the size of the media loaded in the printer, but some portions of the will be cut off Function Menu and not printed.
- Page 195 Normally a printed document has white space around its If a flat cutter has been loaded to the printer in use, the edges (margins), but a borderless print for a photograph or following types of paper cannot be cut, so borderless Chapter 2 created image has no white space at its borders;...
- Page 196 Chapter 2 Using Various Media Important The following page sizes can be set for borderless printing. When creating a document, refer to the following table and Chapter 3 create a document with a size for which borderless printing can be performed.
- Page 197 Chapter 4 Maintenance Chapter 5 Using the Printer in a Network Environment Chapter 6 Open the Finishing (Page Setup for OS 8/9) and then select Enlarged/Reduced Printing and Troubleshooting Borderless Printing. Chapter 7 Operating the Function Menu Contents Index...
- Page 198 When Borderless Printing is selected under the Page Size in the software application, Step 4 are not required. Basic Use When you do this procedure, set the Enlarged/Reduced Printing method as needed for Fit Roll Paper Width. Chapter 2 Using Various Media Chapter 3...
- Page 199 Network Environment Chapter 6 Select the Media Size setting that you want. Troubleshooting Check the content of the settings preview, and then click the Print button. The print job starts. Chapter 7 The print job starts. Operating the Function Menu...
- Page 200 Chapter 4 not be printed. If performing borderless printing to images for which there are blanks at the top and buttom of the print data, combine Maintenance printing with the No Spaces at Top or Buttom function in the Finishing panel sheet for simpler borderless printing than borderless printing with no margins at top, bottom, left, or right.
- Page 201 Chapter 3 Printing by Objective Create the original in the software application so it matches the size of the media used for printing. From the File menu of the software application select Print to display the Print dialog box. Chapter 4 Maintenance Open the Main panel and do the settings for borderless printing.
- Page 202 Chapter 5 Using the Printer in a Network Environment Chapter 6 Troubleshooting Note If Enlarged/Reduced Printing and Borderless Printing have been selected, select Fit Roll Paper Width in Enlarged/Reduced Printing. Chapter 7 Operating the Function Menu Contents Index 3- 85...
- Page 203 Function Menu Note After the print data has been enlarged automatically to fit the roll media width, Scale to fit Roll Paper Width printer Contents driver will enlarge automatically by 3 mm the top, bottom, right, and left edges of the document. Consequently, the margin created by the printer configuration will be covered, and borderless printing will be performed.
-
Page 204: Rotating The Page 90 Degrees For Printing (Conserve Paper)
Rotating the Page 90 Degrees for Printing (Conserve Paper) Chapter 1 If the document to be output vertically on the roll media is vertical, or if the vertical size fits the roll media length, the image Basic Use can be rotated 90 degrees and printed horizontally. By rotating the vertical page, paper can be conserved. - Page 205 Printing from a Macintosh From the File menu of the software application select Print to display the Print dialog box. Chapter 1 Select the Finishing panel. Basic Use Chapter 2 Using Various Media Chapter 3 Printing by Objective Chapter 4...
- Page 206 The print job starts. Chapter 7 Note Operating the To obtain the correct print results, it is recommended to check the print preview screen before printing. For the print Function Menu preview screen display, refer to “Confirming the Print Image (Print Preview)”...
- Page 207 Chapter 3 Printing by Objective From the File menu of the software application select Print to display the Print dialog box. Chapter 4 Select the Layout panel (Page Setup for OS 8/9). Maintenance...
- Page 208 Printing from a Macintosh From the Pages per Sheet (Page Layout Set the Layout Direction (Layout Direction for OS 8/9) list, select the page layout that for OS 8/9) to arrange the pages on the Chapter 1 you want to use for printing.
- Page 209 Chapter 1 Basic Use The print job starts. Note Chapter 2 To obtain the correct print results, it is recommended to Using Various Media check the print preview screen before printing. For the print preview screen display, refer to “Confirming the Print Image (Print Preview)”...
- Page 210 Chapter 1 After the image is enlarged and divided into several dialog box. Basic Use sections, you can print the print the sections and paste them together to assemble one large poster. Select the Page Setup panel. Chapter 2 Using Various Media Note This function is not provided in OS X.
- Page 211 Printing from a Macintosh Select Poster (2x2) from the Page Layout If you do not need to print one of the panels list. of the divided image, click the Pages to Chapter 1 Print checkbox to remove the checkmark for...
-
Page 212: Vertical And Horizontal Banner Printing (Long Prints)
For the easy to print vertical and horizontal banners. print preview screen display, refer to “Confirming the Here we will describe as an example how to take a 250 Print Image (Print Preview)” “Before You Begin”. - Page 213 Printing from a Macintosh Start the software application. Set the Format for (OS 8/9 does not have this setting). Chapter 1 From the File menu select Page Setup to Basic Use open the Page Setup dialog box. Chapter 2 Using Various Media...
- Page 214 Printing from a Macintosh Select Custom Paper Size (Media Design Click the New button (Add for OS 8/9) then for OS 8/9). define the media name and size. Chapter 1 Basic Use Note Here, set the media name to Poster for Sale.
- Page 215 Size dialog box (for OS 8/9, the Media Design dialog box), the custom paper name and size that has been Chapter 2 set will be added to the display. For details of the Using Various Media Custom Paper Size dialog box (for OS 8/9, the Media Design dialog box), refer to“Custom Sizes (User Print...
- Page 216 Chapter 3 Printing by Objective After the original is created, from the File menu select Print to open the Print dialog box. Chapter 4 When the Main panel displays, select Long Format (Banner) for the Print Preferences for the long Maintenance print.
- Page 217 Chapter 7 Operating the Note Function Menu To obtain the correct print results, it is recommended to check the print preview screen before printing. For the print preview screen display, refer to “Confirming the Print Image (Print Preview)” “Before You Begin”.
-
Page 218: Printing Without Top And Bottom Margins (Conserve Paper)
Printing without Top and Bottom Margins (Conserve Paper) Chapter 1 If there are blank areas at the top and bottom of the print data, delete the blank areas before printing. Paper will not feed for Basic Use the blank areas, to conserve paper. This function can be used only if “Roll Media” is selected as the paper feed. - Page 219 Printing from a Macintosh From the File menu of the software application select Print to display the Print dialog box. Chapter 1 Select the Finishing panel. Basic Use Chapter 2 Using Various Media Chapter 3 Printing by Objective Chapter 4...
- Page 220 The print job starts. Chapter 7 Note Operating the To obtain the correct print results, it is recommended to check the print preview screen before printing. For the print Function Menu preview screen display, refer to “Confirming the Print Image (Print Preview)”...
- Page 221 Chapter 1 Customizing Print Quality Basic Use To set the print quality and print sit combinations, select Custom Settings in Print Quality to set the print quality and resolution according to the application, using the Custom Settings dialog box. Chapter 2 Using Various Media From the File menu of the software application select Print to display the Print dialog box.
- Page 222 Chapter 4 Maintenance Chapter 5 Using the Printer in a Network Environment Chapter 6 Troubleshooting Click the Set... button in the Print Quality group to open the Custom Settings dialog box. Chapter 7 Operating the Function Menu Contents Index 3- 105...
- Page 223 Chapter 6 Troubleshooting Important The print quality that can be selected depends on the type of paper set. The Highest print quality can be selected only Chapter 7 if the paper types described below have been set. Operating the...
- Page 224 Operating the Function Menu with photos or graphic data, the resolution of the text will be raised and the resolution of the photos or graphics will be lowered (this function is not available in OS X). Error Diffusion only can be set in Halftoning user settings. The margin of error scatter distributes pixels randomly and is expressed in halftones.
- Page 225 Chapter 1 Adjusting Color Basic Use Basically the color settings of the software application have priority, but if the results of a print job are not want you want you can also adjust color in the printer driver. Chapter 2...
- Page 226 Monochrome Prints in monochrome. Contents Solid Color Printing is limited to colors only. Use to print sharply thinly-colored fine lines. Black Only All colors other than white are printed black. Index 3- 109...
- Page 227 Printing from a Macintosh Important Chapter 1 Monochrome (Photo) can be selected for Color Mode only if one of the following types of paper is selected: Basic Use Glossy Photo Paper/Semi-Glossy Photo Paper/Heavyweight Glossy Photo Paper/Heavyweight SemiGlos Photo Paper/Fine Art Photo/Fine Art Heavyweight Photo/Fine Art Textured/Japanese Paper Washi...
- Page 228 Chapter 3 Printing by Objective Chapter 4 Maintenance Chapter 5 Using the Printer in a Network Confirm that the Color Adjustment panel is displayed, then click the Object Adjustment... button. Environment Chapter 6 Troubleshooting Chapter 7 Operating the Function Menu The Object Adjustment dialog box opens.
- Page 229 Chapter 2 Using Various Media Chapter 3 Printing by Objective Note Note that for this printer driver all the items (Images, Graphics, Text) are selected as the default settings. Chapter 4 Click the button to close the dialog box. Object Adjustment Maintenance Drag the slide bar for the custom settings to the left or right to perform adjustment.
- Page 230 Adjusts grayscale from cool colors (blue tones) to warm colors (red tones). Chapter 5 Using the Printer Important in a Network If changing the panel items, the Preview to the left will be changed. Use Original to restore the default settings. Environment Preview reflects the current settings. Chapter 6 Troubleshooting Click the OK button to close the Color Settings dialog box.
-
Page 231: Color Matching
Printing from a Macintosh Color Matching When you print an image captured with a scanner or a digital camera, sometimes the appearance of the printout does not Chapter 1 match what you see on the screen. Basic Use This is because the colors displayed on-screen and the printed colors are different. Using the Matching panel in the... - Page 232 Monochrome Prints in monochrome. Contents Solid Color Printing is limited to colors only. Use to print sharply thinly-colored fine lines. Black Only All colors other than white are printed black. Index 3- 115...
- Page 233 Printing from a Macintosh Important Chapter 1 Monochrome (Photo) can be selected for Color Mode only if one of the following types of paper is selected: Basic Use Glossy Photo Paper/Semi-Glossy Photo Paper/Heavyweight Glossy Photo Paper/Heavyweight SemiGlos Photo Paper/Fine Art Photo/Fine Art Heavyweight Photo/Fine Art Textured/Japanese Paper Washi...
- Page 234 Printing from a Macintosh The Color Settings dialog box opens. Chapter 1 Basic Use Chapter 2 Using Various Media Chapter 3 Printing by Objective Chapter 4 Maintenance Chapter 5 Using the Printer Select the Matching panel. in a Network Environment...
- Page 235 Driver Correction Calibrates color using the original color profile of the printer driver. Chapter 7 Calibrates the color in the printer driver using the standards of ICC color profiles. If this mode ICC Correction Operating the is selected, specify the input profile and the printer profile.
- Page 236 Graphics and Text (this function is not available in OS X). If you want to do different settings for Graphics and Text, then you must cancel the selection of Use Common Input Profile for All Objects (this function is not available in OS X).
- Page 237 Printing from a Macintosh Click the input profile Matching Method list and select a matching method. Chapter 1 Basic Use Chapter 2 Using Various Media Chapter 3 Printing by Objective Chapter 4 Maintenance Chapter 5 Using the Printer in a Network...
- Page 238 From the Printer Profile Settings list, select a printer profile. Chapter 1 Important Basic Use A print profile can be selected only when ICC Correction or ColorSync is selected under the Mode. Chapter 2 Using Various Media Chapter 3 Printing by Objective...
- Page 239 Basic Use Use this application to create and save unique customized paper. The customized paper sizes can be Chapter 2 selected from the same list as standard paper sizes. Using Various Media Select Page Setup from the File menu. Chapter 3...
- Page 240 Printing from a Macintosh Set the Format for (OS 8/9 does not have Select Custom Paper Size (Media Design this setting). for OS 8/9). Chapter 1 Basic Use Chapter 2 Using Various Media Chapter 3 Printing by Objective Chapter 4...
- Page 241 Click the OK button to close the dialog box. in a Network Environment Note Chapter 6 If you are using OS 8/9 you are allowed to store up to a Troubleshooting maximum of 5 custom settings. The settings in the Custom Paper Size dialog box Chapter 7...
- Page 242 Printing from a Macintosh Selecting a Media Display Series You can select a Display Series that will display for the Chapter 1 Page Size on the Page Setup panel and for Media Size Basic Use in the Print dialog box.
-
Page 243: When The Printout Quality Is Not Clean
Basic Use Paper settings such as ink drying time, etc., can be made using the panel on the printer. Some of these settings can be changed using the Media Detailed Settings dialog box in the printer driver. If clean printing cannot be performed, make Chapter 2 printing adjustment using this dialog box. -
Page 244: Printing From A Macintosh
This software is required to print using this printer. Printing by Objective to the printer in advance. Make sure it is installed on the PC to be used with the printer. Many functions can be used in addition to the Printing Beautiful Digital Camera Images... -
Page 245: Printer Maintenance
(→ Media Configuration Tool Guide) Important Chapter 5 If using the Remote UI with Mac OS 8.6/9.x, open Using the Printer TCP/IP on the Control Panel and make sure that in a Network Ethernet is selected for the Connect via. - Page 246 Using Various Media Ink Tank Handling Precautions ................4-4 Replacing an Ink Tank ................... 4-5 Cautions About Using Refilled Ink Tanks for This Printer ......4-8 Switching Off Ink Level Detection ................4-8 Chapter 3 Executing a Print Job ..................... 4-9 Printing by Objective Cleaning the Printer ..................4-10...
-
Page 247: Replacing Ink Tanks
How to Confirm Ink Levels appears on the operation panel display or on the printer driver screen to tell you that it is time to replace the ink tank. You can confirm the ink level at any time by checking the... -
Page 248: When To Replace An Ink Tank
Using Various Media During printing, the right back cover is locked and the You can check the ink level at any time (during a print job ink tanks cannot be replaced. or while an error is displayed) by pressing the If you pause the printer during printing to replace an Information button. -
Page 249: Ink Tank Handling Precautions
Maintenance to side 7 or 8 times before breaking the seal. If you do If ink has run out in more than one ink tank at the same not shake the ink tank, the ink may sediment, causing time, a message is displayed for each color that is out reduced printing quality. -
Page 250: Replacing An Ink Tank
Caution Using Various Media Always confirm that the replacement black ink tank is the same type as the tank that is installed in the printer. The ink level is shown in the display; a flashing color Chapter 3 means that the ink tank of that color must be... - Page 251 Always confirm that the replacement black ink tank is and right side of the ink tank, then remove it. the same type as the tank that is installed in the printer. Chapter 4 If you mix up the photo black ink tank and matte black Maintenance ink tank, print quality will be reduced.
- Page 252 Important Maintenance The ink tanks are shaped so that the cover will not close if you install the wrong color ink tank. If the ink Important tank cover does not close, confirm that the color label If an ink tank has not been installed, EXXXX (error Chapter 5 on the holder matches the color of the ink tank.
-
Page 253: Switching Off Ink Level Detection
Chapter 2 Press the Online button to display MAIN Using Various Media If you use a refilled ink tank, the ink level detection function MENU. will no longer function correctly. The printer will detect ink out and print operation will halt. Before you can use tanks... -
Page 254: Executing A Print Job
Chapter 2 a print job from the computer. To continue with the print job, Using Various Media press the Online button on the printer operation panel. -
Page 255: Cleaning The Printer
Chapter 3 you see Shut Down.. in the printer operation Printing by Objective When you clean the printer, always turn the printer off panel display then release the button. and unplug the power cord from the power supply. If Information Power... -
Page 256: Cleaning Inside The Top Cover
Cleaning Inside the Top Cover completely, and then use it to clean the Chapter 1 To get the best results out of your printer, clean the printer printer exterior surfaces, paper feed slot (a), Basic Use when the printed surface or the back of the paper becomes and power cord plug. - Page 257 Open the top cover. Chapter 4 Maintenance Chapter 5 Note Using the Printer If the cleaner brush is dirty, wash it in water. in a Network Environment Chapter 6 Troubleshooting Important Do not touch any areas other than as directed. Doing...
- Page 258 Chapter 5 Using the Printer in a Network Important Environment Never wipe the areas inside the top cover with a dry Chapter 6 cloth. This could create static electricity that attracts Troubleshooting dust and dirt and that can lower print quality.
-
Page 259: Maintenance Cartridge Mc
Shaft cleaner (a) is enclosed in the box of maintenance B, moving the printer, or performing an operation that that cartridge. uses a large amount of ink. Replace the maintenance cartridge as soon as possible if the remaining space is low. Chapter 4 Maintenance Displaying Using the Information Button... - Page 260 When the maintenance cartridge becomes full of ink, a Replace MT-Cart. message is displayed, and if printing message is displayed in the printer driver and on the printer is in progress, the current print job is paused. If this Chapter 2...
-
Page 261: Replacing The Maintenance Cartridge
Replacing the Maintenance Cartridge To avoid ink spills from a maintenance cartridge that is full of ink, never drop it and always lay it flat (never at an angle). Spilled ink can stain the surrounding area. Look at the printer display and make sure... - Page 262 Caution Always store used maintenance cartridges in a safe Chapter 5 Using the Printer location out of the reach of children. If a child licks or in a Network ingests ink accidentally, seek medical assistance Environment immediately.
- Page 263 Note in a Network The maintenance cartridge can also be replaced when Environment the printer is switched off. In this case, do not attempt Chapter 6 to remove the maintenance cartridge for at least 5 Troubleshooting seconds after you switch the printer on again.
- Page 264 Replacing the Maintenance Cartridge Replacing the Shaft Cleaner Important Chapter 1 Press the Online button to display Offline. Do not touch any areas other than as directed. Doing Basic Use so may stain your hands or cause the printer to Information Power malfunction.
- Page 265 Install the new shaft cleaner into the carriage by holding the tab on the new shaft cleaner. Chapter 1 Basic Use Push in the shaft cleaner until you hear it click. Chapter 2 Using Various Media Chapter 3 Printing by Objective...
-
Page 266: Printhead Bc
Chapter 2 can easily stain your hands during printhead replacement, Using Various Media so wear the plastic gloves provided in the box with the new Important printhead. Try to avoid dropping or shaking the printhead. Spilled... -
Page 267: How To Replace The Printhead
To replace the printhead, execute Replace P.head on the Basic Use Maintenance menu then follow the directions given by the MAIN MENU Head Cleaning messages on the printer display. Load a roll or cut sheets of Cleaning (3 sec.) Stop/Eject (1 sec.) - Page 268 Pull the printhead fixer lever completely Chapter 4 forward to open it. Important Maintenance Do not touch any areas other than as directed. Doing so may stain your hands or cause the printer to malfunction. Chapter 5 Using the Printer...
- Page 269 Chapter 3 Printing by Objective Press and hold down the knobs (h) on both Chapter 4 sides of the safety cap 2 (g) on the new Maintenance Caution printhead, and then pull the cap down to If you are going to replace the printhead immediately remove it.
- Page 270 The inside surface protective cap 2 (g) is covered with Basic Use ink to protect the nozzles. Do not touch this area of the Handle the printhead carefully so that the nozzles do cap or drop it. Doing so may stain the surrounding...
- Page 271 Using Various Media printhead automatically. (→ P.4-41) The printhead adjustment cannot proceed if the loaded roll paper or cut sheets are not at least A3 size or Chapter 3 larger. Printhead adjustment continues as soon as the Printing by Objective media is loaded.
-
Page 272: Replacing The Cutter Blade
Stop/Eject twice for each blade. Once the cutting position adjustment (1 sec.) Online in a Network Environment dial is set to 3, replace the blade with a new one. Chapter 6 Cutter Blade CT-02 Troubleshooting Press [ ] or [... - Page 273 Replacing the Cutter Blade Press [ ] or [ ] to select Yes, then press OK If the cutter blade or the carriage is dirty, wring out a damp, clean cloth and use it to clean the cutter blade button. Chapter 1...
- Page 274 The position adjustment dial has 3 positions that can Maintenance be adjusted; the blade cab be used at three steps (1, 2, 3). If the dial is returned to a position, the blade can Chapter 5 no longer be used.
- Page 275 ] to display System Setup Replacing Optional Cutter Blades then press [ Chapter 1 (Round Cutters) Basic Use MAIN MENU Follow the procedure below to replace a cutter blade that ↓ System Setup no longer cuts cleanly. Chapter 2 Press [ ] or [...
- Page 276 Maintenance If the cutter unit is dirty, wring out a damp, clean cloth rotate it to the right to lock. and use it to clean the cutter unit before replacing the cutter blade.
- Page 277 Basic Use Chapter 2 Using Various Media Chapter 3 Printing by Objective Please Wait.. appears in the bottom line of the display. After the carriage has moved, the Reset Cut Count message is displayed. Chapter 4 Maintenance Press the OK button.
-
Page 278: Moving The Printer
Chapter 3 Important Printing by Objective If you cannot avoid tilting or standing the printer on end After a few moments, Online appears in the display. when you are moving it, please contact the dealer where you purchased the printer or the nearest service... - Page 279 Store the removed tanks with the ink supply ports Basic Use Move Printer facing up (a). If the ink tanks are stored with the ink supply ports (a) facing down, ink may leak out. Chapter 2 Open RightCover is displayed.
- Page 280 Printing by Objective Important Clamp the belt with the belt stopper then use Chapter 4 Do not touch any areas other than as indicated. Doing the hex screws to fasten the belt stopper. Maintenance so may damage the printer. Rewind the roll media back onto the roll and...
- Page 281 Moving the Printer Close the top cover. Reattach the tapes and shipping materials to the roll holder and printer, then pack them in Chapter 1 the original shipping box. Basic Use This completes the preparation for moving the printer. Chapter 2...
-
Page 282: Confirming The Print Condition
Nozzle Check to determine MENU. whether the nozzles are blocked. Before you print a Nozzle Chapter 2 Check, make sure roll media or cut sheets of A3 size or Using Various Media MAIN MENU Head Cleaning wider are loaded in the printer. - Page 283 Confirming the Print Condition If there are no breaks in the horizontal lines of each color, the nozzle check pattern is normal. Chapter 1 • Sample: Printhead Normal Basic Use Chapter 2 Using Various Media Chapter 3 Printing by Objective •...
-
Page 284: Cleaning The Printhead
The default setting is 10 Pages. three times. If the printer operation does not recover after running Cleaning B, the printhead may have reached the end of its service life. Call for service or contact the dealer Chapter 4 Types of Printhead Cleaning where you purchased the printer. - Page 285 Network Printhead cleaning starts. When printhead cleaning Environment is finished, the printer returns Online. Chapter 6 Troubleshooting Print the nozzle check pattern to check if the printing has improved. ( P.4-37) → Chapter 7 Operating the Function Menu...
-
Page 286: Aligning Printhead Procedure
Information Power Chapter 3 Data Message If printed vertical lines are bent, or if colors are faded and Printing by Objective Cleaning (3 sec.) Stop/Eject uneven, adjust the printhead position. The printer will print the (1 sec.) - Page 287 OK button. Chapter 4 Maintenance Advanced Adj. Chapter 5 The printer will adjust the position of the printhead Using the Printer automatically as it reads the pattern used to adjust in a Network the position of the printhead.
-
Page 288: Adjusting The Amount Of Media Feed
Use the following procedure to run the Adjust Band Message Printing by Objective Cleaning (3 sec.) function to adjust the amount of media feed if you see white Stop/Eject (1 sec.) Online Offline lines or dark color lines in your printed images. The printer... -
Page 289: Adjusting Media Feed Manually
Chapter 1 If horizontal lines or bands appear in printouts, the amount Basic Use Adjust Printer of media feed can be manually fine tuned to be either ↓ Adjust Band greater or smaller. Follow the procedure below to make the Chapter 2 adjustment manually. - Page 290 OK Chapter 1 button. Basic Use If you want to increase the gap between the bands, enter a number from 1 to 3. Chapter 2 If you want to reduce the gap between the bands, Using Various Media enter a number from -1 to -3.
-
Page 291: Reducing The Amount Of Cutting Dust
Reducing the Amount of Cutting Dust Chapter 1 Basic Use When you are using a media like backlight film that creates If the printer power is off, press the Power a large amount of cutting dust, you can activate the cutter button to switch the printer on. - Page 292 Using Various Media setting, and then press the OK button. Select On to activate the cutter dust reduction Chapter 3 function for the selected media type, or select Off to Printing by Objective deactivate the function for the media type. CutDustReduct.
- Page 293 When you execute ChangeBkInkType, the printer Chapter 2 details about the types of black ink, refer to “The Suitable consumes about 55 ml of black ink and about 15 ml of Using Various Media Black Ink for Media”. (→ P.2-2) the colored inks in total.
- Page 294 RightCover message is displayed. Operating the Function Menu Important If the Not Enough Ink error message is displayed, replace the drained ink tank with a new one. Contents Place each ink tank in a plastic bag and seal it. Index 4- 49...
- Page 295 Important The ink tanks are shaped so that the cover will not Important close if you the ink tank in the wrong holder. If the ink Chapter 7 Always hold the ink tank by the left and right grips (b)
- Page 296 Network Environment Adjusts the printhead. ( P.4-41) → Chapter 6 The name of the ink tank type you just installed is Troubleshooting displayed. Important If you change the type of black ink frequently, the black Chapter 7 ink may not print clearly. If that happens, perform Operating the Cleaning B.
-
Page 297: Using The Printer
Chapter 5 Using the Printer in a Network Environment Chapter 1 You can print the items that have been checked. Basic Use Before Using the Printer ................5-2 System Requirements ................... 5-2 Chapter 2 The Network Environment ..................5-3 Using Various Media TCP/IP Network Settings (Windows, Macintosh, UNIX) ......5-5... -
Page 298: Chapter
• Windows Me, Windows 98 Required Memory Chapter 7 • Mac OS 8.6 or later • 24 MB or more for Mac OS 8.6, 32 MB or more for Operating the • Mac OS X ver 10.1 or later Mac OS 9.x Function Menu •... -
Page 299: The Network Environment
Operating the Windows Server 2003/ Windows XP/ Windows 2000/ Function Menu Windows NT computer on the network is setup as a print server, higher printing efficiency can be obtained by sending the print jobs from each computer to the print... - Page 300 Macintosh Network Examples Note For Macintosh computers, the AppleTalk (EtherTalk) or Chapter 1 TCP/IP, or Zeroconf (Mac OS X Ver. 10.2.5 or later) In a network environment that has a NetWare server, Basic Use protocols can be used. (→ P.5-20) the TCP/IP or AppleTalk protocols can be used concurrently.
-
Page 301: Connecting The Lan Cable
Network guide. There is no printer driver for UNIX. Chapter 3 Printing by Objective The following is a summary of the procedures required to → Configuring TCP/IP Protocol Settings P.5-15 set the printer for use on a TCP/IP network. - Page 302 If you are using the printer connected to a network, Comm.Mode, and then press the [ ] button. Chapter 2 check that the LINK lamp (a) lights up after you turn 7. Press [ ] or [ ] to select Half Duplex or Full Using Various Media the printer on.
-
Page 303: Important
Make the perform the printer network settings. Chapter 2 settings in one of the following ways. Use the method that is Installing the GARO Device Setup Utility Using Various Media easiest for you. - Page 304 Chapter 5 Setup Utility. Using the Printer in a Network Environment Chapter 6 Select the name of the printer you want to Troubleshooting setup from the list of printer names, then select Protocol Settings from the Printer menu. Chapter 7...
- Page 305 Chapter 1 click the Set button. Basic Use To configure the IP address automatically, select Auto from Setting IP Address, and then place a Chapter 2 checkmark next to method to use (choose between Using Various Media DHCP, BOOTP, or RARP). To configure a static IP When you have finished configuring the address, select Manual from Setting IP Adress.
-
Page 306: Ping Command
Press [ ] or [ ] to select Test Print then Chapter 3 To find the MAC address using the Status Print, use the press [ Printing by Objective following procedure to print the status print. Load roll media of A3 size or greater before printing. - Page 307 TCP/IP Network Settings (Windows, Macintosh, UNIX) トップ Setting the IP Address The MAC address is printed in the Status Print at the location indicated in the sample below. Chapter 1 If you are using a Windows computer, open Basic Use an MS-DOS prompt or a command prompt.
-
Page 308: Printer
Press [ ] or [ ] to select Interface Setup then press [ Chapter 5 Note Using the Printer The “l” of the “-l” entry is an alphabetic lower case “l” in a Network MAIN MENU Environment (el). ↓ Interface Setup... - Page 309 OK button. Each time you press the [ ] button the number Chapter 5 increases by 1. The next number after 255 is 0. Each time you press the [ ] button the number Using the Printer increases by 1.
- Page 310 IP address of the default gateway, then Important press OK button. Chapter 5 If you change the IP address, subnet mask, or default Each time you press the [ ] button the number Using the Printer gateway, make sure you save the settings using Step increases by 1.
-
Page 311: Configuring Tcp/Ip Protocol Settings
When Remote UI is started using the printer name, Basic Use interface of this printer, allows you to use a Web browser on make sure that the DNS settings in the DNS your computer to monitor the status of the printer and... - Page 312 Note Using the Printer in a Network protocol. If a password has been setup on the printer, enter the Environment password and then press the Logon button. If a Chapter 6 password has not been setup, you do not need to Troubleshooting enter a password.
- Page 313 BOOTP, and RARP, a check is performed to see which of DHCP, BOOTP, and RARP is available when the Chapter 2 printer is turned on or reset, and the IP address is Using Various Media allocated using first available method. If you clear the checkmark from Use DHCP, Use BOOTP, or Use RARP, that particular method will not be checked.
-
Page 314: Configuring The Printer For Sharing
The network printer can be managed efficiently by setting Basic Use up a Windows Server 2003, Windows XP, Windows 2000, or Windows NT 4.0 computer on the network as a print Chapter 2 server using the following procedure. If you setup a printer Using Various Media server, print jobs are managed by the print server. - Page 315 Chapter 7 Operating the Function Menu Important If you are using Windows NT 4.0, Service Pack 6 or Contents later will need to be installed on the computer in order to use the alternative drivers function. This completes the printer sharing settings.
-
Page 316: Macintosh Network Settings
P.5-5 Troubleshooting interface board, select the port name. Connect the LAN port in the printer to the hub using a If you are using Mac OS 8.6/9.x, the printer can be network cable. used over the IP Print network. IP Print uses the TCP/ →... -
Page 317: Configuring A Macintosh
Macintosh Network Settings トップ If you are using Mac OS X v10.1, the printer can be Configuring a Macintosh used over the “Canon IP (GARO)” network. Canon IP Chapter 1 (GARO) uses the TCP/IP protocol. If the TCP/IP Setting the AppleTalk Network Functions... - Page 318 Chapter 3 Printing by Objective Make AppleTalk Active is selected. Close AppleTalk to save the setting. If this item is not checked, select it and then click the Apply Now button. Chapter 4 This completes the AppleTalk network settings for a Maintenance Macintosh.
- Page 319 TCP/IP network settings. Chapter 3 Important Printing by Objective If a static IP address has already been allocated to the Macintosh computer you are using, you can keep using the current settings. No further configuration is Chapter 4 required.
- Page 320 To connect to the printer using the Zeroconf function, Using Various Media the printer and computer need to be connected to the same network segment. It is not possible to connect to a printer on another network via a router using Chapter 3 Zeroconf.
-
Page 321: Configuring The Appletalk Protocol
Maintenance (→ P.5-25) Enable JavaScript and Cookies in the web browser. If multiple remote UIs are run at the same time, the last Printer Operation Panel ( → P.5-30) setting made will be used. It is recommended that you... - Page 322 Chapter 3 Printing by Objective Chapter 4 Maintenance The Network page appears. If you are using the Zeroconf function in MacOS X or Chapter 5 IP Print (Auto) in MacOS 8.6/9.x to connect to the Using the Printer in a Network...
- Page 323 OS 8.6/9.x) or the name displayed in Print Setup Utility (Print Center) (Mac OS X). Chapter 7 Important Operating the If more than one printer is in the same zone, be sure to Function Menu assign a unique name to each printer. Note Contents The initial (default) network phase Name is “Canon NB...
- Page 324 If a zone has been setup on the network, enter the name of zone where the printer Chapter 2 Using Various Media belongs. If no zones have been setup, then leave the asterisk “*” entry (default zone) as it is. Chapter 3 Printing by Objective Important...
- Page 325 Environment This completes the protocol settings for the printer. Chapter 6 Troubleshooting Enter the name of the printer on the network into the Multicast DNS Service Name box. Chapter 7 Operating the Enter the printer name displayed in Chooser ( Mac Function Menu OS 8.6/9.x) or the name displayed in Print Center...
-
Page 326: Operation Panel
Configuring the Printer Using the Printer Press the Online button. Operation Panel Chapter 1 Interface Setup Basic Use You can use the printer operation panel to configure the ↓ AppleTalk AppleTalk protocol. Press the OK button. Chapter 2 Press the Online button to display MAIN... -
Page 327: Install The Printer Driver
Chapter 6 the printer. The connection can be set to AppleTalk, Troubleshooting Canon IP (GARO), or the Zeroconf function. If the name of the printer is not in the Printer Chapter 7 List, click the Add icon. Operating the Function Menu... - Page 328 From the connection destination menu, select AppleTalk, Canon IP (GARO), or Chapter 1 Zeroconf for the network connection, select Basic Use the name of the printer from the displayed list, then click the Add button. Chapter 2 Using Various Media Chapter 3...
- Page 329 Network use the printer. Environment → Connecting the LAN Cable P.5-5 Chapter 6 Connect the LAN port of the printer to the hub using a Troubleshooting network cable. → Setting the Printer Frame Type P.5-34 Chapter 7 Set the printer frame type. Use the following software...
-
Page 330: Setting The Printer Frame Type
Setting the Printer Frame Type Setup Utility Chapter 1 The printer frame type must be setup so that the computer Basic Use If you are using a Windows computer, use the “GARO you are using and the printer can communicate before you Device Setup Utility”... - Page 331 Cleaning (3 sec.) Environment Stop/Eject Note (1 sec.) Online The IP address needs to be configured here so that Chapter 6 you can configure the printer protocol settings using a Troubleshooting web browser (Remote UI). Press [ ] or [...
- Page 332 Troubleshooting Press the OK button. The available frame type selections are Auto Detect, Ethernet 2, Ethernet 802.2, Ethernet 802.3 If you want to abort the setting, press Stop/Eject Chapter 7 and Ethernet SNAP. button for one second or more. Operating the...
-
Page 333: Types Of Print Services
With NetWare 5.1J/6.0, NDPS can also be used as the print service. If using NDPS, use the Novell printer gateway, which is bundled with NetWare. This manual Contents does not explain how to setup NDPS, so refer to the NetWare manual. Index 5- 37... - Page 334 Using Various Media note down the printer name. Log into NetWare as the System If you are performing a quick setup, the printer is Administrator, or as a user with equivalent allocated printer number 0. If you are using queue access rights, then start NWADMIN.
- Page 335 Note If using queue server mode, select Other/ Chapter 1 The step to use the NetWare file server as the print Basic Use Unknown in Type. If you are using remote server is not required if you intend to use Queue printer mode, set Printer Type to Parallel, and Server Mode.
-
Page 336: Setting Netware Protocol
Enable the JavaScript and Cookies settings in the web Environment browser. Chapter 6 If multiple remote UIs are run at the same time, the last Troubleshooting setting to be made will be used. It is recommended Remote UI starts. that you only run one remote UI at a time. - Page 337 If you intend to use burst mode, set NCP Chapter 6 Burst Mode to On. Troubleshooting Note Chapter 7 Burst mode is used in queue server mode to transfer Operating the data rapidly at very high speed during printing. Function Menu Normally, leave this setting on. Contents The Edit NetWare Protocol Settings page appears.
- Page 338 Basic Use Note Bindery PServer Selected: Queue Server Mode Only one of the services selected here will be enabled. (Using a Bindery Print Server) Multiple services cannot be enabled at the same time. Enter the file server name into File Server Chapter 2 Name.
- Page 339 Chapter 1 Enter the Tree Name and Context Name for Basic Use the tree and context name of the print server. Enter a context name of up to 255 characters. Chapter 2 For Print Server Name, enter the name of the...
-
Page 340: Configuring The Computer For Netware
Install the NetWare client software on all computers that Using Various Media will perform printing, and the log onto either the NetWare server or the tree. Refer to the NetWare manual or the Chapter 3 OS manual for the connection methods. -
Page 341: Printing With Unix
Basic Use If you are using a filter, select the filter. Using LPD to Print If there is no filter for the printer, you can temporarily Chapter 2 This section describes printing with LPD. select any filter, shut down the Printer Configuration Using Various Media Utility, and then change the postscript.cfg file in the... -
Page 342: Using Ftp To Print
Using FTP to Print Chapter 1 Basic Use Start the MS-DOS prompt or command prompt. Chapter 2 If you are using UNIX, open the console screen. Using Various Media Execute the following commands. Chapter 3 ftp <Printer IP Address> Printing by Objective Enter any user name. -
Page 343: Default Settings
Chapter 1 Basic Use Follow the procedure below to use the Web browser From the Device Manager menu on the left, (Remote UI) to restore all the network settings to the factory select Network. default settings. Chapter 2 Click the Reset to Default Settings button. -
Page 344: List Of Network Settings
トップ List of Network Settings Chapter 1 Basic Use TCP/IP Settings If you are using a web browser (Remote UI), you can change the network interface settings. The settings that can be changed are described below. Chapter 2 Item Content... -
Page 345: Netware Settings
The names of the printers server of the NetWare print Blank Canon Name in a Network displayed in the Chooser or server. (Range: 0 to 47 chars.) Name NB-15FB Environment printer utility (Printer Center) (xxxxxx) The name of the NetWare (Name length: 1 to 31 chars.) - Page 346 Print Server print server in use. Blank Name (Range: 0 to 47 chars.) Chapter 2 The number used for the printer Using Various Media Printer Number connection to the NetWare print server. (Range: 0 to 15) NDS PServer Chapter 3...
-
Page 347: Software Applications Used To Configure Network Settings
Environment (→ P.5-40) Chapter 6 *1. Only the following can be set: 1 IP address, subnet mask, default gateway, DHCP, BOOTP, and RARP. Troubleshooting *2. Only the following can be set: phase. *3. Only the following can be set: frame type. - Page 348 Chapter 6 Troubleshooting Chapter 1 You can print the items that have been checked. Basic Use Message Is Displayed ................6-2 Operation Panel Message List ................6-3 Chapter 2 Media Messages ....................6-4 Using Various Media Ink Messages ...................... 6-11 Other Messages ....................6-14 When You Cannot Print ................6-19...
-
Page 349: Message Is Displayed
Environment The printer status cannot be displayed with a USB connection to Mac OS X. Chapter 6 If the GARO Status Monitor is not installed on Windows, look at the message on the printer operation panel. Troubleshooting Chapter 7 Operating the... -
Page 350: Operation Panel Message List
RightCover / Close CRG Cover Chapter 2 Using Various Media Remove RollMedia Rep. Ink Tank Reset Lever Check Head Hght L/M/H → L/M/H End of Roll No Bk/PC/C/PM/M/Y Ink Tank RllMed.Shortage Replace RllMed Check Bk/PC/C/PM/M/Y Ink Tank Turn Power Off!! -
Page 351: Media Messages
1. Open the top cover. Maintenance 2. Lift the release lever, and remove the roll Solution 1: Load roll media of the type and size specified to media. the printer using the next step. (→ P.2-28) 3. Lower the release lever. - Page 352 Using Various Media Chapter 3 Printing by Objective Solution 1: Do the procedure below to load the same size and type of roll media in use. (→ P.2-28) Solution 1: Load new roll media to the printer using the 1. Load size and type of roll in use.
- Page 353 Using Various Media Chapter 3 Printing by Objective Solution 1: Load cut sheets of the type and size specified Solution 1: Perform the procedure described below to to the printer using the next step. (→ P.2-38) remove the sheets. (→ P.2-42) Chapter 4 1.
-
Page 354: Glossy Photo Paper
Cause 1: The media type specified by the printer does not match Basic Use while a cut sheet was loaded. the set value for the media in the media feed source. The specified Chapter 2 media type Using Various Media... - Page 355 Cause 1: The printer received data that cannot be used Basic Use for borderless printing. Solution 1: Load 10", 14", 16", JIS B2, or ARCH24 roll paper. Solution 1: Use the following procedure to correct the Chapter 2 Media Type setting on the printer.
- Page 356 The printer interior is dusty or dirty. 1. Open the top cover. 2. Press the release lever to the rear to open. Solution 1: Open the top cover and clean inside the printer. Chapter 5 3. Align the right edge of the roll media so that (→...
- Page 357 Media size smaller than the required size was set for printing the print pattern or the nozzle check pattern. Cause 1: The printer is waiting for the ink to dry on the Chapter 5 Solution 1: Load A3 size media or larger for printing.
-
Page 358: Ink Messages
Chapter 3 Printing by Objective Chapter 4 Solution 1: Obtain a new ink tank. If a long print job is in Maintenance progress, or if you need to print a job of many sheets, you should replace the ink tank with a Solution1 Install correctly the ink tank named in the new one. - Page 359 Using Various Media Chapter 3 Printing by Objective Solution 1: Install correctly the ink tank of the color named Solution 1: Replace the ink tank where the ink level is low. in the message. (→ P.4-2) Chapter 4 (→ P.4-2)
- Page 360 The type of black ink is unsuitable for the Solution 1: Install a maintenance cartridge. (→ P.4-14) Printing by Objective loaded paper. Solution 1: Check whether the black ink setting in the Check MT-Cart. Chapter 4 printer driver is correct.
-
Page 361: Other Messages
Chapter 1 Cause 1: The current height of the printhead (displayed Basic Use at the left end of the bottom display line) is not Close UpperCover / Close RightCover / Close the appropriate height (displayed at the right CRG Cover... - Page 362 ON the printer again. (→ P.6-37) Contents Cause 3: The printer has malfunctioned. Solution 1: Turn OFF the printer, wait for 3 seconds min., and then turn ON the printer again. Index 6- 15...
- Page 363 Cause 2: Printhead abnormal. Cause1 The printhead has malfunctioned. Solution 1: Open the top cover. If the carriage is out, Solution 1: Turn OFF the printer, wait for 3 seconds min., Chapter 3 replace the printhead. (→ P.4-21) and then turn ON the printer again.
- Page 364 Printer ink mist processing limit has been Basic Use exceeded. Solution 1: Open the top cover and make sure a foreign object has not fallen into the printer. Solution 1: Write the message displayed on the top line of Chapter 2 the printer display on a memo, and then turn Solution 2: Turn OFF the printer, wait for 3 seconds min.,...
- Page 365 The optional cutter unit is broken. Solution 1: Set the correct settings for the IP address, Chapter 3 Solution 1: Write the message displayed on the top line of Printing by Objective subnet mask and default gateway. For more the printer display on a memo, and then turn...
-
Page 366: When You Cannot Print
When You Cannot Print When You Cannot Print Chapter 1 Basic Use Check the following items when the printer does not operate and will not print. Printing Does Not Start Printing Halts During Print Job Cannot Print on a Network... - Page 367 When You Cannot Print Solution 2: If you are using Mac OS 8/9, make sure that the Solution 1: For Windows: correct name of the printer is selected with the 1. In the Printers folder, double-click the icon Chapter 1 Chooser, and then try again.
- Page 368 Solution1 Remove the jammed sheet. (→ P.6-37) Cause 2: Printer is offline. Cause 3: With Mac OS 8/9, the printer is shared via USB. Chapter 4 Maintenance Solution 1: After correcting the problem in response to the Solution 1: Connect the printer directly to the computer to...
-
Page 369: Printing Halts During Print Job
Printing Halts During Print Job is not selected. Chapter 1 Basic Use Solution 1: Use the printer operation panel to select the Error message is displayed. correct setting for the media type. (→ P.2-34) Cause 1: An error message is displayed during printing. -
Page 370: Cannot Print On A Network
A blank page is ejected from the previous print Basic Use job. Cannot print for a TCP/IP network. Solution 1: The print job starts after the blank page is Cause 1: The printer LAN port and cable are not Chapter 2 ejected. - Page 371 Available)”, and then click the OK button. name of the file to the printer. If the name of the 5. Return to the Network page of Remote UI job is more than 255 characters, however, LPR and click the Reset button.
- Page 372 Chapter 1 is selected for connection to the correct port Basic Use Solution 1: If the number of routers are exceeded with the for the Connective Via. Zeroconf function, the computer cannot connect to the printer if it is on a different Chapter 2 network.
- Page 373 The printer LAN port and cable are not a checkmark. Basic Use connected correctly. Solution 1: Confirm that the connection of the cable that Chapter 2 connects the printer to the network is secure, Using Various Media then press the Power button to cycle the printer off and on again.
- Page 374 Solution 1: When data is sent from NetWare to the printer, then select the printer name. the data is sent in the NCP path mode, but in Solution 3: If you want to use the IP Print (Auto) function, some network environments data sent to a Chapter 5 use Mac OS 9.0.4 or later.
-
Page 375: Unexpected Printing Results
Unexpected Printing Results Unexpected Printing Results Chapter 1 Basic Use If the results you see in the print job are not what you expect, check the items described below. Chapter 2 Print quality trouble Abnormal Content Other Problems Using Various Media... -
Page 376: Print Quality Trouble
Cleaning B. (→ P.4-39) Chapter 2 Using Various Media Solution 1: Check the front and back side of the media. If Cause 6: A piece of jammed sheet remains under the top you print on the other side of the media, you will cover. - Page 377 Solution 1: Check the paper feed source named in the Solution 1: Clean the part of the platen under the top cover. Chapter 2 message. If the paper is not the same as that (→...
- Page 378 Cause 1: Standard is selected for Print Quality. Solution 1: Clean the part of the platen under the top cover. Solution 1: In the printer driver, select High or Highest for Chapter 2 (→...
-
Page 379: Abnormal Content
Chapter 1 Cause 1: Band Joint is selected. Basic Use Broken lines are visible Solution 1: If you want to match size the media feed direction correctly, select Print Length for the Cause 1: Printhead is out of alignment. Chapter 2... - Page 380 Color tones uneven Cause 5: Yellow ink is smearing. Chapter 1 Solution 1: You may be able to correct the smearing of the Cause 1: The printer driver is not performing color Basic Use yellow ink, select Med. Detail Set. → Correct adjustment.
- Page 381 (2). Using Various Media 1. Press the Online button to display MAIN Note MENU. If thick colors need to be adjusted, adjust the Y, M, C, 2. Press [ ] or [ ] to select Adjust Printer, Chapter 3 and K inks.
-
Page 382: Other Problems
Cause 1: The power cord was unplugged with the printer Troubleshooting Solution 1: The first time the printer used after it is set up or power on. moved to a new location, the ink level display Solution 1: Wait three minutes with the power cord... - Page 383 Unexpected Printing Results Roll media cannot be loaded. Chapter 1 Cause 1: You are trying to load a Tracing Paper roll or Basic Use Translucent Matte Film with the roll media remaining detection function enabled. Chapter 2 Solution 1: First, switch off the roll media remaining Using Various Media detection function, then load the roll paper.
-
Page 384: Removing Media Jams
Removing Media Jams Chapter 1 Basic Use The printer stops and a Media Jam or Turn Power Off!! Removing a Roll Media Jam message appears on the printer display as soon as a jam occurs. When a jam occurs, follow the next procedure to Follow the procedure below to remove a roll media jam. - Page 385 Chapter 7 Operating the Function Menu Contents Important Be sure to push the carriage to the right. If you push it to the left, the printer will display a carriage error after the printer is switched on. Index 6- 38...
- Page 386 The roll media may not Chapter 6 feed out straight in some cases. Troubleshooting If you pull too much of the roll media out, more of the leading sheet than is needed will be cut. Chapter 7 Close the top cover.
-
Page 387: Removing A Cut Sheet Jam
Removing Media Jams Lift the release lever. Removing a Cut Sheet Jam Chapter 1 Follow the procedure below to remove a cut sheet jam that Basic Use occurs during printing. Chapter 2 Press and hold the Power button for over 1... - Page 388 Troubleshooting Chapter 7 Operating the Function Menu Important Make sure you push the carriage to the right. If you Contents push it to the left, the printer will display a carriage error when the printer is switched on. Index 6- 41...
- Page 389 Removing Media Jams Lower the release lever, and then close the top cover. Chapter 1 Basic Use Chapter 2 Using Various Media Chapter 3 Printing by Objective Cut sheet preparation begins. When preparation is finished, the printer is ready to print.
-
Page 390: Updating The Firmware
Updating the Firmware Updating the Firmware Chapter 1 Basic Use By updating the firmware for this printer, you can add on Press the Online button to display MAIN new functions and improvements for existing functions. MENU. Chapter 2 Press [ ] or [ ] to select Information then... -
Page 391: Reinstalling The Usb Or Ieee1394 Driver
Reinstalling the USB or IEEE1394 Driver Chapter 1 Basic Use If you try to install the USB or IEEE1394 driver with the USB Next, when the Add New Hardware Wizard or IEEE1394 cable already connected to the printer, the opens, follow the instructions on the screen. -
Page 392: Uninstalling The Software
2003, Windows XP, Windows 2000, or Windows NT Troubleshooting 4.0, you must log in as a member of the Administrators For OS 8.6 or OS 9.x, in the OS 89 folder, open group before the uninstallation. GARO Installer for 8/9. -
Page 393: Uninstalling Garo Status Monitor
Utility Follow the procedure below to uninstall GARO Status Basic Use Monitor from a Windows system. Follow this procedure to uninstall the GARO Device Setup Utility installed with Windows. Chapter 2 On the desktop click the Start button, point Using Various Media... -
Page 394: Operating The Function Menu
Chapter 3 Printing Cleanly to the Manuscript Edges .............. 7-5 Ink Functions ....................7-6 Printing by Objective Replacing an Ink Tank During a Print Job ............. 7-6 Changing the Black Ink Type ................. 7-7 Print Quality Functions ................7-8 Chapter 4 Determining if the Printhead is Blocked ..............7-8 Maintenance When the Printhead Nozzles Are Clogged ............ - Page 395 Basic Use This chapter explains the operation method and the example of the message of the printer display about the function often used on the printer menu according to the purpose. The message for the required operations and displayed on the printer display is shown in figure.
-
Page 396: Replacing The Cutter
Cutter Functions Cutter Functions Chapter 1 Basic Use The following cutter operations are provided in the printer function menus. Chapter 2 When You Need to Cut Media Replacing the Cutter Using Various Media Execute Force Cutting on the operation panel when you Execute Change Cutter on the operation panel when you need to use the printer cutter to cut the media cleanly. -
Page 397: Special 1 To
Media Functions Media Functions Chapter 1 Basic Use The following media settings are provided in the printer function menus. Chapter 2 Changing the Media Type Settings Using Various Media You can change the settings for each media type to match... - Page 398 [Setting Values] ard, Thin bottom, left, and right margins may occasionally be cut, but Chapter 2 if Keep Media Size is turned on, then the image will be VacuumStrngth Using Various Media printed within the recommended area, with a 5-mm border...
- Page 399 The following ink operations are provided in the printer function menus. Chapter 2 Replacing an Ink Tank During a Print Job Using Various Media Execute Rep. Ink Tank on the operation panel when you need to replace an ink tank during a print job. Chapter 3 Printing Printing by Objective...
- Page 400 Changing the Black Ink Type Chapter 1 Two types of black ink can be used with the printer: Photo Black Ink (Bk) and Matte Black Ink (MBk). To change the type of Basic Use black ink, execute ChangeBkInkType using the operation panel, and then install the type of black ink you want to use.
-
Page 401: Print Quality Functions
Print Quality Functions Print Quality Functions Chapter 1 Basic Use You can use the printer function menus to confirm the print quality settings and change the settings to recover poor printing results. Chapter 2 Using Various Media Determining if the Printhead is Blocked... - Page 402 The printer Chapter 2 pattern and read the pattern as it prints to correct the prints a media feed adjustment pattern and scans it as it prints Using Various Media position of the printhead automatically.
- Page 403 This setting, however, may cause horizontal Chapter 2 banding to appear in the prints. To set the priority to print Using Various Media quality, set the Band Joint. Online...
-
Page 404: Checking The Printer Settings
Printer Information Functions Printer Information Functions Chapter 1 Basic Use You can use the printer function menus to print information about print jobs and printer settings for verification. Chapter 2 Checking the Print Job History Checking the Printer Settings Using Various Media... - Page 405 Checking the Media Type Settings Checking the Printer Functions Menu Chapter 1 Information Execute Menu Map to view the menu items and structure of Basic Use the printer function menus. Execute Media Details to print the settings for each media type for verification.
-
Page 406: Basic Use
Contents Contents Chapter 1 Basic Use How to Use This Guide .........................ii How to Use the Top Page ..........................ii How to Use the Chapter Contents Pages......................iii Chapter 2 Using Various Media Chapter 1 Basic Use Printer Part Names ........................1-2... -
Page 407: Using Various Media
Using the Media Take-up Unit ....................2-46 Contents Settings for Using the Media Take-up Unit....................2-47 Attaching Roll Media............................ 2-47 Removing Media that Has Finished Printing ....................2-53 Settings to Not Use the Media Take-up Unit ....................2-56 Index C- 2... -
Page 408: Printing By Objective
Printing Photos and Illustrations without Borders (Borderless Printing) ............3-13 Chapter 2 Using Various Media Rotating the Page 90 Degrees for Printing (Conserve Paper) ..............3-23 Printing Several Pages on One Sheet (Page Layout) ................. 3-24 Printing Posters (Page Layout)........................3-27 Chapter 3 Using Watermarks ............................ - Page 409 Ink Tank Handling Precautions........................4-4 Chapter 2 Using Various Media Replacing an Ink Tank........................... 4-5 Cautions About Using Refilled Ink Tanks for This Printer ............4-8 Switching Off Ink Level Detection........................4-8 Chapter 3 Executing a Print Job............................. 4-9 Printing by Objective Cleaning the Printer ........................
-
Page 410: Printer Driver
Reducing the Amount of Cutting Dust ..................4-46 Changing the Black Ink Type ....................4-48 Chapter 2 Using Various Media Chapter 5 Using the Printer in a Network Environment Before Using the Printer ......................5-2 Chapter 3 Printing by Objective System Requirements ........................... -
Page 411: Printing
Contents Initializing the Network Settings ....................5-47 List of Network Settings ......................5-48 Chapter 1 Basic Use Software Applications Used to Configure Network Settings ........... 5-51 Chapter 6 Troubleshooting Chapter 2 Using Various Media Message Is Displayed ....................... 6-2 Operation Panel Message List ........................6-3 Media Messages ............................ - Page 412 Printing Cleanly to the Manuscript Edges...................... 7-5 Chapter 3 Ink Functions ..........................7-6 Printing by Objective Replacing an Ink Tank During a Print Job ..................... 7-6 Changing the Black Ink Type......................... 7-7 Chapter 4 Print Quality Functions ......................7-8 Maintenance Determining if the Printhead is Blocked......................
-
Page 413: Canceling A Print Job
Adjust the Printhead Position ........4-41 Maintenance Windows ...............1-44 Adjusting Color ..........3-43, 3-108 Canon imagePROGRAF HDI Driver ......3-59 Adjusting the Amount of Media Feed ......4-43 Canon imagePROGRAF Print Plug-In for Photoshop Chapter 5 Administrator Mode ......... 5-16, 5-26, 5-40 ..............3-59, 3-127 Using the Printer Aligning the Printhead ..........4-41... - Page 414 Cutter position adjustment dial ........4-29 Summary Tables ...........1-19 Chapter 5 Using the Printer Data Lamp ..............1-14 in a Network GARO Device Setup Utility ....3-58, 5-7, 5-34, 5-51 Default G/W ...............5-14 Environment Installing ..............5-7 Device Manager ......5-16, 5-26, 5-29, 5-41 Chapter 6 Uninstalling ............6-46...
-
Page 415: Loading Cut Sheets
Basic Use Holder Stopper ............1-2 MAC Address ...........5-10, 5-11 Horizontal Banner ..........3-31, 3-95 Mac OS 8.6/9.x ......1-40, 1-45, 5-21, 5-23 Chapter 2 How to Replace the Printhead ........4-22 Mac OS X ........1-41, 1-47, 5-22, 5-24 Using Various Media Macintosh .......... -
Page 416: Options
Print Quality ........3-40, 3-104, 3-106 Oversize ..............3-56 Print trouble ...............6-28 Contents Print Type ............3-2, 3-60 Page Border ............ 3-26, 3-92 Printe Page Layout ......3-24, 3-27, 3-90, 3-91, 3-93 Printer Part Name ............1-2 Page Setup Sheet ............1-36 Printer Index PageComposer ............3-5 Specifications ............1-55... - Page 417 Release Lever .......... 1-2, 6-38, 6-40 Stop/Eject button ............1-13 Contents Remote Printer Mode ..........5-37 Stopper ...............1-3 Remote UI ..3-58, 3-127, 5-15, 5-25, 5-40, 5-47, 5-51 Submenu ............1-16, 1-30 Replace an ink tank .............7-6 Subnet Mask ............5-12, 5-13 Resolution ............. 3-42, 3-107 Index Switch the Printer Off ...........1-8...
- Page 418 Chapter 2 Windows 2000 ............5-18 Printer Operation Panel .........5-12 Using Various Media Windows NT ..............5-18 Top cover ..1-2, 1-5, 4-12, 4-23, 4-28, 4-31, 6-37, 6-40 Windows XP ..............5-18 Cleaning Inside ............4-11 Chapter 3 Part Names .............1-4 Printing by Objective Top cover handles .............4-13...
-
Page 419: Fcc Regulations
Chapter 3 Note: This equipment has been tested and found to comply with the limits for class B digital device, pursuant to Part 15 of the FCC Printing by Objective Rules. These limits are designed to provide reasonable protection against harmful interference in a residential installation. This equip- ment generates, uses and can radiate radio frequency energy and, if not installed and used in accordance with the instructions, may cause harmful interference to radio communications. -
Page 420: Canadian Radio Interference Regulations
Index Canadian Radio Interference Regulations This digital apparatus does not exceed the Class B limits for radio noise emissions from digital apparatus as set out in the interference- Chapter 1 Basic Use causing equipment standard entitled “Digital Apparatus”, ICES-003 of the Industry and Science Canada. - Page 421 Index Chapter 1 Basic Use Chapter 2 Using Various Media Chapter 3 Printing by Objective Chapter 4 Maintenance Chapter 5 Using the Printer in a Network Environment Chapter 6 Troubleshooting Chapter 7 Operating the Function Menu Contents Index I- 9...
Need help?
Do you have a question about the imagePROGRAF W8400 and is the answer not in the manual?
Questions and answers