Sign In
Upload
Manuals
Brands
SeeMeCNC Manuals
3D Printers
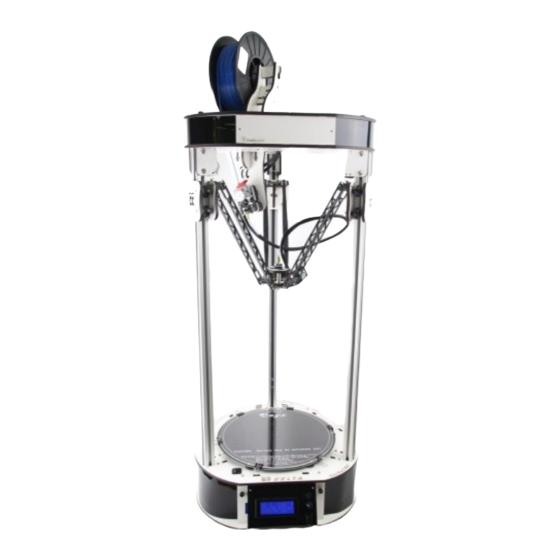
Rostock MAX v2
SeeMeCNC Rostock MAX v2 Manuals
Manuals and User Guides for SeeMeCNC Rostock MAX v2. We have
4
SeeMeCNC Rostock MAX v2 manuals available for free PDF download: Assembly Manual, User Manual
SeeMeCNC Rostock MAX v2 Assembly Manual (314 pages)
Brand:
SeeMeCNC
| Category:
3D Printers
| Size: 47 MB
Table of Contents
Read Me First
2
Table of Contents
3
Introduction and Acknowledgments
6
1 Required Tools and Materials
8
2 Visual Bill of Materials
11
3 Prepping the Hot End and Power Supply
28
Preparing the Hot End
28
Preparing the Power Supply
33
4 Building the Base
40
Installing the Feet
41
Preparing the Vertical Supports
42
Installing the Vertical Supports and Power Supply
47
Installing the Drive Gears on the Stepper Motors
51
Assembling the Tower Supports
54
Installing the Base Top Plate
62
5 Installing the Onyx Heated Bed
65
Installing the Thermistor, Power LED and Power Wires
65
Mounting the Onyx Heated Bed to the Base
75
6 Installing the Towers & Tower Wiring
79
Running Wire in the Towers
79
Setting the Towers
87
7 Assembling, Installing, and Wiring the Top Section
91
Prepping the Upper Tower Mounts
92
Installing the Upper Tower Mounts
93
Installing the End Stop Switches
96
Installing the Upper Tower Mounting Hardware
98
Installing the Upper Idler Bearings
99
A Little Prep Work Is in Order
100
Attaching the Top Plate
101
Connecting the End Stop Switches
105
Routing the Wires & Binding Them
107
Tightening the Towers
113
8 Assembling and Installing the Cheapskate Carriages
116
Assembling the Cheapskate Rollers
116
Assembling the U-Joint Carriers
118
Installing the U-Joint Axles
121
Installing the Belt Clip T-Nuts
122
Assembling and Installing the Cheapskate Carriages
123
Adjusting the Cheapskate Carriages
126
9 Installing the Drive Belts
127
Belt Routing
127
Installing the Belt Clamps
131
Adjusting the Belt Tension
133
10 Assembling and Installing the Ezstruder
136
Assembling the Ezstruder
136
Installing & Mounting the Ezstruder
140
Wiring the Ezstruder Stepper Motor
145
11 Installing the Hot End and Bowden Tube
148
Preparing the Hot End Wiring
148
Wiring the Hot End
151
Attaching the Hot End to the Hot End Mounting Plate
154
Installing the Bowden Tube
156
12 Installing the Effector Platform and Delta Arms
158
Assembling the Effector Platform
158
Installing the Delta Arms
161
Attaching the Effector Platform
164
13 Installing the Hot End
166
14 Finishing the Top End
168
Installing the Spool Holder
168
Installing the Top Plate and Spool Support Arm
172
15 Assembling & Installing the LCD Panel Mount
176
Assembling the Front Panel
176
Installing the LCD Trim Panels
179
16 Installing & Connecting the Rambo Controller
182
Preparing the Rambo Mounting Plate
182
Mounting the Rambo Controller
184
Wire Prep: End Stops
186
Wire Prep: the Hot End Thermistor Connector
188
Wire Prep: the Heated End Thermistor Connector
189
Wire Prep: Extruder Motor Connector
189
Wiring the Rambo Controller - Terminal Block
190
Plugging Cabling into the Rambo
192
Installing the Rambo into the Machine Base
195
Installing the Power Switch and LCD Controller Cables
196
17 Final Assembly Tasks
199
Attaching the Base Covers & LCD Panel
199
Attaching the Power and USB Cables
201
Installing the Acrylic Cover Panels
203
Installing the Borosilicate Glass Build Plate
206
Smoke Test
208
18 Driver and Software Installation
210
Installing the Rambo Driver
210
Installing the Arduino IDE
212
Configuring the Arduino IDE
213
Test Upload
214
Uploading Repetier-Firmware
216
The LCD and Front Panel Controls
218
19 Installing Mattercontrol and Calibrating the Printer
221
Downloading, Installing, and Configuring Mattercontrol
221
Initial Function Tests
228
Optimizing the Temperature Control Algorithms
233
Setting the Z Height
236
Adjusting the End-Stops
237
Verifying Extruder Stepper Operation
241
Extruder Calibration
242
20 First Print: PEEK Fan Shroud
243
Configuring the Slicer
243
Printing the PEEK Fan Shroud
247
Loading Filament
248
Preparing the Heated Bed
250
Printing the PEEK Fan Shroud
250
Installing the PEEK Fan and Shroud
252
21 Second Print: Layer Fan Shroud
256
Appendix A: Maintenance and Troubleshooting
310
Print Layer Issues
311
Machine Won't Move
312
Belt Damage or the Delta Arm Blues
313
Advertisement
SeeMeCNC Rostock MAX v2 Assembly Manual (281 pages)
Brand:
SeeMeCNC
| Category:
3D Printers
| Size: 41 MB
Table of Contents
Read Me First
2
Table of Contents
3
Introduction and Acknowledgments
6
1 Required and Optional Tools and Materials
7
2 Visual Bill of Materials
11
3 Prepping the Hot End and Power Supply
24
Preparing the Hot End
24
Preparing the Power Supply
27
4 Building the Base
31
Installing the Feet
33
Preparing the Vertical Supports
34
Installing the Vertical Supports and Power Supply
37
Installing the Drive Gears on the Stepper Motors
42
Assembling the Tower Supports
43
Installing the Top Plate
49
Installing the Rev2 Onyx Heated Bed
51
Installing the Thermistor, LED and Power Wires
52
Mounting the Onyx Heated Bed to the Base
59
Installing the Rev3 Onyx Heated Bed
62
Installing the Thermistor, LED and Power Wires
63
Mounting the Onyx Heated Bed to the Base
71
Installing the Rev5/6 Onyx Heated Bed
74
Installing the Thermistor, Power Leds and Power Wires
75
Mounting the Onyx Heated Bed to the Base
84
6 Installing the Towers & Tower Wiring
88
Threading the Towers
88
Setting the Towers
94
7 Assembling the Top Section
97
Prepping the Upper Tower Mounts
98
Installing the Upper Tower Mounts
99
Installing the End Stop Switches
102
Installing the Upper Tower Mounting Hardware
105
8 Assembling and Installing the Cheapskate Carriages
106
Assembling the Cheapskate Rollers
106
Assembling the U-Joint Carriers
107
Installing the U-Joints
110
Installing the Belt Clip T-Nuts
114
Assembling and Installing the Cheapskate Carriages
115
Adjusting the Cheapskate Carriages
119
9 Installing the Top Plate and Idler Bearings
120
10 Wiring the End Stop Switches
124
Wire Routing
126
11 Installing the Drive Belts
129
Belt Routing
130
Installing the Belt Clamps
131
Adjusting the Belt Tension
136
12 Assembling the Ezstruder and Filament Holder
137
Preparing the Ezstruder
138
Mounting the Ezstruder
141
Installing the Ezstruder Mount and Filament Holder
143
Wiring the Ezstruder's Stepper Motor
145
13 Wiring & Assembling the Hot End, Bowden Tube
148
Preparing the Hot End Wiring
148
Attaching the Hot End to the Hot End Mounting Plate
154
Installing the Bowden Tube
156
14 Installing the Effector and Delta Arms
157
Assembling the Effector Platform
157
Installing the Delta Arms
159
15 Installing the Hot End
161
16 Finishing the Top End
164
Installing the Spool Holder Mount
165
Installing the Top Plate
168
17 Assembling & Installing the LCD Panel Mount
174
Assembling the Front Panel
175
Installing the LCD Trim Panels
177
18 Installing & Connecting the Rambo Controller
180
Installing the Rambo Cooling Fan
181
Mounting the Rambo Controller
182
Soldering the Cooling Fan
183
Assembling the Rambo LCD Interface Adapter
184
Assembling the End Stop Connectors
184
Installing the Hot End Thermistor Connector
186
Wiring the Rambo Controller - Terminal Block
187
Wiring the Rambo Controller - Plug-In Connectors
190
19 Final Assembly Tasks
198
Attaching the Base Covers & LCD Panel
198
Attaching the Power and USB Cables
200
Installing the Acrylic Cover Panels
202
20 Driver and Software Installation
209
Installing the Rambo Driver
209
Installing the Arduino IDE
211
Configuring the Arduino IDE
212
Test Upload
213
Uploading Repetier-Firmware
215
The LCD and Front Panel Controls
217
21 Installing Repetier-Host and Calibrating the Printer
220
Downloading, Installing, and Configuring Repetier-Host
220
Initial Function Tests
223
Printer Calibration
226
Setting the Z Height
233
Adjusting the End-Stops
235
22 Tonkabot's Missing Chapter
240
23 First Print: PEEK Fan Shroud
241
Verifying Extruder Stepper Operation
241
Configuring Slic3R
242
Loading Filament
245
Preparing the Heated Bed
246
Printing the PEEK Fan Shroud
247
Installing the PEEK Fan Shroud
248
24 Second Print: Layer Fan Shroud
252
25 Repetier-Host
256
Appendix A: Quick Disconnects in Your Rostock MAX V2
266
Wiring the Ezstruder Extension Cable
266
Wiring the Fans, Hot End, and Thermistor Connectors
268
Installing Connectors on the Thermistor and Heating Resistors
270
Attaching the Hot End to the Hot End Mounting Plate
274
Installing the Bowden Tube
276
Appendix B: Maintenance and Troubleshooting
277
Print Layer Issues
278
Machine Won't Move
280
Belt Damage or the Delta Arm Blues
280
SeeMeCNC Rostock MAX v2 User Manual (128 pages)
Brand:
SeeMeCNC
| Category:
3D Printers
| Size: 9 MB
Table of Contents
Read Me First
2
Table of Contents
3
Introduction and Acknowledgments
4
1 Driver and Software Installation
5
Installing the Rambo Driver
5
Installing the Arduino IDE
7
Configuring the Arduino IDE
8
Test Upload
9
Uploading Repetier-Firmware
11
The LCD and Front Panel Controls
13
2 Installing Mattercontrol and Calibrating the Printer
16
Downloading, Installing, and Configuring Mattercontrol
16
Initial Function Tests
22
Setting the Z Height
27
Motion Calibration
29
Verifying Extruder Stepper Operation
32
Extruder Calibration
32
3 First Print: PEEK Fan Shroud
34
Configuring the Slicer
34
Printing the PEEK Fan Shroud
36
Loading Filament
37
Preparing the Heated Bed
38
Printing the PEEK Fan Shroud
39
Installing the PEEK Fan and Shroud
41
4 Second Print: Layer Fan Shroud
44
5 Matter Control Basics: Slicing
47
6 Mattercontrol Basics: Loading and Printing Objects
61
7 Advanced Mattercontrol: Configuration
67
8 Advanced Mattercontrol: Settings - General
71
9 Advanced Mattercontrol: Settings - Filament
81
10 Advanced Mattercontrol: Settings - Printer
85
11 Using the 3D and Layer Views
88
12 A Strategy for Successful (and Great!) Prints
97
Appendix A: Maintenance and Troubleshooting
110
Print Layer Issues
111
Machine Won't Move
113
LCD Panel Not Working
113
Appendix B: Alternate Calibration Method
115
Appendix C: the Mattercontrol Touch
119
Appendix D: Printing from the SD Card
126
Appendix E: Optimizing the Temperature Control Algorithms
127
Advertisement
SeeMeCNC Rostock MAX v2 User Manual (7 pages)
Brand:
SeeMeCNC
| Category:
3D Printers
| Size: 2 MB
Table of Contents
Step 1 — Unpackaging and Setup
2
Step 2 — Unpackaging and Setup Continued
3
Step 3 — Unpackaging and Setup Continued
3
Step 4 — Unpackaging and Setup Continued
4
Step 6 — Software Operation
6
Step 7 — Getting Connected
7
Advertisement
Related Products
SeeMeCNC rostock max v2.0
SeeMeCNC Rostock Max v3
SeeMeCNC Rostock Max
SeeMeCNC Artemis
SeeMeCNC Artemis 300
SeeMeCNC Delta
SeeMeCNC DropLit
SeeMeCNC ERIS DELTA
SeeMeCNC orion delta
SeeMeCNC Categories
3D Printers
More SeeMeCNC Manuals
Login
Sign In
OR
Sign in with Facebook
Sign in with Google
Upload manual
Upload from disk
Upload from URL