Sign In
Upload
Manuals
Brands
Christie Manuals
Projector
Mirage M Series
Christie Mirage M Series Manuals
Manuals and User Guides for Christie Mirage M Series. We have
8
Christie Mirage M Series manuals available for free PDF download: User Manual, Setup Manual, Instruction Sheet
Christie Mirage M Series User Manual (176 pages)
Brand:
Christie
| Category:
Projector
| Size: 22 MB
Table of Contents
Table of Contents
7
1 : Introduction
15
Labels and Marking
15
Typographical Notations
15
Projector Overview
16
How the Projector Works
16
User Interface Overview
17
List of Components
17
Key Features
17
Purchase Record and Service Contacts
16
Safety Warnings and Guidelines
18
General Precautions
18
Ac/Power Precautions
19
Lamp Precautions
19
2 : Installation and Setup
21
Projector Quick Setup and Installation
21
Install a Projection Lens
21
Position the Projector
23
Connect a Source
23
Connect the Line Cord
24
Power up
24
Select a Source
24
Adjust the Image
24
Detailed Setup and Installation
24
About the Projector
25
Installation Considerations
27
Front Screen Installations
27
Rear Screen Installations
28
Screen Size
28
Ambient Lighting
28
Ventilation
28
Other Considerations
29
Projector Position
29
Throw Distance
29
Vertical and Horizontal Position
29
Mounting
33
Ceiling Mount
33
Special Mounting
33
Stacking
34
Stacking Multiple Projectors
35
Stacking Alignment
35
Adjust Projector Height and Tilt
36
Adjust Height
36
Adjust Tilt
36
Basic Optical Alignment
36
Advanced Optical Alignment
37
Power down
39
Remote Keypad/Built-In Keypad
39
Web User Interface (UI)
39
Connect Communications
40
Remote Keypads
40
Serial Port Connections
40
Ethernet Communications
42
Connect Multiple Projectors
42
Separate Networks
43
Communicate to All Ports
43
System Integration - GPIO Connector
44
Projector Communications
46
Status Leds
46
Connect Sources
47
Leds
47
Twin HDMI Input Card
47
Analog BNC Input Card
48
Dual 3G/HD/SD-SDI Input Card
48
Dual Link DVI Input Card
48
Video Decoder Input Card
49
DMXC Interface Card
49
Connect Tiled Projectors
50
3 : Operation
53
How to Use the Remote Keypad or Built-In Keypad
53
Guide to Keypads
53
Remote Keypad
54
Wired Remote
56
Built-In Keypad
56
Overview of LED and Key States
56
Remote Keypad Commands
57
Navigating the Menus
61
Main Menu
61
On-Line Help
62
The Global Icon
62
How to Use Slide Bars and Other Controls
62
Edit Text
64
Using Inputs and Channels
65
How to Select an Input or a Channel
65
Create a New Channel
66
Using a Channel
66
Channel Setup Menu
67
Adjusting the Image
70
Size and Position Menu
71
Resize Presets
71
Size
73
Vertical Stretch
73
Pixel Track
73
Pixel Phase
73
H-Position
73
V-Position
73
Keep Aspect on Auto Setup
74
Blanking - Submenu
74
Image Settings Menu
75
Contrast
75
Brightness
75
Yellow Notch Filter (YNF)
75
Color Space
75
Video Options - Submenu
76
Input Levels - Submenu
78
Advanced Image Settings - Submenu
80
Gamma Settings - Submenu
80
Detail Settings
81
Noise Reduction Settings
82
Color Settings
82
Dynamic Iris
83
Configuration - Adjust System Parameters and Advanced Controls
84
Language
84
Output Options Card - Submenu
84
Lens Settings - Submenu
85
Power Management - Submenu
85
Date and Time - Submenu
86
Menu Preferences - Submenu
86
Communications - Submenu
87
Serial Options - Submenu
87
Ethernet Settings - Submenu
88
DMX / Artnet - Submenu
89
SNMP - Submenu
90
Geometry and Color - Submenu
92
Geometry Correction - Submenu
92
Edge Blending - Submenu
97
Advanced Edge Blending - Submenu
98
Color Adjustments by X/Y - Submenu
99
Color Saturation - Submenu
100
Black Level Blending - Submenu
100
Default Color Adjustments and Default Color Adjustment with YNF
101
Tiling Setup - Submenu
101
Diagnostics and Calibration - Submenu
102
Option Card Settings - Submenu
103
Dynamic Iris - Submenu
103
Lamp Menu
103
Lamp Operation
103
Lamp Mode
104
Power
104
Intensity
104
Yellow Notch Filter
104
Single Lamp Switch on Fail
104
Dynamic Iris - Submenu
104
Warn When Lamp Reaches (Hours)
105
Lamp 1 S/N and Lamp 2 S/N
105
Change Lamp - Submenu
105
Lamp 1 History and Lamp 2 History
105
Input Switching and PIP Menu
105
Main Input
105
PIP Input
105
Swap Main and PIP Inputs
106
PIP Enable
106
PIP Windows Options - Submenu
106
PIP Size and Position - Submenu
106
PIP Image Settings - Submenu
106
Fade Time
106
Frame Locking
107
Auto Input Searching
107
HDMI Output Loop Source
107
Standby Active Loop-Through
107
Status
107
Using Multiple Projectors
108
Match Colors in Multiple Screens
110
Use the Color Saturation Menu for Color Match
110
Remote Control of the Projector
111
Alarm Conditions
111
Requirements
112
Connecting the 3D Stereo Sync Cable
113
Active and Passive Stereo 3D Configurations
114
Settings
115
Example of 3D Multiple Display Setup
119
4 : Web User Interface
121
Logging on
121
Navigate the Web User Interface
122
Help Text
122
Basic Operation
123
Main Tabbed Page - General
123
Main Tabbed Page - Status
123
Main Tabbed Page - Lens
124
Tools Tabbed Page - Virtual OSD
124
Admin Tabbed Page - System
126
Admin Tabbed Page - Users
128
Advanced Tabbed Page - RTE
129
5 : Maintenance
133
Maintenance of the Cooling System
133
Ventilation
133
Optional Filters
133
Maintenance of Optics
134
Optical (Excluding Lens)
134
Supplies or Cleaning Optical Surfaces
135
Cleaning the Lens
135
Replacing the Lamps
135
6 : Troubleshooting
137
Power
137
Projector Does Not Power on
137
Lamp
137
Lamp Does Not Ignite
137
Lamp Suddenly Turns off
138
Flicker, Shadows or Dimness
138
Lcd
138
Blank Screen, no Menu Display
138
Remote Keypad
138
Remote Keypad Does Not Seem to Work
138
Osd
139
The OSD Menu Does Not Display
139
Ethernet
139
Can Not Establish Communication with Projector
139
Displays
139
The Projector Is on but There Is no Display
139
Severe Motion Artifacts
139
Image Appears 'Squeezed' or Vertically Stretched into Center of Screen
139
The Display Is Jittery or Unstable
140
The Display Is Faint
140
The Upper Portion of the Display Is Waving, Tearing or Jittering
140
Portions of the Display Are Cut off or Warped to the Opposite Edge
140
Display Appears Compressed (Vertically Stretched)
140
Data Is Cropped from Edges
140
Display Quality Appears to Drift from Good to Bad, Bad to Good
140
Display Suddenly Freezes
140
Colors in the Display Are Inaccurate
141
Display Is Not Rectangular
141
Display Is "Noisy
141
Web Interface
141
After a Projector Software Upgrade, the Web Pages Do Not Display Correctly
141
A Backup or Interrogator File Cannot be Saved
142
Advertisement
Christie Mirage M Series User Manual (166 pages)
M Series
Brand:
Christie
| Category:
Projector
| Size: 2 MB
Table of Contents
Table of Contents
5
1 : Introduction
13
Labels and Marking
13
Typographical Notations
13
Projector Overview
14
How the Projector Works
14
User Interface Overview
15
List of Components
15
Key Features
15
Purchase Record and Service Contacts
14
Safety Warnings and Guidelines
16
General Precautions
16
Ac/Power Precautions
17
Lamp Precautions
17
2 : Installation and Setup
19
Projector Quick Setup and Installation
19
Install a Projection Lens
19
Position the Projector
21
Connect a Source
21
Connect the Line Cord
22
Power up
22
Select a Source
22
Adjust the Image
22
Detailed Setup and Installation
22
About the Projector
23
Installation Considerations
25
Front Screen Installations
25
Rear Screen Installations
26
Screen Size
26
Ambient Lighting
26
Ventilation
26
Other Considerations
27
Projector Position
27
Throw Distance
27
Vertical and Horizontal Position
27
Mounting
31
Ceiling Mount
31
Special Mounting
31
Stacking
32
Stacking Multiple Projectors
33
Stacking Alignment
33
Adjust Projector Height and Tilt
34
Adjust Height
34
Adjust Tilt
34
Basic Optical Alignment
34
Advanced Optical Alignment
35
Power down
37
Remote Keypad/Built-In Keypad
37
Web User Interface (UI)
37
Connect Communications
38
Remote Keypads
38
Serial Port Connections
38
Connect RS-232
38
Connect RS-422
39
Ethernet Communications
40
Connect Multiple Projectors
40
Separate Networks
41
Communicate to All Ports
41
System Integration - GPIO Connector
42
Configuring the GPIO
43
Projector Communications
44
Status Leds
44
Connect Sources
45
Leds
45
Twin HDMI Input Card
45
Analog BNC Input Card
46
Dual 3G/HD/SD-SDI Input Card
46
Dual Link DVI Input Card
46
Video Decoder Input Card
47
DMXC Interface Card
47
Connect Tiled Projectors
48
3 : Operation
51
How to Use the Remote Keypad or Built-In Keypad
51
Guide to Keypads
51
Remote Keypad
52
Wired Remote
54
Built-In Keypad
54
Overview of LED and Key States
54
Remote Keypad Commands
55
Navigating the Menus
59
Main Menu
59
On-Line Help
60
The Global Icon
60
How to Use Slide Bars and Other Controls
60
Edit Text
62
Using Inputs and Channels
63
How to Select an Input or a Channel
63
Create a New Channel
64
Using a Channel
64
Channel Setup Menu
65
Adjusting the Image
68
Size and Position Menu
69
Resize Presets
69
Size
71
Vertical Stretch
71
Pixel Track
71
Pixel Phase
71
H-Position
71
V-Position
71
Keep Aspect on Auto Setup
72
Blanking - Submenu
72
Image Settings Menu
73
Contrast
73
Brightness
73
Yellow Notch Filter (YNF)
73
Color Space
73
Video Options - Submenu
74
Input Levels - Submenu
76
Advanced Image Settings - Submenu
78
Gamma Settings - Submenu
78
Detail Settings
79
Noise Reduction Settings
80
Color Settings
80
Dynamic Iris
81
Configuration - Adjust System Parameters and Advanced Controls
82
Language
82
Output Options Card - Submenu
82
Lens Settings - Submenu
83
Power Management - Submenu
83
Date and Time - Submenu
84
Menu Preferences - Submenu
84
Communications - Submenu
85
Serial Options - Submenu
85
Ethernet Settings - Submenu
86
DMX / Artnet - Submenu
87
SNMP - Submenu
88
Geometry and Color - Submenu
90
Geometry Correction - Submenu
90
Brightness Uniformity - Submenu
92
Edge Blending - Submenu
95
Advanced Edge Blending - Submenu
96
Color Adjustments by X/Y - Submenu
97
Color Saturation - Submenu
98
Black Level Blending - Submenu
98
Default Color Adjustments and Default Color Adjustment with YNF
99
Tiling Setup - Submenu
99
Diagnostics and Calibration - Submenu
100
Option Card Settings - Submenu
101
Dynamic Iris - Submenu
101
Lamp Menu
101
Lamp Operation
101
Lamp Mode
102
Power
102
Intensity
102
Yellow Notch Filter
102
Single Lamp Switch on Fail
102
Dynamic Iris - Submenu
102
Warn When Lamp Reaches (Hours)
103
Lamp 1 S/N and Lamp 2 S/N
103
Change Lamp - Submenu
103
Lamp 1 History and Lamp 2 History
103
Input Switching and PIP Menu
103
Main Input
103
PIP Input
103
Swap Main and PIP Inputs
104
PIP Enable
104
PIP Windows Options - Submenu
104
PIP Size and Position - Submenu
104
PIP Image Settings - Submenu
104
Fade Time
104
Frame Locking
105
Auto Input Searching
105
HDMI Output Loop Source
105
Standby Active Loop-Through
105
Status
105
Using Multiple Projectors
106
Match Colors in Multiple Screens
108
Use the Color Saturation Menu for Color Match
108
Remote Control of the Projector
109
Alarm Conditions
109
4 : Web User Interface
111
Logging on
111
Navigate the Web User Interface
112
Help Text
112
Basic Operation
113
Main Tabbed Page - General
113
Main Tabbed Page - Status
113
Main Tabbed Page - Lens
114
Tools Tabbed Page - Virtual OSD
114
Admin Tabbed Page - System
116
Admin Tabbed Page - Users
118
Advanced Tabbed Page - RTE
119
5 : Maintenance
123
Maintenance of the Cooling System
123
Ventilation
123
Optional Filters
123
Maintenance of Optics
124
Optical (Excluding Lens)
124
Supplies or Cleaning Optical Surfaces
124
Cleaning the Lens
125
Replacing the Lamps
125
6 : Troubleshooting
127
Power
127
Projector Does Not Power on
127
Lamp
127
Lamp Does Not Ignite
127
Lamp Suddenly Turns off
128
Flicker, Shadows or Dimness
128
Lcd
128
Blank Screen, no Menu Display
128
Remote Keypad
128
Remote Keypad Does Not Seem to Work
128
Osd
129
The OSD Menu Does Not Display
129
Ethernet
129
Can Not Establish Communication with Projector
129
Displays
129
The Projector Is on but There Is no Display
129
Severe Motion Artifacts
129
Image Appears 'Squeezed' or Vertically Stretched into Center of Screen
129
The Display Is Jittery or Unstable
130
The Display Is Faint
130
The Upper Portion of the Display Is Waving, Tearing or Jittering
130
Portions of the Display Are Cut off or Warped to the Opposite Edge
130
Display Appears Compressed (Vertically Stretched)
130
Data Is Cropped from Edges
130
Display Quality Appears to Drift from Good to Bad, Bad to Good
130
Display Suddenly Freezes
130
Colors in the Display Are Inaccurate
131
Display Is Not Rectangular
131
Display Is "Noisy
131
Web Interface
131
After a Projector Software Upgrade, the Web Pages Do Not Display Correctly
131
A Backup or Interrogator File Cannot be Saved
132
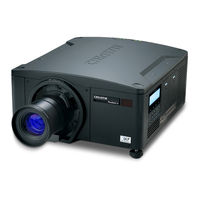
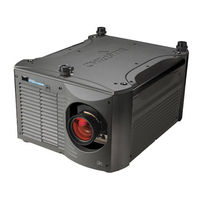
Christie Mirage M Series User Manual (149 pages)
High resolution video/graphics three chip 1080p HD, SXGA+, and WUXGA projectors.
Brand:
Christie
| Category:
Projector
| Size: 12 MB
Table of Contents
Table of Contents
4
Introduction
11
Purchase Record and Service Contacts
11
Projector Models
12
How the Projector Works
12
User Interface Overview
12
List of Components
12
Key Features
13
Safety Warnings and Guidelines
14
General Precautions
14
Ac/Power Precautions
14
Lamp Precautions
14
Product Documentation
14
Related Documentation
15
Installation and Setup
16
About the Projector
16
Installation Considerations
18
Front Screen Installations
19
Rear Screen Installations
19
Screen Size
20
Ambient Lighting
20
Ventilation
20
Other Considerations
20
Installing a Projection Lens
21
Positioning the Projector
22
Throw Distance
23
Vertical and Horizontal Position
23
Mounting the Projector
27
Ceiling Mount
27
Special Mounting
28
Stacking Projectors in a Frame
28
Stacking Multiple Projectors
29
Aligning Stacked Projectors
30
Adjusting Projector Height and Tilt
31
Adjusting Height
31
Adjusting Tilt
31
Connecting a Source
31
Connecting the Line Cord
32
Powering on the Projector
32
Selecting a Source
33
Aligning the Image
33
Aligning Boresight
34
Powering down the Projector
36
Connect Communications
37
Configuring Ethernet Settings
37
Serial Port Connections
37
Connecting through RS232
37
Connecting through RS422
38
Connecting Multiple Projectors
39
Separate Networks
41
Communicating to All Ports
41
Connecting to the GPIO Connector
42
Configuring the GPIO
43
Connecting Sources through Option Cards
44
Leds
44
Twin HDMI Input Card
44
Analog BNC Input Card
45
Dual 3G/HD/SD-SDI Input Card
45
Dual Link DVI Input Card
45
Video Decoder Input Card
46
DMXC Interface Card
46
Twin Displayport Input Card
47
Configuring the Output Options Cards
47
Connecting Tiled Projectors
48
Defining the Communication Method between Projectors
51
Specifying Serial Communication Parameters
51
Adding a Serial Command
52
Configuring DMX512 Support
52
Adding a DMX Channel Event
54
Operating the Projector
55
Controlling the Projector
55
Built-In Keypad
56
Wired Remote
56
IR Remote Keypad
57
Managing Users
58
Creating a User
58
Changing a Password
58
Deleting a User
58
Uploading a Logo File
58
Logging on
59
Setting the Power Management Parameters
60
Setting the Date and Time
61
Navigating the Interface
61
Changing the Language Used for Menus
61
Adjusting the Menu Appearance
61
Selecting an Input or Channel
63
Creating a New Channel
64
Selecting a Channel
64
Displaying a List of Channels
65
Copying a Channel
66
Deleting a Channel
66
Deleting Multiple Channels
66
Editing a Channel
67
Configuring the Lens
67
Configuring up the Lamp
68
Selecting the Lamp Operation Mode
68
Selecting the Lamp Mode
68
Specifying the Amount of Power Sent to the Lamp
69
Setting the Target Brightness
69
Configuring Lamp Failover
69
Using Multiple Projectors
69
Tiling an Image over Multiple Screens
69
Performing Preliminary Calibration
70
Automatically Correct Frame Delay Issues in Tiled Images
70
Matching Colors Across Multiple Screens
71
Refining the Displayed Colors
71
Matching Colors Across Multiple Screens
73
Displaying Picture-In-Picture
73
Enabling Picture-In-Picture
73
Selecting the Main and Picture-In-Picture Inputs
73
Swapping the Main and Picture-In-Picture Inputs
73
Changing the Size and Position of Picture-In-Picture
74
Configuring the Picture-In-Picture Image
74
Fading between Images
74
Locking Image Frames to the Input
74
Automatically Searching for Input Signals
74
Configuring the HDMI Output Options
74
Looping Video Signals
75
Requirements
75
Connecting the 3D Stereo Sync Cable
76
Active and Passive Stereo 3D Configurations
77
3D Settings
78
Performing Diagnostics and Calibration
83
Adjusting the Image
85
Automatically Optimizing Display Parameters
85
Selecting a Test Pattern
86
Changing the Size and Position of the Image
86
Resize Presets
86
Configuring How an Image Is Cropped
89
Adjusting an Image for Keystone Correction
90
Adjusting the Main Image
91
Configure the Video Sources
92
Manually Optimize Input Levels
94
Correcting Gamma Settings
96
Adjusting the Sharpness of the Image
96
Selecting the Noise Reduction Filter
97
Adjusting the Color for the Output
97
Selecting a Color Space
98
Changing Color Performance
98
Defining User Color Gamuts
99
Adjusting the Color Saturation
99
Ensuring Brightness Uniformity
100
Creating a Seamless Image with Edge Blending
102
Adjusting the Intensity of Black
104
Uploading a Gamma File
105
Monitoring and Maintenance
106
Backing up the Projector Configuration and Preferences
106
Creating a Backup File
106
Restoring a Backup File
106
Performing a Diagnostic Test Using Interrogator
107
Monitoring the Projector
107
Viewing the Projector Status
107
Alarm Conditions
107
Configuring SNMP
108
Adding a Scheduled Event
110
Adding a System Event
111
Adding a GPIO Event
111
Adding a Function Key Event
111
LED and Key States
111
Status Leds
112
Maintaining the Cooling System
113
Ventilation
113
Maintaining the Optics
114
Viewing the Lamp History
114
Notifying Users after a Set Number of Hours of Lamp Use
115
Replacing the Lamps
115
Changing the Lamp Serial Number
116
Optical (Excluding Lens)
116
Supplies or Cleaning Optical Surfaces
116
Clean the Projection Lens
116
Dust from the Projection Lens
117
Removing Fingerprints, Smudges, or Oil from the Projection Lens
117
Advertisement
Christie Mirage M Series User Manual (162 pages)
Mirage M Series projectors
Brand:
Christie
| Category:
Projector
| Size: 16 MB
Table of Contents
Table of Contents
5
1 : Introduction
9
Labels and Marking
9
Typographical Notations
10
Purchase Record and Service Contacts
10
Projector Overview
11
How the Projector Works
11
User Interface Overview
11
List of Components
11
Key Features
12
Safety Warnings and Guidelines
13
General Precautions
13
AC /Power Precautions
13
Lamp Precautions
13
2 : Installation and Setup
15
Projector Quick Setup and Installation
15
Detailed Setup and Installation
19
About the Projector
19
Projector Position and Mounting
22
Mounting
24
Adjusting Projector Height/Tilt
24
Basic Optical Alignment
25
Advanced Optical Alignment
26
Powering down
28
Connecting Communications
29
Projector Communications
34
Connecting Sources
35
3 : Operation
39
Using the Remote Keypad or Built-In Keypad
39
Remote Keypad Commands
42
Navigating the Menus
46
Using Inputs and Channels
50
Channel Setup Menu
52
Adjusting the Image
55
Size and Position Menu
56
Image Settings Menu
59
Configuration - Adjusting System Parameters and Advanced Controls
68
Lamp Menu
87
Secondary Input Switching Menu
89
Status
89
Using Multiple Projectors
89
Remote Control of the Projector
93
Alarm Conditions
93
Table of Contents
94
Requirements
94
Active and Passive Stereo 3D Configurations
96
Example of 3D Multiple Display Setup
99
4 : Web User Interface
103
Logging on
103
Navigating the Web User Interface
104
Help Text
104
Basic Operation
105
Main Tabbed Page - General
105
Main Tabbed Page - Status
105
Main Tabbed Page - Lens
106
Tools Tabbed Page - Virtual OSD
106
Admin Tabbed Page - System
108
Admin Tabbed Page- Users
110
Advanced Tabbed Page - RTE
111
About Tabbed Page
115
5 : Maintenance
117
Maintenance of the Cooling System
117
Ventilation
117
Optional Filters
117
Maintenance of Optics
118
Optical (Excluding Lens)
118
Cleaning the Lens
119
Replacing the Lamps
119
6 : Troubleshooting
121
Power
121
Projector Does Not Power on
121
Lamp
121
Lamp Does Not Ignite
121
Lamp Suddenly Turns off
122
Flicker, Shadows or Dimness
122
Lcd
122
Blank Screen, no Menu Displaying
122
Remote Keypad
122
Remote Keypad Does Not Seem to Work
122
Osd
123
The OSD Menu Does Not Display
123
Ethernet
123
Trouble Establishing Communication with Projector
123
Displays
123
The Projector Is on but There Is no Display
123
Severe Motion Artifacts
123
Image Appears 'Squeezed' or Vertically Stretched into Center of Screen
124
The Display Is Jittery or Unstable
124
The Display Is Faint
124
The Upper Portion of the Display Is Waving, Tearing or Jittering
124
Portions of the Display Are Cut off or Warped to the Opposite Edge
124
Display Appears Compressed (Vertically Stretched)
124
Data Is Cropped from Edges
124
Display Quality Appears to Drift from Good to Bad, Bad to Good
124
Display Has Suddenly Frozen
125
Colors in the Display Are Inaccurate
125
Display Is Not Rectangular
125
Display Is "Noisy
125
Web Interface
126
After Upgrading the Projector Software, the Web Pages Do Not Display Correctly
126
Menu Functions Are Not Active
126
A Backup or Interrogator File Cannot be Saved
126
7 : Specifications
129
Image Performance
129
Pixel Format
129
Brightness (ANSI Lumens)
129
Contrast
129
Luminance Uniformity
130
Color Uniformity
130
Color Primaries
130
Gamma
130
Grayscale/Color Resolution
130
Color Temperature
130
Convergence
131
Blemishes
131
Pixel Defects
131
Image Artifacts
131
Picture Centering (with 1.4-1.8:1 HD Lens)
132
Feature Set
132
Airflow
132
Air Filters (Optional)
132
Dust Sealing
132
ILS (Intelligent Lens System)
132
Projection Lens Compatibility
132
Iris
133
Automatic Fans
133
Constant Lamp Output Management
133
Shutter
133
Lamps
134
Status LED
134
Electronics/Sw
134
Christie Mirage M Series Setup Manual (72 pages)
Mirage M Series
Brand:
Christie
| Category:
Projector
| Size: 8 MB
Table of Contents
Table of Contents
5
Purchase Record and Service Contacts
9
List of Components
9
Key Features
10
Safety Warnings and Guidelines
11
General Precautions
11
AC /Power Precautions
11
Lamp Precautions
11
2: Installation and Setup
13
Projector Quick Setup and Installation
13
Mounting
17
Basic Optical Alignment
17
Advanced Optical Alignment
18
Powering down
20
Projector Communications
21
Using the Remote Keypad or Built-In Keypad
23
Remote Keypad Commands
26
Navigating the Menus
30
Alarm Conditions
34
Requirements
35
Active and Passive Stereo 3D Configurations
37
Example of 3D Multiple Display Setup
40
Maintenance of the Cooling System
43
Ventilation
43
Optional Filters
43
Maintenance of Optics
44
Optical (Excluding Lens)
44
Cleaning the Lens
45
Replacing the Lamps
45
Power
47
Projector Does Not Power on
47
Lamp
47
Lamp Does Not Ignite
47
Lamp Suddenly Turns off
48
Flicker, Shadows or Dimness
48
Remote Keypad
48
Remote Keypad Does Not Seem to Work
48
Lcd
48
Blank Screen, no Menu Displaying
48
Osd
49
The OSD Menu Does Not Display
49
Ethernet
49
Trouble Establishing Communication with Projector
49
Displays
49
The Projector Is on but There Is no Display
49
Severe Motion Artifacts
49
Image Appears 'Squeezed' or Vertically Stretched into Center of Screen
50
The Display Is Jittery or Unstable
50
The Display Is Faint
50
The Upper Portion of the Display Is Waving, Tearing or Jittering
50
Portions of the Display Are Cut off or Warped to the Opposite Edge
50
Display Appears Compressed (Vertically Stretched)
50
Data Is Cropped from Edges
50
Display Quality Appears to Drift from Good to Bad, Bad to Good
50
Display Has Suddenly Frozen
51
Colors in the Display Are Inaccurate
51
Display Is Not Rectangular
51
Display Is "Noisy
51
Web Interface
52
After Upgrading the Projector Software, the Web Pages Do Not Display Correctly
52
Menu Functions Are Not Active
52
A Backup or Interrogator File Cannot be Saved
52
Image Performance
55
Pixel Format
55
Brightness (ANSI Lumens)
55
Contrast
55
Luminance Uniformity
56
Color Uniformity
56
Color Primaries
56
Gamma
56
Grayscale/Color Resolution
56
Color Temperature
56
Convergence
57
Blemishes
57
Pixel Defects
57
Image Artifacts
57
Picture Centering (with 1.4-1.8:1 HD Lens)
58
Feature Set
58
Airflow
58
Air Filters (Optional)
58
Dust Sealing
58
ILS (Intelligent Lens System)
58
Projection Lens Compatibility
58
Iris
59
Automatic Fans
59
Constant Lamp Output Management
59
Shutter
59
Lamps
60
Status LED
60
Electronics/Sw
60
Christie Mirage M Series Setup Manual (54 pages)
M Series
Brand:
Christie
| Category:
Projector
| Size: 1 MB
Table of Contents
Table of Contents
5
Purchase Record and Service Contacts
9
List of Components
9
Key Features
10
Safety Warnings and Guidelines
11
General Precautions
11
AC /Power Precautions
11
Lamp Precautions
12
2: Installation and Setup
13
Projector Quick Setup and Installation
13
Install a Projection Lens
13
Position the Projector
15
Connect a Source
15
Connect the Line Cord
15
Power up
16
Select a Source
16
Adjust the Image
16
Detailed Setup and Installation
16
Mounting
16
Stacking
17
Basic Optical Alignment
19
Advanced Optical Alignment
20
Powering down
21
Projector Communications
22
How to Use the Remote Keypad or Built-In Keypad
23
Guide to Keypads
23
Remote Keypad
24
Wired Remote
26
Built-In Keypad
26
Overview of LED and Key States
26
Remote Keypad Commands
27
Navigating the Menus
31
Alarm Conditions
34
SNMP and Email Notifications
35
Controls
35
Items
35
Traps
36
Email Notification
37
Filters
39
Power
41
Projector Does Not Power on
41
Lamp
41
Lamp Does Not Ignite
41
Lamp Suddenly Turns off
41
Flicker, Shadows or Dimness
42
Lcd
42
Blank Screen, no Menu Displaying
42
Remote Keypad
42
Remote Keypad Does Not Seem to Work
42
Osd
42
The OSD Menu Does Not Display
42
Ethernet
43
Trouble Establishing Communication with Projector
43
Displays
43
The Projector Is on but There Is no Display
43
Severe Motion Artifacts
43
Image Appears 'Squeezed' or Vertically Stretched into Center of Screen
43
The Display Is Jittery or Unstable
43
The Display Is Faint
44
The Upper Portion of the Display Is Waving, Tearing or Jittering
44
Portions of the Display Are Cut off or Warped to the Opposite Edge
44
Display Appears Compressed (Vertically Stretched)
44
Data Is Cropped from Edges
44
Display Quality Appears to Drift from Good to Bad, Bad to Good
44
Display Has Suddenly Frozen
44
Colors in the Display Are Inaccurate
44
Display Is Not Rectangular
44
Display Is "Noisy
45
Christie Mirage M Series User Manual (41 pages)
Using 3D in Mirage
Brand:
Christie
| Category:
Projector
| Size: 1 MB
Table of Contents
Copyright Notice
3
Table of Contents
5
About this Guide
7
1 Overview
9
What Do I Need for Stereo 3D
9
2 Quick Start - Basic Setup
11
3 Mirage 3D Stereo Sync Cable
13
Active and Passive Stereo 3D Configurations
14
4 Stereo 3D Setup and Optimization
17
Stereo 3D Setup Options
17
Setup Diagrams
18
Basic Setup
18
Basic Setup with CRT Monitor
19
High Performance Setup
19
High Performance Setup with CRT Monitor
20
Optimization Procedures
20
Navigating to the Simulation 3D Submenu
21
Stereo Sync Locking Options
21
Enable Frame Lock
22
Display the Test Pattern
22
Match the Projector to the CRT Monitor
22
Optimize the Frame Delay
22
Optimize the Stereo Sync Delay
23
Optimize the Stereo Dark Interval
24
500 D Source Requirements
25
Appendix A: Troubleshooting
27
Appendix B: Understanding the Projector Adjustments
28
Appendix C: Vrco Test Pattern Software Setup
33
Download the Cavelib_Eoe Software
33
Unix Installation
33
Install Christie-Supplied Program Scripts
34
Test the Test Pattern
34
Install Cavelib_Eoe
35
Windows Installation
35
Install Christie-Supplied Program Scripts
35
Test the Test Pattern
36
Technical Support
39
Index
41
Christie Mirage M Series Instruction Sheet (3 pages)
Boresight Alignment Procedure
Brand:
Christie
| Category:
Projector
| Size: 0 MB
Table of Contents
Introduction
1
Tools Required
1
Warnings
1
Instructions
2
Advertisement
Related Products
Christie Mirage S+HD
Christie Mirage S+
Christie Mirage WU
Christie Mirage WQ-L
Christie Mirage S+20K
Christie MIRAGE WU20K-J
Christie MIRAGE HD20K-J
Christie MIRAGE HD16K-J
Christie MIRAGE HD14K-J
Christie MIRAGE S+14K-J
Christie Categories
Projector
Monitor
Projector Accessories
Speakers
Racks & Stands
More Christie Manuals
Login
Sign In
OR
Sign in with Facebook
Sign in with Google
Upload manual
Upload from disk
Upload from URL