Table of Contents
Advertisement
Motors | Automation | Energy | Coatings
Frequency Inverter
CFW-09
Convertidor de Frecuencia
CFW-09
Inversor de Freqüência
CFW-09
Frequenzumrichter
CFW-09
Variateur de Vitesse
CFW-09
Frequentie-Omzetter
CFW-09
Frekvensomriktare
CFW-09
Преобразователь частоты
CFW-09
User´s Guide
Manual del Usuario
Manual do Usuário
Bedienungsanleitung
Guide d'instalation et d'exploitation
Installatie en gebruikshandleiding
Bruksanvisning
Руководство по эксплуатации
Advertisement
Table of Contents
Troubleshooting

Related Manuals for WEG CFW-09


Summary of Contents for WEG CFW-09
- Page 1 Motors | Automation | Energy | Coatings Frequency Inverter CFW-09 Convertidor de Frecuencia CFW-09 Inversor de Freqüência CFW-09 Frequenzumrichter CFW-09 Variateur de Vitesse CFW-09 Frequentie-Omzetter CFW-09 Frekvensomriktare CFW-09 Преобразователь частоты CFW-09 User´s Guide Manual del Usuario Manual do Usuário Bedienungsanleitung...
- Page 2 FREQUENCY INVERTER MANUAL Series: CFW-09 Software: version 4.0X Language: English Document: 0899.5306 / 12 09/2008 ATTENTION! It is very important to check if the inverter software version is the same as indicated above.
- Page 3 New models for voltages, currents and powers: Models 500-600 V. Refer to items 1 to 9 Inclusion of the items 8.14 Modbus-RTU, 8.17 CFW-09 Supplied by the DC Link - Line HD, Refer to item 8 8.18 CFW-09 RB Regenerative Converter.
-
Page 4: Table Of Contents
General Information 2.1 About this Manual ................37 2.2 Software Version ................37 2.3 About the CFW-09 ................37 2.4 CFW-09 Identification Label and Code Number ........39 2.5 Receiving and Storage ............... 41 CHAPTER Installation and Connection 3.1 Mechanical Installation ..............42 3.1.1 Environment Conditions ............... - Page 5 6.5.2 Description ................. 220 CHAPTER Diagnostics and Troubleshooting 7.1 Faults and Possible Causes ............. 228 7.2 Troubleshooting ................233 7.3 Contacting WEG ................235 7.4 Preventive Maintenance ..............235 7.4.1 Cleaning Instructions ..............236 7.5 Spare Part List .................. 237 CHAPTER CFW-09 Options and Accessories 8.1 I/O Expansion Boards ...............
- Page 6 8.12.4 DeviceNet ................284 8.12.5 DeviceNet Drive Profile ............286 8.12.6 EtherNet/IP ................287 8.12.7 Use to the Fieldbus/Related Parameters of the CFW-09 ..294 8.12.7.1 Variables Read from the Inverter ........294 8.12.7.2 Variables Written in the Inverter ........296 8.12.7.3 Fault Indications ............
- Page 7 8.16.3 Electrical Installation ............... 332 8.16.4 Closing the Inverter ..............332 8.16.5 How to Specify ................ 333 8.17 CFW-09 Supplied by the DC Link - Line HD ........333 8.18 CFW-09 RB Regenerative Converter ..........333 8.19 PLC Board ..................335...
-
Page 8: Parameters
CFW-09 - QUICK PARAMETER REFERENCE QUICK PARAMETER REFERENCE, FAULT AND STATUS MESSAGES Software: V4.0X Application: CFW-09 Model: Serial Number: Responsible: Date: I. Parameters Factory User's Parameters Function Adjustable Range Unit Page Setting Setting P000 Parameter Access 0 to 999 READ ONLY PARAMETERS... - Page 9 CFW-09 - QUICK PARAMETER REFERENCE Factory User's Parameters Function Adjustable Range Unit Page Setting Setting P060 Fifth Error 0 to 71 P061 Sixth Error 0 to 71 P062 Seventh Error 0 to 71 P063 Eighth Error 0 to 71 P064...
- Page 10 CFW-09 - QUICK PARAMETER REFERENCE Factory User's Parameters Function Adjustable Range Unit Page Setting Setting V/F Control P136 Manual Boost Torque 0 to 9 P137 Autommatic Torque Boost 0.00 to 1.00 0.00 P138 Slip Compensation -10.0 to +10.0 P139 Output Current Filter 0.00 to 16.00...
- Page 11 CFW-09 - QUICK PARAMETER REFERENCE Factory User's Parameters Function Adjustable Range Unit Page Setting Setting P165 Speed Filter 0.012 to 1.000 0.012 P166 Speed Regulator Differential Gain 0.00 to 7.99 0.00 (without differential action) Current Regulator P167 Proportional Gain 0.00 to 1.99 0.50...
- Page 12 CFW-09 - QUICK PARAMETER REFERENCE Factory User's Parameters Function Adjustable Range Unit Page Setting Setting 7 = Loads User Default 1 8 = Loads User Default 2 9 = Not Used 10 = Save User Default 1 11 = Save User Default 2...
- Page 13 CFW-09 - QUICK PARAMETER REFERENCE Factory User's Parameters Function Adjustable Range Unit Page Setting Setting 4 = DI2 to DI8 5 = Serial (L) 6 = Serial (R) 7 = Fieldbus (L) 8 = Fieldbus (R) 9 = PLC (L)
- Page 14 CFW-09 - QUICK PARAMETER REFERENCE Factory User's Parameters Function Adjustable Range Unit Page Setting Setting 2 = DI3 to DI8 3 = Serial 4 = Fieldbus 5 = PLC (1) (8) P226 Remote FWD/REV Selection 0 = Always Forward 4 = DI2...
- Page 15 CFW-09 - QUICK PARAMETER REFERENCE Factory User's Parameters Function Adjustable Range Unit Page Setting Setting P239 Analog Input AI2 Signal 0 = (0 to 10) V / (0 to 20) mA 0 = (0 to 10) V / 1 = (4 to 20) mA...
- Page 16 9 = PID Setpoint 10 = Positive Torque Current 11 = Motor Torque 12 = PLC 13 = Not Used 14 = Motor Voltage 15 to 63 = Exclusive WEG use P256 Analog Output AO3 Gain 0.000 to 9.999 1.000 P257...
- Page 17 CFW-09 - QUICK PARAMETER REFERENCE Factory User's Parameters Function Adjustable Range Unit Page Setting Setting Digital Inputs P263 Digital Input DI1 Function 0 = Not Used 1 = Start/Stop 1 = Start/Stop 2 = General Enable 3 = Fast Stop...
- Page 18 CFW-09 - QUICK PARAMETER REFERENCE Factory User's Parameters Function Adjustable Range Unit Page Setting Setting 11 = JOG- 12 = Reset 13 = Fieldbus 14 = Stop (3 wire) 15 = Man/Auto 16 = Not used 17 = Disables Flying Start...
- Page 19 CFW-09 - QUICK PARAMETER REFERENCE Factory User's Parameters Function Adjustable Range Unit Page Setting Setting 12 = Reset 13 = Fieldbus 14 = Stop (3 wire) 15 = Man/Auto 16 = Not Used 17 = Disables Flying Start 18 = DC voltage regulator...
- Page 20 CFW-09 - QUICK PARAMETER REFERENCE Factory User's Parameters Function Adjustable Range Unit Page Setting Setting 13 = Fieldbus 14 = Stop (3 wire) 15 = Man/Auto 16 = Motor Thermistor 17 = Disables Flying Start 18 = DC Voltage Regulator...
- Page 21 CFW-09 - QUICK PARAMETER REFERENCE Factory User's Parameters Function Adjustable Range Unit Page Setting Setting 35 = Torque Polarity -/+ 36 = F > Fx _ 1 37 = F > Fx _ 2 38 = Set Point = Process...
- Page 22 CFW-09 - QUICK PARAMETER REFERENCE Factory User's Parameters Function Adjustable Range Unit Page Setting Setting P277 Relay Output RL1 Function 0 = Not Used 13 = No Fault 1 = N* > Nx 2 = N > Nx 3 = N < Ny...
- Page 23 CFW-09 - QUICK PARAMETER REFERENCE Factory User's Parameters Function Adjustable Range Unit Page Setting Setting 6 = Is > Ix 7 = Is < Ix 8 = Torque > Tx 9 = Torque < Tx 10 = Remote 11 = Run...
- Page 24 CFW-09 - QUICK PARAMETER REFERENCE Factory User's Parameters Function Adjustable Range Unit Page Setting Setting 14 = No E00 15 = No E01+E02+E03 16 = No E04 17 = No E05 18 = (4 to 20) mA OK 19 = Fieldbus 20 = FWD 21 = Proc.Var.
- Page 25 CFW-09 - QUICK PARAMETER REFERENCE Factory User's Parameters Function Adjustable Range Unit Page Setting Setting 380-480 V Models 20 = 142 A 0 = 3.6 A 21 = 180 A 1 = 4 A 55 = 211 A 2 = 5.5 A...
- Page 26 CFW-09 - QUICK PARAMETER REFERENCE Factory User's Parameters Function Adjustable Range Unit Page Setting Setting 0 = for models P296 Inverter Rated Voltage 0 = 220-230 V (1) (11) Attention! 220-230 V (Rated Input Voltage) 1 = 380 V Refer to...
- Page 27 CFW-09 - QUICK PARAMETER REFERENCE Factory User's Parameters Function Adjustable Range Unit Page Setting Setting 6 = Modbus-RTU, 19200 bps, even parity 7 = Modbus-RTU, 38400 bps, no parity 8 = Modbus-RTU, 38400 bps, odd parity 9 = Modbus-RTU, 38400 bps,...
- Page 28 CFW-09 - QUICK PARAMETER REFERENCE Factory User's Parameters Function Adjustable Range Unit Page Setting Setting 559 to 885 (P296 = 8) P325 Ride-Through Proportional Gain 0.0 to 63.9 22.8 P326 Ride-Through Integral Gain 0.000 to 9.999 0.128 P331 Voltage Ramp 0.2 to 60.0...
- Page 29 CFW-09 - QUICK PARAMETER REFERENCE Factory User's Parameters Function Adjustable Range Unit Page Setting Setting VVW Control P398 Slip Compensation During 0 = Off 1 = On Regeneration 1 = On (1) (2) P399 Motor Rated Efficiency 50.0 to 99.9...
- Page 30 CFW-09 - QUICK PARAMETER REFERENCE Factory User's Parameters Function Adjustable Range Unit Page Setting Setting 33 = 380.0 hp/280.0 kW 34 = 400.0 hp/300.0 kW 35 = 430.0 hp/315.0 kW 36 = 440.0 hp/330.0 kW 37 = 450.0 hp/335.0 kW 38 = 475.0 hp/355.0 kW...
- Page 31 CFW-09 - QUICK PARAMETER REFERENCE Factory User's Parameters Function Adjustable Range Unit Page Setting Setting P527 PID Action 0 = Direct 0 = Direct 1 = Reverse P528 Process Variable Scale Factor 0 to 9999 1000 P529 Decimal Point of Proc. Var.
-
Page 32: Ii.fault Messages
CFW-09 - QUICK PARAMETER REFERENCE Condition where it occurs Parameters that Parameters that are affected During the During affect others and modified automatically oriented normal when set start-up operation P203 P223, P225, P226, P228, P237, P265 P295 P156, P157, P158, P169 (V/F),... -
Page 33: Other Messages
CFW-09 - QUICK PARAMETER REFERENCE III. Other Messages Display Description Inverter is Ready to be Enabled Inverter is Enabled Power Supply Voltage is Too Low for the Inverter Operation (Undervoltage) dCbr Inverter in DC Braking Mode. (Refer to P300) -
Page 34: Safety Notices On The Product
This Manual contains all necessary information for the correct installation and operation of the CFW-09 Variable Frequency Inverter. The CFW-09 Instruction Manual has been written for qualified personnel with suitable training or technical qualifications to operate this type of equipment. - Page 35 NOTE! In this Manual, qualified personnel are defined as people that are trained to: 1. Install, ground, power up and operate the CFW-09 according to this Manual and the local required safety procedures; 2. Use of safety equipment according to the local regulations;...
-
Page 36: General Information
CFW-09 is very flexible and allows for the operation in many different modes as described in this manual. As the CFW-09 can be applied in several ways, it is impossible to describe here all of the application possibilities. WEG does not accept any responsibility when the CFW-09 is not used according to this Manual. - Page 37 Technical specifications for each model of CFW-09 are described in chapter 9. The block diagram below gives a general view of the CFW-09: ...
-
Page 38: Identification Label And Code Number
CHAPTER 2 - GENERAL INFORMATION 2.4 CFW-09 IDENTIFICATION LABEL AND CODE NUMBER WEG Part Software Serial Number Revision Number CFW-09 Model Nominal Input Data Nominal Output Data (Phase, Current and Frequency) (Voltage, Frequency) Nominal Output Current and Switching Frequency for VT and... -
Page 40: Receiving And Storage
Transistor is built in, optional built in or an external module (DBW). 2.5 RECEIVING AND The CFW-09 is supplied in cardboard boxes up to size 3 (refer to item 9) and for models above, the packing will be with wood pallet and wood box. -
Page 41: Installation And Connection
These guidelines must be followed for proper CFW-09 operation. 3.1 MECHANICAL INSTALLATION 3.1.1 Environment Conditions The location of the CFW-09 installation is an important factor to assure good performance and high product reliability. For proper installation of the inverter, we make the following recommendations: Avoid direct exposure to sunlight, rain, high moisture and sea air. -
Page 42: Mounting Specifications
Table 3.1 - Installation data – Refer to item 9.1 3.1.3 Mounting Specifications For installing the CFW-09, leave at least the minimum free spaces around the inverter according to figure 3.2. The dimensions of these free spaces are described on table 3.2. -
Page 43: Mounting Inside A Panel
ATTENTION! Provide independent conduits for signal, control and power conductors (Refer to item 3.2: Electrical Installation). Figure 3.2 - Free space for cooling Model CFW-09 mm (in) mm (in) mm (in) 6 A to 28 A/220-230 V 3.6 A to 24 A/380-480 V (1.57) -
Page 44: Mounting On Surface
3.1.3.2 Mounting on Surface Figure 3.3 shows the installation of the CFW-09 on a mounting plate. b) Sizes 3 to 8 a) Sizes 1 and 2 Figure 3.3 a) and b) - Mounting procedure for the CFW-09 on a surface... -
Page 45: Mounting With The Heatsink Through A Surface
Positioning (for all Sizes) c) Sizes 9 and 10 Air Flow Figure 3.3 c) and d) - Mounting procedure for the CFW-09 on a surface 3.1.3.3 Mounting with the The CFW-09 can also be installed with the heatsink through the mounting plate, as shown in figure 3.4. - Page 46 4 mm (1/6 in) max. Botton Support Flow c) Cutout Dimensions (Refer to table 3.4) Sizes 3 to 8 Sizes 1 and 2 Figure 3.4 a) to c) - Mounting procedure for the CFW-09 with the heatsink through the mounting surface...
-
Page 47: Keypad (Hmi) And Cover Removal
(10.83) (45.27) (2.70) (0.59) (0.39) (*) The Through Surface Mounting kit (kit-KMF) is a set of supports for the CFW-09 as shown on figure 3.4 b). Table 3.4 - Cutout dimensions and kits for CFW-09 through surface mounting 3.1.4 Keypad (HMI) and... -
Page 48: Electrical Installation
Be sure that the AC input power is disconnected before making any terminal connection. DANGER! The CFW-09 frequency inverter cannot be used as an emergency stop device. Provide another devices for this function. The power connection terminals can be of different sizes and configurations, 3.2.1 Power/Grounding... - Page 49 CHAPTER 3 - INSTALLATION AND CONNECTION a) Size 1 models b) Size 2 models c) Size 3, 4 and 5 models d) Size 6 and 7 (220-230 V and 380-480 V models) f) Size 8 (380-480 V models) e) Size 7 (500-600 V models) g) Size 9 and 10 (380-480 V models) h) Size 8E (500-690 V and 660-690 V models) Figure 3.6 a) to h) - Power terminals...
-
Page 50: Location Of The Power/Grounding/Control Connections
CHAPTER 3 - INSTALLATION AND CONNECTION i) Size10E (500-690 V and 660-690 V models) Figure 3.6 i) - Power terminals 3.2.2 Location of the Power/ Grounding/Control Connections b) Size 3, 4 and 5 models a) Size 1 and 2 models CONTROL POWER GROUNDING... - Page 51 CHAPTER 3 - INSTALLATION AND CONNECTION d) Size 8 models e) Size 9 and 10 models c) Size 6 and 7 models RATED VOLTAGE SELECTION RATED VOLTAGE SELECTION RATED VOLTAGE SELECTION CONTROL CONTROL POWER CONTROL POWER POWER GROUNDING GROUNDING GROUNDING f) Size 8E g) Size 10E RATED VOLTAGE...
-
Page 52: Rated Voltage Selection
CHAPTER 3 - INSTALLATION AND CONNECTION 3.2.3 Rated Voltage Selection The following models of CFW-09 inverter series have a jumper for rated voltage selection: - 86 A/380-480 V. - 44 A/500-600 V. - 500-690 V models. ATTENTION! It is necessary to adjust the jumper in models 380-480 V when the power supply voltage is different from 440 V and 460 V. -
Page 53: Power/Grounding Wiring And Fuses
CHAPTER 3 - INSTALLATION AND CONNECTION c) LVS2 (size 7, 500-600 V) d) CIP3 (size 8E and 10E, 500-690 V) RATED VOLTAGE SELECTION AUXILIARY CIRCUITFUSES RATED VOLTAGE SELECTION Figure 3.8 c) and d) – Rated voltage selection on boards LVS1, CIP2, LVS2 and CIP3 3.2.4 Power/Grounding Wiring and Fuses ATTENTION! - Page 54 CHAPTER 3 - INSTALLATION AND CONNECTION High Speed Max. Power CFW-09 Rating Power Cables Grounding Cables Fuse Semiconductor Terminal Cable Size A/volts (AWG/MCM) (AWG/MCM) t @25°C Fuse - A (AWG/MCM) 4.0 (10) 2.9/500-600 4.2/500-600 1.5 (14) 1.5 (14) 2.5 (12) 2.5 (12)
- Page 55 The wire sizing indicated in table 3.5 are reference values only. The exact wire sizing depends on the installation conditions and the maximum acceptable line voltage drop. The tightening torque is as indicated in table 3.6. Use 75ºC copper wire only. Grounding CFW-09 Rating Power Cables Wiring A/Volts N.m (Ibf.in) N.m (Ibf.in) 6 A to 13 A/220-230 V 1.00 (8.85)
-
Page 56: Power Connections
The AC input voltage must be compatible with the inverter rated voltage. Supply line capacity: The CFW-09 is suitable for use in circuits capable of supplying not more than 30.000 A (rms) symmetrical (230 V/480 V/600 V/690 V). The CFW-09 can be installed on power supplies with a higher fault level provided that adequate protection is provided by the fuses or circuit breaker. -
Page 57: Output Connections
Do not share the ground wiring with other equipment that operates with high current (for instance, high voltage motors, welding machines, etc.). If several inverters are used together, refer to figure 3.10. CFW-09 1 CFW-09 2 CFW-09 N CFW-09 1... -
Page 58: It Networks
CHAPTER 3 - INSTALLATION AND CONNECTION ATTENTION! Do not use the neutral from the main power supply to ground the inverter. When electromagnetic interference (EMI), generated by the inverter, causes problems with other equipment, use shielded wires or install the motor wires in metallic conduits. - Page 59 CHAPTER 3 - INSTALLATION AND CONNECTION a) Models 180 A to 240 A/380-480 V b) Models 312 A to 600 A/380-480 V For IT networks remove the jumper For IT networks remove the jumper c) Models 2.9 A to 14 A/500-600 V d) Models 22 A to 32 A/500-600 V J8 jumper position: X11 - Grounded network...
-
Page 60: Control Wiring
CHAPTER 3 - INSTALLATION AND CONNECTION 3.2.6 Control Wiring The control wiring (analog inputs/outputs, digital inputs/outputs and relay outputs) is made on the following terminal blocks of the Electronic Control Board CC9 (refer to location in figures 3.7, item 3.2.2). XC1: Digital and Analog Signals XC1A: Relay Outputs The following diagram shows the control wiring with the digital inputs as active... - Page 61 CHAPTER 3 - INSTALLATION AND CONNECTION The following diagram shows the control wiring with the digital inputs as active low (without a jumper between XC1:8 and XC1:10). Terminal XC1 Specifications Factory Default Function Start / Stop 6 Isolated Digital Inputs Minimum High Level: 18 Vdc FWD / REV Section (Remote Mode) Maximum Low Level: 3 Vdc...
- Page 62 CHAPTER 3 - INSTALLATION AND CONNECTION * Can be used for grounding CC9 Board of the signal and control cable shields Figure 3.13 - Dip switch position for (0 to 10) V or (0 to 20) mA/(4 to 20) mA selection As a default the analogue inputs are selected as (0 to 10) V.
-
Page 63: Typical Terminal Connections
CHAPTER 3 - INSTALLATION AND CONNECTION Connect the shield as shown in figure 3.14. Insulate with Tape Inverter Side Do Not Ground Connect to Ground: Screw located on the CC9 Board and on support plate of the CC9 Board Figure 3.14 - Shield connection 4) For wiring distances longer than 50 m (150 ft), it is necessary to use galvanic isolators for the XC1:11 to XC1:20 analog signals. - Page 64 CHAPTER 3 - INSTALLATION AND CONNECTION Start/Stop Connector XC1 FWD/REV 24 Vdc + REF 5 k AI1 + AI1 - - REF Figure 3.15 - XC1 (CC9) wiring for connection 2 Connection 3 - 3-Wire Control Start/Stop Selection of function Start/Stop with 3 wire control. Parameters to be programmed: Set DI3 to START P265 = 14...
- Page 65 CHAPTER 3 - INSTALLATION AND CONNECTION Connection 4 - FWD Run / REV Run Selection function FWD/REV. Parameters to be programmed: Set DI3 to FORWARD Run P265 = 8 Set DI4 to REVERSE Run P266 = 8 When the FWD Run / REV Run Function is programmed, the function is always active, in both local and remote operation modes.
-
Page 66: European Emc Directive - Requirements For Conforming Installations
Product Standard EN61800-3 “Adjustable speed electrical power drives systems”, specific for variable speed drives systems. Compliance of the whole series of the CFW-09 is based on testing some representative models. A Technical Construction File was checked and approved by a Competent Body. -
Page 67: Epcos Filters
Radio frequency interference is expected if used on such a network. The following tables 3.9, 3.10 and 3.11 show the Epcos filters for CFW-09 3.3.2 Epcos Filters frequency inverters with 380-480 V, 500-600 V and 660-690 V power supply... - Page 68 B84143B600S20 RFI filter. In this case, consider the same motor cable lengths and radiated emission data as shown in table above. (2) Minimum output frequency = 2.9 Hz. (3) Minimum output frequency = 2.4 Hz. Table 3.9 - Epcos filters list for CFW-09 inverter series with 380-480 V power supply...
- Page 69 N/A = Not Applicable – The inverters were not tested with these limits. Note: Minimum output frequency = 2.4 Hz. Table 3.10 - Epcos filters list for CFW-09 inverter series with 500-600 V power supply 660-690 V power supply: Maximum motor cable...
-
Page 70: Schaffner Filters
FN-3258-55-52 30 A First environment, restricted 38 A distribution 45 A FN-3258-100-35 2 x Schaffner 203 First environment, restricted (1151-042) - (filter distribution input/output sides) Table 3.12 - Schaffner filters list for CFW-09 inverter series with 380-480 V power supply... - Page 71 30 to 230 MHz: 40 dB (uV/m) in 30 m 230 to 1000 MHz: 50 dB (uV/m) in 30 m (2) - Motor shielded cable length: 20 m. Table 3.12 (cont.) - Schaffner filters list for CFW-09 inverter series with 380-480 V power supply...
- Page 72 30 to 230 MHz: 40 dB (uV/m) in 30 m 230 to 1000 MHz: 50 dB (uV/m) in 30 m (2) - Motor shielded cable length: 20 m. Table 3.13 - Schaffner filters list for CFW-09 inverter series with 220-230 V power supply...
-
Page 73: Emc Filter Characteristics
Bus /99 0208.2084 FN3359-600-99 0208.2085 FN3359-1000-99 1000 0208.2086 1151-042 0208.2087 1151-043 0208.2088 1151-044 (*) According to the manufacturer, this filter can be used up to 331 A. Table 3.14 - Technical specifications of EMC filters for the CFW-09 inverter series... - Page 74 PE M4 x 11 Terminals 4 mm² Marking LINE LOAD b) EPCOS B84143A16R105 Filter 199.5 PE M5 x 15 Terminals 4 mm² Marking LINE LOAD Figure 3.20 a) and b) - EMC filters for CFW-09 inverter series [dimensions in mm]...
- Page 75 PE M5 x 15 PE M6 x 14 Marking LOAD LINE d) EPCOS B84143A36R105 and B84143A50R105 Filter PE M6 x 14 Terminals 10 mm² Marking LOAD LINE Figure 3.20 c) and d) - EMC filters for CFW-09 inverter series [dimensions in mm]...
- Page 76 EPCOS B84143A66R105 Filter PE M6 x 14 Terminals 16 mm² Marking LOAD LINE f) EPCOS B84143A90R105 Filter PE M10 x 34 Terminals 35 mm² Marking LINE LOAD Figure 3.20 e) and f) - EMC filters for CFW-09 inverter series [dimensions in mm]...
- Page 77 EPCOS B84143G150R110 Filter 500±10 Terminal Litz wire blocks 50 mm PE M10 x 35 Wire end ferrule Litz wire markings 365±0.5 Marking LINE LOAD Figure 3.20 g) and h) - EMC filters for CFW-09 inverter series [dimensions in mm]...
- Page 78 EPCOS B84143B320S20 and B84143B400S20 Filters 240±1 4 x M6 mm deep Marking LINE LOAD 12 42±2 85±0.5 42±2 360±2 11 PE M10 x 30 Figure 3.20 i) and j) - EMC filters for CFW-09 inverter series [dimensions in mm]...
- Page 79 EPCOS B84143B1000S20 Filter 290±1 4 x M6 / 6 mm deep Marking LINE LOAD 12 52±3 135±0.8 52±3 420±2.5 14 PE M12 x 30 Figure 3.20 k) and l) - EMC filters for CFW-09 inverter series [dimensions in mm]...
- Page 80 PE M10 x 30 n) EPCOS B84143B250S21 Filter 240±0.6 2 x M6 / 6 mm deep Marking LINE LOAD 12 42±1 42±1 360±2 11 PE M10 x 30 Figure 3.20 m) and n) - EMC filters for CFW-09 inverter series [dimensions in mm]...
- Page 81 CHAPTER 3 - INSTALLATION AND CONNECTION o) EPCOS B84143B400S125 Filter 220±1 Figure 3.20 o) - EMC filters for CFW-09 inverter series [dimensions in mm]...
- Page 82 CHAPTER 3 - INSTALLATION AND CONNECTION p) EPCOS B84143B600S125 Filter 240±1 12 Figure 3.20 p) - EMC filters for CFW-09 inverter series [dimensions in mm]...
- Page 83 Type/47 - Terminal block for 16 mm solid wires,10 mm flexible wires AWG 8. Type/52 - Dimesions in mm (inch) Terminal block for 25 mm solid wires,16 mm flexible wires AWG 6. Figure 3.20 q) - EMC filters for CFW-09 inverter series [dimensions in mm (in)]...
- Page 84 These filters are supplied with M12 Connector bolts for the grounding connection. Figure 3.20 r) - EMC filters for CFW-09 inverter series [dimensions in mm] NOTE! The declaration of conformity CE is available on the website www.weg.net or on the CD, which comes with the products.
-
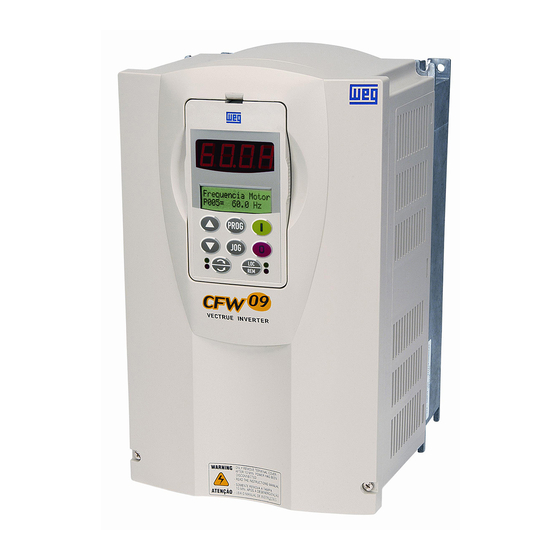
Page 85: Description Of The Keypad
CHAPTER KEYPAD (HMI) OPERATION This chapter describes the CFW-09 operation via the standard Keypad or Human-Machine Interface (HMI), providing the following information: General Keypad Description; Use of the Keypad; Parameter Programming; Description of the Status Indicators. The standard CFW-09 Keypad has two readout displays: a LED readout 4.1 DESCRIPTION... - Page 86 Reverses the direction of motor rotation between Forward/Reverse. Toggles between the LOCAL and REMOTE modes of operation. Performs the JOG function when pressed. Any DIx programmed for General Enable must be closed (and the CFW-09 must be stopped) to enable JOG function.
-
Page 87: Use Of The Keypad (Hmi)
CHAPTER 4 - KEYPAD (HMI) OPERATION The keypad is used for programming and operating the CFW-09 allowing the 4.2 USE OF THE KEYPAD following functions: (HMI) Indication of the inverter status and operation variables; Fault Indication and Diagnostics; Viewing and programming parameters;... -
Page 88: Read-Only" Variables And Status
CHAPTER 4 - KEYPAD (HMI) OPERATION NOTE! Reference Backup The last frequency Reference set by the keys is stored when the inverter is stopped or the AC power is removed, provided P120 = 1 (Reference Backup active is the factory default). To change the frequency reference before starting the inverter, the value of parameter P121 must be changed. -
Page 89: Parameter Viewing And Programming
Troubleshooting); Inverter in Fault condition (Refer to chapter 7 - Diagnostics and Troubleshooting). All CFW-09 settings are made through the parameters. The parameters are 4.2.3 Parameter Viewing and shown on the display with the letter P followed by a number. - Page 90 CHAPTER 4 - KEYPAD (HMI) OPERATION LED DISPLAY ACTION Comments LCD DISPLAY Press the Motor Speed P002 = 0 rpm Use the keys to Select the desired parameter reach P100 Accel. Time P100 = 5. 0 s Numeric value associated to the Press the parameter Accel.
- Page 91 CHAPTER 4 - KEYPAD (HMI) OPERATION (4) To allow the reprogramming of any parameter value it is required to change parameter P000 to the password value. The factory default password value is 5. Otherwise you can only read the parameter values and not reprogram them. For more detail refer to P000 description in chapter 6.
-
Page 92: Pre-Power Checks
A start-up programming example is shown below: Inverter Motor Line: CFW-09 WEG IP55 Rated Current: 9 A Power: 5 hp Rated Voltage: 380 V to 480 V... - Page 93 CHAPTER 5 - START-UP ORIENTED START-UP Initial Power-up - Programming via Keypad (HMI) (Based on the example above): LED DISPLAY ACTION DESCRIPTION LCD DISPLAY Language Selection: After power-up, the display shows 0 = Português the following message 1 = English 2 = Español l a n g u ag e P20 1 = English...
- Page 94 CHAPTER 5 - START-UP LED DISPLAY ACTION DESCRIPTION LCD DISPLAY Use the and keys Selected Inverter Rated Voltage: select the inverter power supply voltage 1 = 380 V VFD Rated Volt. P296 = 380 V Press the key to save the Exit the programming mode selected option and exit the programming mode...
- Page 95 CHAPTER 5 - START-UP LED DISPLAY ACTION DESCRIPTION LCD DISPLAY Use the keys to set Programmed Motor Rated Current: the correct motor rated current value 7.9 A Mo to r R at ed Cur. P401 = 7.9 A Press the key to save the programmed value and exit the Exit the programming mode...
- Page 96 CHAPTER 5 - START-UP LED DISPLAY ACTION DESCRIPTION LCD DISPLAY Programmed Motor Rated rpm: Use the keys to set 1730 rpm the correct motor rated rpm value Moto r Rated P402 = 1730 rpm Press the key to save the Exit the programming mode programmed value and exit the programming mode...
-
Page 97: Start-Up
P295 for models 7 A and 54 A/220-230 V; 2.9 A and 7 A/500-600 V; 107 A, 147 A and 247 A/500-690 V; 100 A, 127 A and 340 A/660-690 V. ATTENTION! Open the input circuit breaker or disconnect switch to shut down the CFW-09. NOTES! To repeat the initial power-up procedure: Set the parameter P204 = 5 or 6 (this loads the factory default parameters) and follow the initial power-up sub-routine again;... -
Page 98: Type Of Control: V/F 60 Hz - Operation Via Keypad (Hmi)
CHAPTER 5 - START-UP 5.3.1 Type of Control: The V/F or Scalar Control is recommended in the following cases: V/F 60 Hz - Operation Several motors driven by the same inverter; Via Keypad (HMI) Motor rated current lower than 1/3 of the inverter rated current; For test purposes, without a motor connected to the inverter. - Page 99 CHAPTER 5 - START-UP LED DISPLAY ACTION DESCRIPTION LCD DISPLAY Press the key to enter the Enter the programming mode programming mode Type o f con t rol P202 = V/F 60 Hz If the option V/F 60 Hz (value = 0) is Use the keys to already programmed, ignore this...
- Page 100 CHAPTER 5 - START-UP LED DISPLAY ACTION DESCRIPTION LCD DISPLAY Motor decelerates down to 0 rpm Press the Stop key ready Motor accelerates from 0 rpm up to the JOG speed set at P122 Ex.: P122 = 150 rpm Press the key and hold it CCW direction of rotation Motor...
-
Page 101: Type Of Control: Sensorless Or Vector With Encoder
CHAPTER 5 - START-UP 5.3.2 Type of Control: Sensorless For the majority of the applications, the Sensorless Vector Control is recommended. This mode permits an operation over a 100:1 speed range, or Vector with Encoder a speed control accuracy of 0.5 % (Refer to P412 - chapter 6), high torque (Operation Via Keypad and fast dynamic response. - Page 102 CHAPTER 5 - START-UP LED DISPLAY ACTION DESCRIPTION LCD DISPLAY Use the keys to Password value (factory default = 5) set the password value Param et er Access P000 = 5 Press the key to save the Exit the programming mode programmed value and exit the programming mode Param et er Access...
- Page 103 CHAPTER 5 - START-UP LED DISPLAY ACTION DESCRIPTION LCD DISPLAY Press the key to save the selected option and start the tuning Motor Rated Voltage Range: routine after changing to Vector 0 to 690 V Control Mode Moto r Rated Volt P400 = 380 V Press the...
- Page 104 CHAPTER 5 - START-UP LED DISPLAY ACTION DESCRIPTION LCD DISPLAY Enter the programming mode Press the key to enter the programming mode Moto r Rated Freq P403 = 60 Hz Programmed Motor Rated Use the keys to set Frequency: 60 Hz the correct motor rated frequency Moto r Rated Freq value...
- Page 105 CHAPTER 5 - START-UP LED DISPLAY ACTION DESCRIPTION LCD DISPLAY Press the key to enter the Enter the programming mode programming mode Mo to r R ated P404 = 5.0 HP Use the keys to Selected Motor Rated Power: select the motor rated power 7 = 5.0 hp/3.7 kW Mo to r R ated P404 = 5.0 HP...
- Page 106 CHAPTER 5 - START-UP LED DISPLAY ACTION DESCRIPTION LCD DISPLAY Press the key to enter the Enter the programming mode programming mode Ventilation Type P4 0 6 = Self Vent. Selected Motor Ventilation Type: Use the keys to 0 = Self Ventilated select the motor ventilation type Ventilation Type P4 0 6 = Self...
- Page 107 CHAPTER 5 - START-UP LED DISPLAY ACTION DESCRIPTION LCD DISPLAY Messages and values of the Press the key to start the estimated parameters are Self-tuning routine in progress self-tuning routine shown Motor Speed (rpm) End of the Self-tuning routine. Inverter is back to normal operation Motor Speed P002 = XXXX rpm Motor accelerates from 0 to 90 rpm*...
-
Page 108: Type Of Control: Vvw - Keypad Operation
The VVW (Voltage Vector WEG) Control Mode follows the same philosophy of 5.3.3 Type of Control: the V/F Control. The VVW Control allows a reasonable improvement of the steady-... - Page 109 CHAPTER 5 - START-UP In order to get a good steady-state speed regulation, the slip frequency is calculated from the estimated load torque value (which uses the motor nameplate data). The following sequence is valid for Connection #1 (refer to item 3.2.7). The inver- ter should have been already installed and powered up according to instructions in chapter 3 and item 5.2.
- Page 110 CHAPTER 5 - START-UP LED DISPLAY ACTION DESCRIPTION LCD DISPLAY Use the keys to Selected Type of Control: select the type of control (VVW) 5 = VVW Type of control P202 = VVW Press the key to save the selected option and start the tuning Motor Rated Voltage Range: routine after changing to VVW 0 to 690 V...
- Page 111 CHAPTER 5 - START-UP LED DISPLAY ACTION DESCRIPTION LCD DISPLAY Motor Rated Frequency Range: Press the key to go to the 0 to 300 Hz next parameter Motor Rated Freq P403 = 60 Hz Enter the programming mode Press the key to enter the programming mode Motor Rated Freq...
- Page 112 CHAPTER 5 - START-UP LED DISPLAY ACTION DESCRIPTION LCD DISPLAY Motor Rated hp Range: Press the key to go to the 1 to 1600.0 CV next parameter 1 to 1190.0 kW Motor Rated HP P404 = 5.0 CV Enter the programming mode Press the key to enter the programming mode...
- Page 113 CHAPTER 5 - START-UP LED DISPLAY ACTION DESCRIPTION LCD DISPLAY Press the key to go to the Motor Rated Efficiency 50.0 to 99 % next parameter Rendim.Nom.Motor P399 = 67.0 % Press the key to enter the Enter the programming mode programming mode Rendim.Nom.Motor P399 = 67.0 %...
- Page 114 CHAPTER 5 - START-UP LED DISPLAY ACTION DESCRIPTION LCD DISPLAY Self-tuning Mode Selection: Press the key to go to the 0 = No next parameter 1 = No Rotation Run Self Tuning P408 = No Press the key to enter the programming mode Enter the programming mode Run Self Tuning...
- Page 115 CHAPTER 5 - START-UP LED DISPLAY ACTION DESCRIPTION LCD DISPLAY Motor decelerates down to 0 rpm Press the FWD / REV key and then reverses the direction of Obs.: The LEDs on the keypad rotation accelerating back up to show whether the motor is running Motor Speed 1800 rpm...
-
Page 116: Detailed Parameter Description
CHAPTER DETAILED PARAMETER DESCRIPTION This chapter describes in detail all CFW-09 parameters. In order to simplify the explanation, the parameters have been grouped by characteristics and functions: Read Only Parameters Variables that can only be viewed on the display but not changed. Examples would be motor speed or motor current. -
Page 117: Access And Read Only Parameters - P000 To P099
CHAPTER 6 - DETAILED PARAMETER DESCRIPTION 6.1 ACCESS AND READ ONLY PARAMETERS - P000 to P099 Range [Factory Setting] Parameter Unit Description / Notes P000 0 to 999 This parameter opens the access to change other parameter values. When Parameter Access/ [ 0 ] P200 = 1 (Password Active)] it is necessary to set P000 = 5 to change Password Value... - Page 118 CHAPTER 6 - DETAILED PARAMETER DESCRIPTION Range [Factory Setting] Parameter Unit Description / Notes P004 0.0 to 1235 Indicates the inverter DC Link voltage in volt (V). DC Link Voltage [ - ] P005 0.0 to 1020 Indicates the inverter output frequency in hertz (Hz). Motor Frequency [ - ] 0.1 Hz...
- Page 119 CHAPTER 6 - DETAILED PARAMETER DESCRIPTION Range [Factory Setting] Parameter Unit Description / Notes Inactive = 0, Active = 1, and the DI1 status is the most significant bit (MSB). Example: DI1 = Active (+24 V); DI2 = Inactive (0 V); DI3 = Inactive (0 V);...
-
Page 120: P022 Weg Use
-100 to +100 Analog Input AI4' Value [ - ] 0.1 % P022 WEG Use [ - ] Indicates the CFW-09 Software Version. P023 V4.0X Software Version [ - ] P024 LCD: -32768 Indicates the A/D conversion result of the analog input A14 located on... - Page 121 CHAPTER 6 - DETAILED PARAMETER DESCRIPTION Range [Factory Setting] Parameter Unit Description / Notes Indicate the percentage value of the analog outputs AO1 to AO4 with P027 0.0 to 100 respect to the full-scale value. The indicated values are obtained after Analog Output AO1 [ - ] the multiplication by the gain.
- Page 122 CHAPTER 6 - DETAILED PARAMETER DESCRIPTION Range [Factory Setting] Parameter Unit Description / Notes P044 0 to 65535 Indicates the energy consumed by the motor. kWh Counter [ - ] Indicates up to 65535 kWh, then it returns to zero. 1 kWh If P204 is set to 4, the P044 is reset to zero.
-
Page 123: Regulation Parameters - P100 To P199
CHAPTER 6 - DETAILED PARAMETER DESCRIPTION 6.2 REGULATION PARAMETERS - P100 to P199 Range [Factory Setting] Parameter Unit Description / Notes P100 0.0 to 999 Setting the value to 0.0 s results in no Acceleration ramp. Acceleration Time [ 20 ] Defines the time to accelerate (P100) linearly from zero up to the 0.1 s (<... - Page 124 CHAPTER 6 - DETAILED PARAMETER DESCRIPTION Range [Factory Setting] Parameter Unit Description / Notes P120 Backup Table 6.2 - Speed reference backup P121 P133 to P134 To activate the active: P221 = 0 or P222 = 0. Keypad Speed [ 90 ] With P120 = 1 (On) the content of P121 is maintained (backup) even Reference 1 rpm...
- Page 125 CHAPTER 6 - DETAILED PARAMETER DESCRIPTION Range [Factory Setting] Parameter Unit Description / Notes During the JOG + or JOG- commands the values of P122 or P123 are respectively added to, or subtracted from the speed reference to generate the total reference. Refer to figure 6.26. P124 (2) (11) P133 to P134...
- Page 126 Figure 6.2 - Multispeed When the effective overspeed exceeds the value of P134+P132 longer P132 0 to 100 than 20 ms, the CFW-09 will disable the PWM pulses by E17. Maximum [ 10 ] Overspeed Level The P132 setting is a value in percent of P134.
- Page 127 Sensorless Vector Control is 18 rpm for 60 Hz motors and 15 rpm for 50 Hz motors, with 4 poles. This parame- For P135 3 the CFW-09 will always operate in Sensorless Vector Mode ter is shown on the display(s) only when when P202 = 3, (there is no transition to the I/F Mode).
- Page 128 CHAPTER 6 - DETAILED PARAMETER DESCRIPTION Range [Factory Setting] Parameter Unit Description / Notes Compensates for the voltage drop on the motor stator resistance at low P136 0 to 9 frequencies and increases the inverter output voltage in order to maintain Manual Torque [ 1 ] a constant torque in V/F operation.
- Page 129 CHAPTER 6 - DETAILED PARAMETER DESCRIPTION Range [Factory Setting] Parameter Unit Description / Notes The automatic Torque Boost compensates for the voltage drop in the P137 0.00 to 1.00 stator resistance as a function of the motor active current. Automatic Torque [ 0.00 ] Boost 0.01...
- Page 130 CHAPTER 6 - DETAILED PARAMETER DESCRIPTION Range [Factory Setting] Parameter Unit Description / Notes Output Voltage Vnom (Function to motor load) Frequency Nnom Figure 6.9 - V/F curve with slip compensation To set Parameter 138: Run the motor without load up to approximately half of the application top speed;...
- Page 131 CHAPTER 6 - DETAILED PARAMETER DESCRIPTION Range [Factory Setting] Parameter Unit Description / Notes Speed P141 Time P140 Figure 6.10 - Curve for high torque starts These parameters allow changing the standard V/F curves defined at P142 0.0 to 100.0 P202.
-
Page 132: Without Losses
CHAPTER 6 - DETAILED PARAMETER DESCRIPTION Range [Factory Setting] Parameter Unit Description / Notes Output Voltage 100 % P142 P202 = 2 P143 P144 Speed/ Frequency P134 0.1 Hz 3 Hz P146 P145 Figure 6.11 - Adjustable V/F curve V/F P150 0 to 2 Action... - Page 133 CHAPTER 6 - DETAILED PARAMETER DESCRIPTION Range [Factory Setting] Parameter Unit Description / Notes 739 to 800 (P296 = 4) DC Link Voltage (Ud) (P004) [ 800 ] E01 - Overvoltage Level P151 Regulation Level Nominal 809 to 1000 (P296 = 5) [ 1000 ] Time 885 to 1000 (P296 = 6)
- Page 134 CHAPTER 6 - DETAILED PARAMETER DESCRIPTION Range [Factory Setting] Parameter Unit Description / Notes DC Link Voltage (Ud) (P004) E01 - Overvoltage Level P151 Regulation Level Nominal Time Speed Time Figure 6.13 - Deceleration curve with DC Link voltage limitation (regulation) NOTES! The factory setting is at maximum (Link regulation is deactivated).
- Page 135 [ 1200 ] pole motor. The braking torque developed at full speed, with torque (P169 and P170) limited by the CFW-09 at a value equal to the motor rated torque, is given by TB1 point (figure 6.15). TB1 value depends on the motor efficiency and disregarding the friction losses it is given by the following equation: ...
- Page 136 CHAPTER 6 - DETAILED PARAMETER DESCRIPTION Range [Factory Setting] Parameter Unit Description / Notes The braking torque indicated in figure 6.15 can be increased by increasing the inverter torque limit: P169 (maximum forward torque current) or P170 (maximum reverse torque current). In general, smaller motors have lower efficiency (higher losses) consequently Optimal Braking can achieve higher braking torques with smaller motors.
- Page 137 CHAPTER 6 - DETAILED PARAMETER DESCRIPTION Range [Factory Setting] Parameter Unit Description / Notes 678 to 800 (P296 = 3) Inverter V P296 P153 [ 748 ] > 400 V 220/230 V 375 V 380 V 618 V 739 to 800 (P296 = 4) 400/415 V 675 V >...
- Page 138 Used to protect motor and inverter against timed overload (Ixt - E05). The Motor Overload Current (P156, P157 and P158) is the current level above which the CFW-09 will consider the motor operating under overload. The higher the overload, the sooner the Overload Fault E05 will occur.
- Page 139 CHAPTER 6 - DETAILED PARAMETER DESCRIPTION Range [Factory Setting] Parameter Unit Description / Notes This overload curve adjustment improves the protection of self-ventilated motors, or it can be programmed with a constant overload level at any speed for blower cooled motors. This curve is changed when P406 (Ventilation Type) is changed during the start-up subroutine.
- Page 140 3. Through AI3 (P241 = 2 - Maximum torque current) Notes: The motor current shall be equivalent to the CFW-09 inverter current so that the torque control can achieve its best precision. The Sensorless Control (P202 = 3) does not work with torque limitation at frequencies lower than 3 Hz.
- Page 141 CHAPTER 6 - DETAILED PARAMETER DESCRIPTION Range [Factory Setting] Parameter Unit Description / Notes P161 0.0 to 63.9 The gains for the speed regulator are automatically set based on the Proportional Gain of [ 7.4 ] value of parameter P413 (Tm Constant). the Speed Regulator However, these gains can be manually adjusted in order to optimize the dynamic response of the speed.
- Page 142 CHAPTER 6 - DETAILED PARAMETER DESCRIPTION Range [Factory Setting] Parameter Unit Description / Notes P163 -999 to 999 Parameters P163 or P164 may be used to compensate a bias offset at Local Speed [ 0 ] the analog input signals, when the speed reference is given by the analog Reference Offset inputs (AI1 to AI4).
- Page 143 CHAPTER 6 - DETAILED PARAMETER DESCRIPTION Range [Factory Setting] Parameter Unit Description / Notes This parameter limits the motor output current by reducing the speed, P169 0.2 x P295 to 1.8 x P295 which avoids motor stalling under overload conditions. Maximum Output [ 1.5 x P295 ] Current...
- Page 144 CHAPTER 6 - DETAILED PARAMETER DESCRIPTION Range [Factory Setting] Parameter Unit Description / Notes The maximum torque produced by the motor is given by: P169 P295 x Tmotor (%) = x 100 - P410 x P178 (P401) where: 1 for N Nrated Nrated x P180 for N >...
-
Page 145: General Enable
CHAPTER 6 - DETAILED PARAMETER DESCRIPTION Range [Factory Setting] Parameter Unit Description / Notes P175 and P176 are automatically set as a function of parameter P412. P175 0.0 to 31.9 In general the automatic setting is adequate and there is no need for a Proportional Gain of [ 2.0 ] reconfiguration. -
Page 146: Configuration Parameters - P200 To P399
V/F Adjustable (Refer to P142 to P146) Sensorless Vector Vector with Encoder VVW (Voltage Vector WEG) Table 6.15 - Type of control selection For details on the Type of Control selection Refer to item 5.3. It defines the selection type of special functions:... - Page 147 In order to load the User Parameters #1 (P204 = 7) and/or the User Parameters #2 (P204 = 8) into the operation area of the CFW-09, it is necessary that the User Memory #1 and/or the User Memory #2 have been previously saved (P204 = 10 and/or P204 = 11).
- Page 148 Reset P043: Resets the Time Enabled hour meter to zero Reset P044: Resets the kWh counter to zero Load WEG-60 Hz: Resets all parameters to the 60 Hz factory default values. Load WEG-50 Hz: Resets all parameters to the 50 Hz factory default values.
- Page 149 Description / Notes P206 0 to 255 In the event of a fault trip, except for E09, E24, E31 and E41, the CFW-09 can initiate an automatic reset after the time given by P206 is elapsed. Auto-Reset [ 0 ] Time If P206 ...
- Page 150 When active, it disables (general disabling, motor runs freely) the inverter when the speed reference and the actual motor speed are lower than the value set at P291 (Zero Speed Zone). The CFW-09 will be enabled again, when one of the conditions defined by the Parameter P212 is satisfied.
-
Page 151: Without
Table 6.23 - Actuation line phase loss detection The phase loss detector is active when: P214 = On and the CFW-09 is enabled. The display indication and the updating of the fault memory happen 3 seconds after the fault has occurred. - Page 152 CHAPTER 6 - DETAILED PARAMETER DESCRIPTION Range [Factory Setting] Parameter Unit Description / Notes The copy function is used to transfer the content of the parameters from one inverter to another. The inverters must be of the same type (voltage/ current and the same software version must be installed.
- Page 153 CHAPTER 6 - DETAILED PARAMETER DESCRIPTION Range [Factory Setting] Parameter Unit Description / Notes INVERTER INVERTER Parameters Parameters INVkeypad keypadINV P215 = 2 P215 = 1 Press Press EEPROM EEPROM Keypad Keypad Figure 6.24 -Copying the parameters from the “Inverter A” to the “Inverter B” While the Keypad runs the reading or writing procedures, it cannot be operated.
- Page 154 CHAPTER 6 - DETAILED PARAMETER DESCRIPTION Range [Factory Setting] Parameter Unit Description / Notes LOCAL/REMOTE Selection P220 Always LOCAL Mode Always REMOTE mode of the Keypad (HMI) (LOCAL Default) of the Keypad (HMI) (REMOTE Default) Digital inputs DI2 to DI8 (P264 to P270) Serial (Local Default) - SuperDrive or incorporated Modbus Serial (Remote Default) - SuperDrive or incorporated Modbus Fieldbus (Local Default) - Optional Fieldbus board...
- Page 155 CHAPTER 6 - DETAILED PARAMETER DESCRIPTION Range [Factory Setting] Parameter Unit Description / Notes P223 (1) (8) 0 to 11 P223 LOCAL FWD/REV Selection LOCAL FWD/REV [ 2 ] Always Forward Selection Always Reverse of the Keypad (Default Forward) of the Keypad (Reverse Default) Digital Input DI2 (P264 = 0) Serial (FWD Default) Reserved Serial (REV Default)
- Page 156 CHAPTER 6 - DETAILED PARAMETER DESCRIPTION Range [Factory Setting] Parameter Unit Description / Notes (1) (8) P226 0 to 11 REMOTE FWD/REV Selection P226 REMOTE FWD/REV [ 4 ] Always Forward Selection Always Reverse of the Keypad (Default Forward ) of the Keypad (Default Reverse ) Digital Input DI2 (P264 = 0) Serial (FWD Default)
- Page 157 CHAPTER 6 - DETAILED PARAMETER DESCRIPTION LOCAL REFERENCE (P221) FWD/REV LOCAL/REMOTE (P223) Selection (P220) START/STOP LOCAL (P224) REFERENCE (P225) REFERENCE REFERENCE REMOTE REFERENCE LOCAL COMMANDS COMMANDS REMOTE COMMANDS REMOTE REFERENCE COMMANDS (P222) FWD/REV (P226) START/STOP (P227) (P228) (*) For P221 = 11 (PLC) or P222 = 11 (PLC) the speed reference will be the total reference according to the figure 6.26. Figure 6.25 - Block diagram of the local / remote mode...
- Page 158 CHAPTER 6 - DETAILED PARAMETER DESCRIPTION (*) Valid only for P202 = 3 and 4. Figure 6.26 - Block diagram of the speed reference...
- Page 159 CHAPTER 6 - DETAILED PARAMETER DESCRIPTION Figure 6.27 a) - Block diagram of the Vector Control...
- Page 160 CHAPTER 6 - DETAILED PARAMETER DESCRIPTION P202 =Type of Control P202 = 0 ou 1 = V/F P136 Total Speed Reference P202 = 2 = Adjustable V/F P142 P143 P144 P146 P145 Speed Reference Is = Output Current TRANSF. P137 P138 Automatic Torque BOOST...
- Page 161 CHAPTER 6 - DETAILED PARAMETER DESCRIPTION Figure 6.27 c) - Block diagram of the VVW Control...
- Page 162 CHAPTER 6 - DETAILED PARAMETER DESCRIPTION Range [Factory Setting] Parameter Unit Description / Notes P232 0 to 2 P232 Stop Mode Stop Mode [ 0 ] Ramp to Stop Selection Coast to Stop Fast Stop Table 6.33 - Stop mode selection Parameter P232 is valid only for the following commands: 1) The key of the keypad;...
- Page 163 CHAPTER 6 - DETAILED PARAMETER DESCRIPTION Range [Factory Setting] Parameter Unit Description / Notes b) Active Dead Zone P233 = 1 Reference P134 P133 Alx Signal 0 ........10 V 0 ........20 mA 4 mA ......20 mA 10 V ........0 20 mA ........
- Page 164 CHAPTER 6 - DETAILED PARAMETER DESCRIPTION Range [Factory Setting] Parameter Unit Description / Notes P235 0 to 3 P235 Input AI1 Signal Switch S1.2 Analog Input AI1 [ 0 ] (0 to 10) V / (0 to 20) mA OFF/ON Signal (4 to 20) mA (10 to 0) V / (20 to 0) mA...
- Page 165 CHAPTER 6 - DETAILED PARAMETER DESCRIPTION Range [Factory Setting] Parameter Unit Description / Notes Option 4 – Maximum Torque Current (AI2+AI1): When parameters P237 = 2 and P241 = 0, the torque current limit (P169 and P170) is given by the signal at the Analog Input AI2. When parameters P237 = 4 and P241 = 0, the torque current limit (P169 and P170) is given by the sum of the signals at Analog Inputs AI1 and AI2.
- Page 166 CHAPTER 6 - DETAILED PARAMETER DESCRIPTION Range [Factory Setting] Parameter Unit Description / Notes When a current signal is used at the Analog Input AI2, set the switch S1.1 on the control board to “ON”. Options 2 and 3 provide an inverse reference with which is possible to have maximum speed with minimum reference.
- Page 167 CHAPTER 6 - DETAILED PARAMETER DESCRIPTION Range [Factory Setting] Parameter Unit Description / Notes When parameters P237 = 2 and P241 = 2, the torque current limit (P169 and P170) is given by the signal at the Analog Input AI2. When parameters P237 = 2 and P241 = 4, the torque current limit (P169 and P170) is given by the sum of the signals at Analog Inputs AI2 and AI3.
- Page 168 CHAPTER 6 - DETAILED PARAMETER DESCRIPTION Range [Factory Setting] Parameter Unit Description / Notes When a current signal is used at the Analog Input AI4, set the switch S2.1 on the EBA board to “ON”. Options 2 and 3 provide an inverse reference with which is possible to have maximum speed with minimum reference.
- Page 169 (with filter 0.5 s) PID Setpoint Torque Positive [P202 = 3 or 4 (vector)] Motor Torque Dead Zone for Speed Indication WEG Use 15 to 63 15 to 63 Motor Voltage Table 6.40 - Functions of the analog outputs P258 0.000 to 9.999 Adjusts the gain of the AO4 analog output for P258 = 1.000 the AO4...
- Page 170 CHAPTER 6 - DETAILED PARAMETER DESCRIPTION Range [Factory Setting] Parameter Unit Description / Notes P251 P253 P255 P257 Speed Reference Total Reference Real Speed Torque Reference Torque Current P252, P254, P256, P258 Output Current Gain PID Process Variable Active Current Power PID Setpoint Positive Torque Current...
- Page 171 CHAPTER 6 - DETAILED PARAMETER DESCRIPTION Range [Factory Setting] Parameter Unit Description / Notes 20 mA 10 V 4 mA P259 P134 Figure 6.32 - Dead zone for speed indication NOTES! For current analog output (0 to 20 mA or 4 to 20 mA) it is necessary to use the EBB expansion board.
- Page 172 CHAPTER 6 - DETAILED PARAMETER DESCRIPTION Range [Factory Setting] Parameter Unit Description / Notes Parameter P263 P264 P265 P266 P267 P268 P269 P270 P268 0 to 22 (Input) Function (DI1) (DI2) (DI3) (DI4) (DI5) (DI6) (DI7) (DI8) Digital Input DI6 [ 6 (Ramp 2) ] 0, 7 0 and 0 and 0 and 0, 5, 7...
- Page 173 CHAPTER 6 - DETAILED PARAMETER DESCRIPTION Range [Factory Setting] Parameter Unit Description / Notes - Speed = DIx Open (0 V), Torque = DIx Closed (+24 V). When Torque is selected the speed regulators gains P161 and P162 are not used and changed to: Gp (Proportional Gain) = 1.00 and Gi (Integral Gain) = 0.00.
- Page 174 CHAPTER 6 - DETAILED PARAMETER DESCRIPTION Range [Factory Setting] Parameter Unit Description / Notes - The functions JOG+ and JOG – are valid only for P202 = 3 and 4. - The option Fieldbus sets the DI as a remote input for the Fieldbus system and in order to become effective it must be read as any other DI of the inverter.
- Page 175 CHAPTER 6 - DETAILED PARAMETER DESCRIPTION Range [Factory Setting] Parameter Unit Description / Notes ‘Timer RL2 and RL3’ function enables and disables the Relays 2 and 3 (RL2 and RL3). When the timing function of the relays 2 and 3 is programmed at any DIx, and when the transition is effected from 0 V to 24 V, the relay will be enabled according to the time set at P283 (RL2) or P285 (RL3).
- Page 176 CHAPTER 6 - DETAILED PARAMETER DESCRIPTION a) START/STOP b) GENERAL ENABLE Accel. Ramp Motor Coasts to Stop Decel. Ramp Accel. Ramp Motor Speed Motor Speed Time Time 24 V 24 V Open Open Time Time Note: All digital inputs set to general enable must be on in Note: All digital inputs set to start/stop must be on in order order that the inverter operates as shown above.
- Page 177 CHAPTER 6 - DETAILED PARAMETER DESCRIPTION h) JOG JOG Speed (P122) Motor Speed Accel. Ramp Decel. Ramp Time 24 V Start/Stop DIx Open Time 24 V JOG - Open Time 24 V General/ Enable DIx Open Time i) JOG + and JOG - JOG+ Speed (P122) JOG- Speed (P123) Motor...
- Page 178 CHAPTER 6 - DETAILED PARAMETER DESCRIPTION k) 3 WIRE START / STOP 24 V Start - DIx Open Time 24 V Time Stop - Open Time Motor Speed Time l) FORWARD RUN / REVERSE RUN 24 V Open Forward Run - DIx Time 24 V Open...
- Page 179 CHAPTER 6 - DETAILED PARAMETER DESCRIPTION Range [Factory Setting] Parameter Unit Description / Notes Check possible options on table 6.42 and details about each function’s P275 0 to 40 operation on the charts in the figure 6.36. Digital Output DO1 [ 0 (Not Used) ] Function (located on The status of the Digital Outputs can be monitored at Parameter P013.
- Page 180 CHAPTER 6 - DETAILED PARAMETER DESCRIPTION Range [Factory Setting] Parameter Unit Description / Notes Additional Notes about the Digital Output Functions: - Remote: Inverter is operating in Remote mode. - Run: Inverter is enabled (the IGBTs are switching, the motor may be at any speed, including zero).
- Page 181 - Overweight - Situation where the lifted load weight is greater than the maximum allowed. When the CFW-09 is powered up, the output set to the option “32 = Overweight” is activated. In order to deactivate the output, i.e., detect the overweight condition, the following conditions shall be satisfied: - P361 = 1 (Load Detection = On);...
- Page 182 CHAPTER 6 - DETAILED PARAMETER DESCRIPTION Range [Factory Setting] Parameter Unit Description / Notes NOTES! If the slack cable condition is detected during the stabilization time, the motor remains at the stabilization speed until receiving a “Stop” command. However, if this condition is detected outside of the stabilization time, the output set to this option will be deactivated and the motor will maintain the same speed.
- Page 183 Master/Slave function The implementation of this function requires the digital or relay outputs of the “master” CFW-09 to be set to the options P275 = 34 (Torque Polarity +/-) or P275 = 35 (Torque Polarity -/+). Therefore, a load resistor (Rc) shall be connected at the digital output DO1 (XC4:5) or DO2 (XC4:7), as presented in figure 8.1.
- Page 184 CHAPTER 6 - DETAILED PARAMETER DESCRIPTION Range [Factory Setting] Parameter Unit Description / Notes Master Slave EBA.01 XC4:6 XC1:10 XC4:4 DGND CFW-09 XC4:8 R 500 24 Vcc XC4:5 XC1:2 DO1 (Torque +/-) DI2 (FWD/REV) XC1:17, 18 XC1:12, 13 AI1 (Speed Reference) CFW-09 XC1:15, 16 XC1:19, 20 AI2 (Max.
- Page 185 CHAPTER 6 - DETAILED PARAMETER DESCRIPTION Range [Factory Setting] Parameter Unit Description / Notes Ix = P290 (Current Ix) - User selected current reference point. Is = P003 (Motor Current). Torque = P009 (Motor Torque). Tx = P293 (Torque Tx) - User selected torque reference point. Vpx = P533 (Process Variable x) - User selected reference point.
- Page 186 CHAPTER 6 - DETAILED PARAMETER DESCRIPTION a) N > Nx b) N < Ny Motor Speed Ny (P289) Nx (P288) P287 P287 Time Time P287 P287 Relay/Transistor Relay/Transistor Output ON Output c) N = N* d) Is > Ix Ix (P290) Time Time Relay/Transistor...
- Page 187 CHAPTER 6 - DETAILED PARAMETER DESCRIPTION i) Enabled Hours > Nx j) N > Nx and Nt > Nx 6553.5 h Nx (P288) Hx (P294) Time Time Hours Enable (P043) Relay/Transistor Relay/ Transistor l) 4 to 20 mA OK k) No External Fault Ready/ Fault (Exy) State...
- Page 188 CHAPTER 6 - DETAILED PARAMETER DESCRIPTION q) Logic for the Brake Activation when DOx or Relay = 30 or 31 CFW-09 Start/Stop N > Nx Is > Ix V/F Control Activate Is > Imr Release Auxiliary the brake the brake...
- Page 189 CHAPTER 6 - DETAILED PARAMETER DESCRIPTION r) Operation of Parameters P353 to P356 with Ix > Imr. Current Imag Reset Pulse for the integrator of the speed regulator Start/Stop P354 Accepted only after P355 P356 P356 RLx or DOx Output (brake activation) P353 P355...
- Page 190 CHAPTER 6 - DETAILED PARAMETER DESCRIPTION s) Operation of Parameters P353 to P356 with Ix < Imr. Current Imag Magnetized Motor Reset Pulse for the integrator of the speed regulator Start/Stop P354 Accepted only after P355 P356 P356 RLx or DOx Output (brake activation) P353 P355...
- Page 191 CHAPTER 6 - DETAILED PARAMETER DESCRIPTION t) F > Fx _ 1 u) F > Fx _ 2 P369 + P370 Fx (P369) Fx (P369) P369 - P370 P369 - P370 Relay Relay Transistor OFF Transistor OFF v) Set Point = Process Variable P040 P537 P525...
- Page 192 CHAPTER 6 - DETAILED PARAMETER DESCRIPTION Range [Factory Setting] Parameter Unit Description / Notes P287 0.0 to 5.0 Used by the Digital and Relay Outputs functions: Hysteresis for Nx/Ny [ 1.0 ] N > Nx and N < Ny. 0.1 % (2) (11) P288 0 to P134...
- Page 193 P295 shall be kept in accordance with the inverter rated current Inverter Rated [ According to the (CT). Current CFW-09 rated current for CT Do not modify the value of P295 for VT applications. application] 220-230 V Models...
- Page 194 Set P296 according to the rated AC line voltage! Do not set according to short term peak values. For CFW-09 models 86 A/380-480 V, 44 A/500-600 V and 500-690 V models, also adjust the voltage selection jumper (Refer to item 3.2.3).
- Page 195 CHAPTER 6 - DETAILED PARAMETER DESCRIPTION Range [Factory Setting] Parameter Unit Description / Notes The option 1.25 kHz is not valid for the Vector Control (P202 = 3 or 4). The option 10 kHz is not valid for the Sensorless Vector Control (P202 = 3) and for the models with supply voltage between 500 V and 690 V (2.9 A to 79 A/500-600 V, 107 A to 472 A/500-690 V and 100 A to 428 A/660-690 V).
- Page 196 CHAPTER 6 - DETAILED PARAMETER DESCRIPTION Range [Factory Setting] Parameter Unit Description / Notes For the V/F Control, there is a “Dead Time” (motor runs freely) before the DC braking starts. This time is required in order to demagnetize the motor and it is a function of the motor speed.
- Page 197 [ 0 ] word (refer to item 8.12.7.2 - Variable Written in the Inverter). Profibus Network P310 Function Bit #6 CFW-09 Action No function Executes a General Disable command, If bit6 = 0 regardless of the value of the remaining bits of the control word.
- Page 198 CHAPTER 6 - DETAILED PARAMETER DESCRIPTION Range [Factory Setting] Parameter Unit Description / Notes If this parameter is set to ON, the bit #6 of the control word shall be kept in 1 to the inverter operation. It will allow the inverter to be disabled in case of STOP in the master of the Fieldbus network, where the control word is reset (all bits are set to zero).
- Page 199 CHAPTER 6 - DETAILED PARAMETER DESCRIPTION Range [Factory Setting] Parameter Unit Description / Notes P314 0.0 to 999.0 Time for serial P314 Time for Serial [ 0.0 ] watchdog action Watchdog Action 0.1 s Disable 0.1 to 999.0 Enable Table 6.53 - Serial Watchdog action If the inverter does not receive any valid serial telegram after the time programmed at P314 has elapsed, the Fault Message E28 on the HMI and the inverter will return to the action programmed at P313 - Type of...
- Page 200 CHAPTER 6 - DETAILED PARAMETER DESCRIPTION Range [Factory Setting] Parameter Unit Description / Notes 324 V to 513 V NOTE! (P296 = 2) This parameter works together with P322, P323, P325, P326 for [459 V] Ride-Through in Vector Control, and with P331, P332 for V/F Control Ride-Through and Flying Start.
- Page 201 CHAPTER 6 - DETAILED PARAMETER DESCRIPTION Range [Factory Setting] Parameter Unit Description / Notes 324 V to 513 V NOTE! (P296 = 2) Cares with Application: [446 V] The use of the line reactance or DC choke is mandatory to limit the inrush current when the network is reestablished.
- Page 202 CHAPTER 6 - DETAILED PARAMETER DESCRIPTION Range [Factory Setting] Parameter Unit Description / Notes 356 V to 564 V t0 - Line Loss; (P296 = 3) t1 - Line Loss Detection; [534 V] t2 - Trip by Undervoltage (E02 without Ride-Through); 388 V to 615 V t3 - Line Recover;...
- Page 203 CHAPTER 6 - DETAILED PARAMETER DESCRIPTION Range [Factory Setting] Parameter Unit Description / Notes The Flying Start function allows the inverter to start a motor that is running P331 0.2 to 60.0 freely. This function takes the motor from its actual speed to the speed Voltage Ramp [ 2.0 ] reference set at the inverter.
- Page 204 CHAPTER 6 - DETAILED PARAMETER DESCRIPTION Line Supply Returns DC Link Voltage E02 level P332 Enabled Output Pulses Disabled P331 Output Voltage Output Speed (P002) 0 rpm Figure 6.44 a) - Ride-Through actuation (line returns before time set at P332 elapses) in V/F mode Line Supply Returns DC Link Voltage E02 level...
- Page 205 P338 area. Input Word #5 If for instance one wants to read from the CFW-09 inverter the motor P339 current in Amps, one must program the value 3 in one of these Input Word #6 parameters, because the parameter P003 is the one that contains this information.
- Page 206 Output Word #5 For instance, if one wishes to write the acceleration ramp value in the CFW-09 inverter, one must program the value 100 in one of these P344 parameters, because the parameter P100 is the one where this data is Output Word #6 programmed.
-
Page 207: Parameters For Crane Applications And For Torque Master/Slave Function - P351 To P368
P202 = 3 or 4. P352 0 to 999 If the CFW-09 remains at torque limitation for a period longer than the Delay for E34 [ 999 ] value set at P352 the inverter will trip with an error code E34. - Page 208 Range [Factory Setting] Parameter Unit Description / Notes P356 0.0 to 10.0 This is the time that the CFW-09 waits before enabling the ramp after Delay for [ 0.0 ] receiving the “Start” command. Ramp Enable 0.1 s P357 0.00 to 9.99 Time constant of the filter applied to the torque current.
- Page 209 Slack Cable Time [0.0] outputs set to the option “Slack Cable Detection”. If the Slack Cable 0.1 s condition is no longer valid, the CFW-09 resets the digital or relay outputs. Available only if P361 = 1 (On) NOTE! When P364 = 0, the detection logic of slack cable is disabled.
- Page 210 CHAPTER 6 - DETAILED PARAMETER DESCRIPTION a) Activation of the load detection parameters during the stabilization time and with P361 = On Speed N* x P368 P362 Show Overweight Output Current P367 P366 P365 P363 Calculate Im P364 Show Slack Cable Overweight Condition Normal Condition...
- Page 211 CHAPTER 6 - DETAILED PARAMETER DESCRIPTION b) Diagram of the Load Detection Logic Start P361 = 1? N > P362 N = 0 To > 1 s Increase To To = 0 Repeat Detection Slack Cable Counter = 0 Repeat Detection Repeat Detection...
- Page 212 The default value of this parameter is automatically set when parameter the display(s) only P404 is modified. The suggested value is valid only for IV pole standard when P202 = 5 three-phase WEG motors. The user shall set this parameter manually (VVW) for other motor types.
-
Page 213: Motor Parameters - P400 To P499
CHAPTER 6 - DETAILED PARAMETER DESCRIPTION MOTOR PARAMETERS - P400 to P499 Range [Factory Setting] Parameter Unit Description / Notes Set this parameter value according to the motor nameplate and the P400 (1) (6) 0 to 690 connection diagram in the terminal box. Motor Rated Voltage [ P296 ] This value cannot be greater than the rated voltage value set at P296. - Page 214 5 at 60 Hz/4.2 at 50 Hz according the rated motor frequency. CONDITIONS FOR USING OPTION P406 = 2: I. Sensorless Vector Mode (P202 = 3); II. WEG motors series: Nema Premium Efficiency, Nema High Efficiency, IEC Premium Efficiency, IEC TOP Premium Efficiency and Alto Rendimento Plus.
- Page 215 - No rotation - The motor remains stationary during the self-tuning routine. zero. The value of P410 is obtained from a table, which is valid for WEG motors up to 12 poles. Self-tuning can be realized only with Thus, P410 must be set to zero before starting the self-tuning routine.
- Page 216 The value of this parameter is set based on the motor rotor inertia (table data is valid for WEG motors), on the Drive Rated Current, and on the Drive Rated Voltage.
- Page 217 WEG motors. Current (I 0.1 A If a non WEG motor is being used set this parameter to the correct value before starting Self-tuning. This parame- ter is shown on the...
- Page 218 - / 1.87 - / - - / - 500 / 375 Table 6.63 - Typical T values for some WEG standard motors P413 0.00 to 99.99 The setting of P413 determines the gains of the speed regulator (P161 Tm Constant [ 0.00 ]...
-
Page 219: Special Functions Parameters - P500 To P699
P500 to P699 6.5.1 PID Regulator The CFW-09 is fitted with the PID regulator that can be used for closed loop process control. This function acts as a proportional, integral and derivative regulator, superimposed on the normal inverter speed control. - Page 220 CHAPTER 6 - DETAILED PARAMETER DESCRIPTION The setpoint can be defined: Keypad: parameter P525. Analog inputs AI1’, AI2’, AI3’, AI4’, (AI1’+ AI2’)>0, (AI1’+ AI2’), Multispeed, Serial, Fieldbus and PLC. NOTE! When P203 = 1, do not use the reference via E.P. (P221/P222 = 7). When the PID function (P203 = 1) is set: The following parameters are automatically changed: P223 = 0 (always forward), P225 = 0 (JOG disabled), P226 = 0 (always forward), P228 = 0 (JOG disabled),...
- Page 221 CHAPTER 6 - DETAILED PARAMETER DESCRIPTION Figure 6.47 - Block diagram of the PID regulator function...
- Page 222 CHAPTER 6 - DETAILED PARAMETER DESCRIPTION Range [Factory Setting] Parameter Unit Description / Notes Some examples of initial settings of the PID Regulator Gains and PID P520 0.000 to 7.999 Ramp Times for some applications mentioned in item 6.5.1, are shown PID Proportional [ 1.000 ] in table 6.65.
- Page 223 [P120 = 1 (Active)]. Once PID is in Automatic mode, the Setpoint value for PID regulator is entered into the CFW-09 via any reference set by P221 (LOCAL mode) or P222 (REMOTE mode). Particularly, most of general PID applications uses the setpoint via the AI1 [P221 = 1 (LOC) or P222 = 1(REM)] or via keys [P221 = 0 (LOC) or P222 = 0 (REM)].
- Page 224 CHAPTER 6 - DETAILED PARAMETER DESCRIPTION Range [Factory Setting] Parameter Unit Description / Notes Select according to the process Motor Speed Fault Select Positive Direct Increase Negative Reverse Table 6.68 - PID action selection Process requirement: PID action type: the PID action should be selected as Direct, when it is required to increase the motor speed in order to increase the process variable.
- Page 225 CHAPTER 6 - DETAILED PARAMETER DESCRIPTION Range [Factory Setting] Parameter Unit Description / Notes Example 2 (values are factory standards): - Desired indication: 0.0 % to 100.0 % (F. S.) - Feedback Input: AI2 - Gain AI2 = P238 = 1.000 - P529 = 1 (one number after decimal point) 100.0 x (10) P528 =...
- Page 226 CHAPTER 6 - DETAILED PARAMETER DESCRIPTION Range [Factory Setting] Parameter Unit Description / Notes P535 0 to 100 The value of this parameter is used along with P212 (Condition to Leave Wake Up Band [ 0 ] Zero Speed Disable), providing additional condition to leave zero speed disable, that is, error of PID >...
-
Page 227: Faults And Possible Causes
DIAGNOSTICS AND TROUBLESHOOTING This chapter assists the user to identify and correct possible faults that can occur during the CFW-09 operation. Guidance on Preventive Maintenance is also provided. When a fault is detected, the inverter is disabled and the Fault Code is 7.1 FAULTS AND POSSIBLE... - Page 228 Encoder is defective P202 = 4 - Vector with Encoder) Electrical noise CPU Error (watchdog) Contact WEG Memory with corrupted values Program Memory Error (Checksum) Power-on A bid to copy the HMI parameters to the inverter with different Software Error in the...
- Page 229 Overweight Speed without Brake Failure Control The load was too heavy and the CFW-09 operated at torque limitation Long Period at for a period longer than allowed Torque Limitation Failure on the brake opening caused the CFW-09 to operate at torque...
- Page 230 Auto-reset models - refer to figures 3.7 f) and g)) Serial Fieldbus When the PLC board stops communicating with the CFW-09 for more Watchdog error than 200 ms for the PLC board Table 7.1 (cont.) - Faults and possible causes...
- Page 231 This error is only active in Vector Modes (P202 = 3 or 4). (9) If the CFW-09 remains at torque limitation for a period longer than the value set at P352 the inverter will trip with an error code E34. When P352 = 999 the detection logic for the error E34 is disabled.
-
Page 232: Troubleshooting
CHAPTER 7 - DIAGNOSTICS AND TROUBLESHOOTING Indication of the inverter status LEDs: Description Error Power Inverter is powered up and is ready A fault has been detected. The FAULT LED flashes, indicating the number of the Fault Code Example: (Flashing) 2.7 s Note: If the fault E00 occurs, the ERROR LED is ON continuously. - Page 233 CHAPTER 7 - DIAGNOSTICS AND TROUBLESHOOTING POINT TO BE PROBLEM CORRECTIVEACTION CHECKED Motor speed Loose Connections 1. Disable the inverter, switch OFF the supply voltage and tighten all connections. varies (oscillates) 2. Check if all internal connection is tightened. Speed 1.
-
Page 234: Contacting Weg
CHAPTER 7 - DIAGNOSTICS AND TROUBLESHOOTING 7.3 CONTACTING NOTE! When contacting WEG for service or technical assistance, please have the following data on hand: Inverter Model; Serial number, manufacturing date and hardware revision, as indicated on the inverter nameplate (Refer to item 2.4);... -
Page 235: Cleaning Instructions
300 V and 330 Vac to the inverter input. 7.4.1 Cleaning Instructions When necessary clean the CFW-09 following the instructions below: Cooling system: Remove AC power from the inverter and wait 10 minutes;... -
Page 236: Spare Part List
CHAPTER 7 - DIAGNOSTICS AND TROUBLESHOOTING 7.5 SPARE PART LIST Models 220-230 V Types (Ampères) Specification Item N Name Units per Inverter 5000.5275 Fan 0400.3681 Length 255 mm (60 x 60) 5000.5292 Fan 0400.3679 Length 165 mm (40 x 40) 5000.5267 Fan 0400.3682 Length 200 mm (80 x 80) 5000.5364... - Page 237 CHAPTER 7 - DIAGNOSTICS AND TROUBLESHOOTING Models 220-230 V Types (Ampères) Specification 86 105 130 Name Item N Units per Inverter Pre-charge Cont.CWM32.10 220 V 50/60 Hz 035502345 Contactors Cont.CWM50.00 220 V 50/60 Hz 035502394 Pre-charge Resistor Vitrified wire Resistor 20 R 75 W 0301.1852 Fan 0400.3682 Length 200 mm 5000.5267...
- Page 238 CHAPTER 7 - DIAGNOSTICS AND TROUBLESHOOTING Models 380-480 V Type (Ampères) Specification Name Item N 3.6 4 Units per Inverter Fan 0400.3284 Length 190 mm (60 x 60) 5000.5275 Fan 2 x 0400.2423 150/110 mm (60 x 60) 5000.5305 Fan 0400.3679 Length 165 mm (40 x 40) 5000.5292 Fan 2 x 0400.3681 (135/175) mm (60 x 60) 5000.5283...
- Page 239 CHAPTER 7 - DIAGNOSTICS AND TROUBLESHOOTING Models 380-480 V Type (Ampères) Specification Item N Name 105 142 Units per inverter Pre-charge Contactor Contactor CWM50.10 220 V 50/60 Hz 035502394 Pre-charge Transformer 100 VA 0307.0034 Transformer Transformer 300 VA 0307.0042 Pre-charge Resistor Vitrified wire Resistor 20 R 75 W 0301.1852 Fan 0400.3682 Length.200 mm (80 x 80)
- Page 240 CHAPTER 7 - DIAGNOSTICS AND TROUBLESHOOTING Type (Ampères) Specification Item N 105 142 Name Units per inverter S41513174 EBC1.01 Function Expansion Board (Optional) S41513175 EBC1.02 Function Expansion Board (Optional) S41513176 EBC1.03 Function Expansion Board (Optional) CB7D.00 S41513136 Board CB7D.00 CB7E.00 S41513134 Board CB7E.00 CB4D.00...
- Page 241 CHAPTER 7 - DIAGNOSTICS AND TROUBLESHOOTING Type (Ampères) Specification Item Nº 180 211 240 312 361 450 515 600 Name Units per inverter CIP2.02 CIP2A.02 Board S41513219 CIP2.03 CIP2A.03 Board S41513220 CIP2.04 CIP2A.04 Board S41513221 CIP2.52 CIP2A.52 Board S41513228 CIP2.53 CIP2A.53 Board S41513229 CIP2.54...
- Page 242 CHAPTER 7 - DIAGNOSTICS AND TROUBLESHOOTING Types (Ampères) Specification Item N Name 2.9 4.2 Units per Inverter HMI-CFW09-LED S417102023 HMI LED (Optional) KMR-CFW09 S417102036 Kit KMR (Optional) CIF1.01 S41510226 Interface Board with HMI (Optional) EBA1.01 S41510110 Function Expansion Board (Optional) EBA1.02 S41511761 Function Expansion Board (Optional)
- Page 243 CHAPTER 7 - DIAGNOSTICS AND TROUBLESHOOTING Models 500-600 V Types (Ampères) Specification Item N Name Units per Inverter EBB.04 S41512671 Function Expansion Board (Optional) EBB.05 S41512741 Function Expansion Board (Optional) S41513174 EBC1.01 Function Expansion Board (Optional) EBC1.02 S41513175 Function Expansion Board (Optional) EBC1.03 S41513176 Function Expansion Board (Optional)
- Page 244 CHAPTER 7 - DIAGNOSTICS AND TROUBLESHOOTING Types (Ampères) Item N Specification Name Units per Inverter EBB.04 Function Expansion Board (Optional) S41512671 EBB.05 Function Expansion Board (Optional) S41512741 EBC1.01 Function Expansion Board (Optional) S41513174 EBC1.02 Function Expansion Board (Optional) S41513175 EBC1.03 Function Expansion Board (Optional) S41513176 SCI1.00...
- Page 245 CHAPTER 7 - DIAGNOSTICS AND TROUBLESHOOTING Types (Ampères) Name Specification Item N 107 147 211 247 315 343 418 472 Units per inverter RCS3 Rectifier Snubber Board RCS3.00 S41512846 Signal Interface Board CIS1.00 S41512836 Signal Interface Board CIS1.01 S41512883 Signal Interface Board CIS1.02 S41512884 Signal Interface Board CIS1.03 S41512885...
- Page 246 CHAPTER 7 - DIAGNOSTICS AND TROUBLESHOOTING Types (Ampères) Name Specification 100 127 179 225 259 305 340 428 Item N Units per Inverter 6431.3207 Centrifugal Fan 230 V 50/60 Hz 0302.4873 Electrolytic Capacitor 4700 uF/400 V Electrolytic Capacitor 0302.4801 Electrolytic Capacitor 4700 uF/400 V 0305.6166 Fuse 2 A 690 V Fuse...
-
Page 247: I/O Expansion Boards
CHAPTER CFW-09 OPTIONS AND ACCESSORIES This chapter describes the optional devices that are available for the CFW-09 and the accessories that may be necessary in specific applications. Options include the Expanded I/O Boards (EBA/EBB), LED-only Keypad, Remote Keypad and Cables, Blank Cover, RS-232 PC Communication kit, The... - Page 248 XC11 (24 V) and XC3. NOTE! For the CFW-09 Size 1 Models (6 A, 7 A, 10 A and 13 A/220-230 V and 3.6 A, 4 A, 5.5 A and 9 A/380-480 V) the plastic cover must be removed to install the EBA board.
- Page 249 CHAPTER 8 - CFW-09 OPTIONS AND ACCESSORIES 3. Press on the EBA board (near XC3) and on the left top edge until com- plete insertion of the connector and plastic spacer; 4. Secure the board to the metallic spacers with the screws provided;...
-
Page 250: Ebb (I/O Expansion Board B)
CHAPTER 8 - CFW-09 OPTIONS AND ACCESSORIES Switch Function (Standard) S2.1 AI4 – Speed reference (0 to 10) V (0 to 20) mA or (4 to 20) mA S3.1 RS-485 B-LINE (+) With termination (120 ) Without termination S3.2 RS-485 A-LINE (-) Obs.: Both S3.1 and S3.2 switches must be set for the same option (ON or OFF). - Page 251 NOTE! For the CFW-09 Size 1 Models (6 A, 7 A, 10 A and 13 A / 220-230 V and 3.6 A, 4 A, 5.5 A and 9 A / 380-480 V) the plastic cover must be removed to install the...
- Page 252 CHAPTER 8 - CFW-09 OPTIONS AND ACCESSORIES Mounting Instructions: 1. Set the board configuration via S4, S5, S6 and S7 dip switches (refer to table 8.4 a) ); 2. Carefully insert terminal block XC3 (EBB) into the female connector XC3 of the CC9 control board. Check that all pins fit in the XC3 connector;...
-
Page 253: Ebe
CC9 (refer to item 3.2.6). 8.1.3 EBE Please download from www.weg.net the EBE Board Quick Guide. For applications that require high-speed accuracy, the actual motor speed INCREMENTAL must be fed back via motor-mounted incremental encoder. The encoder is... - Page 254 CHAPTER 8 - CFW-09 OPTIONS AND ACCESSORIES At start-up, program Parameter P202 – Type of Control = 4 (Vector with Encoder) to operate the motor with incremental encoder speed feedback. For more details about Vector Control operation refer to chapter 5.
-
Page 255: Ebc1 Board
CHAPTER 8 - CFW-09 OPTIONS AND ACCESSORIES When the board EBC1 is used, the selected encoder should have the following 8.2.2 EBC1 Board characteristics: Power Supply Voltage: 5 V to 15 V; 2 quadrature channels (90º) with complementary outputs (differential): - Signals A, A, B and B;... - Page 256 CHAPTER 8 - CFW-09 OPTIONS AND ACCESSORIES CONFIGURATIONS Expansion Power Encoder Customer Board Supply Voltage Action EBC1.01 External 5 V Commutate switch S8 to ON, refer to figure 8.9 External 8 to 15 V 8 to 15 V None EBC1.02...
-
Page 257: Keypad With Leds Only
Figure 8.12 - Keypad with LED display only 8.4 REMOTE KEYPAD The CFW-09 keypad (both the standard or the LED display only) can be installed directly on the inverter cover or remotely. If the keypad is installed remotely, AND CABLES the HMI-09 Frame can be used. - Page 258 CHAPTER 8 - CFW-09 OPTIONS AND ACCESSORIES Figure 8.13 - Standard HMI, remote HMI frame kit and HMI CFW09 – LCD N4 for panel installation To meet NEMA 250 and IEC 60529 the HMI can be supplied with two specific degrees of protection: a) Dimensions of the HMI –...
- Page 259 CHAPTER 8 - CFW-09 OPTIONS AND ACCESSORIES b) Dimensions of the HMI – CFW09 – LED/LCD + remote HMI frame kit with NEMA5-IP51 degree of protection. Keypad Dimensions (1.69) (4.41) (0.984) (0.708) Cutout Dimensions for Panel Door Installation Front View...
- Page 260 CHAPTER 8 - CFW-09 OPTIONS AND ACCESSORIES Remote HMI connection for distances lower than 10 m (30 ft): Inverter key pad (HMI) Insert spacer to connect the cable to the inverter. Max. recommended cable length: 10 m (30 ft) Connector DB9 - Male Connector DB9 - Female Figure 8.15 - Cable for remote keypad connection ...
-
Page 261: Blank Covers
10 m (30 ft). To implement the serial communication, an RS-232 SERIAL INTERFACE module has to be added to the CFW-09. This module is installed in place of the Keypad, making the RS-232 connection (RJ11 connector) available. If the use of the HMI is also required, the RS-232 module also provides its connection. -
Page 262: Line Reactor/Dc Bus Choke
CHAPTER 8 - CFW-09 OPTIONS AND ACCESSORIES Figure 8.18 - RS-232 module The RS-232 PC Communication Kit which allows the connection of the CFW-09 to a PC via the RS-232 interface is composed of: RS-232 Serial Interface Module; 3 m (10 ft) Cable for RJ-11 to DB9 connection;... -
Page 263: Application Criteria
8.7.1 Application Criteria impedance is insufficient for limiting the input current peaks, thus preventing damages to the CFW-09. The minimum required impedances, expressed as impedance drop in percent are following: a) For the model with rated current 130 A/220-230 V, 142 A/380-480 V or ... - Page 264 The electrical installation of an input line reactor is shown on figure 8.19 a). For CFW-09 sizes above 16 A/220-230 V or 13 A/380-480 V, the connection of a DC Bus Choke is possible. The DC bus choke connection is also possible in all 2.9 A to 32 A/500-600 V models.
-
Page 265: Dc Link Inductor Built In
CHAPTER 8 - CFW-09 OPTIONS AND ACCESSORIES 8.7.2 DC Link Inductor Built in The following CFW-09 inverter models, can be fitted with an inductor at the DC Link already incorporated into the product: Models 16 A/220-230 V, Models 13 A/380-480 V and Models 240 A/380- 480 V. -
Page 266: Load Reactor
Cable type, cable length, motor size, switching frequency and other variables all affect Vp and dv/dt. WEG, as specialists in both VSDs and motors are able to provide an integrated solution. The load reactor value is calculated in the same way as the line reactor (refer to item 8.7.1). -
Page 267: Dynamic Braking
CHAPTER 8 - CFW-09 OPTIONS AND ACCESSORIES Driving Panel CFW-09 Conduit or MOTOR shielded cable Filter Supply Line install it as near as Motor possible the Earth Earth inverter (Frame) Figure 8.21 – RFI filter connection Instructions for the RFI filter installation:... - Page 268 Use Wire type resistors with suitable insulation to withstand the instantaneous current peaks. For critical applications with very short braking times, high inertia loads (Ex: centrifuges) or with very short and frequent duty cycles, contact WEG, to define the most suitable resistor. Minimum...
-
Page 269: Installation
Set Parameter P154 to the Ohms value of the DB resistor and Parameter P155 to the resistor power rating in kW. DANGER! The CFW-09 provides an electronic thermal protection for the braking resistor to avoid overheating. The braking resistor and the transistor can be damaged if: They are not properly sized;... -
Page 270: Dynamic Braking Module-Dbw-01 And Dbw-02
CHAPTER 8 - CFW-09 OPTIONS AND ACCESSORIES 8.10.3 Dynamic Braking module - In the CFW-09 220-230 V or 380-480 V types with currents higher or equal to 180 A, dynamic braking uses the DBW-01 external braking module. For 500- DBW-01 and DBW-02 690 V and 660-690 V with currents higher or equal 100 A, dynamic braking uses the DBW-02 external braking module. -
Page 271: And Dbw-02 Identification Label
CHAPTER 8 - CFW-09 OPTIONS AND ACCESSORIES Serial Number WEG Item N 8.10.3.1 DBW-01 and DBW-02 Identification Label DBW Type Rated Output Data Front View A - View Figure 8.23 - Identification label 8.10.3.2 Mechanical Installation The environmental operating conditions of the DBW are the same as of the CFW-09 inverter (refer to item 3.1.1). - Page 272 CHAPTER 8 - CFW-09 OPTIONS AND ACCESSORIES Check the other recommendations for the CFW-09 inverter installation, since from the mechanical viewpoint, the module is compatible with CFW-09 frame size 3. External dimensions and mounting holes are according to figure 8.25.
- Page 273 CHAPTER 8 - CFW-09 OPTIONS AND ACCESSORIES Air Flow Figure 8.27 - DBW-01 and DBW-02 positioning The DBW-01 and DBW-02 can also be installed with a through surface mounting kit as described in item 8.11. In this case, use the available installation kit, which contains the respective installation supports.
-
Page 274: Installation/Connection
CHAPTER 8 - CFW-09 OPTIONS AND ACCESSORIES 8.10.3.3 Installation/Connection Location of the power connections is shown in figures 8.29, 8.30 and 8.31. Figure 8.29 - Connection location Figure 8.30 - Power terminals Figure 8.31 - X7 terminal block... - Page 275 Connect the -UD grounding of the braking module to the -UD terminal of the inverter; The control connection between the CFW-09 and the braking module is made through a cable (0307.7560). One end of this cable is connected to the XC3 connector that can be found at the CRG4 board (refer to figure 8.33 ) in the...
-
Page 276: Through Surface Mounting Kit
8.11 THROUGH SURFACE The kit for through surface mounting is composed of metallic supports that must be mounted on the rear of the CFW-09 frames 3 to 8 to allow through MOUNTING KIT surface mounting. For further information refer to item 3.1.3.3, figure 3.4 and table 3.4. -
Page 277: Installation Of The Fieldbus Kit
The chosen Fieldbus option can be specified in the suitable field of the CFW-09 coding. In this case the CFW-09 will be supplied with all needed components already installed in the product. For later installation you must order and install the desired Fieldbus kit (KFB). - Page 278 CHAPTER 8 - CFW-09 OPTIONS AND ACCESSORIES 3. Press the board near to XC140 and on the lower right edge until the connector and the plastic spacer is inserted completely. 4. Fix the board to the metallic spacer through the bolt (except ModBus RTU).
- Page 279 CHAPTER 8 - CFW-09 OPTIONS AND ACCESSORIES Sizes 3 to 10 - (models up to 30 A): - Connect the Fieldbus connector to the metallic “L” by using the 150 mm (5.9 in). - Fasten the set to the metallic support plate of the control board (refer to figure 8.37).
-
Page 280: Profibus Dp
CHAPTER 8 - CFW-09 OPTIONS AND ACCESSORIES 8.12.2 Profibus DP Introduction The inverter that is fitted with the Profibus DP Kit operates in slave mode, allowing the reading/writing of their parameters through a master. The inverter does not start the communication with other nodes, it only answers to the master controls. - Page 281 CHAPTER 8 - CFW-09 OPTIONS AND ACCESSORIES Line Termination The initial and the en points of the network must be terminated with the characteristic impedance in order to prevent reflections. The DB 9 cable male connector has the suitable termination. When the inverter is the first or the last of the network, the termination switch must be set to Pos.
-
Page 282: Profibus Dp-V1
Check the installation and the network node address. NOTE! Use of the Profibus DP/related CFW-09 Parameters. Refer to item 8.12.7. 8.12.3 Profibus DP-V1 By using the DP-V1 communication kit, besides the exchange of cyclic data,... -
Page 283: Devicenet
CHAPTER 8 - CFW-09 OPTIONS AND ACCESSORIES NOTE! The parameters P000, P001, P215 and P408 are not available for access via network. In order to be able to use the Profibus DP-V1 interface, one must select the option 1, 2 or 3 at P309. This programming is the same for the Profibus DP-V0 or DP-V1 interfaces. - Page 284 CHAPTER 8 - CFW-09 OPTIONS AND ACCESSORIES Line Termination To avoid reflection, the initial and the end points of the network must be terminated with the characteristic impedance. Thus a 120-ohms/0.5W resistor must be connected between the pins 2 and 4 of the Fieldbus connector.
-
Page 285: Devicenet Drive Profile
DeviceNet network master present format and parameterization different from the data exchanged by using the normal DeviceNet board. For more information on the parameterization and operation of this interface, refer to the CFW-09 frequency inverter DeviceNet Drive Profile Communication Manual. -
Page 286: Ethernet/Ip
CHAPTER 8 - CFW-09 OPTIONS AND ACCESSORIES EtherNet/IP (Industrial EtherNet Protocol) is a communication system proper for 8.12.6 EtherNet/IP the industrial environment. This system allows application data exchange, time- restricted or critical, between industrial systems. The EtherNet/IP is available for simple devices such as sensors/actuators as well as for complex devices such as robots, PLCs, keypads and inverters. - Page 287 T-568A and T-568B. The function of each pin is shown in figure 8.45 a) and b). The cable to be used with the CFW-09 shall follow one of these two standards. Furthermore, only one standard shall be used for the cables, i.e., the connectors of both cable ends shall be crimped according...
- Page 288 Data amount programmable through P309: it may be 2, 4 or 6 words with 16 bits (4, 8 or 12 bytes). The EtherNet/IP board for the CFW-09 is described in the network as a Generic Ethernet Module. By using these configurations it is possible to program the network master so that it communicates with the inverter.
- Page 289 (refer to items 8.12.7.1 and 8.12.7.2). NOTE! For the first WEB access use the factory default username and password. Username: web Password: web Figure 8.47 - Open window when accessing the CFW-09 through the WEB...
- Page 290 CHAPTER 8 - CFW-09 OPTIONS AND ACCESSORIES Figure 8.48 - Control and monitoring window when accessing the CFW-09 through the WEB NOTE! It is necessary to have a PC with an EtherNet card connected to the same network of the CFW-09 and a WEB browser (MS Internet Explorer or Mozilla/Firefox.
- Page 291 - Open a MS-DOS command window. - Type the desired service (FTP or Telnet) followed by the IP address or hostname of the CFW-09 on the network. - Enter with: Login: user Password: user Examples: Telnet session for the CFW-09 with IP address 192.168.0.4.
- Page 292 After creating/modifying the user accounts, transfer via FTP the file ‘sys_pswd.cfg’ to the directory ‘user\pswd\’. Example of file transfer through FTP NOTE! The CFW-09 that comes from the factory has a normal user account: Username: user Password: user Users of the normal security level are restricted to the directory ‘\user’.
-
Page 293: Use To The Fieldbus/Related Parameters Of The Cfw-09
It is strongly recommended to change all passwords of the EtherNet/IP communication board after the start-up of the device. The new passwords will be effective only after powering down and up the CFW-09. NOTE! When the inverter returns from the off-line state the output values are reset. - Page 294 CHAPTER 8 - CFW-09 OPTIONS AND ACCESSORIES High-Order Bits - they indicate the status of the associated function EL.15 - Active error: 0 = No, 1 = Yes; EL.14 - PID Regulator 0 = Manual, 1 = Automatic; EL.13 - Undervoltage : 0 = Without, 1 = With;...
-
Page 295: Variables Written In The Inverter
CHAPTER 8 - CFW-09 OPTIONS AND ACCESSORIES 6. Motor Current: This position indicates de P003 Parameter content, disregarding the decimal point. A lowpass filter with a time constant of 0.3 s filters this variable. 8.12.7.2 Variables Written The variables are written in the following order: in the Inverter 1 - Logical Control;... - Page 296 CHAPTER 8 - CFW-09 OPTIONS AND ACCESSORIES NOTE! CL.13: The function to save the changes of the parameters content in EEPROM occurs usually when the HMI is used. The EEPROM admits a limit number of writings (100 000). In the applications where the speed regulator is saturated, but the torque control is desired, you must change the current limitation value at P169/ P170 (valid for P202 = 3 and 4).
-
Page 297: Fault Indications
CHAPTER 8 - CFW-09 OPTIONS AND ACCESSORIES bit.10 - 1 = control of the output RL1; bit.11 - 1 = control of the output RL2; bit.12 - 1 = control of the output RL3. Low-order bits: define the status desired for each output: bit.0 - output status DO1: 0 = output inactive, 1 = output active;... -
Page 298: Addressing Of The Cfw-09 Variables In The Fieldbus Devices
CHAPTER 8 - CFW-09 OPTIONS AND ACCESSORIES E26 - The desired content value is out of permitted range. E27 - Caused by: a) The function selected in the Logical Control is not enabled for the Fieldbus, or b) The control of the Digital Output is not enabled for the Fieldbus, or c) The parameter write is read-only. -
Page 299: Serial Communication
CHAPTER 8 - CFW-09 OPTIONS AND ACCESSORIES 8.13 SERIAL COMMUNICATION 8.13.1 Introduction The basic objective of the serial communication is the physical connection of inverters in a configured equipment network, as shown below: Master PC, PLC, etc. Slave 1 Slave 2... -
Page 300: Interfaces Description
CHAPTER 8 - CFW-09 OPTIONS AND ACCESSORIES - PARAMETERS READING - CHANGE OF PARAMETERS Typical examples of network use: PC (master) for parameterization of one or several inverters at the same time; SDCD monitoring inverter variables; PLC controlling the operation of an inverter in an industrial process. -
Page 301: 302
CHAPTER 8 - CFW-09 OPTIONS AND ACCESSORIES Other ASCII characters used in protocol ASCII CODE Table 8.21 - ASCII characters used in protocol The connection between the network participants is performed through a pair of wires. The signal levels are according to STANDARD EIA RS-485 with differential receivers and transmitters. -
Page 302: Parameters/Variables Resolution
CHAPTER 8 - CFW-09 OPTIONS AND ACCESSORIES SCHEMATIC DIAGRAM: INVERTER BASIC SERIAL CONECTION MASTER VARIABLES VARIABLES PARAMETERS 8.13.3.2 Parameters/Variables During the parameter reading/changing the decimal point is disregarded in the values received with the telegram, excepting the Basic Variables V04 (Reference Resolution via Serial) and V08 Motor Speed) that are standardized in 13 bits (0 to 8191). - Page 303 CHAPTER 8 - CFW-09 OPTIONS AND ACCESSORIES READING TELEGRAM: for inquiring of the inverter variable content; WRITING TELEGRAM: to change inverter variable content or to send controls to the inverters. NOTE! No transmission between two inverters is possible. The master has the bus access control.
-
Page 304: Execution And Telegram Test
CHAPTER 8 - CFW-09 OPTIONS AND ACCESSORIES Writing Telegram This telegram sends data to the inverters variables. The inverter answers by indicating if the data have been accepted or not. 1) Master: CODE (Hexadecimal) TEXT 2) Inverter: ADR NAK ADR ACK Format of the writing telegram: EOT: control character of End Of Transmission;... -
Page 305: Telegram Sequence
CHAPTER 8 - CFW-09 OPTIONS AND ACCESSORIES Writing telegram: No answer: with wrong telegram structure, control characters received incorrectly or wrong inverter address; NAK: code corresponding to the variable does not exist, wrong BCC (checksum byte), only reading variable, VAL out of the allowed range for the respective variable, operation parameter out of the alteration mode;... -
Page 306: Variables And Errors Of The Serial Communication
Basic Variables Indication of the inverter type (reading variable). The reading of this variable allows the inverter type identification. For the CFW-09 this value is 8, as defined in 8.13.3.7. V02 (code 00802): Indication of the inverter state (reading variable). - Page 307 CHAPTER 8 - CFW-09 OPTIONS AND ACCESSORIES EL8: 0 = ramp enabling (run/stop) inactive 1 = ramp enabling Inverter EL9: 0 = general enabling inactive enabled 1 = general enabling active EL8 = EL9 = 1 EL10: 0 = reverse...
- Page 308 CHAPTER 8 - CFW-09 OPTIONS AND ACCESSORIES CL5: not used CL6: not used CL7: the transition in this bit from 0 to 1 causes the inverter “RESET”, when any error condition is present. NOTE! Disabling via Dix has priority over these disabling;...
-
Page 309: Examples Of Telegrams With Basic Variables
CHAPTER 8 - CFW-09 OPTIONS AND ACCESSORIES - EL2.5: not used - EL2.6: not used - EL2.7: not used V07 (code 00807): Status of the Operation Mode (read/write variable) - CL2.0: 1 - It exit after reset from the setting mode to factory setting - CL2.1: 1 - After changing it exit from Scalar or VVW Control to Vector Control... -
Page 310: Parameters Related To The Serial Communication
CHAPTER 8 - CFW-09 OPTIONS AND ACCESSORIES 2) Inverter: JOG enabling (provided P225 = 3 to LOC or P228 = 3 to REM) 1) Master: C. L. Code JOG active = 1 add. 7 2) Inverter: Fault Reset 1) Master: C. -
Page 311: Errors Related To The Serial Communication
CHAPTER 8 - CFW-09 OPTIONS AND ACCESSORIES 8.13.5.4 Errors Related to the They act as follows: They do not disable the inverter; Serial Communication They do not disable defective relays; They are informed in the word the logical status. Fault Types -E22: longitudinal parity fault;... -
Page 312: Physical Connection Of The Rs-232 And Rs-485 Interface
In general, it is possible to connect only signals A (-) and B (+), without connecting the signal SREF. RS-232 Serial Interface Module The RS-232 interface is available for the CFW-09 through the module presented in item 8.6. RS-232 Figure 8.50 - Description of the XC7 (RJ12) connector... -
Page 313: Modbus-Rtu
The Modbus protocol has been already developed 1979 firstly. Currently it is a wide diffused open protocol, used by several manufacturers in different Modbus-RTU Protocol equipment. The Modbus-RTU communication of the do CFW-09 has been developed by considering two documents: 1. MODBUS Protocol Reference Guide Rev. J, MODICON, June 1996. - Page 314 This field contains an only byte, where the master specifies the type of service or the function requested to the slave (read, write, etc.). According to the protocol, each function is used to access a specific data type. In the CFW-09 all data are available as holding type registers (referenced from the address 40000 or’...
-
Page 315: Operation Of The Cfw-09 In The Modbus-Rtu Network
= Minimum interval to indicate the begin and the end of the 3.5x message (3.5 x T 11bits The CFW-09 frequency inverters operate as slaves of the Modbus-RTU network. 8.14.2 Operation of the The communication initiates with the master of the Modbus-RTU network CFW-09 in the requesting a service for a network address. -
Page 316: Inverter Configuration In The Modbus-Rtu Network
Baud rates: 9600, 19200 or 38400 kbits/sec. Parity: None, odd or even. All slaves and even the network master must use the same baud rate and parity. All parameters and available basic variables for the CFW-09 can be accessed 8.14.2.3 Access to the through the network:... - Page 317 0 to send messages that are common to all slaves (broadcast). Data Addressing and Offset: The CFW-09 data addressing is realized with an offset equal to zero that means that the address number is equal to the register number. The parameters are available from address 0 (zero) on, whilst the basic variables are available from address 5000 on.
- Page 318 CHAPTER 8 - CFW-09 OPTIONS AND ACCESSORIES address 0 (zero) on and the control bits are made available from address 100 on. Table below shows the addressing of bits, parameters and basic variables: Parameters Modbus Address Parameter Number Decimal Hexadecimal...
-
Page 319: Detailed Function Description
0 = It does not reset inverter Bit 107 1 = It resets inverter This Item describes in details the functions that are available in the CFW-09 8.14.3 Detailed Function for the Modbus RTU communication. Please note the following during the... -
Page 320: Function 01 - Read Coils
8, the remaining bits of the last byte should be filled out with 0 (zero). Example: reading of the status bits for general enable (bit 1) and direction of rotation (bit 2) of then CFW-09 at the address 1: Query (Master) Response (Slave) -
Page 321: Function 05 - Write Single Coil
CRC- Data 2 (low) etc to CRC+ CRC- CRC+ Example: Read of the value proportional to the frequency value (P002) and motor current (P003) of the CFW-09 at address 1: Query (Master) Response (Slave) Field Value Field Value Slave address... -
Page 322: Function 06 - Write Single Register
CHAPTER 8 - CFW-09 OPTIONS AND ACCESSORIES Example: to drive a ramp enable command (bit 100 = 1) of a CFW-09 at the address 1: Query (Master) Response (Slave) Field Value Field Value Slave address Slave address Function Function Bit number (high) -
Page 323: Function 15 - Write Multiple Coils
CHAPTER 8 - CFW-09 OPTIONS AND ACCESSORIES 8.14.3.5 Function 15 - Write This function allows writing values for a bit group that must be in numerical sequence. This function can be also used to write a single bit (the values Multiple Coils are always hexadecimal, and each field represents one byte). -
Page 324: Function 16 - Write Multiple Registers
Data 2 (high) Data 2 (low) etc to CRC- CRC+ Example: writing of the acceleration time P100 = 1.0 s and deceleration time P101 = 2.0 s, of a CFW-09 at the address 20: Query (Master) Response (Slave) Field Value Field... -
Page 325: Function 43 - Read Device Identification
CFW-09 are only available basic information formed by three objects: Object 00 - VendorName: always ‘WEG’. Object 01 - ProductCode: formed by the product code (CFW-09), plus the rated inverter current. Object 02 - MajorMinorRevision: it indicates the inverter firmware version, in ‘VX.XX’... -
Page 326: Communication Errors
In the example the Object Value has not been represented as hexadecimal value, but with corresponding ASCII characters. For instance, for the object 00, the 'WEG' value has been transmitted as being three ASCII characters, that as hexadecimal have the values 57h (W), 45h (E) and 47h (G). - Page 327 CHAPTER 8 - CFW-09 OPTIONS AND ACCESSORIES Query (Master) Response (Slave) Field Value Field Value Slave address Slave address Function Function Register (high) Error Code Register (low) CRC- Value (high) CRC+ Value (low) CRC- CRC+...
-
Page 328: Kit Kme (For Extractable Mounting)
CHAPTER 8 - CFW-09 OPTIONS AND ACCESSORIES 8.15 KIT KME (for Extractable The kit KME enables the mounting of CFW-09 inverter in the sizes 7, 8, 8E, 9, 10 and 10E (models 361 A to 600 A/380-480 V, 107 A to 472 A/500-690 V and Mounting) 100 A to 428 A/660-690 V) in the panel in an extractable form. -
Page 329: Shark Nema 4X
NEMA 4X against dust, dirt and splashing or hose-directed water. Figure 8.54 - CFW-09 Shark Nema 4X The SHARK NEMA 4X is the CFW-09 standard with a stainless steel enclosure. The models are: CFW 09 0006 T 2223 CFW 09 0007 T 2223... - Page 330 CHAPTER 8 - CFW-09 OPTIONS AND ACCESSORIES Cable glands for control cable (3x) Min = 10.0 110 (4.33) Max = 14.0 Cable glands for power cable 7.20 (0.28) 7.20 (0.28) (3x) Min = 13.0 Max = 18.0 Cable glands for fan wiring 16.00...
-
Page 331: Electrical Installation
CHAPTER 8 - CFW-09 OPTIONS AND ACCESSORIES 8.16.3 Electrical The electrical installation is the same as CFW-09 standard. Refer to chapter 3, item 3.2 to make a correct electrical installation. Installation NOTE! To assure the NEMA 4X total protection, it is necessary to use correct cables. -
Page 332: How To Specify
To specify a NEMA 4X inverter, it is necessary to include the term “N4” in the 8.16.5 How to Specify field “Enclosure Degree of Protection” according to the CFW-09 specification in chapter 2, item 2.4 (CFW-09 Identification). Remember that the NEMA 4X line is only up to 10 hp. 8.17 CFW-09 SUPPLIED... - Page 333 Current Time Figure 8.59 a) - Functioning during operation as motor Figure 8.59 b) shows the wave shapes of the CFW-09 RB input voltage and current, when the motor at the drive output is submitted to a braking process. Voltage...
-
Page 334: Plc Board
14 bits (-10 V to +10 V or Analog input (-20 to 20) mA) Motor PTC isolated input Motor PTC isolated input Note: For more details, refer to the PLC Board Manual. The manual is available in the site: www.weg.net. -
Page 335: Power Data
CHAPTER TECHNICAL SPECIFICATIONS This chapter describes the technical specifications (electrical and mechanical) of the CFW-09 inverter series. 9.1 POWER DATA 9.1.1 Power Supply Operating voltage range: 220-230 V, 380-480 V and 660-690 V models: -15 % to +10 %. Specifications 500-600 V models up to 32 A: -15 % of rated input voltage up to 690 V. -
Page 336: Power Supply
CHAPTER 9 - TECHNICAL SPECIFICATIONS 9.1.2 220-230 V Power Supply Model: Current / Voltage 220-230 220-230 220-230 220-230 220-230 220-230 220-230 Load CT/VT CT/VT CT/VT CT/VT CT/VT CT/VT CT/VT Power (kVA) 10.7 Rated Output Current (A) Maximum Output Current (A) 10.5 19.5 Rated Input Current (A) -
Page 337: Power Supply
CHAPTER 9 - TECHNICAL SPECIFICATIONS 105/ Model: Current / Voltage 380-480 380-480 380-480 380-480 380-480 380-480 380-480 Load Power (kVA) Rated Output Current (A) 105 130 Maximum Output Current (A) Rated Input Current (A) 43.2 45.6 64.8 126 156 Rated Switching Frequency (kHz) 100/ Maximum Motor (hp)/(kW) 18.5... - Page 338 CHAPTER 9 - TECHNICAL SPECIFICATIONS Model: Current / Voltage 500-600 500-600 500-600 Load CT/VT Power (kVA) 21.9 26.9 26.9 31.9 31.9 Rated Output Current (A) Maximum Output Current (A) 40.5 40.5 Rated Input Current (A) 27.5 33.8 33.8 Rated Switching Frequency (kHz) Maximum Motor (hp)/(kW) 20/15 25/18.5...
-
Page 339: Power Supply
CHAPTER 9 - TECHNICAL SPECIFICATIONS 9.1.5 660-690 V Power Supply 100/ 127/ 179/ 225/ Model: Current / Voltage 660-690 660-690 660-690 660-690 Load CT/VT Power (kVA) Rated Output Current (A) Maximum Output Current (A) 190.5 268.5 337.5 337.5 Rated Input Current (A) Rated Switching Frequency (kHz) Maximum Motor (hp)/(kW) 100/75 150/110... - Page 340 CHAPTER 9 - TECHNICAL SPECIFICATIONS NOTES: CT - Constant Torque VT - Variable Torque Torque Torque Speed Speed Nominal Nominal Figure 9.1 - Load characteristics The power rating in kVA is determined by the following equation: 3. Input Voltage (V) x Current Rating (A) P(kVA) = 1000 The values shown on the tables 9.1.2 to 9.1.5 were calculated considering...
- Page 341 The maximum output current is the same for CT and VT. This way the inverter has a lower overload capacity when VT current is used. The indicated maximum motor hp/kW ratings are based on WEG 230 V/ 460 V/575 V 4 pole motors and normal duty loads. A precise inverter sizing must consider the actual motor nameplate and application data.
-
Page 342: Electronics/General Data
CHAPTER 9 - TECHNICAL SPECIFICATIONS 9.2 ELECTRONICS/GENERAL DATA Voltage Source V/F (Scalar), or Vector Control with Encoder Feedback, or Sensorless Vector Control (without Encoder) PWM SVM (Space Vector Modulation) Current, Flux and Speed Digital Regulators METHOD Scan Time: - Current Regulators: 0.2 ms (5 kHz) CONTROL - Flux Regulator: 0.4 ms (2.5 kHz) - Speed Regulator / Speed Measurement: 1.2 ms... -
Page 343: Applicable Standards
CHAPTER 9 - TECHNICAL SPECIFICATIONS 8 Keys: Start, Stop, Increase, Decrease, FWD/REV, JOG, Local/Remote and Program KEYPAD STANDARD LCD display: 2 lines x 16 characters (HMI) (HMI-CFW09-LCD) LED display: 4 digits with 7 segments LEDs for FWD/REV and LOC/REM indication Display Accuracy: - Current: 5 % of Rated Current - Speed Resolution: 1 rpm... -
Page 344: Optional Devices
CHAPTER 9 - TECHNICAL SPECIFICATIONS 9.3 OPTIONAL DEVICES 9.3.1 I/O Expansion Board EBA Isolated RS-485 Serial Interface (the RS-485 and RS-232 serial interfaces cannot COMMUNICATION SERIALINTERFACE be used simultaneously). 1 Bipolar Analog Input (AI4): -10 V to +10 V; (0 to 20) mA or (4 to 20) mA; Linearity: 14 bits (0.006 % of 10 V range). -
Page 345: Mechanical Data
CHAPTER 9 - TECHNICAL SPECIFICATIONS 9.4 MECHANICAL DATA SIZE 1 132 (5.19) 106 (4.17) 75 (2.95) (0.24) (0.28) (0.24) 50 (1.97) 94 (3.7) 134 (5.27) (0.47) (0.43) Air Flow outlet 143 (5.63) 121 (4.76) (2.40) Air Flow inlet Air Flow outlet 139 (5.47) 127 (5.00) 12 (0.47) - Page 346 CHAPTER 9 - TECHNICAL SPECIFICATIONS SIZE 2 173 (6.31) 138 (5.43) 91 (3.58) (0.24) (0.28) (0.24) 45 (1.77) 138 (5.43) (0.43) (0.47) 173 (6.81) Air Flow outlet (6.34) (7.16) Air Flow inlet Air Flow outlet 178 (7.0) 167 (6.57) 12 (0.47) 6 (0.23)
- Page 347 CHAPTER 9 - TECHNICAL SPECIFICATIONS SIZE 3 219 (8.62) (1.34) (1.34) 7.2 (0.28) 7.2 (0.28) Conduit for power cable (3x) 35 (0.63) 62.5 (2.46) 111.5 (4.39) 160.5 (6.32) 150 (5.91) 36.5 (1.44) 223 (8.78) Air Flow outlet 84.5 (3.33) 223 (8.78) Air Flow inlet...
- Page 348 CHAPTER 9 - TECHNICAL SPECIFICATIONS SIZE 4 (1.34) (1.34) 7.2 (0.28) 7.2 (0.28) Conduit for power cable (3x) 16 (0.63) 76 (2.99) 125 (4.92) 174 (6.85) 250 (9.84) Air Flow 50 (1.97) 150 (5.91) outlet 250 (9.84) 84.5 (3.33) Air Flow inlet Air Flow...
- Page 349 CHAPTER 9 - TECHNICAL SPECIFICATIONS SIZE 5 (1.34) (1.34) 9.2 (0.36) 9.2 (0.36) Conduit for power cable (3x) 50.0 (0.79) 95.5 (3.76) 167.5 (6.59) 239.5 (9.43) 67.5 (2.66) Air Flow 200 (7.87) outlet 335 (13.19) 84.5 (3.33) Air Flow inlet Air Flow outlet...
- Page 350 CHAPTER 9 - TECHNICAL SPECIFICATIONS SIZE 6 (1.34) (1.34) 9.2 (0.36) 9.2 (0.36) Conduit for (0.79) power cable (3x) 63.0 84.5 (3.33) 167.5 (6.59) 250.5 (9.86) Air Flow 67.5 (2.66) outlet 200 (7.87) 335 (13.19) 84.5 (3.33) Air Flow inlet Air Flow outlet...
- Page 351 CHAPTER 9 - TECHNICAL SPECIFICATIONS SIZE 7 (1.34) (1.34) Conduit for 9.2 (0.36) 9.2 (0.36) power cable (3x) 63.0 (0.79) 85 (3.35) 168 (6.61) 251 (9.88) Air Flow 67.5 (2.66) outlet 200 (7.87) 335 (13.19) 84.5 (3.33) Air Flow inlet Air Flow outlet...
- Page 352 CHAPTER 9 - TECHNICAL SPECIFICATIONS SIZE 8 AND 8E DETAIL OF CUTOUT WITHOUT FLANGE 366 (14.41) 40 (1.57) 40 (1.57) 322 (12.68) 44 (1.73) Conduit for power cable (3x) 92 (3.62) 38 (1.50) 205 (8.07) 133 (5.24) 277 (10.91) 318 (12.52) 372 (14.65) 9.2 (0.36)
- Page 353 CHAPTER 9 - TECHNICAL SPECIFICATIONS Air Flow inlet 412 (16.22) 275 (2.83) 68.5 (2.70) Air Flow inlet Length Dimensions Size 8 38.38 37.4 37.48 38.58 Size 8E 1145 1122.5 44.19 1124.5 44.27 1152.5 45.37 45.08 Figure 9.9 (cont.) - Size 8 and 8E - dimensions in mm (inch)
- Page 354 CHAPTER 9 - TECHNICAL SPECIFICATIONS SIZE 9 DETAIL OF CUTOUT WITHOUT FLANGE 40 (1.57) 40 (1.57) 48 (1.83) 592 (23.31) Det. E Conduit for power cable (3x) 146 (5.75) 41 (1.61) 344 (13.54) 68 (2.68) 542 (21.34) 344 (13.54) 620 (24.41) 647 (25.47) 11.2 (0.44)
- Page 355 CHAPTER 9 - TECHNICAL SPECIFICATIONS SIZE 10 AND 10E DETAIL OF CUTOUT WITHOUT FLANGE 40 (1.57) 40 (1.57) 54 (2.13) 592 (23.31) Det. E Conduit for power cable (3x) 152 (5.98) 44 (1.73) 350 (13.78) 74 (2.91) 548 (21.57) 350 (13.78) 626 (24.65) 656 (25.83)
- Page 356 CHAPTER 9 - TECHNICAL SPECIFICATIONS 180 A-240 A/380-480 V Models (size 8) NOTES: a) The X dimensions will depend on panel dimensions. b) The fixing panel supports identified by and are not supplied with KME Kit. These should be constructed according to panel dimensions and with fixing holes as specified.
- Page 357 CHAPTER 9 - TECHNICAL SPECIFICATIONS 180 A-240 A/380-480 V Models (size 8) NOTES: a) The X dimensions will depend on panel dimensions. b) The fixing panel supports identified by and are not supplied with KME Kit. These should be constructed according to panel dimensions and with fixing holes as specified.
- Page 358 CHAPTER 9 - TECHNICAL SPECIFICATIONS 107 A to 211 A/500-600 V Models (size 8E) and 100 A to 179 A/660-690 V Models (size 8E) NOTES: a) The X dimensions will depend on panel dimensions. b) The fixing panel supports identified by and are not supplied with KME Kit.
- Page 359 CHAPTER 9 - TECHNICAL SPECIFICATIONS 107 A to 211 A/500-600 V Models (size 8E) and 100 A to 179 A/660-690 V Models (size 8E) NOTES: a) The X dimensions will depend on panel dimensions. b) The fixing panel supports identified by and are not supplied with KME Kit.
- Page 360 CHAPTER 9 - TECHNICAL SPECIFICATIONS 312 A to 361 A/380-480 V (size 9) Models NOTES: a) The X dimensions will depend on panel dimensions. b) The fixing panel supports identified by and are not supplied with KME Kit. These should be constructed according to panel dimensions and with fixing holes as specified.
- Page 361 CHAPTER 9 - TECHNICAL SPECIFICATIONS 450 A to 600 A/380-480 V Models (size 10) NOTES: a) The X dimensions will depend on panel dimensions. b) The fixing panel supports identified by and are not supplied with KME Kit. These should be constructed according to panel dimensions and with fixing holes as specified.
- Page 362 CHAPTER 9 - TECHNICAL SPECIFICATIONS 247 A to 472 A/500-690 V Models (size 10E) and 225 A to 428 A/660-690 V Models (size 10E) NOTES: a) The X dimensions will depend on panel dimensions. b) The fixing panel supports identified by and ...
Need help?
Do you have a question about the CFW-09 and is the answer not in the manual?
Questions and answers