Table of Contents
Advertisement
Advertisement
Table of Contents
Troubleshooting

Related Manuals for WEG CFW08 Vector inverter


Summary of Contents for WEG CFW08 Vector inverter
- Page 2 FREQUENCY INVERTER MANUAL Series: CFW-08 Software: version 3.9X 0899.4690 E/5 08/2003 ATTENTION! It is very important to check if the inverter software version is the same as indicated above.
- Page 3 Summary of Revisions The table below describes all revisions made to this manual. Revision Description Section First Edition Item 3.3 - CE Installation Included See item 3.3 General Revision External Parallel Keypad and See item 8.3 Fixs Kit Included and and 8.12 General Revision General Revision...
-
Page 4: Table Of Contents
CONTENTS Quick Parameter Reference, Fault and Status Messages 1 Parameters ................. 07 2 Fault Messages ................14 3 Other Messages ................. 14 CHAPTER 1 Safety Notices Safety Notices in the Manual ..........15 Safety Notice on The Product ..........15 Preliminary Recommendations .......... - Page 5 6.3.5.3 PID Start-up Guide ........... 106 CHAPTER 7 Diagnostics and Troubleshooting 7.1 Faults and Possible Causes ........... 110 7.2 Troubleshooting ............... 112 7.3 Contacting WEG ..............113 7.4 Preventive Maintenance ............113 7.4.1 Cleaning Instructions ............114 CHAPTER 8 CFW-08 Options and Accessories 8.1 HMI-CFW08-P .................
- Page 6 CONTENTS 8.8 CAB-RS-1, CAB-RS-2, CAB-RS-3, CAB-RS-5, CAB-RS-7.5 CAB-RS-10 ................121 8.9 KCS-CFW08 ................122 8.9.1 Instruction and Removing Instructions for KCS-CFW08 123 8.10 KSD-CFW08 ................123 8.11 KMD-CFW08-M1 ..............124 8.12 KFIX-CFW08-M1, KFIX-CFW08-M2 ........125 8.13 KN1-CFW08-M1, KN1-CFW08-M2 ......... 126 8.14 MIW-02 ..................
- Page 7 9.1.1 200 - 240V Power Supply ..........161 9.1.2 380 - 480V Power Supply ..........161 9.2 General Electronic Data ............163 9.3 WEG Standard IV Pole Motor Data ........164 CHAPTER 10 Warranty Warranty Terms for Frequency Inverters - CFW-08 ......165...
-
Page 8: Parameters
CFW-08 - QUICK PARAMETER REFERENCE QUICK PARAMETER REFERENCE, FAULT AND STATUS MESSAGES Software: V3.9X Application: Model: Serial Number: Responsible: Date: 1. Parameters Factory User Parameter Function Adjustable Range Note Page Setting Setting 0 ... 4, 6 ... 999 = Read P000 Parameter Access 5 = Alteration... - Page 9 CFW-08 - QUICK PARAMETER REFERENCE Factory User Parameter Function Adjustable Range Note Page Setting Setting Speed Limits P133 Minimum Frequency (F 0.00 ... P134 3.00 P134 Maximum Frequency (F P133 ... 300.0Hz 66.00 V/F Control 5.0 or Manual Torque Boost P136 2.0 or 0.0 ...
- Page 10 CFW-08 - QUICK PARAMETER REFERENCE Factory User Parameter Function Adjustable Range Note Page Setting Setting Local/Remote Definition 0 = Always Local 1 = Always Remote 2 = HMI-CFW08-P or HMI-CFW08-RP keypad Local/Remote P220 (default: local) Selection Source 3 = HMI-CFW08-P or HMI-CFW08-RP keypad (default: remote) 4 = DI2 ...
- Page 11 CFW-08 - QUICK PARAMETER REFERENCE Factory User Parameter Function Adjustable Range Note Page Setting Setting Analog Output 0 = Output Frequency (Fs) 1 = Input Reference (Fe) 2 = Output Current (Is) 3, 5, 8 = Not used Only available P251 Analog Output 4 = Motor Torque...
- Page 12 CFW-08 - QUICK PARAMETER REFERENCE Factory User Parameter Function Adjustable Range Note Page Setting Setting 3 = JOG 4 = No Extrernal Fault 5 = Decrease E.P. 6 = Ramp #2 7 = Multispeed (MS0) 8 = Not used or Start/Stop 9 = Start/Stop 10 = Reset...
- Page 13 P133 ... P134 30.00 P306 Skip Band Range 0.00 ... 25.00Hz 0.00 Serial Communication Interface I 1 ... 30 (Serial WEG) P308 Inverter Address 1 ... 247 (Modbus-RTU) Flying Start and Ride-Through 0 = Inactive 1 = Flying Start P310...
- Page 14 CFW-08 - QUICK PARAMETER REFERENCE Factory User Parameter Function Adjustable Range Note Page Setting Setting MOTOR PARAMETERS (P399 ... P499) Rated Parameters P399 Rated Motor Efficiency 50.0 ... 99.9% Only available in vector mode 0 ... 600V P400 Rated Motor Voltage (P202=2).
-
Page 15: Fault Messages
CFW-08 - QUICK PARAMETER REFERENCE 2. Fault Messages Display Description Page Output Overcurrent/Short-Circuit DC Link Overvoltage DC Link Undervoltage Inverter Overtemperature Output Overload (Ixt Function) External Fault CPU Error (Watchdog) Program Memory Error (Checksum) Keypad Copy Function Error Self-tuning Fault E22, E25 Serial Communication Error E26 and E27... -
Page 16: Safety Notices In The Manual
CHAPTER 1 SAFETY NOTICES This Manual contains necessary information for the correct use of the CFW-8 Variable Frequency Drive. This Manual has been written for qualified personnel with suitable training and technical qualification to operate this type of equipment. The following Safety Notices will be used in this Manual: 1.1 SAFETY NOTICES IN THE MANUAL DANGER! - Page 17 SAFETY NOTICES These personnel must follow all safety instructions included in this Manual and/or defined by local regulations. Failure to comply with these instructions may result in personnel injury and/or equipment damage. NOTE! In this Manual, qualified personnel are defined as people that are trained to: 1.
-
Page 18: About This Manual
As the CFW-08 can be applied in several ways, it is impossible to describe here all of the application possibilities. WEG does not accept any responsibility when the CFW-08 is not used according to this Manual. -
Page 19: About The Cfw-08
GENERAL INFORMATION The CFW-08 is a high performance Variable Frequency Drive that permits 2.3 ABOUT THE CFW-08 the control of speed and torque of a three-phase AC induction motor. Two types of control are available in the same product: Programmable scalar (Volts/Hz) control; Sensorless Vector Control (VVC: Voltage Vector Control). - Page 20 GENERAL INFORMATION Rsh1 Power Motor Supply RFI Filter Rsh2 HMI-CFW08-RP POWER CONTROL HMI-CFW08-P POWER SUPPLIES AND CONTROL / POWER INTERFACES Interface MIP-CFW08-RP HMI-CFW08-RS Interface MIS-CFW08-RS "ECC2" CONTROL BOARD WITH DSP PC-Software SuperDrive Interface RS-232 KCS-CFW08 Analog Digital Output Inputs (AO) (DI1 to DI4) RS-485 Analog...
- Page 21 GENERAL INFORMATION Braking Resistor (External and Optional) Pré-Carga Rsh1 Filter Power Suppressor Motor Filter Supply (optional) Rsh2 HMI-CFW08-RP Voltage Feedback POWER CONTROL HMI-CFW08-P POWER SUPPLIES AND CONTROL / POWER INTERFACES Interface MIP-CFW08-RP HMI-CFW08-RS Interface MIS-CFW08-RS "ECC2" CONTROL BOARD WITH DSP PC-Software SuperDrive Interface...
-
Page 22: Differences Between The Old Μline And The New Cfw-08
(formerly: µline, now: CFW-08 vector inverter); WEG logo is now indicated on all accessories of the CFW-08 line (keypad, communication modules etc). Figure below makes a comparison: (a) µ line (b) CFW-08 Figure 2.3 - Comparison between µ... - Page 23 GENERAL INFORMATION Expansion of the Power Range The power range of the old µline (0.25-2HP) has been expanded to (0.25-10HP) with the new CFW-08 line. Control Modes Only the CFW-08 line has: - Voltage Vector Control (VVC) that improves the inverter performance considerably - adding the parameters P178, P399, P400, P402, P403, P404, P407, P408 e P409;...
- Page 24 GENERAL INFORMATION But the control connections (terminals XC1) differ between the µline and the CFW-08 line. Table below shows theses pin differences: µline CFW-08 CFW-08 Plus Digital Input DI1 Digital Input DI2 Digital Input DI3 Digital Input DI4 0V for Digital Inputs +10V Analog Input AI1 - 7 with switch...
- Page 25 GENERAL INFORMATION b) Automatic Torque Boost (Automatic IxR Compensation) and Slip Compensation In the µline only the rated motor current (P401) was used in the Automatic IxR Compensation and the Slip Compensation functions. In the µline the rated motor power factor of the motor was considered as a fixed value and equal to 0.9.
-
Page 26: Identification
CFW-08 Model Rated Input Data Rated Output Data (Voltage, Number of (Voltage, Frequency) Phases Current, Frequency) Serial Number WEG Part Number Manufacturing Date Lateral Nameplate of the CFW-08 CFW-08-Model Manufacturing Date WEG Part Number Hardware Revision Seriel Number Software Version... - Page 27 GENERAL INFORMATION...
-
Page 28: Receiving And Storing
GENERAL INFORMATION NOTE! The Option field (S or O) defines if the CFW-08 is a standard version or if it will be equipped with any optional devices. If the standard version is required, the specification code ends here. The model number has always the letter Z at the end. For example: CFW080040S2024ESZ = standard 4.0A CFW-08 inverter, single-phase at 200...240V input with manual in English. -
Page 29: Mechanical Installation
CHAPTER 3 INSTALLATION 3.1 MECHANICAL This chapter describes the procedures for the electrical and mechanical installation of the CFW-08. INSTALLATION These guidelines and suggestions must be followed for proper CFW-08 operation. The location of the inverter installation is an important factor to assure 3.1.1 Environment good performance and high product reliability. -
Page 30: Mounting Specifications
INSTALLATION AND CONNECTION 3.1.2 Mounting Specification Figure 3.1 - Free Space for Cooling CFW-08 Model 1.6A / 200-240V 2.6A / 200-240V 4.0A / 200-240V 7.0A / 200-240V 30 mm 1.18 in 5 mm 0.20 in 50 mm 2 in 50 mm 2 in 1.0A / 380-480V 1.6A / 380-480V... - Page 31 INSTALLATION AND CONNECTION FRONTAL VIEW OF THE LATERAL VIEW VIEW MOUNTING BASE Figure 3.2 - Dimensional Drawings of the CFW-08...
- Page 32 INSTALLATION AND CONNECTION Dimensions Fixing base Weigth Height H Width L Depth P Mounting Inverter Degree of Screw Model Protection (kg) (mm) (mm) (mm) (mm) (mm) (mm) (mm) 2.95 5.95 5.16 2.52 5.08 0.20 0.24 5/32 1.6A / 200-240V IP20 / NEMA1 (75) (151) (131)
-
Page 33: Electrical Installation
INSTALLATION AND CONNECTION 3.2 ELECTRICAL INSTALLATION 3.2.1 Power / Grounding Connections DANGER! AC input disconnection: provide and AC input disconnecting switch to switch OFF the input power to the inverter. This device shall disconnect the inverter from the AC input supply when required (e.g. - Page 34 INSTALLATION AND CONNECTION R S T U V W Braking -Ud BR PE W V U Resistor (see item 8.17) Power Shielding Disconnect (*) Supply (b) Models 7.3-10-16A / 200-240V e 2.7-4.3-6.5-10-13-16A / 380-480V Note: (*) In case of single-phase power supply with phase and neutral cable, connect only the phase cable to the disconnecting switch.
- Page 35 INSTALLATION AND CONNECTION ATTENTION! The AC input for the inverter must have a grounded neutral conductor. NOTE! The AC input voltage must be compatible with the inverter rated voltage. The requirements for use of line reactors depends on several application factors.
-
Page 36: Power Terminals
INSTALLATION AND CONNECTION NOTE! The wire sizing indicated in Table 3.3 are reference values only. The exact wire sizing, depends on the installation conditions and the maximum acceptable line voltage drop. Grounding Wiring Power Cables Inverter Model Lbf.in Lbf.in 1.6A / 200-240V 8.68 2.6A / 200-240V 8.68... -
Page 37: Location Of The Power/Grounding/Control Connections
INSTALLATION AND CONNECTION L/L1 N/L2 (a) models 1.6-2.6-4.0-7.0A/200-240V and 1.0-1.6-2.6-4.0A/380-480V L/L1 N/L2 (b) models 7.3-10-16A/200-240V and 2.7-4.3-6.5-10A/380-480V (c) models 13-16A/380-480V Figure 3.6 - Power terminals 3.2.3 Location of the Power, Grounding and Control Connections Control (XC1) Power Grounding (a) Models 1.6-2.6-4.0-7.0-7.3-10-16A/200-240V and 1.0-1.6-26-2.7-40- 4.3-65-10A/380-480V... -
Page 38: Control Wiring
INSTALLATION AND CONNECTION Control XC1 Power Grounding (b) Models 13-16A/380-480V Figure 3.7 - Location of the power/grounding and control connections The control wiring (analog inputs/outputs, digital inputs and relay outputs 3.2.4 Control is made on the XC1 connector of control board (see location in Figure 3.7, Wiring Section 3.2.3). - Page 39 INSTALLATION AND CONNECTION Description Conector XC1 Specifications Factory Default Function Digital Input 1 General Enable (remote mode) 4 isolated digital inputs Digital Input 2 Minimum High Level: 10VDC FWD / REV (remote mode) Maximum Low Level: 3VDC Digital Input 3 Input Current: -11mA @ 0V Reset Max.
- Page 40 INSTALLATION AND CONNECTION As a default the analog input(s) is(are) selected as 0...10V. This can be changed using dip switch S1 on the control board and parameters P235 and P239 (see note below). Analog Input Factory Deafult Setting Selection Switch Frequency / Speed OFF: 0 ...
-
Page 41: Typical Terminal Connections
INSTALLATION AND CONNECTION 5) Relays, contactors, solenoids or eletromagnetic braking coils installed near inverters can generate interferences in the control circuit. To eliminate this interference, connect RC suppressor in parallel with the coils of AC relays. Connect free-wheeling diode in case of DC relays. 6) When external keypad (HMI) is used (refer to Chapter 8), separete the cable that connects the keypad to the inverter from other cables, maintaining a minimum distance of 4 in (10 cm) between them. - Page 42 INSTALLATION AND CONNECTION NOTE! The frequency reference can be sent via AI1 analog input (as shown in figure above), via keypad HMI-CFW08-P, or via any other source (as described in Chapter 6 - P221 and P222). When a line fault occurs by using this type of connection with switch S3 at position "RUN", the motor will be enabled automatically as soon as the line is re-established.
- Page 43 INSTALLATION AND CONNECTION Connection 4 - FWD RUN / REV RUN Parameter to be programmed: Set DI1 to Forward Run : P263 = 8 Set DI2 to Reverse Run: P264 = 8 Make sure the inverter commands are via terminals, i.e., P229=1 to local mode or P230=1 to remote mode.
-
Page 44: European Emc Directive
INSTALLATION AND CONNECTION 3.3 European EMC Directive - The CFW-08 inverter series was designed considering safety and EMC Requirements for (ElectroMagnetic Compatibility) aspects. The CFW-08 units do not have an intrinsic function until connected with Conforming Installations other components (e. g. a motor). Therefore, the basic product is not CE marked for compliance with the EMC Directive. -
Page 45: Inverter Models And Filters
INSTALLATION AND CONNECTION 3.3.2 Inverter Models and Filters Table 3.6 below shows the inverter models and the respective RFI filter and the EMC category number. A description of each EMC category is given in item 3.3.3. The characteristics of the footprint and external input RFI filters are given in item 3.3.4. - Page 46 INSTALLATION AND CONNECTION Dimensions Inverter Model Input RFI Filter EMC Category (Width x Height x Depth) CFW080010T3848... Inverter: 75x151x131mm CFW080016T3848... Filter: 40x190x70mm CFW080026T3848... FN3258-7-45 CFW080040T3848... (external filter) Inverter: 115x200x150mm CFW080027T3848... Filter: 40x190x70mm CFW080043T3848... Category II (domestic) CFW080065T3848... Inverter: 115x200x150mm FN3258-16-45 CFW080100T3848...
-
Page 47: Emc Categories Description
INSTALLATION AND CONNECTION There are two EMC categories: Category I for industrial applications and 3.3.3 EMC Categories Category II for residential applications, as described below. Description Category I Basic standard EMC phenomenon Level for test method Emission: Conducted emissions (mains terminal IEC/EN61800-3 First environment (*1), restricted distribution (*4,5) - Class A disturbance voltage - freq band 150kHz... -
Page 48: Emc Categories Characteristics Filters
6) The harmonic current emissions defined by the standards IEC/EN61000- 3-2 and EN61000-3-2 / A14 do not apply because the CFW-08 inverter series are intended for professional applications. 3.3.4 EMC Filters Characteristics Filter Dimensions Filter WEG P/N Rated current Weight Drawings (Width x Height x Depth) FEX1-CFW08 417118238 0.6kg 79x190x51mm Fig. - Page 49 INSTALLATION AND CONNECTION Front View Lateral Right View Bottom View Lateral Right View Front View Terminal block for Bottom View flexible and rigid cable of 4mm or AWG 10. Max. torque: 0.8Nm (a) Footprint Filter (b) Footprint Filter and Inverter Figure 3.16 - FEX1-CFW08 and FEX2-CFW08 footprint filter drawing Type /05 Fast-on terminal 6.3 x 0.8mm...
- Page 50 INSTALLATION AND CONNECTION Bolt type 08=M4 Figure 3.18 - FS6007-25-08 and FS6007-36-08 external filter drawing Mechanical Data Rated Current Type/45 Terminal block for 6mm solid cable, flexible cable AWG 12. Connector Side View Top View Type/47 Terminal block for 16mm solid wires, 10mm flexible wires AWG 8.
- Page 51 INSTALLATION AND CONNECTION Toroid: Thornton NT35/22/22-4100-IP12R (WEG P/N 0208.2102) Plastic clamp: HellermannTyton NXR-18 (WEG P/N 0504.0978) Figure 3.20 - TOR1-CFW08 drawing Toroid: Thornton NT52/32/20-4400-IP12E (WEG P/N 0208.2103) Figure 3.21 - TOR2-CFW08 drawing...
-
Page 53: Pre-Power Checks
CHAPTER 4 START-UP This Chapter provides the following information: how to check and prepare the inverter before power-up; how to power-up and check for proper operation; how to operate the inverter when it is installed according to the typical connections (refer to Section 3.2 - Electrical Installation). The inverter shall be installed according to Chpater 3 - Installation and 4.1 PRE-POWER Connection. -
Page 54: Start-Up
START-UP This Section describes start-up procedures when operating via the keypad 4.3 START-UP (HMI). Two types of control will be considered: V/F and Vetor Control The V/F control is recommended in the following cases: several motors driven by the same inverter; rated current of the motor is lower than 1/3 of rated inverter current for test purposes, inverter is start-up without load. - Page 55 START-UP ACTION DISPLAY HMI DESCRIPTION Release the Motor decelerates down to 0 rpm NOTE! The last frequency reference (speed) vale set via the keys is saved. If you wish to change this value before inverter enabling, change parameter P121 (Keypad Reference). NOTES: (1) If the direction of rotation of the motor is not correct, switch off the inverter.
-
Page 56: Start-Up Operation Via Terminals
START-UP 4.3.2 Start-up Operation Via Terminals - Control Mode: Linear V/F (P202=0) Connections are according to Figures 3.4 and 3.12. ACTION HMI DISPLAY DESCRIPTION See Figure 3.12 Switch S1 (FWD / REV)=open Switch S2 (Reset)=open Switch S3 (Start/Stop)=open Inverter is ready to be operated. Potentiometer R1 (Ref.)=totalzly CCW Power-up inverter Led LOCAL switches OFF and led... -
Page 57: Start-Up - Operation Via Keypad (Hmi) Type Of Control: Vector (P202=2)
START-UP The sequence below is based on the following inverter and motor example: 4.3.3 Start-up Inveter: CFW080040S2024ESZ Operation via Keypad - Motor: WEG-IP55 Control Mode: Power: 0.75HP/0.55kW; Vector (P202=2) Frame size: 71; RPM: 1720; Number of Poles: IV; Power factor (cos ϕ): 0.70;... - Page 58 START-UP ACTION HMI DISPLAY DESCRIPTION Press the key to save the Exit the programming mode selected option and to exit the programming mode Rated motor voltage range: Press the key to go to the next 0 ... 600V parameter Press the key and use the keys Set rated motor voltage: to set the correct...
- Page 59 START-UP ACTION HMI DISPLAY DESCRIPTION Rated motor power range: Press the key to go to the next 0 ... 15 (each value represents a parameter power value) Press the key and use the key s Selected rated motor power: to set the the correct 4 = 0.75HP / 0.55kW motor power.
- Page 60 Follow from now on the start-up procedures described in Section 4.3.3. (2) For each inverter type, the parameters P399...P407 are set automatically to the rated motor data, considering a standard WEG motor, IV poles, 60Hz. When different motors are used, you must set the parameters manually, according to the motor nameplate data.
-
Page 61: Keypad (Hmi) Description
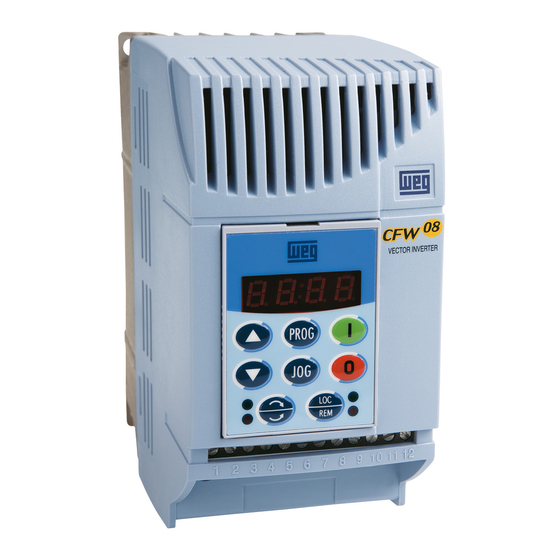
CHAPTER 5 KEYPAD (HMI) OPERATION This chapter describes the CFW-08 operation via standard keypad or Human-Machine Interface (HMI), providing the following information: general keypad description (HM)I; use of the keypad; parameter programming; description of the status indicators. The standard CFW-08 keypad has a LED display with 4 digits of 7 5.1 KEYPAD (HMI) segments, 4 status LEDs and 8 keys. -
Page 62: Use Of The Keypad Hmi
KEYPAD (HMI) OPERATION FWD/REV control selection FWD / Forward Forward Reverse HMI LED Situation FLASHING Figure 5.2 - Direction of rotation (FWD/REV) LEDs Basic Functions of the Keys: Starts the inverter via acceleration ramp. Stops (disables) the inverter via deceleration ramp. Also resets inverter after a fault has occurred. -
Page 63: Keypad Operation
KEYPAD (HMI) OPERATION 5.2.1 Keypad All functions relating to the CFW-08 operation (Start/Stop, Direction of Rotation, JOG, Increment/Decrement of the Speed (Frequency) Reference, Operation and selection of LOCAL/REMOTE mode) can be performed through the HMI selection. For factory default programming of the inverter, all keypad keys are enabled when the LOCAL Mode has been selected. -
Page 64: Inverter Status
KEYPAD (HMI) OPERATION Reference Backup The last frequency reference set by the keys the is stored when inverter is stopped or the AC power is removed, provided P120 = 1 (reference backup active is the factory default). To change the frequency reference before starting the inverter, the value of the parameter P121, must be changed. -
Page 65: Parameter Viewing And Programming
KEYPAD (HMI) OPERATION All CFW-08 settings are made through parameters. The parameter are 5.2.4 Parameter Viewing and shown on the display by the letter P followed by a number: Programming Exmple (P101): 101 = Parameter Number Each parameter is associated with a numerical value (parameter value), that corresponds to the selected option among the available ones for this parameter. - Page 66 KEYPAD (HMI) OPERATION (3) If the last programmed value in the parameter is not functionally compatible with other parameter values already programmed, E24 - Programming Error - will be displayed. Example of programming error: Programming of two digital inputs (DI) with the same function. Refer to Table 5.1 for list of programming errors that can generate an E24 Programming Error.
-
Page 67: Detailed Parameter Description
CHAPTER 6 DETAILED PARAMETER DESCRIPTION This chapter describes in detail all CFW-08 parameters and functions. Please find below some symbols used in this chapter: 6.1 SYMBOLS AIx = Analog input number x. AO = Analog output. DIx = Digital input number x. F* = Frequency reference. -
Page 68: Vector Control (Vvc)
DETAILED PARAMETER DESCRIPTION There is still a variation of the linear V/F control: the quadratic V/F control. This control mode is suitable for applications like centrifugal pumps and fans (loads with quadratic torque x speed characteristics), since it enables a motor loss reduction, resulting in an additional energy saving by using an inverter. - Page 69 DETAILED PARAMETER DESCRIPTION HMI-CFW08-RP HMI - CFW08-RS HMI-CFW08-P Frequency Reference Selection P221 or P222 KEYPAD REFERENCE (P121) 0 - Keypad RS-232 5 - Serial P264=7 PC, CLP, P265=7 P124...P131 MIW-02 P266=7 KCS-CFW-08 P131 P130 P129 P128 P127 P126 P125 P124 6 - Multispeed 000 001 010 011 100 101 110 111 MULTISPEED...
- Page 70 DETAILED PARAMETER DESCRIPTION P151 DC Link Regulation Power Supply P151 P100 P101 P136, P137, P202 P295 P138, P142, P145 P133 P134 Acceleration & Deceleration Ramp Inverter Control (V/F or Vector) P102 P103 Frequency Reference Limits P178 Motor Parameters (P399...P409) Acceleration& Deceleration Ramp #2 3Ø...
-
Page 71: Commands
DETAILED PARAMETER DESCRIPTION 6.2.5 Commands The inverter has the following commands: PWM pulse enabling/disabling, definition of the direction of rotation and JOG. As the reference, the inverter commands can de defined in several ways. The command sources are the following: via keypad - keys via control terminals (XC1) - digital inputs;... -
Page 72: Parameter Listing
DETAILED PARAMETER DESCRIPTION Local/Remote Selection (P220) Local/Remote Command LOCAL , DI, serial, etc) 0 Keypad (HMI-CFW08-P and HMI-CFW08-RS) 1 AI1 Frequency 2 or 3 AI2 Reference REFERENCE 4 E P P221 5 Serial 6 Multispeed 7 Add AI 8 Add AI>0 0 HMI-CFW08-P Controls keypad... -
Page 73: Access And Read Only Parameters - P000
DETAILED PARAMETER DESCRIPTION 6.3.1 Access and Read Only Parameters - P000 ... P099 Range [Factory Setting] Parameter Unit Description / Notes Releases the access to change the parameter values. P000 0...999 Access Parameter [ 0 ] The password is 5. The use of the password is always active. -
Page 74: Regulation Parameters - P100
DETAILED PARAMETER DESCRIPTION Range [Factory Setting] Parameter Unit Description / Notes Indicates the software version installed in the DSP memory located P023 x.yz Software Version [ - ] on the control board. Parameter P040, P203, P520 to P528 are only available from the software version V3.50 on. - Page 75 DETAILED PARAMETER DESCRIPTION Range [Factory Setting] Parameter Unit Description / Notes P120 0...2 Defines if the inverter should save or not the last used digital Digital Reference [ 1 - ativo ] reference. This backup function is only applicable to the keypad Backup reference.
- Page 76 DETAILED PARAMETER DESCRIPTION Range [Factory Setting] Parameter Unit Description/Notes P124 P133...P134 Multispeed is used when the selection of a number up to 8 pre- Multispeed Ref. 1 [ 3.00Hz ] programmed speeds is desired. 0.01Hz (<100.0); It allows the control of the output speed by relating the values 0.1Hz (>99.99) programmed by the parameters P124...P131, according to the logical combination of the digital inputs programmed for multispeed.
- Page 77 DETAILED PARAMETER DESCRIPTION Range [Factory Setting] Parameter Unit Description / Notes P133 0.00...P134 Defines the maximum and minimum output frequency (motor) Minimum Frequency [ 3.00Hz ] when inverter is enabled. 0.01Hz (<100.0); It is valid for any type of speed reference. 0.1Hz (>99.99) The parameter P133 defines a dead zone when analog inputs are used - see parameters P234 ...
- Page 78 DETAILED PARAMETER DESCRIPTION Range [Factory Setting] Parameter Unit Description / Notes P007 Motor Manual Speed Torque Boost Voltage Reference (F*) P136 Automatic Output Active Torque Boost Current (I P137 Filer Figure 6.7 - Block diagram of the automatic torque boost function Output Voltage Maximum (P142)
- Page 79 DETAILED PARAMETER DESCRIPTION Range [factory Setting] Parameter Unit Description / Notes Output Voltage (function of the motor load) Output Frequency Figure 6.10 - V/F curve with slip compensation To set the parameter P138 use the following procedure: - run the motor without load up to approximately half of the application top speed;...
- Page 80 DETAILED PARAMETER DESCRIPTION Range [Factory Setting] Parameter Unit Description / Notes P151 325...410V The DC link voltage regulation (ramp holding) avoids overvoltage DC Link Voltage (line 200-240V) trips (E01) during deceleration of high inertia loads and/or short Regulation Level [ 380V ] deceleration times.
- Page 81 DETAILED PARAMETER DESCRIPTION Range [Factory Setting] Parameter Unit Description / Notes Motor Current (P003) Overload Current Time (s) 15 30 Figure 6.13 - Ixt function – Overload detection Parameter P156 must be set from 10% to 20% higher than the rated motor current (P401).
-
Page 82: Configuration Parameters - P200
DETAILED PARAMETER DESCRIPTION 6.3.3 Configuration Parameters - P200 ... P398 Range [factory Setting] Parameter Unit Description / Notes Defines the inverter control mode. Item 4.3 gives some guidelines P202 0...2 relating to the selection of control type. Type of Control [ 0 - V/F linear ] P202 Type of Control... - Page 83 DETAILED PARAMETER DESCRIPTION Range [factory Setting] Parameter Unit Description / Notes The vector control allows a better performance regarding to torque and speed control. The CFW-08 vector control operates without motor speed sensor (sensorless). It must be applied when following performances are required: - better dynamics (faster accelerations and stoppings);...
- Page 84 DETAILED PARAMETER DESCRIPTION Range [Factory Setting] Parameter Unit Description / Notes It allows that the read-only parameter P002 indicates the motor P208 0.00...99.9 speed in value, for instance, rpm. Reference Scale [ 1.00 ] The indication of P002 is equal to the output frequency value (P005) Factor 0.01 (<10.0) multiplied by the value of P208, i.e., P002 = P208 x P005.
- Page 85 DETAILED PARAMETER DESCRIPTION Range [Factory Setting] Parameter Unit Description / Notes Please consider still the following: -If the inverters A and B are driving different motors, check the motor parameters (P399 ... P409) related to inverter B. -To copy the parameter content of the inverter A to other inverter(s), repeat steps 4 to 6 above.
- Page 86 DETAILED PARAMETER DESCRIPTION Range [Factory Setting] Parameter Unit Description / Notes P220 0...6 Defines the source of the Local/Remote selection. Local/Remote [ 2 - Key P220 Local/Remote Selection Default Mode (*) Source Selection HMI-CFW08-P ] Always Local mode Always Remote mode of the keypad (HMI-CFW08-P Local or HMI-CFW08-RP)
- Page 87 DETAILED PARAMETER DESCRIPTION Range [Factory Setting] Parameter Unit Description / Notes Define the control sources for the inverter enabling disabling P229 0...2 Local Command [ 0 - Keys ] FWD/REV and JOG. Selection P229/P230 Control source HMI-CFW08-P or HMI-CFW08-RP Keypad P230 0...2 Terminals (XC1)
- Page 88 DETAILED PARAMETER DESCRIPTION Range [Factory Setting] Parameter Unit Description / Notes The internal value AIx’ that defines the frequency reference to be used by the inverter, is given as percent of the full scale reading and is obtained by using on of the following equations (see P235 and P239): P235/P239 Signal...
- Page 89 DETAILED PARAMETER DESCRIPTION Range [factory Setting] Parameter Unit Description / Notes P236 -120...120% See P234. Analog Input AI1 [ 0.0 ] Offset 0.1 (<100); 1 (>99.9) P238 0.00...9.99 See P234. Analog Input AI2 [ 1.00 ] Gain 0.01 This parameter is only available in the CFW-08 Plus version...
- Page 90 DETAILED PARAMETER DESCRIPTION Range [Factory Setting] Parameter Unit Description / Notes Variable Full scale Frequency (P251=0 or 1) P134 Current (P251=2 or 7) 1.5xI Torque (P251=4) 150% Process variable - PID (P251=6) P528 Setpoint PID (P251=9) P528 Check possible options on table below and details about each P263 0...14 function operation on Figure 6.19.
- Page 91 DETAILED PARAMETER DESCRIPTION Range [Factory Setting] Parameter Unit Description / Notes NOTES! 1) Local/Remote = open/0V at the digital input respectively. 2) P263=0 (not used or general enable) operates as follows: - if the comand source are the terminals, i.e., if P229=1 for the local mode or P230=1 for the remote mode, the DI1 operates as general enable;...
- Page 92 DETAILED PARAMETER DESCRIPTION GENERAL ENABLE START/STOP motor runs Accel. freely Accel. Decel. ramp ramp ramp Motor Motor Speed speed Time Time open open Time Time 3-WIRE START/STOP DI1 -Start Time open Time DI2 - Stop open Time Motor Speed Tempo FOWARD RUN / REVERSE RUN DI1 - FWD open...
- Page 93 DETAILED PARAMETER DESCRIPTION ELECTRONIC POTENTIOMETER (EP) Minimum frequency (P133) Motor speed Time DI3 - Increase PE open Time Reset DI4 - Decrease PE open Time DI - Start/Stop open Time RAMP #2 FWD/REV DI - Start/Stop open Time Motor Speed Time DI - Ramp #2 open...
- Page 94 DETAILED PARAMETER DESCRIPTION FLYING START DISABLE NO EXTERNAL FAULT Enabled Inverter motor runs Disabled status freely Time open Motor speed DI - Flying Time Start Disable Time DI - No External Fault open Time Motor Speed Time RESET Fault (Exy) Inverter Ready Status...
- Page 95 DETAILED PARAMETER DESCRIPTION Range [Factory Setting] Parameter Unit Description / Notes Check possible options on table below and details about each P277 0...7 function operation on Figure 6.20. Relay Output RL1 [ 7 - No fault ] Function P277 P279 Output/Parameter Function (RL1)
- Page 96 DETAILED PARAMETER DESCRIPTION Range [Factory Setting] Parameter Unit Description / Notes When the definition in the function name is true, the digital output will be activated, i.e., the relay coil is energized. When the option 'Not used' has been programmed, the relay output(s) will be disabled, i.e., the coil is not energized.
- Page 97 DETAILED PARAMETER DESCRIPTION Range [Factory Setting] Parameter Unit Description / Notes P297 4...7 Defines the switching frequency of the IGBTs in the inveter. Switching Frequency [ 4 - 5kHz ] Switching P297 Frequency (f 5kHz 2.5kHz 10kHz 15kHz The switching frequency is a comprimise between the motor acoustic noise level and the inverters IGBTs losses.
- Page 98 In applications where the motor current is lower than the rated inverter current, and where the braking torque is not enough for the braking condition, please contact WEG to optimize the settings.
- Page 99 Sets the address of the inverter for the serial communication. P308 1...30 See item 8.18 and 8.19. Inverter Address (WEG Protocol) The serial interface is an optional inverter accessory. 1...247 See items 8.9, 8.10 and 8.13 for detailed information. (Modbus-RTU) [ 1 ] This parameter can be changed only with the inverter disabled (motor stopped).
- Page 100 DETAILED PARAMETER DESCRIPTION Range [Factory Setting] Parameter Unit Description / Notes The parameter P310 selects the active function(s): P310 0...3 Flying Start and [ 0 - Inativas ] P310 Flying Start Ride-Through Ride-Through Inactive Inactive Active Inactive P311 0.1...10.0s Active Active Voltage Ramp [ 5.0s ]...
- Page 101 [ 0 - WEG Protocol ] The serial interface can be configued for two distinct protocols: WEG and Modbus-RTU. The WEG protocol is described in Item 8.21 and is selected by setting P312=0. The Modbus-RTU protocol, described in item 8.22 has nine...
-
Page 102: Motor Parameters - P399
DETAILED PARAMETER DESCRIPTION 6.3.4 Motor Parameters - P399 ... P499 Range [Factory Setting] Parameter Unit Description / Notes Set this parameter according to motor nameplate. P399 50.0...99.9% If this data are not available: Rated Motor [ according to the - If the rated motor power factor is known Efficiency inverter model ] ∅... - Page 103 DETAILED PARAMETER DESCRIPTION Range [Factory Setting] Parameter Unit Description / Notes P404 0...15 Set this parameter according to motor nameplate, as shown in table Rated Motor [ According to the below. Power inverter model ] Rated Motor power P404 0.16 0.16 0.12 This...
- Page 104 DETAILED PARAMETER DESCRIPTION Range [Factory Setting] Parameter Unit Description / Notes P409 0.00...9.99 Value estimated by the Self-Tuning routine. Motor Resistance [ According to The table in item 9.3 shows the stator resistance for standard, IV the inverter type ] pole, 60Hz, 220/380V motors.
-
Page 105: Special Function Paramaters - P500
DETAILED PARAMETER DESCRIPTION 6.3.5 Special Function Parameters - P500 ... P599 6.3.5.1 PID Introduction CFW-08 is fitted with the PID regulator that can be used for closed loop process control. This function acts as a proportional, integral and derivative regulator, superimposed on the normal inverter speed control. The speed will be changed in order to maintain the process variable (the variable that should be controlled - for instance: water level of a container) at the desired value, set in the setpoint. - Page 106 DETAILED PARAMETER DESCRIPTION Figure 6.25 - Block diagram of the PID regulator function...
-
Page 107: Pid Start-Up Guide
DETAILED PARAMETER DESCRIPTION NOTE! When the PID function (P203=1) is set: The digital input DI3 is automatically set to manual/automatic (P265=15). Thus when DI3 is open, the manual mode is activated and when DI3 is closed, the PID regulator starts to operate (closed loop control - automatic mode). - Page 108 DETAILED PARAMETER DESCRIPTION Set P234 and P236 according to the variation range of the used feedback signal (for more details, see description of the parameters P234 to P240). Example: suppose the following application: - full scale of the transducer (maximum value at the transducer output) = 25bar (FS=25);...
- Page 109 DETAILED PARAMETER DESCRIPTION NOTE! The inverter setting must be correct in order to obtain a good performance of the PID regualtor. Ensure the following settings: torque boosts (P136 and P137) and slip compensation (P138) in the V/F control (P202=0 ou 1); ensure that the self-tuning has been run, if in vector control (P202=2);...
- Page 110 DETAILED PARAMETER DESCRIPTION Range [Factory Setting] Parameter Unit Description / Notes The integral gain can be defined as being the time required to change P520 0.000...7.999 the PI regulator output from 0 to P134, that is given, in seconds, by PID Proportional [ 1.000 ] the equation below:...
-
Page 111: Diagnostics And Troubleshooting
CHAPTER 7 DIAGNOSTICS AND TROUBLESHOOTING This chapter assists the user to identify and correct possible faults that can occur during the CFW-08 operation. Also instructions about required periodical inspections and cleaning procedures are also provided. When a fault is detected, the inverter is disabled and the fault code is 7.1 FAULTS AND POSSIBLE displayed on the readout in EXX form, where XX is the actual fault code. - Page 112 Ani DI (DI3 and/or DI4) programmed for external fault External Fault detection is open (not connected to GND - XC1). Electrical noise. CPU Error (Watchdog) Contact WEG Memory with corrupted values. Program Memory (refer to section 7.3) Error (Checksum) Power-on Defective contact in the HMI-CFW08-RS cable.
-
Page 113: Troubleshooting
DIAGNOSTICS AND TROUBLESHOOTING NOTE! The faults act as follows: E00 ... E06: switches off the relay that has been programmed to “no fault”, disables the PWM pulses, displays the fault code on the display and the “ERROR” LED flashes. Some data are saved on the EEPROM memory: keypad reference and EP (electronic potentiometer) (when the function “backup of the references”... -
Page 114: Contacting Weg
380-480V models: - Min: 323V - Max: 528V 7.3 CONTACTING WEG NOTE! When contacting WEG for services, please have the following data on hand: Inverter model; serial number, manufacturing date and hardware revision, as indicated on the inverter nameplate (refer to section 2.4);... -
Page 115: Cleaning Instructions
Never apply a high voltage test on the inverter! If this is necessary, contact WEG. To avoid operation problems caused by harsh ambient conditions, such as high temperature, moisture, dirt, vibration or premature ageing of the components, periodic inspections of the inverter and installations are recommended. - Page 116 CFW-08 . Table below shows a list of existing optional devices and the types to which they are applied. Are also given information about the optional devices and their application. Models to which WEG Item Name Function are applied...
-
Page 117: Options And Accessories
CFW-08 OPTIONS AND ACCESSORIES Models to which Name Function are applied Item Number FIL1 Internal class A suppressor filter RFI - A - 7.3A/200-240V 7.3-10A/200-240V 4151.2661 Internal class A suppressor filter RFI- A - 2.7-4.3-6.5-10A/380- 2.7-4.3-6.5-10A/ FIL2 4151.0994 480V 380-480V FIL4 Internal class A suppressor filter - RFI - 13-16A/380-480V 13-16A/380-480V... -
Page 118: Instructions For Insertion - Removing Of Hmi-Cfw08-P
CFW-08 OPTIONS AND ACCESSORIES 8.1.1 Instruction for Insertion and Removing of the HMI-CFW08-P 1. Unlock the keypad by using a screwdriver as shown above. 1. Place the keypad as shown above. 2. Remove the keypad by pulling on the lateral sides. 2. -
Page 119: Hmi-Cfw08-Rp Installation
CFW-08 OPTIONS AND ACCESSORIES 36.3 15.9 Figure 8.4 - Dimensions of the HMI-CFW08-RP 8.3.1 HMI-CFW08-RP The HMI-CFW08-RP can be installed directly on the panel door (0,12in), as shown in the figures below: Installation 52mm (2.05in) Figure 8.5 - Installation of the HMI-CFW08-RP 8.4 MIP-CFW08-RP Isolation interface: Isolation interface installed in the inverter instead of the standard keypad only when the remote parallel keypad (HMI-CFW08-... -
Page 120: Cab-Rp-10
CFW-08 OPTIONS AND ACCESSORIES LATERAL VIEW FRONT VIEW Figure 8.6 - Dimensions of the MIP-CFW08-RP Cables used to connect the inverter to the external parallel interface keypad 8.5 CAB-RP-1 (HMI-CFW08-RP). CAB-RP-2 There are 6 cables options ranging in lenghts from 1m (39in) to 10m CAB-RP-3 (394in). -
Page 121: Hmi-Cfw08-Rs Installation
CFW-08 OPTIONS AND ACCESSORIES LATERAL VIEW FRONT VIEW Figure 8.6 - Dimensions of the MIP-CFW08-RP 8.5 CAB-HMI08-RP-1 Cables used to connect the inverter to the external parallel interface keypad (HMI-CFW08-RP). CAB-HMI08-RP-2 There are 6 cables options ranging in lenghts from 1m (39in) to 10m CAB-HMI08-RP-3 (394in). -
Page 122: Keypad Copy Function
CFW-08 OPTIONS AND ACCESSORIES Function via HMI-CFW08-RS Local Mode Remote Mode Frequency reference P221 = 0 P222 = 0 Commands (*) P229 = 2 P230 = 2 P231 = 2 Forward/Reverse Selection P220 = 5 (default local) or Loca/Remote P220 = 6 (default remote) Selection Note: Factory setting... -
Page 123: Kcs-Cfw08
CFW-08 OPTIONS AND ACCESSORIES Keypad Inverter RJ Connector Connector Figure 8.12- CAB-HMI08-S cable the HMI-CFW08-RS 8.9 KCS-CFW08 Serial communication module RS-232: is inserted in the place of the parallel keypad, enabling the RS-232 connection (connector RJ-6). The RS-232 serial interface enables the point-to-point connection (inverter - master). -
Page 124: Instruction And Removing Instructions For Kcs-Cfw08
CFW-08 OPTIONS AND ACCESSORIES 8.9.1 Instructions for KCS-CFW08 Insertion/Removal -Connect the cable of the - Place the communication communication module to XC5 module as shown in figure above. - Press it. (a) Insertion - Use a screwdriver to unlock the - Remove the cable from the XC5 communication module. -
Page 125: Kmd-Cfw08-M1
CFW-08 OPTIONS AND ACCESSORIES To install the RS-232 communication kit on the PC, proceed as follows: Remove the parallel keypad (HMI-CFW08-P) from the inverter. Install the serial communication module RS-232 (KCS-CFW08) in the place of the keypad. Install the software “SUPERDRIVE” in the PC. Connect the inverter to the PC through the cable. -
Page 126: Kfix-Cfw08-M1, Kfix-Cfw08-M2
CFW-08 OPTIONS AND ACCESSORIES 8.12 KFIX-CFW08-M1 This kit must be used when a better access to the screw hole of the inverter is needed. Models that used this kit: KFIX-CFW08-M2 KFIX-CFW08-M1 1,6 - 2,6 - 4,0 - 7,0A/200-240V; 1,0 - 1,6 - 2,6 - 4,0A/380-480V KFIX-CFW08-M2 7,3 - 10 - 16A/200-240V;... -
Page 127: Kn1-Cfw08-M1, Kn1-Cfw08-M2
So the inverter can participate in a multipoint line up to 1000m without the use of transducers. For more details about this connection, see item 8.18.7 and the MIW-02 USER MANUAL. The communication protocols supported by this serial interface are detailed in items 8.18 WEG and 8.19 RTU-Modbus. -
Page 128: Rfi Filters
CFW-08 OPTIONS AND ACCESSORIES WEG network RS-485 RS-485 MIW-02 RS-232 CFW-08 Figure 8.19 - Connection of the CFW-08 to a standard RS-485 communication network 8.15 RFI FILTER The installation of frequency inverters requires some care in order to prevent electromagnetic interferences (EMI). -
Page 129: Line Reactor
CFW-08 OPTIONS AND ACCESSORIES NOTE! For installations that must meet the European standards refer to item 3.3. Driving Panel CFW-08 Conduit or Motor Filter Shielded Cable Power Supply Ground Install it as close as Motor Ground possible to the (frame) inverter Figure 8.20 - Connection of the external RFI filter - Class B 8.16 LINE REACTOR... - Page 130 CFW-08 OPTIONS AND ACCESSORIES This practice results in a compromise between motor voltage drop, power factor improvement and harmonic current distortion reduction. Always add a line reactor, when capacitors for power factor correction are installed in the same line and near to the inverter. Figure 8.19 shows the line reactor connection to the input.
-
Page 131: Load Reactor
WEG recommends using a load reactor when the supply voltage is higher than 500V, though this is not always required. WEG, as a specialist in both motors and inverters (VSDs) is able to provide an integrated solution. The load reactor value is calculated in the same way as the line reactor (see item 8.15.1). -
Page 132: Dynamic Braking
Use wire type or tape type resistors with suitable insulation to withstand the instantaneous current peaks. For critical applications with very short braking times, high inertia loads (ex.: centrifuges) or with very short and frequent duty cycles, contact WEG to define the most suitable resistor. -
Page 133: Installation
CFW-08 OPTIONS AND ACCESSORIES rated Maximum Recommended Recommended (Maximum Braking (Rated Inverter Model Braking Current Resistor Wiring Resistor Power) Current (*1) Resistor Power) 1.6A / 200-240V 2.6A / 200-240V Braking not available 4.0A / 200-240V 7.0A / 200-240V 39 Ω 7.3A / 200-240V 10 A 3.9 kW... -
Page 134: Serial Communication
This software supports WEG protocol and nine different Modbus-RTU modes, that can be selected via parameter P312. The subjects broached in this Section refers to WEG protocol. For more details about the Modbus- RTU, see item 8.19. The transfer rate is 9600 bits/s, following an exchange protocol of question/ answer typeby using ASCII characters. -
Page 135: Interfaces Description
CFW-08 OPTIONS AND ACCESSORIES - IDENTIFICATION network address; inverter; software version. CONTROL general enabling/disabling; enabling/disabling by ramp; direction of rotation; frequency/speed reference; local/remote; JOG; error and fault RESET. - STATUS RECOGNITION ready; Sub; run; local/remote; error; JOG; direction of rotation. - PARAMETER READING - CHANGE OF PARAMETERS Typical examples of network use:... - Page 136 CFW-08 OPTIONS AND ACCESSORIES Address 31: a control can be transmitted to all inverters in the network simultaneously, without acceptance recognition. List of addresses and corresponding ASCII characters. ADDRESS ASCII (P308) CHAR Other ASCII characters used by the protocol ASCII CODE The connection between the network participants is performed through a pair of wires.
-
Page 137: 136
CFW-08 OPTIONS AND ACCESSORIES 8.19.2.2 RS-232 In this case we have the connection of a master to an inverter (point-to- point). The data can be exchanged in a bi-directional way, but not simultaneously (HALF DUPLEX). The logical levels meet the EIA RS-232C STANDARD, that specifies the use of balanced signals. -
Page 138: Protocol
CFW-08 OPTIONS AND ACCESSORIES START STOP Start Stop 8 bits of information 8.19.3.4 Protocol The transmission protocol meets the Standard ISO 1745 for the transmission in code. Only text character sequences without headers are used. The error/ fault monitoring is made through transmission related to the parity of the individual 7 bit characters, according to ISO 646. -
Page 139: Writing Message
CFW-08 OPTIONS AND ACCESSORIES ETX: control character - End of Text; BCC: CheCksum Byte - EXCLUSIVE OR of all bytes between STX (excluded) and ETX (included). NOTE: In some cases there can be an inverter answer with: ADR NAK refer to Item 8.18.3.5 This message sends data to the inverter variables. -
Page 140: Message Sequence
CFW-08 OPTIONS AND ACCESSORIES Writing Message: no answer: with wrong message structure, control characters received incorrectly or wrong inverter address; NAK: CODE corresponding to a non existing variable, wrong BCC (checksum byte), only reading variable, VAL out of the allowed range for the respective variable, operation parameter out of the alteration mode;... -
Page 141: Variables And Errors Of The Serial Communication
CFW-08 OPTIONS AND ACCESSORIES 3) Master: Reading of the output current from the inverter 10 (supposing the the same was at 7.8A at the moment of the enquiry). 1) Master: P003 Code addr.10 2) Inverter: P003 Code P003=30CH=780=7.8/0.01 addr.10 3) Master: 8.19.5 Variables and Errors of the Serial... -
Page 142: V03 (Code 00703)
CFW-08 OPTIONS AND ACCESSORIES EL8: 0 = ramp enabling (start/stop) inactive 1 = ramp enabling Inverter EL9: 0 = general enabling inactive enabled 1 = general enabling active EL8=EL9=1 EL10: 0 = Reverse 1 = Forward EL11: 0 = JOG inactive 1 = JOG active EL12 0 = local... -
Page 143: V04 (Code 00704)
CFW-08 OPTIONS AND ACCESSORIES CL5: not used CL6: not used CL7: the transition in this bit from 0 to 1 causes the inverter “RESET” when any error condition is present. Note: Disabling via DIx has priority over this disabling. To disable the inverter via serial interface, set CL0=CL1=CL8=CL9=1, while the external disabling (example, via DI) must be inactive. - Page 144 CFW-08 OPTIONS AND ACCESSORIES 1) Master: C. L. Code Reverse = 0 addr. 7 2) Inverter: 3) Master: JOG enabling (provided P229=2 for LOC or P230=2 for REM) 1) Master: C. L. Code JOG active=1 addr. 7 2) Inverter: 3) Master: Error reset 1) Master: C.
-
Page 145: Errors Related To The Serial Communication
CFW-08 OPTIONS AND ACCESSORIES 8.19.5.3 Errors Related to They act as follows: they do not disable the inverter; the Serial they do not disable the fault relay; Communication they inform in the word the logical status (V02). Fault types: E22: longitudinal parity fault (BCC); E24: parametrization fault (when some of the situations occurs as indicated in table 5.1 (incompatibility between parameters) or when there is a parameter change attempt that can not be changed with... -
Page 146: Physical Connection Of Rs-232 And Rs-485 Interface
CFW-08 OPTIONS AND ACCESSORIES 8.19.7 Physical CFW-08 CFW-08 CFW-08 Connection RS-232 and RS-485 RS-232 RS-232 RS-232 RS-485 RS-485 RS-485 Network Master (PC, PLC) MIW-02 MIW-02 MIW-02 RS-485 RS-485 XC29 RS-485 BCable XC29 shielding Figure 8.24 - CFW-08 network connection through RS-485 serial interface Notes: LINE TERMINATION: connect the termination resistors at the ends of the line. -
Page 147: Modbus-Rtu
CFW-08 OPTIONS AND ACCESSORIES 8.20 MODBUS-RTU 8.20.1 Introduction to Modbus protocol has been already developed 1979 firstly. Currently it is a wide diffused open protocol, used by several manufacturers in different Modbus-RTU Protocol equipment. The Modbus-RTU communication of the do CFW-08 has been developed by considering two documents: 1. -
Page 148: Address
CFW-08 OPTIONS AND ACCESSORIES 8.20.1.2.1 Address The master initiates the communication by sending one byte with the address of the slave to which the message is addressed. The slave with the right slave address initiates the message with its own address. The master can also send a message destined to address 0 (zero), which means that the message is destined to all network slaves (broadcast). -
Page 149: Time Between Messages
CFW-08 OPTIONS AND ACCESSORIES 8.20.1.2.5 Times between In the RTU mode there is no specific character that indicates the beginning or the end of a message. Thus the only indication for the beginning or the Messages end of a new message is the data transmission absence in the network by 3.5 times the time required for transmission of one data word (11 bits). -
Page 150: 149
CFW-08 OPTIONS AND ACCESSORIES The interface is used for the point-to-point connection (between a single 8.20.2.1.1 RS-232 slave and the master). Max. distance: 10 meters. Signal levels according to EIA STANDARD RS-232C. Three wires: transmission (TX), reception (RX) and return (0V). The RS-232 module (KCS-CFW08) must be used (see item 8.9). -
Page 151: 3.1Available Functions And Response Times
CFW-08 OPTIONS AND ACCESSORIES 8.20.2.3.1 Available Functions In the Modbus RTU protocol specification is defined the functions used for accessing different types of registers described in the specification. In the and Response CFW-08 both parameters and basic variables are defined as being holding Times type registers (referenced as 4x). - Page 152 CFW-08 OPTIONS AND ACCESSORIES Parameters Endereço Modbus Parameter Number Decimal Hexadecimal P000 0000h P001 0001h P100 0064h Basic Variables Modbus Address Number of the Decimal Hexadecimal Basic Variable 5000 1388h 5001 1389h 5005 138Dh Status Bits Modbus Address Bit Number Decimal Hexadecimal Bit 0...
-
Page 153: Detailed Function Description
CFW-08 OPTIONS AND ACCESSORIES Status Bits Function Bit Number 0 = JOG inactive Bit 3 1 = JOG active 0 = Local Mode Bit 4 1 = Remote Mode 0 = No undervoltage Bit 5 1 = With undervoltage Bit 6 Not used 0 = No fault Bit 7... -
Page 154: Function 01 - Read Coils
CFW-08 OPTIONS AND ACCESSORIES 8.20.3.1 Function 01 - It reads the content of an internal group of bits that must compulsorily in a numerical sequence. This function has the following structure for the Read Coils read and response messages (the values are always hexadecimal, and each filed represents one byte): Query (Master) Response (Slave) -
Page 155: Function 05 - Write Single Coil
CFW-08 OPTIONS AND ACCESSORIES Query (Master) Response (Slave) Slave address Slave address Function Function Byte Count Field Initial register address (byte high) Data 1 (high) Initial register address (byte low) Data 1 (low) Number of registers (byte high) Data 2 (high) Number of registers (byte low) Data 2 (low) CRC-... -
Page 156: Function 06 - Write Single Register
CFW-08 OPTIONS AND ACCESSORIES Example: to drive a ramp enable command (bit 100 = 1) of a CFW-08 at the address 1: Query (Master) Response (Slave) Field Value Field Value Slave address Slave address Function Function Bit number (high) Bit number (high) Bit number (low) Bit number (low) Bit value (high) -
Page 157: Function 16 - Write Multiple Registers
CFW-08 OPTIONS AND ACCESSORIES Query (Master) Response (Slave) Slave address Slave address Function Function Initial bit address (byte high) Initial bit address (byte high) Initial bit address (byte low) Initial bit address (byte low) Number of bits (byte high) Number of bits (byte high) Number of bits (byte low) Number of bits (byte low) CRC-... -
Page 158: Function 43 - Read Device Identification
CFW-08 OPTIONS AND ACCESSORIES Query (Master) Response (Slave) Slave address Slave address Function Function Initial register address (byte high) Initial register address (byte high) Initial register address (byte low) Initial register address (byte low) Number of registers (byte high) Number of registers (byte high) Number of registers (byte low) Number of registers (byte low) CRC-... - Page 159 Each object is formed by a sequence of ASCII characters For the CFW-08 are only available basic information formed by three objects: Object 00 - VendorName: always ‘WEG’. Object 01 - ProductCode: formed by the product code (CFW-08), plus the rated inverter current.
-
Page 160: Communication Errors
In the example the Object Value has not been represented as hexadecimal value, but with corresponding ASCII characters. For instance, for the object 00, the ´WEG‘ value has been transmitted as being three ASCII characters, that as hexadecimal have the values 57h (W), 45h (E) e 47h (G). - Page 161 CFW-08 OPTIONS AND ACCESSORIES Query (Master) Response (Slave) Field Value Field Value Slave address Slave address Function Function Register (high) Error Code Register (low) CRC- Value (high) CRC+ Value (low) CRC- CRC+...
-
Page 162: Technical Specifications
CHAPTER 9 TECHNICAL SPECIFICATIONS This chapter describes the technical specifications (electrical and mechanical) of the CFW-08 inverter series. 9.1 POWER DATA AC Input Specifications: Voltage: + 10%, -15% (with loss of motor efficiency) Frequency : 50/60Hz (± 2 Hz) ≤ Phase unbalance: Overvoltage: Category III (EN 61010/UL 508C) Transient voltages according to Category III. - Page 163 TECHNICAL SPECIFICATIONS Model: Current/Voltage 380-480 380-480 Power (kVA) 12.2 Rated Output Current (A) Max. Output Current (A) 19.5 Rated Input Current (A) Switching Frequency (kHz) Max. Motor Power 7.5HP/5.5kW 10HP/7.5kW Dynamic Braking Internal Class A RFI Filter (optional) External Class B RFI Filter (optional) Watt Loss (W) 7.99 x 5.63 x 6.50 in...
-
Page 164: General Electronic Data
TECHNICAL SPECIFICATIONS 9.2 ELECTRONICS/GENERAL DATA Voltage Source Inverter V/F Control or Sensorless Vector Control (VVC - Voltage Vector Control). METHOD CONTROL PWM SVM (Space Vector Modulation). OUTPUT 0 ... 300Hz, resolution of 0.01Hz. FREQUENCY V/F CONTROL Speed regulation: 1% of the rated speed. PERFORMANCE VECTOR Speed regulation: 0.5% of the rated speed. -
Page 165: Weg Standard Iv Pole Motor Data
The data of the applied motor must be programmed at P399 to P409 and the value of P409 (stator resistance) obtained through the Self-Tuning (parameter estimation via P408). The table below shows the data of WEG standard motors as a reference. Efficiency at Power Factor at... - Page 166 In case the inverter fails to function or operate incorrectly during the warranty time, the warranty services will be carried out, at WEG discretion, at its Authorized Repair Shops. The failed product must be available to the supplier for a required period to detect the cause of the failure and to make the corresponding repairs.
- Page 167 12.0 Any request, complaint, communication, etc. related to the product under warranty, servicing, start-up, etc., shall be sent in writing to WEG Branch or Representative. 13.0 The Warranty granted by WEG is conditioned by the observation of this warranty that is the only valid warranty for the good.
Need help?
Do you have a question about the CFW08 Vector inverter and is the answer not in the manual?
Questions and answers