Table of Contents
Advertisement
Quick Links
User Manual
SP-20000M-PMCL
SP-20000C-PMCL
CMOS Digital Progressive Scan
Monochrome and Color Camera with Mini Camera Link Interface
Document Version: 3.1
Date: 2024-02-07
Thank you for purchasing this product.
Be sure to read this documentation before use.
This documentation includes important safety precautions and instructions on how to operate the unit. Be sure to read this documentation to ensure
proper operation.
The contents of this documentation are subject to change without notice for the purpose of improvement.
© 2024 JAI
Advertisement
Table of Contents

Related Manuals for IAI SP-20000M-PMCL


Summary of Contents for IAI SP-20000M-PMCL
- Page 1 User Manual SP-20000M-PMCL SP-20000C-PMCL CMOS Digital Progressive Scan Monochrome and Color Camera with Mini Camera Link Interface Document Version: 3.1 Date: 2024-02-07 Thank you for purchasing this product. Be sure to read this documentation before use. This documentation includes important safety precautions and instructions on how to operate the unit. Be sure to read this documentation to ensure proper operation.
-
Page 2: Table Of Contents
SP-20000-PMCL User Manual (Ver. 3.1) Table of Contents Table of Contents Table of Contents About Technical Note Notice/Warranty Notice Warranty Certifications CE Compliance Warning China RoHS Usage Precautions EMVA1288 Frame Grabber Board Notes on Cable Configurations Notes on Camera Link Cable Connections Notes on Attaching the Lens Phenomena Specific to CMOS Image Sensors Notes on Exportation... - Page 3 SP-20000-PMCL User Manual (Ver. 3.1) Table of Contents ① Lens ② Mounting (or Use MP-42 Tripod Adapter Plate) ③ Camera Link Cable ④ Frame Grabber Board ⑤ DC IN / Trigger IN Connection Cable ⑥ AC adapter (Power Supply, If Necessary) Step 2: Verify Camera Operation Step 3: Verify the Connection Between the Camera and PC Step 4: Change the Camera Settings...
- Page 4 SP-20000-PMCL User Manual (Ver. 3.1) Table of Contents ROI Setting Examples (1/2) ROI Setting Examples (2/2) (Frame Rate) Mirroring Function Digital Output Bit Allocation Acquisition Control (Change the Frame Rate) Interval Calculation of Frame Rate (In Continuous Trigger mode) Frame Rate Interval Setting Range (Typical Value) in Continuous Trigger Mode Exposure Mode ExposureTime Behavior if Trigger Overlap is Set to Readout...
- Page 5 SP-20000-PMCL User Manual (Ver. 3.1) Table of Contents Video Send Mode Sequence ROI Setting Parameters Multi ROI Function Multi ROI Setting Parameters Operation and Function Matrix Black Level Control Gain Control Gain Auto Balance White Auto LUT (Lookup Table) Gamma Function Shading Correction Blemish Compensation ALC (Automatic Level Control)
-
Page 6: About Technical Note
SP-20000-PMCL User Manual (Ver. 3.1) Table of Contents F-Mount Model M42A-Mount Model User's Record Revision History About Technical Note Some additional technical information is provided on the JAI website as Technical Notes. In this manual, if a technical note is available for a particular topic, the above icon is shown. Please refer to the following URL for Technical notes. -
Page 7: Notice/Warranty
CE Compliance As defined by the Directive 2004/108/EC of the European Parliament and of the Council, EMC (Electromagnetic compatibility), JAI Ltd., Japan declares that SP-20000M-PMCL and SP-20000C- PMCL comply with the following provisions applying to their standards. EN 61000-6-3 (Generic emission standard part 1) -
Page 8: Warning
JAI Ltd. Japan 상 호: JAI Ltd. Japan 기자재명칭: Industrial Camera 기자재명칭: Industrial Camera 모 델 명: SP-20000M-PMCL 모 델 명: SP-20000C-PMCL 제조자 및 제조국가: JAI Ltd., Japan / JAPAN 제조자 및 제조국가: JAI Ltd., Japan / JAPAN MSIP-REM-JAi-SP-20000M-PMCL MSIP-REM-JAi-SP-20000M-PMCL 제조년월은 제품상자의 라벨을 참조하십시오. -
Page 9: China Rohs
物质或元素名称及含量表》如下. 有毒有害物质或元素 部件名称 六价铬 多溴联苯 多溴二苯醚 铅 汞 镉 (Cr (VI)) (PBB) (PBDE) (Pb) (Hg) (Cd) SP-20000M-PMCL × 〇 〇 〇 〇 〇 SP-20000C-PMCL 〇:表示该有毒有害物质在该部件所有均质材料中的含量均在 GB/T 26572-2011规定的限量要求以下。 ×:表示该有毒有害物质至少在该部件的某一均质材料中的含量超出 GB/T 26572-2011规定的限量要求。 环保使用期限 电子信息产品中含有的有毒有害物质或元素在正常使用的条件下不会发生外 泄或突变、 电子信息产品用户使用该电子信息产品不会对环境造成严重污染 或对其人身、财产造成 严重损害的期限。 数字「15」为期限15年。 - 9 -... -
Page 10: Usage Precautions
SP-20000-PMCL User Manual (Ver. 3.1) Usage Precautions Usage Precautions EMVA1288 With regard to signal-to-noise ratio in this manual, specifications measured by EMVA 1288 are used together with specifications by a traditional measurement method. EMVA 1288 is a more complete measurement that considers multiple noise sources, including random noise, pattern noise, and shading. -
Page 11: Notes On Camera Link Cable Connections
SP-20000-PMCL User Manual (Ver. 3.1) Usage Precautions Notes on Camera Link Cable Connections Secure the locking screws on the connector manually, and do not use a driver. Do not secure the screws too tightly. Doing so may wear down the screw threads on the camera. (Tightening torque: 0.15 N·m or less) Caution: Secure manually. -
Page 12: Phenomena Specific To Cmos Image Sensors
SP-20000-PMCL User Manual (Ver. 3.1) Usage Precautions Phenomena Specific to CMOS Image Sensors The following phenomena are known to occur on cameras equipped with CMOS image sensors. These do not indicate malfunctions. Aliasing: When shooting straight lines, stripes, and similar patterns, vertical aliasing (zigzag distortion) may appear on the monitor. -
Page 13: Features
This camera provides both high resolution and a high frame rate with excellent image quality for machine vision applications. The SP-20000M-PMCL is a monochrome progressive scan CMOS camera and the SP-20000C-PMCL is the equivalent Bayer mosaic progressive scan CMOS camera. - Page 14 SP-20000-PMCL User Manual (Ver. 3.1) Features Timed and trigger width exposure control PIV and sequential trigger modes for specific applications ALC control with combined function of AGC and auto exposure Various pre-processing circuits are provided: Programmable LUT, Gamma correction from 0.45 to 1.0, Shading correction, Bayer white balance with manual or one-push auto (color model only), Blemish compensation Auto iris lens video output with H-sync...
-
Page 15: Parts Identification
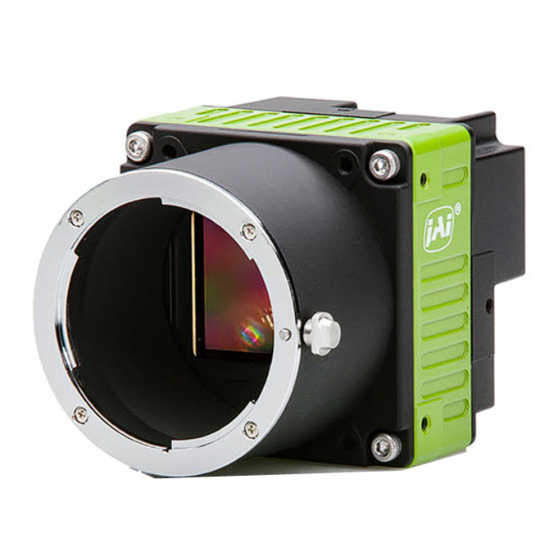
SP-20000-PMCL User Manual (Ver. 3.1) Parts Identification Parts Identification ① Lens Mount (F-Mount or M42A-Mount) ② AUX connector (10-Pin) ③ POWER/TRIG LED ④ DC IN / Trigger IN Connector (12-pin Round) ⑤ ⑥ Camera Link Connector 2 & 1 ⑦ ⑧ Mounting Holes (M3) ①... -
Page 16: ② Aux Connector (10-Pin)
SP-20000-PMCL User Manual (Ver. 3.1) Parts Identification ② AUX connector (10-Pin) AUX connector for TTL IN/OUT and LVDS IN. Type: HIROSE 10-Pin Connector 3260-10S3(55) Name Note TTL OUT2 Line8 TTL OUT3 Line9 TTL IN2 Line10 LVDS IN1+ Line11 LVDS IN1- Line11 ③... -
Page 17: ④ Dc In / Trigger In Connector (12-Pin Round)
SP-20000-PMCL User Manual (Ver. 3.1) Parts Identification ④ DC IN / Trigger IN Connector (12-pin Round) Connect the cable for DC IN / Trigger IN here. Type: HR-10A-10R-12PB(72) Hirose male or equivalent. Use the part number HR10A-10P- 12S or equivalent for the cable side. Signal Remarks DC Input... -
Page 18: ⑤ ⑥ Camera Link Connector 2 & 1
SP-20000-PMCL User Manual (Ver. 3.1) Parts Identification ⑤ ⑥ Camera Link Connector 2 & 1 ⑤ Camera Link Connector 2: Digital video output (Medium and Full configuration) ⑥ Camera Link Connector 1: Digital video output (Base, Medium and Full config.) Type: 26-pin Mini Camera Link connector (Honda HDR-EC26FYTG2-SL+) Input Input... -
Page 19: Preparation
SP-20000-PMCL User Manual (Ver. 3.1) Preparation Preparation Read this section to learn how the camera connects to devices and accessories. The preparation process is described below. Step 1: Connect Devices Connect the lens, Camera Link cable, AC adapter, computer, and other devices. Step 2: Verify Camera Operation Verify whether the camera is turned on and ready for use. -
Page 20: Step 1: Connect Devices
SP-20000-PMCL User Manual (Ver. 3.1) Preparation Step 1: Connect Devices ① Lens ② Mounting (or Use MP-42 Tripod Adapter Plate) ③ Camera Link Cable ④ Frame Grabber Board ⑤ DC IN / Trigger IN Connection Cable ⑥ AC adapter (Power Supply, If Necessary) ①... -
Page 21: ② Mounting (Or Use Mp-42 Tripod Adapter Plate)
SP-20000-PMCL User Manual (Ver. 3.1) Preparation Focal length = WD / (1 + W/w) WD: Working distance (distance between lens and object) W: Width of object w: Width of sensor (= 8.5mm) ② Mounting (or Use MP-42 Tripod Adapter Plate) When mounting the camera directly to a wall or other device, use screws that match the mounting holes on the camera (see ⑦... -
Page 22: ⑥ Ac Adapter (Power Supply, If Necessary)
SP-20000-PMCL User Manual (Ver. 3.1) Preparation ⑥ AC adapter (Power Supply, If Necessary) Connect the AC adapter and the round connector of the connection cable to the DC IN / trigger IN connector on the camera. Note: The AC adapter is not required when using PoCL. Step 2: Verify Camera Operation When power is supplied to the camera while the necessary equipment is connected, the POWER/TRIG LED at the rear of the camera lights amber, and initialization of the camera starts. -
Page 23: Step 3: Verify The Connection Between The Camera And Pc
SP-20000-PMCL User Manual (Ver. 3.1) Preparation Step 3: Verify the Connection Between the Camera and PC Use a short ASCII command to verify whether the camera is properly recognized in your setup. 1. Install terminal emulator software capable of serial communication to the PC connected to the camera via the frame grabber board. -
Page 24: Step 4: Change The Camera Settings
SP-20000-PMCL User Manual (Ver. 3.1) Preparation Step 4: Change the Camera Settings Related Setting Items: Image Format Control This section explains how to change settings by describing the procedure for changing the output format as an example. Configure the Output Format Configure the size, position, and pixel format of the images to be acquired. - Page 25 SP-20000-PMCL User Manual (Ver. 3.1) Preparation Example: Change the Width setting (ImageFormatControl) 1. To check the current Width setting, enter the command WTC?<CR><LF> from the terminal emulator software. 2. To change the Width setting to 1200, enter WTC=1200<CR><LF>. 3. To change other setting items, please use the Short ASCII command below. Short ASCII Item Value...
-
Page 26: Step 5: Adjust The Image Quality
SP-20000-PMCL User Manual (Ver. 3.1) Preparation Step 5: Adjust the Image Quality Related Setting Items: Analog Control Display the camera image and adjust the image quality. 1. Display the image. Display the image captured by the camera. Please display the image with the viewer on the frame grabber board application. -
Page 27: Save The User Settings
SP-20000-PMCL User Manual (Ver. 3.1) Preparation Save the User Settings 1. Stop image acquisition. Settings can only be saved when image acquisition on the camera is stopped. 2. Specify the storage location (UserSet1 - UserSet3) using the UserSetSave command and save the current camera settings. -
Page 28: Main Functions
SP-20000-PMCL User Manual (Ver. 3.1) Main Functions Main Functions This chapter describes the camera's main functions. Camera Link Interface Digital I/O - 1 Camera Link Configuration Base Medium Full 80bit Camera Link port/bit 2Tap / 12bit 4Tap / 12bit 8 Tap / 8bit 8 Tap / 10bit GenICam Tap Geometry 1X 2 - 1Y... - Page 29 SP-20000-PMCL User Manual (Ver. 3.1) Main Functions Digital I/O - 2 (1/2) Camera Link Configuration Base Medium Full 80bit Camera Link port/bit 2Tap / 12bit 4Tap / 12bit 8 Tap / 8bit 8 Tap / 10bit GenICam Tap Geometry 1X 2 - 1Y 1X 4 - 1Y 1x8 - 1Y 1X 8 - 1Y...
- Page 30 SP-20000-PMCL User Manual (Ver. 3.1) Main Functions Digital I/O - 2 (2/2) Camera Link Configuration Base Medium Full 80bit Camera Link port/bit 2Tap / 12bit 4Tap / 12bit 8 Tap / 8bit 8 Tap / 10bit GenICam Tap Geometry 1X 2 - 1Y 1X 4 - 1Y 1x8 - 1Y 1X 8 - 1Y...
-
Page 31: Camera Link Pixel Clock
SP-20000-PMCL User Manual (Ver. 3.1) Main Functions If you use 80-bit (8Tap/10-bit) camera configuration, DVAL and Exposure Active (JAI custom) are not output through the Camera Link interface. FVAL is only output via Digital I/O-1 connector. Camera Link Pixel Clock Related Setting Items: JAI Custom This camera uses the Camera Link pixel clock of 80 MHz as the default setting. -
Page 32: Gpio (Digital Input/Output Settings)
SP-20000-PMCL User Manual (Ver. 3.1) Main Functions GPIO (Digital Input/Output Settings) Related Setting Items: Digital IO Control The camera can input/output the following signals to and from external input/output connectors. Line Selector Line Selector Description Line 1 TTL 1 Out TTL output from # 9 pin of DC In/Trigger 12-Pin on the rear Line 8 TTL 2 Out TTL output from #1pin “AUX”... - Page 33 SP-20000-PMCL User Manual (Ver. 3.1) Main Functions GPIO GPIO is a general interface for input and output and controls the I/O for trigger signals and other valid signals and pulse generators. By using this interface, you can control an external light source, make a delay function for an external trigger signal, or make a precise exposure setting together with a PWC trigger.
-
Page 34: Input And Output Matrix Table
SP-20000-PMCL User Manual (Ver. 3.1) Main Functions Input and Output Matrix Table The relation between input and output is as follows. Selector (Cross point switch output) Trigger Line Selector Pulse Generator Selector Selector Source signal Trigger (Cross point Line 1 - Line 8 Line 9 Pulse... -
Page 35: Pulse Generator
SP-20000-PMCL User Manual (Ver. 3.1) Main Functions Pulse Generator Related Setting Items: JAI Custom This camera has a frequency divider using the sensor clock as the basic clock and four pulse generators. In each Pulse Generator, various Clear settings are connected to GPIO. The following shows Pulse Generator default settings. - Page 36 SP-20000-PMCL User Manual (Ver. 3.1) Main Functions Pulse Generator Length Set the counter up value for the selected pulse generator. If Repeat Count value is “0”, and if Pulse Generator Clear signal is not input, the pulse generator generates the pulse repeatedly until reaching this counter up value.
- Page 37 SP-20000-PMCL User Manual (Ver. 3.1) Main Functions Pulse Generator Clear Sync Mode Set the count clear method for the selected pulse generator. In case of Async Mode, if the clear signal is input during the length setting value, the counter will stop counting according to the clear signal input.
- Page 38 SP-20000-PMCL User Manual (Ver. 3.1) Main Functions Pulse Generator Inverter Clear Source Signal can have polarity inverted. Pulse Generator Setting Parameters Display Name Value Clock Pre-scaler 1 to 4096 Pulse Generator Clock [Pixel Clock:39.16MHz] ÷ [Clock Per-scaler] (MHz) Pulse Generator Selector Pulse Generator 0 ~ 3 Pulse Generator Length 1 to 1048575...
-
Page 39: Sensor Layout
SP-20000-PMCL User Manual (Ver. 3.1) Main Functions Sensor Layout The CMOS sensors used on this camera have the following pixel layout. Monochrome Sensor Bayer sensor - 39 -... -
Page 40: Camera Output Format (Tap Geometry)
SP-20000-PMCL User Manual (Ver. 3.1) Main Functions Camera Output Format (Tap Geometry) Related Setting Items: Transport Layer Control This camera supports the following output format. Camera Output Format Pixel Format 1X2 – 1Y 8 bit, 10 bit, 12 bit 1X4 – 1Y 8 bit, 10 bit, 12 bit 1X8 –... - Page 41 SP-20000-PMCL User Manual (Ver. 3.1) Main Functions 1X4–1Y 1X4–1Y is a 2-tap readout system specified in GenICam Tap Geometry and it outputs as follows. Width: 5120 pixels, 1280 pixels x 4 Taps Height: 3840 pixels - 41 -...
- Page 42 SP-20000-PMCL User Manual (Ver. 3.1) Main Functions 1X8–1Y 1X 8–1Y is an 8-tap readout system and outputs as follows. Width: 5120 pixels, 640 pixels x 8 Taps Height: 3840 pixels - 42 -...
-
Page 43: Output Timing
SP-20000-PMCL User Manual (Ver. 3.1) Main Functions Output Timing Horizontal Timing This timing is for the continuous trigger. The horizontal frequency is changed by the setting of Tap Geometry. The monochrome model supports horizontal and vertical binning. However, the horizontal frequency does not change when horizontal binning is effective, and therefore, the frame rate is not increased. -
Page 44: Continuous Trigger Horizontal Timing
SP-20000-PMCL User Manual (Ver. 3.1) Main Functions Continuous Trigger Horizontal Timing Note: Binning 1 = Off, 2 = On Camera Binning LVAL LVAL H-Offset Exposure Active Start to Link Step [Unit: [Unit: [Unit: LVAL Active Start [Unit: Geometry Pixel Offset (Typ.) Width Height OffsetY H... -
Page 45: Continuous Trigger Horizontal Frequency (1X8 - 1Y, 1X4 - 1Y)
SP-20000-PMCL User Manual (Ver. 3.1) Main Functions On this camera, the horizontal frequency is 1/2 if vertical binning is ON. And if vertical binning is ON, the invalid data is output in non-active range (H-offset range) of DVAL during LVAL being active. H-Offset: Duration between LVAL Active Start and DVAL Active Start. - Page 46 SP-20000-PMCL User Manual (Ver. 3.1) Main Functions Camera Binning Horizontal Link 1Line Total Clock Horizontal Frequency [Unit: Geometry Pixel [Unit: Clock] Period [Unit: us] kHz] Width OffsetX Height OffsetY H Clock 659 or 660 91.047 or 90.909 10.983 or 11 5120 3840 Calc.
-
Page 47: Continuous Trigger Horizontal Frequency (1X2 - 1Y)
SP-20000-PMCL User Manual (Ver. 3.1) Main Functions Continuous Trigger Horizontal Frequency (1X2 – 1Y) In the following table, values in “Actual operation” are real operating values. However, “1 Line Total Clock” values in “Calculation” are used to calculate the frame rate and other. This is because jitter occurs in “LVAL Non Active”... -
Page 48: Vertical Timing
SP-20000-PMCL User Manual (Ver. 3.1) Main Functions Vertical Timing In Continuous Trigger operation, the output through the Camera Link interface is as follows. However, if 80-bit (1X8-1Y, 10-bits) configuration is set, DVAL and Exposure Active (JAI CUSTOM) are not output through Camera Link “Spare” bit because this port is used for data output. This camera supports the H-Binning and V-Binning functions, but the frame rate is not increased. -
Page 49: Continuous Trigger Vertical Timing (1/2)
SP-20000-PMCL User Manual (Ver. 3.1) Main Functions Continuous Trigger vertical Timing (1/2) Note: Binning 1 = Off, 2 = On [C] V- Binning Camera Frame [A] FVAL & [D] Exposure FVAL Non- Offset Link Pixel Rate (Typ.) DVAL Active Time (Min) Geometry Offset Offset... -
Page 50: Continuous Trigger Vertical Timing (2/2)
SP-20000-PMCL User Manual (Ver. 3.1) Main Functions Continuous Trigger Vertical Timing (2/2) Note: Binning 1 = Off, 2 = On (F) Exposure End to Binning Camera FVAL Active Frame Rate Frame [E] Exposure Time (Max) Link Pixel Start Geometry (Typ.) Time Rate [Unit: us] Clock Offset... -
Page 51: Roi (Regional Scanning Function)
SP-20000-PMCL User Manual (Ver. 3.1) Main Functions On this camera, the horizontal frequency is 1/2 if vertical binning is used. Therefore, if the height is 1/2, the vertical frequency is not doubled. On this camera, the frame rate can be changed by 1 μs unit. In the above table, “B” FVAL Non-Active duration is varied. -
Page 52: Roi Setting Examples (1/2)
SP-20000-PMCL User Manual (Ver. 3.1) Main Functions ROI Setting Examples (1/2) Note: Binning 1 = Off, 2 = On Width and Binning Offset X Step Width Height Max Offset Max Offset Height Offset Y X Value Y Value Step Step Offset Offset 1X8-... -
Page 53: Roi Setting Examples (2/2) (Frame Rate)
SP-20000-PMCL User Manual (Ver. 3.1) Main Functions ROI Setting Examples (2/2) (Frame Rate) Notes: Binning 1 = Off, 2 = On Tap Geometry: 1X8-1Y, 1X4-1Y, 1X2-1Y Camera Link Pixel Clock: 80Mz, 60Mz Binning 1X8-1Y 1X4-1Y 1X2-1Y Width Offset X Height Offset Y 80MHz 60MHz 80MHz 60MHz 80MHz 60MHz... -
Page 54: Mirroring Function
SP-20000-PMCL User Manual (Ver. 3.1) Main Functions Mirroring Function This camera has the ability to reverse the image vertically, horizontally, or both vertically and horizontally. If ROI readout is used, ROI image can be read out after the image is reversed. Examples of Mirror function settings is shown below. -
Page 55: Digital Output Bit Allocation
SP-20000-PMCL User Manual (Ver. 3.1) Main Functions Digital Output Bit Allocation Digital Out CMOS Out 8bit 10bit 12bit Black 8LSB 32LSB 128LSB Mono / Color 100% 222LSB 890LSB 3560LSB Mono / Color 115% 225LSB 1023LSB 4095LSB Bit Allocation (10-bit) - 55 -... -
Page 56: Acquisition Control (Change The Frame Rate)
SP-20000-PMCL User Manual (Ver. 3.1) Main Functions Acquisition Control (Change the Frame Rate) Related Setting Items: Acquisition Control, JAI Custom With Trigger OFF (free-running mode), it is possible to specify a free-running frame rate (i.e., no trigger needed) that is slower than the default rate. The setting range in Acquisition Frame Rate is: Shortest Longest... -
Page 57: Interval Calculation Of Frame Rate (In Continuous Trigger Mode)
SP-20000-PMCL User Manual (Ver. 3.1) Main Functions If ROI is changed from a smaller size to a larger size, the default frame rate of the ROI is automatically recalculated inside the camera and changed to the slower frame rate of the larger ROI. Interval Calculation of Frame Rate (In Continuous Trigger mode) Camera Settings ART Command Minimum Value Setting Calculation Formula... -
Page 58: Frame Rate Interval Setting Range (Typical Value) In Continuous Trigger Mode
SP-20000-PMCL User Manual (Ver. 3.1) Main Functions Frame Rate Interval Setting Range (Typical Value) in Continuous Trigger Mode Camera Settings ART Command value (limited standard value) Camera Min. Max. Link Binning Height Geometry Pixel Vertical Setting Actual operating time/Actual Setting Actual operating time/Actual Clock Value... -
Page 59: Exposure Mode
SP-20000-PMCL User Manual (Ver. 3.1) Main Functions On this camera, the frame rate has maximum 1 line longer or shorter depending on the exposure time. This happens, when the exposure executes for the next frame while the previous video is reading out, the increment or of 1 μs for the exposure time is completed at the exposure completion side. -
Page 60: Exposuretime
8 seconds is guaranteed only under the following conditions. SP-20000M-PMCL: The ambient temperature is up to 25°C. SP-20000C-PMCL: The ambient temperature is up to 15°C. - 60 -... -
Page 61: Behavior If Trigger Overlap Is Set To Readout
SP-20000-PMCL User Manual (Ver. 3.1) Main Functions Behavior if Trigger Overlap is Set to Readout On this camera, if the accumulation of the next frame starts while the current image is read out, the varied value of accumulation time is changed to 1 Line period inside the camera. This is done so that the accumulation start signal will not affect the output signal while it is overlapped. - Page 62 SP-20000-PMCL User Manual (Ver. 3.1) Main Functions - 62 -...
-
Page 63: Calculation For The Period Which The Exposure Time Is Overlapped With Previous Trigger In Continuous Trigger Mode
SP-20000-PMCL User Manual (Ver. 3.1) Main Functions Calculation for the Period Which the Exposure Time is Over- lapped with Previous Trigger in Continuous Trigger Mode Tap Geometry: 1X8-1Y Camera Exposure Start Position [Unit: Binning Continuous trigger readout / exposure overlapped period Exposure Link Pixel Line] Vertical... - Page 64 SP-20000-PMCL User Manual (Ver. 3.1) Main Functions Camera Exposure Start Position [Unit: Binning Continuous trigger readout / exposure overlapped period Exposure Link Pixel Line] Vertical Time value calculation formula Clock ([Height] - 1 - (ROUNDOWN( ( [Exposure Time] - [1Line Control Start 80MHz Exposure Time value] )×(10^-6)×[Camera Link Clock Frequency:80MHz]÷654.63)))
-
Page 65: Tap Geometry: 1X4-1Y
SP-20000-PMCL User Manual (Ver. 3.1) Main Functions Tap Geometry: 1X4-1Y Camera Binning Continuous trigger readout / exposure overlapped period Exposure Item Link Pixel Vertical Time value calculation formula Clock ROUND([Frame Rate (Time)] - ((([Height]×1309.27) + 24931 - 1309.27 + 80MHz ([Width]÷4) ÷[Camera Link Clock Frequency:80MHz]×(10^6))) 1 (Off) ROUND([Frame Rate (Time)] - ((([Height]×1318.61) + 25111 - 1318.61+... -
Page 66: Tap Geometry: 1X2-1Y
SP-20000-PMCL User Manual (Ver. 3.1) Main Functions Tap Geometry: 1X2-1Y Camera Binning Continuous trigger readout / exposure overlapped period Exposure Item Link Pixel Vertical Time value calculation formula Clock ROUND([Frame Rate (Time)] - ((([Height]×2618.54) + 49865 - 2618.54 + 80MHz ([Width]÷2)) ÷[Camera Link Clock Frequency:80MHz]×(10^6))) 1 (Off) ROUND([Frame Rate (Time)] - ((([Height]×2637.25) + 50223 - 2637.25 +... -
Page 67: Exposureauto
SP-20000-PMCL User Manual (Ver. 3.1) Main Functions ExposureAuto This is a function to control the exposure automatically. It is effective only for Timed. JAI ALC Reference controls the brightness. There are three modes: OFF, Once and Continuous. No exposure control Once Exposure adjusts when the function is set, then remains at that setting Continuous... -
Page 68: Trigger Control
SP-20000-PMCL User Manual (Ver. 3.1) Main Functions Trigger Control The camera allows Frame Start trigger controls to be performed via external trigger signals. The Frame Start trigger allows exposure control via the trigger signal inputs. Trigger Mode can be selected in Trigger Selector. On this camera, the trigger mode is limited to Frame Start. - Page 69 SP-20000-PMCL User Manual (Ver. 3.1) Main Functions Trigger Activation This command can select how to activate the trigger. Rising edge: At the rising edge of the pulse, the trigger is activated. Falling edge: At the falling edge of the pulse, the trigger is activated. Level High: During the high level of trigger, the accumulation is activated Level Low: During the low level of trigger, the accumulation is activated Note: If Exposure Mode is set to Trigger Width, Level High or Level Low must be used.
-
Page 70: Normal Continuous Operation (Timed Exposure Mode/Trigger Mode Off)
SP-20000-PMCL User Manual (Ver. 3.1) Main Functions Normal Continuous Operation (Timed Exposure Mode/Trigger Mode OFF) This is used for applications which do not require triggering. In this mode, the video signal for the auto- iris lens is available. Minimum interval Time (Min. -
Page 71: Timed (Eps) Mode
SP-20000-PMCL User Manual (Ver. 3.1) Main Functions Timed (EPS) Mode This mode allows a single image frame to be captured with a preset exposure time by using the external trigger. An additional setting determines if the trigger pulse can be accepted during the exposure period. -
Page 72: Trigger Overlap = Off (Timed Mode)
SP-20000-PMCL User Manual (Ver. 3.1) Main Functions Trigger Overlap = Off (Timed Mode) Note: The trigger pulse is accepted during Frame Trigger Wait being active if the trigger overlap is OFF. When the trigger is accepted, the trigger wait is inactive until the readout is completed. EPS Trigger Mode, Trigger Overt Lap = Off Camera Link Pixel Clock Vertical Binning... -
Page 73: Trigger Overlap = Readout (Timed Mode)
SP-20000-PMCL User Manual (Ver. 3.1) Main Functions Trigger Overlap = Readout (Timed Mode) Note: If the trigger overlap is Readout mode, Frame Trigger Wait is active on FVAL period of the previous trigger. In this period, the next trigger can be accepted. After receiving this trigger pulse, Frame Trigger Wait becomes inactive. -
Page 74: Calculation Formula For The Minimum Trigger Interval (Trigger Overlap = Off, Timed Mode)
SP-20000-PMCL User Manual (Ver. 3.1) Main Functions Calculation Formula for the Minimum Trigger Interval (Trigger Overlap = Off, Timed Mode) Camera Link Pixel EPS Trigger / Trigger Overlap = Off Tap Geometry Binning Vertical Clock Minimum Trigger Interval calculation formula [Unit: us] = ROUND(((([Height]+1) ×654.63) −... -
Page 75: Calculation Formula For The Minimum Trigger Interval (Trigger Overlap = Readout, Timed Mode)
SP-20000-PMCL User Manual (Ver. 3.1) Main Functions Calculation Formula for the Minimum Trigger Interval (Trigger Overlap = Readout, Timed Mode) TapGeometry: 1X8-1Y Camera Link Binning EPS Trigger / Trigger Overlap = Readout Clock Vertical Minimum Trigger Interval calculation formula [Unit: us] At the condition of [Exposure Time Max] ≦... - Page 76 SP-20000-PMCL User Manual (Ver. 3.1) Main Functions TapGeometry: 1X4-1Y Camera Link Binning EPS Trigger / Trigger Overlap = Readout Clock Vertical Minimum Trigger Interval calculation formula [Unit: us] At the condition of [Exposure Time Max] ≦ [Trigger Period] - 266 (1) If [Exposure Time] value is less than 1Frame = ROUND(((([Height] + 1) ×1309.27) - 1309.27 + 1 (Off) ([Width]÷4))÷80MHz×10^6)+339...
- Page 77 SP-20000-PMCL User Manual (Ver. 3.1) Main Functions TapGeometry: 1X2-1Y Camera Link Binning EPS Trigger / Trigger Overlap = Readout Clock Vertical Minimum Trigger Interval calculation formula [Unit: us] At the condition of [Exposure Time Max] ≦ [Trigger Period] - 521 (1) If [Exposure Time] value is less than 1Frame = ROUND(((([Height] + 1) ×2618.54) - 2618.54 + 1 (Off) ([Width]÷2))÷80MHz×10^6)+667...
-
Page 78: Gpio Ttl Output Timing (Trigger Overlap = Off, Timed Mode)
SP-20000-PMCL User Manual (Ver. 3.1) Main Functions GPIO TTL Output Timing (Trigger Overlap = Off, Timed Mode) GPIO TTL Out Timing GPIO Out Timing (Reference) (80 MHz, EPS Trigger, Trigger Overlap= OFF) Tap Geometry Setting Description Note 1X8-1Y 1X4-1Y 1X2-1Y Frame Start Trigger to Frame 820 ns 820 ns... - Page 79 SP-20000-PMCL User Manual (Ver. 3.1) Main Functions Tap Geometry Setting Description Note 1X8-1Y 1X4-1Y 1X2-1Y 31.75 63.18 126.36 Frame Active [Exposure Mode] = Timed FVAL Falling Edge to Frame This will be different by Binning or ROI setting. Frame Active 1.110 us 1.110 us 410 ns Active Falling Edge...
- Page 80 SP-20000-PMCL User Manual (Ver. 3.1) Main Functions Tap Geometry Setting Description Note 1X8-1Y 1X4-1Y 1X2-1Y 42.64 84.84 169.67 Frame Active [Exposure Mode] = Timed FVAL Falling Edge to Frame This will be different by Binning or ROI setting. Frame Active 780 ns 390 ns 760 ns...
-
Page 81: Gpio Ttl Output Timing (Trigger Overlap = Readout, Timed Mode)
SP-20000-PMCL User Manual (Ver. 3.1) Main Functions GPIO TTL Output Timing (Trigger Overlap = Readout, Timed Mode) GPIO Timing (Overlap = Readout) GPIO Output Timing (Reference) (80 MHz, EPS Trigger, Trigger Overlap = Readout ) Tap Geometry Setting Description Note 1X8-1Y 1X4-1Y 1X2-1Y... - Page 82 SP-20000-PMCL User Manual (Ver. 3.1) Main Functions Tap Geometry Setting Description Note 1X8-1Y 1X4-1Y 1X2-1Y FVAL Falling Edge to Frame If Binning off and [Height]=3840, (Will be changed by 1.10 us 1.27 us 370 ns Active Falling Edge Height setting) Frame Trigger wait Falling Edge to 1.22 us 1.22 us...
- Page 83 SP-20000-PMCL User Manual (Ver. 3.1) Main Functions Tap Geometry Setting Description Note 1X8-1Y 1X4-1Y 1X2-1Y 42.64 84.84 168.78 FVAL Active Exposure Mode = Timed 323.97 314.73 634.65 Frame Active Exposure Active Falling Edge to This will be different by Binning or ROI setting. Frame Active Frame Trigger Wait Raising 790 ns 410 ns...
-
Page 84: Triggerwidth Mode
SP-20000-PMCL User Manual (Ver. 3.1) Main Functions TriggerWidth Mode In this mode, the exposure time is equal to the trigger pulse width. Accordingly, longer exposure times are supported. Additional settings determine if the trigger pulse can be accepted during the exposure period. -
Page 85: Trigger Overlap = Off (Triggerwidth Mode)
SP-20000-PMCL User Manual (Ver. 3.1) Main Functions Trigger Overlap = OFF (TriggerWidth Mode) Note: The trigger pulse is accepted during Frame Trigger Wait being active if the trigger overlap is OFF. When the trigger is accepted, the trigger wait is inactive until the readout is completed. Tap Geometry Setting Camera Link Pixel Clock Vertical Binning... -
Page 86: Trigger Overlap = Readout (Triggerwidth Mode)
SP-20000-PMCL User Manual (Ver. 3.1) Main Functions Notes: The jitter from the trigger occurs at both the exposure start edge and exposure end edge. The actual exposure time difference is an additional period of exposure time against TTL trigger input. (t4) - (t2) ≒ The real exposure time difference Trigger Overlap = Readout (TriggerWidth Mode) Note: If the trigger overlap is Readout mode, Frame Trigger Wait is active during FVAL period of the previous trigger. - Page 87 SP-20000-PMCL User Manual (Ver. 3.1) Main Functions Tap Geometry Setting Camera Link Pixel Vertical Clock Binning 1X8-1Y 1X4-1Y 1X2-1Y 1 (Off) 320 us 328 us 656 us 80MHz 2 (On) 328 us 345 us 689 us 1 (Off) 430 us 441 us 881 us 60MHz...
-
Page 88: Minimum Trigger Interval Calculation Formula (Trigger Overlap = Off, Triggerwidth Mode)
SP-20000-PMCL User Manual (Ver. 3.1) Main Functions Minimum Trigger Interval Calculation Formula (Trigger Overlap = Off, Trig- gerWidth Mode) Trigger Width / Trigger Overlap = Off Tap Geometry Camera Link Pixel Clock Binning Vertical Minimum Trigger interval calculation formula [Unit: us] = ROUND(((([Height]+1) ×654.63) −... -
Page 89: Minimum Trigger Interval Calculation Formula (Trigger Overlap = Readout, Triggerwidth Mode)
SP-20000-PMCL User Manual (Ver. 3.1) Main Functions Minimum Trigger Interval Calculation Formula (Trigger Overlap = Readout, TriggerWidth Mode) TapGeometry: 1X8-1Y Camera Link Binning Trigger Width/ Trigger Overlap = Readout Clock Vertical Minimum Trigger Interval calculation formula [Unit: us] At the condition of [Trigger Pulse Width] ≦ [Trigger Period: us] - 266us (1) If [Trigger Pulse Width] is less than 1Frame = ROUND(((([Height] + 1) ×... - Page 90 SP-20000-PMCL User Manual (Ver. 3.1) Main Functions TapGeometry: 1X4-1Y Camera Link Binning Trigger Width/ Trigger Overlap = Readout Clock Vertical Minimum Trigger Interval calculation formula [Unit: us] At the condition of [Trigger Pulse Width] ≦ [Trigger Period: us] - 266us (1) If [Trigger Pulse Width] is less than 1Frame = ROUND(((([Height] + 1) ×1309.27) - 1309.27 + 1 (Off) ([Width]÷4))÷80MHz×10^6)+339...
- Page 91 SP-20000-PMCL User Manual (Ver. 3.1) Main Functions Tap Geometry: 1X2-1Y Camera Link Binning Trigger Width/ Trigger Overlap = Readout Clock Vertical Minimum Trigger Interval calculation formula [Unit: us] At the condition of [Trigger Pulse Width] ≦ [Trigger Period: us] - 521us (1) If [Trigger Pulse Width] is less than 1Frame = ROUND(((([Height] + 1) ×2618.54) - 2618.54 + 1 (Off) ([Width]÷2))÷80MHz×10^6)+667...
-
Page 92: Piv (Particle Image Velocimetry)
SP-20000-PMCL User Manual (Ver. 3.1) Main Functions PIV (Particle Image Velocimetry) The Particle Image Velocimetry mode can be used in applications where 2 images need to be taken with a very short time interval. It can only be used with strobe flash as illumination. The first accumulation time is 10 us to 2 sec. - Page 93 SP-20000-PMCL User Manual (Ver. 3.1) Main Functions Notes: The exposure time for the first frame (te1) can be set by [Exposure Time]. The second exposure time (te2) varies by ROI setting and Binning setting but is not affected by [Exposure Time] setting. PIV Trigger Mode Specifications (1X8 –...
- Page 94 SP-20000-PMCL User Manual (Ver. 3.1) Main Functions Description Camera Link Pixel Clock = 80MHz Camera Link Pixel Clock = 60MHz [FVAL Active] [FVAL Active] (1) V-Binning Off [FVAL Active] (1) V-Binning Off [FVAL Active] = (([Height]×654.63)-654.63+([Width]÷8))÷80 = (([Height]×659.31)-659.31+([Width]÷8))÷60MHz tframe First Frame read out (2) V-Binning On [FVAL Active] (2) V-Binning On [FVAL Active] = ((([Height]-0.5)×1309.27)-640+([Width] ÷...
- Page 95 SP-20000-PMCL User Manual (Ver. 3.1) Main Functions PIV Trigger Mode Specifications (1X4 – 1Y) Description Camera Link Pixel Clock = 80MHz Camera Link Pixel Clock = 60MHz Exposure Beginning 430 ns~470 ns 490 ns ~540 ns delay 10us ~ ≒ 1 Frame ([Height]=3840 : 10us ~ ≒...
- Page 96 SP-20000-PMCL User Manual (Ver. 3.1) Main Functions Description Camera Link Pixel Clock = 80MHz Camera Link Pixel Clock = 60MHz More than 1 Line More than 1 Line Less than 1 Line Less than 1 Line PIV Trigger Mode Specifications (1X2 – 1Y) Description Camera Link Pixel Clock = 80MHz Camera Link Pixel Clock = 60MHz...
- Page 97 SP-20000-PMCL User Manual (Ver. 3.1) Main Functions Description Camera Link Pixel Clock = 80MHz Camera Link Pixel Clock = 60MHz (1) V-Binning Off (1) V-Binning Off = (((([Height]+0.5)×2618.54)-2618.54+([Width = (((([Height]+0.5)×2637.25)-2637.25+ ]÷2)) x 2Frame÷80MHz) +[Exposure Time] + 1413 ([Width]÷2)) x 2Frame÷60MHz) +[Exposure Time] + 1853 us Trigger Period (Min.) (2) V-Binning On...
-
Page 98: Sequential Timed Exposure Mode
SP-20000-PMCL User Manual (Ver. 3.1) Main Functions Sequential Timed Exposure Mode This is a function to capture images in sequence based preset ROI, Exposure Time, Gain and other parameters in the sequence index table. Video Send Mode In order activate this function, Video Send Mode should be set to Trigger Sequence. Minimum Trigger Interval (Trigger Overlap = Off) Time (Min. -
Page 99: Sequence Roi Setting Parameters
SP-20000-PMCL User Manual (Ver. 3.1) Main Functions one. The sequence must start with Index 0. After Index 0 is executed, the sequence proceeds to the next setting index. In this mode, while the previous trigger operation (Index table) is activating, the next trigger cannot be overlapped. - Page 100 SP-20000-PMCL User Manual (Ver. 3.1) Main Functions Item Default Description Sequence In Sequence ROI Gain Selector, the gain settings for each index are available. Color model: Gain (ALL), Red, ROI Gain and Blue can be set. Monochrome model: Only Gain is displayed and can be set. Selector Sequence 180000 Exposure Time setting is available for each index.
- Page 101 SP-20000-PMCL User Manual (Ver. 3.1) Main Functions - 101 -...
-
Page 102: Multi Roi Function
SP-20000-PMCL User Manual (Ver. 3.1) Main Functions Multi ROI Function Related Topic: JAI Custom This function divides one frame image into a maximum of 8 images vertically and reads out all areas in one frame. In this function, width is the same for all 8 images. The Multi ROI function is enabled if [Video Sending Mode] is set to “Multi ROI”. - Page 103 SP-20000-PMCL User Manual (Ver. 3.1) Main Functions ROI setting explanation if Multi ROI Index Max is set to 4 The figure below shows the video output with the above example settings. Video output of Multi ROI Caution: If Multi ROI function is used, the Camera Link frame grabber board that is used should be set as follows.
-
Page 104: Operation And Function Matrix
SP-20000-PMCL User Manual (Ver. 3.1) Main Functions Operation and Function Matrix Video Sending Auto Mode Trigger Exposure Single Auto Auto Trigger Exposure White Mode Binning* Binning** Control Gain Exposure Overlap Sequence Balance** Multi ROI ● ● ● ● ● ● ●... -
Page 105: Black Level Control
SP-20000-PMCL User Manual (Ver. 3.1) Main Functions Black Level Control This function adjusts the setup level. Variable range: -256 to 255 LSB (at 12-bit output) Model Black Level Selector Black Level Monochrome Black Level All -256 ~ +255 Black Level All -256 ~ +255 Color Black Level Red... -
Page 106: Gain Control
SP-20000-PMCL User Manual (Ver. 3.1) Main Functions Gain Control Related Setting Items: Analog Control This camera can adjust the gain level from x1 (0dB) to 16 times (+24dB) using x1 (0dB) as the reference (Factory default). The master gain can be adjusted from x1 (0dB) to 16 times (+24dB) and R and B gains can be adjusted in the range of 0.45 times (-7dB) to 7.15 times (+10dB) using the master gain as the reference. -
Page 107: Gain Auto
SP-20000-PMCL User Manual (Ver. 3.1) Main Functions Gain Auto This provides automatic control of the gain level. There are three modes. OFF: Adjust manually. Once: Operate only one time when this command is set Continuous: Operate the auto gain continuously The following detailed settings are also available. -
Page 108: Balance White Auto
SP-20000-PMCL User Manual (Ver. 3.1) Main Functions Balance White Auto This is a function to enable the auto white balance by using R and B gain controls. OFF: Set the white balance manually Once: Control the auto white balance only one time when it is set Continuous: Continuing control of the auto white balance AWB Channel Area: Can set the area to control the auto white balance. -
Page 109: Lut (Lookup Table)
SP-20000-PMCL User Manual (Ver. 3.1) Main Functions LUT (Lookup Table) Related Setting Items: LUT Control This function can be used to convert the input to the desired output characteristics. The Look-Up Table (LUT) has 256 points for setup. The output level can be created by multiplying the gain data by the input level. -
Page 110: Gamma Function
SP-20000-PMCL User Manual (Ver. 3.1) Main Functions Gamma Function Note: Analog Control This command is used to set gamma between gamma 0.45 and gamma 1.0 (OFF). 8 steps are provided. The gamma value is an approximate value. - 110 -... -
Page 111: Shading Correction
SP-20000-PMCL User Manual (Ver. 3.1) Main Functions Shading Correction Related Setting Items: JAI Custom This function compensates for shading (non-uniformity) caused by the lens or the light source used. This compensation can be performed even if shading issues are not symmetrical i.n horizontal and/or vertical directions. -
Page 112: Blemish Compensation
SP-20000-PMCL User Manual (Ver. 3.1) Main Functions Blemish Compensation Related Setting Items: JAI Custom This camera has a blemish compensation circuit. This function compensates blemishes on the CMOS sensor (typically pixels with extremely high response or extremely low response). This applies to both monochrome and color versions. -
Page 113: Alc (Automatic Level Control)
SP-20000-PMCL User Manual (Ver. 3.1) Main Functions ALC (Automatic Level Control) Related Setting Items: JAI Custom On this camera, auto gain and auto exposure can be combined to provide a wide ranging automatic exposure control from dark to bright or vice versa. The functions are applied in the sequence shown below and if one function is disabled, the remaining function will work independently. -
Page 114: Short Ascii Command List
SP-20000-PMCL User Manual (Ver. 3.1) Short ASCII Command List Short ASCII Command List All configuration of the camera is done via the RS-232C port. The camera can be set up from a PC running terminal emulator software. Below is the description of the ASCII based short command protocol. Communication Setting Baud Rate 9600... - Page 115 SP-20000-PMCL User Manual (Ver. 3.1) Short ASCII Command List Transmit the Request Command to Camera The status of camera's settings can be queried by transmitting NN?<CR><LF>, where NN is any valid command. The camera will return the current setting data. Send to camera: GA? <CR><LF>...
-
Page 116: Gencp Bootstrap Register
SP-20000-PMCL User Manual (Ver. 3.1) Short ASCII Command List GenCP Bootstrap Register Name Access Short ASCII Values Default Description DVN?<CR><LF> DeviceVendorName "JAI Ltd., Japan" Display the manufacture name. MD?<CR><LF> SP-20000C- DeviceModelName PMCL Display the model name. DV?<CR><LF> DeviceVersion Display the camera version. ID?<CR><LF>... -
Page 117: Device Control
SP-20000-PMCL User Manual (Ver. 3.1) Short ASCII Command List Device Control Interface Name Short ASCII Values Default Description Access VN?<CR><LF> DeviceFirmware Version Firm Ver. No. Display the firmware version. CRS00=1<CR><LF> DeviceReset CRS00 Reset the device. Image Format Control Short Name Access Values DEFAULT... - Page 118 SP-20000-PMCL User Manual (Ver. 3.1) Short ASCII Command List Short Name Access Values DEFAULT Description ASCII VB=[Param.]<CR><LF> VB?<CR><LF> 1: Normal BinningVertical 2: Binning mode Set the number of pixels in the vertical direction for which to perform binning. (Mono model only) Mono Model 0: Mono8 1: Mono10...
-
Page 119: Acquisition Control
SP-20000-PMCL User Manual (Ver. 3.1) Short ASCII Command List Acquisition Control Related Topic: Trigger Control, Exposure Mode, ExposureTime, ExposureAuto Short Name Access Values DEFAULT Description ASCII TM=[Param.]<CR><LF> 0: Off TM?<CR><LF> FrameStartTrigMode 1: On Display the Trigger mode. STRG=0<CR><LF> TriggerSoftware STRG 0 Execute a software trigger. -
Page 120: Digital Io Control
SP-20000-PMCL User Manual (Ver. 3.1) Short ASCII Command List Short Name Access Values DEFAULT Description ASCII PE=[Param.]<CR><LF> PE?<CR><LF> ExposureTimeRaw 10 ~ 8000000 [us] 18000 Set the exposure time. ASC=[Param.]<CR><LF> 0: Off ASC?<CR><LF> ExposureAuto 1: Continuous 2: Once Set whether to enable auto exposure. Digital IO Control Related Topic: GPIO (Digital Input/Output Settings) - Page 121 SP-20000-PMCL User Manual (Ver. 3.1) Short ASCII Command List Short Name Access Values DEFAULT Description ASCII ND1INV1=[Param.]<CR><LF> ND1INV1?<CR><LF> 0: Non-Inv GpioNand1Input ND1INV1 Invert1 1: Inv Enable/disable polarity inversion for the NAND1 In1 input. ND1INV2=[Param.]<CR><LF> ND1INV2?<CR><LF> 0: Non-Inv GpioNand1Input ND1INV2 Invert2 1: Inv Enable/disable polarity inversion for the NAND1 In2 input.
- Page 122 SP-20000-PMCL User Manual (Ver. 3.1) Short ASCII Command List Short Name Access Values DEFAULT Description ASCII 0: Low 1: High 3: FrameTrigger Wait 4: FrameActive 5: ExposureActive 6: Fval ND0IN1=[Param.]<CR><LF> 8: PulseGenerator0 GpioNand0Input ND0IN1?<CR><LF> ND0IN1 Source1 9: PulseGenerator1 Select the line source signal for Nand0In1. 10: PulseGenerator2 11: PulseGenerator3 12: TTL_In...
-
Page 123: Analog Control
SP-20000-PMCL User Manual (Ver. 3.1) Short ASCII Command List Analog Control Related Topic: Gain Control, Black Level Control, Balance White Auto Short Name Access Values DEFAULT Description ASCII FGA=[Param.]<CR><LF> FGA?<CR><LF> GainRawAnalogAll 100 ~ 1600 Set the gain value. PGR=[Param.]<CR><LF> PGR?<CR><LF> GainRawDigitalRedAll - 4533 ~ 17713 Set the red gain value for white balance control. -
Page 124: Lut Control
SP-20000-PMCL User Manual (Ver. 3.1) Short ASCII Command List LUT Control Related Topic: LUT (Lookup Table) Short Name Access Values DEFAULT Description ASCII Param 1: LUT LUTR=[Param1],[Param2]<CR><LF> index LUTR?[Param1]<CR><LF> γ=1 equivalent (0 ~ 255) LUTValueRed LUTR value Set the LUT value for the red output signal. Color model Param 2:LUTdata only. -
Page 125: User Set Control
SP-20000-PMCL User Manual (Ver. 3.1) Short ASCII Command List User Set Control Related Topic: Step 7: Save the Settings Short Name Access Values Default Description ASCII 0: Default LD=[Param.]<CR><LF> 1: UserSet1 LD?<CR><LF> UserSetLoad 2: UserSet2 Load user settings. 3: UserSet3 SA=[Param.]<CR><LF>... - Page 126 SP-20000-PMCL User Manual (Ver. 3.1) Short ASCII Command List Short Min ~ Name Access Default Description ASCII BMPYW=[Param1],[Param2]<CR><LF> BMPYW? [Param1]<CR><LF> BlemishWhiteDetect BMPYW Display the Y coordinate (vertical pixel position) of the blemish PositionY 1439 selected in Blemish Data Index. You can also manually enter the Y coordinate of the blemish you want to correct.
- Page 127 SP-20000-PMCL User Manual (Ver. 3.1) Short ASCII Command List Sequencer Control Related Topic: Sequence ROI Setting Parameters Short Name Access Min ~ Max Default Description ASCII VideoSendMode 0: Normal 1: Trigger VSM=[Param.]<CR><LF> Sequence Related Topic: VSM?<CR><LF> 2: Command Multi ROI Configure Video Send Mode.
- Page 128 SP-20000-PMCL User Manual (Ver. 3.1) Short ASCII Command List Short Name Access Min ~ Max Default Description ASCII SQGA n=[Param.]<CR><LF> SequenceRoi Gainn SQGA n?<CR><LF> SQGAn 100 ~1600 n = 1 ~ 10 Set the gain of Sequence Roi Index n. 1: Hbinning = SequenceRoi SQHB n=[Param.]<CR><LF>...
- Page 129 SP-20000-PMCL User Manual (Ver. 3.1) Short ASCII Command List Short Name Access Min ~ Max Default Description ASCII 0: Index0 1: Index1 2: Index2 3: Index3 CSQI=[Param.]<CR><LF> 4: Index4 CommandSequence CSQI?<CR><LF> CSQI Index 5: Index5 Set the inidex to execute during Command Sequence Mode. 6: Index6 7: Index7 8: Index8...
- Page 130 SP-20000-PMCL User Manual (Ver. 3.1) Short ASCII Command List LUT Mode Related Topic: LUT (Lookup Table) Short Name Access Min ~ Max Default Description ASCII LUTC=[Param.]<CR><LF> 0: Off LUTC?<CR><LF> LUTMode LUTC 1: Gamma 2: LUT Select the JAI LUT mode. Color Matrix Short Name Access...
- Page 131 SP-20000-PMCL User Manual (Ver. 3.1) Short ASCII Command List Short Name Access Min ~ Max Default Description ASCII 0 = Complete. 1 = Too Bright. 2 = Too dark. 3 = Timeout ASRS?<CR><LF> RequestExposure ASRS Error. AutoResult Display the Exposure Auto result. 4 = Busy.
- Page 132 SP-20000-PMCL User Manual (Ver. 3.1) Short ASCII Command List Short Name Access Min ~ Max Default Description ASCII ALCA=[Param.]<CR><LF> ALCA?<CR><LF> ALCChannelAreaAll On: Specify all photometry areas for ALC, regardless of the 0: OFF enabled/disabled statuses configured individually for each Related Topic: ALCA 1: ON photometry area with [ALC Area Selector].
- Page 133 SP-20000-PMCL User Manual (Ver. 3.1) Short ASCII Command List Short Name Access Min ~ Max Default Description ASCII AWBxxx=[Param.]<CR><LF> AWBxxx?<CR><LF> Enable/disable the specified photometry area. For example, when enable the Low Right photometry area,use the Short ASCII command "AWBLR". 16 Photometry Areas and Short ASCII Commands AWBHML AWBHMR AWBHL...
- Page 134 SP-20000-PMCL User Manual (Ver. 3.1) Short ASCII Command List Data Area, Acquisition, Gamma, Temperature Short Name Access Min ~ Max Default ASCII 0: Factory area EA?<CR><LF> 1: User 1 area Display the currently configured Use Set Selector CurrentAreaNoRequest 2: User 2 status.
- Page 135 SP-20000-PMCL User Manual (Ver. 3.1) Short ASCII Command List Pulse Generator Control Related Topic: Pulse Generator Short Name Access Min ~ Max Default ASCII PGDEV=[Param.]<CR><LF> PGDEV?<CR><LF> GpioPulseGenDivide PGDEV 1 ~ 4095 Value Set the division value for the prescaler (12-bit) using the pixel clock as the base clock.
- Page 136 SP-20000-PMCL User Manual (Ver. 3.1) Short ASCII Command List Short Name Access Min ~ Max Default ASCII 0: Low 1: High 3: Acquisition Trigger Wait 4: FrameActive 5: ExposureActive PGINn=[Param.]<CR><LF> 6: FVAL PGINn?<CR><LF> 7: LVAL GpioPulseGen 8: PG0* Select the count clear input signal source. Inputn PGINn 9: PG1*...
- Page 137 SP-20000-PMCL User Manual (Ver. 3.1) Short ASCII Command List Short Name Access Min ~ Max Default ASCII 0:Low 1:High 3: FrameTriggerWait 4: FrameActive 5: ExposureActive 6: Fval ND1IN1=[Param.]<CR><LF> 8: PulseGenerator0 GpioNand1 ND1IN11?<CR><LF> ND1IN1 9: PulseGenerator1 InputSource1 10: PulseGenerator2 Select the input source signal for NAND1 In1. 11: PulseGenerator3 12: TTL_In1 13: CL_CC1_In...
- Page 138 SP-20000-PMCL User Manual (Ver. 3.1) Short ASCII Command List Miscellaneous Short Name Access Min ~ Max Default ASCII 0: Off ImageFlipping FLIP=[Param.]<CR><LF> 1: Horizontal FLIP?<CR><LF> FLIP 2: Vertical Related Topic: Outputs the image by inverting it horizontally and/or 3: Horizontal & Mirroring Function vertically.
-
Page 139: Miscellaneous
SP-20000-PMCL User Manual (Ver. 3.1) Miscellaneous Miscellaneous Troubleshooting Check the following before requesting help. If the problem persists, contact your local JAI distributor. Power Supply and Connections Issue: The POWER/TRIG LED remains lit amber and does not turn green, even after power is supplied to the camera. -
Page 140: Spectral Response
SP-20000-PMCL User Manual (Ver. 3.1) Miscellaneous Spectral Response SP-20000M-PMCL SP-20000C-PMCL (With IR Cut Filter) - 140 -... -
Page 141: Specifications
SP-20000-PMCL User Manual (Ver. 3.1) Miscellaneous Specifications Item Description Scanning System Progressive scan, 1 tap Synchronization Internal Camera Link Specfications (V.2.0 RC2) , Conforming with PoCL specifications, Interface Pixel clock: 80 MHz (Standard) or 60 MHz can be selected in conjunction with sensor clock Monochrome: 35mm Monochrome CMOS Image Sensor Color:... - Page 142 SP-20000-PMCL User Manual (Ver. 3.1) Miscellaneous Item Description Video Send Mode (Sequence ROI) ROI, Gain and Exposure time can be set for 10 indexes in sequence output by trigger Video Send Mode (Multi ROI) Maximum 8 ROIs can be set in one frame and are output as one video Acquisition Mode Continuous / Single Frame / Multi Frame 1X8 –...
- Page 143 SP-20000-PMCL User Manual (Ver. 3.1) Miscellaneous Item Description AGC and Auto Exposure can be combined and automatically controlled Gamma 0.45 ~ 1.0 (8 steps available) OFF: γ = 1.0, ON = 256 points can be set Mono: Flat field Block based (20 x 15 blocks) Each block: 256 x 256 pixels Shading Correction Color: Flat field, Color shading Block based (20 x 15 blocks) Each block: 256 x 256 pixels Vibration Resistance...
-
Page 144: Dimensions
SP-20000-PMCL User Manual (Ver. 3.1) Miscellaneous Dimensions F-Mount Model Notes: Dimensional tolerance: ± 0.3mm Unit: mm - 144 -... - Page 145 SP-20000-PMCL User Manual (Ver. 3.1) Miscellaneous M42A-Mount Model Notes: Dimensional tolerance: ± 0.3mm Unit: mm - 145 -...
- Page 146 SP-20000-PMCL User Manual (Ver. 3.1) Miscellaneous User's Record Model name: …………… Revision: …………… Serial No: …………… Firmware version: …………… For camera revision history, please contact your local JAI distributor. - 146 -...
- Page 147 SP-20000-PMCL User Manual (Ver. 3.1) Revision History Revision History Revision Date Device Version Changes 2024/02/07 DV0401 Corrected errors. Added the M42A-mount model information. 2024/01/10 DV0401 Redesigned the user manual and corrected/updated topics. Previous Revisions (1.0 ~ 2.2) Revision Date Changes Jan.