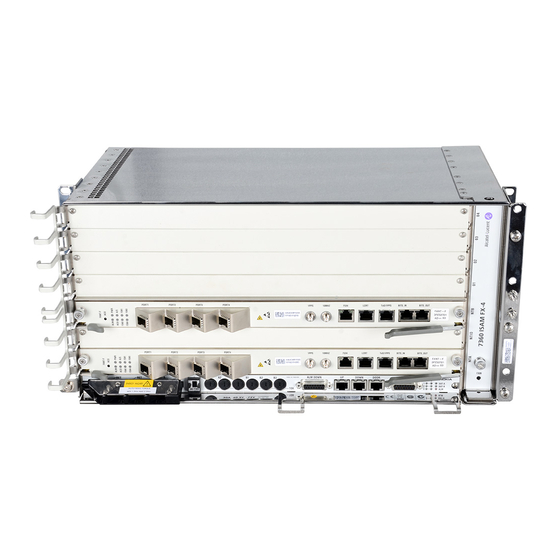
Nokia 7360 Intelligent Services Access Manager FX Series Hardware Installation Manual

Nokia 7360 Intelligent Services Access Manager FX Series Hardware Installation Manual

Ansi
Hide thumbs Also See for 7360 Intelligent Services Access Manager FX Series:
Table of Contents

Advertisement

ANSI Hardware Installation Manual
7360 Intelligent Services Access
Manager FX
Release 5.6
ANSI Hardware Installation Manual
3HH-12893-AAAA-TCZZA
Issue: 09
March 2017
Nokia — Proprietary and confidential
Use pursuant to applicable agreements
DRAFT

Advertisement

Table of Contents
loading

Summary of Contents for Nokia 7360 Intelligent Services Access Manager FX Series

  • Page 1 ANSI Hardware Installation Manual 7360 Intelligent Services Access Manager FX Release 5.6 ANSI Hardware Installation Manual 3HH-12893-AAAA-TCZZA Issue: 09 March 2017 Nokia — Proprietary and confidential Use pursuant to applicable agreements DRAFT...
  • Page 2 © 2015-2017 Nokia. Contains proprietary/trade secret information which is the property of Nokia and must not be made available to, or copied or used by anyone outside Nokia without its written authorization. Not to be used or disclosed except in accordance with applicable agreements.
  • Page 3: Table Of Contents

    ANSI Hardware Installation Manual Table of contents Preface...................25 Scope ......................25 Applicable releases ...................25 Related documents..................26 Audience....................26 Assumed knowledge .................26 Assistance and ordering phone numbers ..........26 Safety information..................26 Documents ....................26 Conventions....................26 1.10 Acronyms and initialisms ................27 1.11 Special information ..................27 1.11.1 Procedures with options or substeps............27 1.12 Multiple PDF document search ..............28...
  • Page 4 ANSI Hardware Installation Manual 7360 ISAM FX-16 shelf installation Installing a 7360 ISAM FX-16 shelf..........77 Overview....................77 Mounting the 7360 ISAM FX-16 shelf in a 23 in. rack .......78 5.2.1 7360 ISAM FX-16 rack mounting configurations ........78 5.2.2 Parts list.....................79 5.2.3 Recommended tools..................80 5.2.4 Prerequisites....................80...
  • Page 5: 7360 Isam Fx-16 Shelf Installation

    ANSI Hardware Installation Manual 7.3.3 Dummy front panel for optical LT cards...........128 Recommended tools................129 Guideline for card installation ..............129 Installation procedures ................130 7.6.1 General....................130 7.6.2 Rules for handling cards................131 7.6.2.1 ESD sensitive cards ................131 7.6.2.2 Cards with optical fiber connectors............133 Fiber optic cable management in the 7360 ISAM FX-16 shelf .....................141 Overview....................141...
  • Page 6 ANSI Hardware Installation Manual 10.10 Combo cable connector................181 10.10.1 Cable type ....................182 10.10.2 Connection/locking ..................182 10.10.3 Cabling ....................182 10.11 POTS and LINE MDF cable connector............183 10.11.1 MDF cable type ..................183 10.11.2 Prerequisites....................184 10.12 Vectoring cable connector ...............186 10.12.1 VL cable....................187 10.12.2 Prerequisites....................187 Installing cards in the 7360 ISAM FX-12 shelf......193...
  • Page 7 ANSI Hardware Installation Manual 14.3 Shelf grounding connection ..............260 14.3.1 Grounding cable type ................261 14.3.2 Cable routing and connection..............261 14.4 Rack grounding connection ..............263 14.5 Power cabling ..................264 14.5.1 General....................265 14.5.1.1 Power distribution frame (PDF) ...............265 14.5.1.2 External ground ..................265 14.5.1.3 Cable routing ...................265 14.5.2...
  • Page 8 ANSI Hardware Installation Manual 16.2.4 Fiber management kit................304 16.3 Routing fiber optic cables ................304 7360 ISAM FX-4 shelf installation Installing a 7360 ISAM FX-4 shelf..........311 17.1 Overview....................311 17.2 Mounting the 7360 ISAM FX-4 shelf in a 19 in. rack .......312 17.2.1 7360 ISAM FX-4 rack mounting configurations ........313 17.2.2...
  • Page 9: 7360 Isam Fx-12 Shelf Installation

    ANSI Hardware Installation Manual 19.3.1 NT dummy front panel ................366 19.3.2 NTIO dummy front panel .................367 19.3.3 Dummy front panel for optical LT cards...........368 19.4 Recommended tools................369 19.5 Guideline for card installation ..............369 19.6 Installation procedures ................370 19.6.1 General....................370 19.6.2 Rules for handling cards................371 19.6.2.1 ESD sensitive cards ................371...
  • Page 10 ANSI Hardware Installation Manual 23.3.1 For 7360 ISAM WM power cards ............421 23.3.2 For 7360 ISAM WM line cards..............421 23.4 Recommended tools................421 23.5 Guideline for card installation ..............422 23.6 Installation procedures ................422 23.6.1 General....................423 23.6.2 Rules for handling cards................423 23.6.2.1 ESD sensitive cards ................423 23.6.2.2 Cards with optical fiber connectors............425...
  • Page 11 ANSI Hardware Installation Manual List of figures Overview..................31 Figure 1 Vertical mount configuration for 7360 ISAM FX-16 in a 23 in. rack...40 Figure 2 Vertical mount configuration for 7360 ISAM FX-12 in a 19 in. rack...41 Figure 3 Vertical mount position for 7360 ISAM FX-8 in a 19 in. rack .....42 Figure 4 Vertical mount position for 7360 ISAM FX-8 in a 23 in.
  • Page 12 ANSI Hardware Installation Manual Figure 39 Power cable routing for 7360 ISAM FX-16 ..........108 Figure 40 Mounting of power cable shoes and safety cover on 7360 ISAM FX- 16......................109 Figure 41 CO external alarm connector on 7360 ISAM FX-16 ........111 Figure 42 BITS interface connections on 7360 ISAM FX-16 ........112 Figure 43...
  • Page 13: 7360 Isam Fx-8 Shelf Installation

    ANSI Hardware Installation Manual 7360 ISAM FX-12 shelf cabling ..........169 Figure 79 Grounding cable connection on 7360 ISAM FX-12 .........172 Figure 80 External frame ground point rear view.............174 Figure 81 Power cable routing for 7360 ISAM FX-12 ..........177 Figure 82 Mounting of power cable shoes and safety cover on 7360 ISAM FX- 12......................178 Figure 83...
  • Page 14 ANSI Hardware Installation Manual Figure 117 Horizontal mounting locations in a 19 in. rack for 7360 ISAM FX-8 ..230 Figure 118 Vertical mounting locations in a 19 in. rack for the 7360 ISAM FX-8 ..232 Figure 119 Mounting the 7360 ISAM FX-8 pre-assembled shelf mounting bracket and air intake baffle/drip tray in a 19 in.
  • Page 15 ANSI Hardware Installation Manual Figure 153 Universal dummy front panel for NTIO card ..........286 Figure 154 Dummy front panel for optical LT card ............286 Figure 155 ESD awareness symbol ................290 Figure 156 Label for earth bonding point..............291 Figure 157 Laser classification label................292 Figure 158 NTIO slot ....................292 Figure 159...
  • Page 16 ANSI Hardware Installation Manual Figure 189 Mounting the 7360 ISAM FX-4 pre-assembled shelf mounting bracket and air intake baffle/drip tray in a 23 i n. rack ......337 Figure 190 Attaching the 7360 ISAM FX-4 bottom mounting bracket in a 23 in. rack......................338 Figure 191 Mounting the 7360 ISAM FX-4 shelf assembly vertically in a 23 in.
  • Page 17 ANSI Hardware Installation Manual Installing a 7360 ISAM WM shelf ..........393 Figure 229 View of drip tray for 7360 ISAM WM ............393 Figure 230 Mounting 7360 ISAM WM drip tray............395 Figure 231 23 in. rack vertical mounting configuration for 7360 ISAM WM....398 Figure 232 Mounting a 7360 ISAM WM in a 23 in.
  • Page 18 ANSI Hardware Installation Manual 3HH-12893-AAAA-TCZZA Issue: 09 DRAFT...
  • Page 19 ANSI Hardware Installation Manual List of tables Preface...................25 Table 1 7360 ISAM FX shelves ................25 Table 2 Documentation conventions ..............27 Overview..................31 Table 3 Class 1 controlled protected environments ..........34 Table 4 Maximum yearly levels of contamination — GR-63-CORE indoor controlled environments ..............35 Table 5 Supported rack configurations for 7360 ISAM FX ........38 Installing a 7360 ISAM FX-16 shelf..........77...
  • Page 20 ANSI Hardware Installation Manual Table 25 Cable color designations .................449 Table 26 Wiring list for CHAMP100 MDF cable .............450 Connector pinning on NT card ..........453 Table 27 1PPS-TTL interface signal list ..............453 Table 28 10 MHz GPS interface signal list .............454 Table 29 ToD/PPS signal list and pinning ..............454 Table 30...
  • Page 21 ANSI Hardware Installation Manual List of procedures Preface...................25 Procedure 1 Example of options in a procedure ............28 Procedure 2 Example of required substeps in a procedure ...........28 Procedure 3 To search multiple PDF files for a common term ........29 Floor preparation ................55 Procedure 4 To mark the rack positions ................57 Procedure 5...
  • Page 22 ANSI Hardware Installation Manual 7360 ISAM FX-12 shelf cabling ..........169 Procedure 33 To connect the grounding cable ..............172 Procedure 34 To connect the rack ground..............173 Procedure 35 To connect power cables.................177 Procedure 36 To disconnect the power cables ..............179 Procedure 37 MDF cabling procedure for LT cards with integrated splitter ....185 Procedure 38 To connect vectoring links ...............188...
  • Page 23 ANSI Hardware Installation Manual Installing a 7360 ISAM FX-4 shelf..........311 Procedure 69 To mount the 7360 ISAM FX-4 shelf horizontally in a 19 in. rack....317 Procedure 70 To mount the 7360 ISAM FX-4 shelf in vertically in a 19 in. rack ....319 Procedure 71 To mount the 7360 ISAM FX-4 shelf horizontally in a 23 in.
  • Page 24 ANSI Hardware Installation Manual Fiber optic handling and acceptance criteria ......457 Procedure 103 Inspection of fiber optic devices ..............463 Procedure 104 Clean the fiber optic receptacles .............464 Procedure 105 Clean the fiber optic cable connectors ............465 3HH-12893-AAAA-TCZZA Issue: 09 DRAFT...
  • Page 25: Preface

    ANSI Hardware Installation Manual Preface 1 Preface This preface provides general information for the 7360 Intelligent Services Access Manager FX (7360 ISAM FX) and 7360 Intelligent Services Access Manager WM (7360 ISAM WM) for ANSI. 1.1 Scope The 7360 ISAM FX Hardware Installation Manual describes how to install the 7360 ISAM FX and 7360 ISAM WM equipment that is listed in Table for ANSI.
  • Page 26: Related Documents

    The reader must be a skilled installer of hardware equipment and have knowledge of general telecommunications principles. 1.6 Assistance and ordering phone numbers For ordering information, contact your Nokia sales representative. 1.7 Safety information Safety guidelines are provided in the 7360 ISAM FX Safety Manual.
  • Page 27: Acronyms And Initialisms

    ANSI Hardware Installation Manual Preface Table 2 Documentation conventions Convention Description Examples Key name Identifies a keyboard key. Delete Italics Identifies a variable. hostname — An em dash in a table cell indicates that there is no information or that —...
  • Page 28: Multiple Pdf Document Search

    Preface ANSI Hardware Installation Manual Procedure 1 Example of options in a procedure At step 1, you can choose option a or b. At step 2, you must do what the step indicates. This step offers two options. You must choose one of the following: This is one option.
  • Page 29 ANSI Hardware Installation Manual Preface Procedure 3 To search multiple PDF files for a common term Open Adobe Acrobat Reader. Choose Edit→Search from the Acrobat Reader main menu. The Search PDF panel appears. Enter the search criteria. Click on the All PDF Documents In radio button. Select the folder in which to search using the drop-down menu.
  • Page 30 Preface ANSI Hardware Installation Manual 3HH-12893-AAAA-TCZZA Issue: 09 DRAFT...
  • Page 31: Overview

    ANSI Hardware Installation Manual Overview 2 Overview 2.1 Requirements 2.2 Installation environment requirements 2.3 Equipment description 2.4 Initial site survey 2.5 Installation materials and tools 2.6 Installation procedures Issue: 09 3HH-12893-AAAA-TCZZA DRAFT...
  • Page 32: Requirements

    Overview ANSI Hardware Installation Manual 2.1 Requirements Observe the following: Safety requirements. Danger — Follow the safety guidelines described in the Safety Manual. See 7360 ISAM FX Safety Manual for more information. 3HH-12893-AAAA-TCZZA Issue: 09 DRAFT...
  • Page 33 ANSI Hardware Installation Manual Overview The following rack installation guidelines should be Danger — considered before installing a rack mounted shelf. • Elevated operating ambient temperature If the shelf is installed in a closed or multi-unit rack assembly, the operating ambient temperature of the rack environment may be greater than room ambient.
  • Page 34: Installation Environment Requirements

    Overview ANSI Hardware Installation Manual EMC/ESD requirements. Danger — Ensure that the EMC/ESD conditions meet GR 1089 CORE [35], GR-499-CORE [37]. Follow the antistatic procedures when handling units. Most 7360 ISAM FX plug-in units and powered equipment contain devices susceptible to electrostatic discharge (ESD) that can damage circuitry in unconnected conditions.
  • Page 35: Gr-63-Core Indoor Controlled Environmental Space

    ANSI Hardware Installation Manual Overview 2.2.2 GR-63-CORE indoor controlled environmental space GR-63-CORE indoor controlled environmental space requires: • continuous, ambient operating temperature of 40°C measured at inlet air to shelf • relative humidity of 5% to 85% non-condensing • maximum altitude of 6 kft. The 40°C operating temperature can be exceeded with a short-term, temporary temperature up to 55°C measured at the air inlet, provided that the increase lasts for a period of no more than 96 consecutive hours, and for a total of no more than...
  • Page 36: Equipment Description

    Overview ANSI Hardware Installation Manual Notes μg/m = micrograms per cubic meter ppb = parts per billion 2.3 Equipment description The basic building block of the 7360 ISAM FX is the OLT shelf that houses the plug-in units. The following types of OLT shelves are supported: •...
  • Page 37 ANSI Hardware Installation Manual Overview For the 7360 ISAM FX-16 and 7360 ISAM WM vertical mount configurations, mounting kits are included with the shipment, and contain specific shelf mounting brackets that must be used. Drip trays are required below each installed 7360 ISAM FX shelf, including below the bottom shelf of a rack when mounted on combustible surfaces for safety purposes.
  • Page 38: Table 5 Supported Rack Configurations For 7360 Isam Fx

    7-ft level in these racks. Customers can provide their own equipment racks and order 7360 ISAM FX equipment from Nokia. The customer-provided rack must meet or exceed the rack specifications as specified in the relevant unit data sheet. Table...
  • Page 39 ANSI Hardware Installation Manual Overview Notes Specific baffle mounting kit must be used. See the 7360 ISAM FX Product Information Guide for ordering information. Specific mounting bracket kits must be used. See the 7360 ISAM FX Product Information Guide for ordering information. Specific vertical mount kits must be used.
  • Page 40: Figure 1 Vertical Mount Configuration For 7360 Isam Fx-16 In A 23 In. Rack

    Overview ANSI Hardware Installation Manual Figure 1 Vertical mount configuration for 7360 ISAM FX-16 in a 23 in. rack 23921 3HH-12893-AAAA-TCZZA Issue: 09 DRAFT...
  • Page 41: Figure 2 Vertical Mount Configuration For 7360 Isam Fx-12 In A 19 In. Rack

    ANSI Hardware Installation Manual Overview Figure 2 Vertical mount configuration for 7360 ISAM FX-12 in a 19 in. rack A: 60A B: 60A External Alarms BITS 7360 ISAM FX-12 Remote Craft BAT A BAT B Alarms Min. Maj. Crit. NTIO LT10 LT11 LT12...
  • Page 42: Figure 3 Vertical Mount Position For 7360 Isam Fx-8 In A 19 In. Rack

    Overview ANSI Hardware Installation Manual Figure 3 Vertical mount position for 7360 ISAM FX-8 in a 19 in. rack 18.312 17.750 16 Ru 23367 3HH-12893-AAAA-TCZZA Issue: 09 DRAFT...
  • Page 43: Figure 4 Vertical Mount Position For 7360 Isam Fx-8 In A 23 In. Rack

    ANSI Hardware Installation Manual Overview Figure 4 Vertical mount position for 7360 ISAM FX-8 in a 23 in. rack 22.313 21.500 16 Ru 23366 Issue: 09 3HH-12893-AAAA-TCZZA DRAFT...
  • Page 44: Figure 5 Horizontal Mount Position For 7360 Isam Fx-8 In A 19 In. Rack

    Overview ANSI Hardware Installation Manual Figure 5 Horizontal mount position for 7360 ISAM FX-8 in a 19 in. rack 18.312 17.750 35 RU 8 RU B-40A 7360 ISAM FX-8 Ener g y Hazzar d Energy Hazard Alarms Critical Major A-40A Minor NTA GND NTB External Alarms...
  • Page 45: Figure 6 Horizontal Mount Position For 7360 Isam Fx-8 In A 23 In. Rack

    ANSI Hardware Installation Manual Overview Figure 6 Horizontal mount position for 7360 ISAM FX-8 in a 23 in. rack 22.313 21.500 35 RU 8 RU 7360 ISAM FX-8 B-40A Ener g y Hazzar d Energy Hazard Alarms Critical Major A-40A Minor NTA GND NTB External Alarms...
  • Page 46: Figure 7 Horizontal Mount Position For 7360 Isam Fx-4 In A 19 In. Rack

    Overview ANSI Hardware Installation Manual Figure 7 Horizontal mount position for 7360 ISAM FX-4 in a 19 in. rack 18.312 17.750 38 RU 5 RU External Alarms BITS TOD/IHZ Remote Craft BAT A BAT B FUSE Critical Alarms N594 Major 7360 ISAM FX-4 Minor NTA GND NTB...
  • Page 47: Figure 8 Horizontal Mount Position For 7360 Isam Fx-4 In A 23 In. Rack

    ANSI Hardware Installation Manual Overview Figure 8 Horizontal mount position for 7360 ISAM FX-4 in a 23 in. rack 22.313 21.500 38 RU 5 RU External Alarms BITS TOD/IHZ Remote Craft BAT A BAT B FUSE Critical Alarms N594 Major 7360 ISAM FX-4 NTA GND NTB Minor...
  • Page 48: Figure 9 Vertical Mount Position For 7360 Isam Fx-4 In A 19 In. Rack

    Overview ANSI Hardware Installation Manual Figure 9 Vertical mount position for 7360 ISAM FX-4 in a 19 in. rack 18.312 17.750 NTIO 7360 ISAM FX-4 31 RU NTIO 7360 ISAM FX-4 23567 3HH-12893-AAAA-TCZZA Issue: 09 DRAFT...
  • Page 49: Figure 10 Vertical Mount Position For 7360 Isam Fx-4 In A 23 In. Rack

    ANSI Hardware Installation Manual Overview Figure 10 Vertical mount position for 7360 ISAM FX-4 in a 23 in. rack 22.313 21.500 NTIO 7360 ISAM FX-4 31 Ru NTIO 7360 ISAM FX-4 23568 Issue: 09 3HH-12893-AAAA-TCZZA DRAFT...
  • Page 50: Figure 11 Vertical Mount Position For 7360 Isam Wm In A 23 In. Rack

    Overview ANSI Hardware Installation Manual Figure 11 Vertical mount position for 7360 ISAM WM in a 23 in. rack BITS INTERFACE NT-A NT-B TIME OF DAY RING 1 Hz-PULSE CO ALARMS CRAFT PORT FRAME GND 10 RU 25785 3HH-12893-AAAA-TCZZA Issue: 09 DRAFT...
  • Page 51: Initial Site Survey

    7360 ISAM FX System Description. 2.4 Initial site survey Nokia recommends that a site survey be conducted prior to ordering installation materials, to ensure a properly planned installation. During the site survey, at minimum, the following items should be determined: •...
  • Page 52: Installation Materials And Tools

    Overview ANSI Hardware Installation Manual 2.5 Installation materials and tools You need the following tools to install the 7360 ISAM FX system equipment. Other tools may be required to perform special procedures as specified in the instructions. All tools used on working equipment must be insulated. Note —...
  • Page 53: Installation Procedures

    ANSI Hardware Installation Manual Overview 2.6 Installation procedures The installation procedures described in this document include the following: • installation of pre-assembled rack • installation of a shelf into an existing rack • installation of NT and LT cards in a 7360 ISAM FXshelf •...
  • Page 54 Overview ANSI Hardware Installation Manual 3HH-12893-AAAA-TCZZA Issue: 09 DRAFT...
  • Page 55: Floor Preparation

    ANSI Hardware Installation Manual Floor preparation 3 Floor preparation 3.1 Overview 3.2 General 3.3 Parts list 3.4 Recommended tools 3.5 Procedures 3.1 Overview This chapter provides the procedures to prepare the 7360 ISAM FX and 7360 ISAM WM ANSI installation site in a central office (CO) and includes seismic and non-seismic qualified instructions.
  • Page 56: Figure 12 7360 Isam Fx/Wm Ansi 23 In. Rack Footprint And Dimensions

    Floor preparation ANSI Hardware Installation Manual Figure 12 7360 ISAM FX/WM ANSI 23 in. rack footprint and dimensions Equipment rear Rack upright Rack base Center line 4 places 4 places Center line 4 places Equipment front 18.32 in. (46.53 cm) 5.00 in.
  • Page 57: Parts List

    Cable areas on the left and the right of each rack allow you to route rack cables up to rack overhead guides. 3.3 Parts list For racks and hardware mounting parts can be ordered from Nokia. See the 7360 ISAM FX Product Information Guide for ordering information. 3.4 Recommended tools The following tools are recommended: •...
  • Page 58 Floor preparation ANSI Hardware Installation Manual Mark the references and the layout lines. To avoid cumulative errors when laying out short dimensions in a straight line, first mark the total length, then divide it into shorter lengths leaving the measuring tape in place. Where the layout lines intersect, extend the lines at least 6 in.
  • Page 59 ANSI Hardware Installation Manual Floor preparation Is this a seismic qualified installation? If it is seismic qualified, go to step 5. If it is non-seismic qualified, go to step 8. Note — Use the exact drill size for drilling anchor holes to achieve maximum anchor strength.
  • Page 60 Floor preparation ANSI Hardware Installation Manual 3HH-12893-AAAA-TCZZA Issue: 09 DRAFT...
  • Page 61: Installing Racks

    ANSI Hardware Installation Manual Installing racks 4 Installing racks 4.1 Overview 4.2 Unpacking and inspection 4.3 Installing a rack 4.1 Overview This chapter provides the procedures to install 7360 ISAM FX and 7360 ISAM WM ANSI racks using the adapter plate assembly, floor mounting hardware, and rack base guards for both seismic and non-seismic qualified installations.
  • Page 62: Parts List

    To unpack equipment Inspect each shipping container for damage. If there is damage, notify the transportation carrier and Nokia immediately. Photograph all damaged containers. Keep all inspection and packing documents for reference. If there is no damage, place the container on a level floor as near to the final installation location as possible.
  • Page 63 Warning — Do not install damaged or dirty equipment, since this can adversely affect the equipment. If anything is missing or damaged, notify the transportation carrier and Nokia immediately. Photograph all damaged equipment. Keep all inspection and packing documents for reference.
  • Page 64: Transport Brackets

    Installing racks ANSI Hardware Installation Manual If there is no damage, dispose of the shipping material according to local code. STOP. This procedure is complete. 4.2.5 Transport brackets The transport brackets are mounted on the rack for easier transport and to protect the rack from damage during transport.
  • Page 65: Installing A Rack

    ANSI Hardware Installation Manual Installing racks Figure 14 Transport brackets located on the rear of the rack Transport bracket Transport bracket 22369 The brackets must be removed on site. 4.3 Installing a rack See the 7360 ISAM FX Product Information Guide for part numbers and ordering information.
  • Page 66: Parts List

    Installing racks ANSI Hardware Installation Manual 4.3.1 Parts list General installation components include the following: • 7360 ISAM FX supported rack • 7360 ISAM WM supported rack • adapter plate assembly kit; one required per rack (not included with rack; order separately) •...
  • Page 67 ANSI Hardware Installation Manual Installing racks • shop vacuum • socket set, 3/8-in. drive with ratchet handle and extensions • torque wrench Do not use a shelf as a handhold (or foothold) Danger 1 — when lifting the rack. Brace the top of the rack during movement to Danger 2 —...
  • Page 68: Figure 15 Securing The Rack To The Floor (Non-Seismic Qualified Installation)

    Installing racks ANSI Hardware Installation Manual Figure 15 Securing the rack to the floor (non-seismic qualified installation) 1/2 in.-13 Hex nut 1/2 in. Split lockwasher 1/2 in.-13 x 3 1/2 in. Threaded rod 1/2" in. Steel flat washer Anchor plate (part of the rack ssembly) Adapter plate (part of the rack ssembly)
  • Page 69: Figure 16 Rack Connector Plate For 7-Ft Rack

    ANSI Hardware Installation Manual Installing racks Mount the connector plate to the top of the rack; see Figure 16. Note — The connector adapter kit provides rack tie-down facilities per Telecordia specifications. Figure 16 Rack connector plate for 7-ft rack Adapter plate assembly kit Flathead screw Hexhead screw...
  • Page 70: Figure 17 Bracing The Rack To Overhead (Example)

    Installing racks ANSI Hardware Installation Manual Brace the rack per recommended office practice. Figure provides an example of attaching the rack to overhead rails. Note — To attach the rack to rails higher than 7-ft (213 cm), use a seismic rack extender. See Procedure for the installation steps.
  • Page 71 ANSI Hardware Installation Manual Installing racks Tighten the top support hardware. Re-tighten the floor anchor bolts. STOP. This procedure is complete. Procedure 9 To mount a rack to floor for seismic installation Verify the rack is unpacked as described in “Unpacking and inspection”...
  • Page 72: Figure 18 Securing The Rack To The Floor (Seismic-Qualified Installation)

    Installing racks ANSI Hardware Installation Manual Figure 18 Securing the rack to the floor (seismic-qualified installation) Cover plate Slotted plate Anchor bolts Anchor plate(s) Minimum embedment line Concrete floor 18 mm hole size Anchor bolts Anchor plate Slotted plate 22365 Line up the rack.
  • Page 73: Figure 19 Rack Connector Plate For 7-Ft Rack

    ANSI Hardware Installation Manual Installing racks Mount the seismic rack extender on the rack using the screws provided, then mount the connector plate at the top of the extender; see Figure 19. Note — The connector adapter kit provides rack tie-down facilities per Telecordia specifications.
  • Page 74: Figure 20 Bracing The Rack To Overhead (Example)

    Installing racks ANSI Hardware Installation Manual Figure 20 Bracing the rack to overhead (example) Overhead rails/cable raceway J-Bolts Clip 5/8-11 threaded rod (secure with lock nut) Clip Lockwasher 5/8-11 tapped hole 22367 Verify rack leveling and adjust as required. Tighten the top support hardware. STOP.
  • Page 75 ANSI Hardware Installation Manual 7360 ISAM FX-16 shelf installation 7360 ISAM FX-16 shelf installation 5 Installing a 7360 ISAM FX-16 shelf 6 7360 ISAM FX-16 shelf cabling 7 Installing cards in the 7360 ISAM FX-16 shelf 8 Fiber optic cable management in the 7360 ISAM FX-16 shelf Issue: 09 3HH-12893-AAAA-TCZZA DRAFT...
  • Page 76 7360 ISAM FX-16 shelf installation ANSI Hardware Installation Manual 3HH-12893-AAAA-TCZZA Issue: 09 DRAFT...
  • Page 77: Installing A 7360 Isam Fx-16 Shelf

    ANSI Hardware Installation Manual Installing a 7360 ISAM FX-16 shelf 5 Installing a 7360 ISAM FX-16 shelf 5.1 Overview 5.2 Mounting the 7360 ISAM FX-16 shelf in a 23 in. rack 5.3 Installing a drip tray below a 7360 ISAM FX-16 shelf 5.4 Installing a 7360 ISAM FX-16 heat and fiber baffle kit 5.5 Installing or replacing the fan unit in a 7360 ISAM FX-16 shelf 5.1 Overview...
  • Page 78: Mounting The 7360 Isam Fx-16 Shelf In A 23 In. Rack

    Installing a 7360 ISAM FX-16 shelf ANSI Hardware Installation Manual • use in: • network telecommunication facilities • locations where the NEC applies • Due to the high heat dissipation for the Caution — 7360 ISAM FX-16, special equipment room cooling may be required, or aisle spacing may need to be increased.
  • Page 79: Parts List

    ANSI Hardware Installation Manual Installing a 7360 ISAM FX-16 shelf Figure shows an example for the rack mounting configuration 3FE 66742 AB. Figure 21 Rack mounting configuration 3FE 66742 AB for 7360 ISAM FX-16 23921 5.2.2 Parts list The following parts are required: •...
  • Page 80: Recommended Tools

    Installing a 7360 ISAM FX-16 shelf ANSI Hardware Installation Manual • 2 AWG .25 mm dual-hole lug • left and right mounting brackets including: • 12 × 24 1/2 in. (12.7 mm) hex screws (x 5 each side) • heat and fiber management baffle kit including: •...
  • Page 81 Unpack and visually inspect the shelf and shelf mount kits for physical damage. If anything is missing or damaged, notify the transportation carrier and Nokia immediately. Photograph all the damaged equipment. Keep all the inspection and packing documents as a reference.
  • Page 82: Figure 22 Mounting Locations For The 7360 Isam Fx-16

    Installing a 7360 ISAM FX-16 shelf ANSI Hardware Installation Manual Figure 22 Mounting locations for the 7360 ISAM FX-16 23920 Attach the left and right shelf mounting brackets to the 7360 ISAM FX-16 shelf using the ten 12 × 24 1/2 in. (12.7 mm) hex screws provided in the bag labeled ‘Use these screws to mount left and right mounting brackets’.
  • Page 83: Figure 23 Mounting 7360 Isam Fx-16 Lower Shelf In A 23 In. Rack

    ANSI Hardware Installation Manual Installing a 7360 ISAM FX-16 shelf Ensure the drip tray is installed in the correct mounting position in the shelf. Note 1 — The drip tray must be installed prior to mounting the shelf in the rack. See 5.3 “Installing a drip tray below a 7360 ISAM FX-16 shelf”.
  • Page 84 Installing a 7360 ISAM FX-16 shelf ANSI Hardware Installation Manual Mount the shelf in the second upper mounting position in the rack by lifting the shelf over the installed drip tray and then lowering it slowly into the correct mounting position. Attach the shelf using the ten 12 ×...
  • Page 85: Figure 24 Mounting 7360 Isam Fx-16 Upper Shelf In A 23 In. Rack

    ANSI Hardware Installation Manual Installing a 7360 ISAM FX-16 shelf Figure 24 Mounting 7360 ISAM FX-16 upper shelf in a 23 in. rack 23915 STOP. This procedure is complete. Note 1 — See Procedure 12 “To install a 7360 ISAM FX-16 heat and fiber baffle kit above a shelf”.
  • Page 86: Installing A Drip Tray Below A 7360 Isam Fx-16 Shelf

    Remove the drip tray unit from its shipping packaging and inspect the part for damage. If damaged, do not install the drip tray but notify the transportation carrier and Nokia immediately. 3HH-12893-AAAA-TCZZA Issue: 09...
  • Page 87: Figure 26 Mounting 7360 Isam Fx-16 Lower Drip Tray

    ANSI Hardware Installation Manual Installing a 7360 ISAM FX-16 shelf Mount the drip tray in the lower mounting position, as shown in Figure 26. Attach the drip tray with screws to the rack uprights. Figure 26 Mounting 7360 ISAM FX-16 lower drip tray 23912 If mounting a second shelf in the rack, verify the upper shelf unit and drip tray mounting positions;...
  • Page 88: Figure 27 Mounting 7360 Isam Fx-16 Upper Drip Tray

    Installing a 7360 ISAM FX-16 shelf ANSI Hardware Installation Manual Figure 27 Mounting 7360 ISAM FX-16 upper drip tray 23917 STOP. This procedure is complete. Note — See section 5.2 “Mounting the 7360 ISAM FX-16 shelf in a 23 rack”. 3HH-12893-AAAA-TCZZA Issue: 09 DRAFT...
  • Page 89: Installing A 7360 Isam Fx-16 Heat And Fiber Baffle Kit

    ANSI Hardware Installation Manual Installing a 7360 ISAM FX-16 shelf 5.4 Installing a 7360 ISAM FX-16 heat and fiber baffle kit The 7360 ISAM FX-16 heat and fiber management baffle kit is required to meet NEBS preferred airflow specifications (air flows in the front, and out the rear of the shelf).
  • Page 90 Put on the antistatic wrist strap and connect it to a grounding point. Remove the heat and fiber baffle kit from its shipping packaging and inspect the parts for damage. If damaged, do not install the baffle but notify the transportation carrier and Nokia immediately.
  • Page 91: Figure 28 Pre-Assembled 7360 Isam Fx-16 Heat And Fiber Baffle Kit

    ANSI Hardware Installation Manual Installing a 7360 ISAM FX-16 shelf Figure 28 Pre-assembled 7360 ISAM FX-16 heat and fiber baffle kit 23604 Attach the heat and fiber baffle kit to the top of the 7360 ISAM FX-16 shelf using the provided screws, as shown in Figure 29.
  • Page 92: Figure 30 Mounting 7360 Isam Fx-16 Upper Heat And Fiber Baffle Kit

    Installing a 7360 ISAM FX-16 shelf ANSI Hardware Installation Manual Repeat steps if a second shelf is to be installed in the upper mounting position of the rack, see Figure 30. Figure 30 Mounting 7360 ISAM FX-16 upper heat and fiber baffle kit 23916 3HH-12893-AAAA-TCZZA Issue: 09...
  • Page 93: Figure 31 Fiber Management Bracket

    ANSI Hardware Installation Manual Installing a 7360 ISAM FX-16 shelf Once the heat and fiber baffle kit is mounted and secured to the top of the shelf, attach the fiber management bracket to the cable management bracket of the 7360 ISAM FX-16 shelf using two washers and one screw in an upward-facing position for each of the six mounting holes.
  • Page 94: Installing Or Replacing The Fan Unit In A 7360 Isam Fx-16 Shelf

    Installing a 7360 ISAM FX-16 shelf ANSI Hardware Installation Manual Figure 32 Fiber management bracket Fiber management bracket Cable management bracket 25362 STOP. This procedure is complete. 5.5 Installing or replacing the fan unit in a 7360 ISAM FX-16 shelf The fan unit is a field-replaceable unit with wide-voltage-range fans, an alarm interface board, and (optional) a fan filter.
  • Page 95 ANSI Hardware Installation Manual Installing a 7360 ISAM FX-16 shelf The fan unit can be hot inserted into the shelf. The fan unit does not have an on/off switch so removing the fan unit disconnects power provided from the backplane. Risk of fire and equipment damage or system Danger —...
  • Page 96: Figure 33 Remove The Fan Cover

    Remove the fan unit from its shipping packaging and inspect it for damage. If damaged, do not install or replace the fan unit but notify the transportation carrier and Nokia immediately. In case of replacement, remove the installed fan unit: Loosen the captive screws of the fan cover and remove the cover;...
  • Page 97: Figure 34 Fan Unit Handles

    ANSI Hardware Installation Manual Installing a 7360 ISAM FX-16 shelf Figure 34 Fan unit handles Handle 22372 If the system is active, be aware of the maximum time (5 minutes) that the fans are allowed to be out of operation. Danger —...
  • Page 98 CO). Use the following procedure to replace the fan unit. Unpack and inspect the fan filter visually for physical damage. If anything is missing or damaged, notify the transportation carrier and Nokia immediately. Photograph all the damaged equipment. Keep all the inspection and packing documents as a reference.
  • Page 99: 7360 Isam Fx-16 Shelf Cabling

    ANSI Hardware Installation Manual 7360 ISAM FX-16 shelf cabling 6 7360 ISAM FX-16 shelf cabling 6.1 Overview 6.2 Safety precautions 6.3 Shelf grounding connection 6.4 Rack grounding connection 6.5 Power cabling 6.6 CO external alarm connector 6.7 BITS interface connections 6.8 ToD/1 Hz connector 6.9 Remote craft port connector 6.10 Combo cable connector...
  • Page 100: Safety Precautions

    7360 ISAM FX-16 shelf cabling ANSI Hardware Installation Manual 6.2 Safety precautions The following safety precautions apply: Before working on the power supply unit, verify Danger 1 — whether it is live. If the power supply is live, which can deliver −48 Vdc, you must use an insulated tool kit.
  • Page 101: Shelf Grounding Connection

    POTS with xDSL). To comply with EMC, observe the following: • Apply shielded LINE and POTS cables between the MDF and the 7356 ISAM FTTB (Nokia always provides shielded cables). • Connect, if possible, the shielding of each MDF cable to ground at MDF end.
  • Page 102: Cable Routing And Connection

    7360 ISAM FX-16 shelf cabling ANSI Hardware Installation Manual 6.3.2 Cable routing and connection The grounding cable must be used when the shelf is stand-alone and will not be used if the shelf is assembled in a rack. The cable is routed through an opening in the right side of the shelf or to the left side of the shelf to the grounding terminal.
  • Page 103: Rack Grounding Connection

    ANSI Hardware Installation Manual 7360 ISAM FX-16 shelf cabling Procedure 15 To connect the grounding cable Use the following procedure to connect the grounding cable. Route the grounding cable to the right or left side of the shelf. Connect the dual-lug to the grounding cable connection point as shown in Figure 35. Danger —...
  • Page 104: Figure 36 External Frame Ground Point Rear View

    7360 ISAM FX-16 shelf cabling ANSI Hardware Installation Manual Connect the grounding cable to one of the two frame grounding points on the top of the rack, as shown in Figure 36, using the screws provided with the rack. Figure 36 External frame ground point rear view No.
  • Page 105: Power Cabling

    Power cables are routed from the PDF to the rack using cable channels overhead and are connected at the input terminal block inside the 7360 ISAM FX-16 shelf. To minimize interference, Nokia recommends that you route power cables using separate channels for signal and power cables.
  • Page 106: Power Distribution Unit

    7360 ISAM FX-16 shelf cabling ANSI Hardware Installation Manual Keeping a distance of 4 in. (10 cm) between signal and power cables is advisable where it imposes no practical problems. Crossing of signal cables with power cables and parallel routing over short distances is acceptable.
  • Page 107: Power Cables

    The 7360 ISAM FX-16 requires the use of a 2 AWG power cable. The color of the power cables must be according to Note 1 — local installation practices. Nokia recommends the following crimp lugs and Note 2 — tooling for −48 Vdc input and return: •...
  • Page 108: Figure 39 Power Cable Routing For 7360 Isam Fx-16

    7360 ISAM FX-16 shelf cabling ANSI Hardware Installation Manual Figure 39 Power cable routing for 7360 ISAM FX-16 NTIO CRITICAL BAT A Energy Hazard N594 MAJOR BAT B 7360 ISAM FX-16 A/70 FOR LT B/70 FOR LT -48V 70A MINOR Energy Hazard BITS INTERFACE TIME OF DAY...
  • Page 109: Figure 40 Mounting Of Power Cable Shoes And Safety Cover On 7360 Isam Fx- 16

    ANSI Hardware Installation Manual 7360 ISAM FX-16 shelf cabling Figure 40 Mounting of power cable shoes and safety cover on 7360 ISAM FX-16 NTIO CRITICAL BAT A Energy Hazard N594 MAJOR BAT B 7360 ISAM FX-16 A/70 FOR LT B/70 FOR LT -48V 70A MINOR Energy Hazard...
  • Page 110 7360 ISAM FX-16 shelf cabling ANSI Hardware Installation Manual Tighten the nuts back on the power terminals with a torque of 65 lbf-in. maximum. Place the safety cover back in its location and fasten the screws. Turn on the A and B power from the power distribution frame to the rack. Verify that the BAT A and BAT B LEDs are green.
  • Page 111: Co External Alarm Connector

    CRAFT PORT FRAME GND BITS INTERFACE TIME OF DAY NT-A NT-B 1 Hz-PULSE CO ALARMS RING FRAME GND CO Alarm connector 22215 For a description of the CO external alarm cable connector pinning, see your Nokia representative. Issue: 09 3HH-12893-AAAA-TCZZA DRAFT...
  • Page 112: Bits Interface Connections

    7360 ISAM FX-16 shelf cabling ANSI Hardware Installation Manual 6.7 BITS interface connections The 7360 ISAM FX-16 requires six wire-wrappable pins for the BITS clock timing connection. BITS timing signals will be supplied using two twisted pair cables (22 AWG solid copper conductors with overall shield and drain wire, Belden 1175A or equivalent).
  • Page 113: Tod/1 Hz Connector

    ANSI Hardware Installation Manual 7360 ISAM FX-16 shelf cabling 6.8 ToD/1 Hz connector The 7360 ISAM FX-16 requires an RJ-45 connector for the ToD and 1 Hz signal connection. Figure shows the ToD/1 Hz connector on the 7360 ISAM FX-16. Figure 43 ToD/1 Hz connector on 7360 ISAM FX-16 NTIO...
  • Page 114: Remote Craft Port Connector

    6.9 Remote craft port connector The 7360 ISAM FX-16 requires a DB-9 female connector for the remote craft port connection. Nokia supports the use of a DB-9 female connector Note — cable for the remote craft port connection to avoid potential damage due to exposed pins on the typically used DB-9 male connector.
  • Page 115: Connection/Locking

    ANSI Hardware Installation Manual 7360 ISAM FX-16 shelf cabling Figure 44 Combo cable Front view Front view Connector B Connector A No3454 See Appendix for the pinning of the CHAMP100 Note 1 — connectors. See the 7360 ISAM FX Product Information Guide for Note 2 —...
  • Page 116: Pots And Line Mdf Cable Connector

    7360 ISAM FX-16 shelf cabling ANSI Hardware Installation Manual Figure 45 Combo cable connection on 7360 ISAM FX-16 NTIO CRITICAL BAT A Energy Hazard MAJOR BAT B 7360 ISAM FX-16 -48V 70A MINOR CAUTION ROTATING FAN BLADES Energy Hazard BITS INTERFACE TIME OF DAY NT-A NT-B...
  • Page 117: Prerequisites

    See the 7360 ISAM FX Product Information Guide for Note 2 — ordering information. 6.11.2 Prerequisites The following tools are required: • MDF (LINE/POTS) cables as provided by Nokia • an antistatic wrist strap • tie-wraps • lacing cord for tying up and/or bundling cables...
  • Page 118: Figure 47 Mdf Cable Line Connection On 7360 Isam Fx-16

    7360 ISAM FX-16 shelf cabling ANSI Hardware Installation Manual Procedure 19 To connect MDF cabling for LT cards with integrated splitter Proceed as follows to connect the MDF cables for LINE and POTS to the LT card with integrated splitter: Connect the MDF cable for the LINE to the right-hand CHAMP connector on the LT card with integrated splitter, as shown in Figure 47.
  • Page 119: Vectoring Cable Connector

    ANSI Hardware Installation Manual 7360 ISAM FX-16 shelf cabling Figure 48 MDF cable POTS connection on 7360 ISAM FX-16 NTIO Energy Hazard CRITICAL BAT A MAJOR BAT B 7360 ISAM FX-16 -48V 70A MINOR CAUTION ROTATING FAN BLADES Energy Hazard BITS INTERFACE TIME OF DAY NT-A...
  • Page 120: Vl Cable

    7360 ISAM FX-16 shelf cabling ANSI Hardware Installation Manual 6.12.1 VL cable The VL cables must not be routed where they may be exposed to high voltage such as lightning strikes. When VL cables need to be disconnected, only do Caution —...
  • Page 121 ANSI Hardware Installation Manual 7360 ISAM FX-16 shelf cabling Procedure 20 To connect vectoring links Proceed as follows to connect vectoring links: Warning 1 — Units contain ESD-sensitive devices. These devices are susceptible to ESD damage in unconnected circuit conditions. Appropriate ESD procedures should always be followed when installing or removing units and cables.
  • Page 122: Figure 49 Vl Ports On The Ndps-B

    7360 ISAM FX-16 shelf cabling ANSI Hardware Installation Manual Figure 49 VL ports on the NDPS-B FP LT -A VL 1 VL 2 VL 3 VL 4 VL 5 VL 6 VL 7 VL 8 PW R AC T AL M 24286 Remove the dust covers from the VL ports identified in step 3.
  • Page 123: Figure 50 Inserting The Cable Connector Into A Vl Port On The Ndps-B Card

    ANSI Hardware Installation Manual 7360 ISAM FX-16 shelf cabling Figure 50 Inserting the cable connector into a VL port on the NDPS-B card VL port VL cable 23722 Route the VL cable through the appropriate cable exit area of the shelf; see Figure for VL cable exit areas: •...
  • Page 124: Figure 51 Vl Cable Exit Areas

    7360 ISAM FX-16 shelf cabling ANSI Hardware Installation Manual Figure 51 VL cable exit areas NTIO CRITICAL BAT A Energy Hazard MAJOR BAT B 7360 ISAM FX-16 -48V 70A MINOR CAUTION ROTATING FAN BLADES Energy Hazard BITS INTERFACE TIME OF DAY NT-A NT-B 1 Hz-PULSE...
  • Page 125: Installing Cards In The 7360 Isam Fx-16 Shelf

    ANSI Hardware Installation Manual Installing cards in the 7360 ISAM FX-16 shelf 7 Installing cards in the 7360 ISAM FX-16 shelf 7.1 Overview 7.2 Shelf areas and slot positions 7.3 Dummy front panels 7.4 Recommended tools 7.5 Guideline for card installation 7.6 Installation procedures 7.1 Overview This chapter provides the procedures to install field-replaceable units (FRUs) in the...
  • Page 126: Dummy Front Panels

    Installing cards in the 7360 ISAM FX-16 shelf ANSI Hardware Installation Manual Figure 52 NT and LT slot positions in 7360 ISAM FX-16 NTIO NT CBs, LEDs and switches Fan unit Connectors 22131 The 7360 ISAM FX-16 can be equipped with a maximum of 16 LT cards, 2 NT cards, and 1 NTIO card.
  • Page 127: Nt Dummy Front Panel

    ANSI Hardware Installation Manual Installing cards in the 7360 ISAM FX-16 shelf 7.3.1 NT dummy front panel A dummy front panel must be used when the second NT card is not installed. Figure shows the dummy front panel for NT card slots. Figure 53 Dummy front panel for NT card 22197...
  • Page 128: Dummy Front Panel For Optical Lt Cards

    Installing cards in the 7360 ISAM FX-16 shelf ANSI Hardware Installation Manual Figure 54 Universal dummy front panel for NTIO card 22429 7.3.3 Dummy front panel for optical LT cards A dummy front panel must be used for all unused LT card slots. Figure shows one example of a dummy front panel for optical LT card slots.
  • Page 129: Recommended Tools

    ANSI Hardware Installation Manual Installing cards in the 7360 ISAM FX-16 shelf 7.4 Recommended tools The following tools are recommended: • screwdriver to secure cards • antistatic wrist strap for handling cards with ESD sensitive devices • ohmmeter to check connection of wrist strap to earth bounding point 7.5 Guideline for card installation This section provides a general guideline for the correct installation of a card in a shelf.
  • Page 130: Installation Procedures

    Installing cards in the 7360 ISAM FX-16 shelf ANSI Hardware Installation Manual 7.6 Installation procedures This section describes the following card installation procedures: • To install NT cards • To install NTIO cards • To install LT cards • To remove cards 7.6.1 General When installing cards in a new installation, install the NT card(s) first.
  • Page 131: Rules For Handling Cards

    ANSI Hardware Installation Manual Installing cards in the 7360 ISAM FX-16 shelf 7.6.2 Rules for handling cards Observe the following: Units contain ESD sensitive devices. These Warning 1 — devices are susceptible to ESD damage in unconnected circuit conditions. Appropriate ESD procedures should always be followed when installing or removing cards.
  • Page 132: Figure 56 Esd Awareness Symbol

    Installing cards in the 7360 ISAM FX-16 shelf ANSI Hardware Installation Manual Figure 56 ESD awareness symbol 22390 Risk of damage to equipment with ESD sensitive Warning — devices. Most cards and powered equipment contain devices that are susceptible to ESD. ESD could damage these or other devices in unconnected circuit conditions.
  • Page 133: Cards With Optical Fiber Connectors

    ANSI Hardware Installation Manual Installing cards in the 7360 ISAM FX-16 shelf 7.6.2.2 Cards with optical fiber connectors Observe the following. Risk of eye damage or skin burns by laser emission. Danger — When installing optical cards or handling optical fibers, never look inside connectors of cards or fibers when these are not connected.
  • Page 134: Figure 59 Nt Card Slots In 7360 Isam Fx-16

    Installing cards in the 7360 ISAM FX-16 shelf ANSI Hardware Installation Manual Figure 59 NT card slots in 7360 ISAM FX-16 NT A NT B NTIO CRITICAL BAT A N594 Energy Hazard MAJOR BAT B 7360 ISAM FX-16 A/70 FOR LT B/70 FOR LT -48V 70A MINOR...
  • Page 135 ANSI Hardware Installation Manual Installing cards in the 7360 ISAM FX-16 shelf Slide the NT card into the NTA slot of the shelf; see Figure 59. Caution — When sliding the NT card into the slot, ensure that the solder side of the NT card does not come into contact with the EMC shielding plate adjacent to the NT card slot.
  • Page 136: Figure 60 Ntio Slot

    Installing cards in the 7360 ISAM FX-16 shelf ANSI Hardware Installation Manual Figure 60 NTIO slot NT A NTIO NT B NTIO CRITICAL BAT A N594 Energy Hazard MAJOR BAT B 7360 ISAM FX-16 A/70 FOR LT B/70 FOR LT -48V 70A MINOR Energy Hazard...
  • Page 137: Figure 61 Lt Card Slots In 7360 Isam Fx-16

    ANSI Hardware Installation Manual Installing cards in the 7360 ISAM FX-16 shelf Figure 61 LT card slots in 7360 ISAM FX-16 NTIO CRITICAL BAT A Energy Hazard N594 MAJOR BAT B 7360 ISAM FX-16 A/70 FOR LT B/70 FOR LT -48V 70A MINOR Energy Hazard...
  • Page 138 Installing cards in the 7360 ISAM FX-16 shelf ANSI Hardware Installation Manual Slide the LT card into the appropriate LT card slot. Caution — When sliding the LT card into slot 9, ensure that the solder side of the LT card does not come into contact with the EMC shielding plate adjacent to the LT card slot.
  • Page 139: Figure 62 Ejector Handles For Lt Cards

    ANSI Hardware Installation Manual Installing cards in the 7360 ISAM FX-16 shelf Figure 62 Ejector handles for LT cards Guiding plate Withdrawl 22376 Figure 63 Ejector handles for LT cards Guiding plate Withdrawl 25830 Figure 64 Ejector handles for NT cards 33.77 in.
  • Page 140 Installing cards in the 7360 ISAM FX-16 shelf ANSI Hardware Installation Manual 3HH-12893-AAAA-TCZZA Issue: 09 DRAFT...
  • Page 141: Fiber Optic Cable Management In The 7360 Isam Fx-16 Shelf

    ANSI Hardware Installation Manual Fiber optic cable management in the 7360 ISAM FX-16 shelf 8 Fiber optic cable management in the 7360 ISAM FX-16 shelf 8.1 Overview 8.2 Managing fiber optic cables 8.3 Routing fiber optic cables 8.1 Overview This chapter describes the fiber optic cable management for the 7360 ISAM FX-16 shelf.
  • Page 142: Managing Fiber Optic Cables

    Fiber optic cable management in the ANSI Hardware Installation Manual 7360 ISAM FX-16 shelf Figure 65 Fiber guiding elements of the 7360 ISAM FX-16 optical fiber management kit 4-slot guide 3-slot guide 23043 8.2 Managing fiber optic cables This section describes how to fiber optic cables for NT cards and LT cards in the 7360 ISAM FX-16 shelf.
  • Page 143: General Safety And Operations Information

    ANSI Hardware Installation Manual Fiber optic cable management in the 7360 ISAM FX-16 shelf 8.2.1 General safety and operations information This section provides general safety and operations information. See the 7360 ISAM FX Safety Manual for more information. Non-terminated optical connectors may emit Danger —...
  • Page 144: Fiber Cables

    For an overview of the supported SFP modules, see Note 1 — the 7360 ISAM FX Product Information Guide. Nokia recommends protecting any SFP cage that is Note 2 — not equipped with an SFP modules with a dust cover in order to prevent dust intrusion.
  • Page 145: Routing Fiber Optic Cables

    ANSI Hardware Installation Manual Fiber optic cable management in the 7360 ISAM FX-16 shelf Figure 66 Fiber management guide for 7360 ISAM FX-16 22202 8.3 Routing fiber optic cables This section provides procedures for mounting fiber management guides, routing and connecting fiber optic cables to the NT and LT cards for 7360 ISAM FX-16, and for installing optical modules.
  • Page 146: Figure 68 Fiber Routing Without A Fiber Management Guide For 7360 Isam Fx- 16

    Fiber optic cable management in the ANSI Hardware Installation Manual 7360 ISAM FX-16 shelf Figure 68 Fiber routing without a fiber management guide for 7360 ISAM FX-16 A /S A /S A /S A /S A /S A /S A /S A /S 25373 Procedure 26...
  • Page 147: Figure 69 Alignment Of 7360 Isam Fx-16 Fiber Management Guide

    ANSI Hardware Installation Manual Fiber optic cable management in the 7360 ISAM FX-16 shelf Figure 69 Alignment of 7360 ISAM FX-16 fiber management guide Finger guide Notch 22203 Push down on the pre-assembled fiber management bracket and slide it forward onto the finger guides of the cable management bracket on the shelf until it locks into place;...
  • Page 148 Fiber optic cable management in the ANSI Hardware Installation Manual 7360 ISAM FX-16 shelf Procedure 27 To route fiber cables to NT and LT cards Use the following procedure to route and connect 7360 ISAM FX-16 fiber cables to NT and LT cards.
  • Page 149 ANSI Hardware Installation Manual Fiber optic cable management in the 7360 ISAM FX-16 shelf Procedure 28 Installing an optical module Caution — It is important to install optical modules prior to connecting power to a 7360 ISAM FX shelf. To install optical modules, proceed as follows: Put on an antistatic wrist strap and connect it to a grounding point.
  • Page 150 Fiber optic cable management in the ANSI Hardware Installation Manual 7360 ISAM FX-16 shelf 3HH-12893-AAAA-TCZZA Issue: 09 DRAFT...
  • Page 151 ANSI Hardware Installation Manual 7360 ISAM FX-12 shelf installation 7360 ISAM FX-12 shelf installation 9 Installing a 7360 ISAM FX-12 shelf 10 7360 ISAM FX-12 shelf cabling 11 Installing cards in the 7360 ISAM FX-12 shelf 12 Fiber optic cable management in the 7360 ISAM FX-12 shelf Issue: 09 3HH-12893-AAAA-TCZZA DRAFT...
  • Page 152 7360 ISAM FX-12 shelf installation ANSI Hardware Installation Manual 3HH-12893-AAAA-TCZZA Issue: 09 DRAFT...
  • Page 153: Installing A 7360 Isam Fx-12 Shelf

    ANSI Hardware Installation Manual Installing a 7360 ISAM FX-12 shelf 9 Installing a 7360 ISAM FX-12 shelf 9.1 Overview 9.2 Mounting the 7360 ISAM FX-12 shelf 9.3 Installing a 7360 ISAM FX-12 heat and fiber baffle kit 9.4 Replacing the fan unit in a 7360 ISAM FX-12 shelf 9.1 Overview This chapter provides the steps to install a 7360 ISAM FX-12 shelf in a standard CO equipment rack, including procedures for:...
  • Page 154: Mounting The 7360 Isam Fx-12 Shelf

    Installing a 7360 ISAM FX-12 shelf ANSI Hardware Installation Manual 9.2 Mounting the 7360 ISAM FX-12 shelf The 7360 ISAM FX-12 shelf can be mounted: • vertically in a seismic 19 in. rack (17.5 in. opening) 9.2.1 7360 ISAM FX-12 rack mounting configurations Table describes the vertical rack configurations for a 7360 ISAM FX-12 shelf in a seismic 19 in.
  • Page 155: Recommended Tools

    Use this procedure to mount a 7360 ISAM FX-12 shelf vertically in a seismic 19 in. rack. Unpack and visually inspect the shelf for physical damage. If anything is missing or damaged, notify the transportation carrier and Nokia immediately. Photograph all the damaged equipment. Keep all the inspection and packing documents as a reference.
  • Page 156: Figure 71 Vertical Mounting Locations In A 19 In. Rack For 7360 Isam Fx-12

    Installing a 7360 ISAM FX-12 shelf ANSI Hardware Installation Manual Figure 71 Vertical mounting locations in a 19 in. rack for 7360 ISAM FX-12 A: 60A B: 60A External Alarms BITS 7360 ISAM FX-12 Remote Craft BAT A BAT B Alarms Min.
  • Page 157: Installing A 7360 Isam Fx-12 Heat And Fiber Baffle Kit

    ANSI Hardware Installation Manual Installing a 7360 ISAM FX-12 shelf 9.3 Installing a 7360 ISAM FX-12 heat and fiber baffle kit The 7360 ISAM FX-12 heat and fiber baffle kit is required to meet NEBS preferred airflow specifications (air flows in the front, and out the rear of the shelf). The upper baffle assembly of the heat and fiber baffle kit must be installed above the card cage of the 7360 ISAM FX-12 shelf for cable management and support, and for protection from possible flame spread and damage to any equipment in the rack.
  • Page 158 Unpack and visually inspect the heat and fiber baffle kit for physical damage. If anything is missing or damaged, notify the transportation carrier and Nokia immediately. Photograph all the damaged equipment. Keep all the inspection and packing documents as a reference.
  • Page 159: Figure 72 Pre-Assembled Upper Baffle Assembly Of The 7360 Isam

    ANSI Hardware Installation Manual Installing a 7360 ISAM FX-12 shelf Figure 72 Pre-assembled upper baffle assembly of the 7360 ISAM FX-12 heat and fiber baffle kit 24867 Attach the upper baffle assembly to the top of the 7360 ISAM FX-12 shelf using the provided screws, as shown in Figure 73.
  • Page 160: Figure 73 Mounting The Upper Baffle Assembly - Lower Shelf

    Installing a 7360 ISAM FX-12 shelf ANSI Hardware Installation Manual Figure 73 Mounting the upper baffle assembly - lower shelf LT 1 LT 2 LT 3 LT 4 LT 5 LT 6 NT A LT 7 LT 8 LT 9 LT 10 LT 11 LT 12...
  • Page 161: Figure 74 Mounting The Lower Baffle - Lower Shelf

    ANSI Hardware Installation Manual Installing a 7360 ISAM FX-12 shelf Figure 74 Mounting the lower baffle - lower shelf G FC LT 1 LT 2 LT 3 LT 4 LT 5 LT 6 NT A LT 7 LT 8 LT 9 LT 10 LT 11 LT 12...
  • Page 162: Figure 75 Mounting The Upper Baffle Assembly - Upper Shelf

    Installing a 7360 ISAM FX-12 shelf ANSI Hardware Installation Manual Figure 75 Mounting the upper baffle assembly - upper shelf LT 1 LT 2 LT 3 LT 4 LT 5 LT 6 NT A LT 7 LT 8 LT 9 LT 10 LT 11 LT 12...
  • Page 163: Figure 76 Mounting The Lower Baffle - Upper Shelf

    ANSI Hardware Installation Manual Installing a 7360 ISAM FX-12 shelf Figure 76 Mounting the lower baffle - upper shelf LT 1 LT 2 LT 3 LT 4 LT 5 LT 6 NT A LT 7 LT 8 LT 9 LT 10 LT 11 LT 12 LT 1...
  • Page 164: Replacing The Fan Unit In A 7360 Isam Fx-12 Shelf

    Installing a 7360 ISAM FX-12 shelf ANSI Hardware Installation Manual After the upper baffle assembly and lower baffle have been mounted and secured to the 7360 ISAM FX-12 shelf, attach the fiber management guide onto the fiber management bracket of the 7360 ISAM FX-12 shelf.
  • Page 165 Use the following procedure to replace a fan unit. Unpack the fan unit and visually inspect it for physical damage. If anything is missing or damaged, notify the transportation carrier and Nokia immediately. Photograph all the damaged equipment. Keep all the inspection and packing documents as a reference.
  • Page 166: Figure 77 Remove The Fan Cover

    Installing a 7360 ISAM FX-12 shelf ANSI Hardware Installation Manual Verify if the fan unit type is correct for the rack configuration. See Table 7. Remove the installed fan unit: Loosen the captive screws of the fan cover and remove the cover; see Figure 77. Figure 77 Remove the fan cover Captive screw...
  • Page 167: Figure 78 Fan Unit Handles

    ANSI Hardware Installation Manual Installing a 7360 ISAM FX-12 shelf Figure 78 Fan unit handles Handle 22372 If the system is active, be aware of the maximum time (5 minutes) that the fans are allowed to be out of operation. Danger —...
  • Page 168 CO. Use the following procedure to replace the fan unit. Unpack and inspect the fan filter visually for physical damage. If anything is missing or damaged, notify the transportation carrier and Nokia immediately. Photograph all the damaged equipment. Keep all the inspection and packing documents as a reference.
  • Page 169: 7360 Isam Fx-12 Shelf Cabling

    ANSI Hardware Installation Manual 7360 ISAM FX-12 shelf cabling 10 7360 ISAM FX-12 shelf cabling 10.1 Overview 10.2 Safety precautions 10.3 Shelf grounding connection 10.4 Rack grounding connection 10.5 Power cabling 10.6 CO alarm connector 10.7 BITS interface connections 10.8 ToD/PPS connector 10.9 Remote craft port connector 10.10 Combo cable connector 10.11 POTS and LINE MDF cable connector...
  • Page 170: Safety Precautions

    7360 ISAM FX-12 shelf cabling ANSI Hardware Installation Manual 10.2 Safety precautions The following safety precautions apply: Before working on the power supply unit, verify Danger 1 — whether it is live. If the power supply is live, which can deliver −48 Vdc, you must use an insulated tool kit.
  • Page 171: Grounding Cable Type

    ANSI Hardware Installation Manual 7360 ISAM FX-12 shelf cabling Observe the following safety notes. Rack or frame must be suitably connected to the Danger 1 — office grounding network in accordance with Article 250 of the national electrical code (NEC) to ensure UL and CSA compliance.
  • Page 172: Grounding Cable Connection On 7360 Isam Fx-12

    7360 ISAM FX-12 shelf cabling ANSI Hardware Installation Manual Figure 79 Grounding cable connection on 7360 ISAM FX-12 Ground cable connector NTIO LT10 LT11 LT12 ENERGY HAZARD Alarm ROATING FAN BLADES KEEP FINGERS AWAY FROM TOP AND BOTTOM OF FAN TRAY 24951 Procedure 33 To connect the grounding cable...
  • Page 173: Rack Grounding Connection

    ANSI Hardware Installation Manual 7360 ISAM FX-12 shelf cabling 10.4 Rack grounding connection The 7360 ISAM FX-12 requires a 6 AWG rack frame grounding cable for the rack grounding connection. Rack or frame must be suitably connected to the Danger 1 — office grounding network in accordance with Article 250 of the National Electrical Code (NEC) to ensure UL and CSA compliance.
  • Page 174: Power Cabling

    7360 ISAM FX-12 shelf cabling ANSI Hardware Installation Manual Figure 80 External frame ground point rear view No. 2 AWG lug and 2 12-24 screws (provided with the rack) Frame ground point Frame ground point Frame ground point (may be located on the opposite side on some racks) Rack frame ground locations rear view...
  • Page 175: General

    Power cables are routed from the PDF to the rack using cable channels overhead and are connected at the input terminal block inside the 7360 ISAM FX-12 shelf. To minimize interference, Nokia recommends that you route power cables using separate channels for signal and power cables.
  • Page 176: Power Cables

    The 7360 ISAM FX-12 requires the use of an 2 AWG power cable. The color of the power cables must be according to Note 1 — local installation practices. Nokia recommends the following crimp lugs and Note 2 — crimp lug tool: •...
  • Page 177: Power Cable Routing For 7360 Isam Fx-12

    ANSI Hardware Installation Manual 7360 ISAM FX-12 shelf cabling Figure 81 Power cable routing for 7360 ISAM FX-12 G FC LT 1 LT 2 LT 3 LT 4 LT 5 LT 6 NT A LT 7 LT 8 LT 9 LT 10 LT 11 LT 12...
  • Page 178: Mounting Of Power Cable Shoes And Safety Cover On 7360 Isam Fx- 12

    7360 ISAM FX-12 shelf cabling ANSI Hardware Installation Manual Figure 82 Mounting of power cable shoes and safety cover on 7360 ISAM FX-12 22383 Remove the nuts from the power terminals; see Figure 82. Danger — If the following sequence is not followed exactly, there can be a possible fire hazard.
  • Page 179: Co Alarm Connector

    ANSI Hardware Installation Manual 7360 ISAM FX-12 shelf cabling Verify that the fans spin. STOP. This procedure is complete. Procedure 36 To disconnect the power cables Use the following procedure when the power cables need to be disconnected on 7360 ISAM FX- Warning —...
  • Page 180: Bits Interface Connections

    The 7360 ISAM FX-12 requires a 50-pin micro DSUB connector with an angled head for the CO external alarm connection. A cable assembly is available from Nokia (sold separately), that can be used with the 7360 ISAM FX-12, as shown in Figure 84. See Figure for the location of the CO external alarm connector.
  • Page 181: Tod/Pps Connector

    10.9 Remote craft port connector The 7360 ISAM FX-12 requires a DB-9 female connector for the remote craft port connection. Nokia supports the use of a DB-9 female connector Note — cable for the remote craft port connection to avoid potential damage due to exposed pins on the typically used DB-9 male connector.
  • Page 182: Cable Type

    7360 ISAM FX-12 shelf cabling ANSI Hardware Installation Manual 10.10.1 Cable type The required cable is an MDF cable with two CHAMP100 connectors; see Figure 86. Figure 86 Combo cable Front view Front view Connector B Connector A No3454 See Appendix for the pinning of the CHAMP100 Note —...
  • Page 183: Pots And Line Mdf Cable Connector

    ANSI Hardware Installation Manual 7360 ISAM FX-12 shelf cabling Figure 87 Combo cable connection on 7360 ISAM FX-12 NTIO LT10 LT11 LT12 ENERGY HAZARD Alarm ROATING FAN BLADES KEEP FINGERS AWAY FROM TOP AND BOTTOM OF FAN TRAY 24946 10.11 POTS and LINE MDF cable connector This section describes the procedures to install MDF cables (xDSL and POTS) between the 7360 ISAM FX-12 and the Main Distribution Frame (MDF).
  • Page 184: Prerequisites

    CHAMP100 Note — connectors. 10.11.2 Prerequisites The following tools are required: • MDF (LINE/POTS) cables as provided by Nokia • an antistatic wrist strap • tie-wraps • lacing cord for tying up and/or bundling cables...
  • Page 185: Mdf Cable Line Connection On 7360 Isam Fx-12

    ANSI Hardware Installation Manual 7360 ISAM FX-12 shelf cabling Procedure 37 MDF cabling procedure for LT cards with integrated splitter Proceed as follows to connect the MDF cables for LINE and POTS to the LT card with integrated splitter: Connect the MDF cable for the LINE to the right-hand CHAMP connector on the LT card with integrated splitter, as shown in Figure 89.
  • Page 186: Vectoring Cable Connector

    7360 ISAM FX-12 shelf cabling ANSI Hardware Installation Manual Figure 90 MDF cable POTS connection on 7360 ISAM FX-12 NTIO LT10 LT11 LT12 ENERGY HAZARD Alarm ROATING FAN BLADES KEEP FINGERS AWAY FROM TOP AND BOTTOM OF FAN TRAY 24948 Secure the connector with baillocks.
  • Page 187: Vl Cable

    ANSI Hardware Installation Manual 7360 ISAM FX-12 shelf cabling 10.12.1 VL cable The VL cables must not be routed where they may be exposed to high voltage such as lightning strikes. When VL cables need to be disconnected, only do Caution —...
  • Page 188 7360 ISAM FX-12 shelf cabling ANSI Hardware Installation Manual Procedure 38 To connect vectoring links Proceed as follows to connect vectoring links: Warning 1 — Units contain ESD-sensitive devices. These devices are susceptible to ESD damage in unconnected circuit conditions. Appropriate ESD procedures should always be followed when installing or removing units and cables.
  • Page 189: Vl Ports On The Ndps-B

    ANSI Hardware Installation Manual 7360 ISAM FX-12 shelf cabling Figure 91 VL ports on the NDPS-B FP LT -A VL 1 VL 2 VL 3 VL 4 VL 5 VL 6 VL 7 VL 8 PW R AC T AL M 24286 Remove the dust covers from the VL ports identified in step 3.
  • Page 190: Inserting The Cable Connector Into A Vl Port On The Ndps-B Card

    7360 ISAM FX-12 shelf cabling ANSI Hardware Installation Manual Figure 92 Inserting the cable connector into a VL port on the NDPS-B card VL port VL cable 23722 Route the VL cable through the appropriate cable exit area of the shelf; see Figure for the VL cable exit areas: •...
  • Page 191 ANSI Hardware Installation Manual 7360 ISAM FX-12 shelf cabling Route the other end of the VL cable to an NDLS-E card using the cable management tray and the cable tie down clips to secure the cable as needed. Connect the VL cable to the VL port on the NDLS-E card by removing the dust cover from the VL port, removing the cap from the cable connector, and inserting the cable connector into the VL port.
  • Page 192 7360 ISAM FX-12 shelf cabling ANSI Hardware Installation Manual 3HH-12893-AAAA-TCZZA Issue: 09 DRAFT...
  • Page 193: Installing Cards In The 7360 Isam Fx-12 Shelf

    ANSI Hardware Installation Manual Installing cards in the 7360 ISAM FX-12 shelf 11 Installing cards in the 7360 ISAM FX-12 shelf 11.1 Overview 11.2 Shelf areas and slot positions 11.3 Dummy front panels 11.4 Recommended tools 11.5 Guideline for card installation 11.6 Installation procedures 11.1 Overview This chapter provides the procedures to install field-replaceable units (FRUs) in a...
  • Page 194: Dummy Front Panels

    Installing cards in the 7360 ISAM FX-12 shelf ANSI Hardware Installation Manual Figure 94 LT and NT slot positions on 7360 ISAM FX-12 NGFC-I Fan unit 24885 The 7360 ISAM FX-12 can be equipped with a maximum of 12 LT cards, 2 NT cards, and 1 NTIO card.
  • Page 195: Ntio Dummy Front Panel

    ANSI Hardware Installation Manual Installing cards in the 7360 ISAM FX-12 shelf Figure 95 Dummy front panel for NT card 22197 11.3.2 NTIO dummy front panel A dummy front panel must be used when the NTIO card is not installed. Figure shows one example of a universal dummy front panel for NTIO card slots.
  • Page 196: Dummy Front Panel For Optical Lt Cards

    Installing cards in the 7360 ISAM FX-12 shelf ANSI Hardware Installation Manual Figure 96 Universal dummy front panel for NTIO card 22429 This dummy front panel can also be used for LT slots Note — where no pre-cabling is foreseen. 11.3.3 Dummy front panel for optical LT cards A dummy front panel must be used for all unused LT card slots.
  • Page 197: Recommended Tools

    ANSI Hardware Installation Manual Installing cards in the 7360 ISAM FX-12 shelf 11.4 Recommended tools The following tools are recommended: • screwdriver to secure cards • antistatic wrist strap for handling cards with ESD sensitive devices • ohmmeter to check connection of wrist strap to earth bounding point 11.5 Guideline for card installation This section provides a general guideline for the correct installation of a card in a shelf.
  • Page 198: Installation Procedures

    Installing cards in the 7360 ISAM FX-12 shelf ANSI Hardware Installation Manual 11.6 Installation procedures This section describes the following card installation procedures: • To install NT cards • To install NTIO cards • To install LT cards • To remove cards •...
  • Page 199: Rules For Handling Cards

    ANSI Hardware Installation Manual Installing cards in the 7360 ISAM FX-12 shelf 11.6.2 Rules for handling cards Observe the following: Units contain ESD sensitive devices. These Warning 1 — devices are susceptible to ESD damage in unconnected circuit conditions. Appropriate ESD procedures should always be followed when installing or removing cards.
  • Page 200: Esd Awareness Symbol

    Installing cards in the 7360 ISAM FX-12 shelf ANSI Hardware Installation Manual Figure 98 ESD awareness symbol 22390 Risk of damage to equipment with ESD sensitive Warning — devices. Most cards and powered equipment contain devices that are susceptible to ESD. ESD could damage these or other devices in unconnected circuit conditions.
  • Page 201: Cards With Optical Fiber Connectors

    ANSI Hardware Installation Manual Installing cards in the 7360 ISAM FX-12 shelf Figure 99 Location of earth bonding point A: 60A B: 60A External Alarms BITS 7360 ISAM FX-12 Remote Craft BAT A BAT B Alarms Min. Maj. Crit. NTIO LT10 LT11 LT12...
  • Page 202: Laser Classification Label

    Installing cards in the 7360 ISAM FX-12 shelf ANSI Hardware Installation Manual Figure 100 Laser classification label CLASS 1 LASER PRODUCT 18256 Procedure 40 To install NT cards Use this procedure to install network termination (NT) cards in a 7360 ISAM FX-12 shelf. A 7360 ISAM FX-12 has one or two NT cards: •...
  • Page 203: Nt Card Slots In 7360 Isam Fx-12

    ANSI Hardware Installation Manual Installing cards in the 7360 ISAM FX-12 shelf Figure 101 NT card slots in 7360 ISAM FX-12 NT A NT B A: 60A B: 60A External Alarms BITS 7360 ISAM FX-12 Remote Craft BAT A BAT B Alarms Min.
  • Page 204 Installing cards in the 7360 ISAM FX-12 shelf ANSI Hardware Installation Manual Slide the NT card in the NT-A slot of the shelf; see Figure 101. Caution — When sliding the NT card into the slot, ensure that the solder side of the NT card does not come into contact with the EMC shielding plate adjacent to the NT card slot.
  • Page 205: Ntio Slot

    ANSI Hardware Installation Manual Installing cards in the 7360 ISAM FX-12 shelf Figure 102 NTIO slot NTIO A: 60A B: 60A External Alarms BITS 7360 ISAM FX-12 Remote Craft BAT A BAT B Alarms Min. Maj. Crit. NTIO LT10 LT11 LT12 ENERGY HAZARD Alarm...
  • Page 206: Lt Cards Slots In 7360 Isam Fx-12

    Installing cards in the 7360 ISAM FX-12 shelf ANSI Hardware Installation Manual Figure 103 LT cards slots in 7360 ISAM FX-12 A: 60A B: 60A External Alarms BITS 7360 ISAM FX-12 Remote Craft BAT A BAT B Alarms Min. Maj. Crit. NTIO LT10 LT11...
  • Page 207: Ejector Handles For Lt Cards

    ANSI Hardware Installation Manual Installing cards in the 7360 ISAM FX-12 shelf Press the insertion/extraction tabs on the front panel to lock the card in place. Attach fixation screws located at the top and the bottom of the front panel of the card; see Figure 103. Maximum torque: 2.66 lbf-in.
  • Page 208: Ejector Handles For Nt Cards

    Installing cards in the 7360 ISAM FX-12 shelf ANSI Hardware Installation Manual Figure 105 Ejector handles for NT cards 33.77 in. 85.8 cm 22375 Remove the card from its slot and place it in an ESD protective bag. STOP. This procedure is complete. Procedure 44 To change the NGFC-I card Use the following procedure to change the NGFC-I card on the 7360 ISAM FX-12 shelf.
  • Page 209: Remove Safety Cover And Power Cable Shoes On 7360 Isam Fx-12

    ANSI Hardware Installation Manual Installing cards in the 7360 ISAM FX-12 shelf Figure 106 Remove safety cover and power cable shoes on 7360 ISAM FX- A: 60A B: 60A External Alarms BITS 7360 ISAM FX-12 Remote Craft BAT A BAT B Alarms Min.
  • Page 210: Remove Fixation Screws For Ngfc-I Card

    Installing cards in the 7360 ISAM FX-12 shelf ANSI Hardware Installation Manual Figure 107 Remove fixation screws for NGFC-I card G FC LT 1 LT 2 LT 3 LT 4 LT 5 LT 6 N TA N TI N TB LT 7 LT 8 LT 9...
  • Page 211: Fiber Optic Cable Management In The 7360 Isam Fx-12 Shelf

    ANSI Hardware Installation Manual Fiber optic cable management in the 7360 ISAM FX-12 shelf 12 Fiber optic cable management in the 7360 ISAM FX-12 shelf 12.1 Overview 12.2 Managing fiber optic cables 12.3 Routing fiber optic cables 12.1 Overview This chapter describes the fiber optic cable management and installation procedures for the 7360 ISAM FX-12 shelf.
  • Page 212: Fiber Management Bracket For 7360 Isam Fx-12

    Fiber optic cable management in the 7360 ISAM ANSI Hardware Installation Manual FX-12 shelf Figure 108 Fiber management bracket for 7360 ISAM FX-12 24869 Figure 109 Fiber management guide for 7360 ISAM FX-12 24905 Figure shows a view of the upper baffle assembly for the 7360 ISAM FX-12 heat and fiber baffle for vertical mount configurations.
  • Page 213: Managing Fiber Optic Cables

    ANSI Hardware Installation Manual Fiber optic cable management in the 7360 ISAM FX-12 shelf Figure 110 Upper baffle assembly for 7360 ISAM FX-12 vertical rack mounting configurations 24867 12.2 Managing fiber optic cables This section describes how to fiber optic cables for NT cards and LT cards in the 7360 ISAM FX-12 shelf.
  • Page 214: General Safety And Operations Information

    Fiber optic cable management in the 7360 ISAM ANSI Hardware Installation Manual FX-12 shelf 12.2.1 General safety and operations information This section provides general safety and operations information. See the 7360 ISAM FX Safety Manual for more information. Non-terminated optical connectors may emit Danger —...
  • Page 215: Fiber Cables

    For an overview of the supported SFP modules, see Note 1 — the 7360 ISAM FX Product Information Guide. Nokia recommends protecting any SFP cage that is Note 2 — not equipped with an SFP module, with a dust cover in order to prevent dust intrusion.
  • Page 216: Mounting Of 7360 Isam Fx-12 Fiber Management Guide

    Fiber optic cable management in the 7360 ISAM ANSI Hardware Installation Manual FX-12 shelf Figure 111 Mounting of 7360 ISAM FX-12 fiber management guide G FC LT 1 LT 2 LT 3 LT 4 LT 5 LT 6 NT A LT 7 LT 8 LT 9...
  • Page 217: Alignment Of 7360 Isam Fx-12 Fiber Management Guide

    ANSI Hardware Installation Manual Fiber optic cable management in the 7360 ISAM FX-12 shelf Procedure 45 To mount the fiber management guide Use the following procedure to mount the fiber management guide onto the 7360 ISAM FX-12. Align the notches on the front of the fiber management guide with the finger guides located along the fiber management bracket at the top of the shelf, see Figure 112.
  • Page 218 Fiber optic cable management in the 7360 ISAM ANSI Hardware Installation Manual FX-12 shelf Attach the fiber management guide elements as shown in Figure using the provided screws. STOP. This procedure is complete. Procedure 46 To route fiber cables to NT and LT cards Use the following procedure to route and connect 7360 ISAM FX-12 fiber cables to NT and LT cards.
  • Page 219 ANSI Hardware Installation Manual Fiber optic cable management in the 7360 ISAM FX-12 shelf Insert the fiber cables into the appropriate optical modules located on the front panels of the NT and LT cards. If optical modules must first be installed, see Procedure 47. Route and connect the other end of the fiber cables as per site practices.
  • Page 220 Fiber optic cable management in the 7360 ISAM ANSI Hardware Installation Manual FX-12 shelf 3HH-12893-AAAA-TCZZA Issue: 09 DRAFT...
  • Page 221 ANSI Hardware Installation Manual 7360 ISAM FX-8 shelf installation 7360 ISAM FX-8 shelf installation 13 Installing a 7360 ISAM FX-8 shelf 14 7360 ISAM FX-8 shelf cabling 15 Installing cards in the 7360 ISAM FX-8 shelf 16 Fiber optic cable management in the 7360 ISAM FX-8 shelf Issue: 09 3HH-12893-AAAA-TCZZA DRAFT...
  • Page 222 7360 ISAM FX-8 shelf installation ANSI Hardware Installation Manual 3HH-12893-AAAA-TCZZA Issue: 09 DRAFT...
  • Page 223: Installing A 7360 Isam Fx-8 Shelf

    ANSI Hardware Installation Manual Installing a 7360 ISAM FX-8 shelf 13 Installing a 7360 ISAM FX-8 shelf 13.1 Overview 13.2 Mounting the 7360 ISAM FX-8 shelf in a 19 in. rack 13.3 Mounting the 7360 ISAM FX-8 shelf in a 23 in. rack 13.4 Installing or replacing a fan unit in a 7360 ISAM FX-8 shelf 13.1 Overview This chapter provides the steps to install a 7360 ISAM FX-8 shelf in a standard CO...
  • Page 224: Mounting The 7360 Isam Fx-8 Shelf In A 19 In. Rack

    Installing a 7360 ISAM FX-8 shelf ANSI Hardware Installation Manual 13.2 Mounting the 7360 ISAM FX-8 shelf in a 19 in. rack The 7360 ISAM FX-8 shelf can be mounted: • horizontally in a EIA standard 19 in. rack (17.75 in. opening) •...
  • Page 225: 7360 Isam Fx-8 Rack Mounting Configurations

    ANSI Hardware Installation Manual Installing a 7360 ISAM FX-8 shelf 13.2.1 7360 ISAM FX-8 rack mounting configurations Table describes the horizontal rack configurations for a 7360 ISAM FX-8 shelf in an EIA standard 19 in. rack. Table 8 Horizontal mounting configurations for 7360 ISAM FX-8 in a 19 in.
  • Page 226: Horizontal Mounting Configuration For 7360 Isam Fx-8 In A 19 In

    Installing a 7360 ISAM FX-8 shelf ANSI Hardware Installation Manual Figure 115 Horizontal mounting configuration for 7360 ISAM FX-8 in a 19 in. EIA standard rack 18.312 17.750 35 RU 8 RU 7360 ISAM FX-8 B-40A Ener g y Hazzar d Energy Hazard Alarms Critical...
  • Page 227: Vertical Mounting Configuration For 7360 Isam Fx-8 In A 19 In. Eia Standard Rack

    ANSI Hardware Installation Manual Installing a 7360 ISAM FX-8 shelf Rack unit EIA standard 19 in. rack (17.75 in. I.D.) Seismic 19 in. rack (17.5 in. I.D.) SR 2 NFXS-E NFXS-E Vertical shelf mount kit Vertical shelf mount kit Fan 2 BFAN-E BFAN-E (with fan filter)
  • Page 228: Parts List

    Installing a 7360 ISAM FX-8 shelf ANSI Hardware Installation Manual 13.2.2 Parts list The following parts are required: • 7360 ISAM FX-8 shelf (NFXS-E) • grounded 19 in. EIA standard rack or 19 in. seismic standard rack that can accommodate the 7360 ISAM FX-8 shelf •...
  • Page 229 Use this procedure to mount a 7360 ISAM FX-8 shelf horizontally in a 19 in. EIA standard rack. Unpack and visually inspect the shelf for physical damage. If anything is missing or damaged, notify the transportation carrier and Nokia immediately. Photograph all the damaged equipment. Keep all the inspection and packing documents as a reference.
  • Page 230: Figure 117 Horizontal Mounting Locations In A 19 In. Rack For 7360 Isam Fx-8

    Installing a 7360 ISAM FX-8 shelf ANSI Hardware Installation Manual Figure 117 Horizontal mounting locations in a 19 in. rack for 7360 ISAM FX-8 B-40A 7360 ISAM FX-8 Energy Hazard Alarms Critical Major A-40A Minor NTA GND NTB External Alarms BITS TOD/IHZ Remote Craft...
  • Page 231 (air flows in the front, and out the rear of the shelf). Unpack and visually inspect the vertical shelf mount kit for physical damage. If anything is missing or damaged, notify the transportation carrier and Nokia immediately. Photograph all the damaged equipment. Keep all the inspection and packing documents as a reference.
  • Page 232: Figure 118 Vertical Mounting Locations In A 19 In. Rack For The 7360 Isam Fx-8

    Installing a 7360 ISAM FX-8 shelf ANSI Hardware Installation Manual Figure 118 Vertical mounting locations in a 19 in. rack for the 7360 ISAM FX-8 23344 3HH-12893-AAAA-TCZZA Issue: 09 DRAFT...
  • Page 233: Figure 119 Mounting The 7360 Isam Fx-8 Pre-Assembled Shelf Mounting Bracket And Air Intake Baffle/Drip Tray In A 19 In. Rack

    ANSI Hardware Installation Manual Installing a 7360 ISAM FX-8 shelf Install the pre-assembled shelf horizontal mounting bracket and air intake baffle/drip tray onto the bottom of the 19 in. rack as shown in Figure 119. Caution — The pre-assembled shelf mounting bracket and air intake baffle/drip tray is required in the bottom position of each installed 7360 ISAM FX-8 shelf in a rack.
  • Page 234: Figure 120 Location Of 7360 Isam Fx-8 Top Mounting Bracket

    Installing a 7360 ISAM FX-8 shelf ANSI Hardware Installation Manual Figure 120 Location of 7360 ISAM FX-8 top mounting bracket Top mounting bracket Bottom mounting bracket 0 IS N TA 7 3 6 23562 Remove the bottom mounting bracket, screws, and washers and retain them to re-install later.
  • Page 235: Figure 121 Mounting The 7360 Isam Fx-8 Pre-Assembled Skirts And Bracket

    ANSI Hardware Installation Manual Installing a 7360 ISAM FX-8 shelf Figure 121 Mounting the 7360 ISAM FX-8 pre-assembled skirts and bracket 23353 Orient the intumescent panel horizontally over the top of the skirt assembly aligning the holes, and attach it to the skirt assembly using the M3 × 14 mm screws as shown in Figure 122.
  • Page 236: Figure 122 Mounting The 7360 Isam Fx-8 Intumescent Panel Onto The Skirt Assembly

    Installing a 7360 ISAM FX-8 shelf ANSI Hardware Installation Manual Figure 122 Mounting the 7360 ISAM FX-8 intumescent panel onto the skirt assembly 23354 Orient the top baffle horizontally over the top of the intumescent panel aligning the holes, and attach it to the intumescent panel using the M3 ×...
  • Page 237: Figure 123 Mounting The 7360 Isam Fx-8 Top Baffle

    ANSI Hardware Installation Manual Installing a 7360 ISAM FX-8 shelf Figure 123 Mounting the 7360 ISAM FX-8 top baffle Baffle 23355 Note — Proceed to step to complete the 23 in. rack installation. Continue on to step for the 19 in. rack installation. Attach the bottom mounting bracket that was removed in an earlier step to the shelf horizontal mounting bracket and the air intake baffle/drip tray assembly using the 12-24 ×...
  • Page 238: Figure 124 Attaching The 7360 Isam Fx-8 Bottom Mounting Bracket In A 19 In.rack

    Installing a 7360 ISAM FX-8 shelf ANSI Hardware Installation Manual Figure 124 Attaching the 7360 ISAM FX-8 bottom mounting bracket in a 19 in.rack 23561 Attach the shelf assembly above the air intake/drip tray assembly and onto the bottom mounting bracket using the 12-24 × 1/2 in. (12.7 mm) screws and the screws and washers that were removed earlier, as shown in Figure 125.
  • Page 239: Figure 125 Mounting The 7360 Isam Fx-8 Shelf Assembly Vertically In A 19 In

    ANSI Hardware Installation Manual Installing a 7360 ISAM FX-8 shelf Figure 125 Mounting the 7360 ISAM FX-8 shelf assembly vertically in a 19 in. rack 23356 Note — See Chapter 14 “7360 ISAM FX-8 shelf cabling” 7360 ISAM FX-8 shelf cabling information. STOP.
  • Page 240: Mounting The 7360 Isam Fx-8 Shelf In A 23 In. Rack

    Installing a 7360 ISAM FX-8 shelf ANSI Hardware Installation Manual 13.3 Mounting the 7360 ISAM FX-8 shelf in a 23 in. rack The 7360 ISAM FX-8 shelf can be mounted: • horizontally in a 23 in. rack with 21.5 in. opening •...
  • Page 241: Figure 126 Horizontal Mounting Configuration In A 23 In. Rack For

    ANSI Hardware Installation Manual Installing a 7360 ISAM FX-8 shelf Figure 126 Horizontal mounting configuration in a 23 in. rack for 7360 ISAM FX-8 22.313 21.500 35 RU 8 RU B-40A 7360 ISAM FX-8 Ener g y Hazzar d Energy Hazard Alarms Critical Major...
  • Page 242: Table 11 Vertical Mounting Configuration For 7360 Isam Fx-8 In A 23 In. Rack

    Installing a 7360 ISAM FX-8 shelf ANSI Hardware Installation Manual Table 11 Vertical mounting configuration for 7360 ISAM FX-8 in a 23 in. rack Rack unit 23 in. rack vertical mount (21.5 in. opening) SR 1 NFXS-E Vertical shelf mount kit Fan 1 BFAN-E (with fan filter)
  • Page 243: Parts List

    ANSI Hardware Installation Manual Installing a 7360 ISAM FX-8 shelf Figure 127 Vertical mounting configuration for 7360 ISAM FX-8 in a 23 in. rack 22.313 21.500 23346 13.3.2 Parts list The following parts are required: • 7360 ISAM FX-8 shelf (NFXS-E) •...
  • Page 244 Use this procedure to mount a 7360 ISAM FX-8 shelf horizontally in a 23 in. rack. Unpack and inspect the shelf visually for physical damage. If anything is missing or damaged, notify the transportation carrier and Nokia immediately. Photograph all the damaged equipment. Keep all the inspection and packing documents as a reference.
  • Page 245: Figure 128 Horizontal Mounting Locations For 7360 Isam Fx-8 In A 23 In. Rack

    ANSI Hardware Installation Manual Installing a 7360 ISAM FX-8 shelf Figure 128 Horizontal mounting locations for 7360 ISAM FX-8 in a 23 in. rack B-40A 7360 ISAM FX-8 Energy Hazard Alarms Critical Major A-40A Minor NTA GND NTB External Alarms BITS TOD/IHZ Remote Craft...
  • Page 246: Figure 129 Horizontal Mounting Installation For 7360 Isam Fx-8 In A 23 In. Rack

    Installing a 7360 ISAM FX-8 shelf ANSI Hardware Installation Manual Mount the 7360 ISAM FX-8 shelf with 12-24 × 1/2 in. (12.7 mm) screws to the left mounting plate on the rack, then to the right mounting plate on the rack securely; see Figure 129. Figure 129 Horizontal mounting installation for 7360 ISAM FX-8 in a 23 in.
  • Page 247 Unpack and inspect the shelf and vertical shelf mount kit visually for physical damage. If anything is missing or damaged, notify the transportation carrier and Nokia immediately. Photograph all the damaged equipment. Keep all the inspection and packing documents as a reference.
  • Page 248: Figure 130 Veritcal Mounting Locations For 7360 Isam Fx-8 In A 23 In. Rack

    Installing a 7360 ISAM FX-8 shelf ANSI Hardware Installation Manual Figure 130 Veritcal mounting locations for 7360 ISAM FX-8 in a 23 in. rack 23347 3HH-12893-AAAA-TCZZA Issue: 09 DRAFT...
  • Page 249: Figure 131 Mounting The 7360 Isam Fx-8 Rack Adapter Brackets To A 23 In. Rack

    ANSI Hardware Installation Manual Installing a 7360 ISAM FX-8 shelf Attach the rack adapter brackets to the shelf using 12-24 × 1/2 in. (12.7 mm) screws as shown in Figure 131. Figure 131 Mounting the 7360 ISAM FX-8 rack adapter brackets to a 23 in. rack 590.9 279.8 102.0...
  • Page 250: Figure 132 Mounting The 7360 Isam Fx-8 Pre-Assembled Shelf Mounting Bracket And Air Intake Baffle/Drip Tray In A 23 In. Rack

    Installing a 7360 ISAM FX-8 shelf ANSI Hardware Installation Manual Figure 132 Mounting the 7360 ISAM FX-8 pre-assembled shelf mounting bracket and air intake baffle/drip tray in a 23 in. rack 85.3 23361 Assemble the shelf using the vertical mounting kit pre-assembled parts as shown in the 19 in.
  • Page 251: Figure 133 Attaching The 7360 Isam Fx-8 Bottom Mounting Bracket In A 23 In. Rack

    ANSI Hardware Installation Manual Installing a 7360 ISAM FX-8 shelf Figure 133 Attaching the 7360 ISAM FX-8 bottom mounting bracket in a 23 in. rack 23577 Attach the shelf assembly above the air intake/drip tray assembly and onto the bottom mounting bracket using the 12-24 ×...
  • Page 252: Installing Or Replacing A Fan Unit In A 7360 Isam Fx-8 Shelf

    Installing a 7360 ISAM FX-8 shelf ANSI Hardware Installation Manual Figure 134 Mounting the 7360 ISAM FX-8 shelf assembly vertically in a 23 in. rack 23362 Note — See Chapter 14 “7360 ISAM FX-8 shelf cabling” 7360 ISAM FX-8 shelf cabling information. STOP.
  • Page 253 ANSI Hardware Installation Manual Installing a 7360 ISAM FX-8 shelf One version of the fan unit is available: • intelligent fan unit (BFAN-E) The fan unit can be shipped factory installed in the rack, but can also be ordered as a separate unit for replacement on site.
  • Page 254 Use the following procedure to install or replace a fan unit. Unpack and inspect the fan unit visually for physical damage. If anything is missing or damaged, notify the transportation carrier and Nokia immediately. Photograph all the damaged equipment. Keep all the inspection and packing documents as a reference.
  • Page 255: Figure 135 Fan Installation For 7360 Isam Fx-8

    ANSI Hardware Installation Manual Installing a 7360 ISAM FX-8 shelf In case of replacement, remove the installed fan unit: Loosen the captive screw of the fan cover and remove the cover; see Figure 135. Figure 135 Fan installation for 7360 ISAM FX-8 22389 Pull the fan unit out of the fan area by the handles.
  • Page 256 Guide for information on orderable part numbers. Unpack and inspect the fan filter visually for physical damage. If anything is missing or damaged, notify the transportation carrier and Nokia immediately. Photograph all the damaged equipment. Keep all the inspection and packing documents as a reference.
  • Page 257 ANSI Hardware Installation Manual Installing a 7360 ISAM FX-8 shelf Carefully remove the fan filter and place it in the appropriate removal container. Caution — Be careful when removing the fan filter to ensure that dust will not get into the card cage area and onto the card components, to prevent possible damage to the other equipment.
  • Page 258 Installing a 7360 ISAM FX-8 shelf ANSI Hardware Installation Manual 3HH-12893-AAAA-TCZZA Issue: 09 DRAFT...
  • Page 259: 7360 Isam Fx-8 Shelf Cabling

    ANSI Hardware Installation Manual 7360 ISAM FX-8 shelf cabling 14 7360 ISAM FX-8 shelf cabling 14.1 Overview 14.2 Safety precautions 14.3 Shelf grounding connection 14.4 Rack grounding connection 14.5 Power cabling 14.6 CO alarm connector 14.7 BITS interface connections 14.8 ToD/PPS connector 14.9 Remote craft port connector 14.10 Combo cable connector 14.11 POTS and LINE MDF cable connector...
  • Page 260: Safety Precautions

    7360 ISAM FX-8 shelf cabling ANSI Hardware Installation Manual 14.2 Safety precautions The following safety precautions apply: Before working on the power supply unit, verify Danger 1 — whether it is live. If the power supply is live, which can deliver −48 Vdc, you must use an insulated tool kit.
  • Page 261: Grounding Cable Type

    ANSI Hardware Installation Manual 7360 ISAM FX-8 shelf cabling Observe the following safety notes. Rack or frame must be suitably connected to the Danger 1 — office grounding network in accordance with Article 250 of the national electrical code (NEC) to ensure UL and CSA compliance.
  • Page 262: Figure 136 Grounding Cable Connection On 7360 Isam Fx-8

    7360 ISAM FX-8 shelf cabling ANSI Hardware Installation Manual Figure 136 Grounding cable connection on 7360 ISAM FX-8 Ground cable connector 22381 Procedure 54 To connect the grounding cable Use the following procedure to connect the grounding cable. Route the grounding cable to the right side of the shelf and up to the middle of the shelf. Connect the dual-lug to the grounding cable connection point as shown in Figure 136.
  • Page 263: Rack Grounding Connection

    ANSI Hardware Installation Manual 7360 ISAM FX-8 shelf cabling 14.4 Rack grounding connection The 7360 ISAM FX-8 requires a 6 AWG rack frame grounding cable for the rack grounding connection. Rack or frame must be suitably connected to the Danger 1 — office grounding network in accordance with Article 250 of the National Electrical Code (NEC) to ensure UL and CSA compliance.
  • Page 264: Power Cabling

    7360 ISAM FX-8 shelf cabling ANSI Hardware Installation Manual Figure 137 External frame ground point rear view No. 6 AWG lug and 2 12-24 screws (provided with the rack) Frame ground point Frame ground point Frame ground point (may be located on the opposite side on some racks) Rack frame ground locations rear view...
  • Page 265: General

    Power cables are routed from the PDF to the rack using cable channels overhead and are connected at the input terminal block inside the 7360 ISAM FX-8 shelf. To minimize interference, Nokia recommends that you route power cables using separate channels for signal and power cables.
  • Page 266: Power Cables

    The 7360 ISAM FX-8 requires the use of an 8 AWG power cable. The color of the power cables must be according to Note 1 — local installation practices. Nokia recommends the following crimp lugs and Note 2 — crimp lug tool: •...
  • Page 267: Figure 138 Power Cable Routing For 7360 Isam Fx-8

    ANSI Hardware Installation Manual 7360 ISAM FX-8 shelf cabling Figure 138 Power cable routing for 7360 ISAM FX-8 22384 Procedure 56 To connect power cables Use the following procedure to connect the power cables to the 7360 ISAM FX-8 shelf. Danger —...
  • Page 268: Figure 139 Mounting Of Power Cable Shoes And Safety Cover On 7360 Isam Fx- 8

    7360 ISAM FX-8 shelf cabling ANSI Hardware Installation Manual Figure 139 Mounting of power cable shoes and safety cover on 7360 ISAM FX-8 22383 Remove the nuts from the power terminals; see Figure 139. Danger — If the following sequence is not followed exactly, there can be a possible fire hazard.
  • Page 269: Co Alarm Connector

    ANSI Hardware Installation Manual 7360 ISAM FX-8 shelf cabling Verify that the fans spin. STOP. This procedure is complete. Procedure 57 To disconnect the power cables Use the following procedure when the power cables need to be disconnected on 7360 ISAM FX-8. Warning —...
  • Page 270: Bits Interface Connections

    The 7360 ISAM FX-8 requires a 50-pin micro DSUB connector with an angled head for the CO external alarm connection. A cable assembly is available from Nokia (sold separately), that can be used with the 7360 ISAM FX-8, as shown in Figure 141. See Figure for the location of the CO external alarm connector.
  • Page 271: Tod/Pps Connector

    14.9 Remote craft port connector The 7360 ISAM FX-8 requires a DB-9 female connector for the remote craft port connection. Nokia supports the use of a DB-9 female connector Note — cable for the remote craft port connection to avoid potential damage due to exposed pins on the typically used DB-9 male connector.
  • Page 272: Cable Type

    7360 ISAM FX-8 shelf cabling ANSI Hardware Installation Manual 14.10.1 Cable type The required cable is an MDF cable with two CHAMP100 connectors; see Figure 143. Figure 143 Combo cable Front view Front view Connector B Connector A No3454 See Appendix for the pinning of the CHAMP100 Note 1 —...
  • Page 273: Pots And Line Mdf Cable Connector

    ANSI Hardware Installation Manual 7360 ISAM FX-8 shelf cabling Figure 144 Combo cable connection on 7360 ISAM FX-8 xDSL POTS LINE 7360 ISAM FX-8 B-40A Energy Hazard Alarms Critical Major A-40A Minor NTA GND NTB External Alarms BITS TOD/IHZ Remote Craft BAT A BAT B 23893...
  • Page 274: Prerequisites

    See the 7360 ISAM FX Product Information Guide for Note 2 — ordering information. 14.11.2 Prerequisites The following tools are required: • MDF (LINE/POTS) cables as provided by Nokia • an antistatic wrist strap • tie-wraps • lacing cord for tying up and/or bundling cables...
  • Page 275: Figure 146 Mdf Cable Line Connection On 7360 Isam Fx-8

    ANSI Hardware Installation Manual 7360 ISAM FX-8 shelf cabling Procedure 58 MDF cabling procedure for LT cards with integrated splitter Proceed as follows to connect the MDF cables for LINE and POTS to the LT card with integrated splitter: Connect the MDF cable for the LINE to the right-hand CHAMP connector on the LT card with integrated splitter, as shown in Figure 146.
  • Page 276: Vectoring Cable Connector

    7360 ISAM FX-8 shelf cabling ANSI Hardware Installation Manual Figure 147 MDF cable POTS connection on 7360 ISAM FX-8 xDSL POTS LINE 7360 ISAM FX-8 B-40A Energy Hazard Alarms Critical Major A-40A Minor NTA GND NTB External Alarms BITS TOD/IHZ Remote Craft BAT A BAT B...
  • Page 277: Vl Cable

    ANSI Hardware Installation Manual 7360 ISAM FX-8 shelf cabling 14.12.1 VL cable The VL cables must not be routed where they may be exposed to high voltage such as lightning strikes. When VL cables need to be disconnected, only do Caution —...
  • Page 278 7360 ISAM FX-8 shelf cabling ANSI Hardware Installation Manual Procedure 59 To connect vectoring links Proceed as follows to connect vectoring links: Warning 1 — Units contain ESD-sensitive devices. These devices are susceptible to ESD damage in unconnected circuit conditions. Appropriate ESD procedures should always be followed when installing or removing units and cables.
  • Page 279: Figure 148 Vl Ports On The Ndps-B

    ANSI Hardware Installation Manual 7360 ISAM FX-8 shelf cabling Figure 148 VL ports on the NDPS-B FP LT -A VL 1 VL 2 VL 3 VL 4 VL 5 VL 6 VL 7 VL 8 PW R AC T AL M 24286 Remove the dust covers from the VL ports identified in step 3.
  • Page 280: Figure 149 Inserting The Cable Connector Into A Vl Port On The Ndps-B Card

    7360 ISAM FX-8 shelf cabling ANSI Hardware Installation Manual Figure 149 Inserting the cable connector into a VL port on the NDPS-B card VL port VL cable 23722 Route the VL cable through the appropriate cable exit area of the shelf; see Figure the VL cable exit areas: •...
  • Page 281: Figure 150 Vl Cable Exit Areas

    ANSI Hardware Installation Manual 7360 ISAM FX-8 shelf cabling Figure 150 VL cable exit areas NTIO CRITICAL BAT A Energy Hazard MAJOR BAT B 7360 ISAM FX-16 -48V 70A MINOR CAUTION ROTATING FAN BLADES Energy Hazard BITS INTERFACE TIME OF DAY NT-A NT-B 1 Hz-PULSE...
  • Page 282 7360 ISAM FX-8 shelf cabling ANSI Hardware Installation Manual 3HH-12893-AAAA-TCZZA Issue: 09 DRAFT...
  • Page 283: Installing Cards In The 7360 Isam Fx-8 Shelf

    ANSI Hardware Installation Manual Installing cards in the 7360 ISAM FX-8 shelf 15 Installing cards in the 7360 ISAM FX-8 shelf 15.1 Overview 15.2 Shelf areas and slot positions 15.3 Dummy front panels 15.4 Recommended tools 15.5 Guideline for card installation 15.6 Installation procedures 15.1 Overview This chapter provides the procedures to install field-replaceable units (FRUs) in a...
  • Page 284: Dummy Front Panels

    Installing cards in the 7360 ISAM FX-8 shelf ANSI Hardware Installation Manual Figure 151 LT and NT slot positions on 7360 ISAM FX-8 LT 8 LT 7 LT 6 LT 5 LT 4 LT 3 LT 2 LT 1 NT B NT I/O NT A NGFC-H...
  • Page 285: Ntio Dummy Front Panel

    ANSI Hardware Installation Manual Installing cards in the 7360 ISAM FX-8 shelf Figure 152 Dummy front panel for NT card 22197 15.3.2 NTIO dummy front panel A dummy front panel must be used when the NTIO card is not installed. Figure shows one example of a universal dummy front panel for NTIO card slots.
  • Page 286: Dummy Front Panel For Optical Lt Cards

    Installing cards in the 7360 ISAM FX-8 shelf ANSI Hardware Installation Manual Figure 153 Universal dummy front panel for NTIO card 22429 This dummy front panel can also be used for LT slots Note — where no pre-cabling is foreseen. 15.3.3 Dummy front panel for optical LT cards A dummy front panel must be used for all unused LT card slots.
  • Page 287: Recommended Tools

    ANSI Hardware Installation Manual Installing cards in the 7360 ISAM FX-8 shelf 15.4 Recommended tools The following tools are recommended: • screwdriver to secure cards • antistatic wrist strap for handling cards with ESD sensitive devices • ohmmeter to check connection of wrist strap to earth bounding point 15.5 Guideline for card installation This section provides a general guideline for the correct installation of a card in a shelf.
  • Page 288: Installation Procedures

    Installing cards in the 7360 ISAM FX-8 shelf ANSI Hardware Installation Manual 15.6 Installation procedures This section describes the following card installation procedures: • To install NTIO cards • To install NT cards • To install LT cards • To remove cards •...
  • Page 289: Rules For Handling Cards

    ANSI Hardware Installation Manual Installing cards in the 7360 ISAM FX-8 shelf 15.6.2 Rules for handling cards Observe the following: Units contain ESD sensitive devices. These Warning 1 — devices are susceptible to ESD damage in unconnected circuit conditions. Appropriate ESD procedures should always be followed when installing or removing cards.
  • Page 290: Figure 155 Esd Awareness Symbol

    Installing cards in the 7360 ISAM FX-8 shelf ANSI Hardware Installation Manual Figure 155 ESD awareness symbol 22390 Risk of damage to equipment with ESD sensitive Warning — devices. Most cards and powered equipment contain devices that are susceptible to ESD. ESD could damage these or other devices in unconnected circuit conditions.
  • Page 291: Cards With Optical Fiber Connectors

    ANSI Hardware Installation Manual Installing cards in the 7360 ISAM FX-8 shelf Figure 156 Label for earth bonding point 22391 15.6.2.2 Cards with optical fiber connectors Observe the following. Risk of eye damage or skin burns by laser emission. Danger — When installing optical cards or handling optical fibers, never look inside connectors of cards or fibers when these are not connected.
  • Page 292: Figure 157 Laser Classification Label

    Installing cards in the 7360 ISAM FX-8 shelf ANSI Hardware Installation Manual Figure 157 Laser classification label CLASS 1 LASER PRODUCT 18256 Procedure 61 To install NTIO cards Each shelf containing one or two redundant NT boards can have an NT I/O applique. The NT I/O applique is a single board which is installed in the NT I/O slot between the two NT slots of the FX- 8 shelf.
  • Page 293 ANSI Hardware Installation Manual Installing cards in the 7360 ISAM FX-8 shelf Use the ejector handles to engage the board connectors in the backplane. Lock the board in place with the fixation screws located at the top and bottom of the faceplate of the board;...
  • Page 294: Figure 159 Nt Card Slots In 7360 Isam Fx-8

    Installing cards in the 7360 ISAM FX-8 shelf ANSI Hardware Installation Manual Figure 159 NT card slots in 7360 ISAM FX-8 NT B NT A 7360 ISAM FX-8 B-40A Energy Hazard Alarms Critical Major A-40A Minor NTA GND NTB External Alarms BITS TOD/IHZ Remote Craft...
  • Page 295 ANSI Hardware Installation Manual Installing cards in the 7360 ISAM FX-8 shelf Press the insertion/extraction tabs on the front panel to lock the card in place. Attach fixation screws located at the top and the bottom of the front panel of the card; see Figure 159. Maximum torque: 2.66 lbf-in.
  • Page 296: Figure 160 Lt Cards Slots In 7360 Isam Fx-8

    Installing cards in the 7360 ISAM FX-8 shelf ANSI Hardware Installation Manual Figure 160 LT cards slots in 7360 ISAM FX-8 7360 ISAM FX-8 B-40A Energy Hazard Alarms Critical Major A-40A Minor NTA GND NTB External Alarms BITS TOD/IHZ Remote Craft BAT A BAT B 22385...
  • Page 297: Figure 161 Ejector Handles For Lt Cards

    ANSI Hardware Installation Manual Installing cards in the 7360 ISAM FX-8 shelf The card first displays a heartbeat signal, that is, the green PWR LED is flashing. Then the card displays an enabling operation signal: • the green PWR LED is steady on •...
  • Page 298: Figure 162 Ejector Handles For Lt Cards

    Installing cards in the 7360 ISAM FX-8 shelf ANSI Hardware Installation Manual Figure 162 Ejector handles for LT cards Guiding plate Withdrawl 25830 Figure 163 Ejector handles for NT cards 33.77 in. 85.8 cm 22375 Remove the card from its slot and place it in an ESD protective bag. STOP.
  • Page 299: Figure 164 Remove Safety Cover And Power Cable Shoes On 7360 Isam Fx-8

    ANSI Hardware Installation Manual Installing cards in the 7360 ISAM FX-8 shelf Figure 164 Remove safety cover and power cable shoes on 7360 ISAM FX-8 Energy Hazard 22382 Remove the fixation screws located on the front panel of the card; see Figure 165. Issue: 09 3HH-12893-AAAA-TCZZA DRAFT...
  • Page 300: Figure 165 Remove Fixation Screws For Ngfc-H Card

    Installing cards in the 7360 ISAM FX-8 shelf ANSI Hardware Installation Manual Figure 165 Remove fixation screws for NGFC-H card 22386 Remove the NGFC-H card from the shelf and wear the antistatic wrist strap. Place the card in an ESD protective bag. Remove the new NGFC-H card from its ESD protective bag.
  • Page 301: Fiber Optic Cable Management In The 7360 Isam Fx-8 Shelf

    ANSI Hardware Installation Manual Fiber optic cable management in the 7360 ISAM FX-8 shelf 16 Fiber optic cable management in the 7360 ISAM FX-8 shelf 16.1 Overview 16.2 Managing fiber optic cables 16.3 Routing fiber optic cables 16.1 Overview This chapter describes the fiber optic cable management and installation procedures for the 7360 ISAM FX-8 shelf.
  • Page 302: Managing Fiber Optic Cables

    Fiber optic cable management in the ANSI Hardware Installation Manual 7360 ISAM FX-8 shelf Figure 166 Fiber management kit for 7360 ISAM FX-8 23565 Figure shows a view of the 7360 ISAM FX-8 heat and fiber baffle for vertical mount configurations. Figure 167 Baffle for 7360 ISAM FX-8 vertical rack mounting configurations 22387...
  • Page 303: General Safety And Operations Information

    ANSI Hardware Installation Manual Fiber optic cable management in the 7360 ISAM FX-8 shelf 16.2.1 General safety and operations information This section provides general safety and operations information. See the 7360 ISAM FX Safety Manual for more information. Non-terminated optical connectors may emit Danger —...
  • Page 304: Fiber Cables

    For an overview of the supported SFP modules, see Note 1 — the 7360 ISAM FX Product Information Guide. Nokia recommends protecting any SFP cage that is Note 2 — not equipped with an SFP module, with a dust cover in order to prevent dust intrusion.
  • Page 305: Figure 168 Mounting Of 7360 Isam Fx-8 Fiber Management Kit

    ANSI Hardware Installation Manual Fiber optic cable management in the 7360 ISAM FX-8 shelf Figure 168 Mounting of 7360 ISAM FX-8 fiber management kit NT A 0 IS 7 3 6 23566 Issue: 09 3HH-12893-AAAA-TCZZA DRAFT...
  • Page 306: Figure 169 Alignment Of 7360 Isam Fx-8 Fiber Management Guide

    Fiber optic cable management in the ANSI Hardware Installation Manual 7360 ISAM FX-8 shelf Procedure 66 To mount the fiber management guide Use the following procedure to mount the fiber management guide onto the 7360 ISAM FX-8. Align the notches on the front of the fiber management guide with the finger guides located on the top of the shelf, see Figure 169.
  • Page 307 ANSI Hardware Installation Manual Fiber optic cable management in the 7360 ISAM FX-8 shelf Attach the fiber management guides as shown in Figure using the provided screws. STOP. This procedure is complete. Procedure 67 To route fiber cables to NT and LT cards Use the following procedure to route and connect 7360 ISAM FX-8 fiber cables to NT and LT cards.
  • Page 308 Fiber optic cable management in the ANSI Hardware Installation Manual 7360 ISAM FX-8 shelf Insert the fiber cables into the appropriate optical modules located on the front panels of the NT and LT cards. If optical modules must first be installed, see Procedure 68. Route and connect the other end of the fiber cables as per site practices.
  • Page 309 ANSI Hardware Installation Manual 7360 ISAM FX-4 shelf installation 7360 ISAM FX-4 shelf installation 17 Installing a 7360 ISAM FX-4 shelf 18 7360 ISAM FX-4 shelf cabling 19 Installing cards in the 7360 ISAM FX-4 shelf 20 Fiber optic cable management in the 7360 ISAM FX-4 shelf Issue: 09 3HH-12893-AAAA-TCZZA DRAFT...
  • Page 310 7360 ISAM FX-4 shelf installation ANSI Hardware Installation Manual 3HH-12893-AAAA-TCZZA Issue: 09 DRAFT...
  • Page 311: Installing A 7360 Isam Fx-4 Shelf

    ANSI Hardware Installation Manual Installing a 7360 ISAM FX-4 shelf 17 Installing a 7360 ISAM FX-4 shelf 17.1 Overview 17.2 Mounting the 7360 ISAM FX-4 shelf in a 19 in. rack 17.3 Mounting the 7360 ISAM FX-4 shelf in a 23 in. rack 17.4 Installing or replacing a fan unit in a 7360 ISAM FX-4 shelf 17.1 Overview This chapter provides the steps to install a 7360 ISAM FX-4 shelf in a standard CO...
  • Page 312: Figure 171 19 In. Eia Standard Rack Upright Channel Direction In Horizontal

    Installing a 7360 ISAM FX-4 shelf ANSI Hardware Installation Manual 17.2 Mounting the 7360 ISAM FX-4 shelf in a 19 in. rack The 7360 ISAM FX-4 shelf can be mounted: • horizontally in a 19 in. EIA standard rack (17.75 in. opening) •...
  • Page 313: Isam Fx-4 Rack Mounting Configurations

    ANSI Hardware Installation Manual Installing a 7360 ISAM FX-4 shelf 17.2.1 7360 ISAM FX-4 rack mounting configurations Table describes the horizontal rack mounting configurations for a 7360 ISAM FX- 4 shelf in an EIA standard 19 in. rack. Table 12 Horizontal mounting configurations for 7360 ISAM FX-4 in a 19 in.
  • Page 314: Figure 172 Horizontal Mounting Configuration For 7360 Isam Fx-4 In A 19 In

    Installing a 7360 ISAM FX-4 shelf ANSI Hardware Installation Manual Figure 172 Horizontal mounting configuration for 7360 ISAM FX-4 in a 19 in. EIA standard rack 18.312 17.750 38 RU 5 RU External Alarms BITS TOD/IHZ Remote Craft BAT A BAT B FUSE Critical Alarms...
  • Page 315: Figure 173 Vertical Mounting Configuration For 7360 Isam Fx-4 In A 19 In. Eia Standard Rack

    ANSI Hardware Installation Manual Installing a 7360 ISAM FX-4 shelf Rack unit EIA standard 19 in. rack (17.75 in. Seismic 19 in. rack (17.5 in. opening) opening) SR 2 NFXS-F NFXS-F Vertical shelf mount kit Vertical shelf mount kit Fan 2 BFAN-X BFAN-X (with fan filter)
  • Page 316: Parts List

    Installing a 7360 ISAM FX-4 shelf ANSI Hardware Installation Manual 17.2.2 Parts list The following parts are required: • 7360 ISAM FX-4 shelf (NFXS-F) • grounded 19 in. EIA standard rack or 19 in. seismic standard rack that can accommodate the 7360 ISAM FX-4 shelf •...
  • Page 317 ANSI Hardware Installation Manual Installing a 7360 ISAM FX-4 shelf Procedure 69 To mount the 7360 ISAM FX-4 shelf horizontally in a 19 in. rack Use this procedure to mount a 7360 ISAM FX-4 shelf horizontally in a 19 in. EIA standard rack. Verify the 7360 ISAM FX-4 shelf mounting locations on the rack;...
  • Page 318: Figure 174 Horizontal Mounting Locations In A 19 In. Rack For 7360 Isam Fx-4

    Installing a 7360 ISAM FX-4 shelf ANSI Hardware Installation Manual Figure 174 Horizontal mounting locations in a 19 in. rack for 7360 ISAM FX-4 External Alarms BITS TOD/IHZ Remote Craft BAT A BAT B FUSE Critical Alarms N594 Major 7360 ISAM FX-4 NTA GND NTB Minor 22741...
  • Page 319 Unpack and inspect the shelf and vertical shelf mount kit visually for physical damage. If anything is missing or damaged, notify the transportation carrier and Nokia immediately. Photograph all the damaged equipment. Keep all the inspection and packing documents as a reference.
  • Page 320: Figure 175 Vertical Mounting Locations For The 7360 Isam Fx-4 In A 19 In. Rack

    Installing a 7360 ISAM FX-4 shelf ANSI Hardware Installation Manual Figure 175 Vertical mounting locations for the 7360 ISAM FX-4 in a 19 in. rack NTIO 7360 ISAM FX-4 NTIO 7360 ISAM FX-4 23570 3HH-12893-AAAA-TCZZA Issue: 09 DRAFT...
  • Page 321: Figure 176 Mounting The 7360 Isam Fx-4 Pre-Assembled Shelf Mounting Bracket And Air Intake Baffle/Drip Tray In A 19 In. Rack

    ANSI Hardware Installation Manual Installing a 7360 ISAM FX-4 shelf Install the pre-assembled shelf horizontal mounting bracket and air intake baffle/drip tray onto the bottom of the 19 in. rack as shown in Figure 176. Caution — The pre-assembled shelf mounting bracket and air intake baffle/drip tray is required in the bottom position of each installed 7360 ISAM FX-4 shelf in a rack.
  • Page 322: Figure 177 Location Of 7360 Isam Fx-4 Top And Bottom Mounting Brackets

    Installing a 7360 ISAM FX-4 shelf ANSI Hardware Installation Manual Figure 177 Location of 7360 ISAM FX-4 top and bottom mounting brackets Top mounting bracket Bottom mounting bracket 23579 Attach the pre-assembled skirts and mounting bracket to the shelf using the M3 × 8mm screws as shown in Figure 178.
  • Page 323: Figure 178 Mounting The 7360 Isam Fx-4 Pre-Assembled Skirts And Bracket

    ANSI Hardware Installation Manual Installing a 7360 ISAM FX-4 shelf Figure 178 Mounting the 7360 ISAM FX-4 pre-assembled skirts and bracket 23580 Orient the intumescent panel horizontally over the top of the skirt assembly aligning the holes, and attach it to the skirt assembly using the M3 × 14 mm screws as shown in Figure 179.
  • Page 324: Figure 179 Mounting The 7360 Isam Fx-4 Intumescent Panel Onto The Skirt Assembly

    Installing a 7360 ISAM FX-4 shelf ANSI Hardware Installation Manual Figure 179 Mounting the 7360 ISAM FX-4 intumescent panel onto the skirt assembly 23581 Orient the top baffle horizontally over the top of the intumescent panel aligning the holes, and attach it to the intumescent panel using the M3 ×...
  • Page 325: Figure 180 Mounting The 7360 Isam Fx-4 Top Baffle

    ANSI Hardware Installation Manual Installing a 7360 ISAM FX-4 shelf Figure 180 Mounting the 7360 ISAM FX-4 top baffle 23582 Proceed to step to complete the 23 in. rack installation. Continue on to step for the 19 in. rack installation. Attach the bottom mounting bracket that was removed in an earlier step to the shelf horizontal mounting bracket and the air intake baffle/drip tray assembly using the 12-24 ×...
  • Page 326: Figure 181 Attaching The 7360 Isam Fx-4 Bottom Mounting Bracket In A 19 In. Rack

    Installing a 7360 ISAM FX-4 shelf ANSI Hardware Installation Manual Figure 181 Attaching the 7360 ISAM FX-4 bottom mounting bracket in a 19 in. rack 23574 Attach the shelf assembly above the air intake/drip tray assembly and onto the bottom mounting bracket using the 12-24 ×...
  • Page 327: Figure 182 Mounting The 7360 Isam Fx-4 Shelf Assembly Vertically In A 19 In

    ANSI Hardware Installation Manual Installing a 7360 ISAM FX-4 shelf Figure 182 Mounting the 7360 ISAM FX-4 shelf assembly vertically in a 19 in. rack 23573 Note — See Chapter 18 “7360 ISAM FX-4 shelf cabling” 7360 ISAM FX-4 shelf cabling information. STOP.
  • Page 328: Rack

    Installing a 7360 ISAM FX-4 shelf ANSI Hardware Installation Manual 17.3 Mounting the 7360 ISAM FX-4 shelf in a 23 in. rack The 7360 ISAM FX-4 shelf can be mounted: • horizontally in a 23 in. rack with 21.5 in. I.D. •...
  • Page 329: Figure 183 23 In. Rack Horizontal Mounting Configuration For 7360 Isam Fx-4

    ANSI Hardware Installation Manual Installing a 7360 ISAM FX-4 shelf Figure 183 23 in. rack horizontal mounting configuration for 7360 ISAM FX-4 22.313 21.500 38 RU 5 RU External Alarms BITS TOD/IHZ Remote Craft BAT A BAT B FUSE Critical Alarms N594 Major 7360 ISAM FX-4...
  • Page 330: Figure 184 Vertical Mounting Configuration For 7360 Isam Fx-4 In A 23 In. Rack

    Installing a 7360 ISAM FX-4 shelf ANSI Hardware Installation Manual Rack unit 23 in. rack vertical mount (21.5 in. opening) Fan 1 BFAN-X (with fan filter) SR 2 NFXS-F Vertical shelf mount kit Fan 2 BFAN-X (with fan filter) (2 of 2) Figure 184 Vertical mounting configuration for 7360 ISAM FX-4 in a 23 in.
  • Page 331: Parts List

    ANSI Hardware Installation Manual Installing a 7360 ISAM FX-4 shelf 17.3.2 Parts list The following parts are required: • 7360 ISAM FX-4 shelf (NFXS-F) • grounded 23 in. rack that can accommodate the 7360 ISAM FX-4 shelf • horizontal shelf mount kit rack containing: •...
  • Page 332: Figure 185 Horizontal Mounting Locations For 7360 Isam Fx-4 In A 23 In. Rack

    Installing a 7360 ISAM FX-4 shelf ANSI Hardware Installation Manual Procedure 71 To mount the 7360 ISAM FX-4 shelf horizontally in a 23 in. rack Use this procedure to mount the 7360 ISAM FX-4 shelf horizontally in a 23 in. rack. Verify the 7360 ISAM FX-4 shelf mounting locations on the rack;...
  • Page 333: Figure 186 Horizontal Mounting Installation For 7360 Isam Fx-4 In A 23 In. Rack

    ANSI Hardware Installation Manual Installing a 7360 ISAM FX-4 shelf Attach the left and right shelf horizontal brackets to the 7360 ISAM FX-4 shelf using 12-24 × 1/2 in. (12.7 mm) screws. Orient the 7360 ISAM FX-4 shelf horizontally with the fan unit located on the right side and align the shelf unit with the left and right mounting bracket holes.
  • Page 334 (air flows in the front, and out the rear of the shelf). Unpack and inspect the shelf vertical shelf mount kit visually for physical damage. If anything is missing or damaged, notify the transportation carrier and Nokia immediately. Photograph all the damaged equipment. Keep all the inspection and packing documents as a reference.
  • Page 335: Figure 187 Vertical Mount Locations For The 7360 Isam Fx-4 In A 23 In. Rack

    ANSI Hardware Installation Manual Installing a 7360 ISAM FX-4 shelf Figure 187 Vertical mount locations for the 7360 ISAM FX-4 in a 23 in. rack NTIO 7360 ISAM FX-4 NTIO 7360 ISAM FX-4 23569 Issue: 09 3HH-12893-AAAA-TCZZA DRAFT...
  • Page 336: Figure 188 Mounting The 7360 Isam Fx-4 Rack Adapter Brackets To A 23 In. Rack

    Installing a 7360 ISAM FX-4 shelf ANSI Hardware Installation Manual Attach the rack adapter brackets to the shelf using 12-24 × 1/2 in. (12.7 mm) screws as shown in Figure 188. Figure 188 Mounting the 7360 ISAM FX-4 rack adapter brackets to a 23 in. rack 743.0 FEF 609.6 FEF 23598...
  • Page 337: Figure 189 Mounting The 7360 Isam Fx-4 Pre-Assembled Shelf Mounting Bracket And Air Intake Baffle/Drip Tray In A 23 I N. Rack

    ANSI Hardware Installation Manual Installing a 7360 ISAM FX-4 shelf Figure 189 Mounting the 7360 ISAM FX-4 pre-assembled shelf mounting bracket and air intake baffle/drip tray in a 23 i n. rack (138.19) (85.31) 23578 Assemble the shelf using the vertical mounting kit pre-assembled parts as shown in the 19 in.
  • Page 338: Figure 190 Attaching The 7360 Isam Fx-4 Bottom Mounting Bracket In A 23 In. Rack

    Installing a 7360 ISAM FX-4 shelf ANSI Hardware Installation Manual Figure 190 Attaching the 7360 ISAM FX-4 bottom mounting bracket in a 23 in. rack 23577 Attach the shelf assembly above the air intake/drip tray assembly and onto the bottom mounting bracket using the 12-24 ×...
  • Page 339: Figure 191 Mounting The 7360 Isam Fx-4 Shelf Assembly Vertically In A 23 In

    ANSI Hardware Installation Manual Installing a 7360 ISAM FX-4 shelf Figure 191 Mounting the 7360 ISAM FX-4 shelf assembly vertically in a 23 in. rack 23606 Note — See Chapter 18 “7360 ISAM FX-4 shelf cabling” 7360 ISAM FX-8 shelf cabling information. STOP.
  • Page 340 Verify the mounting position of the fan unit; see Figure 185. Remove the fan unit from its shipping packaging and inspect it for damage. If damaged, do not mount the fan unit but notify the transportation carrier and Nokia immediately. 3HH-12893-AAAA-TCZZA...
  • Page 341: Figure 192 Fan Installation For 7360 Isam Fx-4 Shelf

    ANSI Hardware Installation Manual Installing a 7360 ISAM FX-4 shelf In case of replacement, remove the installed fan unit: Loosen the captive screw of the fan cover and remove the cover; see Figure 192. Figure 192 Fan installation for 7360 ISAM FX-4 shelf 22402 If a fan filter was installed, remove the fan filter.
  • Page 342 Installing a 7360 ISAM FX-4 shelf ANSI Hardware Installation Manual Install the new fan unit: Gently insert the fan unit into the fan area until the backplane connectors are fully mated. If a fan filter was installed, re-insert the fan filter. Replace the fan unit cover and secure the cover and the fan unit by tightening the captive screw.
  • Page 343: 7360 Isam Fx-4 Shelf Cabling

    ANSI Hardware Installation Manual 7360 ISAM FX-4 shelf cabling 18 7360 ISAM FX-4 shelf cabling 18.1 Overview 18.2 Safety precautions 18.3 Shelf grounding connection 18.4 Rack grounding connection 18.5 Power cabling 18.6 CO external alarm connector 18.7 BITS interface connections 18.8 ToD/PPS connector 18.9 Remote craft port connector 18.10 Combo cable connector...
  • Page 344: Safety Precautions

    7360 ISAM FX-4 shelf cabling ANSI Hardware Installation Manual 18.2 Safety precautions The following safety precautions apply: Before working on the power supply unit, verify Danger 1 — whether it is live. If the power supply is live, which can deliver −48 Vdc, you must use an insulated tool kit.
  • Page 345: Grounding Cable Type

    ANSI Hardware Installation Manual 7360 ISAM FX-4 shelf cabling Observe the following safety notes: Rack or frame must be suitably connected to the Danger 1 — office grounding network in accordance with Article 250 of the national electrical code (NEC) to ensure UL and CSA compliance.
  • Page 346: Figure 193 Grounding Cable Connection On 7360 Isam Fx-4

    7360 ISAM FX-4 shelf cabling ANSI Hardware Installation Manual Figure 193 Grounding cable connection on 7360 ISAM FX-4 Ground cable connector 22393 Procedure 75 To connect the grounding cable Use the following procedures to connect the grounding cable. Route the grounding cable to the right side of the shelf and up to the middle of the shelf. Connect the dual-lug to the grounding cable connection point as shown in Figure 193.
  • Page 347: Rack Grounding Connection

    ANSI Hardware Installation Manual 7360 ISAM FX-4 shelf cabling 18.4 Rack grounding connection The 7360 ISAM FX-4 requires a 6 AWG rack frame grounding cable for the rack grounding connection. Rack or frame must be suitably connected to the Danger 1 — office grounding network in accordance with Article 250 of the National Electrical Code (NEC) to ensure UL and CSA compliance.
  • Page 348: Figure 194 External Frame Ground Point Rear View

    7360 ISAM FX-4 shelf cabling ANSI Hardware Installation Manual Figure 194 External frame ground point rear view No. 6 AWG lug and 2 12-24 screws (provided with the rack) Frame ground point Frame ground point Frame ground point (may be located on the opposite side on some racks) Rack frame ground locations rear view...
  • Page 349: General

    Power cables are routed from the PDF to the rack using cable channels overhead and are connected at the input terminal block inside the 7360 ISAM FX-4 shelf. In order to minimize interference, Nokia recommends that you route power cables using separate channels for signal and power cables.
  • Page 350: Figure 195 Power Distribution Unit On 7360 Isam Fx-4

    10 AWG power lug. The color of the power cables must be according to Note 1 — local installation practices. Nokia recommends the following crimp lugs and Note 2 — crimp lug tool: • input power lug: Panduit crimp ring lugs PV10-10R to be used with 10 AWG cable •...
  • Page 351: Figure 196 Power Cable Routing For 7360 Isam Fx-4

    ANSI Hardware Installation Manual 7360 ISAM FX-4 shelf cabling 18.5.3.2 Power cable routing and connection The power cables are routed through the left side of the rack and can then be routed to the power distribution terminal block located on the bottom of the shelf; see Figure 196.
  • Page 352: Figure 197 Mounting Of Power Cable Screws And Safety Cover On

    7360 ISAM FX-4 shelf cabling ANSI Hardware Installation Manual Figure 197 Mounting of power cable screws and safety cover on 7360 ISAM FX-4 22398 Remove the screws from the power terminals; see Figure 197. Danger — If the following sequence is not followed exactly, there can be a possible fire hazard.
  • Page 353: Figure 198 External Interfaces On 7360 Isam Fx-4

    The 7360 ISAM FX-4 requires a 50-pin micro DSUB connector with an angled head for the CO external alarm connection. A cable assembly is available from Nokia (sold separately), that can be used with the 7360 ISAM FX-4, as shown in Figure 199. See Figure for the location of the CO external alarm connector on the GFC card.
  • Page 354: Figure 199 External Co Alarm Cable For 7360 Isam Fx-4

    Company label label 22959 For a description of the CO external alarm connector pinning, see your Nokia representative. 18.7 BITS interface connections The 7360 ISAM FX-4 requires six wire-wrappable pins for the BITS clock timing connection. BITS timing signals will be supplied using two twisted pair cables (22 AWG solid copper conductors with overall shield and drain wire, Belden 1175A or equivalent).
  • Page 355: Figure 200 Tod/Pps Connector Location On Nt Card

    18.9 Remote craft port connector The 7360 ISAM FX-4 requires a DB-9 female connector cable for the remote craft port connection. Nokia supports the use of a DB-9 female connector Note — cable for the remote craft port connection to avoid potential damage due to exposed pins on the typically used DB-9 male connector.
  • Page 356: Figure 201 Combo Cable

    7360 ISAM FX-4 shelf cabling ANSI Hardware Installation Manual Figure 201 Combo cable Front view Front view Connector B Connector A No3454 See Appendix for the pinning of the CHAMP100 Note 1 — connectors. See the 7360 ISAM FX Product Information Guide for Note 2 —...
  • Page 357: Figure 202 Combo Cable Connection On 7360 Isam Fx-4

    ANSI Hardware Installation Manual 7360 ISAM FX-4 shelf cabling Figure 202 Combo cable connection on 7360 ISAM FX-4 xDSL POTS LINE External Alarms BITS TOD/IHZ Remote Craft BAT A BAT B FUSE Critical Alarms N594 Major 7360 ISAM FX-4 Minor NTA GND NTB 23898 18.11 POTS and LINE MDF cable connector...
  • Page 358: Figure 203 Mdf Cable For 48-Line Cards

    See the 7360 ISAM FX Product Information Guide for Note 2 — ordering information. 18.11.2 Prerequisites The following tools are required: • MDF (LINE/POTS) cables as provided by Nokia • an antistatic wrist strap • tie-wraps • lacing cord for tying up and/or bundling cables...
  • Page 359: Figure 204 Mdf Cable Line Connection On 7360 Isam Fx-4

    ANSI Hardware Installation Manual 7360 ISAM FX-4 shelf cabling Procedure 79 MDF cabling procedure for LT cards with integrated splitter Proceed as follows to connect the MDF cables for LINE and POTS to the LT card with integrated splitter: Connect the MDF cable for the LINE to the right-hand CHAMP connector on the LT card with integrated splitter, as shown in Figure 204.
  • Page 360: Vectoring Cable Connector

    7360 ISAM FX-4 shelf cabling ANSI Hardware Installation Manual Secure the connector with standoffs and nuts. Route and connect the other end of the MDF cable as per site practices. STOP. This procedure is complete. 18.12 Vectoring cable connector This DLP provides the steps to connect vectoring links between a NDPS-B card and NDLS-E cards.
  • Page 361 ANSI Hardware Installation Manual 7360 ISAM FX-4 shelf cabling Procedure 80 To connect vectoring links Proceed as follows to connect vectoring links: Warning 1 — Units contain ESD-sensitive devices. These devices are susceptible to ESD damage in unconnected circuit conditions. Appropriate ESD procedures should always be followed when installing or removing units and cables.
  • Page 362: Figure 206 Vl Ports On The Ndps-B

    7360 ISAM FX-4 shelf cabling ANSI Hardware Installation Manual Figure 206 VL ports on the NDPS-B FP LT -A VL 1 VL 2 VL 3 VL 4 VL 5 VL 6 VL 7 VL 8 PW R AC T AL M 24286 Remove the dust covers from the VL ports identified in step 3.
  • Page 363: Figure 207 Inserting The Cable Connector Into A Vl Port On The Ndps-B Card

    ANSI Hardware Installation Manual 7360 ISAM FX-4 shelf cabling Figure 207 Inserting the cable connector into a VL port on the NDPS-B card VL port VL cable 23722 Route the VL cable through the appropriate cable exit area of the shelf; see Figure the VL cable exit areas: •...
  • Page 364: Figure 208 Vl Cable Exit Areas

    7360 ISAM FX-4 shelf cabling ANSI Hardware Installation Manual Figure 208 VL cable exit areas NTIO CRITICAL BAT A Energy Hazard MAJOR BAT B 7360 ISAM FX-16 -48V 70A MINOR CAUTION ROTATING FAN BLADES Energy Hazard BITS INTERFACE TIME OF DAY NT-A NT-B 1 Hz-PULSE...
  • Page 365: Installing Cards In The 7360 Isam Fx-4 Shelf

    ANSI Hardware Installation Manual Installing cards in the 7360 ISAM FX-4 shelf 19 Installing cards in the 7360 ISAM FX-4 shelf 19.1 Overview 19.2 Shelf areas and slot positions 19.3 Dummy front panels 19.4 Recommended tools 19.5 Guideline for card installation 19.6 Installation procedures 19.1 Overview This chapter provides the procedures to install field-replaceable units (FRUs) in a...
  • Page 366: Dummy Front Panels

    Installing cards in the 7360 ISAM FX-4 shelf ANSI Hardware Installation Manual The 7360 ISAM FX-4 can be equipped with a maximum of 4 LT cards, 2 NT cards, and 1 NTIO card. 19.3 Dummy front panels Dummy front panels must be mounted on any unused slot of a shelf to: •...
  • Page 367: Figure 210 Dummy Front Panel For Nt Card

    ANSI Hardware Installation Manual Installing cards in the 7360 ISAM FX-4 shelf Figure 210 Dummy front panel for NT card 22197 19.3.2 NTIO dummy front panel A dummy front panel must be used when the NTIO card is not installed. Figure shows one example of a universal dummy front panel for NTIO card slots.
  • Page 368: Figure 211 Universal Dummy Front Panel For Ntio Card

    Installing cards in the 7360 ISAM FX-4 shelf ANSI Hardware Installation Manual Figure 211 Universal dummy front panel for NTIO card 22429 This dummy front panel can also be used for LT slots Note — where no pre-cabling is foreseen. 19.3.3 Dummy front panel for optical LT cards A dummy front panel must be used for all unused LT card slots.
  • Page 369: Recommended Tools

    ANSI Hardware Installation Manual Installing cards in the 7360 ISAM FX-4 shelf 19.4 Recommended tools The following tools are recommended: • screwdriver to secure cards • antistatic wrist strap for handling cards with ESD sensitive devices • ohmmeter to check connection of wrist strap to earth bounding point 19.5 Guideline for card installation This section provides a general guideline for the correct installation of a card in a shelf.
  • Page 370: Installation Procedures

    Installing cards in the 7360 ISAM FX-4 shelf ANSI Hardware Installation Manual 19.6 Installation procedures This section describes the following card installation procedures: • To install NTIO cards • To install NT cards • To install LT cards • To remove cards •...
  • Page 371: Rules For Handling Cards

    ANSI Hardware Installation Manual Installing cards in the 7360 ISAM FX-4 shelf 19.6.2 Rules for handling cards Observe the following: Units contain ESD sensitive devices. These Warning 1 — devices are susceptible to ESD damage in unconnected circuit conditions. Appropriate ESD procedures should always be followed when installing or removing cards.
  • Page 372: Figure 213 Esd Awareness Symbol

    Installing cards in the 7360 ISAM FX-4 shelf ANSI Hardware Installation Manual Figure 213 ESD awareness symbol 22390 Risk of damage to equipment with ESD sensitive Warning — devices. Most cards and powered equipment contain devices that are susceptible to ESD. ESD could damage these or other devices in unconnected circuit conditions.
  • Page 373: Figure 214 Label For Earth Bonding Point

    ANSI Hardware Installation Manual Installing cards in the 7360 ISAM FX-4 shelf Figure 214 Label for earth bonding point 22391 19.6.2.2 Cards with optical fiber connectors Observe the following. Risk of eye damage or skin burns by laser emission. Danger — When installing optical cards or handling optical fibers, never look inside connectors of cards or fibers when these are not connected.
  • Page 374: Figure 215 Laser Classification Label

    Installing cards in the 7360 ISAM FX-4 shelf ANSI Hardware Installation Manual Figure 215 Laser classification label CLASS 1 LASER PRODUCT 18256 Procedure 82 To install NTIO cards Each shelf containing one or two redundant NT boards can have an NT I/O applique. The NT I/O applique is a single board which is installed in the NT I/O slot between the two NT slots of the FX- 4 shelf.
  • Page 375 ANSI Hardware Installation Manual Installing cards in the 7360 ISAM FX-4 shelf Use the ejector handles to engage the board connectors in the backplane. Lock the board in place with the fixation screws located at the top and bottom of the faceplate of the board;...
  • Page 376: Figure 217 Nt Card Slots In 7360 Isam Fx-4

    Installing cards in the 7360 ISAM FX-4 shelf ANSI Hardware Installation Manual Figure 217 NT card slots in 7360 ISAM FX-4 NT B NT A External Alarms BITS TOD/IHZ Remote Craft BAT A BAT B FUSE Critical Alarms N594 Major 7360 ISAM FX-4 Minor NTA GND NTB...
  • Page 377 ANSI Hardware Installation Manual Installing cards in the 7360 ISAM FX-4 shelf Wait until the NT card in the NT-A slot is fully operational. The card first displays a heartbeat signal, that is, the green PWR LED is flashing. Then the card displays an enabling operation signal, that is: •...
  • Page 378: Figure 218 Lt Card Slots In 7360 Isam Fx-4

    Installing cards in the 7360 ISAM FX-4 shelf ANSI Hardware Installation Manual Figure 218 LT card slots in 7360 ISAM FX-4 External Alarms BITS TOD/IHZ Remote Craft BAT A BAT B FUSE Critical Alarms N594 Major 7360 ISAM FX-4 Minor NTA GND NTB 22397 Locate the free LT card slots for mounting the LT cards;...
  • Page 379: Figure 219 Ejector Handles For Lt Cards

    ANSI Hardware Installation Manual Installing cards in the 7360 ISAM FX-4 shelf Install LT card dummy panels in any unused, unpopulated LT card slots to maintain proper operation. STOP. This procedure is complete. Procedure 85 To remove cards Use the following procedure to remove cards. Put on the antistatic wrist strap and connect it to the earth bonding point at the bottom of the 7360 ISAM FX-4;...
  • Page 380: Figure 220 Ejector Handles For Lt Cards

    Installing cards in the 7360 ISAM FX-4 shelf ANSI Hardware Installation Manual Figure 220 Ejector handles for LT cards Guiding plate Withdrawl 25830 Figure 221 Ejector handles for NT cards 33.77 in. 85.8 cm 22375 Remove the card from its slot and place it in an ESD protective bag. STOP.
  • Page 381: Figure 222 Remove Safety Cover And Power Cable Screws On 7360 Isam Fx-4

    ANSI Hardware Installation Manual Installing cards in the 7360 ISAM FX-4 shelf Figure 222 Remove safety cover and power cable screws on 7360 ISAM FX- 22398 Remove the fixation screws located on the front panel of the card; see Figure 223. Figure 223 Remove fixation screws for NGFC-G card 22400...
  • Page 382 Installing cards in the 7360 ISAM FX-4 shelf ANSI Hardware Installation Manual Reconnect the power cable connectors and safety cover. STOP. This procedure is complete. 3HH-12893-AAAA-TCZZA Issue: 09 DRAFT...
  • Page 383: Fiber Optic Cable Management In The 7360 Isam Fx-4 Shelf

    ANSI Hardware Installation Manual Fiber optic cable management in the 7360 ISAM FX-4 shelf 20 Fiber optic cable management in the 7360 ISAM FX-4 shelf 20.1 Overview 20.2 Managing fiber optic cables 20.3 Routing fiber optic cables 20.1 Overview This chapter describes the fiber optic cable management for the 7360 ISAM FX-4 shelf.
  • Page 384: Figure 224 Fiber Management Kit For 7360 Isam Fx-4

    Fiber optic cable management in the ANSI Hardware Installation Manual 7360 ISAM FX-4 shelf Figure 224 Fiber management kit for 7360 ISAM FX-4 23576 Figure shows a view of the 7360 ISAM FX-4 baffle for vertical mount options. Figure 225 Baffle for 7360 ISAM FX-4 vertical rack mounting configurations 22562 20.2 Managing fiber optic cables...
  • Page 385: General Safety And Operations Information

    ANSI Hardware Installation Manual Fiber optic cable management in the 7360 ISAM FX-4 shelf 20.2.1 General safety and operations information This section provides general safety and operations information. See the 7360 ISAM FX Safety Manual for more information. Non-terminated optical connectors may emit Danger —...
  • Page 386: Fiber Cables

    For a description of the supported SFP and XFP Note 1 — modules; see the 7360 ISAM FX Product Information Guide. Nokia recommends protecting any SFP cage that is Note 2 — not equipped with an SFP module, with a dust cover in order to prevent dust intrusion.
  • Page 387: Figure 226 Mounting Of The 7360 Isam Fx-4 Fiber Management Kit

    ANSI Hardware Installation Manual Fiber optic cable management in the 7360 ISAM FX-4 shelf Figure 226 Mounting of the 7360 ISAM FX-4 fiber management kit 23575 Issue: 09 3HH-12893-AAAA-TCZZA DRAFT...
  • Page 388: Figure 227 Alignment Of 7360 Isam Fx-4 Fiber Management Guide

    Fiber optic cable management in the ANSI Hardware Installation Manual 7360 ISAM FX-4 shelf Procedure 87 To mount the fiber management guide Use the following procedure to mount the fiber management guide onto the 7360 ISAM FX-4. Align the notches on the front of the fiber management guide with the finger guides located on the top of the shelf, see Figure 227.
  • Page 389 ANSI Hardware Installation Manual Fiber optic cable management in the 7360 ISAM FX-4 shelf Attach the fiber management guides as shown in Figure using the provided screws. STOP. This procedure is complete. Procedure 88 To route fiber cables to NT and LT cards Use the following procedure to route and connect 7360 ISAM FX-4 fiber cables to NT and LT cards.
  • Page 390 Fiber optic cable management in the ANSI Hardware Installation Manual 7360 ISAM FX-4 shelf Insert the fiber cables into the appropriate optical modules located on the front panels of the NT and LT cards. If optical modules must first be installed, see Procedure 89. Route and connect the other end of the fiber cables as per site practices.
  • Page 391 ANSI Hardware Installation Manual 7360 ISAM WM shelf installation 7360 ISAM WM shelf installation 21 Installing a 7360 ISAM WM shelf 22 7360 ISAM WM shelf cabling 23 Installing cards in the 7360 ISAM WM shelf 24 Fiber optic cable management in the 7360 ISAM WM shelf Issue: 09 3HH-12893-AAAA-TCZZA DRAFT...
  • Page 392 7360 ISAM WM shelf installation ANSI Hardware Installation Manual 3HH-12893-AAAA-TCZZA Issue: 09 DRAFT...
  • Page 393: Installing A 7360 Isam Wm Shelf

    ANSI Hardware Installation Manual Installing a 7360 ISAM WM shelf 21 Installing a 7360 ISAM WM shelf 21.1 Overview 21.2 Installing a drip tray below a 7360 ISAM WM shelf 21.3 Mounting the 7360 ISAM WM shelf in a 23 in. rack 21.1 Overview This chapter describes the procedure for installing a 7360 ISAM WM shelf in a 23 in.
  • Page 394 Remove the drip tray unit from its shipping packaging and inspect the part for damage. If damaged, do not install the drip tray, but instead notify the transportation carrier and Nokia immediately. Mount the drip tray in the mounting position shown in Figure 230. Attach the drip tray with screws to the rack uprights.
  • Page 395: Mounting 7360 Isam Wm Drip Tray

    ANSI Hardware Installation Manual Installing a 7360 ISAM WM shelf Figure 230 Mounting 7360 ISAM WM drip tray 23912 STOP. This procedure is complete. Note — See section 21.3 “Mounting the 7360 ISAM WM shelf in a 23 in. rack”. Issue: 09 3HH-12893-AAAA-TCZZA DRAFT...
  • Page 396: Isam Wm Rack Mounting

    Installing a 7360 ISAM WM shelf ANSI Hardware Installation Manual 21.3 Mounting the 7360 ISAM WM shelf in a 23 in. rack The 7360 ISAM WM shelf can be mounted vertically in a 23 in. rack. The 7360 ISAM WM is intended to be installed in a Warning —...
  • Page 397: Table 16 Supported Rack Configuration With The 7360 Isam Wm Shelf

    The 7360 ISAM WM can also be installed in a rack with Note — a 7360 ISAM FX-8 or 7360 ISAM FX-4 shelf, with similar installation and distance between shelves. Contact your Nokia representative for more information. Issue: 09 3HH-12893-AAAA-TCZZA...
  • Page 398: In. Rack Vertical Mounting Configuration For 7360 Isam Wm

    Installing a 7360 ISAM WM shelf ANSI Hardware Installation Manual Figure 231 23 in. rack vertical mounting configuration for 7360 ISAM WM BITS INTERFACE NT-A NT-B TIME OF DAY RING 1 Hz-PULSE CO ALARMS CRAFT PORT FRAME GND 10 RU 25785 21.3.2 Parts list...
  • Page 399: Recommended Tools

    ANSI Hardware Installation Manual Installing a 7360 ISAM WM shelf • grounded 23 in. rack that can accommodate the 7360 ISAM WM shelf, and has the 7360 ISAM FX-16 shelf, fan unit, drip tray, and heat and fiber baffle kit already installed •...
  • Page 400 Proceed as follows to install a 7360 ISAM WM shelf: Unpack and visually inspect the shelf and mounting kit for physical damage. If anything is missing or damaged, notify the transportation carrier and Nokia immediately. Photograph any damaged equipment. Keep all the inspection and packing documents as a reference.
  • Page 401: Mounting A 7360 Isam Wm In A 23 In. Rack

    ANSI Hardware Installation Manual Installing a 7360 ISAM WM shelf Figure 232 Mounting a 7360 ISAM WM in a 23 in. rack BITS INTERFACE NT-A NT-B TIME OF DAY RING 1 Hz-PULSE CO ALARMS CRAFT PORT FRAME GND 10 RU 25786 Attach the left and right shelf mounting brackets to the 7360 ISAM WM shelf using the eight M6 x 16 mm pan head screws and lock washers provided with the mounting kit.
  • Page 402 Installing a 7360 ISAM WM shelf ANSI Hardware Installation Manual Ensure that the drip tray has been installed in the correct position beneath the 7360 ISAM WM shelf. Note 1 — A drip tray must be installed in the rack before the 7360 ISAM WM shelf is installed.
  • Page 403: Attaching The 7360 Isam Wm Shelf To The Rack

    ANSI Hardware Installation Manual Installing a 7360 ISAM WM shelf Figure 233 Attaching the 7360 ISAM WM shelf to the rack 25787 STOP. This procedure is complete. Note — See section 22 “7360 ISAM WM shelf cabling”. Issue: 09 3HH-12893-AAAA-TCZZA DRAFT...
  • Page 404 Installing a 7360 ISAM WM shelf ANSI Hardware Installation Manual 3HH-12893-AAAA-TCZZA Issue: 09 DRAFT...
  • Page 405: 7360 Isam Wm Shelf Cabling

    ANSI Hardware Installation Manual 7360 ISAM WM shelf cabling 22 7360 ISAM WM shelf cabling 22.1 Overview 22.2 Safety precautions 22.3 Shelf grounding connection 22.4 Rack grounding connection 22.5 Power Cable 22.6 Alarm cable 22.1 Overview This chapter provides the following cabling information for the 7360 ISAM WM. •...
  • Page 406: Safety Precautions

    7360 ISAM WM shelf cabling ANSI Hardware Installation Manual 22.2 Safety precautions The following safety precautions apply: Before working on the power supply unit, verify Danger 1 — whether it is live. If the power supply is live, which can deliver −48 Vdc, you must use an insulated tool kit.
  • Page 407: Shelf Grounding Cable Connector Location On 7360 Isam Wm

    ANSI Hardware Installation Manual 7360 ISAM WM shelf cabling 22.3.1 Grounding cable type As shown in Figure 234, the 7360 ISAM WM includes one grounding cable connector. Each ground lug is a 4 AWG, 3/8 in. stud with 1 in. hole spacing, single crimp, peep, copper, UL- and CSA-recognized dual-hole lug.
  • Page 408: Rack Grounding Connection

    7360 ISAM WM shelf cabling ANSI Hardware Installation Manual Procedure 92 To connect the grounding cable Use the following procedure to connect the grounding cable. Route the grounding cable to the right or left side of the shelf. Connect the dual lug to the grounding cable connection point as shown in Figure 234. Danger —...
  • Page 409: External Frame Ground Point Rear View

    ANSI Hardware Installation Manual 7360 ISAM WM shelf cabling Connect the grounding cable to one of the two frame grounding points on the top of the rack, as shown in Figure 235, using the screws provided with the rack. Figure 235 External frame ground point rear view No.
  • Page 410: Power Distribution On The 7360 Isam Wm Shelf

    7360 ISAM WM shelf cabling ANSI Hardware Installation Manual 22.5 Power Cable The 7360 ISAM WM shelf operates with nominal voltage levels of −48 V dc as well as − 60 V dc supplied by the 7360 ISAM WM power card. This power card is connected to the power terminals of either the 7360 ISAM FX-16, 7360 ISAM FX-8, or 7360 ISAM FX-4 shelf through a power cable.
  • Page 411: 7360 Isam Wm Power Cable

    7360 ISAM WM shelf the FX-16 shelf. The 7360 ISAM WM can also be installed in a rack with Note — a 7360 ISAM FX-8 or 7360 ISAM FX-4 shelf, with similar cabling procedures. Contact your Nokia representative for more information. Issue: 09 3HH-12893-AAAA-TCZZA...
  • Page 412: 7360 Isam Fx-16 Shelf

    7360 ISAM WM shelf cabling ANSI Hardware Installation Manual Figure 238 Power cable routing through the bottom of the 7360 ISAM FX-16 shelf NTIO CRITICAL CRITICAL BAT A BAT A Energy Hazard Energy Hazard N594 MAJOR MAJOR BAT B BAT B 7360 ISAM FX-16 7360 ISAM FX-16 A/70 FOR LT...
  • Page 413: Power Cable Routing From The 7360 Isam Wm To The 7360 Isam Fx- 16 Shelf

    ANSI Hardware Installation Manual 7360 ISAM WM shelf cabling Figure 239 Power cable routing from the 7360 ISAM WM to the 7360 ISAM FX-16 shelf NTIO CRITICAL CRITICAL BAT A BAT A Energy Hazard Energy Hazard N594 MAJOR MAJOR BAT B BAT B 7360 ISAM FX-16 7360 ISAM FX-16...
  • Page 414: Routing The Power Cable

    7360 ISAM WM shelf cabling ANSI Hardware Installation Manual Procedure 94 Connecting the power cables Proceed as follows to connect the 7360 ISAM WM power cable: Connect the power cables to the 7360 ISAM FX-16; see routing from the 7360 ISAM WM in Figure and cable connection in Figure 241.
  • Page 415: Connecting The Power Cable

    ANSI Hardware Installation Manual 7360 ISAM WM shelf cabling Figure 241 Connecting the power cable NTIO CRITICAL BAT A Energy Hazard MAJOR BAT B 7360 ISAM FX-16 -48V 70A MINOR CAUTION ROTATING FAN BLADES Energy Hazard BITS INTERFACE Power Terminals NT-A NT-B TIME OF DAY...
  • Page 416: 7360 Isam Wm Alarm Cable

    7360 ISAM WM shelf cabling ANSI Hardware Installation Manual Figure 242 7360 ISAM WM alarm cable 25795 22.6.1 Alarm cable routing connection The alarm cable is routed from the FWPC-A at the front of the 7360 ISAM WM, through the right side of the rack, and connected to the alarm connector on the right side of the 7360 ISAM FX-16 shelf;...
  • Page 417: Co External Alarm Connector On 7360 Isam Wm

    ANSI Hardware Installation Manual 7360 ISAM WM shelf cabling Figure 243 CO external alarm connector on 7360 ISAM WM NTIO CRITICAL BAT A Energy Hazard MAJOR BAT B 7360 ISAM FX-16 -48V 70A MINOR CAUTION ROTATING FAN BLADES Energy Hazard BITS INTERFACE TIME OF DAY NT-A...
  • Page 418 7360 ISAM WM shelf cabling ANSI Hardware Installation Manual 3HH-12893-AAAA-TCZZA Issue: 09 DRAFT...
  • Page 419: Installing Cards In The 7360 Isam Wm Shelf

    ANSI Hardware Installation Manual Installing cards in the 7360 ISAM WM shelf 23 Installing cards in the 7360 ISAM WM shelf 23.1 Overview 23.2 Shelf areas and slot positions 23.3 Dummy front panels 23.4 Recommended tools 23.5 Guideline for card installation 23.6 Installation procedures 23.1 Overview This chapter provides the procedures to install field-replaceable units (FRUs) in a...
  • Page 420: Card Slot Positions On 7360 Isam Wm

    Installing cards in the 7360 ISAM WM shelf ANSI Hardware Installation Manual Figure 244 Card slot positions on 7360 ISAM WM Power Power LC01 LC03 LC05 Controller LC08 LC10 LC12 LC02 LC04 LC06 LC07 LC09 LC11 25757 The 7360 ISAM WM can be equipped with a maximum of 12 line cards, 2 power cards, and 1 controller card.
  • Page 421: Dummy Front Panel For 7360 Isam Wm Power Card Slots

    ANSI Hardware Installation Manual Installing cards in the 7360 ISAM WM shelf 23.3.1 For 7360 ISAM WM power cards A dummy front panel must be used when a second power card is not installed in the 7360 ISAM WM shelf. Figure shows the dummy front panel for the 7360 ISAM WM power card slot.
  • Page 422: Guideline For Card Installation

    Installing cards in the 7360 ISAM WM shelf ANSI Hardware Installation Manual 23.5 Guideline for card installation This section provides a general guideline for the correct installation of a card in a shelf. Procedure 95 Installing a card To install a card: Gently plug the card in the shelf until the front panel of the board touches the shelf.
  • Page 423: General

    ANSI Hardware Installation Manual Installing cards in the 7360 ISAM WM shelf 23.6.1 General The line card and power card dummy front panels (or filler plates) must be installed in any unused, unpopulated line card or power card slot in order to maintain proper operation.
  • Page 424: Esd Awareness Symbol

    Installing cards in the 7360 ISAM WM shelf ANSI Hardware Installation Manual Figure 248 ESD awareness symbol 22390 Risk of damage to equipment with ESD sensitive Warning — devices. Most cards and powered equipment contain devices that are susceptible to ESD. ESD could damage these or other devices in unconnected circuit conditions.
  • Page 425: Laser Caution Label

    ANSI Hardware Installation Manual Installing cards in the 7360 ISAM WM shelf 23.6.2.2 Cards with optical fiber connectors Observe the following. Risk of eye damage or skin burns by laser emission. Danger — When installing optical cards or handling optical fibers, never look inside connectors of cards or fibers when these are not connected.
  • Page 426: 7360 Isam Wm Power Card Slots

    Installing cards in the 7360 ISAM WM shelf ANSI Hardware Installation Manual Figure 251 7360 ISAM WM power card slots Power A Power B FWCC-A FWPC-A FWPC-A FWLC-A FWLC-A FWLC-A FWLC-A FWLC-A FWLC-A FWLC-A FWLC-A FWLC-A FWLC-A FWLC-A FWLC-A PORT A PORT A PORT A PORT A...
  • Page 427: 7360 Isam Wm Controller Card Slot

    ANSI Hardware Installation Manual Installing cards in the 7360 ISAM WM shelf Procedure 97 To install controller cards Each 7360 ISAM WM shelf contains one controller card. Proceed as follows to install the 7360 ISAM WM controller card: Remove the controller card from its ESD protective bag. Make sure to wear the antistatic wrist strap.
  • Page 428: 7360 Isam Wm Line Card Slots

    Installing cards in the 7360 ISAM WM shelf ANSI Hardware Installation Manual Procedure 98 To install line cards Each 7360 ISAM WM shelf can contain up to a maximum of 12 line cards. Proceed as follows to install a 7360 ISAM WM line card: Remove the line card from its ESD protective bag.
  • Page 429 ANSI Hardware Installation Manual Installing cards in the 7360 ISAM WM shelf Procedure 99 To remove cards Use the following procedure to remove a cards. Put on the antistatic wrist strap and connect it to the earth bonding point at the bottom of the 7360 ISAM WM shelf;...
  • Page 430 Installing cards in the 7360 ISAM WM shelf ANSI Hardware Installation Manual 3HH-12893-AAAA-TCZZA Issue: 09 DRAFT...
  • Page 431: Fiber Optic Cable Management In The 7360 Isam Wm Shelf

    ANSI Hardware Installation Manual Fiber optic cable management in the 7360 ISAM WM shelf 24 Fiber optic cable management in the 7360 ISAM WM shelf 24.1 Overview 24.2 Managing fiber optic cables 24.3 Routing fiber optic cables 24.1 Overview This chapter describes the fiber optic cable management for the 7360 ISAM WM shelf.
  • Page 432: Management Kit

    Fiber optic cable management in the ANSI Hardware Installation Manual 7360 ISAM WM shelf Figure 255 Fiber guiding elements of the 7360 ISAM WM optical fiber management kit 25788 24.2 Managing fiber optic cables This section describes how to fiber optic cables for line cards in the 7360 ISAM WM shelf.
  • Page 433: Optical Modules

    For an overview of the supported SFP modules, see Note 1 — the 7360 ISAM FX Product Information Guide. Nokia recommends protecting any SFP cage that is Note 2 — not equipped with an SFP modules with a dust cover in order to prevent dust intrusion.
  • Page 434: Fiber Management Guide For 7360 Isam Wm

    Fiber optic cable management in the ANSI Hardware Installation Manual 7360 ISAM WM shelf One fiber management guide is required for every three cards. Figure shows an example of a fiber management guide. Figure 256 Fiber management guide for 7360 ISAM WM 24905 24.3 Routing fiber optic cables This section provides procedures for mounting fiber management guides, for routing...
  • Page 435: Fiber Routing With A Fiber Management Guide For The

    ANSI Hardware Installation Manual Fiber optic cable management in the 7360 ISAM WM shelf Figure 257 Fiber routing with a fiber management guide for the 7360 ISAM WM 25370 Procedure 100 To mount the fiber management guide Use the following procedure to mount the fiber management guide onto the 7360 ISAM WM shelf. Align the pre-assembled fiber management bracket and fiber guiding elements with the finger guides located on the top of the shelf;...
  • Page 436: Mount The 7360 Isam Wm Fiber Management Guide

    Fiber optic cable management in the ANSI Hardware Installation Manual 7360 ISAM WM shelf Push down on the pre-assembled fiber management bracket and slide it forward onto the finger guides of the cable management bracket on the shelf until it locks into place; see Figure 259.
  • Page 437 ANSI Hardware Installation Manual Fiber optic cable management in the 7360 ISAM WM shelf If using a fiber management guide, route the fiber cables through the fiber management guide, and toward the line cards. Otherwise, route the fiber cables, maintaining a proper bend radius, toward the line cards: Route to the left for: •...
  • Page 438 Fiber optic cable management in the ANSI Hardware Installation Manual 7360 ISAM WM shelf To install optical modules, proceed as follows: Put on an antistatic wrist strap and connect it to a grounding point. Install an optical module as follows: Align the optical module with an optical module port and slide it into the port until it clicks into place.
  • Page 439 ANSI Hardware Installation Manual Appendices Appendices 25 Connector pinning of the external interfaces 26 Connector pinning on NT card 27 Fiber optic handling and acceptance criteria Issue: 09 3HH-12893-AAAA-TCZZA DRAFT...
  • Page 440 Appendices ANSI Hardware Installation Manual 3HH-12893-AAAA-TCZZA Issue: 09 DRAFT...
  • Page 441: Connector Pinning Of The External Interfaces

    • MDF CHAMP100 cable connector For CO external alarm connector pinning information, Note — see your Nokia representative. 25.2 BITS interface connections Table describes the BITS interface pinning for the 7360 ISAM FX-4, 7360 ISAM FX-8 and 7360 ISAM FX-12 shelves.
  • Page 442: Table 18 Bits Interface Pinning For 7360 Isam Fx-4, 7360 Isam Fx-8, And 7360 Isam Fx 12

    Connector pinning of the external interfaces ANSI Hardware Installation Manual Table 18 BITS interface pinning for 7360 ISAM FX-4, 7360 ISAM FX-8, and 7360 ISAM FX 12 Signal name Type Pin number Description NTB_BITSIN_R Input BITS signal going to NT-B NTB_BITSIN_T Input BITS signal going to NT-B...
  • Page 443: Table 21 Remote Craft Port Pinning For 7360 Isam Fx Shelves

    ANSI Hardware Installation Manual Connector pinning of the external interfaces Signal name Type Pin number Description SIG_GND Input Electrical ground 1HZ_TIP Input 1 Hz signal tip input TOD_RING Input Time of day ring input TOD_TIP Input Time of day tip input Input Frame ground Input...
  • Page 444: Table 22 External Alarm Cable

    Connector pinning of the external interfaces ANSI Hardware Installation Manual Table 22 External Alarm Cable Signal Name Type Connectors Description Subrack side CO side cable pin number color MISC1_ALA_A Blue Miscellaneous Alarm 1 (A wire) MISC1_ALA_B White Miscellaneous Alarm 1 (B wire) MISC2_ALA_A Orange Miscellaneous Alarm 2 (A wire)
  • Page 445 ANSI Hardware Installation Manual Connector pinning of the external interfaces Signal name Type Pin number Color Description EXT_ALM0_40 Input White/yellow External alarm input 5 (A terminal) EXT_ALM0_41 Yellow/white External alarm input 5 (B terminal) EXT_ALM0_50 Input White/green External alarm input 6 (A terminal) EXT_ALM0_51 Green/white External alarm input 6 (B terminal)
  • Page 446 Connector pinning of the external interfaces ANSI Hardware Installation Manual Signal name Type Pin number Color Description VIS_CRI_A Output Brown/green Critical alarm external visual indicator (relay Contact A) VIS_CRI_B Green/brown Critical alarm external visual indicator (relay Contact B) AUD_MIN_A Output Brown/blue Minor alarm external audible indicator (relay Contact A)
  • Page 447: Table 24 Co External Alarm Pinning For 7360 Isam Wm

    ANSI Hardware Installation Manual Connector pinning of the external interfaces Table 24 CO external alarm pinning for 7360 ISAM WM Signal name Type Pin number Color Description EXT_ALM_00 Input White/tan External alarm input 1 (A terminal) EXT_ALM_01 Tan/white External alarm input 1 (B terminal) EXT_ALM_10 Input White/brown...
  • Page 448 Connector pinning of the external interfaces ANSI Hardware Installation Manual Signal name Type Pin number Color Description EXT_ALM_160 Input Tan/gray External alarm input 17 (A terminal) EXT_ALM_161 Gray/tan External alarm input 17 (B terminal) EXT_ACO_A Input Brown/pink External ACO switch (A terminal) EXT_ACO_B Pink/brown External ACO switch (B terminal)
  • Page 449: Table 25 Cable Color Designations

    BATRET voltage (due to the voltage drop in the feeding cables) Nokia strongly advises adding extra in-line 100 mA fuses in the BATRET connections to comply in a safe way with the maximum current drain of 100 mA in the BATRET wire.
  • Page 450: Table 26 Wiring List For Champ100 Mdf Cable

    Connector pinning of the external interfaces ANSI Hardware Installation Manual 25.6.2 Line number The following designations are used for the line number: • T: tip • R: ring • NC: not connected 25.6.3 Connector pinning Table shows the pinning for the CHAMP100 MDF cable. Table 26 Wiring list for CHAMP100 MDF cable —...
  • Page 451 ANSI Hardware Installation Manual Connector pinning of the external interfaces YE/GN RD/OR Orange YE/GN RD/OR Blue GN/YE OR/RD Orange GN/YE OR/RD Blue YE/BN RD/BL Orange YE/BN RD/BL Blue BN/YE BL/RD Orange BN/YE BL/RD Blue YE/SL WH/SL Orange YE/SL WH/SL Blue SL/YE SL/WH Orange...
  • Page 452 Connector pinning of the external interfaces ANSI Hardware Installation Manual 3HH-12893-AAAA-TCZZA Issue: 09 DRAFT...
  • Page 453: Table 27 1Pps-Ttl Interface Signal List

    ANSI Hardware Installation Manual Connector pinning on NT card 26 Connector pinning on NT card 26.1 Overview 26.2 1PPS-TTL interface signal 26.3 10 MHz-GPS interface signal 26.4 ToD/PPS interface signal 26.5 Local craft interface 26.1 Overview This section describes the following connector signals and pinnings for the 7360 ISAM FX NT cards: •...
  • Page 454: Table 28 10 Mhz Gps Interface Signal List

    An example of the DB9 cable pinning is provided in the table, however based on the specific device used, connections may require alteration. See your Nokia representative for more information. 3HH-12893-AAAA-TCZZA Issue: 09 DRAFT...
  • Page 455: Table 30 Local Craft Interface Signal List And Pinning

    ANSI Hardware Installation Manual Connector pinning on NT card Table 30 Local craft interface signal list and pinning Signal name Description Type DB9 (female) number Signal number name LCMI_RI_DSR Local-craft-mgt-itf “data-set-ready” Output LCMI_DCD Local-craft-mgt-itf “data-carrier-detect” Output LCMI_DTR Local-craft-mgt-itf “data-terminal-ready” Input Electrical ground or “signal ground”...
  • Page 456 Connector pinning on NT card ANSI Hardware Installation Manual 3HH-12893-AAAA-TCZZA Issue: 09 DRAFT...
  • Page 457: Fiber Optic Handling And Acceptance Criteria

    ANSI Hardware Installation Manual Fiber optic handling and acceptance criteria 27 Fiber optic handling and acceptance criteria 27.1 Overview 27.2 Handling considerations 27.3 Acceptance criteria for fiber optic device inspections 27.4 Fiber optic jumper cable care 27.5 Inspection of fiber optic devices 27.1 Overview This section describes the handling of fiber optic devices and acceptance criteria for fiber optic device inspections.
  • Page 458: Parts Of A Fiber Optic Cable

    In a fiber distribution network, it is an industry best Note — practice to use APC-based connections or spliced connections to avoid any potential network problems. Nokia recommends that the unused ports of splitters be terminated into an APC-based connector.
  • Page 459: Acceptance Criteria

    ANSI Hardware Installation Manual Fiber optic handling and acceptance criteria • do not expose the cable to excessive heat • do not allow connectors to strike or drag across work surfaces, including the floor • do not allow cables to support any weight •...
  • Page 460: Single-Mode End-Face Zones

    Fiber optic handling and acceptance criteria ANSI Hardware Installation Manual The result of an inspection can be one of three conditions: • preferred • acceptable • unacceptable Table 31 Single-mode end-face inspection acceptance criteria Zone Diameter Acceptance criteria (number and size) Non-removable (contamination of Scratches pits)
  • Page 461: Preferred Condition Of Fiber Optic End-Face

    ANSI Hardware Installation Manual Fiber optic handling and acceptance criteria Figure 262 Preferred condition of fiber optic end-face Core and core zone Cladding zone Epoxy zone Contact zone FGU184 Table describes acceptable and unacceptable conditions. Table 32 Acceptable and unacceptable conditions for fiber optic end-fac- Criteria Acceptable Unacceptable...
  • Page 462: Fiber Optic Jumper Cable Care

    Fiber optic handling and acceptance criteria ANSI Hardware Installation Manual Criteria Acceptable Unacceptable Scratches in single- One scratch in One scratch mode fiber cladding zone, or through core multiple scratches in a contact zone Contamination Contamination in Contamination, particles or pits in cladding or epoxy large particle in multi-mode fiber...
  • Page 463 ANSI Hardware Installation Manual Fiber optic handling and acceptance criteria • items for cleaning: • optical grade stick cleaners (swabs) that have a tightly wrapped tip (1.25 mm, 2.50 mm, and 4.0 mm) • cassette cleaner (reel type or equivalent), or lint-free, nonabrasive cloths •...
  • Page 464 Note 2 — In a fiber distribution network, it is an industry best practice to use APC-based connections or spliced connections to avoid any potential network problems. Nokia recommends that the unused ports of splitters be terminated into an APC-based connector.
  • Page 465 ANSI Hardware Installation Manual Fiber optic handling and acceptance criteria If the receptacle fails the inspection, and it appears the contaminant can be dislodged using canned compressed air, apply a short burst of air to the end-face to remove the contaminant. Note —...
  • Page 466 Fiber optic handling and acceptance criteria ANSI Hardware Installation Manual If the connector fails the inspection, clean the connector by gently wiping the ferrule and end- face surfaces using a cleaner cassette that has a drop of optical-grade isopropyl alcohol applied to it.
  • Page 467 Customer document and product support Customer documentation Customer Documentation Welcome Page Technical Support Product Support Portal Documentation feedback Customer Documentation Feedback...
  • Page 468 Copyright 2015-2017 Nokia. 3HH-12893-AAAA-TCZZA...

This manual is also suitable for:

7360 isam fx-16

Table of Contents

Save PDF