
Subscribe to Our Youtube Channel
Related Manuals for nanoString GeoMx DSP

Summary of Contents for nanoString GeoMx DSP
-
Page 1: Geomx Dsp Instrument User Manual
GeoMx® DSP Instrument User Manual FOR RESEARCH USE ONLY. Not for use in diagnostic procedures. © 2022 NanoString Technologies, Inc. All rights reserved. MAN-10152-01 for v2.5 software | March 2022... -
Page 2: Contacts
NanoString, Inc. 530 Fairview Ave N Seattle, Washington 98109 www.nanostring.com T: 888.358.6266 F: 206.378.6288 geomxsupport@nanostring.com Sales Contacts United States: us.sales@nanostring.com EMEA: europe.sales@nanostring.com Asia Pacific & Japan: apac.sales@nanostring.com Other Regions: info@nanostring.com EU Authorized Representative NanoString Technologies Germany Gmbh Birketweg 31 80639 Munich... -
Page 3: Rights, License, & Trademarks
Subject to the terms and conditions of the GeoMx DSP System contained in the product quotation, NanoString grants you a limited, non-exclusive, non-transferable, non-sublicensable, research use only license to use the proprietary GeoMx DSP System only in accordance with the manual and other written instructions provided by NanoString. Except as expressly set forth in... -
Page 4: Table Of Contents
GeoMx DSP Instrument User Manual MAN-10152-01 for software v2.5 Table of Contents Table of Contents GeoMx DSP Instrument User Manual Contacts Rights, License, & Trademarks Changes in This Revision Conventions GeoMx DSP Instrument Introduction Instrument Components Instrument Specifications Fluorescence Channel Specifications... - Page 5 MAN-10152-01 for software v2.5 GeoMx DSP Instrument User Manual Table of Contents Uploading Counts Create Slides and Scans outside GeoMx DSP Workflow Example Scan Parameters Changing a probe kit configuration file after collection Slide and Scan Management Administration Menu GeoMx DSP Instrument Reagents Changing Reagent Bottles GeoMx DSP Instrument Maintenance...
-
Page 6: Changes In This Revision
Added instructions to edit a probe kit configuration (.pkc) file after collection on page 69 Added instructions to synchronize system time with internet time server on page 96 Improved the GeoMx DSP hibernation protocol for instruments that will be inactive for >2 weeks on page 106 Added an Instrument Best Practices guide on page 110... -
Page 7: Conventions
GeoMx DSP. Follow these ® Follow these instructions if using instructions if using nCounter MAX/FLEX, Pro, ® Illumina NGS to read out GeoMx DSP or SPRINT to read out GeoMx DSP counts. counts. FOR RESEARCH USE ONLY. Not for use in diagnostic procedures. -
Page 8: Geomx Dsp Instrument Introduction
The GeoMx DSP instrument is intended for Research Use Only . This GeoMx DSP Instrument manual is concerned exclusively with the operation of the GeoMx Digital Spatial Profiler. It is important that you read and comprehend the provided information. -
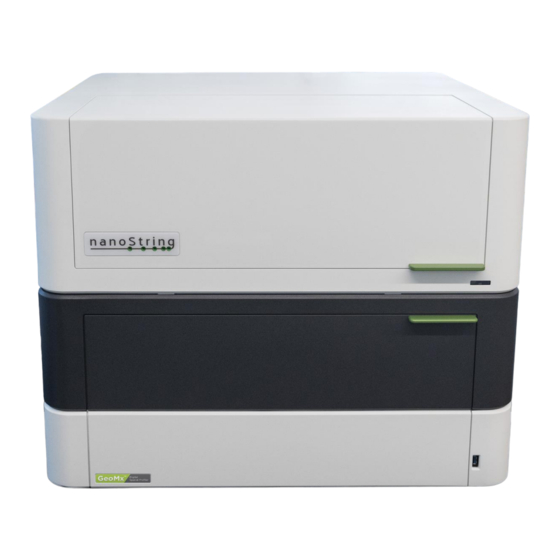
Page 9: Instrument Components
Instrument Components Figure 2: GeoMx DSP instrument exterior diagram The GeoMx DSP instrument is a benchtop instrument and comes equipped with a 27" color LED monitor (4K - 8MP, model: LG 27HJ712C-W), as well as a mouse and keyboard. The front of the instrument has a USB port (USB-A 3.0) and a barcode scanner... - Page 10 Instrument Introduction Figure 3: GeoMx DSP instrument interior diagram To access the GeoMx DSP instrument stage, open the main (upper) door. On the stage a collection plate is loaded into the plate holder and secured by the plate clamp. When loading a collection plate before your slides, the system will prompt you to slide the plate cover over the collection plate until loading is complete.
- Page 11 GeoMx DSP Instrument User Manual Instrument Introduction Figure 4: GeoMx DSP instrument reagent bay diagram The GeoMx DSP instrument requires the following reagent bottles in the reagent bay (see Figure Buffer S: 1 L bottles in reagent bay slots 1 and 4.
- Page 12 GeoMx DSP Instrument User Manual MAN-10152-01 for software v2.5 Instrument Introduction Figure 5: GeoMx DSP instrument backside diagram The backside of the GeoMx DSP instrument (see Figure 5) has the following ports: An ethernet connection: CAT 6 Network Port with RJ45 connector.
-
Page 13: Instrument Specifications
Instrument Introduction Instrument Specifications The GeoMx DSP system is a single instrument, intended for Research Use Only. The necessary cables and a waste bottle are included with each instrument. Do not dispose of the waste bottle. All other consumables and reagents may be purchased separately. Instrument specifications are listed below. -
Page 14: Installing And Moving
Disposal of Electronic Equipment on page Product Use Limitations The GeoMx DSP system is intended for research use only. Not for use in diagnostic procedures. Disposal of Electronic Equipment Review and follow all laws regarding the safe and proper disposal of electrical instrumentation. -
Page 15: Safety Information (English)
NanoString for instruction before installing or moving the instrument. If it is necessary to move equipment, use extreme caution when lifting items that weigh more than 50 pounds. When lifting a load heavier than 50 pounds (such as the GeoMx DSP instrument), use two or more people to lift the load. -
Page 16: Consignes De Sécurité (Français)
Instrument Introduction Consignes de Sécurité (Français) Le GeoMx DSP instrument ne peut être utilisé que par une personne ayant reçu une formation professionnelle appropriée. NanoString recommande que tous les utilisateurs lisent et comprennent ce manuel avant de tenter de faire fonctionner le système. Conservez ce manuel à proximité de l’instrument pour faciliter l'accès aux instructions et consignes de sécurité. -
Page 17: Geomx Dsp Workflow
® Leica Biosystems Day 2: Process Slides on GeoMx DSP. Load prepared slides into the GeoMx DSP instrument and enter slide/study information. Slides are scanned to capture fluorescent images used to select regions of interest (ROIs). The instrument collects UV-cleaved oligos from the ROIs into the wells of a collection plate. - Page 18 GeoMx DSP Instrument User Manual MAN-10152-01 for software v2.5 GeoMx DSP Workflow Figure 6: GeoMx DSP workflow summary FOR RESEARCH USE ONLY. Not for use in diagnostic procedures.
-
Page 19: User Manuals And Resources
Workflow GeoMx DSP Data Analysis User Manual Step 4 MAN-10154 User manuals and other documents can be found online in the NanoString University Document Library at https://university.nanostring.com. Instrument and workflow training courses are available in NanoString University. For NGS readout:... -
Page 20: Geomx Dsp Control Center
GeoMx DSP Control Center GeoMx DSP Control Center The GeoMx DSP Control Center is the main interface of the GeoMx DSP software. Figure 7: GeoMx DSP Control Center diagram By clicking the Data Collection button in the GeoMx DSP Control Center header (see Figure 7), you can begin a new run or upload counts or calibration files. -
Page 21: Geomx Dsp Run
GeoMx Instrument Buffer Kit GeoMx Slide Prep Kit (only Buffer S is needed from this kit) GeoMx RNA Slide Prep Kit GeoMx Protein Slide Prep Kit GeoMx DSP Collection Plates (not pictured) FOR RESEARCH USE ONLY. Not for use in diagnostic procedures. -
Page 22: Start A New Run
GeoMx DSP Instrument User Manual MAN-10152-01 for software v2.5 Start a New Run Start a new run It is recommended to begin each new run by rebooting (shutting down and restarting) the instrument, then clicking Assist (wrench icon), then Restart Data Collection Workflow, to bring the software to the beginning of the workflow. - Page 23 MAN-10152-01 for software v2.5 GeoMx DSP Instrument User Manual Start a New Run 3. Place your slide in the slide holder, face up, label toward slide holder clamp opening (see Figure 9). Ensure that the slide is evenly seated in the slide holder slot.
- Page 24 GeoMx DSP Instrument User Manual MAN-10152-01 for software v2.5 Start a New Run Set up the GeoMx DSP instrument The prompts may appear in a different order than that listed here. Replace Plate? This screen only appears if the system detects that a collection plate is already loaded on the instrument.
- Page 25 Start a New Run Identify Plate Each NanoString collection plate has a barcode along one side. This barcode is used to track the plate and its aspirates throughout the DSP workflow. Scan the plate's barcode by holding it at a 45° angle to the right of the scanner and moving the plate between 2-6 inches from the instrument.
- Page 26 GeoMx DSP Instrument User Manual MAN-10152-01 for software v2.5 Start a New Run Insert the Collection Plate 1. Open the plate holder clamp. 2. Insert the collection plate onto the plate holder (see Figure 13). Figure 13: Insert the collection plate onto the plate holder when prompted 3.
- Page 27 MAN-10152-01 for software v2.5 GeoMx DSP Instrument User Manual Start a New Run Insert the Slide Holder Find information on loading the slides into the slide holder page 22. Load the slide holder onto the stage of the instrument (see Figure 16) when prompted.
-
Page 28: Identify Slides
Once loading the instrument is complete and the necessary components for the run have been detected, the system will commence Slide Identification by taking a low-magnification image of each loaded slide (see Figure 17). Figure 17: Identify Slides stage in GeoMx DSP run workflow FOR RESEARCH USE ONLY. Not for use in diagnostic procedures. - Page 29 You may link slides to any slide records and scan parameters created earlier. See Create Slides and Scans outside GeoMx DSP Workflow on page Slide Record: This record contains the metadata for the slide. You may click the Create button or the Look Up button (see Slide records on page 30).
- Page 30 GeoMx DSP Instrument User Manual MAN-10152-01 for software v2.5 Identify Slides Slide records If the slide record field is blank, you will need to either look up a previously-created slide record or create a new one at this time. Look up: From the Identify Slides window, select Look up slide record.
- Page 31 MAN-10152-01 for software v2.5 GeoMx DSP Instrument User Manual Identify Slides Scan Parameters Scan parameters contain the settings for the scan (see Figure 18). Review the options in the Scan Parameters field at the bottom of the Slide ID window. You may select one of the sets in the drop-down field or create a new set.
- Page 32 If using a custom panel, NanoString Bioinformatics will provide a custom .pkc file. Upload this file to the GeoMx DSP, then select it from the Probe Reagent Kit drop-down menu, along with any other probe kits in use in this collection.
- Page 33 MAN-10152-01 for software v2.5 GeoMx DSP Instrument User Manual Identify Slides For nCounter readout: Protein assays: If a protein module added to the list shares the same Probe R space as another module on the list, a warning will appear. Proceeding poses the risk of losing data from both modules.
-
Page 34: Scan Slides
GeoMx DSP Instrument User Manual MAN-10152-01 for software v2.5 Scan Slides Scan Slides Before the system's 20x scan, it checks the tissue area. You may accept the default parameters automatically detected by the system, or customize them. Define Scan Area... - Page 35 MAN-10152-01 for software v2.5 GeoMx DSP Instrument User Manual Scan Slides IMPORTANT: Inspect slides and settings carefully before proceeding as settings cannot be modified once scanning begins. When you have completed defining the scan area for all slides, select the Scan button.
-
Page 36: Select Rois
If desired, you can also perform segmentation within the Scan Workspace or using an external program. Once you have completed this process, the GeoMx DSP instrument begins the collection of tags by exposing each segment of each ROI to UV light and aspirates material from the solution into a well of the collection plate. - Page 37 MAN-10152-01 for software v2.5 GeoMx DSP Instrument User Manual Select ROIs & Segment Open the Scan Workspace There are two ways to access the Scan Workspace: 1. During the DSP run, use the Edit ROIs button (see Figure 22) , which will become active underneath a slide's image after the 20x scan has completed.
- Page 38 GeoMx DSP Instrument User Manual MAN-10152-01 for software v2.5 Select ROIs & Segment Inspect the image Ensure that the scan quality is acceptable Keyboard Shortcuts for designation of ROIs and segments. Do Zoom out - (hyphen) not proceed with collection from out of focus images, as it can cause instrument failure.
- Page 39 MAN-10152-01 for software v2.5 GeoMx DSP Instrument User Manual Select ROIs & Segment Draw ROIs Choose from geometric shapes (circle or rectangle), custom polygon , or grid ROIs. For custom standalone RNA- NGS assays (without Whole Transcriptome Atlas or Cancer Transcriptome Atlas), ensure that the ROI selection strategy includes a sufficient number of ROIs of...
- Page 40 GeoMx DSP Instrument User Manual MAN-10152-01 for software v2.5 Select ROIs & Segment Custom Polygon 1. Select the polygon button from the Scan Workspace (see Figure 26). Figure 26: Scan Workspace polygon button 2. Single-click where you would like one vertex of the polygon; drag your mouse and watch a line grow from this vertex.
- Page 41 MAN-10152-01 for software v2.5 GeoMx DSP Instrument User Manual Select ROIs & Segment Grid ROIs 1. Select the Grid ROIs tool in the Scan Workspace (see Figure 27). 2. Select the ROI shape (circle or rectangle), diameter, and column gap (distance between each column of ROIs), row gap (distance between each row of ROIs), and odd row indent (to indent every other row in a checkerboard pattern).
- Page 42 GeoMx DSP Instrument User Manual MAN-10152-01 for software v2.5 Select ROIs & Segment Move and Adjust ROIs Select the select/edit ROI button (arrow icon) from the Scan Workspace (see Figure 28) click on the ROI you'd like to edit. Click and drag the center point of the shape to move it.
- Page 43 MAN-10152-01 for software v2.5 GeoMx DSP Instrument User Manual Select ROIs & Segment Open the ROIs List (see Figure 29) Export all ROIs as high- resolution tiled .tiff files for custom segmenting (see Using an External Program for Segmenting on page 51) .
-
Page 44: Segment Rois (Optional)
ROIs. To auto- segment all ROIs in the scan, use the Segments Panel within the Scan Workspace. Alternatively, you can export an ROI image for processing in an external program, such as ImageJ. See GeoMx DSP: Creating Geometric Segmentation Masks using ImageJ guidelines in the NanoString University Document Library at https://university.nanostring.com. - Page 45 MAN-10152-01 for software v2.5 GeoMx DSP Instrument User Manual Select ROIs & Segment 4. Click the Generate Segments button to see the segments materialize on the scan. 5. Adjust value Channel Thresholds grid (see Figure 31) , as needed, to change the sensitivity to the channel you've chosen to assess (the channel designation set to +).
- Page 46 GeoMx DSP Instrument User Manual MAN-10152-01 for software v2.5 Select ROIs & Segment Segmenting ROIs in the Scan Workspace 1. Open the Segments Panel (see Figure 32). 2. Select +Add Segment Definition one or more times to establish a definition for every segment you would like to create.
- Page 47 MAN-10152-01 for software v2.5 GeoMx DSP Instrument User Manual Select ROIs & Segment 3. For each Segment Definition box (see Figure 33), choose the Segment Name (to be used across all applicable ROIs). Do not use special characters like ‘ \ / * : <...
- Page 48 GeoMx DSP Instrument User Manual MAN-10152-01 for software v2.5 Select ROIs & Segment 6. Click the Generate Segments button to see the segments materialize on the scan. If you make changes to the segment definitions, click the Save Changes button to ensure the changes are applied to the scan.
- Page 49 MAN-10152-01 for software v2.5 GeoMx DSP Instrument User Manual Select ROIs & Segment Hole Size: Holes smaller than this size in the detected segment area will be filled and included in the segment. Increasing hole size increases total segment area.
- Page 50 GeoMx DSP Instrument User Manual MAN-10152-01 for software v2.5 Select ROIs & Segment Use the eye icon in each segment definition box to toggle all segments of that definition between visible and invisible Use the Channel Thresholds grid to customize thresholds for each individual ROI or use the Override All row to customize thresholds to the same value for every ROI.
- Page 51 MAN-10152-01 for software v2.5 GeoMx DSP Instrument User Manual Select ROIs & Segment Using an External Program for Segmenting Export images to an external program (such as ImageJ) to create segments within an ROI. 1. From the ROIs List (see Figure...
-
Page 52: Overlays, Roi Transfer, And Export Images
GeoMx DSP Instrument User Manual MAN-10152-01 for software v2.5 Overlays, ROI Transfer, Export Images Overlays, ROI Transfer, and Export Images Overlays You may overlay the current scan with imported images (including scan images exported from other GeoMx instruments) to facilitate the selection of ROIs. - Page 53 MAN-10152-01 for software v2.5 GeoMx DSP Instrument User Manual Overlays, ROI Transfer, Export Images ROI Transfer ROI Transfer copies ROIs from an existing scan onto another scan. This feature is useful for: Transferring ROIs from one section to a serial section. Creating ROI templates for large slide cohorts (to keep numbers, types, and labels of ROIs consistent).
- Page 54 GeoMx DSP Instrument User Manual MAN-10152-01 for software v2.5 Overlays, ROI Transfer, Export Images 5. When you are satisfied with the incoming ROIs positions, click the ROI button of the Overlay Alignment tools menu (see Figure 39). Figure 39: ROI button...
- Page 55 MAN-10152-01 for software v2.5 GeoMx DSP Instrument User Manual Overlays, ROI Transfer, Export Images 7. The transferred ROIs appear on the current scan. The overlay can be toggled on and off or deleted in the Overlays panel (and the ROIs will remain on the scan).
- Page 56 GeoMx DSP Instrument User Manual MAN-10152-01 for software v2.5 Overlays, ROI Transfer, Export Images Export Images IMPORTANT: Do not attempt to export images when collection is in progress. The instrument must be in an idle software state before exporting images.
-
Page 57: Approve Rois For Collection
Figure 44) when ROI selection is complete. Figure 44: GeoMx DSP Scan Workspace with Exit button at lower left 2. A pop-up window will ask you to Approve ROIs or Save and Exit. The Well Count estimate for your scan will appear here. Approve the ROIs to queue them for collection. Save and Exit to save the ROIs without starting Collection at the current time. - Page 58 Modify button will not be available. Figure 45: Scan status messages and buttons If the collection plate becomes full, the GeoMx DSP instrument will pause and display prompts instructing how to change the collection plate (see Figure 46) .
-
Page 59: Unload Plate And Slides
Choose the Remove Slides and Microplate button to remove these materials from the instrument, without initiating a new run. Removing the collection plate Follow the prompts in the GeoMx DSP Control Center to remove the collection plate from the instrument (see Figure 48). - Page 60 MAN-10152-01 for software v2.5 Unload Plate and Slides Removing the Slide Holder 1. Follow the prompts in the GeoMx DSP Control Center to remove the slide holder from the stage (see Figure 49) and move it to a designated laboratory space.
-
Page 61: Finalize The Collection Plate
MAN-10152-01 for software v2.5 GeoMx DSP Instrument User Manual Finalizing Finalize the collection plate When you finalize the collection plate, you are designating the group of samples that will be processed together in the subsequent readout steps. Notes on finalizing the collection plate: Plates are finalized by row, not by the well, even if some wells in the row are unused. - Page 62 MAN-10152-01 for software v2.5 Finalizing 1. To finalize a plate, click on the plate icon area at the lower right of the GeoMx DSP Control Center (see Figure 50). If the plate is not currently on the instrument, enter its barcode.
- Page 63 Seq Code UDI Indices file. use for reference during hybridization setup. This worksheet also contains 12. NextSeq 1000/2000 users with their GeoMx DSP information needed to set up readout on linked to their BaseSpace Sequence Hub the nCounter SPRINT platform.
- Page 64 GeoMx DSP Instrument User Manual MAN-10152-01 for software v2.5 Finalizing Table 3. i5 Index Read Direction - for Finalizing an NGS Plate i5 Sequence Illumina Platform Orientation Forward HiSeq 2000/2500 MiSeq NovaSeq 6000 with v1.0 reagent kits NextSeq 500/550 where local run manager software is used to set up...
-
Page 65: Uploading Counts
MAN-10152-01 for software v2.5 GeoMx DSP Instrument User Manual Uploading Counts Uploading Counts 1. Click on Data Collection then Upload Counts/Cal Files. The Upload Count Data and Cal Files window opens (see Figure 54). 2. Click Choose File and navigate to the zipped counts folder: DCC.zip for NGS... -
Page 66: Create Slides And Scans Outside Geomx Dsp Workflow
GeoMx DSP Instrument User Manual MAN-10152-01 for software v2.5 Create Slides and Scans Create Slides and Scans outside GeoMx DSP Workflow Create a New Folder You can create folders where you can organize slide records, scan cards, and analyses. 1. Select the Records button in the DSP Control Center (see Figure 55). - Page 67 . To associate scan parameters with this slide record, click the Add Scan button in the Slide Record window. Figure 56: Slide record under Records in GeoMx DSP Control Center 2. The Scan Parameters window opens (see Figure 57). Proceed to fill in scan parameters...
-
Page 68: Example Scan Parameters
GeoMx DSP Instrument User Manual MAN-10152-01 for software v2.5 Create Slides and Scans Example Scan Parameters For NanoString- provided Morphology Marker Kit reagents, the following settings are a recommended starting point for Scan Parameters ( Figure 58 Figure 59). GeoMx Melanoma TME Morphology Kit, Human... -
Page 69: Changing A Probe Kit Configuration File After Collection
DCC counts files, uploading them to the scan will now GeoMx DSP will overwrite the originals. Studies created from this show counts for scan will now show counts for the correct targets. the correct targets. -
Page 70: Slide And Scan Management
GeoMx DSP Instrument User Manual MAN-10152-01 for software v2.5 Slide and Scan Management Slide and Scan Management To manage slide records outside of the DSP run workflow, select the Records button in the DSP Control Center. This opens the Navigation window. - Page 71 Click the Add to Queue button to send this scan's counts to the Data Analysis queue. See the GeoMx DSP Data Analysis User Manual (MAN-10154). FOR RESEARCH USE ONLY. Not for use in diagnostic procedures.
- Page 72 GeoMx DSP Instrument User Manual MAN-10152-01 for software v2.5 Slide and Scan Management Managing Scan Cards Select a folder from the Navigation window. Click the grid button or bars button in the top right to see alternative gallery views of the scan cards in that folder (see Figure 62).
- Page 73 (Scan Name or Slide Name), if desired. Once all desired scans have been selected, click the Add to Queue button to send this scan's counts to the Data Analysis queue. See the GeoMx DSP Data Analysis User Manual (MAN- 10154).
-
Page 74: Administration Menu
(see Figure 63) . General users will only have access to the Download Logs feature of the Administration menu. Figure 63 : GeoMx DSP Administrative menu FOR RESEARCH USE ONLY. Not for use in diagnostic procedures. - Page 75 ADMIN_SystemPrimeFromBottle.xaml is for recovering from a fluidic error on the needle if it has pulled air into the system. Run ONLY at the instruction of NanoString personnel. ControlDoor.xaml lets you unlock/lock door. A prompt will appear to ask if you want to lock the door.
- Page 76 GeoMx DSP Instrument User Manual MAN-10152-01 for software v2.5 Administration Menu XCHANGE Using Data Exchange, you may export GeoMx folders, scans, and studies to an external drive and import those folders, scans, and studies to another GeoMx system. This function is only available when logged in locally to the GeoMx system, not over remote Chrome connection.
- Page 77 MAN-10152-01 for software v2.5 GeoMx DSP Instrument User Manual Administration Menu 5. Click Confirm. 6. The Notification Bell in the Control Center will inform when export is complete. IMPORTANT: Allow the export to fully complete before starting a new export. Interrupting an export in progress with a new export could result in overwriting files.
- Page 78 Clicking on the Reset Error Level button will result in the following warning: Warning: Resetting data collection errors without correcting underlying causes or first contacting NanoString support may result in future sample loss or instrument damage. If you choose to proceed, the error reset signal will be sent to the system and the result of this action (Success or Failure) will be displayed.
- Page 79 \\\\server IP address\\folder path Since archiving from the GeoMx DSP System can occur at any time, the remote location must be available at all times. Username: enter the username for a user with read and write privileges for the remote server path entered.
- Page 80 GeoMx DSP Instrument User Manual MAN-10152-01 for software v2.5 Administration Menu In the event that you received an error when setting up the archive, check the following specifications and tips: Ensure that your institute network is set up for SMB3 file sharing.
- Page 81 NanoString by contacting your NanoString representative. Set up the server by installing its software according to GeoMx DSP Auxiliary Server Software Manual (MAN-10135), then pairing it with the GeoMx DSP following the steps below. Ensure that there are no Data Analysis sessions in progress when configuring the auxiliary server;...
- Page 82 GeoMx DSP Instrument User Manual MAN-10152-01 for software v2.5 Administration Menu 6. You will be asked to confirm the configuration. This is the last opportunity to abort the configuration. Click Continue. Data Analysis will be temporarily taken offline while setup continues.
- Page 83 MAN-10152-01 for software v2.5 GeoMx DSP Instrument User Manual Administration Menu ROUP ANAGEMENT IMPORTANT: All Admin users are able to manage all groups. In the GeoMx software you can create different user groups to control which users have access to data. In the Group Management tab, you can create a new group or edit an existing...
- Page 84 GeoMx DSP Instrument User Manual MAN-10152-01 for software v2.5 Administration Menu ANAGING EMBERS 1. Once on the Group Management tab under Administration, click the Manage button next to the group of interest. 2. The group membership window will appear, listing the available users and the current...
- Page 85 Chrome browser. Users may connect their GeoMx DSP to their Illumina BaseSpace workgroup(s) to enable seamless end-to-end workflows. These workflows allow a sequencing job to be sent from the GeoMx DSP directly to the BaseSpace Sequence Hub, eliminating the file processing steps of the conventional workflow.
- Page 86 GeoMx DSP Instrument User Manual MAN-10152-01 for software v2.5 Administration Menu 7. Return to the GeoMx DSP browser tab and click Connect to BaseSpace. An authentication windows opens. Click Accept to grant permission for the applications to communicate. 8. Enter the Illumina Platform API Key as follows: In a third browser tab, navigate to https://accounts.login.illumina.com/platform-...
- Page 87 Keep the key in a secure location and do not share it with others, as such exposure may allow unknown users to access your data. If the key is compromised, a user should regenerate it and configure the GeoMx DSP connection with the new API key.
- Page 88 GeoMx DSP Instrument User Manual MAN-10152-01 for software v2.5 Administration Menu ANAGEMENT In the Kit Management tab (see Figure you can upload configuration files to your system. Download configuration files from www.nanostring.com/dspconfigfiles transfer unzipped files to the instrument via USB.
- Page 89 When connected to your system remotely, you can analyze data, select or modify ROIs, and export images. 1. Connect the GeoMx DSP instrument to your network with a network cable. 2. Log into the GeoMx DSP system with an administrative username and password.
- Page 90 2. Read the Terms and Agreements on this page, scrolling to the end. 3. Check the box confirming you have read and agree to the terms. 4. Click the Send Instrument Performance Data to NanoString button. 5. A message will appear, indicating a successful enrollment.
- Page 91 Use the Platform Selection window (see Figure 81) to indicate the platforms your laboratory uses for GeoMx DSP data readout: the nCounter platform, Illumina NGS platform, or both.. Figure 81: Platform Selection window FOR RESEARCH USE ONLY. Not for use in diagnostic procedures.
- Page 92 SSL S ETTINGS This is only relevant for computers used to remotely access the GeoMx DSP interface. This process is not necessary for the on-board DSP computer. If your browser does not recognize the GeoMx DSP software security certificate and warns that the site is “not secure,”...
- Page 93 MAN-10152-01 for software v2.5 GeoMx DSP Instrument User Manual Administration Menu 5. Click the Install Certificate button (see Figure 84). Figure 84: Install certificate window 6. Choose Local Machine and click Next (see Figure 85). Administrative privileges are required for this step;...
- Page 94 GeoMx DSP Instrument User Manual MAN-10152-01 for software v2.5 Administration Menu 7. Select the option for Place all certificates in the following store, then click Browse (see Figure 86). 8. Browse to Trusted Root Certification Authorities click (see Figure 87).
- Page 95 If your GeoMx is configured to use an auxiliary server, it is required to update the NanoString software on the auxiliary server as soon as the GeoMx DSP software update is complete. See MAN-10135 GeoMx Auxiliary Server Software Installation Manual at http://www.nanostring.com/geomx-software-updates.
- Page 96 Please check with your network administrator to allow outbound network traffic from your GeoMx DSP and auxiliary server to the address ntp.ubuntu.com. If it’s not possible to use ntp.ubuntu.com, select an alternative time server that you can successfully connect to.
- Page 97 MAN-10152-01 for software v2.5 GeoMx DSP Instrument User Manual Administration Menu ANAGEMENT The User Management window allows you to edit or create new user profiles (see Figure 92). You can also manage the type of password users are allowed to use. Scroll to the bottom of the User Accounts list and check the Enforce Strict Passwords box to require users to have more complex passwords.
- Page 98 GeoMx DSP Instrument User Manual MAN-10152-01 for software v2.5 Administration Menu 1. On the User Management tab under Administration , select the Create User button. 2. The Create New User window will appear (see Figure 93) ; fill out the required fields (indicated with *).
- Page 99 If encountering a warning on your system, contact GeoMxSupport@nanostring.com. At the instruction of a NanoString support scientist, you may reset the warning light by navigating to Warning Reset under Administration and clicking the Reset button.
-
Page 100: Geomx Dsp Instrument Reagents
MAN-10152-01 for software v2.5 GeoMx DSP Instrument Reagents GeoMx DSP Instrument Reagents Figure 95: GeoMx DSP instrument reagent bay diagram The GeoMx DSP instrument requires the following reagent bottles in the reagent bay (see Figure 95): Buffer S: 1 L bottles in reagent bay slots 1 and 4. -
Page 101: Changing Reagent Bottles
GeoMx DSP Instrument Reagents Changing Reagent Bottles The GeoMx DSP system tracks reagent usage and waste levels and displays the volume of each in the Reagent Status Indicator in the lower right of the Control Center. The system checks reagent levels before ROI collection on each slide; if a bottle runs too low for collection, you will be prompted to replace the depleted bottle. - Page 102 The system will check the waste level periodically; if the waste is too full, you will be prompted to empty it. You can also click on the Reagent Status Indicator in the GeoMx DSP Control Center to initiate the waste emptying process if the instrument is in an idle software state (see Bring GeoMx DSP Software to an Idle Software State on page 95).
-
Page 103: Geomx Dsp Instrument Maintenance
GeoMx DSP Instrument User Manual GeoMx DSP Instrument Maintenance GeoMx DSP Instrument Maintenance System Startup & Shutdown The GeoMx DSP instrument should be shut down and restarted at least weekly as well as before every new run. Only a user with administrative privileges can shutdown through the Administration Menu. - Page 104 MAN-10152-01 for software v2.5 GeoMx DSP Instrument Maintenance Shut Down The GeoMx DSP instrument should be shut down and restarted on a weekly basis. IMPORTANT: Leave the slide tray in the instrument. Ensure it is in the instrument before shutting down or restarting. If the door is locked, click Assist (wrench icon), Restart Data Collection Workflow to reach the prompt to open the door.
-
Page 105: Cleaning The Slide Holder
MAN-10152-01 for software v2.5 GeoMx DSP Instrument User Manual GeoMx DSP Instrument Maintenance Cleaning the Slide Holder Clean the slide holder after each run to ensure proper instrument function. 1. If neccessary, remove buffer from loaded slides with a pipette and then remove slides from the slide holder. -
Page 106: Hibernating The Geomx Dsp For Extended Shutdown
GeoMx DSP Instrument Maintenance Hibernating the GeoMx DSP for Extended Shutdown If the GeoMx DSP instrument will be inactive for 2 weeks or more, NanoString recommends following this hibernation protocol to flush the fluidic lines of instrument buffers and fill the lines with DEPC-treated water. - Page 107 When finished, close the door to the instrument. 3. Turn off the instrument (optional): a. Select the Administration tab from the GeoMx DSP Control Center. b. Select System Settings, then System Shutdown, then Shutdown System. c. When the screen turns black (after ~30 seconds), power off by flipping the switch on the back-right of the instrument.
- Page 108 GeoMx DSP Instrument User Manual MAN-10152-01 for software v2.5 GeoMx DSP Instrument Maintenance i. Insert slide holder with a spare slide in Slot 1, covered with Buffer S. ii. Insert the spare collection plate. iii. Select any Morphology Marker kit from the dropdown menu. Do not select any Panel Kit.
-
Page 109: General Cleaning
4. Remove and dispose of the mesh filter. Do not attempt to clean and re-use the filter. 5. Insert the new filter supplied by NanoString. 6. Replace the metal cover and affix the screw by hand (do not use tools). -
Page 110: Instrument Best Practices
GeoMx DSP Instrument User Manual MAN-10152-01 for software v2.5 Instrument Best Practices Instrument Best Practices Reboot instrument weekly, and prior to beginning an instrument run. To properly shut down the instrument, select Administration, System Settings then Shutdown. When the screen goes dark, flip the switch at back of instrument to off. -
Page 111: Troubleshooting
MAN-10152-01 for software v2.5 GeoMx DSP Instrument User Manual Troubleshooting Troubleshooting If you run into a problem with the instrument, try these steps: 1. Click F5 or click Assist (wrench icon) then Refresh to update the screen view. 2. If the problem is not resolved, log out by pressing Ctrl Alt Del then Sign Out. When the screen shows the time, click anywhere to return to the users screen. - Page 112 Troubleshooting Issue Possible cause Suggested action Can’t log in from Clocks are out of Check that the remote computer clock and the GeoMx DSP a remote sync instrument clock are set to the same time. computer The door should The latch may be...
- Page 113 MAN-10152-01 for software v2.5 GeoMx DSP Instrument User Manual Troubleshooting Issue Possible cause Suggested action Accidentally ran User error See instructions on amending .pkc after the experiment experiment with page 69. wrong set of probe kit configuration (.pkc) files selected I can't get Overcomplicated A complex segmentation strategy may lead to ROI segments...
- Page 114 GeoMx DSP Instrument User Manual MAN-10152-01 for software v2.5 Troubleshooting Issue Possible cause Suggested action Screen is stuck Software is lagging Click Ctrl Alt Del then Sign Out. When the screen shows the on the pop-up time, click anywhere. Sign in to Kiosk User.
-
Page 115: Symbols & Definitions
MAN-10152-01 for software v2.5 GeoMx DSP Instrument User Manual Symbols & Definitions Symbols & Definitions Manufacturer Authorized Representative in the European Community (safety) Safety CE Mark UK Conformity Assessed Mark Catalogue or Reference Number Batch code / Lot number Serial number... - Page 116 NanoString Technologies, Inc. CONTACT US SALES CONTACTS 530 Fairview Ave North info@nanostring.com United States: us.sales@nanostring.com Seattle, Washington 98109 USA Tel: +1 888 358 6266 EMEA: europe.sales@nanostring.com www.nanostring.com Fax: +1 206 378 6288 Asia Pacific & Japan: apac.sales@nanostring.com Other regions: info@nanostring.com...
Need help?
Do you have a question about the GeoMx DSP and is the answer not in the manual?
Questions and answers