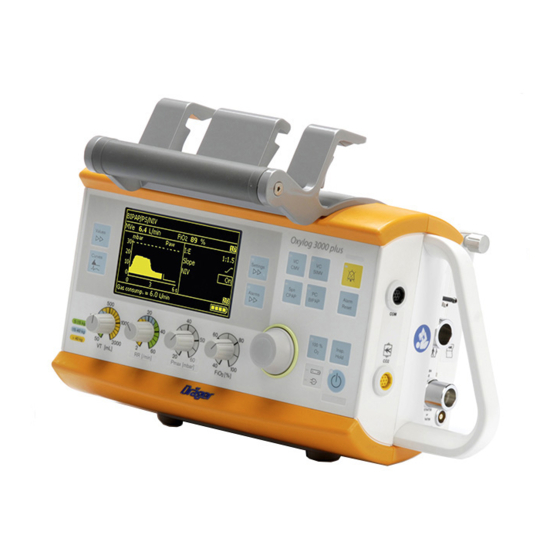
Dräger Oxylog 3000 plus Instructions For Use Manual
Emergency and transport ventilator
Hide thumbs
Also See for Oxylog 3000 plus:
- Instructions for use manual (176 pages) ,
- Supplement manual (65 pages) ,
- Pocket manual (40 pages)

Related Manuals for Dräger Oxylog 3000 plus


Summary of Contents for Dräger Oxylog 3000 plus
- Page 1 Instructions for Use Oxylog 3000 plus Emergency and Transport Ventilator WARNING To properly use this medical device, Software 1.n read and comply with these Instructions for Use.
- Page 2 PEEP, Air, or Alarm settings. Trademarks ® – Oxylog ® – AutoFlow ® – DrägerService are trademarks owned by Dräger. ® – Sekusept is a trademark of ECOLAB. – BIPAP* Trademark used under license Instructions for Use Oxylog 3000 plus SW 1.n...
- Page 3 Users medical device. Users are intended operators as defined on page 14 hereof for the use of the medical device in accordance with its intended use. Instructions for Use Oxylog 3000 plus SW 1.n...
- Page 4 Abbreviations and Symbols Please refer to "Abbreviations" on page 23 and "Symbols" on page 24 for explanations. Instructions for Use Oxylog 3000 plus SW 1.n...
-
Page 5: Table Of Contents
Error messages during the device check . . . 122 zero calibration and filter check before ventilation (optional) ....Instructions for Use Oxylog 3000 plus SW 1.n... - Page 6 Maintenance ......133 Maintenance intervals of Oxylog 3000 plus . . 134 Safety inspections ..... 135 Exchanging the internal battery .
- Page 7 Installing accessories ....Instructions for Use only available once ..Instructions for Use Oxylog 3000 plus SW 1.n...
-
Page 8: General Safety Information
If unreleased accessories are used, there is a risk of patient injury due to medical device failure. Only use the medical device together with released accessories listed in the current list of accessories. Instructions for Use Oxylog 3000 plus SW 1.n... -
Page 9: Connected Devices
Do not use portable and mobile HF communi- Instructions, warnings, and caution statements are cations equipment, e.g., mobile phones, in the limited, therefore, largely to the specifics of the vicinity of the medical device. Dräger design. Instructions for Use Oxylog 3000 plus SW 1.n... -
Page 10: Functional Safety
For Your Safety and that of Your Patients Functional safety The essential performance of the Oxylog 3000 plus is defined as: Appropriate delivery of ventilation to the patient- connection port or generation of an alarm condition. Appropriate monitoring CAUTION Always use a separate SpO... -
Page 11: Product-Specific Safety Information
CAUTION times! Whenever a patient is connected to the ventilator, constant attention by qualified Installations on the Oxylog 3000 plus must be medical staff is required in order to provide done in accordance with these Instructions for immediate corrective action in case of a Use. - Page 12 This page intentionally left blank Instructions for Use Oxylog 3000 plus SW 1.n...
-
Page 13: Application
Indications / Contraindications ..Environment of use ....Instructions for Use Oxylog 3000 plus SW 1.n... -
Page 14: Intended Use
Application Intended use The Oxylog 3000 plus is a time-cycled, volume- controlled and pressure-controlled emergency and transport ventilator for patients requiring mandatory or assisted ventilation with a tidal volume from 50 mL upwards. Intended operator: the device is intended for use by and under the supervision of trained healthcare professionals, e.g. -
Page 15: Environment Of Use
The medical device may malfunction, causing danger to the patient. WARNING This medical device is neither approved nor certified for use in areas where combustible or explosive gas mixtures are likely to occur. Instructions for Use Oxylog 3000 plus SW 1.n... - Page 16 This page intentionally left blank Instructions for Use Oxylog 3000 plus SW 1.n...
-
Page 17: System Overview
Abbreviations ......Symbols......Instructions for Use Oxylog 3000 plus SW 1.n... -
Page 18: Front Panel With All Options
O inhalation or key V Key Values to change screen pages in 100 % O for 100 % O application, depending the "Measured Values" window on the option installed at manufacture Instructions for Use Oxylog 3000 plus SW 1.n... -
Page 19: Side View, Right
Do not use the protection bracket as a handle. Tilting the device to a vertical position may lead to F Connector for power supply airway pressure oscillation. G Connector for CO sensor H Connector for data communication cable Instructions for Use Oxylog 3000 plus SW 1.n... -
Page 20: Adult Hose System, Reusable
A Angled connector B Flow sensor B Flow sensor C Breathing valve C Breathing valve D Breathing hose D Breathing hose E Flow and pressure measuring hoses E Flow and pressure measuring hoses Instructions for Use Oxylog 3000 plus SW 1.n... -
Page 21: Paediatric Hose System, Disposable
System Overview Paediatric hose system, disposable A Angled connector B Flow sensor C Breathing valve D Breathing hose E Flow and pressure measuring hoses Instructions for Use Oxylog 3000 plus SW 1.n... -
Page 22: Range Of Functions
– NIV: in the ventilation modes: SpnCPAP (/PS), PC-BIPAP (/PS), VC-CMV / AF, VC-AC / AF and VC-SIMV / AF. Special procedures: – Inspiration hold, – O inhalation (optional), with an inhalation mask. Instructions for Use Oxylog 3000 plus SW 1.n... -
Page 23: Abbreviations
Oxygen Tidal volume -Inhalat. inhalation VTapn Tidal volume during apnoea ventilation Airway pressure Expiratory tidal volume PC-BIPAP Pressure Controlled - Biphasic Positive Airway Pressure Inspiratory tidal volume PEEP Positive End Expiratory Pressure Instructions for Use Oxylog 3000 plus SW 1.n... -
Page 24: Symbols
Do not dispose of the device as municipal waste. Rotary knob Manufacturing date Start / Standby key Manufacturer Upper alarm limit DC input Lower alarm limit Operating instructions Advisory message Caution message Follow Instructions for Use Warning message Instructions for Use Oxylog 3000 plus SW 1.n... - Page 25 Do not use oil and grease Non-sterile Keep away from sunlight For indoor use only Do not open Prohibition: Do not obstruct emer- gency air intake or fresh gas intake Paediatric Pediatric Adult Adult Instructions for Use Oxylog 3000 plus SW 1.n...
- Page 26 This page intentionally left blank Instructions for Use Oxylog 3000 plus SW 1.n...
-
Page 27: Operating Concept
Additional function keys ....Screen window structure....Instructions for Use Oxylog 3000 plus SW 1.n... -
Page 28: Switch On Or Off
Operating Concept Switch on or off Oxylog 3000 plus Switch on To switch the device ON, briefly press the key (A). Switch off Refer to "Shutdown" on page 82. Instructions for Use Oxylog 3000 plus SW 1.n... -
Page 29: Ventilation Controls
The active ventilation mode is displayed in the – Inspiratory tidal volume VT [mL], upper left corner of the display (C). – Ventilation respiratory rate RR [/min], – Maximum inspiratory pressure Pmax [mbar], – O concentration FiO [%]. Instructions for Use Oxylog 3000 plus SW 1.n... -
Page 30: Display Operating Controls
(ventilation screen) in the "Settings and Alarms" window and to change screen pages. E Key Alarms to display the alarm settings in the "Settings and Alarms" window and to change screen pages. Instructions for Use Oxylog 3000 plus SW 1.n... -
Page 31: Additional Function Keys
D Key O inhalation for O inhalation or key 100 % O for 100 % O application, depending on the option installed at manufacture. Instructions for Use Oxylog 3000 plus SW 1.n... -
Page 32: Screen Window Structure
F Information window. For information on the E Trigger indicator. content, refer to "Messages in the information The last page shows an overview of all measured window" on page 120. values. Instructions for Use Oxylog 3000 plus SW 1.n... - Page 33 – RRapn and VTapn – Slope – Tapn – Tplat – Trigger Δ – Psupp B Page number: e.g. 1st page of 3 available pages. Press Settings key. The pages are displayed consecutively. Instructions for Use Oxylog 3000 plus SW 1.n...
- Page 34 Curve window showing the airway pressure curve Paw. Curves Press Curves key multiple times. Flow curve large view Curve window showing the flow curve. curve large view Curve window showing the CO curve. Instructions for Use Oxylog 3000 plus SW 1.n...
-
Page 35: Assembly
......Hanging the Oxylog 3000 plus on standard rail systems....Instructions for Use Oxylog 3000 plus SW 1.n... - Page 36 Risk of CO rebreathing. ventilating. Risk of asphyxiation or hypoventilation. CAUTION Do not use the Oxylog 3000 plus without a dust WARNING filter. Do not use any damaged parts or accessories. Risk of patient inhaling dust or device damage. Damaged or deformed parts must be replaced.
-
Page 37: Internal Rechargeable Battery
3 Remove the battery (A) by pulling the tab. Checking the charge status of the battery Press the button on the rechargeable battery. The charge status is indicated as a percentage by an indicator. Instructions for Use Oxylog 3000 plus SW 1.n... -
Page 38: Connecting The Power Supply
It is recommended to have a fully charged spare battery available when using the Oxylog 3000 plus. Always position the device so that the external power connector can be easily disconnected from the ventilator. Instructions for Use Oxylog 3000 plus SW 1.n... -
Page 39: External Power Supply
Risk of electric shock or equipment damage. The DC/DC converter must be used to connect the Oxylog 3000 plus to onboard DC power supply systems, e.g. in ambulances. It can be used with the following voltages: 12 VDC, 24 VDC or 28 VDC. -
Page 40: External Power Supply From Mains Voltage (Ac/Dc Power Pack)
1 Connect the mains plug (A) to the mains outlet. 2 Connect the DC connector (B) to the DC connector (C) of the Oxylog 3000 plus. 3 When the Oxylog 3000 plus is correctly connected to an external supply, the indicator (D) lights up. -
Page 41: Connecting The Gas Supply
O concentration below 25 %, to prevent risk of fire. WARNING No smoking or open flames. enhances combustion of other substances and can intensify fires. Instructions for Use Oxylog 3000 plus SW 1.n... -
Page 42: Supply From A Piped O2 System
4 Rotate the cylinder valve (C) slowly and open fully. WARNING Do not connect flow control valves or flowme- ters in the gas supply to the Oxylog 3000 plus. The ventilator could malfunction. WARNING Always check the O pressure of cylinder before use, to prevent insufficient oxygen supply during use. -
Page 43: Assembling The Adult Reusable Hose System
(C). Note the correct alignment of the parts by the groove in the flow sensor (D) and the notch on the breathing valve (C). 4 Push the angled connector (E) onto the flow sensor (D). Instructions for Use Oxylog 3000 plus SW 1.n... -
Page 44: Hose Connections
2 Connect the flow measuring lines (B) to the noz- zles on the flow sensor. Note the different diam- eters of the hoses and the nozzles when connecting the flow measuring lines and con- nect to the correct side. Instructions for Use Oxylog 3000 plus SW 1.n... -
Page 45: Connecting The Adult Disposable Hose System
2 Connect the breathing hose (B) to the gas outlet on the Oxylog 3000 plus. When connecting a hose, check that the hose setting in the Settings window corresponds to the connected hose. Instructions for Use Oxylog 3000 plus SW 1.n... -
Page 46: Connecting The Paediatric Disposable
3 Connect the breathing hose (C) to the gas outlet on the Oxylog 3000 plus. When connecting a hose, check that the hose setting in the Settings window corresponds to the connected hose. Instructions for Use Oxylog 3000 plus SW 1.n... -
Page 47: Connecting The Bacterial Filter Or Hme
Connect the bacterial filter or HME to the angled connector as follows. Adult reusable hose: Instructions for Use Oxylog 3000 plus SW 1.n... -
Page 48: Connecting The Co 2 Sensor And The Cuvette
58. For CO zero calibration and filter check during ventilation, see page 91. For measurement and cuvette type selection see page 91. For CO configuration in the Customer Service Mode see page 105. Instructions for Use Oxylog 3000 plus SW 1.n... -
Page 49: Hanging The Oxylog 3000 Plus On Standard Rail Systems
Assembly Hanging the Oxylog 3000 plus on standard rail systems The Oxylog 3000 plus can be hung on various rail systems measuring up to 35 mm diameter by means of the claw. – Ensure that the rail is completely inserted in the claw. - Page 50 This page intentionally left blank Instructions for Use Oxylog 3000 plus SW 1.n...
-
Page 51: Getting Started
Zero calibration before ventilation ..filter check before ventilation ..Preparation for use after system check, zero calibration and filter check ..Instructions for Use Oxylog 3000 plus SW 1.n... -
Page 52: Charging The Battery
When an external supply is available: Oxylog 3000 plus The remaining capacity of the battery is indicated by Oxylog 3000 plus in 25 % increments in the lower right section of the information window when power is ON. As an example, in the above screen the battery is 75 % charged. -
Page 53: Operating Time
The amount of gas from the high-pressure supply, which is currently being consumed, is indicated by the Oxylog 3000 plus in the lower left section of the information window in L/min. This display is over- written when a higher priority message is activated. -
Page 54: Checking Readiness For Operation
– Before every use of the device if the breathing hose was changed. – At least every six months. The Oxylog 3000 plus interrupts the device check if a fault is detected. The relevant fault is indicated on the screen. - Page 55 NOTE Press rotary knob for device check and During device check, the connections (gas supply, configuration hose type) and the system (flow, pressure levels, alarm signals and knobs) are checked. Instructions for Use Oxylog 3000 plus SW 1.n...
- Page 56 2 Select and confirm the appropriate hose type. 3 Ensure that the test lung has been connected. Oxylog 3000 plus The Oxylog 3000 plus automatically checks if a test lung has been connected. The device check is interrupted if a test lung is not detected within one minute.
- Page 57 Oxylog 3000 plus. 6 Connect the external power supply. Troubleshooting WARNING The ventilator is ready for operation only after all functional tests have been successfully performed. Instructions for Use Oxylog 3000 plus SW 1.n...
-
Page 58: Co 2 Zero Calibration And Filter Check Before Ventilation (Optional)
2 Press the rotary knob (B) to confirm, before the black progress bar is complete. Instructions for Use Oxylog 3000 plus SW 1.n... -
Page 59: Co 2 Filter Check Before Ventilation
4 Press Alarm Reset to exit. If the check was not successful: 5 Attach the CO sensor back to the cuvette. The Oxylog 3000 plus displays the alarm Filter check failed. The test value is outside the If zero calibration was not successful: permissible tolerance. -
Page 60: Preparation For Use After System Check, Co
Preparation for use after system check, CO zero calibration and filter check 1 Assemble the Oxylog 3000 plus for operation. Refer to "Assembly" on page 35. 2 Connect to the power supply and gas supply. Refer to "Internal rechargeable battery"... -
Page 61: Operation
Alarm volume ......Shutdown ......Instructions for Use Oxylog 3000 plus SW 1.n... -
Page 62: Starting Operation
100 % O Exposing the patient to very warm inspiratory gas may cause lung damage. The Oxylog 3000 plus performs a selftest. The selftest will be completed in approximately six seconds. During the selftest, the system briefly displays the... - Page 63 Refer to "Customer Service Mode" on page 98. Starting screen with default settings. The default settings can be configured in Customer Service Mode. Refer to "Set start-up settings" on page 100. Instructions for Use Oxylog 3000 plus SW 1.n...
-
Page 64: Preparing Ventilation Mode
I:E will be shown in the information window when Ti is selected, and vice versa. This configuration will apply to all ventilation modes. Refer to the "Customer Service Mode" on page 98. Instructions for Use Oxylog 3000 plus SW 1.n... -
Page 65: Vc-Cmv, Vc-Ac
Set the ventilation pattern with the controls below the display: – AutoFlow (optional). – Tidal volume VT. – Ventilation respiratory rate RR. (minimum possible frequency: 5 per min). – Maximum airway pressure Pmax. – O concentration FiO Instructions for Use Oxylog 3000 plus SW 1.n... -
Page 66: Trigger (Vc-Ac)
Therefore, the correct cuvette type must be selected in the Setting menu. Otherwise the zero point is shifted by up to ± 8 mmHg of CO Instructions for Use Oxylog 3000 plus SW 1.n... -
Page 67: Setting Autoflow (Optional)
1 Set a value less than 1 L/min or greater than 15 L/min (off is displayed instead of a value). The Oxylog 3000 plus will try to limit the airway pressure Paw to the set Pmax, without ending the 2 Press the rotary knob to confirm. -
Page 68: Vc-Simv, Vc-Simv/Ps
– Respiratory rate RR. (minimum possible respiratory rate: 2 per min). – Plateau time Tplat %, in % of the inspiratory – Maximum airway pressure Pmax. time. – O concentration FiO – AutoFlow (optional). Instructions for Use Oxylog 3000 plus SW 1.n... -
Page 69: Setting Pressure Support Vc-Simv/Ps
Therefore, the correct cuvette type must be selected in the Setting menu. Otherwise the zero point is shifted by up to ± 8 mmHg of CO Instructions for Use Oxylog 3000 plus SW 1.n... -
Page 70: Setting Autoflow (Optional)
– The AutoFlow function AutoFlow-AF. When AutoFlow is switched on, the setting Tplat% is no longer valid, and Slope must be set. For more information on AutoFlow, refer to "AutoFlow" on page 162. Instructions for Use Oxylog 3000 plus SW 1.n... -
Page 71: Pc-Bipap, Pc-Bipap/Ps
Refer to "NIV – Non-invasive ventilation (Mask ventilation)" on page 76. Set the ventilation pattern with the controls below the display: – Respiratory rate RR. – Maximum airway pressure Pmax. – O concentration FiO Instructions for Use Oxylog 3000 plus SW 1.n... -
Page 72: Setting Pressure Support Pc-Bipap/Ps
Therefore, the correct cuvette type must be selected in the Setting menu. Otherwise the zero point is shifted by up to ± 8 mmHg of CO Instructions for Use Oxylog 3000 plus SW 1.n... -
Page 73: Spncpap, Spncpap/Ps
Therefore, the correct cuvette type must be selected in the Setting menu. Otherwise the zero point is shifted by up to ± 8 mmHg of CO Instructions for Use Oxylog 3000 plus SW 1.n... -
Page 74: Apnoea Ventilation
The ventilation time ratio I:E = 1:1.5 and the plateau time Tplat % = 0 are preset during apnoea ventilation. 3 Set RRapn and VTapn. 4 Set Pmax. This determines the maximum airway pressure allowed during apnoea ventilation. Instructions for Use Oxylog 3000 plus SW 1.n... -
Page 75: Setting Pressure Support Spn-Cpap/Ps
SpnCPAP: – Sensitivity Trigger. Successful patient triggering is indicated by an asterisk (*) on the left side of the curve window. – Pressure rise time Slope (effective for Pressure Δ Support Psupp). Instructions for Use Oxylog 3000 plus SW 1.n... -
Page 76: Niv - Non-Invasive Ventilation (Mask Ventilation)
SpnCPAP (/PS), 2 Select NIV on and confirm. PC-BIPAP (/PS), VC-CMV / AF, VC-AC / AF and VC-SIMV / AF. The Oxylog 3000 plus automatically – The supplement NIV appears in the ventilation adjusts to the requirements of mask ventilation. -
Page 77: Special Functions
0 mbar. The !!! Paw high alarm is active. NOTE The options 100 % O and O inhalation are mutually exclusive. Press key Inspiration hold (A) for as long as inspiration is required. Instructions for Use Oxylog 3000 plus SW 1.n... - Page 78 2 Press and hold key O inhalation (A) for approx. 3 seconds. inhalation is performed with the previously effective setting. 3 Set and confirm the required O flow via the rotary knob (C). Display (example): Instructions for Use Oxylog 3000 plus SW 1.n...
-
Page 79: O2 Concentration With "O2 Blending
It is not measured by an internal O sensor. 82 (%) If the Oxylog 3000 plus cannot achieve the set O concentrations, the signal "Check settings FiO " prompts the user to correct the setting. -
Page 80: Setting Hme Correction
35 °C and a relative humidity of 0 %. When HME - Off is selected, the flow sensor expects an expiration gas temperature of 37 °C and a relative humidity of 100 %. Instructions for Use Oxylog 3000 plus SW 1.n... -
Page 81: Calibration
(power save mode). Alarm volume The alarm volume level can be set on the last page of the Alarms menu, from level 1/4 to 4/4. Instructions for Use Oxylog 3000 plus SW 1.n... -
Page 82: Shutdown
When the device is switched OFF, the battery is If this is not done, the corrugations or hose may still being charged if the device is connected to an be torn from the sleeve. external power source. Instructions for Use Oxylog 3000 plus SW 1.n... -
Page 83: Alarms
In the event of an alarm ....Setting alarm limits ....Instructions for Use Oxylog 3000 plus SW 1.n... -
Page 84: Types Of Alarms
An alarm of medium priority. The alarm indicator (A) flashes yellow. The Oxylog 3000 plus assigns a priority to the Caution messages are preceded by two alarm message. This message highlights the text exclamation marks. -
Page 85: In The Event Of An Alarm
(e.g. in a helicopter). NOTE To be notified of new acoustic alarm signals, the 2 minutes alarm silence must be reset. Instructions for Use Oxylog 3000 plus SW 1.n... - Page 86 An acoustic alarm signal is given to indicate the internal power supply failure. Spontaneous breathing can continue through the emergency air intake. Disconnect the patient from the device and continue ventilation without delay using another ventilator. Instructions for Use Oxylog 3000 plus SW 1.n...
-
Page 87: Setting Alarm Limits
Display (example): Pmax appears in the pressure curve as a dashed line. When this dashed line is reached, the Oxylog 3000 plus issues a !!! Paw high alarm. Oxylog 3000 plus 2 Select and activate the low alarm limit high alarm limit for MVe, RRsp or etCO the display. - Page 88 [kPA] or value [kPA] or [Vol.%] [kPA] or [Vol.%] [Vol.%] Unchanged <2.0 Unchanged Current –0.7 2.0 to 4.7 Current +2.0 Current –0.9 4.7 to 6.0 Current +1.3 Current –1.3 >6.0 Current +0.7 Instructions for Use Oxylog 3000 plus SW 1.n...
- Page 89 Checking the CO2 sensor during ventilation . Zero calibration during ventilation..filter check during ventilation ..Instructions for Use Oxylog 3000 plus SW 1.n...
-
Page 90: Displaying Curves
The values are shown in pairs; the pairs of values can be configured as required. Refer to "Customer Service Mode" on page 98. Instructions for Use Oxylog 3000 plus SW 1.n... -
Page 91: Co 2 Measurement (Optional)
Customer Service Mode see page 105. zero cali- Recommended before measure- bration ment and when changing the sensor to another unit. filter Required in intervals of one check month. Instructions for Use Oxylog 3000 plus SW 1.n... -
Page 92: Zero Calibration During Ventilation
Monitoring Zero calibration during ventilation If zero calibration was not successful: The Oxylog 3000 plus displays the alarm !!! CO The zero calibration is performed with a clean CO Zero calib. failed. sensor that has been removed from the cuvette! Repeat zero calibration. -
Page 93: Co 2 Filter Check During Ventilation
6 Attach the CO sensor (A) back to the cuvette. If the check was not successful: The Oxylog 3000 plus displays the alarm !!! CO Filter check failed. The test value is outside the permissible tolerance. Check whether the sensor (A) or test filter (B) is soiled and clean them if necessary. - Page 94 This page intentionally left blank Instructions for Use Oxylog 3000 plus SW 1.n...
-
Page 95: Configuration
Exit Customer Service Mode ... . . 109 Customer service manual ....110 Instructions for Use Oxylog 3000 plus SW 1.n... -
Page 96: Setting Configuration Parameters / Display Information
2 Press the rotary knob to confirm, before the black progress bar is complete. The start-up menu is then displayed: 3 Select Configuration and information in the start-up menu and confirm. Instructions for Use Oxylog 3000 plus SW 1.n... -
Page 97: Displaying Configuration And Information
(Hours since service time) – Battery type and battery capacity. Displaying the battery type Press the key Settings to select the menu Information. The performance data of the inserted battery are displayed on the device. Instructions for Use Oxylog 3000 plus SW 1.n... -
Page 98: Customer Service Mode
Display user logbook. Logbook of operating phases, ventilator settings and alarms. Display maintenance and service Display the maintenance schedule and contact contact information. information for service personnel. sensor. Check or calibrate the CO sensor. Instructions for Use Oxylog 3000 plus SW 1.n... -
Page 99: To Enter Customer Service Mode
2 Press the rotary knob to confirm. The set values are saved as default settings and remain effective. 5 Press the rotary knob to activate the test. Instructions for Use Oxylog 3000 plus SW 1.n... -
Page 100: Set Start-Up Settings
33 mmHg Paediatric disposable unit mmHg Cuvette type Disposable Hose type Adult disposable Reusable Cuvette type Disposable * Brightness-min: screen brightness level in power save mode. Refer to "Screen brightness" on page 81. Instructions for Use Oxylog 3000 plus SW 1.n... -
Page 101: Hose/Cuvette Start-Up Settings
(Adult Reusable, Adult Disposable or Pae- diatric Disposable). To restore the manufacturer's defaults: – Cuvette type (optional): The start-up setting for the CO cuvette type (Reusable or Disposable). 2 Select and confirm line Set factory default. Instructions for Use Oxylog 3000 plus SW 1.n... -
Page 102: Set Date And Time
It is recommended that you have the FiO value as a displayed value during ventilation. Each measured value can be freely selected in any position and is only displayed at that position. Instructions for Use Oxylog 3000 plus SW 1.n... -
Page 103: Test Loudspeaker, Buzzer, Leds And Display
To test the loudspeaker, buzzer, all LEDs and the display: 1 Select the required test. 2 Confirm the test with the rotary knob. The requested function is tested by the device. To test the screen display (Test display). Instructions for Use Oxylog 3000 plus SW 1.n... -
Page 104: Check Safety Valve
The maintenance schedule and contact information for service personnel are displayed. The message Advance to the next page: Service date overdue ! is shown if service is Select line Page, confirm and turn the rotary needed. knob. Instructions for Use Oxylog 3000 plus SW 1.n... -
Page 105: Co2 Sensor
The screen displays – Filter check; the text Remove sensor from cuvette. – Gas check; 4 Confirm with rotary knob. The Oxylog 3000 plus – Gas Calibration; performs the zero calibration and displays the message Zero calibration in progress. - Page 106 Start the calibration of the CO sensor with a If the check was not successful: test filter The Oxylog 3000 plus displays the alarm Filter check failed. The test value is outside the NOTE permissible tolerance. Before the calibration check with a test filter, per- form CO zero calibration.
- Page 107 Otherwise the calibration with test gas may be select CONTINUE and confirm with the rotary incorrect. knob. 9 The Oxylog 3000 plus starts the calibration of NOTE the CO sensor and displays the progress and For the calibration only use a test gas which result of the calibration in the message field.
- Page 108 48. For CO zero calibration and filter check before ventilation, see page 58. For CO zero cali- bration and filter check during ventilation, see page 91. For CO measurement see page 91. Instructions for Use Oxylog 3000 plus SW 1.n...
-
Page 109: Exit Customer Service Mode
Exit Customer Service Mode 1 Press the key for approximately 3 seconds; the indicator flashes yellow. To turn ventilation on: 2 Briefly press the key To switch off: 3 Press the rotary knob. Instructions for Use Oxylog 3000 plus SW 1.n... -
Page 110: Customer Service Manual
Configuration Customer service manual Should you need additional information on the Oxylog 3000 plus, refer to Customer service manual (can be ordered through DrägerService). Instructions for Use Oxylog 3000 plus SW 1.n... -
Page 111: Problem Solving
Messages in the alarm window ..112 Messages in the information window..120 Error messages during the device check . 122 Instructions for Use Oxylog 3000 plus SW 1.n... -
Page 112: Alarm - Cause - Remedy
10 minutes of operating time remaining in the internal battery. Check cuvette An incorrect cuvette type is Select the correct cuvette type. type selected Cuvette or sensor soiled. Clean the cuvette or sensor. Instructions for Use Oxylog 3000 plus SW 1.n... - Page 113 The CO sensor has a Replace the CO sensor. hardware failure. Clean the CO The sensor or cuvette Clean the sensor and cuvette cuvette window is soiled. windows. Perform the zero calibration. Instructions for Use Oxylog 3000 plus SW 1.n...
- Page 114 Call DrägerService. etCO high The upper alarm limit for Check patient condition. end-expiratory CO Check alarm limits concentration has been Adjust the alarm limit, if necessary. exceeded. Instructions for Use Oxylog 3000 plus SW 1.n...
- Page 115 Press the Alarm Reset key to been disconnected, the confirm the alarm. internal battery becomes the main power source. When starting ventilation while using the internal battery this alarm will not be issued. Instructions for Use Oxylog 3000 plus SW 1.n...
- Page 116 Faulty flow sensor. Replace flow sensor. Technical defect. Disconnect the patient from the device and continue ventilation without delay using another ventilator. Call DrägerService. Instructions for Use Oxylog 3000 plus SW 1.n...
- Page 117 Check patient's condition, check airway pressure has been ventilation pattern, adjust alarm reached. Patient "fights" the limits if necessary. ventilator, coughing. Breathing hose kinked, or Check hose system, breathing obstructed. valve and tube. Instructions for Use Oxylog 3000 plus SW 1.n...
- Page 118 Set a lower VT or press the Alarm 250 mL, while using a pae- Reset key to confirm the alarm. diatric hose. An incorrect hose Use another hose or press the connected. Alarm Reset key to confirm the alarm. Instructions for Use Oxylog 3000 plus SW 1.n...
- Page 119 Use another hose. VT low, pressure During AutoFlow additional Check patient condition. limit pressure is necessary to Check ventilation settings achieve the set tidal volume VT. (Pressure is limited to Pmax - 5 mbar.) Instructions for Use Oxylog 3000 plus SW 1.n...
-
Page 120: Messages In The Information Window
(optional)" on page 91. knob, the filter check will proceed. Cancel by press- ing Alarm Reset. Pinsp>=PEEP + 3 mbar Set PEEP + 3 mbar > Pinsp Set Pinsp > PEEP + 3 mbar Instructions for Use Oxylog 3000 plus SW 1.n... - Page 121 Change in I:E or Ti, in ventilation Te= 9.5 s mode PC-BIPAP. I:E= 1 : 1.5 Te= 9.5 s 1) Unit I:E or Ti is configurable. Refer to "Customer Service Mode" on page 98. Instructions for Use Oxylog 3000 plus SW 1.n...
-
Page 122: Error Messages During The Device Check
Check measuring lines The flow measuring lines are Connect the flow measuring lines connected incorrectly. correctly. Instructions for Use Oxylog 3000 plus SW 1.n... -
Page 123: Cleaning, Disinfection And Sterilization
Reprocessing list ..... 131 Assembling parts ..... 131 Instructions for Use Oxylog 3000 plus SW 1.n... -
Page 124: Disassembly
(D). 4 Remove the angled connector (A) from the cuvette (C). 1 Disconnect the breathing hose (A) from the gas output. 2 Disconnect the flow measuring lines (B) from the nozzles. Instructions for Use Oxylog 3000 plus SW 1.n... - Page 125 WARNING breathing valve. The rubber disc (A) in the housing must not be removed, damaged or bent, otherwise the valve will not work properly and endangers the patient. Risk of CO rebreathing. Instructions for Use Oxylog 3000 plus SW 1.n...
-
Page 126: Removal Of The Adult Disposable Hose System
The disposable paediatric hose system must not withstand high temperatures and may be be cleaned, disinfected or sterilized: it cannot damaged. withstand high temperatures and may be damaged. Instructions for Use Oxylog 3000 plus SW 1.n... -
Page 127: Safety Information On Reprocessing
Neodisher LM2 by Dr. Weigert Referring to its reprocessing, this medical product (Concentration 2%) belongs to the group of uncritical medical products. – For the flow sensor: Sekusept Powder classic by Ecolab (Concentration 4%) Instructions for Use Oxylog 3000 plus SW 1.n... -
Page 128: Uncritical Medical Products
Only wipe-disinfect items and If necessary, repeat manual cleaning. make sure no liquids penetrate into the device. 1 Carry out surface disinfection. 2 After contact time, remove disinfectant resi- dues. Instructions for Use Oxylog 3000 plus SW 1.n... - Page 129 EN ISO 15883, preferably with a cart for anesthe- sia and ventilation accessories, for automatic cleaning and disinfection. Use mildly alkaline or enzymatic (with neutral pH) cleaning agent. Strictly observe the manufacturer’s information on the cleaning agent. Instructions for Use Oxylog 3000 plus SW 1.n...
-
Page 130: Visual Inspection
The recommended sterilization temperature and time is 134 °C for 5 minutes. CAUTION Do not sterilize parts in ethylene oxide! Ethylene oxide may diffuse into the parts and cause damage to health. Instructions for Use Oxylog 3000 plus SW 1.n... -
Page 131: Reprocessing List
– Connect to the power supply and gas supply, refer to "Assembly" on page 35 for information. – Check readiness for operation, refer to "Getting Started" on page 51 for information. Instructions for Use Oxylog 3000 plus SW 1.n... - Page 132 This page intentionally left blank Instructions for Use Oxylog 3000 plus SW 1.n...
-
Page 133: Maintenance
Exchanging the internal battery ..136 In case of ventilator failure ... . . 136 Instructions for Use Oxylog 3000 plus SW 1.n... -
Page 134: Maintenance Intervals Of Oxylog 3000 Plus
(including safety inspections) sensor inspection and Every two years Service personnel maintenance 1) The dust filter can be treated as household waste. 2) Refer to "Technical Data" section for the battery operating time. Instructions for Use Oxylog 3000 plus SW 1.n... -
Page 135: Safety Inspections
6 Perform a device check according to the Instructions for Use. The safety inspections are no substitute for the inspections and maintenance indicated by the manufacturer, including the preventive exchange of wearing parts. Instructions for Use Oxylog 3000 plus SW 1.n... -
Page 136: Exchanging The Internal Battery
WARNING Never operate a ventilator if it has suffered physical damage or does not seem to operate properly. In this case, always use factory trained or authorized personnel to service the device. Instructions for Use Oxylog 3000 plus SW 1.n... -
Page 137: Disposal
Disposal of the hose systems and CO cuvettes ......138 Instructions for Use Oxylog 3000 plus SW 1.n... -
Page 138: Disposing Of The Medical Device
Improper handling of batteries can result in explosions and chemical burns. Do not throw batteries into fire. Do not force batteries open. Do not recharge batteries. The medical device battery contains pollutant sub- stances. Instructions for Use Oxylog 3000 plus SW 1.n... -
Page 139: Technical Data
Electromagnetic Emissions ....153 Electromagnetic Immunity ....153 Recommended separation distances ..155 Instructions for Use Oxylog 3000 plus SW 1.n... -
Page 140: Ambient Conditions
Atmospheric pressure 570 to 1200 hPa Relative humidity 5 to 95 % (no condensation) Replaceable battery Temperature –20 to +35 °C Atmospheric pressure 570 to 1200 hPa Relative humidity 5 to 95 % (no condensation) Instructions for Use Oxylog 3000 plus SW 1.n... -
Page 141: Settings
0 to 35 mbar (relative to PEEP) Rise time for Pressure long (1 s), standard (0.4 s), short. Support Alarm limit ranges Alarm Alarm limit range 2 to 41 L/min 0.5 to 40 L/min Instructions for Use Oxylog 3000 plus SW 1.n... - Page 142 1 to 100 mmHg / 0.1 to 13.3 kPa / 0.1 to 13.3 Vol.% etCO 0 to 100 mmHg /0 to 13.3 kPa / 0 to 13.3 Vol.% 1) see O concentration, page 79 Instructions for Use Oxylog 3000 plus SW 1.n...
-
Page 143: Performance Data
The maximum inspiratory flow is reduced to 80 L/min at service pressures <350 kPa and to 39 L/min at service pressures <280 kPa. 2) When using an accessory with a female connector, add 2 mL to the hose system dead space. Instructions for Use Oxylog 3000 plus SW 1.n... -
Page 144: Measured Values And Curves Display
1/min Accuracy ±1/min Curve display Airway pressure Paw (t) –10 to 100 mbar Flow (t) –120 to 120 L/min –5 to 120 mmHg / –1 to 16 Vol.% /–1 to 16 kPa Instructions for Use Oxylog 3000 plus SW 1.n... -
Page 145: Monitoring
15 to 60 s Data communication (option) Exported data Measured values Curves Alarms Alarms settings User settings Data (trigger) to activate the monitoring of loops For the Data communication protocol contact your local DrägerService. Instructions for Use Oxylog 3000 plus SW 1.n... -
Page 146: Operating Data
The criteria for the warnings !!! Int. battery discharged and !! Charge int. battery are therefore based on measurement of the battery voltage. The capacity indicated at this moment may differ from the actual capacity of the internal battery. Instructions for Use Oxylog 3000 plus SW 1.n... -
Page 147: Gas Supply
270 kPa to 600 kPa at 100 L/min Supply gas Medical oxygen inlet connection either: NIST to EN 739 / ISO5359, or DISS to CGA V5-1989, or S90-116 WARNING Only use medical grade oxygen. Instructions for Use Oxylog 3000 plus SW 1.n... - Page 148 Accuracy of gas 15 % or ±1 L/min, whichever is greater. consumption indication 1) NIST = National Institute of Standards and Technology 2) DISS = Diameter Index Safety Systems 3) N-F = Norme française Instructions for Use Oxylog 3000 plus SW 1.n...
-
Page 149: Device Specifications
Protection class, breathing circuits (disposable or Type BF (body floating, defibrillation-proof). reusable), including CO sensor, endotracheal tubes, or masks Type of protection against ingress of liquids IPX4 Protection class, CO sensor IP64 Defibrillation recovery time Instructions for Use Oxylog 3000 plus SW 1.n... -
Page 150: Materials Used
Vane in flow sensor Polyester Patient connection Polyethylene (PE), Polypropylene (PP), K-Resin®, Thermoplastic Polyether Elastomer (TPE) Disposable paediatric hose system Breathing hose Ethylene Vinyl Acetate (EVA) Non-return valve Housing: Polypropylene (PP) Membrane: silicone rubber Instructions for Use Oxylog 3000 plus SW 1.n... - Page 151 Polycarbonate (PC) Y-piece Polycarbonate (PC) Vane in flow sensor Polyethylene terephthalate (PET) Connectors Polypropylene (PP) and Polycarbonate (PC) sensor Housing Polysulfone Cable Polyurethane Cuvette Disposable K-Resin® SBC Reusable Polysulfone (PSU) with sapphire windows Instructions for Use Oxylog 3000 plus SW 1.n...
-
Page 152: Technical Documentation For The Oxylog 3000 Plus According To Emc
Technical Documentation for the Oxylog 3000 plus according to EMC standard IEC 60601-1-2 General Information The EMC conformity of the Oxylog 3000 plus includes the use of following external cables, transducers and accessories: – AC/DC power pack – DC/DC Converter –... -
Page 153: Electromagnetic Emissions
Electromagnetic Emissions Electromagnetic Emissions The Oxylog 3000 plus is intended for use in the electromagnetic environment specified below. The user of the Oxylog 3000 plus should make sure that it is used in such an environment. Emissions Compliance Electromagnetic environment... - Page 154 Field strengths from fixed, portable or mobile RF transmitters at the location of the Oxylog 3000 plus should be less than 3 V/m in the frequency range from 150 kHz to 2.5 GHz and less than 1 V/m above 2.5 GHz.
-
Page 155: Recommended Separation Distances
WLAN 5600 (not in Europe)* 2.000 e.g. GSM 900 mobiles* 3.000 Information regarding separation distances (IEC 60601-1-2, tables 5 and 6). * Telecommunication devices. For the correct type, check the product manual of the device. Instructions for Use Oxylog 3000 plus SW 1.n... - Page 156 This page intentionally left blank Instructions for Use Oxylog 3000 plus SW 1.n...
-
Page 157: Principles Of Operation
Monitoring......166 CO2 measurement ..... 166 Instructions for Use Oxylog 3000 plus SW 1.n... -
Page 158: Ventilation Modes
This phase, the inspiratory pause, can be identified as the plateau Tplat% and is defined as a percentage of the inspiratory time. Instructions for Use Oxylog 3000 plus SW 1.n... -
Page 159: Vc-Simv
Since the synchronization of the mandatory breath reduces the effective spontaneous breathing time, which would result in an undesirable increase in effective respiratory rate, the Oxylog 3000 plus prolongs the spontaneous breathing time of the Instructions for Use Oxylog 3000 plus SW 1.n... - Page 160 The device then increases the airway Δ pressure up to the preselected pressure Psupp above PEEP, which is adjustable to the condition of the patient. Instructions for Use Oxylog 3000 plus SW 1.n...
-
Page 161: Pc-Bipap
VT. controlled by the Slope setting. The tidal volume VT results principally from the pressure difference between the PEEP and Pinsp Instructions for Use Oxylog 3000 plus SW 1.n... -
Page 162: Autoflow
= 0), before the inspiratory time Ti has fully required to deliver the set tidal volume VT based on elapsed, the Oxylog 3000 plus ensures that the lung characteristics such as resistance and compli- patient can breathe during the remaining inspira- ance relationships, and the patient's spontaneous tory time. -
Page 163: Start Up Behavior Of Autoflow
In this situation, the inspira- PEEP. The applied volume is measured and tory pressure is limited by the Oxylog 3000 plus as determines an initial target pressure to achieve described above. If, as a result, the set tidal volume the set tidal volume VT. -
Page 164: Dead Space
0.5 s. If Te would not fit anymore within the Cycle time (due to a high Ti), the Cycle time is automatically increased. These rules are also applicable when the ventilator is configured to set I:E instead of Ti. Instructions for Use Oxylog 3000 plus SW 1.n... -
Page 165: Functional Description
The various pneumatic actuators in the for BTPS, taking into account the ambient Oxylog 3000 plus are controlled by the micropro- pressure. In this way, Oxylog 3000 plus meters and cessor system via digitized electrical signals. measures roughly 10 % less volume in operation with a test lung (dry gas at room temperature). -
Page 166: Safety
PEEP, PIP, Pplat, Pmean. The plausibility of this airway pressure measurement on the patient side is monitored by a redundant internal airway pressure measurement in the ventilator via S4 in the inspiratory duct. Instructions for Use Oxylog 3000 plus SW 1.n... -
Page 167: List Of Accessories
57 04 799 All-round Wall holder 57 04 216 Carrying System 2M 86 975 Lithium ion battery 2M 86 733 Test lung 84 03 201 Data communication cable 0.8 m 57 05 301 Instructions for Use Oxylog 3000 plus SW 1.n... - Page 168 Cuvette (paediatric) 68 70 280 Disposable CO Cuvette (adult) MP 01 062 Disposable CO Cuvette MP 01 063 (paediatric) Calibration set CO 8412710 Spare CO cylinder 5 % for 6850435 calibration set Instructions for Use Oxylog 3000 plus SW 1.n...
-
Page 169: Index
Disassembling ..... . 124 CO2 measurement ....91, 105 Instructions for Use Oxylog 3000 plus SW 1.n... - Page 170 Sterilization ......123 Switching OFF the device ... . . 28, 82 Instructions for Use Oxylog 3000 plus SW 1.n...
- Page 171 VTe ........90 Warning ......3, 85, 88 Instructions for Use Oxylog 3000 plus SW 1.n...
- Page 172 These Instructions for Use only apply to Oxylog 3000 plus SW 1.n with the Serial No.: If no Serial No. has been filled in by Dräger, these Instructions for Use are provided for gen- eral information only and are not intended for use with any specific machine or device.
Need help?
Do you have a question about the Oxylog 3000 plus and is the answer not in the manual?
Questions and answers