Dräger Savina 300 Instructions For Use Manual
Hide thumbs
Also See for Savina 300:
- Technical documentation manual (166 pages) ,
- Quick start manual (3 pages)

Related Manuals for Dräger Savina 300


Summary of Contents for Dräger Savina 300
- Page 1 DRAFT:19. December 2019 15:22 Instructions for use Savina 300 Ventilator WARNING To properly use this medical device, Software 5.n read and comply with these instructions for use.
- Page 2 Use of terms Dräger uses the term "accessories" not only for accessories in the sense of IEC 60601-1, but also for consumables, removable parts, and attached parts. Instructions for use Savina 300 SW 5.n...
- Page 3 Mikrozid ® Perform ® Actichlor Ecolab USA ® Incidin ® Oxycide ® BruTab 6S Brulin ® Dispatch Clorox ® Klorsept Medentech ® Descogen Antiseptica ® Oxygenon ® SteriMax Aseptix ® Cleanisept Dr. Schumacher Instructions for use Savina 300 SW 5.n...
- Page 4 NOTE A NOTE provides additional information intended to avoid inconvenience during operation. Instructions for use Savina 300 SW 5.n...
- Page 5 Users have knowledge of device monitoring and ventilation care. Reprocessing personnel This user group carries out the necessary activities to reprocess the product. Reprocessing personnel has specialist knowledge in the reprocessing of medical devices. Instructions for use Savina 300 SW 5.n...
- Page 6 This page has been left blank intentionally. Instructions for use Savina 300 SW 5.n...
-
Page 7: Table Of Contents
Ventilation settings ..... 84 Savina 300 ......20 Adjusting the ventilation settings . - Page 8 Configuring the start settings ....135 Alarm system of Savina 300 ....216 Configuring the device settings ... . 141 Automatic alarm limits .
- Page 9 Training....... 16 Mandatory reporting of adverse events ..16 Instructions for use Savina 300 SW 5.n...
-
Page 10: For Your Safety And That Of Your Patients
If service is not performed regularly, malfunc- tions may occur, which can result in personal injury and property damage. Perform the service in accordance with the chapter "Service". Instructions for use Savina 300 SW 5.n... -
Page 11: Patient Safety
The responsibility for selecting the best level of patient monitoring lies solely with the user of the medical device. Instructions for use Savina 300 SW 5.n... -
Page 12: Disposable Products
Sterile-packaged accessories CAUTION Risk of medical device failure and of patient injury Do not use sterile-packaged accessories if the packaging has been opened, is damaged, or if there are other signs of non-sterility. Instructions for use Savina 300 SW 5.n... -
Page 13: Product-Specific Safety Information
Repeat this check regularly. Do not simultaneously touch the connectors – Replace flow sensors when damaged, of the interfaces and the patient. soiled, or not particle-free. Instructions for use Savina 300 SW 5.n... - Page 14 WARNING latory system. Risk of electric shock Monitor the patient's condition. There are live components under the housing cover. Do not remove the cover. Instructions for use Savina 300 SW 5.n...
-
Page 15: Functional Safety
(e.g., with the manual resuscitator MR-100). – Failure of the O supply (HPO mode) The medical device is equipped with basic safety features to reduce the possibility of patient injury while the cause of an alarm is remedied. Instructions for use Savina 300 SW 5.n... -
Page 16: Additional Information
Training Training for users is available from the Dräger organization responsible, see www.draeger.com. Mandatory reporting of adverse events Serious adverse events with this product must be reported to Dräger and the responsible authorities. Instructions for use Savina 300 SW 5.n... -
Page 17: Application
Contraindications ..... . 18 Environments of use ....18 Instructions for use Savina 300 SW 5.n... -
Page 18: Intended Use
Application Intended use Savina 300 is a ventilator intended for the ventilation of adults and pediatric patients. Savina 300 offers mandatory ventilation modes, ventilation modes supporting spontaneous breathing, and airway monitoring. Contraindications When using small minute volumes, it takes longer for a modified oxygen concentration to reach the patient. -
Page 19: Overview
Overview Savina 300 ......20 Ventilator with trolley..... 20 Control and display unit . -
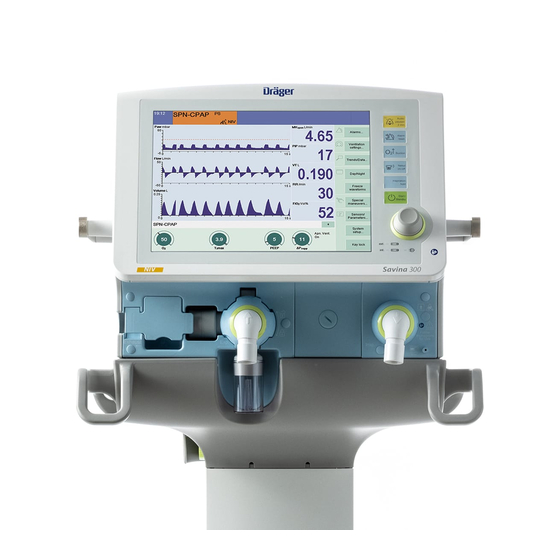
Page 20: Savina 300
A Touch screen B Fixed function keys C Rotary knob D Power supply display A Control and display unit B Patient connection panel C Dräger Savina 300 trolley D Dräger Savina 300 compact trolley Instructions for use Savina 300 SW 5.n... - Page 21 Battery operation or bat- Charging Overheated or Not present tery charge at least 75 % defective Internal battery Battery operation or bat- Charging Overheated or Not being charged tery charge at least 75 % defective Instructions for use Savina 300 SW 5.n...
-
Page 22: Patient Connection Panel
D Water trap of expiratory valve E Expiratory valve with expiratory port Exp. (GAS RETURN) F Flow sensor flap (behind flap: flow sensor) G Gas outlet Exhaust, non-conical connection (EXHAUST – NOT FOR SPIROMETER) Instructions for use Savina 300 SW 5.n... -
Page 23: Rear
H Port for CO sensor COM port (serial RS232 interface) J Connection for nurse call K Main switch for switching on or off L Fuse for the internal battery M Storage recess for fuse Instructions for use Savina 300 SW 5.n... -
Page 24: Trolley
Universal holder with standard rail universal holder with standard rail can be fitted. Holder for breathing gas humidifier Holder for breathing gas humidifier Trolley column Trolley column Mounting with handle Mounting with 4 handles Instructions for use Savina 300 SW 5.n... -
Page 25: Range Of Functions
Overview Range of functions The functions described correspond to the overall Additional settings for ventilation functionality of Savina 300. Some functions are – Apnea ventilation only optional and may not be included in the – Trigger settings individual device configuration. The optional –... -
Page 26: Displays On The Screen
Transport of patients Power supply For transporting patients, the Savina 300 trolley Savina 300 is supplied with mains power or with can be coupled to a bed. For additional information, power from the internal or external battery. The see instructions for use "Bed Coupling". -
Page 27: Abbreviations
1 hPa = 1 mbar = approx. PEEP) (set value) 1 cmH DSSS Direct-Sequence Spread High Pressure Oxygen Spectrum High-pressure O supply from the Direct-Sequence Spread central gas supply system or an Spectrum compressed gas cylinder Instructions for use Savina 300 SW 5.n... - Page 28 (set value) Magnetic resonance imaging Inspiratory pressure (set value) insp Overall minute volume Peak Inspiratory Pressure Leakage minute volume leak Peak inspiratory pressure Spontaneous breathing portion of spon Plateau Inspiratory pause time minute volume Instructions for use Savina 300 SW 5.n...
- Page 29 Mandatory Ventilation Expiratory time Intermittent, triggered, volume- controlled ventilation Temp Inspiratory breathing gas tem- perature Vol% Percentage of gas, related to the total volume Time of upper pressure level in high PC-APRV (set value) Instructions for use Savina 300 SW 5.n...
- Page 30 Tidal volume of apnea ventilation (set value) Expiratory tidal volume Volume trapped in the lung by trap intrinsic PEEP and not exhaled during subsequent expiration Tidal volume during a sponta- spon neous breath Instructions for use Savina 300 SW 5.n...
-
Page 31: Symbols
Potential equalization connector Expiratory valve locked Protective earth Expiratory valve unlocked Nurse call Alarm limit deactivated Applied part type BF Lower alarm limit Port for CO sensor Upper alarm limit In lists: One line up Instructions for use Savina 300 SW 5.n... - Page 32 Use by Do not reuse Protect from moisture ESD warning symbol ESD warning symbol on device Information on disposal Manufacturer Manufacturing date 20XX The product is a medical device (CE conformity assessment procedure) Instructions for use Savina 300 SW 5.n...
-
Page 33: Product Labels
Do not connect a humidifier to the LPO inlet. Maximum loads and conditions for the tipping sta- bility when using the trolley Caution! Maximum loads and conditions for the tipping sta- bility when using the compact trolley Instructions for use Savina 300 SW 5.n... - Page 34 Nominal weight and maximum weight for the basic unit with trolley nom. 54 kg (119 lbs) max. 142 kg (313 lbs) Nominal weight and maximum weight for the basic unit with compact trolley Instructions for use Savina 300 SW 5.n...
-
Page 35: Operating Concept
Selecting and making settings ... . . 39 Start/Standby page..... . 40 Instructions for use Savina 300 SW 5.n... -
Page 36: Control And Display Unit
Resets or dismisses alarm message Suction Starts or terminates the suction maneuver Nebul. on/off Switches the medication nebulizer on or off E Inspiration hold Starts the manual inspiration Start/Standby Opens the Start/Standby page Instructions for use Savina 300 SW 5.n... -
Page 37: Screen
E Alarm messages, e.g., MV high e.g., 5 min F Acoustic alarm signal suppressed, remaining L Charge state of the internal battery (during time, e.g., 60 s operation with an internal battery) G Alarm limit deactivated Instructions for use Savina 300 SW 5.n... -
Page 38: Main Menu Bar
"Monitoring" on page 121 System setup... Opens the dialog window for configur- ing the device functions, see page 133 Key lock Locks all keys and buttons, see page 99 Instructions for use Savina 300 SW 5.n... -
Page 39: Therapy Bar
Selecting and making settings Selecting a control 1 Touch the control. The control turns yellow. 2 Press the rotary knob to confirm. The selection is adopted, the control turns back to light green or dark green. Instructions for use Savina 300 SW 5.n... -
Page 40: Start/Standby Page
Do not press the rotary knob. After 15 seconds, the change is reset. Check settings Savina 300 displays a low-priority alarm message. J Results of the last device check and breathing circuit check performed since the device was Press the Alarm reset key. -
Page 41: Assembly And Preparation
Connecting an external device ... . 66 Savina 300 trolley ..... . . 43 Configuring the interface . -
Page 42: Safety Information
Risk of personal injury due to damaged trolley If, for instance, the double castors are faulty, the device may move unintentionally. Do not use the trolley if there is visible dam- age. Contact specialized service personnel. Instructions for use Savina 300 SW 5.n... -
Page 43: Load And Tipping Stability Of The Dräger Savina 300 Trolley
Assembly and preparation Load and tipping stability of the Dräger Savina 300 trolley WARNING Risk of personal injury and damage to the device If Savina 300 is equipped with a transport supply unit and is used at inclinations >5°, there is a risk of tipping over. -
Page 44: Load And Tipping Stability Of The Dräger Savina 300 Compact Trolley
Assembly and preparation Load and tipping stability of the Dräger Savina 300 compact trolley For the individual areas, the following load limits apply: Range Maximum load Examples Shelf 31 kg (68.3 lb) Device: 26 kg (57.3 lb) Hinged arm: 5 kg (11.0 lb) Universal holder 10 kg (22.0 lb) -
Page 45: Fitting The Holders For Accessories
5 Check that the universal holder is fixed securely. When the universal holder is fitted and only the height must be adjusted, it is sufficient to loosen the adjusting screw (A). Instructions for use Savina 300 SW 5.n... -
Page 46: Mounting O 2 Compressed Gas Cylinders To
Replace the hook-and-loop straps. The length of the hook-and-loop straps must match the circumference of the compressed gas cylinders. 3 Secure the compressed gas hoses by hanging them over the hose holders (B). Instructions for use Savina 300 SW 5.n... - Page 47 Replace the hook-and-loop straps. The length of the hook-and-loop straps must match the circumference of the compressed gas cylinders. 3 Hang the compressed gas hose over the hose holder. Instructions for use Savina 300 SW 5.n...
-
Page 48: Mounting The Ventilator To The Trolley
Fasten the device securely. Check for secure fit. 1 Insert the device into the mounting. 2 Fasten with 2 screws from underneath: – Trolley (A): M5 x 12 – Compact trolley (B): M5 x 20 Instructions for use Savina 300 SW 5.n... -
Page 49: Parking The Trolley
A Brake released B Brake locked Parking the trolley for stationary operation: 1 Lock all brakes of the trolley. 2 Check that the brakes are functioning correctly. Instructions for use Savina 300 SW 5.n... -
Page 50: Fitting An Additional Monitor
– Which parameters can be displayed. WARNING Risk of tipping over Mounting an Infinity monitor on Savina 300 If a monitor is mounted onto Savina 300, there is a risk of tipping over. Prerequisites: – The corresponding holder is mounted on The device combination is only permitted on Savina 300. - Page 51 Assembly and preparation 3 Position the monitor in the middle so that the locking bolt (A) engages in the hole in the insertion plate. 4 Tighten the nylon screws (B) (2 pieces) by hand. Instructions for use Savina 300 SW 5.n...
-
Page 52: Preparing The Ventilator
1 Fit the diaphragm (A) onto the edge of the expiratory valve housing. 2 Make sure that the diaphragm is fitted properly. 3 If the flow sensor sleeve (B) has been removed, fit the flow sensor sleeve. Instructions for use Savina 300 SW 5.n... -
Page 53: Fitting The Flow Sensor
4 Check that it is properly secured by gently pulling on the expiratory valve. Additional information Savina 300 can be equipped with the MP01781 expiratory filter. 1 Push the socket (A) as far to the left as it will go. - Page 54 (C) of the expiratory valve. Closing the flap When the expiratory valve and the flow sensor are fitted, tilt the flap (D) downwards. Leave the flap closed during ventilation. Instructions for use Savina 300 SW 5.n...
-
Page 55: Information On Breathing Circuits And Additional Components
Using bacterial filters or HMEs 3 Observe the instructions for use for the HMEs, Savina 300 is designed to minimize the patient's bacterial filters, and breathing circuits in use. work of breathing. The use of bacterial filters or... -
Page 56: Fitting The Bacterial Filter
– on the standard rail of the universal holder – on the humidifier holder If the external battery is attached to the trolley, the humidifier holder must be used when fitting the breathing gas humidifier. Instructions for use Savina 300 SW 5.n... -
Page 57: Fitting The Hinged Arm
Fitting the breathing gas humidifier to the humidifier holder Hang the hinged arm (A) on the lateral standard rail of Savina 300 and tighten the screws. Depending on the position of the device in relation to the bed, the hinged arm can be fitted on the right side or the left side. -
Page 58: Fitting The Breathing Circuit
(C) in a vertical position. 4 Connect the Y-piece (D) to the breathing hoses. 5 Insert the Y-piece or the breathing hoses in the opening of the hinged arm. 6 Check the breathing circuit, see page 75. Instructions for use Savina 300 SW 5.n... -
Page 59: Fitting The Co 2 Cuvette And Co
The expiratory port on the device remains open. 3 Insert the connector (C) of the CO sensor into the socket (D) at the rear of Savina 300. 4 Select the cuvette type, see page 126. Additional information Checking the CO sensor, see page 127. -
Page 60: Connecting The Power Supply
Assembly and preparation Connecting the power supply Mains power supply Battery supply Savina 300 is designed for connection to the WARNING hospital's mains power supply. Risk of explosion WARNING Electrolytic gas can occur when the batteries are charging. In a sufficient concentration, Risk due to incorrect mains voltage or missing this can cause an explosion. -
Page 61: Using The Power Supply
Inserting the fuse for the internal battery Power supply from the internal battery Before first use and after storage of Savina 300, the If Savina 300 is powered from the internal battery, fuse for the internal battery must be inserted. -
Page 62: Connecting The Gas Supply
Assembly and preparation Connecting the gas supply For ventilation, Savina 300 uses ambient air supply from a central gas supply system supplied by an internal turbine. The O supply is provided by one of the following sources: – Central gas supply system (HPO mode) –... -
Page 63: Connecting The Nurse Call
WARNING Risk of nurse call failure A connection failure between the device and As soon as Savina 300 signals an alarm, the the central hospital alarm system may inter- connection between cable 5 and cable 3 is closed rupt the transmission of information. -
Page 64: Connecting The Nurse Call To The Ventilator
(SELV) devices to the connection for the nurse call. 1 Plug the nurse call connector (A) into the socket (B) and screw into place. 2 Check the correct operation of connected nurse call system. Instructions for use Savina 300 SW 5.n... -
Page 65: Using The Medibus Or Medibus
Dräger recommends the use of MEDIBUS.X. MEDIBUS and MEDIBUS.X are software protocols If MEDIBUS is used, the following restrictions must for the transfer of data between Savina 300 and be noted: other medical devices (e.g., patient monitors) or other devices (e.g., computers for data –... -
Page 66: Connecting An External Device
(SELV) are connected to the COM port (serial RS232 interface). Connect an external device to the COM port (A). Configuring the interface A description is given in chapter "Configuring the data interface" on page 143. Instructions for use Savina 300 SW 5.n... -
Page 67: Removing And Fitting The Filter Cover
Assembly and preparation Removing and fitting the filter cover The filter cover on the back of Savina 300 must Fitting the filter cover occasionally be removed, e.g., for the following actions: – Connecting a potential equalization cable – Connecting the external battery –... -
Page 68: Intrahospital Transport Of The Device
5 If present, push in the bed coupling to the smallest size available. 6 Grasp the handle of the trolley firmly and move the device in the longitudinal direction. The safety information for patient transport also applies, see page 103. Instructions for use Savina 300 SW 5.n... -
Page 69: Getting Started
Selecting the start settings for a new patient . . 80 Starting the therapy ....82 Instructions for use Savina 300 SW 5.n... -
Page 70: Safety Information
Switching on the ventilator NOTE When the device is switched on and no breathing circuit or test lung is connected, Savina 300 may not be able to perform automatic calibration of the flow sensor. The alarm message Flow sensor in- operable is displayed. - Page 71 Getting started Savina 300 is in standby mode. The Start/Standby page (B) is opened. C Therapy type D Patient admission E Check settings F Empty dots indicate that no results are available for the device check and for the breathing circuit check.
-
Page 72: Selecting The Breathing Circuit And The Humidification Type
The actual values are determined during the breathing circuit check. Active humidification is not possible when using a coaxial breathing circuit. Prerequisite: Savina 300 is prepared and in standby mode. 1 Press the Start/Standby key. Savina 300 opens the Start/Standby page. -
Page 73: Checking The Operational Readiness
Getting started Checking the operational readiness Performing a device check Readiness for operation of Savina 300 is checked using the device check and the breathing circuit check. Additionally, the switch-over to battery Test steps of the device check operation must be checked. - Page 74 Getting started The test steps in the device check are displayed Savina 300 displays the individual test steps in a with the following symbols: list (G). 3 Touch the Start button (B). Green dot : Correct result 4 Confirm with the rotary knob.
-
Page 75: Information On The Breathing Circuit Check
Automatic cancelation special test is required, see page 77. If the Breathing circ. check page is exited, the Savina 300 uses the compliance determined to check is canceled and has to be restarted. increase the accuracy of the tidal volume delivered. -
Page 76: Performing The Breathing Circuit Check
2 Confirm with the rotary knob. Touch the Breathing circ. check tab (A). 3 When requested by Savina 300 in the instruction field (E), seal the patient port, e.g., with a sterile glove. 4 Confirm with OK (F). -
Page 77: Performing The Coaxial Breathing Circuit
Preparing the coaxial breathing circuit check Prerequisites: – Savina 300 is prepared and in standby mode. – The Breathing circ. check page (A) is opened. – The breathing circuit Coaxial (C) is selected, see page 72. -
Page 78: Checking The Co 2 Zero Indication
Getting started Checking the CO zero indication 7 When requested by Savina 300 in the instruction field (H), remove the red test adapter. Connect the HME/filter, catheter If CO monitoring is used, the CO zero indication mount, and airway connector. -
Page 79: Selecting The Therapy Type And The Application Mode
Getting started Selecting the therapy type and the application mode Selecting the application mode for Savina 300 offers a selection between the therapy types ventilation and O therapy. ventilation The Tube application mode is used for the ventilation of intubated patients. The NIV... -
Page 80: Selecting The Start Settings For Ventilation
Start/Standby key. ideal body weight. The ideal body weight is calculated by entering the body height. Savina 300 opens the Start/Standby (A) page. All previous settings and trend data are deleted. The start settings can be changed, see "Defining start settings for a new patient" on page 136. - Page 81 2 Set the body height with the rotary knob and confirm. The ideal body weight IBW is displayed. The start values for VT, RR, FlowAcc, and Trigger are determined based on the ideal body weight. Instructions for use Savina 300 SW 5.n...
-
Page 82: Starting The Therapy
Starting the therapy Savina 300 opens the Start/Standby (A) page. 1 Touch the (D) button. 2 Confirm with the rotary knob. Savina 300 starts the therapy. The main screen is displayed. B Ventilation settings... C Ventilation therapy type: Alarms... D The following is displayed depending on the se- lected therapy type: –... -
Page 83: Operation
Safety information..... . . 97 Performing O therapy ....97 Instructions for use Savina 300 SW 5.n... -
Page 84: Ventilation Settings
4) The parameter is only displayed when Plateau or AutoFlow is activated. 5) The parameter is only displayed when Pressure limitation is activated and AutoFlow is deactivated. Pressure-controlled ventilation modes Ventilation parameters Ventilation mode PC-AC PC-BIPAP PC-APRV FlowAcc insp PEEP P supp high Instructions for use Savina 300 SW 5.n... -
Page 85: Additional Settings For Ventilation
Tube type Tube Ø 1) When the additional setting Flow trigger is deactivated, Savina 300 displays the VC-CMV ventilation mode in the header bar. 2) The parameter is only displayed when the Insp. termination ventilation function is activated. See "Configuring the venti- lation functions"... -
Page 86: Adjusting The Ventilation Settings
For the active ventilation mode, the following is Touch the displayed ventilation mode (C) in the displayed: header bar. A Name of ventilation mode H General settings tab More settings tab J ATC settings tab Instructions for use Savina 300 SW 5.n... -
Page 87: Selecting A Ventilation Mode
The ventilation mode is active. The settings are applied to the patient. Press the rotary knob. Savina 300 takes the maximum value that can be set. Setting the ventilation parameters Setting additional settings Prerequisite: The Ventilation settings >... -
Page 88: Setting Tube Compensation (Atc)
Enter the inner diameter of the tube (C): 2 Touch the therapy control. 3 Set the value by turning the rotary knob and confirm. Activate ATC (D): 4 Touch the On button. 5 Confirm with the rotary knob. Instructions for use Savina 300 SW 5.n... -
Page 89: Non-Invasive Ventilation (Niv)
If the alarm limits and ventilation settings are cannot completely monitor ventilation. not adjusted after changing from application Use a separate monitoring device. mode NIV to Tube, Savina 300 cannot monitor ventilation adequately. CAUTION Check alarm limits and ventilation settings Risk of patient injury and change if necessary. -
Page 90: Suction Maneuver With Oxygenation
4 Start ventilation. See "Starting the therapy" on page 82. Suction maneuver with oxygenation Safety information For endotracheal suction, Savina 300 offers a program for oxygenation with the following phases: – Preoxygenation to avoid any risk of hypoxia WARNING during the disconnection phase Development of atelectasis –... -
Page 91: Performing Oxygenation
If suction is 3 Reconnect patient. used in a closed breathing circuit, negative Savina 300 ventilates again in the set ventilation pressure is possible. mode, except that for 120 seconds 100 Vol% O Only use suction in volume-controlled delivered for postoxygenation. -
Page 92: Medication Nebulization
Therefore, the set inspiratory If medication nebulization is activated although no concentration is increased during medication pneumatic medication nebulizer is connected, nebulization. Savina 300 delivers a too small tidal volume. Deactivate medication nebulization. CAUTION Ventilation impaired NOTE If unapproved pneumatic medication nebulizers... -
Page 93: Information On Pneumatic Medication
3 Place the medication nebulizer in the vertical position. 4 Run the nebulizer hose (C) back to Savina 300 Installing the pneumatic medication along the inspiratory hose using clamps. nebulizer... -
Page 94: Performing Pneumatic Medication
After medication nebulization Savina 300 automatically switches off the medication nebulizer after the nebulization time has elapsed. Savina 300 automatically cleans the flow sensor by heating and performs calibration following medication nebulization. 1 Remove any residual medication. Observe the instructions for use of the medication nebulizer. -
Page 95: Manual Inspiration - Inspiration Hold
Manually prolonging inspiration Press the Inspiration hold key and hold for the desired inspiratory time. Savina 300 triggers a prolonged breath or prolongs an already triggered automatic breath. The maneuver is ended at the latest 15 seconds after pressing the Inspiration hold key. -
Page 96: Special Maneuvers
This special procedure can be performed in all ventilation modes. Breathing activity by the patient Special maneuvers during this maneuver can distort the measured values. Savina 300 displays the following values (B) for the last two measurements, including the date and time: – PEEPi – incl. PEEP –... -
Page 97: O 2 Therapy
1 Fit the breathing hoses, see page 58. must be set in LPO mode, see page 111. 2 Switch Savina 300 on, see page 70. The alarm limits for the following parameters are not monitored: 3 Switch Savina 300 to standby mode, see –... - Page 98 Deactivating O therapy 1 Press the Start/Standby key. Savina 300 opens the Start/Standby (A) page. 2 Touch the Standby button (B) and confirm with the rotary knob. Savina 300 is in standby mode. O therapy is deactivated. The therapy type can be changed to ventilation.
-
Page 99: Day/Night Screen Switch-Over
Touch the Day/Night button in the main menu bar. Savina 300 switches over the screen display. Additional information "Adjusting screen brightness" on page 141. Key lock The controls on the screen and the keys can be locked to prevent accidental changes from being made. -
Page 100: Low Pressure Oxygen (Lpo)
Risk of patient injury chapter "Low Pressure Oxygen (LPO)" on page 246. If a humidifier is used between Savina 300 and the oxygen source, correct functional integrity of the device may be impaired or the device may be Safety information damaged, and the patient may be endangered. -
Page 101: Activating Lpo Mode
Setting the O concentration System setup In LPO mode, the O concentration cannot be set on Savina 300. The setting is made via the flow at the O concentrator (LPO flow). The O concentration reaching the patient is influenced by the following factors: –... -
Page 102: Deactivating Lpo Mode
LPO mode can be deactivated during ventilation. 1 Touch the System setup... button in the main menu bar. 2 Touch the Ventilation tab (A). System setup 3 Touch the Off button (B) and confirm with the rotary knob. Instructions for use Savina 300 SW 5.n... -
Page 103: Transporting Patients
Risk of personal injury and damage to the 2 Hoses and cables hooked as close as possible device to the trolley. If Savina 300 is placed on the bed when 3 Fold in the breathing gas humidifier if transporting patients, the device may fall necessary. -
Page 104: Interrupting The Therapy - Standby Mode
Operation Interrupting the therapy – standby mode If the standby mode is activated, ventilation is Savina 300 is in standby mode. Standby is interrupted. Switch to standby mode for the displayed in the header bar of the screen instead of following actions: the ventilation mode. -
Page 105: Ending Operation
The alarm message Main switch off is displayed. 2 Confirm the alarm message with the rotary knob. If the main switch is switched back on without confirming the alarm message, ventilation is continued. The alarm message is no longer displayed. Instructions for use Savina 300 SW 5.n... -
Page 106: Storing The Device
Operation Storing the device Storing Savina 300 for less than 14 days Connect the device to the mains power supply during storage so that the internal and external batteries can be charged. Insert the power plug into the power socket. -
Page 107: Alarms
Deactivating alarm limits....112 Response to power supply failure ..112 Instructions for use Savina 300 SW 5.n... -
Page 108: Display Of Alarms
Optical alarm signals until either the cause for the alarm has been resolved or the alarm signal is suppressed. Savina 300 displays the following optical alarm The alarm volume can be adjusted, see page 141. signals: – The system displays the relevant alarm... -
Page 109: Alarm Priorities
!! Quick action required to avert danger Cyan Alarm with low priority ! Attention and action required For a list of causes and remedies, see chapter "Alarm – Cause – Remedy" on page 147. Instructions for use Savina 300 SW 5.n... -
Page 110: Alarm Silence
– During the device check when testing the alarm signals Dismissing alarm messages After the fault has been eliminated, the alarm signal stops. High-priority alarm messages continue to be displayed and need to be dismissed. Press the Alarm reset key. Instructions for use Savina 300 SW 5.n... -
Page 111: Setting The Alarm Limits
B Current value : Current measured value the FiO set value: : Lower alarm limit Set value Alarm limit <60 Vol% –> ±4 Vol% 60 Vol% –> ±6 Vol% Instructions for use Savina 300 SW 5.n... -
Page 112: Deactivating Alarm Limits
Risk of patient injury If alarm limits are switched off, Savina 300 cannot monitor the patient. Only deactivate alarm limits if the safety of the patient is not jeopardized by the absence of an alarm. -
Page 113: Trends And Data
Freezing waveforms ..... 119 Evaluating Loops ..... . . 120 Instructions for use Savina 300 SW 5.n... -
Page 114: Opening The Dialog Window
Displaying set values opened. Touch the Settings tab. The set values are displayed on a green Displaying measured values background. Touch the Measurements tab. The measured values are displayed on a blue background. Instructions for use Savina 300 SW 5.n... -
Page 115: Displaying Trends
Select the time by turning the rotary knob or – Measured values in blue touching the time. – Set values in green When Savina 300 is switched off, the saved trends Selecting a time interval are deleted. For displaying trends, the time interval can be 1 Touch the header bar of the time columns (D). - Page 116 Configuration 2 Touch the Measurements (I) or Settings (J) button. 3 Touch the corresponding parameter, e.g., (K). Savina 300 displays the trend table with the selected parameter. Using an empty trend table To rearrange the order of the parameters, the contents of the current trend table can be deleted.
-
Page 117: Displaying The Logbook
D Buttons for displaying further areas of the table Displaying settings for a particular time Select the time by turning the rotary knob or touching the time. Instructions for use Savina 300 SW 5.n... -
Page 118: Displaying Waveforms And Measured Values On The Main Screen
Configuring a waveform field and 2 Touch button, e.g., Trend (measurem.) (C). parameter fields Savina 300 displays the list of parameters (D) and, for trends, also the time scale (E). 3 For trends, touch the respective button for the time scale, e.g., (F). -
Page 119: Freezing Waveforms
The measured value or the measured value pair is displayed above the waveform. The frozen waveform remains displayed until the Freeze waveforms button (A) is touched again or another area of the screen is touched. Instructions for use Savina 300 SW 5.n... -
Page 120: Evaluating Loops
The respective values are displayed (D). The frozen loop remains displayed until the Capt. button (B) is touched again. Instructions for use Savina 300 SW 5.n... -
Page 121: Monitoring
......129 Performing calibration of the CO sensor..130 Deactivating or activating CO monitoring ..132 Instructions for use Savina 300 SW 5.n... -
Page 122: Information On Monitoring
– After the start of ventilation 2 Re-insert the flow sensor. – Every 24 hours during operation Savina 300 uses one full inspiratory phase for – After replacing the flow sensor calibration. Short inspiratory times are prolonged to – After and during medication nebulization approx. -
Page 123: Deactivating Or Activating Flow Monitoring
If calibration was not successful, the message Risk of patient injury Flow calibration failed. is displayed. The If flow monitoring is deactivated, Savina 300 expiratory portion of the flow waveform and the cannot monitor the patient completely. measured values VT , MV, and PEEP are not displayed. -
Page 124: Fio 2 Monitoring
– Every 8 hours during operation Prerequisites for calibration in LPO mode – After replacing the O sensors – After switching on Savina 300, wait for the ten- – After a change in atmospheric pressure by minute warm-up phase to complete. more than 200 hPa –... -
Page 125: Deactivating Or Activating Fio
Automatic cancelation of calibration when prompted to do so by Savina 300. If reconnection has not taken place 30 seconds after being requested to do so by Savina 300, the Canceling calibration of the O sensors set ventilation mode and the alarms are 1 Touch the Cancel button (C) and confirm with reactivated. -
Page 126: Co 2 Monitoring
The zero point is shifted by up to 8 mmHg CO The cuvette type used must therefore be selected on the Zero calib. on/off page. Instructions for use Savina 300 SW 5.n... -
Page 127: Information On Checking The Co Information On The Alarm Messages Issued During Co Monitoring
CO sensor can be performed during ventilation. Instructions for use Savina 300 SW 5.n... -
Page 128: Zero Indication
4 Observe the CO measured value. If 0 to After approx. 5 seconds, Savina 300 displays the 1 mmHg (or 0 to 0.1 Vol% or 0 to 0.1 kPa) is not following information: CO zero calibration displayed when the cuvette is being exposed to successful. -
Page 129: With Test Filter
(D). and N 1 Use the reusable cuvette from the calibration set! At the start of the check with test gas, Savina 300 automatically sets the cuvette type to Reusable. Instructions for use Savina 300 SW 5.n... -
Page 130: Sensor
1 Use the reusable cuvette from the calibration set! Savina 300 displays the measured CO concentration (G). Within 60 seconds after setting At the start of calibration, Savina 300 automatically the test gas flow, the measured CO value must sets the cuvette type to Reusable. - Page 131 3 Approx. 1 minute after setting the test gas flow, touch the Start button (G) and confirm with the rotary knob. Savina 300 starts calibration and displays information in the message field (H). 4 Close the test gas cylinder again. Instructions for use Savina 300 SW 5.n...
-
Page 132: Monitoring
> Zero calib. on/off page. Sensors 3 Touch the Off button (A) and confirm with the rotary knob. Switching on CO monitoring Touch the On button (B) and confirm with the rotary knob. Instructions for use Savina 300 SW 5.n... -
Page 133: Configuration
Enabling software options....143 Scanning the QR code ....144 Instructions for use Savina 300 SW 5.n... -
Page 134: Information On Configuration
In Tube application mode, leakage compensation For a description of the ventilation modes, can be activated or deactivated. In NIV application see page 224. mode, leakage compensation is always activated. Low Pressure Oxygen (LPO), see page 100. Instructions for use Savina 300 SW 5.n... -
Page 135: Configuring The Start Settings
1 Enter the user password by touching the buttons (C). 2 Touch the OK button (D). The Settings 1 page is displayed. If the password is not correct, it can be deleted with the Clear button (E). Instructions for use Savina 300 SW 5.n... -
Page 136: Defining Start Settings For A New Patient
4 Set the value by turning the rotary knob and confirm. Selecting the start mode 1 Touch the button below row (E). 2 Select the ventilation mode with the rotary knob and confirm. Instructions for use Savina 300 SW 5.n... -
Page 137: Defining The Start Settings For The Ventilation Parameters
> Settings 2 (A) page is opened. 1 Touch the appropriate button, e.g., (B). System setup 2 Set the value by turning the rotary knob and confirm. The start settings for the ventilation parameters are displayed. Instructions for use Savina 300 SW 5.n... -
Page 138: Defining The Start Settings For The Additional
2 Confirm with the rotary knob. Entering the inner diameter of the selected tube 1 Touch the button in the Tube Ø (D) line. 2 Set the value by turning the rotary knob and confirm. Instructions for use Savina 300 SW 5.n... -
Page 139: Defining The Start Setting For The Alarm Limits
VT +99 % 35/min RR +20 % 15 s 15 s 0 to 60 s 0 to 60 s disconnect etCO 8.0 Vol% 8.0 Vol% 60 mmHg 60 mmHg 8.0 kPa 8.0 kPa Instructions for use Savina 300 SW 5.n... -
Page 140: Changing The User Password
8 digits by touching the buttons (B). 2 Save the new user password by touching the OK button (C). If the password is not correct, it can be deleted with the Clear button (D). Instructions for use Savina 300 SW 5.n... -
Page 141: Configuring The Device Settings
The minimum alarm volume can be configured in service mode. Contact DrägerService. Setting the alarm volume 1 Touch the button for alarm volume (B). 2 Set the value by turning the rotary knob and confirm. Instructions for use Savina 300 SW 5.n... -
Page 142: Configuring Country-Specific Settings
G Hours H Minutes Selecting the screen text language 2 Set the value by turning the rotary knob and Savina 300 is factory-set to the customer's own confirm. language. The current language is displayed in the field (B). Configuring units... -
Page 143: Configuring The Data Interface
2 Select the setting with the rotary knob and push to confirm. Enabling software options Savina 300 can be supplemented with additional Enabling options Dräger options. The options are enabled by means 1 Touch the relevant button in the Release code of a numerical code. -
Page 144: Scanning The Qr Code
Configuration Scanning the QR code The QR code can be scanned. Prerequisite: Savina 300 is in standby mode General product information from the Dräger web page is shown when a normal scan program is used. If the code is scanned using the Dräger ServiceConnect app, detailed information on this product is shown. -
Page 145: Troubleshooting
High ambient temperature ....146 Alarm – Cause – Remedy....147 Instructions for use Savina 300 SW 5.n... -
Page 146: Failure Of The Power Supply
Troubleshooting Failure of the power supply If the power supply fails, Savina 300 generates a Power supply of the O sensors power supply failure alarm. The ventilation settings The O sensors are also supplied from the internal and the alarm limits remain saved even in the event battery of Savina 300 when the device is switched of a power supply failure. -
Page 147: Alarm - Cause - Remedy
"Alarm reset" key. quently. The function of this key is not available as long as the fault exists. If the fault can- not be eliminated, contact specialized service person- nel. Instructions for use Savina 300 SW 5.n... - Page 148 The upper alarm limit for the Check patient condition. airway pressure has been Check ventilation settings. exceeded. The patient is Adjust alarm limit if neces- breathing against the venti- sary. lator or coughing. Instructions for use Savina 300 SW 5.n...
- Page 149 Contact specialized service personnel. Ambient temperature high Due to high ambient tem- Reduce ambient tempera- peratures (35 to 40 °C / ture. 95 to 104 °F), the device achieves peak pressure, but not peak flow. Instructions for use Savina 300 SW 5.n...
- Page 150 When mains power supply or power supply via a charged external battery is established, ventilation with this device can be contin- ued. Downgrade alarm priority: Press "Alarm reset" key. Contact specialized service personnel. Instructions for use Savina 300 SW 5.n...
- Page 151 Clean the CO cuvette or soiled. sensor. sensor drift. Perform CO zero calibra- tion. Inspiratory CO concentra- Check ventilation settings. tion high. Check patient condition. Instructions for use Savina 300 SW 5.n...
- Page 152 Check if sensor is connect- sor failed. ed correctly. Repeat device check. Replace flow sensor. Device failure The device failed. Disconnect patient from the device and continue ventila- tion without delay using an- other independent ventilator. Instructions for use Savina 300 SW 5.n...
- Page 153 Adjust alarm limit if neces- sary. Perform CO zero calibra- tion if necessary. Check whether the cuvette windows are soiled. Expiration hold The "Exp. hold" button was Release "Exp. hold" button. interrupted pressed too long. Instructions for use Savina 300 SW 5.n...
- Page 154 LPO mode: The upper alarm Check patient condition. limit for the O concentration Check LPO flow and ventila- was exceeded. tion settings. Adjust alarm limit if neces- sary. Instructions for use Savina 300 SW 5.n...
- Page 155 The setting was changed, Check the setting. but the change was not con- If necessary, adjust the set- firmed. ting and confirm with the rotary knob. Acknowledge message by pressing "Alarm reset" key. Instructions for use Savina 300 SW 5.n...
- Page 156 The setting was changed, Check the setting. but the change was not con- If necessary, adjust the set- firmed. ting and confirm with the rotary knob. Acknowledge message by pressing "Alarm reset" key. Instructions for use Savina 300 SW 5.n...
- Page 157 45 minutes. the internal battery. Maxi- mum operating time is 45 minutes. Instructions for use Savina 300 SW 5.n...
- Page 158 When mains power supply faulty, or not connected or or power supply via a the fuse is faulty. charged external battery is established, ventilation with this device can be contin- ued. Contact specialized service personnel. Instructions for use Savina 300 SW 5.n...
- Page 159 With mains power supply or Allow the internal battery to power supply from the exter- charge. nal battery: Internal battery is not yet sufficiently charged. Instructions for use Savina 300 SW 5.n...
- Page 160 The main switch at the rear To switch the device off, of the device has been actu- press the rotary knob to ated during ventilation. confirm the message. To continue ventilation, switch the main switch to "On" again. Instructions for use Savina 300 SW 5.n...
- Page 161 Make sure that the tube or mask is connected correctly. Device failure Disconnect patient from the device and continue ventila- tion without delay using an- other independent ventilator. Contact specialized service personnel. Instructions for use Savina 300 SW 5.n...
- Page 162 The ventilation mode was Check the ventilation mode. changed, but the change If necessary, change the was not confirmed. ventilation mode and con- firm with the rotary knob. Acknowledge message by pressing "Alarm reset" key. Instructions for use Savina 300 SW 5.n...
- Page 163 The setting was changed, Check the setting. insp but the change was not con- If necessary, adjust the set- firmed. ting and confirm with the rotary knob. Acknowledge message by pressing "Alarm reset" key. Instructions for use Savina 300 SW 5.n...
- Page 164 Replace internal battery Due to aging or wear the ex- Contact specialized service pected duration of operation personnel. of the internal battery has been reduced. Instructions for use Savina 300 SW 5.n...
- Page 165 The setting was changed, Check the setting. but the change was not con- If necessary, adjust the set- firmed. ting and confirm with the rotary knob. Acknowledge message by pressing "Alarm reset" key. Instructions for use Savina 300 SW 5.n...
- Page 166 If necessary, adjust the set- firmed. ting and confirm with the rotary knob. Acknowledge message by pressing "Alarm reset" key. Temp. sensor (Y-piece) Temperature sensor faulty. Insert a new temperature failed sensor. Instructions for use Savina 300 SW 5.n...
- Page 167 The setting was changed, Check the setting. firmed but the change was not con- If necessary, adjust the set- firmed. ting and confirm with the rotary knob. Acknowledge message by pressing "Alarm reset" key. Instructions for use Savina 300 SW 5.n...
- Page 168 The setting was changed, Check the setting. firmed but the change was not con- If necessary, adjust the set- firmed. ting and confirm with the rotary knob. Acknowledge message by pressing "Alarm reset" key. Instructions for use Savina 300 SW 5.n...
- Page 169 VT low The lower alarm limit of the Check patient condition. applied inspiratory tidal vol- Check ventilation settings. ume has been exceeded. Increase inspiratory time or flow acceleration. Adjust alarm limit if neces- sary. Instructions for use Savina 300 SW 5.n...
- Page 170 The setting was changed, Check the setting. but the change was not con- If necessary, adjust the set- firmed. ting and confirm with the rotary knob. Acknowledge message by pressing "Alarm reset" key. Instructions for use Savina 300 SW 5.n...
-
Page 171: Reprocessing
......184 Preparation before next use of device ..184 Instructions for use Savina 300 SW 5.n... -
Page 172: Safety Information
30 minutes. – Before inserting the flow sensor check for visible damage and soiling, such as resid- ual mucus, medication aerosols, and parti- cles. – Replace flow sensors when damaged, soiled, or not particle-free. Instructions for use Savina 300 SW 5.n... -
Page 173: Information On Reprocessing
During normal operation, contaminated gas flows through the expiratory valve and other accessories in the expiratory path. In the event of a fault, accessories in the inspiratory path may become contaminated. Instructions for use Savina 300 SW 5.n... -
Page 174: Classifications For Reprocessing
1 Switch off the device and all devices connected to it. 2 Disconnect all power plugs. 3 Drain the water traps and the breathing hoses. 4 Drain the water reservoir of the breathing gas humidifier. Instructions for use Savina 300 SW 5.n... -
Page 175: Consumables
3 Disassemble the medication nebulizer in accordance with the corresponding instructions for use. 1 Remove the CO sensor (A) from the cuvette. 2 Remove the cuvette (B) from the patient port of the Y-piece. Instructions for use Savina 300 SW 5.n... - Page 176 1 Lift the flap (A) by the lower edge and pivot it upwards. 2 Push the flow sensor (B) to the left end position. 3 Remove the flow sensor from the socket (C). Instructions for use Savina 300 SW 5.n...
-
Page 177: Device-Specific Components
1 Remove the flow sensor sleeve (B) from the expiratory valve. 2 Remove the diaphragm (C) and do not disassemble further. 3 Remove the water trap container (D). 4 Drain the water trap container. Instructions for use Savina 300 SW 5.n... -
Page 178: Validated Reprocessing Procedures
5 At the end of the contact time, moisten a new, – Electric shock uncontaminated and lint-free cloth with water – Device malfunctions (at least drinking water quality). Ensure that no liquid penetrates the device. Instructions for use Savina 300 SW 5.n... -
Page 179: Machine Cleaning With Thermal Disinfection
Min. 90 °C Min. 5 min (194 °F) Drying – – – – Drying time de- pends on the load Prerequisites: – The washer-disinfector has been prepared in accordance with the manufacturer's instructions. Instructions for use Savina 300 SW 5.n... -
Page 180: Storage And Transport
1 Select a cycle. 2 When the cycle has ended, check the components for visible soiling and repeat the cycle if necessary. 3 Check the components for visible damage and replace if necessary. Instructions for use Savina 300 SW 5.n... -
Page 181: Other Agents And Reprocessing Procedures
Actichlor plus Ecolab USA Oxygen-releasing Descogen Liquid Antiseptica agents Descogen Liquid r.f.u. Oxygenon Liquid r.f.u. Dismozon plus BODE Chemie Oxycide Ecolab USA Perform Schülke & Mayr SteriMax Wipes Aseptix Incidin OxyWipes Ecolab USA Instructions for use Savina 300 SW 5.n... - Page 182 Dräger states that oxygen-releasing agents and chlorine-releasing agents may cause color change in some materials. Color change does not indicate that the product is not functioning correctly. Other surface disinfectants are used at one's own risk. Instructions for use Savina 300 SW 5.n...
-
Page 183: Reprocessing Procedures
ISO 17665. Dräger recommends steam sterilization with fractionated vacuum. Procedure: 1 Sterilize the components (maximum 134 °C (273.2 °F), 5 min). 2 Check the components for visible damage and replace if necessary. Instructions for use Savina 300 SW 5.n... -
Page 184: After Reprocessing
Checking the operational readiness Prerequisites: – The device has been assembled and prepared so that it is ready for operation. Procedure: Check the operational readiness, see chapter "Getting started" on page 69. Instructions for use Savina 300 SW 5.n... -
Page 185: Service
....192 Replacing the diaphragm of the reusable expiratory valve ..... . . 192 Instructions for use Savina 300 SW 5.n... -
Page 186: Safety Information
Under the housing, there are live electrical components, which may cause an electric NOTE shock. If Savina 300 is used under the following conditions, the specified intervals, e.g., for The housing may only be opened by those checking the batteries, must be reduced: user groups that are assigned to that –... -
Page 187: Definition Of Service Terminology
Must be carried out for the first time after 2 years or at Service personnel the latest after 12000 operating hours, whichever occurs first. Thereafter annually or after 6000 operating hours, whichever occurs first. Safety check Every 12 months Service personnel Instructions for use Savina 300 SW 5.n... -
Page 188: Safety Checks
The test must be carried out on individual devices and together in the system. – Contact resistance of protective ground conductor 0.2 – Equivalent leakage current (device) 1 mA – Equivalent leakage current (patient) 5 mA Instructions for use Savina 300 SW 5.n... -
Page 189: Maintenance
Every 8 years Replace Specialized service personnel 1) The capacity test for the external battery is not part of the service provided by DrägerService and is therefore the respon- sibility of the user. Instructions for use Savina 300 SW 5.n... -
Page 190: Repair
2 Remove the soiled microfilter (A) from the holder and dispose of it with domestic waste. 3 Push new microfilter (A) into the holder as far as it will go. 4 Fit the filter cover, see page 67. Instructions for use Savina 300 SW 5.n... -
Page 191: Replacing The Dust Filter Set
2 Remove the soiled dust filter set (A) from the filter cover (B) and dispose of with domestic waste. 3 Insert the new dust filter set (A). 4 Fit the filter cover, see page 67. Instructions for use Savina 300 SW 5.n... -
Page 192: Replacing The O 2 Sensors
5 Fit the cover plate (B) again and tighten the screw using a coin. 6 Switch on Savina 300 and wait for the sensors to complete their warm-up phase (10 to 20 minutes). 7 Calibrate the O sensors, see page 124. -
Page 193: Disposal
... . . 195 Disposing of the device ....195 Instructions for use Savina 300 SW 5.n... -
Page 194: Safety Information
The battery installed in the device must therefore be removed by service personnel before disposal of the device. Observe the applicable laws and regulations for battery disposal. Instructions for use Savina 300 SW 5.n... -
Page 195: Disposing Of The O 2 Sensors
This device must be disposed of in accordance with national regulations. In countries of the European Union, Dräger will organize the return of the device. Additional information is available at www.draeger.com (search term: WEEE). Instructions for use Savina 300 SW 5.n... - Page 196 This page has been left blank intentionally. Instructions for use Savina 300 SW 5.n...
-
Page 197: Technical Data
Operating data ......210 Alarm system of Savina 300 ... . . 216 Automatic alarm limits . -
Page 198: Ambient Conditions
(0 = apnea ventilation off) Accuracy ±1/min Inspiratory time T 0.2 to 10 s Accuracy 0.1 s Resolution 0.05 s in the range up to 1 s, 0.1 s in the range above 1 s Instructions for use Savina 300 SW 5.n... - Page 199 ISO 80601-2- <140 s 0...90 (VT = 30 mL (only possible if the Pediatric Plus option is enabled), maximum values for the combination of accessories in accordance with ISO 80601-2-12) Instructions for use Savina 300 SW 5.n...
- Page 200 Accuracy ±2 mbar (or hPa or cmH Automatic tube compensation Tube type Endotracheal tube ET or tracheostomy tube Trach. Inner diameter of the tube 3.5 to 12.0 mm in increments of 0.5 mm Instructions for use Savina 300 SW 5.n...
-
Page 201: Performance Characteristics
For up to 30 min, in the inspiratory flow phase, 2 bar (with high-pressure O supply only) (or 200 kPa or 29 psi), max. 10 L/min, Savina 300 takes the nebulizer flow into consideration and keeps the minute volume constant... - Page 202 O/L/s at 30 L/min 40 mbar/L/s at 15 L/min 40 hPa/L/s at 15 L/min 40 cmH O/L/s at 15 L/min 10 mbar/L/s at 2.5 L/min 10 hPa/L/s at 2.5 L/min 10 cmH O/L/s at 2.5 L/min Instructions for use Savina 300 SW 5.n...
-
Page 203: Displayed Measured Values
Safety valve Opens the breathing system at max.120 mbar (or hPa or cmH Displayed measured values Airway pressure measurement (resistive relative pressure sensor) Peak inspiratory pressure Plateau pressure plat Positive end-expiratory pressure PEEP Instructions for use Savina 300 SW 5.n... - Page 204 0.01 L/min in the range up to 10 L/min 0.1 L/min in the range above 10 L/min Accuracy ±12 % of the measured value or ±0.6 L/min, whichever is greater Approx. 35 s 10...90 Instructions for use Savina 300 SW 5.n...
- Page 205 ±10 % of the measured value or ±11 mL, whichever is greater Respiratory rate measurement Spontaneous respiratory rate spon Total respiratory rate Range 0 to 150/min Resolution 1/min Accuracy ±1/min Approx. 35 s 10...90 Instructions for use Savina 300 SW 5.n...
- Page 206 Tidal volume per kg of body weight VT / IBW Range 0 to 99.9 mL/kg Resolution 0.1 mL/kg Rapid shallow breathing index Range 0 to 9999 (1/min/L) Resolution 1/min/L Accuracy See measurement of VT and RR spon spon Instructions for use Savina 300 SW 5.n...
- Page 207 0.0 to 400.0 mbar/L/s (or hPa/L/s or cmH O/L/s) Range with guaranteed accuracy 0.0 to 100.0 mbar/L/s (or hPa/L/s or cmH O/L/s) Resolution 0.1 mbar/L/s (or hPa/L/s or cmH O/L/s) Accuracy ±35 % of the measured value Instructions for use Savina 300 SW 5.n...
-
Page 208: Monitoring
55 dB (A) to 62 dB (A) auxiliary alarm Expiratory minute volume Upper alarm limit alarm If the upper alarm limit has been exceeded Range 2 to 41 L/min in increments of 0.1 L/min Instructions for use Savina 300 SW 5.n... - Page 209 19 to 99 Vol%, , in increments of 1 Vol% Range of lower alarm limit 18 to 98 Vol%, in increments of 1 Vol% (18 to 99 Vol% if the upper alarm limit is switched off) Instructions for use Savina 300 SW 5.n...
-
Page 210: Operating Data
Mains power supply Mains power connection 100 V~ to 240 V~ 50 Hz to 60 Hz Current consumption at 240 V~ Max. 1.3 A at 100 V~ Max. 3.4 A Inrush current Max. 15 A Instructions for use Savina 300 SW 5.n... - Page 211 Operating time if mains power supply is not Approx. 4 hours (e.g., with 2 lead-gel batteries available, with a fully-charged external bat- 12 V / 17 Ah) tery at 17 Ah and typical ventilation (Typical ventilation, see page 215) Instructions for use Savina 300 SW 5.n...
- Page 212 1.45 psi to max. 29 psi flow 0.5 L/min to max. 10 L/min humidity Without condensation Output for pneumatic medication nebulizer , max. 2 bar (or 200 kPa or 29 psi), max. 16 L/min Instructions for use Savina 300 SW 5.n...
- Page 213 Device with Dräger Savina 300 trolley (22.72 x 50.98 x 26.65 0.20 in) 577 x 1295 x 677 5 mm Device with Dräger Savina 300 compact trolley (22.72 x 50.98 x 26.65 0.20 in) 460 x 383 x 364 2 mm Device with LPO (18.11 x 15.08 x 14.33 0.08 in)
- Page 214 With 1846248 plug only Potential-free DC contact Input voltage Max. 40 V = Input current Max. 500 mA Switching power Max. 15 W 2.5 s Alarm delay MEDIBUS 3 s Alarm delay (on request) Instructions for use Savina 300 SW 5.n...
- Page 215 21 Vol% FlowAcc 30 mbar/s (or hPa/s or cmH O/s) 12/min PEEP 5 mbar (or hPa or cmH Test lung compliance 50 mL/mbar (50 mL/cmH Test lung resistance 5.0 mbar/L/s (5.0 cmH O/L/s) Instructions for use Savina 300 SW 5.n...
-
Page 216: Alarm System Of Savina 300
Following completion of the system start, The alarms are output acoustically and optically Savina 300 starts the therapy with the last set alarm immediately upon detection of an alarm, without an and ventilation parameters. The main screen for additional delay. -
Page 217: Automatic Alarm Limits
Groups of alarm conditions can also be deactivated Operation is terminated by activating standby mode by the user, see chapter "Monitoring" on page 121. (see page 104) and then switching off Savina 300 (see page 105). Automatic alarm limits The following tables describe the alarm limits which cannot be set by the user. -
Page 218: Device Combinations
Device combinations approved by Dräger meet the requirements of the following standards: – IEC 60601-1 (electrical safety, mechanical safety, software) – IEC 60601-1-2 (EMC) – IEC 60601-1-8 (alarm systems) Instructions for use Savina 300 SW 5.n... -
Page 219: Emc Declaration
Test level and required electromagnetic environment Electrostatic discharge (ESD) (IEC 61000-4-2) Contact discharge: ±8 kV Air discharge: ±15 kV Fast transient electrical disturbances (bursts) Power cable: ±2 kV (IEC 61000-4-4) Longer signal input lines/output lines: ±1 kV Instructions for use Savina 300 SW 5.n... -
Page 220: Recommended Separation Distances From Wireless Communication Devices
80 MHz to 2.7 GHz: (IEC 61000-4-3) 20 V/m: Savina 300 without trolley 10 V/m: Savina 300 with trolley during hospital use 3 V/m: Savina 300 with CO sensor Conducted high-frequency disturbances 150 kHz to 80 MHz: 3 V, ISM bands: 6 V... -
Page 221: Connections To It Networks
The following documents must be observed: – Accompanying documents of this device – Description of the network interface – Description of the network-based alarm systems Instructions for use Savina 300 SW 5.n... -
Page 222: Open-Source Software
Open- source software may be subject to different terms of license. Additional information regarding the open- source software used in this device is available at the following web page: www.draeger.com/opensource Instructions for use Savina 300 SW 5.n... -
Page 223: Principles Of Operation
Overview of the menu structure ..254 References ......258 Instructions for use Savina 300 SW 5.n... -
Page 224: Ventilation Modes
P in the waveform plat mandatory breaths are time-cycled and are not Paw (t). triggered by the patient. The number of mandatory breaths is determined by the respiratory rate RR. Instructions for use Savina 300 SW 5.n... - Page 225 Principles of operation If the inspiratory pause time Plateau is deactivated, Savina 300 immediately switches to expiration as soon as the set tidal volume VT is applied. When the Pressure limitation ventilation function is activated, the P therapy control is active. The set tidal volume VT is maintained and pressure peaks are avoided.
-
Page 226: Vc-Simv
If the inspiratory pause time Plateau is deactivated, Synchronization of the mandatory breath reduces Savina 300 immediately switches to expiration as the expiratory time. Savina 300 prolongs the soon as the set tidal volume VT is applied. - Page 227 Principles of operation If the patient breathes in at the beginning of the trigger window and has already inspired a significant volume, Savina 300 takes this volume into account. During the subsequent mandatory breath, the ventilator reduces the inspiratory flow phase and the inspiratory time.
-
Page 228: Vc-Mmv
T has fully elapsed, an inspiratory breathing is present. pause occurs. MMV works similar to SIMV, however, the breaths are only provided if spontaneous breathing is not sufficient and below the prescribed minimum Instructions for use Savina 300 SW 5.n... -
Page 229: Pc-Ac
PEEP", the lung mechanics (resistance and for the previous expiration. The expiratory time is compliance), and the patient's respiratory drive. determined by the respiratory rate RR and the The pressure rise is determined by the flow acceleration FlowAcc. Instructions for use Savina 300 SW 5.n... -
Page 230: Pc-Bipap
"P – patient's spontaneous breathing. Synchronization insp PEEP", the lung mechanics (resistance and of the mandatory breath reduces the duration of the Instructions for use Savina 300 SW 5.n... - Page 231 500 ms for the previous expiration. Synchronization of the mandatory breath reduces the expiratory time. Savina 300 prolongs the subsequent expiratory time or spontaneous breathing time by the missing time. This prevents an increase in the mandatory respiratory rate.
-
Page 232: Pc-Aprv
. For very short expiratory times T high Savina 300 switches to a low pressure level P The normal lung areas are emptied, but the "slow" lung areas only change volume to a lesser extent*. The number of pressure releases is determined by... -
Page 233: Spn-Cpap
Slow pressure rise PEEP Flow Inspiratory termination criterion When the pressure support is not switched on, the patient's spontaneous breathing is merely supported by an increased PEEP. For information on pressure support, see page 234. Instructions for use Savina 300 SW 5.n... -
Page 234: General Ventilation Functions
Max. 4 s Flow peaks are avoided. The inspiratory pressure is maintained at the level of P until Savina 300 has applied the set tidal volume VT or until the inspiratory time has fully elapsed. 25 % Insp. Flow If the set tidal volume VT cannot be fully applied, an alarm message VT low is generated. - Page 235 Savina 300 generates the low-priority alarm message PS breath > 4 s. In the NIV application mode, the maximum duration of pressure support is set using the T therapy control. Instructions for use Savina 300 SW 5.n...
-
Page 236: Additional Settings
The patient can breathe spontaneously and the ventilation mode with AutoFlow. mandatory breaths are synchronized with the patient's spontaneous breathing. The apnea For Savina 300 to be able to detect apnea, flow respiratory rate RR remains constant. measurement must function and flow monitoring Savina 300 provides synchronized intermittent must be activated. -
Page 237: Flow Trigger
With the trigger threshold Trigger, the mandatory breaths and pressure support PS are synchronized with the inspiratory efforts. Spontaneous breathing activity by the patient is indicated on the screen by the brief appearance of symbol. Instructions for use Savina 300 SW 5.n... -
Page 238: Inspiratory Termination
The sigh function can be activated in the VC- CMV/VC-AC and VC-MMV ventilation modes. When the sigh function is activated, the end- Instructions for use Savina 300 SW 5.n... -
Page 239: Autoflow
When the patient breathes in, Savina 300 delivers airways. With AutoFlow, these fluctuations occur in an additional inspiratory flow limited by the increments with a maximum of 3 mbar (3 cmH alarm limit. - Page 240 In this situation, the pressure synchronized with the patient's inspiratory efforts is limited by Savina 300 as described. If the set tidal by means of the variable flow trigger. volume VT can no longer be fully applied as a...
-
Page 241: Tube Compensation (Atc)
Automatic tube compensation regulates the airway Calculating the tracheal pressure pressure to the tracheal level. This function Savina 300 calculates the tracheal pressure on the calculates and displays the tracheal pressure on basis of a square function of tube resistance and the basis of a mathematical tube model, the set patient flow. - Page 242 Tube compensation is inactive during volume- |Flow| Amount of flow controlled inspiratory phases without AutoFlow. When tube compensation is activated, Savina 300 Tube coefficient controls the ventilation pressure so that the resistive work of breathing on the tube is The tube coefficient K...
- Page 243 4.50 8.50 5.17 8.50 3.70 9.00 4.29 9.00 2.95 9.50 3.80 9.50 2.65 10.00 3.50 10.00 2.50 10.50 3.00 10.50 2.05 11.00 2.50 11.00 1.65 11.50 2.00 11.50 1.35 12.00 1.50 12.00 1.10 Instructions for use Savina 300 SW 5.n...
-
Page 244: Therapy Types And Application Modes
Non-invasive ventilation by mask for patients with spontaneous breathing Leakages are greater with non-invasive ventilation than with invasive ventilation. Savina 300 takes into account the leakages in the NIV application mode accordingly. The inspiratory trigger is automatically adapted to the measured leakage. This prevents auto-triggering due to a flow trigger which has been set too low and prolonged inspirations. -
Page 245: Special Maneuvers
Intrinsic PEEP. At the end of measuring interval 1, Intrinsic PEEP is measured in two phases. Savina 300 opens the expiratory valve and, in Savina 300 keeps the inspiratory and expiratory measuring interval 2, measures the expiratory flow valves closed during measuring interval 1. -
Page 246: Low Pressure Oxygen (Lpo)
LPO inlet valve on – Temperature = 25 °C (77 °F) the rear of Savina 300. In the mixing chamber, a – Relative humidity = 50 % mixture of oxygen and air is formed, which is then delivered to the patient. -
Page 247: Lpo Flow Setting Diagram
Result: LPO-Flow = 6 L/min the LPO flow. – If the FiO value is too high, set a lower value for the LPO flow. Instructions for use Savina 300 SW 5.n... -
Page 248: Automatic Leakage Compensation
Automatic leakage compensation The automatic leakage compensation feature of Tidal volume VT Savina 300 ensures that ventilation is adapted to During volume-controlled ventilation, Savina 300 the new conditions after a few breaths in the case supplies additional volume in order to compensate of leakage changes. - Page 249 1) Leakage compensation is activated. 2) Leakage compensation is deactivated. Monitoring of leakages If Savina 300 detects a significant leakage in the Tube application mode, the low-priority alarm message Leakage is displayed. In this case, the breathing circuit and the tube must be checked for leakages.
-
Page 250: Measurements
564 mL BTPS when warmed to 37 °C (99 °F) and humidified to 100 % rel. humidity. Savina 300 controls tidal volume in such a way that the set tidal volume value is applied under BTPS conditions in the lungs. -
Page 251: Pneumatic Functional Description
27 Nebulizer outlet 12 Patient's lung 28 Bacterial filter 13 Expiratory valve 29 Breathing gas humidifier 14 Return valve 30 Medication nebulizer 15 Expiratory flow sensor 31 CO measurement 16 Barometric pressure sensor 1 Instructions for use Savina 300 SW 5.n... - Page 252 Description of pneumatic functions hot wire anemometry. The measured flow is thus a mass flow (NTPD). The expiratory valve assembly Savina 300 consists of 9 pneumatic assemblies. and the expiratory flow sensor can be removed The gas mixing and gas delivery assembly (A) from Savina 300 for cleaning.
- Page 253 Principles of operation For medication nebulization a pneumatic medication nebulizer (30) can be connected to the nebulizer gas outlet (27). Savina 300 provides a flow from the HPO supply to drive the medication nebulizer. The upstream pressure regulator (25) throttles the variable oxygen supply pressure to a constant value for delivery.
-
Page 254: Overview Of The Menu Structure
VC-SIMV General settings More settings Apnea ventilation Flow trigger AutoFlow ATC settings VC-MMV General settings More settings Sigh Flow trigger AutoFlow ATC settings PC-AC General settings More settings Sigh Flow trigger ATC settings Instructions for use Savina 300 SW 5.n... - Page 255 Trends Logbook Group Button in main menu bar Horizontal tab Vertical tab Functions Day/Night Freeze waveforms Group Button in main menu bar Horizontal tab Vertical tab Functions Special maneuvers... Expiration hold Intrinsic PEEP Instructions for use Savina 300 SW 5.n...
- Page 256 , I:E, T imax insp , PEEP, P supp high high Settings 3 Apnea ventilation AutoFlow ATC settings Tube type Tube Ø Alarm settings MV, Paw, VT, RR, T etCO , FiO Password Instructions for use Savina 300 SW 5.n...
- Page 257 Patient admission Body height and ideal body weight Check settings Start: Start ventilation Start O therapy Standby Device check Device check Breathing circ. check Breathing circuit Breathing circuit check Check results Breathing circuit check Instructions for use Savina 300 SW 5.n...
-
Page 258: References
A prospective multicenter trial. Critical Care Medicine 19:1234 - 1241 Guttmann W, Eberhard L, Fabry B, et al.: Continuous Calculation of Tracheal Pressure in Tracheally Intubated Patients. Anesthesiology 79 (1993): 503-513 Instructions for use Savina 300 SW 5.n... -
Page 259: Index
Data transfer ......26 Date and time, set ..... 142 Instructions for use Savina 300 SW 5.n... - Page 260 Display on the main screen ... 118 MEDIBUS ......65 Instructions for use Savina 300 SW 5.n...
- Page 261 Failure ......146 Power supply failure alarm ....146 Instructions for use Savina 300 SW 5.n...
- Page 262 Ventilation settings ..... . 84 Ventilator Prepare ......52 Instructions for use Savina 300 SW 5.n...
-
Page 263: Labels For Options
Labels for options Labels for options Instructions for use Savina 300 SW 5.n... - Page 264 Labels for options Instructions for use Savina 300 SW 5.n...
- Page 265 Labels for options Instructions for use Savina 300 SW 5.n...
- Page 266 Labels for options Instructions for use Savina 300 SW 5.n...
- Page 267 Labels for options Instructions for use Savina 300 SW 5.n...
- Page 268 Labels for options Instructions for use Savina 300 SW 5.n...
- Page 269 Labels for options Instructions for use Savina 300 SW 5.n...
- Page 270 This page has been left blank intentionally. Instructions for use Savina 300 SW 5.n...
-
Page 271: User Password For Savina 300 Sw 5.N
User password for Savina 300 SW 5.n Cut out from the instructions for use of Savina 300 SW 5.n To prevent unauthorized adjustments, the start settings (System setup > Startup settings) are protected by the following default user password: 4155... - Page 272 This page has been left blank intentionally. Instructions for use Savina 300 SW 5.n...
- Page 273 This page has been left blank intentionally. Instructions for use Savina 300 SW 5.n...
- Page 274 These instructions for use only apply to Savina 300 SW 5.n with the Serial No.: If no Serial No. has been filled in by Dräger, these instructions for use are provided for general information only and are not intended for use with any specific medical device.
Need help?
Do you have a question about the Savina 300 and is the answer not in the manual?
Questions and answers