Table of Contents
Advertisement
Quick Links
Measurement Guide
Vector Network Analyzer
for Anritsu RF and Microwave
Handheld Instruments
Time Domain
Bias Tee
Vector Voltmeter
6 GHz VNA Frequency Extension
Balanced Ports
Distance Domain
Option 501, Distance Domain measurements, becomes a standard feature with
newer firmware. Refer to
Note
Not all instrument models offer every option or every measurement within a given
option. Please refer to the Technical Data Sheet of your instrument for available
options and measurements within the options.
Anritsu Company
490 Jarvis Drive
Morgan Hill, CA 95037-2809
USA
http://www.anritsu.com
Option 2
Option 10
Option 15
Option 16
Option 77
Option 501
Chapter
9.
Part Number: 10580-00289
Revision: K
Published: October 2016
Copyright 2016 Anritsu Company
Advertisement
Table of Contents

Subscribe to Our Youtube Channel
Related Manuals for Anritsu MS2024B


Summary of Contents for Anritsu MS2024B
- Page 1 Measurement Guide Vector Network Analyzer for Anritsu RF and Microwave Handheld Instruments Time Domain Option 2 Bias Tee Option 10 Vector Voltmeter Option 15 6 GHz VNA Frequency Extension Option 16 Balanced Ports Option 77 Distance Domain Option 501 Option 501, Distance Domain measurements, becomes a standard feature with newer firmware.
- Page 2 VNA Master, and LMR Master are trademarks of Anritsu Company. NOTICE Anritsu Company has prepared this manual for use by Anritsu Company personnel and customers as a guide for the proper installation, operation and maintenance of Anritsu Company equipment and computer programs.
-
Page 3: Table Of Contents
Introduction ..........1-1 Contacting Anritsu . - Page 4 Table of Contents (Continued) Chapter 4—VNA Measurements Introduction ..........4-1 Select Measurement Type –...
- Page 5 Table of Contents (Continued) Graph Type Selector List Box........5-4 Field Measurements View versus VNA Measurements View .
- Page 6 Table of Contents (Continued) Calibration Menus ......... 6-18 Calibration Menu .
- Page 7 Table of Contents (Continued) System Menus ..........6-63 System Menu .
- Page 8 Table of Contents (Continued) 7-10 Application Options Menu ........7-19 Chapter 8—Time Domain, Option 2 Introduction .
- Page 9 Table of Contents (Continued) 10-5 Bias Tee Menus (MS20xxC, MS2026B, and MS2028B) ... . 10-7 Bias Tee Setup Menu ........10-8 Bias Tee Menu .
- Page 10 Table of Contents (Continued) Appendix B—Windowing Introduction ..........B-1 Rectangular Windowing .
-
Page 11: Chapter 1-General Information
From here, you can select the latest sales, select service and support contact information in your country or region, provide online feedback, complete a “Talk to Anritsu” form to have your questions answered, or obtain other services offered by Anritsu. -
Page 12: Vna Master Models
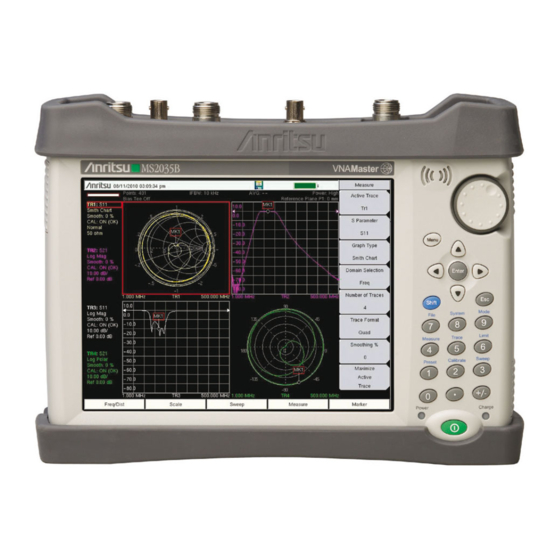
General Information VNA Master Models This Measurement Guide is for the following Vector Network Analyzer instrument models: • MS2024B, MS2025B, MS2034B, MS2035B (MS20xxB), VNA Master • MS2026C, MS2027C, MS2028C, MS2036C, MS2037C, MS2038C (MS20xxC), VNA Master • MS2026B and MS2028B VNA Master with Firmware Version 2.0 and higher. -
Page 13: Identifying The Connections
LMR Master S412E S412E S412E MS20xxB is used in this manual to refer ONLY to models MS2024B, MS2025B, Note MS2034B, and MS2035B. When referring to models MS2026B and MS2028B, the full model numbers are specified and are never abbreviated. Identifying the Connections The VNA Master and LMR Master connectors are described in the user guide for your instrument. - Page 14 1-4 Identifying the Connections General Information PN: 10580-00289 Rev. K Vector Network Analyzer MG...
-
Page 15: Chapter 2-Vna Display Overview
Chapter 2 — VNA Display Overview Introduction This chapter provides an overview of the display features that are found in the VNA Master and the S412E LMR Master. The topics include active traces, trace format, number of traces, markers, and limits. Powerful Display Capabilities These vector network analyzers have a flexible display capable of single, dual, tri, and quad displays, meaning that you can subdivide the measurement display area into 2, 3, or... -
Page 16: Active Trace
2-2 Powerful Display Capabilities VNA Display Overview 5. Now return to the default display of Trace Format = Quad. Change the Number of Traces from 4 to 1. Note how the top left quadrant is filled, while the other three quadrants have no data. -
Page 17: Touch Screen Trace Features
VNA Display Overview 2-2 Powerful Display Capabilities Another powerful feature to become acquainted with is the ability to Maximize and Minimize an active trace. On the quad default display, select Maximize Active Trace from the Measure menu, and note how this feature zooms in on the active trace and uses maximum area to display the measurement results. -
Page 18: Example Measurement Displays
2-2 Powerful Display Capabilities VNA Display Overview Example Measurement Displays Figure 2-1. Format = Quad, Traces = 4 (MS202xC trace shown) Figure 2-2. Format = Single, Traces = 4 (MS202xC trace shown) PN: 10580-00289 Rev. K Vector Network Analyzer MG... -
Page 19: Vector Network Analyzer Mg Pn: 10580-00289 Rev. K
VNA Display Overview 2-2 Powerful Display Capabilities Figure 2-3. Format = Dual, Traces = 4 (MS202xC trace shown) Figure 2-4. Format = Tri, Traces = 4 (MS202xC trace shown) Vector Network Analyzer MG PN: 10580-00289 Rev. K... - Page 20 2-2 Powerful Display Capabilities VNA Display Overview Figure 2-5. Format = Quad, Traces = 1 Figure 2-6. Format = Quad, Traces = 4 (MS202xC trace shown, same as Figure 2-1) PN: 10580-00289 Rev. K Vector Network Analyzer MG...
-
Page 21: Marker And Limit Capabilities
VNA Display Overview 2-3 Marker and Limit Capabilities Marker and Limit Capabilities Marker Description A marker is a tool for extracting results from traces (or from trace memory). Eight independent markers can be assigned to any one trace (or to all traces). User-defined attributes for a marker include: Marker Type (reference or delta) and Readout Style. -
Page 22: Setting Up Delta Markers
2-3 Marker and Limit Capabilities VNA Display Overview If multiple markers are displayed in the table, and if the marker data is displayed with overlapping text, then the readout format can be set to Small with the Marker Text Size soft key in the Readout Format menu. -
Page 23: Trace Math Capabilities
VNA Display Overview 2-4 Trace Math Capabilities You can touch and hold to place the active marker, or you can slide your finger to drag the marker along a trace. Your touch point represents a location on the x-axis, and this touch point may be anywhere on the y-axis, or even within the Marker Table when it is displayed (On). - Page 24 2-4 Trace Math Capabilities VNA Display Overview 2-10 PN: 10580-00289 Rev. K Vector Network Analyzer MG...
-
Page 25: Chapter 3-Vna Fundamentals
Chapter 3 — VNA Fundamentals Introduction This chapter includes Vector Network Analyzer (VNA) measurement capabilities and instrument architecture information. It also describes calculating and displaying S-parameters, and describes using markers to provide additional measurement information. The function hard keys (or main menu keys) in Vector Network Analyzer mode without Option 2 (Time Domain) are: Freq/Dist, Scale, Sweep, Measure, Marker The function hard keys in Vector Network Analyzer mode with Option 2 (Time Domain) are:... -
Page 26: S-Parameters
3-2 S-Parameters VNA Fundamentals S-Parameters To simplify the description of the types of measurements a VNA can make, the reflection and transmission measurements are defined in terms of scattering parameters, or S-parameters. For a 2-port network, four fundamental S-parameters can be measured, and they are defined as S . -
Page 27: Vna Master Architecture
VNA Fundamentals 3-3 VNA Master Architecture VNA Master Architecture A VNA can have 1-port only, in which case it measures only reflection signals. A VNA can have 2-ports, in which case it can measure both reflection and transmission. A 2-port VNA can also have two different capabilities: 1-path 2-port, or full-reversing. - Page 28 3-3 VNA Master Architecture VNA Fundamentals Port 1 Port 2 Receiver Receiver Port 1 Port 2 Bridge/ Bridge/ Reference Coupler Coupler Receiver Switch Source Figure 3-2. MS20xxC VNA Master Block Diagram During Reverse Sweep The MS20xxC VNA Master, when equipped with Option 77, can calculate the balanced differential, common, and mixed mode S-parameters (S d1d1 c1c1...
- Page 29 VNA Fundamentals 3-3 VNA Master Architecture Figure 3-3 shows a general block diagram of the three-receiver architecture that is used in the MS20xxB VNA Master and the S412E LMR Master and shows how the S-parameters are related to the signals that are being transmitted and received by the ports. Port 1 Port 2 Receiver...
-
Page 30: Calculating And Displaying S-Parameters
3-4 Calculating and Displaying S-Parameters VNA Fundamentals Calculating and Displaying S-Parameters S-parameters are a measure of the ratio of two complex voltage levels, one measured by the port receiver, and one measured by the reference receiver. S-parameters therefore consist of unitless complex numbers. - Page 31 VNA Fundamentals 3-4 Calculating and Displaying S-Parameters Table 3-4. ------------------------- - – Application Note SWR, or Standing Wave Ratio, is a measure of the reflection from the DUT input port or output port, and it must be used, therefore, with S or S Table 3-5.
-
Page 32: Extracting More Information By Using Markers
3-5 Extracting More Information by Using Markers VNA Fundamentals Extracting More Information by Using Markers An S-parameter can be displayed in different formats, as already described. The VNA Master also allows you to extract information from the trace by using markers. By default, the marker presents the trace point information using the graph type format, thereby providing additional flexibility in analyzing S-parameter VNA data. -
Page 33: Chapter 4-Vna Measurements
Chapter 4 — VNA Measurements Introduction This chapter describes some of the VNA measurements that can be made with the VNA Master. It includes both 1-port and 2-port measurements (coaxial and waveguide) and features the key considerations that you are required to make regarding calibration types, IF Bandwidth (IFBW), power levels, graph types, and graph formats. -
Page 34: Measurement Readout And Interpretation
4-2 1-Port Cable Measurement VNA Measurements Measurement Readout and Interpretation The screen-captured measurement that is shown in Figure 4-1 uses a four-trace display to show S , a smoothed version of S /2, a distance-to-fault (DTF) measurement using return loss, and another distance-to-fault measurement using SWR. Note that these four measurements are displayed in Quad format as Trace 1 (upper left quadrant), Trace 2 (upper right quadrant), Trace 3 (lower left quadrant), and Trace 4 (lower right quadrant). - Page 35 VNA Measurements 4-2 1-Port Cable Measurement To calculate cable loss, the far end of the cable is shorted, and the resulting S return loss measurement is divided by two (S /2) to compensate for the round-trip loss of the cable. Smoothing can be applied to remove any ripples in the 1-port cable loss response.
- Page 36 4-2 1-Port Cable Measurement VNA Measurements After tightening the connector, the insertion loss becomes well behaved, and the mismatch from the connector is significantly reduced, as shown in Figure 4-2. Figure 4-2. Improved Trace with Connector Tightened The 1-port measurement approach is useful for deployed cables, but does have a practical limitation.
-
Page 37: 1-Port Smith Chart Tuning Example
VNA Measurements 4-3 1-Port Smith Chart Tuning Example 1-Port Smith Chart Tuning Example The Smith Chart is a useful tool for tuning input match. This complex impedance plot reveals which matching elements are necessary to match a device under test to the reference impedance (usually 50 ohms). - Page 38 4-3 1-Port Smith Chart Tuning Example VNA Measurements Figure 4-4, the more familiar log magnitude response is showing the input match improvement at 375 MHz. Trace 1 (shown in yellow with marker MK1) is the trace of the tuned circuit. Figure 4-4.
-
Page 39: 2-Port Filter Measurement
VNA Measurements 4-4 2-Port Filter Measurement 2-Port Filter Measurement Introduction Filters are 2-port devices that lend themselves well to a full 2-port measurement. They are usually compact devices with both sides of the component being easily accessible. Setup Considerations To perform the measurement, set the frequency to the range of interest, and set the power level to high. - Page 40 4-4 2-Port Filter Measurement VNA Measurements M1 and M2 are the full 12-term calibration responses. TR1 and TR2 are the responses from the transmission response calibration. Figure 4-5 In the electronic (PDF) file of this user guide, the traces are shown in color, and are therefore easier to distinguish.
- Page 41 VNA Measurements 4-4 2-Port Filter Measurement IF-bandwidth can be reduced to lower the noise floor of the instrument. The screen-captured measurement that is shown in Figure 4-7 uses trace memory to show the same measurement taken with a 100 kHz IFBW and with a 100 Hz IFBW measurement. Narrower IF bandwidths slow down the measurement speed, but provide a lower measurement noise floor.
-
Page 42: 2-Port Amplifier Measurement
4-5 2-Port Amplifier Measurement VNA Measurements 2-Port Amplifier Measurement Introduction Another popular 2-port device is the amplifier. For amplifier measurements, configuring the instrument to low power mode is an important step. This reduces the source power to ensure that the amplifier and the VNA Master (or LMR Master) do not go into compression. The screen-captured measurements that are shown in this measurement guide are examples and may not match any display on your instrument. - Page 43 VNA Measurements 4-5 2-Port Amplifier Measurement Group delay is another popular measurement with broadband amplifiers. The two plots that are illustrated in Figure 4-9 Figure 4-10 show the group delay of the amplifier with 2% aperture and 10% aperture. Increasing the group delay aperture makes the measurement less susceptible to noise, but provides less fine detail in phase linearity.
- Page 44 4-5 2-Port Amplifier Measurement VNA Measurements The 5 kHz low end of the MS20xxC VNA Master facilitates the characterization of low frequency resonances that are commonly caused by bias networks. The screen-captured measurement that is illustrated in Figure 4-11 shows the difference between an amplifier with proper low frequency biasing (TR1) and one with a defective bias inductor (M1).
-
Page 45: Waveguide Considerations
VNA Measurements 4-6 Waveguide Considerations Waveguide Considerations Introduction Only the MS20xxC VNA Master models accommodates waveguide measurements in addition to the previously discussed coaxial measurements. Setup Considerations The primary difference between waveguide and coax measurements is the calibration. Coax is typically calibrated by using an open, short, load, and through line. -
Page 46: Measurement Readout And Interpretation
4-6 Waveguide Considerations VNA Measurements Measurement Readout and Interpretation In the Distance Domain, the VNA Master includes waveguide dispersion correction to account for different propagation speeds of signals in the waveguide. Dispersion correction is not applied in Time Domain. The S measurement of a 15 cm shorted waveguide section (Figure 4-12) shows how dispersion compensation improves distance domain resolution. - Page 47 VNA Measurements 4-6 Waveguide Considerations When measuring reflection parameters (such as S in the Figure 4-12 example), the distance domain measurement is adjusted so that the peak of the signal is at the end of the cable or waveguide (a length of 15 cm in the example). This is called a One-Way representation of the measurement.
-
Page 48: Calibration Considerations
4-7 Calibration Considerations VNA Measurements Calibration Considerations Various 2-port calibrations are available in the Vector Network Analyzer. Transmission response is the simplest and requires only one connection during calibration, but it does not correct for test port match errors. 1-Path 2-Port calibration requires four calibration connections and corrects for the transmit port match, but does not correct for the receive port. -
Page 49: Ms20Xxb 1-Path 2-Port Calibration
VNA Measurements 4-7 Calibration Considerations MS20xxB 1-Path 2-Port Calibration OPEN SHORT LOAD 1 VNA Master 2 Optional Test Port Cable at Port 2 3 Optional Test Port Cable at Port 1 4 Through Connection (Port 1 Connects to Port 2) 5 OSL (Open, Short, Load) Precision Calibration Components Figure 4-13. -
Page 50: Ms20Xxc Full 2-Port Calibration
4-7 Calibration Considerations VNA Measurements MS20xxC Full 2-Port Calibration OPEN OPEN SHORT SHORT LOAD LOAD 1 The VNA Master 2 Optional Test Port Cable 3 Male Connector 4 Female Connector 5 OSL (Open, Short, Load) Precision Calibration Components, Female 6 OSL (Open, Short, Load) Precision Calibration Components, Male 7 Through Connection (Item 3 Connects to Item 4) Figure 4-14. -
Page 51: Calibration Data And Indications
VNA Measurements 4-7 Calibration Considerations Calibration Data and Indications When you perform a calibration, the correction coefficients are calculated for specific S-parameters (depending on the type of calibration chosen) and for instrument settings (frequency range, number of points, and power level). The term “calibration correction” refers to the measurement correction coefficients that are applied to measurements as a result of your calibration. -
Page 52: Cal Type
4-7 Calibration Considerations VNA Measurements Cal Type The Cal Type soft key is found in the “Calibration Menu” (shown on page 6-19). The Calibration Type list box provides the complete selection of available calibration types. Refer to section “Calibration Types” on page 6-37 4-20 PN: 10580-00289 Rev. -
Page 53: Chapter 5-Field Measurements
All of the vector network analyzers that are referenced in this measurement guide provide the VNA measurements view (as described throughout this document). Only the S412E LMR Master and the MS2024B, MS2025B, MS2034B, MS2035B (MS20xxB), VNA Master provide the Field measurements view that is described in this chapter. -
Page 54: Measurement Setup
5-3 Measurement Setup Field Measurements Measurement Setup Before conducting a measurement, ensure that the instrument is set to Field measurements view. Then select a measurement type, specify the frequency range and sweep parameters (such as number of data points), and perform a calibration. These operations are described further in the following paragraphs. -
Page 55: Setting The Start And Stop Frequencies
Field Measurements 5-3 Measurement Setup Setting the Start and Stop Frequencies Set the Start Frequency by pressing Start Freq soft key and using the keypad, the arrow keys, or the rotary knob to set a value in Hz, kHz, MHz, or GHz for the desired frequency. Set the Stop Frequency by pressing the Stop Freq soft key. -
Page 56: Graph Type Selector List Box
5-4 Graph Type Selector List Box Field Measurements Graph Type Selector List Box The Graph Type Selector list box is opened by pressing the Measurement Type soft key in the Measure menu. Field Measurements View versus VNA Measurements View Three measurement display types are available in Field Measurements view: Single, Dual, and Overlay. -
Page 57: Insertion Loss In Display Type Single
Field Measurements 5-4 Graph Type Selector List Box • Log Magnitude/2 (1-Port Cable Loss) • Linear Polar • Log Polar • Real Impedance • Imaginary Impedance Insertion Loss in Display Type Single The screen-captured measurements that are shown in this measurement guide are examples and may not match any display on your instrument. -
Page 58: Vswr And Return Loss In Display Type Dual
5-4 Graph Type Selector List Box Field Measurements VSWR and Return Loss in Display Type Dual The example in this figure may not match the display on your instrument. Figure 5-2. Display Type Dual – VSWR and Return Loss PN: 10580-00289 Rev. K Vector Network Analyzer MG... -
Page 59: Insertion Loss And Return Loss In Display Type Overlay
Field Measurements 5-4 Graph Type Selector List Box Insertion Loss and Return Loss in Display Type Overlay The example in this figure may not match the display on your instrument. Figure 5-3. Display Type Overlay – Insertion Loss and Return Loss Vector Network Analyzer MG PN: 10580-00289 Rev. -
Page 60: Field View Menus
5-5 Field View Menus Field Measurements Field View Menus Many menus display limited soft key functionality in Field view. Various keys that are available in VNA measurements view may be in different locations or may not be displayed at all. Refer to Chapter 7, “Field View Menus”... -
Page 61: Return Loss/Vswr
Field Measurements 5-7 Return Loss/VSWR Return Loss/VSWR Return Loss is used to characterize RF components and systems. The Return Loss indicates how well the system is matched by taking the ratio of the reflected signal to the incident signal, measuring the reflected power in dB. The 1-port Measurement data can also be displayed linearly as VSWR. - Page 62 5-7 Return Loss/VSWR Field Measurements 14. Press the Measure function hard key and select VSWR from the Graph Type Selector list box to view the match in VSWR. Figure 5-5 is displaying a VSWR measurement and the Measure menu of the Field setting when Display Type is Single. The example in this figure may not match the display on your instrument..
- Page 63 Field Measurements 5-7 Return Loss/VSWR Figure 5-6 is displaying both a VSWR measurement and a Return Loss measurement. Note that the Measure menu of the Field setting shows Display Type is Dual. and that the Active Display soft key provides for selection of TR1 or TR2. On instruments with a touch screen, you may tap a measurement trace or the trace Note data in the Instrument Settings Summary to make a trace the active trace.
-
Page 64: Cable Loss
5-8 Cable Loss Field Measurements Cable Loss The transmission feed line insertion loss test verifies the signal attenuation level of the cable. This test can be done using the Cable Loss or Return Loss Measurement with a short or an open connected at the end of the system. - Page 65 Field Measurements 5-8 Cable Loss 10. Connect the test port extension cable to the Transmission Line to begin the Cable Loss measurement. The example below shows a cable loss measurement in the WiFi band. Average cable loss is calculated and displayed at the top of the graticule. Figure 5-7.
-
Page 66: Distance-To-Fault (Dtf)
5-9 Distance-To-Fault (DTF) Field Measurements Distance-To-Fault (DTF) The DTF measurements display Return Loss or VSWR values versus distance. These measurements are standard on the MS20xxB VNA Master and the S412E LMR Master. If frequency measurements fail or indicate a problem in the system, then the DTF measurement can be used to identify and pinpoint the exact location of the problem. - Page 67 Field Measurements 5-9 Distance-To-Fault (DTF) The MS20xxB VNA Master and the S412E LMR Master are equipped with a cable list, which includes most of the common cables that are used today. After the correct cable has been selected, the instrument updates the propagation velocity and the cable attenuation values to correspond with the cable.
- Page 68 5-9 Distance-To-Fault (DTF) Field Measurements 12. Press the Freq/Dist function hard key and use the Stop Dist soft key to enter the Stop Distance. Make sure that the Stop Distance is smaller than Dmax (refer to “DMax” on page 5-17). 13.
-
Page 69: Dtf Measurement Calculations
Field Measurements 5-9 Distance-To-Fault (DTF) DTF Measurement Calculations Fault Resolution Fault resolution is the ability of the system to separate two closely spaced discontinuities. If the fault resolution is 10 feet and two faults are 5 feet apart, then the VNA Master will not be able to show both faults unless Fault Resolution is improved by widening the frequency span. -
Page 70: 5-10 Phase Measurements
5-10 Phase Measurements Field Measurements 5-10 Phase Measurements The MS20xxB VNA Master or the S412E LMR Master can display both Return Loss and Insertion Loss phase measurements. 2-Port Phase measurements can use power settings of High (0 dBm), Default (–5 dBm), and Low (–25 dBm). 1-Port Phase Measurement The following example compares the phase of two cables using a 1-port phase measurement. -
Page 71: 2-Port Phase Measurement
Field Measurements 5-10 Phase Measurements The example in this figure may not match the display on your instrument. Figure 5-9. Return Loss, 1-Port Phase Measurement 2-Port Phase Measurement The following example compares the phase of two cables using a 2-port phase measurement. Figure 5-10 shows a typical 2-Port Phase measurement (Insertion Loss). - Page 72 5-10 Phase Measurements Field Measurements 6. When the Calibration is finished, CAL: ON (OK) should be displayed with the trace data in the instrument settings summary at the left side of the sweep window, and the trace should be centered around 0 dB when the short or open is connected. 7.
-
Page 73: Smith Chart
Field Measurements 5-11 Smith Chart 5-11 Smith Chart The MS20xxB VNA Master or the S412E LMR Master can display 1-port measurements in a standard Normalized 50 ohm or 75 ohm Smith Chart. When markers are used, the real and imaginary components of the Smith Chart value are displayed. Smith Chart Measurement The following example shows how a Smith Chart can be used to measure the match of an antenna. - Page 74 5-11 Smith Chart Field Measurements The example in this figure may not match the display on your instrument. Figure 5-11. 1-Port Smith Chart Measurement 5-22 PN: 10580-00289 Rev. K Vector Network Analyzer MG...
-
Page 75: 5-12 Log Mag Display Types
Field Measurements 5-12 Log Mag Display Types 5-12 Log Mag Display Types The MS20xxB VNA Master and the S412E LMR Master can display 1-port and 2-port measurements (Return Loss and Insertion Loss) in a Single display format (one at a time) or simultaneously in a twofold display format. - Page 76 5-12 Log Mag Display Types Field Measurements The example in this figure may not match the display on your instrument. Figure 5-12. Log Mag – Display Type Overlay – Return Loss and Insertion Loss 5-24 PN: 10580-00289 Rev. K Vector Network Analyzer MG...
- Page 77 Field Measurements 5-12 Log Mag Display Types The example in this figure may not match the display on your instrument. Figure 5-13. Log Mag – Display Type Dual – Return Loss and Insertion Loss Vector Network Analyzer MG PN: 10580-00289 Rev. K 5-25...
-
Page 78: Dual Channel Filter Tuning Measurement
5-12 Log Mag Display Types Field Measurements Dual Channel Filter Tuning Measurement Figure 5-14 shows a typical filter tuning measurement. The marker table is displayed at the bottom of the sweep window. This screen display may not match the display on your instrument. - Page 79 Field Measurements 5-12 Log Mag Display Types The example in this figure may not match the display on your instrument. Figure 5-14. Filter Tuning, Log Mag – Display Type Dual – Insertion Loss and Return Loss Vector Network Analyzer MG PN: 10580-00289 Rev.
- Page 80 5-12 Log Mag Display Types Field Measurements The example in this figure may not match the display on your instrument. Figure 5-15. Filter Tuning, Log Mag – Display Type Overlay – Insertion Loss and Return Loss 5-28 PN: 10580-00289 Rev. K Vector Network Analyzer MG...
-
Page 81: Chapter 6-Vna View Menus
Chapter 6 — VNA View Menus Introduction The menus that are shown in this chapter are found on the Vector Network Analyzer instrument when it is in VNA measurement view. This guide contains measurement instructions for the available Vector Network Analyzer instrument options. Not all options are available on all models, and your instrument may not have all options installed. - Page 82 6-2 VNA Key Functions VNA View Menus • “DUT Port Setup Menu (Waveguide)” on page 6-33 • “Cal Kit Definition Menus for Waveguide” on page 6-34 • “DUT Connector Selector List Box for Waveguide” on page 6-35 • “Calibration Types” on page 6-37 •...
-
Page 83: Domain Setup Menus
VNA View Menus 6-3 Domain Setup Menus Domain Setup Menus Freq Setup Domain Time Distance Setup Start Freq Start Freq Setup Start Time Start Dist # kHz # kHz Frequency # ps # mm Stop Freq Stop Freq Setup Stop Time Stop Dist # GHz # GHz... -
Page 84: Freq Menu
6-3 Domain Setup Menus VNA View Menus Freq Menu Preliminary Key Sequence: Measure > Domain Selection > Frequency Preliminary Key Sequence: Freq/Time/Dist > Domain Setup > Setup Frequency Key Sequence: Freq/Time/Dist Start Freq: Press this soft key to set the start frequency in units of Hz, kHz, MHz, or GHz. -
Page 85: Setup Domain Menu
VNA View Menus 6-3 Domain Setup Menus Setup Domain Menu Key Sequence: Freq/Time/Dist > Domain Setup Setup Frequency: Press this soft key to open the Frequency menu and to use those soft keys to set start, stop, and center frequencies and frequency Setup Domain span. -
Page 86: Time Menu
6-3 Domain Setup Menus VNA View Menus Time Menu Preliminary Key Sequence: Measure > Domain Selection > Time Preliminary Key Sequence: Freq/Time/Dist > Domain Setup > Setup Time Key Sequence: Freq/Time/Dist Time Start Time: Press this soft key to set the start time in seconds (s), Start Time milliseconds (ms), microseconds (µs), nanoseconds (ns), or # ps... -
Page 87: Time Info List Box
VNA View Menus 6-3 Domain Setup Menus Time Info List Box Figure 6-5. Time Info List Box (scrolled to view entire list) Vector Network Analyzer MG PN: 10580-00289 Rev. K... -
Page 88: Windowing Menu
6-3 Domain Setup Menus VNA View Menus Windowing Menu Key Sequence: Freq/Time/Dist > Windowing Windowing Rectangular: Press this soft key to set windowing to the rectangular view for Rectangular maximum side lobes and maximum resolution. Refer to Figure B-1, “Rectangular Windowing Example”. -
Page 89: Distance Setup Menu
VNA View Menus 6-3 Domain Setup Menus Distance Setup Menu Preliminary Key Sequence: Measure > Domain Selection > Distance Preliminary Key Sequence: Freq/Time/Dist > Domain Setup > Setup Distance Key Sequence: Freq/Time/Dist Distance Setup Start Dist: Press this soft key to set the start distance. Use the arrow keys, the rotary knob, or the number keypad to set a distance value. -
Page 90: Additional Dist Setup Menu (Coax)
6-3 Domain Setup Menus VNA View Menus Additional Dist Setup Menu (Coax) Key Sequence: Freq/Time/Dist > Additional Dist Setup Additional Dist Setup Distance Info: Press this soft key to open the Distance Info List Box to find helpful distance and parameter information. For a view of the list box information, refer to Figure 6-11. -
Page 91: Cable List Menu (Coax)
VNA View Menus 6-3 Domain Setup Menus Cable List Menu (Coax) Key Sequence: Freq/Time/Dist > Additional Dist Setup > Cable List Cable List Top of List: Press this submenu key to jump to the top of the Antenna list. List Page Page Up: Press this key to skip up through the list. -
Page 92: Additional Dist Setup Menu (Waveguide)
6-3 Domain Setup Menus VNA View Menus Additional Dist Setup Menu (Waveguide) Key Sequence: Freq/Time/Dist > Additional Dist Setup Additional Dist Setup Distance Info: Press this soft key to open the Distance Info List Box to find helpful distance and parameter information. For a view of the list box information, refer to Figure 6-12. -
Page 93: Distance Info List Box For Cable
VNA View Menus 6-3 Domain Setup Menus Distance Info List Box for Cable Key Sequence: Freq/Time/Dist > Additional Dist Setup > Distance Info Figure 6-11. Distance Information List Box for Cable Distance Info List Box for Waveguide Key Sequence: Freq/Time/Dist > Additional Dist Setup > Distance Info Figure 6-12. -
Page 94: Fgt Menu
6-3 Domain Setup Menus VNA View Menus FGT Menu Preliminary Key Sequence: Measure > Domain Selection > FGT Preliminary Key Sequence: Freq/Time/Dist > Domain Setup > Setup FGT Key Sequence: Freq/Time/Dist Start Freq: Press this soft key to set the start frequency in units of Hz, kHz, MHz, or GHz. -
Page 95: Gate Menu
VNA View Menus 6-3 Domain Setup Menus Gate Menu Key Sequence: Measure > Domain Selection > Gate Gate Function Off Display On: Press this soft key to toggle the Gate Function status to Gate Off, Display, or On. Gate Function When set to Off, the gate is not displayed on the screen nor applied to Display the data. -
Page 96: Gate Setup Menu (Continued)
6-3 Domain Setup Menus VNA View Menus Gate Setup Menu (continued) Gate Center Gate: Press this soft key to set the center Gate in either time or distance units, depending on whether the active trace is in the Time Domain Gate Function or the Distance Domain. -
Page 97: Gate Shape Menu
VNA View Menus 6-3 Domain Setup Menus Gate Shape Menu Key Sequence: Measure > Domain Selection > Gate > Gate Shape Gate Shape Minimum: Press this soft key to set the gate shape value to Minimum. Minimum Nominal: Press this soft key to set the gate shape value to Nominal. The Nominal gate shape is the default value and most commonly used one. -
Page 98: Calibration Menus
6-4 Calibration Menus VNA View Menus Calibration Menus Calibration Cal Line Setup DUT Port Setup DUT Port Setup Coax DUT Port 1 WG DUT Port 1 Cal Line Type Start Cal N–Conn(M) WG11A/WR229/R40 Coax Waveguide Cal Type Coax DUT Port 2 WGDUT Port 2 Line Delay Full 2 Port... -
Page 99: Calibration Menu
VNA View Menus 6-4 Calibration Menus Calibration Menu Key Sequence: Shift, Calibrate (2) Start Cal: Press this soft key to open the “Next Step” List Box, which contains the instructions: “Connect cal component, select step, and press Enter to Calibration measure:”... - Page 100 6-4 Calibration Menus VNA View Menus Cal Type Menu This menu offers a choice between Standard, which is the default type, and Flex. When you choose Flex, the instrument performs a calibration over the entire frequency range of the instrument. You can then set any frequency range or any number of points (or both), and the instrument interpolates the calibration coefficients and applies the calibration to the new range or points (or both).
- Page 101 VNA View Menus 6-4 Calibration Menus Calibration Types Figure 6-19. Calibration Type List Vector Network Analyzer MG PN: 10580-00289 Rev. K 6-21...
- Page 102 VNA View Menus Interpolation This feature is used by all Anritsu VNA Masters and by the S412E LMR Master. You can set your instrument to interpolate the calibration coefficients of a Standard mode calibration. After performing a Standard calibration, you can turn Interpolation On and then change the frequency range (smaller and anywhere within the calibrated range) or increase the number of data points.
- Page 103 VNA View Menus 6-4 Calibration Menus Figure 6-21. Interpolation Allows 410 MHz to 435 MHz with All 4001 Points Vector Network Analyzer MG PN: 10580-00289 Rev. K 6-23...
- Page 104 6-4 Calibration Menus VNA View Menus Calibration Methods Figure 6-22. Calibration Method List The Reciprocal is also known as an Unknown Thru. If you do not know the length of the Thru in your setup, and if it is a reciprocal device, then you can choose one of the bottom three calibration methods shown in Figure 6-22.
-
Page 105: Calibration Menu With Thru
VNA View Menus 6-4 Calibration Menus Calibration Menu with Thru Key Sequence: Shift, Calibrate (2) > Thru Update or Start Cal Calibration Start Cal: Press this soft key to open the “Next Step” List Box (see Start Cal Figure 6-24), which contains the instructions: “Connect cal component, select step, and press Enter to measure:”... - Page 106 6-4 Calibration Menus VNA View Menus Next Step Connect cal component, select step, and press Enter to measure: Thru, Fwd & Rev Calculate and Finish Cal Exit to Setup Abort Cal Figure 6-25. Thru Update, Next Step Dialog Box 6-26 PN: 10580-00289 Rev.
-
Page 107: Calibration Line Setup Menu
VNA View Menus 6-4 Calibration Menus Calibration Line Setup Menu Key Sequence: Shift, Calibrate (2) > Cal Line Setup Cal Line Setup Cal Line Type Cal Line Type Coax Waveguide: Press this soft key to toggle the line type between Coax Coax Waveguide and Waveguide. -
Page 108: Existing Calibration Information List Box
It also displays the Cal Status information and the associated level of accuracy. Interpolation is available in all Anritsu VNA Masters and in the S412E LMR Master, but Flex calibration is available only in the MS20xxC models. -
Page 109: Dut Port Setup Menu (Coax)
VNA View Menus 6-4 Calibration Menus DUT Port Setup Menu (Coax) Key Sequence: Shift, Calibrate (2) > DUT Port Setup Coax DUT Port 1: Press this soft key to open the “DUT Connector Selector” List Box for Port 1. Choose the connector type that matches the calibration components that are to be used on Port 1. -
Page 110: Cal Kit Definition Menus For Coax
6-4 Calibration Menus VNA View Menus Cal Kit Definition Menus for Coax SOLT – Coax Open Short SSLT – Coax SSST – Coax Edit Name Open Offset (mm) Short Offset (mm) Edit Name Edit Name SOLT(4) – USER4 SSLT(1)–USER1 SSST(1)–USER1 Open C0(e-15) Short C0(e-12) Short1 Offset (mm) -
Page 111: Dut Connector Selector List Box For Coax
Open and inductance coefficients for the Short. Inductance values are provided in all instruments with VNA mode. This feature is used by all Anritsu VNA Masters and by the S412E LMR Master. Vector Network Analyzer MG PN: 10580-00289 Rev. -
Page 112: Solt - Coax Menu
6-4 Calibration Menus VNA View Menus SOLT – Coax Menu Key Sequence: Shift, Calibrate (2) > DUT Port Setup > Setup User-Defined > Enter SOLT – Coax Edit Name Edit Name: Press this soft key to use the Text Entry feature (refer to the Text Entry section in the user guide for your instrument). -
Page 113: Dut Port Setup Menu (Waveguide)
VNA View Menus 6-4 Calibration Menus DUT Port Setup Menu (Waveguide) Key Sequence: Shift, Calibrate (2) > DUT Port Setup WG DUT Port 1: Press this soft key to open the “DUT Connector Selector” List Box for Port 1. Choose the connector type that matches the DUT DUT Port Setup connection on Port 1. -
Page 114: Cal Kit Definition Menus For Waveguide
6-4 Calibration Menus VNA View Menus Cal Kit Definition Menus for Waveguide SOLT – WG SSLT – WG SSST – WG Edit Name Edit Name Edit Name SOLT(4)–USER4 SSLT(4)–USER4 SSST(4)–USER4 Short Offset (mm) Cutoff Freq Cutoff Freq 5.000 Hz 5.000 Hz Open Offset (mm) Short1 Offset (mm) Short1 Offset (mm) -
Page 115: Dut Connector Selector List Box For Waveguide
Figure 6-34. DUT Connector Selector List Box for Waveguide This list box is opened by the WG DUT Port 1 and WG DUT Port 2 soft keys. This feature is used by all Anritsu VNA Masters and by the S412E LMR Master. Vector Network Analyzer MG PN: 10580-00289 Rev. -
Page 116: Solt - Wg Menu
6-4 Calibration Menus VNA View Menus SOLT – WG Menu Key Sequence: Shift, Calibrate (2) > DUT Port Setup > Setup User-Defined > Enter SOLT – WG Edit Name Edit Name: Press this soft key to use the Text Entry feature (refer to the Text Entry section in the user guide for your instrument). -
Page 117: Calibration Types
VNA View Menus 6-4 Calibration Menus Calibration Types The Calibration Type list box provides the complete selection of available calibration types. The MS20xxB compact VNA Master and the S412E LMR Master models are two-port, 1-path vector network analyzers that allow S and S measurements with a single connection. -
Page 118: Limit Menus
6-5 Limit Menus VNA View Menus Limit Menus Limit Edit Limit Move Active Trace Point Limit Limit X Limit # kHz Upper Lower Amplitude Limit State Limit Edit Point Delete Limit Alarm Point Next Pass Fail Message Point Left Next Point Right Clear Limit... -
Page 119: Limit Menu
VNA View Menus 6-5 Limit Menus Limit Menu Active Trace: Press this soft key to open the “Active Trace Selector” List Box and select a trace. The selected trace number is displayed on the soft key face. Scroll through the list with the arrow keys or the rotary knob, and press the rotary knob or the Enter key to select a trace. -
Page 120: Limit Edit Menu
6-5 Limit Menus VNA View Menus Limit Edit Menu Move Point Limit: Press this soft key to select a single limit point or an entire limit line. Changes in limit frequency or amplitude affect the limit point or limit line that is selected by this soft key. -
Page 121: Marker Menus
VNA View Menus 6-6 Marker Menus Marker Menus Marker Search Marker Marker Peak Search Marker Type Valley Search Delta Enter Marker Avail Ref Mkr Find Marker Marker on Trace Value TR # Marker Search Back Readout Style Log Mag Readout Format None Figure 6-39. -
Page 122: Marker Menu
6-6 Marker Menus VNA View Menus Marker Menu Marker Marker: Press this soft key to open the Select Marker List Box and select a marker. The active marker number is displayed on the soft key face. Marker Marker Type Ref Delta Off: Press this soft key to toggle the Marker Type selection. The active marker becomes a Reference marker or a Delta marker, or it can Marker Type be turned off. -
Page 123: Marker Search Menu
VNA View Menus 6-6 Marker Menus Marker Search Menu Marker Search Peak Search: Press this soft key to place the currently active marker on the highest signal amplitude that is currently displayed in the sweep window. Peak Search Valley Search: Press this soft key to place the currently active marker on the lowest signal amplitude that is currently displayed in the sweep window. -
Page 124: Readout Format Menu
6-6 Marker Menus VNA View Menus Readout Format Menu Readout Format None: Press this soft key to remove all marker data (except the marker indicator on the measurement trace) from the measurement display screen. None Trace: Press this soft key to display the frequency and value of the current marker at the marker location (on the trace) in the sweep window. -
Page 125: Measurement Menus
VNA View Menus 6-7 Measurement Menus Measurement Menus Domain Measure # of Traces Trace Format Gate Active Trace Frequency Gate Function Single Display S Parameter Time Start Gate Dual # ns Graph Type Distance Stop Gate Log Mag # ns Domain Selection Center Gate Quad... -
Page 126: Measure Menu
6-7 Measurement Menus VNA View Menus Measure Menu Active Trace: Press this soft key to open the “Active Trace Selector” List Box Measure and choose a trace. Use the arrow keys or the rotary knob to scroll through the list. Press the rotary knob or the Enter key to select a trace. Press the Esc Active Trace key to close the list box and return to the “Measure Menu”... -
Page 127: S-Parameter List Box
VNA View Menus 6-7 Measurement Menus If no other feature is currently enabled, then the rotary knob and arrow keys can change the active trace selection. Within the individual menus that are activated from the Measure menu, such as the Trace Format menu, you can select a setting by pressing a soft key or by using the arrow keys or the rotary knob or a number key. -
Page 128: S-Parameter Menu
6-7 Measurement Menus VNA View Menus S-Parameter Menu The MS20xxB VNA Master and the S412E LMR Master display the S-Parameter menu when the Measure menu S-Parameter soft key is pressed. For a visual depiction of S-Parameter measurements, refer to Chapter S Parameter S11: Press this soft key to set the measurement to S Forward Reflection... -
Page 129: Domain Menu
VNA View Menus 6-7 Measurement Menus Domain Menu This menu is opened by the Domain Selection soft key of the “Measure Menu”. Domain Frequency: Press this soft key to select Frequency for the x-axis of the Frequency active trace. Focus returns automatically to the “Measure Menu”. -
Page 130: Low Pass Mode Menu
6-7 Measurement Menus VNA View Menus Low Pass Mode Menu Low Pass Mode Impulse: Press this soft key to set the response of the low pass time or Impulse (LPI) distance domain to Impulse response. The annotation on the x-axis is (LPI) to indicate Low Pass Impulse response. -
Page 131: Number Of Traces Menu
VNA View Menus 6-7 Measurement Menus Number of Traces Menu # of Traces 1: Press this soft key to display 1 trace in the sweep window. Focus returns automatically to the “Measure Menu”. 2: Press this soft key to display 2 traces in the sweep window. Trace 1 and Trace 2 are displayed. -
Page 132: Trace Format Menu
6-7 Measurement Menus VNA View Menus Trace Format Menu Trace Format Single: Press this soft key to display the active trace (or traces) at full size in Single the sweep window. If more than one trace is selected by the Number of Traces soft key, then the traces are displayed overlapping in the sweep window. -
Page 133: Sweep Menu - Ms20Xxc
VNA View Menus 6-7 Measurement Menus Sweep Menu — MS20xxC Sweep Run/Hold Run/Hold Run Hold: Press this soft key to toggle the sweep to Run or Hold. Hold Sweep Type Single Cont Ext: Press this soft key to toggle the sweep type to Single, Sweep Type Continuous, or External. -
Page 134: Sweep Menu - Ms20Xxb And S412E
6-7 Measurement Menus VNA View Menus Sweep Menu — MS20xxB and S412E Run/Hold Run Hold: Press this soft key to toggle the sweep to Run or Hold. Sweep Sweep Type Run/Hold Single Cont: Press this soft key to toggle the sweep type to Single or Hold Continuous. -
Page 135: Configure Ports Menu
VNA View Menus 6-7 Measurement Menus Configure Ports Menu Access to this menu is from the Configure Ports soft key in the “Sweep Menu — MS20xxC”. Auto Reference Plane Extension: Press this soft key to use the active trace data to automatically determine the best length to mathematically extend the Configure Ports reference plane (plane of calibration) in order to remove cable length from the measurement, based on the current value of Propagation Velocity (refer to the... -
Page 136: Bias Tee Setup Menu
6-7 Measurement Menus VNA View Menus Bias Tee Setup Menu Access to this menu is from the Bias Tee Setup soft key in the “Configure Ports Menu”. Bias Tee: Press this soft key to open the “Bias Tee Menu (MS20xxC only)” select External, Internal, or Off. -
Page 137: Bias Tee Menu (Ms20Xxc Only)
VNA View Menus 6-7 Measurement Menus Bias Tee Menu (MS20xxC only) Access to this menu is from the Bias Tee soft key in the “Bias Tee Setup Menu”. Bias Tee Off: Press this soft key to turn the Bias Tee function Off. External: Press this soft key to activate the External Bias Tee connection. -
Page 138: Source Power Menu (Ms20Xxc Only)
6-7 Measurement Menus VNA View Menus Source Power Menu (MS20xxC only) Access to this menu is from the Source Power soft key in the “Configure Ports Menu”. Source Power Low: Press this soft key to set the Source Power to Low. This setting is for amplified devices. -
Page 139: Preset Menu
VNA View Menus 6-7 Measurement Menus Preset Menu Preset: Press this soft key to preset sweep conditions to the default state of full band sweep, 201 data points, Quad display, 4 traces (S Smith, S Preset Mag, S Log Mag, S Smith), 10 kHz IFBW, S Log Mag display, High output power, continuous sweep. -
Page 140: Scale Menu
6-7 Measurement Menus VNA View Menus Scale Menu Resolution Per Div: Press this soft key to set the number of units that are displayed between horizontal reticlereticle lines. Units depend upon Scale frequency, time, and distance settings. Use the Up/Down arrow keys, the keypad, or the rotary knob to set this parameter, then press the Enter key or Resolution Per Div the rotary knob. -
Page 141: Smith Scale Menu
VNA View Menus 6-7 Measurement Menus Smith Scale Menu Smith Scale Normal: Press this soft key to display the normal Smith Chart or Inverted Normal Smith Chart. Expand 10dB Expand 10 dB: Press this soft key to display the Smith Chart or Inverted Smith Chart expanded by 10 dB. -
Page 142: Polar Scale Menu
6-7 Measurement Menus VNA View Menus Polar Scale Menu Polar Scale Resolution Per Div: Press this soft key to set the number of units that are Resolution Per Div displayed between horizontal reticle lines. Units depend upon frequency, time, and distance settings. Use the Up/Down arrow keys, the keypad, or the rotary knob to set this parameter, then press the Enter key or the rotary knob. -
Page 143: System Menus
VNA View Menus 6-8 System Menus System Menus To access the System Menu, press the Shift key, then the System (8) key. The System menu is used to interact with the system attributes of the VNA Master. Self Test, GPS, Application Options, and System Options can be found in this menu. -
Page 144: Application Options Menu (Vna Mode)
6-8 System Menus VNA View Menus Application Options Menu (VNA Mode) The display of this menu varies based on the current instrument measurement mode. The menu shown here is specific to the Vector Network Analyzer application. Key Sequence: Shift, System (8) > Application Options VNA Mode selected Options Units... -
Page 145: Application Options Menu (Spa Mode) Vna Master
50 Ohm 75 Ohm Other setting to 50 Homs, 75 Ohms, or Other impedance value. Choosing 75 Ohm selects the 7.5 dB loss of the Anritsu 12N50-75B adapter. For other adapters, choose Other and enter the appropriate loss value. Auto Ref Level: Press this soft key to set the Auto Reference Level, which... -
Page 146: Application Options Menu (Spa Mode) Lmr Master
50 Ohm 75 Ohm Other impedance setting to 50 Homs, 75 Ohms, or Other impedance value. Selecting 75 Ohm selects the 7.5 dB loss of the Anritsu 12N50-75B adapter. For other adapters, select Other and enter the appropriate loss Bias Tee value. -
Page 147: Time Domain Options Menu
VNA View Menus 6-8 System Menus Time Domain Options Menu Time Domain Options Reflection Calc in Time: Press this soft key to set the calculation method Reflection Calc in Time One Way Round Trip that is used in the time domain (not distance) reflection measurements. The method can be either One Way (divide the total time by 2) or Round Trip. -
Page 148: Trace Menu
6-8 System Menus VNA View Menus Trace Menu To access the Trace Menu, press the Shift key, then the Trace (5) key. Trace Active Trace: Press this soft key to open the “Active Trace Selector” List Box Active Trace and choose a trace. Use the arrow keys, the rotary knob, or the number keypad to select a trace and then press the Enter key. -
Page 149: Trace Math Menu
VNA View Menus 6-8 System Menus Trace Math Menu Trace Math None: Press this soft key to set the trace math function to use only the None current trace. Trace Trace Minus Memory: Press this soft key to set the trace math function to Minus Memory subtract the trace that is in memory from the current trace. - Page 150 6-8 System Menus VNA View Menus 6-70 PN: 10580-00289 Rev. K Vector Network Analyzer MG...
-
Page 151: Introduction
Chapter 7 — Field View Menus Introduction The menus that are shown in this chapter are found on the Vector Network Analyzer instrument when it is in VNA mode. All of the vector network analyzers that are referenced in this measurement guide provide the VNA measurements view (as described throughout this document). -
Page 152: Field View Menu Group (Field View)
7-2 Field View Menus Field View Menus Field View Menu Group (Field View) Freq Scale Sweep Measure Marker Run/Hold Display Type Marker Start Freq # kHz Hold Single # dB Sweep Type Marker Type Bottom Stop Freq # GHz Single Cont Delta # dB... -
Page 153: Field View Frequency Menus
Field View Menus 7-3 Field View Frequency Menus Field View Frequency Menus Many menus display limited soft key functionality in Field view. Various keys that are available in VNA measurements view may be in different locations or may not be displayed at all. -
Page 154: Freq/Dist Menu (Distance-Based)
7-3 Field View Frequency Menus Field View Menus Freq/Dist Menu (Distance-Based) Start Dist: Press this soft key to set the start distance in units of meters or feet. If you enter a start distance that is higher than the currently-set stop Freq/Dist distance, and if CAL = On, then the start distance is set to the same value as Start Dist... -
Page 155: Distance Menus
Field View Menus 7-4 Distance Menus Distance Menus These are the menus that are displayed in response to pressing the function hard keys (main menu keys) when making distance-to-fault measurements. DTF Menu Group (Field View) Freq/Dist Scale Sweep Measure Marker Display Type Run/Hold Marker... -
Page 156: Dtf Setup Menu
7-4 Distance Menus Field View Menus DTF Setup Menu This menu is displayed when a DTF graph type is selected. Key Sequence: Freq/Dist > More DTF Setup Cable Loss Cable Loss: Press this soft key to set the cable loss coefficient from 0.000 dB/m to 5.000 dB/m. -
Page 157: Cable List Menu
Field View Menus 7-4 Distance Menus Cable List Menu Key Sequence: Freq/Dist > More > Cable List Cable List Top of List: Press this submenu key to jump to the top of the Antenna list. List Page Page Up: Press this key to skip up through the list. Page Page Down: Press this key to skip down through the list. -
Page 158: Windowing Menu
7-4 Distance Menus Field View Menus Windowing Menu Windowing Rectangular: Press this soft key to set windowing to the rectangular view for Rectangular maximum side lobes and maximum resolution. Refer to Figure B-1, “Rectangular Windowing Example”. Nominal Side Lobe: Press this soft key to set windowing to the Nominal Nominal Side Lobe Side Lobe view, which (compared to Rectangular) displays smaller side lobes and slightly less resolution. -
Page 159: Scale Menus
Field View Menus 7-5 Scale Menus Scale Menus The soft keys that are available in the Scale menu depend upon the Display Type setting in the Measure menu. Scale Menu Group (Field View) Scale Scale Scale # dB # dB # dB Bottom Bottom... -
Page 160: Scale Menu
7-5 Scale Menus Field View Menus Scale Menu This menu has only three soft keys when Display Type is set to Single. An additional soft key is displayed when Display Type is set to Dual or Overlay. Scale Menu – Single Start Freq: Press this soft key to set the start frequency in units of Hz, kHz, MHz, or GHz. -
Page 161: Scale Menu – Dual Or Overlay
Field View Menus 7-5 Scale Menus Scale Menu – Dual or Overlay Scale Top: Press this soft key to set the upper value of the y-axis in dB. # dB Bottom: Press this soft key to set the lower value of the y-axis in dB. Bottom # dB Active Display... -
Page 162: Sweep Menus
7-6 Sweep Menus Field View Menus Sweep Menus These are the menus that are displayed in response to pressing the Sweep function hard key in Field view. Sweep Menu Group (Field View) Sweep Avg/Smooth Source Power Run/Hold Sweep Averaging Hold # dBm Sweep Type Smooth %... -
Page 163: Sweep Menu
Field View Menus 7-6 Sweep Menus Sweep Menu Run/Hold Run Hold: Press this soft key to toggle the sweep setting to Run or Hold. Sweep Sweep Type Run/Hold Single Cont: Press this soft key to toggle the sweep setting to Single or Hold Continuous (Cont). -
Page 164: Avg/Smooth Menu
7-6 Sweep Menus Field View Menus Avg/Smooth Menu Avg/Smooth Sweep Averaging Sweep Averaging: Press this soft key to set the number of sweeps to use for averaging. The minimum number is 1. Smooth %: Press this soft key to add a smoothing percentage from 0 (zero) Smooth % to 20%. -
Page 165: Measure Menus
Field View Menus 7-7 Measure Menus Measure Menus Press the Measure function hard key (main menu key) to display the Measure menu. The Active Display soft key appears only when the Display Type is Dual or Overlay. Measure Menu Group (Field View) Measure Measure Measure... -
Page 166: Measure Menu – Dual
7-7 Measure Menus Field View Menus Measure Menu – Dual Display Type: Press this soft key to open the Display Type list box and Measure choose a display type. The choices are: Display Type Single, Dual, Overlay. Dual Active Display TR1 TR2: Press this soft key to toggle the active display to Trace 1 or Active Display Trace 2. -
Page 167: Marker Menu
Field View Menus 7-7 Measure Menus Marker Menu Marker Marker Marker: Press this soft key to open the Select Marker List Box and select a one of the 8 markers. The active marker number is displayed on the soft key face. -
Page 168: Calibration Menu
7-8 Calibration Menu Field View Menus Calibration Menu To access the Calibration Menu, press the Shift key, then the Calibrate (2) key. Calibration Start Cal: Press this soft key to open the “Next Step” List Box, which contains Start Cal the instructions: “Connect cal component, select step, and press Enter to measure:”... -
Page 169: Application Options Menu
Field View Menus 7-10 Application Options Menu 7-10 Application Options Menu To choose between the Field Measurements view and the VNA Measurements view, open the System menu, then the Application Options menu, then press the Meas Menu key to toggle the setting to Field. - Page 170 7-10 Application Options Menu Field View Menus 7-20 PN: 10580-00289 Rev. K Vector Network Analyzer MG...
-
Page 171: Introduction
For more details about time domain fundamentals, refer to the following application notes: • Reflectometer Measurements — Revisited - Anritsu Application Note 11410-00214 • Time Domain Measurements Using Vector Network Analyzers - Anritsu Application Note 11410-00206 • Distance to Fault - Anritsu Application Note 11410-00373 Vector Network Analyzer MG PN: 10580-00289 Rev. -
Page 172: Vna Master Implementation
8-3 VNA Master Implementation Time Domain, Option 2 VNA Master Implementation The Time Domain implementation in the VNA Master is trace based, which makes it very flexible to use. Each of the four traces in the VNA Master can be configured independently and can be in the frequency, time, or distance domain. - Page 173 Time Domain, Option 2 8-3 VNA Master Implementation Figure 8-1. Time Domain Measurements of a 3.05 m Cable Showing S and S Take a look at what happens in the distance domain for the same cable. As a user, you want the reflection and transmission measurements to show you where the end of the cable is located.
- Page 174 8-3 VNA Master Implementation Time Domain, Option 2 Figure 8-2. Distance Domain Measurements of a 3.05 m Cable Showing S and S PN: 10580-00289 Rev. K Vector Network Analyzer MG...
-
Page 175: Time Domain – Impulse Response
Time Domain, Option 2 8-3 VNA Master Implementation Time Domain – Impulse Response The screen capture in Figure 8-3 shows both frequency and time domain measurements of a Beatty standard (a transmission line with a low impedance section in the middle). The left quadrants shows the frequency response of S and S , and the right quadrants show the... -
Page 176: Step Response Versus Impulse Response
8-3 VNA Master Implementation Time Domain, Option 2 Step Response versus Impulse Response The screen capture in Figure 8-4 shows both impulse and step responses of the same Beatty standard. Step responses may seem more intuitive because they are a representation of impedance versus distance. - Page 177 Time Domain, Option 2 8-3 VNA Master Implementation The VNA Master (when Domain Processing is set to Auto) always tries to use lowpass processing whenever the frequency sweep has low frequency content. For band-limited sweeps with a starting frequency not near DC (such as for waveguide devices), the VNA Master automatically defaults to bandpass processing.
- Page 178 8-3 VNA Master Implementation Time Domain, Option 2 The same DUT measured with bandpass time domain processing is shown in Figure 8-6. The reduced resolution in this mode is apparent as the 6 dB reflection becomes spread out (wider peak). Figure 8-6.
-
Page 179: Frequency Gated By Time
Time Domain, Option 2 8-3 VNA Master Implementation Frequency Gated by Time Often times, you would like to measure the characteristics of a DUT by connecting to it with a cable. Unfortunately, the cable is not ideal and degrades the measurement of the DUT. Frequency Gated by Time (FGT) is a feature that allows the unwanted characteristics of the devices surrounding the DUT to be “gated”... - Page 180 8-3 VNA Master Implementation Time Domain, Option 2 Another feature that is related by FGT is called “notch”. Instead of gating the desired portion of the time domain response, notch allows you to suppress an unwanted portion of the time domain response.
-
Page 181: Waveguide With Dispersion Compensation
Time Domain, Option 2 8-3 VNA Master Implementation Waveguide with Dispersion Compensation Waveguide media suffers from frequency dispersion, which basically means that signals at different frequencies that are launched at the same time into a waveguide will arrive at different times at the output of that waveguide. This phenomenon is not evident when looking at the frequency response of the waveguide. - Page 182 8-3 VNA Master Implementation Time Domain, Option 2 Similarly, the effect of the dispersion compensation can be seen in the transmission response ) of a 15 cm long waveguide, as shown in Figure 8-10. Note how the distance response is sharp and centered at 15 cm, whereas the time response is spread out and inaccurate.
-
Page 183: Phasor Impulse
Time Domain, Option 2 8-3 VNA Master Implementation Phasor Impulse Impedance discontinuities are more difficult to analyze in the time domain with bandpass processing because the phase of the discontinuity cannot easily be extrapolated to DC. A technique called phasor impulse allows you to determine whether a mismatch is caused by a low impedance line or a high impedance line by using a special technique to “unwrap”... - Page 184 8-3 VNA Master Implementation Time Domain, Option 2 Phasor impulse can also be viewed in a polar plot, as shown in Figure 8-12. The lower plots use phasor impulse to show a clear reflection with approximately 180 degrees phase, indicating a low-impedance mismatch. The upper plots use standard bandpass mode and do not adequately reveal the phase of the reflection.
-
Page 185: Windowing
Time Domain, Option 2 8-4 Windowing Windowing Windowing is a frequency filter that is applied to the frequency-domain data when it is converted to time-domain data. This filtering rolls off the abrupt transition that occurs at the start and stop frequencies. This effectively produces a time-domain response with lower sidelobes. -
Page 186: In The Additional Dist Setup Submenu:
8-5 Distance-to-Fault Measurement Example Time Domain, Option 2 In the Additional Dist Setup submenu: (under Freq/Time/Dist Menu) • DUT Line Type = set to Coax or Waveguide • Cable List/Waveguide List = pick a cable or waveguide from a list to capture its propagation velocity and cable loss (if it is coax) or its cutoff frequency and waveguide loss (if it is waveguide). -
Page 187: Time And Distance Information
Time Domain, Option 2 8-6 Time and Distance Information Time and Distance Information To help you with the time and distance setup, the VNA Master provides a helpful aid that provides information on the resolution and maximum range. Figure 8-14 shows the Distance Info window (which can be displayed from the Additional Dist Setup submenu under the Distance Setup menu). - Page 188 8-6 Time and Distance Information Time Domain, Option 2 Figure 8-14. Distance Info Window As you can see in Figure 8-14, the user has entered a Dstop value of 35 m, whereas the calculated maximum usable range (Distance max) is 12.6 m for a reflection measurement and is 25.2 m for a transmission measurement.
-
Page 189: Introduction
The maximum range is determined by the frequency step size. For more details about distance domain fundamentals, refer to the following application notes: • Reflectometer Measurements — Revisited - Anritsu Application Note 11410-00214 • Distance to Fault - Anritsu Application Note 11410-00373 Vector Network Analyzer MG... -
Page 190: Vna Master Implementation
9-3 VNA Master Implementation Distance Domain VNA Master Implementation The Distance Domain implementation in the Vector Network Analyzer is trace based, which makes it very flexible to use. Each of the four traces in the instrument can be configured independently and can be in the frequency or distance domain. Each trace can also be configured to represent any of the S-parameters. - Page 191 Distance Domain 9-3 VNA Master Implementation The measured cable had a propagation velocity of 70%, which was entered into the Vector Network Analyzer. Measurements in the distance domain use the Note entered propagation velocity value to calculate the actual physical length of cables.
-
Page 192: Windowing
9-4 Windowing Distance Domain Windowing Windowing is a frequency filter that is applied to the frequency-domain data when it is converted to distance-domain data. This filtering rolls off the abrupt transition that occurs at the start and stop frequencies. This effectively produces a distance-domain response with lower sidelobes. - Page 193 Distance Domain 9-5 Distance-to-Fault Measurement Example Figure 9-3 shows a typical distance-to-fault measurement result. The device under test is a 3.7 m long cable with a discontinuity close to the end of the cable, at 3.1 m. The display shows the Log Mag (top) and SWR (bottom) responses.
-
Page 194: Distance Information
9-6 Distance Information Distance Domain Distance Information To help you with the distance setup, the Vector Network Analyzer has an aid that provides information on the resolution and maximum range. Figure 9-4 shows the Distance Info window (which can be displayed from the Additional Dist Setup submenu under the Distance Setup menu). -
Page 195: Introduction
Chapter 10 — Bias Tee, Option 10 10-1 Introduction Option 10 provides an internal bias tee for the VNA Master or for the S412E LMR Master. In Vector Network Analyzer mode, the internal bias tee permits testing of amplifiers that require their system power to be supplied from their RF signal port. -
Page 196: How Bias Is Generated
10-3 How Bias is Generated Bias Tee, Option 10 The bias can be turned on only when the instrument is in vector network analyzer mode and when the lowest frequency is set greater than or equal to 2 MHz. Below 2 MHz, both internal and external bias tee are not supported. - Page 197 Bias Tee, Option 10 10-3 How Bias is Generated Figure 10-2 shows how the MS20xxC can provide an internal voltage between 12 volts and 32 volts that can be switched between Port 1 and Port 2. That voltage would be available at the port along with the RF signals.
- Page 198 10-3 How Bias is Generated Bias Tee, Option 10 TMA — DD Antenna Tx / Rx Tx / Rx (Bias on Port 2) Port 2 Port 1 1 TMA–DD (Tower Mounted Amplifier – Dual Duplex) 2 Internal Components 3 Base Station Transmit and Receive Connection 4 Bias voltage is on Port 2 5 Port 2 of VNA Master 6 Port 1 of VNA Master...
-
Page 199: Bias Tee When Making 2-Port Gain Measurements
For performance details and measurement uncertainties, refer to the Technical Data Sheet (Anritsu part number 11410-00501). The internal bias tee is typically used to put voltage on the RF port that is feeding the bias to the amplifier under test. - Page 200 10-4 Bias Tee when Making 2-Port Gain Measurements Bias Tee, Option 10 With external bias tee voltage input, you can connect an external voltage of ±50 VDC to both ports simultaneously, although for most applications biasing is required on only one port. When the bias tee is set to External, the actual measured voltage and current at both ports are displayed on the screen, as shown in Figure...
-
Page 201: Bias Tee Menus (Ms20Xxc, Ms2026B, And Ms2028B)
Bias Tee, Option 10 10-5 Bias Tee Menus (MS20xxC, MS2026B, and MS2028B) 10-5 Bias Tee Menus (MS20xxC, MS2026B, and MS2028B) To access the Bias Tee menu, press the Sweep function hard key (or press the Shift key then the Sweep (3) key). Press the Configure Ports soft key, and then press the Bias Tee Setup soft key to open the Bias Tee Setup menu. -
Page 202: Bias Tee Setup Menu
10-5 Bias Tee Menus (MS20xxC, MS2026B, and MS2028B) Bias Tee, Option 10 Bias Tee Setup Menu Bias Tee (On/Off): Press this soft key to open the “Bias Tee Menu” to select External, Internal, or Off. Int Port Selection 1 2: Press this soft key to toggle the internal port selection to Port 1 or Bias Tee Setup Port 2. -
Page 203: Bias Tee Menu
Bias Tee, Option 10 10-5 Bias Tee Menus (MS20xxC, MS2026B, and MS2028B) Bias Tee Menu Bias Tee Off: Press this soft key to turn the Bias Tee function Off. External: Press this soft key to activate the External Bias Tee connection. Both Port 1 and Port 2 external bias tees are activated. -
Page 204: Bias Tee Menus (Field Measurements View)
10-6 Bias Tee Menus (Field Measurements View) Bias Tee, Option 10 10-6 Bias Tee Menus (Field Measurements View) These Bias Tee menus are used only in the Field Measurements view of the MS20xxB VNA Master and the S412E LMR Master. To access the Bias Tee menu, press the Shift key and then the System (8) key). -
Page 205: Bias Tee Setup Menu
Bias Tee, Option 10 10-6 Bias Tee Menus (Field Measurements View) Bias Tee Setup Menu Bias Tee Setup Bias Tee (On/Off): Press this soft key to open the “Bias Tee Menu” to turn On or Off the Bias Tee voltage. Bias Tee Int voltage P2: Press this soft key to set the internal bias tee voltage that is directed onto the center conductor of Port 2. -
Page 206: Bias Tee Menus (Ms20Xxb And S412E In Vna View)
10-7 Bias Tee Menus (MS20xxB and S412E in VNA View) Bias Tee, Option 10 10-7 Bias Tee Menus (MS20xxB and S412E in VNA View) In VNA Measurements mode (as opposed to Field Measurements mode), the Bias Tee Setup soft key is in the Configure Ports menu. The Bias Tee Setup menu and the Bias Tee menu have the same keys as in the Field Measurements mode. -
Page 207: Introduction
Chapter 11 — Vector Voltmeter, Option 15 11-1 Introduction When equipped with Option 15, the Vector Network Analyzer is a convenient tool for ensuring phase match between RF cables, especially in the field where access to AC power is typically limited. This mode is called Vector Voltmeter mode (VVM) because it can replace a vector voltmeter, which is becoming obsolete. -
Page 208: Getting Started
11-2 Getting Started Vector Voltmeter, Option 15 11-2 Getting Started Figure 11-1 shows a block diagram comparison of the test configuration for the Vector Voltmeter instrument method (left) and the Vector Network Analyzer (right) when used for an S measurement. The Vector Network Analyzer (when equipped with Option 15) contains not only the Vector Voltmeter receiver, but also the signal source and couplers that are necessary for conducting both 1-port and 2-port measurements at a selected CW frequency. -
Page 209: Using Vector Voltmeter Mode For The First Time
11-3 Using Vector Voltmeter Mode for the First Time Disclaimer (an important distinction): The Vector Voltmeter Option 15 in the Anritsu VNA Master and LMR Master does not measure RF voltages. The traditional vector voltmeter function of probing RF voltages (A and B) in... -
Page 210: How The Vvm Function Works
11-4 How the VVM Function Works Vector Voltmeter, Option 15 11-4 How the VVM Function Works 1. Insertion technique (2-port). One technique uses the Vector Network Analyzer in a straightforward manner with its 2-port setup. By characterizing the insertion phase delay of a signal by measuring S or S through the cable, the operator can determine... -
Page 211: Simple Measurement Using Cw Display
Vector Voltmeter, Option 15 11-5 Simple Measurement Using CW Display 11-5 Simple Measurement Using CW Display 1. Press Shift and Mode and Enter to use the Vector Voltmeter function. 2. Press the CW function hard key. 3. Press CW Frequency soft key and enter the desired frequency. 4. -
Page 212: Calibration Correction
11-6 Calibration Correction Vector Voltmeter, Option 15 11-6 Calibration Correction Table 11-1 summarizes the meaning of the calibration correction status displays. When you choose the Measurement Type and the Cal Port, the Vector Network Analyzer compares these measurement settings with the current calibration. If a match is found, then the current calibration is applied to the measured data, and the Cal info box on the display (refer to Figure 11-4 on page... - Page 213 Vector Voltmeter, Option 15 11-6 Calibration Correction OPEN SHORT LOAD 1 The VNA Master 2 Optional Test Port Cable 3 OSL (Open, Short, Load) Precision Calibration Components Figure 11-2. 1-Port Calibration, using MS2024B Vector Network Analyzer MG PN: 10580-00289 Rev. K 11-7...
- Page 214 11-6 Calibration Correction Vector Voltmeter, Option 15 OPEN OPEN SHORT LOAD SHORT LOAD 1 The VNA Master 2 Optional Test Port Cable 3 Optional Adapter for Through Connection 4 OSL (Open, Short, Load) Precision Calibration Components Figure 11-3. 2-Port Calibration, using MS2028C Figure 11-3 shows an optional adapter for the Through connection.
- Page 215 Vector Voltmeter, Option 15 11-6 Calibration Correction Figure 11-4. Continuous Wave Menu – MS20xxC VNA Master The Cal Port soft key is available only on the MS20xxC VNA Master. The Note MS20xxB VNA Master and the S412E LMR Master calibrate only on Port 1, so they do not use this soft key.
-
Page 216: Relative Measurements Using Cw Display
11-7 Relative Measurements using CW Display Vector Voltmeter, Option 15 11-7 Relative Measurements using CW Display For many phase-sensitive applications, absolute phase shift of a cable is not as critical as the phase matching among multiple cables. For this application, the Vector Network Analyzer relative phase measurement is preferred. - Page 217 Vector Voltmeter, Option 15 11-7 Relative Measurements using CW Display 6. To create a new reference, press the Clear Reference soft key followed by the Save New Reference soft key This completes the procedure for relative measurements. Vector Network Analyzer MG PN: 10580-00289 Rev.
-
Page 218: Measurements Using Comparison Table Display
11-8 Measurements Using Comparison Table Display Vector Voltmeter, Option 15 11-8 Measurements Using Comparison Table Display The Vector Voltmeter procedure includes a convenient table display for comparing up to twelve cables. With this feature, the user can save the first cable measurement as a reference, can view the differences among the other cables, and can output a final report showing both absolute and relative values of all the cables. - Page 219 Vector Voltmeter, Option 15 11-8 Measurements Using Comparison Table Display 7. As shown in Figure 11-7, the Vector Network Analyzer saves the current measurement in a new reference window above the table and updates the REL Amp and REL Phase columns to display the difference between the current measurement and the saved reference measurement.
-
Page 220: Vector Voltmeter Menus
11-9 Vector Voltmeter Menus Vector Voltmeter, Option 15 11-9 Vector Voltmeter Menus In the Vector Voltmeter mode, the function hard keys display the following labels: “CW”, “Table”, “Save/Recall”, and “Cal”. The fifth function hard key has no function in the Vector Voltmeter mode. -
Page 221: Table Menu
Vector Voltmeter, Option 15 11-9 Vector Voltmeter Menus Continuous Wave (CW) Measurements In Continuous Wave, the meter displays the selected frequency and indicates if calibration is On or Off for that specific frequency. The instrument must be calibrated for each chosen frequency. -
Page 222: Save/Recall Menu
11-9 Vector Voltmeter Menus Vector Voltmeter, Option 15 Save/Recall Menu ‘Pressing the Save/Recall function hard key opens the File menu. For a description of the soft keys in the File menu, refer to the file management instructions in the user guide for your instrument. -
Page 223: Introduction
Chapter 12 — Balanced Ports, Option 77 12-1 Introduction When equipped with Option 77, the Vector Network Analyzer is able to leverage both of its test ports in order to measure the S-parameters of balanced and differential test configurations. Using mathematical transformations, the Vector Network Analyzer can convert single-ended S-Parameters into the equivalent balanced differential, common, and mixed mode S-parameters: S . - Page 224 12-2 Procedure For Using Balanced Ports Balanced Ports, Option 77 Markers, limits, and all other features that can be used with the standard S-parameters also can be used with the balanced or differential S-parameters. Figure 12-1. Differential S-Parameter Selection List Box (no soft key menu) With Option 77, the S-parameter submenu uses the selection list box instead of the standard soft keys for choosing the desired S-parameter, even for non-differential S-parameters.
-
Page 225: Typical Measurements
Balanced Ports, Option 77 12-3 Typical Measurements 12-3 Typical Measurements The following description uses S as an example. The same measurements can be made on d1d1 any of the other parameters: S , or S c1c1 c1d1 d1c1 The differential match, or S , can be viewed in the frequency domain. - Page 226 12-3 Typical Measurements Balanced Ports, Option 77 Figure 12-3 shows both the frequency and distance domain responses of the differential cable under test. Markers are used in the frequency domain to check for the return loss values at different frequency points. In the distance domain, a marker is used to check the impedance value at the end of the cable under test.
- Page 227 Balanced Ports, Option 77 12-3 Typical Measurements Figure 12-4. Cable with Failing Return Loss (Marker Text Size = Regular) Figure 12-5. Cable with Failing Return Loss (Marker Text Size = Small) Vector Network Analyzer MG PN: 10580-00289 Rev. K 12-5...
- Page 228 12-3 Typical Measurements Balanced Ports, Option 77 Compare the table of marker data at the bottom of the sweep windows in Figure 12-4 Figure 12-5. Figure 12-5 shows marker text size set to small (the Marker Text Size soft key is shown in the figure).
-
Page 229: A-1 Vector Network Analyzer Formulas
Appendix A — Formulas Vector Network Analyzer Formulas The following formulas can be used with the Vector Network Analyzer (VNA Master and LMR Master). Reflection Coefficient Reflection coefficient is the ratio of the amplitude of the reflected wave to the amplitude of incident wave. -
Page 230: Propagation
A-1 Vector Network Analyzer Formulas Formulas Propagation Propagation is the propagation velocity expressed as a ratio to the speed of light. Propagation Constant ------ ε ≤ < where: Cable Loss Return Loss (dB) Cable Loss ---------------------------------------------- - Peak Valley Cable Loss Average --------------------------------------------- Fault Resolution Fault resolution (in the distance domain) is the ability of the system to separate two... -
Page 231: B-1 Introduction
Appendix B — Windowing Introduction The theoretical requirement for inverse FFT is for the data to extend from zero frequency to infinity. Side lobes appear around a discontinuity because the spectrum is cut off at a finite frequency. Windowing reduces the side lobes by smoothing out the sharp transitions at the beginning and the end of the frequency sweep. -
Page 232: Rectangular Windowing
B-1 Introduction Windowing Rectangular Windowing –5 –10 –15 –20 –25 –30 –35 –40 –45 –50 Figure B-1. Rectangular Windowing Example This Distance To Fault graph has Return Loss (dB) on the vertical scale (y-axis) and distance in feet on the horizontal scale (x-axis). This view of Rectangular Windowing shows the maximum side lobe display and the greatest waveform resolution. -
Page 233: Nominal Side Lobe Windowing
Windowing B-1 Introduction Nominal Side Lobe Windowing –5 –10 –15 –20 –25 –30 –35 –40 –45 –50 Figure B-2. Nominal Side Lobe Windowing Example This Distance To Fault graph has Return Loss (dB) on the vertical scale (y-axis) and distance in feet on the horizontal scale (x-axis). -
Page 234: Low Side Lobe Windowing
B-1 Introduction Windowing Low Side Lobe Windowing –5 –10 –15 –20 –25 –30 –35 –40 –45 –50 Figure B-3. Low Side Lobe Windowing Example This Distance To Fault graph has Return Loss (dB) on the vertical scale (y-axis) and distance in feet on the horizontal scale (x-axis). -
Page 235: Minimum Side Lobe Windowing
Windowing B-1 Introduction Minimum Side Lobe Windowing –5 –10 –15 –20 –25 –30 –35 –40 –45 –50 Figure B-4. Minimum Side Lobe Windowing Example This Distance To Fault graph has Return Loss (dB) on the vertical scale (y-axis) and distance in feet on the horizontal scale (x-axis). - Page 236 B-1 Introduction Windowing PN: 10580-00289 Rev. K Vector Network Analyzer MG...
-
Page 237: C-1 Introduction
Hold the Esc button while pressing the On/Off button. Continue holding the Esc button until the Anritsu splash screen appears. You can then release the button. The instrument starts up with many Factory Default settings (refer to your user guide). Throughout this appendix, this sequence is abbreviated as Factory Defaults (Esc+On). -
Page 238: C-3 Self Test Or Application Self Test Error Messages
Use of Master Reset (System+On), will erase all user saved setups and Caution measurement traces and will return the instrument to a full Factory Default condition. If the error persists, then contact your Anritsu Service Center. PN: 10580-00289 Rev. K Vector Network Analyzer MG... - Page 239 Error Messages C-3 Self Test or Application Self Test Error Messages Figure C-1. Self Test Results Window (Vector Network Analyzer mode) Vector Network Analyzer MG PN: 10580-00289 Rev. K...
-
Page 240: Application Self Test Results Window — Vna
C-3 Self Test or Application Self Test Error Messages Error Messages Application Self Test Results Window — VNA Figure C-2. Application Self Test Results Window (Vector Network Analyzer mode) Application Self Test (Vector Network Analyzer mode only) To run the application self test, press Shift and System (8) and then Application Self Test from within the desired mode. -
Page 241: Application Self Test Results Window — Spa
Caution measurement traces and will return the instrument to a full Factory Default condition. If the error persists, then contact your Anritsu Service Center. Application Self Test Results Window — SPA Figure C-3. Application Self Test Results Window (Spectrum Analyzer mode) Vector Network Analyzer MG PN: 10580-00289 Rev. -
Page 242: C-4 Operation Error Messages
Caution measurement traces and will return the instrument to a full Factory Default condition. If the error persists, then contact your Anritsu Service Center. Operation not Permitted in Recall Mode Attempted to perform an operation on a recalled trace. Many operations are valid only on a live or active trace. -
Page 243: Pmon Pld Fail
Error Messages C-5 Vector Network Analyzer Specific Warning Messages PMON PLD Fail Unable to communicate with the Power Monitor PCBA. Power Supply Power Supply failed. Charge the battery. Error Saving File. General Error Saving File An error was detected while saving a file. Try again. Vector Network Analyzer Specific Warning Messages Bias Tee cannot be enabled for start freq <... -
Page 244: Bias Tee State Cannot Be Changed During Calibration
Option 10 (Bias Tee) not enabled. To turn on the internal or external Bias Tee, Option 10 must be enabled in the instrument. Contact your Anritsu Service Center to inquire about enabling this option. No External Reference signal detected. External Reference was switched to 10 MHz but no external 10 MHz signal was detected. The External Reference setting is turned back to Off. -
Page 245: Limit Is Not Available For This Graph Type
Error Messages C-5 Vector Network Analyzer Specific Warning Messages Limit is not available for this Graph type. Limits are supported only for rectilinear graph types (not for Smith Charts, for example). Vector Network Analyzer MG PN: 10580-00289 Rev. K... - Page 246 C-5 Vector Network Analyzer Specific Warning Messages Error Messages C-10 PN: 10580-00289 Rev. K Vector Network Analyzer MG...
- Page 247 TMA-DD with bias ... . 10-4 Anritsu, contact ....1-1 VNA vs vector voltmeter ..11-2 application options Field view .
- Page 248 ..... . . 6-27 contacting Anritsu ....1-1...
- Page 249 to E reading and interpreting ..4-2 smoothing ....4-3 ripples (example) ....4-3 S-parameters .
- Page 250 Freq/Dist menu, Field view ..7-4 http, contacting Anritsu ... . 1-1 group delay calculation ..3-7 IFBW in sweep menu .
- Page 251 ....8-1, 8-5 links trace description ....2-3 contacting Anritsu ... . . 1-1 menu list box additional dist setup (coax) .
- Page 252 to N freq ......6-4 DTF example ....4-3 freq, Field view .
- Page 253 to R preset menu ....6-59 block diagram ....3-4 propagation velocity description .
- Page 254 DTF, Field view ....5-15 sweep speed versus data points .5-15, 8-15 URL contacting Anritsu ... . 1-1 marker data format ... . 3-8 SWR (reflection) formula .
- Page 256 Anritsu Company 490 Jarvis Drive Anritsu utilizes recycled paper and environmentally conscious inks and toner. Morgan Hill, CA 95037-2809 http://www.anritsu.com...
Need help?
Do you have a question about the MS2024B and is the answer not in the manual?
Questions and answers