Table of Contents
Advertisement
Quick Links
Maintenance Manual
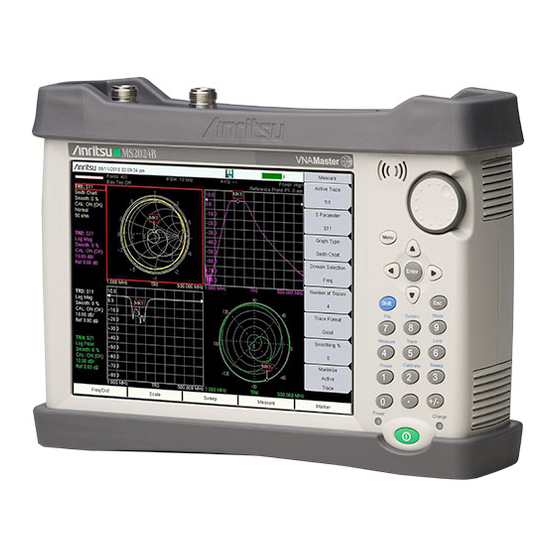
VNA Master™
Model MS2024B, MS2025B, MS2034B,
MS2035B
Compact Handheld Vector Network Analyzer with Spectrum Analyzer
MS2024B
VNA, 500 kHz to 4 GHz
MS2025B
VNA, 500 kHz to 6 GHz
MS2034B
VNA, 500 kHz to 4 GHz
SPA, 100 kHz to 4 GHz
MS2035B
VNA, 500 kHz to 6 GHz
SPA, 100 kHz to 6 GHz
Anritsu Company
490 Jarvis Drive
Morgan Hill, CA 95037-2809
USA
Part Number: 10580-00303
Revision: D
Published: December 2014
Copyright 2011, 2012 Anritsu Company
Advertisement
Table of Contents
Troubleshooting

Related Manuals for Anritsu VNA Master MS2024B


Summary of Contents for Anritsu VNA Master MS2024B
- Page 1 SPA, 100 kHz to 4 GHz MS2035B VNA, 500 kHz to 6 GHz SPA, 100 kHz to 6 GHz Anritsu Company Part Number: 10580-00303 490 Jarvis Drive Revision: D Morgan Hill, CA 95037-2809 Published: December 2014 Copyright 2011, 2012 Anritsu Company...
-
Page 3: Safety Symbols
Some or all of the following five symbols may or may not be used on all Anritsu equipment. In addition, there may be other labels attached to products that are not shown in the diagrams in this manual. - Page 4 These hazardous compounds present a risk of injury or loss due to exposure. Anritsu Company recommends removing the battery for long-term storage of the instrument and storing the battery in a leak-proof, plastic container.
-
Page 5: Table Of Contents
Anritsu Customer Service Centers ........ - Page 6 Table of Contents (Continued) Input Related Spurious (IRS) Signals ......... . 3-13 Equipment Required .
- Page 7 Table of Contents (Continued) Internal Anatomy of MS203xB ..........6-10 MS203xB Separating Case Back from Case Front .
- Page 8 Table of Contents (Continued) MS2025B Test Record ............A-3 VNA Frequency Accuracy .
- Page 9 Table of Contents (Continued) Appendix B—Test Fixture Schematics T2904 Test Fixture Schematic ..........B-1 T3377 Test Fixture Schematic .
- Page 10 Contents-6 PN: 10580-00303 Rev. D Model MS20xxB MM...
-
Page 11: Chapter 1-General Information
• Blank test records (Appendix A, “Test Records”) Anritsu recommends that you make a copy of the blank test records to document the measurements each time a Performance Verification is performed. Continuing to document this process each time it Note is performed provides a detailed history of instrument performance, which allows you to observe trends. -
Page 12: Product Description
SPA, 100 kHz to 4 GHz, N Connectors MS2035B VNA, 500 kHz to 6 GHz, N Connectors SPA, 100 kHz to 6 GHz, N Connectors Standard Accessories Table 1-2. Standard Accessories Anritsu Part Number Accessory 10580-00301 MS20xxB User Guide 2300-498 Master Software Tools CD ROM 633-44... -
Page 13: Related Documents
General Information 1-3 Related Documents Related Documents Other documents are available for the MS20xxB at the Anritsu Web site: www.anritsu.com VNA Master MS20xxB User Guide – part number 10580-00301 VNA Master MS20xxB Programming Manual – part number 10580-00302 VNA Master MS20xxB Technical Data Sheet – part number 11410-00549 Vector Network Analyzer Measurement Guide –... -
Page 14: Recommended Test Equipment
1-6 Recommended Test Equipment General Information Recommended Test Equipment The following test equipment is recommended for use in testing and maintaining Anritsu VNA Master Models MS2024B, MS2025B, MS2034B, and MS2035B. Table 1-4 on page 1-4 is a list of test equipment that is recommended for verifying the vector network analyzer functions and associated VNA options. -
Page 15: Spectrum Analyzer Test Equipment
Power Meter Power Range: –70 to +20 dBm Anritsu Model ML2438A Power Sensor Frequency: 100 kHz to 18 GHz Anritsu Model SC7400 (Quantity 2) Power Range: –30 to +20 dB Power Sensor Frequency: 100 kHz to 18 GHz Anritsu Model MA2442D Power Range: –67 to +20 dB... -
Page 16: Instrument Options Test Equipment
Recommended Instrument Critical Specification Manufacturer/Model Load Test Fixture (for Option 10) Resistance: 40 ohm Anritsu Model T2904 Power: 5 watt Load Test Fixture (for Option 10) Resistance: 105 ohm Anritsu Model T3377 Power: 1 watt Load Test Fixture (for Option 10) -
Page 17: Replaceable Parts And Assemblies
General Information 1-7 Replaceable Parts and Assemblies Replaceable Parts and Assemblies To ensure that the correct options are provided on the replacement assembly when ordering either a VNA Module Assembly or Main PCB Assembly, all installed instrument options must be declared on the order. The installed options are listed on a label on the top of the VNA Master. - Page 18 1-7 Replaceable Parts and Assemblies General Information Table 1-7 summarizes the available replaceable parts and assemblies. Table 1-7. List of Replaceable Parts Part Number Description ND72051 Main/VNA PCB Assembly for MS2024B instruments – Does not include GPS Receiver Module – Does not include Ethernet Option PCB Assembly ND72052 Main/VNA PCB Assembly for MS2025B instruments –...
- Page 19 General Information 1-7 Replaceable Parts and Assemblies Table 1-7. List of Replaceable Parts Part Number Description 3-2000-1498 USB Type 2 A to Mini B Cable, 3 meters (10 feet) (for all MS202xB and MS203xB instruments) Model MS20xxB MM PN: 10580-00303 Rev. D...
-
Page 20: Performance Verification Procedures
1-8 Performance Verification Procedures General Information Performance Verification Procedures Performance verification procedures are in the following Chapters: • Chapter 2, “VNA Performance Verification” • Chapter 3, “Spectrum Analyzer Performance Verification” • Chapter 4, “Options Performance Verification” Refer to Table 1-8 for the list of performance verification procedures that are required for each model. - Page 21 General Information 1-8 Performance Verification Procedures Table 1-8. Required Performance Verification Procedures for Each Model of VNA Master MS20xxB Procedure Model Performance Verification Procedure VNA Frequency Accuracy Chapter 2 VNA Transmission Dynamic Range Chapter 2 VNA Return Loss Measurements Accuracy Chapter 2 VNA Mode Bias Tee Operational Check Chapter 4...
- Page 22 1-8 Performance Verification Procedures General Information 1-12 PN: 10580-00303 Rev. D Model MS20xxB MM...
-
Page 23: Chapter 2-Vna Performance Verification
• 10 MHz Time Base Reference • RF Coaxial Cable, Anritsu Model 15NN50-1.0B • BNC male to BNC male Cable, Anritsu Model 2000-1627-R Procedure 1. Connect a BNC cable between the output connector of the external Time Base Reference to the Reference Input connector of the Frequency Counter. -
Page 24: Transmission Dynamic Range
• Calibration Tee, N female, Anritsu Model OSLNF50-1 • RF Coaxial Cable, Anritsu Model 15NN50-1.0B • USB Mini-B male to USB Type A male Cable, Anritsu part number 3-2000-1498 • Personal Computer with Microsoft Windows XP Operating System, USB port, and National Instrument VISA software 4.4.1 or later... -
Page 25: Return Loss Measurement Accuracy Verification
VNA Master is required for this test. Equipment Required • Calibration Tee, N male, Anritsu Model OSLN50-1 • 20 dB Offset Termination, N male, Anritsu Model SC7423 • 6 dB Offset Termination, N male, Anritsu Model SC7424 Procedure 1. Press the On/Off key to turn on the VNA Master. - Page 26 2-4 Return Loss Measurement Accuracy Verification VNA Performance Verification 15. Press the Enter key and wait until the measurement is complete. 16. Disconnect the Short, connect the Load of the Calibration Tee to VNA Port 1 and then press the Enter key.
-
Page 27: Chapter 3-Spectrum Analyzer Performance Verification
Chapter 3 — Spectrum Analyzer Performance Verification Introduction This chapter contains tests that are used to verify the Spectrum Analyzer performance of VNA Master Models MS2034B and MS2035B. Blank performance verification test records are provided in Appendix A. Make copies of the blank test records and use them to record measured values. -
Page 28: Residual Spurious Response
The following test is used to verify the residual spurious response of the spectrum analyzer of VNA Master models MS2034B and MS2035B. Equipment Required • 50 ohm Termination, Anritsu Model 28N50-2 Procedure 1. Connect the 50 ohm Termination to the RF In connector of the VNA Master. - Page 29 Spectrum Analyzer Performance Verification 3-2 Residual Spurious Response 22. Verify that Marker 1 amplitude is < –90 dBm. If a spur larger than –90 dBm appears, then wait another full sweep and observe whether the spur reappears at the same point on the second sweep. Note If the spur does not appear at the same point on the second sweep, then the spur on the first sweep was not real.
-
Page 30: Displayed Average Noise Level (Danl)
The following test is used to verify the Displayed Average Noise Level (DANL) of the spectrum analyzer in the MS2034B and MS2035B VNA Master. This test is performed using the RMS detection mode. Equipment Required • 50 ohm Termination, Anritsu Model 28N50-2 Procedure 1. Connect the 50 ohm Termination to the RF In connector of the VNA Master. - Page 31 Spectrum Analyzer Performance Verification 3-3 Displayed Average Noise Level (DANL) The noise floor consists of totally random signals where a spur is a fixed spike of varying amplitude Note that is always visible. 23. Repeat Step through Step for other frequency settings in Table A-9 for MS2034B or Table A-34...
-
Page 32: Frequency Accuracy
• Synthesized Signal Generator, Anritsu Model MG3692X series • K(m) to N(f) Adapter, Anritsu Model 34RKNF50 • 10 MHz Reference Standard • RF Coaxial Cable, Anritsu Model 15NN50-1.5C • BNC(m) to BNC(m) Coaxial Cable, Anritsu part number 2000-1627-R Procedure Adapter Signal Source... -
Page 33: Related Tests
Table A-11 for MS2034B or Table A-36 MS2035B in Appendix If the instrument fails this test, then contact your local Anritsu Service Center Note (http://www.anritsu.com/Contact.asp). Related Tests Frequency Accuracy with GPS On (refer to Section 4-4 “Spectrum Analyzer Frequency Accuracy with GPS On”... -
Page 34: Single Side Band (Ssb) Phase Noise
• 10 MHz Reference Standard • RF Coaxial Cable, Anritsu Model 15NN50-1.5C • BNC(m) to BNC(m) Coaxial Cable, Anritsu part number 2000-1627-R Procedure 1. Connect the BNC Coaxial Cable between the 10 MHz Reference Standard output and the 10 MHz Ref In connector of the Anritsu MG3692X Synthesized Signal Generator. - Page 35 Spectrum Analyzer Performance Verification 3-5 Single Side Band (SSB) Phase Noise 26. Press the Delta On/Off submenu button to turn On Delta. 27. Use the numeric keypad to enter 10 and then press the kHz submenu button. 28. Record the measured value in Appendix •...
-
Page 36: Spurious Response (Second Harmonic Distortion)
• K(m) to N(f) Adapter, Anritsu Model 34RKNF50 • 10 MHz Reference Standard • RF Coaxial Cable, Anritsu Model 15NN50-1.5C • 50 MHz Low Pass Filter, Anritsu part number 1030-96 • BNC(m) to BNC(m) Coaxial Cable, Anritsu part number 2000-1627-R Procedure... - Page 37 Spectrum Analyzer Performance Verification 3-6 Spurious Response (Second Harmonic Distortion) 4. Install the 34RKNF50 Adapter to the output of the MG3692X Generator and then connect the male end of the 50 MHz Low Pass Filter to the Adapter. 5. Connect the 15NN50-1.5C RF Coaxial Cable between the 50 MHz Low Pass Filter and the RF In connector of the VNA Master.
- Page 38 3-6 Spurious Response (Second Harmonic Distortion) Spectrum Analyzer Performance Verification 36. Press the Marker main menu button and then Peak Search submenu button. 37. Record the amplitude of 100.2 MHz in Table A-14 for MS2034B or Table A-39 for MS2035B in Appendix 38.
-
Page 39: Input Related Spurious (Irs) Signals
• 10 MHz Reference Standard • RF Coaxial Cable, Anritsu Model 15NN50-1.5C • BNC(m) to BNC(m) Coaxial Cable, Anritsu part number 2000-1627-R Procedure 1. Connect the BNC Coaxial Cable between the 10 MHz Reference Standard output and the 10 MHz Ref In connector of the Anritsu MG3692X Synthesized Signal Generator. - Page 40 3-7 Input Related Spurious (IRS) Signals Spectrum Analyzer Performance Verification 24. Press the Marker main menu button and then the Peak Search submenu button. 25. Record the Marker amplitude reading of 2072.5 MHz in Table A-15 on page A-6 for MS2034B or Table A-40 on page A-19 for MS2035B in Appendix...
- Page 41 Spectrum Analyzer Performance Verification 3-7 Input Related Spurious (IRS) Signals 55. Press the Shift key, press the Trace (5) key and then press the Trace A Operations submenu button. 56. Press the # of Averages submenu button. 57. Use the numeric keypad to enter 5, and then press the Enter key. 58.
- Page 42 3-7 Input Related Spurious (IRS) Signals Spectrum Analyzer Performance Verification 87. Press the Marker main menu button and then Peak Search submenu button. 88. Record the Marker amplitude reading into the Measured Value column for 2821 MHz to 2823 MHz in Table A-15 on page A-6 for MS2034B or Table A-40 on page A-19...
-
Page 43: Resolution Bandwidth Accuracy
• K(m) to N(f) Adapter, Anritsu Model 34RKNF50 • 10 MHz Reference Standard • RF Coaxial Cable, Anritsu Model 15NN50-1.5C • BNC(m) to BNC(m) Coaxial Cable (Quantity 2), Anritsu part number 2000-1627-R • BNC Tee Adapter, BNC(m) to BNC(f)/BNC(f), Anritsu part number 3-2600-2 Procedure... - Page 44 3-8 Resolution Bandwidth Accuracy Spectrum Analyzer Performance Verification 6. Install the 34RKNF50 Adapter to the output of the MG3692X Generator and then connect the 15NN50-1.5C RF Coaxial Cable between the Adapter and the RF In connector of the VNA Master. 7.
- Page 45 Spectrum Analyzer Performance Verification 3-8 Resolution Bandwidth Accuracy RBW Test 19. Press the Span submenu button. 20. Use the numeric keypad and the appropriate unit submenu button (for example, MHz) to set Span to the first value listed in the table in Appendix A.
-
Page 46: Amplitude Accuracy
• K(m) to N(f) Adapter, Anritsu Model 34RKNF50 • 10 MHz Reference Standard • BNC(m) to BNC(m) Coaxial Cable, Anritsu part number 2000-1627-R • Dual Channel Power Meter, Anritsu Model ML2438A • High Accuracy Power Sensors (Quantity 2), Anritsu Model SC7400 •... - Page 47 Spectrum Analyzer Performance Verification 3-9 Amplitude Accuracy 6. Install the 10 dB Fixed Attenuator to the other Power Splitter output and then connect Sensor A to the end of the attenuator as shown in Figure 3-4. Power Meter Adapter Sensor B Power Splitter Attenuator Signal Source...
- Page 48 3-9 Amplitude Accuracy Spectrum Analyzer Performance Verification 9. Record the Sensor B reading into the Required Sensor B Reading column of Table A-17 for MS2034B or Table A-42 for MS2035B in Appendix 10. Repeat Step 8 Step 9 for the other input levels from –4 dBm to –50 dBm. 50 MHz Amplitude Accuracy Measurements 11.
- Page 49 Spectrum Analyzer Performance Verification 3-9 Amplitude Accuracy 15. Press the Shift key and then the Sweep (3) key, Sweep Mode submenu key and then the Performance submenu key. 16. Press the Freq main menu button and then the Center Freq submenu button. 17.
-
Page 50: Amplitude Accuracy Across Frequency Verification
• K(m) to N(f) Adapter, Anritsu Model 34RKNF50 • 10 MHz Reference Standard • BNC(m) to BNC(m) Coaxial Cable, Anritsu part number 2000-1627-R • Dual Channel Power Meter, Anritsu Model ML2438A • High Accuracy Power Sensors (Quantity 2), Anritsu Model SC7400 •... - Page 51 Spectrum Analyzer Performance Verification 3-9 Amplitude Accuracy 5. Install the 10 dB Fixed Attenuator to the other Power Splitter output and then connect Sensor A to the end of the attenuator as shown in Figure 3-6. Power Meter Adapter Sensor B Power Splitter Attenuator Signal Source...
- Page 52 3-9 Amplitude Accuracy Spectrum Analyzer Performance Verification 8. On the power meter, press the Sensor key, the Cal Factor soft key, and then the Freq soft key. Use the numeric keypad to enter the value matching the frequency of MS3692X as the input signal frequency. Do this for both Sensor A and Sensor B.
- Page 53 Spectrum Analyzer Performance Verification 3-9 Amplitude Accuracy 15. Connect the open end of the 34NN50A Adapter to the RF In connector of the VNA Master as shown in Figure 3-4. Power Meter Adapter Sensor B Power Splitter Attenuator Signal Source Adapter 10 MHz Reference Enter...
- Page 54 3-9 Amplitude Accuracy Spectrum Analyzer Performance Verification 26. Set the power meter to display Channel B. Press the Sensor key, the Cal Factor soft key, and then the Freq soft key. Use the numeric keypad to enter the value matching the frequency of MG3692X as the input signal frequency.
- Page 55 Spectrum Analyzer Performance Verification 3-9 Amplitude Accuracy 45. Repeat Step through Step for all frequencies that are applicable for the unit under test. Record the results in Appendix A in the following tables for MS2034B: • Table A-21 on page A-10 •...
-
Page 56: Third Order Intercept (Toi)
• Fixed Attenuator, Aeroflex/Weinschel Model 44-6 (Quantity 2) • Fixed Attenuator, Aeroflex/Weinschel Model 44-20 (Quantity 2) • RF Coaxial Cable, N(m) to N(f), Anritsu Model 15NN50-1.5C (Quantity 2) • Adapter, Anritsu Model 34NN50A • Coaxial Cable, BNC(m) to BNC(m), Anritsu Part Number 2000-1627-R (Quantity 3) •... - Page 57 Spectrum Analyzer Performance Verification 3-10 Third Order Intercept (TOI) Power Meter Adapter 34NN50A Enter Back Shift Mode System File Limit Trace Measure Sweep Calibrate Preset Power Charge Sensor VNA Master 2 dB 6 dB 20 dB 20 dB 6 dB 2 dB Attenuators Attenuators Power...
- Page 58 3-10 Third Order Intercept (TOI) Spectrum Analyzer Performance Verification 8. On the MG3692x Synthesized Signal Generator #2, turn the RF On, and adjust the RF amplitude so that –20 dBm appears at the splitter output (approximately +16 dBm). 9. Turn Off the RF of the MG3692x Synthesized Signal Generator #2. 10.
- Page 59 3-10 Third Order Intercept (TOI) 14. Disconnect the power sensor from the output of the power splitter and connect the power splitter output to the MS203XB RF In connector through the Anritsu Model 34NN50A adapter as shown in Figure 3-9.
- Page 60 30. Turn Off the RF of the MG3692x Synthesized Signal Generator #2. 31. Disconnect the power sensor from the output of the power splitter and connect the power splitter output to the MS203XB RF In connector through the Anritsu Model 34NN50A adapter. Refer to Figure 3-9.
-
Page 61: Chapter 4-Options Performance Verification
Chapter 4 — Options Performance Verification Introduction This chapter contains tests that are used to verify the performance of options that are installed in VNA Master Models MS2024B, MS2025B, MS2034B, and MS2035B. Blank performance verification test records are provided in Appendix A. -
Page 62: Vna Mode Bias Tee (Option 10) Operational Check
• 105 ohm, 1 Watt, Low Current Load, Anritsu part number T3377 • AC Power Adapter, Anritsu part number 40-187-R Procedure 1. Connect the AC Power Adapter (Anritsu part number 40-187-R) to the VNA Master and then plug the power cord of the AC Power Adapter to an AC outlet. Note The VNA Master must be powered by external AC power for this test. - Page 63 Options Performance Verification 4-2 VNA Mode Bias Tee (Option 10) Operational Check Table 4-1. VNA Bias Tee Verification Voltage Setting (V) 12.0 18.0 32.0 Expected Current (mA) 85 to 145 142 to 202 370 to 450 16. Press the Off submenu button to turn the Bias Tee Off. Press the Back submenu button to return to previous menu.
-
Page 64: Gps (Option 31) Operational Check
Equipment Required • SMA(m) to BNC(f) Adapter, Pomona part number 4290 • BNC(m) 93 ohm Terminator, Amphenol part number B1004A1-ND3G-93R-0.05-1W • GPS Antenna, Anritsu part number 2000-1528-R or Trimble part number 57861-00 • AC Power Adapter, Anritsu part number 40-187-R Procedure 1. - Page 65 GPS Receiver Operational Check (For MS2024B and MS2025B Only) 19. Connect the GPS Antenna to the GPS connector of the VNA Master. Ensure that the Anritsu GPS Antenna is in a direct line-of-sight relationship to the GPS satellites or Note the Antenna is placed outside without any obstructions.
-
Page 66: Spectrum Analyzer Frequency Accuracy With Gps On
Procedure 1. Connect GPS Antenna to the GPS Antenna connector of the MS203XB VNA Master. Ensure that the Anritsu GPS Antenna is in a direct line-of-sight relationship to the GPS satellites or Note the Antenna is placed outside without any obstructions. - Page 67 Options Performance Verification 4-4 Spectrum Analyzer Frequency Accuracy with GPS On 10 MHz Reference Adapter Signal Source Antenna Enter Back Shift Mode System File Limit Trace Measure Sweep Calibrate Preset Power Charge VNA Master Figure 4-1. Spectrum Analyzer Frequency Accuracy with GPS On 3.
- Page 68 25. Verify that the marker frequency reading is within specification and record the measured value in Table A-12 for MS2034B or Table A-29 for MS2035B in Appendix If the instrument fails this test, then contact your local Anritsu Service Center Note (http://www.anritsu.com/Contact.asp). PN: 10580-00303 Rev. D Model MS20xxB MM...
-
Page 69: Chapter 5-Battery Information
Chapter 5 — Battery Information Introduction This chapter describes battery information for VNA Master Models MS2024B, MS2025B, MS2034B, and MS2035B. Some of the procedures in this section are generic, and apply to many similar instruments. Photos Note and illustrations are representative and may show instruments other than the MS2024B, MS2025B, MS2034B, and MS2035B. -
Page 70: Battery Pack Removal And Replacement
5-2 Battery Pack Removal and Replacement Battery Information Battery Pack Removal and Replacement This section provides instructions for the removing and replacing the battery pack. 1. With the instrument standing upright on its base and standing on a stable surface, locate the battery access door, as illustrated in Figure 5-1. - Page 71 Battery Information 5-2 Battery Pack Removal and Replacement Figure 5-2. Battery Insertion and Removal Battery Contacts Figure 5-3. Battery Contacts Model MS20xxB MM PN: 10580-00303 Rev. D...
-
Page 72: Battery Pack Information
Battery Information Battery Pack Information The following information relates to the care and handling of the Anritsu battery pack and Lithium-Ion batteries in general. • The battery pack that is supplied with your instrument may need charging before use. Before using the VNA Master, the internal battery may be charged in the VNA Master, using either the AC-DC Adapter or the 12 Volt DC adapter, or may be charged separately in the optional Dual Battery Charger. -
Page 73: Chapter 6-Removal And Replacement
Chapter 6 — Removal and Replacement Introduction This chapter describes the removal and replacement procedures for the various assemblies of VNA Master Models MS2024B, MS2025B, MS2034B, and MS2035B. Illustrations (drawings or photographs) in this manual may differ slightly from the instrument that you are servicing, but the basic removal and replacement functions will remain as specified. -
Page 74: Removal And Replacement Instructions
Removal and Replacement Removal And Replacement Instructions The removal and replacement instructions are described in the following sections: • Section 6-6 “Opening the Instrument Case” on page 6-14 • Section 6-7 “PCB Assembly Replacement (MS202xB and MS203xB)” on page 6-17 Section 6-7 is preliminary to the remaining sections, •... -
Page 75: Internal Anatomy Of All Four Vna Master Models
Removal and Replacement 6-2 Internal Anatomy of All Four VNA Master Models Internal Anatomy of All Four VNA Master Models First Step for Opening the Case Figure 6-1. Removal of Bumpers and Rotary Knob Model MS20xxB MM PN: 10580-00303 Rev. D... -
Page 76: Screws On Case Back
6-2 Internal Anatomy of All Four VNA Master Models Removal and Replacement Screws on Case Back Figure 6-2. Location of Six Screws that Secure Case Back to Case Front Figure 6-2 shows the 6 screw locations for opening the case (arrows) and also shows the 4 screws that secure the tilt bail. -
Page 77: Basic Case Parts
Removal and Replacement 6-2 Internal Anatomy of All Four VNA Master Models Basic Case Parts Figure 6-3. Perspective View of Case Parts (Case bottom is Facing Upward) The Case Front includes the Keypad, Touch Screen, LCD, and Fan. The Case Back includes the Battery Compartment and its Door. Figure 6-3 also shows the Tilt Bail and the 3 vents (ventilation grills) for Fan intake and exhaust. -
Page 78: Ms20Xxb Instrument Overview
6-2 Internal Anatomy of All Four VNA Master Models Removal and Replacement MS20xxB Instrument Overview 1. Touch Screen and LCD Display 2. Fan Inlet Vent 3. Top Bumper 4. Ventilation Exhaust Vent 5. Rotary Knob 6. Keypad 7. Ventilation Exhaust Vent 8. -
Page 79: Internal Anatomy Of Ms202Xb
Removal and Replacement 6-3 Internal Anatomy of MS202xB Internal Anatomy of MS202xB MS202xB Separating Case Back from Case Front 1. Battery Cable and Connection to Mother Board Figure 6-5. Opening the Case Model MS20xxB MM PN: 10580-00303 Rev. D... -
Page 80: Ms202Xb Parts In Case Front
6-3 Internal Anatomy of MS202xB Removal and Replacement MS202xB Parts in Case Front 1. Keyboard Cable and Connector on Mother Board 2. Fan Cable and Connector Location 3. LCD Cable and Connector Location Figure 6-6. Parts in Front Case PN: 10580-00303 Rev. D Model MS20xxB MM... -
Page 81: Ms202Xb Connector Panel
Removal and Replacement 6-3 Internal Anatomy of MS202xB MS202xB Connector Panel 1. External Reference In (not installed in MS202xB models) 2. External Trigger In (not installed in MS202xB models) 3. RF In (not installed in MS202xB models) 4. USB Mini-B (Full Speed, USB 2.0) 5. -
Page 82: Internal Anatomy Of Ms203Xb
6-4 Internal Anatomy of MS203xB Removal and Replacement Internal Anatomy of MS203xB MS203xB Separating Case Back from Case Front 1. Battery Cable and Connection to Mother Board Figure 6-8. Battery Cable and Connection to Mother Board In addition to the basic parts within the MS202xB models, the MS203xB models contain a SPA PCB and DSP PCB, both attached to the Mother Board. -
Page 83: Ms203Xb Parts In Case Front
Removal and Replacement 6-4 Internal Anatomy of MS203xB MS203xB Parts in Case Front 1. Keyboard Cable and Connector on Mother Board 2. Fan Cable and Connector Location 3. LCD Cable and Connector Location Figure 6-9. Parts in Front Case Model MS20xxB MM PN: 10580-00303 Rev. -
Page 84: Ms203Xb Connector Panel
6-4 Internal Anatomy of MS203xB Removal and Replacement MS203xB Connector Panel 1. External Reference In 2. External Trigger In 3. RF In 4. USB Mini-B (Full Speed, USB 2.0) 5. GPS Antenna (with Option 31) 6. External Power 7. USB Type A (Full Speed, USB 2.0) 8. -
Page 85: Disassembly Sequence Overview
All work must be performed in a static-safe work area. Before opening the case, Anritsu Company strongly recommends that all internally-saved files be saved to a PC by using the Master Software Tools utility program, or that they be copied to an Note external USB flash drive. -
Page 86: Opening The Instrument Case
6-6 Opening the Instrument Case Removal and Replacement Opening the Instrument Case This procedure provides instructions for opening the VNA Master case. With the case opened, the internal assemblies can be removed and replaced, as described in the rest of this chapter. Electrostatic Discharge (ESD) can damage the highly sensitive circuits in the instrument. - Page 87 Removal and Replacement 6-6 Opening the Instrument Case 3. Place the VNA Master face down on a stable work surface that will not scratch the display. 4. Use a Phillips screwdriver to remove the six screws securing the two halves of the case together. The instrument that is shown in Figure 6-12 is not a VNA Master, but the case is the same.
- Page 88 6-6 Opening the Instrument Case Removal and Replacement 1. Battery Connector 2. Battery Compartment 3. Real Time Clock Battery Figure 6-13. VNA Master Case Opened 180 Degrees Case Reassembly: 7. Closing the case is the reverse of opening. 8. Connect the battery cable to the Mother board and close the case, as described in “Case Reassembly:”...
-
Page 89: Pcb Assembly Replacement (Ms202Xb And Ms203Xb)
Removal and Replacement 6-7 PCB Assembly Replacement (MS202xB and MS203xB) PCB Assembly Replacement (MS202xB and MS203xB) This section describes the removal and replacement of the Main/VNA and Main/VNA/DSP PCB assemblies and the SPA PCB, which are attached to the VNA Master Front Case. This section is preliminary to the removal and replacement of the Main/VNA PCB Assembly (MS202xB Mother Board), the Main/VNA/DSP PCB Assembly (MS203xB Mother Board), or the SPA PCB. - Page 90 6-7 PCB Assembly Replacement (MS202xB and MS203xB) Removal and Replacement 2. Disconnect the Keypad PCB connector (item Figure 6-14), the Fan Assembly cable connector (item Figure 6-14), and the LCD connector (item Figure 6-14). 3. Use a Phillips screwdriver to remove the 4 screws (item Figure 6-14) that secure the entire PCB assembly to the front case.
-
Page 91: Spa Assembly Replacement
Removal and Replacement 6-8 SPA Assembly Replacement SPA Assembly Replacement This section describes the removal of the Spectrum Analyzer Assembly board. Parts: • ND72119 – SPA PCB Assembly for MS2034B and MS2035B instruments Procedure: 1. Open the case as described in Section 6-6 “Opening the Instrument Case”... -
Page 92: Pcb Assembly Out Of Case
6-8 SPA Assembly Replacement Removal and Replacement PCB Assembly Out Of Case Figure 6-16 shows the PCB assembly as viewed from the top and from the bottom. Figure 6-16. Main/VNA PCB Assembly (with SPA PCB) Removed from Case 6-20 PN: 10580-00303 Rev. D Model MS20xxB MM... - Page 93 Mother Board. Torque these six screws to 7.5 lbf·in (0.85 N·m). 11. Use the Anritsu Tool T1451 to attach the castellated BNC dress nuts to the External Reference connector and the External Trigger connector (shown in...
-
Page 94: Pcb Cable Connections
6-8 SPA Assembly Replacement Removal and Replacement PCB Cable connections Figure 6-17. Connections Between PCB Assemblies 6-22 PN: 10580-00303 Rev. D Model MS20xxB MM... - Page 95 Removal and Replacement 6-8 SPA Assembly Replacement Table 6-2. Numbered Items in Figure 6-17 1 VNA shield attached to Mother Board (DO NOT remove shields) 2 MB to SPA PCB Ribbon cable at Mother Board connector J1 3 DSP PCB connector J2 (140 MHZ SPA IF) – RF cable attaches to SPA PCB connector J4 (item 6) 4 DSP PCB connector J1 (100 MHZ) –...
-
Page 96: Gps (Option 31) Replacement
In the MS2034B or MS2035B, the SPA board RF cables that connect to the DSP board do not need to be removed when replacing the GPS Module. a. Use the Anritsu Tool T1451 to remove the castellated BNC dress nuts from the External Reference connector and the External Trigger connector (shown in... - Page 97 Removal and Replacement 6-9 GPS (Option 31) Replacement The PCB Assembly that is shown in Figure 6-18 is not a VNA Master, but the removal steps are Note appropriate. Remove nut and washer from GPS SMA connector Remove 2 screws Figure 6-18.
-
Page 98: 6-10 Ethernet Pcb Assembly (Option 411) Replacement
In the MS2034B or MS2035B, the SPA board RF cables that connect to the DSP board do not need to be removed when replacing the Ethernet PCB Assembly. a. Use the Anritsu Tool T1451 to remove the castellated BNC dress nuts from the External Reference connector and the External Trigger connector (shown in... -
Page 99: Ethernet Pcb Assembly
Removal and Replacement 6-10 Ethernet PCB Assembly (Option 411) Replacement Ethernet PCB Assembly 1. Screw (4 total) to attach Option 411 PCB to Main/VNA PCB Assembly 2. Connector J1 (Mother Board to SPA PCB ribbon cable connector) 3. VNA shield 4. -
Page 100: Main/Vna Pcb Assembly Replacement
6-11 Main/VNA PCB Assembly Replacement Removal and Replacement 6-11 Main/VNA PCB Assembly Replacement This procedure provides instructions for removing and replacing the Main/VNA PCB Assembly for MS2024B and MS2025B instruments. When ordering the Main/VNA PCB Assembly, all options that are installed on the instrument must be Note stated on the order. -
Page 101: 6-12 Main/Vna/Dsp Pcb Assembly Replacement
Removal and Replacement 6-12 Main/VNA/DSP PCB Assembly Replacement 6-12 Main/VNA/DSP PCB Assembly Replacement This procedure provides instructions for removing and replacing the Main/VNA/DSP PCB Assembly for MS2034B and MS2035B instruments. When ordering the Main/VNA/DSP PCB Assembly, all options that are installed on the instrument Note must be stated on the order. -
Page 102: 6-13 Fan Assembly Replacement
6-13 Fan Assembly Replacement Removal and Replacement 6-13 Fan Assembly Replacement This procedure provides instructions for removing and replacing the Fan Assembly. Parts: • 3-72779 – Fan Assembly Procedure: 1. Open the case as described in Section 6-6 “Opening the Instrument Case” on page 6-14. - Page 103 Removal and Replacement 6-13 Fan Assembly Replacement 4. Extract the fan cable from the metal pan and remove the fan assembly. Figure 6-21. Fan Assembly Replacement Installing the Fan Assembly: 5. Installation is the reverse of removal. Follow replacement instructions for each of the parts and assemblies that were removed, as appropriate.
-
Page 104: 6-14 Lcd Assembly Replacement
6-14 LCD Assembly Replacement Removal and Replacement 6-14 LCD Assembly Replacement This procedure provides instructions for removing and replacing the Liquid Crystal Display (LCD) after the Main/VNA PCB or Main/VNA PCB/DSP assembly has been separated from the instrument. Parts: • 3-15-147 – LCD Display Procedure: 1. - Page 105 Removal and Replacement 6-14 LCD Assembly Replacement Disconnect Cable Figure 6-24. Replacing the LCD Assembly 5. Use a Phillips screw driver to remove the four screws securing the LCD to the housing (Figure 6-25). LCD Backlight Cable LCD Cable to Motherboard LCD Backlight Remove 4 screws to replace LCD...
- Page 106 6-14 LCD Assembly Replacement Removal and Replacement Installing the LCD: 9. Installation is the reverse of removal. Follow replacement instructions for each of the parts and assemblies that were removed, as appropriate. Pay attention to the routing of the LCD Backlight Cable. The cable must be positioned so that it is not Note pinched when the unit is reassembled.
-
Page 107: 6-15 Lcd Backlight Pcb Removal And Replacement
Removal and Replacement 6-15 LCD Backlight PCB Removal and Replacement 6-15 LCD Backlight PCB Removal and Replacement This procedure provides instructions for removing and replacing the VNA Master LCD backlight PCB. Parts: • 3-68567-3 – LCD Backlight Inverter PCB Assembly Procedure: 1. -
Page 108: 6-16 Keypad And Keypad Pcb Replacement
6-16 Keypad and Keypad PCB Replacement Removal and Replacement 6-16 Keypad and Keypad PCB Replacement This procedure provides instructions for removing and replacing the keypad and the keypad PCB. Parts: • 3-72773 – Rubber Keypad • 3-72811-3 – Main Numeric Keypad PCB Assembly Procedure: 1. -
Page 109: 6-17 Touch Screen Replacement
Removal and Replacement 6-17 Touch Screen Replacement 6-17 Touch Screen Replacement This procedure provides instructions for removing and replacing the touch screen. Parts: • ND73867 – Touch Screen with Gasket Procedure: 1. Open the case as described in Section 6-6 “Opening the Instrument Case” on page 6-14. - Page 110 6-17 Touch Screen Replacement Removal and Replacement 7. Reverse the above steps to install the replacement Touch Screen. Firmware version 1.05 and greater was modified to accept touch screen calibration data needed for Note touch screen part number ND73867. Ensure that firmware version 1.05 or greater is installed. If not, install the latest firmware.
-
Page 111: Chapter 7-Troubleshooting
Instrument Cannot Boot Up Instrument cannot boot up. No activity occurs when the On/Off key is pressed: 1. Battery may have been fully discharged. Use an external charger (Anritsu PN 2000-1374) to charge a completely discharged battery. 2. Battery may be the wrong type. Use only Anritsu approved battery packs. Some non-approved battery packs will fit into the MS2024B, MS2025B, MS2034B, and MS2035B, but they are electrically incompatible and do not charge correctly. -
Page 112: Instrument Boots With No Display
7-3 Operating Problems Troubleshooting Instrument Boots with No Display Instrument produces a ding sound after a while, but with no display: 1. If the display is dim, then check the Brightness setting under the System Menu | System Options. 2. LCD Backlight Inverter PCB may have failed. Replace LCD Backlight Inverter PCB. 3. -
Page 113: Spectrum Analyzer Problems
1. Verify that the GPS Antenna is in direct line-of-sight relationship or is placed outside without any obstructions. 2. If the Anritsu 2000-1528-R GPS Antenna is used, attached the antenna to a large magnetic metal surface such as the roof on a passenger car. -
Page 114: Other Issues
7-4 Other Issues Troubleshooting Other Issues 1. Perform a Master Reset. 2. Refer to the User Guide and Measurement Guide. 3. Update firmware. 4. Replace the failed parts or assemblies (for example, the LCD touch screen, keypad, and so forth). PN: 10580-00303 Rev. -
Page 115: Introduction
Appendix A — Test Records Introduction This appendix provides test records that can be used to record the performance of VNA Master models MS2024B, MS2025B, MS2034B, and MS2035B. Make a copy of the following Test Record pages and document the measured values each time performance verification is performed. Continuing to document this process each performance verification session provides a detailed history of the instrument‘s performance. -
Page 116: Ms2024B Test Record
A-2 MS2024B Test Record Test Records Serial Number: Firmware Revision: Operator: Options: Date: MS2024B Test Record VNA Frequency Accuracy Table A-1. VNA Frequency Accuracy VNA Output Frequency Specification Frequency Counter Reading 1 GHz ±2.5 kHz VNA Transmission Dynamic Range _____ Refer to Attached Test Data Report VNA Return Loss Measurements Accuracy Table A-2. -
Page 117: Ms2025B Test Record
Test Records A-3 MS2025B Test Record Serial Number: Firmware Revision: Operator: Options: Date: MS2025B Test Record VNA Frequency Accuracy Table A-3. VNA Frequency Accuracy VNA Output Frequency Specification Frequency Counter Reading 1 GHz ±2.5 kHz VNA Transmission Dynamic Range _____ Refer to Attached Test Data Report VNA Return Loss Measurements Accuracy Table A-4. -
Page 118: Ms2034B Test Record
A-4 MS2034B Test Record Test Records Serial Number: Firmware Revision: Operator: Options: Date: MS2034B Test Record VNA Frequency Accuracy Table A-5. VNA Frequency Accuracy VNA Output Frequency Specification Frequency Counter Reading 1 GHz ±2.5 kHz VNA Transmission Dynamic Range _____ Refer to Attached Test Data Report VNA Return Loss Measurements Accuracy Table A-6. -
Page 119: Spectrum Analyzer Displayed Average Noise Level (Danl
Test Records A-4 MS2034B Test Record Serial Number: Firmware Revision: Operator: Options: Date: Spectrum Analyzer Displayed Average Noise Level (DANL) Table A-9. Spectrum Analyzer DANL with Preamp Off Start Stop Measured Values at Calculated Values for Freq Freq Specification 100 kHz RBW 10 Hz RBW <... -
Page 120: Spectrum Analyzer Single Side Band (Ssb) Phase Noise
A-4 MS2034B Test Record Test Records Serial Number: Firmware Revision: Operator: Options: Date: Spectrum Analyzer Single Side Band (SSB) Phase Noise Table A-13. Spectrum Analyzer SSB Phase Noise Offset Frequency Specification Measured Value Calculated Value ≤ –100 dBc/Hz 10 kHz dBc/Hz dBc/Hz ≤... -
Page 121: Spectrum Analyzer Resolution Bandwidth Accuracy
Test Records A-4 MS2034B Test Record Serial Number: Firmware Revision: Operator: Options: Date: Spectrum Analyzer Resolution Bandwidth Accuracy Table A-16. Spectrum Analyzer Resolution Bandwidth Accuracy Span Lower Limit Measured Values Upper Limit 3 MHz 6 MHz 300 kHz 2.7 MHz 3.3 MHz 1 MHz 2 MHz... -
Page 122: Spectrum Analyzer Amplitude Accuracy
A-4 MS2034B Test Record Test Records Serial Number: Firmware Revision: Operator: Options: Date: Spectrum Analyzer Amplitude Accuracy Table A-17. Spectrum Analyzer 50 MHz Amplitude Accuracy Setup Table Test Power Level @ 50 MHz Required Sensor B Reading 0 dBm –4 dBm –10 dBm –14 dBm –20 dBm... -
Page 123: Spectrum Analyzer Amplitude Accuracy (Continued
Test Records A-4 MS2034B Test Record Serial Number: Firmware Revision: Operator: Options: Date: Spectrum Analyzer Amplitude Accuracy (continued) Table A-19. Spectrum Analyzer Amplitude Accuracy Across Frequency Setup Table Required Sensor B reading for Required Sensor B reading for Frequency –2 dBm @Attenuator output –30 dBm @Attenuator output 100 kHz 10.1 MHz... - Page 124 A-4 MS2034B Test Record Test Records Serial Number: Firmware Revision: Operator: Options: Date: Spectrum Analyzer Amplitude Accuracy (continued) Table A-21. Spectrum Analyzer Amplitude Accuracy Across Frequency – 10.1 MHz Specification Test Power Atten Level (for SN <1441001) Marker 1 Reading Deviation –30 ±1.25 (±1.3)
-
Page 125: Spectrum Analyzer Amplitude Accuracy (Continued
Test Records A-4 MS2034B Test Record Serial Number: Firmware Revision: Operator: Options: Date: Spectrum Analyzer Amplitude Accuracy (continued) Table A-23. Spectrum Analyzer Amplitude Accuracy Across Frequency – 100 MHz Specification Test Power Atten Level (for SN <1441001) Marker 1 Reading Deviation –30 ±1.25 (±1.3) -
Page 126: Spectrum Analyzer Amplitude Accuracy (Continued
A-4 MS2034B Test Record Test Records Serial Number: Firmware Revision: Operator: Options: Date: Spectrum Analyzer Amplitude Accuracy (continued) Table A-25. Spectrum Analyzer Amplitude Accuracy Across Frequency – 1000 MHz Specification Test Power Atten Level (for SN <1441001) Marker 1 Reading Deviation –30 ±1.25 (±1.3) -
Page 127: Spectrum Analyzer Amplitude Accuracy (Continued
Test Records A-4 MS2034B Test Record Serial Number: Firmware Revision: Operator: Options: Date: Spectrum Analyzer Amplitude Accuracy (continued) Table A-27. Spectrum Analyzer Amplitude Accuracy Across Frequency – 3000 MHz Specification Test Power Atten Level (for SN <1441001) Marker 1 Reading Deviation –30 ±1.25 (±1.3) -
Page 128: Third Order Intercept
A-4 MS2034B Test Record Test Records Serial Number: Firmware Revision: Operator: Options: Date: Third Order Intercept Table A-29. Spectrum Analyzer Third Order Intercept Third Order Intercept at Center Frequency Measured Value Specification 800.151 MHz 799.851 MHz ≥ +16 dBm Calculated TOI at 800 MHz 2400.151 MHz 2399.851 MHz ≥... -
Page 129: Ms2035B Test Record
Test Records A-5 MS2035B Test Record Serial Number: Firmware Revision: Operator: Options: Date: MS2035B Test Record VNA Frequency Accuracy Table A-30. VNA Frequency Accuracy VNA Output Frequency Specification Frequency Counter Reading 1 GHz ±2.5 kHz VNA Transmission Dynamic Range _____ Refer to Attached Test Data Report VNA Return Loss Measurements Accuracy Table A-31. -
Page 130: Spectrum Analyzer Residual Spurious Response
A-5 MS2035B Test Record Test Records Serial Number: Firmware Revision: Operator: Options: Date: Spectrum Analyzer Residual Spurious Response Table A-32. Spectrum Analyzer Residual Spurious Response with Preamp Off Start Freq Stop Freq Specification Measured Values ≤ –90 dBm 10 MHz 50 MHz 1 kHz 300 Hz... -
Page 131: Spectrum Analyzer Displayed Average Noise Level (Danl
Test Records A-5 MS2035B Test Record Serial Number: Firmware Revision: Operator: Options: Date: Spectrum Analyzer Displayed Average Noise Level (DANL) Table A-34. Spectrum Analyzer DANL with Preamp Off Start Stop Measured Values at Calculated Values for Freq Freq Specification 100 kHz RBW 10 Hz RBW ≤... -
Page 132: Spectrum Analyzer Frequency Accuracy
A-5 MS2035B Test Record Test Records Serial Number: Firmware Revision: Operator: Options: Date: Spectrum Analyzer Frequency Accuracy Table A-36. Spectrum Analyzer Frequency Accuracy Frequency Specification Measured Value Deviation 1 GHz ±1.5 kHz (±1.5 ppm) 3.9 GHz ±5.85 kHz (±1.5 ppm) 5.9 GHz ±8.85 kHz (±1.5 ppm) a.To account for Aging, add 1 kHz (1 ppm) per year (after the first year) to the value stated in the Specification column. -
Page 133: Spectrum Analyzer Spurious Response (Second Harmonic Distortion
Test Records A-5 MS2035B Test Record Serial Number: Firmware Revision: Operator: Options: Date: Spectrum Analyzer Spurious Response (Second Harmonic Distortion) Table A-39. Spectrum Analyzer Spurious Response (Second Harmonic Distortion Frequency Specification Measured Value 2nd Harmonic Level 50.1 MHz ≤ –56 dBc 100.2 MHz Spectrum Analyzer Input Related Spurious (IRS) Signals Table A-40. -
Page 134: Spectrum Analyzer Resolution Bandwidth Accuracy
A-5 MS2035B Test Record Test Records Serial Number: Firmware Revision: Operator: Options: Date: Spectrum Analyzer Resolution Bandwidth Accuracy Table A-41. Spectrum Analyzer Resolution Bandwidth Accuracy Span Lower Limit Measured Values Upper Limit 3 MHz 6 MHz 300 kHz 2.7 MHz 3.3 MHz 1 MHz 2 MHz... -
Page 135: Spectrum Analyzer Amplitude Accuracy
Test Records A-5 MS2035B Test Record Serial Number: Firmware Revision: Operator: Options: Date: Spectrum Analyzer Amplitude Accuracy Table A-42. Spectrum Analyzer 50 MHz Amplitude Accuracy Setup Table Test Power Level at 50 MHz Required Sensor B Reading 0 dBm –4 dBm –10 dBm –14 dBm –20 dBm... -
Page 136: Spectrum Analyzer Amplitude Accuracy (Continued
A-5 MS2035B Test Record Test Records Serial Number: Firmware Revision: Operator: Options: Date: Spectrum Analyzer Amplitude Accuracy (continued) Table A-44. Spectrum Analyzer Amplitude Accuracy Across Frequency Setup Table Required Sensor B reading for Required Sensor B reading for Frequency –2 dBm at Attenuator output –30 dBm at Attenuator output 100 kHz 10.1 MHz... -
Page 137: Spectrum Analyzer Amplitude Accuracy (Continued
Test Records A-5 MS2035B Test Record Serial Number: Firmware Revision: Operator: Options: Date: Spectrum Analyzer Amplitude Accuracy (continued) Table A-46. Spectrum Analyzer Amplitude Accuracy Across Frequency – 10.1 MHz Specification Test Power Atten Level (for SN< 1441001) Marker 1 Reading Deviation –30 ±1.25 (±1.3) -
Page 138: Spectrum Analyzer Amplitude Accuracy (Continued
A-5 MS2035B Test Record Test Records Serial Number: Firmware Revision: Operator: Options: Date: Spectrum Analyzer Amplitude Accuracy (continued) Table A-48. Spectrum Analyzer Amplitude Accuracy Across Frequency – 100 MHz Specification Test Power Atten Level (for SN< 1441001) Marker 1 Reading Deviation –30 ±1.25 (±1.3) -
Page 139: Spectrum Analyzer Amplitude Accuracy (Continued
Test Records A-5 MS2035B Test Record Serial Number: Firmware Revision: Operator: Options: Date: Spectrum Analyzer Amplitude Accuracy (continued) Table A-50. Spectrum Analyzer Amplitude Accuracy Across Frequency – 1000 MHz Specification Test Power Atten Level (for SN< 1441001) Marker 1 Reading Deviation –30 ±1.25 (±1.3) -
Page 140: Spectrum Analyzer Amplitude Accuracy (Continued
A-5 MS2035B Test Record Test Records Serial Number: Firmware Revision: Operator: Options: Date: Spectrum Analyzer Amplitude Accuracy (continued) Table A-52. Spectrum Analyzer Amplitude Accuracy Across Frequency – 3000 MHz Specification Test Power Atten Level (for SN< 1441001) Marker 1 Reading Deviation –30 ±1.25 (±1.3) -
Page 141: Spectrum Analyzer Amplitude Accuracy (Continued
Test Records A-5 MS2035B Test Record Serial Number: Firmware Revision: Operator: Options: Date: Spectrum Analyzer Amplitude Accuracy (continued) Table A-54. Spectrum Analyzer Amplitude Accuracy Across Frequency – 5000 MHz Specification Test Power Atten Level (for SN< 1441001) Marker 1 Reading Deviation –30 ±1.5 (±1.3) -
Page 142: Third Order Intercept
A-5 MS2035B Test Record Test Records Serial Number: Firmware Revision: Operator: Options: Date: Third Order Intercept Table A-56. Spectrum Analyzer Third Order Intercept Third Order Intercept at Center Frequency Measured Value Specification 800.151 MHz 799.851 MHz ≥ +16 dBm Calculated TOI at 800 MHz 2400.151 MHz 2399.851 MHz ≥... -
Page 143: B-2 T2904 Test Fixture Schematic
Appendix B — Test Fixture Schematics Introduction The following schematics are provided for those wishing to build their own test fixtures for the Option 10 verification test. The part numbers that are referenced in the schematics are Anritsu part numbers. T2904 Test Fixture Schematic 130-200-3 200, 5%, 3.25 W... -
Page 144: B-3 T3377 Test Fixture Schematic
B-3 T3377 Test Fixture Schematic Test Fixture Schematics T3377 Test Fixture Schematic 101-10-5 130-200-3 513-32 200, 5%, 3.25 W 10, 5%, 0.25 W 101-10-5 130-200-3 10, 5%, 0.25 W 200, 5%, 3.25 W Figure B-2. T3377 Test Fixture Schematic PN: 10580-00303 Rev. D Model MS20xxB MM... -
Page 145: B-4 T3536 Test Fixture Schematic
Test Fixture Schematics B-4 T3536 Test Fixture Schematic T3536 Test Fixture Schematic 3-116-10-5 10, 5%, 1 W 250-108 1000 μf 63 V 513-32 3-116-10-5 3-130-36-5 3-130-36-5 10, 5%, 1 W 36, 5%, 10 W 36, 5%, 10 W Figure B-3. T3536 Test Fixture Schematic Model MS20xxB MM PN: 10580-00303 Rev. - Page 146 B-4 T3536 Test Fixture Schematic Test Fixture Schematics PN: 10580-00303 Rev. D Model MS20xxB MM...
- Page 147 A to S Index accessories, standard ..... . 1-2 no display problems ......7-2 amplitude accuracy test, SPA .
-
Page 148: Troubleshooting
T to W SPA tests troubleshooting amplitude accuracy ....3-20 battery charging ......7-2 DANL . - Page 150 Anritsu Company 490 Jarvis Drive Anritsu utilizes recycled paper and environmentally conscious inks and toner. Morgan Hill, CA 95037-2809 http://www.anritsu.com...
Need help?
Do you have a question about the VNA Master MS2024B and is the answer not in the manual?
Questions and answers