Sign In
Upload
Manuals
Brands
Silicon Graphics Manuals
Server
Origin 350
Silicon Graphics Origin 350 Manuals
Manuals and User Guides for Silicon Graphics Origin 350. We have
1
Silicon Graphics Origin 350 manual available for free PDF download: User Manual
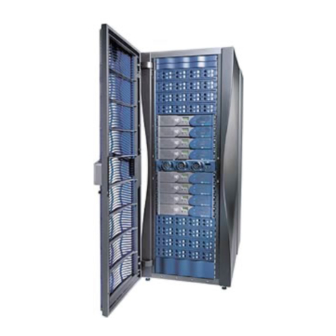
Silicon Graphics Origin 350 User Manual (274 pages)
Brand:
Silicon Graphics
| Category:
Server
| Size: 23.28 MB
Table of Contents
Record of Revision
3
Table of Contents
5
Figures
11
Tables
17
About this Guide
19
Important Information
20
Chapter Descriptions
20
Related Publications
22
Conventions
24
Product Support
24
Reader Comments
25
1 Installation and Operation
27
System Installation Overview (the Road Map)
28
Safety Precautions
29
Hazard Statements
29
ESD Precautions
30
Safety Measures
30
Installing a Rack
31
Preinstallation Activities
32
Site Plan Verification
32
Power Receptacle Verification
33
Table 1-1 Installation Tools
33
Tools Required
33
Figure 1-1 30-Amp Single-Phase Power Receptacle for North American Sites
34
Figure 1-2 32-Amp Single-Phase Power Plug for International Sites
35
Figure 1-3 Dimensions of Tall Rack Shipping Crate
37
Figure 1-4 Dimensions of Short Rack Shipping Crate
38
Transporting the Shipping Crate
39
Figure 1-5 Removing a Short Rack from the Shipping Crate
41
Removing a Tall Rack from the Shipping Crate
42
Figure 1-6 Removing a Tall Rack from the Shipping Crate
44
Figure 1-7 Leveling Bolts
45
Positioning and Leveling a Single-Rack System
45
Figure 1-8 Seismic Tie-Down Attachment Points
46
Positioning and Leveling a Multiple-Rack (Clustered) System
46
Figure 1-9 Leveling Bolts
47
Figure 1-10 Joining Locations
48
Figure 1-11 Location of Table-Mounting Feet
50
Installing the Server System in a Rack
51
Rackmounting Modules with Slide Rails
51
Checking the Slide Rail Hardware
52
Determining Space Requirements
52
Table 1-2 Module Space Requirements
52
Table 1-3 Rackmounting Hardware
52
Preparing the Slide Rail Assemblies
53
Figure 1-12 Removing the Chassis Rail from the Slide Rail
54
Figure 1-13 Attaching the Rear Mounting Bracket to the Slide Rail
55
Figure 1-14 Attaching Chassis Rails to the Module Chassis
56
Preparing the Module
56
Determining Where to Attach the Slide Rail in the Rack
57
Figure 1-15 Mounting Hole Pattern of Rack Vertical Rails
57
Attaching the Slide Rail to the Rack
58
Figure 1-16 Placing the Barnuts on the Rack Rails
59
Figure 1-17 Attaching the Slide Rail to the Rack
60
Figure 1-18 Installing Clip Nuts in Rack Rails
61
Installing Clip Nuts in Rack Rails
61
Installing the Module in the Rack
62
Figure 1-19 Pressing the Safety Latches
63
Adjusting the Position of the Rackmounted Module
64
Figure 1-20 Securing the Module to the Rack
64
Removing a Module on Slide Rails from a Rack
65
Figure 1-21 Releasing the Safety Latches
66
Figure 1-22 Releasing the Slide Latches
67
Rackmounting Modules with Shelf Rails
68
Figure 1-23 Installing the Shelf Rails in the Rack
69
Figure 1-24 Securing the Module to the Rack
70
Removing a Module on Shelf Rails from a Rack
70
Cabling the System Modules to each Other
71
Figure 1-25 Cabling a Base Compute Module to a System Expansion Compute
72
Figure 1-27 Power Connector on the Rear of the Base Compute Module
74
Connecting a Multiple-Module Server System to a Power Source
75
Figure 1-28 Connecting a Dual-Module System to a Power Source
75
Figure 1-29 Connecting Multiple Modules to a Power Source
76
Figure 1-30 Location of the Console Port
78
Operating the Server System
79
Powering the Server System on and off
79
Preparing to Power on
79
Powering on at the System Console
80
Figure 1-31 PDU Circuit Breaker
81
Powering on Manually
82
Figure 1-32 Location of the Power Button
83
Powering off at the System Console
84
Powering off Manually
85
Connecting Two Server Systems
86
Operating the Server System Modules Via Front Panel Controls
87
Operating the L1 Controller
88
Unloading and Moving System Equipment
36
Unloading the Equipment from the Truck
36
Inspecting the Shipping Crate
38
Removing a Short Rack from the Shipping Crate
39
Setting the Server System on a Table Top
49
Unpacking and Inspecting Server System Modules
49
Module
72
Figure 1-26 Cabling Multiple Modules to each Other
73
Cabling the Server System to a Power Source
74
Connecting a Single-Module or Dual-Module Server System to a Power Source
74
Connecting the System Console
77
Figure 1-33 Front Panel Functions
88
2 System Overview
91
Physical Features
92
Figure 2-1 Example of SGI Origin 350 Server Systems
93
Figure 2-2 Base Compute Module Connected to an Expansion Compute
96
Module
96
Functional Architecture
94
Figure 2-3 Compute Modules Connected Via a Numalink Module
97
Figure 2-4 Base Compute Module Connected to an MPX Module
98
Figure 2-5 Connection of MPX and PCI Expansion Modules to Compute Modules Via Numalink Module
100
Figure 2-6 Examples of Base Configurations in 17U and 39U Racks
103
Figure 2-7 Examples of Numalink Configurations in 17U and 39U Racks
105
Major Components of a Base Configuration
106
System Components
106
Major Components of a Numalink Configuration
107
Figure 2-8 Component Example of Numalink Configuration
108
Compute Module
109
Numalink Configuration
104
System Configurations
101
Base Configuration
102
Figure 2-9 Front and Rear Views of Compute Module
110
Numalink Module
111
MPX Module
112
PCI Expansion Devices
113
Figure 2-12 PCI Expansion Module
114
Figure 2-13 PCI Card Slot Numbering on the PCI Expansion Module
115
SGI TP900 Storage Module
116
2Gb SGI TP9100 Storage System
117
Storage Expansion
115
Figure 2-14 SGI TP900 Storage Module
117
Figure 2-15 2Gb SGI TP9100 Storage System
118
Figure 2-16 SGI TP9400 Storage System
119
Tape Devices
120
Table 2-2 Supported Tape Drive Subsystems
121
L2 Controller
123
SGI TP9400 and SGI TP9500 Storage Systems
119
Figure 2-17 L2 Controller
123
Figure 2-18 System Control for Base Configuration
124
Figure 2-19 System Control for Numalink Configuration
124
Figure 2-20 USB Hub
125
Power Components
125
USB Hub
125
Figure 2-21 Power Distribution Unit and Power Strip
126
Figure 2-22 Power Bay Module
127
Figure 2-23 Power Connections for a Sample Origin 350 Server System
128
Rack
129
Figure 2-24 Unit Numbering Within Rack
129
Figure 2-25 Slide Mounting Rails
130
Figure 2-26 L-Shaped Mounting Rails (Shelf Rails)
131
Figure 2-27 Front Views of Short and Tall Racks
132
3 Compute Module
133
System Features
134
Figure 3-1 Front and Side Views of a Compute Module
135
Figure 3-2 Block Diagram of Base Compute Module
139
Figure 3-3 IP53 Node Board
141
Local Memory (Dimms)
142
Primary and Secondary Cache
142
Table 3-2 Dimms and Bank Pairs
143
Figure 3-4 Local Memory Layout
144
Table 3-3 Memory DIMM Specifications
144
Bedrock ASIC
145
IO9 Card
145
Interface Board with a Daughtercard
146
PCI Riser Card
146
Disk Drives
147
DVD-Rom
147
External Components
148
Figure 3-5 Front Panel Items
148
Front Panel Items
148
Power Supplies
148
Figure 3-6 Rear Panel Items
150
Rear Panel Items
150
Internal Configurations
152
System Configuration
152
External Configurations
153
Figure 3-7 System with One Base Compute Module and One MPX Module
154
Figure 3-8 System with a PCI Expansion Module, an MPX Module, a Numalink Module, a System Expansion Compute Module, and a Base Compute Module
155
Technical Specifications
156
Table 3-5 General Features of the Compute Module
157
IP53 Node Board
140
Processors (Cpus)
141
4 Memory and PCI Expansion (MPX) Module
159
System Features
159
Figure 4-1 Front and Side Views of MPX Module
160
Figure 4-2 Local Memory Layout
163
Figure 4-3 Front Panel Items
165
Power Supplies
165
Rear Panel Items
166
Figure 4-4 Rear Panel Items
167
Internal Configurations
168
System Configurations
168
External Configurations
169
Figure 4-5 System with One MPX Module and One Base Compute Module
170
Compute Module
171
Technical Specifications
172
Table 4-2 Memory DIMM Specifications
163
Bedrock ASIC
164
Interface Board
164
PCI Riser Card
164
External Components
165
Front Panel Items
165
IP53 Node Board
161
Local Memory (Dimms)
161
Table 4-1 DIMM Slots and Corresponding Bank Pairs
162
Figure 4-6 System with PCI Expansion Module, MPX Module, Numalink
171
5 Numalink Module
173
Overview
173
Figure 5-1 Block Diagram of Numalink Module
174
Figure 5-2 Front View of Numalink Module
176
Figure 5-3 Rear View of Numalink Module
178
Table 5-3 Bandwidth Characteristics of the Numalink Module
179
Technical Specifications
179
Rear Panel Components
177
External Components
175
Front Panel Components
175
6 Installing and Removing Customer-Replaceable Units
181
Safety Instructions
181
Figure 6-1 PCI and PCI-X Card Slots in the Rear Panel of the Base Compute
183
Module
183
Rules for Card Installation and Removal
184
Installing a Card
184
PCI and PCI-X Cards
183
Figure 6-2 Opening the Cover to Install the Card
185
Figure 6-10 Opening the Cover to Remove the Card
194
Figure 6-11 Removing the Chassis Rail
195
Figure 6-12 Removing the Lower PCI/PCI-X Support Bracket
196
Figure 6-13 Removing the Retaining Screw and Extracting the Card
197
Figure 6-14 Placing a Blanking Plate
198
Figure 6-15 Replacing the Lower PCI/PCI-X Support Bracket
199
Figure 6-16 Replacing the Chassis Rail
200
Figure 6-17 Close and Screw down Cover
201
Figure 6-18 Disk Drive Location
202
Installing a Disk Drive
203
Figure 6-19 Installing a Disk Drive
204
Removing a Disk Drive
205
Figure 6-20 Removing a Disk Drive
206
Figure 6-21 Power Supplies Location
207
Power Supplies
207
Reading the Power Supply Leds
208
Replacing a Power Supply
208
Table 6-1 LED Status and Power Supply Condition
208
Figure 6-22 Removing a Power Supply
210
Figure 6-23 Installing the Power Supply
211
Memory
212
Table 6-2 Dimms and Bank Pairs
212
Figure 6-24 Layout of DIMM Slots and Local Memory Banks
214
Installing a DIMM
215
Figure 6-25 Opening Module Cover to Install Dimms
216
Figure 6-26 Removing the Plastic Air Baffle
217
Figure 6-27 Inserting a DIMM
218
Figure 6-28 Opening Module to Remove DIMM
219
Removing a DIMM
219
Figure 6-29 Removing the Plastic Air Baffle
220
Figure 6-30 Removing a DIMM
221
Figure 6-31 L1 Controller Display on Base Compute Module
222
L1 Controller Display
222
Disk Drives
202
Figure 6-3 Removing the Chassis Rail
186
Figure 6-4 Removing the Lower PCI/PCI-X Support Bracket
187
Figure 6-5 Removing Blanking Plate
188
Figure 6-6 Installing the Card and Installing the Retaining Screw
189
Figure 6-7 Replacing the Lower PCI/PCI-X Support Bracket
190
Figure 6-8 Replacing the Chassis Rail
191
Figure 6-9 Closing the Cover
192
Removing a Card
193
Figure 6-32 Opening the Module to Access the L1 Controller Display
223
Figure 6-33 Removing the L1 Controller Display Panel
224
Figure 6-34 Installing an L1 Controller Display Panel
226
7 Troubleshooting
229
Troubleshooting Chart
230
Table 7-1 Troubleshooting Chart
230
L1 Controller Error Messages
232
Table 7-2 L1 Controller Messages
232
SGI Electronic Support
234
Figure 7-1 Full Support Sequence
234
Technical Specifications
237
Table 3-6 Compute Module Specifications
237
Table 4-4 MPX Module Specifications
237
Table A-10 Numalink Module Specifications
237
Table A-15 Power Bay Module Specifications
237
Table A-17 USB Hub Specifications
237
Table A-4 Compute Module Specifications
237
Table A-6 MPX Module Specifications
237
Table A-8 PCI Expansion Module Specifications
237
Environmental System Specifications
238
Compute Module Specifications
239
Table A-2 Bandwidth Characteristics of the Compute Module
239
Table A-3 General Features of the Compute Module
239
MPX Module Specifications
241
Table A-5 Bandwidth Characteristics of the MPX Module
241
PCI Expansion Module Specifications
242
Numalink Module Specifications
243
Table A-9 Bandwidth Characteristics of the Numalink Module
243
Rack Specifications
244
SGI TP900 Storage Module Specifications
245
Power Bay Module Specifications
246
Non-Proprietary I/O Port Specifications
247
Compute Module
247
Table A-18 Compute Module Connectors
248
USB Hub Specifications
247
Figure A-1 Rear Panel of Compute Module
249
Figure A-2 Non-Proprietary Connectors on Rear Panel of MPX Module
250
Figure A-3 Non-Proprietary Connectors on Rear Panel of L2 Controller
251
L2 Controller
251
Table A-20 L2 Controller Connectors
251
MPX Module
250
Table A-19 MPX Module Connectors
250
Figure A-5 Non-Proprietary Connectors on Rear Panel of TP900 Storage
252
Numalink Module
252
SGI TP900 Storage Module
252
Figure A-6 USB Hub Type a Connectors
253
Figure A-7 DB-9 Connector Pin Assignments
254
Connector
255
Figure A-8 RJ-45 Connector Pin Assignments
255
Table A-21 Ethernet Connector Pin Assignments
255
External SCSI Port Connector
256
Figure A-9 Pin Number Locations for External SCSI Port
256
Table A-22 SCSI VHDCI Pin Assignments
256
Figure A-10 Stereo Jack Connector Conductors
258
Stereo Jack Connector Conductor
258
Table A-23 Conductor Assignments for Stereo Jack Connector
258
Figure A-11 Pin Number Locations for USB Type a Connector
259
Table A-24 Pin Assignments for USB Type a Connector
259
USB Type a Connector
259
Figure A-12 Pin Number Locations for USB Type B Connector
260
Table A-25 Pin Assignments for USB Type B Connector
260
USB Type B Connector
260
Connectors
261
Figure A-13 Pin Number Locations for the PS/2 Keyboard and Mouse
261
PS/2 Connectors
261
Table A-26 Pin Assignments for the PS/2 Connectors
261
DB-9 Connector
254
Figure A-4 Non-Proprietary Connector on Rear Panel of Numalink Module
252
Module
252
USB Hub
253
Regulatory Specifications and Safety Information
263
Manufacturer's Regulatory Declarations
263
Server Model Number
263
CE Notice and Manufacturer's Declaration of Conformity
263
Electromagnetic Emissions
264
FCC Notice (USA Only)
264
Chinese Class a Regulatory Notice
265
Industry Canada Notice (Canada Only)
265
Korean Class a Regulatory Notice
265
VCCI Notice (Japan Only)
265
Shielded Cables
266
Electrostatic Discharge
266
Laser Compliance Statements
266
Lithium Battery Statement
268
Index
269
Advertisement
Advertisement
Related Products
Silicon Graphics InfiniteStorage 3000
Silicon Graphics InfiniteStorage 3500
Silicon Graphics Origin 3900
Silicon Graphics InfiniteStorage 3104
Silicon Graphics Origin 300
Silicon Graphics Origin200
Silicon Graphics Silicon Graphics 330
Silicon Graphics 320
Silicon Graphics SGI Altix 3700 Bx2
Silicon Graphics 1200
Silicon Graphics Categories
Server
Desktop
Monitor
Storage
Computer Hardware
More Silicon Graphics Manuals
Login
Sign In
OR
Sign in with Facebook
Sign in with Google
Upload manual
Upload from disk
Upload from URL