Sign In
Upload
Manuals
Brands
Silicon Graphics Manuals
Speakers
320
Silicon Graphics 320 Manuals
Manuals and User Guides for Silicon Graphics 320. We have
2
Silicon Graphics 320 manuals available for free PDF download: Owner's Manual, Installation Manual
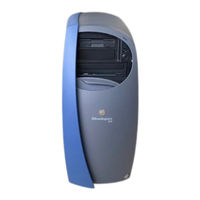
Silicon Graphics 320 Owner's Manual (152 pages)
Visual Workstation
Brand:
Silicon Graphics
| Category:
Desktop
| Size: 3.11 MB
Table of Contents
Table of Contents
3
About this Guide
13
Where to Find Additional Information
14
Customer Support
15
1 Getting Started
17
Checking Your Shipment
18
Figure 1-1 Items Included in Your Shipment
18
Setting up the System
19
Figure 1-2 Back View of the System (Ports Labeled)
19
Figure 1-3 Attaching the Mouse and Keyboard
20
Figure 1-4 Attaching the Ethernet Cable
21
Figure 1-5 Attaching the Monitor and Power Cord
22
Figure 1-6 Checking the Voltage Switch Setting
23
Figure 1-7 Attaching the Power Cord to the System
24
Opening and Closing the Sliding Front Panel
25
Figure 1-8 Opening the Sliding Front Panel
25
Figure 1-9 Locating the Power and Reset Buttons
26
Figure 1-10 Closing the Sliding Front Panel
26
Turning on the System
27
Figure 1-11 Turning on the System
27
Shutting down the System
28
Resetting the System
29
Figure 1-12 Resetting the System
29
2 Opening the System
31
Removing the Covers
32
Removing the Side Cover
32
Figure 2-1 Removing the Side Cover
33
Removing the Front Cover
34
Figure 2-2 Removing the
34
Identifying the Internal Parts
35
Figure 2-3 Interior View of the System
35
Replacing the Covers
36
Figure 2-4 Replacing the
36
Replacing the Front Cover
36
Figure 2-5 Replacing the Side Cover
37
Replacing the Side Cover
37
Locking the System
38
3 Memory
39
About Memory
40
Figure 3-1 Identifying the DIMM Slot Groups
40
Installing Dimms
41
Table 3-1 Possible Memory Configurations
41
Figure 3-2 Identifying the DIMM Slot Groups
42
Figure 3-3 Stabilizing the System with Your Hand
42
Figure 3-4 Installing a DIMM
43
Removing Dimms
44
Verifying and Troubleshooting DIMM Installation
44
Figure 3-5 Identifying the DIMM Slot Groups
45
Figure 3-6 Removing a DIMM
45
4 Internal Drives
47
Configuration and Cabling for Internal Ultra33 EIDE Drives
48
Figure 4-1 Cabling and Configuration for Internal EIDE Drives
48
Installing a Removable Media Drive
49
Figure 4-2 Removing the Sleds from the Side Panel
50
Figure 4-3 Attaching the Sleds to a Removable Media Drive
51
Figure 4-4 Removing a Blank Panel from a Removable Media Drive Slot
51
Figure 4-5 Installing a Removable Media Drive
52
Figure 4-6 Attaching the Cables to a Removable Media Drive
52
Drive Installation
53
Verifying and Troubleshooting Removable Media
53
Figure 4-7 Disconnecting the Cables from a Removable Media Drive
54
Removing a Removable Media Drive
54
Figure 4-8 Removing a Removable Media Drive
55
Figure 4-9 Installing the Blank Panel in a Removable Media Drive Bay
55
Figure 4-10 Disconnecting Cables from an Internal Hard Drive
56
Installing an Internal Hard Drive
56
Figure 4-11 Removing the Internal Hard Drive Bracket
57
Figure 4-12 Attaching an Internal Hard Drive to the Drive Bracket
58
Figure 4-13 Installing the Internal Hard Drive Bracket
59
Figure 4-14 Attaching Cables to an Internal Hard Drive
60
Installation
61
Verifying and Troubleshooting Internal Hard Drive
61
Figure 4-15 Disconnecting Cables from an Internal Hard Drive
62
Removing an Internal Hard Drive
62
Figure 4-16 Removing the Internal Hard Drive Bracket
63
Figure 4-17 Removing a Hard Drive from the Drive Bracket
64
Figure 4-18 Installing the Internal Hard Drive Bracket
65
Figure 4-19 Attaching Cables to an Internal Hard Drive
66
Attaching the SCSI PCI Option Card Internal Cable
67
Figure 4-20 Attaching the SCSI PCI Option Card Internal Cable
67
Disconnecting the SCSI PCI Option Card Internal Cable
68
Figure 4-21 Disconnecting the SCSI PCI Option Card Internal Cable
68
5 Option Cards
69
About PCI Cards
70
Installing a PCI Card
70
Figure 5-1 Removing the Cover Plate from a PCI Card Slot
71
Figure 5-2 Installing a PCI Card
72
Verifying and Troubleshooting PCI Card Installation
73
Removing a PCI Card
73
Figure 5-3 Removing a PCI Card
74
Figure 5-4 Installing a Blank Panel in a PCI Slot
75
Installing the Display Option Card
76
Figure 5-5 Removing the Display Option Slot Cover Plate
76
Figure 5-6 Installing the Display Option Card
77
Removing the Display Option Card
78
Figure 5-7 Installing the Display Option Card Screws
78
Figure 5-8 Removing the Screws from the Display Option Card
79
Figure 5-9 Removing the Display Option Card
79
Figure 5-10 Installing the Display Option Slot Cover Plate
80
6 Processors
81
Installing a Processor
82
Figure 6-1 Removing the Processor Terminator Card
83
Figure 6-2 Processor Count Jumper
84
Table 6-1 Processor Count Jumper Configuration
84
Figure 6-3 Stabilizing the System with Your Hand
85
Figure 6-4 Installing a Processor
85
Figure 6-5 Attaching the Processor Fan Power Supply Cable to the Board
86
Figure 6-6 Installing a Processor Voltage Regulator
86
Figure 6-7 Processor Speed Jumpers
87
Table 6-2 Processor Speed Jumper Positions
87
Verifying and Troubleshooting Processor Installation
88
Removing a Processor
89
Figure 6-8 Detaching the Processor Fan Power Supply Cable from the Board
90
Figure 6-9 Removing a Processor
90
Figure 6-10 Removing the Processor Voltage Regulator
91
Figure 6-11 Installing a Processor Terminator
92
Finding the Stepping Value of a Processor
93
7 Power Supply and Fan
95
Removing the Power Supply
96
Figure 7-1 Disconnecting the Power Supply Cables from the System Module
96
Figure 7-2 Removing the Power Supply Screws and Cables
97
Figure 7-3 Removing the Power Supply from the System
98
Installing the Power Supply
99
Figure 7-4 Installing the Power Supply
99
Figure 7-5 Power Supply Tab
100
Figure 7-6 Installing the Power Supply Screws and Cables
100
Figure 7-7 Attaching the Power Supply Cables to the System Board
101
Installation
102
Removing the Fan
102
Verifying and Troubleshooting Power Supply
102
Figure 7-8 Removing the Fan
103
Figure 7-9 Installing the Fan
104
Installing the Fan
104
8 Maintenance and Troubleshooting
105
Table 8-1 Troubleshooting
105
Troubleshooting
106
Interpreting LED Blink Codes
110
Maintenance Tips
110
Disabling and Enabling the Password
111
Figure 8-1 Password Jumper
111
Figure 8-2 Password Jumper in Disabled Position
111
Figure 8-3 Password Jumper in Enabled Position
112
Technical Specifications
113
Physical Specifications
114
Environmental Range Specifications
114
AC Power
115
Acoustic Noise
115
Table A-1 Environmental Range Specifications
115
Table A-2 AC Power
115
System Board Specifications
116
Table A-3 System Board Specifications
116
Port Information
119
Ethernet RJ45 Port Pinouts
120
Figure B-1 Ethernet Port Pinouts
120
Table B-1 Port and Connector Type
120
Table B-2 Ethernet RJ45 Port Pinouts
120
IEEE 1394 Port Pinouts
121
Figure B-2 IEEE 1394 Port Pinouts
121
Table B-3 IEEE 1394 Port Pinouts
121
USB Port Pinouts
122
Figure B-3 USB Port Pinouts
122
Table B-4 USB Port Pinouts
122
Parallel Port Pinouts
123
Figure B-4 Parallel Port Pinouts
123
Table B-5 Parallel Port Pinouts
123
Serial Port Pinouts
124
Figure B-5 Serial Port Pinouts
124
Table B-6 Serial Port Pinouts
124
Monitor Port Pinouts
125
Figure B-6 Monitor Port Pinouts
125
Table B-7 Monitor Port Pinouts
125
Microphone and Headphone/Speaker Port Pinouts
126
Table B-8 Microphone Pinouts
126
Table B-9 Microphone Port Pinouts
126
Table B-10 Headphone Pinouts
126
Table B-11 Headphone Specifications
126
Analog Line Level Audio Port Pinouts
127
Figure B-7 Analog Line Level Audio Port Pinouts
127
Table B-12 Analog Line Level Audio Specifications
127
Composite Video Port Pinouts
128
Svideo Port Pinouts
128
Figure B-8 Composite Video Port Pinouts
128
Figure B-9 Svideo Port Pinouts
128
PS/2 Mouse Port Pinouts on Keyboard
129
Figure B-10 PS/2 Mouse Port Pinouts on Keyboard
129
Table B-13 PS/2 Mouse Port Pinouts on Keyboard
129
Display Option Card Port Pinouts
130
Figure B-11 Display Option Card Port Pinouts
130
Table B-14 Display Option Card Port Pinouts
130
SCSI Devices
133
Attaching External SCSI Devices
134
Verifying and Troubleshooting SCSI Device Installation
136
Regulatory Information
137
Manufacturer's Regulatory Declarations
137
CMN and Series Numbers
137
FCC Class B Conformance
138
Manufacturer's Declaration of Conformity
138
Electromagnetic Emissions
139
Electrostatic Discharge
140
Shielded Cables
140
CE Notice
141
Industry Canada Notice (Canada Only)
141
VCCI Notice (Japan Only)
141
55022 Compliance (Czech Republic)
142
Korean Regulatory Notice
142
NOM 024 Information (Mexico Only)
142
Polish Notice (Poland Only)
143
Limited Product Warranty
144
Index
147
Advertisement
Silicon Graphics 320 Installation Manual (20 pages)
Brand:
Silicon Graphics
| Category:
Speakers
| Size: 1.34 MB
Table of Contents
Operating Precautions
4
Speaker Specifications
5
Précautions D'emploi
6
Precauciones de Operación
12
Advertisement
Related Products
Silicon Graphics InfiniteStorage 3000
Silicon Graphics Silicon Graphics 330
Silicon Graphics InfiniteStorage 3500
Silicon Graphics Origin 3900
Silicon Graphics InfiniteStorage 3104
Silicon Graphics Origin 350
Silicon Graphics Origin 300
Silicon Graphics SGI Altix 3700 Bx2
Silicon Graphics 39U
Silicon Graphics 540
Silicon Graphics Categories
Server
Desktop
Storage
Monitor
Computer Hardware
More Silicon Graphics Manuals
Login
Sign In
OR
Sign in with Facebook
Sign in with Google
Upload manual
Upload from disk
Upload from URL