Sign In
Upload
Manuals
Brands
Intermec Manuals
Printer
EasyCoder 4100
Intermec EasyCoder 4100 Label Printer Manuals
Manuals and User Guides for Intermec EasyCoder 4100 Label Printer. We have
3
Intermec EasyCoder 4100 Label Printer manuals available for free PDF download: User Manual, Developer's Manual
Intermec EasyCoder 4100 User Manual (282 pages)
Bar Code Label Printer
Brand:
Intermec
| Category:
Printer
| Size: 1.43 MB
Table of Contents
Table of Contents
5
System Commands
11
Before You Begin
19
Warranty Information
19
Safety Summary
19
Warnings and Cautions
20
About this Manual
21
Loading Media
21
Customer Advisory
23
Getting Started
25
Introduction to the 4100 Printer
27
Printing Capabilities
27
Printer Components
28
Printer Component Descriptions (Front View)
29
Printer Component Descriptions (Front Interior)
31
Self-Strip Printing
31
Transfer on Switch
31
Printer Component Descriptions (Rear View)
33
DIP Switches
33
Printer Component Descriptions (Mechanism Detail)
35
Rewind Adapter
35
Printer Options
36
Ribbon Save
36
Cutter
36
Unpacking the 4100
37
Checking the Order for Completeness
37
Reporting Damage or Defects
37
Installing the Front Panel Cover
38
Preparing the Printer for Installation
38
Plugging in the Printer
38
Checking the DIP Switch Settings
39
Opening the Printer
39
Loading Media
39
If You Have Difficulty Feeding the Media
41
Adjusting the Label Gap Sensor
41
Printing Configuration Test Labels
42
What the Configuration Test Labels Tell You
42
Hardware Configuration
43
Forms Adjust
45
Installing the Printer
47
About Printer Installation
49
Preparing for Installation
49
Serial Port
49
Situating the Printer
50
Connecting the Printer to the Host
50
Default (Point-To-Point) Installation
50
About Network Installations
51
Modem Installation Procedure
53
Configuring the Serial Port
54
Serial Port Settings
54
DIP Switch Settings
55
Self-Strip
55
Test and Service Mode
55
Connecting the Printer to a Network
56
Host Requirements
56
Communication Boundaries
56
Communication Protocols
56
Intermec "Standard" Protocol
57
Polling Mode D Protocol
58
Multi-Drop Protocol
58
XON/XOFF Protocol (Software and Hardware / Flow Control)
58
Ready/Busy Protocol
59
User-Defined Protocol
59
Communication Interfaces
60
RS-232C Serial Interface
61
RS-485 Serial Interface
62
RS-422 Serial Interface
63
Printer Serial Port
63
Choosing the Correct Cable
63
Intermec Cables
64
Cable Schematics
64
RS-232 Null Modem Cable for PC
64
RS-232 Null Modem Cable for at
65
RS-485 (Multi-Drop) Cables
66
Cabling Considerations in Noisy Electrical Environments
66
Operating the Printer
69
About Printer Operation
71
Opening and Closing the Printer
71
Opening the Printer
72
Closing the Printer
72
Using the Front Control Panel
72
Loading Media into the Printer
73
Batch Take-Up Printing
73
Straight-Through Printing
73
Straight-Through Printing
74
Self-Strip Printing
76
Repositioning the Tear-Off Plate before Printing
76
Loading the Media
76
Batch Take-Up Printing
78
Installing the Rewind Adapter before Printing
78
Loading the Media
79
Fanfold Printing
80
Adjusting the Label Gap Sensor
81
Adjusting the Label Gap Sensor for die Cut Media
82
Adjusting the Label Gap Sensor for Tag Stock
82
Setting Media Sensitivity
82
Setting the Approximate Sensitivity Rating for Your Media
83
Fine-Tuning the Sensitivity Rating
83
Loading the Thermal Transfer Ribbon
85
Image Band Setting
86
How the Image Bands Command Works
86
Optimizing the Number of Image Bands
86
Modified Field Reimaging
87
Printing Labels
88
Routine Maintenance
89
About Printer Maintenance
91
Safety Precautions
91
Inspecting the Printer
92
Components You Should Maintain
93
Lubrication
94
Cleaning the Printer
94
Cleaning the Drive Roller
94
Cleaning the Media Path
95
Cleaning the Printer Case
95
Cleaning the Printhead
96
Cleaning the Cutter Blades
97
Adjusting the Printhead Support
98
Cutter Blades
98
Adjusting the Printhead Alignment
99
Replacing the Cutter Blade
101
Replacing the Fuse
105
About Troubleshooting
109
Troubleshooting Checklist
109
Printer Operation Problems
110
Print Quality Problems
111
Communication Problems
112
Error Handling
112
Syntax Errors
112
Parameter Errors
112
Image Overrun Errors
113
Invalid Numeric Character Errors
113
Insufficient Storage RAM Errors
113
Error Codes
114
Using Test and Service Mode
116
Cloning
117
Data Line Print
117
Memory Reset
117
Selective Transfer
117
Printing Test Labels
118
Using Data Line Print
118
Performing Cloning
119
Performing Selective Transfer
120
Selective Transfer
120
Using Memory Reset
121
Changing Configuration Commands in Test and Service Mode
122
Test and Service Mode
122
Setting the Number of Dot Increments
123
Adjusting the Label Rest Point
124
Using 86XX Emulation Mode
125
Forms Adjust
127
Setting the X Forms Adjust
128
Setting the y Forms Adjust
129
Using Test and Service Mode Commands
130
Reflective Sensor Value
130
Designing Labels and Using Commands
133
Introduction to Label Design
135
Using Label Formats
135
Communicating with the Printer
138
Using Intermec Label Design Software
138
Using the Printer Command Set
138
Downloading Printer Commands Using DOS
138
Print Command
138
Using a Text Editor or Word Processor to Create Your Label
139
Downloading Printer Commands Using PC Communications Programs or Host Terminals
140
Switching between Print Mode and Program Mode
141
Creating Label Design Components
141
Different Kinds of Fields
142
About Bar Code Symbologies
142
Character Fields and Fonts
146
User-Defined Fonts
147
Downloading Fonts
148
Lines and Boxes
149
Graphics
150
One Bit Per Byte
150
Downloading One Bit Per Byte Graphics
151
Diamond Graphic
152
Six Bits Per Byte
152
Editing Labels and Working with Fields
154
Editing Labels
154
Deleting Fields
155
Scaling Fields
155
Magnifying Fonts and Character Fields
155
Magnifying Bar Code Fields
156
Positioning Fields
156
Rotating Fields
158
Storing Label Formats
159
Designing Pages
159
Format Examples
160
Example 1
160
Example 2
163
Graphic for Example 2
163
Printer Commands
171
Introduction
173
Command Set Summary
173
Summary of
174
86XX Emulation Mode
174
Label Rest Point
177
Start and Stop Codes (Code 39)
179
Status Dump
179
Storage Area Usage
179
Top of Form
179
Transmissive Sensor Value
179
User-Defined Character
179
User-Defined Characters
179
User-Defined Font Character
179
Warm Boot
179
Width of Line, Box, Bar, or Character
179
Using Printer Commands According to Function
180
Program Mode
180
Programming
180
Editing a Page
180
Editing a Format
180
Using
180
Editing
180
Editing a Bar Code Field
181
Editing a Human-Readable Field
181
Editing an Interpretive Field
181
Editing a Line Field
181
Editing a UDC Field
182
Editing a Box Field
182
Editing a UDC
182
Editing a Bitmap User-Defined Field
182
Immediate Commands
182
Editing
182
System Commands
182
Print Mode
183
Print Commands
183
Configuration Commands
183
Transmit Commands
184
Protocol Modification Commands
184
Test and Service Commands
184
Remaining Quantity and Batch Count
184
Immediate Commands
185
Abort Print Job
185
Error Code, Request
185
Label and Gap Length, Transmit
185
Remaining Quantity and Batch Count, Transmit
186
Reset
186
Status Dump
186
Status Enquiry
187
Print Mode Commands
188
86XX Emulation Mode, Select
189
Advanced Mode, Select
189
Alphanumeric Field Separator
189
Batch Count, Set
190
Clear All Data
190
Clear Data from Current Field
191
Command Terminator 1
191
Command Terminator 2
191
Configuration Parameters, Transmit
191
Cut
191
Data Shift - International Characters
192
Field, Select
192
Field Decrement, Set
192
Field Increment, Set
193
First Data Entry Field, Select
193
Font, Transmit
193
Form Feed
194
Format, Select
194
Format, Transmit
195
Increment and Decrement, Disable
195
Next Data Entry Field, Select
195
Numeric Field Separator
196
Options Selected, Transmit
196
Page, Select
196
Page, Transmit
197
Print
197
Printhead Parameters, Transmit
197
Program Mode, Enter
197
Program Number, Transmit
198
Quantity Count, Set
198
Start and Stop Codes (Code 39), Print
198
Storage Area Usage, Transmit
199
Test and Service Mode, Enter
199
User-Defined Characters, Transmit
199
User-Defined Tables, Transmit
200
Warm Boot
200
Configuration Commands
201
86XX or Advanced Mode on Power up
201
Amount of Storage, Define
202
Audible Alarm, Enable or Disable
202
Auto-Transmit 1, Enable
202
Auto-Transmit 2, Enable
203
Auto-Transmit 3, Enable
203
Auto-Transmit 1, 2, and 3, Disable
203
Control Panel Access Permission, Set
204
Cutter, Enable or Disable
204
Dark Adjust, Set
204
End-Of-Print Skip Distance, Set
204
IBM Language Translation, Enable or Disable
205
Intercharacter Delay, Set
205
Interlabel Ribbon Save, Enable or Disable
205
Label Rest Point, Adjust
206
Label Retract, Enable or Disable
206
Label Retract Distance, Set
206
Label Stock Type, Select
207
Label Width, Set
207
Maximum Label Length, Set
207
Media Sensitivity, Select
207
Message Delay, Set
208
Number of Image Bands, Set
208
Online or Offline on Power up
208
Postamble, Set
209
Preamble, Set
209
Print Speed, Set
209
Printer Language, Select
210
Printhead Pressure, Set
210
Printhead Test Parameters, Set
210
Ribbon Save Zones, Set
210
Self-Strip, Enable or Disable
211
Top of Form, Set
211
Program Mode Commands
212
Bar Code, Select Type
213
Upc
216
Bar Code Field, Create or Edit
218
Bitmap Cell Height for Graphic or UDF, Define
219
Bitmap Cell Width for Graphic or UDF, Define
219
Bitmap User-Defined Font, Clear or Define
220
Border Around Human-Readable Text, Define
220
Box Field, Create or Edit
220
Character Bitmap Origin Offset, Define
221
Character Rotation or Bar Code Ratio, Define
221
Code 39 Prefix Character, Define
222
Command Tables, Load
222
Current Edit Session, Save
223
Data Source for Format in a Page, Define
223
Field, Delete
224
Field Data, Define Source
224
Field Direction, Define
225
Field Origin, Define
225
Font Character Width, Define
226
Font Type, Select
226
Format, Create or Edit
227
Format, Erase
227
Format Direction in a Page, Define
227
Format Offset Within a Page, Define
228
Format Position from Page, Delete
228
Format Position in a Page, Assign
228
Graphic Type, Select
228
Graphic or UDC, Define
229
Height Magnification of Bar, Box, or UDC, Define
229
Human-Readable Field, Create or Edit
230
Intercharacter Space for UDF, Define
230
Interpretive Field, Edit
231
Interpretive Field, Enable or Disable
231
Length of Line or Box Field, Define
231
Line Field, Create or Edit
232
Outline Font, Clear or Create
232
Outline Font, Download
232
Page, Create or Edit
233
Page, Delete
233
Pitch Size, Set
233
Point Size, Set
233
Print Line Dot Count Limit, Set
234
Program Mode, Exit
234
User-Defined Character, Clear or Create
234
User-Defined Character Field, Create or Edit
234
User-Defined Font Character, Create
235
Width of Line, Box, Bar, or Character, Define
235
Test and Service Mode Commands
236
User-Defined Interface Tables
237
Print Commands (T=0)
238
Escape Print Commands (T=1)
239
Shift Print Commands (T=2)
240
Status Responses and Auto-Transmit Commands (T=3)
241
Protocol Commands (T=4)
242
Communication Protocol Characters
243
Printer Functional Boundaries
244
Appendix
245
4100 Printer Specifications
247
Dimensions (no Options Installed
247
Electrical Requirements
247
Printing Method
247
Printing Speed
247
Printhead
247
Media Specifications
248
Ribbon Specifications
248
Cutter Specifications
248
Environment
248
Communications
249
Fonts and Graphics
249
Character Sets
249
Bar Code Symbologies
249
Factory Defaults
250
Extended Character Sets
251
International Character Sets
253
ASCII Translation Table
255
Configuration Parameters Upload
256
4100 Printer Options
257
Present Sensor/Self-Strip
257
Memory Expansion
257
Cutter and Tray
257
Ribbon Save
258
Glossary
259
User-Defined Fonts
267
Advertisement
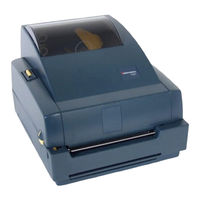
Intermec EasyCoder 4100 Developer's Manual (116 pages)
Intermec Printer Language (IPL)
Brand:
Intermec
| Category:
Printer
| Size: 1.87 MB
Table of Contents
Table of Contents
7
Before You Begin
11
Safety Information
11
Global Services and Support
11
Warranty Information
11
Web Support
11
Telephone Support
12
Service Location Support
12
Who Should Read this Manual
13
Related Documents
13
Introduction to IPL Commands
15
What Is IPL
16
Which Printers Support IPL
16
About IPL Commands
16
Printing Labels with IPL Commands
17
Learning the Structure of IPL Command Strings
17
Using ASCII Control Characters
18
Creating Command Strings
19
Sending IPL Commands to the Printer
20
Switching between Printer Operating Modes
21
Designing Bar Code Labels
23
Introduction to Label Formats
24
About Field Types
24
Human-Readable Fields
25
Bar Code Fields
25
Line and Box Fields
26
User-Defined Character or Graphic Fields
26
Working with Fields
26
Editing Field Zero (H0)
26
Numbering Fields in a Format
27
About Interpretive Fields and Field Locations
27
Editing Existing Fields
28
Deleting Fields
29
Positioning Fields
29
Rotating Fields
30
Scaling Fields
31
Magnifying Fonts and Character Fields
31
Magnifying Bar Code Fields
32
Specifying Data for Fields
32
Example of Constant Data
33
Example of Changing Data
33
Example Using the "Next Data Entry Field, Select" Command
34
Working with RFID Tags
35
How to Write Data to an RFID Tag
35
How Data Is Stored on an RFID Tag
36
Writing Hex or ASCII Formats
36
Writing Numerical Formats
36
Creating a Sample Label Format
36
Positioning Fields in a Label Format
37
Creating Command Strings for the Label Format
38
Printing the Sample Label
42
Complex Label Design Examples
42
Example with Lines and Boxes
42
Example with Graphics and Rotated Fields
44
RFID Tag Example
47
Working with Fonts and Graphics
51
Learning about Fonts
52
About Bitmap Fonts
52
About Outline Fonts
52
Choosing a Font
53
Downloading Fonts to the Printer
53
Using Printset to Download Fonts
53
Using IPL Commands to Download Fonts
54
Downloading Bitmap Fonts
54
Downloading Outline Fonts
54
Using Truetype Fonts
55
Selecting the Printer Language
55
Truetype Fonts and Memory Usage
55
Installing Asian Fonts
56
Installing Code Page Tables for Asian Scalable Fonts
56
Installing Asian Bitmap Fonts
57
Licensing Your Fonts
58
Creating Bitmap Fonts from Truetype Fonts
58
Creating User-Defined Characters and Fonts
58
Creating User-Defined Characters for Emulation Mode
59
Creating User-Defined Fonts for Emulation Mode
62
Creating User-Defined Characters for Advanced Mode
63
Creating User-Defined Font Characters for Advanced Mode
68
Advanced Printer Programming
71
Using the Printer Memory Efficiently
72
How Is the Printer Storage Memory Used
72
Making the most of Your Storage Memory
72
Reimaging Modified Fields
73
Using Emulation Mode
73
Using Direct Graphics Mode
77
What Is Run-Length Encoding
78
Immediate Commands
78
Compression Encoding Commands
78
Low Order Data
79
High Order Data
79
Bitmap Data
79
Example of Direct Graphics Commands
79
Designing Pages
81
Troubleshooting
83
Troubleshooting Checklist
84
How the Printer Handles Error Conditions
84
Syntax Errors
84
Parameter Errors
84
Image Overrun Errors
85
Invalid Numeric Character Errors
85
Insufficient Storage Memory Errors
85
Interpreting Error Codes and Solving Problems
86
Printing Labels with 86XX-Compatible Code 39
88
Full ASCII Tables and International Character Sets
89
Full ASCII Table
90
Full ASCII Control Characters Table
92
International Character Sets
93
Advanced Character Table
93
86XX Character Table
93
IBM Translation Character Table
94
Code Page 850 Character Table
95
Extended Character Sets
96
Characters in Fonts C0, C1, C2, and C7
96
Characters in Fonts C20, C21, and C22
97
Characters in Font C23
98
Characters in Font C24
99
Characters in Fonts C25, C26 and C28
100
User-Defined Interface Tables
101
Print Commands (T = 0)
102
Escape Print Commands (T = 1)
103
Shift Print Commands (T = 2)
104
Status Responses and Auto-Transmit Commands (T = 3)
105
Protocol Commands (T = 4)
106
Communications Protocol Characters
107
Index
109
Intermec EasyCoder 4100 User Manual (64 pages)
Installing EasyCoder Printers in Microsoft Windows
Brand:
Intermec
| Category:
Printer
| Size: 0.66 MB
Advertisement
Advertisement
Related Products
Intermec 4820
Intermec 4820F
Intermec EasyCoder 401
Intermec EasyCoder 4420e
Intermec EasyCoder 4440e
Intermec EasyCoder 4420
Intermec EasyCoder 4440
Intermec EasyCoder PD4
Intermec EasyCoder 501S
Intermec EasyCoder 601XP
Intermec Categories
Printer
Handhelds
PDA
Barcode Reader
Printer Accessories
More Intermec Manuals
Login
Sign In
OR
Sign in with Facebook
Sign in with Google
Upload manual
Upload from disk
Upload from URL