Xerox Phaser 6000 Service Manual
Color laser printer/multi-funtion printer
Hide thumbs
Also See for Phaser 6000:
- User manual (82 pages) ,
- Service manual (24 pages) ,
- Quick use manual (5 pages)

Related Manuals for Xerox Phaser 6000


Summary of Contents for Xerox Phaser 6000
-
Page 1: Service Manual
Phaser 6000/6010/6015 ® Color Laser Printer/Multi-Funtion Printer Phaser 6000/6010 Printer ® & WorkCentre 6015 MFP Service Manual Xerox Internal-Use Only... - Page 3 The following servicing instructions are for use by qualified service personnel only. To avoid personal injury, do not perform any servicing other than that contained in the operating instructions, unless you are qualified to do so. First Printing: March 2011 Xerox Internal Use Only...
- Page 4 Xerox technical training materials and service manuals are intended for use by authorized Xerox service technicians and service partners only and are not for resale. These materials may not be distributed, copied, or otherwise reproduced without prior written consent from Xerox Corporation.
-
Page 5: Table Of Contents
Fusing ..................2-15 Phaser 6000/6010 and WC 6015 MFP... - Page 6 Phaser 6000B Errors ................3-18 Xerox Internal Use Only Phaser 6000/6010 and WC 6015 MFP...
- Page 7 Copy Limit ..................3-78 Phaser 6000/6010 and WC 6015 MFP...
- Page 8 WorkCentre 6015 MFP Fax/Scanner Diagnostic Test Procedures ........4-60 Xerox Internal Use Only Phaser 6000/6010 and WC 6015 MFP...
- Page 9 Phaser 6000/6010 Test Prints ........
- Page 10 Phaser 6000/6010 Color Registration With the Printer Setting Utility ......6-3...
- Page 11 Feed Solenoid .................8-98 Phaser 6000/6010 and WC 6015 MFP...
- Page 12 Parts List 7.1 Phaser 6000/6010 Electrical (1/2)........
- Page 13 Phaser 6000/6010 Image Processor Board ........
- Page 14 Contents Xerox Internal Use Only Phaser 6000/6010 and WC 6015 MFP...
-
Page 15: About This Service Manual
About this Service Manual The Phaser 6000/6010 and WC 6015 MFP Service manual is the primary document used for repairing, maintaining, and troubleshooting the printers. Use this manual as your primary resource for understanding the operational characteristics of the printer and all available options. This manual describes specifications, theory, and the diagnosis and repair of problems occurring in the printer. -
Page 16: Manual Organization
Manual Organization The Phaser 6000/6010 and WC 6015 MFP Service Manual contains these sections: Introductory, Safety, and Regulatory Information: This section contains important safety information and regulatory requirements. Chapter 1 - General Information: This section contains an overview of the printer’s operation, configuration, specifications, and consumables. -
Page 17: Symbols Marked On The Product
Caution: A personal injury hazard exists that may not be apparent. For example, a panel may cover the hazardous area. Danger: A personal injury hazard exists in the area where you see the sign. Phaser 6000/6010 and WC 6015 MFP Xerox Internal Use Only... -
Page 18: Power Safety Precautions
• if the printer is dropped or damaged, • if you suspect that the product needs servicing or repair, • whenever you clean the product. Xerox Internal Use Only Phaser 6000/6010 and WC 6015 MFP... -
Page 19: Electrostatic Discharge (Esd) Precautions
Handle ICs and Erasable Programmable Read-Only Memories (EPROM’s) carefully to avoid bending pins. • Pay attention to the direction of parts when mounting or inserting them on Circuit Boards. Phaser 6000/6010 and WC 6015 MFP Xerox Internal Use Only xvii... -
Page 20: Service Safety Summary
Make sure all covers are in place and the Interlock Switch is functioning correctly after you have completed a printer service call. If you bypass an Interlock Switch during a service call, use extreme caution when working on or around the printer. xviii Xerox Internal Use Only Phaser 6000/6010 and WC 6015 MFP... - Page 21 There is a danger of a new battery exploding if it is incorrectly installed. Replace the battery with the same or equivalent type. Dispose the battery according to the manufacture’s instruction. IP Board s6015-042 Phaser 6000/6010 and WC 6015 MFP Xerox Internal Use Only...
- Page 22 This printer uses heat to fuse the image to the media. During operation, the Fuser is very hot. Allow at least 5 minutes for the Fuser to cool before you attempt to service the Fuser or adjacent components. Xerox Internal Use Only Phaser 6000/6010 and WC 6015 MFP...
-
Page 23: Regulatory
• Consult the dealer or an experienced radio/television technician for help. Any changes or modifications not expressly approved by Xerox could void the user's authority to operate the equipment. To ensure compliance with Part 15 of the FCC rules, use shielded interface cables. -
Page 24: European Union
European Union The CE mark applied to this product symbolizes Xerox’s Declaration of Conformity with the following applicable Directives of the European Union as of the dates indicated: December 12, 2006: Low Voltage Directive 2006/95/EC December 15, 2004: Electromagnetic Compatibility Directive 2004/108/EC March 9, 1999: Radio Equipment &... -
Page 25: General Information
General Information In the chapter..• Printer Overview • Printer Configurations • Parts of the Printer • Consumables • Specifications Chapter... -
Page 26: Printer Overview
General Information Printer Overview The Xerox Phaser Phaser 6000/6010 and WC 6015 MFPs have a LED xerography color tandem print engine. These printers offers print speeds of 10-15 pages-per- minute (ppm), and resolutions up to 600 x 600 dots-per-inch (dpi). -
Page 27: Printer Configurations
General Information Printer Configurations The following tables list the configurations of the Phaser 6000/6010 Printers and the WorkCentre 6015 MFPs. Phaser 6000/6010 Printer Configurations Features Phaser 6000B Phaser 6010N Processor Speed 192 MHz 384 MHz Memory 64 MB 128 MB... -
Page 28: Parts Of The Printer
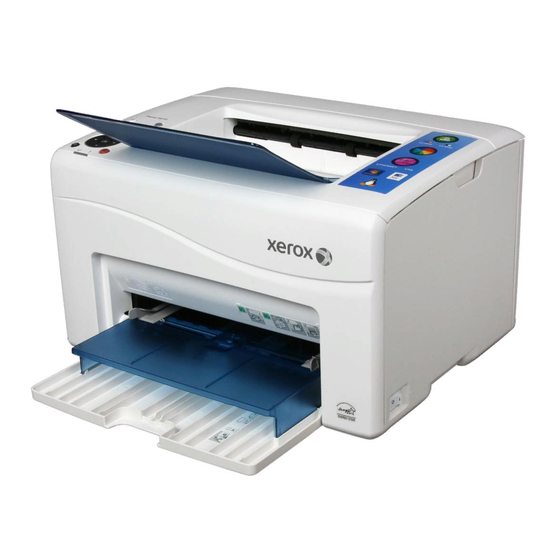
Output Tray Extension Front Cover Handle Toner Cartridges Bypass Tray Feeder Guides (6010N and WorkCentre 6015 MFP only) Bypass Tray (6010N an Control Panel WorkCentre 6015 MFP only) Main Paper Tray Xerox Internal Use Only Phaser 6000/6010 and WC 6015 MFP... - Page 29 LED Cleaning Rod Platen Cover Power Switch Output Tray Front Cover Output Tray Extension Main Paper Tray Control Panel Main Tray Extension ADF Input Tray USB Connector Toner Door Handle Phaser 6000/6010 and WC 6015 MFP Xerox Internal Use Only...
-
Page 30: Rear View
General Information Rear View Phaser 6000/6010 Printer s6000-172 Item Description Rear Door USB Port Network Port (6010N only) Power Receptacle Xerox Internal Use Only Phaser 6000/6010 and WC 6015 MFP... - Page 31 Item Description Item Description Rear Door Fuser Levers Transfer Roller Rear Door Latch Separator Pad Assembly USB Port Registration Pinch Roller Ethernet Port (6015N/NI models only) Transfer Belt Power Receptacle Phaser 6000/6010 and WC 6015 MFP Xerox Internal Use Only...
-
Page 32: Control Panel
Magenta Toner LED Yellow Toner LED Power Saver LED OK LED Jam LED Error LED Cancel button For more information on the 6000B Control Panel, see “Phaser 6000B Errors” on page 3-18. Xerox Internal Use Only Phaser 6000/6010 and WC 6015 MFP... - Page 33 Indicates the amount of toner left in each Toner Cartridge. Arrow Buttons Use to navigate the menu. OK Button Enter current setting/confirm current selection. Cancel Button Cancels print job. Error LED When illuminated, indicates a printer error. Phaser 6000/6010 and WC 6015 MFP Xerox Internal Use Only...
- Page 34 Indicates printer status, warnings, and error messages. Color Mode Switch color mode (Color/B&W) for Copy and Scan. Button B/W, Color Upper LED indicates Black and White mode. Lower indicator LEDs LED indicates Color mode. 1-10 Xerox Internal Use Only Phaser 6000/6010 and WC 6015 MFP...
- Page 35 Indicates the status of the printer – power and ready-to-print. Error LED When illuminated, indicates a printer error. Address Book Move to Address Book menu for Fax and E-mail. button Back button Move back to previous screen. Phaser 6000/6010 and WC 6015 MFP Xerox Internal Use Only 1-11...
- Page 36 Color Mode Switch color mode (Color/B&W) for Copy and Scan. Button Black and Upper LED indicates Black and White mode. Lower White/Color LED indicates Color mode. indicator LEDs 1-12 Xerox Internal Use Only Phaser 6000/6010 and WC 6015 MFP...
-
Page 37: Consumables
Standard Capacity 1000 pages a. Declared cartridge yield in accordance with ISO/IEC 19798 and ISO/IEC 24712 Toner Cartridge (K) Toner Cartridge (C) Toner Cartridge (M) Toner Cartridge (Y) s6000-020 Phaser 6000/6010 and WC 6015 MFP Xerox Internal Use Only 1-13... - Page 38 General Information Toner Cartridges (C, M, Y, K) s6015-063 1-14 Xerox Internal Use Only Phaser 6000/6010 and WC 6015 MFP...
-
Page 39: Specifications
Protocol: Hi-speed USB 2.0 compatible Phaser 6010N USB 2.0 Connector Type: One Type B Protocol: Hi-speed USB 2.0 compatible Ethernet Connector Type: One RJ-45 connector 10 BASE-T/100 BASE-TX compatible Phaser 6000/6010 and WC 6015 MFP Xerox Internal Use Only 1-15... - Page 40 2008 Server (32/64 bit), 2008R2 (64 bit) Linux Supported Memory Specifications Memory Phaser 6000B Main Memory: 64 MB Flash ROM: 2 MB Phaser 6010N Main Memory: 128 MB Flash ROM: 8 MB 1-16 Xerox Internal Use Only Phaser 6000/6010 and WC 6015 MFP...
-
Page 41: Copy Specifications
5 Levels Auto Fit On, Off Cloning On, Off Watermarks Documents can be printed with pre-registered watermarks. Copy Mode Color (default) The following modes are available Text/Photo (default) Photo Text Phaser 6000/6010 and WC 6015 MFP Xerox Internal Use Only 1-17... -
Page 42: Scanning Specifications
Local (USB) Scanning Scan Interface TWAIN, WIA 2.0 Resolution Up to 4800 dpi Network Scanning Scan Interface TWAIN, WIA 2.0 Color Mode Color, Black & White Original Type Text, photo, mixed 1-18 Xerox Internal Use Only Phaser 6000/6010 and WC 6015 MFP... - Page 43 215.9 mm x 355.6 mm (8.5” x 14”) Scanning Halftone Level Output from the CCD has the B/W: 1 bit for Line art and 8 bit for grayscale. following halftone levels. Color: 24 bit. Phaser 6000/6010 and WC 6015 MFP Xerox Internal Use Only 1-19...
-
Page 44: Fax Specifications (Workcentre 6015N/Ni Color Mfp)
Settings: OFF, Forward only, or Print & Forward. Walk-up Fax Incoming Call Control Telephone Mode, Auto Receive, iFax, Tel/Fax, Ans/Fax, DRPD Color Fax Not supported Resolution Standard, Fine, Super Fine, and Ultra Fine 1-20 Xerox Internal Use Only Phaser 6000/6010 and WC 6015 MFP... - Page 45 Same as printer driver. Watermark Same as printer driver. Phone Book Up to 500 Speed Dial Numbers and up to 500 Group Dial. Local phone book stored on PC. Secure Receive Supported Phaser 6000/6010 and WC 6015 MFP Xerox Internal Use Only 1-21...
- Page 46 Image Modem A/D Conversion Unit Conversion (Modulation) Sending FAX Analog signal Telephone line Control Circuit Receiving FAX Modem conversion A/D Conversion Unit (demodulation) Digital signal Printer Print Printing s6015-033 1-22 Xerox Internal Use Only Phaser 6000/6010 and WC 6015 MFP...
-
Page 47: Environmental Specifications
WorkCentre 6015N Color MFP ADF 65.0 dB in use WorkCentre 6015NI Color MFP ADF 65.0 dB in use Standby WorkCentre 6015 MFP all models 43.0 dB Power Save Mode (all models) Background level Phaser 6000/6010 and WC 6015 MFP Xerox Internal Use Only 1-23... -
Page 48: Electrical Specifications
7 W or less WorkCentre 6015 MFP (full option model) a. See the Rating label on the machine for the correct voltage, frequency (hertz), and current for your machine. 1-24 Xerox Internal Use Only Phaser 6000/6010 and WC 6015 MFP... -
Page 49: Image Specifications
The printer is in standby status, ready to run. Fusing Kept at standby temperature. Exposure The system is at Pause. system Recording The system is at Pause. system Cooling fan The fan operates at low speed. Phaser 6000/6010 and WC 6015 MFP Xerox Internal Use Only 1-25... -
Page 50: First Print Output Time
27 seconds or 52 seconds or 52 seconds or 6010N, less less less WorkCentre Black and 22 seconds or 47 seconds or 47 seconds or 6015 MFPs white less less less 1-26 Xerox Internal Use Only Phaser 6000/6010 and WC 6015 MFP... -
Page 51: First Copy Output Time (Workcentre 6015 Mfp)
Paper source: Feed from the standard paper tray • Paper type: Standard paper • Paper size: A4 • Mode: Standard mode (Factory default) FCOT: • Color: 37 seconds or less • B/W: 24 seconds or less Phaser 6000/6010 and WC 6015 MFP Xerox Internal Use Only 1-27... -
Page 52: Physical Dimensions And Clearances
General Information Physical Dimensions and Clearances Phaser 6000/6010 Printer Dimensions and Weight 29.5 cm (11.6 in.) 10 cm (3.9 in.) 30 cm (12.1 in.) 33 cm (13 in.) s6000-021 Print Engine Specification Height (Output Tray open) 294 mm (11.7 in.) Width 394 mm (15.5 in.) - Page 53 Depth (Main Paper Tray closed) 379 mm (14.92 in.) Weight (Toner cartridges installed) WorkCentre 6015B Color MFP 14.95 kg (32.96 lb.) ± 5% WorkCentre 6015N Color MFP 15.2 kg (33.51 lb.) ± 5% Phaser 6000/6010 and WC 6015 MFP Xerox Internal Use Only 1-29...
-
Page 54: Mounting Surface Specifications
5 mm Max s6000-184 Failure to adhere to the specified mounting specification will void all guarantees of print-quality and/or performance. 1° or 7 mm 1° or 7 mm s6015-048 1-30 Xerox Internal Use Only Phaser 6000/6010 and WC 6015 MFP... -
Page 55: Media And Tray Specifications
Media recommended for use with this printer is known as standard paper. The feed performance, reliability, and print quality satisfy the specifications. The following table lists supported media for the Phaser 6000/6010 and WC 6015 MFP printers. Supported Media Sizes... -
Page 56: Adf Specifications
210.0 mm (8.27") Max: Fast scan direction 215.9 mm (8.5") x Slow scan direction 355.6 mm (14") Paper Weight 60 g/m to 105 g/m Feeding Order Top to bottom feed 1-32 Xerox Internal Use Only Phaser 6000/6010 and WC 6015 MFP... -
Page 57: Theory Of Operation
Theory of Operation In this chapter... • Print Process Overview • Media Handling • Major Printer Components • Operation Modes / Consumables • Control • Main Drive Assembly Chapter... -
Page 58: Print Process Overview
Theory of Operation Print Process Overview The Phaser 6000/6010 and WC 6015 MFPs are LED-based full-color xerographic printers operating on a tandem printing system that has four color-specific drum/developer sets for Yellow, Magenta, Cyan, and Black (YMCK). The four color-separated images of the original document are created with toner on the drums and then transferred in registration onto the transfer belt (IBT = Intermediate Belt Transfer) to reproduce a full color image. - Page 59 (d) Primary Transfer Charging (Drum Belt) Exposure Development Neutralization Xerographic Cleaning Developer Assembly (C) (d) Primary Transfer Charging (Drum Belt) Exposure Development Xerographic (h) Cleaning (2) Fusing Developer Cleaning Assembly (K) s6000-022 Phaser 6000/6010 and WC 6015 MFP Xerox Internal Use Only...
-
Page 60: Xerograhic Components
[(6) Secondary Transfer] Belt 1st BTR [(4) Primary transfer] Drum Cleaning Blade [(5) Cleaning] Magnet Roller [(3) Development] [(1) Charging] LED Print Head Cleaning Roll [(2) Exposure] [(5) Cleaning] s6000-023 Xerox Internal Use Only Phaser 6000/6010 and WC 6015 MFP... - Page 61 The cleaning roller is a sponge that contacts the BCR to catch the toner. Photoreceptor : Positive electric charge : Negative electric charge Conductor Drum HVPS Cleaning Roll Electric Potential Drum Surface on Drum s6000-024 Phaser 6000/6010 and WC 6015 MFP Xerox Internal Use Only...
- Page 62 These sections with lowered surface potential form the electrostatic latent image. Xerox Internal Use Only Phaser 6000/6010 and WC 6015 MFP...
- Page 63 : Positive Electric Charge Conductor : Negative Electric Charge Drum Drum Surface (LED Lights) Electrostatic Latent Image Drum Concept Potential On Drum Surface Electrostatic LED Lights (LED Lights) Latent Image Photoreceptor Conductor s6000-057 Phaser 6000/6010 and WC 6015 MFP Xerox Internal Use Only...
- Page 64 The toner in the Toner Cartridge is fed into the imaging unit by an auger. The auger is driven by the Toner Motor. Toner Cartridge Auger Imaging Unit Auger Toner Motor s6000-058 Xerox Internal Use Only Phaser 6000/6010 and WC 6015 MFP...
- Page 65 The AC voltage shakes the developer on the surface of the magnet roller so that the toner easily flies to the drum. Phaser 6000/6010 and WC 6015 MFP Xerox Internal Use Only...
- Page 66 : Negative electric charge Belt : Toner 1st BTR (Y) 1st BTR (M) 1st BTR (C) 1st BTR (K) Drum (Y) Drum (M) Drum (C) Drum (K) HVPS s6000-060 2-10 Xerox Internal Use Only Phaser 6000/6010 and WC 6015 MFP...
-
Page 67: Drum Cleaning
(see “Waste Toner Collection” on page 2-16). : Toner Drum Cleaning Blade Cleaning Roller s6000-061 Phaser 6000/6010 and WC 6015 MFP Xerox Internal Use Only 2-11... - Page 68 HVPS and the Transfer Roller grounded and positively polarized. : Positive electric charge Paper : Negative electric charge : Toner Belt Back Up Roller 2nd BTR HVPS Drum Surface Belt Surface Excess Toner s6000-062 2-12 Xerox Internal Use Only Phaser 6000/6010 and WC 6015 MFP...
- Page 69 The eliminator is a metal sheet that is held at the ground level. The eliminator is installed several millimeters away from the backside of the belt. Paper : Positive electric charge : Negative electric charge : Toner Belt Eliminator 2nd BTR s6000-063 Phaser 6000/6010 and WC 6015 MFP Xerox Internal Use Only 2-13...
- Page 70 Black Toner Cartridge (see “Waste Toner Collection” on page 2-16). : Positive electric charge : Negative electric charge : Toner Cleaning Blade Belt 2nd BTR Back Up Roll HVPS s6000-064 2-14 Xerox Internal Use Only Phaser 6000/6010 and WC 6015 MFP...
-
Page 71: Fusing
The belt assembly, friction-driven by the heat roller, nips the print media against the heat roller using the pressurizing mechanism it contains. Paper Belt Assembly Fixed toner Spring Nip Heat Roller Heat Lamp Unfixed Toner s6000-065 Phaser 6000/6010 and WC 6015 MFP Xerox Internal Use Only 2-15... -
Page 72: Waste Toner Collection
Black Toner Cartridge via the auger in the Black imaging unit. Toner Cartridge (K) Transfer Belt Drum Cleaning Auger (K) Waste Toner Bottle (K) Belt Cleaning Blade Belt Cleaning Auger s6000-078 2-16 Xerox Internal Use Only Phaser 6000/6010 and WC 6015 MFP... -
Page 73: Media Handling
IBT Belt Assembly Motor Drive / Belt / 2nd BTR Fuser Assembly Motor Drive / Heat Roller / Pressure Belt Exit Roller in the Fuser Assembly Top Cover s6000-079 Phaser 6000/6010 and WC 6015 MFP Xerox Internal Use Only 2-17... -
Page 74: Media Path Components
Transfer Belt [Belt Assy IBT] Transfer Roller Rubber Registration Roller [Regi Assy] Registration Pinch Roller [Regi Assy] Feed Roller Registration Sensor No Paper Sensor [Regi Assy] Separator Roller s6000-080 2-18 Xerox Internal Use Only Phaser 6000/6010 and WC 6015 MFP... -
Page 75: Feeding From The Main Paper Tray
Left Follower Arm and Right Follower Arm to the position for sheet feeding. Feed Roller Separator Roller Bottom Plate Assembly Right Cam Right Arm Left Cam Left Arm Feed Solenoid Bottom Plate Assembly Multipurpose Feeder s6000-081 Phaser 6000/6010 and WC 6015 MFP Xerox Internal Use Only 2-19... - Page 76 The Separator Pad is pushed toward the Feed Roller by spring pressure, and is controlled by the torque limiter (Friction Clutch) with which it is coupled. Feed Roller Separator Roller Bottom Plate Assembly Friction Clutch Separator Roller s6000-082 2-20 Xerox Internal Use Only Phaser 6000/6010 and WC 6015 MFP...
-
Page 77: Feeding From The Bypass Tray
Feed Roller, and are given the higher priority in feeding if both the Main Paper Tray and the Bypass Tray are loaded. Feed Roller Paper (PSI) Paper (MPF) Separator Roller Bottom Plate Feed Solenoid Bypass Tray s6000-083 Phaser 6000/6010 and WC 6015 MFP Xerox Internal Use Only 2-21... -
Page 78: Feeding In Registration Section
When the sheet reaches the registration section, its lead-edge position is adjusted (see “Lead-edge Registration” on page 2-23), and then the sheet is forwarded to the toner transfer section (Transfer Roller). Registration Roller Paper Registration Roller Registration Clutch s6000-084 2-22 Xerox Internal Use Only Phaser 6000/6010 and WC 6015 MFP... - Page 79 By pushing the edge of the sheet against the Registration Roller that is not turning, the lead edge of the sheet is registered. Registration Roller Registration Pinch Roller Registration Rollers Skewed Paper s6000-085 Phaser 6000/6010 and WC 6015 MFP Xerox Internal Use Only 2-23...
-
Page 80: Transfer/Fusing/Exit
At the exit section, the sheet is ejected by the Fuser’s exit roller. The exit roller is driven by the Main Drive Assembly. Exit Roller Pressure Belt Transfer Roller Heat Roller Transfer Belt s6000-086 2-24 Xerox Internal Use Only Phaser 6000/6010 and WC 6015 MFP... -
Page 81: Major Printer Components
Process Control Sensors • LED Print Head • Toner Cartridge • Xerographic Assembly • Fuser & Exit • Drive Assemblies • Electrical • Scanner • Automatic Document Feeder (ADF) Phaser 6000/6010 and WC 6015 MFP Xerox Internal Use Only 2-25... -
Page 82: Sensors
K Mode Sensor s6000-140 WorkCentre 6015 MFP Sensors Exit Sensor CRUM K CRUM C CRUM M Interlock CRUM Y Switch Registration Sensor No Paper Sensor K Mode Sensor s6015-033 2-26 Xerox Internal Use Only Phaser 6000/6010 and WC 6015 MFP... -
Page 83: Main Paper Tray
When sheets are fed, the bottom plate rises to the position where sheets can be fed (see “Feeding from the Main Paper Tray” on page 2-19). Separator Holder Right Side Guide Bottom Plate Left Side Guide Tray Extension s6000-087 Phaser 6000/6010 and WC 6015 MFP Xerox Internal Use Only 2-27... -
Page 84: Paper Feeder
“Main Drive Assembly” on page 2-68. • Feed Roller When the Feed Solenoid operates, the Feed Roller starts rotating to feed the print medium. See “Main Drive Assembly” on page 2-68. 2-28 Xerox Internal Use Only Phaser 6000/6010 and WC 6015 MFP... - Page 85 (No sheets: Sensor beam is received.) No Paper Actuator No Paper Actuator (No Paper Position) Paper No Paper Sensor No Paper Sensor Bottom Plate Bottom Plate No Paper Actuator No Paper Sensor s6000-173 Phaser 6000/6010 and WC 6015 MFP Xerox Internal Use Only 2-29...
-
Page 86: Registration Assembly
The Registration Clutch transmits the driving torque from the Main Drive Assembly to the Registration Roller to feed the sheet from the Main Paper Tray, or Bypass Tray, to the Fuser. See “Main Drive Assembly” on page 2-68. 2-30 Xerox Internal Use Only Phaser 6000/6010 and WC 6015 MFP... - Page 87 To place the toner image at an appropriate position on the sheet, the timing of feeding from the Registration Assembly is adjusted by the duration for which the Registration Clutch operates. Registration Pinch Roller Registration Roller Registration Clutch Registration Sensor s6000-089 Phaser 6000/6010 and WC 6015 MFP Xerox Internal Use Only 2-31...
-
Page 88: Process Control Sensors
MOB (Mark On Belt sensor) Sensor Detects misregistration among the YMCK colors based on the marks created on the rear side of the Belt. Transfer Belt ADC Sensor MOB Sensor s6000-090 2-32 Xerox Internal Use Only Phaser 6000/6010 and WC 6015 MFP... -
Page 89: Led Print Head
A circuit board that distributes signals from the LED Driver Board to the LPH. LPH Assembly (K) LPH Assembly (C) LPH Assembly (M) LPH Assembly (Y) Bottom View ASIC PWB LPH Assembly s6000-091 Phaser 6000/6010 and WC 6015 MFP Xerox Internal Use Only 2-33... -
Page 90: Toner Cartridge
Yellow and Magenta, and a motor for driving the augers for Cyan and Black. Connector CRUMs (Y, M, C, K) Toner Cartridges Dispense Motor (Y/M) Dispense Motor (C/K) (Y, M, C, K) s6000-102 2-34 Xerox Internal Use Only Phaser 6000/6010 and WC 6015 MFP... -
Page 91: Xerographic Assembly
The drums are exposed to LED light to create latent images for each of Yellow, Magenta, Cyan, and Black. • Bias Charge Roller (BCR) Charges the drum electrically. • Cleaning Roller Removes the toner remaining on the BCR. Phaser 6000/6010 and WC 6015 MFP Xerox Internal Use Only 2-35... -
Page 92: Transfer Belt
Attracts the toner image on the drum to the transfer belt by positively charging the transfer belt from the backside. • Transfer Belt Receives the four color-separated toner images from each drum in registration with one another. 2-36 Xerox Internal Use Only Phaser 6000/6010 and WC 6015 MFP... -
Page 93: Fuser & Exit
Scrapes off the excess toner remaining on the transfer belt. Fuser & Exit Heat Roller Pressure Belt Heater Lamp Front Thermostat Temperature Sensor (Contact Type) Fuser Fuser Exit Sensor s6000-105 Phaser 6000/6010 and WC 6015 MFP Xerox Internal Use Only 2-37... -
Page 94: Major Functions
• Fuser Exit Sensor Detects whether the fused print has passed through the Fuser based on the change of the actuator position. (Sheet passed: Sensor beam received.) 2-38 Xerox Internal Use Only Phaser 6000/6010 and WC 6015 MFP... -
Page 95: Drive Assemblies
MU Drive Assembly An assembly that rotates the transfer belt, drums (YMCK), and the augers and magnet rolls in the Developer Drive Assembly by the torque from the Main Drive Assembly. Phaser 6000/6010 and WC 6015 MFP Xerox Internal Use Only 2-39... - Page 96 Drive To Magnet Roller (Y), (M), (C) Flange D4 Flange D4 Gear D4 In Actuator K Gear D4 Out (Full Color Mode Position) Drive From Main Drive Switching Sensor s6000-107 2-40 Xerox Internal Use Only Phaser 6000/6010 and WC 6015 MFP...
- Page 97 Switching Solenoid Cutting Off Drive Flange D4 Flange D4 Gear D4 In Actuator K Gear D4 Out (Black And White Mode Position) Drive From Main Motor Switching Sensor s6000-108 Phaser 6000/6010 and WC 6015 MFP Xerox Internal Use Only 2-41...
-
Page 98: Electrical
Theory of Operation Electrical Major Functions • Exhausts heat out of the printer. Front Main Fan Rear Main Fan s6000-109 2-42 Xerox Internal Use Only Phaser 6000/6010 and WC 6015 MFP... - Page 99 USB or Ethernet port to image data suitable for the LED Driver Board. • LED Driver Board The LED Driver Board generates image signals for the LPHs. Phaser 6000/6010 and WC 6015 MFP Xerox Internal Use Only 2-43...
- Page 100 Allows the user to view the printer status or execute operations via the LCD, LED, and buttons. Rear Control Panel Front Interlock Main Power Switch Switch HVPS IP Board LVPS LED Driver Board s6000-110 2-44 Xerox Internal Use Only Phaser 6000/6010 and WC 6015 MFP...
-
Page 101: Data Flow
Machine Control Unit (Electric Signal) LPH (LEDs) Electrostatic Latent on Drum (Invisible Image) Toner Image on Drum Toner Image on Belt Toner Image on Paper Print Image on Paper s6000-111 Phaser 6000/6010 and WC 6015 MFP Xerox Internal Use Only 2-45... -
Page 102: Scanner
Carriage Assembly Document LED Array Rod Scope CMOS Image Sensor s6015-018 2-46 Xerox Internal Use Only Phaser 6000/6010 and WC 6015 MFP... - Page 103 The image data from the document set on the IIT or ADF goes through the following components before it is printed at the engine section. Document CCD Image Sensor (Scanner Assembly) Scanner Engine Controller (IP Board) LPH (LED) Drum (CRU) s6015-035 Phaser 6000/6010 and WC 6015 MFP Xerox Internal Use Only 2-47...
- Page 104 Major Functional Components of the Image Input Terminal (IIT) Scanner Board Control Panel Assembly Carriage Assembly Scanner Home Position Sensor Carriage Motor IP Board Fax Board USB Board s6015-022 2-48 Xerox Internal Use Only Phaser 6000/6010 and WC 6015 MFP...
- Page 105 USB Front Board The USB Front Board is used to connect USB memory devices for scanning to USB memory and printing from USB memory. This connector complies with USB2.0 (Hi-Speed). Phaser 6000/6010 and WC 6015 MFP Xerox Internal Use Only 2-49...
- Page 106 The AGC and AOC adjustment values are used to compensate for the image data read by the CMOS image sensor. 2-50 Xerox Internal Use Only Phaser 6000/6010 and WC 6015 MFP...
- Page 107 The speed at which the carriage assembly moves is dependant on what the copy magnification is set at. Document Carriage Carriage Assembly Assembly Document LED Array Rod Scope CMOS Image Sensor s6015-019 Phaser 6000/6010 and WC 6015 MFP Xerox Internal Use Only 2-51...
-
Page 108: Automatic Document Feeder (Adf)
The reflected image is read by the CMOS image sensor through the rod scope. CVT Position Document Carriage Assembly Document LED Array Rod Scope CMOS Image Sensor s6015-020 2-52 Xerox Internal Use Only Phaser 6000/6010 and WC 6015 MFP... -
Page 109: Adf Components
ADF Top Cover. This also allows the lead edge of the sheet traveling in the feeding direction to go forward by displacing the document stopper upward. When the sheet Phaser 6000/6010 and WC 6015 MFP Xerox Internal Use Only 2-53... - Page 110 The pinch roller assembly is normally pressed against the direction of the takeaway roller by spring pressure. Documents are fed between the pinch rollers and the takeaway roller to the CVT window by rotation of the takeaway roller. 2-54 Xerox Internal Use Only Phaser 6000/6010 and WC 6015 MFP...
- Page 111 ADF Top Cover Closed ADF Top Cover Open ADF Top Cover ADF Top Cover Link Pinch Roller Pinch Roller Link Takeaway Roller Takeaway Roller Spring Spring Pinch Roller Assembly s6015-038 Phaser 6000/6010 and WC 6015 MFP Xerox Internal Use Only 2-55...
-
Page 112: Adf Paper Path
The exit roller is driven by torque from the ADF Motor. : Paper Transfer Feed Roller Nudger Roller : Paper Sensors Takeaway Roller Exit Roller Feed Sensor Document Sensor ADF Separator Pad Home Position (CVT Position) s6015-021 2-56 Xerox Internal Use Only Phaser 6000/6010 and WC 6015 MFP... - Page 113 [ Exit Roller ] [ Feed Roller ] Pickup Roller Gear Pickup Idle Gear Pickup Idle Gear Pickup Idle Gear Pickup Roller Gear [ Nudger Roller ] ADF Top Cover Assembly s6015-040 Phaser 6000/6010 and WC 6015 MFP Xerox Internal Use Only 2-57...
- Page 114 Feed Gear Deceleration Takeaway Roller Gear Pickup Gear Deceleration [ Takeaway Roller ] Exit Gear Deceleration Idler Gear Idler Gear Exit Roller Gear [ Exit Roller ] Front s6015-041 2-58 Xerox Internal Use Only Phaser 6000/6010 and WC 6015 MFP...
-
Page 115: Fax
Digital data Modem A/D Conversion Unit Conversion (Modulation) Sending FAX Analog signal Telephone line Control Circuit Receiving FAX Modem conversion A/D Conversion Unit (demodulation) Digital signal Printer Print Printing s6015-033 Phaser 6000/6010 and WC 6015 MFP Xerox Internal Use Only 2-59... - Page 116 The black/white information obtained from the AD conversion is sent to the printer, where black cells are reproduced on the paper at the positions where they were on the original. 2-60 Xerox Internal Use Only Phaser 6000/6010 and WC 6015 MFP...
- Page 117 Most common standard in use. Group 4 (G4) Approx. 3 sec. 400 x 400 dpi 64 kbps Digital 1988 (using ISDN) transmission. Supported by various digital transmission services. Halftone supported. Phaser 6000/6010 and WC 6015 MFP Xerox Internal Use Only 2-61...
-
Page 118: Operation Modes / Consumables
500 pages a. The page counts are for reference only. The actual page count may vary greatly depending on conditions such as print settings, document contents, or power-on/off frequency. 2-62 Xerox Internal Use Only Phaser 6000/6010 and WC 6015 MFP... - Page 119 C, or K) has reached its 6015 MFP Replace replacement period. The Y/M/C/K printer stops operating. Immediately replace the Toner Cartridge (Y, M, C, or K) with a new one. Phaser 6000/6010 and WC 6015 MFP Xerox Internal Use Only 2-63...
-
Page 120: Control
4. The drum charging voltage, the developing DC voltage, and the LED light amount of the LPH are adjusted for each color according to the detected patch density. 2-64 Xerox Internal Use Only Phaser 6000/6010 and WC 6015 MFP... -
Page 121: Toner Density Control
Phaser 6000/6010 and WC 6015 MFP Xerox Internal Use Only 2-65... -
Page 122: Color Registration Control
4. The shift correction amount is calculated from the threshold value determined in 1) and the patch density measured in 3). 5. The LPH write timing is changed according to the shift correction amount. 2-66 Xerox Internal Use Only Phaser 6000/6010 and WC 6015 MFP... -
Page 123: Fuser Control
The thermistor loses its measuring accuracy when the temperature of the sensor itself is -5°C or below. Therefore, the sensor is warmed up to 0°C when its temperature is -5°C or below. This is called “Sensor Warm-up”. Phaser 6000/6010 and WC 6015 MFP Xerox Internal Use Only 2-67... -
Page 124: Main Drive Assembly
Gear Idler Exit Gear Feed Registration Clutch Gear Exit MPT Feed Solenoid [ Feed Roller ] [ Regi Roller ] [ Exit Roller ] MPF & PSI Registration Assembly Fuser s6000-125 2-68 Xerox Internal Use Only Phaser 6000/6010 and WC 6015 MFP... - Page 125 Gear PH5 Gear PF1 Gear PH4 PH Drive Main Motor Registration Clutch Gear PH6 Feed Gear [ Registration Roller ] Front MPT Feed Solenoid [ Feed Roller ] s6000-126 Phaser 6000/6010 and WC 6015 MFP Xerox Internal Use Only 2-69...
-
Page 126: Full Color Mode Development Drive Flow
[ Admix Auger (Y) ] [ Admix Auger (M) ] [ Admix Auger (C) ] [ Admix Auger (K) ] Xerographic Xerographic Xerographic Xerographic Developer (Y) Developer (M) Developer (C) Developer (K) s6000-127 2-70 Xerox Internal Use Only Phaser 6000/6010 and WC 6015 MFP... - Page 127 Gear D5 Gear D4 In Gear DK1 Gear Flange D4 Gear D4 In Idler D1 Gear D2 Gear D3C Gear D4 Out Gear DK2 Switching Solenoid Gear D3C s6000-128 Phaser 6000/6010 and WC 6015 MFP Xerox Internal Use Only 2-71...
-
Page 128: B/W Mode Development Drive Flow
[ Magnet Roll (K) ] Magnet Idler Gear (K) Auger Gear (K) [ Auger Supply (K) ] Admix Auger Gear (K) [ Auger Admix (K) ] Xerographic Developer (K) s6000-129 2-72 Xerox Internal Use Only Phaser 6000/6010 and WC 6015 MFP... - Page 129 Idler Gear D1 Gear D4 Out Gear D2 Gear D3C Gear D3C Gear D4 In Gear C Flange D4 Gear Dk1 Gear C Gear Cam Gear DK2 Switching Solenoid s6000-130 Phaser 6000/6010 and WC 6015 MFP Xerox Internal Use Only 2-73...
-
Page 130: Drum, Belt Drive, And Excess Toner Collecting Drive Flow
Cleaning Auger (C)] Cleaning Auger (K)] Xerographic Xerographic Xerographic Xerographic Developer (Y) Developer (M) Developer (C) Developer (K) Gear T1 Gear DRV Auger Gear [Belt Cleaning Auger] [ Belt] Belt s6000-131 2-74 Xerox Internal Use Only Phaser 6000/6010 and WC 6015 MFP... - Page 131 MU Drive Gear X2 Front [ Drum ] Xerographic Developer (Y) Xerographic Xerographic Cleaning Auger Gear Developer (M) Xerographic [ Xerographic Cleaning Auger ] Xerographic Developer (C) Developer (K) s6000-132 Phaser 6000/6010 and WC 6015 MFP Xerox Internal Use Only 2-75...
-
Page 132: Toner Dispenser (Y, M, C, K) Drive Flow
Auger (Y) ] Auger (K) ] Auger Gear (K) Auger Gear (Y) [ Cartridge Auger (Y) ] [ Cartridge Auger (K) ] Toner Cartridge (Y) Toner Cartridge (K) s6500-133 2-76 Xerox Internal Use Only Phaser 6000/6010 and WC 6015 MFP... - Page 133 Idler Gear 23 (Y) Gear (Y) Clutch (K) Oneway Clutch (Y) Idler Gear 34 Idler Gear 34 Dispense Motor (C), (K) Front Dispense Motor (Y), (M) Idler Gear 34 s6000-134 Phaser 6000/6010 and WC 6015 MFP Xerox Internal Use Only 2-77...
- Page 134 Auger (M) ] Auger (C) ] Auger Gear (M) Auger Gear (C) [ Cartridge Auger (M) ] [ Cartridge Auger (C) ] Toner Cartridge (M) Toner Cartridge (C) s6000-135 2-78 Xerox Internal Use Only Phaser 6000/6010 and WC 6015 MFP...
- Page 135 Idler Gear 23 (M) Oneway Clutch (K) Oneway Clutch (Y) Oneway Clutch (M) Idler Gear 34 Idler Gear 34 Dispense Motor (C), (K) Front Dispense Motor (Y), (M) Idler Gear 34 s6000-136 Phaser 6000/6010 and WC 6015 MFP Xerox Internal Use Only 2-79...
- Page 136 Theory of Operation 2-80 Xerox Internal Use Only Phaser 6000/6010 and WC 6015 MFP...
-
Page 137: Error Messages And Codes
Error Messages and Codes In this chapter... • Introduction • Printing the Error History Report • Servicing Instructions • Messages, Codes, and Procedures • Error Code Troubleshooting Chapter... -
Page 138: Introduction
The Printer Settings, Device Settings, and Error History Report are printed. Note If the Error History Report will not print due to printer failure, see “Phaser 6000B Errors” on page 3-18. Xerox Internal Use Only Phaser 6000/6010 and WC 6015 MFP... -
Page 139: Printing The Error History Report With The Printer Settings Utility
Error Messages and Codes Printing the Error History Report with the Printer Settings Utility 1. From the Start Menu, select Programs > Xerox Office Printing >Phaser 6000B/6010N > Printer Settings Utility. 2. On the Printer Settings Report tab, select Information Pages. -
Page 140: Servicing Instructions
2. Use the FRU Disassembly procedures to replace the part. Step 5: Final Checkout Test the printer to be sure you have corrected the initial problem and there are no additional problems present. Xerox Internal Use Only Phaser 6000/6010 and WC 6015 MFP... -
Page 141: Messages, Codes, And Procedures
Media Access Control Address Machine Control Unit Non-Volatile Memory. Used instead of NVRAM. NVRAM Non-Volatile Random Access Memory Page Description Language Random Access Memory Registration Read Only Memory TRAN Transfer Belt Phaser 6000/6010 and WC 6015 MFP Xerox Internal Use Only... -
Page 142: Error Message Summary
016-500 Erase Flash Err Erase Flash Error 3-31 Restart Printer 016-501 Write Flash Error <Download Write Error> 3-31 016-501 System Flash memory write error occurred. Contact Support If Message Returns Xerox Internal Use Only Phaser 6000/6010 and WC 6015 MFP... - Page 143 The print data cannot be processed Data Violation by PJL. Press OK 016-764 Connect Fail <Connect Error> 3-40 016-764 Scan Can not connect to mail server for Job Failure sending mail. Press OK Phaser 6000/6010 and WC 6015 MFP Xerox Internal Use Only...
- Page 144 017-970 Scan Out of Memory. Job Failure Press OK 017-980 Report error <Report File Open/Close Error> 3-46 017-980 System Report job fails to open/close Job Failure report file. Press OK Xerox Internal Use Only Phaser 6000/6010 and WC 6015 MFP...
- Page 145 Press OK 026-721 File Write Error <USB Memory Write Error> 3-54 026-721 Scan Failed to write data to the USB Job Failure memory. Press OK Phaser 6000/6010 and WC 6015 MFP Xerox Internal Use Only...
- Page 146 SMB delete file error is detected. Delete File Error Press OK 031-536 SMB Error <SMB Delete Folder Error> 3-59 031-536 Scan SMB delete file error is detected. Delete Folder Error Press OK 3-10 Xerox Internal Use Only Phaser 6000/6010 and WC 6015 MFP...
- Page 147 FTP path error is detected. FTP Path Error Press OK 031-582 FTP Error <FTP File Make Error> 3-62 031-582 Scan Can not create file name well. File Make Error Press OK Phaser 6000/6010 and WC 6015 MFP Xerox Internal Use Only 3-11...
- Page 148 Job Failure correctly. Press OK 033-519 Function is Disabled. <FAX Function is not set correctly> 3-65 033-519 Fax The FAX Function setting is not set Job Failure correctly. Press OK 3-12 Xerox Internal Use Only Phaser 6000/6010 and WC 6015 MFP...
- Page 149 Carriage Motor error is detected. 062-322 <No message, only Scanner drive calibration failed. 3-77 appears in error log> 062-360 062-360 System <Image Processing Error> 3-110 Restart Printer Image Processor error is detected. Phaser 6000/6010 and WC 6015 MFP Xerox Internal Use Only 3-13...
- Page 150 Open Rear Cover registration section of the Printer. Remove Paper 091-402 091-402 Printer <Xero Near Life> 3-94 Contact Support The Printer (Xerographic) is If Message Returns approaching the replacement time. 3-14 Xerox Internal Use Only Phaser 6000/6010 and WC 6015 MFP...
- Page 151 (Y,M, C, or K) Cartridge 093-952. 093-925 093-960 CRUM ID <(Y, M, or C) CRUM ID Error> 3-102 093-92X An unsupported Toner Cartridge is 092-062 Reseat X detected. Cartridge Phaser 6000/6010 and WC 6015 MFP Xerox Internal Use Only 3-15...
- Page 152 116-335 116-335 System <Checksum error (Network)> 3-34 Restart Printer Checksum error for Network Contact Support parameter is detected. If Message Returns 116-343 ASIC Error ASIC Error 3-31 Restart Printer 3-16 Xerox Internal Use Only Phaser 6000/6010 and WC 6015 MFP...
- Page 153 The Printer (Xerographics unit) has Contact Support reached the replacement time. IfMessageReturns 193-700 Ready to Print <Custom Toner Mode> 3-111 193-700 Printer The printer is in custom toner Non-Xerox Toner mode. Installed Phaser 6000/6010 and WC 6015 MFP Xerox Internal Use Only 3-17...
-
Page 154: Phaser 6000B Errors
Flashing means non-Xerox toner is installed. Yellow Toner Indicates that the Yellow toner is low. Flashing indicates the toner is empty or toner warning. Flashing means non-Xerox toner is installed. 3-18 Xerox Internal Use Only Phaser 6000/6010 and WC 6015 MFP... - Page 155 There are 3 cases where only the Error LED is illuminated but there is no extended error codes. • 077-304: Rear Door Open • 091-402: Xero Life Warning • 092-910: ADC Sensor Dustiness Pre-warning Phaser 6000/6010 and WC 6015 MFP Xerox Internal Use Only 3-19...
- Page 156 Orange 016-502 3-31 Orange 016-718 3-38 Orange 016-720 3-40 Orange Orange Orange 016-737 3-35 Orange Orange Orange 016-741 3-35 Orange Orange Orange 016-742 3-35 Orange Orange Orange 016-743 3-35 3-20 Xerox Internal Use Only Phaser 6000/6010 and WC 6015 MFP...
- Page 157 077-106 3-86 Orange Blinking Orange 077-108 3-89 Orange Blinking Orange 077-109 3-92 Orange Orange 077-304 3-90 Blinking Orange 077-900 3-93 Orange Blinking Orange 077-901 3-93 Orange Orange 091-402 3-94 Phaser 6000/6010 and WC 6015 MFP Xerox Internal Use Only 3-21...
- Page 158 Blinking Orange 093-933 3-100 Orange Orange Orange 093-950 3-101 Orange Orange 093-951 3-101 Orange Orange 093-952 3-101 Blinking 093-960 3-102 Orange Blinking 093-961 3-102 Orange Blinking 093-962 3-102 Orange 3-22 Xerox Internal Use Only Phaser 6000/6010 and WC 6015 MFP...
- Page 159 116-317 3-31 Orange Blinking 116-324 3-31 Orange Blinking 116-326 3-31 Orange Blinking 116-343 3-31 Orange Blinking 124-333 3-107 Orange Blinking 191-310 3-111 Orange Orange Orange Orange Orange 193-700 3-111 Phaser 6000/6010 and WC 6015 MFP Xerox Internal Use Only 3-23...
-
Page 160: Error Code Troubleshooting
6. Does the error persist? Go to step 7. Complete. Clean the ADF feed rollers. Go to step 8. Replace the Do the feed rollers rotate smoothly? (page 8-37). 3-24 Xerox Internal Use Only Phaser 6000/6010 and WC 6015 MFP... -
Page 161: Adf Cover Open
4. Does the error persist? Go to step 5. Complete. Reseat P/J1, P/J6, and P/J16 on the Go to step 6. Complete. IP Board. Does the error persist? Phaser 6000/6010 and WC 6015 MFP Xerox Internal Use Only 3-25... -
Page 162: Main Motor Failure
If the problem persists, use the following procedure. Troubleshooting Reference Table Applicable Parts Wiring and Plug/Jack Map References Main Drive Assembly, PL6.1.2 “Map 3 - Phaser 6000/6010” on page 10-9 Harness Assembly Main MOT, PL 6.1.7 “Phaser 6000/6010 Fuser” on page 10-17 MCU Board, PL7.2.2... -
Page 163: Fuser Error
If the problem persists, use the following procedure. Troubleshooting Reference Table Applicable Parts Wiring and Plug/Jack Map References Fuser, PL5.1.1 “Map 3 - Phaser 6000/6010” on page 10-9 MCU Board, PL7.2.2 “Phaser 6000/6010 Fuser” on page 10-17 “Map 3 - WorkCentre 6015 MFP” on page 10-23 “WorkCentre 6015 MFP Fuser”... -
Page 164: Ip Memory Check Fail
Wiring and Plug/Jack Map References IP Board, PL7.1.9 “Map 2 - WorkCentre 6015 MFP” on page 10-22 MCU Board, PL7.2.2 “Map 3 - WorkCentre 6015 MFP” on LED Driver Board, PL7.1.5 page 10-23 3-28 Xerox Internal Use Only Phaser 6000/6010 and WC 6015 MFP... -
Page 165: Fax Checksum Error
Board and the MCU Board. Does the error persist? Replace the IP Board (page 8-114). Replace the Complete. Does the error persist when the MCU Board power is turned on? (page 8-121). Phaser 6000/6010 and WC 6015 MFP Xerox Internal Use Only 3-29... -
Page 166: Dram Memory Allocation Error
Board and the MCU Board. Does the error persist? Replace the IP Board (page 8-114). Replace the Complete. Does the error persist when the MCU Board power is turned on? (page 8-121). 3-30 Xerox Internal Use Only Phaser 6000/6010 and WC 6015 MFP... -
Page 167: Firmware Errors
Wiring and Plug/Jack Map References IP Board, PL7.1.9 “Phaser 6000/6010 Image Processor Board” on page 10-18 MCU Board, PL7.2.2 “Map 2 - Phaser 6000/6010” on LED Driver Board, PL7.1.5 page 10-8 “WorkCentre 6015 MFP Image Processor Board” on page 10-32 “Map 2 - WorkCentre 6015 MFP”... -
Page 168: E-Mail Error
Board and the MCU Board. Does the error persist? Replace the IP Board (page 8-114). Replace the Complete. Does the error persist when the MCU Board power is turned on? (page 8-121). 3-32 Xerox Internal Use Only Phaser 6000/6010 and WC 6015 MFP... -
Page 169: Checksum Error
Board and the MCU Board. Does the error persist? Replace the IP Board (page 8-114). Replace the Complete. Does the error persist when the MCU Board power is turned on? (page 8-121). Phaser 6000/6010 and WC 6015 MFP Xerox Internal Use Only 3-33... -
Page 170: Nvram Checksum Error
Wiring and Plug/Jack Map References IP Board, PL7.1.9/7.1.16 “Phaser 6000/6010 Image Processor Board” on page 10-18 MCU Board, PL7.2.2 “Map 2 - Phaser 6000/6010” on page 10-8 “WorkCentre 6015 MFP Image Processor Board” on page 10-32 “Map 2 - WorkCentre 6015 MFP” on... -
Page 171: Download Errors
Wiring and Plug/Jack Map References IP Board, PL7.1.9/7.1.16 “Phaser 6000/6010 Image Processor Board” on page 10-18 MCU Board, PL7.2.2 “Map 2 - Phaser 6000/6010” on page 10-8 “WorkCentre 6015 MFP Image Processor Board” on page 10-32 “Map 2 - WorkCentre 6015 MFP” on... -
Page 172: Download Error
Wiring and Plug/Jack Map References IP Board, PL7.1.9/7.1.16 “Phaser 6000/6010 Image Processor Board” on page 10-18 MCU Board, PL7.2.2 “Map 2 - Phaser 6000/6010” on page 10-8 “WorkCentre 6015 MFP Image Processor Board” on page 10-32 “Map 2 - WorkCentre 6015 MFP” on... -
Page 173: Pjl Request Error
Wiring and Plug/Jack Map References IP Board, PL7.1.9/7.1.16 “Phaser 6000/6010 Image Processor Board” on page 10-18 MCU Board, PL7.2.2 “Map 2 - Phaser 6000/6010” on page 10-8 “WorkCentre 6015 MFP Image Processor Board” on page 10-32 “Map 2 - WorkCentre 6015 MFP” on... -
Page 174: Memory Overflow
Wiring and Plug/Jack Map References IP Board, PL7.1.9/PL7.1.16 “Phaser 6000/6010 Image Processor Board” on page 10-18 MCU Board, PL7.2.2 “Map 2 - Phaser 6000/6010” on page 10-8 “WorkCentre 6015 MFP Image Processor Board” on page 10-32 “Map 2 - WorkCentre 6015 MFP” on... -
Page 175: Decode Error
Wiring and Plug/Jack Map References IP Board, PL7.1.9 “Phaser 6000/6010 Image Processor Board” on page 10-18 MCU Board, PL7.2.2 “Map 2 - Phaser 6000/6010” on page 10-8 “WorkCentre 6015 MFP Image Processor Board” on page 10-32 “Map 2 - WorkCentre 6015 MFP” on... -
Page 176: Pdl Error
Board and the MCU Board. Does the error persist? Replace the IP Board (page 8-114). Replace the Complete. Does the error persist when the MCU Board power is turned on? (page 8-121). 3-40 Xerox Internal Use Only Phaser 6000/6010 and WC 6015 MFP... -
Page 177: Usb Memory Removal Error
Board and MCU Board. Does the error persist? Replace the IP Board (page 8-114). Go to step 3. Complete. Does the error persist? Replace the MCU Board Complete. (page 8-121). Phaser 6000/6010 and WC 6015 MFP Xerox Internal Use Only 3-41... -
Page 178: Invalid Job
Wiring and Plug/Jack Map References IP Board, PL7.1.9/PL7.1.16 “Phaser 6000/6010 Image Processor Board” on page 10-18 MCU Board, PL7.2.2 “Map 2 - Phaser 6000/6010” on page 10-8 “WorkCentre 6015 MFP Image Processor Board” on page 10-32 “Map 2 - WorkCentre 6015 MFP” on... -
Page 179: Wireless Error
Board and MCU Board. Does the error persist? Replace the IP Board (page 8-114). Go to step 3. Complete. Does the error persist? Replace the MCU Board Complete. (page 8-121). Phaser 6000/6010 and WC 6015 MFP Xerox Internal Use Only 3-43... -
Page 180: Collate Full
An unsupported USB memory device was attached to the USB port. Applicable Error • 016-930: USB Host Full • 016-931: USB Host Error Initial Actions Unplug the unsupported device. 3-44 Xerox Internal Use Only Phaser 6000/6010 and WC 6015 MFP... -
Page 181: Mail Size Limits Error, Pcscan Time Out, Memory Full
Board and the MCU Board. Does the error persist? Replace the IP Board (page 8-114). Replace the Complete. Does the error persist when the MCU Board power is turned on? (page 8-121). Phaser 6000/6010 and WC 6015 MFP Xerox Internal Use Only 3-45... -
Page 182: Report File Open/Close Error
Board and the MCU Board. Does the error persist? Replace the IP Board (page 8-114). Replace the Complete. Does the error persist when the MCU Board power is turned on? (page 8-121). 3-46 Xerox Internal Use Only Phaser 6000/6010 and WC 6015 MFP... -
Page 183: Wireless Error
Is each cable of the Wireless Harness. Harness continuous? Replace the Wi-Fi Board. Replace the IP Complete. Does the error persist when the Board power is turned on? (page 8-114). Phaser 6000/6010 and WC 6015 MFP Xerox Internal Use Only 3-47... -
Page 184: Scanner Calibration Failure
Replace the IP Board (page 8-114). Replace the Complete. Does the error persist? MCU Board (page 8-121), then go to step 3. Does the error persist? Replace the Complete. Scanner (page 8-35). 3-48 Xerox Internal Use Only Phaser 6000/6010 and WC 6015 MFP... -
Page 185: Firmware Error 024-340
“WorkCentre 6015 MFP System Wiring” on page 10-24 Troubleshooting Procedure Table Step Actions and Questions Replace the MCU Board Perform the Complete. (page 8-121). Electrical Noise Does the error persist? check (page 4-66). Phaser 6000/6010 and WC 6015 MFP Xerox Internal Use Only 3-49... -
Page 186: Download Error
Board and MCU Board. Does the error persist? Replace the MCU Board Perform the Contact your (page 8-121). Electrical Noise designated Does the error persist? check field support (page 4-66). for assistance. 3-50 Xerox Internal Use Only Phaser 6000/6010 and WC 6015 MFP... -
Page 187: Mcu Comm Error
Wiring and Plug/Jack Map References IP Board, PL7.1.9/7.1.16 “Phaser 6000/6010 Image Processor Board” on page 10-18 MCU Board, PL7.2.2 “Map 2 - Phaser 6000/6010” on page 10-8 “WorkCentre 6015 MFP Image Processor Board” on page 10-32 “Map 2 - WorkCentre 6015 MFP” on... -
Page 188: Paper Size Mismatch
If the problem persists, use the following procedure. Troubleshooting Reference Table Applicable Parts Wiring and Plug/Jack Map References Registration Sensor, PL2.3.5 “Map 3 - Phaser 6000/6010” on page 10-9 Harness Assembly RKN SNS, PL2.2.25 “Phaser 6000/6010 Feeder” on page 10-12 MCU Board, PL7.2.2... -
Page 189: No Suitable Paper
If the problem persists, use the following procedure. Troubleshooting Reference Table Applicable Parts Wiring and Plug/Jack Map References Registration Sensor, PL2.3.5 “Map 3 - Phaser 6000/6010” on page 10-9 Harness Assembly RKN SNS, PL2.2.25 “Phaser 6000/6010 Feeder” on page 10-12 MCU Board, PL7.2.2... -
Page 190: Usb Memory Full/Usb Memory Write Error
Wiring and Plug/Jack Map References IP Board, PL7.1.9 “Phaser 6000/6010 Image Processor Board” on page 10-18 MCU Board, PL7.2.2 “Map 2 - Phaser 6000/6010” on page 10-8 “WorkCentre 6015 MFP Image Processor Board” on page 10-32 “Map 2 - WorkCentre 6015 MFP” on... -
Page 191: Usb Memory Write Protect Error / File Path Limit Error
Wiring and Plug/Jack Map References IP Board, PL7.1.9 “Phaser 6000/6010 Image Processor Board” on page 10-18 MCU Board, PL7.2.2 “Map 2 - Phaser 6000/6010” on page 10-8 “WorkCentre 6015 MFP Image Processor Board” on page 10-32 “Map 2 - WorkCentre 6015 MFP” on... -
Page 192: Scan Communication Fail
Does the error persist? Go to step 3. Complete. Replace the IP Board (page 8-114). Go to step 4. Complete. Does the error persist? Replace the MCU Board Complete. (page 8-121). 3-56 Xerox Internal Use Only Phaser 6000/6010 and WC 6015 MFP... -
Page 193: Ipv6 Duplicate
Wiring and Plug/Jack Map References IP Board, PL7.1.9 “Phaser 6000/6010 Image Processor Board” on page 10-18 MCU Board, PL7.2.2 “Map 2 - Phaser 6000/6010” on page 10-8 “WorkCentre 6015 MFP Image Processor Board” on page 10-32 “Map 2 - WorkCentre 6015 MFP” on... -
Page 194: Ipv4 Duplicate
>TCP/IP > IPv4 > Get Address. another device the other Is Get Address set to Panel? on the network. device and Change the resolve the printer’s problem by address. changing the other device’s address. 3-58 Xerox Internal Use Only Phaser 6000/6010 and WC 6015 MFP... -
Page 195: Smb Error
Go to step 2. Complete. MCU Boards then cycle system power. Does the error persist? Replace the IP Board (page 8-114). Replace the Complete. Does the error persist? MCU Board (page 8-121). Phaser 6000/6010 and WC 6015 MFP Xerox Internal Use Only 3-59... -
Page 196: Smb Connection Error
Go to step 2. Complete. MCU Boards then cycle system power. Does the error persist? Replace the IP Board (page 8-114). Replace the Complete. Does the error persist? MCU Board (page 8-121). 3-60 Xerox Internal Use Only Phaser 6000/6010 and WC 6015 MFP... -
Page 197: Ftp Connection Error
Go to step 2. Complete. MCU Boards then cycle system power. Does the error persist? Replace the IP Board (page 8-114). Replace the Complete. Does the error persist? MCU Board (page 8-121). Phaser 6000/6010 and WC 6015 MFP Xerox Internal Use Only 3-61... -
Page 198: Ftp Error
Go to step 2. Complete. MCU Boards then cycle system power. Does the error persist? Replace the IP Board (page 8-114). Replace the Complete. Does the error persist? MCU Board (page 8-121). 3-62 Xerox Internal Use Only Phaser 6000/6010 and WC 6015 MFP... - Page 199 Go to step 2. Complete. MCU Boards then cycle system power. Does the error persist? Replace the IP Board (page 8-114). Replace the Complete. Does the error persist? MCU Board (page 8-121). Phaser 6000/6010 and WC 6015 MFP Xerox Internal Use Only 3-63...
-
Page 200: Memory Error
If the problem persists, use the following procedure. Troubleshooting Reference Table Applicable Parts Wiring and Plug/Jack Map References IP Board, PL7.1.9 “Map 2 - Phaser 6000/6010” on page 10-8 MCU Board, PL7.2.2 “Phaser 6000/6010 Image Processor Board” on page 10-18 “Map 2 - WorkCentre 6015 MFP”... -
Page 201: Fax Errors
Go to step 2. Complete. MCU Boards then cycle system power. Does the error persist? Replace the IP Board (page 8-114). Replace the Complete. Does the error persist? MCU Board (page 8-121). Phaser 6000/6010 and WC 6015 MFP Xerox Internal Use Only 3-65... -
Page 202: Memory Full Fax Job Failure
Go to step 2. Complete. MCU Boards then cycle system power. Does the error persist? Replace the IP Board (page 8-114). Replace the Complete. Does the error persist? MCU Board (page 8-121). 3-66 Xerox Internal Use Only Phaser 6000/6010 and WC 6015 MFP... -
Page 203: Fax Busy / No Dial Tone
Go to step 2. Complete. MCU Boards then cycle system power. Does the error persist? Replace the IP Board (page 8-114). Replace the Complete. Does the error persist? MCU Board (page 8-121). Phaser 6000/6010 and WC 6015 MFP Xerox Internal Use Only 3-67... -
Page 204: Communication Error
Go to step 2. Complete. MCU Boards then cycle system power. Does the error persist? Replace the IP Board (page 8-114). Replace the Complete. Does the error persist? MCU Board (page 8-121). 3-68 Xerox Internal Use Only Phaser 6000/6010 and WC 6015 MFP... -
Page 205: Rx Communication Errors
Go to step 2. Complete. MCU Boards then cycle system power. Does the error persist? Replace the IP Board (page 8-114 Replace the Complete. Does the error persist? MCU Board (page 8-121). Phaser 6000/6010 and WC 6015 MFP Xerox Internal Use Only 3-69... -
Page 206: Nvram Error
If the problem persists, use the following procedure. Troubleshooting Reference Table Applicable Parts Wiring and Plug/Jack Map References MCU Board, PL7.2.2 “Map 3 - Phaser 6000/6010” on page 10-9 “Phaser 6000/6010 System Wiring” on page 10-10 “Map 3 - WorkCentre 6015 MFP” on page 10-23 “WorkCentre 6015 MFP System Wiring”... -
Page 207: Motor Error
If the problem persists, use the following procedure. Troubleshooting Reference Table Applicable Parts Wiring and Plug/Jack Map References Main Drive Assembly, PL6.1.2 “Map 3 - Phaser 6000/6010” on page 10-9 Main Motor Harness, PL6.1.7 “Phaser 6000/6010 LVPS” on MCU Board, PL7.2.2 page 10-11 “Phaser 6000/6010 Drive”... -
Page 208: Fan Motor Failure
If the problem persists, use the following procedure. Troubleshooting Reference Table Applicable Parts Wiring and Plug/Jack Map References LVPS, PL 7.2.1 “Map 2 - Phaser 6000/6010” on page 10-8 Fan, PL 7.1.2 “Phaser 6000/6010 Fuser” on MCU Board, PL7.2.2 page 10-17 “Map 3 - WorkCentre 6015 MFP”... -
Page 209: Deve Mode Change Failure
If the problem persists, use the following procedure. Troubleshooting Reference Table Applicable Parts Wiring and Plug/Jack Map References Feed Solenoid, PL6.1.10 “Map 3 - Phaser 6000/6010” on page 10-9 Switching Sensor “Phaser 6000/6010 Feeder” on Harness Assembly RKN SNS page 10-12 PL2.2.25/26... - Page 210 Is the harness damaged? Disconnect P/J12 on the MCU Replace the Replace the Board. Is the voltage across ground Developer Drive MCU Board to P/J12-7 approximately +3.3 VDC? Assembly. (page 8-121). 3-74 Xerox Internal Use Only Phaser 6000/6010 and WC 6015 MFP...
-
Page 211: Lph Failure
Board ASIC. (page 8-107). You can also print the test pattern from the CE Diag Tool. See “Digital Output Test Procedures” on page A-16. Is the image printed correctly? Phaser 6000/6010 and WC 6015 MFP Xerox Internal Use Only 3-75... -
Page 212: Carriage Motor Error
Go to step 2. Complete. MCU Boards then cycle system power. Does the error persist? Replace the IP Board (page 8-114). Replace the Complete. Does the error persist? MCU Board (page 8-121). 3-76 Xerox Internal Use Only Phaser 6000/6010 and WC 6015 MFP... -
Page 213: Scanner Motor Error
Replace the IP Board (page 8-114). Replace the Complete. Does the error persist? MCU Board (page 8-121), then go to step 3. Does the error persist? Replace the Complete. Scanner (page 8-35). Phaser 6000/6010 and WC 6015 MFP Xerox Internal Use Only 3-77... -
Page 214: Copy Limit
Go to step 2. Complete. MCU Boards then cycle system power. Does the error persist? Replace the IP Board (page 8-114). Replace the Complete. Does the error persist? MCU Board (page 8-121). 3-78 Xerox Internal Use Only Phaser 6000/6010 and WC 6015 MFP... -
Page 215: Waiting For Continue Key To Be Pressed After Reloading Paper
If the problem persists, use the following procedure. Troubleshooting Reference Table Applicable Parts Wiring and Plug/Jack Map References IP Board, PL7.1.9 “Map 2 - Phaser 6000/6010” on page 10-8 MCU Board, PL7.2.2 “Phaser 6000/6010 Image Processor Board” on page 10-18 “Map 2 - WorkCentre 6015 MFP”... -
Page 216: Misfeed Jam
If the problem persists, use the following procedure. Troubleshooting Reference Table Applicable Parts Wiring and Plug/Jack Map References Feed Roller, PL22.4 “Map 3 - Phaser 6000/6010” on page 10-9 Feed Solenoid, PL6.1.10 “Phaser 6000/6010 Feeder” on Registration Sensor, PL2.3.5 page 10-12 Main Drive Assembly, PL6.1.2... - Page 217 Are the voltages correct? Check the connector of P/J19 on the Go to step 16. Reconnect the MCU Board. connector, Is the connection secure? then go to step 15. Phaser 6000/6010 and WC 6015 MFP Xerox Internal Use Only 3-81...
- Page 218 MCU Board Registration Clutch. (page 8-121). Clutch You can also use the CE Diag Tool to (page 8-66). run this test (see page A-16). Does the Registration Clutch function correctly? 3-82 Xerox Internal Use Only Phaser 6000/6010 and WC 6015 MFP...
-
Page 219: Paper Remain At Regi
If the problem persists, use the following procedure. Troubleshooting Reference Table Applicable Parts Wiring and Plug/Jack Map References Registration Sensor, PL2.3.5 “Map 3 - Phaser 6000/6010” on page 10-9 Harness Assembly RKN SNS, PL2.2.25/26 “Phaser 6000/6010 Feeder” on page 10-12 MCU Board, PL7.2.2... -
Page 220: Reg Off Jam
If the problem persists, use the following procedure. Troubleshooting Reference Table Applicable Parts Wiring and Plug/Jack Map References Registration Sensor, PL2.3.5 “Map 3 - Phaser 6000/6010” on page 10-9 Registration Clutch, PL2.3.7 “Phaser 6000/6010 Feeder” on Harness Assembly RKN SNS, page 10-12 PL2.2.25/26... - Page 221 Check the MCU Board P/J25 for Go to step 15. Reconnect the proper connection. connector, Is P/J25 securely connected? then go to step 14. Does the error persist? Go to step 15. Complete. Phaser 6000/6010 and WC 6015 MFP Xerox Internal Use Only 3-85...
-
Page 222: Exit On Jam
If the problem persists, use the following procedure. Troubleshooting Reference Table Applicable Parts Wiring and Plug/Jack Map References Registration Sensor, PL2.3.5 “Map 3 - Phaser 6000/6010” on page 10-9 Registration Clutch, PL2.3.7 “Phaser 6000/6010 Feeder” on Harness Assembly RKN SNS, page 10-12 PL2.2.25/26... - Page 223 Check the Main Drive Assembly for Go to step 12. Reseat the proper installation. Main Drive Is the Main Drive Assembly installed Assembly, then correctly? go to step 12. Phaser 6000/6010 and WC 6015 MFP Xerox Internal Use Only 3-87...
- Page 224 MCU Board Registration You can also use the CE Diag Tool to (page 8-121). Clutch run this test (see page A-16). (page 8-66). Does the Registration Clutch function correctly? 3-88 Xerox Internal Use Only Phaser 6000/6010 and WC 6015 MFP...
-
Page 225: Exit Off Jam/Exit Off Early Jam
If the problem persists, use the following procedure. Troubleshooting Reference Table Applicable Parts Wiring and Plug/Jack Map References Fuser, PL5.1.1 “Map 3 - Phaser 6000/6010” on page 10-9 MCU Board, PL7.2.2 “Phaser 6000/6010 Fuser” on page 10-17 “Map 3 - WorkCentre 6015 MFP” on page 10-23 “WorkCentre 6015 MFP Fuser”... -
Page 226: Rear Cover Open
If the problem persists, use the following procedure. Troubleshooting Reference Table Applicable Parts Wiring and Plug/Jack Map References Rear Door, PL1.1.6 “Map 3 - Phaser 6000/6010” on page 10-9 Interlock Switch, PL1.1.12 “Phaser 6000/6010 LVPS” on LVPS, PL7.2.1 page 10-11 MCU Board, PL7.2.2... - Page 227 Error Messages and Codes Troubleshooting Procedure Table Step Actions and Questions Replace the LVPS (page 8-119). Replace the Complete. Does the error still occur when MCU Board printing? (page 8-121). Phaser 6000/6010 and WC 6015 MFP Xerox Internal Use Only 3-91...
-
Page 228: Exit Jam
If the problem persists, use the following procedure. Troubleshooting Reference Table Applicable Parts Wiring and Plug/Jack Map References Fuser, PL5.1.1 “Map 3 - Phaser 6000/6010” on page 10-9 MCU Board, PL7.2.2 “Phaser 6000/6010 Fuser” on page 10-17 “Map 3 - WorkCentre 6015 MFP” on page 10-23 “WorkCentre 6015 MFP Fuser”... -
Page 229: Registration Jam
If the problem persists, use the following procedure. Troubleshooting Reference Table Applicable Parts Wiring and Plug/Jack Map References Registration Sensor, PL2.3.5 “Map 2 - Phaser 6000/6010” on page 10-8 Harness Assembly RKN SNS, PL2.2.25 “Phaser 6000/6010 Feeder” on page 10-12 MCU Board, PL7.2.2... -
Page 230: Xero Near Life
If the problem persists, use the following procedure. Troubleshooting Reference Table Applicable Parts Wiring and Plug/Jack Map References MCU Board, PL7.2.2 “Map 3 - Phaser 6000/6010” on page 10-9 “Phaser 6000/6010 Xerographics” on page 10-14 “Map 3 - WorkCentre 6015 MFP” on page 10-23 “WorkCentre 6015 MFP Xerographics”... -
Page 231: Check Unit Adc Sensor
If the problem persists, use the following procedure. Troubleshooting Reference Table Applicable Parts Wiring and Plug/Jack Map References MCU Board, PL7.2.2 “Map 3 - Phaser 6000/6010” on page 10-9 “Phaser 6000/6010 Developer” on page 10-16 “Map 3 - WorkCentre 6015 MFP” on page 10-23 “WorkCentre 6015 MFP Developer”... -
Page 232: Adc Sensor Error
Is the harness continuous? Replace the MCU Board Contact your Complete. (page 8-121). designated Does the error persist when the field support for power is turned on? assistance. 3-96 Xerox Internal Use Only Phaser 6000/6010 and WC 6015 MFP... -
Page 233: Env Sensor Error
If the problem persists, use the following procedure Troubleshooting Reference Table Applicable Parts Wiring and Plug/Jack Map References MCU Board, PL7.2.2 “Map 3 - Phaser 6000/6010” on page 10-9 “Phaser 6000/6010 Fuser” on page 10-17 “Map 3 - WorkCentre 6015 MFP” on page 10-23 “WorkCentre 6015 MFP Fuser”... -
Page 234: Cru Near Life
If the problem persists, use the following procedure. Troubleshooting Reference Table Applicable Parts Wiring and Plug/Jack Map References Harn assy dckr, PL4.1.2 “Map 3 - Phaser 6000/6010” on page 10-9 MCU Board, PL7.2.2 “Phaser 6000/6010 Developer” on page 10-16 “Map 3 - WorkCentre 6015 MFP” on page 10-23 “WorkCentre 6015 MFP Developer”... -
Page 235: Toner Low Density
If the problem persists, use the following procedure. Troubleshooting Reference Table Applicable Parts Wiring and Plug/Jack Map References MCU Board, PL7.2.2 “Map 3 - Phaser 6000/6010” on page 10-9 “Phaser 6000/6010 LVPS” on page 10-11 “Phaser 6000/6010 Drive” on page 10-13 “Map 3 - WorkCentre 6015 MFP”... -
Page 236: Cru Life Over
If the problem persists, use the following procedure. Troubleshooting Reference Table Applicable Parts Wiring and Plug/Jack Map References Harn assy dckr, PL4.1.2 “Map 3 - Phaser 6000/6010” on page 10-9 MCU Board, PL7.2.2 “Phaser 6000/6010 Developer” on page 10-16 “Map 3 - WorkCentre 6015 MFP” on page 10-23 “WorkCentre 6015 MFP Developer”... -
Page 237: Toner Comm Fail
If the problem persists, use the following procedure. Troubleshooting Reference Table Applicable Parts Wiring and Plug/Jack Map References Harn assy dckr, PL4.1.2 “Map 3 - Phaser 6000/6010” on page 10-9 MCU Board, PL7.2.2 “Phaser 6000/6010 Developer” on page 10-16 “Map 3 - WorkCentre 6015 MFP” on page 10-23 “WorkCentre 6015 MFP Developer”... -
Page 238: Crum Id Error, X Cru Detached
If the problem persists, use the following procedure. Troubleshooting Reference Table Applicable Parts Wiring and Plug/Jack Map References MCU Board, PL7.2.2 “Map 3 - Phaser 6000/6010” on page 10-9 Harness Assembly DCKR, PL4.1.2 “Phaser 6000/6010 Developer” on page 10-16 “Map 3 - WorkCentre 6015 MFP” on page 10-23 “WorkCentre 6015 MFP Developer”... - Page 239 P/J13-3 on the MCU Board DCKR. approximately +3.3 VDC? Replace the Toner Cartridge (C, M, Y, Replace the Complete. or K). MCU Board Does the error persist? (page 8-121). Phaser 6000/6010 and WC 6015 MFP Xerox Internal Use Only 3-103...
-
Page 240: Insert Print Cartridge
If the problem persists, use the following procedure. Troubleshooting Reference Table Applicable Parts Wiring and Plug/Jack Map References MCU Board, PL7.2.2 “Map 3 - Phaser 6000/6010” on page 10-9 Harn assy dckr, PL4.1.2 “Phaser 6000/6010 Developer” on page 10-16 “Map 3 - WorkCentre 6015 MFP” on page 10-23 “WorkCentre 6015 MFP Developer”... -
Page 241: Ess Error
If the problem persists, use the following procedure. Troubleshooting Reference Table Applicable Parts Wiring and Plug/Jack Map References IP Board, PL7.1.9 “Map 2 - Phaser 6000/6010” on page 10-8 MCU Board, PL7.2.2 “Phaser 6000/6010 Image Processor Board” on page 10-18 “Map 2 - WorkCentre 6015 MFP”... -
Page 242: Fax Board Modem Error
If the problem persists, use the following procedure. Troubleshooting Reference Table Applicable Parts Wiring and Plug/Jack Map References IP Board, PL7.1.9 “Map 2 - Phaser 6000/6010” on page 10-8 Fax Board, PL7.1.22 “Phaser 6000/6010 Image Processor Fax Harness. PL7.1.22 Board” on page 10-18 MCU Board, PL7.2.2... -
Page 243: Asic Failure
If the problem persists, use the following procedure. Troubleshooting Reference Table Applicable Parts Wiring and Plug/Jack Map References LED Driver Board, PL7.1.5 “Map 3 - Phaser 6000/6010” on page 10-9 LED/MCU Cable, PL7.1.6 “Phaser 6000/6010 Xerographics” on MCU Board, PL7.2.2 page 10-14 “Phaser 6000/6010 Image Processor... -
Page 244: On Board Network Fatal Error
If the problem persists, use the following procedure. Troubleshooting Reference Table Applicable Parts Wiring and Plug/Jack Map References IP Board, PL7.1.9 “Map 2 - Phaser 6000/6010” on page 10-8 MCU Board, PL7.2.2 “Phaser 6000/6010 Image Processor Board” on page 10-18 “Map 2 - WorkCentre 6015 MFP”... -
Page 245: System Usb Port Error
If the problem persists, use the following procedure. Troubleshooting Reference Table Applicable Parts Wiring and Plug/Jack Map References IP Board, PL7.1.9 “Map 2 - Phaser 6000/6010” on page 10-8 MCU Board, PL7.2.2 “Phaser 6000/6010 Image Processor Board” on page 10-18 “Map 2 - WorkCentre 6015 MFP”... -
Page 246: System Restart
If the problem persists, use the following procedure. Troubleshooting Reference Table Applicable Parts Wiring and Plug/Jack Map References IP Board, PL7.1.9 “Map 2 - Phaser 6000/6010” on page 10-8 “Phaser 6000/6010 Image Processor Board” on page 10-18 “Map 2 - WorkCentre 6015 MFP” on page 10-22 “WorkCentre 6015 MFP Image... -
Page 247: Xero Life Over
Loosen the screws on the IP Board, Go to step 2. Complete. then retighten the screws to reseat the board. Check that all the connectors on the IP Board are secure. Does the problem persist? Phaser 6000/6010 and WC 6015 MFP Xerox Internal Use Only 3-111... - Page 248 Error Messages and Codes Troubleshooting Procedure Table Step Actions and Questions Replace the IP Board (page 8-114). Replace the Complete. Does the error persist? MCU Board (page 8-121). 3-112 Xerox Internal Use Only Phaser 6000/6010 and WC 6015 MFP...
-
Page 249: Troubleshooting
Troubleshooting In this chapter... • Introduction • Using Phaser 6010N and WorkCentre 6015 MFP Service Diagnostics • Phaser 6010N Service Diagnostics • WorkCentre 6015 MFP Service Diagnostics • Control Panel Troubleshooting • Abnormal Noises • Power Supply Troubleshooting Chapter... -
Page 250: Introduction
Is the power cord damaged? 4. Check the electrical outlet. Is the outlet turned off by a switch or breaker? 5. Does other electrical equipment plugged into the outlet operate? Xerox Internal Use Only Phaser 6000/6010 and WC 6015 MFP... -
Page 251: Display Problems
Print the Configuration Page to verify that the current settings are correct. Copy Problems If document loaded in the ADF cannot be copied, check and try the following. 1. Ensure that the ADF cover is firmly closed. Phaser 6000/6010 and WC 6015 MFP Xerox Internal Use Only... -
Page 252: Scanning Problems
6. Ensure that the document is not curled. 7. Fan the document well before loading it in the ADF. Vertical stripes appear on the Clean the document glass. output when scanned using the ADF. Xerox Internal Use Only Phaser 6000/6010 and WC 6015 MFP... - Page 253 Server Address mail or Scan to Network feature Server Path Share Name Login Name Login Password Scan to E-mail 2. Check the following setting under Address Book > E-Mail Address: Address Phaser 6000/6010 and WC 6015 MFP Xerox Internal Use Only...
-
Page 254: Fax Problems
2. Check your printer by making a copy. 3. The toner cartridge may be empty. Replace the toner cartridge. 4. The fax machine sending you the fax may be faulty. Xerox Internal Use Only Phaser 6000/6010 and WC 6015 MFP... -
Page 255: Media-Based Problems
3. Try loading media from a fresh ream, fan, and then insert the media into the tray or flip existing media over. 4. Clean the Feed and Separator Rollers with a clean, dry, lint-free wipe. Phaser 6000/6010 and WC 6015 MFP Xerox Internal Use Only... -
Page 256: Skewed Image
5. Ensure that the loaded media matches the Control Panel settings. 6. Are the margins on the page greater than 4.1 mm? 7. Check the Fuser area for debris. 8. Visually inspect the Fuser for burrs. Xerox Internal Use Only Phaser 6000/6010 and WC 6015 MFP... - Page 257 6. If debris is visible, clean the printer with a clean, dry, lint-free wipe. 7. Turn the printer off and then back on. The exit roller in the Fuser should turn for a few seconds. Phaser 6000/6010 and WC 6015 MFP Xerox Internal Use Only...
-
Page 258: Using Phaser 6010N And Workcentre 6015 Mfp Service Diagnostics
Puts the printer in reduced power mode. Cancel Resets a diagnostic item, cancel, or exit the menu. For parameters, pressing OK after selecting an item from the menu displays the current value of the item. 4-10 Xerox Internal Use Only Phaser 6000/6010 and WC 6015 MFP... -
Page 259: Entering Service Diagnostics Mode
Complete Exit Exit? is displayed. For WorkCentre 6015 MFP: 1. Scroll to Fax/Scanner > Complete > Exit Fax/Scanner Diag, and press OK. 2. Press OK when Complete Exit? is displayed. Phaser 6000/6010 and WC 6015 MFP Xerox Internal Use Only 4-11... -
Page 260: Phaser 6010N Service Diagnostics
Toner TDCC Y TestPatLPHC[IOT] Toner TDCC M TestPatLPHK[IOT] Toner TDCC C Grid2 Toner TDCC K TonerPalletCheck Toner Pixel Y ContaminationChk Toner Pixel M Toner Pixel C Toner Pixel K s6000-223 4-12 Xerox Internal Use Only Phaser 6000/6010 and WC 6015 MFP... -
Page 261: Phaser 6010N Diagnostic Test Descriptions
Cancel Cancel job Back Back Energy Saver Power save Engine Test Start Print engine communication test. Run Check OK or Engine this test when the 024-371 error Error occurs. Phaser 6000/6010 and WC 6015 MFP Xerox Internal Use Only 4-13... - Page 262 10 seconds. Executing this test for 10 seconds or longer may cause damage to the printer. Regi Clutch Drive Clutch Feed SOLENOID Feed Solenoid K Mode SOLENOID Developer Drive Assembly 4-14 Xerox Internal Use Only Phaser 6000/6010 and WC 6015 MFP...
- Page 263 Please wait Print Info Provides printer configuration and settings information. Info Page Ready Prints version information. The Processing Configuration Page contains: Engine ROM Revision No. MCU NVM Revision No. Phaser 6000/6010 and WC 6015 MFP Xerox Internal Use Only 4-15...
- Page 264 (Read only) B/W Print Total Print Full Color Backup Color 1 Backup Color 2 Backup B/W Backup Total Backup Full Color Error Color 1 Error Color 2 Error B/W Error 4-16 Xerox Internal Use Only Phaser 6000/6010 and WC 6015 MFP...
- Page 265 Skew Y, M, C, K -630 to 630 Adjusts the skew so that the image is parallel with both sides of the paper. See the following illustration for additional explanation. Phaser 6000/6010 and WC 6015 MFP Xerox Internal Use Only 4-17...
- Page 266 These counter values are reference only. Do not use as the official value. M/C Total PU 30000 M/C FC PV DEVE Roundtime K - DEVE Roundtime XERO Roundtime M/C DispTime Y 4-18 Xerox Internal Use Only Phaser 6000/6010 and WC 6015 MFP...
- Page 267 Toner DispTime C Toner DispTime K Toner TDCC Y Toner TDCC M Toner TDCC C Toner TDCC K Toner Pixel Y Toner Pixel M Toner Pixel C Toner Pixel K Phaser 6000/6010 and WC 6015 MFP Xerox Internal Use Only 4-19...
-
Page 268: Phaser 6010N Sensor Test Procedures
Sensor No Paper Sensor K Mode Sensor s6000-140 Note Pressing the Cancel button stops the sensor tests. Press the Menu button to get back to the Engine Diag menu. 4-20 Xerox Internal Use Only Phaser 6000/6010 and WC 6015 MFP... - Page 269 3. Insert a sheet into the tray to check whether the sensor functions properly. 4. Confirm the number shown on the display increases each time the sheet is inserted. 5. Press the Cancel button to stop the test. Paper s6000-141 Phaser 6000/6010 and WC 6015 MFP Xerox Internal Use Only 4-21...
- Page 270 5. Confirm the number shown on the display increases every time the actuator is operated. 6. Press the Cancel button to stop the test. 7. Replace the main paper tray harness guide and Left Side Cover. Actuator K Mode Switching Sensor s6000-142 4-22 Xerox Internal Use Only Phaser 6000/6010 and WC 6015 MFP...
-
Page 271: Exit Sensor
4. Confirm the number shown on the display increases every time the actuator is operated. 5. Press the Cancel button to stop the test. Actuator Exit Sensor Paper Paper s6000-143 Phaser 6000/6010 and WC 6015 MFP Xerox Internal Use Only 4-23... -
Page 272: Registration Sensor
5. Confirm the number shown on the display increases every time the actuator is operated. 6. Press the Cancel button to stop the test. 7. Close the Rear Door. Actuator Registration Sensor s6000-144 4-24 Xerox Internal Use Only Phaser 6000/6010 and WC 6015 MFP... - Page 273 4. Confirm the number shown on the display increases every time the actuator is operated. 5. Press the Cancel button to stop the test. 6. Close the Rear Door. s6000-145 Phaser 6000/6010 and WC 6015 MFP Xerox Internal Use Only 4-25...
-
Page 274: Phaser 6010N Motor Test Procedures
Fan Motor (High, Low) • Registration Clutch • Feed Solenoid • K Mode Solenoid Yellow/Magenta Toner Motor Main Motor Cyan/Black Toner Motor K Mode Solenoid Feed Solenoid Regi Clutch s6000-003 4-26 Xerox Internal Use Only Phaser 6000/6010 and WC 6015 MFP... -
Page 275: Main Motor
To stop the motor check, press the Cancel button (or click the Stop button if performing the test from the CE Diag Tool). 3. Check that the Exit Roller rotates. 4. Press the Cancel button to stop the test. Exit Roller s6000-147 Phaser 6000/6010 and WC 6015 MFP Xerox Internal Use Only 4-27... - Page 276 When checking the Fan, stop the test within 10 seconds. Executing the Fan test for 10 seconds or longer may cause damage to the Fan. 3. Check Fan rotation. 4. Press the Cancel button to stop the test. s6000-148 4-28 Xerox Internal Use Only Phaser 6000/6010 and WC 6015 MFP...
-
Page 277: Registration Clutch
7. Use the Down Arrow to scroll to the motor test and press Cancel to stop the motor test. 8. Open the Rear Door Interlock Switch. 9. Close the Rear Door. Registration Roller s6000-149 Phaser 6000/6010 and WC 6015 MFP Xerox Internal Use Only 4-29... -
Page 278: Feed Solenoid
5. Press the Cancel button to stop the Feed Solenoid test. 6. Use the Down Arrow to scroll to the motor test, and press Cancel to stop the motor test. 7. Replace the Bypass Tray. Feed Roller s6000-150 4-30 Xerox Internal Use Only Phaser 6000/6010 and WC 6015 MFP... - Page 279 4. Check Color Mode Solenoid movement. 5. Press the Cancel button to stop the solenoid test. 6. Replace the harness guide and Left Side Cover. K Mode Solenoid s6000-151 Phaser 6000/6010 and WC 6015 MFP Xerox Internal Use Only 4-31...
-
Page 280: Workcentre 6015 Mfp Service Diagnostics
Toner DispTime M Toner DispTime C Toner DispTime K Toner TDCC Y Toner TDCC M Toner TDCC C Toner TDCC K Toner Pixel Y Toner Pixel M Toner Pixel C s6015-083 4-32 Xerox Internal Use Only Phaser 6000/6010 and WC 6015 MFP... -
Page 281: Workcentre 6015 Mfp Diagnostic Test Descriptions
Chapter 8. If test results are inconclusive, isolate the problem using the general procedures in this chapter. Caution Do not turn the printer Off during ESS Diag testing. Phaser 6000/6010 and WC 6015 MFP Xerox Internal Use Only 4-33... - Page 282 A crimping tool Pin 1 TX+ to 3 Rx+ Pin 2 TX- to 6 Rx- s6015-087 IOT Test CHECK OK This test checks communication with IOT ERROR the printer. 4-34 Xerox Internal Use Only Phaser 6000/6010 and WC 6015 MFP...
- Page 283 K Mode Sensor (DI-3) Color Mode Sensor Exit Sensor (DI-4) Exit Sensor Regi Sensor (DI-5) Registration Sensor Interlock Switch (DI-7) Interlock Switch CRUM Y Sensor (DI-8) Yellow CRUM Sensor Phaser 6000/6010 and WC 6015 MFP Xerox Internal Use Only 4-35...
- Page 284 Save NVM to ESS Save NVM Saves the MCU Board NVM to the IP Board temporarily when the MCU Save NVM MCU -> ESS OK? needs to be replaced. Saved Please wait 4-36 Xerox Internal Use Only Phaser 6000/6010 and WC 6015 MFP...
- Page 285 Full Color Error Color 1 Error Color 2 Error B/W Error Clear All NVM Clears all NVM. Processing Initialized Clear Job History Deletes job history data from NVM. Processing Initialized Phaser 6000/6010 and WC 6015 MFP Xerox Internal Use Only 4-37...
- Page 286 Default Value s6000-229 Life Counter Name Value These counter values are for reference only. Do not use as the official value. M/C Total PV 30000 M/C FC PV 4-38 Xerox Internal Use Only Phaser 6000/6010 and WC 6015 MFP...
-
Page 287: Workcentre 6015 Mfp Print Engine Test Procedures
2. Press and hold the Up and Down Arrow simultaneously and turn the printer 3. Release the buttons when CE Mode Please wait appears on the display. 4. Press OK at Printer. 5. Press OK at ESS Diag. Phaser 6000/6010 and WC 6015 MFP Xerox Internal Use Only 4-39... - Page 288 0x55 and 0xAA is the test data pattern. USB Test 1 Tests communication between the USB Host port and the device to which it is connected. 4-40 Xerox Internal Use Only Phaser 6000/6010 and WC 6015 MFP...
- Page 289 This test checks whether Wi-Fi dongle enumeration passes. OP Panel Test This test starts with an LCD test. The following test patterns are displayed. Horizontal bar s6015-088 Vertical bar s6015-089 Checker pattern s6015-090 Black display s6015-091 Phaser 6000/6010 and WC 6015 MFP Xerox Internal Use Only 4-41...
- Page 290 Test, Lamp Test, and Scanner Test. If an error occurs during testing, the LCD displays the test failure item. When you have eliminated the error, continue this test until the test runs successfully. 4-42 Xerox Internal Use Only Phaser 6000/6010 and WC 6015 MFP...
-
Page 291: Workcentre 6015 Mfp Sensor Test Procedures
Parameters for the Digital Input tests are as shown in the following table. Code Component DI-0 Fan Alarm ((internal signal) DI-2 No Paper Sensor DI-3 K Mode Sensor DI-4 Exit Sensor Phaser 6000/6010 and WC 6015 MFP Xerox Internal Use Only 4-43... - Page 292 3. Insert a sheet into the tray to check whether the sensor functions properly. 4. Confirm the number shown on the display increases each time the sheet is inserted. 5. Press the Stop button to stop the test. Paper s6015-075 4-44 Xerox Internal Use Only Phaser 6000/6010 and WC 6015 MFP...
- Page 293 5. Confirm the number shown on the display increases every time the actuator is operated. 6. Press the Stop button to stop the test. 7. Replace the main paper tray harness guide and Left Side Cover. Actuator K Mode Switching Sensor s6000-142 Phaser 6000/6010 and WC 6015 MFP Xerox Internal Use Only 4-45...
- Page 294 4. Confirm the number shown on the display increases every time the actuator is operated. 5. Press the Stop button to stop the test. Actuator Exit Sensor Paper Paper s6000-143 4-46 Xerox Internal Use Only Phaser 6000/6010 and WC 6015 MFP...
- Page 295 5. Confirm the number shown on the display increases every time the actuator is operated. 6. Press the Stop button to stop the test. 7. Close the Rear Door. Actuator Registration Sensor s6000-144 Phaser 6000/6010 and WC 6015 MFP Xerox Internal Use Only 4-47...
- Page 296 4. Confirm the number shown on the display increases every time the actuator is operated. 5. Press the Stop button to stop the test. 6. Close the Rear Door. s6015-076 4-48 Xerox Internal Use Only Phaser 6000/6010 and WC 6015 MFP...
- Page 297 5. Confirm the number shown on the display increases each time the toner cartridge is removed. 6. Press the Stop button to stop the test. Phaser 6000/6010 and WC 6015 MFP Xerox Internal Use Only 4-49...
-
Page 298: Workcentre 6015 Mfp Motor Test Procedures
DO-2 Main Motor (Slow Rotation) DO-4 Fan Motor (Full Rotation) DO-5 Fan Motor (Half Rotation) DO-7 Regi Clutch DO-9 Feed Solenoid DO-b K Mode Solenoid DO-10 Yellow Toner Motor 4-50 Xerox Internal Use Only Phaser 6000/6010 and WC 6015 MFP... - Page 299 To stop the motor check, press the Stop button (or click the Stop button if performing the test from the CE Diag Tool). 3. Check that the Exit Roller rotates. 4. Press the Stop button to stop the test. Exit Roller s6015-077 Phaser 6000/6010 and WC 6015 MFP Xerox Internal Use Only 4-51...
- Page 300 When checking the Fan, stop the test within 10 seconds. Executing the Fan test for 10 seconds or longer may cause damage to the Fan. 3. Check Fan rotation. 4. Press the Stop button to stop the test. s6015-078 4-52 Xerox Internal Use Only Phaser 6000/6010 and WC 6015 MFP...
- Page 301 7. Use the Down Arrow to scroll to the motor test and press Cancel to stop the motor test. 8. Open the Rear Door Interlock Switch. 9. Close the Rear Door. Registration Rollers s6015-079 Phaser 6000/6010 and WC 6015 MFP Xerox Internal Use Only 4-53...
- Page 302 5. Press the Stop button to stop the Feed Solenoid test. 6. Use the Down Arrow to scroll to the motor test and press Stop to stop the motor test. 7. Replace the Bypass Tray. Feed Roller s6015-080 4-54 Xerox Internal Use Only Phaser 6000/6010 and WC 6015 MFP...
- Page 303 4. Check K Mode Solenoid movement. 5. Press the Stop button to stop the solenoid test. 6. Replace the harness guide and Left Side Cover. K Mode Solenoid s6000-151 Phaser 6000/6010 and WC 6015 MFP Xerox Internal Use Only 4-55...
- Page 304 4. Remove the toner cartridge under test. 5. Check that the toner motor gear rotates. 6. Press the Stop button to stop the test. 7. Replace the toner cartridge and close the Toner Door. 4-56 Xerox Internal Use Only Phaser 6000/6010 and WC 6015 MFP...
-
Page 305: Workcentre 6015 Mfp Fax/Scanner Diagnostic Test Descriptions
4:- 4 dB, 5: -5 dB DTMF Dialing 0: 70 ms, 1: 80 ms, 2: 85 ms, Speed (ms) 3: 90 ms, 4: 95 ms, 5: 100 ms, 6: 105 ms, 7: 110 ms Phaser 6000/6010 and WC 6015 MFP Xerox Internal Use Only 4-57... - Page 306 2: 363 Hz ~ 502 Hz 3: 276 Hz ~ 504 Hz 4: 415 Hz ~ 460 Hz 5: 310 Hz ~ 640 Hz 6: 370 Hz ~ 525 Hz 4-58 Xerox Internal Use Only Phaser 6000/6010 and WC 6015 MFP...
- Page 307 Initializes the system data. System Data Init Initializes the system data. Complete Exits the diagnostics and returns to normal operation, taking the changes of the data into effect. Phaser 6000/6010 and WC 6015 MFP Xerox Internal Use Only 4-59...
-
Page 308: Workcentre 6015 Mfp Fax/Scanner Diagnostic Test Procedures
3. Release the buttons when CE Mode Please wait appears on the display. 4. Press OK at Fax/Scanner. Information Select this menu item to display the value of the scan counter. 4-60 Xerox Internal Use Only Phaser 6000/6010 and WC 6015 MFP... -
Page 309: Scanner Maintenance
Checks the operation (on/off) of the Feed ADF Document Sensor sensor. Checks the operation (on/off) of the ADF ADF Cover Sensor cover sensor a.3-in-1 model does not have an ADF. Phaser 6000/6010 and WC 6015 MFP Xerox Internal Use Only 4-61... - Page 310 5: 1000 ms, 6: 1100 ms, 7: 1200 ms, 8: 1300 ms, 9: 1400 ms, 10: 1500 ms, 11: 1600 ms, 12: 1700 ms, 13: 1800 ms, 14: 1900 ms, 15: 2000 ms 4-62 Xerox Internal Use Only Phaser 6000/6010 and WC 6015 MFP...
- Page 311 6: -9 dB, 7: -10 dB, 8: -11 dB, 9: -12 dB, 10: -13 dB, 11: -14 dB, 12: -15 dB, 13: -16 dB, 14: -17 dB, 15: -18 dB Phaser 6000/6010 and WC 6015 MFP Xerox Internal Use Only 4-63...
- Page 312 Initializes the system data. System Data Init: Initializes the system data. Complete Exits the diagnostics and returns to normal operation, taking the changes of the data into effect. 4-64 Xerox Internal Use Only Phaser 6000/6010 and WC 6015 MFP...
-
Page 313: Control Panel Troubleshooting
1. Reseat connectors on the Image Processor Board. 2. Refer to “DC Power Troubleshooting” on page 4-68. 3. Replace the Control Panel (page 8-101 for Phaser 6000/6010, page 8-104 for WorkCentre 6015 MFP). 4. Repair the Control Panel wiring harnesses. -
Page 314: Abnormal Noises
Wipe the stains Reseat the plate earth dl (PL3.2.2). or foreign connectors on Are there any stains or foreign substance with the HVPS. substances on the contacts? dry cloth. 4-66 Xerox Internal Use Only Phaser 6000/6010 and WC 6015 MFP... -
Page 315: Power Supply Troubleshooting
Disconnect the power cord and wait Complete. Replace the for 1 minute. Reseat the AC Inlet LVPS Harness (PL7.2.9), and then turn the (page 8-119). printer on. Does the printer now work? Phaser 6000/6010 and WC 6015 MFP Xerox Internal Use Only 4-67... -
Page 316: Dc Power Troubleshooting
Control Panel (page 8-101 for Phaser 6000/6010, page 8-104 for WorkCentre 6015 MFP). Reseat the connectors on the MCU Replace the Complete. Board. LVPS Does the error persist? (page 8-119). 4-68 Xerox Internal Use Only Phaser 6000/6010 and WC 6015 MFP... -
Page 317: Image Quality
Image Quality In this chapter... • Image Quality Overview • Checklist Before Troubleshooting Print-Quality • Print-Quality Troubleshooting • Test Prints • Image Specifications Chapter... -
Page 318: Image Quality Overview
Refer to “Media and Tray Specifications” on page 1-31 for supported and specialty media that have been tested and approved for use in the Phaser 6000/6010 and WorkCentre 6015 MFP printers. Use paper from a fresh ream that is acclimated to room temperature and humidity. -
Page 319: Repeating Defects
If the toner is low, replace the affected cartridges. Toner that is not genuine Xerox toner can also cause print-quality problems. If the toner is not Xerox toner, replace the Toner Cartridge and recheck the print-quality issue. -
Page 320: Symptom Checklist
Check the Toner Cartridge to make sure that it is installed correctly. The toner may be low. Change the Toner Cartridge. Blank Print Black Output Check the amount of toner remaining in the cartridge. Black Print Xerox Internal Use Only Phaser 6000/6010 and WC 6015 MFP... - Page 321 Check the Toner Cartridge(s) to ensure correct installation. Clean the inside of the printer. Random Spots Streaks On Page Check the amount of toner remaining in the cartridge. Vertical Stripes Phaser 6000/6010 and WC 6015 MFP Xerox Internal Use Only...
- Page 322 Try changing the Paper Type setting in the printer driver. For example, change the plain paper to thick. Adjust the transfer bias (see page 6-8). Adjust the Fuser temperature (see page 6-9). Residual Image/Ghosting Xerox Internal Use Only Phaser 6000/6010 and WC 6015 MFP...
- Page 323 If using a downloaded font, ensure that the font is recommended for the printer, operating system, and Chrysanthemum x morifolium Chrysanthemum x morifolium nthemum x nthemum x the application being used. Fuzzy Text Phaser 6000/6010 and WC 6015 MFP Xerox Internal Use Only...
- Page 324 Operate the Dispense Motor (Y, M, C, or K) for the color in which the problem lies. s6000-203 Damaged Media Verify that the correct print media is being used. Wrinkling Xerox Internal Use Only Phaser 6000/6010 and WC 6015 MFP...
- Page 325 Manually correct color registration (page 6-2). Color Registration Skewed Images Verify that the paper guides are set correctly. Verify that the correct print media is being used. Image Area Skew 3 Phaser 6000/6010 and WC 6015 MFP Xerox Internal Use Only...
- Page 326 Chrysanthemum x morifolium Chrysanthemum x morifolium Chrysanthemum x morifolium nthemum x nthemum x Fuzzy Text 5-10 Xerox Internal Use Only Phaser 6000/6010 and WC 6015 MFP...
-
Page 327: Print-Quality Troubleshooting
Is the trouble fixed? Is the trouble fixed? Replace the Fuser Is the trouble fixed? Replace the "Possible causative parts" listed in the relevant procedure one by one. s6000-200 Phaser 6000/6010 and WC 6015 MFP Xerox Internal Use Only 5-11... -
Page 328: Print-Quality Defect Definitions
The toner is not completely fused. 5-34 Hunting The printed image has wavy column line in 5-36 the direction of the paper travel. Incorrect Incorrect magnification when copying with 5-37 Magnification the ADF feeding. 5-12 Xerox Internal Use Only Phaser 6000/6010 and WC 6015 MFP... -
Page 329: Light Or Undertone Print
Check that the media settings match the media in use. • Check that the media is dry and in good condition. Troubleshooting Reference Table Applicable Parts Example Print Toner Motor, PL4.1.9 Transfer Roller, PL1.1.9 Light or Undertone Print Phaser 6000/6010 and WC 6015 MFP Xerox Internal Use Only 5-13... - Page 330 Motor Y/M/C/K On, then click the Start button. Does the Toner Motor function? Replace the Transfer Roller Contact your Complete. (page 8-14). designated Does the error persist? field support for assistance. 5-14 Xerox Internal Use Only Phaser 6000/6010 and WC 6015 MFP...
-
Page 331: Blank Print
Reseat and lock the Toner Complete. Go to step 4. Cartridges. Does the image print correctly? Replace the Transfer Roller. Contact your Complete. Does the error persist? designated field support for assistance. Phaser 6000/6010 and WC 6015 MFP Xerox Internal Use Only 5-15... -
Page 332: Black Print
Ensure there is no debris on the transfer path. Troubleshooting Reference Table Applicable Parts Example Print Black Print Troubleshooting Procedure Table Step Actions and Questions Contact your designated field support for assistance. 5-16 Xerox Internal Use Only Phaser 6000/6010 and WC 6015 MFP... -
Page 333: Toner Smears
Does the image print correctly? Replace the Fuser (page 8-80). Complete. Replace the Transfer Roller. Warning: Allow the Fuser to cool before removing it. Does the image print correctly? Phaser 6000/6010 and WC 6015 MFP Xerox Internal Use Only 5-17... -
Page 334: Random Spots
Replace the Transfer Roller Complete. Go to step 6. (page 8-14). Does the image print correctly? Replace the Fuser (page 8-80). Complete. Warning: Allow the Fuser to cool before replacing. 5-18 Xerox Internal Use Only Phaser 6000/6010 and WC 6015 MFP... -
Page 335: Streaks
Replace the Transfer Roller Complete. Go to step 6. (page 8-14). Does the image print correctly? Replace the Fuser (page 8-80). Complete. Warning: Allow the Fuser to cool before replacing. Phaser 6000/6010 and WC 6015 MFP Xerox Internal Use Only 5-19... -
Page 336: Pitched Color Dots
Measure the pitch. Replace the Contact your Does the pitch match any of the corresponding designated pitches shown in the Repeating parts. field support for Defects Table? See page 5-3. assistance. 5-20 Xerox Internal Use Only Phaser 6000/6010 and WC 6015 MFP... -
Page 337: Vertical Blank Lines
Replace the Transfer Roller Complete. Go to step 4. (page 8-14). Does the image print correctly? Replace the Fuser (page 8-80). Complete. Warning: Allow the Fuser to cool before replacing. Phaser 6000/6010 and WC 6015 MFP Xerox Internal Use Only 5-21... -
Page 338: Residual Image Or Ghosting
Replace the Transfer Roller Complete. Go to step 2. (page 8-14). Does the image print correctly? Replace the Fuser (page 8-80). Complete. Warning: Allow the Fuser to cool before replacing. 5-22 Xerox Internal Use Only Phaser 6000/6010 and WC 6015 MFP... -
Page 339: Jagged Characters
Chrysanthemum x morifolium Chrysanthemum x morifolium Chrysanthemum x morifolium nthemum x nthemum x Fuzzy Text Troubleshooting Procedure Table Step Actions and Questions Replace the Image Processor Board. Complete. Phaser 6000/6010 and WC 6015 MFP Xerox Internal Use Only 5-23... -
Page 340: Horizontal Band, Voids, Or Streaks
Compare the defects to the Pitch Replace the Contact your Chart (page 5-44). corresponding designated Do any of the horizontal bands parts. field support for match the chart? assistance. 5-24 Xerox Internal Use Only Phaser 6000/6010 and WC 6015 MFP... -
Page 341: Auger Mark
Transfer Roller, PL6.1.7 s6000-203 Troubleshooting Procedure Table Step Actions and Questions Replace the Image Processor Board. Complete. Contact your Does the image print correctly? designated field support for assistance. Phaser 6000/6010 and WC 6015 MFP Xerox Internal Use Only 5-25... -
Page 342: Damaged Media
Is there contamination or foreign and then go to objects in the paper path? step 3. Does the image print correctly? Complete. Go to step 4. 5-26 Xerox Internal Use Only Phaser 6000/6010 and WC 6015 MFP... - Page 343 Allow the Fuser to cool before removing it. Does the image print correctly? Replace the Separator Pad Complete. Go to step 10. (page 8-49). Does the image print correctly? Phaser 6000/6010 and WC 6015 MFP Xerox Internal Use Only 5-27...
-
Page 344: Image Not Centered
If feeding from the Bypass Tray, try feeding from Main Paper Tray. Troubleshooting Reference Table Applicable Parts Example Print Feed Drive Assembly, PL6.1.5 Registration Roller, PL2.3.1 Registration Pinch Roller, PL2.3.2 Separator Pad, PL2.2.11 MCU Board, PL7.2.2 Image Not Centered 5-28 Xerox Internal Use Only Phaser 6000/6010 and WC 6015 MFP... - Page 345 Registration Pinch Roller rotate correctly? Replace the Main Drive Assembly Complete. Go to step 6. (page 8-82). Does the image print correctly? Does the image print correctly? Complete. Go to step 6. Phaser 6000/6010 and WC 6015 MFP Xerox Internal Use Only 5-29...
- Page 346 Go to step 9. (page 8-49). Does the image print correctly? Replace the MCU Board Complete. Contact your (page 8-121). designated Does the image print correctly? field support for assistance. 5-30 Xerox Internal Use Only Phaser 6000/6010 and WC 6015 MFP...
-
Page 347: Color Registration
Sensors” on page 7-7. Does the image print correctly? Adjust the color registration. See Complete. Contact your “Color Registration” on page 6-2. designated Does the image print correctly? field support for assistance. Phaser 6000/6010 and WC 6015 MFP Xerox Internal Use Only 5-31... -
Page 348: Skew
Skew 2 Note The Main Paper Tray is recommended for paper feeding because paper fed from the Bypass Tray is prone to skew depending on how the sheet is fed. 5-32 Xerox Internal Use Only Phaser 6000/6010 and WC 6015 MFP... - Page 349 1. Do the Registration Roller and the Registration Pinch Roller rotate correctly? Replace the Main Drive Assembly Complete. Go to step 5. (page 8-82). Does the image print correctly? Phaser 6000/6010 and WC 6015 MFP Xerox Internal Use Only 5-33...
-
Page 350: Unfused Image
Unfused Image The image is not completely fused to the paper. The image easily rubs off. Initial Actions • Check the media path. • Check the Fuser connection (P/J171). 5-34 Xerox Internal Use Only Phaser 6000/6010 and WC 6015 MFP... - Page 351 Allow the Fuser to cool before removal. Does the error persist? Replace the MCU Board Contact your Complete. (page 8-121). designated Does the error persist? field support for assistance. Phaser 6000/6010 and WC 6015 MFP Xerox Internal Use Only 5-35...
-
Page 352: Hunting
2. Does the image print correctly? Complete. Go to step 3. Replace the ADF Assembly Replace the IIT Complete. (page 8-37). Assembly Does the error persist? (page 8-35). 5-36 Xerox Internal Use Only Phaser 6000/6010 and WC 6015 MFP... -
Page 353: Incorrect Magnification
2. Does the image print correctly? Complete. Go to step 3. Replace the ADF Assembly Replace the IIT Complete. (page 8-37). Assembly Does the error persist? (page 8-35). Phaser 6000/6010 and WC 6015 MFP Xerox Internal Use Only 5-37... -
Page 354: Test Prints
WorkCentre 6015 MFP Test Prints To print a test print: 1. Start the Xerox Chart Print Tool. 2. Check that the Paper Size is set correctly in the tool. 3. Click the check box of the chart that you want to print. - Page 355 MQ Chart Prints charts to check for binding in A4 or Letter. When the PQ problem occurred, this test helps to identify the problem as printer related or otherwise. s6000-199 Phaser 6000/6010 and WC 6015 MFP Xerox Internal Use Only 5-39...
- Page 356 LED Driver Board. If the test print is OK, check that the printer is connected correctly. s6000-192 5-40 Xerox Internal Use Only Phaser 6000/6010 and WC 6015 MFP...
- Page 357 Prints the LED Driver Board built-in test pattern. If the pattern does not print correctly, check the LED Driver board. If the pattern prints OK, check the Image Processor Board. s6000-187 Phaser 6000/6010 and WC 6015 MFP Xerox Internal Use Only 5-41...
- Page 358 If the test pattern does not print correctly, check the print process. If the test pattern prints correctly, check the LED Driver Board and the Image Processor Board. s6000-190 5-42 Xerox Internal Use Only Phaser 6000/6010 and WC 6015 MFP...
-
Page 359: Phaser 6000/6010 Test Prints
Phaser 6000/6010 Test Prints Printing Test Prints From CE Diagnostics Note This procedure applies to the Phaser 6000/6010 printers only. 1. Start the CE Diagnostic software (see page A-4), and select the CE Diag tab. 2. Select Test Print. 3. Select the desired test print button. - Page 360 Prints the LED Driver Board built-in test pattern. If the pattern does not print correctly, check the LED Driver board. If the pattern prints OK, check the Image Processor Board. s6000-187 5-44 Xerox Internal Use Only Phaser 6000/6010 and WC 6015 MFP...
- Page 361 If the test pattern does not print correctly, check the print process. If the test pattern prints correctly, check the LED Driver Board and the Image Processor Board. s6000-190 Phaser 6000/6010 and WC 6015 MFP Xerox Internal Use Only 5-45...
- Page 362 Compare the print with this example to determine the problem. • Fail: Check the Toner Cartridge and delivery for the problem color. • Pass: Check the print data. s6000-193 5-46 Xerox Internal Use Only Phaser 6000/6010 and WC 6015 MFP...
- Page 363 When there is a problem, alignment is skewed. • Fail: Perform the Skew troubleshooting procedure (page 5-32). • Pass: Lines are parallel to the edges of the sheet. s6015-108 Phaser 6000/6010 and WC 6015 MFP Xerox Internal Use Only 5-47...
- Page 364 Compare the print with this example to determine the problem. • Checks Cyan, Magenta, or Yellow Toner Cartridge, HVPS, Imaging Units, biasing contacts. • Used to troubleshoot repeating defects, missing colors, streaks, voids or banding. s6015-110 5-48 Xerox Internal Use Only Phaser 6000/6010 and WC 6015 MFP...
-
Page 365: Image Specifications
200 mm ± 0.5 mm Vertical 280 mm ± 0.5 mm 260 mm ± 0.5 mm Registration ≤ ± 2.0 mm Leading Edge ≤ ± 2.5 mm Side Edge Phaser 6000/6010 and WC 6015 MFP Xerox Internal Use Only 5-49... -
Page 366: Specification Chart
Image Quality Specification Chart The points lettered A through K on the example illustration are measurement points used to determine whether the image is within specifications. Color Chart 5-50 Xerox Internal Use Only Phaser 6000/6010 and WC 6015 MFP... -
Page 367: Skew
Image Area s6000-242 Note The most common reason for skew to be out of specification is because the paper guides are set incorrectly. Phaser 6000/6010 and WC 6015 MFP Xerox Internal Use Only 5-51... -
Page 368: Parallelism
180 mm 280 mm Parallelism (within ±1.3 mm) Parallelism Note The most common reason for parallelism to be out of specification is because the paper guides are set incorrectly. 5-52 Xerox Internal Use Only Phaser 6000/6010 and WC 6015 MFP... -
Page 369: Linearity
Linearity of Horizontal Line (within ±0.5 mm) 280 mm (A4) Linearity of Slant 260 mm (LTR) Linearity of (within ±1.2 mm) Vertical Line (mm) (within ±0.6 mm) 254.5 mm (A4) 282.8 mm (LTR) s6000-228 Phaser 6000/6010 and WC 6015 MFP Xerox Internal Use Only 5-53... -
Page 370: Perpendicularity
260 mm ± 0.5 mm Magnification = Measured Length / Nominal Nominal = 280 mm A4 Nominal = 180 mm LTR Nominal = 260 mm LTR Nominal = 200 mm Magnification 5-54 Xerox Internal Use Only Phaser 6000/6010 and WC 6015 MFP... -
Page 371: Registration
Left Edge Nominal = 8.5 mm (within ±2.5 mm) Registration Note The most common reason for registration to be out of specification is because the paper guides are set incorrectly. Phaser 6000/6010 and WC 6015 MFP Xerox Internal Use Only 5-55... -
Page 372: Guaranteed Print Areas
4 mm 4 mm 355.6 mm 347.6 mm (14 inch) Guaranteed Printing Area 351.6 mm 207.9 mm 4 mm 210.9 mm 215.9 mm (8.5 inch) Guaranteed and Maximum Area 5-56 Xerox Internal Use Only Phaser 6000/6010 and WC 6015 MFP... -
Page 373: Adjustment And Calibration
Adjustment and Calibration In this chapter... • Color Registration • Adjusting the Bias Transfer Roller • Adjusting the Fuser • Adjusting Altitude • Scanner Adjustment Chapter... -
Page 374: Color Registration
5. At Auto Adjust, press OK. 6. At the prompt, Are you sure?, select Yes and press OK to begin the calibration. When the adjustment is complete, Ready appears on the printer control panel. Xerox Internal Use Only Phaser 6000/6010 and WC 6015 MFP... -
Page 375: Phaser 6000/6010 Color Registration With The Printer Setting Utility
Use the following procedure to enable or disable the automatic color registration adjustment feature. 1. On your computer, click Start > All Programs > Xerox Office Printing > Phaser 6000B/6010N > Printer Setting Utility. 2. Click the Printer Maintenance tab, then select Color Registration Adjustment from the list. - Page 376 3. “Entering Color Registration Values With the Printer Setting Utility” on page 6-5. Printing the Color Registration Correction Chart 1. On your computer, click Start > All Programs > Xerox Office Printing > Phaser 6000B/6010N > Printer Setting Utility. 1. Click the Printer Maintenance tab, then select Color Registration Adjustment from the list.
- Page 377 Using the printer control panel, enter the values that you found in the Color Registration Correction Chart to make adjustments. 1. On your computer, click Start > All Programs > Xerox Office Printing > Phaser 6000B/6010N > Printer Setting Utility.
- Page 378 LY, LM, LC, RY, RM, and RC. Each set of lines has a corresponding number printed to the right of it. Xerox Internal Use Only Phaser 6000/6010 and WC 6015 MFP...
- Page 379 For details, see “Printing the Color Registration Correction Chart” on page 6-6. 11. Repeat the steps until the color registration is satisfactory. 12. Press the Back button to return to Ready. Phaser 6000/6010 and WC 6015 MFP Xerox Internal Use Only...
-
Page 380: Adjusting The Bias Transfer Roller
2. Make sure that the corresponding Paper Type is selected in the print driver Printing Preferences. 3. On your computer, click Start > All Programs > Xerox Office Printing > Phaser 6000B/6010N > Printer Setting Utility. 4. Click the Printer Maintenance tab, then select Adjust BTR from the list. -
Page 381: Adjusting The Fuser
2. Make sure that the corresponding Paper Type is selected in the print driver Printing Preferences. 3. On your computer, click Start > All Programs > Xerox Office Printing > Phaser 6000B/6010N > Printer Setting Utility. 4. Click the Printer Maintenance tab, then select Adjust Fuser from the list. -
Page 382: Adjusting Altitude
Phaser 6000/6010 Altitude Adjustment To adjust altitude: 1. On your computer, click Start > All Programs > Xerox Office Printing > Phaser 6000B/6010N > Printer Setting Utility. 2. Click the Printer Maintenance tab, then select Adjust Altitude from the list. -
Page 383: Scanner Adjustment
3. Choose the Scanner from the Scanner List. 4. Enter the Gap Serial Number in the Gap SN box and press Enter. The information is written to the IP Board. Phaser 6000/6010 and WC 6015 MFP Xerox Internal Use Only 6-11... - Page 384 Adjustment and Calibration 6-12 Xerox Internal Use Only Phaser 6000/6010 and WC 6015 MFP...
-
Page 385: Cleaning And Maintenance
Cleaning and Maintenance In this chapter... • Service Maintenance • Cleaning • Maintenance • Moving the Printer Chapter... -
Page 386: Service Maintenance
Recommended Tools • Toner vacuum cleaner • Clean water • Clean, dry, lint-free cloth Xerox Internal Use Only Phaser 6000/6010 and WC 6015 MFP... -
Page 387: Cleaning
4. Pinch the Toner Cartridge release lever upward, as shown in the illustration. s6000-153 5. Pull out the Toner Cartridge and set it on the paper with the label side down to prevent spillage. 6. Remove the other 3 cartridges. Phaser 6000/6010 and WC 6015 MFP Xerox Internal Use Only... - Page 388 7. Pull out the cleaning rod and remove it from the printer. s6000-154 8. Insert the cleaning rod into the hole beside the arrow in the first toner slot. s6000-155 Xerox Internal Use Only Phaser 6000/6010 and WC 6015 MFP...
- Page 389 9. Push the cleaning rod into the printer until it stops, then pull it out of the printer. s6000-156 10. Repeat the same procedure for each of the other 3 LED windows. 11. Return the cleaning rod to the original location. s6000-157 Phaser 6000/6010 and WC 6015 MFP Xerox Internal Use Only...
- Page 390 Insert the cartridge firmly by pressing in on the center of the label until it clicks in place. s6000-158 13. Insert each of the other 3 Toner Cartridges. 14. Close the toner access cover. Xerox Internal Use Only Phaser 6000/6010 and WC 6015 MFP...
-
Page 391: Cleaning The Color Toner Density Sensors
3. Clean the ADC Sensors by wiping inside the access holes with a clean, dry cotton swab. s6000-159 4. Close the Rear Door. Cleaning the Document Glass To clean the document glass, gently wipe the glass with a clean, dry, lint-free cloth. Phaser 6000/6010 and WC 6015 MFP Xerox Internal Use Only... -
Page 392: Maintenance
Review proper printer operation using a customer file, if possible. Check with the customer regarding any special applications they may be running. • Review with the customer all work that was performed and discuss proper printer care. Xerox Internal Use Only Phaser 6000/6010 and WC 6015 MFP... -
Page 393: Moving The Printer
Cleaning and Maintenance Moving the Printer The Phaser 6000/6010, with consumables installed weighs 11.3 kg (24.9 lb.), and the WorkCentre 6015 MFP weighs 15.2 kg (33.51 lb.). Caution When moving the printer over long distances, remove the Toner Cartridges to prevent toner from spilling. - Page 394 1. Reinstall any parts you removed. 2. Reconnect the printer to the cables and power cord. 3. Plug in and turn On the printer. 4. Adjust the color registration before using the printer. 7-10 Xerox Internal Use Only Phaser 6000/6010 and WC 6015 MFP...
-
Page 395: Service Parts Disassembly
Service Parts Disassembly In this chapter... • Overview • Consumables • Phaser 6000/6010 Printer Covers • WorkCentre 6015 MFP Covers • IIT Procedures • Paper Feeder • Xerographics • Toner Dispenser • Fuser • Drive • Electrical Chapter... -
Page 396: Overview
When needed, the orientation of the printer is called out in the procedure as an aid for locating the printer parts. The following illustrations identify the Front, Rear, Left, and Right sides of the printer. Phaser 6000/6010 Printers Rear Left Right Front s6000-001 Xerox Internal Use Only Phaser 6000/6010 and WC 6015 MFP... -
Page 397: Preparation
1. Wear an Electrostatic Discharge wrist strap. 2. Turn Off power and disconnect the power cord from the wall outlet. 3. Disconnect all cables from the printer. 4. Remove the Toner Cartridges (page 8-6). Phaser 6000/6010 and WC 6015 MFP Xerox Internal Use Only... -
Page 398: Notations In The Disassembly Text
The notation “(tap, plastic, 10 mm)” or “(metal, 6 mm)” refer to the type of screw being removed. Replacement Note Provides information specific to the replacement of parts or assemblies. Xerox Internal Use Only Phaser 6000/6010 and WC 6015 MFP... -
Page 399: Fastener Types
Always use the correct type and size screw. Using the wrong screw can damage tapped holes. Do not use excessive force to remove or install either a screw or a printer part. Phaser 6000/6010 and WC 6015 MFP Xerox Internal Use Only... -
Page 400: Consumables
Consumables consist of the 4 Toner Cartridges. Toner Cartridges (Y, M, C, K) s6015-086 Removing Toner Cartridges PL4.1.13-16 1. Open the Toner Door. 2. Lift the Toner Cartridge handle upward to release the lock. s6000-153 Xerox Internal Use Only Phaser 6000/6010 and WC 6015 MFP... -
Page 401: Phaser 6000/6010 Printer Covers
Service Parts Disassembly Phaser 6000/6010 Printer Covers Phaser 6000/6010 Main Paper Tray Cover PL1.1.17 1. Open the Main Paper Tray Cover. 2. Release the boss on the Main Paper Tray Cover from the hole in the Front Cover, and then remove the Main Paper Tray Cover. -
Page 402: Phaser 6000/6010 Front Cover
1. Remove the Main Paper Tray Cover (page 8-7). 2. Open the Toner Door. 3. Remove the 2 screws (silver, tap, 8 mm) that fix the Front Cover to the printer. s6000-026 Xerox Internal Use Only Phaser 6000/6010 and WC 6015 MFP... - Page 403 Front Cover. There are 3 hooks per side, and 7 on the top. Replacement Note Reinstall the top hooks first, and then work down the sides. Hooks Hooks Hooks s6000-027 Phaser 6000/6010 and WC 6015 MFP Xerox Internal Use Only...
-
Page 404: Phaser 6000/6010 Left Side Cover
Left Side Cover. s6000-028 Replacement Note Engage the hooks on the rear side of the printer, and then engage the hooks on the bottom of the Left Side Cover. 8-10 Xerox Internal Use Only Phaser 6000/6010 and WC 6015 MFP... -
Page 405: Phaser 6000/6010 Top Cover Assembly
4. Release the front tabs, and carefully lift the Top Cover from the right and disconnect P/J220 on the Control Panel to remove the Top Cover. s6000-029 5. If replacing the Front Top Cover, remove the Top Rear Cover (see page 8-21). Phaser 6000/6010 and WC 6015 MFP Xerox Internal Use Only 8-11... -
Page 406: Phaser 6000/6010 Output Tray Extension
Phaser 6000/6010 Output Tray Extension PL1.1.2 1. Open the Output Tray Extension. 2. Release the boss of the Output Tray Extension from the hole on the Top Cover. s6000-241 8-12 Xerox Internal Use Only Phaser 6000/6010 and WC 6015 MFP... -
Page 407: Phaser 6000/6010 Rear Door
PL1.1.6 1. Open the Rear Door. 2. Release the right side boss of the Rear Door (located adjacent to the power receptacle) from the hole in the printer. s6000-030 Phaser 6000/6010 and WC 6015 MFP Xerox Internal Use Only 8-13... -
Page 408: Transfer Roller
3. Unclip the Right Transfer Roller Bearing (black), then rotate it and pull it off of the Transfer Roller. 4. Remove the Transfer Roller from the printer. s6000-032 Replacement Note The Right Transfer Roller Bearing is installed over the spring. 8-14 Xerox Internal Use Only Phaser 6000/6010 and WC 6015 MFP... -
Page 409: Phaser 6000/6010 Rear Cover
5. Remove the Top Cover (page 8-11). 6. Pull up the 2 levers on the Fuser. 7. Remove the 4 screws (silver, tap, 8 mm), and remove the Rear Cover from the printer. s6000-031 Phaser 6000/6010 and WC 6015 MFP Xerox Internal Use Only 8-15... - Page 410 You do not have to completely unthread the harness. You need only enough play to access the screws on the Rear Cover Interlock Switch in the next step. P/J204 s6000-033 8-16 Xerox Internal Use Only Phaser 6000/6010 and WC 6015 MFP...
-
Page 411: Phaser 6000/6010 Rear Cover Interlock Switch
9. Remove 2 screws (silver, tap, 8mm) that secure the Rear Cover Interlock Switch to the Rear Cover. s6000-034 Phaser 6000/6010 Rear Cover Interlock Switch PL1.1.12 1. Remove the Main Paper Tray Cover (page 8-7). 2. Remove the Front Cover (page 8-8). - Page 412 8. Unthread the Interlock Switch harness from the harness guide. 9. Remove two screws (silver, tap, 8 mm) to disconnect the Interlock Switch from the rear cover. s6015-068 8-18 Xerox Internal Use Only Phaser 6000/6010 and WC 6015 MFP...
-
Page 413: Phaser 6000/6010 Toner Door
3. Open the Rear Door. 4. Remove the Top Cover (page 8-11). 5. Remove the Left Side Cover (page 8-10). 6. Remove the Rear Cover (page 8-15). 7. Remove the Toner Door. s6000-212 Phaser 6000/6010 and WC 6015 MFP Xerox Internal Use Only 8-19... -
Page 414: Phaser 6000/6010 Hinge Cover
6. Remove the Rear Cover (page 8-15). 7. Remove the Toner Door (page 8-19). 8. Remove 1 screw (silver, tap, 8 mm), and remove the Hinge Cover from the printer. s6000-035 8-20 Xerox Internal Use Only Phaser 6000/6010 and WC 6015 MFP... -
Page 415: Phaser 6000/6010 Top Rear Cover
1. Remove the Main Paper Tray Cover (page 8-7). 2. Remove the Front Cover (page 8-8). 3. Remove the Top Cover (page 8-11). 4. Release the 2 hooks and remove the Inner Top Cover. s6000-037 Phaser 6000/6010 and WC 6015 MFP Xerox Internal Use Only 8-21... -
Page 416: Workcentre 6015 Mfp Covers
5. Remove the Front Cover (page 8-34). 6. Remove the Left Side Cover (page 8-22). 7. Remove the Scanner (page 8-35). 8. If present, remove the Wi-Fi Assembly (page 8-103) 9. Open the Rear Door. 8-22 Xerox Internal Use Only Phaser 6000/6010 and WC 6015 MFP... - Page 417 11. Remove 4 screws (silver, M3m 6 mm) that fix the Top Cover to the printer. Tabs s6015-027 12. Release the 3 hooks and remove the Top Cover from the printer. Phaser 6000/6010 and WC 6015 MFP Xerox Internal Use Only 8-23...
-
Page 418: Workcentre 6015 Mfp Rear Door
2. Release the right side boss of the Rear Door (located adjacent to the power receptacle) from the hole in the printer. s6015-067 WorkCentre 6015 MFP Rear Cover PL1.1.10 1. Remove the Top Cover (page 8-22). 2. Remove the Rear Door (page 8-24). 8-24 Xerox Internal Use Only Phaser 6000/6010 and WC 6015 MFP... - Page 419 Service Parts Disassembly 3. Disconnect P/J204 on the LVPS, and release the harness from the harness guide. P/J204 s6000-033 4. Pull up the two levers on the Fuser. s6015-104 Phaser 6000/6010 and WC 6015 MFP Xerox Internal Use Only 8-25...
-
Page 420: Workcentre 6015 Mfp Rear Interlock Switch
1. Remove the Rear Cover (page 8-24). 2. Remove 2 screws (silver, tap, 8 mm) and remove the switch holder from the Rear Cover. s6015-068 3. Remove the Rear Interlock Switch from the switch holder. 8-26 Xerox Internal Use Only Phaser 6000/6010 and WC 6015 MFP... -
Page 421: Workcentre 6015 Mfp Toner Door
Service Parts Disassembly WorkCentre 6015 MFP Toner Door PL1.1.15 1. Remove the Top Cover (page 8-22). 2. Remove the Rear Cover (page 8-24). 3. Remove the Toner Door. s6015-069 Phaser 6000/6010 and WC 6015 MFP Xerox Internal Use Only 8-27... -
Page 422: Workcentre 6015 Mfp Hinge Cover
1. Remove the Rear Cover (page 8-24). 2. Remove the Toner Door (page 8-27). 3. Remove 1 screw (silver, tap, 8 mm), and remove the Hinge Cover from the printer. s6000-035 8-28 Xerox Internal Use Only Phaser 6000/6010 and WC 6015 MFP... -
Page 423: Workcentre 6015 Mfp Main Paper Tray Cover
WorkCentre 6015 MFP Left Side Cover PL1.1.21 1. Remove the Main Paper Tray Cover (page 8-29). 2. Lift the Scanner. s6015-065 3. Remove the Output Tray Extension (page 8-31). Phaser 6000/6010 and WC 6015 MFP Xerox Internal Use Only 8-29... - Page 424 7. Release the hooks on the Left Cover at the rear of the printer. 8. To remove the cover, release the hooks while pulling the Left Cover down and away from the printer. Hooks Hooks s6015-024 8-30 Xerox Internal Use Only Phaser 6000/6010 and WC 6015 MFP...
-
Page 425: Workcentre 6015 Mfp Output Tray Extension
2. Slide the Output Tray Extension towards the front of the printer until it stops. 3. Remove the Output Tray Extension by releasing the bosses from the Top Cover. s6015-070 Phaser 6000/6010 and WC 6015 MFP Xerox Internal Use Only 8-31... -
Page 426: Workcentre 6015 Mfp Left And Right Scanner Arms
2. Remove the Output Tray Extension (page 8-31). s6015-070 3. Open the Toner Door. 4. Remove the Front Cover (page 8-34). 5. Remove the Left Side Cover (page 8-29). 8-32 Xerox Internal Use Only Phaser 6000/6010 and WC 6015 MFP... - Page 427 6. Disconnect P/J1, P/J6, and P/J16 on the Image Processor Board. s6015-026 7. Remove 1 screw (silver, tap, 8 mm) from each arm, and remove the arms from the Scanner. s6015-025 Phaser 6000/6010 and WC 6015 MFP Xerox Internal Use Only 8-33...
-
Page 428: Workcentre 6015 Mfp Front Cover
4. Open the Toner Door. 5. Remove 2 screws (silver, tap, 8 mm). Refer to the following illustration. 6. Starting on the right side, release the hooks and remove the Front Cover. s6015-023 8-34 Xerox Internal Use Only Phaser 6000/6010 and WC 6015 MFP... -
Page 429: Iit Procedures
6. Disconnect P/J1, P/J6, and P/J16 on the IP Board. If the printer has an ADF, remove 1 screw (silver, M3, 6 mm) to disconnect the ADF ground wire from the chassis. Grounding Wire and screw: ADF Only s6015-051 Phaser 6000/6010 and WC 6015 MFP Xerox Internal Use Only 8-35... - Page 430 8. Remove the scanner arms. Note If the Scanner has an ADF, hold it closed when performing the next step. 8-36 Xerox Internal Use Only Phaser 6000/6010 and WC 6015 MFP...
-
Page 431: Workcentre 6015 Mfp Adf Assembly
5. Remove the Front Cover (page 8-34). 6. Remove the Left Side Cover (page 8-29). 7. Remove the Scanner (page 8-35). 8. Turn the Scanner over and set it down. Phaser 6000/6010 and WC 6015 MFP Xerox Internal Use Only 8-37... - Page 432 12. Lift the ADF Assembly, and release the hook of the ADF Hinge Assembly using a screwdriver. Remove the ADF Assembly from the IIT Assembly, and pull the harness through the hole in the IIT Assembly. 8-38 Xerox Internal Use Only Phaser 6000/6010 and WC 6015 MFP...
-
Page 433: Workcentre 6015 Mfp Adf Cover
Service Parts Disassembly WorkCentre 6015 MFP ADF Cover PL8.1.3 1. Open the ADF Cover. 2. Release the ADF Cover from the bosses on the ADF Assembly. s6015-094 Phaser 6000/6010 and WC 6015 MFP Xerox Internal Use Only 8-39... -
Page 434: Workcentre 6015 Mfp Adf Separator Pad
Service Parts Disassembly WorkCentre 6015 MFP ADF Separator Pad PL8.1.4 1. Open the ADF Cover 2. Release the hook on the Separator Pad and remove it. s6015-096 8-40 Xerox Internal Use Only Phaser 6000/6010 and WC 6015 MFP... -
Page 435: Workcentre 6015 Mfp Adf Input Tray
2. Slightly bend the Input Tray rear side hinge to release the boss from the hole in the ADF Assembly. 3. Release the front side boss of the Input Tray to remove it. s6015-095 Phaser 6000/6010 and WC 6015 MFP Xerox Internal Use Only 8-41... -
Page 436: Paper Feeder
Paper Feeder Main Tray Extension PL2.1.7 1. Remove the Main Paper Tray Cover (Phaser 6000/6010 page 8-7; WorkCentre 6015 MFP page 8-29). 2. Remove the Bypass Tray Cover/Dust Cover (page 8-43). 3. Slide the Main Tray Extension to the front side until it stops. -
Page 437: Bypass Tray Cover/Dust Cover
Service Parts Disassembly Bypass Tray Cover/Dust Cover PL2.1.10, PL2.1.11 1. Open the Main Paper Tray Cover. 2. Remove the Bypass Tray Cover/Dust Cover from the printer. s6000-038 Phaser 6000/6010 and WC 6015 MFP Xerox Internal Use Only 8-43... -
Page 438: Paper Guide
Hooks s6000-208 5. Repeat step 4 for the other side, and then pull the assembly out of the printer. 8-44 Xerox Internal Use Only Phaser 6000/6010 and WC 6015 MFP... -
Page 439: Left And Right Feed Roller Cam/Feed Roller
Left and Right Feed Roller Cam/Feed Roller PL2.2.2, PL2.2.4, PL2.2.7 1. Remove the Main Paper Tray Cover (Phaser 6000/6010 page 8-7; WorkCentre 6015 MFP page 8-29). 2. Remove the Front Cover (Phaser 6000/6010 page 8-8; WorkCentre 6015 MFP page 8-34). - Page 440 10. Disconnect P/J206 on the LVPS, and P/J13 and P/J20 on the MCU Board. Release the harness from the harness guide. P/J206 P/J20 P/J13 s6000-069 11. Disconnect P/J201 on the LVPS and release the harness from the harness guide. P/J201 s6000-117 8-46 Xerox Internal Use Only Phaser 6000/6010 and WC 6015 MFP...
- Page 441 19. Remove the Registration Actuator (page 8-67). 20. Remove the Separator Assembly (page 8-49). 21. Release the hooks on the Left Cam (PL 2.2.7) and Right Cam (PL 2.2.2). s6000-040 Phaser 6000/6010 and WC 6015 MFP Xerox Internal Use Only 8-47...
- Page 442 22. Depress the Feed Solenoid arm while rotating the Feed Roller Shaft counterclockwise 90 degrees. s6000-243 23. Release the hook on the Feed Roller, and move the Feed Roller to printer right to remove it. Rear s6000-215 8-48 Xerox Internal Use Only Phaser 6000/6010 and WC 6015 MFP...
-
Page 443: Separator Pad Assembly And Spring
Separator Pad Assembly and Spring PL2.2.11~12 1. Remove the Main Paper Tray Cover (Phaser 6000/6010 page 8-7; WorkCentre 6015 MFP page 8-29). 2. Remove the Front Cover (Phaser 6000/6010 page 8-8; WorkCentre 6015 MFP page 8-34). 3. Open the Rear Door. - Page 444 10. Disconnect P/J206 on the LVPS, and P/J13 and P/J20 on the MCU Board. Release the harness from the harness guide. P/J206 P/J20 P/J13 s6000-069 11. Disconnect P/J201 on the LVPS and release the harness from the guide. P/J201 s6000-117 8-50 Xerox Internal Use Only Phaser 6000/6010 and WC 6015 MFP...
- Page 445 16. Remove the Registration Roller (page 8-61). 17. Remove the Main Paper Tray Chute (page 8-64). 18. Remove the Registration Actuator (page 8-67). 19. Release the Separator Spring. s6000-067 Phaser 6000/6010 and WC 6015 MFP Xerox Internal Use Only 8-51...
-
Page 446: Left/Right Follower, Arm, And Spring
20. Rotate the Separator Pad Assembly until you can lift it out. s6000-068 Left/Right Follower, Arm, and Spring PL2.2.13~14, PL2.2.17~18, PL2.2.24 1. Remove the Main Paper Tray Cover (Phaser 6000/6010 page 8-7; WorkCentre 6015 MFP page 8-29). 2. Remove the Front Cover (Phaser 6000/6010 page 8-8; WorkCentre 6015 MFP page 8-34). - Page 447 10. Disconnect P/J206 on the LVPS, and P/J13 and P/J20 on the MCU. Release the harness from the harness guide. P/J206 P/J20 P/J13 s6000-069 11. Disconnect P/J201 on the LVPS and release the harness from the harness guide. P/J201 s6000-117 Phaser 6000/6010 and WC 6015 MFP Xerox Internal Use Only 8-53...
- Page 448 18. While releasing the hook of the Follower, push the Follower towards the inside of the printer. Note This step applies to both the left and right parts. s6000-040 8-54 Xerox Internal Use Only Phaser 6000/6010 and WC 6015 MFP...
-
Page 449: No Paper Spring Actuator, No Paper Actuator, No Paper Cover
1. Check that there are no cables attached to the rear of the printer, and then turn the printer over and set it on the Rear Door. 2. Release the 2 hooks, and remove the No Paper Cover. Hooks s6000-042 Phaser 6000/6010 and WC 6015 MFP Xerox Internal Use Only 8-55... - Page 450 3. Release the right shaft of the No Paper Actuator from the hole in the printer, and remove it. s6000-043 4. Remove the No Paper Spring Actuator from the No Paper Actuator. s6000-044 8-56 Xerox Internal Use Only Phaser 6000/6010 and WC 6015 MFP...
-
Page 451: No Paper Sensor
P/J121 s6000-216 Registration Pinch Roller PL2.3.2 1. Remove the Main Paper Tray Cover (Phaser 6000/6010 page 8-7; WorkCentre 6015 MFP page 8-29). 2. Remove the Front Cover (Phaser 6000/6010 page 8-8; WorkCentre 6015 MFP page 8-34). 3. Open the Rear Door. - Page 452 9. Disconnect P/J206 on the LVPS, and P/J13 and P/J20 on the MCU Board. Release the harness from the harness guide. P/J206 P/J20 P/J13 s6000-069 10. Disconnect P/J201 on the LVPS and release the harness from the harness guide. P/J201 s6000-117 8-58 Xerox Internal Use Only Phaser 6000/6010 and WC 6015 MFP...
- Page 453 14. Remove the Registration Clutch (page 8-66). Note Steps 15 and 16 apply to the bearings on both the left and right side. 15. Remove the Registration Spring. s6000-092 Phaser 6000/6010 and WC 6015 MFP Xerox Internal Use Only 8-59...
- Page 454 Service Parts Disassembly 16. Release the latch, and remove the Registration Bearing. 17. Remove the Registration Pinch Roller Assembly. Latch s6000-217 8-60 Xerox Internal Use Only Phaser 6000/6010 and WC 6015 MFP...
-
Page 455: Registration Roller
Service Parts Disassembly Registration Roller PL2.3.1 1. Remove the Main Paper Tray Cover (Phaser 6000/6010 page 8-7; WorkCentre 6015 MFP page 8-29). 2. Remove the Front Cover (Phaser 6000/6010 page 8-8; WorkCentre 6015 MFP page 8-34). 3. Open the Rear Door. - Page 456 14. Remove the Image Processor Board (page 8-114). 15. Remove the Feed Drive Assembly (page 8-91). 16. Remove the Registration Clutch (page 8-66). 17. Remove the Registration Pinch Roller (page 8-57). 8-62 Xerox Internal Use Only Phaser 6000/6010 and WC 6015 MFP...
- Page 457 19. Release the tab, and remove the Registration Bearing from the Registration Roller. s6000-094 20. Remove the Registration Roller. Phaser 6000/6010 and WC 6015 MFP Xerox Internal Use Only 8-63...
-
Page 458: Main Paper Tray Chute
Service Parts Disassembly Main Paper Tray Chute PL2.3.3 1. Remove the Main Paper Tray Cover (Phaser 6000/6010 page 8-7; WorkCentre 6015 MFP page 8-29). 2. Remove the Front Cover (Phaser 6000/6010 page 8-8; WorkCentre 6015 MFP page 8-34). 3. Open the Rear Door. -
Page 459: Registration Sensor
1. Open the Rear Door. 2. Release the 2 hooks and remove the Sensor Cover. s6000-047 3. Lift the Chute Low and release the 3 hooks on the Registration Sensor. P/Jxx s6000-049 Phaser 6000/6010 and WC 6015 MFP Xerox Internal Use Only 8-65... -
Page 460: Registration Clutch
Service Parts Disassembly Registration Clutch PL2.3.7 1. Remove the Main Paper Tray Cover (Phaser 6000/6010 page 8-7; WorkCentre 6015 MFP page 8-29). 2. Remove the Front Cover (Phaser 6000/6010 page 8-8; WorkCentre 6015 MFP page 8-34). 3. Open the Rear Door. -
Page 461: Registration Actuator
3. Release the left shaft of the Registration Actuator from the hole in the printer. 4. Remove the Registration Actuator and spring. 5. Remove the Registration Spring from the Registration Actuator. s6000-051 Phaser 6000/6010 and WC 6015 MFP Xerox Internal Use Only 8-67... -
Page 462: Xerographics
Service Parts Disassembly Xerographics Xerographics Assembly PL3.1.1 1. Remove the Main Paper Tray Cover (Phaser 6000/6010 page 8-7; WorkCentre 6015 MFP page 8-29). 2. Remove the Front Cover (Phaser 6000/6010 page 8-8; WorkCentre 6015 MFP page 8-34). 3. Open the Rear Door. - Page 463 17. Remove the LED Driver Board (page 8-107). 18. Remove the Feed Drive Assembly (page 8-91). 19. Remove the Main Drive Assembly (page 8-82). 20. Remove the Developer Drive Assembly (page 8-95). Phaser 6000/6010 and WC 6015 MFP Xerox Internal Use Only 8-69...
- Page 464 21. Remove the grounding terminal from the front of the printer by removing 1 screw (silver, with washer, 6 mm). s6000-095 22. Remove 2 screws (silver, M3, 6 mm), and remove the Front Harness Guide. s6000-096 8-70 Xerox Internal Use Only Phaser 6000/6010 and WC 6015 MFP...
- Page 465 1 through 5 in that order. 24. Remove the 4 screws (silver, tap, 8 mm) that fix the xerographics assembly to the printer. s6000-098 Phaser 6000/6010 and WC 6015 MFP Xerox Internal Use Only 8-71...
- Page 466 After removing the xerographics assembly place it in a flat stable location. Front s6000-099 27. Inspect the Feed Roller and replace if worn (page 8-45). 28. Clean the Separator Roller. If damaged, replace the Separator Pad Assembly (page 8-49). 8-72 Xerox Internal Use Only Phaser 6000/6010 and WC 6015 MFP...
-
Page 467: Toner Dispenser
Idler 34 Gear, Oneway Clutch Assembly, and Idler 23 Gear PL4.1.6~7, PL 4.1.11 1. Remove the Main Paper Tray Cover (Phaser 6000/6010 page 8-7; WorkCentre 6015 MFP page 8-29). 2. Remove the Front Cover (Phaser 6000/6010 page 8-8; WorkCentre 6015 MFP page 8-34). - Page 468 Hooks s6000-232 13. Remove the Idler 34 Gears, the Oneway Clutches Assemblies, and the Idler 23 Gears. Idler 23 Gears Oneway Clutches Idler 34 Gears Idler 34 Gears s6000-114 8-74 Xerox Internal Use Only Phaser 6000/6010 and WC 6015 MFP...
-
Page 469: Toner Motor
Service Parts Disassembly Toner Motor PL4.1.9 1. Remove the Main Paper Tray Cover (Phaser 6000/6010 page 8-7; WorkCentre 6015 MFP page 8-29). 2. Remove the Front Cover (Phaser 6000/6010 page 8-8; WorkCentre 6015 MFP page 8-34). 3. Open the Rear Door. - Page 470 11. Disconnect P/J201 on the LVPS and release the harness from the harness guide. P/J201 s6000-117 12. Remove 5 screws (silver, tap, 8 mm), and remove the toner dispense frame from the printer. s6000-039 8-76 Xerox Internal Use Only Phaser 6000/6010 and WC 6015 MFP...
- Page 471 13. Disengage P/J200 and P/J201 from the Toner Motors. Remove the 2 screws (silver, tap, 8 mm), and remove the Toner Motors from the toner dispense frame. P/J200 P/J201 s6000-101 Phaser 6000/6010 and WC 6015 MFP Xerox Internal Use Only 8-77...
-
Page 472: Connector Cover
Service Parts Disassembly Connector Cover PL4.1.12 1. Open the Toner Door. 2. Release the hook, and remove the Connector Cover from the printer. s6000-115 8-78 Xerox Internal Use Only Phaser 6000/6010 and WC 6015 MFP... -
Page 473: Cleaner Assembly
Service Parts Disassembly Cleaner Assembly PL4.1.17 1. Open the Toner Door. 2. Pull the Cleaner Assembly out of the printer. s6000-006 Phaser 6000/6010 and WC 6015 MFP Xerox Internal Use Only 8-79... -
Page 474: Fuser
PL5.1.1 Warning Allow the Fuser to cool before performing this procedure. 1. Remove the Main Paper Tray Cover (Phaser 6000/6010 page 8-7; WorkCentre 6015 MFP page 8-29). 2. Remove the Front Cover (Phaser 6000/6010 page 8-8; WorkCentre 6015 MFP page 8-34). - Page 475 10. Remove 2 screws (silver, Hex Head, tap, 8 mm), and remove the Fuser. (J201) (J18) (J26) Front s6000-118 Warning To avoid electrical shock hazards, be sure to properly route the wires into the wire harness guides when reinstalling the Fuser. Phaser 6000/6010 and WC 6015 MFP Xerox Internal Use Only 8-81...
-
Page 476: Drive
Service Parts Disassembly Drive Main Drive Assembly PL6.1.2 1. Remove the Main Paper Tray Cover (Phaser 6000/6010 page 8-7; WorkCentre 6015 MFP page 8-29). 2. Remove the Front Cover (Phaser 6000/6010 page 8-8; WorkCentre 6015 MFP page 8-34). 3. Open the Rear Door. - Page 477 Service Parts Disassembly 9. This step varies depending on the model of the printer. • Phaser 6000/6010: Remove the 3 screws (silver, M3, 6 mm), and remove the IP Board plate from the printer. s6000-054 Phaser 6000/6010 and WC 6015 MFP...
- Page 478 10. On the MCU Board, disconnect the harness at P/J10, and then unlace the harness from the harness guide. 11. Disconnect the connectors on the MCU Board as shown in the following illustration. P/J16 P/J10 P/J19 P/J25 P/J23 P/J14 P/J12 s6000-119 8-84 Xerox Internal Use Only Phaser 6000/6010 and WC 6015 MFP...
- Page 479 Service Parts Disassembly 12. If present, unplug the USB cable (WorkCentre 6015 MFP only). P/J2 s6015-032 13. Release the hook, and move the drive harness guide away from the printer. s6000-120 Phaser 6000/6010 and WC 6015 MFP Xerox Internal Use Only 8-85...
- Page 480 14. Release the 3 hooks, and move the main paper tray harness guide away from the printer. s6000-121 15. Remove the LED Driver Board (page 8-107). 16. Remove the Feed Drive Assembly (page 8-91). 17. Disconnect P/J160 on the Main Drive Assembly. 8-86 Xerox Internal Use Only Phaser 6000/6010 and WC 6015 MFP...
-
Page 481: Drive Gears F3 And Ph3
Drive Assembly. s6000-175 Drive Gears F3 and PH3 PL6.1.3~4 1. Remove the Main Paper Tray Cover (Phaser 6000/6010 page 8-7; WorkCentre 6015 MFP page 8-29). 2. Remove the Front Cover (Phaser 6000/6010 page 8-8; WorkCentre 6015 MFP page 8-34). 3. Open the Rear Door. - Page 482 Service Parts Disassembly 8. Remove 1 screw (silver, metal, 6mm) and move the fan out of the way. Latch s6000-213 8-88 Xerox Internal Use Only Phaser 6000/6010 and WC 6015 MFP...
- Page 483 Service Parts Disassembly 9. This step varies depending on the model of the printer. • Phaser 6000/6010: Remove the 3 screws (silver, M3, 6 mm), and remove the IP Board Plate from the printer. s6000-054 Phaser 6000/6010 and WC 6015 MFP...
- Page 484 To gain access to the lower screw on the face of the IP Board plate, unhook the Main Paper Tray Harness Guide from the IP Board plate. s6015-031 10. Remove the F3 Gear and the PH3 Gear. s6000-176 8-90 Xerox Internal Use Only Phaser 6000/6010 and WC 6015 MFP...
-
Page 485: Feed Drive Assembly
Service Parts Disassembly Feed Drive Assembly PL6.1.5 1. Remove the Main Paper Tray Cover (Phaser 6000/6010 page 8-7; WorkCentre 6015 MFP page 8-29). 2. Remove the Front Cover (Phaser 6000/6010 page 8-8; WorkCentre 6015 MFP page 8-34). 3. Open the Rear Door. - Page 486 Service Parts Disassembly 9. This step varies depending on the model of the printer. • Phaser 6000/6010: Remove the 3 screws (silver, M3, 6 mm), and remove the IP Board Plate from the printer. s6000-054 8-92 Xerox Internal Use Only...
- Page 487 To gain access to the lower screw on the face of the IP Board plate, unhook the Main Paper Tray Harness Guide from the IP Board plate. s6015-031 10. Remove the F3 and PH3 Gears (page 8-87). Phaser 6000/6010 and WC 6015 MFP Xerox Internal Use Only 8-93...
- Page 488 Service Parts Disassembly 11. Remove 2 screws (silver, M3, 6 mm), and remove the Feed Drive Assembly from the printer. s6000-177 8-94 Xerox Internal Use Only Phaser 6000/6010 and WC 6015 MFP...
-
Page 489: Developer Drive Assembly
Service Parts Disassembly Developer Drive Assembly PL6.1.6 1. Remove the Main Paper Tray Cover (Phaser 6000/6010 page 8-7; WorkCentre 6015 MFP page 8-29). 2. Remove the Front Cover (Phaser 6000/6010 page 8-8; WorkCentre 6015 MFP page 8-34). 3. Open the Rear Door. - Page 490 9. Remove the LED Driver Board (page 8-107). 10. Remove the Main Drive Assembly (page 8-82). 11. WorkCentre 6015 MFP: Loosen the cables enough to move the Main Paper Tray Harness Guide away from the printer. 8-96 Xerox Internal Use Only Phaser 6000/6010 and WC 6015 MFP...
- Page 491 Be careful to not let the gears fall off of the assembly. When removing, start by tipping the top of the assembly away from the printer so that the gears do not fall off. s6000-178 Phaser 6000/6010 and WC 6015 MFP Xerox Internal Use Only 8-97...
-
Page 492: Feed Solenoid
Service Parts Disassembly Feed Solenoid PL6.1.10 1. Remove the Main Paper Tray Cover (Phaser 6000/6010 page 8-7; WorkCentre 6015 MFP page 8-29). 2. Remove the Front Cover (Phaser 6000/6010 page 8-8; WorkCentre 6015 MFP page 8-34). 3. Open the Rear Door. - Page 493 10. Release the hook, and remove the drive harness guide from the printer. s6000-120 11. Release the 3 hooks, and move the main paper tray harness guide away from the printer. s6000-121 Phaser 6000/6010 and WC 6015 MFP Xerox Internal Use Only 8-99...
- Page 494 Service Parts Disassembly 12. Remove 1 screw (silver, tap, 8 mm), and remove the Feed Solenoid from the printer. s6000-233 8-100 Xerox Internal Use Only Phaser 6000/6010 and WC 6015 MFP...
-
Page 495: Electrical
Electrical Phaser 6000/6010 Control Panel PL1.1.3 Note This procedure applies to the Phaser 6000/6010. 1. Remove the Main Paper Tray Cover (page 8-7). 2. Remove the Front Cover (page 8-8). 3. Open the Rear Door. 4. Remove the Top Cover (page 8-11). - Page 496 There are 2 slots at the front of the printer, install the Control Panel in the lower slot and the board shield in the upper slot. See the following illustration. s6000-179 8-102 Xerox Internal Use Only Phaser 6000/6010 and WC 6015 MFP...
-
Page 497: Wi-Fi Assembly
6. Remove the Left Side Cover (page 8-29). 7. Disconnect P/J12 on the IP Board and unlace the harness. s6015-113 8. Release the two clips and remove the Wi-Fi Assembly. Phaser 6000/6010 and WC 6015 MFP Xerox Internal Use Only 8-103... -
Page 498: Workcentre 6015 Mfp Control Panel
This procedure applies to the WorkCentre 6015 MFP. 1. Lift the Scanner Assembly. s6015-065 2. Remove 2 screws (silver, with flange, tap, 8 mm). s6015-071 3. Close the Scanner Assembly. 8-104 Xerox Internal Use Only Phaser 6000/6010 and WC 6015 MFP... - Page 499 Service Parts Disassembly 4. Disconnect the ribbon cable and remove the Control Panel. P/J1 s6015-072 Phaser 6000/6010 and WC 6015 MFP Xerox Internal Use Only 8-105...
-
Page 500: Fan
Service Parts Disassembly PL7.1.2 1. Remove the Main Paper Tray Cover (Phaser 6000/6010 page 8-7; WorkCentre 6015 MFP page 8-29). 2. Remove the Front Cover (Phaser 6000/6010 page 8-8; WorkCentre 6015 MFP page 8-34). 3. Open the Rear Door. 4. Remove the Left Side Cover (Phaser 6000/6010 page 8-10; WorkCentre 6015 MFP page 8-29). -
Page 501: Led Driver Board And Harness
Service Parts Disassembly LED Driver Board and Harness PL7.1.5, PL7.1.7A~B 1. Remove the Main Paper Tray Cover (Phaser 6000/6010 page 8-7; WorkCentre 6015 MFP page 8-29). 2. Remove the Front Cover (Phaser 6000/6010 page 8-8; WorkCentre 6015 MFP page 8-34). - Page 502 9. Release the harness from the drive harness guide. s6000-219 10. Release the hook, and remove the drive harness guide from the printer. s6000-220 11. Disengage P/J2 on the Front USB Board. 8-108 Xerox Internal Use Only Phaser 6000/6010 and WC 6015 MFP...
- Page 503 12. Release the harness from the main paper tray harness guide. s6000-221 13. Release the 3 hooks, and remove the main paper tray harness guide from the printer. s6000-218 Phaser 6000/6010 and WC 6015 MFP Xerox Internal Use Only 8-109...
- Page 504 14. Remove 4 screws (silver, M3, 6 mm), and remove the plate from the printer. s6000-122 15. Disengage the flexible cables on the LED Driver Board, and remove the LED Driver Board. P/J1 s6000-182 8-110 Xerox Internal Use Only Phaser 6000/6010 and WC 6015 MFP...
-
Page 505: Led/Mcu Cable
Service Parts Disassembly LED/MCU Cable PL7.1.6 1. Remove the Main Paper Tray Cover (Phaser 6000/6010 page 8-7; WorkCentre 6015 MFP page 8-29). 2. Remove the Front Cover (Phaser 6000/6010 page 8-8; WorkCentre 6015 MFP page 8-34). 3. Open the Rear Door. - Page 506 Service Parts Disassembly 9. Release the harness from the drive harness guide. s6000-219 10. Release the hook, and remove the drive harness guide from the printer. s6000-220 8-112 Xerox Internal Use Only Phaser 6000/6010 and WC 6015 MFP...
- Page 507 11. Remove 4 screws (silver, M3, 6 mm), and remove the plate from the printer. s6000-122 12. Disengage the LED/MCU Cable from P/J1 on the LED Driver Board and P/J23 on the MCU Board. Phaser 6000/6010 and WC 6015 MFP Xerox Internal Use Only 8-113...
-
Page 508: Image Processor Board
IP Board. These procedures are detailed in the Replacement Notes that follow the removal procedure. 1. Remove the Main Paper Tray Cover (Phaser 6000/6010 page 8-7; WorkCentre 6015 MFP page 8-29). 2. Remove the Front Cover (Phaser 6000/6010 page 8-8; WorkCentre 6015 MFP page 8-34). - Page 509 7. Remove 4 screws (silver, M3, 6 mm), and 1 screw (silver, M2, 6 mm), and remove the Image Processor Board from the printer. WorkCentre 6015 MFP IP Board (4 screws only) s6015-029 Phaser 6000/6010 and WC 6015 MFP Xerox Internal Use Only 8-115...
- Page 510 In the options menu, located on the upper left of the CE Diag tab, select Installation Set. Enter the printer’s serial number in the Printer Serial Number text field, and then click the Restart printer to apply new settings button. 8-116 Xerox Internal Use Only Phaser 6000/6010 and WC 6015 MFP...
-
Page 511: Front Usb Board
IP Board. See “Scanner Adjustment” on page 6-11. Front USB Board PL7.1.18 Note This procedure applies to the WorkCentre 6015 MFP. 1. Remove the Left Side Cover (page 8-29). Phaser 6000/6010 and WC 6015 MFP Xerox Internal Use Only 8-117... -
Page 512: Fax Board
2. Open the Scanner Assembly. 3. Remove the Output Tray Extension (page 8-31). 4. Open the Toner Door. 5. Remove the Front Cover (page 8-34). 6. Remove the Left Side Cover (page 8-29). 8-118 Xerox Internal Use Only Phaser 6000/6010 and WC 6015 MFP... -
Page 513: Lvps
Fax Board. s6015-030 LVPS PL7.2.1A~B 1. Remove the Main Paper Tray Cover (Phaser 6000/6010 page 8-7; WorkCentre 6015 MFP page 8-29). 2. Remove the Front Cover (Phaser 6000/6010 page 8-8; WorkCentre 6015 MFP page 8-34). 3. Open the Rear Door. - Page 514 Remove the LVPS from the printer. s6000-071 Warning When reinstalling the LVPS, ensure all the cables remain properly routed through the harness guides and all connectors are fully seated. 8-120 Xerox Internal Use Only Phaser 6000/6010 and WC 6015 MFP...
-
Page 515: Mcu Board
5. Press the Up or Down Arrow key to select SaveNVM to ESS, and press the OK key. Replacement Procedure 1. Remove the Main Paper Tray Cover (Phaser 6000/6010 page 8-7; WorkCentre 6015 MFP page 8-29). 2. Remove the Front Cover (Phaser 6000/6010 page 8-8; WorkCentre 6015 MFP page 8-34). - Page 516 11. Remove 4 screws (silver, plastic, 6 mm), to remove the MCU Board. s6000-070 Replacement Note Restore the NVM data from the IP Board using the following procedure that matches the model of printer. 8-122 Xerox Internal Use Only Phaser 6000/6010 and WC 6015 MFP...
-
Page 517: Hvps
6. Press the OK key twice to execute LoadNVM from ESS. HVPS PL7.2.3 1. Remove the Main Paper Tray Cover (Phaser 6000/6010 page 8-7; WorkCentre 6015 MFP page 8-29). 2. Remove the Front Cover (Phaser 6000/6010 page 8-8; WorkCentre 6015 MFP page 8-34). - Page 518 8. Remove 2 screws (silver, Hex Head, tap, 8 mm), and pull the Fuser slightly away from the printer. (J201) (J18) (J26) Front s6000-118 9. Disconnect P/J21 on the MCU Board. 8-124 Xerox Internal Use Only Phaser 6000/6010 and WC 6015 MFP...
- Page 519 11. Unlace the HVPS wiring from the harness guide. 12. Disconnect P/J210, and remove 5 screws (silver, tap, 8mm). 13. Lift the side of the board closest to the fan first, and remove the HVPS. s6000-210 Phaser 6000/6010 and WC 6015 MFP Xerox Internal Use Only 8-125...
-
Page 520: Image Processor Harness
Service Parts Disassembly Image Processor Harness PL7.2.12 1. Remove the Main Paper Tray Cover (Phaser 6000/6010 page 8-7; WorkCentre 6015 MFP page 8-29). 2. Remove the Front Cover (Phaser 6000/6010 page 8-8; WorkCentre 6015 MFP page 8-34). 3. Open the Rear Door. - Page 521 Service Parts Disassembly 8. Remove the Image Processor Harness by disengaging P/J402 (Phaser 6000/6010) or P/J8 (WorkCentre 6015 MFP) on the Image Processor Board. P/J402 s6000-238 Phaser 6000/6010 and WC 6015 MFP Xerox Internal Use Only 8-127...
- Page 522 Service Parts Disassembly 8-128 Xerox Internal Use Only Phaser 6000/6010 and WC 6015 MFP...
-
Page 523: Parts List
Parts List In this chapter... • Serial Number Format • Using the Parts List • Print Engine Parts • Xerox Supplies and Accessories Chapter... -
Page 524: Serial Number Format
Parts List Serial Number Format Changes to Xerox products are made to accommodate improved components as they become available. It is important when ordering parts to include the following information: • Component's part number • Product type or model number •... -
Page 525: Phaser 6000/6010 Serial Number Format
6015NI MFP, 220V Engine 143101 158000 Example YXL240299: Xerox Serial Number YXL: Product Code for the Phaser 6000B, 110V printer 2 = Revision Level 40299 = Serial Number for 6000B Phaser 6000/6010 and WC 6015 MFP Xerox Internal Use Only... -
Page 526: Using The Parts List
Refer to “Fastener Types” on page 8-5 for a complete list of fasteners used, and “Hardware Kit” on page 9-41 for fasteners available in the Hardware Kit. Parts Diagram Fastener Designators Designator Fastener Type E-ring K-clip Screw, self-tapping Screw, sheet metal Xerox Internal Use Only Phaser 6000/6010 and WC 6015 MFP... -
Page 527: Print Engine Parts
Parts List Print Engine Parts Parts List 1.1 Phaser 6000/6010 Covers For WorkCentre 6015 MFP covers, see page 9-7. 1 (with 2-4,23) (J220) (J204) (J407) Front s6000-008 Phaser 6000/6010 and WC 6015 MFP Xerox Internal Use Only... - Page 528 Parts List Parts List 1.1 Phaser 6000/6010 Covers Item Parts name Part Number Cover Assembly Top (Output Tray Extension) 848K 49810 (6010N only) Cover Assembly Top (Output Tray Extension) 848K 49820 (6000B only) Tray Extension (Output Tray Extension) 086S 29661...
-
Page 529: Parts List 1.1 Workcentre 6015 Mfp Covers
Parts List Parts List 1.1 WorkCentre 6015 MFP Covers For Phaser 6000/6010 covers, see page 9-5. 33 (with 23-25) 34 (with 23,24,26) 32 (with 30,31) (SP12) 1 (with 2,4,27) (J204) Front 38 (with 18,35-37) s6015-003 Phaser 6000/6010 and WC 6015 MFP... - Page 530 Harness Assembly Wi-Fi LT (Wireless Harness) Package Assembly Wi-Fi (with 30, 31) 101K 61442 Holder Assembly Arm L (Left Scanner Arm) 019K 11690 Holder Assembly Arm R (Right Scanner Arm) 019K 11700 Xerox Internal Use Only Phaser 6000/6010 and WC 6015 MFP...
- Page 531 Item Parts name Part Number Upper Front Cover Inner Front Cover Latch Cover Front (18, 35, and 37)(Front Cover) 604K 66371 Kit Cover Extension Assembly (2, and 27) 604K 66380 Phaser 6000/6010 and WC 6015 MFP Xerox Internal Use Only...
- Page 532 Parts List <This page intentionally left blank> 9-10 Xerox Internal Use Only Phaser 6000/6010 and WC 6015 MFP...
-
Page 533: Parts List 2.1 Feeder (1/3)
Parts List Parts List 2.1 Feeder (1/3) Front 6000B Model Only s6000-009 Phaser 6000/6010 and WC 6015 MFP Xerox Internal Use Only 9-11... - Page 534 Tray Assembly Bypass Cover (Bypass Tray) (6010N and 050K 66350 WorkCentre 6015 MFPs only) Cover Dust (Dust Cover) (6000B only) Guide Paper Bypass (Paper Guide) (6010N and 038E 39310 WorkCentre 6015 MFPs only) 9-12 Xerox Internal Use Only Phaser 6000/6010 and WC 6015 MFP...
-
Page 535: Parts List 2.2 Feeder (2/3)
Parts List 2.2 Feeder (2/3) 1 (with 2-7) 9 (with 27,28) 11 (with 29-31) Front (P121) No Paper Sensor (J122) (J12) (J121) (J120) (J122) (J12) (J120) LT Model Only s6000-010 Phaser 6000/6010 and WC 6015 MFP Xerox Internal Use Only 9-13... - Page 536 Harness Assembly RKN SNS (J12-J120,J121,J122) (Phaser 6010N and WorkCentre 6015 MFPs only) Harness Assembly RK SNS (J12-J120,J122) (6000B only) Plate Bottom Pad Main Paper Tray Clutch Assy Friction Roll Assy Separator Holder Separator 9-14 Xerox Internal Use Only Phaser 6000/6010 and WC 6015 MFP...
-
Page 537: Parts List 2.3 Feeder (3/3)
Parts List Parts List 2.3 Feeder (3/3) 2 (with 15-17) Front (P120) Registration Sensor (J25) s6000-011 Phaser 6000/6010 and WC 6015 MFP Xerox Internal Use Only 9-15... - Page 538 Spring Act Regi (Registration Spring Actuator) 809E 91650 Actuator Regi (Registration Actuator) 120E 32561 Chute Low Bearing Regi Metal Earth Bearing Regi Earth Roll Pinch Regi 10 Roll Pinch Regi 30 Shaft Pinch Regi 9-16 Xerox Internal Use Only Phaser 6000/6010 and WC 6015 MFP...
-
Page 539: Parts List 3.1 Xerographics (1/3)
Parts List Parts List 3.1 Xerographics (1/3) 1 (with PL3.2,PL3.3) (J2) (LPH M) (J3) (LPH Y) (J5) (LPH C) (J4) (LPH K) (J14) Front s6000-012 Phaser 6000/6010 and WC 6015 MFP Xerox Internal Use Only 9-17... - Page 540 Parts List Parts List 3.1 Xerographics (1/3) Item Parts name Part Number Xerographics Deve LPH Belt Assembly (with PL3.2, PL3.3) (xerographics assembly) 9-18 Xerox Internal Use Only Phaser 6000/6010 and WC 6015 MFP...
-
Page 541: Parts List 3.2 Xerographics (2/3)
Parts List Parts List 3.2 Xerographics (2/3) Front (J14) [Ref PL3.3] s6000-018 Phaser 6000/6010 and WC 6015 MFP Xerox Internal Use Only 9-19... - Page 542 Guide Ffc Lph Housing Assy Transfer B Spring Deve D Housing Assy Deve Y Housing Assy Deve M Housing Assy Deve C Housing Assy Deve K Spring Deve Ad 9-20 Xerox Internal Use Only Phaser 6000/6010 and WC 6015 MFP...
-
Page 543: Parts List 3.3 Xerographics (3/3)
Parts List Parts List 3.3 Xerographics (3/3) Front (P7) (P6) (P9) (J3) (J2) (P8) (J4) (J5) (J7) (J6) (J9) (J8) s6000-019 Phaser 6000/6010 and WC 6015 MFP Xerox Internal Use Only 9-21... - Page 544 Part Number Housing Assy Xero High Spring-FG Part2 Spring LPH D PART2 Head Assembly-K Spring LPH Ad Part2 Housing Assy Xero High K Cable-FFC-K,KRN Cable-FFC-C,KRN Cable-FFC-M,KRN Cable-FFC-Y,KRN Core Ferrite Tape 9-22 Xerox Internal Use Only Phaser 6000/6010 and WC 6015 MFP...
-
Page 545: Parts List 4.1 Toner Dispense
Parts List Parts List 4.1 Toner Dispense 1 (with 2-11) (J13) (P200) 11 11 (P201) 11 11 11 11 11 (J206) Front (J20) (J208) (J200) (J201) s6000-013 Phaser 6000/6010 and WC 6015 MFP Xerox Internal Use Only 9-23... - Page 546 807E 32130 Cover Connector (Connector Cover) 848E 51070 — — — — Cleaner Assy (Cleaner Assembly) 042K 94280 Harness Assembly FSR Test (J206-J208) Harness Assembly Dispense MOT (J20-J200, J201) 9-24 Xerox Internal Use Only Phaser 6000/6010 and WC 6015 MFP...
-
Page 547: Parts List 5.1 Fuser
Parts List Parts List 5.1 Fuser (J201) (J18) (J26) ST10 ST10 Front s6000-014 Phaser 6000/6010 and WC 6015 MFP Xerox Internal Use Only 9-25... - Page 548 Item Parts name Part Number WorkCentre 6015 MFP Fuser, 110V Model 126K 29414 Fuser, 220V Model 126K 29424 Phaser 6000/6010 Fuser, 110V Model 126K 29175 Fuser, 220V Model 126K 29185 9-26 Xerox Internal Use Only Phaser 6000/6010 and WC 6015 MFP...
-
Page 549: Parts List 6.1 Drive
Parts List Parts List 6.1 Drive Front (J16) (J160) (P160) (J10) (J19) K Mode (P122) Switching Sensor s6000-015 Phaser 6000/6010 and WC 6015 MFP Xerox Internal Use Only 9-27... - Page 550 Harness Assembly Main MOT (J16-J160) Gear Feed Spring Feed Solenoid Feed (Feed Solenoid) 121E 22671 Drive Assembly Mot (With 2, 3, 4, and 5) (Main Drive 604K 64630 Assembly Kit) 9-28 Xerox Internal Use Only Phaser 6000/6010 and WC 6015 MFP...
-
Page 551: Parts List 7.1 Phaser 6000/6010 Electrical (1/2)
Parts List Parts List 7.1 Phaser 6000/6010 Electrical (1/2) Front (J205) (J23) (J1) (P1) (P2) (P1) (P3) (P112) (P5) (P4) (J1) Model 6010 Only Model 6000 Only (P401) (P402) (P407) (J111) (J112) (P404)* *: Not used (P406)* s6000-016 Phaser 6000/6010 and WC 6015 MFP... - Page 552 Parts List Parts List 7.1 Phaser 6000/6010 Electrical (1/2) Item Parts name Part Number Duct Fan Fan Main (Fan) 127E 86170 Guide Harness Drive (Drive Harness Guide) Plate Bitz PWB Assy TOKI (LED Driver Board) 960K 54361 FFC Assy Light Biz (LED/MCU Cable)
-
Page 553: Parts List 7.2 Phaser 6000/6010 Electrical (2/2)
Parts List Parts List 7.2 Phaser 6000/6010 Electrical (2/2) (J202) (J22) (P206) (P202) (J17) (J402) (J401) (P200) (J21) (P204) (P201) (P205) *: Not in used. (P16) (J210) (P15)* (P10) (P210) (P13) (P20) (P19) (P25) (P23) (P14) (P22) (P12) (P17) (P26) - Page 554 Parts List Parts List 7.2 Phaser 6000/6010 Electrical (2/2) Item Parts name Part Number LVPS (110V) 105K 23974 LVPS (220V) 105K 23984 MCU Board 960K 60951 HVPS 105K 23993 — Guide Harness Front Guide Harness AC Holder SW SFP Guide Harness Inlet...
-
Page 555: Parts List 7.1 Workcentre 6015 Mfp Electrical (1/2)
(P1) (P2) (P1) (P3) (P5) (P4) (J1) (SP9) (J2) (SP11) (SJ1) (SJ6) (J1) (SJ16) (SP2) (SJ8) (SJ14)* (SJ9) (SJ11) (SJ12) (J2)* (SJ2) *: Not used 22 (with 20,21) s6015-011 Phaser 6000/6010 and WC 6015 MFP Xerox Internal Use Only 9-33... -
Page 556: Parts List 7.2 Workcentre 6015 Mfp Electrical (2/2)
PWB Assembly USB Front (USB Board) 960K 47000 — Harness Assembly Swift FAX (Fax Harness) PWBA Swift FAX (FAX Board) Package Assembly FAX LT (with 20 and 21) 101K 62530 9-34 Xerox Internal Use Only Phaser 6000/6010 and WC 6015 MFP... - Page 557 (J21) (P204) (P201) (P205) *: Not used (P16) (J210) (P15)* (P10) (P210) (P13) (P19) (P20) (P25) (P23) (P14) (P22) (P12) (P17) (P26) (P18) (P21) [Ref PL7.2.2] Front (J200) s6015-012 Phaser 6000/6010 and WC 6015 MFP Xerox Internal Use Only 9-35...
- Page 558 J200) (AC Inlet Harness) 10A Power Cord, 110V (Power Cord) 675K 17830 Power Cord, 220V (Power Cord) 675K 17660 Harness Assembly LVPS FFC Assy ESS (Image Processor Harness) Harness Assy HVPS (J21-J210) 9-36 Xerox Internal Use Only Phaser 6000/6010 and WC 6015 MFP...
-
Page 559: Parts List 8.1 Workcentre 6015N/Ni Mfp Scanner
Parts List Parts List 8.1 WorkCentre 6015N/NI MFP Scanner 1 (with 2,8,10-12) 2 (with 3-7) [Ref PL1.1.34] [Ref PL1.1.33] Front s6015-013 Phaser 6000/6010 and WC 6015 MFP Xerox Internal Use Only 9-37... - Page 560 ADF Hinge Assembly IIT Assembly 3IN VB — Console Assembly 4IN (Control Panel) (See 13 and 14 below) SSB Cover Rail IIT FB Control Panel Board Label FAX 897E82971 9-38 Xerox Internal Use Only Phaser 6000/6010 and WC 6015 MFP...
-
Page 561: Parts List 9.1 Workcentre 6015B Mfp Scanner
Parts List Parts List 9.1 WorkCentre 6015B MFP Scanner 1 (with 2,8,10-12) 2 (with 7) [Ref PL1.1.34] [Ref PL1.1.33] Front s6015-014 Phaser 6000/6010 and WC 6015 MFP Xerox Internal Use Only 9-39... - Page 562 — — — — Hinge Assembly — — Console Assembly (Control Panel) (See 13 and 14 below) SSB Cover Rail IIT FB Control Panel Board ADF Top Cover Kit 9-40 Xerox Internal Use Only Phaser 6000/6010 and WC 6015 MFP...
-
Page 563: Xerox Supplies And Accessories
ST10 with flange Sheet metal screw, Silver M3 x 6 mm M4 x 6mm M3 x 6mm Screw for sheet metal, Silver, with M4 x 6mm external tooth washer Phaser 6000/6010 and WC 6015 MFP Xerox Internal Use Only 9-41... - Page 564 Parts List 9-42 Xerox Internal Use Only Phaser 6000/6010 and WC 6015 MFP...
-
Page 565: Wiring
In this chapter... • Wiring Diagrams • Phaser 6000/6010 Printer Plug/Jack Designations • Phaser 6000/6010 Plug and Jack Locator Diagrams • Phaser 6000/6010 Wiring Diagrams • WorkCentre 6015 MFP Printer Plug/Jack Designations • WorkCentre 6015 MFP Plug and Jack Locator Diagrams •... -
Page 566: Wiring Diagrams
Parts List. PL X.Y.Z Subassembly 1 Denotes functional parts attached with functional parts name. Heater Subassembly 2 Denotes the control and its outline in the Board. Control Subassembly 3 10-2 Xerox Internal Use Only Phaser 6000/6010 and WC 6015 MFP... - Page 567 Connection of Wires Denotes a Clutch or Solenoid. Solenoid/Clutch Denotes a Motor. Motor Denotes a Photo Sensor. Optic Sensor Denotes an LED. Denotes a Safety Interlock Switch. Safety Interlock Switch Phaser 6000/6010 and WC 6015 MFP Xerox Internal Use Only 10-3...
- Page 568 I/L +24 VDC Denotes DC voltage when the Interlock Switch in MCU Board turns On. +5 VDC Denotes DC voltage. +3.3 VDC Denotes signal ground. Denotes analog ground. Denotes return. 10-4 Xerox Internal Use Only Phaser 6000/6010 and WC 6015 MFP...
-
Page 569: Phaser 6000/6010 Printer Plug/Jack Designations
4. The Remarks column provides a brief description of each connection. For WorkCentre 6015 MFP plug and jack designators, see “WorkCentre 6015 MFP Printer Plug/Jack Designations” on page 10-19. Phaser 6000/6010 Plug and Jack Designators Map Coordinates Remarks I-122 Connects LED Driver Board and LED/MCU CABLE... - Page 570 Wiring Phaser 6000/6010 Plug and Jack Designators (Continued) Map Coordinates Remarks 112 2 H-123 Connects LED Driver Board and LED Driver Board 120 2 E-125 Connects Registration Sensor and RKN SNS Harness (6010N Only) 120 2 E-125 Connects Registration Sensor and RKN SNS Harness...
-
Page 571: Phaser 6000/6010 Plug And Jack Locator Diagrams
Wiring Phaser 6000/6010 Plug and Jack Locator Diagrams Map 1 - Phaser 6000/6010 s6000-007 Phaser 6000/6010 and WC 6015 MFP Xerox Internal Use Only 10-7... -
Page 572: Map 2 - Phaser 6000/6010
Wiring Map 2 - Phaser 6000/6010 404* 406* : Not Connected s6000-123 10-8 Xerox Internal Use Only Phaser 6000/6010 and WC 6015 MFP... -
Page 573: Map 3 - Phaser 6000/6010
Wiring Map 3 - Phaser 6000/6010 : Not Connected 21 18 s6000-124 Phaser 6000/6010 and WC 6015 MFP Xerox Internal Use Only 10-9... -
Page 574: Phaser 6000/6010 System Wiring
P/J122 Switching Sensor 2 Feeder, MSI & Registration Registration Sensor P/J12 P/J120 PL2.3.5 No Paper Sensor P/J121 PL2.2.23 (6010 Only) MSI Feed Solenoid P/J19 PL6.1.10 Registration Clutch P/J25 PL2.3.7 10-10 Xerox Internal Use Only Phaser 6000/6010 and WC 6015 MFP... -
Page 575: Phaser 6000/6010 Lvps
+24v On +24V Ret +24V Ret +24V Ret +24V MCU +24V MCU +24V MCU Main Fan PL7.1.2 P/J205 FAN +24VDC FAN ALARM HARN ASSY INLET PL7.2.9 P/J200 LINE s6000-164 Phaser 6000/6010 and WC 6015 MFP Xerox Internal Use Only 10-11... -
Page 576: Phaser 6000/6010 Feeder
REGI SENSED (L) +3.3VDC +3.3VDC P/J121 PULL UP +3.3VDC No Paper Sensor PL2.2.23 NO PAPER SENSED (H) +3.3VDC Interlock +24VDC P/J25 I/L +24VDC Registration Clutch REGI CL ON (L) +24VDC PL2.3.7 s6000-165 10-12 Xerox Internal Use Only Phaser 6000/6010 and WC 6015 MFP... -
Page 577: Phaser 6000/6010 Drive
K MODE SENSED (L) +3.3VDC Interlock Main Motor Harness Assembly +24VDC PL6.1.7 Main Drive Assembly P/J160 P/J16 PL6.1.2 I/L +24VDC I/L +24VDC START / STOP REF CLOCK GAIN CHANGE s6000-166 Phaser 6000/6010 and WC 6015 MFP Xerox Internal Use Only 10-13... -
Page 578: Phaser 6000/6010 Xerographics
FFC Assembly Light Biz PL7.1.6 MCU Board Belt P/J23 P/J140 PL7.2.2 P/J 1 P/J14 +3.3V Vmon LED-K (ADC) VOUT MOB 1 MOB 2 P/J141 SDAT SCLK VOUT TR0*3 RESET (MOB) s6000-167 10-14 Xerox Internal Use Only Phaser 6000/6010 and WC 6015 MFP... -
Page 579: Phaser 6000/6010 Hvps
TR2+ DA TR1 I MON TR2 I MON CR DA HV CLK +3.3V +24V LPH Developer Belt PL3.1.1 Developer BTR : Bias Transfer Roller BCR : Bias Charge Roller s6000-168 Phaser 6000/6010 and WC 6015 MFP Xerox Internal Use Only 10-15... -
Page 580: Phaser 6000/6010 Developer
CRUM Y CRUM M CRUM C CRUM K P/J133 P/J132 P/J131 P/J130 CRUM Y Key CRUM M Key CRUM C Key CRUM K Key PL4.1.4 PL4.1.4 PL4.1.4 PL4.1.3 s6000-169 10-16 Xerox Internal Use Only Phaser 6000/6010 and WC 6015 MFP... -
Page 581: Phaser 6000/6010 Fuser
PL5.1.1 PL7.2.2 STS 2 STS 2 STS 1 +3.3VDC P/J18 FUSER EXIT SENSED (L) +3.3VDC PULL UP +3.3VDC Exit Sensor LVPS PL8.2.1 Heater P/J201 N HEAT1 LINE Thermostat s6000-170 Phaser 6000/6010 and WC 6015 MFP Xerox Internal Use Only 10-17... -
Page 582: Phaser 6000/6010 Image Processor Board
VD1 M PREQ M (VALID M) VDO+ C VDO- C VD1 C PREQ C (VALID C) VDO+ K VDO- K VD1 K PREQ K LREQ K (VALID K) s6000-183 10-18 Xerox Internal Use Only Phaser 6000/6010 and WC 6015 MFP... -
Page 583: Workcentre 6015 Mfp Printer Plug/Jack Designations
Connects IP Board and Scanner I-133 Connects MCU Board and Harness Assembly Main H-134 Connects MCU Board and LVPS I-134 Connects MCU Board and Fuser I-133 Connects MCU Board and Feed Solenoid Phaser 6000/6010 and WC 6015 MFP Xerox Internal Use Only 10-19... - Page 584 Connects LVPS and Interlock Switch 205 3 E-140 Connects LVPS and Fan 206 3 E-139 Connects LVPS and FSR Test Harness 210 3 f-140 Connects HVPS and HVPS Harness 10-20 Xerox Internal Use Only Phaser 6000/6010 and WC 6015 MFP...
-
Page 585: Workcentre 6015 Mfp Plug And Jack Locator Diagrams
Wiring WorkCentre 6015 MFP Plug and Jack Locator Diagrams Map 1 - WorkCentre 6015 MFP s6015-015 Phaser 6000/6010 and WC 6015 MFP Xerox Internal Use Only 10-21... -
Page 586: Map 2 - Workcentre 6015 Mfp
Wiring Map 2 - WorkCentre 6015 MFP : Not Used S14* s6015-016 10-22 Xerox Internal Use Only Phaser 6000/6010 and WC 6015 MFP... -
Page 587: Map 3 - Workcentre 6015 Mfp
Wiring Map 3 - WorkCentre 6015 MFP : Not Used s6015-017 Phaser 6000/6010 and WC 6015 MFP Xerox Internal Use Only 10-23... -
Page 588: Workcentre 6015 Mfp Wiring Diagrams
P/J12 P/J132 PL4.1.2 PL2.3.5 No Paper Sensor CRUM Connector (C) P/J121 P/J131 PL2.2.23 PL4.1.2 MPT Feed Solenoid P/J19 CRUM Connector (K) P/J130 PL2.2.19 PL4.1.2 Clutch Registration P/J25 PL6.1.10 s6015-052 10-24 Xerox Internal Use Only Phaser 6000/6010 and WC 6015 MFP... -
Page 589: Workcentre 6015 Mfp Lvps
+24v On +24V Ret +24V Ret +24V Ret +24V MCU +24V MCU +24V MCU Main Fan PL7.1.2 P/J205 FAN +24VDC FAN ALARM Inlet Harness Assembly PL7.2.9 P/J200 LINE s6015-053 Phaser 6000/6010 and WC 6015 MFP Xerox Internal Use Only 10-25... -
Page 590: Workcentre 6015 Mfp Feeder
REGI SENSED (L) +3.3VDC +3.3VDC P/J121 PULL UP +3.3VDC No Paper Sensor PL2.2.23 NO PAPER SENSED (H) +3.3VDC Interlock +24VDC P/J25 I/L +24VDC Registration Clutch REGI CL ON (L) +24VDC PL2.3.7 s6015-054 10-26 Xerox Internal Use Only Phaser 6000/6010 and WC 6015 MFP... -
Page 591: Workcentre 6015 Mfp Drive
K MODE SENSED (L) +3.3VDC Interlock Main Motor Harness Assembly +24VDC PL6.1.7 Main Drive Assembly P/J160 P/J16 PL6.1.2 I/L +24VDC I/L +24VDC START / STOP REF CLOCK GAIN CHANGE s6015-060 Phaser 6000/6010 and WC 6015 MFP Xerox Internal Use Only 10-27... -
Page 592: Workcentre 6015 Mfp Xerographics
FFC Assembly Light Biz PL7.1.6 MCU Board Belt P/J23 P/J140 PL7.2.2 P/J 1 P/J14 +3.3V Vmon LED-K (ADC) VOUT MOB 1 MOB 2 P/J141 SDAT SCLK VOUT TR0*3 RESET (MOB) s6015-055 10-28 Xerox Internal Use Only Phaser 6000/6010 and WC 6015 MFP... -
Page 593: Workcentre 6015 Mfp Hvps
TR2+ DA TR1 I MON TR2 I MON CR DA HV CLK +3.3V +24V LPH Developer Belt PL3.1.1 Developer BTR : Bias Transfer Roller BCR : Bias Charge Roller s6015-061 Phaser 6000/6010 and WC 6015 MFP Xerox Internal Use Only 10-29... -
Page 594: Workcentre 6015 Mfp Developer
CRUM Y CRUM M CRUM C CRUM K P/J133 P/J132 P/J131 P/J130 CRUM Y Key CRUM M Key CRUM C Key CRUM K Key PL4.1.4 PL4.1.4 PL4.1.4 PL4.1.3 s6015-062 10-30 Xerox Internal Use Only Phaser 6000/6010 and WC 6015 MFP... -
Page 595: Workcentre 6015 Mfp Fuser
PL5.1.1 PL7.2.2 STS 2 STS 2 STS 1 +3.3VDC P/J18 FUSER EXIT SENSED (L) +3.3VDC PULL UP +3.3VDC Exit Sensor LVPS PL8.2.1 Heater P/J201 N HEAT1 LINE Thermostat s6015-056 Phaser 6000/6010 and WC 6015 MFP Xerox Internal Use Only 10-31... -
Page 596: Workcentre 6015 Mfp Image Processor Board
VD1 C VD2 C VD3 C PREQ C LREQ C (VALID C) VD0+ K VD0- K VD1 K VD2 K VD3 K PREQ K LREQ K (VALID K) s6015-057 10-32 Xerox Internal Use Only Phaser 6000/6010 and WC 6015 MFP... -
Page 597: Workcentre 6015 Mfp Scanner
SH_R AFE_SDIO AFE_SCLK /AFE_SEN RXIN0- RXIN0+ RXIN1- RXIN1+ DGND RXIN2- RXIN2+ Lamp RXINCLK- RXINCLK+ DGND LVDSCLK+ LVDSCLK- Scanner Motor P/J1002 SCAN MOT/B SCAN MOTB SCAN MOT/A SCAN MOTA s6015-058 Phaser 6000/6010 and WC 6015 MFP Xerox Internal Use Only 10-33... - Page 598 SH_R AFE_SDIO AFE_SCLK /AFE_SEN RXIN0- RXIN0+ RXIN1- RXIN1+ DGND RXIN2- Lamp RXIN2+ RXINCLK- RXINCLK+ DGND LVDSCLK+ LVDSCLK- Scanner Motor P/J1002 SCAN MOT/B SCAN MOTB SCAN MOT/A SCAN MOTA s6015-059 10-34 Xerox Internal Use Only Phaser 6000/6010 and WC 6015 MFP...
-
Page 599: Workcentre 6015 Mfp Menu Map
Reference In this chapter... • WorkCentre 6015 MFP Menu Map • Phaser 6010N Menu Map • Using the CE Diags Tool Software • Acronyms and Abbreviations Appendix... - Page 600 WorkCentre 6015NI † WorkCentre 6015N © 2011 Xerox Corporation. All rights reserved. XEROX® and XEROX and Design® are trademarks of Xerox Corporation in the United States and/or other countries. s6015-101 Xerox Internal Use Only Phaser 6000/6010 and WC 6015 MFP...
- Page 601 Magyar Česky Polski Türkçe www.xerox.com/office/6010docs © 2011 Xerox Corporation. All rights reserved. XEROX® and XEROX and Design® are trademarks of Xerox Corporation s6000-222 in the United States and/or other countries. Phaser 6000/6010 and WC 6015 MFP Xerox Internal Use Only...
-
Page 602: Using The Ce Diags Tool Software
Starting the CE Diags Tool To start the CE Diags Tool: 1. On the computer, select Start >Programs > Xerox Office Printing > Phaser 6000B/6010N > Printer Settings Utility. 2. Select the port that the printer is connected to and press OK. - Page 603 Checks the operation of internal parts of the printer, prints out the printer information, changes the adjusted values, and implements other functions. This CE Diag tab is the focus of this section of the manual. Phaser 6000/6010 and WC 6015 MFP Xerox Internal Use Only...
-
Page 604: Ce Diags Menu Tree
Print Parameters Life Y Toner Waste Toner Count Registration Life M Toner Waste Toner Count Machine Life C Toner Waste Toner Count Toner Life K Toner Waste Toner Count s6000-224 Xerox Internal Use Only Phaser 6000/6010 and WC 6015 MFP... -
Page 605: Diag Types And Test Contents
PHY: Physical Layer ASIC Test ASIC Register check. Executes this test when the 116-343 error occurs. Test result: NG: See “Firmware Errors” on page 3-31. OK: Turn off/on the main power. Phaser 6000/6010 and WC 6015 MFP Xerox Internal Use Only... - Page 606 Tests the K Mode Sensor (color mode switching sensor). IL OPEN Tests the Rear Door Interlock Switch. FAN ALARM Not used. CRU Y/ CRU M/ CRU C/ CRU K Tests the Toner Cartridge sensors. Xerox Internal Use Only Phaser 6000/6010 and WC 6015 MFP...
- Page 607 All of the diagnostic test procedures in the following table can be accessed from the CE Diag tab. Select Digital Input, and then select the test from the Digital Input Number drop down list. Phaser 6000/6010 and WC 6015 MFP Xerox Internal Use Only...
- Page 608 STARTED = No PAPER SNR [23:58] No PAPER SNR = HIGH STARTED = No PAPER SNR [23:58] No PAPER SNR = LOW STARTED = No PAPER SNR [23:58] Digital Input Mode = EXIT A-10 Xerox Internal Use Only Phaser 6000/6010 and WC 6015 MFP...
- Page 609 REGI SNR = LOW STARTED = REGI SNR [12:08] REGI SNR = HIGH STARTED = REGI SNR [12:08] REGI SNR = LOW STARTED = REGI SNR [12:08] Digital Input Mode = EXIT Phaser 6000/6010 and WC 6015 MFP Xerox Internal Use Only A-11...
- Page 610 Test Procedure EXIT SNR 1. Remove the Top Cover (Phaser 6000/6010 page 8-11; WorkCentre 6015 MFP page 8-22). 2. Power on the printer, and start the CE Diag Tool. 3. Select the EXIT SNR test, and click the OK button.
- Page 611 STARTED = K MODE SNR [14:08] K MODE SNR = HIGH STARTED = K MODE SNR [14:08] K MODE SNR = LOW STARTED = K MODE SNR [14:08] Digital Input Mode = EXIT Phaser 6000/6010 and WC 6015 MFP Xerox Internal Use Only A-13...
- Page 612 STARTED = IL OPEN [09:37] IL OPEN = HIGH STARTED = IL OPEN [09:37] IL OPEN = LOW STARTED = IL OPEN [09:37] Digital Input Mode = EXIT FAN ALARM Not used. A-14 Xerox Internal Use Only Phaser 6000/6010 and WC 6015 MFP...
- Page 613 CRU Y = LOW STARTED = CRU Y [09:15] CRU Y = HIGH STARTED = CRU Y [09:15] CRU Y = LOW STARTED = IL OPEN [09:15] Digital Input Mode = EXIT Phaser 6000/6010 and WC 6015 MFP Xerox Internal Use Only A-15...
- Page 614 The use of DBAC ON, DBDC ON, 24V ON, HV CLK ON, TR1+ ON, TR2+ ON, TR2- ON, CR ON, MOB LED ON, and ADC LED ON is prohibited to avoid shock hazards since they are high-voltage outputs. A-16 Xerox Internal Use Only Phaser 6000/6010 and WC 6015 MFP...
- Page 615 3. Select the MAIN MOTOR ON FULL, MAIN MOTOR ON HALF, or MAIN MOTOR ON SLOW test, and click the OK button. 4. Check that the Exit Roller rotates. Exit Roller s6000-147 Phaser 6000/6010 and WC 6015 MFP Xerox Internal Use Only A-17...
- Page 616 2) Remove the Bypass Tray. 3) Select the MAIN MOTOR ON FULL and FEED SOLENOID ON tests, and click the OK button. 4) Check that the Feed Roller rotates. A-18 Xerox Internal Use Only Phaser 6000/6010 and WC 6015 MFP...
- Page 617 STARTED = MAIN MOTOR ON FULL, FEED SOLENOID ON [15:25] FEED SOLENOID ON = ON STARTED = MAIN MOTOR ON, FEED SOLENOID ON [15:25] Digital Output Mode = EXIT Phaser 6000/6010 and WC 6015 MFP Xerox Internal Use Only A-19...
- Page 618 5. Click the Stop button to stop the test. Test example: 14:14] Digital Output Mode = ENTRY [14:14] K MODE SOLENOID ON = ON STARTED = K MODE SOLENOID ON [14:15] Digital Output Mode = EXIT A-20 Xerox Internal Use Only Phaser 6000/6010 and WC 6015 MFP...
- Page 619 5. Click the Stop button to stop the test. Test example: [14:14] Digital Output Mode = ENTRY [14:14] FAN ON (HIGH) = ON STARTED = FAN ON (HIGH) [14:15] Digital Output Mode = EXIT Phaser 6000/6010 and WC 6015 MFP Xerox Internal Use Only A-21...
- Page 620 Digital Output Mode = EXIT NOTE The check procedure for TONER MOTOR M ON, TONER MOTOR C ON, and TONER MOTOR K ON are the same as that for TONER MOTOR Y ON. A-22 Xerox Internal Use Only Phaser 6000/6010 and WC 6015 MFP...
- Page 621 MAIN MOTOR ON FULL = ON STARTED = MAIN MOTOR ON FULL, REGI CLUTCH ON [14:14] REGI CLUTCH ON = ON STARTED = MAIN MOTOR ON, REGI CLUTCH [14:15] Digital Output Mode = EXIT Phaser 6000/6010 and WC 6015 MFP Xerox Internal Use Only A-23...
- Page 622 This button should be clicked to move to any other setting menu from the current menu in operation. NOTE After completion of all operations the Restart printer to apply new settings button should be clicked without exceptions. A-24 Xerox Internal Use Only Phaser 6000/6010 and WC 6015 MFP...
- Page 623 Grid 2 Prints the ESS built-in grid pattern. When a print quality problem occurs, this test identifies the problem as printer-related or otherwise. Phaser 6000/6010 and WC 6015 MFP Xerox Internal Use Only A-25...
- Page 624 -630 to 630 Regi Bow Y, M, C, K -100 to 100 Regi Lead Offset -94 to 94 Regi Side Offset -68 to 68 See the following illustration for additional explanation. A-26 Xerox Internal Use Only Phaser 6000/6010 and WC 6015 MFP...
- Page 625 Image Side Shifts the print area in this direction by increasing the value. Default Value s6000-229 Machine/Toner Lists counter values for multiple parameters Phaser 6000/6010 and WC 6015 MFP Xerox Internal Use Only A-27...
-
Page 626: Acronyms And Abbreviations
Federal Communications Commission Feeder FPOT First Print Output Time Field Replaceable Unit Giga Byte Ground HARN Harness Humidity High Voltage HVPS High-Voltage Power Supply Hertz (cycles per second) International Electrotechnical Commission A-28 Xerox Internal Use Only Phaser 6000/6010 and WC 6015 MFP... - Page 627 PostScript Printer Description Pages Per Minute PWBA Printed Wiring Board Assembly Random Access Memory Relative Humidity Root Mean Square Voltage Read-Only Memory Raster Output Scanner - Laser Unit Short-Edge Feed Phaser 6000/6010 and WC 6015 MFP Xerox Internal Use Only A-29...
- Page 628 Reference Acronym Description Single-Function Printer Server Message Block SNMP Simple Network Management Protocol Sensor Solenoid Toner Density Control Toner User Interface Universal Serial Bus A-30 Xerox Internal Use Only Phaser 6000/6010 and WC 6015 MFP...
- Page 630 Copyright © 2011, Xerox Corporation. All rights reserved. Unpublished rights reserved under the copyright laws of the United States. Part#: 702P00130...
Need help?
Do you have a question about the Phaser 6000 and is the answer not in the manual?
Questions and answers