Table of Contents
Advertisement
Quick Links
Advertisement
Table of Contents
Troubleshooting

Subscribe to Our Youtube Channel
Related Manuals for Ag Leader EDGE


Summary of Contents for Ag Leader EDGE
- Page 1 EDGE User Manual Firmware Version 4.5 Ag Leader PN 4001660 Rev. F...
-
Page 3: Table Of Contents
Table of Contents General Introduction and Company Profile .................1 ABOUT US........................1 INNOVATION......................1 COMPATIBILITY......................1 QUALITY AND SUPPORT..................1 WE WANT TO HEAR FROM YOU! ................1 About the Display ......................1 SERVICE ........................2 SYSTEM USES......................2 SYSTEM FEATURES ....................2 DATA CARD USAGE....................3 COLOR TOUCH SCREEN..................3 CAN-BUS TECHNOLOGY..................3 TECHNICAL SPECIFICATIONS.................3 SYSTEM UPGRADES ....................3... - Page 4 Module Firmware Management ..............15 Field Notes ....................... 16 Start Field Operation ....................17 Run Time Environment: Map Screen ..............18 Title Bar ......................18 Task Bar Buttons ................... 18 Map Screen Icons..................19 Map Screen Status Items ................21 Edit Legend ......................
- Page 5 Create an AB Line Within a SmartPath Pass..........41 Choose Existing Lines Within SmartPath ..........42 SmartPath Guidance Options ..............42 Save Pattern....................43 Reset Pattern ....................43 Load Pattern....................43 About Guidance Patterns..................44 A+ Pattern ......................44 Pivot .......................45 Adaptive Curve....................46 Identical Curve ....................46 Guidance Options ....................47 Pause ......................47 Remark A .......................47 Shift ........................47...
- Page 6 Implement Offsets ....................63 Planting Run Time Environment: Map Screen ............... 65 Map Screen: Zoom to Extent ................65 Map Screen: Zoom Detail ................... 65 Planting Map Screen Items ................. 66 Planting Setup Tabs ....................66 Create a Planting Configuration ................67 Configuration Settings ....................
- Page 7 Control Valve Settings - PWM ..............86 Control Valve Settings - Servo..............86 Auxiliary Tab....................86 Hydraulic Seed Controller Settings for Specific Planter .........87 John Deere Planters .................87 White Planters...................87 Case IH Planters..................87 Hydraulic Seed Meter Calibration Numbers ...........87 Stepper Seed Rate Control ..................89 Stepper Seed Rate Control Configuration ............89 Controller Settings for Stepper Seed Rate Motor Drives ........90 Channel Tabs ....................90...
- Page 8 Vehicle Tab......................108 GPS Offsets ...................... 109 Antenna Tab ....................109 Mount Tab....................109 Hitch Tab ..................... 109 Implement Tab......................110 Implement Offsets ..................... 110 Section Offsets .................... 110 Controller Tab......................111 Controller Settings (DirectCommand) ............... 111 Product Tab ......................112 Product Screen ....................
- Page 9 Container Alarm Screen................131 Rate Screen: Liquid Flow/Pressure ..............132 Rate Screen: Spinner Spreader Settings............132 Spinner Spreader Product Settings..............132 Spreader Control ..................133 Application Rate Control Configuration Screen ..........134 Loading Prescriptions...................134 Shape File Conversion....................135 Liquid Application Control ..................136 Liquid Application Control Configuration............136 Liquid Application Controller Settings ..............139 Controller Settings - PWM ..............139 Controller Settings - Servo, Calibrated Reflow or Ramsey Valve ...140 Rate Error Alarm Threshold................140...
- Page 10 Troubleshooting Serial Control Applications (Liquid and Granular) ....161 Troubleshooting Serial Control Applications (Liquid Only)........ 162 Troubleshooting Serial Control Applications (Granular Only) ......162 Miscellaneous......................162 Glossary of Application Settings ............... 162 Configuration Settings ................. 162 Speed Input Settings ................... 162 Automatic Swath Control Settings ...............
- Page 11 Vibration Calibration ..................178 Temperature Calibration................179 Moisture Calibration ..................179 Grain Weight Calibration ................179 Adding a New Calibration ..................182 Diagnostics......................184 Appendix “Company Warranty Statement” on page 186System Diagrams Reference ..185 File Formats ......................185 Prescription Map File Types ................185 Boundary and Guideline File Types..............185 System File Types .....................185 Module LED Diagnostic States ................186 LED display......................186...
-
Page 13: Introduction And Company Profile
ROFILE ABOUT US Welcome to the Ag Leader Technology family. Ag Leader Technology, Inc. is the global leader in yield monitor and precision farming systems and is committed to meeting the present and future needs of the agriculture industry by providing high quality products and first class customer support. -
Page 14: Service
Note: The card door slot must be fully closed for the display to remain weather-tight. SERVICE There are no user-serviceable parts inside the display. Ag Leader Technical Support ph: (515) 232-5363 fax: (515) 232-3595 e-mail: support@agleader.com CAUTION: This display has an internal lithium coin cell battery and an internal nickel metal hydride battery. -
Page 15: Data Card Usage
CAUTION: Exceeding these specifications may result in degraded operation and/or damage to the display. SYSTEM UPGRADES Ag Leader Technology will periodically provide operating program updates that will improve the performance of your display. Required software updates will be available free of charge for download from m. -
Page 16: Conventions Used In This Manual
NLINE This user manual can be viewed online at Ag Leader’s Web site. To view an online version, go to the Ag Leader Web site, and click the Support link. You should see a page titled “Manuals and Quick Reference Sheets.”... -
Page 17: How To Find Information You're Looking For
’ OW TO NFORMATION OOKING What do you do if you cannot find the information that you’re looking for? There are three different ways at your disposal to find specific information quickly. These steps can include: 1. Look up the information in the Table of Contents. 2. -
Page 18: Mounting The Display
Mounting the Display Mount the display to a secure support inside the vehicle cab. The following must be considered when choosing a mounting location. • The display must be readily accessible to the machine operator. • The display must not obstruct the machine operator's normal driving view. •... -
Page 19: Fuse Installation And Replacement
Fuse Installation and Replacement CAUTION: The fuse is to be placed in the fuse holder in-line with the battery power cable and used with display only. CREEN ONVENTIONS The following control buttons are made available for entering names and calibration values into the display. - Page 20 An on-screen Keyboard is made available when appropriate for use during all setup processes. Press the keyboard button to access the on-screen text entry screen. An on-screen Numeric Keypad is made available for changing configuration settings and calibration numbers. Press the keypad button to access the on-screen numeric entry screen.
-
Page 21: Setup
ETUP ETUP YSTEM UNCTIONALITY Prior to setup, most of the functionality of the display is not available until the basic setup process is completed, and the Home screen will look like the picture below. The Run Time Environment is not accessible, because the Map button does not appear on the task bar at bottom. -
Page 22: Setup Screen
• View Operation Summary button Opens the Select Summary screen, where you can select different configuration settings for Seasons, Grower, Farm, Field, Operations, and Product. For more information, see “Summary” on page 23. ETUP CREEN The Setup Screen is where you can access management information, adjust display and GPS settings, and specify field operations. -
Page 23: Importing An .Msf File
Importing an .MSF File A Management Setup File (.msf) is a file format that allows the display to import Grower and Field information from desktop software via a Compact Flash Card. Follow the process outlined below to import desktop software information from your Compact Flash Card. Note: When importing management items from an .MSF setup file, the imported data will always update or be added to existing management data and will not overwrite it. -
Page 24: Field Management Tab
IELD ANAGEMENT A field consists of one or more outer boundaries. Each outer boundary can contain one or more inner boundaries used to define any combination of roadways, waterways, building sites, or bodies of water. If the display will be used for multiple Growers, enter each Grower business name and associate the field names with the correct grower when the fields are setup within the system. -
Page 25: Boundary Import
Boundary Import 1. To import a boundary from the external data card, press Import. The File Selection screen appears, as shown. 2. Select the desired file to import. 3. Press the checkmark box on the File Selection screen to complete the import process. Boundary Export 1. -
Page 26: Memory Tab
• Time Zone Use the drop-down menu to select your time zone. • Country/Language Selection Use the drop-down menu to select the language. • Operating Units Select either Imperial or Metric. EMORY The Memory Tab displays the used and free space available on the external data card, as well as the percentage of memory used on that card. -
Page 27: Features Tab
EATURES Unlock codes are unique to the serial number of each display and the feature registration number. You must supply these numbers to your dealer when purchasing any unlock codes. Press the Unlock button, and the Feature Registration box appears. Use the on-screen keyboard to enter the unlock code and press the checkmark box to enable the feature. -
Page 28: Field Notes
• Upgrade Makes necessary upgrades to all the modules’ firmware while the display’s firmware is upgraded. • Import Imports any firmware stored on the Compact Flash Card into the display memory. • Remove Removes unwanted module firmware from the Module Firmware Management list. Note: Pressing the Remove button does not remove firmware from the module itself. -
Page 29: Start Field Operation
TART IELD PERATION You can start field operations after setting up a Grower, Farm and Field; and then creating an operating configuration. • To set up a Planting Operating Configuration, see “Create a Planting Configuration” on page 67. • To set up a Tillage Operating Configuration, see “Create a Tillage Configuration”... -
Page 30: Run Time Environment: Map Screen
NVIRONMENT CREEN The appearance of the map screen varies, depending upon which operation you are performing. As examples, typical map screens for Tillage and Harvest are shown. Data shown at the Title Bar at the top of the Map Screen show speed and distance logged. Icons on the Map Screen itself indicate features pertaining to the specific operation you are viewing at the map screen. -
Page 31: Map Screen Icons
AutoSwath - ON AutoSwath - OFF Area Logging Status Button. This button appears for configurations that do not use rate control, such as Tillage, Harvest, Planting operations that do not use SeedCommand, and Application operations that do not use DirectCommand. Pressing this button turns logging on and off. Rate Control Button. - Page 32 The Engage icon shows that the OnTrac2 autosteer system is on, off, or off but ready to engage. The appearance of this icon displays the following: • Engage - On Green autosteer system is on. • Engage - Ready Grey autosteer system off but ready to engage.
-
Page 33: Map Screen Status Items
Press the center of the Map Screen, and four arrow icons appears around the vehicle icon. An example of one of these arrow buttons is shown at left. Pressing these arrow icons will move the center of the Map Screen in the direction of the arrow button. •... -
Page 34: Create A Boundary
• Color Scheme The color scheme can be modified by using the drop down list. • Reset Legend Resets the legend to the default settings. • Automatic Legend If the Automatic Legend checkbox is selected, the average automatically sets itself to the field average and updates as the field average changes •... -
Page 35: View Boundary
OUNDARY At the Boundary Creation screen, you can press the View button to open the File Selection screen, where you can view all field boundary information. ARKERS Pressing on the View Map Markers button on the Create Boundary screen cycles this screen to the Map Markers screen, as shown. -
Page 36: Select Summary
Select Summary If you have performed more than one operation for a field, the Select Summary Screen appears. Use the center-right drop- down menu to choose the Operation that you wish to view. Press the View Map button (A) to view a Summary Map. Press the Summary Screen button (B) at bottom right to view the Summary Screen. -
Page 37: Display
ISPLAY The Display screen shows generalized diagnostic information about the display, including display temperature, as well as display and CAN Bus voltage. -
Page 39: Gps
During your field operation, the GPS icon/button in the upper left-hand side of the Map Screen should appear as green, which means you are receiving a differential GPS signal. If this icon appears yellow, you are still receiving GPS but are not receiving a differential signal. -
Page 40: Omnistar Settings
• Ignore NMEA Checksum Check this to ignore intermittent GPS message errors. STAR S ETTINGS Pressing the Wrench button on the GPS General Tab opens the OmniSTAR® Settings screen, as shown, where you can view differential source and frequency settings. Serial Number/OmniSTAR User ID This box shows the serial number of your receiver. -
Page 41: Omnistar Settings - Gps 2500
• GPS Pos. Rate (Hz) Represents the cycles per second (shown in Hz) that the display receives position information from the receiver. (This is the same number as shown on GPS Rate (Hz) drop-down list menu located on the General Tab). •... -
Page 42: Gps Port Setup - Gps 2500
• Reset to Defaults Press the Reset button to restore the receiver settings to the factory default. This will remove all custom settings. Note: Differential settings and NMEA messages will need to be configured for the system to function properly after resetting factory defaults. -
Page 43: Gps Diagnostics
From this screen the user can adjust GPS output. The screen is the same for both Port A and Port B. • Output Baud Rate Displays the speed at which the receiver communicates with the display. For optimal performance, the GPS baud rate should be set at 192000 or higher. -
Page 44: Gps Information - Second Screen
GPS I NFORMATION ECOND CREEN • UTC Time UTC is an acronym for Coordinated Universal Time, a high- precision atomic time standard that defines local time throughout the world. Different versions of universal time use atomic clocks to correct for irregularities in the Earth's rotation and orbit. UTC is used in navigation, astronomy, aviation, Internet broadcasts, and amateur radio. -
Page 45: Ontrac2 Information
- If the Fast Update Rate is ON, then your receiver is capable of outputting an update rate faster than 1 Hz per second. - If the Fast Update Rate is OFF, then currently your receiver is only capable of an update rate of 1 Hz per second. - Page 46 • NTRIP Status Displays NTRIP connection; either Connected or Disconnected. • Cellular Status Displays status of ParaDyme cellular modem; either Connected or Disconnected. • Cellular Signal Strength (%) Displays a number between 0 and 100%. • WiFi Status Displays status of WiFi router; either Connected or Disconnected. •...
-
Page 47: Guidance
UIDANCE UIDANCE The Guidance Tab, located on the GPS screen, includes some general settings for the on- screen lightbar and L160 External Lightbar features. Note: In order to use guidance with the display, you must have a GPS receiver capable of a GPS output rate of 5 Hz or more. -
Page 48: Lightbar Settings
• Remove All This will remove all guidance pattern files from the display’s internal memory. IGHTBAR ETTINGS To adjust lightbar settings, press the Lightbar Settings button on the Manual Guidance screen. The Lightbar Settings screen appears, as shown. • LED Spacing Enter in an amount specifying the distance represented by each square of the lightbar. -
Page 49: Guidance Screen
• (D) Map Icon (Perspective View) • AB Line The AB Line is a line that runs between Point A and Point B.In most cases, the AB Line is the reference line for subsequent swaths. When you press the Set A button on your display, the "A" point will appear on your display's screen. -
Page 50: New Ab Pattern
New AB Pattern Use the following procedure to create a new pattern. The following example explains how to create an AB line. Note: Pattern options other than SmartPath and Straight AB are explained in full detail on “About Guidance Patterns” on page 1. - Page 51 Additionally, the point marker box changes its appearance, so that the letter changes from Set A to Set B, however the Set B button appears as greyed out. You must drive a minimum of 100 feet (30 meters) before marking the B point. Note: If you are creating a Pivot pattern, you must drive a minimum of 160 yards (49 meters) before marking the B point.
-
Page 52: Smartpath
SmartPath The SmartPath pattern is designed to give guidance from any previously-driven pass. This is used in irregular-shaped and terraced fields where you cannot run all passes parallel to the previous pass. Instead, the SmartPath guidance allows you to move to a different area of the field, and then resume a previous guidance pattern later. -
Page 53: Smartpathnotes
6. Turn Around. After you turn around on your first pass, the system guidance will follow a maroon-colored line parallel to your previously-driven pass. An example is shown in the picture below. As you continue using the SmartPath, the map screen will display three lines: •... -
Page 54: Choose Existing Lines Within Smartpath
Once the AB line is created you can switch between the AB line and SmartPath patterns by pressing the AB/SmartPath toggle. A-B/SmartPath Toggle • Curved Lines • Straight AB Line After the Guidance System has switched over to a different path, the name of the currently-followed pattern is shown within a black box on the Map Screen. -
Page 55: Save Pattern
Save Pattern You can save a pattern (.pat file) to the display's internal memory to the current field by using the following procedure. 1. Press Save Pattern The Save Pattern screen appears, as shown. Note: The Save Pattern button will appear when there is an active pattern. 2. -
Page 56: About Guidance Patterns
2. Select a Pattern The Load Pattern screen appears, as shown. Select and highlight the desired pattern. If the pattern you selected was an AB Line, that pattern now appears on the Map screen. Press the green check mark box to continue. 3. -
Page 57: Pivot
4. Drive around the field. Keep the vehicle wheel in the rut. The lightbar does not yet provide guidance. 5. When you are almost back to the pivot arm or the edge of the field, set Point B. 6. A screen appears. It states: “Please wait while the Pivot Center is calculated”. -
Page 58: Adaptive Curve
- A radius of at least two swath widths. - An arc length of at least two swath widths. • You can shift to the nearest row by going to the Guidance Screen and pressing Options. At the Guidance Options screen, press the Nearest Row button. The Shift to Nearest Row screen appears, as shown at left. -
Page 59: Guidance Options
Note: Guidance extends beyond the end of curved swaths. This makes it possible to get LED guidance back onto the swath if the vehicle drives past the end of a swath. The extended swath lines do not appear on screen. UIDANCE PTIONS The Options button on the Guidance Screen becomes active after you have set an AB line. -
Page 60: Nudge
- Area Count generates the next pass, based on coverage area of the previous pass. The display must be logging coverage data in order to generate the next pass. - Heading Change logs the next pass when the vehicle turns past the heading threshold. •... -
Page 61: Ontrac2 Setup Tasks
ETUP ASKS Upon installation of the OnTrac2 hardware, you must set up a new configuration using the OnTrac2 guidance feature, by performing the following tasks: • Configure a vehicle on the OnTrac2 Configuration Tab For more information, see “Vehicle Configuration” on page 49. •... -
Page 62: Edit Vehicle Settings
4. Enter Antenna Forward/Behind Offset Use the numeric keypad to enter the antenna Forward/Behind position. Press the blue right-arrow button to continue. Note: Forward indicates the antenna is located in front of the vehicle’s control point. Behind indicates the antenna is located behind the vehicle’s control point. Be sure to select the appropriate offset for your configuration. -
Page 63: Ontrac2 Tools Tab
2. Press Edit Press the Edit button, and a second Vehicle Settings screen appears, as shown. 3. Adjust Settings, if necessary At the Vehicle Settings screen, you can adjust the following settings: • Wheel Base • Antenna Forward/Behind Offset • Antenna Height Press the green check mark box when finished. -
Page 64: Calibrating Ontrac2
Calibrating OnTrac2 Calibration of the OnTrac2 should be performed after you install it on your vehicle. This calibration procedure consists of four main tasks: Selecting the Electronic Control Unit (ECU) orientation, Calibrating the Tilt Sensor, Adjusting the minimum output for the Motor Drive Unit, and Adjusting the Disengage Sensitivity. -
Page 65: Ontrac2 Steering Diagnostics
6. Wheel Rotating As you drive forward, your wheel will begin to rotate. Press the Wheel Rotating button when this happens. The Disengage Test message then displays. Press the blue right-arrow button to continue. Notes: - If you run out of space in the field at any time during the Calibration procedure, you can manually reposition the vehicle by pressing the Pause and Resume buttons. -
Page 66: Drive Unit
Drive Unit The Drive Unit Tab displays the following information: Status • Engaged Shows the OnTrac2 system is actively attempting to turn the steering wheel. • MDU Power Shows the MDU Power Switch is set to On. • Remote Engage Flashes green when the remote switch is pressed. -
Page 67: Ontrac2 Advanced Tab
DVANCED The Advanced Tab is where you can back up and restore all of your OnTrac2 data. Note: OnTrac2 data is stored in internal memory independently of other data. Thus the backup and restore procedures described in this section both save different data than the data described in the Console Memory Tab in “Memory Tab”... -
Page 68: Tuning
• Tuning The Tuning process is where you can adjust individual settings for Steering, Heading and Cross-Track Error. For more information, see “Tuning” on page 56. • Line Acquisition Controls the aggressiveness that a vehicle acquires an AB line. Increasing this value will cause the vehicle to take a sharper angle toward the AB line. -
Page 69: How The Ontrac2 System Works
• Heading Aggressiveness How accurately the OnTrac2 system’s will control the heading or the direction of the vehicle when on the AB line. The higher the Heading Aggressiveness Value the more accurately the system will try to control the actual heading of the vehicle. Heading Aggressiveness should be set as high as possible. If it is set too high, the OnTrac2 system will try and control the vehicle’s heading too accurately, and will oscillate across the AB line of the OnTrac2 Mechanical Drive Unit. -
Page 70: Steering
Steering Motor Aggressiveness adjusts how aggressively Steering turns the steering wheel left and right. The higher Motor Aggressiveness is set, the quicker and more responsive Steering turns the steering wheel. The lower the Motor Aggressiveness is set, the more lazily Steering turns the steering wheel. -
Page 71: Cross Track
Cross Track Cross Track Error also does two things: - First, it adjusts the volume at which Cross Track talks to Steering. - Second, it adjusts the offline tolerance at which Cross Track tries to hold the tractor on the AB Line. The higher Cross Track Error is set, the louder Cross Track talks to Steering;... -
Page 73: Tillage
ILLAGE ILLAGE NVIRONMENT CREEN The screen shown is for a Tillage configuration. In order for you to view the Map screen, you must first set up a Grower, Farm and Field at the Start Field Operation portion of the Home screen. •... -
Page 74: Configuration Notes
3. Press the Add button. 4. The Operating Configuration Wizard appears. Follow the wizard’s instructions to complete the configuration. Configuration Notes If you are not using GPS for ground speed, then the ground speed sensor input must be calibrated for accurate speed and area calculations. -
Page 75: Hitch Tab Settings
Note: Accuracy when measuring for a specific setting is essential to ensure proper machine performance. ITCH ETTINGS The Hitch Tab is shown. The Hitch Tab allows you to enter in the distance from four different mounting positions on the tractor to the rear axle. Use the number pads to enter these values in if using the hitch point. -
Page 77: Run Time Environment: Map Screen
LANTING LANTING NVIRONMENT CREEN The screens shown in this section are for a Planting configuration. In order for you to view the Map Screen, you must first select a Grower, Farm and Field at the Start Field Operation portion of the Home Screen. -
Page 78: Planting Map Screen Items
• (A) Total Acres • (B) GPS Status • (C) Map Options • (D) Home • (E) Map View • (F) Vehicle Icon • (G) Implement Icon • (H) Ground Speed (I) Logging Status (shown for area logging Planting Configuration) The map is shown for a typical Planting Configuration which does not include any Rate Control or Row Shutoff features. -
Page 79: Create A Planting Configuration
This Tab is shown in front of four other tabs: Vehicle, Implement, Controller and Product. • Configuration Tab The Configuration Tab is where you can add and edit operating configurations. For more information, see “Create a Planting Configuration” on page 67 and “Configuration Settings” on page 68. •... -
Page 80: Configuration Settings
4. The Operating Configuration Wizard appears, as shown. From here, follow the Wizard’s instructions to create a configuration that includes Vehicle, Implement, and Controller settings Note: From the Configuration Tab, you can also: • Press the on-screen keyboard to edit or rename existing configurations. •... -
Page 81: Configuration Settings: Equipment Configuration
ONFIGURATION ETTINGS QUIPMENT ONFIGURATION The Equipment Configuration screen displays the Implement and Controller information. The appearance of this screen may vary, depending upon your particular planting configuration. To edit equipment configuration settings, highlight a configuration and press Edit. Equipment Configuration Settings - SeedCommand Users of the Hydraulic Drive and Stepper Seed Meter planting configurations may adjust the following settings at this screen: •... -
Page 82: Auxiliary Input Settings (Switch Mapping)
4. From here, follow the on-screen wizard’s instructions to complete the distance calibration procedure. UXILIARY NPUT ETTINGS WITCH APPING To view Auxiliary Input Settings, go to the Planting Configuration Tab, highlight the desired configuration and press the Wrench button. At the Configuration Settings screen, press the Aux Input button, and the Auxiliary Input Settings screen appears, as shown. -
Page 83: Autoswath
• Control Module Specifies the function of your DirectCommand or Planting Row Shutoff.(For example, Seed Clutch). • Channel Select the channel to control. • F2 Switch 1 Selects the section to turn on and off. WATH The Automatic Swath Control feature turns sections off and on automatically based upon the following conditions: •... -
Page 84: Autoswath Notes
AutoSwath Notes To use AutoSwath for planting operations, you are required to use a 5 Hz or higher GPS output rate. AutoSwath control will not allow sections to be turned on until the master and planting section switches are on. If you have less than a 5 Hz GPS output rate and you select AutoSwath, a warning appears, telling you that AutoSwath Control is not available at less than 5 Hz. -
Page 85: Antenna Tab
These settings are used by mapping, product control, and Automatic Swath Control. Press the GPS Offsets button to view Antenna and Hitch Tab GPS settings. More information can be found at “Antenna Tab” on page 73 “Hitch Tab” on page 73 Antenna Tab The Antenna Tab contains three different settings. -
Page 86: Implement Tab
MPLEMENT Individual implements are set up and configured from the Implement Tab. The Implement List displays all previously- configured implements that are available for use. • Add Press to add a new implement. A wizard will walk you through setting up the implement. •... -
Page 87: Controller Settings (Seedcommand)
• Add Press to add a new controller. A wizard will walk you through setting up the controller. • Keyboard Button Press to edit the name of a selected controller from the list. • Wrench Button Press to edit Controller Settings, including tabs for Channel 1, 2 & 3 settings, and also Auxiliary settings. -
Page 88: Product Options
Note: When deleting a product all data using it will be deleted. RODUCT PTIONS To add or import a product, press the Add button located on the Product Tab. The Product Options screen appears, as shown. • Add Product The Add Product button summons the Variety Setup Wizard. For more information, see “Add Product”... -
Page 89: Product Settings
1. Select Product and Type Select the Product and Type from the drop-down menus. 2. Select Units Select the units of the product. 3. Follow the steps in the Wizard to complete the procedure. RODUCT ETTINGS The Product Settings screen is where you can edit product information, add a color or edit the legend. -
Page 90: Map Screen: Zoom To Extent
• Planter Row Shutoff functions beginning on “Row Shutoff” on page 81 • Hydraulic Seed Rate Control functions beginning on “Hydraulic Seed Rate Control” on page 84 • Stepper Seed Rate Control functions beginning on “Stepper Seed Rate Control” on page 89 Note: For information on AutoSwath functionality, see the pages beginning at “AutoSwath”... -
Page 91: Planting Map Screen Items
• (A) Total Acres • (B) GPS Status • (C) Map Options • (D) Home • (E) Map View • (F) Rate Button • (G) Vehicle Icon • (H) Implement Icon • (I) Ground Speed • (J) Status Items: Target Rate + Actual Rate •... -
Page 92: Planting Rate Control Configuration Screen
• (A) Active Rate Note: In some conditions, the Actual Rate may increment slower than the Target Rate, or its numeric values may vary before matching the Target Rate. • Meter RPM The Meter RPM button, as shown at left, displays the number of hydraulic motors and their speed, shown in Revolutions Per Minute (RPM). -
Page 93: Row Shutoff
2. Choose an .irx (prescription) file from the names list. Press the checkmark box when complete. 3. Once selected, the Prescription button on the Planting Rate Control Configuration Screen will change its appearance to the Remove Prescription button, which appears as a minus sign. This will allow you to clear out the selected prescription. - Page 94 5. Enter Number of Implement Sections Use the up and down arrows to enter the number of clutch sections, and press the blue right-arrow button to continue. Note: Do not enter the number of individual rows. Enter the number of swath sections that can be independently turned on and off.
-
Page 95: Row Shutoff Look-Ahead Numbers
Note: The Clutch Module Configuration must match the actual number of clutch sections on the planter. Otherwise, you will see a message stating that “The number of detected module outputs does not equal the number of planter sections.” (This message may also appear if you have not connected the clutches to the module). -
Page 96: Hydraulic Seed Rate Control
• If you suspect the results are incorrect, then adjust the appropriate look-ahead setting one-tenth (.1) second per trial. When making changes to the look-ahead settings, make sure to adjust these settings only one-tenth (.1) second per trial. Larger adjustments can cause unintentional large changes in the AutoSwath’s performance. -
Page 97: Controller Settings For Hydraulic Seed Rate Motor Drives
5. Select Controller Select an existing controller from the drop-down menu, or press the New button and use the Controller Setup Wizard to create a controller. 6. Select Device and Seed Command Type After pressing the New button, the Controller Setup Wizard appears. Use the drop-down menus to select SeedCommand as your device. -
Page 98: Control Valve Settings - Pwm
Control Valve Settings - PWM • Control Valve Setting determines the type of control valve being used for the hydraulic motor. Choices include PWM or Servo. • PWM Frequency The frequency that the PWM control valve is pulsed at. Settings can be found from the manufacturer of the valve. -
Page 99: Hydraulic Seed Controller Settings For Specific Planter
Hydraulic Seed Controller Settings for Specific Planter John Deere Planters • Control Valve Configuration — PWM • PWM Frequency — 175 • PWM Gain — 110 • Zero Flow Offset — 40 • Gear Ratio - (chain drive) — 2.374 - (ProShaft) —... - Page 100 Cotton Planter brand and type Corn Soybeans Standard Sorghum Rate John Deere Vacuum: Standard Vacuum: ProMax™ Vacuum: Precision Planting eSet® Vacuum: VenHuizen AccuVac Kit Mechanical: Finger Mechanical: Brush Meter Case IH Vacuum Cyclo[ KINZE EdgeVac® Mechanical:Finger White Great Plains Mechanical Standard Mechanical: Twin Row Note: Check your operator’s manual for more specific information on other seed disk options.
-
Page 101: Stepper Seed Rate Control
TEPPER ONTROL The Stepper Seed Control module allows Rawson ACCU-RATE Variable Rate Controller users to control up to three hydraulic motor drives via the display. If you have purchased the Stepper Seed Rate Control module, you should configure it in the following order. 1. -
Page 102: Controller Settings For Stepper Seed Rate Motor Drives
7. Enter number of drives Use the up and down arrows to enter in the number of hydraulic drives on your planter. Press the blue right- arrow button to continue. 8. Enter suggested controller name A suggested controller name appears. If necessary, use the on-screen keyboard to edit the name of the controller. -
Page 103: Gear Ratio Calculations For Seed Rate Motors
ATIO ALCULATIONS FOR OTORS The Gear Ratio is a setting that appears on the Controller Tab to users of the Stepper Seed Meter Motor Drive. It is the ratio of the revolutions of the hydraulic drive as compared to one revolution of the seed meter. -
Page 104: Gear Ratio Drawing - For Multiple Drive Combinations
Gear Ratio Drawing - For Multiple Drive Combinations Seed Rate Drive Setting (Calculating a Gear Ration for Multiple Drive Combinations) = 2.4 Driven/Drive 1 X Driven/Drive 2 = Gear Ratio Planter Drive Seed Meter Shaft Sprocket = Gear Ratio Seed Rate Motor Planter Drive Shaft Driven/Drive 1 Driven/Drive 2... -
Page 105: Gear Ratio Drawing - For John Deere Pro-Shaft™ Drives
Gear Ratio Drawing - For John Deere Pro-Shaft™ Drives Seed Rate Drive Setting (Calculating a Gear Ration for John Deere Pro-Shaft Drives) = 2.4 Drive/Driven 1 Drive/Driven 2 = Gear Ratio Planter Drive Seed Meter Shaft Sprocket = Gear Ratio Seed Rate Motor Planter Drive Shaft Driven/Drive 1... -
Page 106: Priming Seed Rate Meters
RIMING ETERS The Seed Meter Prime is used to charge the seed meter when filling with seed. To begin, go to Rate Screen and press the Meter RPM button, as shown at left. The Seed Rate Planter Control Screen appears, as shown. 1. -
Page 107: Troubleshooting
3. Acknowledge the Warning Acknowledge this warning by pressing the checkmark box. 4. Press the Calibrate button The Meter Calibration Wizard appears, as shown. 5. Select Drive to Calibrate Select the drive that you wish to calibrate. Press the blue right- arrow button to continue. -
Page 108: Hydraulic Seed Control: Zero Flow Offset Variation
Error Message: Drive is slow to begin turning. Possible Cause: Zero Flow Offset is set too low. Conformation Technique: a. Turn the Master Switch off. Enter a manual ground speed and enter a new region. b. From the Run screen, open the product application rate window, and highlight the appropriate product. -
Page 109: Diagnostics
Possible Cause: The hydraulic drive motor has stopped rotating. Solution: Check the stepper seed motor to see if it is restricted from turning, and that the hydraulic drive is working. Error Message: “Meter Not Moving - Drive #” Possible Cause: Either the Seed Meter Calibration failed, or the Seed Meter Prime failed Solution: Make sure that the tractor’s hydraulic outlet is turned on. - Page 110 Note: The E2 position is the indicator for the foot box. Note: Other diagnostic settings can be found in “Diagnostics” on page 24.
-
Page 111: Run Time Environment: Map Screen
PPLICATION PPLICATION NVIRONMENT CREEN The screens shown in this section are for an Application configuration. In order for you to view the Map Screen, you must first select a Grower, Farm and Field at the Start Field Operation portion of the Home Screen. For more information, see “Management”... -
Page 112: Application Map Screen Items
• (A) Total Field Acres • (B) GPS Status • (C) Ground Speed • (D) Map Options • (E) Home • (F) Map View • (G) Vehicle Icon • (H) Implement Icon (5-section boom) • (I) Logging Status Shown for area logging Application configurations Note: For information on Map Screen items that are standard for all operations, See “Run Time Environment: Map Screen”... -
Page 113: Create An Application Configuration
• Configuration Tab The Configuration Tab is where you can add and edit operating configurations. For more information, see “Create an Application Configuration” on page 101 “Configuration Settings” on page 103. • Vehicle Tab The Vehicle Tab is where you can add and edit vehicles. For more information, see “Vehicle Tab”... - Page 114 4. From here, follow the Wizard’s instructions to create a configuration that includes Vehicle, Implement, and Controller settings. Note: From the Configuration Tab, you can also: • Press the on-screen keyboard to edit or rename existing configurations. • Press the Wrench button to access Configuration Settings. For more information, see “Configuration Settings”...
-
Page 115: Configuration Settings
ONFIGURATION ETTINGS By highlighting a configuration and pressing the Wrench button on the Configuration Tab, you can summon the Configuration Settings screen, where you can edit Configuration Settings, Speed Input Settings, Auxiliary Input Settings and AutoSwath Settings. • Configuration Settings Press to display and edit application settings specific to a vehicle, implement and controller combination. -
Page 116: Configuration Settings - Directcommand
Configuration Settings - DirectCommand The Equipment Configuration screen is shown. This screen displays the Implement and Controller information. To edit equipment configuration settings, highlight a configuration and press Edit. Configuration Settings - DirectCommand • Configuration Name The configuration name can be changed by pressing the on-screen keyboard. -
Page 117: Auxiliary Input Settings
2. Press the Calibrate Distance button The Speed Sensor Calibration wizard appears. 3. Follow the on-screen wizard’s instructions Complete the distance calibration procedure. UXILIARY NPUT ETTINGS To view Auxiliary Input Settings, go to the Application Setup Configuration Tab and press the Wrench button. At the Configuration Settings screen, press the Aux Input button, and the Auxiliary Input Settings screen appears. -
Page 118: Add Auxiliary Input Settings
Add Auxiliary Input Settings If you wish to add a switch setting, press the Add button on the Auxiliary Input Settings Screen, and a second Auxiliary Input Settings screen appears, as shown. This screen shows the following drop down menus specified for switch mapping on a sprayer. -
Page 119: Autoswath
5. Save Switch Functions The new switch settings appear in the lower left-hand portion of the Auxiliary Input Settings screen, as shown. Press the checkmark box to save these settings. 6. Fence row nozzle indicators on Map Screen After completing these Auxiliary Input Settings changes, the Fence Row Nozzle Indicators (A), which are shaped like triangles, appear on either side of the sections behind the vehicle icon, as shown. -
Page 120: Autoswath Notes
• Coverage Option In the Coverage Option area, you must choose between three options: - Minimize Skip turns off the implement section after the entire boom section is fully inside your coverage area. This prevents the possibility of skips. - Minimize Overlap turns off the implement section when that boom section first enters your coverage area. -
Page 121: Gps Offsets
GPS O FFSETS After completing the process of setting up a Vehicle, you must also configure GPS Offsets. The GPS Offsets define where machine rear axle, hitch, and product placement is in relation to the GPS antenna. These settings are used by mapping, product control, and Automatic Swath Control. -
Page 122: Implement Tab
Note: Accuracy when measuring for a specific setting is essential to ensure proper machine performance. MPLEMENT Individual implements are set up and configured from the Implement Tab. The Implement List displays all previously- configured implements that are available for use. •... -
Page 123: Controller Tab
3. Enter Forward or Backward Distance from Hitch Point Use the numeric keypad to enter the distance from front hitch, if present, to rear hitch point. Press the checkmark box when complete. (This option will not be present on self-propelled vehicles.) Note: Accuracy when measuring and entering swath section GPS offsets is required to ensure proper machine performance. -
Page 124: Product Tab
Press the Controller Settings button and another Controller Settings screen opens, where you can view controller settings. For more information, see the following in the Application: DirectCommand section: • “Liquid Application Controller Settings” on page 139 • “Spinner Spreader Controller Settings” on page 148 RODUCT The Product Tab allows you to add new products or edit existing products for planting and seeding. -
Page 125: Product Settings
• Edit Legend The Edit Legend button allows you to change the legend associated with the selected product. For more information, see “Edit Legend” on page 21. Product Settings The Product Settings screen is where you can edit product information for an existing product in the Product List. To view the Product Settings Screen, first go to the Product Tab, highlight your product configuration, press the Wrench Button and after the Product Screen opens press the Edit Info button,... -
Page 126: Tank Mix Setup
ETUP Tank Mixes are set up by using the on-screen wizard. A tank mix can contain up to seven individual components. To create a Tank Mix, go to the Product Options Screen and press Add Product Mix. The Product Mix Setup Wizard appears. 1. -
Page 127: Miscellaneous Items
3. Press the Add button to start the process of adding components to the fertilizer blend. Note: Any liquid herbicides set up within the system can be added to create an impregnated blend product. 4. Select the desired component from the list box. New components can be set up at this time if required. 5. -
Page 128: John Deere Specific Instructions
Percentage (in terms of lbs./100 lbs) Abbreviated name for P (P K (K Material Type display and Density predefined name for SMS Ammonium Ammonium nitrate nitrate Ammonium Ammonium phosphate phosphate Ammonium Ammonium sulfate sulfate Urea Urea Potash Potash Triple Triple superphosphat superphosphat Ordinary... -
Page 129: Target Rate
use the John Deere master switch when completely shutting down the sprayer to transport or service the machine. TARGET RATE The display must have a non-zero target rate entered in the display before the boom valves will open for product application. Ensure that the target rate entered into the display and Spray Star match to avoid any unwarranted alarms or warnings on the display. - Page 130 • Pump Servo Rate control is achieved through speed changes to the solution pump. The pump servo setting is programmed to control an electric motor used to actuate a hydraulic valve to adjust the hydraulic flow to the solution pump. •...
-
Page 131: Servo Control Valve Settings (By Manufacturer)
ERVO ONTROL ALVE ETTINGS ANUFACTURER Flow Control Valve Control Valve Valve Valve Response Configuration Response 1 Response 2 Threshold Raven Accu-Flow, 20 GPM Single Valve System In-line servo (Fast Close Valve) Raven Accu-Flow, 10 GPM Dual Valve System In-line servo 100% (Standard Valve) Raven Accu-Flow, 30... - Page 132 Flow Control Valve Control Valve Valve Valve Response Configuration Response 1 Response 2 Threshold Dickey-john NH3 Heat In-line Servo Exchanger...
-
Page 133: Control Valve Settings For Self-Propelled Sprayers
ONTROL ALVE ETTINGS FOR ROPELLED PRAYERS Control Valve Settings for Self-Propelled Sprayers Flow Control Valve Valve Respon Valve or Typical Zero Allowabl Respon Respon Sprayer Model Control System Frequen Gain Offset e Error Thresho (and year if Range applicable) Use a Apache starting 510/710/... - Page 134 Control Valve Settings for Self-Propelled Sprayers (Continued) Flow Control Valve Valve Respon Valve or Typical Zero Allowabl Respon Respon Sprayer Model Control System Frequen Gain Offset e Error Thresho (and year if Range applicable) Non-AIM Case IH 3150 Command with Raven 100% Mode In-Line valve...
- Page 135 Control Valve Settings for Self-Propelled Sprayers (Continued) Flow Control Valve Valve Respon Valve or Typical Zero Allowabl Respon Respon Sprayer Model Control System Frequen Gain Offset e Error Thresho (and year if Range applicable) Miller Nitro N1 Pump Servo 100% and N2 Miller Nitro N4 Pump Servo 100%...
-
Page 136: Liquid Servo Settings Description
Control Valve Settings for Self-Propelled Sprayers (Continued) Flow Control Valve Valve Respon Valve or Typical Zero Allowabl Respon Respon Sprayer Model Control System Frequen Gain Offset e Error Thresho (and year if Range applicable) Walker Pump Servo 100% *Adjust this number to fit your particular configuration. Refer to the Application section in the InSight User Manual for more information on adjusting this response threshold. -
Page 137: Liquid Pwm Control Valve Settings Description
PWM C IQUID ONTROL ALVE ETTINGS ESCRIPTION • PWM Frequency Default Value: 100 The frequency that the PWM control valve is pulsed at. Typical settings range from 100 - 125. See PWM valve manufacturer information for recommended settings. • Gain Default Value: 800 This setting determines how aggressively the control valve responds when making rate change adjustments. -
Page 138: Spinner Spreader Pwm Control Valve Settings Description
Determines where the control system switches between using Valve Response 1 or Valve Response 2 speed setting. Leaving all other valve control settings at the default value and making a small adjustment to this setting is usually all that is required to fine tune system performance. - Decreasing this value will have the overall effect of speeding up servo valve response. -
Page 139: Dickey John Nh3 Conversions
• Zero RPM Offset Default Value: 30 This setting represents the maximum duty cycle that is sent to the control valve without producing any hydraulic flow from the PWM valve. Using too high of a Zero RPM Offset value can cause the product control system to not properly shut off. -
Page 140: Map Screen: Zoom To Extent
• Rate Screen functions beginning on “Run Time Environment: Rate Screen” on page 129 • Loading Prescription Files beginning on “Loading Prescriptions” on page 134 • Shape File Conversion beginning on “Shape File Conversion” on page 135 • Liquid Application Control beginning on “Liquid Application Control”... -
Page 141: Application Map Screen Items
• • (A) GPS Status • (B) Total Field Acres • (C) Status Items Target Rate / Actual Rate • (D) Ground Speed • (E) Container Level • (F) Map Options • (G) Home • (H) Map View • (I) Target Rate •... -
Page 142: Rate Screen: Container Level
• Target Rate The Target Rate is the amount of product that you wish to apply. • Actual Rate The Flow Sensor returns the actual rate of the product that you are applying. Note: In some conditions, the Actual Rate may increment slower than the Target Rate, or its numeric values may vary before matching the Target Rate. -
Page 143: Tank Empty
Tank Empty The Tank Empty button, as shown at left, decreases the container level logged in the display to zero. Tank Partial Fill The Tank Partial Fill button, as shown at left, increases the container level logged in the display to specific amount that you specify in the numeric keypad. Pressing the Partial Fill button summons the Adjust Container Amount Screen, as shown. -
Page 144: Rate Screen: Liquid Flow/Pressure
CREEN IQUID RESSURE DirectCommand users applying liquid products can use the bottom active area of the Rate Screen to view settings for Flow, Main Pressure, and Agitator Pressure. This screen also displays the Serial Number of your DirectCommand Liquid Product Controller. CREEN PINNER PREADER... -
Page 145: Spreader Control
• The Spread Width, Spinner Speed, Product Density, Feed Gate 1 Opening and the Conveyor 1 Rate are all stored with each combination of product and control channel. • Product Density This density value (shown in pounds per cubic foot, or lb./ft.3), is stored with each product. -
Page 146: Application Rate Control Configuration Screen
• In-Field Calibration Press the In-Field Calibration button to summon the In-Field Calibration Wizard, which will guide you through the In-Field Conveyor Rate Calibration process. PPLICATION ONTROL ONFIGURATION CREEN Application Rate Control Configuration Button The Application Control Configuration button, which appears on the Rate Screen as shown at left, summons the Application Rate Control Configuration screen, shown. -
Page 147: Shape File Conversion
HAPE ONVERSION What is commonly called a shape file is actually a collection of three different files. All three of the files are required and must be present on the external storage card for the system to use shape file groups for variable rate product application. -
Page 148: Liquid Application Control
5. Select Equipment Configuration for Prescription Enter the channel you wish to use for the shape file conversion. 6. Select Shape File Products and Units From the drop-down menu on the left, select the column that contains the product recommendation rate. The list on the right side of the dialog shows sample data from the selected column. - Page 149 Note: Individual boom widths must equal the total. This step is skipped if you are using a Tractor, ATV, or Pickup Truck. -d. Enter a Vehicle Name. The vehicle’s default name is the Make and Model you entered in step 1b. If necessary, edit that name by pressing the keyboard button and typing the preferred name.
- Page 150 -a.The Controller Setup Wizard appears. Select DirectCommand from the drop-down list. Under the Direct Type list, select Liquid Product Control. Press the blue right-arrow button to continue. -b.Enter the Flow Meter Calibration Number by using the numeric keypad to set the pulses per gallon. (This usually is tagged on the flow meter).
-
Page 151: Liquid Application Controller Settings
IQUID PPLICATION ONTROLLER ETTINGS • Controller Settings Displays control valve settings for PWM and Servo Valve Controls. For PWM Valve Control Settings, see “Controller Settings - PWM” . For Servo Valve Control Settings, see on page 139 “Controller Settings - Servo, Calibrated Reflow or Ramsey Valve” on page 140. •... -
Page 152: Controller Settings - Servo, Calibrated Reflow Or Ramsey Valve
Controller Settings - Servo, Calibrated Reflow or Ramsey Valve • Valve Response 1 Determines the speed of the servo valve when product control error exceeds the Response Threshold setting. The default for this setting is 100%. Decreasing the value will cause the servo valve to run slower. -
Page 153: Direct Injection
Press the Rate Error Alarm button. The Rate Error Alarm screen appears, as shown. Enter values for % Threshold and Time in seconds. IRECT NJECTION DirectCommand interfaces with the Raven SCS Sidekick™ for complete control over chemical injection applications. The display can support up to four Raven SCS Sidekick™ injection pumps plus a liquid carrier. - Page 154 6. Select Controller Select an existing controller from the Controller List. If a new Controller needs to be created, press the New button to start the controller wizard. 7. Select Device and Direct Type Use the drop-down menu to select DirectCommand for the Device and Liquid Product Control for the Direct Type.
-
Page 155: Direct Injection Controller Settings
20. Enter Suggested Name for Configuration If desired, use the keyboard button to edit the suggested configuration name. Press the green check mark button and continue with the procedure. 21. Complete the configuration procedure At the Add Equipment for Dual Product Application screen, press the blue right-arrow button. Continue through the wizard by entering a Ground Speed Source and then entering a suggested name for your operating configuration. -
Page 156: Priming An Injection Pump
RIMING AN NJECTION If you are using a Direct Injection configuration, you must prime the Injection Pump each time you flush or refill a tank, or change products. This ensures that air is not in the product lines. CAUTION: Failure to perform this priming procedure before beginning a Direct Injection application could result in skips at the start of field operations. - Page 157 At the following screen, press the Controller Settings button. The Controller Settings screen appears, as shown. 1. Enter Factory Calibration Before entering a Direct Injection Calibration, a Factory Calibration must be entered. If you have not already done so, enter the Factory Calibration Number by pressing the Factory Calibration button.
-
Page 158: Injection Diagnostics
Note: You may press the Reset button if you wish to start the calibration procedure over. 7. Enter Actual Dispense Amount Enter in the actual amount of the product that was dispensed. Press the blue right-arrow button to continue. 8. Calibration Complete The Pump Calibration number appears. -
Page 159: Spinner Spreader Granular Control
PINNER PREADER RANULAR ONTROL The following procedure describes the complete process of configuring a granular spinner bed control system. To begin, go to the Configuration Tab, press the Add button, and the Operating Configuration Wizard appears. PINNER PREADER ONTROL ONFIGURATION 1. -
Page 160: Spinner Spreader Controller Settings
Choose the appropriate Direct Type according to the module’s part number: • 4000396 - Spinner Spreader Control 3 CH • 4001611 - Spinner Spreader Control 5 CH -a.Enter Suggested Controller Name. The display assigns a default name of DirectSpreader to the controller. Use the on- screen keyboard to edit the name if desired. -
Page 161: Controller Settings - Pwm
- Too high of a setting will cause excessive product application error. • Control Valve Settings Displays control valve settings for PWM and Servo Valve Controls. For PWM Valve Control Settings, see . For Servo Valve Control Settings, see “Controller Settings - PWM” on page 149 “Controller Settings - Servo”... -
Page 162: Fan Settings
Fan Settings • Fan Speed Calibration The number of pulses that are generated by the sensor during one revolution of the spinner dish. The Default Setting is 4. • PWM Gain Determines how aggressively the control valve responds when making spinner speed adjustments. The higher the value the more aggressive the system response is. -
Page 163: Norac Uc5 Setup
Press Conveyor Rate button Conveyor Rate screen shows rates for previously applied products to use as a reference. Press and highlight product to enter conveyor rate. Press Conveyor Rate button. Using numeric keypad, enter desired rate. Press checkmark button to exit screen. Press checkmark button to accept new rate. -
Page 164: Retune
• Sprayer Make and Model • Input module wiring and configuration • Number of sensors and location • Sensor zero point • Valve dead zone and gain values Note: For detailed Automatic Setup information, see the NORAC UC5 manual. Retune From time to time it may be necessary to recalibrate (Retune) the UC5 electronics to your sprayer’s hydraulics. -
Page 165: Norac Uc5 Run Time Environment
• Minimum Height - Soil Mode - The minimum height setting when operating in Soil Mode. - Crop Mode - The minimum height setting when operating in Crop Mode. UC5 R ORAC NVIRONMENT Boom Height Screen When the NORAC UC5 Spray Height Controller is configured on the display, the Boom Height button appears on the Task Bar. -
Page 166: Engage Button
• Temperature Shows the measurement of the outside ambient air temperature. Engage button The Engage button enables boom height control. This button can toggle back and forth between Automatic Mode and Manual Mode. When you enable Automatic Mode, this button turns green and the display beeps three times. When you disable Automatic Mode on any part of the boom and the display switches to Manual Mode, this button turns white and the display beeps twice. - Page 167 3. Check the switch status found on the Diagnostics Screen, which can be accessed via the Diagnostics button on the Home Screen. As the boom switches are turned on and off, the Input Diagnostics screen should change from black to green (if they do not, then refer to the installation instructions to verify boom switch connections).
- Page 168 1. Verify that the rate display smoothing option is checkmarked in the setup of the configuration. 2. Check the controller settings of the active configuration. Verify that the valve setting for your particular type of control valve agree with the settings given in the Quick Reference Guide. 3.
-
Page 169: Troubleshooting Direct Injection Configurations
3. Make sure there is not a gap between the boundary and the first pass of the headlands. Note: For best results, run a new boundary when spraying the first pass of the headlands. Problem: Booms turn on for a split second in the headlands. Solution: 1. -
Page 170: Battery Power Pin-Outs
ATTERY OWER 2 Pin Deutsch 2 Pin Deutsch Plug 2 Pin WP Tower Receptacle Power 12 V Ground Direct Injection: Pump Runs Full Speed • Digital Pump Speed Sensor The injection pump’s digital pump speed sensor is used to provide actual rate feedback to the display. -
Page 171: Direct Injection: Application Error
• Analog Pump Speed Sensor The injection pump’s analog speed sensor is used in conjunction with the digital pump speed sensor to provide accurate rate feedback. The sensor is a generator that produces a varying voltage dependent on the speed of the pump. The injection module will only get feedback from this sensor when the pump is rotating. -
Page 172: Discharge Flow Sensor Pin Outs
ISCHARGE ENSOR Module Auxiliary Connection 3-Pin Shroud 12-Pin Socket Power (12V) Signal Ground Direct Injection: Inlet Restriction The injection pump has a vacuum switch that is used to warn operators of any restriction at the inlet of the pump. The sensor is a normally closed switch that opens if a restriction is encountered in the injection system. -
Page 173: Troubleshooting Serial Control Applications (Liquid And Granular)
3. Check the switch status found under Input Diagnostics. As the master switch is turned on and off, the Input Diagnostics Screen should change from black to green (if they do not, then refer to the installation instructions to verify switch connections). 4. -
Page 174: Troubleshooting Serial Control Applications (Liquid Only)
3. Check cabling and all connections. 4. Disconnect the serial connection and determine if the controller is functioning properly without the display. ROUBLESHOOTING ERIAL ONTROL PPLICATIONS IQUID Problem: The display rate and serial-controlled rate do not match. Solution: 1. Verify the current firmware on the display and the Application Rate module. 2. -
Page 175: Automatic Swath Control Settings
• Backup Speed Source If the primary speed source fails, the display will use the backup if one is available. • Manual Speed If both of the speed input sources are unavailable, manual speed can be used in order for the control channel to provide application. -
Page 176: Controller Settings: Direct Injection Pump Calibration
• Allowable Error\ Determines the percent of error that is allowed prior to the product control system making any flow rate changes. • Flow Control Delay Setting for period of time from master switch on and the start of product application to the first flow control correction. -
Page 177: Run Screen
• Enable Warning The Enable Warning check box allows you the option of displaying the Flow Monitor Warning. Run Screen • AutoSwath Use to enable/disable automatic control of boom section on/off state based upon field boundaries, prescription files, and previously applied areas. IAGNOSTICS NPUT IAGNOSTICS... -
Page 179: Run Time Environment: Map Screen
ARVEST ARVEST NVIRONMENT CREEN The screens shown are for a Harvest configuration. In order for you to view the Map Screen, you must first select a Grower, Farm and Field at the Start Field Operation portion of the Home Screen. For more information, see “Management”... -
Page 180: Harvest Button On Task Bar
• (A) Total Acres • (B) GPS Status • (C) Map Options • (D) Home • (E) Map View • (F) Harvest • (G) Vehicle Icon • (H) AutoSwath • (I) Logging Status • (J) Status Items: Yield + Moisture •... -
Page 181: Run Time Environment: Harvest Screen
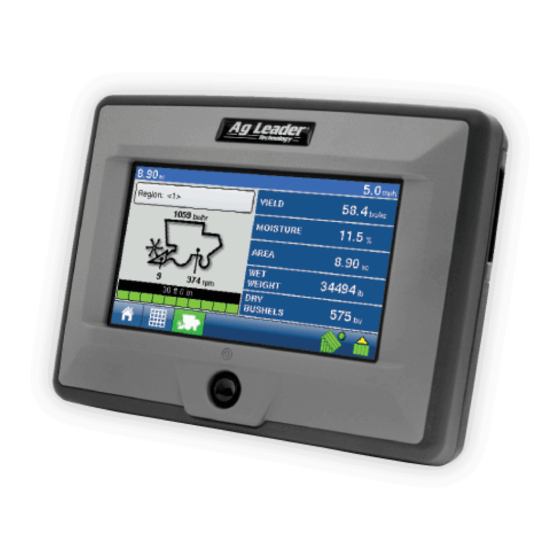
NVIRONMENT ARVEST CREEN The Harvest Screen, accessible with the Harvest Button, is where you can view Region Selection, Header Height, Elevator Speed, Swath Width and Display Items. • (A) Total Acres • (B) Region Selection Displays the current region that you are harvesting, and also used to change regions and flag calibration loads. -
Page 182: Harvest Screen - Active Display Items
• Area Shows the area harvested for the current region. • Wet Weight Shows the actual weight that has been harvested in the region. • Dry Bushels Displays the number of bushels at the specified dry moisture percentage. ARVEST CREEN CTIVE ISPLAY TEMS... -
Page 183: Harvest Setup Tabs
ARVEST ETUP Pressing the Harvest button at the Setup Screen takes you to the Grain Harvest Configuration Tab. This tab is shown in front of four other tabs: Combine, Header, Crops and Calibration. • Configuration Tab The Configuration Tab is where you can add and edit operating configurations. For more information, see “Create a Harvest Configuration”... -
Page 184: Configuration Settings
3. Follow the Wizard’s instructions The Wizard’s instructions will guide you through the necessary steps to create a configuration that includes Combine, Header and Crops settings. Note: From the Configuration Tab, you can also: • Press the on-screen keyboard to edit or rename existing configurations. •... -
Page 185: Combine Tab
2. Press the Calibrate Distance button, and the Speed Sensor Calibration wizard appears, as shown. 3. From here, follow the on-screen wizard’s instructions to complete the distance calibration procedure. OMBINE Underneath the Combine Tab, you can view, add, rename or remove combines, or adjust combine settings. -
Page 186: Gps Offsets
CAUTION: Do not change settings from the default value of 4 without specific instruction from Technical Support. GPS Offsets After completing the process of setting up a Combine, GPS Offsets must be configured. The GPS Offsets define where machine parameters are in relation to the GPS antenna. These settings are used by mapping and AutoSwath. -
Page 187: Header Settings
Note: When a header is removed, all data in the regions and configurations using that header are deleted. EADER ETTINGS Under the Header Tab, highlight the header name, press the Wrench button and go to the Header Settings screen. At the Header Settings screen, you can view the swath width and/or the number of rows on the header, as well as calibrate the Header Sensor and adjust the Header Offset. -
Page 188: Header Offset
3. Set Stop Height Select the correct crop type from the list box. Raise or lower the header to the height where you would like to have the area logging turn on and off. Press Set Height. Note: The position relating to the Stop Height will be represented as a percentage. - Move the header above and below the Stop Height. -
Page 189: Crop Settings
• Press the Add button to add a crop. • Press the on-screen keyboard to edit or rename existing crops. • Press the Wrench button to access Crop Settings. For more information, see “Crop Settings” on page 177. • Press the Remove button to remove a crop. Note: When a crop or variety is removed, all logged harvest data relating to that crop or variety will be deleted. -
Page 190: Pre-Harvest Checklist
ARVEST HECKLIST Calibration Sequence Perform Harvest Calibrations in the following order: 1. Distance (Speed Sensor) Calibration This calibrates the Ground Speed Sensor connected to the display. (calibrate a backup sensor even when using GPS speed as the primary speed sensor must still ). For more information, see “Calibrate Distance”... -
Page 191: Temperature Calibration
Temperature Calibration A Temperature Calibration only needs to be performed once per season. Changing this calibration will affect previously harvested data. 1. Place Combine in Shady Spot Leave the combine parked in a shaded area or a shed for a few hours. - Page 192 four and six calibration loads. You can complete a weight calibration at any time during the season; however it is recommended that you calibrate grain weight at the beginning of the season. Note: Start the calibration procedure with the combine stopped, the combine grain tank empty, and a hauling vehicle empty.
- Page 193 12. Select Crop to Calibrate Press the Grain Harvest button and then go to the Calibration Tab, as shown. Use the drop-down menu to select the crop to calibrate. 13. Press Weight Button Press the Weight button, and the Weight Calibration Screen appears, as shown.
-
Page 194: Adding A New Calibration
18. Examine Error Percentage When the calibration is finished, a screen appears, stating “Full Calibration Complete.” Examine the error percentages before checking the check mark box. 19. Uncheck Loads With Excessive Error Percentages At the Weight Calibration Screen, take note of any calibration loads that have excessive error percentages. - Page 195 3. Press Show Cal Numbers Press the Show Cal Numbers button, and the Weight Calibration Numbers Screen appears, as shown. • On the left-hand side of the Weight Calibration Numbers Screen is a list of grain calibration values that range from C1 through C11. These 11 C numbers determine the weight that the display calculates from the data that it records into your regions as you harvest.
-
Page 196: Diagnostics
IAGNOSTICS Pressing the Harvest Display Item on the Harvest Screen summons the Harvest Diagnostics screens that pertain to your configuration (For an example, see illustration at “Harvest ). Technical support Screen - Active Display Items” on page 170 may request that you look at these screens for help in diagnosing a problem. -
Page 197: Appendix
The Adobe Reader software comes pre-installed on most personal computers. If Adobe Reader is not installed on your computer the program is available for download at no charge. A link to the Adobe download site is located at the Ag Leader Web site. ORMATS... -
Page 198: Module Led Diagnostic States
Warranty is not provided for damage resulting from abuse, neglect, accidents, vandalism, acts of nature, or any causes that are outside of the normal intended use of the display. Ag Leader Technology shall not be liable for indirect, incidental, or consequential damages to the dealer, end user, or third parties arising from the sale, installation, or use of any Ag Leader Technology product. -
Page 199: Service And Support
If you have additional questions or feel that you may be having a problem with your system, call your local Ag Leader Technology dealer or call us directly at the phone number below. If we determine you have a hardware failure, we will ship replacement hardware immediately. - Page 201 Index GPS output rate implement switch 71, 108 minimize overlap 71, 108 minimize skip 71, 107 outside boundary option overplanting a+ heading 44 turn off look ahead a+ pattern 44 71, 107 turn on look ahead A-B button 42 turn-off look ahead AB line 37 turn-on look ahead within SmartPath...
- Page 202 import clear map 23 inner clear marks 23 outer clear nudge 48 pause clutch control 81 start look-ahead numbers type clutch sections 82 boundary files 12 clutches boundary offset 22 number brightness 13 combine browse files memory tab combine settings 173 browse files 14 advanced bushels per hour 169...
- Page 203 general tab legend settings language selection crops memory tab operating units remove console crops tab 171, 177 metric 14 keyboard restore backup wrench button volume cross track error 56, 57 console button 13 cross-track error 36 contact person 10 container alarm 131 percentage delete field 12 container alarm button 131...
- Page 204 differential source 27, 29 edit 177 differential status 31 edit field name 12 diffferential 31 edit grower 10 direct injection 140 edit info 112 controller settings edit info button 113 diagnostics edit legend 21, 113, 177 factory calibration edit vehicle settings 50 flow monitor warning elevation 31 glossary...
- Page 205 field information 12 time zone volume field note GGA 29, 31 GLL 29, 31 field notes 16 glossary 162 arrow buttons change icon view map markers general tab field operation wizard 17 GPS diagnostics 31 operating configuration selection GPS icon 19 field tab 12 GPS information 31, 32 area...
- Page 206 wet weight delete yield HDOP 32 edit wrench button head tab 174 grower tab 10 header GSA 29, 31 GSV 29, 31 edit name guidance 35 remove rename guidance button 37 header height 169 guidance control 35 header offset 175, 176 operator presence alarm header raw 184 ParaDyme...
- Page 207 pwm gain rate not responding threshold John Deere rate not responding time instructions response threshold Spray Star shaft speed cal valve response 1 valve response 2 L160 lightbar zero flow offset brightness language selection 14 latitude 31 icon LED spacing 36 engage legend 21, 66, 100 icon selection 16...
- Page 208 troubleshooting external 2 liquid product control master switch indicator 19 servo settings MDU power 54 liquid product controller memory tab 14 serial number clear internal memory load pattern 43 copy to card shift pattern create backup load pattern button 43 restore backup meter calibration number 94 loading prescriptions 81...
- Page 209 new pattern button 38, 40 serial number settings new pattern screen 38 28, 30 NMEA on-screen lightbar 36 28, 30 ignore NMEA checksum OnTrac2 48 output parity advanced tab NMEA messages 29, 31 backup 29, 31 52–?? calibration 29, 31 clear 29, 31 copy logs...
- Page 210 pattern files 35 EPA number manufacturer pause 47 restricted use pesticide pause boundary 22 product settings button 132 pause button 47 product tab 67, 75, 101, 112 PDOP 32 pivot 45 keyboard button arc length 75, 112 wrench button radius product type 113 shift by distance product units 113...
- Page 211 renaming configurations 67 priming seed rate planter control screen 94 reset SeedCommand confirm reset button 43 AutoSwath auxiliary input settings reset legend clutch control legend settings controller settings reset legend 21 controller tab reset pattern 43 controllers reset to defaults 27, 30, 55 definition restore backup 14 equipment configuration settings...
- Page 212 shp file 134 rate screen response threshold loading 146, 147 self propelled spreader smart button 42 servo settings smartpath 40 shaft speed calibration A-B button spread width AB line 131, 132 spreader control AB lines spreader speed active line cycle button static calibration all area covered valve response 1...
- Page 213 max meter speed upgrade 51 minimum allowable ground speed memory tab stop height 176 upgrade 14 summary 23 use a+ heading 44 swath section offsets 63, 73 use manual moisture 180 edit UTC time 32 swath width 169, 170 switch mapping 69 see also auxiliary input settings variety setup wizard 76 vehicle...
- Page 214 view operation summary button 9 volume 13 VTG 29, 31 weight 177, 182 weight calbration linear calibration weight calibration 180, 182 error percentage full calibration weight calibration numbers 183 wheel rotating button 53 wrench button 9, 27, 29 27, 29 Beacon 27, 29 OmniSTAR...
Need help?
Do you have a question about the EDGE and is the answer not in the manual?
Questions and answers