
Related Manuals for Illustra Pro PTZ 30x


Summary of Contents for Illustra Pro PTZ 30x
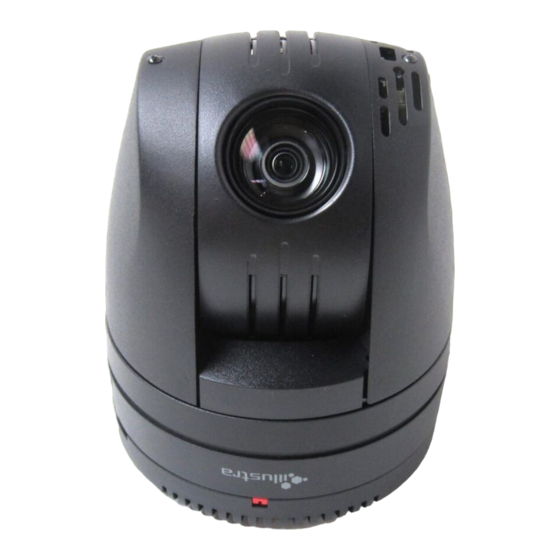
- Page 1 Configuration & User Guide Illustra Pro PTZ 30x Illustra 625 PTZ 20x 8200-1199-01 A1...
-
Page 2: Customer Service
Customer Service Thanks you for using Illustra products. We support our products through an extensive worldwide network of dealers. the dealer through whom you originally purchased this product is your point of contact if you need service or support. Our dealers are empowered to provide the very best in customer service and support. - Page 3 Introduction The Illustra Pro PTZ and Illustra 625 PTZ 20x Cameras (hereafter referred to as the camera)are PTZ high definition cameras utilizing the latest in IP technologies. ONVIF-compatibility allows interoperability with other ONVIF-compliant third party NVRs. A built-in web server allows you to configure the camera and stream video using Internet Explorer version 8 and higher.
- Page 4 Security Mode Profiles for First Time Connection This Illustra Pro PTZ Camera now has Enhanced Security features that allow for operation in a Standard Security mode or in Enhanced Security mode.
- Page 5 Camera control operates on a "last come, first served" basis. Therefore, when a new user logs into the camera from a different browser and starts a camera control session, the original user will lose their camera control session. Illustra Pro PTZ Configuration & User Guide ...
- Page 6 Using the Camera Controls Controlling the Camera via Keyboard Shortcuts You can use the following keyboard shortcuts to control the camera. Pan Left Pan Right Tilt Up Tilt Down Zoom In Zoom Out Controlling the Camera via Camera Controls You can use the on-screen controls in the Live Video Pane to control the camera. Procedure 1-2 Controlling the Camera via the Live Video Pane Step Action Select...
- Page 7 Using the mouse, double-click on the area of interest in the live video pane. The PTZ will adjust to display the area of interest in the center of the live video pane. Repeat Step 2 to select a new area of interest. - End - Illustra Pro PTZ Configuration & User Guide ...
- Page 8 Using the Camera Controls PTZ to a Selected Area Using the Mouse Draw a rectangle on the live video pane to have the camera PTZ adjust to the selected area of interest. Procedure 1-6 Activate PTZ to a Selected Area Using the Mouse Step Action Select to start the live web video.
- Page 9 The Basic Configuration menu provides access to the most common features required when setting up a camera for the first time and is only available to an ‘admin’ user. The following tabs are displayed: • TCP/IP • Video Stream Settings • Picture Basic • Picture Additional • Date/Time/OSD Illustra Pro PTZ Configuration & User Guide ...
- Page 10 TCP/IP TCP/IP Configure the IPv4 and IPv6 network settings on the camera. IPv4 Configure the IPv4 network settings for the camera. Procedure 2-1 Configure the IPv4 Settings Step Action Select Setup on the GUI banner to display the setup menus. Select the TCP/IP tab in the Basic Configuration menu.
-
Page 11: Video Stream Settings
The camera allows the configuration of two video streams; Stream 1 and Stream 2. These streams can be configured via the Web GUI, as detailed here, or via the Illustra API. Opening the Web GUI live video will allow the stream to be shared with the Illustra API and will minimize the impact on camera resources. - Page 12 Video Stream Settings Use the slider bar to select the Frame Rate (fps). The settings are: • Stream 1 - 1 - 30 fps, default 30. • Stream 2 - 1 - 30 fps, default 30. The settings are 1-30, default 30. If MJPEG has been selected, MJPEG Quality will be enabled.
- Page 13 Configure the Auto Focus, Auto Iris, Exposure, Wide Dynamic Range (WDR); Defog, and Enhanced Intensity settings on the camera. Note: Defog, and Enhanced Intensity are only available on Illustra Pro cameras When Auto Focus and Iris are enabled, the camera automatically compensates for scene changes that affect focal length (focus) and light levels (iris).
- Page 14 Picture Basic Setting Exposure Configure the exposure settings for the camera. Automatic Gain Control (AGC) and Open Shutter provide additional functionality to help compensate for low-light scenes Automatic Gain Control (AGC) AGc amplifies the video signal in scenes when there is not enough light to produce full video levels. The maximum level of AGC is controlled by the Max Gain control.
- Page 15 Defog This is a feature on Illustra Pro models that provides clear images even in environments with low visibility due to fog or heavy rain. It can be used in a wide range of installation locations for monitoring foggy areas such as shipping, airports, highways and at high altitudes.
- Page 16 - End - Enhanced Intensity The Enhanced Intensity feature on Illustra Pro models allows the camera to produce clear images when there is normally dark shadows in low light conditions or when there are bright sources of light such as headlights. The Emphasise Dark option will brighten dark areas while leaving the bright areas untouched enabling clearer images of shadows.
- Page 17 • Auto Mid - camera will give a good balance of Color and BW depending on the scene. • Auto Low- camera will adjust between BW and Color depending on light levels. . The default setting is 'Auto Low'. Illustra Pro PTZ Configuration & User Guide ...
- Page 18 Picture Additional - End - Picture Adjustment Adjust brightness, contrast and saturation of the image displayed on the video pane. Procedure 2-10 Adjust the Brightness, Contrast and Saturation Step Action Select Setup on the GUI banner to display the setup menus. Select the Picture Additional tab from the Basic Configuration menu.
- Page 19 - End - Electronic Image Stabilization Electronic Image Stabilization (EIS) on Illustra Pro models can reduce the effect of image shake caused by strong winds or vehicle vibrations. This ensures a stable picture even at high levels of zoom. Procedure 2-14 Enable/Disable Electronic Image Stabilization (EIS) Step Action...
- Page 20 Deselect the Enable EIS check box to disable auto focus. The default setting is ‘Off’. - End - Frame Noise Reduction On Illustra Pro models,the brightness of the object (AGC) in auto mode changes the level of Frame Noise Reduction. Procedure 2-15 Enable/Disable Frame Noise Reduction Step Action Select Setup on the GUI banner to display the setup menus.
- Page 21 • Enter the NTP Server Name in the text box. - End - OSD (On-Screen Display) Within OSD you can choose whether to enable or disable the camera name and/or time in the on-screen display. Illustra Pro PTZ Configuration & User Guide ...
- Page 22 Date/Time/OSD Procedure 2-18 Display or Hide the Camera Name/ Camera Time OSD Step Action Select Setup on the GUI banner to display the setup menus. Select the Date/Time/OSD tab in the Basic Configuration menu. In the Enable OSD, select the Camera Name check box to display the camera name in the OSD. Deselect the Camera Name check box to hide the camera name in the OSD.
-
Page 23: Video Menu
The camera allows the configuration of two video streams; Stream 1 and Stream 2. These streams can be configured via the Web GUI, as detailed here or via the Illustra API. Opening the Web GUI live video will allow the stream to be shared with the Illustra API and will minimize the impact on camera resources. - Page 24 Integration with other Illustra API Clients Stream 1 and Stream 2 can be configured via the Web GUI, as detailed here, or via the Illustra API interface. Changes made to the streams via either method will be applied and the video will be displayed according to the configuration.
- Page 25 1600x900 1600x900 1280x720 1280x720 1280x720 If H264 has been selected in step 4, Rate Control will be enabled. Select the required Rate Control by selecting the radio buttons: • VBR (Variable Bit Rate) Illustra Pro PTZ Configuration & User Guide ...
- Page 26 Configure the Auto Focus, Auto Iris, Exposure, Wide Dynamic Range (WDR); Defog, and Enhanced Intensity settings on the camera. Note: Defog, and Enhanced Intensity are only available on Illustra Pro cameras When Auto Focus and Iris are enabled, the camera automatically compensates for scene changes that effect focal length (focus) and light levels (iris).
- Page 27 • AGC on - good low-light performance with the chance for some noise. • openshutter - best for low-light performance. However there is a chance for some noise and some image blur. Illustra Pro PTZ Configuration & User Guide ...
- Page 28 Picture Settings The default setting is ‘openshutter’. Note: If you require “Real Time” video, open shutter must be turned off to ensure that the resulting video quality is acceptable for prosecution purposes. If openshutter has been selected in Step 5, Max Exposure will be enabled.. Select Max Exposure (sec) from the drop-down menu: •...
- Page 29 Defog This is a feature on Illustra Pro models that provides clear images even in environments with low visibility due to fog or heavy rain. It can be used in a wide range of installation locations for monitoring foggy areas such as shipping, airports, highways and at high altitudes.
- Page 30 Balance displayed in the video pane, as well as Electronic Image Stabilization and Frame Noise Reduction. Note: Electronic Image Stabilization and Frame Noise Reduction are only available on Illustra Pro models. Wide Dynamic Range Wide Dynamic Range (WDR) is a feature that allows viewing of high contrast scenes that include both bright and low light areas in the same field of view (FOV).
- Page 31 • Auto Mid - camera will give a good balance of Color and BW depending on the scene. • Auto Low- camera will adjust between BW and Color depending on light levels. . The default setting is 'Auto Low'. - End - Illustra Pro PTZ Configuration & User Guide ...
- Page 32 Picture Additional Picture Adjustment Adjust brightness, contrast and saturation of the image displayed on the video pane. Procedure 3-9 Adjust the Brightness, Contrast and Saturation Step Action Select Setup on the GUI banner to display the setup menus. Select Picture Settings from the Video menu. Select the Picture Additional tab.
- Page 33 - End - Electronic Image Stabilization (EIS) Electronic Image Stabilization (EIS)on Illustra Pro models can reduce the effect of image shake caused by strong winds or vehicle vibrations. This ensures a stable picture even at high levels of zoom. Procedure 3-13 Enable/Disable Electronic Image Stabilization (EIS)
- Page 34 Change the camera name and date and time and enable OSD. Camera Name The camera name will be displayed on the GUI banner and the on-screen display for the camera. This name will also be displayed when using Illustra Connect or ONVIF. Procedure 3-15 Change the Camera Name Step Action Select Setup on the GUI banner.
- Page 35 • Enter the NTP Server Name in the text box. - End - OSD (On-Screen Display) Within OSD you can choose to whether to enable or disable the camera name and/or time in the on-screen display. Illustra Pro PTZ Configuration & User Guide ...
-
Page 36: Privacy Zones
Privacy Zones Procedure 3-17 Display or Hide the Camera Name/ Camera Time OSD Step Action Select Setup on the GUI banner to display the setup menus. Select Date/Time/OSD from the Video menu. The Date/Time/OSD tab displays. In the Enable OSD, select the Camera Name check box to display the camera name in the OSD. Deselect the Camera Name check box to hide the camera name in the OSD. - Page 37 The video pane will display the current camera view. Select the corresponding Enabled check box to enable the privacy zone. Deselect the corresponding Enabled check box to disable the privacy zone. - End - Illustra Pro PTZ Configuration & User Guide ...
-
Page 38: Deleting A Privacy Zone
Privacy Zones Deleting a Privacy Zone Delete a privacy zone from the camera. Procedure 3-20 Delete a Privacy Zone Step Action Select Setup on the GUI banner to display the setup menus. Select Privacy Zones from the Video menu. The Privacy Zones tab displays. Select to delete the corresponding privacy zone. - Page 39 • Patterns • Scans • Sequences • Areas PTZ Parameters PTZ Parameters PTZ Parameters allows you to adjust Automatic Flip, Freeze Frame, Return Settings, Set North Position, Zoom Stops, and Home Position Type. Illustra Pro PTZ Configuration & User Guide ...
- Page 40 PTZ Parameters Automatic Flip Use the automatic (proportional) “flip” feature when you need to track someone who walks directly under the camera and continues on the other side. You start the flip by moving the tilt control to its lower limit and holding for a brief period.
- Page 41 Adjust the camera view as required to locate the north position. Refer to GUI Camera Controls Page 5 to make the necessary adjustments. Click Set North to save the current view as the north position. - End - Illustra Pro PTZ Configuration & User Guide ...
- Page 42 The Zoom Stop will not be used if EIS is enabled. For example the Illustra Pro PTZ 30X Dome has a 30x optical zoom with a 12X digital zoom allowing a maximum possible zoom of 360X. The camera default setting for the First Stop is 45X and 120X for the Max stop. If the current zoom level is less than 45X, pressing Zoom In continuously causes the zoom to stop at 45X.
- Page 43 The video pane will display the current camera view. Adjust the camera view as required. • Pan, Tilt and Zoom. • Focus Mode and Iris Mode. Refer to Using the Camera Controls Page 5 to make the necessary adjustments. Illustra Pro PTZ Configuration & User Guide ...
-
Page 44: Viewing A Preset
Preset The following camera controls can be modified and saved as part of the preset and accessed via the Picture Settings menu: • White Balance • Picture Balance • Wide Dynamic Range (WDR) • IR/DayNight • Shutter Limit In a numbered slot on the preset table, select to add the new preset. - Page 45 Select Setup on the GUI banner to display the setup menus. Select Preset from the PTZ menu. The Preset tab displays. Select to delete the corresponding preset. You will be prompted to confirm the deletion. Illustra Pro PTZ Configuration & User Guide ...
- Page 46 Note: The Illustra Pro PTZ provides Apple Peel, which is a predefined pattern stored on the camera by default that covers the entire viewing area. This pattern slowly pans 360° starting at the ceiling line. It then tilts 30°...
-
Page 47: Running A Pattern
Procedure 4-14 Delete a Pattern Step Action Select Setup on the GUI banner to display the setup menus. Select Patterns from the PTZ menu. The Patterns tab displays. Select to delete the corresponding pattern. Illustra Pro PTZ Configuration & User Guide ... - Page 48 Scans You will be prompted to confirm the deletion. Note: You cannot delete a pattern while it is associated with another camera function. To remove the pattern, refer to the associated camera function. Select OK to confirm the deletion. Select Cancel. - End - Repeating a Pattern Use this procedure to have a pattern repeat until interrupted by a camera command.
- Page 49 Select Setup on the GUI banner to display the setup menus. Select Scans from the PTZ menu. The Scans tab displays. Select to start the video stream if it is not already active. Illustra Pro PTZ Configuration & User Guide ...
- Page 50 Scans The video pane will display the current camera view. (Before activating a scan, refer to Set Scan Limits to Default Settings Page 49.) Select to activate the corresponding scan. • Smooth - slowly pans between the left and right scan limits, starting at the left scan limit. When the right scan limit is reached, the scan reverses •...
- Page 51 Add a Preset Page 43 before continuing to the next step. Select Sequences from the PTZ menu. Select the Add Sequence tab. Enter the Sequence Name. Select a preset from the Preset Name drop-down menu. Illustra Pro PTZ Configuration & User Guide ...
- Page 52 Sequences Enter a dwell time in seconds in the Dwell Time (sec) text box. The settings are 5-500. Select Add. The preset is now listed as part of the sequence. Repeat steps 5 to 7 to add further presets to the sequence. Note: Up to 16 presets can be added to a sequence.
-
Page 53: Deleting A Sequence
The Motion Tracking feature enables the camera to detect motion in the field of view and once detected track the motion using the PTZ functionality of the camera. The Duration setting allows the configuration of the time an object is tracked once it is detected. Note: Illustra Pro PTZ Configuration & User Guide ... - Page 54 Sequences Any changes to the Motion Tracking configuration applies to both Scans and Sequences. Motion Tracking together with Stepped Scans or Sequences can be used to complete Intelligent Guard Tours. For more information on Intelligent Guard Tours refer to Appendix A- Intelligent Guard Tour Page 131.
- Page 55 Select Set in the Right column to set the displayed position as the right boundary. Note: This must not be greater than the next area's left boundary. Select Add to save the area. Select Cancel. - End - Illustra Pro PTZ Configuration & User Guide ...
-
Page 56: Deleting An Area
Areas Editing an Area Edit the details for an existing area on the camera. Procedure 4-26 Edit an Area Step Action Select Setup on the GUI banner to display the setup menus. Select Areas from the PTZ menu. The Areas tab displays. Select to edit the corresponding area. - Page 57 Areas Select Cancel. - End - Illustra Pro PTZ Configuration & User Guide ...
- Page 58 Event and Actions Menu. Event Settings Configure the SMTP, FTP, and CIFS details required when setting Event Actions for alarms and analytic alerts. (This menu option is available only for Feature Plus cameras.) Illustra Pro PTZ Configuration & User Guide ...
- Page 59 Event Settings SMTP Configure the SMTP settings to allow e-mail alerts to be sent from the camera when an alarm or analytic alert is triggered. SMTP settings must be configured to enable email alerts when using alarms and analytic alerts. Note: SMTP settings can also be configured via the Network menu.
- Page 60 Deselect the Enable check box to disable FTP. The default setting is ‘Disabled’. Note: When in Enhanced Security mode, enabling FTP will require the admin account password. If required, select the Secure FTP check box. Illustra Pro PTZ Configuration & User Guide ...
- Page 61 The default setting is ‘Disabled’. Enter the IP address of the FTP Server in the FTP Server text box. Enter the FTP port in the FTP Port text box. The default setting is 21. Enter the FTP username in the Username text box. Enter the FTP password in the Password text box.
- Page 62 Enter the password in the Password text box. Select Apply to save the settings. Note: Refer to Test CIFS Settings Page 63 to confirm that the CIFS settings are working as expected. - End - Illustra Pro PTZ Configuration & User Guide ...
- Page 63 Event Actions Test CIFS Settings Test that the settings set in Configure CIFS Settings Page 62 have been configured correctly. Procedure 5-7 Test the CIFS Settings Step Action Select Setup on the GUI banner to display the setup menus. Select Event Settings from the Events and Actions menu. Select the CIFS tab.
- Page 64 • preset • pattern • scan • sequence The default setting is 'None'. If an action is selected, choose the specific PTZ action to perform from the PTZ Parameter drop-down menu. - End - Illustra Pro PTZ Configuration & User Guide ...
-
Page 65: Alarm Actions
Event Actions Editing a Event Action Modify the details of an existing event action. Procedure 5-9 Edit an Event Action Step Action Select Setup on the GUI banner to display the setup menus. Select Event Actions from the Events and Actions menu. Select an entry in the event actions list;... - Page 66 Enable or Disable Alarm Output Alarm Output allows the alarm to activate a digital output as an action. For example, this digital output could be linked to an electrical device,such as a security light or siren. Illustra Pro PTZ Configuration & User Guide ...
-
Page 67: Motion Detection
Analytics Procedure 5-12 Enable/Disable Alarm Output Step Action Select Setup on the GUI banner to display the setup menus. Select Alarm I/O from the Event and Actions menu. Select the Output check box to enable alarm output. Deselect the Output check box to disable alarm output. - End - Procedure 5-13 Clearing Alarm Output Step Action... - Page 68 When events are triggered the resulting alarms are displayed in the Event Log with the following information: • # - details the event index. • Event - this will be listed as ‘MotionDetected’. • Date created - the time and date when the motion detection was triggered. Illustra Pro PTZ Configuration & User Guide ...
- Page 69 Event Logs • Component - internal software component that raised the fault for a motion detection alert. This will be listed as ANALYTICS. • Severity - indicates how serious the fault is. Motion detection alerts are listed as ‘Warning’. • Detail - extra information that supplements the motion detection alert. •...
- Page 70 Select the Fault Log tab. - End - Procedure 5-18 Delete Current Faults Step Action Select Setup on the GUI banner to display the setup menus. Select Event Logs from the Events and Actions menu. Illustra Pro PTZ Configuration & User Guide ...
- Page 71 Scheduled Tasks Select the Fault Log tab. Select the corresponding Delete check box to mark the fault for deletion. Deselect the corresponding Delete check box to keep the fault. Note: You can select the Select All check box to mark all faults displayed in the list for deletion. Select Delete to delete the selected faults.
- Page 72 The task will open in the Edit Task tab. You can make changes to the following: • Task Name • Start Time (HH:MM) • Task Frequency • Action Illustra Pro PTZ Configuration & User Guide ...
- Page 73 Scheduled Tasks Select Apply to save the changes - End - Deleting a Scheduled Task Delete an existing scheduled task. Procedure 5-21 Delete a Scheduled Task Step Action Select Setup on the GUI banner to display the setup menus. Select Scheduled Tasks from the Events and Actions menu. Select the Scheduled Tasks tab.
- Page 74 Select Setup on the GUI banner to display the setup menus. Select the Applications menu. The Applications tab displays. Select the Browse button for the Select package to upload text box to navigate to the application file. Illustra Pro PTZ Configuration & User Guide ...
- Page 75 The Choose file dialog will be displayed. Navigate to the location where the application has been saved. Select the application file and then select the Open button. Select Upload. The upload process will start. - End - Available Applications A list of applications currently installed and running are displayed. Each can be started, stopped and removed. Procedure 6-2 Start, Stop or Remove an Application Step Action Select Setup on the GUI banner to display the setup menus.
- Page 76 'Recording is disabled because of some apps running in the camera'. Figure 6-2 Install exacqVision Edge exacqVision Edge can be installed by purchasing an SD card with the eqacqVision server and license. Please speak to your Tyco Security integrator to purchase this card. Illustra Pro PTZ Configuration & User Guide ...
- Page 77 Procedure 6-1 Install exacqVision Edge Server using Purcahsed SD Card with exacqVision Server Step Action Insert the SD card before powering up your camera. The edge server will automatically be installed when the camera starts for the first time. Select Setup then Applications to confirm the exacqVision Edge Version. - End - Procedure 6-2 Install exacqVision Edge Server using the Camera GUI Step Action...
- Page 78 If the SD Card which has the files for the edge server is in use and requires formatting you must first Stop the edge server and then format the card. When the camera reboots the edge server files will be installed and operational. Illustra Pro PTZ Configuration & User Guide ...
- Page 79 • IEEE 802.1x • Firewall • Remote Access • Session Timeout Security Status In this section you are able to configure security features for the camera and modify the communication protocols that are used. Illustra Pro PTZ Configuration & User Guide ...
- Page 80 Security Status Note: Any changes in the Security section, either changes to the Security Mode or individual protocol, are logged in the Security Log. Enhanced Security Admin users may change the Security Mode of the camera from Standard Security to Enhanced Security. Procedure 7-1 Enable Enhanced Security Step Action Select Setup on the GUI banner to display the setup menus.
- Page 81 The default setting is ‘Disabled’. Select the Dyn DNS check box to enable Dyn DNS . The default setting is ‘Disabled’. Select the SMTP check box to enable SMTP. The default setting is ‘Disabled’. Click Apply. Illustra Pro PTZ Configuration & User Guide ...
- Page 82 Users Note: • When in Enhanced Security, changes to individual protocols will require the admin account password. • Any changes to individual protocol are logged in the Security Log. - End -Sec Security Log The security log records any changes made to the security mode or to individual protocol. Procedure 7-4 Display Security Log Step Action Select Setup on the GUI banner to display the setup menus.
-
Page 83: Add User
The password must start with an alphanumeric character and is case sensitive; it can contain alphanumeric characters with a length of between 4 and 32 characters. Note: When the system is in enhanced security mode, the password must meet the following requirements: Illustra Pro PTZ Configuration & User Guide ... - Page 84 Users • Be a minimum of seven characters long. • Have at least one character from at least three of the following character groups: • Upper-case letters • Lower-case letters • Numeric characters • Special characters. Enter the same password in the Confirm Password text box. Select Apply to save the settings.
- Page 85 Select HTTP/HTTPS from the Security menu. The HTTP/HTTPS tab displays. Select the Browse button for the Select certificate file text box to navigate to the certificate location. The Choose file dialog will be displayed. Illustra Pro PTZ Configuration & User Guide ...
- Page 86 IEEE 802.1x Navigate to the location where the HTTP/HTTPS certificate has been saved. Select the file and select Open. Note: The certificate needs to match the camera ‘host name’. Select Upload. You will be prompted to confirm that you would like to upload the HTTP/HTTPS certificate. Select OK to confirm the upload.
- Page 87 Enter the required Private Key Password. - End - Firewall Configure the Basic Filtering and Address Filtering for the firewall. Basic Filtering Enable or disable basic filtering for the camera including: • ICMP (Internet Control Message Protocol) Blocking Illustra Pro PTZ Configuration & User Guide ...
- Page 88 Firewall • RP (Reverse Path) Filtering • SYN Cookie Verification. Procedure 7-14 Enable/Disable Basic Filtering Step Action Select Setup on the GUI banner to display the setup menus. Select Firewall from the Security menu. Select the Basic Filtering tab. Select the ICMP Blocking check box to enable ICMP blocking. Deselect the ICMP Blocking check box to disable ICMP blocking.
- Page 89 Step Action Select Setup on the GUI banner to display the setup menus. Select Firewall from the Security menu. Select the Address Filtering tab. Select to delete the corresponding address filter. - End - Illustra Pro PTZ Configuration & User Guide ...
- Page 90 The separation of Discovery Mode and User Authentication allows the camera to be set up in a configuration that suits requirements for the network and users. The preferred discovery method for the camera is Illustra Connect, and this utilizes ONVIF discovery. It is therefore recommended that ONVIF Discovery Mode always be enabled.
- Page 91 The Remote Access tab displays. Select the ONVIF User Authentication check box to enable ONVIF User Authentication. Deselect ONVIF User Authentication check box to disable ONVIF User Authentication. The default setting is ‘Enabled’. - End - Illustra Pro PTZ Configuration & User Guide ...
- Page 92 Session Timeout Session Timeout Session timeout specifies the number of minutes that a web session can remain idle before it is automatically terminated.
- Page 93 Select Setup on the GUI banner to display the setup menus. Select Session Timeout from the Security menu. The Session Timeout tab displays. Use the slider bar to select the Session Timeout (mins). The default setting is 15 minutes. - End - Illustra Pro PTZ Configuration & User Guide ...
-
Page 94: Network Menu
The Network Menu provides access to the following camera settings and functions: • TCP/IP • FTP • SMTP • SNMP • CIFS • Dynamic DNS TCP/IP Configure the IPv4 and IPv6 settings on the camera. IPv4 Configure the IPv4 settings for the camera. Illustra Pro PTZ Configuration & User Guide ... - Page 95 TCP/IP Procedure 8-1 Configure the IPv4 Settings Step Action Select Setup on the GUI banner to display the setup menus. Select TCP/IP from the Network menu. Select the Enable DHCP check box to enable DHCP (Dynamic Host Configuration Protocol) and disable manual settings.
- Page 96 When entering the upload path the following format should be used '//<name of ftp directory>/<folder>' Note: Refer to Test FTP Settings Page 97 to confirm that the FTP settings are working as expected. - End - Illustra Pro PTZ Configuration & User Guide ...
- Page 97 SMTP File Transfer Rate The File Transfer Rate can be limited and a max transfer rate assigned to manage the amount of FTP bandwidth used. Procedure 8-4 Configure the FTP Transfer Rate Step Action Select Setup on the GUI banner to display the setup menus. Select FTP from the Network menu.
- Page 98 SMTP settings are working as expected. - End - Test SMTP Settings Test that the settings set in Configure SMTP Settings Page 97 have been configured correctly. Procedure 8-7 Test the SMTP Settings Step Action Illustra Pro PTZ Configuration & User Guide ...
- Page 99 SMTP Select Setup on the GUI banner to display the setup menus. Select SMTP from the Network menu. The SMTP tab displays. Select Test. A sample email will be sent to the specified email address to confirm that SMTP settings are correct. - End - SNMP The camera introduces support for the Simple Network Management Protocol making it easier to manage on an IP...
- Page 100 Select the CIFS tab. Select the Enable CIFS check box to enable CIFS. Text boxes on the tab become available for entry. Deselect the Enable check box to disable CIFS. The default setting is ‘Enabled’. Illustra Pro PTZ Configuration & User Guide ...
- Page 101 Dynamic DNS Note: When in Enhanced Security mode, enabling CIFS will require the admin account password. Enter the network path in the Network Path text box. Enter the domain name in the Domain Name text box. Enter the username in the Username text box. Enter the password in the Password text box.
- Page 102 • dynsip.org • tzo.com Enter a Username in the text box. Enter a Password in the text box. Enter Service Data in the text box. Select Apply to save the settings. - End - Illustra Pro PTZ Configuration & User Guide ...
- Page 103 The System Menu provides access to the following camera settings and functions: • Maintenance • Date Time • Audio • Environmental • Health Monitor • Logs • About Note: Audio will be available only for Feature Plus models. Illustra Pro PTZ Configuration & User Guide ...
- Page 104 Maintenance Maintenance The Maintenance menu allows you to restore the camera settings to factory default, reboot the camera and apply a firmware upgrade. Reset To perform a physical reset of the camera, refer to Resetting the Camera to Factory Default Settings Using the Reboot/Reset Switch Page 134.
- Page 105 All existing camera settings are maintained when the firmware is upgraded. Caution You should only use firmware that has been provided by Illustra. Using any other firmware may cause a malfunction and damage the camera. Procedure 9-3 Upgrade Camera Firmware Step Action...
- Page 106 Backup/Restore Select Setup on the GUI banner to display the setup menus. Select Maintenance from the System menu. Select the Maintenance tab. Select Browse next to the Select firmware image file text box. The Choose file to Upload dialog will be displayed. Navigate to the location where the firmware file has been saved.
- Page 107 Deselect the Time 24-hour check box to enable the 12-hour clock. The default setting is ‘24-hour’. Select the Date Display Format from the drop-down menu: • DD/MM/YYYY • MM/DD/YYYY • YYYY/MM/DD The default setting is ‘YYYY/MM/DD’. Illustra Pro PTZ Configuration & User Guide ...
- Page 108 Audio Select the Time Zone from the drop-down menu. The default setting is ‘(GMT-05:00) Eastern Time (US & Canada) Select the Set Time setting by selecting a radio button: • Manually • via NTP The default setting is ‘Manually’. If you select 'Manually' in step 6: Select the Date (DD/MM/YYYY) using the drop-down menus.
- Page 109 Select Upload next to the corresponding audio file. The Choose file dialog will be displayed. Navigate to the location where the audio file has been saved. Select the audio file and then select the Open button. Illustra Pro PTZ Configuration & User Guide ...
- Page 110 Environmental An audio file must meet the following requirements to be uploaded: • Its filename cannot contain spaces. • It must be a ‘wav’ file with a ‘.wav’ extension. • It must be a ‘ single channel mono file with a bit depth of 16kHz. •...
- Page 111 The Health Monitor option displays the following PTZ statistics information: • Pan Rights • Pan Lefts • Tilt Down • Tilt Up • Zoom Out • Zoom In Procedure 9-14 Display PTZ Summary Information Step Action Illustra Pro PTZ Configuration & User Guide ...
-
Page 112: System Log
Logs Select Setup on the GUI banner to display the setup menus. Select Health Monitor from the System menu. Select the PTZ Summary tab. View the information. - End - Logs Information is provided on system, boot, and audit logs created by the camera. System Log The system log gives the most recent messages from the unix/var/log/messages file. - Page 113 • Changes in Stream are logged under class VIDEO. • Changes in Reboot, Reset and Upgrade are logged under class MAINTENANCE. • Changes in DIO and ROI are logged under EVENT. Procedure 9-19 Display Audit Log Step Action Illustra Pro PTZ Configuration & User Guide ...
- Page 114 About Select Setup on the GUI banner to display the setup menus. Select Logs from the System menu. Select the Audit Log tab. Select Refresh to refresh the log for the most up-to-date information. - End - Procedure 9-20 Filter the Audit Log Step Action Select Setup on the GUI banner to display the setup menus.
- Page 115 Step Action Select Setup on the GUI banner to display the setup menus. Select About from the System menu. The model tab displays. Edit the name in the Camera Name textbox. - End - Illustra Pro PTZ Configuration & User Guide ...
-
Page 116: Sd Card Management
Edge recording provides the ability to save recorded video to a microSD Card. Video can be configured to be recorded based on an event. The following provides details of functions available without an microSD Card and when using one. Features Available With/Without an SD Card With a microSD Card Illustra Pro PTZ Configuration & User Guide ... - Page 117 SD Card Management • Current faults notifications are displayed on camera if an alarm is triggered. • Video/Audio and screenshot are saved to the SD card. • SMTP notifications can be sent. • FTP uploads of video can be sent. •...
- Page 118 Select which video stream to use for alarm video and configure pre and post event durations for the playable video clip. The camera can record video generated from MD, face detection and DIO events. Illustra Pro PTZ Configuration & User Guide ...
- Page 119 Event Download Procedure 10-5 Configure Record Settings Step Action Select Setup on the GUI Banner to display the setup menus. Select Record Settings from the Edge Recording menu. Select Enable Event Record to allow the camera to create a playable video clip. Deselect Enable Event Record to disable the feature.
-
Page 120: Technical Specifications
Illustra Pro PTZ Technical Specifications This section provides information on the technical, environmental and operating specifications for the Illustra Pro PTZ camera. For the Technical Specifications of the Illustra 625 PTZ refer to the Illustra 625 PTZ User Manual 8200-0999-06. Basic Summary of Features •... - Page 121 Technical Specifications Specification Details Pixel size 2.75 um square Output Pixel Format 1920(H) x 1080(V) 2.07MP Effective pixels 1944(H) x 1092(V) 2.12M Scanning System Progressive Rate 1 to 30 ips Wide Dynamic Range On/Off Yes, True day nigh with mechanical cut filter Day/Night removal mechanism Auto Tracing White Balance...
- Page 122 Full zoom position in < 4 seconds. Focus on dome saved presets is < 1 second Presets Patterns Sequences Areas Privacy Zones External Storage Micro SD/SDHC card slot for up to 32 GB card Illustra Pro PTZ Configuration & User Guide ...
- Page 123 Technical Specifications Feature Plus Models: Alarm Inputs One form 1-C relay Auxiliary Output PCM, G711A, G711U Audio Compression Arabic, Chinese (Simplified), Chinese (Tra- ditional), Czech, Danish, English (default), Language selection French, German, Hungarian, Italian, Japan- ese, Korean, Dutch, Polish, Portuguese (Brazilian), Spanish, Swedish, Turkish.
- Page 124 Electrical For Illustra Pro PTZ indoor models, power can be provided by PoE Plus or by a 24 VAC power line. Local powering is possible for indoor models, with the capability to have both sources connected at any time. The local powering option will always be available, whatever the POE status.
-
Page 125: Surge Protection
Technical Specifications Specification Details Pluggable Euro-style 3 pin 3.5mm terminal block Connector connector Input minimum: 19 VAC RMS without dropout Input Maximum: Voltage >35 VAC RMS may damage equipment Design Tolerance Line Frequency: 47-63 Hz Allowable drop out: 30 ms Surge Protection Specification Details... - Page 126 • The camera supports both IPv4 and IPv6, running either in single stack mode or dual stack mode (supporting both IP versions at the same time). • TCP is used for two way communication and UDP will be used for broadcasting protocols. Illustra Pro PTZ Configuration & User Guide ...
- Page 127 Network Name Resolution • HTTP is used for the ONVIF protocol as transport mechanism for SOAP calls. • FTP can be used to push alarm buffer video clips to a specified remote FTP server. The camera can use anonymous FTP or a specified username and password. There is no incoming FTP service. IP multicast RFC 1112 level 1 support for sending but not receiving multicast IP datagrams to a group of interested receivers in single transmissions is supported for audio, video and metadata stream types.
- Page 128 The product supports WS-Discovery for discovery purpose. A copy of Illustra Connect is supplied with the camera, this is a MS-Windows based discovery application, which will allow discovering any illustra camera on a network; OS Compatibility: MS-Windows XP, MS-Windows Vista, MS-Windows 7 &...
- Page 129 ONVIF Video and Control Interface Specification Details Message Format Discovery WS-Discovery Security WS-Security Video Transport RTP/RTSP Audio Transport RTP/RTSP WS-Eventing Event Handling (alarms) WS-Base Notification WS-Topics Service Connection WS-Addressing Security Permissions WS-Policy (ken to think about) Data Object Exchange Spec. WS-Transfer ONVIF Functions Supported The following ONVIF functions are supported on the camera:...
-
Page 130: Microsd Card
128GB. Refer to the Quick Reference Guide provided with the camera for information on how to remove and install the microSD Card. Illustra Pro PTZ Configuration & User Guide ... - Page 131 In the mode of operation the Security Guard must monitor the camera view looking for objects of interest, which can easily be missed. The Illustra Pro PTZ combines Stepped Scans or Sequences and Motion Trackion to introduce the Intelligent Guard Tour feature. This feature allows the camera to monitor different fields of view, configured using a stepped scan or a sequence, for motion.
- Page 132 Intelligent Guard Tour Illustra Pro PTZ Configuration & User Guide ...
- Page 133 ‘apple peel’ pattern, or if powered up once before, to the last position in memory. Once the camera stops, it is online and ready to be accessed and controlled. - End - Illustra Pro PTZ Configuration & User Guide ...
- Page 134 Resetting the Camera to Factory Default Settings Using the Reboot/Reset Switch Resetting the Camera to Factory Default Settings Using the Reboot/Reset Switch The reset/reboot switch can be used to restore the camera to the factory default settings. Note: It is not possible to retain network settings, presets, patterns or sequences when using this procedure. If you need to maintain these settings it is recommended to reset the camera using the GUI.
- Page 135 Patterns Record Repeat Scans Scans Sequences Sequences Add Sequence Areas Areas Events and Actions Event Settings SMTP CIFS Event Actions Event Actions Alarm I/O Alarm I/O Analytics Motion Detection Event Logs Event Log Illustra Pro PTZ Configuration & User Guide ...
- Page 136 Camera Menu Sub Menu Admin Operator User Fault Log Scheduled Tasks Scheduled Tasks Add Task Applications Applications Applications License License Security Security Status Security Overview Security Log Users Users Add User Change Password HTTP/HTTPS HTTP/HTTPS IEEE 802.1x EAP Settings Firewall Basic Filtering Address Filtering Remote Access...
- Page 137 Camera Menu Sub Menu Admin Operator User Boot Log Audit Log About Model SD Card SD Card Edge Recording Management Management Record Settings Record Settings Event Download Event Download Illustra Pro PTZ Configuration & User Guide ...
- Page 139 Enter the IP address of the camera stream in the Network URL text box in the following format to view Stream 1 and 2: • Stream 1: rtsp://<ip address>:554/StreamId=1 • Stream 2: rtsp://<ip address>:554/StreamId=2 For example: rtsp://192.168.1.168:554/StreamId=1 Select Play. The live video stream will be displayed. - End - Illustra Pro PTZ Configuration & User Guide ...
-
Page 140: Quick Start
MJPEG Quality Rate Control VBR Quality High High CBR Bit Rate Picture Basic Auto Focus Auto Iris AGC/Shutter Setting openshutter Max Exposure (sec) Max Gain (dB) 15dB Enable WDR Enable Defog Enhanced Intensity none Illustra Pro PTZ Configuration & User Guide ... - Page 141 Video Picture Additional IR Mode visible Day Night Mode Auto Low Brightness Contrast Saturation White Balance Mode Auto Blue Enable EIS Enable Frame Noise Reduction Date/Time/OSD Camera Friendly Name ProPTZ-<S/N> Camera Time Today's date/time Time 24-hour Date Display Format YYYY/MM/DD (GMT-05:00) Eastern Time (US and Time Zone Canada)
- Page 142 Time Zone (GMT-05:00) Eastern Time (US and Canada) Set Time Manually Date(DD/MM/YY) empty or unspecified Time(HH:MM:SS) empty or unspecified NTP Server Name empty or unspecified OSD Camera Name OSD Time Text Attributes Translucent Illustra Pro PTZ Configuration & User Guide ...
-
Page 143: Ptz Settings
PTZ Settings Privacy Zones Item Default Setting Privacy Zones Name empty or unspecified PTZ Settings PTZ Parameters Item Default Setting PTZ Parameters Automatic Flip Freeze Frame Return to Auto Focus Return to Auto Iris Return to Auto Previous Zoom Stops Home Home Position Type None Preset... - Page 144 Server Port From Address empty or unspecified Send Email To empty or unspecified Use authentication to log on to server Username empty or unspecified Password empty or unspecified Enable FTP Secure FTP Illustra Pro PTZ Configuration & User Guide ...
- Page 145 Events and Actions FTP Server empty or unspecified FTP Port Username empty or unspecified Password empty or unspecified Upload Path empty or unspecified Limit Transfer Rate Max Transfer Rate(Kbps) CIFS Enable Network Path empty or unspecified Domain Name empty or unspecified Username empty or unspecified Password...
- Page 146 Select Package to Upload empty or unspecified Security Security Status Item Default Setting Security Overview Enable Enhanced Security Current Password empty or unspecified New Password empty or unspecified Confirm Password empty or unspecified HTTP HTTPS Illustra Pro PTZ Configuration & User Guide ...
- Page 147 Security Dyn DNS SMTP Security Log Lines (From The End Of The Log File) empty or unspecified Filter(Only Lines Containing Text) empty or unspecified Users Item Default Setting Users Logon Name admin Role admin Add User Name empty or unspecified Role admin Password...
- Page 148 Default Setting TCP/IP Enable DHCP IPv4 Address 192.168.1.168 Network Mask 255.255.255.0 Gateway empty or unspecified Primary DNS Server empty or unspecified Ipv6 Enable Current IPv6 Address empty or unspecified Item Default Setting Enable FTP Illustra Pro PTZ Configuration & User Guide ...
- Page 149 Network Secure FTP FTP Server empty or unspecified FTP Port Username empty or unspecified Password empty or unspecified Upload Path empty or unspecified Limit Transfer Rate Max Transfer Rate(Kbps) SMTP Enable SMTP Mail Server empty or unspecified Server Port From Address empty or unspecified Send Email To empty or unspecified...
- Page 150 (GMT-05:00) Eastern Time (US and Canada) Set Time Manually Date (DD/MM/YYYY) empty or unspecified Time(HH:MM:SS) empty or unspecified NTP Server Name us.pool.ntp.org Audio Item Default Setting Audio Input Enable Input Volume Output Enable Output Volume Illustra Pro PTZ Configuration & User Guide ...
- Page 151 System Audio Clips Audio Clips Table empty or unspecified Environmental Item Default Setting Environmental Internal Temperature Blower. Heater. Environmental Firmware Version Health Monitor Item Default Setting Health Monitor Reporting Period(seconds) Health Monitor Table real time information PTZ Summary PTZ Statistics real time information Logs Item...
- Page 152 Record Settings Item Default Setting Record Settings Enable Event Recording Record Source Stream 1 Pre Event(secs) 10 secs Post Event(secs) 10 secs Event Download Item Default Setting Event Download File Name Table empty or unspecified Illustra Pro PTZ Configuration & User Guide ...
-
Page 153: Bubble Handling And Cleaning
Bubble Handling and Cleaning Appendix F- Bubble Cleaning Procedure Bubble Handling and Cleaning Dome camera bubbles require special care when handling and cleaning to avoid scratches. Handling The bubble is packaged with a protective plastic sheet. It is recommended that the bubble remain stored this way until it is ready to install.
Need help?
Do you have a question about the Pro PTZ 30x and is the answer not in the manual?
Questions and answers