
Subscribe to Our Youtube Channel
Related Manuals for Oracle ZS5 SERIES


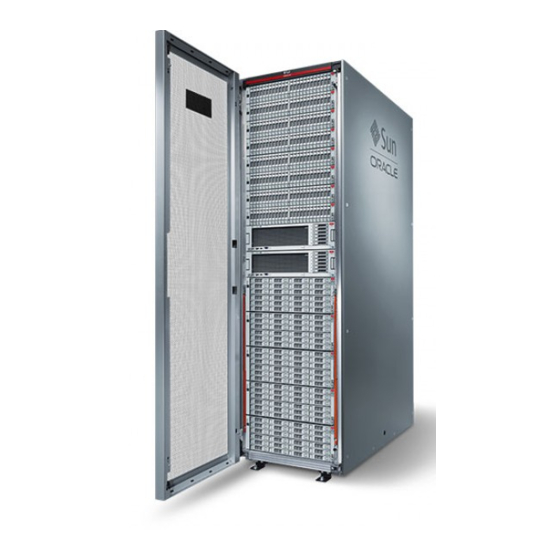
Summary of Contents for Oracle ZS5 SERIES
-
Page 1: Installation Guide
Oracle ZFS Storage Appliance ® Installation Guide For ZS5-x, ZS4-4, ZS3-x, 7x20 Controllers, and DEx-24, Sun Disk Shelves, Release OS8.6.x Part No: E76481-02 December 2016... - Page 3 Oracle. Oracle Corporation and its affiliates will not be responsible for any loss, costs, or damages incurred due to your access to or use of third-party content, products, or services, except as set forth in an applicable agreement between you and Oracle.
- Page 4 Oracle Corporation et ses affiliés déclinent toute responsabilité ou garantie expresse quant aux contenus, produits ou services émanant de tiers, sauf mention contraire stipulée dans un contrat entre vous et Oracle. En aucun cas, Oracle Corporation et ses affiliés ne sauraient être tenus pour responsables des pertes subies, des coûts occasionnés ou des dommages causés par l’accès à...
-
Page 5: Table Of Contents
Cable Lengths .................. 16 Supported Disk Shelf Combinations and HBAs ........... 16 Maximum Disk Shelves per Controller Configuration .......... 17 Overview of Disk Shelves ................ 19 Oracle Storage Drive Enclosure DE3-24 ............ 20 Oracle Storage Drive Enclosure DE2-24 ............ 27 Sun Disk Shelf .................. 33 Disk Shelf Components ................ 37 Overview of ZS5-4 Controller ................. - Page 6 7320 Base Configurations ............... 66 7320 Front Panel Components .............. 67 7320 Rear Panel Components .............. 68 Overview of 7120 Controller ................ 69 7120 Physical Specifications .............. 69 7120 Electrical Specifications .............. 69 7120 Front Panel Components .............. 70 Oracle ZFS Storage Appliance Installation Guide • December 2016...
- Page 7 Contents 7120 Rear Panel Components .............. 71 Installing Disk Shelves .................. 73 ▼ Installing a DE3-24P Disk Shelf .............. 73 ▼ Installing a DE3-24C Disk Shelf .............. 77 ▼ Installing a DE2-24P Disk Shelf .............. 83 ▼ Installing a DE2-24C Disk Shelf .............. 88 ▼ Installing a Sun Disk Shelf ................ 93 Installing a ZS5-4 Controller ................
- Page 8 Configuring the Appliance for the First Time .......... 183 ▼ Configuring the System ................ 184 ▼ Performing Initial Configuration (BUI) ............ 187 ▼ Performing Initial Configuration (CLI) ............ 201 Troubleshooting Hardware Faults .............. 211 ▼ Connecting to Oracle ILOM .............. 211 Oracle ZFS Storage Appliance Installation Guide • December 2016...
-
Page 9: Installation Overview
Installation Overview This guide describes installation procedures for the Oracle ZFS Storage Appliance. Each controller should have at least one NIC port configured as a management interface. If necessary, install additional NIC card(s) into the appropriate PCIe slot(s) before initial controller installation. - Page 10 Oracle ZFS Storage Appliance Installation Guide • December 2016...
-
Page 11: Installation Prerequisites And Hardware Overviews
Installation Prerequisites and Hardware Overviews This section gives an overview of the Oracle ZFS Storage Appliance disk shelves and controllers, as well as the prerequisites for installation. For safety information and configuration guidelines, see: “Prerequisites for Installation” on page 11 ■... -
Page 12: Security Information
“Cabinet and Tool Requirements” on page 12 ■ “Disconnecting an RJ-45 Cable” on page 14 ■ Security Information To understand the security issues relevant to initial installation of the Oracle ZFS Storage Appliance, refer to the Oracle ZFS Storage Appliance Security Guide, Release OS8.6.x. Safety Information Take the following precautions when installing disk shelves and controllers into a rack. - Page 13 Note - power supply with fan modules to reduce the weight. For instructions, refer to “Servicing the Disk Shelves” in Oracle ZFS Storage Appliance Customer Service Manual. A flashlight for the spotter to ensure the shelf is engaged in the rails.
-
Page 14: Disconnecting An Rj-45 Cable
Using your thumb and middle finger, apply a slight downward pressure while pulling the plug out of the port. Do not pull the plug upward or pinch the release tab with your fingers below the plug, as shown below. Oracle ZFS Storage Appliance Installation Guide • December 2016... -
Page 15: Cabinet Configuration Guidelines
For safety reasons, mount the heaviest equipment, typically disk shelves, at the bottom ■ of the cabinet. Refer to the appropriate Oracle Safety and Compliance Guide for rack- mounting guidelines. To best prepare for cabling controllers to disk shelves, now and in the future, mount ■... -
Page 16: Cable Lengths
All DE3 Disk All DE2 Disk DE3 and DE2 Disk DE2 and Sun Disk Configuration Shelves Shelves Shelves Shelves ZS5-4 with SAS-3 4x4 port HBAs ZS5-4 with SAS-2 4x4 port HBAs Oracle ZFS Storage Appliance Installation Guide • December 2016... -
Page 17: Maximum Disk Shelves Per Controller Configuration
Maximum Disk Shelves per Controller Configuration Controller All DE3 Disk All DE2 Disk DE3 and DE2 Disk DE2 and Sun Disk Configuration Shelves Shelves Shelves Shelves ZS5-2 with SAS-3 4x4 port HBAs ZS5-2 with SAS-2 4x4 port HBAs ZS4-4 with SAS-2 4x4 port HBAs ZS3-4 with SAS-2 4x4 port HBAs... - Page 18 Directly connecting different disk shelf types is not supported. 7420 Disk shelves can include 24x HDD, or combine 20x HDD plus 4x SSD. SSDs provide write-optimized Oracle ZFS Storage Appliance Installation Guide • December 2016...
-
Page 19: Overview Of Disk Shelves
(DE2 and legacy Sun Disk Shelves) to the same controllers. Overview of Disk Shelves This section provides an overview of the Oracle ZFS Storage Appliance disk shelves. For installation instructions, refer to “Installing Disk Shelves” on page 73. -
Page 20: Oracle Storage Drive Enclosure De3-24
DE3-24P Disk Shelf The Oracle Storage Drive Enclosure DE3-24P is a 2U chassis that supports 24 2.5'' SAS-3 drives. The high-performance HDDs provide reliable storage. The SSDs provide accelerated write operations, and for some controllers, read-optimized cache operations. This disk shelf features dual, redundant I/O Modules (IOMs), and dual power supply with fan modules. - Page 21 Overview of Disk Shelves DE3-24P Status Indicators (Front View) FIGURE 2 Figure Legend 1 Locate indicator 2 Service required indicator 3 OK indicator 4 Power supply fault indicator 5 SAS I/O Module fault indicator 6 Power/Activity indicator 7 Drive service required indicator 8 Ready-to-remove indicator Installation Prerequisites and Hardware Overviews...
- Page 22 4 Power supply with fan module 1 DE3-24C Disk Shelf The Oracle Storage Drive Enclosure DE3-24C is a 4U chassis that supports 24 3.5" SAS-3 drives. The high-performance HDDs provide reliable storage. The SSDs provide accelerated write operations, and for some controllers, read-optimized cache operations. This disk shelf features dual, redundant I/O Modules (IOMs), and dual power supply with fan modules.
- Page 23 Read-optimized cache SSDs can also be installed in the DE3-24C disk shelf, for some controllers. For slot configuration details and minimum software requirements, see “Disk Shelf Configurations” in Oracle ZFS Storage Appliance Customer Service Manual. Installation Prerequisites and Hardware Overviews...
- Page 24 1 Locate indicator 2 Service required indicator 3 OK indicator 4 Power supply fault indicator 5 SAS I/O Module fault indicator 6 Ready-to-remove indicator 7 Drive service required indicator 8 Power/Activity indicator Oracle ZFS Storage Appliance Installation Guide • December 2016...
- Page 25 Overview of Disk Shelves DE3-24C Rear Panel FIGURE 6 Figure Legend 1 Power supply filler panel, slot 4 2 I/O Module 1 3 I/O Module filler panel 4 Power supply with fan module 2 5 Power supply filler panel, slot 2 6 I/O Module filler panel 7 I/O Module 0 8 Power supply with fan module 1...
- Page 26 9 Host port activity indicator 10 Power/Activity indicator 11 Drive service required indicator 12 Ready-to-remove indicator 13 For Oracle service only The DE3-24C and DE3-24P disk shelves use the same I/O Module. Oracle ZFS Storage Appliance Installation Guide • December 2016...
-
Page 27: Oracle Storage Drive Enclosure De2-24
DE2-24 Disk Shelf The Oracle Storage Drive Enclosure DE2-24P is a 2U chassis that supports 24 2.5" SAS-2 drives. The high-capacity HDDs provide reliable storage. The SSDs provide accelerated write operations, and for some controllers, read-optimized cache operations. This disk shelf features dual, redundant I/O Modules (IOMs), and dual power supply with fan modules. - Page 28 Configurations” in Oracle ZFS Storage Appliance Customer Service Manual. FIGURE 10 DE2-24P Status Indicators (Front View) Figure Legend 1 System power indicator 2 Module fault indicator 3 Locate indicator 4 Power/Activity indicator 5 Drive fault indicator Oracle ZFS Storage Appliance Installation Guide • December 2016...
- Page 29 4 Power supply with fan module 1 DE2-24C Disk Shelf The Oracle Storage Drive Enclosure DE2-24C is a 4U chassis that supports 24 3.5" SAS-2 drives. The high-capacity HDDs provide reliable storage. The SSDs provide accelerated write operations, and for some controllers, read-optimized cache operations. This disk shelf features dual, redundant I/O Modules (IOMs), and dual power supply with fan modules.
- Page 30 Read-optimized cache SSDs can also be installed in the DE2-24C disk shelf, for some controllers. For slot configuration details and minimum software requirements, see “Disk Shelf Configurations” in Oracle ZFS Storage Appliance Customer Service Manual. FIGURE 13 DE2-24C Status Indicators (Front View) Oracle ZFS Storage Appliance Installation Guide • December 2016...
- Page 31 Overview of Disk Shelves Figure Legend 1 System power indicator 2 Module fault indicator 3 Locate indicator 4 Power/Activity indicator 5 Drive fault indicator FIGURE 14 DE2-24C Rear Panel Figure Legend 1 Power supply filler panel, slot 0 2 Power supply with fan module 1 3 Power supply with fan module 2 4 Power supply filler panel, slot 3 5 I/O Module filler panel...
- Page 32 6 Host port activity indicators 7 For Oracle service only 8 For Oracle service only The DE2-24C and DE2-24P disk shelves use the same I/O Module. FIGURE 16 DE2 Power Supply Indicators Oracle ZFS Storage Appliance Installation Guide • December 2016...
-
Page 33: Sun Disk Shelf
Overview of Disk Shelves Figure Legend 1 DC power fail indicator 2 Fan fail indicator 3 AC power fail indicator 4 Power supply status indicator 5 Power on/off switch 6 Universal power input connector 7 Power cord tie wrap The DE2-24C and DE2-24P disk shelves use the same power supply. Sun Disk Shelf The Sun Disk Shelf is a 4U chassis that supports 24 3.5"... - Page 34 3 System power indicator 4 Disk ready to be removed indicator 5 Disk fault indicator 6 Disk activity indicator 7 Over temperature warning 8 SIM board fault indicator 9 Power supply fault indicator indicator Oracle ZFS Storage Appliance Installation Guide • December 2016...
- Page 35 Overview of Disk Shelves Sun Disk Shelf Rear Panel FIGURE 19 Figure Legend 1 Power supply modules with built-in fans. Power supply 2 Removable SAS Interface Module (SIM) Boards. SIM 0 is on the left and power supply 1 is on the right. 0 is on the left, and SIM 1 is on the right.
- Page 36 4 Power supply fault indicator 5 Universal power connector 6 Power switch 7 Port fault indicator 8 Port OK indicator 9 SIM board OK indicator (green)/ SIM board fault indicator (amber) 10 SIM locator indicator Oracle ZFS Storage Appliance Installation Guide • December 2016...
-
Page 37: Disk Shelf Components
7 Universal power input connector 8 Right ejection arm and captive screw latch Disk Shelf Components The following sections describe each disk shelf's components: Oracle Storage Drive Enclosure DE3-24P Components Drive Enclosure DE3-24P Base Chassis ■ Filler Panel, Drive Enclosure DE3-24P ■... -
Page 38: Overview Of Zs5-4 Controller
Up to 24 3.5" SAS-2 HDDs, SSDs. For information about supported HDDs and SSDs, see ■ Oracle Systems Handbook. Overview of ZS5-4 Controller This section provides an overview of the Oracle ZFS Storage ZS5-4 controller. For installation instructions, refer to “Installing a ZS5-4 Controller” on page 99. For service instructions, refer to “Servicing the ZS5-4 Controller”... -
Page 39: Zs5-4 Electrical Specifications
Overview of ZS5-4 Controller ZS5-4 Electrical Specifications The ZS5-4 controller has two hot-swappable rear accessible power supplies with N+N redundancy. To understand the overall power consumption, see Oracle's online power calculator at http://www.oracle.com/goto/powercalculators. Parameter AC Power Supplies Nominal input frequencies... -
Page 40: Zs5-4 Front Panel Components
8 DB-15 VGA port 9 Two USB 2.0 ports 10 RFID tag ZS5-4 Rear Panel Components The ZS5-4 controller PCIe slots and rear panel components are shown in the following figure. Oracle ZFS Storage Appliance Installation Guide • December 2016... - Page 41 Cluster Interface Card Compatibility - The ZS5-4 controller contains a Version 3 cluster interface card, which is incompatible with Version 2. For information about how to connect cables to form a cluster, see “Connecting Cluster Cables” in Oracle ZFS Storage Appliance Cabling Guide. Installation Prerequisites and Hardware Overviews...
-
Page 42: Overview Of Zs5-2 Controller
Overview of ZS5-2 Controller Overview of ZS5-2 Controller This section provides an overview of the Oracle ZFS Storage ZS5-2 controller. For installation instructions, refer to “Installing a ZS5-2 Controller” on page 109. For service instructions, refer to “Servicing the ZS5-2 Controller” in Oracle ZFS Storage Appliance Customer Service Manual. -
Page 43: Zs5-2 Acoustic Noise Emissions
768 GB 4-port (4x4) SAS-2 6 Gb/s external Refer to http://oracle.com/zfsstorage for the most recent component specification. ZS5-2 Front Panel Components The ZS5-2 controller drive slots and front panel components are shown in the following figure. Installation Prerequisites and Hardware Overviews... -
Page 44: Zs5-2 Rear Panel Components
4 Two USB 2.0 ports 5 RFID tag 6 System disk 0 7 Alert indicators ZS5-2 Rear Panel Components The ZS5-2 controller PCIe slots and rear panel components are shown in the following figure. Oracle ZFS Storage Appliance Installation Guide • December 2016... -
Page 45: Cable Management Arm
Version 2. For information about how to connect cables to form a cluster, see “Connecting Cluster Cables” in Oracle ZFS Storage Appliance Cabling Guide. Cable Management Arm The following figure identifies the components of the cable management arm (CMA). For installation instructions, see “Installing a ZS5-2 Cable Management Arm”... - Page 46 ZS5-2 Controller Cable Management Arm FIGURE 26 Figure Legend Connector A Connector D Front slide bar Slide-rail latching bracket (used with connector D) Velcro straps (6) Rear slide bar Connector B Cable covers Connector C Oracle ZFS Storage Appliance Installation Guide • December 2016...
-
Page 47: Overview Of Zs4-4 Controller
Overview of ZS4-4 Controller Overview of ZS4-4 Controller This section provides an overview of the Oracle ZFS Storage ZS4-4 controller. For installation instructions, refer to “Installing a ZS4-4 or ZS3-4 Controller” on page 127. For service instructions, refer to “Servicing the ZS4-4 Controller” in Oracle ZFS Storage Appliance Customer Service Manual. -
Page 48: Zs4-4 Rear Panel Components
The ZS4-4 rear panel is shown in the following figure. Base configuration PCIe cards are not depicted in this illustration. For more information about PCIe cards, see “ZS4-4 PCIe I/O Cards” in Oracle ZFS Storage Appliance Customer Service Manual. Oracle ZFS Storage Appliance Installation Guide • December 2016... - Page 49 Slots 6 and 7 - Two 4-port (4x4) SAS-2 external HBAs ■ For information about PCIe slot order, see “ZS4-4 PCIe I/O Cards” in Oracle ZFS Storage Appliance Customer Service Manual. Ethernet Ports - The ZS4-4 has four RJ-45 10-Gigabit Ethernet (10GbE) network ■...
- Page 50 SP console. HBA Ports - The 4x4 SAS-2 HBA provides connectivity to external DE2-24 disk shelves. ■ The HBA ports are numbered 0-3, bottom to top. Oracle ZFS Storage Appliance Installation Guide • December 2016...
-
Page 51: Overview Of Zs3-4 Controller
Overview of ZS3-4 Controller Overview of ZS3-4 Controller This section provides an overview of the Oracle ZFS Storage ZS3-4 controller. For installation instructions, refer to “Installing a ZS4-4 or ZS3-4 Controller” on page 127. For service instructions, refer to “Servicing the ZS3-4 Controller” in Oracle ZFS Storage Appliance Customer Service Manual. -
Page 52: Zs3-4 Front Panel Components
The ZS3-4 controller has two SAS-2 system boot drives in slots 0 and 1, configured as a mirrored pair. Up to four SAS-2 read cache SSDs can fill slots 2 through 5, in order. For information about supported HDDs and SSDs, see the Oracle Systems Handbook. Oracle ZFS Storage Appliance Installation Guide • December 2016... -
Page 53: Zs3-4 Rear Panel Components
The following graphic shows the rear panel of the ZS3-4 controller. Base configuration HBAs are not depicted in this illustration. For information about PCIe cards, see “ZS3-4 PCIe I/O Cards” in Oracle ZFS Storage Appliance Customer Service Manual. FIGURE 32... - Page 54 SP console. HBA Ports - The 4x4 SAS-2 HBA, installed in the ZS3-4, provides connectivity to external ■ DE2 and Sun Disk Shelves. The HBA ports are numbered 3-0, top to bottom: Oracle ZFS Storage Appliance Installation Guide • December 2016...
-
Page 55: Overview Of Zs3-2 Controller
Overview of ZS3-2 Controller Overview of ZS3-2 Controller This section provides an overview of the Oracle ZFS Storage ZS3-2 controller. For installation instructions, refer to “Installing a ZS3-2 Controller” on page 137. For service instructions, refer to “Servicing the ZS3-2 Controller” in Oracle ZFS Storage Appliance Customer Service Manual. -
Page 56: Zs3-2 Acoustic Noise Emissions
512GB 16x32GB Refer to http://oracle.com/zfsstorage for the most recent component specification. ZS3-2 Front Panel Components The ZS3-2 controller drive slots and front panel components are shown in the following figure. Oracle ZFS Storage Appliance Installation Guide • December 2016... -
Page 57: Zs3-2 Rear Panel Components
ZS3-2 Rear Panel Components The ZS3-2 controller PCIe slots and rear panel components are shown in the following figure. For more information about PCIe cards, see “ZS3-2 PCIe I/O Cards” in Oracle ZFS Storage Appliance Customer Service Manual. Installation Prerequisites and Hardware Overviews... - Page 58 NET 3, NET 2, NET 1, and NET 0 (left to right) on the rear panel. The ports operate at 100 Mbits/sec, 1000 Mbits/sec, or 10-Gbits/sec. Use these ports to connect the appliance to the network. Oracle ZFS Storage Appliance Installation Guide • December 2016...
- Page 59 Overview of ZS3-2 Controller The LEDs located above each NET port are Link/Activity (left) and Speed (right) indicators for each port as described in this table: Connection Type EEE Terminology Speed LED Color Transfer Rate Fast Ethernet 100BASE-TX 100 Mbits/sec Gigabit Ethernet 1000BASE-T Amber...
-
Page 60: Optional Cable Management Arm
The following figure identifies the components of the second-generation cable management arm (CMA). See the CMA installation instructions. Cable Management Arm Components FIGURE 35 Figure Legend 1 Connector A 2 Front slide bar 3 Velcro straps (6) Oracle ZFS Storage Appliance Installation Guide • December 2016... -
Page 61: Overview Of 7420 Controller
8 Rear slide bar 9 Cable covers with connector D) Overview of 7420 Controller This section provides an overview of the Oracle ZFS Storage 7420 controller. For installation instructions, refer to “Installing a 7x20 Controller” on page 155. For service instructions, refer to “Servicing the 7420 or 7320 Controller”... -
Page 62: 7420 Configuration Options
You can identify your configuration by looking at the product id on the BUI Maintenance screen or by using the CLI configuration version show command. You can also check the physical label on the boot drive. Refer to http://oracle.com/zfsstorage for the most recent component specification. Oracle ZFS Storage Appliance Installation Guide • December 2016... -
Page 63: 7420 Front Panel Components
Overview of 7420 Controller 7420 Front Panel Components 7420 Front Panel FIGURE 36 Figure Legend 1 Locator LED and button (white) 2 Service Required LED (amber) 3 Power/OK LED (green) 4 Power button 5 Service Processor (SP) OK LED 6 Fan/CPU/Memory Service (green) Required LED 7 Power Supply (PS) Service... -
Page 64: 7420 Rear Panel Components
The following graphic shows the rear panel of the controller. Base configuration HBAs are not depicted in this illustration. For information about PCIe cards, see “7420 PCIe I/O Cards” in Oracle ZFS Storage Appliance Customer Service Manual. Oracle ZFS Storage Appliance Installation Guide • December 2016... -
Page 65: Overview Of 7320 Controller
MGT) 10/100 BASE-T Ethernet port port 13 DB-15 video connector Overview of 7320 Controller This section provides an overview of the Oracle ZFS Storage 7320 controller. For installation instructions, refer to “Installing a 7x20 Controller” on page 155. For service instructions, refer to “Servicing the 7420 or 7320 Controller”... -
Page 66: 7320 Electrical Specifications
7320 Base Configurations The 7320 controller base configuration options are: Single or cluster ■ 24GB or 96GB RAM ■ 2x2.4GHz Quad-Core processors ■ One external SAS HBA ■ Four 10/100/1000 Ethernet ports ■ Oracle ZFS Storage Appliance Installation Guide • December 2016... -
Page 67: 7320 Front Panel Components
Overview of 7320 Controller 7320 Front Panel Components The following figure and legend identify the front panel LEDs. FIGURE 39 7320 Controller Front Panel Figure Legend 1 Locate Button/LED 2 Service Required LED (amber) 3 Power/OK LED (green) 4 Power Button 5 Rear Power Supply 6 System Overtemperature LED 7 Top Fan... -
Page 68: 7320 Rear Panel Components
Network Management Port - The network management connector (NET MGT) is an RJ- ■ 45 10/100 BASE-T Ethernet port and provides an alternate terminal interface to the SP console. Oracle ZFS Storage Appliance Installation Guide • December 2016... -
Page 69: Overview Of 7120 Controller
■ connector and is a terminal connection to the SP console. Overview of 7120 Controller This section provides an overview of the Oracle ZFS Storage 7120 controller. For installation instructions, refer to “Installing a 7x20 Controller” on page 155. For service instructions,... -
Page 70: 7120 Front Panel Components
SSD belongs in slot 3 and is not supported in controllers configured with the internal Sun Aura flash HBA Logzilla. FIGURE 42 7120 Controller Front Panel Figure Legend 1 Locator LED/button 2 Service Action Required 3 Power button 4 Power/OK LED (green) (white) LED (amber) Oracle ZFS Storage Appliance Installation Guide • December 2016... -
Page 71: 7120 Rear Panel Components
01) may be located in slots 1, 2, or 3. 375-3606-01 HCA expansion cards are not supported in the 10Gb network configurations. For more information about PCIe cards, see “7120 PCIe Options” in Oracle ZFS Storage Appliance Customer Service Manual. 7120 Controller Rear Panel... -
Page 72: Oracle Zfs Storage Appliance Installation Guide • December
45 port and provides an alternate terminal interface to the SP console. Serial Management Port - The serial management connector (SER MGT) is an RJ-45 port ■ and provides a terminal connection to the SP console. Oracle ZFS Storage Appliance Installation Guide • December 2016... -
Page 73: Installing Disk Shelves
“Installing a Sun Disk Shelf” on page 93 ■ Installing a DE3-24P Disk Shelf The Oracle Storage Drive Enclosure DE3-24P requires two rack units (RU), or six rack holes, of vertical space in the cabinet. Review “Prerequisites for Installation” on page 11 “Overview of Disk... - Page 74 Adjust the rail length to fit the front and rear of the rack [A and B]. Mark which rack rail holes you will be using to ensure the shelf rails are installed evenly. Note - Oracle ZFS Storage Appliance Installation Guide • December 2016...
- Page 75 Installing a DE3-24P Disk Shelf Press and hold open the clamp lever on each rail end [1], and insert both rail ends into the appropriate rack holes [2]. Close the rail clamps over the rails by releasing the clamp lever [3]. You will hear an audible click as the clamps lock in place over the rack rails.
- Page 76 Carefully slide the disk shelf into the cabinet. Ensure that it is fully seated within the rails. If removing the disk shelf to reseat it, support it at all times. Oracle ZFS Storage Appliance Installation Guide • December 2016...
-
Page 77: Installing A De3-24C Disk Shelf
If shipping the racked disk shelf, install a screw [1 and 2] into each rear chassis ear [A]. Installing a DE3-24C Disk Shelf The Oracle Storage Drive Enclosure DE3-24C requires four rack units (RU), or twelve rack holes, of vertical space in the cabinet. Review “Prerequisites for Installation”... - Page 78 Orient the rail so that the stamped label (LEFT or RIGHT) is facing the inside of the rack. Adjust the rail length to fit the front and rear of the rack [A and B]. Oracle ZFS Storage Appliance Installation Guide • December 2016...
- Page 79 Installing a DE3-24C Disk Shelf Mark which rack rail holes you will be using to ensure the shelf rails are installed evenly. Note - Press and hold open the clamp lever on each rail end [1], and insert both rail ends into the appropriate rack holes [2].
- Page 80 Install the front cage nuts. A mounted disk shelf is unstable if the front cage nuts are not installed. Always Caution - install the cage nuts before mounting the disk shelf. Oracle ZFS Storage Appliance Installation Guide • December 2016...
- Page 81 Installing a DE3-24C Disk Shelf Use the template to determine cage nut placement [1]. Insert one cage nut into the appropriate hole in each rack rail [2]. Installing Disk Shelves...
- Page 82 Carefully slide the disk shelf into the cabinet. Ensure that it is fully seated within the rails. If removing the disk shelf to reseat it, support it at all times. Secure the front of the disk shelf using the four captive screws [1 - 4]. Oracle ZFS Storage Appliance Installation Guide • December 2016...
-
Page 83: Installing A De2-24P Disk Shelf
If shipping the racked disk shelf, install a screw [1 and 2] into each rear chassis ear [A]. Installing a DE2-24P Disk Shelf Use the following procedure to install an Oracle Storage Drive Enclosure DE2-24P, which requires two rack units (RU), or six rack holes, of vertical space in the cabinet. Review “Prerequisites for Installation”... - Page 84 Insert and tighten one screw through the front of the rack and into the top hole in the rails. Adjust the rail lengths to fit, and position the rear rail location pegs in the corresponding rear rack holes. Oracle ZFS Storage Appliance Installation Guide • December 2016...
- Page 85 Installing a DE2-24P Disk Shelf Insert and tighten one screw through the back of the rack and into the back of the rails. If your rack is a threaded universal 19-inch cabinet: Installing Disk Shelves...
- Page 86 Adjust the rail lengths to fit, and locate the rear pins inside the corresponding rear rack holes. Insert and tighten one screw through the back of the rack and into the back of the rails. Oracle ZFS Storage Appliance Installation Guide • December 2016...
- Page 87 Installing a DE2-24P Disk Shelf Using a mechanical lift or two people, one at each side of the disk shelf, carefully lift and rest the shelf on the bottom ledge of the left and right rails. Do not lift using the power supply with fan module handles. Carefully slide the shelf into the rails until it is fully seated within the cabinet.
-
Page 88: Installing A De2-24C Disk Shelf
Installing a DE2-24C Disk Shelf Use the following procedure to install an Oracle Storage Drive Enclosure DE2-24C, which requires four rack units (RU), or twelve rack holes, of vertical space in the cabinet. Oracle ZFS Storage Appliance Installation Guide • December 2016... - Page 89 Installing a DE2-24C Disk Shelf Review “Prerequisites for Installation” on page 11 “Overview of Disk Before You Begin ■ Shelves” on page To prevent the cabinet from tipping, always load the heaviest equipment, which are disk ■ shelves, starting from the bottom of the cabinet. To best prepare for cabling disk shelves to controllers, now and in the future, mount ■...
- Page 90 Threaded cabinet - The location pins fit inside the rack holes. ■ Adjust the rail lengths to fit. Install one screw through the rack and into the rear of each rail. Oracle ZFS Storage Appliance Installation Guide • December 2016...
- Page 91 Installing a DE2-24C Disk Shelf Tighten the two locking screws in the rails. Installing Disk Shelves...
- Page 92 If removing the shelf to reseat it, support it at all times. Remove the front side caps, install two screws into each front side, and replace the caps. Oracle ZFS Storage Appliance Installation Guide • December 2016...
-
Page 93: Installing A Sun Disk Shelf
Installing a Sun Disk Shelf Install one long patchlock screw per rail to secure the rear of the shelf to the rear of the rack. Installing a Sun Disk Shelf Use the following procedure to install a Sun Disk Shelf. Starting at the bottom of the cabinet, locate the appropriate rack unit (RU) height. - Page 94 Install appropriate rail plates in four locations on the rack (2 front and 2 back) by aligning the two pins on the rail plate with holes on the cabinet rails. Oracle ZFS Storage Appliance Installation Guide • December 2016...
- Page 95 Installing a Sun Disk Shelf Insert M6 screws in the top and bottom holes of each rail plate and tighten (8 total places). Install each rail by first aligning the front pins of the rack adapter plates with corresponding holes in the front of the rail, then adjust the rail to fit the rack and insert the pins from the rear rack adapter plates into the corresponding holes of the rail.
- Page 96 Installing a Sun Disk Shelf Install four 8-32 screws into the four remaining front and rear holes of each rack rail (16 total). Oracle ZFS Storage Appliance Installation Guide • December 2016...
- Page 97 Installing a Sun Disk Shelf Using a mechanical lift or two people, one at each side of the shelf or controller, carefully lift and rest the shelf on the bottom ledge of the left and right rails. The following graphic illustrates the chassis insertion. Carefully slide the shelf into the cabinet until the front flanges of the shelf touch the vertical face of the rack.
- Page 98 Oracle ZFS Storage Appliance Installation Guide • December 2016...
-
Page 99: Installing A Zs5-4 Controller
Installing a ZS5-4 Controller This section contains installation procedures for the ZS5-4 controller. Before beginning installation, see “Installation Prerequisites and Hardware Overviews” on page Use the following procedures to install a ZS5-4 controller: “Installing the Slide Rails onto a ZS5-4” on page 99 ■... -
Page 100: Installing The Slide Rails Into The Rack For A Zs5-4
Align the slide-rail assembly mounting pins with the front and rear rack post mounting holes. Then lock the assembly into place by pushing the assembly Oracle ZFS Storage Appliance Installation Guide • December 2016... - Page 101 Installing the Slide Rails into the Rack for a ZS5-4 toward the rear of the rack until the mounting pins engage the rack with an audible click. Note - The slide rails can be used with either 9.5-mm square or M6 round mounting hole racks. (Optional) If installing the assembly with cage nuts and mounting screws, insert the cage nuts into the front and rear rack posts in the desired positions.
-
Page 102: Installing A Zs5-4 Onto The Rack Slide Rails
Attempting this procedure alone could result in equipment damage or personal injury. Always load the heaviest equipment (disk shelves) at the bottom of the rack. If your rack includes an anti-tip foot, extend it from the bottom of the rack. Oracle ZFS Storage Appliance Installation Guide • December 2016... - Page 103 Installing a ZS5-4 onto the Rack Slide Rails Lower the rack stabilization feet if you have not already done so. Push the slide rails into the slide-rail assemblies in the rack as far as possible. Raise the chassis so that the back ends of the mounting brackets are aligned with the slide rail and insert the chassis into the slide rails, pushing the chassis slowly, until the mounting brackets meet the slide-rail stops (approximately 12 inches, or 30 cm).
-
Page 104: Installing A Zs5-4 Cable Management Arm
SAS cables between the two CMAs so they properly route to the upper and lower disk shelves. If later removing the CMA, be sure to support it as you remove the connectors. ■ Oracle ZFS Storage Appliance Installation Guide • December 2016... - Page 105 Installing a ZS5-4 Cable Management Arm Insert the CMA mounting bracket connector (1) into the right slide rail (2) until the connector locks into place with an audible click. Insert the right CMA slide-rail connector (1) into the right slide-rail assembly (2) until the connector locks into place with an audible click.
-
Page 106: Verifying Operation Of Zs5-4 Slide-Rails And Cma
Slowly pull the storage controller out of the rack until the slide-rails reach their stops. Inspect the attached cables for any binding or kinks. Verify that the CMA extends fully with the slide-rails. Oracle ZFS Storage Appliance Installation Guide • December 2016... - Page 107 Verifying Operation of ZS5-4 Slide-Rails and CMA Push the storage controller back into the rack and verify that the CMA retracts without binding. Adjust the cable straps and the CMA, as required. Installing a ZS5-4 Controller...
- Page 108 Oracle ZFS Storage Appliance Installation Guide • December 2016...
-
Page 109: Installing A Zs5-2 Controller
Installing a ZS5-2 Controller This section contains installation procedures for the ZS5-2 controller. Before beginning installation, see “Installation Prerequisites and Hardware Overviews” on page Use the following procedures to install a ZS5-2 controller: “Installing the Mounting Brackets and Slide Rail Assemblies for a ZS5-2” on page 109 ■... - Page 110 Installing the Mounting Brackets and Slide Rail Assemblies for a ZS5-2 Push the mounting bracket release button toward the front of the mounting bracket (2) while withdrawing the bracket from the assembly. Oracle ZFS Storage Appliance Installation Guide • December 2016...
- Page 111 Installing the Mounting Brackets and Slide Rail Assemblies for a ZS5-2 Attach a mounting bracket to each side of the controller. Installing a ZS5-2 Controller...
- Page 112 If you are using a universal 19-inch cabinet, snap an M6 square cage nut into the top and bottom holes of the location where you will be installing the rail plate as shown. Oracle ZFS Storage Appliance Installation Guide • December 2016...
- Page 113 Installing the Mounting Brackets and Slide Rail Assemblies for a ZS5-2 Position a slide rail assembly in your rack so that the brackets at each end of the slide rail assembly are on the outside of the front and back rack posts. The following graphic illustrates the rail assembly brackets.
- Page 114 Remove the spacer and confirm that the rails are attached tightly to the rack. Stabilize the rack, using all anti-tilt mechanisms, to prevent it from tipping during installation. See your rack documentation for detailed instructions. Oracle ZFS Storage Appliance Installation Guide • December 2016...
-
Page 115: Installing A Zs5-2 Onto The Rack Slide Rails
Installing a ZS5-2 onto the Rack Slide Rails Installing a ZS5-2 onto the Rack Slide Rails Use the following procedure to install a ZS5-2 controller onto the rack slide rails. This procedure requires a minimum of two people because of the weight of the Caution - chassis. -
Page 116: Installing A Zs5-2 Cable Management Arm
If later removing the CMA, be sure to support it as you remove the connectors. ■ If the CMA has flat cable covers (for a 1U chassis), install the 2U round cable covers provided in the accessory kit. To replace the flat cable covers: Oracle ZFS Storage Appliance Installation Guide • December 2016... - Page 117 Installing a ZS5-2 Cable Management Arm Remove each flat cable cover by lifting up on the cable cover handle. Open it 180 degrees to the horizontal position. Apply upward pressure to the outside edge of each hinge connector until the hinge connector comes off the hinge.
- Page 118 At the back of the rack, insert the CMA's connector A into the front slot on the left slide-rail until it locks into place with an audible click (frames 1 and 2). Oracle ZFS Storage Appliance Installation Guide • December 2016...
- Page 119 Installing a ZS5-2 Cable Management Arm The connector A tab (1) goes into the slide-rail's front slot (2). Gently tug on the left side of the front slide bar to verify that connector A is properly seated. Support the CMA and do not allow it to hang under its own weight until it is secured at all four attachment points.
- Page 120 Align connector C with the slide-rail so that the locking spring (1) is positioned inside (server side) of the right slide-rail (frame 1). Insert connector C into the right side-rail until it locks into place with an audible click (frames 2 and 3). Oracle ZFS Storage Appliance Installation Guide • December 2016...
- Page 121 Installing a ZS5-2 Cable Management Arm Gently tug on the right side of the CMA's rear slide bar to verify that connector C is properly seated. Installing a ZS5-2 Controller...
- Page 122 While holding the slide-rail latching bracket in place, insert connector D and its associated slide-rail latching bracket into the left slide-rail until connector D locks into place with an audible click (frames 1 and 2). Oracle ZFS Storage Appliance Installation Guide • December 2016...
- Page 123 Installing a ZS5-2 Cable Management Arm When inserting connector D into the slide-rail, the preferred and easier method is to install connector D and the latching bracket as one assembly into the slide-rail. Gently tug on the left side of the CMA's rear slide bar to verify that connector D is properly seated.
- Page 124 Open the CMA cable covers, route controller cables through the CMA's cable troughs, close the cable covers, and secure the cables with the six Velcro straps. Route the cables through the cable troughs in this order: Route the cables Oracle ZFS Storage Appliance Installation Guide • December 2016...
- Page 125 Installing a ZS5-2 Cable Management Arm through the front-most cable trough, then through the small cable trough, then through the rear-most cable trough. When securing the cables with the Velcro straps located on the front slide bar, ensure that the Velcro straps do not wrap around the bottom of the slide bar. Otherwise, expansion and contraction of the slide bar might be hindered when the server is extended from the rack and returned to the rack.
-
Page 126: Verifying Operation Of Zs5-2 Slide-Rails And Cma
Verify that the CMA extends fully with the slide-rails. Push the storage controller back into the rack and verify that the CMA retracts without binding. Adjust the cable straps and the CMA, as required. Oracle ZFS Storage Appliance Installation Guide • December 2016... -
Page 127: Installing A Zs4-4 Or Zs3-4 Controller
Installing a ZS4-4 or ZS3-4 Controller This section contains installation procedures for the ZS4-4 or ZS3-4 controller. Before beginning installation, see “Installation Prerequisites and Hardware Overviews” on page Use the following procedures to install a ZS4-4 or ZS3-4 controller: “Installing the Slide Rails onto a ZS4-4 or ZS3-4” on page 127 ■... -
Page 128: Installing The Slide Rails Into The Rack For A Zs4-4 Or Zs3-4
If you plan to move the rack after the controller is installed, use mounting screws and cage nuts to secure the slide-rail assembly. Refer to the Rail Rackmount Kit Overview and Information card for instructions on inserting these cage nuts. This card is included with the rack kit. Oracle ZFS Storage Appliance Installation Guide • December 2016... - Page 129 Installing the Slide Rails into the Rack for a ZS4-4 or ZS3-4 Position a slide-rail assembly in your rack so that the slide-rail assembly front bracket is on the outside of the front rack post and the slide-rail assembly rear bracket is on the inside of the rear rack post.
-
Page 130: Installing A Zs4-4 Or Zs3-4 Onto The Rack Slide Rails
Caution - the weight of the chassis. Attempting this procedure alone could result in equipment damage or personal injury. Always load the heaviest equipment (disk shelves) at the bottom of the rack. Oracle ZFS Storage Appliance Installation Guide • December 2016... - Page 131 Installing a ZS4-4 or ZS3-4 onto the Rack Slide Rails If your rack includes an anti-tip foot, extend it from the bottom of the rack. Lower the rack stabilization feet if you have not already done so. Push the slide rails into the slide-rail assemblies in the rack as far as possible. Raise the chassis so that the back ends of the mounting brackets are aligned with the slide rail and insert the chassis into the slide rails, pushing the chassis slowly, until the mounting brackets meet the slide-rail stops (approximately 12...
- Page 132 Continue pushing until the slide-rail locks (on the front of the mounting brackets) engage the slide- rail assemblies with an audible click. Oracle ZFS Storage Appliance Installation Guide • December 2016...
-
Page 133: Installing A Zs4-4 Or Zs3-4 Cable Management Arm
Installing a ZS4-4 or ZS3-4 Cable Management Arm Verify that the controller is securely mounted in the rack and that the slide-rail locks Caution - are engaged with the mounting brackets before continuing, or equipment damage and possibly personal injury could occur. Installing a ZS4-4 or ZS3-4 Cable Management Arm Use the following procedure to install the cable management arm (CMA) for a ZS4-4 or ZS3-4 controller. - Page 134 If required, attach the cable hook and loop straps to the CMA, and press them into place to secure the cables. Cable hooks and loop straps are preinstalled on the CMA. Perform this step if you need Note - to reinstall cable hooks and straps. Oracle ZFS Storage Appliance Installation Guide • December 2016...
- Page 135 Installing a ZS4-4 or ZS3-4 Cable Management Arm For best results, place three cable straps (1), evenly spaced, on the rear-facing side of the CMA arm (2), and three cable straps on the side of the CMA nearest the controller. Installing a ZS4-4 or ZS3-4 Controller...
- Page 136 Oracle ZFS Storage Appliance Installation Guide • December 2016...
-
Page 137: Installing A Zs3-2 Controller
Installing a ZS3-2 Controller This section contains installation procedures for the ZS3-2 controller. Before beginning installation, see “Installation Prerequisites and Hardware Overviews” on page Use the following procedures to install a ZS3-2 controller: “Installing the Mounting Brackets and Slide Rail Assemblies for a ZS3-2” on page 137 ■... - Page 138 Installing the Mounting Brackets and Slide Rail Assemblies for a ZS3-2 Push the mounting bracket release button toward the front of the mounting bracket (2) while withdrawing the bracket from the assembly. Oracle ZFS Storage Appliance Installation Guide • December 2016...
- Page 139 Installing the Mounting Brackets and Slide Rail Assemblies for a ZS3-2 Attach a mounting bracket to each side of the controller. Installing a ZS3-2 Controller...
- Page 140 If you are using a universal 19-inch cabinet, snap an M6 square cage nut into the top and bottom holes of the location where you will be installing the rail plate as shown. Oracle ZFS Storage Appliance Installation Guide • December 2016...
- Page 141 Installing the Mounting Brackets and Slide Rail Assemblies for a ZS3-2 Position a slide rail assembly in your rack so that the brackets at each end of the slide rail assembly are on the outside of the front and back rack posts. The following graphic illustrates the rail assembly brackets.
- Page 142 Remove the spacer and confirm that the rails are attached tightly to the rack. Stabilize the rack, using all anti-tilt mechanisms, to prevent it from tipping during installation. See your rack documentation for detailed instructions. Oracle ZFS Storage Appliance Installation Guide • December 2016...
-
Page 143: Installing A Zs3-2 Onto The Rack Slide Rails
Installing a ZS3-2 onto the Rack Slide Rails Installing a ZS3-2 onto the Rack Slide Rails Use the following procedure to install a ZS3-2 controller onto the rack slide rails. This procedure requires a minimum of two people because of the weight of the Caution - chassis. -
Page 144: Installing A Zs3-2 Cable Management Arm
If the CMA has flat cable covers (for a 1U chassis), install the 2U round cable covers provided in the accessory kit. To replace the flat cable covers: Remove each flat cable cover by lifting up on the cable cover handle. Oracle ZFS Storage Appliance Installation Guide • December 2016... - Page 145 Installing a ZS3-2 Cable Management Arm Open it 180 degrees to the horizontal position. Apply upward pressure to the outside edge of each hinge connector until the hinge connector comes off the hinge. Position each round cable cover horizontally over the hinges, and align the hinge connectors with the hinges.
- Page 146 Insert the CMA's connector B into the front slot on the right slide-rail until it locks into place with an audible click (frames 1 and 2). Oracle ZFS Storage Appliance Installation Guide • December 2016...
- Page 147 Installing a ZS3-2 Cable Management Arm The connector B tab (1) goes into the slide-rail front slot (2). Gently tug on the right side of the front slide bar to verify that connector B is properly seated. To install the CMA's connector C into the right slide-rail, perform the following steps: Align connector C with the slide-rail so that the locking spring (1) is positioned inside (server side) of the right slide-rail (frame 1).
- Page 148 Installing a ZS3-2 Cable Management Arm Gently tug on the right side of the CMA's rear slide bar to verify that connector C is properly seated. Oracle ZFS Storage Appliance Installation Guide • December 2016...
- Page 149 Installing a ZS3-2 Cable Management Arm To prepare the CMA's connector D for installation, remove the tape that secures the slide-rail latching bracket to connector D and ensure that the latching bracket is properly aligned with connector D (frames 1 and 2). While holding the slide-rail latching bracket in place, insert connector D and its associated slide-rail latching bracket into the left slide-rail until connector D locks into place with an audible click (frames 1 and 2).
- Page 150 CMA to hang by its own weight. Verify that the slide-rails and the CMA are operating properly before routing cables through the CMA: Ensure all rack anti-tilt devices are extended to prevent the rack from tipping. Oracle ZFS Storage Appliance Installation Guide • December 2016...
- Page 151 Installing a ZS3-2 Cable Management Arm Extend the controller from the front of the rack until the CMA is fully extended. Return the storage controller to the rack. As you push the storage controller into the rack, verify that the CMA retracts without binding. Open the CMA cable covers, route controller cables through the CMA's cable troughs, close the cable covers, and secure the cables with the six Velcro straps.
- Page 152 If you need to install additional Velcro straps, wrap the straps around the cables only, not around any of the CMA components; otherwise, expansion and contraction of the CMA slide bars might be hindered when the server is extended from the rack and returned to the rack. Oracle ZFS Storage Appliance Installation Guide • December 2016...
-
Page 153: Verifying Operation Of Zs3-2 Slide-Rails And Cma
Verifying Operation of ZS3-2 Slide-Rails and CMA Verifying Operation of ZS3-2 Slide-Rails and CMA Use the following procedure to verify the operation of the optional CMA and slide rails on a ZS3-2 controller. Ensure all rack anti-tilt devices are extended to prevent the rack from tipping forward when the Before You Begin storage controller is extended from the rack. - Page 154 Oracle ZFS Storage Appliance Installation Guide • December 2016...
-
Page 155: Installing A 7X20 Controller
Installing a 7x20 Controller This section contains installation procedures for the 7420, 7320, and 7120 controllers. Before beginning installation, see “Installation Prerequisites and Hardware Overviews” on page Use the following procedures to install a 7x20 controller: “Removing the 7x20 Mounting Brackets from inside the Slide Rails” on page 155 ■... - Page 156 Removing the 7x20 Mounting Brackets from inside the Slide Rails Example 2 Disassembling a 7420 Rail Kit The following graphic illustrates the procedure for disassembling the 7420 rail kit. Oracle ZFS Storage Appliance Installation Guide • December 2016...
-
Page 157: Installing The Mounting Brackets On A 7X20
Installing the Mounting Brackets on a 7x20 Installing the Mounting Brackets on a 7x20 Use the following procedure to install the mounting brackets on a 7420, 7320, or 7120 controller. If the mounting brackets are shipped inside the slide rails, you must remove them before Note - beginning this procedure;... - Page 158 Installing the Mounting Brackets on a 7x20 The following graphic illustrates how to attach the 7120/7320 mounting brackets. Oracle ZFS Storage Appliance Installation Guide • December 2016...
-
Page 159: Installing A 7X20 Onto The Rack Slide Rails
Installing a 7x20 onto the Rack Slide Rails The following graphic illustrates how to attach the 7x20 mounting brackets. With the heads of the four chassis locating pins protruding though the four keyed openings in the mounting bracket, pull the mounting-bracket toward the front of the chassis until the mounting-bracket clip locks into place with an audible click. - Page 160 Position a slide rail assembly in your rack so that the brackets at each end of the slide rail assembly are on the outside of the front and back rack posts. Oracle ZFS Storage Appliance Installation Guide • December 2016...
- Page 161 Installing a 7x20 onto the Rack Slide Rails The following graphic illustrates the rail assembly brackets. Attach each slide rail assembly to the rack posts, but do not tighten the screws completely. Installing a 7x20 Controller...
- Page 162 (~12 in or 30 cm). You will hear an audible click. Oracle ZFS Storage Appliance Installation Guide • December 2016...
- Page 163 Installing a 7x20 onto the Rack Slide Rails Installing a 7120/7320 onto the Rack Slide Rails Example 3 The following graphic illustrates the 7120/7320 chassis insertion and slide rail locks usage. Installing a 7420 onto the Rack Slide Rails Example 4 The following graphic illustrates 7420 chassis insertion.
-
Page 164: Installing A 7X20 Cable Management Arm
Do not route short SAS daisy chain cables through the CMA. Do not route an excess of ■ cables such that the CMA clamps bow or appear structurally unfit to support the weight. Oracle ZFS Storage Appliance Installation Guide • December 2016... - Page 165 Installing a 7x20 Cable Management Arm If using two clustered controllers mounted in the middle of the rack with disk shelves ■ located above and below them, you can divide the disk shelf SAS cables between the two CMAs so they properly route to the upper and lower disk shelves. If later removing the CMA, be sure to support it as you remove the connectors.
- Page 166 Installing a 7x20 Cable Management Arm Insert the CMA mounting bracket connector into the right slide rail until the connector locks into place. Oracle ZFS Storage Appliance Installation Guide • December 2016...
- Page 167 Installing a 7x20 Cable Management Arm Insert the right CMA slide rail connector (1) into the right slide rail assembly (2) until the connector locks into place. Installing a 7x20 Controller...
- Page 168 Installing a 7x20 Cable Management Arm Insert the left CMA slide rail connector (1) into the rail extension on the left slide rail assembly (2) until the connector locks into place. Oracle ZFS Storage Appliance Installation Guide • December 2016...
- Page 169 Installing a 7x20 Cable Management Arm After you install and route the cables through the assembly, attach the hook and loop straps (1) to secure the cables. Then attach the right and left outer latches to support the assembly. Installing a 7x20 Controller...
- Page 170 Oracle ZFS Storage Appliance Installation Guide • December 2016...
-
Page 171: Cabling The Appliance
Guide. Connecting System Cables Use the following procedure to make a physical serial or network connection to Oracle ILOM. It is strongly recommended that you use a serial SP connection for system configuration and initial configuration because you can monitor progress, especially during system reboots. -
Page 172: Connecting Cluster Cables
Connect another Ethernet cable between serial port 1 of one controller and serial port 0 of the other controller. The cables between the serial ports form a crossover pattern, as shown in the following illustrations. Oracle ZFS Storage Appliance Installation Guide • December 2016... - Page 173 Connecting Cluster Cables Connect one Ethernet cable between the Ethernet ports of each controller. The following figure shows cluster cabling between two ZS5-4 controllers. ZS5-4 Cluster Cabling The following figure shows cluster cabling between two ZS5-2 controllers. ZS5-2 Cluster Cabling The following figure shows cluster cabling between two ZS4-4 controllers.
- Page 174 The cluster card for ZS3-4 and 7420 is installed in the Cluster slot, as described in the Note - hardware overview for each controller in Oracle ZFS Storage Appliance Customer Service Manual. The following figure shows cluster cabling between two ZS3-2 controllers. ZS3-2 Cluster Cabling Oracle ZFS Storage Appliance Installation Guide • December 2016...
-
Page 175: Connecting Disk Shelf Cables
“Getting Started with Cabling” in Oracle ZFS Storage Appliance Cabling Guide. “Cabling DE3-24 Disk Shelves to 4X4 Port SAS-3 HBAs” in Oracle ZFS Storage ■ Appliance Cabling Guide “Cabling DE2-24 Disk Shelves to 4X4 Port SAS-2 HBAs” in Oracle ZFS Storage ■... - Page 176 Shelf 7 (RU 31-34) Shelf 4 (RU 13-16) Shelf 6 (RU 27-30) Shelf 3 (RU 9-12) Shelf 5 (RU 23-26) Shelf 2 (RU 5-8) Controller 1 (RU 20-22) Shelf 1 (RU 1-4) Oracle ZFS Storage Appliance Installation Guide • December 2016...
-
Page 177: Powering On The Appliance
Powering On the Appliance This section contains power-on procedures for Oracle ZFS Storage Appliance disk shelves and storage controllers. Do not power on disk shelves and controllers until all other cabling is complete, as Caution - described in “Cabling the Appliance” on page 171. -
Page 178: Powering On A Sun Disk Shelf
Provide a suitable power source with electrical overload protection to meet the power ■ supply input voltage range of 100-240 VAC, 50-60 Hz. The disk shelves are compatible with 100-120 VAC or 200-240 VAC sources. The power source must not be overloaded Oracle ZFS Storage Appliance Installation Guide • December 2016... -
Page 179: Powering On A Controller
“Powering Off a Controller” on page 180 ■ Powering On a Controller Use the following procedure to power on an Oracle ZFS Storage Appliance controller. Plug power cables into power supply 0 and power supply 1 on the storage controller(s). -
Page 180: Powering Off A Controller
“Powering Off a Controller” on page 180. Place the power supply on/off switches to the "O" off position. Disconnect the power cords from the external power source for the cabinet. Oracle ZFS Storage Appliance Installation Guide • December 2016... - Page 181 Powering Off a Disk Shelf All power cords must be disconnected to completely remove power from the disk shelf. Note - Related Topics “Powering Off a Controller” on page 180 ■ “Powering On a DE3-24 or DE2-24 Disk Shelf” on page 177 ■...
- Page 182 Oracle ZFS Storage Appliance Installation Guide • December 2016...
-
Page 183: Configuring The Appliance For The First Time
This section contains first-time configuration procedures for the Oracle ZFS Storage Appliance. Follow these steps to complete first-time configuration: 1. Ensure you have completed cabling, including the serial or network cabling for Oracle ILOM connectivity, as described in “Cabling the Appliance” on page 171. -
Page 184: Configuring The System
After the cluster is initialized, you can administer the system from either storage controller. However, do not attempt initial configuration on both controllers independently. Open a terminal or terminal emulator window and log in to Oracle ILOM in one of the following ways: For a serial connection (recommended), use as the user name. - Page 185 When prompted, enter the password changeme Note - This is the default password that provides initial access to Oracle ILOM. You can set a different password for the appliance in step 5. At the command prompt, enter start /SP/console...
- Page 186 If <X> appears by NET-0, check that all cable connections are secure. Sun ZFS Storage 7120 Configuration Copyright (c) 2008, 2013, Oracle and/or its affiliates. All rights reserved. NET-0 <=> NET-1 <X> NET-2 <X> NET-3 <X> Host Name: hostname DNS Domain: us.oracle.com...
-
Page 187: Performing Initial Configuration (Bui)
BUI for initial configuration. For clustered controllers, configure only the primary controller. Do not attempt initial configuration on both controllers independently. For more information about clustering, see “Appliance Cluster Configuration” in Oracle ZFS Storage Appliance Administration Guide, Release OS8.6.x. Gather the following information for the interfaces and services you will set up, and ■... - Page 188 Log in to the appliance: Username - Enter root. Password - Password you assigned during system configuration. Click LOGIN or press Enter. To begin initial configuration, click START. Oracle ZFS Storage Appliance Installation Guide • December 2016...
- Page 189 Optionally, click SKIP to configure this device as a standalone controller, and go to Note - step 6. To configure clustered controllers later, see “Upgrading a Standalone Appliance to a Clustered Configuration (BUI)” in Oracle ZFS Storage Appliance Administration Guide, Release OS8.6.x. Configuring the Appliance for the First Time...
- Page 190 Root Password - Enter the same password that you set for the appliance during system ■ configuration. Confirm Password - Re-enter the password. ■ Click COMMIT. A status bar in the masthead displays the progress. Configure the appliance networking interfaces. Oracle ZFS Storage Appliance Installation Guide • December 2016...
- Page 191 Performing Initial Configuration (BUI) You can create a management interface now, or at another time using a task in Note - “Configuring Management Interfaces” in Oracle ZFS Storage Appliance Administration Guide, Release OS8.6.x. For detailed information, see the following topics: “Working with Network Configuration”...
- Page 192 Performing Initial Configuration (BUI) For detailed information, see the following tasks: “Creating a VNIC Without a VLAN ID for Clustered Controllers (BUI)” in Oracle ■ ZFS Storage Appliance Administration Guide, Release OS8.6.x “Creating VNICs with the Same VLAN ID for Clustered Controllers (BUI)” in Oracle ■...
- Page 193 Performing Initial Configuration (BUI) Click APPLY. For clustered controllers, repeat steps a-f for the second controller, and choose a unique controller name. Click the trash icon next to the default interface, named Untitled Interface, to destroy it and click APPLY. Configuring the Appliance for the First Time...
- Page 194 Note - appliance via the BUI and CLI. Without a route, the only means of communication with the appliance is through an Oracle ILOM connection to the SP. To configure additional routing, go to step 7. Otherwise, click COMMIT and skip to step 8.
- Page 195 Performing Initial Configuration (BUI) Interface - Select the interface for which you want to configure routing. ■ Click ADD. The new route appears in the routing table. Click COMMIT. Configure the Domain Name Service (DNS) and click COMMIT. Configuring the Appliance for the First Time...
- Page 196 One way to ensure clock synchronization is to configure the appliance and the SMB clients to use the same NTP server. Oracle ZFS Storage Appliance Installation Guide • December 2016...
- Page 197 Performing Initial Configuration (BUI) For detailed information, see “NTP Configuration” in Oracle ZFS Storage Appliance Administration Guide, Release OS8.6.x. Configure name services. For detailed information, see “Configuring Services” in Oracle ZFS Storage Appliance Administration Guide, Release OS8.6.x. Active Directory has two modes: domain and workgroup mode, which dictate how Note - SMB users are authenticated.
- Page 198 “Configuring Storage” in Oracle ZFS Storage Appliance Administration Guide, Release OS8.6.x. Perform one of the following steps: To register your appliance for remote support, complete the fields and click ■ REGISTER. Oracle ZFS Storage Appliance Installation Guide • December 2016...
- Page 199 Performing Initial Configuration (BUI) If you do not have an Oracle support account, click LATER and see “Phone Home Configuration” in Oracle ZFS Storage Appliance Administration Guide, Release OS8.6.x. To skip remote support configuration, click LATER. ■ Perform one of the following steps: If you clicked REGISTER in the previous step, read the privacy statement ■...
- Page 200 “Upgrading the Software” in Oracle ZFS Storage Appliance ■ Customer Service Manual. If clustered controllers, see “Locking Cluster Management Interfaces (BUI)” in Oracle ZFS ■ Storage Appliance Administration Guide, Release OS8.6.x. Oracle ZFS Storage Appliance Installation Guide • December 2016...
-
Page 201: Performing Initial Configuration (Cli)
Performing Initial Configuration (CLI) If you did not configure the management interface yet, see the tasks in “Configuring ■ Management Interfaces” in Oracle ZFS Storage Appliance Administration Guide, Release OS8.6.x. Related Topics For an overview of network interface configuration, see “Working with Network... - Page 202 Press any key to begin initial configuration ... Configure the appliance network interfaces. For detailed information, see the following topics: “Working with Network Configuration” in Oracle ZFS Storage Appliance Administration ■ Guide, Release OS8.6.x “Network Configuration” in Oracle ZFS Storage Appliance Administration Guide, Release ■...
- Page 203 Configure routing for the interface labeled Untitled Interface. Enter cd .. to return to the correct context for the next step. For detailed information, see “Configuring Network Routing” in Oracle ZFS Storage Appliance Administration Guide, Release OS8.6.x. hostname:maintenance system setup net> routing hostname:maintenance system setup net routing>...
- Page 204 ../.. Configure the Domain Name Service (DNS). For detailed information, see “DNS Configuration” in Oracle ZFS Storage Appliance Administration Guide, Release OS8.6.x. Configure DNS. Configure the Domain Name Service. Oracle ZFS Storage Appliance Installation Guide • December 2016...
- Page 205 Performing Initial Configuration (CLI) Subcommands that are valid in this context: help [topic] => Get context-sensitive help. If [topic] is specified, it must be one of "builtins", "commands", "general", "help", "script" or "properties". show => Show information pertinent to the current context commit =>...
- Page 206 "ntp", advancing configuration to "directory" ... Configure name services. For detailed information, see “Configuring Services” in Oracle ZFS Storage Appliance Administration Guide, Release OS8.6.x. Oracle ZFS Storage Appliance Installation Guide • December 2016...
- Page 207 Performing Initial Configuration (CLI) Active Directory has two modes: domain and workgroup mode, which dictate how Note - SMB users are authenticated. In domain mode, SMB clients are authenticated through the Active Directory domain controller, and you must ensure that the times on the appliance and the domain controller match within five minutes.
- Page 208 = pool-0 status = online profile = mirror log_profile = - cache_profile = - hostname:maintenance system setup storage> done aksh: done with "storage", advancing configuration to "support" ... Configure remote support. Oracle ZFS Storage Appliance Installation Guide • December 2016...
- Page 209 Performing Initial Configuration (CLI) You can configure remote support now, or at another time. If you do not have an Oracle Note - support account, enter done without configuring remote support and complete it later. For more information about configuring remote support later or obtaining an Oracle support account, see “Phone Home Configuration”...
- Page 210 Oracle ZFS Storage Appliance Installation Guide • December 2016...
-
Page 211: Troubleshooting Hardware Faults
In rare cases, faults associated with uncorrectable CPU errors are not diagnosable or displayed in the controller. These faults will be preserved by and observable in the Oracle ILOM, located in the service processor. Connect to Oracle ILOM on the server platform to diagnose hardware faults that do not appear in the BUI. -
Page 212: Oracle Zfs Storage Appliance Installation Guide • December
Oracle ZFS Storage Appliance Installation Guide • December 2016...
Need help?
Do you have a question about the ZS5 SERIES and is the answer not in the manual?
Questions and answers