
Subscribe to Our Youtube Channel
Summary of Contents for Sinexcel SVG 100 Ultra
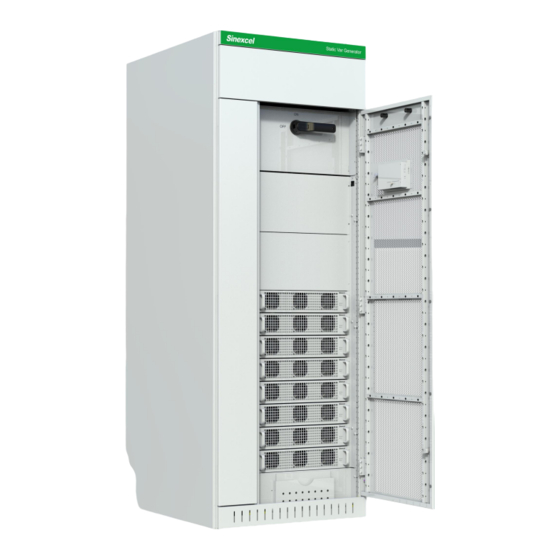
- Page 1 Sinexcel Ultra Static Var Generator (SVG) --USER MANUAL Sinexcel Electric Co., Ltd...
-
Page 2: Safety Precautions
SAFETY INSTRUCTIONS Thank you for choosing Sinexcel Ultra Static Var Generator (SVG) module. Please read the safety instructions carefully before using and ensure that the unit is operated according to the instructions in this manual. The safety instructions contain important information, which ensure that you can safely and properly use the product and prevent personal injury or property damage. -
Page 3: Wiring Precautions
CAUTION Reserve enough space around the equipment, so as to maintain good ventilation and easy maintenance access and operation. CAUTION Read the user manual carefully before connecting the power, and keep it easily accessible for future reference. WIRING PRECAUTIONS WARNING This equipment has a leakage current from 3.5mA to 1000mA. -
Page 4: Storage Precautions
CAUTION The SVG must be used with external current transformers. CAUTION To ensure SVG has good reliability and to avoid overheating, do not block or cover the air inlet/outlet. CAUTION No corrosive gas and conductive dust is allowed in the working environment. - Page 5 CAUTION After 1-3 years of storage in a sealed environment with a temperature not exceeding 40 degrees, the first time you turn on the power without turning it on, keep it for more than 1 hour to activate the internal electrolytic capacitor.
-
Page 6: Product Identification
For the module with other type certification that the nameplate will show it in the top right-hand corner indicating the certification. Sinexcel reserves the right to update nameplates. This means that Sinexcel has the authority to make changes to the nameplates on their products, which may include updating information such as the model... - Page 7 For example: Sinexcel SVG Ultra 100K 44L HL represents the Sinexcel Ultra SVG series, with a module capacity of 100K. It is suitable for use in 400V three-phase four-wire low-voltage systems. The module is a wall-mounted type with a 4.3-inch Human-Machine Interface screen.
- Page 8 Note: The table is showed the Sinexcel standard SVG module, which customer can order from March 2023, DOCUMENT REVISION Revision Date Revised Content 2023/09/06 Integrate user manual information 2023/11/01 Revised detailed information Sinexcel reserves the right to make modification to the device or the unit specifications set out in the user manual without prior notice. VIII...
-
Page 9: Table Of Contents
CONTENT SAFETY INSTRUCTIONS ........................II SAFETY PRECAUTIONS ........................II WIRING PRECAUTIONS ........................III PRECAUTIONS FOR USE ........................III STORAGE PRECAUTIONS ........................IV PRODUCT IDENTIFICATION ......................VI DOCUMENT REVISION ........................VIII CHAPER I PRODUCT DESCRIPTION ..................13 1.1 PRODUCT INTRODUCTION ...........................13 1.2 PRODUCT FEATURES ............................13 1.3 WORKING PRINCIPLE ............................ - Page 10 APPENDIX Ⅰ SINEXCEL ULTRA SVG SPECIFICATION ............. 15 APPENDIX Ⅱ HUMAN-MACHINE INTERFACE ..............16 7-INCH INTERFACE & DIMENSIONS .......................16 SINEXCEL 7-INCH HMI RECORDING AND DOWNLOAD FUNCTION ........... 17 SINEXCEL HMI HOLIDAY FUNCTION .......................22 SINEXCEL 7-INCH HMI HIGHER LEVEL PASSWORD PARAMETER INTRODUCTION ....23 SINEXCEL 4.3-INCH HMI HIGHER LEVEL PASSWORD PARAMETER INTRODUCTION ..28...
- Page 11 READ THE PARAMETERS OF THE DEVICE (EACH HARMONIC COMPENSATION MODE) ....73 SETTING PARAMETERS OF DEVICE ..........................73 ACQUIRE FAULT RECORD ...............................74 SINEXCEL MODBUS APPLICATION ........................75 MODBUS TCP/IP ................................75 MODBUS RTU ................................76 APPENDIX Ⅳ ICMS-P2 INTERGRATED CONTROL MONITORING SYSTEM ..78 INTERFACE &...
- Page 12 CT SPECIAL APPLICATION INSTALLATION ........................89 APPENDIX Ⅷ CABLE SIZING ....................90 APPENDIX Ⅸ System power on and shutdown ................91 POWER ON STEPS .................................... 91 POWER OFF STEPS................................... 91 AUTO POWER ON .................................... 91 EMERGENCY STOP................................... 91 APPENDIX Ⅺ Sinexcel COMMON FAULT DIAGNOSIS ..............92...
-
Page 13: Chaper I Product Description
456V, and lower limit is 228V (For 400V module). High Accuracy: Sinexcel SVG Ultra has a high level of accuracy, with a compensation rate of up to 99%, User-friendly Interface: Sinexcel SVG Ultra features a user-friendly interface that allows users to easily set parameters and monitor the performance of the system. -
Page 14: Product Details
Please refer to Fig. 1-9 for the appearance and size of Ultra CE 220V 100kVAr rack-mounted type. Note: Sinexcel Ultra series, the standard wall mounted is with LCD, the standard rack mounted is with LED. If needs other type module, please discuss with Sinexcel's engineer. - Page 15 Figure 1- 4 Sinexcel Ultra CE 220V 25kVAr wall-mounted Figure 1- 5 Sinexcel Ultra CE 220V 25kVAr rack-mounted Figure 1- 6 Sinexcel Ultra 50kVAr SVG wall-mounted Figure 1- 7 Sinexcel Ultra 50kVAr SVG rack-mounted Figure 1- 8 Sinexcel Ultra CE 220V 100kVAr wall-mounted...
- Page 16 Please refer to Fig. 1-17 for the appearance and size of Ultra CE 400V 200kVAr rack-mounted type. Note: Sinexcel Ultra series, the standard wall mounted is with LCD, the standard rack mounted is with LED. If needs other type module, please discuss with Sinexcel's engineer.
- Page 17 Figure 1- 14 Sinexcel Ultra CE 400V 100kVAr wall-mounted Figure 1- 15 Sinexcel Ultra CE 400V 100kVAr rack-mounted Figure 1- 16 Sinexcel Ultra CE 400V 200kVAr wall-mounted Figure 1- 17 Sinexcel Ultra CE 400V 200kVAr rack-mounted...
-
Page 18: Wiring Terminal
The wiring terminal is located at the rear side of the module, including power terminal, CT terminal and communication terminal. Figure 1- 18 Sinexcel Ultra SVG Terminal Table 1- 1 Sinexcel Ultra SVG Terminal Definition COM_A 422 communication port used for multiple module parallel... - Page 19 EPO_A To parallel the EPO signal of each module To parallel the EPO signal of each module EPO_A To parallel the EPO signal of each module To parallel the EPO signal of each module CT_A Connected to S1 of phase L1 CT GND_A Connected to S2 of phase L1 CT CT_B...
-
Page 20: Cabinet Solution
The size Sinexcel provided for Flexi Cabinet and Top-Vent cabinet in the table, which not including the structure of the door. Note: The table only list the Sinexcel Ultra module solution, if need other type module cabinet solution, please contact the Sinexcel’s engineer;... - Page 21 Sinexcel ensures that customers can find the right cabinet for their specific application. Multiple capacities can choose: In addition to the four size options, the Sinexcel Flexible Cabinet also offers customers multiple capacity configurations to choose from, Sinexcel support to install 100~800K SVG capacity inside of the cabinet.
- Page 22 Used for the incoming cables, no restrict for incoming cables position. ⑥ Note: Sinexcel Flexi Cabinet 1 (600*1000*2200mm), the copper low is the back position of the cabinet; The other 3 types of cabinets, the copper low are in the side cabinet.
- Page 23 1.4.3.2 TOP-VENT CABINET Sinexcel's top-vent cabinet is a versatile and space-saving solution that can be directly installed against the wall. The cabinet is available in two different sizes, providing customers with 2 options to choose according on their specific needs and requirements.
- Page 24 2 options to choose according to their specific needs and requirements. The two different sizes of IP54 cabinets offered by Sinexcel provide customers with flexibility in choosing the right cabinet for their specific application. The smaller size is ideal for applications with limited space, while the larger size is suitable for applications that require bigger capacity solution.
- Page 25 Figure 1- 29 Structure of Sinexcel IP54 Cabinet Table 1- 5 The definition of Sinexcel IP54 Cabinet structure Name Number Description Panel Front panel, back panel, right panel, left panel, top panel and bottom ① panel, which are made by hot-dip galvanized / cold-rolled steel sheets / aluminum-zinc coated sheets.
-
Page 26: Chapter Ii Installation And Wiring
Please note that the leakage current of the load will also flow through RCCB or RCD; the grounding of the device must meet the local electrical regulations CAUTION Sinexcel Ultra SVG should be installed in a clean, well-ventilated indoor environment. 2.2 ENVIRONMENT REQUIREMENTS ATTENTION The cold air enters SVG through the front grid of the module and hot air is discharged through the rear grid of the module. - Page 27 ATTENTION The ambient temperature at the time of installation must be -10℃ ~40℃. ATTENTION Ensure that there is no dust (can be conductive) or corrosive/explosive gases in the installation environment. ATTENTION The SVG MUST NOT be installed in an environment with strong magnetic fields, nuclear radiation or high-power RF noise.
-
Page 28: Installation
2.3 INSTALLATION NOTICE All the modules have the dust-proof stickers to protect the module from the dust while storing. The dust-proof stickers must be removed before the module is installed at site. Figure 2- 1 Dust-proof sticker... -
Page 29: Wall-Mounted
2.3.1 WALL-MOUNTED NOTICE For the wall-mount module, the distance from top side of the unit to the ceiling should be at least 500mm, and the bottom side should be at least 800mm from the floor. For wall mount module, the fixing screws are located at the top and bottom of the module. The module must be fixed vertically to a wall or support, using 4 screws with a diameter of 6mm to be suitable for the chosen wall or support. -
Page 30: Rack-Mounted
500mm, and the front side should be at least 800mm from the wall to allow for module extraction or insertion. Please contact Sinexcel if other occasions. There are four screws on the module that need to be installed for fixation, with a diameter of thread with a major diameter of 6 and a pitch of 12 to be suitable for the cabinet, switch gear. -
Page 31: Cabinet
When the cabinet is moved to the designated position, reattach the front and rear. Figure 2- 6 Cabinet Transportation Figure 2- 7 Lifting Cabinet Sinexcel flexible cabinet is free-standing cabinet with 4 bearing supports on the ground. NOTICE For the flexible cabinet, the distance from the rear side of the unit to the wall should be at least 800mm, and the front side should be at least 1000mm from the wall to allow for module extraction or insertion. -
Page 32: Top-Vent Cabine
Note: When moving the cabinet from the bottom of its front, disassemble the front and rear panel at the bottom. When the cabinet is moved to the designated position, reattach the front and rear panel. Sinexcel top-vent cabinet is free-standing cabinet with 4 bearing supports on the ground. Figure 2- 10 Front side... -
Page 33: Ip54 Cabinet
For the flexible cabinet, the distance from the rear side of the unit to the wall should be at least 800mm, and the front side should be at least 1000mm from the wall to allow for module extraction or insertion. Please contact Sinexcel if other occasions. -
Page 34: Connection
Before connecting the cables or electronics, please be sure to cut off the input power of the SVG device to avoid accidents. 2.4.1 SINGLE WALL MOUNTED Table 2- 1 Installation Steps of Sinexcel Single Wall-mounted Module Step One: Power Cables Connection Step Two: CT Connection... -
Page 35: Multiple Wall Mounted
2.4.2 MULTIPLE WALL MOUNTED Table 2- 2 Installation Steps of Sinexcel Multiple Wall-mounted Modules Step One: Power Cables Connection Step Two: L1 Phase CT Connection Step Three: L2 Phase CT Connection... - Page 36 Step Four: L3 Phase CT Connection Step Five: 7-Inch HMI Connection Note: If user need to use 7-inch Human-machine interface (HMI) to control the module, which need to operate as STEP FIVE;...
-
Page 37: Single Rack Mounted
2.4.3 SINGLE RACK MOUNTED Table 2- 3 Installation Steps of Sinexcel Single Rack-mounted Module Step One: Power Cables Connection Step Two: CT Connection Step Three: 7-Inch HMI Connection... -
Page 38: Multiple Rack Mounted
2.4.4 MULTIPLE RACK MOUNTED Table 2- 4 Installation Steps of Sinexcel Multiple Rack-mounted Modules Step One: Power Cables Connection Step Two: L1 Phase CT Connection... - Page 39 Step Two: L3 Phase CT Connection Step Four: 7-Inch HMI Connection...
-
Page 40: Cabinet
2.4.5 CABINET Table 2- 5 Installation Steps of Sinexcel Cabinet Step One: Power Cables Connection Step Two: CT Connection... - Page 41 Cabinet connection notice: WARNING Must be performed by qualified engineers. WARNING Before wiring, make sure the switch in distribution room of SVG system input power and city power are in “off” state, and warning label is attached to prevent any other person from handling the switch. NOTICE Confirm all input distribution power switches are completely off NOTICE...
-
Page 42: Cable
An open circuit of CT secondary polarity is not allowed. NOTICE Sinexcel module is support 3P3W and 3P4W at the same time, according to circuit calculation, for 3P3W system only needs two CTs connect to L1 and L3; For 3P4W system needs three CTs connect to L1, L2 and L3. - Page 43 2.5.1.3 SINGLE MODULE CT CONNECTIS ON THE LOAD SIDE Figure 2- 14 3-Phase 4-Wiring System Figure 2- 15 3-Phase 3-Wiring System CT CONNECTIS ON THE SUPPLY SIDE Figure 2- 16 3-Phase 4-Wiring System Figure 2- 17 3-Phase 3-Wiring System...
- Page 44 2.5.1.4 MULTIPLE MODULES CT CONNECTIS ON THE LOAD SIDE Figure 2- 18 3-Phase 4-Wiring System Figure 2- 19 3-Phase 3-Wiring System CT CONNECTIS ON THE SUPPLY SIDE Figure 2- 20 3-Phase 4-Wiring System Figure 2- 21 3-Phase 3-Wiring System CT CLOASED LOOP DESIGN__ONE SET OF CT INSTALLATION FOR MULTIPLE MODULES IN SUPPLY SIDE Figure 2- 22 3-Phase 4-Wiring System Figure 2- 23 3-Phase 3-Wiring System...
- Page 45 2) After installing the new module, push gliding slab 3, 8 and 13 of CT terminal to “breaking” state. To assist customers in simplifying the wiring of current transformers (CTs) when using Sinexcel cabinets, Sinexcel has introduced CT terminal blocks.
- Page 46 When user chooses Sinexcel cabinet solution, which for all the wiring between modules will be completed in Sinexcel factory. The only two that user need to connect are external CT and power cables. During the maintenance, please follow the below steps.
-
Page 47: Communication Connection
2.5.2 COMMUNICATION CONNECTION The Sinexcel 7-inch HMI is designed for centralized control of Sinexcel modules, the HMI provides a clear and detailed display of the status and performance of the modules, allowing for easy monitoring and management of the system, which only needs the function that connect the J22 as the module. -
Page 48: Can Communication Cable
2.5.4 CAN COMMUNICATION CABLE NOTICE When you parallel the rack mounted modules that need to connect the communication cable, which to meet the communicate between the modules. Figure 2- 30 The position of CAN Note: The function of CAN, which is to communicate between modules. 2.5.5 DIP SWITCH The dip switch is on the rear side of the module is used when using 7-inch HMI to control rack-mounted LED modules, which to identify the individual modules by giving them an address via the dip switch. - Page 49 The relationship between the dip switch and the machine number is expressed in binary, as shown in Table 2-8 below: Table 2- 8 For example, if there three 100K SVG rack-mounted connection, which for the dip switch should be: Table 2- 9 Dip Switch Setting Dip Switch The first module 0000...
-
Page 50: Chapter Iii Commissioning
Ensure and connections are correct, safe and follow the manufacturer's instructions. Sinexcel 4.3-inch HMI is a fully touchscreen, color visualizing and intelligent monitoring system, which is a leading provider of power electronics solutions. It provides real-time monitoring of power distribution systems, helping users to quickly identify and diagnose any issues that may arise. -
Page 51: Data Interface
Data Page When user chooses the 'Data Page' that Sinexcel HMI shows more power quality data, like 'Voltage', 'Current', 'Power Analysis', 'IO & Temp.', 'Debugging', 'Version' and 'CT Check' Setting Page After completing the physical installation, it is necessary to enter the settings interface to configure the parameters. - Page 52 Click the 'Waveform' on Grid Voltage that can see waveforms of grid voltage and grid current. The red line represents grid voltage, and the green line represents grid current. After watching, click “back” to back to data interface. Waveform Click the 'Spectrum' on Grid Voltage that can see spectrum of grid voltage and grid current.
- Page 53 The 'Comp. Current' display the output Current (A) and Load Rate (%) of L1/L2/L3 phase. Also can display Waveform and Spectrum. Comp. Current (Compensated Current) Click 'Power' option in the data menu that can be real-time see the data of Apparent (KVA), Active (KW), Reactive (KVAr) and PF of Grid L1/L2/L3 and Load L1/L2/L3.
- Page 54 The 'Pos./Neg. bus vol.' are used to see the value of voltage on different bus. The 'Controller Para. P/Q/R' are used for Sinexcel inter factory test. Debugging Click 'Version' option in the data menu that can be real-time see the data of Software Version, System Model and Expiry Days.
-
Page 55: Parameter Setting Introduction
3.1.2 PARAMETER SETTING INTRODUCTION The “General Settings” can be accessed using The '080808' password and is suitable in most applications for system commissioning by the user. Table 3- 1 General Operation Mode Power On Mode CT Location Total Capacity NO POW. COMP. 123 Comp. - Page 56 Auto-aging Operation Reactive (Only factory of Sinexcel testing. User shall be forbidden to use.) Mode Mixed mode: Used for mixed solution, AHF+SVG Balancing (Refer to document <One Centralized HMI to Control SVG&SVG Mixed Mode Hybrid System>...
- Page 57 Note: Not used for SVG. Limit the biggest output of the module. For example, input 0.9 means the biggest capacity of the machine Derating is 90% of its rated capacity. Value Coeff Note: Do not change it without the guidance of Sinexcel engineer.
-
Page 58: Record Introductions
History Sinexcel's historical alarm function in monitoring displays all alarms that have occurred since the system was installed, with a maximum record of 500 alarms. This feature allows users to review past alarms and identify any recurring issues or patterns. -
Page 59: Commissioning Step With 4.3-Inch Hmi
310V (for 480V module should be both around 400V). If the result shows abnormal data, do not power on the module. Try resupply the power to the module, if there is still abnormal bus voltage, contact Sinexcel product engineer for support. Figure 3- 2 pos/neg. bus vol. -
Page 60: Check Whether The Data In The Hmi Is Matching External Meter
3.2.2 CHECK WHETHER THE DATA IN THE HMI IS MATCHING EXTERNAL METER. Figure 3- 3 Main page of Ultra SVG If the data in the HMI is matching external meter, it means the CT wiring probably is correct. The user could use CT auto check function to double check. -
Page 61: Parameter Setting
3.2.3 PARAMETER SETTING . The table below are parameters needed to set up Sinexcel 4.3-inch HMI; Table 3- 3 Parameter setting in HMI Operation Mode Total Capacity Comp. Rate Comp. Mode CT Ratio Power On Mode CT Location Take SVG 100K for example, assuming SVG is used for reactive power compensation, and the CT ratio on site is 300:5. -
Page 62: 7-Inch Hmi Introduction
3.2 7-INCH HMI INTRODUCTION Sinexcel 7-inch HMI is typically used to control multiple modules, making management more convenient. It features a full touch screen and a colorful visual display for monitoring. Figure 3- 2 The position of 7-inch HMI NOTICE Ensure and connections are correct, safe and follow the manufacturer's instructions. -
Page 63: Info' Illustrate
There's 7 parts in Sinexcel 7-inch HMI, 'Main', 'Info.', 'Records', 'Settings', 'Help', 'About' and 'Back' Main Screen with drop-down selection Note: click on to get a drop-down selection 3.2.1 'INFO ' ILLUSTRATE The 'BASIC' can be real-time observe the data of RMS(A), PF, THDi(%), Vol.(V), Fre.(Hz) and THDu(%) of Grid... - Page 64 The 'WAVES' can be real-time see all current and voltage waveform of each phase. Display four kinds of waveforms, Comp. I L1/L2/L3, Grid I L1/L2/L3, Grid L1/L2/L3 Load L1/L2/L3. Click , pop-up menu, select the waveform displayed in the color. 'Comp.
-
Page 65: Record Introduction
History Sinexcel's historical alarm function in monitoring displays all alarms that have occurred since the system was installed, with a maximum record of 500 alarms. This feature allows users to review past alarms and identify any recurring issues or patterns. -
Page 66: Parameter Setting Introduction
3.2.3 PARAMETER SETTING INTRODUCTION The “General Settings” can be accessed using The '080808' password and is suitable in most applications for system commissioning by the user. Table 3- 5 General Operation Mode Target Power Factor Comp. Rate Total Capacity Comp. Mode CT Ratio Power On Mode Slave Module Quantity... - Page 67 Auto-aging: The module outputs current according to set compensation rate, which tests whether the module can output Auto-aging normally. Reactive (Only factory of Sinexcel testing. User shall be forbidden to use.) Balancing Mixed mode: Used for mixed solution, AHF+SVG Mixed Mode Operation (Refer to document <One Centralized HMI to Control SVG&SVG...
- Page 68 Source side: CT installation position is closer to the grid transformer side than the power access point of the module. Source side Load side: CT installation position is closer to the load side than the According to CT location Load side power access point of the module.
- Page 69 required by the load. This function can be used to compensate for the reactive power generated by the SVG itself or to compensate for [-3000, 3000] magnetising reactive power required by the upstream transformer, typically when the utility meter the client on the primary side of kvar transformer, but SVG system is installed on secondary side.
-
Page 70: Parameter Setting
3.2.4 PARAMETER SETTING The table below are parameters needed to set up Sinexcel 7-inch HMI; Table 3- 7 Parameter setting in HMI Operation Mode Total Capacity Comp. Rate Comp. Mode CT Ratio Power On Mode Slave Module Quantity CT Location Take one 500K SVG system for example. -
Page 71: Help
3.2.5 HELP There are eight common types of alarms, for detailed explanations, please refer to Appendix X. 3.2.6 ABOUT The system software version information For example: Machine Cod 000000 Version M317D000B000 (M: Monitor version, D:DSP version) System Mode 380-0/0-4-0 Expiry Days(d) Forever... -
Page 72: Appendix Ⅰ Sinexcel Ultra Svg Specification
APPENDIX Ⅰ SINEXCEL ULTRA SVG SPECIFICATION Sinexcel Ultra Series SVG Items Rating 30K/50K 100K Function Reactive power and three-phase unbalance compensation System parameters Nominal voltage 380/400/415V(228-456V) L-N voltage 220/230/240V (127-263V) Nominal frequency 50/60Hz, auto sensing(Range : 45Hz~62.5Hz) Parallel quantities Unlimited... -
Page 73: Appendix Ⅱ Human-Machine Interface
APPENDIX Ⅱ HUMAN-MACHINE INTERFACE 7-INCH INTERFACE & DIMENSIONS Figure A- 1 Dimensions of Sinexcel 7-inch HMI Sinexcel 7-inch HMI, which the size is W226*D61.2*H135mm. Figure A- 2 Structure of Sinexcel 7-inch HMI... -
Page 74: Sinexcel 7-Inch Hmi Recording And Download Function
SINEXCEL 7-INCH HMI RECORDING AND DOWNLOAD FUNCTION The data recording and downloading function of Sinexcel Electric 7inch HMI, which can be accessed from two interfaces. The first part shows the data recorded automatically by HMI, mainly historical alarms and data, and the other interface is the data and setting information collected manually by users. - Page 75 Alarm records (historical equipment alarm information) and operation records (historical manual setting records) can be exported 500 records each. Fault point information: HMI automatically record module's fault information for Sinexcel R&D analysis (including hardware and software faults: inverter, relay, capacitor, hall, soft start, auxiliary power supply, etc.;...
- Page 76 Step 2: Data Record-Start Recording Figure A- 5 Sinexcel 7-inch HMI Data Record-Start Recording Record Interval(s): 1 (1 second, default setting) Setting range: 1~70 (1 second to 70 seconds record interval), can be manually set by the customer. The minimum interval time is 1 second, the maximum interval time is 70 seconds to record a record. A total of 8, 640 pieces of data will be recorded.
- Page 77 Figure A- 6 Sinexcel 7-inch HMI Data Record Setting Step 3: Insert the USB into the HMI Insert the USB flash drive on the side of the monitor. Figure A- 7 Sinexcel 7-inch HMI USB Port Start Recording, Pause Recording, Stop Recording, Data Export Click “Start Recording”, then the HMI will start recording the data of certain module or the entire system.
- Page 78 Figure A- 8 Sinexcel 7-inch HMI PO Record Data Figure A- 9 Sinexcel 7-inch HMI Data Export...
-
Page 79: Sinexcel Hmi Holiday Function
SINEXCEL HMI HOLIDAY FUNCTION The power saving function can help user manage the working day and hour of the module according to the specific requirement of the site. Another mode is energy saving shutdown mode, it could be set to power off the module when the load rate of the SVG is lower than certain percentage. -
Page 80: Sinexcel 7-Inch Hmi Higher Level Password Parameter Introduction
SINEXCEL 7-INCH HMI HIGHER LEVEL PASSWORD PARAMETER INTRODUCTION Table A- 3 Sinexcel 7-inch HMI higher level password parameter introduction Parameter Meaning and Function of Parameter Options Default Unit setting This function is not used for SVG; it can realize capacitive reactive power compensation. - Page 81 PLL: Phase-Locked Loop Lock the phase angle of the grid and default enabling. Enable Enable Disable Note: Do not change it without the guidance of Sinexcel engineer. Ext. When AHF works with external passive filters together to 3~51 Value...
- Page 82 Value before. Eg. If the external power quality analyzer shows the grid THDI is 10%, while Sinexcel HMI shows 12%, you can change the setting of “L1/L2/L3_grid_THDI_config.” to 10/12=0.83 to calibrate Sinexcel HMI. The module will power off automatically when the load rate is lower than certain value.
- Page 83 Limit the biggest output of the machine. For example, input 0.9 means the biggest capacity of the machine is 90% of its rated capacity. Value Derating Factor Note: Do not change it without the guidance of Sinexcel engineer. Only used by R&D of Sinexcel Enable Disable Test Mode Note: Prohibit change.
- Page 84 The phase angle adjustment needs to be adjusted according -180~180 ° to the actual situation on site, normally try from -1~-0.1, then 0.1~1 (accuracy is 0.01), to check whether the compensation effect is better. Note: No need to modify, if want to change, please contact with Sinexcel engineer.
-
Page 85: Sinexcel 4.3-Inch Hmi Higher Level Password Parameter Introduction
SINEXCEL 4.3-INCH HMI HIGHER LEVEL PASSWORD PARAMETER INTRODUCTION Table A- 4 Sinexcel 4.3-inch HMI higher level password parameter introduction Parameter Meaning and Function of Parameter Options Default Unit setting According 3P3W Network Set the network structure of module. It should be same as the actual Config. - Page 86 In the past it's for R&D only, will be deleted from the interface. Disable Apparent Transformer parameter. capacity >0 2000 Value Note: Do not change it without the guidance of Sinexcel engineer. (kva) Transformer parameter. >0 Value Note: Do not change it without the guidance of Sinexcel engineer. Transformer parameter. Rated >0...
- Page 87 Lock the phase angle of the grid and default enabling. Enable Disable Note: Do not change it without the guidance of Sinexcel engineer. Enable: The equipment will give an alarm and stop outputting current when its input-current goes wrong. Disable: The equipment will keep outputting current when its input-current goes wrong.
- Page 88 Generally, this setting is not changed, but when the customer feels Fan gear that the machine is noisy, you can contact the engineer of Sinexcel to adjust it. When the Grid THDU of L1/L2/L3 phase shown in the HMI is different with the Grid THDU of L1/L2/L3 phase measured by the power quality detector.
-
Page 89: Sinexcel 7-Inch Hmi Software Upgrade Instruction
SINEXCEL 7-INCH HMI SOFTWARE UPGRADE INSTRUCTION Tools required for upgrade: Large SD card + card reader or Large SD card + USB Flash disk Note: The capacity of SD card should be 2G to 16G, otherwise the HMI cannot read the SD card. - Page 90 DiskGenius) and use the software to format it to'FAT32'. Step 2: Find the firmware ZIP file provided by Sinexcel (different HMI has different software version), the firmware folder includes two packages'DWIN_SET', 'monitor.tar.gz'. ('DWIN_SET' is to upgrade monitor screen interface, 'monitor.tar.gz' is used to upgrade the monitor board, as shown in below Figure).
- Page 91 Wait for 10 seconds, HMI will start the upgrade process by itself. The HMI screen will turn into blue and start to flash the picture, wait until the flashing process is finished, then the HMI will reboot. Figure A- 17 Updating Step 4:...
- Page 92 Figure A- 19 HMI Version Check Step one: Click the menu and choose ‘ABOUT’; Step two: Check the version;...
-
Page 93: Sinexcel 4.3-Inch Hmi Software Upgrade Instruction
SINEXCEL 4.3-INCH HMI SOFTWARE UPGRADE INSTRUCTION Step 1: Use DuPont Lines to connect the J-link connector to the PCBA board corresponding terminals referring to the figure and table below. The green indicator light stays on when the connection complete. For SWD connector:... - Page 94 Step 2: Check the Drivers of J-Link in Device Manager. The drivers will be installed automatically when insert the J-Link connector to PC. Figure A- 20 J-Link connect Step 3:I nstall Setup_JLinkARM_V486b.exe JLINK root directory to find J-Flash, run the program. Figure A- 21 Application...
- Page 95 Step 4:Option-->Project Settings-->CPU Device Options-- choose chip type--STM21F103VET6 Figure A- 22 Option Figure A- 23 STM21F103VET6...
- Page 96 Step 5:Option-->Project Settings-->Target Interface Choose ‘SWD’. And click ‘OK’. Figure A- 24 SWD Step 6:Target-->Connect JLINK Figure A- 25 Target...
- Page 97 Step 7:APF-105.hex put into J-flash (Different hex software according to different units’ version) Figure A- 26 Target Memory Step 8: Target-->Connect JLINK;Target-->Program(F5) Completed Figure A- 27 Connecting...
- Page 98 Step 9: The user need to prepare a micro SD card first. Samsung or Kinston brand is better. Please format SD card with computer. When you format the SD card, the File system please select ‘FAT32’, the Allocation unit size please select ‘4096 bytes’. Then click start to complete formatting. Figure A- 28 Format SD Card Step 10: There is a file named “DWIN_SET.zip”, unzip this package and you can get a folder named...
- Page 99 Step 11: Turn off the power of module There is a SD card interface right behind the display screen, put the SD card into the interface. Pay attention that HMI has two circuit boards: monitor board and control board, each circuit board has a SD card interface, do not make it wrong.
- Page 100 Step 12: Turn on the power of module. The HMI software will update automatically. If you see the screen turn blue, it means the HMI will start the update. During the update, you can see the display screen is changing fast, this is normal. When the display screen stop changing, it means HMI software update is done.
-
Page 101: Sinexcel Factory Calibration For Svg Module
SINEXCEL FACTORY CALIBRATION FOR SVG MODULE Before delivery of the module, Sinexcel will perform a calibration in the following four aspects: the parameter settings of Inductor current, CT Current, Inverter Current and Input Voltage in corresponding HMI interfaces. This document is to illustrate the calibrating process. - Page 102 Set the operation mode to ‘Auto-ageing’. Set the ‘Inductor Current config.’ to ‘Capacitive’ and set ‘Comp. Rate’ to 0.8.
- Page 103 Set the ‘CT location’ to ‘Load Side’ and check the exterior CT is connected properly. And please set the Wire system (Network Config) to ‘3P4W’. 5) Before testing, it’s essential to examine the data interface of the Grid Voltage, the Waveform and Comp.
- Page 104 2. Input Voltage Configuration 1) Keep the module in standby. 2) Use the Multimeter to measure the Phase Voltage of three-phase and record. 3) Fill in the measurement value in the corresponding items shown below. 4) Back to the Data interface and check the ‘Grid Voltage’. Normally its showing Voltage data should be approximated to the number which you input in procedure 3).
- Page 105 3. CT Current Configuration (without loads) & Inverter Current Config. interface 1) Power-on and wait till the Comp. current is stable. Figure A- 35 Power ON 2) Use the Current clamp to measure the Line current of L1/L2/L3 where the CTs placed in. 3) Input the same data in Settings-CT current config interface and Inverter Current Config interface.
- Page 106 4. Inductor Current Configuration 1) Remain Power-on. 2) Set the Inductor current config to ‘Capacitive’. Figure A- 36 Inductor Current Config. 3) Back to the comp current interface to check compensating current change. Wait till the current is stable. 4) Use the Current clamp to measure the Line current of L1/L2/L3. 5) Calculate the average number of 4) and Inverter Current Config for each phase which represented to the Inductive current and the capacitive current.
-
Page 107: Appendix Ⅲ Dry Contact Board Introduction
APPENDIX Ⅲ DRY CONTACT BOARD INTRODUCTION INTERFACE & DIMENSIONS Figure A- 38 Dimensions of Dry Contact Board Sinexcel dry contact board, which the size is W130*D40*H87mm. Figure A- 39 Structure of Dry Contact Board... -
Page 108: Rj45 Ethernet Port
RJ45 ETHERNET PORT Sinexcel offers Modbus protocol and RJ45 Ethernet port. The user can access the module to the user LAN through the network cable, then establish communication between the user Ethernet monitoring system and the module based on Modbus. -
Page 109: Output Dry Contact 1
This dry contact is used to monitor the on/off status of the module. As shown in the figure 3, Pin 2 always output high level: VDD. Pin 1 and Pin 3 have two level: high level “VDD” and low level “0”. In order to monitor the module power status, there is need to measure the output level of Pin 1 and Pin 3. -
Page 110: Input Dry Contact
INPUT DRY CONTACT Figure A- 43 Dry contact input As shown in figure 5, there are four input ports. Pin 2 and Pin 4 are connected to GND. If input high level “VDD” to Pin 1, the module will turn off. If input low level "0" to Pin 1, the module will ... -
Page 111: Dry Contact Board Install Position
For SVG Ultra series module, the dry contact board space is reservced at the rear side of the module. The red circle below is the position of dry contact board installed in Sinexcel Ultra SVG Figure A- 44 SVG wall-mounted Ultra dry contact board position... -
Page 112: Dry Contact Board Connection Guidance
RJ45 Ethernet port on the dry contact board, they must connect two ports through one 10-pin cable. Sinexcel will send customers the 14-pin cable and the 10-pin cable if required. Figure A- 46 Connection to 4.3-inch LCD panel... -
Page 113: Connect To 7-Inch Hmi
When the dry contact board working with 7-inch HMI, usually the dry contact board is installed outside the module. Sinexcel offers 2 kinds of boxes for customer to protect the board, one is in black and one is in grey (RAL 7035),... -
Page 114: Appendix Ⅳ Modbus
APPENDIX Ⅳ MODBUS MODBUS PROTOCAL OUTLINE Protocal Overview MODBUS is an application layer protocol and widely used in industrial control. It is the de facto industry standard. This protocol describes the MODBUS communication protocol implemented in Sinexcle product family. Communication uses response mode, the host sends request, then the slave to execute request and response. -
Page 115: Communication
Floating-point storage format is four bytes, using IEEE32 bit standard Floating-point format (Standard C language format). First transmit high bytes D31~D24, second D23~D16, third D15~D8, last transmit low bytes D7~D0. COMMUNICATION Communication applies Master-Slave mode, monitor as the host and DSP module as the slave; or backstage software as the host, monitor as the slave. - Page 116 Request Frame: Register Start Address Register Quantity Format Address Function Code Check High High Byte Response Frame: Format Address Function Code Byte Quantity Data Check Byte …… Byte Quantity = Register Quantity * 2 For example, to get the first frame data (50 analog data): Tx: 01 04 00 00 00 64 F1 E1 ...
-
Page 117: Request/Response Information Details
REQUEST/RESPONSE INFORMATION DETAILS ACQUIRE STATUS INFORMATION AND ALARMING INFORMATION OF THE DEVICE Function Code = 02 Status Start Address = 0x0000 Table A- 6Acquire status information and alarming information of the device Status Byte Description Remark Data Attribute Address 0: No Initialization, 0x0000 Initialize flag 1: Initialization... - Page 118 0x0025 Reserved 0x0026 Reserved 0x0027 Reserved 0: Normal 0x0028 Inverter short-circuit failure 1: Abnormal 0: Normal 0x0029 Output current abnormal 1: Abnormal 0: Normal 0x002A Auxiliary power failure 1: Abnormal 0: Normal 0x002B Fuse failure 1: Abnormal 0: Normal 0x002C Fan failure 1: Abnormal 0: Normal...
-
Page 119: Acquire Analog Data
0: Normal 0x0046 Output current un!!!balance!!! 1: Abnormal 0: Normal 0x0047 Harmonics exceed limits 1: Abnormal 0: Normal 0x0048 Cooling system failure 1: Abnormal 0: Normal 0x0049 422 Communication failure 1: Abnormal 0: Normal 0x004A CAN communication failure 1: Abnormal ACQUIRE ANALOG DATA Function Code = 03, 04 Register Start Address= 0x0000... - Page 120 0x0050 L3 Load Reactive Power kVar 0x0052 L1 Comp Current 0x0054 L2 Comp Current 0x0056 L3 Comp Current 0x0058 L1 Comp Current Load Rate 0x005A L2 Comp Current Load Rate 0x005C L3 Comp Current Load Rate 0x005E Temperature 4 ℃ 0x0060 Temperature5 ℃...
-
Page 121: Read The Waveform Data Of The Device(Waveform)
READ THE WAVEFORM DATA OF THE DEVICE(WAVEFORM) Function Code = 03, 04 Register Start Address = 0x0500 A complete waveform consists of 128 points. A byte represents the value of a point. 128 points are needed to draw a complete waveform. Data is transferred from low to high, where the first byte represents the first point, and so on. -
Page 122: Acquire Information Of Manufacturer
ACQUIRE INFORMATION OF MANUFACTURER Function Code = 03, 04 Register Start Address = 0x1000 Table A- 10 Acquire Information of Manufacturer Register Byte Description Remark Address In decimal form 0x1000 Protocol Version E.g. 100 means V100 protocol. In decimal form upper 12bits represent main version 0x1001 Software Version... -
Page 123: Acquire Parameters Of Device (General Settings)
ACQUIRE PARAMETERS OF DEVICE (GENERAL SETTINGS) Function Code = 03, 04 Register Start Address = 0x2000 Table A- 12 Acquire Parameters of Device (General Settings) Register Byte Description Remark Address Initialization [1-10] 0x2000 Number of Slave Default: 1 [0, 30000] 0x2002 CT ratio Default: 300... - Page 124 0: 50Hz 0x202E Input Frequency Level 1: 60Hz Default: 50Hz 1: Disable 0x2030 PPL Enable 0: Enable Default: 1 1: Disable 0x2032 Input Current Abnormal Enable 0: Enable Default: 1 0x2034 Reserved 1: Disable 0x2036 Temperature Derating Enable 0: Enable Default: 1 1: Disable Capacitive Reactive Power Compensation...
-
Page 125: Acquire Parameters Of Device (Parameter Of Phase Angle Offset)
ACQUIRE PARAMETERS OF DEVICE (PARAMETER OF PHASE ANGLE OFFSET) Function Code = 03, 04 Register start address = 0x2500 Table A- 13 Acquire Parameters of Device (Parameter of Phase Angle Offset) Register Address Byte Name Remark Initialization [-40, 40] 0x2500 Fundamental phase angle offset Accuracy: 0.1 Default: 0... - Page 126 [-180, 180] 0x2524 16th harmonic phase angle offset Accuracy: 0.01 Default: 0 [-180, 180] 0x2526 17th harmonic phase angle offset Accuracy: 0.01 Default: 0 [-180, 180] 0x2528 18th harmonic phase angle offset Accuracy: 0.01 Default: 0 [-180, 180] 0x252A 19th harmonic phase angle offset Accuracy: 0.01 Default: 0 [-180, 180]...
- Page 127 [-180, 180] 0x254E 37th harmonic phase angle offset Accuracy: 0.01 Default: 0 [-180, 180] 0x2550 38th harmonic phase angle offset Accuracy: 0.01 Default: 0 [-180, 180] 0x2552 39th harmonic phase angle offset Accuracy: 0.01 Default: 0 [-180, 180] 0x2554 40th harmonic phase angle offset Accuracy: 0.01 Default: 0 [-180, 180]...
-
Page 128: Acquire Parameters Of Device (Harmonic Compensation Parameters)
ACQUIRE PARAMETERS OF DEVICE (HARMONIC COMPENSATION PARAMETERS) Function Code = 03, 04 Register start address = 0x2A00 Table A- 14 Acquire Parameters of Device (harmonic Compensation Parameters) Register Address Byte Name Remark Initialization [0, 110] 0x2A00 2nd harmonic compensation degree Default: 0 [0, 110] 0x2A02... - Page 129 [0, 110] 0x2A36 29th harmonic compensation degree Default: 0 [0, 110] 0x2A38 30th harmonic compensation degree Default: 0 [0, 110] 0x2A3A 31st harmonic compensation degree Default: 0 [0, 110] 0x2A3C 32nd harmonic compensation degree Default: 0 [0, 110] 0x2A3E 33rd harmonic compensation degree Default: 0 [0, 110] 0x2A40...
-
Page 130: Acquire Parameters Of Device (No Initialization)
ACQUIRE PARAMETERS OF DEVICE (NO INITIALIZATION) Function Code = 03, 04 Register start address = 0x2C00 End address = 0x30ff Table A- 15 Acquire Parameters of Device (No Initialization) Register address Byte Name Remark No initialization 0x2C00 L1 Input Voltage Calibration Greater than 0 0x2C02 L2 Input Voltage Calibration... -
Page 131: Acquire Fault Record
ACQUIRE FAULT RECORD Function Code: 03, 04 Register start address = 0xf000... -
Page 132: Sinexcel Modbus Application
Acquire data like analog value, waveform, histogram, and manufacturer information; Set the parameters of the device. For more details, please refer to the Sinexcel Modbus protocol. Physical Connection Following is instructions on establishing connection between PC and modules via MODBUS MODBUS TCP/IP For LCD modules, Ethernet connection is optional. -
Page 133: Modbus Rtu
IP address should be the one of monitor and the port should be 1025. MODBUS RTU RS485 is a standard function for all Sinexcel products. For single units, RS485 interfaces are on the back side. For the 7-inch HMI, they're on the right side, and 485_A7 and 485_B7 are for remote control. - Page 134 Figure A- 53 7-inch HMI If were to connect with PC, an adapter is needed, like 485 to 232 adatper or 485 to USB adapter. Monitor connects with PC via adapter. Figure A- 54 Connecting 1. Make sure devices are firmly connected. 2.
-
Page 135: Appendix Ⅳ Icms-P2 Intergrated Control Monitoring System
APPENDIX Ⅳ ICMS-P2 INTERGRATED CONTROL MONITORING SYSTEM INTERFACE & DIMENSIONS Figure A- 55 Dimensions of ICMS-P2 Sinexcel ICMS-P2, which the size is W273.5*D76.5*H170.5mm. Figure A- 56 Structure of ICMS-P2... -
Page 136: Icms-P2 Introduction
ICMS-P2 INTRODUCTION Sinexcel ICMS is a special 7-inch HMI that is able to control both SVG and capacitor bank, offers the more cost effective solution for the customer. Reactive power generated by load will be compensated by SVC at first and the rest of the reactive power will be compensated accurately in real time basis by SVG. In this way, the whole system is able to remain in low cost but it is able to compensate the reactive power in 15ms. -
Page 137: Icms-P2 Definition
Figure A- 57 ICMS-P2 Nameplate ICMS-P2 FUNCTION Sinexcel ICMS is equipped with a 7-inch color touch screen, which serves as the center of monitoring and setting. High performance control unit is embedded in the monitoring module. Thus, the module has abundant functions such as real-time data acquisition, storage, real-time control, USB, etc. - Page 138 Recording and analyzing of historical data The monitoring module of Sinexcel ICMS can store historical data; namely, it can save data at the time of power down. Users may click at the top panel and then click “ record ” , check the current alarm, historical...
-
Page 139: Icms-P2Technical Parameters
Figure A- 65 Current alarm interface Figure A- 66 Historical alarm interface Figure A- 67 Operating Record Interface Figure A- 68 Capacitor switching times and operating time Data management Via the USB Interface arranged on the controller, users may export recorded data with a USB flash disk. The exported file belongs to txt file,Open it in Excel on PC for data analysis. -
Page 140: Control And Protection Parameter Range
CONTROL AND PROTECTION PARAMETER RANGE Table A- 19 ICMS-P2 Control and protection parameter range Adjust the Parameter Range Default Remarks step Power Factor of System Target -1~1 0.01 1.00 Setting of voltage classes 380/480/690/1140 Options Setting of grid frequency 50/60 Options Setting of CT transformation ratio 150~10000... -
Page 141: Appendix Ⅶ Cabinet Designing Instructions
Module Max. is 9 MCCB(Breaker) For others customers can choose to buy on their own or from Sinexcel. CABINET VENTILATION DESIGN When users need to design their own cabinets, the cabinet ventilation design should meet the requirements of this article. - Page 142 Above standards apply to IP2X or IP3X air cooling design cabinet, higher IP level cabinet may need to add fans to improve heat dissipation. If there are requirements of higher protection class cabinet, please contact Sinexcel. Figure A- 71 Structure of Sinexcel Rear Ventilation Cabinet...
- Page 143 FAN-FORCED AIR COOLING Sinexcel doesn't suggest user to design the cabinet with fans, which means the IP class of the cabinet is higher than IP4X. When design the cabinet with fans inside for cooling, cabinet ventilation design should meet the following items: Open the ventilation hole in the front door, use fans to exhaust hot air in the rear.The effective ventilation...
-
Page 144: Appendix Ⅷ Current Transfomer
CT CABLE As an accessory of Sinexcel SVG system, CT cable may contain three groups of shielded twisted pair (STP): yellow + black, green + black and red + black, each group consisting of two cables, twisted in pair to constitute CT cable. -
Page 145: Ct Va Burden
Sinexcel SVG is compatible with CTs with secondary side current of 1A or 5A. For the CT with secondary side current of 1A, the range of CT ratio Sinexcel SVG can support is10/1~6000/1. For the CT with secondary side current of 5A, the range of CT ratio Sinexcel SVG can support is50/1~30000/1. -
Page 146: Conclusion
CONCLUSION For the CT with the CT burden ≥ 5VA If CT cable<15m, 2.5mm^2, dual twisted pair CT cable is suggested. If CT cable>15m but<30m, 4mm^2, dual twisted pair CT cable is suggested. If CT cable>30m, it is necessary to confirm whether the CT rated load is larger than the cable impedance. CALCULATION For the impedance calculation of the CT cable, please refer to the following calculation of the 100m CT cable. -
Page 147: Appendix Ⅷ Cable Sizing
1000A 1250A Breaker CT cable Below 15m: RVVSP 2*2.5 mm2; 15m-30m: RVVSP 2*4 mm2; above 30m: contact Sinexcel Range of 50/5~30000/5 CT ratio Use SVG rated current as the current in this table, it provides the reference for power cable, neutral cable, PE cable and breaker sizing. -
Page 148: Appendix Ⅸ System Power On And Shutdown
APPENDIX Ⅸ SYSTEM POWER ON AND SHUTDOWN POWER ON STEPS WARNING Only after SVG is installed and commissioned by an engineer correctly and the external power switch has been closed, can the power on steps be executed. These power on steps are applicable to SVG when it is at off-position. Operation steps are as follows: Supply power to SVG by closing the breaker between the grid and SVG. -
Page 149: Appendix Ⅺ Sinexcel Common Fault Diagnosis
The failures caused by improper use, such as CT cable reverse, CT polarity error, power cable phase sequence error and parameter setting error, can be found by checking the data in the power on process. For poor compensation effect and no alarm information, please contact Sinexcel. Table A- 23 Sinexcel Common Fault Diagnosis... - Page 150 Check the dip switch, change it to correspond number. The setting of dip The dip switch setting error Offline fault switch could be referred to user manual Internal cable wiring is not connected well. if the dip switch setting is correct, please contact Sinexcel engineer.
Need help?
Do you have a question about the SVG 100 Ultra and is the answer not in the manual?
Questions and answers