Table of Contents
Advertisement
Quick Links
M
u
l
t
M
u
l
t
U
s
e
r
U
s
e
r
I
n
I
n
M
u
M
u
M
u
l
t
i
L
M
u
l
t
i
M
u
l
t
i
M
u
l
t
i
M
u
l
t
i
L
M
u
l
t
i
L
Part # 6017
Firmware Version 3/4.31.37
October 2017
i
L
o
a
i
L
o
a
G
u
i
G
u
i
c
l
u
d
i
n
g
:
c
l
u
d
i
n
g
:
l
t
i
L
o
a
d
I
I
l
t
i
L
o
a
d
I
I
o
a
d
I
I
S
M
L
o
a
d
I
I
S
M
L
o
a
d
I
I
S
C
L
o
a
d
I
I
S
C
o
a
d
I
I
M
o
b
o
a
d
I
I
M
o
d
I
I
d
I
I
d
e
d
e
P
P
S
S
i
l
e
b
i
l
e
Advertisement
Table of Contents

Summary of Contents for Toptech Systems MultiLoad II
- Page 1 Part # 6017 Firmware Version 3/4.31.37 October 2017...
- Page 2 Toptech Systems, Inc. Disclaimer Toptech Systems assumes no responsibility for damages resulting from installation or use of its products. Toptech Systems will not be liable for any claims of damage, lost data, or lost time as a result of using its products.
-
Page 3: Table Of Contents
MultiLoad II RCU ............................ 20 2.5.1 RCU enclosures available with MultiLoad II ..................20 2.5.2 RCU enclosures available with MultiLoad II SMP ................20 External FCM (Flow Control Module) ....................21 FCM II ..............................22 Internal I/O Board ........................... 24 Internal 2-Meter I/O Board ........................ - Page 4 Download Parameter Prompt File ....................56 3.13.4 Create a Configuration File ......................57 3.13.5 Download a Configuration File From a MultiLoad II ................ 59 3.13.6 Upload a Configuration File TO a MultiLoad II ................60 3.13.7 Update the Firmware Image in a MultiLoad II.................. 61 CHAPTER 4 GENERAL CONFIGURATION ....................
- Page 5 4.8.2 Preset Setup ............................99 4.8.3 Meter Setup ............................110 4.8.4 Component Setup ..........................121 4.8.5 Additive Setup ............................ 128 4.8.6 Sampler Setup ........................... 128 Tank Setup ............................129 4.10 FCM Type Setup ........................... 131 4.11 Alarm Setup ............................132 4.11.1 Bay Alarm Setup ..........................
- Page 6 5.2.6 Adaptive Digital Control Algorithm ..................... 175 5.2.7 Two Stage Valves ..........................175 5.2.8 Analog Valves ............................ 176 Sequential Blending (Excluding SMP) ....................176 5.3.1 Sequential Blending Configuration ....................177 Ratio Blending (Excluding SMP) ......................180 5.4.1 Ratio Blending Configuration ......................181 Side-Stream Blending (Excluding SMP) ....................
- Page 7 Tanks (SCS Only) ..........................270 8.24 Custom Logic ............................272 8.25 Modbus Device ............................ 272 8.26 GPS Diagnostics (MultiLoad II Moble Only) ..................273 CHAPTER 9 WEIGHTS AND MEASURES ....................275 Overview ............................... 275 9.1.1 Weights and Measures ........................275 Access Restrictions to W&M Parameters ..................
- Page 8 View Sampler Batch Reports (SCS Only) ..................342 10.13 View Weights and Measures Change Log ..................343 10.14 View MultiLoad II Message Log ...................... 346 10.15 View MultiLoad II Audit Log ......................346 10.16 View MultiLoad II FCM Mapping ..................... 348 10.17...
- Page 9 Product Database .......................... 374 12.5.3 Meter Ticket Printing ........................374 12.5.4 Miscellaneous Tasks ........................375 12.5.5 Configuring MultiLoad II for Local Mode ..................375 12.5.6 Operation in Local Mode ........................ 376 12.5.7 Local Authorization ........................376 12.5.8 Meter Ticket ........................... 377 12.5.9...
- Page 10 14.1 Overview ............................... 422 14.2 Login ..............................422 14.3 Website ..............................422 14.4 Message Log ............................424 14.5 W&M Change Log ..........................424 14.6 Audit Log .............................. 424 14.7 Files on the SD-Card ........................... 425 14.8 Upload Files To the SD-Card ......................425 14.9 Transaction Viewer ..........................
- Page 11 Table of Figures Figure 2.1 FCM II Modules ..........................23 Figure 2.2 Type 1 Program / W&M Switches ....................30 Figure 2.3 Type 2 Program / W&M Switches ....................31 Figure 2.4 Type 3 Program / W&M Switches ....................32 Figure 2.5 CPU Board Rev 1.0 Program and W&M DIP Switches ..............
- Page 12 Figure 7.1 Swing Arm Configuration ....................... 237 Figure 7.2 Swing Arm FCM Relay Socket ...................... 239 Figure 10.1 View Transaction Header Screen ....................339 Figure 12.1 Preset Control Screen ........................369 Firmware Version 3/4.31.37...
-
Page 13: Chapter 1 Before You Begin
EFORE EGIN HOULD UIDE This guide is intended for those individuals at your terminal who will set up and use the MultiLoad II system: terminal managers, system administrators, terminal operators, technicians, and meter proving personnel, UIDE RGANIZED The MultiLoad II User Guide is organized by functional procedures. It mirrors the MultiLoad II menu structure. -
Page 14: Documentation Conventions
Chapter 1 – Before You Begin Chapter Audience Topics Covered System Admin, analyst, Custom logic overview, and explaination of each 13. Custom Logic programmer logic function available. System Admin, Terminal Explaination of all features available via the web 14. Web Interface personel interface like RCU Ditto, log viewers, transaction viewer, etc. -
Page 15: Information Alerts
Chapter 1 – Before You Begin EQUIPMENT SETUP MENU Preset Meters Components Additives Samplers Next Prev Exit Enter 3. Press Next until Meters is highlighted. Press Enter. The Meter Setup screen displays: PRE #1 MTR #1 SETUP Flow Control Module#: Side-Stream on Mtr#: Side-Strm on Any Mtr: DISABLD... -
Page 16: Typographical Conventions
The following typographical conventions are used throughout the Guide. Boldface Indicates what you are asked to key in or which button(s) to press on the MultiLoad II keypad. Example: “Key in 00000 and press Next.” In topic text, italic indicates a key MultiLoad II term or industry term. Example: “The display Italic features a pick list style of item selection.”... -
Page 17: Chapter 2 System Description
CHAPTER 2 YSTEM ESCRIPTION VERVIEW This chapter introduces you to the MultiLoad II system by defining its capabilities, describing its operating modes, identifying its main components, and discussing navigation of the user interface. Main topics covered are: System Overview Three Operating Modes... -
Page 18: System Overview
YSTEM VERVIEW The MultiLoad II is designed to manage multiple loading arms delivering straight or blended products. The system can operate in conjunction with the Toptech TMS system (remote processing mode), in Local (standalone) mode or connected to the cloud (UAP Mode). The MultiLoad II supports: ... -
Page 19: Three Operating Modes
ONTROL In local mode, the MultiLoad II RCU will read a driver’s Prox Card (Excluding the SMP) or will prompt the driver to enter an access ID. Next the driver will be prompted to enter a PIN code. The supplied driver card or access ID and PIN must match a record in the driver database stored in the non-volatile memory of the MultiLoad II RCU. -
Page 20: System Components
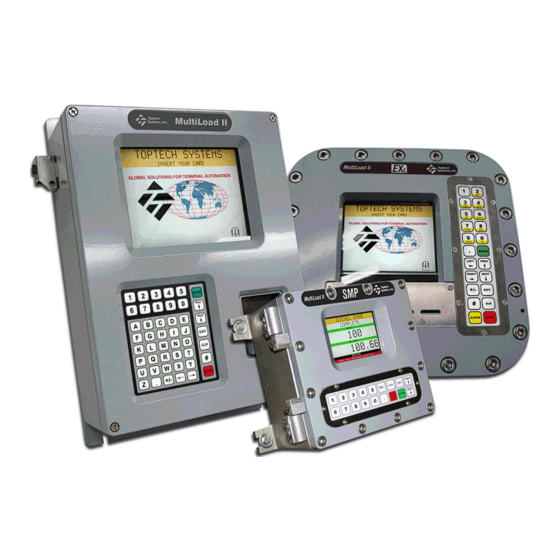
II RCU ULTI The Remote Control Unit (RCU) of the MultiLoad II is the driver interface to the system which performs all high level process controls, contains all configuration information, totalizers, and event logs. The driver interface contains a keypad, display, and prox card reader. -
Page 21: External Fcm (Flow Control Module)
Chapter 2 –System Description FCM (F XTERNAL ONTROL ODULE The MultiLoad Flow Control Module (FCM) is a state-of- the-art device that delivers the maximum in flexible, modular flow control processing. The FCM contains its own microprocessor for digital valve control, meter pulse counts and factoring, additive injection, pump and meter permissives, and more. - Page 22 Chapter 2 –System Description FCM II The Flow Control Module (FCM) is an integral part of the MultiLoad system. The FCM contains its own microprocessor for digital/analog valve control, meter pulse counts and factoring, additive injection, pump and meter permissives, DC & AC General purpose I/O, RTD Input, 4-20 mA input/output and more. The utilization of FCMs enables you to extend control beyond the confines of the expensive, heavy metal boxes that clutter today’s load racks.
-
Page 23: Fcm Ii
Chapter 2 –System Description FCM II consists of 8 different module types: 4DCIN/4ACOUT: 4 DC Inputs (5-30 VDC), 4 AC Outputs (85-250 VAC) 6ACIN: 6 AC Input (90-140 VAC) or (180-250 VAC) 6ACOUT: 6 AC Outputs (85-250VAC) 6DCIN: 6 DC Inputs (5-30 VDC) 6DCOUT: 6 DC Outputs (0-30 VDC) ANALOG/4DCIN/4ACOUT: RTD Input, 4-20mA Input, 4-20mA Out, 4 DC Inputs (5-30 VDC), 4 AC Outputs (85-250 VAC) -
Page 24: Internal I/O Board
Chapter 2 –System Description I/O B NTERNAL OARD All RCU enclosures can support the installation of one Internal I/O board. The basic functionality of the I/O board mirrors the functions of an external FCM but adding a 4-20mA input, 4-20mA output, and several additional discrete inputs and outputs. -
Page 25: Internal 2-Meter I/O Board
Chapter 2 –System Description I/O B NTERNAL ETER OARD All RCU enclosures, excluding the Division 1/Zone 1 SMP Explosion Proof Enclosure, can support the installation of one Internal 2-Meter I/O board. The basic functionality of the 2-Meter I/O board mirrors the functions of two external FCMs but adding several additional input and outputs on that of an FCM. -
Page 26: Navigating The System
2.10.1 ENUS AND CREENS The MultiLoad II Main Menu is shown below. From this menu, you can select one of four main functions. M A I N M E N U Configuration Diagnostics... -
Page 27: Field Modification And Data Entry
ODIFICATION AND NTRY MultiLoad II will have all fields populated with default values. There are two types of fields, toggle or data entry. Toggle fields contain a number of choices. Scroll through the choices by pressing the Enter key. Data entry fields require that a value be entered into the field within a given, applicable range. - Page 28 Chapter 2 –System Description Type in the new value (e.g. 123) and press Enter. The new value displays on the screen. RCU GENERAL SETUP █ RCU Address: Card Reader Type: DISABLD Remote Processing: StndAln Swing Arm Secondary: DISABLD Terminal Name: Toptech Terminal Security Accounts Enter Exit...
-
Page 29: Switch Access Control
The Diagnostics Menu and its functions Other administrative procedures, such as clearing high-level alarms. To access Program Mode, the MultiLoad II terminal operator must: 1. Move the Program Mode switch into the active position. 2. At the idle card in screen, enter the security code (default security code is 000000) and press the <Next>... -
Page 30: Type 1 Program / W&Mswitches
Chapter 2 –System Description / W&M 2.11.1 ROGRAM SWITCHES Type 1 switches consist of two separate external rotary switches, one for Program Mode Access, and one for W&M change access. Each switch has external fold down cover that can be locked or sealed with a wire and lead seal to prevent moving the switch into the active state. -
Page 31: Type 2 Program / W&Mswitches
Chapter 2 –System Description / W&M 2.11.2 ROGRAM SWITCHES Type 2 switches consist of a single, 3-position, external rotary switch. Each position corresponds to an operating mode. The switch has two external fold down covers that limits the switch rotation as described below. Each cover can be locked or sealed with a wire and lead seal to prevent moving the switch into the active states. -
Page 32: Type 3 Program / W&Mswitches
Chapter 2 –System Description / W&M 2.11.3 ROGRAM SWITCHES Type 3 switches consist of two separate external magnetic bolts, one for Program Mode Access, and one for W&M change access. Program or W&M access is achieved by removing the corresponding bolt. Each bolt has a small hole that can be sealed with a wire and lead seal to detect unauthorized access. -
Page 33: Program Mode / W&M Dip / Security Bypass Switch
Two DIP switches on the CPU board can also provide the closure of the Program Mode / W&M switch contacts. When the MultiLoad II does not have the external Program Mode / W&M switch installed, it is necessary to use this DIP switches on the CPU board to enable program mode and W&M access. -
Page 34: Program Mode / W&M Field Switches
If an external switch is wired to the MultiLoad II as a W&M access switch, the installer may be required to seal the switch enclosure and all conduit junction points between the switch and the MultiLoad II to ensure that the W&M parameters remain secure. -
Page 35: Getting Started
Prev Exit Enter 2.12 G ETTING TARTED After exiting program mode, and when first powering up the MultiLoad II RCU, the Firmware identification will be displayed for several seconds. M.u.l.t.i.L.o.a.d. .I.I. . . v3.31.xx M.u.l.t.i.L.o.a.d. .S.M.P. . v3.31.xx ......Sep xx 2014 ......Sep xx 2014... -
Page 36: Configuration Parameters
The remainder of this Guide discusses the functions available from the MultiLoad II Main Menu. To exit the Main Menu, press Exit. After exiting this menu, the MultiLoad II will reboot. The MultiLoad II banner screen displays briefly; showing the firmware version number. -
Page 37: Multiload Ii Configuration Tool
2.15 F ACTORY EFAULTS If there becomes a need to reset the MultiLoad II back to the factory defaults, this can be accomplished in the following manner. Activate the W&M switch (remove the W&M bolt). Remove power from the MultiLoad II. -
Page 38: Chapter 3 Gui Configuration Tool
MultiLoad II is configured for Remote, Local (stand-alone) and UAP mode. A major advantage of the Config Tool is the ability to store the configuration for a MultiLoad II unit onto a hard drive that can be backed up. In the event that the MultiLoad II configuration is lost, or the unit is damaged, the entire configuration can be restored to the replacement hardware in minutes. -
Page 39: Access From Tms 5 Gui
7. Select the file name that appears. This file has been pre-configured at Toptech for your facility. It can be modified, and you can create new configuration files that can be downloaded to the MultiLoad II. 8. After selecting the configuration file, click the Done button. -
Page 40: Figure 3.2 Bay Configuration Menu
9. The Bay Level Configuration screen displays. Figure 3.2 Bay Configuration Menu Notice that the fields on this screen correspond to the parameter fields found on the Bay Setup screen (from the Equipment Setup Menu) from the MultiLoad II Configuration screen. Firmware Version 3/4.31.37... -
Page 41: Screen Navigation
Parameter Names in Red, are parameters that are under W&M control. Attempting to upload a value different then the value already in the MultiLoad II, with the external switch NOT in W&M mode, will cause that single parameter upload to be rejected by the MultiLoad II. After an upload a report of all rejected commands will be displayed. -
Page 42: Menu Functions
UNCTIONS Copy Function-permits the user to copy a preset configuration to another preset within the same bay. This feature is used for MultiLoad II products that support multiple load arms and does not apply to SMP. UNCTIONS The following are brief descriptions of the functions available from the Tool menu. -
Page 43: Upload Registers
EGISTERS Use this function to upload a configuration file to a MultiLoad II at a load rack. You would typically use this function after modifying an existing configuration file or creating a new configuration file, then uploading the file to the appropriate MultiLoad II. -
Page 44: Reload Language
Chapter 3 – GUI Configuration Tool File Name Name of the configuration file. Disabled RCU while Checking this box is recommended because it will stop the bay while the Upload is in Download progress. Warning: If the box is unchecked (blank), it will be possible for a driver to start a load while the upload/download is in progress. -
Page 45: Multiload Ii Reports
II R ULTI EPORTS The MultiLoad II GUI Config package provides two useful reports: the Configuration Report and the Flow Control Modules Report. The report format, mechanism and display options are identical to those employed for TMS reports. If you need information on TMS reporting capabilities and options, please refer to the TMS Operations Guide. -
Page 46: Flow Control Modules Report
ONTROL ODULES EPORT The Flow Control Modules Report is a comprehensive listing of every I/O assignment on the MultiLoad II. These assignments can be on the external FCMs (excluding SMP) or on the optional internal I/O board. Figure 3.9 I/O Assignment Report... -
Page 47: Local Mode Only Parameters
OCAL ARAMETERS When running in Remote mode, some MultiLoad II prompts are supplied by TMS or other TAS. When running in Local mode, these parameter values must be supplied via the MultiLoad II Configuration tool, in lieu of TMS. These “local only parameters” are accessed under the Miscellaneous group, as shown in the sample screen below. -
Page 48: Product Configuration
ONFIGURATION Figure 3.11 Product Configuration Screen Under Remote control, product information is supplied to the MultiLoad II by the TMS Product database. In local mode, you must supply the product data. Product ID Alpha or numeric product ID; up to 5 characters. -
Page 49: Driver Access Id
Company ID of the carrier for whom the driver hauls (2 digits). Language Language code that determines the language text that appears on the MultiLoad II display when the driver cards in or keys in. Preset #n Lockout When enabled (clicked on), the driver will not be allowed to load at the load arm(s) controlled by corresponding preset(s). -
Page 50: Hazard Statements
ONFIGURATION UNCTIONS All other Config Tool screens mirror the functionality available and accessible from the MultiLoad II Configuration Menu, described in the next chapter. Equivalent Config Tool screens are shown after each section describing an area of configuration: RCU Setup, Presets, Meters, Components, Additives, etc. -
Page 51: Fcm Gui Display
Chapter 3 – GUI Configuration Tool FCM GUI D 3.12.1 ISPLAY Figure 3.14 I/O Assignment Graphic To view detail for a port, left-click on it. A detail window appears immediately to its right. Figure 3.15 I/O Assignment Detail Firmware Version 3/4.31.37... -
Page 52: Windows Multimate Configuration Tool
Chapter 3 – GUI Configuration Tool 3.13 W INDOWS ULTI ONFIGURATION 3.13.1 NSTALLATION The MultiMate Configuration Tool program is typically distributed as a .ZIP file. The instructions below describe the proper procedure to install and run the software. 1. Extract the zip file 2. - Page 53 Chapter 3 – GUI Configuration Tool Firmware Version 3/4.31.37...
-
Page 54: Connection To The Multiload Ii
ONNECTION TO THE ULTI Setup a connection to the MultiLoad II via serial, tms5/6 or Ethernet Go to the menu Communications and select Connection… A new screen will pop up. In this screen in the left upper corner the button new connection should be pushed. - Page 55 Chapter 3 – GUI Configuration Tool 3. This will trigger the Connection Configuration Wizard. Follow this to create a connection to the MultiLoad. 4. MultiMate supports three different ways to connect to a device: Ethernet Serial Port of your PC/Laptop ...
-
Page 56: Download Parameter Prompt File
During the first install of the MultiMate Configuration Tool, there is no Parameter Prompt File. This file describes the all of the parameters that can be configured on the MultiLoad II. The prompt file must be downloaded from the MultiLoad II before any configuration files can be created, downloaded or edited. The instructions below describe the proper procedure to downloading the parameter prompt file from the MultiLoad II. -
Page 57: Create A Configuration File
Chapter 3 – GUI Configuration Tool Here is a view of the application when complete: 3.13.4 REATE A ONFIGURATION To create, edit and save Connection File should only be done when the correct prompt file is already on your machine 1. - Page 58 Chapter 3 – GUI Configuration Tool 2. As modifications are made to each parameter, the background should highlight to yellow indicating a change from the default value. 3. Store the configuration file via the Menu File > Save. Firmware Version 3/4.31.37...
-
Page 59: Download A Configuration File From A Multiload Ii
ONFIGURATION ROM A ULTI To download a configuration file from a MultiLoad II 1. Start the MultiMate program 2. Open a connection to a MultiLoad device (download prompts) 3. After downloading the prompts, the red highlighted button can be used to download all the config registers Firmware Version 3/4.31.37... -
Page 60: Upload A Configuration File To A Multiload Ii
PLOAD A ONFIGURATION ULTI To upload a configuration file to a MultiLoad II 1. Start the MultiMate program 2. Open the configured connection to the MultiLoad device (download prompts) 3. After downloading the prompts, the red highlighted button can be used to upload all the config registers... -
Page 61: Update The Firmware Image In A Multiload Ii
The process of updating the firmware image in a MultiLoad II occurs in two steps. The first step involves uploading the new firmware image to the MultiLoad II. This step may take a while but it can be done concurrently with normal loading operations. The Second step involves updating the flash memory with the new image and restarting the system. - Page 62 Note: Some firmware updates MAY cause the configuration parameters and possibly the totalizer data to be set back to factory defaults. It is critical to download a fresh copy of the current MultiLoad II configuration before updating the firmware. Totalizers may be reset to zero.
- Page 63 9. After the upgrade the communication parameters should be re-entered to the MultiLoad. 10. Test the communication again via MultiMate and reload the existing configuration. Note: Legacy MultiLoad II 1-Arm firmware can be updated to the full MultiLoad II firmware version 2.29.02 or later.
-
Page 64: Chapter 4 General Configuration
ENERAL ONFIGURATION VERVIEW MultiLoad II is highly configurable, which makes it extremely flexible and adaptable to your facility’s changing needs. The MultiLoad II Configuration functions are available from the Configuration Menu. Navigate to this screen as: Program Mode -> Configuration... - Page 65 2. The circuit is 4-wire, RS-485 Multi Select this choice when the following two conditions are met 1. More than one MultiLoad II will be on the circuit 2. The circuit is 4-wire, RS-485 2-Wire Select this choice when using a 2-wire RS-485 circuit.
- Page 66 Chapter 4 – General Configuration Parameter Description Line 6 – Port Usage Specify how the port is to be used. Choices are: will communicate to the external FCMs (excluding SMP) or optional internal I/O board Default for Com0 Host will communicate to a TMS Default for Com1 (not applicable) Default for Com2...
-
Page 67: Network Setup
Chapter 4 – General Configuration ETWORK ETUP Use the Network Setup function to define the network parameters for the Ethernet port. Navigate to this screen as: Program Mode -> Configuration -> Network The NETWORK SETUP screen displays: NETWORK SETUP MAC Address: 00:50:c2:60:90:00 OpenSSL Version: OpenSSL 1.0.1h... -
Page 68: Host Setup
IP address of the DNS server. If an IP address entered, the MultiLoad will be able to resolve a domain name into an IP address. Remark: In DHCP mode the MultiLoad II will wait 1 minute before timing out and boot the rest of the software. 4.3.1... -
Page 69: Modbus Setup & Modbus Slave Device Configuration
Chapter 4 – General Configuration & M 4.3.2 ODBUS ETUP ODBUS LAVE EVICE ONFIGURATION Use the Modbus Setup to enable or disable port 502 for incoming Modbus messages, as well as configure up to 10 slave devices for the MultiLoad to send Modbus commands to. Navigate to this screen: Main Menu ->... - Page 70 Chapter 4 – General Configuration The MultiLoad II is capable of communicating with up to 10 slave devices using the Modbus protocol. Once the device has been configured, you can then use Custom Logic to send read and write commands.
- Page 71 Chapter 4 – General Configuration MODBUS DEVICE 1 Name: Device 01 IP Address: 0.0.0.0 Enabled: DISABLD ID Number: Protocol: TCP/IP 32-bit Endian Word Order: Poll Time (Seconds): Write Time (Seconds): Write On State Change: ENABLED Next Prev Exit Enter Parameter Description Name This parameter allows you to assign a name for the device, which will be displayed in...
-
Page 72: Termserver Setup
Chapter 4 – General Configuration 4.3.3 ERMSERVER ETUP TERMSERVER SETUP Com0 Port(7000): ENABLED Com0 SSL Port(7010): DISABLD Com1 Port(7001): ENABLED Com1 SSL Port(7011): DISABLD Com2 Port(7002): ENABLED Com2 SSL Port(7012): DISABLD Parameter Description Next Prev Exit Enter Com0 Port(7000) This parameter can be configured to allow external communication from any system via Ethernet and pipe this data transfer to the serial port. -
Page 73: Webpage Setup
The user’s user name is “user” (lower case) Note: The default password for both is toptech (lower case), if the password is changed by the keypad of the MultiLoad II it will always be upper case. 4.3.5... -
Page 74: Tds/Uap Interface Setup
Chapter 4 – General Configuration Parameter Description Printer1 IP To print a ticket to a network printer give the IP address in of that Printer Printer1 Port This port is set fixed to 9100 (standard raw-protocol) Printer1 Copies This specifies how many copies of the BOL will be printed for that printer. Printer2 IP To print a ticket to a network printer give the IP address in of that Printer. -
Page 75: E-Mail Setup
Chapter 4 – General Configuration 4.3.7 ETUP NETWORK E-MAIL SETUP E-Mail (PORT 25): DISABLD__________ SMTP Server: mail.example.com FROM: fromname@domain.com toname@domain.com Email Messages Next Prev Exit Enter After changes are made in this screen, exiting program mode is required for the changes to take effect. Parameter Description eMail... - Page 76 Chapter 4 – General Configuration NETWORK EMAIL SETUP E-Mail (PORT 25): DISABLD SMTP Server: mail.example.com FROM: fromname@domain.com toname@domain.com__________________ Next Prev Exit Enter First select the Parameter. NETWORK EMAIL SETUP eMail (PORT 25): DISABLD SMTP Server: mail.example.com FROM: fromname@domain.com toname@domain.com Enter=@ Exit Prev=Upper Next=Lower...
-
Page 77: Ntp Server Setup
ETUP The FTP functionality of the MultiLoad II is used to push reports and transactions to a FTP server. Any files that need to be pushed will be marked with a special character (@ symbol). Every ten minutes the MultiLoad II will scan the Reports and the Transactions directories to search for any files that need to be sent. - Page 78 The Password that will be used to login to the FTP server After enabling the network and rebooting the MultiLoad II, the two network activity lights next to the Ethernet connection should become active indicating network activity and link status. The Boot Screen will display as: M.u.l.t.i.L.o.a.d.
-
Page 79: Rcu General Setup
For security reasons, IP Address information will only be displayed when the network is first enabled and on power up. Note: MultiLoad II SSL communications ONLY support the TLSv1.2 protocol; if a third party device is attempting to communicate via SSL it MUST use the TLSv1.2 protocol. - Page 80 Terminal Name: Toptech Terminal Security Accounts Enter Exit Parameter Description RCU Address Address of the MultiLoad II RCU unit. The values are 001–099. Card Reader Type Enable or Disable the card reader. If enabled following options are possible: (Excluding SMP) BUCKET ...
-
Page 81: Security Accounts Setup
Chapter 4 – General Configuration 4.4.1 ECURITY CCOUNTS ETUP Use the Security Accounts setup function to create different User accounts that can be used to identify who has accessed Program Mode and when. You can also assign security levels to each user which can be used to limit which parameters they are allowed to change. -
Page 82: Rcu Setup
The bottom bar will display feedback messages if anything goes wrong. RCU Setup Use the RCU Setup function to configure how the MultiLoad II RCU unit will function. Navigate to this screen as: Program Mode -> Configuration -> RCU Setup All Weights and Measures controlled values are displayed in red both on the screen and in this manual. - Page 83 iBUTTON When Disabled, the MultiLoad II will prompt the driver to ‘Press Next to Begin” for login. The driver then keys in his card number and PIN. The dual card process works as follow, the first card is the loading card during the loading a second card can be entered which will be indicate with a card status ‘2’...
- Page 84 1 = All additive and component values. Meter data only when values are different from the component data. 2 = All additive, component and meter values. Compartment If enabled, the MultiLoad II will prompt the driver for a compartment entry for each batch. This Entry compartment data is stored with the transaction. Config Timeout...
- Page 85 Enable this parameter to print a Message Log thru a Printer Control Module (PCM). A Message Log is a record of all activities and alarms on the MultiLoad II and is typically used for troubleshooting. After enabling this parameter, go to “Message Log PCM#” and assign a PCM.
- Page 86 Min Time Change Secs: Before the beginning of each transaction, TMS will attempt to Secs synchronize the date and time of the MultiLoad II with the date and time of the TMS computer. TMS will update the date and time of the MultiLoad II if the difference between the TMS system time and MultiLoad II time is greater than the value of this parameter.
-
Page 87: Security Setup
Startup Keypad At startup of the MultiLoad II the keypad is locked or not locked. The only screen where the Locked keypad is still working is the IDLE Screen. So the Configuration Menu is always accessible. - Page 88 Default: Max: Security Lvl: 9-Toptech Support Enter the number of presets (load arms) that will be controlled by this MultiLoad II. Next Prev Exit Enter Security level modification Regarding users: only an ADMIN can create a user and therefore only an ADMIN can set the security level of the user.
-
Page 89: Password Security Setup
Chapter 4 – General Configuration SECURITY MENU Secure Password Setup Group Parameter Level Setup External Access Level Setup Next Prev Exit Enter 4.6.1 ASSWORD ECURITY ETUP The Password Security Setup screen is where the user can setup the settings for user account passwords. This is where the user would set things like minimum password length, maximum rety attempts, password complexity requirements, etc. -
Page 90: Group Parameter Level Setup
Chapter 4 – General Configuration Minimum This parameter will set the minimum length of the user password. Password Length Max Retry This parameter will determine how many times an operator can try to access the unit with the wrong password before they’re locked out. Attempts Lockout Duration This parameter will determine how long a user is locked out for if they exceed the Max Retry... -
Page 91: External Access Level Setup
Chapter 4 – General Configuration Access IDs This is a 1-10 level that the User or Access level setting is compared to when attempting a parameter change in the Access IDs setup. Date and Time This is a 1-10 level that the User or Access level setting is compared to when attempting a parameter change in the RCU Date/Time setup. -
Page 92: Trace Setup
RACE ETUP Use the TRACE Setup function to configure what the MultiLoad II RCU unit will log in the message log. Navigate to this screen as: Program Mode -> Configuration -> TRACE Setup All Weights and Measures controlled values are displayed in red both on the screen and in this manual. - Page 93 This parameter is used for advanced troubleshooting. Do not enable without direction from Toptech Systems. Trace Recipe Use this parameter to view how blends are constructed in MultiLoad II. Blend composition used during deliveries of the preset specified in Trace Preset Number will be echoed to the event log for analysis.
-
Page 94: Equipment Setup
This parameter is used for advanced troubleshooting. Do not enable without direction from Toptech Systems. Trace Modbus Use this parameter for troubleshooting the communications between the MultiLoad II and the configured Modbus Devices. Feedback from the Modbus communication functions will be echoed to the event log for analysis. - Page 95 Exit Enter Note: A typical MultiLoad II SMP bay would consist of one load arm or Preset, one main product Meter/control valve connected to one Component and may have up to two Additives: The following table shows the relationships between internal I/O board ports and the functional assignments:...
-
Page 96: Bay Setup
Parameter Description Number Bay Presets Enter the number of presets (load arms) that will be controlled by this MultiLoad II. (Excluding SMP & SCS) Number of FCMs Enter the number of Flow Control Modules (FCM) including the I/O board that will be attached to this bay. - Page 97 Meter Tickets and Alibi Logs. Valid entries are 000-9999. Number External Enter the number of external presets a host system will display on the MultiLoad II load screen. These presets will be displayed with a green background color with a “Not Legal for Presets Trade”...
- Page 98 Chapter 4 – General Configuration Parameter Description Deadman Mode None: Deadman functionality is disabled (Excluding SCS) ContHld: (Continuous Hold) The Deadman input needs to be preset when the loading goes in low flow, if not the load will stop. No pre-alarm is given Hld&Rel: (Hold and Release) The Deadman input needs to be pushed continuously.
-
Page 99: Preset Setup
Chapter 4 – General Configuration 4.8.2 RESET ETUP Use the Preset Setup functions to configure the characteristics of a load arm. Further details about flow control can be found in Chapter 5. Navigate to this screen as: Program Mode -> Configuration -> Equipment Setup -> Select Parameter Level -> Preset All Weights and Measures controlled values are displayed in red both on the screen and in this manual. - Page 100 Chapter 4 – General Configuration Parameter Description Blending Type Possible modes: (Excluding SMP & SCS) RATIO: Enables Ratio Blending. Multiple flow meters and control valves are required for ratio blending. Enable this parameter if multiple flow meters and control valves are assigned to the load arm and Ratio Blending is desired.
- Page 101 Chapter 4 – General Configuration Parameter Description Line Flush Comp# Select the component to be used to flush the pipe segment that lies between the flow meter and the end of the load arm. After the Line Flush Component is metered, it will (Excluding SMP &...
- Page 102 Chapter 4 – General Configuration Parameter Description Blnd Chk Restart Vol Blend Check Restart Volume applies to ratio blending only. After the volume specified in this parameter has been delivered, the system will start checking the (Excluding SMP & SCS) ratio of the blend.
- Page 103 Chapter 4 – General Configuration Parameter Description Blnd Adj Start Vol Blend Adjust Start Volume applies to ratio blending only. After the volume specified in this parameter has been delivered, the system will start adjusting the ratio of the (Excluding SMP & SCS) blend, when it is found to deviate from the tolerance by the amount specified in the Blend Adjust Deviation Percentage parameter.
- Page 104 Chapter 4 – General Configuration Parameter Description Deliver Type This parameter, when NET is selected, will allow preset quantities to be entered as net volumes and delivered as net volumes. CTL and/or CPL must be configured before net delivery can be realized. Each preset in the bay can be configured independently of the others for gross or net delivery.
- Page 105 BSW1 Sensor FCM# Up to two BSW sensors are supported. If the value from the BSW1 sensor is out of range, the Multiload II will attempt to use the value from the BSW2 sensor if it is enabled. Enter the FCM # and the analog port number for the BSW1 sensor.
- Page 106 Up to two BSW sensors are supported. If enabled and the value from the BSW1 sensor is out of range, the MultiLoad II will attempt to use the value from this sensor. Enter the FCM # and the analog port number for the BSW2 sensor.
- Page 107 Divert Restart Time The Divert Restart Time parameter is the amount of time the diverter valve will stay closed when restarting a load. After this amount of time has passed, the MultiLoad II (SCS Only) will check the current BSW value and if the value is less than the Divert BSW Value parameter, the diverter valve will be opened.
- Page 108 Remote Start button. The Remote Start Button can be used to start a load from a location away from the MultiLoad II, such as from a top loading position. The card-in process and preset entry must be completed at the MultiLoad II, prior to activating flow via the Remote Start Button.
- Page 109 Chapter 4 – General Configuration Parameter Description Permiss FCM# Permiss FCM# parameter allows the selection of a port that will receive an input signal. The input signal will represent the state of the preset's Permissive. If the signal is not present at authorization or if the signal is lost during delivery, the process will be stopped and a permissive level alarm will be raised.
-
Page 110: Meter Setup
Chapter 4 – General Configuration Parameter Description Recipe Output Bit 2 Recipe Output Bit 2 FCM# parameter allows the selection of a port that will send an FCM# output signal. This output signal will represent the third bit of a binary representation for the selection of the current loaded authorized preset product. - Page 111 Chapter 4 – General Configuration Parameter Description Side-Stream on Any Enable this parameter if a side-stream meter will be serving a load arm that has more Meter than one custody-meter stream. A typical application is when one side-stream meter is used at a two-component ratio blending arm. The side-stream meter can only flow (Excluding SMP &...
- Page 112 Volume. All displays and preset quantities will still be done in Volume. The MultiLoad II processes data and are configured at different equipment levels. Typically data flows from the actual meter hardware, into the Meter Level, then on to the assigned Component Level and finally to the Preset Level.
- Page 113 Chapter 4 – General Configuration Parameter Description Max Quad Errors This parameter is only valid when the Quadrature feature has been enabled. Enter the number of Quadrature (Pulse Security) errors that will trigger a Quadrature alarm. The alarm will stop flow. A dual Pick-Off flow meter or dual channel meter pulser is required to use this feature.
- Page 114 Chapter 4 – General Configuration Parameter Description Valve Fault Alrm Vol When the valve has been commanded to close, the Valve Fault Alarm will activate if the valve fails to close before the Valve Fault Alarm Volume is delivered. Creep Reset Time Meter Creep is any volume that passes the meter when the valve is commanded to be shut.
- Page 115 Chapter 4 – General Configuration Parameter Description Valve Dwell Step Rate This parameter is to be used in conjunction with Valve Dwell Time. Set this parameter to be four times the deadband rate. Large, course valve adjustments will be made when the flow rate is far from the deadband.
- Page 116 Chapter 4 – General Configuration Parameter Description Density Sensor FCM# Enter the FCM # and the analog port number for the Density sensor. Meter Module: <FCM Address>.A0mA I/O Board: 00.A0mA SCS I/O Board: 00.A0mA,00.A1mA, 01.A0mA,01.A1mA,01.A2V Note: You can configure the port for 4-20mA (mA) or 1-5V (V) by pressing NEXT after the port number has been configured.
- Page 117 Chapter 4 – General Configuration Parameter Description Default Pressure This is the pressure that the API table will use when the pressure transmitter is undergoing maintenance. Do not adjust this value unless the pressure transmitter is out of service. Return the value to 999.9 when the transmitter has been placed back into service.
- Page 118 #1 or meter factor #3. If a new meter factor is entered that violates this setting, an INVCONFIG alarm will be raised after the MultiLoad II reboots. To set the limit to 0.25%, enter a value of 0.0025. The flow meter should be inspected if it is not possible to obtain a meter factor that does not violate this condition.
- Page 119 Chapter 4 – General Configuration Parameter Description Alarm Out FCM# Alarm Out provides an output signal if the meter has an active alarm. This parameter selects the output port that will be assigned to signal an unspecified alarm condition from the meter. Authorized FCM# Authorized FCM provides an output signal if the meter has been authorized for flow as a result of driver card-in or product selection.
- Page 120 Temp Module Type Enter a value that represents the appropriate type of temperature sensor. For a typical setups, set to 1. For MultiLoad II SMP: 1 – Internal I/O Board RTD 3 – Internal I/O Board 4-20mA For MultiLoad II: 0 –...
-
Page 121: Component Setup
Chapter 4 – General Configuration Parameter Description Alarm High API Gravity When an API Gravity Sensor is enabled, this parameter can be used to raise an alarm when the measured API Gravity rises above a maximum value. When the API Gravity of the metered product exceeds the value entered in this field, an API Gravity alarm will be raised and loading will be stopped. - Page 122 Overrun Alarm Volume has been exceeded. Final Trip Vol Lock Enable this parameter to prevent the MultiLoad II from automatically adjusting the Final Trip Volume parameter. When this parameter is enabled, the MultiLoad II will analyze the closing performance of the control valve and make adjustments to the Final Trip Volume as necessary.
- Page 123 Chapter 4 – General Configuration Parameter Action Blk Valve Open Rate Use this parameter when using hydraulic product selection valves, instead of MOVs. A value of zero disables this feature. Hydraulic valves used upstream of the digital control valve may not open fully during the Low Flow stage, due to low differential pressure across the product selection valve.
- Page 124 Chapter 4 – General Configuration Parameter Action If during the High Flow stage, the flow rate is below the High Flow Rate deadband for Fallback Time the period specified by this parameter, the control algorithm will search for a controllable rate.
- Page 125 Chapter 4 – General Configuration Parameter Action API BIO This API BIO tables are used for Methode3 from the PTB Community. Select API Table Name PTB-BIO table combined with API BIO to choose the wanted product. *(T – T *(T – T *(T –...
- Page 126 Chapter 4 – General Configuration Parameter Action This parameter needs to be configured when the API Table ASTM D1555-09 is chosen. API ASTMD1555 Selecting the Aromatic Hydrocarbon is needed for proper calculation of the CTL factor. Product Also for the weight calculation of these products it is needed to enter a default relative density.
- Page 127 Permits selection of a port that will provide an output signal to control a component’s Open Blk Val FCM# block valve. This output will provide a signal to open the block valve. When MultiLoad II commands the valve to close, the signal will be removed.
-
Page 128: Additive Setup
Enter the meter factor that was calculated when proving at the Meter Factor #3 flow rate. The meter factor is used to correct the volume indicated at the MultiLoad II display to correspond with the observed gross volume. The observed gross volume is typically determined by a proving device. -
Page 129: Tank Setup
Chapter 4 – General Configuration PRE #1 SAMP #1 (Samp 001 ) SETUP Sampler Enable: ENABLED Flow Control Module#: FCM Port#: Sampler Vol/Sample: 0.0200 Vol/Sample Cal Factr: 1.0000 Injection Time: 1.000 Alarm Out FCM#: DISABLD Authorized FCM#: DISABLD Permiss FCM#: DISABLD Permiss Out FCM#: DISABLD... - Page 130 Chapter 4 – General Configuration Navigate to this screen: Program Mode -> Configuration -> Tank Setup TANK SETUP Tank Group: Tank Number: Active Tank Mode: LOADING Tank High High Level FCM#: DISABLD Tank High Level FCM#: DISABLD Tank Low Level FCM#: DISABLD Tank Low Low Level FCM#: DISABLD...
-
Page 131: Fcm Type Setup
Permits selection of a port that will provide an output signal to control a component’s Open TankValve FCM# block valve. This output will provide a signal to open the tank valve. When MultiLoad II commands the valve to close, the signal will be removed. Tank Start Trigger... -
Page 132: Alarm Setup
Chapter 4 – General Configuration The FCM Type Setup screen displays: FCM Type FCM 00: 4ACOUT 4DCIN FCM 01: 4ACOUT 4DCIN ANALOG FCM 02: 6ACOUT FCM 03: NOT SPECIFIED Next Prev Exit Enter 4.11 A LARM ETUP Use the Alarm Setup functions to define alarm conditions and authorities at the various configuration levels: Bay, Preset, Meter, Component, Additive, Sampler, and Tank. - Page 133 Chapter 4 – General Configuration ALARM SETUP MENU Preset Meters Components Additives Samplers Tanks Next Prev Exit Enter The Bay Alarm Setup screen displays: (Preset, Meter, Component, and Additive screens are similar.) BAY ALARM SETUP *BAY FCM: AUTO *GROUND: AUTO *VRU: AUTO *OVERFILL:...
- Page 134 Chapter 4 – General Configuration 2 MIN After 2 minutes of continuous system time. 5 MIN After 5 minutes of continuous system time. 15 MIN After 15 minutes of continuous system time. 30 MIN After 30 minutes of continuous system time. 60 MIN After 60 minutes of continuous system time.
- Page 135 Chapter 4 – General Configuration In the following topics, only Bay Alarm Setup screen is shown. To change each alarm you need to push ENTER to go into the ALARM DETAIL SETUP SCREEN ADDITIVE ALARM DETAIL SETUP Alarm Name: *ADTV FCM Alarm Level: AUTO Promo Count:...
-
Page 136: Bay Alarm Setup
Default values are in the left column Alarm Meaning The MultiLoad II has lost communication with the I/O board or FCM. This message BAY FCM indicates that bay level functions are affected by the interrupted communication. This alarm will automatically clear when communication with the I/O board is restored. Check... -
Page 137: Preset Alarm Setup
Alarm Meaning PRE FCM The MultiLoad II has lost communication with the I/O board or FCM. This message indicates that preset level functions are affected by the interrupted communication. This alarm will automatically clear when communications are restored. Check the Diagnostic AUTO menu under FCM Com to determine if the I/O board or FCM is communicating. -
Page 138: Meter Alarm Setup
Flow will be stopped on the I/O board if this alarm occurs. When communications are REMOTE restored between the I/O board and the MultiLoad II, it will be possible to clear the alarm and resume operations. VALVE FLT Valve Fault. - Page 139 Chapter 4 – General Configuration Alarm Meaning QUAD ENC Quadrature Encoder error, also known as pulse security error. This alarm applies to flow meters that use dual-channel pulsers. One of the pulser channels has failed or is failing intermittently. This alarm occurs in new installations when pulser channel A is wired to pulser channel B and vice versa.
-
Page 140: Component Alarm Setup
Alarm Meaning COMP FCM The MultiLoad II has lost communication with the I/O board or FCM. This message indicates that component level functions are affected by the interrupted communication. This alarm will automatically clear when communications are restored. Check the Diagnostic menu under FCM AUTO Com to determine if the I/O board or FCM is communicating. -
Page 141: Additive Alarm Setup
Meaning ADTV FCM The MultiLoad II has lost communication with the I/O board or FCM. This message indicates that additive level functions are affected by the interrupted communication. This alarm will automatically clear when communications are restored. Check the Diagnostic menu under AUTO FCM Com to determine if the I/O board or FCM is communicating. -
Page 142: Sampler Alarm Setup
Chapter 4 – General Configuration Alarm Meaning This alarm indicates that MultiLoad II has detected that an injection failure has taken place. If INJCT FLT a piston injector is used, the alarm indicates that a number of injections have been missed. -
Page 143: Tank Alarm Setup
Meaning TANK FCM The MultiLoad II has lost communication with the I/O board or FCM. This message indicates that tank level functions are affected by the interrupted communication. This alarm will automatically clear when communications are restored. Check the Diagnostic menu under AUTO FCM Com to determine if the I/O board or FCM is communicating. -
Page 144: Product Setup
RODUCT ETUP Use the Product Setup functions to define products when the MultiLoad II is configured for Local, stand-alone mode. The strategy here is to define base components, base additives, and samplers first. Then use these as building blocks to define products. -
Page 145: Defining Base Components
In the sample screen below, an operator has filled in the values to create an unleaded 87 base component. Note, since the MultiLoad II SMP enclosure keypad does not support Alpha characters, specification of Alpha characters on product names MUST be done through the MultiLoad Configuration Tool. -
Page 146: Defining Base Component Recipes
Select Edit Product Recipe. The Product Recipe screen appears. 4.14.1 EFINING OMPONENT ECIPES For both TMS and MultiLoad II, every base product component must be composed of 100% of itself. Therefore, the product recipe for a base component would look like this: Firmware Version 3/4.31.37... -
Page 147: Defining An Additive
Chapter 4 – General Configuration PRODUCT (000123 BASE87UNL ) RECIPE Comp: %100.00 000123 BASE87UNL Comp: %0.00 (---undefined---) Adtv: %0.0000 (---undefined---) Samp: 0.00 (---undefined---) Next Prev Exit Enter Note that the default percent is 100, indicating that this “product” is composed of 100% of itself. Press Exit to return to the Edit Product screen. - Page 148 Chapter 4 – General Configuration PRODUCT SELECTION Comp: 000123 BASE87UNL Comp: BAS002 Base 002 Comp: BAS003 Base 003 Comp: BAS004 Base 004 Comp: BAS005 Base 005 Comp: BAS006 Base 006 (------undefined------) Adtv: ADD001 Adtv 001 Adtv: ADD002 Adtv 002 Adtv: ADD003 Adtv 003 Adtv: ADD004 Adtv 004 Adtv: ADD005 Adtv 005 Adtv: ADD006 Adtv 006...
- Page 149 Chapter 4 – General Configuration Select Enter. The base additive is defined automatically, and it is composed of %100 of itself. If you were to select Edit Product Recipe, the new base additive would be displayed on the Product Recipe screen, shown below.
-
Page 150: Defining A Sampler
Chapter 4 – General Configuration 4.14.3 EFINING A AMPLER Defining a sampler is almost identical to defining a base component: On the Product Selection screen, highlight the product to edit. PRODUCT SELECTION Comp: 000123 BASE87UNL Comp: BAS002 Base 002 Comp: BAS003 Base 003 Comp: BAS004 Base 004 Comp: BAS005 Base 005 Comp: BAS006 Base 006... -
Page 151: Defining Saleable Products
Chapter 4 – General Configuration Select Enter. The sampler is defined automatically, and it is composed of %100 of itself. If you were to select Edit Product Recipe, the new base additive would be displayed on the Product Recipe screen, shown below. (Normally, however, there would be no need to go to the Product Recipe screen when establishing sampler, base additives and base product components.) PRODUCT (AD720... - Page 152 Chapter 4 – General Configuration Defining a Single Saleable Product In the following sequence, a single saleable product is created, based on a single base component and a percentage of an additive. On the Product Selection screen, highlight the product to edit. PRODUCT SELECTION Prod: PRD001 Prod 001 Prod: PRD002 Prod 002...
- Page 153 Chapter 4 – General Configuration Fill in the fields and for Type select Product, as shown in the example below. EDIT PRODUCT Code : 87UNL Long Desc : OCTANE87UNLEADED Short Desc: 87UNLEAD Hazard Idx: 0 Type : Product Edit Product Recipe Next Prev Exit...
-
Page 154: Preset Product Setup
Chapter 4 – General Configuration Configure the Base Component, Base Additive and Sampler as shown in the example below. PRODUCT (87UNL 87UNLEAD ) RECIPE Comp: %100.00 000123 BASE87UNL Comp: %0.00 (---undefined---) Adtv: %0.0500 AD720 ADSP0720 Adtv: %0.0000 (---undefined---) Samp: 42.00 SAMP720 SAMP0720 Samp: 0.00 (---undefined---) -
Page 155: Preset Name
Chapter 4 – General Configuration 4.16.1 RESET The Preset can be assigned a name. This is will be displayed before the driver makes a product selection. 4.16.2 OMPONENT SSIGNMENT After defining your base components, this function allows assignment to the physical component. When selected the Component Selection Screen is displayed: PRE #1 (Preset 001) COMPONENT SELECTION Comp #1: BAS001 Base 001... - Page 156 Chapter 4 – General Configuration 4.16.3 DDITIVE SSIGNMENT After defining your base additives, this function allows assignment to the physical additive. When selected the Additive Selection Screen is displayed: PRE #1 (Preset 001) ADDITIVE SELECTION Adtv #1: ADD001 Adtv 001 Next Prev Exit...
- Page 157 Chapter 4 – General Configuration PRE #1 (Preset 001) SAMPLER SELECTION Samp #1: SAMP720 SAMP0720 Next Prev Exit Enter Configure the assigned Sampler as shown in the example below. PRE #1 (Preset 001) SAMPLER SELECTION Samp #1: SAMP720 SAMP0720 Next Prev Exit Enter...
-
Page 158: Authorized Products Assignment
Chapter 4 – General Configuration 4.16.5 UTHORIZED RODUCTS SSIGNMENT After defining your saleable products, use this function is to specify which saleable products are authorized to be loaded at this preset. When Authorized Products is selected the Authorized Products Screen is displayed: PRE #1 AUTHORIZED SELECTION Prod: PRD001 Prod 001 (------undefined------) -
Page 159: Tank Product Setup
Chapter 4 – General Configuration 4.17 T RODUCT ETUP Use the Tank Product Setup functions to: - Assign defined Base Component to a Tank - Assign defined Base Additive to a Tank. Navigate to this screen: Program Mode -> Configuration -> Products -> Tank Product Setup The Tank Product Setup screen displays: TANK#1 PRODUCT SETUP - PRESET #1 Name... -
Page 160: Configuration Tool Product Register Configuration Screen
Chapter 4 – General Configuration TNK #1 (Tank 001) COMPONENT SELECTION Comp #1: 000123 BASE87UNL Adtv #1: AD720 ADSP0720 Next Prev Exit Enter 4.18 C ONFIGURATION RODUCT EGISTER ONFIGURATION CREEN (See Local Product Definition and Assignment for information on this screen.) Firmware Version 3/4.31.37... -
Page 161: Configuration Tool Recipe Configuration Screen
4.20 A CCESS Use the Access ID's function to assign Personal Identification Numbers (PINs) to MultiLoad II access cards. Up to 300 (0–299) Access IDs (cards) can be stored in the system along with the associated PIN number. Access number length may be from 4–8 characters long. -
Page 162: Sampler Batch Access (Scs Only)
Authorized Products: Sampler Batch Access: DISABLD Next Prev Exit Enter 4.21 C USTOMER ETUP When the MultiLoad II is idle (not authorized for loading), the screen displays a message instructing the driver how to begin the authorization process. Firmware Version 3/4.31.37... - Page 163 The display also alternates between three graphic images, 2 Product Identification Images, and a configurable customer logo (default customer logo is the “Toptech Systems” graphic. There are two methods to configure this customer logo: Load from a built in customer logo or upload a custom .bmp file.
-
Page 164: Loading A Built In Customer Logo
TMS 5 and TMS 6 have a utility program to upload a .BMP file conforming to these specifications into a MultiLoad II. For standalone MultiLoad II and RCU II applications, use the latest MultiMate configuration tool to upload a customer logo. On Rev 2.0 CPU boards, the SD-Card slot can also be used to upload a logo BMP file. -
Page 165: System Date And Time
Chapter 4 – General Configuration 4.22 S YSTEM ATE AND Use the Date & Time function to set the current date and time. 1. From the Configuration menu, choose Date & Time. The CLOCK SETUP screen displays: C L O C K S E T U P [1]Date(YYYYMMDD):20111231 [2]Time... - Page 166 Chapter 4 – General Configuration A L I B I L O G S E T U P BAY: Bay: TICKET: Ticket: CARD: Card #: PRESET: Preset: PROD: Prod COMP: Comp ADTV: Adtv GROSS: Gross NET: TEMP: Temp PRESS: Press GRAV: Grav RELDEN:...
- Page 167 Chapter 4 – General Configuration H A Z A R D S E T U P Hazard1: DANGER! EXTREMELY FLAMMABLE. U4 Hazard2: LONG-TERM EXPOSURE MAY CAUSE C Hazard3: ADDITIZED GASOLINE; MAY CONTAIN Hazard4: BENZENE MAY CAUSE NERVOUS SYST Hazard5: DO NOT USE IN REFORMULATED GAS Next Prev Exit...
-
Page 168: Gps Sites (Ml Ii Mobile Only)
Chapter 4 – General Configuration Selecting the fourth menu point will show the BOL Layout Screen, it is possible to change the position and line on the fly. Also is it possible to print a test print to see if the alignment is correct. BOL SETUP LINE Total Mass:... -
Page 169: Reports Setup
Chapter 4 – General Configuration For each Site, press Enter, then key in the Site Name using the keypad. Press Enter then key in the corresponding Latitude and Longitude values. Press Enter again to save. Then press Next to select the next line and repeat the above. - Page 170 Chapter 4 – General Configuration Parameter Action Daily Report Enable Enabling this parameter will enable the creation of daily reports automatically. Daily Report Time All daily reports will capture transactions over a 24 hour period. This parameter specifies Trigger the start and end time of the report. For example if 01:00 is used then all transactions from 01:00 the previous day to 00:59 the next day will be captured.
-
Page 171: Chapter 5 Product Flow Control
Chapter 5 – Product Flow Control CHAPTER 5 RODUCT ONTROL VERVIEW This Chapter focuses on flow control configuration; it discusses the concepts and procedures relevant to effective product flow control Single-Component Product Delivery Calibration Using Meter Factor Linearization Low Flow First Final High Flow... -
Page 172: Single Product Delivery
2nd Stage Trip Final Trip The digital control valve is the key component of the meter run. The MultiLoad II makes adjustments to the valve based on feedback from the flow meter. The flow profile illustrated below shows how each stage progresses throughout a load. -
Page 173: High Flow
These parameters are located in the Component Setup screen. Once the Low Flow rate has been achieved, the MultiLoad II will make periodic adjustments to the valve as the flow rate drifts above or below the Low Flow Dead Band rate. Dead Band rates are configured on the Meter Setup screen. -
Page 174: Stage Trip
1st Stage Flow Rate is reached. The 1st Stage Flow Rate is configured in the Component menu. When the 1st Stage Trip flow rate is achieved, the MultiLoad II will energize the normally open (upstream) solenoid. This is done in an attempt to lock the valve in a position to maintain the desired flow rate. Periodic adjustments to the valve are made as the flow rate drifts above or below the 1st Stage Trip Dead Band rate. -
Page 175: 2"-3" Digital Control Valves
Chapter 5 – Product Flow Control Overrun Alarm Volume 20 gallons Preset Setup 2”-3” D 5.2.5 IGITAL ONTROL ALVES Once the digital control valve, needle valve adjustments are correctly set, digital valve control is not a problem. But with small 2”-3” digital valves or valves that do not contain needle valve adjusters, these valves tend to react very quickly and sometimes result in constant overshooting of the target flow rate, especially at low flow rates. -
Page 176: Analog Valves
Chapter 5 – Product Flow Control 5.2.8 NALOG ALVES Analog valves are control valves that operate from a 4-20mA signal that indicates the proportional opening of the valve. An analog signal of less than or equal to 4mA will drive the valve completely closed (0%). An analog signal of greater than or equal to 20mA will drive the valve completely open (100%). -
Page 177: Sequential Blending Configuration
Chapter 5 – Product Flow Control 2nd Stage Trip Final Trip The load begins in the Low Flow Start stage. When the Start button is pressed, the control valve opens and the flow rate ramps up from zero to the Low Flow Start flow rate. Both the normally open (NO) and normally closed (NC) solenoids of the digital control valve are energized, causing the control valve to open. - Page 178 Chapter 5 – Product Flow Control After establishing the number of flow meters assigned to the preset, indicate the number of components that will be delivered through the load arm. Set the Blending Type parameter to SEQ (Sequential Blending). For multiple meter runs, the Blending Type parameter may also be set to RAT+SEQ if some recipes will be using ratio delivery.
- Page 179 Chapter 5 – Product Flow Control Component Setup Component parameters related to Sequential Blending are found on the Component Setup screen, shown here. Scroll down the screen to view additional parameter fields. PRE #1 CMP #1 (Base 001 ) SETUP Meter#: High Flow Rate: 1st Stage Trip Volume:...
-
Page 180: Ratio Blending (Excluding Smp)
Chapter 5 – Product Flow Control Block Valve Open FCM# Disabled Block Valve Close FCM# Disabled Block Valve Status FCM# Disabled For detailed parameter descriptions, please refer to the Component Setup section (Section 4.8.4). SMP) ATIO LENDING XCLUDING Regular Comp #1 Premium Comp #2 Figure 5.4... -
Page 181: Ratio Blending Configuration
Chapter 5 – Product Flow Control As each component completes its requirement for the load, its control valve will close. Each component will probably finish at slightly different times. 5.4.1 ATIO LENDING ONFIGURATION Preset Setup Preset configuration for Ratio Blending is accomplished on the Preset Setup screen shown below. Configure the preset or the load arm for ratio blending by indicating the number of flow meters that will be assigned to the preset. - Page 182 Chapter 5 – Product Flow Control time. The alarm can also be activated based on volumetric error rather than a percentage error. This is accomplished via the Blend Check Alarm Volume parameter. Parameter Default Setting Blend Check Start Volume 60 gallons Blend Check Restart Volume 10 gallons Blend Check Alarm %...
- Page 183 Two additional ratio blending parameters are found on the Meter Setup screen. The Ratio Adjust Proportional Factor and the Ratio Adjust Derivative Factor have been configured at the factory. These parameters should not be adjusted without consulting Toptech Systems. Parameter...
-
Page 184: Side-Stream Blending (Excluding Smp)
Chapter 5 – Product Flow Control Component Setup For ratio blending, each component must have its own meter. Assign the component #1 to Meter #1. Assign the component #2 to Meter #2, and so on. PRE #1 CMP #1 (Base 001 ) SETUP Meter#: High Flow Rate:... -
Page 185: Simple Side-Stream Blender Configuration
Chapter 5 – Product Flow Control Regular Comp #1 Ethanol Comp #2 Figure 5.5 Simple Side-Stream Application Side-Steam blending is similar to Ratio blending in that two or more components are delivered simultaneously to achieve a blend. Each component incorporates its own control valve and flow meter. In a side-stream configuration, minor component(s) are injected upstream of the major component’s flow meter (primary meter). -
Page 186: Hybrid Blending (Excluding Smp)
Chapter 5 – Product Flow Control Weights & Measures - Meters Minimum Flow Rate 5 gpm Maximum Flow Rate 100 gpm Figure 5.6 Simple Side-Stream Configuration SMP) YBRID LENDING XCLUDING The MultiLoad architecture permits hybrid blending schemes, where there may be multiple side-streams or multiple, major components that flow through the primary stream. -
Page 187: Sequential Blending With Side-Stream
Chapter 5 – Product Flow Control The following table identifies the configuration parameters necessary to support the diagram in Figure 5.3. Meter #2 and Meter #3 are both designated as side-stream meters of Meter #1. Four side-stream meters could potentially be assigned to this load arm. Preset Meter (Meter #2) Meter (Meter #3) -
Page 188: Ratio Blending With Side-Stream
Chapter 5 – Product Flow Control At the preset-level, define the number of flow meters and components (liquids) that will be delivered through the load arm. In this example, there will be two flow meters and three components. Set the Blending Type parameter found at the preset-level to RAT+SEQ. -
Page 189: Figure 5.11 Ratio Blending With Side Stream Application
Chapter 5 – Product Flow Control Regular Comp #1 Premium Comp #2 Ethanol C #3 Figure 5.11 Ratio Blending with Side Stream Application The example shows a single side-stream meter serving two primary components of a ratio blender. The side- stream meter will only flow into one of the primary streams during a given batch. -
Page 190: Figure 5.12 Ratio Blending With Side Stream Configuration
Chapter 5 – Product Flow Control Component-To-Meter Assignment “Meter #” Param. High Flow DB Rate 10 gpm Stage DB Rate 10 gpm 2nd Stage DB Rate 10 gpm Weights & Measures - Meter #3 Minimum Flow Rate 5 gpm Maximum Flow Rate 100 gpm Figure 5.12 Ratio Blending with Side Stream Configuration At the component-level, I/O assignments can be made for product pumps, etc. -
Page 191: Proving Side-Stream Meters (Excluding Smp)
Chapter 5 – Product Flow Control SMP) ROVING TREAM ETERS XCLUDING It is assumed that proving connections will be used to by-pass the primary meter and valve in order to flow through the side-stream meter into a calibration vessel. Prior to proving a side-stream meter, make the following configuration changes. - Page 192 Chapter 5 – Product Flow Control PRE #1 (Preset 001) SETUP Line Flush Vol: Line Flush Min Vol: Line Flush Comp#: Take L.F. from Match: ENABLED Take L.F. from First: DISABLD Take L.F. from Last: DISABLD Alf. High Delay: Stop Start Delay: Blnd Chk Start Vol: Blnd Chk Restart Vol: Blnd Chk Alarm %:...
- Page 193 Chapter 5 – Product Flow Control short the first component in the recipe; the first component will be shorted by the Line Flush Volume. If this parameter is disabled, MultiLoad will look to the third decision parameter. The third decision parameter is Take Line Flush From Last. This parameter must be enabled if the two previous parameters are disabled.
-
Page 194: Ratio Blending Considerations (Excluding Smp)
Chapter 5 – Product Flow Control SMP) ATIO LENDING ONSIDERATIONS XCLUDING When Ratio Blending, all product recipe components are flowing simultaneously. Any time Ratio Blending is occurring, a flush requirement appears on the Status screen, since a mixture of components exists in the line. Before the ratio-blended load begins, the algorithm decides which component to short. -
Page 195: Calibration Using Meter Factor Linearization
Meter factors are determined during flow meter proving tests by comparing the observed volume with the volume that is indicated on the MultiLoad II display. As the MultiLoad II collects pulses from a flow meter, it divides the pulses by the K-Factor to obtain a Raw Gross Volume. Meter factors are used to correct the Raw Gross Volume so that the volume indicated on the MultiLoad II display matches the volume that is observed during flow meter proving. - Page 196 Meter Factors and Meter Factor Flow Rates are the parameter fields that will be entered. These fields are displayed red and are Weights and Measures protected. When entering the values through the MultiLoad II keypad, the Weights and Measures key switch must be activated to change the value.
-
Page 197: Single Meter Factor
Chapter 5 – Product Flow Control meter factor will be a value that lies somewhere between the Meter Factor #1 Rate and Meter Factor #2 Rate. If the flow rate is higher than the Meter Factor #2 Rate, the meter factor that is applied to the Raw Gross Volume will be interpolated between Meter Factor #2 and Meter Factor #3. -
Page 198: Chapter 6 Additive Control
0.0500%. Once this number is established, any injection size (Additive Volume Per Injection) can be programmed in the MultiLoad II as long as it falls within the mechanical limitations of the injector. MultiLoad II adjusts the frequency of injections to maintain the correct additive percentage. -
Page 199: Additive Port Assignment
Chapter 6 – Additive Control Inject Piston @ Max Travel Return (Launch) (1/2 Cycle Complete) (Throw Time Expires) Piston Cycle Graph Throw Time Expired. Injection Complete Piston Piston Switch High Switch High IDLE Throw Time Throw Time IDLE Figure 6.1 Piston Cycle Graph DDITIVE SSIGNMENT... -
Page 200: Additive Units
Additive totals can be displayed in one of two units: cubic centimeters (cc) or thousandths of a unit volume. The parameter to select the desired units for additives, “Display Adtv as CCs,” is accessed from the MultiLoad II Setup screen. When enabled, all additive related displays will show additive totals in cubic centimeters (cc). If disabled, additive totals will be displayed in thousandths of a unit volume. -
Page 201: Configuring A Piston Only Additive
This topic describes the minimum configuration to get an additive to operate with this method. Configuration of these parameters is mandatory. Using the MultiLoad II Configuration Tool or the Remote Control Unit keypad, access the Program mode. From the Configuration Menu, select the preset and additive desired. -
Page 202: Configuring A Piston With Input Additive
This topic describes the minimum configuration required to get an additive to operate using this method. Configuration of the following parameters is mandatory. Using the MultiLoad II Configuration Tool or the Remote Control Unit keypad in Program mode, select the preset and additive desired. -
Page 203: Method 3 - Pulser Input
This topic describes the minimum configuration needed to get an additive to operate using this method. Configuration of the following parameters is mandatory. You can accomplish this using the MultiLoad II Configuration Tool or the MultiLoad II keypad in Program mode. Select the preset and additive desired. Additive Enable Enable this parameter. -
Page 204: Method 4 - Analog Additive
This topic describes the minimum configuration needed to get an additive to operate using this method. Configuration of the following parameters is mandatory. You can accomplish this using the MultiLoad II Configuration Tool or the MultiLoad II keypad in Program mode. Select the preset and additive desired. Additive Enable Enable this parameter. -
Page 205: Figure 6.3 Common Injector Valve Scheme
Chapter 6 – Additive Control A maximum of 16 additives (2 additives on SMP) can be routed through a single injector. Regardless of the configuration, a maximum of 16 additives (2 additives on SMP) can be assigned to each load arm; only one additive can be delivered through the common injector during a single load. -
Page 206: Additive Block Valves Only
Chapter 6 – Additive Control Additive Injection Injector Valve Output Solenoid Additive Block Valve Additive Block Valve Output-Add #1 Solenoid-Add #1 Additive Block Valve Additive Block Valve Output-Add #2 Solenoid-Add #2 Figure 6.4 Electrical Schematic using Injector Valve 6.5.10 DDITIVE LOCK ALVES Add #1... -
Page 207: Configuring A Common Meter With Multiple Additives
Chapter 6 – Additive Control During a load, the selected Additive Block Valve output will be active at all times. The Additive Injection output will periodically complete the circuit, energizing the Additive Block Valve solenoid, whenever an injection is commanded. Additive Injection Additive Block Valve Additive Block Valve... - Page 208 Chapter 6 – Additive Control Piston Only Piston w/Input Pulser Only Common Meter Analog Add. Enable Enabled* Enabled* Enabled* Enabled* Enabled* Add. FCM# Yes* Yes* Yes* Yes* Yes* Yes* (4 – 20mA) FCM Port (output) Yes* Yes* Yes* Yes* W&M Controlled Upstream Block Valve Additive Type...
- Page 209 Chapter 6 – Additive Control Piston Only Piston w/Input Pulser Only Common Meter Analog Meter Creep Alm. Remote Calibrate BV Open Alrm Time BV Close Alrm Time Pump Stop Delay Flush Pump Run Time Meter Flushed Solenoid Flushed W&M Alarm Promo Count W&M Alarm Reset Mode...
-
Page 210: General Additive Setup
Chapter 6 – Additive Control ENERAL DDITIVE ETUP 1. From Program mode, select Configuration | Equipment Setup. 2. From the Equipment Setup Menu, select Additives. The Select Preset menu displays. 3. Select a preset. The Select Additive – Preset# screen displays. 4. - Page 211 Chapter 6 – Additive Control Parameter Description FCM Port# Choose the port that will serve as the additive injection (output) signal for the selected additive. Possible choices are 0-3 (0-1 on SMP). This port choice also automatically chooses a port to serve as either the additive meter input or the additive feedback signal.
- Page 212 Chapter 6 – Additive Control Parameter Description Solenoid Shut Pulses This parameter applies only to the Pulser additive method. Its purpose is to compensate for the closing speed of the solenoid valve, which may allow consistent over-deliveries. Compensation is accomplished on a pulse basis rather than a volumetric basis.
- Page 213 Chapter 6 – Additive Control Parameter Description W&M Recipe If this additive is to have the recipe percentage under W&M protection, set this value to Percentage the W&M accepted value. When this value is non-zero, the Additive Recipe Percentage MUST be equal to the W&M Recipe Percentage or all attempts to authorize a batch will be denied displaying a message of “W&M Required Additive Pct Not Correct”.
-
Page 214: Figure 6.7 Additive Over Injection
Chapter 6 – Additive Control Parameter Description Check Add Tol Time Set the Check Additive Tolerance Time to permit the system ample time to recover from an Under Additized or Over Additized alarm condition. If this value is set too low, the system will continue to go into the referenced alarm conditions until the additive error has been reduced to within the # of injections specified by the Additized Alarm parameters. - Page 215 Chapter 6 – Additive Control Parameter Description Creep Reset Time Additive Meter Creep is any volume that passes the additive meter when the valve is commanded to be shut. Creep volumes can occur when the additive is authorized or unauthorized (see ‘Unauth Reset Time’...
- Page 216 Shutoff Volume From End. The signal is removed at this volume in order for the valve to close and to permit the additive or dye to be flushed from the line. When MultiLoad II commands the valve to close, the Open Blk Val signal will be removed. Firmware Version 3/4.31.37...
-
Page 217: Additive Calibration
DDITIVE ALIBRATION Two additive calibration methods are available with the MultiLoad II. One is called Additive Cal, which addresses one additive at a time. The other is Remote Calibration, which permits simultaneous setup of multiple additives for calibration. The Remote Calibration function is discussed following the section on the standard Additive Calibration function. -
Page 218: Automatic Calibration Function
UNCTION The following screen samples reflect standard Additive flow meters. The screens for Piston type meters are slightly different. The sequence demonstrates injections that are initiated at the MultiLoad II. 1. From the Additive Calibrate screen, choose Automatic Calibration Function. - Page 219 Chapter 6 – Additive Control PRE #1 ADTV #1 (Adtv 001 ) CALIBRATE Press Next Key to Inject Now! Injection: 0 Meter Pulses: 0 Delivered Volume: 0.000( 0cc) Exit (Note: If the Test Button is Enabled, the text ‘Hold Test Button To Inject Now!’ would appear instead of ‘Press NEXT Key to Inject Now!’) 3.
- Page 220 Chapter 6 – Additive Control PRE #1 ADTV #1 (Adtv 001 ) CALIBRATE Press Next Key to Inject Now! Injection: 5 Meter Pulses: 261 Delivered Volume: 0.100( 379cc) Exit 8. Record the volume collected in the beaker. 9. Press EXIT. 10.
- Page 221 Chapter 6 – Additive Control PRE #1 ADTV #1 (Adtv 001 ) CALIBRATE Delivered Vol: 0.100( 379cc) [1]Beaker Vol: 0.000000 █ [2]Beaker Vol CCs: Meter Pulses: Additive Mtr K-Factr: 2600 Exit 13. At the prompt, key in the additive volume collected in the beaker, and press Enter. (In the sample below, the value 405 was keyed in.) PRE #1 ADTV #1 (Adtv 001 ) CALIBRATE...
-
Page 222: Piston Type Additive Calibration
Chapter 6 – Additive Control PRE #1 ADTV #1 (Adtv 001 ) CALIBRATE Automatic Calibration Function Review Last Calibration Data Calculate Additive Vol/Inject Additive Vol/Inject: 0.0200 Additive Mtr K-Factr: 2600 Additive Mtr Factor: 1.0658 Next Prev Exit Enter The new additive meter factor is now in effect. 16. -
Page 223: Calculate Additive Vol/Inject
Chapter 6 – Additive Control PRE #1 ADTV #1 (Adtv 001 ) CALIBRATE Delivered Vol: 0.100( 379cc) [1]Beaker Vol: 0.106990 [2]Beaker Vol CCs: 405.000 Piston Cycles: Additive Vol/Inject: 0.0200 New Vol/Inject Cal Factr: 1.0699 Enter=Save Exit The following is a screen sample for a Piston-type additive injector after calibration. Notice that the last three fields (Piston Cycles, Additive Vol/Inject, and Vol/Inject Cal Factr) are specific to the piston type of injector. - Page 224 Chapter 6 – Additive Control PRE #1 ADTV #1 (Adtv 001 ) CALIBRATE Automatic Calibration Function Review Last Calibration Data Calculate Additive Vol/Inject Additive Vol/Inject: 0.0200 Additive Mtr K-Factr: 2600 Additive Mtr Factor: 1.0000 Next Prev Exit Enter 2. The Following screen displays: PRE #1 ADTV #1 (Adtv 001 ) CALCULATE [1]Additive Percentage:...
-
Page 225: Remote Additive Calibration
The injectors can be tested one right after the other without having to return to the MultiLoad II to enter data. Observed additive volumes are entered at one time after all samples have been measured and recorded. - Page 226 Chapter 6 – Additive Control C O N F I G U R A T I O N M E N U Communication Network RCU General Setup RCU Setup Equipment Setup Alarm Setup Products Additive Cal. Remote Adtv Cal. Access ID's Custom Logic Customer Logo Setup Next...
- Page 227 Enter 9. The technician is prompted to remove the program key in order to lock the MultiLoad II keypad; this is optional. Upon entering this screen, all of the additives that were enabled in the last step are now ready for calibration.
- Page 228 It is not required to test all of the additives that were enabled in the Select Additives step. 12. After all of the injectors have been tested, return to the MultiLoad II and unlock the MultiLoad II keypad with the Program Key if necessary. Press the Exit key to continue.
- Page 229 Chapter 6 – Additive Control 13. At the Remote Additive Calibration menu, select the Check Delivered option. The Check Delivered Additive screen displays: CHECK DELIVERED ADDITIVE P#1 A#1 Adtv 001 0.100( 379cc) P#1 A#2 Adtv 002 (None Delivered) Next Prev Exit Enter 14.
-
Page 230: Additive Status Screen
Chapter 6 – Additive Control 15. Press 2 and key in the measured amount of additive in CCs collected for this additive, then press ENTER. (In the sample below, we’ll use 405 CCs.) PRE #1 ADTV #1 (Adtv 001 ) CALIBRATE Delivered Vol: 0.100( 379cc) -
Page 231: Additive Flush Features
Or, flush pumps and valves may be used for applications that have demanding flush requirements, such as red dye. MultiLoad II has additional features to support hardware that has been designed for these applications. -
Page 232: Figure 6.9 Basic Flush Cycle
Chapter 6 – Additive Control Last Injection Volume From End=200 gal. Additive Target Volume 1st Stage Trip Volume 200 gal. Shutoff Volume From End=150 gal. Min Flush Vol=150 gal. 1000 Remaining Load Volume (gal.) Figure 6.9 Basic Flush Cycle Last Injection Volume From End-This parameter serves as a warning to the system, that a point is approaching where all additive for the load must be delivered. -
Page 233: Techniques For Flushing Dye
Chapter 6 – Additive Control 6.11.2 ECHNIQUES FOR LUSHING Front Loading Dye The flush cycle can be maximized by injecting the load’s entire dye requirement at the very beginning of the delivery cycle. Flushing will occur for the majority of the load; the load will be over additized during most of the delivery. -
Page 234: Block Valves And Flush Pumps
The Block Valve will open when the MultiLoad II’s Start button is pressed. The Block Valve will close as soon as the volume specified by the Shutoff Volume From End parameter is reached. -
Page 235: Figure 6.12 Additive Meter In Flush Path
Chapter 6 – Additive Control Flushing Systems that use Multiple Block Valves on a Common Additive Meter If the additive meter is in the flush path, it will generate pulses during the flush phase, when additive is no longer being delivered. In such a case, enable the Meter Flushed parameter. Meter pulses will then be ignored during the flush phase. -
Page 236: Figure 6.13 Additive Meter And Injector Valve In Flush Path
Chapter 6 – Additive Control If the Injector Valve is in the flush path, as in the diagram below, it will have to be held open during the flush phase. In such a case, enable the Solenoid Flushed parameter. The Injector Valve will then remain open during the flush phase. -
Page 237: Chapter 7 Swing Arm Setup And Operation (Excluding Smp)
A swing arm is mounted on an island and can be pulled to either of the two bays adjacent to the island. On MultiLoad II, up to 12 swing arms can be assigned to a bay. A bay can have any combination of fixed load arms and swing load arms, provided the total number of load arms does not exceed 12 per bay. -
Page 238: Swing Arm Operation
MultiLoad II RCU. When a swing arm is absent from a bay, all other load arms in the bay can be used normally. - Page 239 Chapter 7 – Swing Arm Setup and Operation (Excluding SMP) Relay Pin Primary Bay FCMs Swing Arm FCMs Secondary Bay FCMs J3-4 (TDB) J3-3 (TDA) J3-2 (RDB) J3-1 (RDA) J3-4 (TDB) J3-3 (TDA) J3-2 (RDB) J3-1 (RDA) J3-4 (TDB) J3-3 (TDA) J3-2 (RDB) J3-1 (RDA) Relay Coil...
-
Page 240: Swing Arm Configuration
Perform the following steps when configuring two bays to share one or more swing arms. Designate one of the bay MultiLoad II RCUs to be the swing arm secondary RCU. It does not matter which RCU is chosen as the secondary. To make a RCU the secondary, go to the designated RCU and enter the program mode. - Page 241 In cases where the swing arm additive pumps are common to other load arms in the bay, Pump Run and Pump Status assignments should be made to FCMs that are dedicated to a single MultiLoad II RCU. That means that the assignment will have to be configured on both RCUs.
-
Page 242: Diagnostics
IAGNOSTICS VERVIEW The MultiLoad II provides built-in diagnostic tools that enable your technician(s) or electrician(s) to isolate wiring or hardware problems by performing various tests. The main diagnostic functions available from the Diagnostics Menu and described in this chapter are:... -
Page 243: Card Reader (Excluding Smp)
EADER XCLUDING Note: If the MultiLoad II is a SMP or does not have a card reader installed, this test is not applicable. Use the Card Reader function to verify the operation of proximity card reader and a driver card. - Page 244 Chapter 9 – Weights & Measures yyyy is the facility number (00-4095) xxxxxxxx is the card number (00000000-01048575). For HID 37-bit H10320 formatted Prox cards, 0=yy=0000000=xxxxxxxx=01 – Card number that was read from the card. Where: yy is the facility number (Always 00). xxxxxxxx is the card number (00000000-99999999).
-
Page 245: Ibutton Reader (Excluding Smp)
EADER XCLUDING Note: If the MultiLoad II is a SMP or does not have a iButton installed, this test is not applicable. Use the iBUTTON function to verify the operation of ibutton and a driver card. From the DIAGNOSTICS MENU, choose iBUTTON Reader. - Page 246 Chapter 9 – Weights & Measures D I A G N O S T I C S M E N U Card Reader Meters COM Loopback Components Serial Ports Additives Network Test Sampler Keypad Tanks Display Custom Logic Unicode FCM Com PCM Com FCM Health PCM Health...
- Page 247 1. Press the 1 key to toggle the Loopback Test to ON. 2. When Loopback is turned ON, press any key at the MultiLoad II keypad and the character pressed will be transmitted out the Serial Port assigned to the Host.
-
Page 248: Serial Port Test
ORT TEST The Serial Port Test is used to verify the serial port hardware of the MultiLoad II. This test provides a method for service personnel to determine the serial port hardware health before sending equipment back to Toptech for repair. -
Page 249: Ptb Serial Test
This option is only available if a PTB printer is configured. PTB diagnostics enable your technician or electrician to diagnose wiring problems or hardware problems by testing the wiring and control from the MultiLoad II to the Serial printer by sending a simple message to it. From the screen the operator needs only to press ENTER per screen directions to send a bay level messge. -
Page 250: Keypad Test
Chapter 9 – Weights & Measures The Network Test introduction screen displays: NETWORK TEST During this test, Ping packets will be sent to the Host IP Address. The Ethernet port must be: enabled, properly configured, and connected to the Host Computer. Exit Enter Press Enter. - Page 251 Chapter 9 – Weights & Measures D I A G N O S T I C S M E N U Card Reader Meters COM Loopback Components Serial Ports Additives Network Test Sampler Keypad Tanks Display Custom Logic Unicode FCM Com PCM Com FCM Health PCM Health...
-
Page 252: Display Test
Chapter 9 – Weights & Measures ISPLAY TEST Use this function to test the MultiLoad II display. 1. From the Diagnostics Menu, select Display. D I A G N O S T I C S M E N U Card Reader... -
Page 253: Unicode Test
Chapter 9 – Weights & Measures 8.10 U NICODE TEST Use this function to view the supported Unicode fonts. 4. From the Diagnostics Menu, select Unicode. D I A G N O S T I C S M E N U Card Reader Meters COM Loopback... -
Page 254: Fcm Communications
8.11 FCM C OMMUNICATIONS Use this function to determine if the internal I/O board or external FCMs are communicating with the MultiLoad II. 1. From the Diagnostics Menu, select FCM Com. D I A G N O S T I C S... -
Page 255: Pcm Communications
Chapter 9 – Weights & Measures 8.12 PCM C OMMUNICATIONS Use this function to determine if a PCM is communicating with the MultiLoad II. 1. From the Diagnostics Menu, select PCM Com. D I A G N O S T I C S... -
Page 256: Fcm Health Status
Flow Control Module number. I/O board-1Meter is 00 and 2-Meter is 00 and 01. Timeouts A timeout occurs when MultiLoad II does not receive a response from the internal I/O board or external FCM after a poll is sent. The MultiLoad II interprets three consecutive timeouts to mean that communications with the internal I/O board or external FCM has been lost. -
Page 257: Pcm Health Status
Flow Control Module number. Timeouts A timeout occurs when MultiLoad II does not receive a response from a PCM after a poll is sent. The MultiLoad II interprets three consecutive timeouts to mean that communications with the PCM has been lost. The Timeouts totalizer increments each time a timeout occurs. -
Page 258: Rcu Diagnostics
Chapter 9 – Weights & Measures 8.15 RCU D IAGNOSTICS The RCU Diagnostics screen displays the state of the MultiLoad II Program switch, the Weights and Measures switches. 1. From the Diagnostics Menu, select RCU. D I A G N O S T I C S... -
Page 259: Bay Diagnostics
Chapter 9 – Weights & Measures Program Key On means that the program mode bolt has been removed. OFF means that the program mode bolt is inside the unit. W&M Key On means that the W&M bolt has been removed. OFF means that the W&M bolt is inside the unit. -
Page 260: Preset Diagnostics
Chapter 9 – Weights & Measures BAY DIAGNOSTICS *GROUND -OFF *VRU -OFF *OVERFILL -OFF *ESD PERM -OFF *BAY PERM4 -OFF *BAY PERM5 -OFF *BAY PERM6 -OFF *BAY PERM7 -OFF [1]PermissOut -OFF [2]Authorized -OFF [3]Alarm Out -OFF [4]OutPulse Exit 8.17 P RESET IAGNOSTICS Preset diagnostics enable your technician or electrician to narrow down the problem by showing what is turned on... -
Page 261: Meter Diagnostics
IAGNOSTICS Meter diagnostics enable your technician or electrician to diagnose wiring problems or hardware problems by testing the wiring and control from the MultiLoad II to outside devices such as digital control valves, flow meters, and permissives. Input statuses can be viewed as ON or OFF. - Page 262 Chapter 9 – Weights & Measures 2. After Selection of the Meter, the Meter Diagnostics screen displays. Only the I/O that is configured will appear on this screen. PRE #1 MTR #1 DIAGNOSTICS Permissive -OFF [1]PermissOut [2]Authorized -OFF [3]Alarm Out -OFF [4]Upstrm Val -OFF...
- Page 263 Chapter 9 – Weights & Measures Turning on both Upstrm Val and Dnstrm Val at the same time will open the digital control valve and may result in flow (if pumps, block valves, and dry breaks are set correctly). Driving the mA output to any value greater than 4 mA will open the digital control valve and may result in flow (if pumps, block valves, and dry breaks are set correctly).
-
Page 264: Digital Control Valve Test
ONTROL ALVE MultiLoad II contains an Open/Close valve test in the Meter Diagnostics screen. This test will automatically open the digital control valve until the high flow rate is achieved. When the high flow rate is achieved, the digital control valve will be commanded to close. - Page 265 Chapter 9 – Weights & Measures 1. At the MultiLoad II, enter Program mode and select the Diagnostic menu. 2. Energize the pump of the desired component: a) From the Diagnostic screen select Components. b) Select the preset that is under test. Select the desired component for the valve that is under test.
- Page 266 Chapter 9 – Weights & Measures PRE #1 MTR #1 DIAGNOSTICS Permissive -OFF [1]PermissOut [2]Authorized -OFF [3]Alarm Out -OFF [4]Upstrm Val -OFF [5]Dnstrm Val -OFF [6]DNS-19.4UPS- 2.7 Del Pulses- 2840 Del Vol- 56.80 Gross Rate- Exit Valve will remain open until the High Flow Rate is reached. If the High Flow Rate cannot be obtained, stop flow by pressing any key.
-
Page 267: Component Diagnostics
IAGNOSTICS Component diagnostics enable your technician or electrician to diagnose wiring problems or hardware problems by testing the wiring and control from the MultiLoad II to outside devices such as block valves, pump runs/status, and permissives. Input statuses can be viewed as ON or OFF. -
Page 268: Additive Diagnostics
IAGNOSTICS Additive diagnostics enable your technician or electrician to diagnose wiring problems or hardware problems by testing the wiring and control from the MultiLoad II to outside devices such as block valves, pump runs/status, injector outputs/inputs and permissives. Input statuses can be viewed as ON or OFF. -
Page 269: Sampler
AMPLER Sampler diagnostics enable your technician, or electrician, to diagnose wiring or hardware problems by testing the wiring and control from the MultiLoad II to outside devices such as block valves, pump runs/status, injector outputs/inputs and permissives. Input statuses can be viewed as ON or OFF. -
Page 270: Tanks (Scs Only)
ANKS Tank diagnostics enable your technician or electrician to diagnose wiring problems or hardware problems by testing the wiring and control from the MultiLoad II to the gauging unit, valves, etc. Input statuses can be viewed as ON or OFF. - Page 271 Chapter 9 – Weights & Measures Outputs can be activated or deactivated from this screen by pressing the number that corresponds to the function. 1. From the Diagnostics Menu, select Tanks. D I A G N O S T I C S M E N U Card Reader Meters...
-
Page 272: Custom Logic
Chapter 9 – Weights & Measures Reads the FCM’s input port for stimulis to start a transaction and reports. Strt Trg Lvl Reads the FCM’s input port for stimulis to stop a transaction and reports. Stop Trg Lvl 8.24 C USTOM OGIC The Custom Logic diagnostic function is used to look at what the live value of each line is. -
Page 273: Gps Diagnostics (Multiload Ii Moble Only)
Chapter 9 – Weights & Measures MODBUS DEVICE 01 DIAGNOSTICS Device Name: Device 01 Adjust Configuration Command: READ 32-bit Register#: 12000 Write Value: 0 Send Command_____________________________ Connection: Closed Sent Command: READ 32-bit Reg# #of Regs [0x03][0x2EE0][0x0002] Received: Value = 65535 Bytes Value [0x03][0x04][0x0000FFFF]... - Page 274 Chapter 9 – Weights & Measures The Pseudo Random Noise (PRN) Code reported for each SV (Space Vehicle) signal received by the GPS. The Received signal strength of each SV signal received. Higher the number, the stronger the signal. As reported by the GPS, the “**” indicates that the corresponding SV signal is being used to compute the current position fix.
-
Page 275: Chapter 9 Weights And Measures
W&M parameters will be rejected. The MultiLoad II enclosure has a location where a lead seal can be placed to ensure that any tampering with the MultiLoad II internals to access the field connections, CPU, configuration memory or switch electronics directly will be evident. -
Page 276: Weights & Measures Change Log And Metrological Parameter Security
ACTOR EATURES The MultiLoad II has the ability to calculate net volumes. Net volume, for the purposes of this discussion, is defined to be the gross volume corrected to a reference temperature and/or a vapor pressure. The net volume is calculated by multiplying the gross volume by a Volume Correction Factor (VCF). -
Page 277: Net And Mass Calculations
ALCULATIONS The MultiLoad II has the ability to calculate mass. Mass, for the purposes of this discussion, is defined to be the net volume corrected to a density. The mass is calculated by multiplying the net volume by a density. There are 3 types of densities which can be used. -
Page 278: Net Pulse Output
Chapter 9 – Weights & Measures Kilogram Air will change the density with -1.1 for products under a density of 996.6 , between 996.6 and 1663.5 we use a density change of -1.0 and everything above 1663.5 will be -0.9. 9.5.1 ULSE UTPUT... -
Page 279: Api Mpms Chapter 11.1-2004/Adjunct To Ip 200/04/Adjunct To Astm D 1250-04
DJUNCT TO DJUNCT TO MultiLoad II firmware as of version 4.31.04 supports API MPMS Chapter 11.1-2004/Adjunct to IP 200/04/Adjunct to ASTM D 1250-04, referred to hereafter as the 2004 standard. Advantages over the 1980 standard include an addition digit of accuracy and correction to an arbitrary reference temperatures or gravity. These methods can be used to recreate corrections factors in the manner of the historic tables with the appropriate inputs. - Page 280 Chapter 9 – Weights & Measures Table Description ASTM1250- This table provides CTL factors for correcting volumes of petroleum liquids at observed 1980 Table 6C temperatures to the volume at 60 F. Use this table if the following conditions exist. ...
- Page 281 Chapter 9 – Weights & Measures Table Description ASTM1250- This table provides CTL factors for correcting volumes of gasolines at observed 1980 Table 24B temperatures to the volume at 60 F. Use this table if the following conditions exist. The liquid is a refined product ...
- Page 282 Chapter 9 – Weights & Measures Table Description ASTM1250- This table provides CTL factors for correcting volumes of crude oil at observed 1980 Table 54A temperatures to the volume at 15 C. Use this table if the following conditions exist. ...
- Page 283 Chapter 9 – Weights & Measures Table Description ASTM1250- This table provides CTL factors for correcting volumes of crude oil at observed 1980 Table temperatures to the volume at 15 C. Use this table if the following conditions exist. 54AG Germany ...
- Page 284 Reference Temperature is 15 C Alpha and K coefficient are known these factors are selected in the MultiLoad II via parameter YG Product name. The test temperature and Calculated CTL are for informational purposes and will not be used in calculations during operations.
- Page 285 Chapter 9 – Weights & Measures Table Description ASTM1250- This table provides density at 20 C of light hydrocarbons at observed temperature and 1980 Table 59E density. Use this table if the following conditions exist. The liquid is a NGL or LPG (propane) ...
- Page 286 Chapter 9 – Weights & Measures Table Description Table TEC ETH This table provides CTL factors for correcting volumes of ethanol at observed temperatures to the volume at either 15 C or 60 F. Use this table if the following conditions exist: ...
- Page 287 Chapter 9 – Weights & Measures Table Description Table PTB-BIO This API BIO tables are used for Methode3 from the PTB Community. Select PTB-BIO table combined with API BIO to choose the wanted product. V(T) = V0 *{1 + [A1 *(T – T0) + A2 *(T – T0)2 + A3 *(T – T0)3]} Formula: = Volume @ base temperature V(T) = Volume @ observed temperature...
- Page 288 Chapter 9 – Weights & Measures Table Description TABLE HYDRO This table provides CTL factors for correcting volumes of hydrocarbons at observed temperatures to the volume at 20 C . Use this table if the following conditions exist: BRAZIL The liquid is alcohol ...
- Page 289 Chapter 9 – Weights & Measures Table Description ASTM1250- This table provides CTL factors for correcting volumes of gasolines at observed 2004 Table 6B temperatures to the volume at 60 F, using the method outlined in Chapter 11.1.6.1 of the 2004 standard.
- Page 290 Chapter 9 – Weights & Measures Table Description ASTM1250- This table provides CTL factors for correcting volumes of lube oils at observed temperatures 2004 Table 24D to the volume at 60 F, using the method outlined in Chapter 11.1.6.1 of the 2004 standard. Use this table if the following conditions exist.
- Page 291 Chapter 9 – Weights & Measures Table Description ASTM1250- This table provides density at 60 F of light hydrocarbons at observed temperature and 2007 Table 23E density. Use this table if the following conditions exist. The liquid is a NGL or LPG (propane) ...
- Page 292 Chapter 9 – Weights & Measures Table Description ASTM1250- This table provides CTL factors for correcting volumes of lube oils at observed temperatures 2004 Table 54D to the volume at 15 C. Use this table if the following conditions exist. ...
- Page 293 Chapter 9 – Weights & Measures Table Description ASTM1250- This table provides CTL factors for correcting volumes of lube oils at observed temperatures 2004 Table 60D to the volume at 20 C. Use this table if the following conditions exist. ...
- Page 294 Chapter 9 – Weights & Measures Table Description ASTM1250- This table is used to correct observed density at the observed temperature to a density at 2004 Table 53D 15 C. When this table is activated, the corrected density is then automatically used in Table 54B, which provides CTL factors for correcting volumes of gasolines at observed temperatures to the volume at 15...
- Page 295 Chapter 9 – Weights & Measures Table Description ASTM1250- This table is used to correct observed density at the observed temperature to a density at 2004 Table 59D 20 C. When this table is activated, the corrected density is then automatically used in Table 54B, which provides CTL factors for correcting volumes of gasolines at observed temperatures to the volume at 20...
- Page 296 CTL are for informational purposes and will not be used in calculations during operations. 2. Configure Temperature Measurement The API tables used in MultiLoad II require the availability of an observed temperature. The observed temperature is the temperature of the liquid as it is being metered. The observed temperature can be monitored continuously with a Resistance Temperature Device (RTD) or a 4-20 mA temperature transmitter.
- Page 297 Chapter 9 – Weights & Measures a) Enter the program mode at the MultiLoad II. Select the Configuration, Equipment Setup, Meters menu. Then select the appropriate preset and meter. b) Find the parameter Temperature Sensor. Set the parameter to Disabled.
- Page 298 Wire the pressure transmitter to the I/O board. Use any available analog input port. Consult wiring diagrams in the Installation Guide. b) Perform pressure calibration. c) Enter the program mode at the MultiLoad II. Select the Weights & Measures/Meters menu. Then select the appropriate preset and meter. Firmware Version 3/4.31.37...
- Page 299 When the pressure transmitter is undergoing maintenance, the observed pressure can be manually entered for use by the API table. a) Enter the program mode at the MultiLoad II. Select the Weights & Measures/Meters menu. Then select the appropriate preset and meter.
-
Page 300: Multiload Straight Delivery (Single Component) Calculations
Chapter 9 – Weights & Measures ULTI TRAIGHT ELIVERY INGLE OMPONENT ALCULATIONS Regular Comp #1 Meter (Meter Level) values are reported as: Gm=M1 Tm=T1 Dm=D1 OR Dr Nm=Gm*VCFr(Tm,Dm) Mm=Nm * Dr OR Mm=Gm * Dm Where: Gm=Gross volume loaded for the Meter M1=Gross volume reported by meter M1 Tm=Temperature for the Meter T1= Volume weighted average temperature reported by probe T1... -
Page 301: Multiload Sequential Blending Calculations
Chapter 9 – Weights & Measures Saleable product (Preset Level) values reported as: Gb=Gm Tb=Tm Db=Dm Nb=Nm Mb=Mm Where: Gb=Gross volume loaded for the blend Tb=Temperature for the blend Db=Density for the blend Nb=Net volume loaded for the blend Mb=Mass loaded for the blend Pressure and Gravity are handled in the same way as Temperature and Density. - Page 302 Chapter 9 – Weights & Measures Regular product (Component Level) values are reported as: Gr=Grm Tr=Trm Dr=Dr’ OR Drm Nr=Nrm Mr=Mrm Where: Gr=Gross volume loaded for the Regular component Tr=Temperature for the Regular component Dr=Density for the Regular component Dr’=Density specified for the Regular component Nr=Net volume loaded for the Regular component Mr=Mass loaded for the Regular component Premium meter (Meter Level) values are reported as:...
-
Page 303: Multiload Ratio Blending Calculations
Chapter 9 – Weights & Measures Tb=((Tr*Gr) + (Tp*Gp)) / Gb (value not to be used for trade) Db=((Dr*Gr) + (Dp*Gp)) / Gb (value not to be used for trade) Nb=Nr + Np Mb=Mr + Mp Where: Gb=Gross volume loaded for the blend Tb=Temperature for the blend ((Tr*Gr) + (Tp*Gp)) / Gb=Volume weighted temperature for the blend Db=Density for the blend... - Page 304 Chapter 9 – Weights & Measures Tr=Trm Dr=Dr’ OR Drm Nr=Nrm Mr=Mrm Where: Gr=Gross volume loaded for the Regular component Tr=Temperature for the Regular component Dr=Density for the Regular component Dr’=Density specified for the Regular component Nr=Net volume loaded for the Regular component Mr=Mass loaded for the Regular component Premium meter (Meter Level) values are reported as: Gpm=M2...
-
Page 305: Multiload Side-Stream Blending Calculations
Chapter 9 – Weights & Measures Mb=Mr + Mp Where: Gb=Gross volume loaded for the blend Tb=Temperature for the blend ((Tr*Gr) + (Tp*Gp)) / Gb=Volume weighted temperature for the blend Db=Density for the blend ((Dr*Gr) + (Dp*Gp)) / Gb=Volume weighted density for the blend Nb=Net volume loaded for the blend Mb=Mass loaded for the blend Pressure and Gravity are handled in the same way as Temperature and Density. - Page 306 Chapter 9 – Weights & Measures Tb=Tbm Db=Dbm Nb=Nbm Mb=Mbm Where: Gb=Gross volume loaded for the blend Tb=Temperature for the blend Db=Density for the blend Nb=Net volume loaded for the blend Mb=Mass loaded for the blend Ethanol meter (Meter Level) values are reported as: Gem=M2 (value not to be used for trade) Tem=T2...
-
Page 307: Multiload Sequential With Ratio Blending Calculations
Chapter 9 – Weights & Measures Where: Gr=Gross volume loaded for the Regular component Gbm-Ge=Gross volume loaded difference between Blend and Ethanol Tr=Temperature for the Regular component ((Tbm * Gbm) – (Te * Ge)) / Gr=Back calculated average temperature for the Regular component Dr=Density for the Regular component Dr’=Density specified for the Regular component ((Dbm * Gbm) –... - Page 308 Chapter 9 – Weights & Measures D1=Volume weighted average Density measured while flowing Regular OR specified for meter M1 Dr=Density specified for the Regular component Nrm=Net volume loaded for the Regular Meter VCFr=API Correction Table for Regular Mrm=Mass loaded for the Regular Meter Regular product (Component Level) values are reported as: Gr=Grm Tr=Trm...
- Page 309 Chapter 9 – Weights & Measures Dp=Density for the Premium component Dp’=Density specified for the Premium component Np=Net volume loaded for the Premium component Mp=Mass loaded for the Premium component Ethanol meter (Meter Level) values are reported as: Gem=M2 Tem=T2 Dem=D2 OR De Nem=Gem*VCFe(Tem,Dem) Mem=Nem * Dem OR Mem=Gem * D2...
-
Page 310: Multiload Sequential With Side-Stream Blending Calculations
Chapter 9 – Weights & Measures ((Dr*Gr) + (Dp*Gp) + (De*Ge)) / Gb=Volume weighted density for the blend Nb=Net volume loaded for the blend Mb=Mass loaded for the blend Pressure and Gravity are handled in the same way as Temperature and Density. 9.11 M ULTI EQUENTIAL WITH... - Page 311 Chapter 9 – Weights & Measures Premium/Ethanol meter (Meter Level) values are reported as: Gpem=M1 Tpem=T1 Dpem=D1 OR ((Dp * (Gpem - Ge)) + (De * Ge)) / Gpem Npem=Gpem*VCFp(Tpem,Dpem) Mpem=Npem * Dpem OR Mpem=Gpem * D1 Where: Gpem=Gross volume loaded for the Premium/Ethanol Meter M1=Gross volume reported by meter M1 while flowing Premium/Ethanol Tpem=Temperature for the Premium/Ethanol Meter T1= Volume weighted average temperature reported by probe T1 while flowing Premium/Ethanol...
- Page 312 Chapter 9 – Weights & Measures D2=Volume weighted average Density measured OR specified for meter M2 De=Density specified for the Ethanol component Nem=Net volume loaded for Ethanol Meter VCFe=API Correction Table for Ethanol Mem=Mass loaded for Ethanol Meter Ethanol product (Component Level) values are reported as: Ge=Gem (value not to be used for trade) Te=Tem...
-
Page 313: Multiload Ratio With Side-Stream Blending Calculations
Chapter 9 – Weights & Measures Tp=((Tpem * Gpem) – (Tep * Gep)) / Gp (value not to be used for trade) Dp=Dp’ OR Dp= ((Dpem * Gpem) – (Dep * Gep)) / Gp (value not to be used for trade) Np=Npem-Nep (value not to be used for trade) Mp=Mpem-Mep... - Page 314 Chapter 9 – Weights & Measures Grem=M1 Trem=T1 Drem=D1 OR ((De * Ge) + (Dr * Gr)) / Gb Nrem=Grem*VCFr(Trem,Drem) Mrem=Nrem * Drem OR Mrem=Grem * D1 Where: Grem=Gross volume loaded for the Regular/Ethanol Meter M1=Gross volume reported by meter M1 Trem=Temperature for the Regular/Ethanol Meter T1= Volume weighted average temperature reported by probe T1 Drem=Density for the Regular/Ethanol Meter...
- Page 315 Chapter 9 – Weights & Measures Db=Density for the blend ((Drem*Grem) + (Dpm*Gpm)) / Gb=Volume weighted density for the blend Nb=Net volume loaded for the blend Mb=Mass loaded for the blend Ethanol meter (Meter Level) values are reported as: Gem=M3 (value not to be used for trade) Tem=T3 (value not to be used for trade)
-
Page 316: Temperature Calibration For Meters
Chapter 9 – Weights & Measures Regular product (Component Level) values are reported as: Gr=Grem-Ge (value not to be used for trade) Tr=((Trem * Grem) – (Te * Ge)) / Gr (value not to be used for trade) Dr=Dr’ OR Dr= ((Drem * Grem) –... - Page 317 Chapter 9 – Weights & Measures PRE #1 MTR #1 TEMPERATURE Temperature Unadjusted: +42.27C [1]Temperature Offset: +0.00C [2]Temperature Adjusted: +42.27C Status Ok Next Prev Exit 2. If the observed temperature is different from the unadjusted temperature displayed, there are two options: Press 1 and key in the observed offset (that is, the difference between the Temp Unadjusted and Temp Adjusted).
-
Page 318: Temperature Compensation And Vcf Calculator
Chapter 9 – Weights & Measures Parameter Description Temp Unadjusted Displays the Resistance Temperature Detector real-time temperature. Temp Offset Displays the current temperature offset value, which is the difference between the Temp Unadjusted value and the Temp Adjusted (observed temperature) value. Temp Adjusted Displays the observed temperature as a result of applying the temperature offset. -
Page 319: Pressure Calibration For Meters
Chapter 9 – Weights & Measures Parameter Description API Name Select the desired API table to correct liquid volumes to a reference temperature. Highlight the field and press Enter to scroll through the choices. Test Temp Enter a test temperature in this field. The temperature that is entered here will not have any effect on actual measurement. - Page 320 Chapter 9 – Weights & Measures PRE #1 MTR #1 PRESSURE Pressure Unadjusted: 25.00 [1]Pressure Offset: +0.00 [2]Pressure Adjusted: 25.00 Next Prev Exit 2. If the observed pressure is different from the unadjusted pressure displayed, there are two options: Press 1 and key in the observed offset (that is, the difference between the Pressure Unadjusted and Pressure Adjusted).
-
Page 321: Density Calibration
Chapter 9 – Weights & Measures 9.16 D ENSITY ALIBRATION Use the Density screen to calibrate density for a Meter. 1. From the Views & Inquiries Menu, choose Density. After selecting the preset and meter, the Density screen displays: PRE #1 MTR #1 DENSITY Density Unadjusted: +500.0 [1]Density Offset:... -
Page 322: Relative Density Calibration
Chapter 9 – Weights & Measures 9.17 R ELATIVE ENSITY ALIBRATION Use the Relative Density screen to calibrate relative density for a Meter. 3. From the Views & Inquiries Menu, choose Relative Density. After selecting the preset and meter, the Relative Density screen displays: PRE #1 MTR #1 RELATIVE DENSITY Relative Density Unadjusted:+0.5000... -
Page 323: Api Gravity Calibration
Chapter 9 – Weights & Measures 9.18 API G RAVITY ALIBRATION Use the API Gravity screen to calibrate API Gravity for a Meter. 5. From the Views & Inquiries Menu, choose API Gravity. After selecting the preset and meter, the API Gravity screen displays: PRE #1 MTR #1 API GRAVITY API Gravity Unadjusted:... -
Page 324: Bsw1 Calibration
Chapter 9 – Weights & Measures 9.19 BSW1 C ALIBRATION Use the BSW1 screen to calibrate the BSW1 sensor for a preset. 7. From the Views & Inquiries Menu, choose BSW1. After selecting the preset, the BSW1 screen displays: PRE #1 BSW1 BSW1 Unadjusted: +50.5% [1]BSW1 Offset:... - Page 325 Chapter 9 – Weights & Measures 9. From the Views & Inquiries Menu, choose BSW2. After selecting the preset, the BSW2 screen displays: PRE #1 BSW2 BSW2 Unadjusted: +50.5% [1]BSW2 Offset: + 0.0% [2]BSW2 Adjusted: +50.5% Next Prev Exit 10. If the observed BSW2 is different from the unadjusted BSW2 displayed, there are two options: Press 1 and key in the observed offset (that is, the difference between the BSW2 Unadjusted and BSW2 Adjusted).
-
Page 326: Chapter 10 Views And Inquiries
Chapter 10– Views and Inquiries CHAPTER 10 IEWS AND NQUIRIES 10.1 VERVIEW The MultiLoad II provides inquiry functions available from the VIEWS AND INQUIRY MENU, shown below: VIEWS AND INQUIRY MENU Alarms Audit Log Totalizers FCM Mapping Temperature Firmware Info... -
Page 327: Viewing Totalizers
Chapter 10– Views and Inquiries If the Alarm message is longer than the display screen allows, the message will wrap to the next line. To clear all active alarms, press the CLR key. However, certain alarms, such as RTD ERROR, will not clear until the condition has been corrected. - Page 328 Chapter 10– Views and Inquiries PRE #1 (Preset 001) TOTALIZERS Total Gross:0000006.31 0000006.31 Total Net :0000006.31 0000006.31 Total Mass :0000006.31 0000006.31 Authorized Gross:0000006.31 0000006.31 Authorized Net :0000006.31 0000006.31 Authorized Mass :0000006.31 0000006.31 Unauthorized Gross:0000000.00 0000000.00 Unauthorized Net :0000000.00 0000000.00 Unauthorized Mass :0000000.00 0000000.00 Parameter Descriptions CLeaR Next...
-
Page 329: Viewing Meter Totalizers
Chapter 10– Views and Inquiries 10.3.2 IEWING ETER OTALIZERS From the View Totalizers Menu, select Meters. After selecting the preset and meter, the Meter Totalizers screen displays: PRE #1 MTR #1 TOTALIZERS Total Gross:000000631 (000000631) Authorized Gross:000000631 (000000631) Unauthorized Gross:000000000 (000000000) Meter Creep Gross:000000000 (000000000) Backflow Gross:000000000 (000000000) CLeaR... -
Page 330: Viewing Component Totalizers
Chapter 10– Views and Inquiries Notes: Volume numbers displayed are whole numbers or with 1/100 resolution depending on the current setting of the “Use Hundredths” RCU W&M Parameter. The numbers on the left indicate volumes in non-resettable totalizers. The numbers on the right indicate volumes in resettable totalizers. Use the CLR key to zero out the resettable totalizers. -
Page 331: Viewing Additive Totalizers
Chapter 10– Views and Inquiries Parameter Descriptions Total Gross Total gross volume of the component delivered. Total Net Total net volume of the component delivered. Total Mass Total mass of the component delivered. Authorized Gross Total authorized gross volume of the component delivered. Authorized Net Total authorized net volume of the component delivered. -
Page 332: Viewing Sampler Totalizers
Chapter 10– Views and Inquiries Unauthorized Gross Total unauthorized gross volume through the additive meter. Meter Creep Gross Gross amount of volume designated as meter creep. Meter creep volumes are small amounts of volume that have been indicated by the meter when flow is supposed to be idle. -
Page 333: Viewing Temperatures
Chapter 10– Views and Inquiries Use the CLR key to zero out the resettable totalizers. 10.4 IEWING EMPERATURES From the Views and Inquiry Menu select Temperature. After selecting the preset and meter, the Temperature screen displays: PRE #1 MTR #1 TEMPERATURE Temperature Input: 099.417Ω... -
Page 334: Viewing Density
Chapter 10– Views and Inquiries PRE #1 MTR #1 PRESSURE Pressure Input: 08.000mA Pressure Unadjusted: +162.50 [1]Pressure Offset: +0.00 [2]Pressure Adjusted: +162.50 Next Prev Exit Parameter Descriptions: Pressure Input Displays the live mA value that is being read by the analog input. Pressure Unadjusted Displays the real-time pressure. -
Page 335: Viewing Relative Density
Chapter 10– Views and Inquiries Parameter Descriptions: Density Input Displays the live mA value that is being read by the analog input. Density Unadjusted Displays the real-time density. Density Offset Displays the current Density offset value, which is the difference between the Density Unadjusted value and the Density Adjusted (observed density) value. -
Page 336: Viewing Bsw1
Chapter 10– Views and Inquiries 10.8 BSW1 IEWING From the Views and Inquiry Menu select BSW1. After selecting the preset, the BSW1 screen displays: PRE #1 BSW1 BSW1 Input: 08.000mA BSW1 Unadjusted: +25.00% [1]BSW1 Offset: +0.00% [2]BSW1 Adjusted: +25.00% Next Prev Exit Parameter Descriptions:... -
Page 337: Viewing Api Gravity
Chapter 10– Views and Inquiries PRE #1 BSW2 BSW2 Input: 08.000mA BSW2 Unadjusted: +25.00% [1]BSW2 Offset: +0.00% [2]BSW2 Adjusted: +25.00% Next Prev Exit Parameter Descriptions: BSW2 Input Displays the live mA value that is being read by the analog input. BSW2 Unadjusted Displays the real-time BSW2. -
Page 338: Viewing Transactions
Chapter 10– Views and Inquiries Parameter Descriptions: API Gravity Input Displays the live mA value that is being read by the analog input. API Gravity Displays the real-time API Gravity. Unadjusted API Gravity Offset Displays the current API Gravity offset value, which is the difference between the API Gravity Unadjusted value and the API Gravity Adjusted (observed relative density) value. - Page 339 Chapter 10– Views and Inquiries VIEW TRANSACTION HEADER Bol#: 0003 Card#: 00000132 Company: 00 Date: 03/23 Start: 00:27 #Details: Stop: 00:31 Prompts: Toptech (5M) 28 41.646 N 081 21.119 W 2=Print Transactions xxxx-yyyy 1=Print Transaction Next Prev Exit Enter=Details Figure 10.1 View Transaction Header Screen #Details Indicates the number of detail lines for this transaction.
- Page 340 Prev Exit (1/100 resolution is displayed when the Use Hundredths RCU W&M parameter is enabled) Preset Number (Always 1 on MultiLoad II SMP). Product Type: 1=Saleable Product Recipe; 2=Component; 3=Additive; 4=Meter, 5=Preset Totalizer, 6=Meter Totalizer, 7=component Totalizer, 8=Additive Totalizer Prod Product ID.
- Page 341 Bol # sequence number from MultiLoad II Detail Number of details of 1 transaction (1 to 99) Batch# Batch# sequence number from MultiLoad II for each loaded batch the number will be increased by 1 Preset Preset or Arm which was used during loading...
-
Page 342: View Sampler Batch Reports (Scs Only)
Chapter 10– Views and Inquiries MultiLoad stores by batch the alarms which occurred during loading for all alarm levels except the bay level. Select the alarm and press Enter to view Alarm details. VIEW TRANSACTION ALARM DETAILS Preset 1 No Alarms Next Prev Exit... -
Page 343: View Weights And Measures Change Log
Chapter 10– Views and Inquiries REF# START DATE END DATE 0002 09/18/15 10/20/15 0001 00/00/00 09/18/15 Next Prev Exit Select a batch report to view in more detail. The View Sampler Batch Report screen displays. SAMPLER 01 BATCH 0002 Start Date: 09/18/15 End Date: 10/20/15 Start Time: 15:11 End Time: 10:10... - Page 344 Printing the W&M Change Log - Select Print to have the log printed. A serial printer must be connected to Com Port 2 of the MultiLoad II to print this log. Com Port 2 must be configured as “Print” on the Communication Setup screen to print the W&M Change Log.
- Page 345 Chapter 10– Views and Inquiries Component level changes may include settings such as meter factors, flow rates and VCF configurations. Meter level changes may include settings such as Temperature and Pressure configurations. This field will indicate CMP:xx for a component change event or MTR:xx for a meter change event. The numeric designation that follows the Cmp or Mtr prefixes is an arbitrary designation made by the facility engineer.
-
Page 346: View Multiload Ii Message Log
ULTI ESSAGE The MultiLoad II Message Log is a real-time event log. All authorization attempts, flow starts, flow stops, alarms (raised or cleared), and various other events are logged with their dates and times. Particular events will also cause totalizer values to be logged. - Page 347 2. Preset Identification-This field describes the preset (load arm) that is relevant to the event. This value will always be 1 on MultiLoad II SMP. Example: Pre:01 indicates that an event has occurred relevant to load arm #1. The numeric designation that follows the Pre prefix is an arbitrary designation made by the facility engineer.
-
Page 348: View Multiload Ii Fcm Mapping
APPING The MultiLoad II FCM Mapping displays all of the different FCM assignments configured in the MultiLoad. It will tell you the parameter that is configured along with the FCM address and port number it is assigned to. If you have specified the type of each FCM (Configuration ->... -
Page 349: View Firmware Information
IRMWARE NFORMATION The Firmware Information screen displays the current version number of the firmware running on the MultiLoad II unit. It also displays the build date, and the checksum. All three are used to specify the exact version of firmware that is currently running. -
Page 350: Chapter 11 Sd Card
There is a SD Card slot located above all CPU boards manufactured after 1/1/2011. This SD Card slot allows the quick loading/saving of configuration files, loading custom logo files, and upgrading firmware. The MultiLoad II firmware version 4.xx.xx provides a SD Card menu screen available from the Main Menu, shown below:... - Page 351 Chapter 13 – Custom Logic View Dir/Files FileName1.bin Configuration 1.mlc Directory1 2013_09_23_ML_LOG Directory2 [new directory] Next Prev Exit Enter CLeaR To go into a directory simply select it from the menu. Select the “..” once inside a directory to get out of it. View Dir/Files Filename1.txt Filename2.bin...
- Page 352 Chapter 13 – Custom Logic To rename a file select it from the menu, then enter the new filename and press Enter. Do not add the extension when creating the new name the extension will be added automatically. View Dir/Files FileName1.bin Configuration 1.mlc Directory1...
-
Page 353: Load Configuration
Chapter 13 – Custom Logic 11.3 ONFIGURATION From the SD Card menu, select Load Configuration. The Load Configuration screen displays files on the SD Card. Load Configuration Configuration 1.mlc Configuration 2.mlc Next Prev Exit Enter CLeaR Select the configuration file to load. Parameters may be rejected if the parameter is out of range, the parameter no longer exists, or the parameter is attempting to change a W&M protected parameter without the W&M key active;... -
Page 354: Save Configuration
Chapter 13 – Custom Logic 11.4 ONFIGURATION From the SD Card menu, select Save Configuration. The Save Configuration screen displays files on the SD Card. Save Configuration Configuration 1.mlc Configuration 2.mlc [new file] [new directory] Next Prev Exit Enter CLeaR Select the configuration file or create a new file to save the configuration. -
Page 355: Load Logo
Chapter 13 – Custom Logic 11.5 From the SD Card menu, select Load Logo. The Load Logo screen displays files on the SD Card. Load Logo Customer Logo.bmp Next Prev Exit Enter CLeaR Select the logo file to load. The logo file MUST be a BMP file with a resolution of 640x240x16 colors. Any file format or color issues will be displayed if the file cannot be loaded. -
Page 356: Load Firmware
Chapter 13 – Custom Logic 11.6 IRMWARE From the SD Card menu, select Load Firmware. The Load Firmware screen displays files on the SD Card. Load Firmware 20100101_ML_4_30_01.bin Next Prev Exit Enter CLeaR Select the firmware file to load. The W&M switch must be active and the firmware file image will be verified before it is accepted and loaded into flash memory. -
Page 357: Corrupt Flash Memory
Chapter 13 – Custom Logic 11.6.1 ORRUPT LASH EMORY If flash memory was corrupted, upon powering up, the MultiLoad will display the following screen: Flash Memory Corrupted Enter 1234 to Continue Press Next to Reload Firmware Pressing 1234 and then hitting Enter will continue operations as normal. However, the behavior of the firmware will be unpredictable and it is recommended that you attempt to reload the firmware image, or contact Toptech Systems. -
Page 358: Format Sd-Card
Press Enter To Continue... Enter Exit Make sure an SD card is inserted in the MultiLoad II unit and press Enter. The screen will display status as the MultiLoad II progresses through the process until successfully formatted. Firmware Version 3/4.31.37... -
Page 359: Dump Diagnostic Data
Chapter 13 – Custom Logic 11.8 IAGNOSTIC From the SD Card menu, select Dump Diagnostic Data. The Dump Diagnostic Data screen prompts for Enter before continuing. DIAGNOSTIC DATA DUMP Press Enter To Continue... Exit Make sure an SD card is inserted in the MultiLoad unit and press Enter. The NVRAM and FLASH is written to the SD card as NVRAM.BIN and FLASH.BIN, respectively. -
Page 360: Export Reports
MultiLoad II parameters or just the non default (modified) parameters. 11.9.2 RANSACTION ETER AMPLER EPORT If Transaction, Sampler, or Meter Report is selected the MultiLoad II will prompt the user to enter in a Start Date, Start Time, End Date and an End Time. Firmware Version 3/4.31.37... -
Page 361: Configuration
Chapter 13 – Custom Logic TRANSACTION REPORT MENU Enter Start Date: 09/03/14 Enter Start Time: 00:00 Enter End Date: 09/03/14 Enter End Time: 11:59 Format: ______________Export Report______________ Next Prev Exit Enter Note: The Transaction report is the only report that is available in XML and CSV format. All other reports are only available in CSV format. - Page 362 Chapter 13 – Custom Logic Description Parameter Store Event Log Files in The Event log file type will be contained in its own subdirectory on the SD Card. This Days parameter is used to configure how long the files will be stored in its directory. Range is 1 day to 3 years (1095 days).
-
Page 363: Chapter 12 Operation
CCESS To begin the authorization process, the MultiLoad II RCU will read a driver’s Prox Card (Excluding the SMP) or will prompt the driver to enter an access ID. Next the driver will be prompted to enter a PIN code. -
Page 364: Remote Control Operation
Product, Quantity, Compartment. The host system may also verify the supplied data and check allocations before uploading the product recipe and authorizing the batch. Upon receiving batch authorization from TMS, the MultiLoad II requests the Driver to "Confirm Start" by pressing Enter again to start flow. - Page 365 Chapter 13 – Custom Logic After inserting a driver card or pressing Next and entering an Access ID/Driver Number, the driver is prompted for a PIN (Personal Identification Number). █ Enter PIN Number:*** The driver may be prompted for additional information like trailer ID. Afterwards the Customer Selection screen will display: █...
- Page 366 Chapter 13 – Custom Logic The driver can either select the customer from the picklist or they can key in the customer number at the prompt. In either case, press Enter. If the customer you selected has at least one account defined, the Account Selection screen will display (shown below).
- Page 367 Chapter 13 – Custom Logic On MultiLoad II On MultiLoad II SMP PRE PRODUCT STATUS Preset 001 >1 Preset 001 IDLE Preset 002 IDLE IDLE PRESET: DELIVER: GALLONS Next Prev ExitLoad Enter=Pick ExitLoad Enter=Preset (1/100 resolution is displayed when the Use Hundredths RCU W&M parameter is enabled) Select a loading arm and press Enter to preset a product to load.
- Page 368 Chapter 13 – Custom Logic Driver will key in the desired volume to load (e.g., 5000) and press Enter PRESET SCREEN PRODUCT: Low Sulfur Diesel 5000 PRESET QUANTITY: Enter=Authorize Exit Press Enter to have the system authorize the load. PRESET SCREEN PRODUCT: Low Sulfur Diesel 5000...
- Page 369 A PLEASE WAIT message displays momentarily while authorization takes place. PRESET SCREEN PRODUCT: Low Sulfur Diesel 5000 PRESET QUANTITY: Please Wait… Then the Load Screen displays again. On MultiLoad II On MultiLoad II SMP PRE PRODUCT STATUS Low Sulfur Diesel >1 LS Diesel 5000 STOPPED Preset 002...
- Page 370 Chapter 13 – Custom Logic Press Enter to start the load. On MultiLoad II On MultiLoad II SMP PRE PRODUCT STATUS Low Sulfur Diesel >1 LS Diesel 5000 2501 HIGH FLOW Preset 002 IDLE HIGH FLOW PRESET: 5000 DELIVER: 2501...
-
Page 371: Load Status Values
Chapter 13 – Custom Logic On MultiLoad II 12:07 PRESET 01 CONTROL SCREEN PRODUCT: Default Product 001 ++++++ STATUS: STOPPED PRESET: DELIVER: 1000 GALLONS ++++++ Gross Tot. : 000000099 Net Tot. : 000000099 Mass Tot. : 000000099 09/10/2013 17:05 Next Prev ExitLoad Enter=Pick At the left Top corner the Real Time is added to the loading screen for all devices except SMP. - Page 372 Chapter 13 – Custom Logic View Detail Status During Loading Driver access to these screens can be blocked using the Status Screen Lockout parameter found on the RCU Setup screen from the Configuration Menu. Pressing the Next and Prev keys will advance through the following load detail screens: From the Load Screen press Next, the Preset Status screen displays.
-
Page 373: End Load Phase
In Local mode, the MultiLoad II prompts the driver for a PIN code after the driver card or access ID/driver number is verified. This PIN code must match the PIN code of the driver table stored in the non-volatile database of the MultiLoad II. -
Page 374: Product Database
Several MultiLoad devices can be attached to the same serial printer. Using the RS232 Multidrop hardware in the MultiLoad it is possible to connect the RS232 COM 2 port on all MultiLoad II devices to a single printer. Serial connections must be as follows:... -
Page 375: Miscellaneous Tasks
When COM 2 is put into the Multi mode, the MultiLoad will monitor the RTS line to determine when the printer is in use by another MultiLoad II device. The DCD line on the MultiLoad will be driver low by a MultiLoad device to take control of the printer. -
Page 376: Operation In Local Mode
As mentioned earlier, in Local mode, the MultiLoad II prompts the driver to insert a driver card or enter an access ID/driver # and PIN. This PIN code must match the PIN code of the driver table stored in the MultiLoad II’s non- volatile database. -
Page 377: Meter Ticket
ExitLoad Enter=Preset From this point, operation is identical to operation in Remote mode. However, when the load completes and the driver pulls his card, instead of TMS printing a bill of lading, the MultiLoad II will print a Meter Ticket. 12.5.8... -
Page 378: Automatic Proving Function
When delivery is complete, the prover operator will be prompted to enter the volume that was observed in the calibrated vessel. A new meter factor for that proving flow rate will be calculated and entered into the MultiLoad II configuration, if approved by the operator. - Page 379 Chapter 13 – Custom Logic PRE #1 (Preset 001) CMP #1 (LS DIESEL ) Meter Proving Preconfiguration Proving Rate M.F. M.F. Flow Rate: 1.0000 Low Flow Vol: 1.0000 Low Flow Rate: 1.0000 Prover 1.0000 Exp Coeff: 0.000000000 Next Prev Exit Enter (Note: The Weights and Measures Switch MUST be active to modify Rate and M.F.
- Page 380 12. Pressing the Next button will advance the user to the remaining rates and meter factors. To return to any of the previous fields, press the Prev key. On MultiLoad II On MultiLoad II SMP PRE PRODUCT STATUS Low Sulfur Diesel >1...
- Page 381 Chapter 13 – Custom Logic PRE #1 (Preset 001) CMP #1 (LS DIESEL ) Meter Proving Results (1 of 4) Prover Volume: 1001.10 Prover Temperature #1: 20.00 Prover Temperature #2: 21.00 Prover Temperature #3: Prover Temperature #4: Next Prev Exit Enter 16.
- Page 382 Chapter 13 – Custom Logic PRE #1 (Preset 001) CMP #1 (LS DIESEL ) Meter Proving Results (3 of 4) Prover Corrected Vol: 1001.10 Metered Volume: 999.64 Correction Factor: 1.0014605 Next Prev Exit 20. Meter Proving Results screen #3 displays the Prover Corrected Volume, the Metered Volume and the Correction Factor that was calculated from all of the data that was entered by the operator.
-
Page 383: Ending Sampler Batch (Scs Only)
Chapter 13 – Custom Logic 12.7 (SCS O NDING AMPLER ATCH A Sampler Batch is a record of all of the activity that has occurred, over a specified period of time, for a particular sample pot. This record contains the following information: 1. -
Page 384: End Sampler Batch During Transaction
Chapter 13 – Custom Logic END SAMPLER BATCH Sampler 01 Sampler 02 Sampler 03 Sampler 04 Next Prev Exit Enter 12.7.2 AMPLER ATCH URING RANSACTION If a transaction is currently active it is still possible to end a sampler batch. From the Load screen, navigate to the Sampler Status screen by pressing the NEXT key until the following screen is displayed. -
Page 385: Chapter 13 Custom Logic
13.1 VERVIEW Custom Logic supplements the standard logic in MultiLoad II. This allows the MultiLoad II to perform many of the simple I/O sequencing tasks that would have required an additional PLC. Configuring Custom Logic involves building a list of logic instructions to read FCM inputs, read MultiLoad II internal states (bay authorized, batch authorized, pump run, etc.), perform logic operations (logic AND, OR, etc.),... -
Page 386: Custom Logic Groups
Chapter 13 – Custom Logic C O N F I G U R A T I O N M E N U Communication Network RCU General Setup RCU Setup Security Setup Equipment Setup FCM Type Setup Alarm Setup Products Additive Cal. Remote Adtv Cal. -
Page 387: Input/Output
Chapter 13 – Custom Logic SELECT CUSTOM LOGIC GROUP UNUSED INPUT/OUTPUT R.T. VALUES READ CONFIGURATION WRITE CONFIGURATION R.T. ALARMS OPERATIONS TIMERS/COUNTERS SCALING RANGE CHECKING R.T. TOTALIZERS NETWORK GROUP Next Prev Exit Enter 13.2.1 NPUT UTPUT The Input/Output group is used to assign a particular I/O port from an FCM to that custom logic line. SELECT CUSTOM LOGIC IN/OUTPUT PARAMETER FCM INPUT PORT FCM OUTPUT PORT... -
Page 388: Real Time Values
Exit Enter RCU Real Time (RT) Parameter Description Proving Mode Indicates if the MultiLoad II is in Proving Mode W&M Key Indicates if the W&M key is active Program Key Indicates if the Program Key is active Card Inserted Indicates if a proximity card has been detected by the card reader... - Page 389 Chapter 13 – Custom Logic Parameter Description Prompt 1 Value entered in by the driver for Prompt 1 Prompt 2 Value entered in by the driver for Prompt 2 Prompt 3 Value entered in by the driver for Prompt 3 Prompt 4 Value entered in by the driver for Prompt 4 Prompt 5...
- Page 390 Chapter 13 – Custom Logic Parameter Description RCU State A numeric value will be used to represent the current status of the MultiLoad. State Numeric Value Idle Authorizing Bay Program Mode Diagnostic Mode Authorizing Load Load Authorized Completing Load Transaction Done Transaction Cancelled Pulling Transaction Archiving Transaction...
- Page 391 Chapter 13 – Custom Logic Parameter Description Card 1 Number Gives the card number of the loader Card 1 Facility Code Gives the facility code of the loader Card 2 Number Gives the card number of the security card Card 2 Facility Code Gives the facility code of the security card Security Bypass Indicates if the Security Bypass switch is ON or OFF...
- Page 392 Chapter 13 – Custom Logic Parameter Description Total Mass Volume Total Mass volume delivered of the current load for the entire Bay. Preset Real Time (RT) Parameter Description Authorized Indicates when a driver is authorized to use a particular preset (load arm). Flow Active Indicates when flow is active on a particular preset.
- Page 393 Chapter 13 – Custom Logic Parameter Description Preset State Indicates the current state of the Preset. Each state will be represented as a numerical value (see below). State Numeric Value Idle Low Flow High Flow Trip Trip Final Trip Start Alarm Complete Not Authorized...
- Page 394 Chapter 13 – Custom Logic Parameter Description Mass Delivered The amount that has been delivered, in mass, on that preset for the current batch. The value is in whole units. Delivered Percentage The amount of product that has been delivered on that preset for the current batch.
- Page 395 Chapter 13 – Custom Logic Parameter Description Compartment Preset Volume The amount of volume that was entered in by the driver to be loaded for the current compartment. Diverter Mode Indicates the current mode the diverter valve is in. Initially it is always in the start mode which means that the divert valve will divert the product back to the tank.
- Page 396 Chapter 13 – Custom Logic Component Real Time (RT) Parameter Description Clearing Errors Indicates that operational alarms are being cleared for that particular component. This process can be initiated remotely or locally. Clear Batch Indicates that this particular component batch is being cleared and archived.
- Page 397 Chapter 13 – Custom Logic Parameter Description Component State Indicates the current flow state of the component. Each state will be represented as a numerical value (see below). State Numeric Value Idle Low Flow High Flow Trip Trip Final Trip Gross Delivered The gross volume that has been delivered, of the specified component, for the current batch.
- Page 398 Chapter 13 – Custom Logic Parameter Description Average Temperature The average temperature of that component for the current batch. Average Pressure The average pressure of that component for the current batch. Average Density The average density of that component for the current batch. Average Relative Density The average density of that component for the current batch.
- Page 399 Chapter 13 – Custom Logic Parameter Description Blend Adjustment Flow Rate The adjusted flow rate, of the specified component, for a ratio blended product, Meter Real Time (RT) Parameter Description Clearing Errors Indicates that operational alarms are being cleared for that particular meter.
- Page 400 Chapter 13 – Custom Logic Parameter Description Gross Flow Rate The current gross flow rate, measured from the specified meter, for the current batch. The value is in whole units. Temperature The current temperature reading associated with the specified meter. The value is in hundredths, with an inferred decimal.
- Page 401 Chapter 13 – Custom Logic Parameter Description Pump Kill Indicates that a Pump Kill signal has been received for a particular additive. Pump Status Indicates that a Pump Status signal has been satisfied for a particular additive. Open Block Valve Indicates that a Block Valve has been commanded to open for a particular additive.
- Page 402 Chapter 13 – Custom Logic Parameter Description Additive State Indicates the current state of the specified Additive. Each state will be represented as a numerical value (see below). State Numeric Value Inactive Ready Injecting Last Injection Shutoff Missed Injections Indicates the current number of missed injections, of the specified additive, for the current batch.
-
Page 403: Read/Write Configuration Parameters
Chapter 13 – Custom Logic Gross Delivered Indicates the current gross volume delivered, of the specified sampler, for the current batch. Value is in thousandths with an implied decimal. Pacing Rate Indicates how often a sample will be taken for the current batch, as defined by the product recipe. - Page 404 Chapter 13 – Custom Logic SELECT CUSTOM LOGIC WRITE PARAMETER RCU CFG BAY CFG PRESET CFG COMPONENT CFG METER CFG ADDITIVE CFG SAMPLER CFG Next Prev Exit Enter CUSTOM LOGIC [0000] 000000400 [0001] P01 C01 High Flow Rate=[0000] [0002] UNUSED [0003] UNUSED [0004] UNUSED [0005] UNUSED...
- Page 405 Chapter 13 – Custom Logic W&M Alarm Reset Mode Definition Numerical Value Authorize Clear 2 minutes 5 minutes 15 minutes 30 minutes 60 minutes 3 hours 12 hours 24 hours Deliver Type Output Pulse Type Definition Numerical Value Gross Mass RCU Level: Program Mode Language Driver Language...
- Page 406 Chapter 13 – Custom Logic Bucket Captive Bucket Noncaptive Slot Captive Slot Noncaptive iButton Bucket Dual Noncaptive Slot Dual Noncaptive Processing Mode Definition Numerical Value Stand-alone Remote UAP Gate Mass Measure Used Definition Numerical Value None Pounds Short Tons Long Tons Grams Kilograms Density of Air...
- Page 407 Chapter 13 – Custom Logic No Measure Liters Decaliters Display Load Volume Definition Numerical Value Disabled Gross Mass Decimal Mark Type Definition Numerical Value Decimal Comma SCS Prompting Definition Numerical Value None Density BSW and Density Sampler UOM Definition Numerical Value None Bay Level: Temperature UOM...
- Page 408 Chapter 13 – Custom Logic Deadman Mode Definition Numerical Value No Mode Continuous Hold Hold & Release Push Preset Level: Blending Type Definition Numerical Value None Ratio Sequential Ratio and Sequential Watercut Blend On Lead Comp Definition Numerical Value None First Component Highest Percentage Lowest Percentage...
- Page 409 Chapter 13 – Custom Logic Micromotion Component Level: API 54YG Products Definition Numerical Value No Product Propane Propylene Butane Isobutane Isobutene Cis-But-2-ene Trans-But-2-ene But-1-ene But-1,3-dien Methanol Ethanol Isopropanol Isobutanol MTBE TAME Benzol Toluol o-Xylol m-Xylol p-Xylol API BIO Definition Numerical Value None E100 Benzin/Petrol...
- Page 410 Chapter 13 – Custom Logic Diesel B5 Rapeseed Oil B7 Rapeseed Oil B100 Rapeseed Oil B5 Soy Bean Oil B7 Soy Bean Oil B100 Soy Bean Oil Density UOM Definition Numerical Value kg/m Api Gravity Relative Density Pressure UOM Definition Numerical Value psig API ASTMD1555 Product...
- Page 411 Chapter 13 – Custom Logic Additive Type Definition Numerical Value Solenoid w/ Meter Piston w/ Normal Feedback Piston w/ Inverted Feedback Piston w/ No Feedback Analog Valve w/ Meter Additive Mode Definition Numerical Value Start On Batch Start On High Flow Start On Volume Tank Level: Active Tank Mode...
-
Page 412: Real Time Alarms
Chapter 13 – Custom Logic FCM Address Bitwise Representation Custom Logic Enabled Invert FCM Number Port Number 1 bit 1 bit 1 bit 5 bits 6 bits Examples Port Bitwise Representation Numerical Value Number Number 00001 000100 4164 00011 001011 4299 13.2.4 LARMS... - Page 413 Chapter 13 – Custom Logic SELECT CUSTOM LOGIC OPERATIONS PARAMETER ALWAYS FALSE EQUAL TO ALWAYS TRUE LESS THAN ASSIGN GREATER THAN LESSorEQUAL GREATERorEQUAL NOT AND NOT OR EXCLUSIVE OR SUBTRACT MULTIPLY DIVIDE SET VALUE Next Prev Exit Enter Type Input Output Always False None...
- Page 414 Chapter 13 – Custom Logic Type Input Output EXCLUSIVE OR A.) Custom Logic Index Output B.) Custom Logic Index A.) Custom Logic Index A + B B.) Custom Logic Index Subtract A.) Custom Logic Index A - B B.) Custom Logic Index Multiply A.) Custom Logic Index A x B...
-
Page 415: Timers/Counters
Chapter 13 – Custom Logic 13.2.6 IMERS OUNTERS The Timers/Counters group can be used to delay outputs, send pulses, and create trigger able counters. SELECT CUSTOM LOGIC TIMER PARAMETER START DELAY STOP DELAY BEACON PULSE COUNTER SET/RESET Next Prev Exit Enter Type Inputs... -
Page 416: Scaling
Chapter 13 – Custom Logic Type Inputs Description Set/Reset A.) Custom Logic Index If the output is 0 and input A is set to 1 then the output will be set to 1. If the output is 1 and input B is B.) Custom Logic Index set to 1, then the output will be reset to 0. -
Page 417: Real Time Totalizers
Chapter 13 – Custom Logic SELECT CUSTOM LOGIC RANGE PARAMETER RANGE CHECK Next Prev Exit Enter First select a custom logic line that will be the absolute minimum of the range. Second select a custom logic line that will be the absolute maximum. The last custom logic line selection will be the input, which will be checked to see if it is greater than the minimum and less than the maximum. -
Page 418: Networking
Chapter 13 – Custom Logic 13.2.10 ETWORKING SELECT CUSTOM LOGIC NETWORK PARAMETER EMAIL MSG______ MODBUS READ 16 MODBUS READ 32 MODBUS WRITE 16 MODBUS WRITE 32 Next Prev Exit Enter E-mail Message: The E-mail Messages function gives you the ability to send off an email message to the email address that is configured in the Network Settings. - Page 419 Chapter 13 – Custom Logic The Modbus Read 16 and Read 32 functions allow you to read from a Modbus register from one of the 10 configured slave devices (Section 4.3.2). SELECT CUSTOM LOGIC NETWORK PARAMETER EMAIL MSG______ MODBUS READ MODBUS READ 32 MODBUS WRITE 16 MODBUS WRITE 32...
- Page 420 Chapter 13 – Custom Logic Modbus Write: The Modbus Write 16 and Write 32 functions allow you to write to a Modbus register from one of the 10 configured slave devices (Section 4.3.2). You first select either Modbus Write 16 or Modbus Write 32. SELECT CUSTOM LOGIC NETWORK PARAMETER EMAIL MSG MODBUS READ 16_...
- Page 421 Chapter 13 – Custom Logic ENTER REGISTER NUMBER Next Prev Exit Enter Then select a Custom Logic line. The value of the referenced Custom Logic line is the value that will be sent to the slave device. SELECT PARAMETER FOR OUTPUT [0000] UNUSED [0001] UNUSED [0002] UNUSED...
-
Page 422: Chapter 14 Web Interface
NTERFACE 14.1 VERVIEW The MultiLoad II has now a web-interface which gives following information: Rcu Ditto (View of the display in the field) Message Log (Normal Logging of the MultiLoad II) W&M Change Log (W&M Log for parameter that are changed) - Page 423 Chapter 14 – Web Interface Note: Only when the user is logging with the admin user the keypad is available. Firmware Version 3/4.31.37...
-
Page 424: Message Log
The W&M Change Log page shows the full W&M log of every W&M parameter change in MultiLoad II. 14.6 UDIT The Audit Log page displays all the parameter changes of the MultiLoad II unit. Go to the Audit Log Screen for more information. Firmware Version 3/4.31.37... -
Page 425: Files On The Sd-Card
Chapter 14 – Web Interface 14.7 SD-C ILES ON THE It is possible to see all the files on the SD-Card remotely. It is possible to click on the log files and open them in the web interface to investigate a problem if needed. 14.8 SD-C PLOAD... -
Page 426: Transaction Viewer
Chapter 14 – Web Interface 14.9 RANSACTION IEWER It is possible to see the last 10000 transactions in the web-interface of MultiLoad II. Opening a transaction to get the full details of the load: Firmware Version 3/4.31.37... -
Page 427: Fcm Mapping Report
Chapter 14 – Web Interface 14.10 FCM M APPING EPORT This page displays the FCM Mapping report produced by the MultiLoad unit. Firmware Version 3/4.31.37... -
Page 428: Simulator Page
Chapter 14 – Web Interface 14.11 S IMULATOR The simulator page of the interface provides a way to provide stimulus to the FCMs as input devices. When the FCM is configured for a meter, port 4 will be hidden, if Quadrature enabled, port 5 will also be hidden. Firmware Version 3/4.31.37... -
Page 429: Configuration Report
Chapter 14 – Web Interface 14.12 C ONFIGURATION EPORT This page displays a Configuration report produced by the MultiLoad unit. This easy to understand screen provides a switch to display modified parameters only and is logically grouped for convenience and to limit viewable size. -
Page 430: Transaction Report
Chapter 14 – Web Interface 14.13 T RANSACTION EPORT This page displays a Transaction report produced by the MultiLoad unit. Current date Transactions are shown by default when the screen is opened however the dates can be modified and submitted using the refresh button. Firmware Version 3/4.31.37... -
Page 431: Chapter 15 Multiload Help
VERVIEW The MultiLoad has the manual built into the firmware. By enabling the parameter RCU Setup -> “Display Help”, an explanation of each parameter will be shown on the MultiLoad II screen. 15.2 Go to RCU SETUP -> Parameter Display Help needs to be enabled. -
Page 432: Chapter 16 Firmware Revision History
16.2 IRMWARE HANGES 08/30/06 ML, ML1, SMP 3.26 WJP (released to QA and production) MultiLoad 1 Version 2.26 ported to MultiLoad II platform. Added customer logos. Added Kanji character sets. VGA (RCU) and QVGA (QRCU) support added. Ethernet support added. - Page 433 Chapter 16 – Firmware Revision History Added additive calibration logic to prevent block valve from opening unless injector is shared. Added a flush volume reset after calibration to prevent flush alarm. Updated clock setup to show time/date in real time. 11/03/06 ML, ML1, SMP 3.26 WJP Added interface to use 4-20mA input on I/O Board or FCM II for Pressure and Density Inputs.
- Page 434 Chapter 16 – Firmware Revision History 02/01/07 3.27.02 WJP Program Mode key switch no longer enables displaying 1/100s vol. Added RCU Setup parameter to enable or disable displaying 1/100s vol. W&M key switch no longer automatically enters proving mode when in standalone mode.
- Page 435 Incorporated final review of all Spanish Transactions. Added Multilingual Product Graphic capability with English and Spanish versions for the ML II, ML II 1-Arm, MultiLoad II SMP graphics. Corrected SMP bug when the program key was not active and the Load Screen Timeout occurs, the screen would stop updating and keypad would stop functioning until an end transaction signal was received.
- Page 436 Chapter 16 – Firmware Revision History Corrected design in transaction archive that omitted storing the year in the date. Removed unused datestr and timestr from RCU Setup Database. Removed unused Report Time, Detailed Report, and Auto Report from RCU Setup Parameters.
- Page 437 Chapter 16 – Firmware Revision History For Component, when "gross value measured for trade" is not set, Temperature, Pressure, Density, Gross Volume and Net Volume may not be used for trade. Updated firmware version to 3.28.02 (bug, still at 3.28.01). 07/23/07 3.28.02 (bug, still at 3.28.01) WJP (released to QA) Corrected placement of Measured for Trade Flag in Transaction Database.
- Page 438 Chapter 16 – Firmware Revision History Number of Components parameter added back into SMP builds. ECO2008-001 Moved all flow rate parameters out of W&M control, except meter min and max flow rates. TMS can change these values when a batch is not authorized. Preset - Low Flow Rate Preset - High Flow Rate Preset - Alt.
- Page 439 Chapter 16 – Firmware Revision History other handshake signals to the RCU or a printer alarm will be raised and prevent loading. 01/26/08 3.28.07 WJP (sent to QA for testing) Corrected bug that caused meter level alarms not to clear when leaving factory calibration/analog calibration menu.
- Page 440 Updated makefile to build new MultiLoad II Mobile application. Added new "MultiLoad II Mobile" product identification graphic. R000 will respond with "MultiLoad Mobl" to identify MultiLoad II Mobile product. The following are specific only to the MultiLoad II Mobile product.
- Page 441 Chapter 16 – Firmware Revision History Added new meter level parameters "Density Alarm Time" and "Pressure Alarm Time" to provide a time that the value must be out of spec before raising the alarm. Same logic as the "Temperature Alarm Time" parameter. Updated density calculations to handle values larger than 1200.0.
- Page 442 Chapter 16 – Firmware Revision History The following are specific only to the MultiLoad II Mobile product. Added R/U650 to support reading or writing the GPS database. Added R140 to support reading the current Latitude/Longitude position. Added R141 to support reading the current load Latitude/Longitude/Site Index.
- Page 443 Chapter 16 – Firmware Revision History Updated Real Time Database version to 3.28.13. Updated Equipment Configuration Database version to 3.28.13. Updated firmware version to 3.28.13. 10/25/08 3.28.13 WJP Introduced beta MODBUS register interface. 11/12/08 3.28_13 WJP Updated Card Reader Logic to support 26-bit, Corporate 1000 formatted cards. Corporate 1000 reads are returned to the Host system as 0=%04u=00000=%08u=01.
- Page 444 Chapter 16 – Firmware Revision History Main Component Net Volume error on effected components would always be an understatement in the amount of side stream net volume that flowed during the previous main components with the common side stream. Corrected placement of "*" when performing a sequential or ratio blend with a side stream.
- Page 445 Chapter 16 – Firmware Revision History Updated PickList routines to support attributed (color selection) of items in the list. Moved all W&M Equipment Configurations back under Equipment Configurations. Moved Temperature, Pressure and Density Calibration functions to the Temperature, Pressure and Density View Screens. Moved Temperature Comp and Pressure Comp screens from the W&M Menu to the Views and Inquiry Menu.
- Page 446 Added "Toptech Product ID French" graphic screens. Added "Total Oil" and various other customer logo graphic screens. Replaced "Toptech Global Solutions" with "Toptech Systems" graphic screen. Updated "MultiLoad" (English, Spanish, and French) product ID graphic screens. Updated code to bring in product ID graphics as raw files in /rcutlc4/bmp directory instead of compiled C const structs.
- Page 447 Chapter 16 – Firmware Revision History Removed ml1 (MultiLoad 1-Arm) target from the Makefile build script. Updated ML package firmware to contain 1-Arm product id string to allow legacy 1- Arm firmware to upgrade to this and later full MultiLoad versions. Updated simulation get_ticks() to not log warnings about non-monotonic system timer jitter on Linux.
- Page 448 Chapter 16 – Firmware Revision History In FCM2_TESTER build, added I/O board digital output, digital input, analog cal, and analog test functions. Updated FCM 2 Analog Tester to correctly exit RTD calibration mode. Updated "4-20mA Input" to more descriptive "Observed 4-20mA". Display yellow background on parameters changed from the default on RCU, Bay, Preset, Component, Meter and Additive configuration screens.
- Page 449 Chapter 16 – Firmware Revision History Added new W&M RCU Setup parameter "Use Hundredths", R030, to enable display, recording, and totalizing in hundredths. Added support to transaction archive and alibi log for viewing or printing whole units or hundredths. Updated Transaction Detail view screen to display whole units or hundredths. Corrected ticket printing of leading zeros on temperature, pressure and density.
- Page 450 Chapter 16 – Firmware Revision History Updated serial routines to use integer instead of character configuration parameters. Added web server functionality. Added routines to get and set Ethernet MAC address for new and old processor. Added ML_Mass build for demo of Krohne meter at ILTA. Density alarm, 4-20mA values outside 4-20 are to be treated as an error and density set to zero.
- Page 451 Chapter 16 – Firmware Revision History Updated software ID to be different for PXA255 vs Atmel builds to prevent upload image swap. Added start of hardware watchdog timer at startup. Updated software major number for new platform builds. Disabled much of the email WIP code. 9/17/10 WJP Added ability to accept analog flow meter inputs.
- Page 452 Chapter 16 – Firmware Revision History When a default density value is supplied or measured at the meter level, this density value is accepted as the meter density and is applied to API calculations on the received meter volumes. When a default density value is not supplied or measured at the meter level, a blend weighted density is calculated from the component densities and is accepted as the meter density and is applied to API calculations on the received meter volumes.
- Page 453 Chapter 16 – Firmware Revision History 2/3/11 WJP Transaction archive lockup issue resolved. After a card out on 3.29.xx firmware, there was a slight possibility of the following issues occurring: - Lockup on preset screen while displaying a status of clearing on one or more arms.
- Page 454 Chapter 16 – Firmware Revision History Added new Meter configuration parameters to support live Relative Density input: "Relative Density Sensor Enabled" "Relative Density Sensor FCM#" "Default Relative Density" "Alarm Low Relative Density" "Alarm High Relative Density" "Relative Density Alarm Time" "Relative Density at 4mA"...
- Page 455 Chapter 16 – Firmware Revision History 2/10/11 WJP (release) Added BP Customer Logo. 2/21/11 WJP (release to QA) Updated 4449 inspection mode to directly access W&M change log (bypassing views & inquiry menu). Corrected bug with density and relative input density format in the Temp Comp screen.
- Page 456 Chapter 16 – Firmware Revision History Corrected Web RCU Ditto processing of the stop key. 7/19/11 WJP Added Preset, Component and Additive product names to the alibi log. 7/19/11 WJP Added new configuration W&M protection type of CONDITIONAL_DENSITY. Added new configuration parameter "W&M Density Lock", that will conditionally move default density, default relative density and API gravity parameters under W&M protection.
- Page 457 Chapter 16 – Firmware Revision History 9/9/11 MSH Added support for two-meter I/O board automated test rig. Changed prompting sequence to use Driver Language setting in RCU Setup rather than language bit in card database. 10/3/11 MSH Added vehicle ID as prompted in transload to truck scenario to transaction sent to TDS.
- Page 458 Chapter 16 – Firmware Revision History Fixed improper BOL number when packing transactions. Changed order of operations in TDS task, so that any pending transactions will be sent first. 10/17/11 MSH Filter tankcar list by terminal ID. Sort Vendor BOLs by BOL number. 10/17/11 WJP Added new configuration parameter (U075) of http_port to allow using alternate ports or complete disabling (http_port = 0) the http service.
- Page 459 Chapter 16 – Firmware Revision History Added densitygravity_type and corrected_densitygravity_type to the transaction detail for proper formatting of the densitygravity value. Update sprintfexp() to return number of characters written to string. 11/4/11 MSH Added Thai translations. 11/7/11 MSH Fixed TDS routines to close connection when our local databases are full. This should keep the records queued on TDS.
- Page 460 Chapter 16 – Firmware Revision History 11/29/11 WJP Added API Tables 54AG, 54BG, 54CG, and 54DG; 12/17/11 WJP When reading a configuration from an SD Card, any rejected commands are added to the message log. 12/21/11 MSH Add Vendor Term ID to Transloading operations. 01/03/12 MSH Merge fix from 3/4.31.01 branch Fix issue where printing tickets longer than 60 lines cause the firmware to...
- Page 461 Chapter 16 – Firmware Revision History Need to retest meter diagnostic screen with analog valve output. Need to add check for misconfiguration of Analog Valves or Additive Analog Valves attempting to use the same 4-20mA output. 01/19/12 WJP Updated the terminal text command, Esc K (Clear EOL) and esc (Clear EOS) to use the current character attributes unless one is specified using the esc G command.
- Page 462 Chapter 16 – Firmware Revision History Updated software copyright year. Corrected scaling and update bug in meter and additive analog output diagnostic screens. 02/21/12 WJP Updated the following API table defs for integration with new TMS5 bay code. TABLE_54CG = 'K', TABLE_54XG = 'L', TABLE_54YG...
- Page 463 Chapter 16 – Firmware Revision History 4/9/12 MSH Added archiving of Lua chunks to flash along with transaction in UAP builds. Changed logic of TDS thread to allow processing of lower priority tasks even if higher priority tasks fail. 4/13/12 Added Modem init string to General Setup screen.
- Page 464 Chapter 16 – Firmware Revision History Updated FCM, PCM and Krohne Mass Meter polling logic to wait 8 seconds before retrying after lost communications. This will ensure that any FCM flowing product or with outputs on will stop flow and drop all outputs. 5/10/12 WJP Removed CTS check on PTB Alibi Log Printers.
- Page 465 Chapter 16 – Firmware Revision History 07/10/12 MSH Revert changes to authorization process relating to Meter table. Remove comp_add_id from Meter table. 07/24/12 MSH Revert changes made to PWM value for display ID 0x02. Add new display ID 0x03 for MultiLoad Mobile display. Add setting for max brightness (register 80).
- Page 466 Chapter 16 – Firmware Revision History Added ability to UAP firmware to read the BOL script from the SD Card for customer/site custom BOL formats. On startup, bol_script.LUA is read from the root directory of the SD card. bol_scripts directory has been created in Perforce to maintain controlled version control and history of custom BOLs developed.
- Page 467 Chapter 16 – Firmware Revision History 11/02/2012 PS Add ability of EOD-Report to trigger via Modbus 11/04/2012 WJP Added RCU general configuration parameter (R/U076) Ethernet HTTP "admin" Password (default "‘Toptech") Added RCU general configuration parameter (R/U077) Ethernet HTTP "user" Password (default "toptech") 11/06/2012 PS Integrated a Low Flow Proving Rate, so during proving another low flow rate can...
- Page 468 Chapter 16 – Firmware Revision History added BSW into UAP build 11/19/2012 PS added change that prompts higher than 100 can be read. r-command 11/20/2012 PS API Table function has now a Test API Gravity instead of using the real API Gravity.
- Page 469 Chapter 16 – Firmware Revision History Remove ability to build special UAP MultiLoad builds. Remove ability to build ml_uap_sim from the Makefile. Remove UAP special build label. Correct #ifdef TDS_INTERFACE/#endif alignments in source. Correct size of returned LUA Data in web transaction viewer. On ml_tds_3op and ml_db, added ability to selectively start or stop tasks.
- Page 470 Chapter 16 – Firmware Revision History 3 modes: Continuous push, Continuous push with scheduled periodic release, Scheduled periodic releases. All signals are added to the Bay Diagnostic screen. New alarm added *DEADMAN. 01/01/2013 PS New feature FKEYPADON and FKEYPADOFF, this gives the capability to disable the keypad.
- Page 471 Chapter 16 – Firmware Revision History Change firmware number to x.31.09 SD-card will save register 78, 79 and 80 Changed equipment database version to 3.31.09. 01/31/2013 PS Added Hydrocarbon Table Brazil (LPG, Gasoline, Diesel, Lubes, Crude, Asphalt and heavy oils) 01/31/2013 PS Enhance sd card file lists to only display select extensions (.bmp, .mlc, .bin) ignoring extension case.
- Page 472 Chapter 16 – Firmware Revision History 03/07/2013 PS Enhancement of Custom Logic supports now Temperature, BSW, Gravity, Relative Density, Density, Pressure, Volumes Enhancement of Custom Logic supports now Timers Start and Stop Delay. 03/07/2013 WJP Added display of Battery Voltage and Temperature on RCU Diagnostics screen (only if CPU board supports the feature).
- Page 473 Chapter 16 – Firmware Revision History Added printing BSW on UAP tickets (previously missing). Added printing Batch Number on UAP tickets. Added printing Batch Number on Stand Alone tickets. Added new LUA command, SetDetailBatchNumberPos(), to BOL script processing. Added SetDetailBswPos() and SetDetailBatchNumberPos() to default BOL script. Added Batch Number to transaction details in the MRTDppp and R800 commands.
- Page 474 Chapter 16 – Firmware Revision History TDS connection status messages, GPS messages, Reprint Ticket, CN Prompts, and all Meter Screens. Language on the Idle Screen Logo images. UAP authorization picklists. Incorrectly only referencing the driver language for the stand alone driver card database instead of the currently selected driver_language.
- Page 475 Chapter 16 – Firmware Revision History Added Mass to the Web Server Transaction Detail Viewer. Added Mass to Alibilog only saleable product(will not print when Mass is ZERO) Added new mass totalizer to Totalizer Screen Added new register R114 to read real-time Mass Totalizers Added real-time preset gross/net/mass totalizers to CONTROL SCREEN Added new mass_measured_used_type on RCU Level Added new mass_measured_used_type to r133 Register...
- Page 476 Chapter 16 – Firmware Revision History Global rename batch_volume_del to batch_del. Global rename volume_preset_whole to preset_whole. Global rename load_volume_del to load_del. Global rename batch_volume_ to batch_. 4/22/2013 WJP Increased resolution of transaction temperature from tenths to hundredths. Updated view transactions and web transaction viewer to display temperature in hundredths.
- Page 477 Chapter 16 – Firmware Revision History UAP, TMS and MultiMate uploads of Driver Card Number data should be zero padded before uploading. UAP, TMS and MultiMate should be updated to support alphanumeric (hex) data for ibutton support. needs updated support following card reader...
- Page 478 Chapter 16 – Firmware Revision History Added to Diagnostic Mode. Added check if analog output is already used by meter level for valve control. 05/14/2013 PS Added Canexus Logo Added Alarm Output for each alarm on global alarm level 05/15/2013 PS Enhancement on Custom Logic: Each Alarm Level Bay, Preset, Meter, Component and Additive can be used for a certain/specific Bay, Preset, Meter, Component and Additive.
- Page 479 Chapter 16 – Firmware Revision History 06/23/2013 WJP Remove not batch_complete check from remote_clear input processing. Added DEBUG_VOLUME and MEMORY_FILL test code. 07/02/2013 PS Start new build x.31.12 For the creation of type 4 transaction record: When loading in whole we only will generate a type4 transaction if the whole value has a difference When loading in hundredths we will only check the hundredths difference Added also Net_whole and gross_hunds value for checking.
- Page 480 Chapter 16 – Firmware Revision History Fixed relative sensor enabled in the W&M menu 08/02/2013 PS Added support for printing W&M Logs to Network Printers 08/05/2013 WJP Corrected check_fcm_analog_assignment() to allow multiple additives on the same preset to share the same analog output. 08/08/2013 PS Fix problem with non-proportional blending, that we allow straight loading of the second product.
- Page 481 Chapter 16 – Firmware Revision History 09/03/2013 PS PHASE1: Moved BSW from meter level to preset level, this includes communication (smith to Modbus), BSW removed from component screen, added a second BSW to support two ranges of inputs, calculations, view and inquire BSW1 and 2 screens.
- Page 482 Chapter 16 – Firmware Revision History Chinese language configuration prompt translations have been updated. Fix W&M log software version number display. Update preset current temperature to be set to zero if no flow. Previously was last flowing blended temp. Fixed Modbus register 955 Driver Name both read and write were misaligned. 10/2/2013 WJP Added Facility Code to UAP Terminal Profile database.
- Page 483 Chapter 16 – Firmware Revision History Updated Auto Batch authorize to not switch to the control screen when a remote start is configured. Corrected bug in Auto authorization where multiple presets running auth authorization at the same time would not work. 10/15/2013 WJP Updated UAP TDS record download to space fill if the record received from TDS is smaller than the record size defined in the database table.
- Page 484 Chapter 16 – Firmware Revision History Removed battery calculation for compensation and removed displaying this value. 11/08/2013 PS Added new help screen with description for Rcu, Bay, Preset, Meter, Component, Additive and Trace level. Also added value, minimum, default and maximum value to screen.
- Page 485 Chapter 16 – Firmware Revision History 12/13/2013 PS Added for all 2004 API Tables the Compressibility Factor (Fp). Enhanced the VCF SETUP calculator to show the Compressibility Factor. Added pressure input to all 2004 API Tables with UOM Selection. Remark: Density and Temperature are fixed to API Type.
- Page 486 Chapter 16 – Firmware Revision History 1/31/2014 WJP Added Open Loading for Germany Local Requirement. New Preset Parameter "Open Loading" added, when enabled will prompt for a Compartment Preset volume (sub batch size). This can be done until the Batch preset volume is reached.
- Page 487 Chapter 16 – Firmware Revision History 3/19/2014 PS Fix: SD-Card Menus were not showing correct filename link, only internal build was affected. Fixed compiler warnings int versus unsigned int and also added some extra range checking. Enhance Custom Logic delays, timers if the time value is negative we force it to zero.
- Page 488 Chapter 16 – Firmware Revision History Fix: Factory default of the alarms will copy now the default_level also into the promoted_level. 4/29/2014 PS Added in UAP mode the order processing database and functionality. Added Order Number to UAP bol. 4/30/2014 PS Enhancement added to Preset, Meter, Component and Additive level all totalizer types.
- Page 489 Chapter 16 – Firmware Revision History Updated prompt script date error messages to clearly indicate the database and field that is causing the error. Updated custom prompt script with comments and changes some variable names to more easily follow the logic. Updated custom prompt script to clear previous prompt data on each prompt to prevent previous data from being preserved when no entry is given.
- Page 490 7/01/2014 PS Remove MultiLoad Arm1 build. Added MultiLoad SCS build. Added new config exclusion for SCS. Remove and replace logos MultiLoad II to new Toptech standard. TODO: New logos are still missing. Changed all logo scripts. Update Makefile for SCS.
- Page 491 Chapter 16 – Firmware Revision History Enhancement: Added new Sampler feature. 7/15/2014 PS Fix: SMP and SCS build Preset Control Screen bottom bar was wrapping. Fix: UAP Bol script alignment issue with Configurable Prompts. Fix: UAP alignment issue with Configurable Prompts on MultiLoad screen. Enhancement: Only allow on the webserver TLSv1 SSL communication.
- Page 492 Chapter 16 – Firmware Revision History 7/26/2014 PS Enhancement: Added the possibility to configure 4 Ntp-servers with gmttime offset parameter. Enhancement: File changes on the sd-card will also have no the correct date and time. 7/28/2014 PS Enhancement: Added DNS-Server for Host IP Address and for all Printer IP Addresses.
- Page 493 Chapter 16 – Firmware Revision History Fix so that Avg. BSW is still calculated even if BSW goes out of range but hasn't gone into Alarm yet. Fix Preset Status Screen so that the current BSW value is always displayed, even if product is not flowing through the meter, when Diverting is enabled.
- Page 494 Chapter 16 – Firmware Revision History 8/14/2014 PS Enhancement: Added a Start and Stop Tank Trigger for unloading of the tanks. 8/15/2014 PS Fix: Ensure that all Custom Logic Diagnostic parameters are fully displayed and not cut off. 8/21/2014 PS Fix: If additive or sampler values are out of screen range in the meter status screens MultiLoad will show #######.
- Page 495 Chapter 16 – Firmware Revision History Pressure value is now in hundredths. Communication will only give whole values for backwards compatibility reasons. 9/17/2014 PS Remove logic that stores previous IP-address. This could cause power-cycling of the unit because unusable IP address is restored. Remark: By removing network cable and entering correct IP-address the issue gets resolved.
- Page 496 Chapter 16 – Firmware Revision History Remove read write Password Registers. (Only Maintained Webserver or Tms Rcuditto) Increased max password length from 8 to 40. Enhancement: Added new security setup level. New Configuration Functions: Password minimum length, password history(up to 14), password expiration time,...
- Page 497 Chapter 16 – Firmware Revision History 11/3/2014 PS Enhancement: When password reset function is used this will be reported in the auditlog. Enhancement: When selecting an email message in Custom Logic the Multiload will show a part of that email message. Enhancement: Added Preset, Meter and Component totalizers to the unauthorized flow voucher.
- Page 498 Chapter 16 – Firmware Revision History Enhancement: Added new parameter Additive No Flow mA, this to support Analog Additive Control Valve which needs continuous 4mA loop power. Enhancement: Added on Bay Level Output Pulse Type for Gross, Net and Mass. 12/04/2014 PS Fix: The 6 character CTL, CPL and VCF fields on the MRTD, MRS and R800 commands...
- Page 499 Chapter 16 – Firmware Revision History Fix: Checking for duplicate tank numbers. It was possible for the MultiLoad to miss a duplicate tank number if all tank groups were not assigned to a component. 02/06/2015 TF Increased Firmware version to x.31.21 Fix: Re coded the unauthorized flow voucher to print every time a batch is authorized.
- Page 500 Chapter 16 – Firmware Revision History Enhancement: Added FTP client report file push from a specific folder and file prepend char. Currently the folder is "reports" and the prepended character is '@'. Once pushed, the @ symbol is removed. Fix: The archive log file potential to assert or crash if the log message has a 0 month or 0 day timestamp.
- Page 501 Chapter 16 – Firmware Revision History - Added Sampler Injection Time Parameter. Added the ability to store transaction data to the SD Card. It is saved as a flat file with no extension, and has the BOL number appended to the filename. All logs, reports, and transaction files will be stored in separate directories now.
- Page 502 Chapter 16 – Firmware Revision History 05/03/15 WJP Added customer logic FCM real time parameter to access the 4-20mA output monitor value. This is required for customer logic to see the 4-20mA signal being sent to an Analog Control Valve since this is computed internally by the FCM. 05/04/15 TF Fix: Fallback flow rate based on current flow rate.
- Page 503 Chapter 16 – Firmware Revision History Fix: The automated reports had the potential of trying to create a filename length that was too long for the CPU to handle. If the filename length was too long then a report could not be created.
- Page 504 Chapter 16 – Firmware Revision History 06/30/2015 TF Fix: In version x.31.23 (MultiLoad and SCS Builds) if Display Hundredths, Use Hundredths, or Proving Mode were enabled, the MultiLoad would continuously redraw the Delivered Amount on the Preset/Line Control Screen. 06/30/2015 MS Enhancement: Added Hi Limit FCM as Sampler input.
- Page 505 Chapter 16 – Firmware Revision History 07/13/2015 TF Added a new Firmware Info screen to Views & Inquiries menu. Display the firmware checksum on the bootup screen. 07/23/2015 WJP Corrected a bug in the UAP ticket reprint function that would prevent reprinting some tickets.
- Page 506 Chapter 16 – Firmware Revision History Enhancement: The formatting of the Audit and W&M Change logs to display the Username when the displaying the logs on the web interface. Previously was only doing that for the SD Card. Enhancement: (Available for ALL reports) Once a report has finished being generated, a summary of the report will be displayed on the screen.
- Page 507 Chapter 16 – Firmware Revision History Updated BSW, RTD, Pressure, Density, Relative Density and API Gravity to use new FCM Analog Input Type. Removed seperate enable parameter for many of these parameters. Added SCS I/O Board Calibration Screen to Factory Menu. Added common routine to display RTD and 4-20mA status to simplify code.
- Page 508 Chapter 16 – Firmware Revision History - New Modbus Device Configuration Screen: Name, IP Address, Slave ID, Protocol, 32-bit Endianness, Poll Time (seconds), Write Time (seconds), Write on Change. - If Write on Change is enabled, then anytime the value changes the MLT will send a write command to the device.
- Page 509 Chapter 16 – Firmware Revision History Fix: Audit Logging of the Group Security Level for Trace parameters. The security level for all Trace parameters fall under the Trace Group Security Level. If the user attempts to change the security level for an individual Trace parameter, it will change all other Trace parameters.
- Page 510 Chapter 16 – Firmware Revision History Fix: Modbus Device Diagnostics would not reset the watch dog timer when attempting to communicate to the slave device. If communications took more than a few seconds the MultiLoad would power cycle itself. Fix: Alarm Detail Screen bug fix, after exiting the alarm_details_screen() the MultiLoad would exit back to the Configuration Menu instead of returning to the alarm setup menu.
- Page 511 Chapter 16 – Firmware Revision History 3/31/2016 TF Fix: If a User's password had expired (Configuration->Security Setup->Password Security Setup->"Expiration in Days" parameter would need to be enabled), and an Administrator logged in to reset the User's password, the User would still be locked out from getting into Program Mode.
- Page 512 Chapter 16 – Firmware Revision History 11/8/2016 MSH Fix: Driver number display for the CSV reports. 11/9/2016 TF Fix: Divert logic wouldn’t close the control valve when diverting product. 12/9/2016 MSH Increased firmware version to x.31.32 Fix: Transaction archive could get corrupted in rare instances after archive wrapped around to beginning of flash.
- Page 513 Chapter 16 – Firmware Revision History Fix: Issue with stopping and then restarting a load when the Deliver Type (Preset Level) was set to something different than the Meter Type (Meter Level) was set to. Example: if Meter Type was set to VOL PULSES but Deliver Type was set to MASS. The MultiLoad could accidently set a load to complete before reaching the target preset amount because the gross volume delivered was equal to or greater than the (preset_amount - final_volume_trip).
- Page 514 Chapter 16 – Firmware Revision History Fix: Issue with FCM Mapping report for SCS I/O Board. The mapping of the ports types were incorrect. 05/11/2017 TF Fix: Additive PID loop logic. If the math for the output went above 24 mA, it would roll over to 0 mA.
- Page 515 Chapter 16 – Firmware Revision History Fix: MultiLoad incorrectly assigned the control valve logic to an FCM analog output when the control valve type was set to NONE, which would throw an erroneous error message if an additive output was assigned to the same analog output. 09/15/2017 TF Added the ability adjust the low flow targets using the blend adjustment logic.
Need help?
Do you have a question about the MultiLoad II and is the answer not in the manual?
Questions and answers
Greetings, how can multiload ll totalizers be reset?
The resettable totalizers on the Toptech Systems MultiLoad II can be reset using the CLR (Clear) key. Non-resettable totalizers cannot be reset.
This answer is automatically generated