
Related Manuals for Ruckus Wireless ZoneDirector 1100


Summary of Contents for Ruckus Wireless ZoneDirector 1100
-
Page 1: User Guide
Ruckus Wireless ™ ZoneDirector ™ User Guide Part Number 800-70401-001 Rev B Published August 2013 www.ruckuswireless.com... -
Page 3: About This Guide
Most user guides and release notes are available in Adobe Acrobat Reader Portable Document Format (PDF) or HTML on the Ruckus Wireless Support Web site at: http://support.ruckuswireless.com/... -
Page 4: Related Documentation
Documentation Feedback Ruckus Wireless is interested in improving its documentation and welcomes your comments and suggestions. You can email your comments to Ruckus Wireless at: docs@ruckuswireless.com When contacting us, please include the following information: •... -
Page 5: Table Of Contents
ZoneDirector 5000 ........... 8 Introduction to the Ruckus Wireless Network ......12 Ensuring That APs Can Communicate with ZoneDirector . - Page 6 Configuring ZoneDirector for Smart Redundancy ......40 Forcing Failover to the Backup ZoneDirector ......42 Configuring the Built-in DHCP Server .
- Page 7 About Ruckus Wireless WLAN Security ........113...
- Page 8 5 Managing Access Points Adding New Access Points to the Network .......154 Working with Access Point Groups .
- Page 9 Monitoring Individual Clients ........190 Monitoring Wired Clients .
- Page 10 Creating a Guest Pass Generation User Role ......220 Assigning a Pass Generator Role to a User Account ..... 221 Generating and Printing a Single Guest Pass .
- Page 11 Upgrading ZoneDirector and ZoneFlex APs .......256 Performing an Upgrade with Smart Redundancy ......257 Working with Backup Files .
- Page 12 12 Smart Mesh Networking Best Practices Choosing the Right AP Model for Your Mesh Network ..... .294 Calculating the Number of APs Required ....... . 294 Placement and Layout Considerations .
- Page 13 Introduction to the Ruckus Wireless Network ........
-
Page 14: Introducing Ruckus Wireless Zonedirector
Overview of ZoneDirector Overview of ZoneDirector Ruckus Wireless ZoneDirector serves as a central control system for Ruckus ZoneFlex Access Points (APs). ZoneDirector provides simplified configuration and updates, wireless LAN security control, RF management, and automatic coordination of Ethernet-connected and mesh- connected APs. -
Page 15: Zonedirector Physical Features
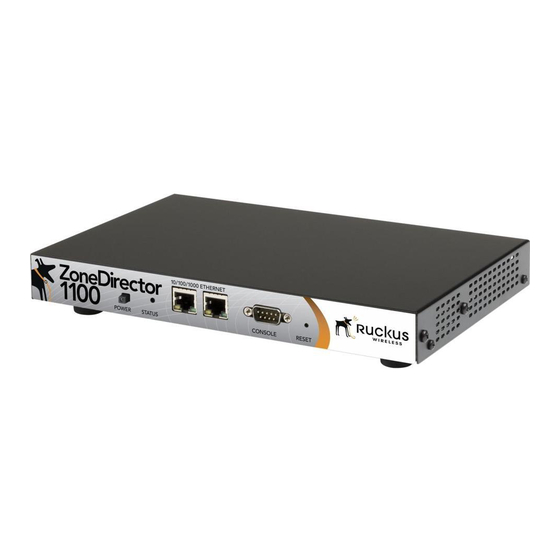
Introducing Ruckus Wireless ZoneDirector ZoneDirector Physical Features ZoneDirector Physical Features Three models of ZoneDirector are currently available: ZoneDirector 1100, ZoneDirector 3000 and ZoneDirector 5000. This section describes the physical features of these ZoneDirector models. ZoneDirector 1100 This section describes the following physical features of ZoneDirector 1100: •... - Page 16 WARNING: Resetting ZoneDirector to factory default settings will erase all configuration changes that you made. Front Panel LEDs Table 2 describes the LEDs on the front panel of ZoneDirector 1100. Table 2. ZoneDirector 1100 front panel LEDs LED Label State...
-
Page 17: Zonedirector 3000
Introducing Ruckus Wireless ZoneDirector ZoneDirector Physical Features Table 2. ZoneDirector 1100 front panel LEDs LED Label State Meaning Ethernet Link Solid Green or The port is connected to a device. Amber Flashing Green or The port is transmitting or receiving Amber traffic. - Page 18 Reset To restart ZoneDirector, press the Reset button once for less than two seconds. For Ruckus Wireless Support use only Console RJ-45 port for accessing the ZoneDirector command line interface. 10/100/1000 Ethernet Two auto negotiating 10/100/1000Mbps Ethernet ports.
- Page 19 Introducing Ruckus Wireless ZoneDirector ZoneDirector Physical Features Table 4. ZoneDirector 3000 front panel LEDs LED Label State Meaning Status Solid Green Normal state. Flashing Green ZoneDirector has not yet been configured. Log into the Web interface, and then configure ZoneDirector using the setup wizard.
-
Page 20: Zonedirector 5000
Introducing Ruckus Wireless ZoneDirector ZoneDirector Physical Features ZoneDirector 5000 This section describes the following physical features of ZoneDirector 5000: • Front Panel Features • Front Panel (Bezel Removed) • Control Panel • Rear Panel Features Figure 3. ZoneDirector 5000 Front Panel Front Panel Features Table 5. -
Page 21: Control Panel
Introducing Ruckus Wireless ZoneDirector ZoneDirector Physical Features Front Panel (Bezel Removed) Figure 4. ZoneDirector 5000 front panel (bezel removed) Table 6. ZoneDirector 5000 front panel (bezel removed) Number Feature ESD ground strap attachment Hard drive bays (not used) Control panel RJ45 serial port for accessing the ZoneDirector command line interface. -
Page 22: Rear Panel Features
Introducing Ruckus Wireless ZoneDirector ZoneDirector Physical Features Table 7. ZoneDirector 5000 control panel Number Feature Power button System reset button System status LED Fan status LED Critical alarm (not used) MJR alarm (not used) NMI pin hole button (factory reset button) - Page 23 Introducing Ruckus Wireless ZoneDirector ZoneDirector Physical Features Number Feature Three full-length PCIe add-in cards (not used) Power supply 2 (backup AC power) Power supply 1 (primary AC power) RJ45 serial port (COM2/serial B) Video connector (not used) USB 0 and 1 (#1 on top)
-
Page 24: Introduction To The Ruckus Wireless Network
Introduction to the Ruckus Wireless Network Introduction to the Ruckus Wireless Network Your new Ruckus Wireless network starts when you disperse a number of Ruckus Wireless access points (APs) to efficiently cover your worksite. After connecting the APs to ZoneDirector (through network hubs or switches), running through the Setup Wizard and completing the “Zero-IT”... -
Page 25: How Aps Discover Zonedirector On The Network
Introducing Ruckus Wireless ZoneDirector Ensuring That APs Can Communicate with ZoneDirector How APs Discover ZoneDirector on the Network 1. When an AP starts up, it sends out a DHCP discovery packet to obtain an IP address. 2. The DHCP server responds to the AP with the allocated IP address. If you configured DHCP Option 43 (see “Option 2: Customize Your DHCP Server”... -
Page 26: How To Ensure That Aps Can Discover Zonedirector On The Network
Introducing Ruckus Wireless ZoneDirector Ensuring That APs Can Communicate with ZoneDirector How to Ensure that APs Can Discover ZoneDirector on the Network If you are deploying the APs and ZoneDirector on different subnets, you have three options for ensuring successful communication between these two devices: •... - Page 27 0 to 255). Sub-options are embedded in option 43 as TLV (type, length, value) blocks. Ruckus Wireless Access points support non-TLV format option 43 values with comma separated IP address strings for discovering ZoneDirectors, and also TLV based option 43 encapsulation as specified in RFC 2132.
- Page 28 TLVs in option 43 by hard coding the DHCP option 43 value, Ruckus Wireless recommends using vendor class option spaces - especially when you have more than one vendor type on the network and need “option 43” to be supported for different vendor type DHCP clients.
- Page 29 Introducing Ruckus Wireless ZoneDirector Ensuring That APs Can Communicate with ZoneDirector NOTE: You can also optionally configure DHCP Option 12 (Host Name) to specify host names for APs. Then, when an AP joins ZoneDirector and ZoneDirector does not already have a device name for this AP, it will take the host name from DHCP and display this name in events, logs and other Web interface elements.
- Page 30 Introducing Ruckus Wireless ZoneDirector Ensuring That APs Can Communicate with ZoneDirector Figure 7. Select the 015 DNS Domain Name check box, and then type your company domain name in String value Step 2: Set the DNS Server IP Address on the DHCP Server 1.
- Page 31 Introducing Ruckus Wireless ZoneDirector Ensuring That APs Can Communicate with ZoneDirector Figure 8. Select the 006 DNS Servers check box, and then type your DNS server’s IP address in the Data entry section Step 3: Register the ZoneDirector IP Addresses with a DNS Server After you complete configuring the DHCP server with DNS related information, you need to register the IP addresses of ZoneDirector devices on the network with your DNS server.
-
Page 32: Firewall Ports That Must Be Open For Zonedirector Communications
Introducing Ruckus Wireless ZoneDirector Ensuring That APs Can Communicate with ZoneDirector Firewall Ports that Must be Open for ZoneDirector Communications Depending on how your network is designed, you may need to open firewall ports on any firewalls located between ZoneDirector, FlexMaster or the access points. The following table lists the ports that need to be open for different types of communications. -
Page 33: Installing Zonedirector
Introducing Ruckus Wireless ZoneDirector Installing ZoneDirector • An active ZoneDirector behind NAT will be unable to perform upgrades to the standby ZoneDirector on the other side of the NAT device. Installing ZoneDirector Basic installation instructions are included in the Quick Start Guide that shipped with your ZoneDirector. -
Page 34: Accessing Zonedirector's Command Line Interface
Introducing Ruckus Wireless ZoneDirector Accessing ZoneDirector’s Command Line Interface Figure 10. ZoneDirector Setup Wizard Accessing ZoneDirector’s Command Line Interface In general, this User Guide provides instructions for managing ZoneDirector and your ZoneFlex network using the ZoneDirector Web interface. You can also perform many management and configuration tasks using the ZoneDirector Command Line Interface (CLI) by connecting directly to the Console port or an Ethernet port. - Page 35 To view a list of commands that are available at the root level, enter help or ?. For more information on using the CLI, see the Ruckus Wireless ZoneDirector Command Line Interface Reference Guide, available from...
-
Page 36: Using The Zonedirector Web Interface
Using the ZoneDirector Web Interface The ZoneDirector Web interface consists of several interactive components that you can use to manage and monitor your Ruckus Wireless WLANs (including ZoneDirector and all APs). Table 12. Components of the ZoneDirector Web interface Dashboard... -
Page 37: Navigating The Dashboard
Introducing Ruckus Wireless ZoneDirector Using the ZoneDirector Web Interface Navigating the Dashboard The Dashboard offers a number of self-contained indicators and tables that summarize the network and its current status. Some indicators have fields that link to more focused, detailed views on elements of the network. -
Page 38: Using Indicator Widgets
Click the + button next to an AP group to expand the group to display all members of the AP group. • Support: Shows contact information for Ruckus Wireless support. • Most Active Client Devices: Shows the top five clients in terms of usage, their IP addresses and MAC addresses, and the user name. - Page 39 Introducing Ruckus Wireless ZoneDirector Using the ZoneDirector Web Interface Adding a Widget To add a widget 1. Go to the Dashboard. 2. Click the Add Widgets link located at the bottom left corner of the Dashboard page. Figure 13. The Add Widgets link is at the bottom-left corner of the Dashboard...
- Page 40 Introducing Ruckus Wireless ZoneDirector Using the ZoneDirector Web Interface Figure 14. The widget icons appear at the top-left corner of the Dashboard Widget icons 4. Click Finish in the Widgets pane to close it. Removing a Widget To remove a widget from the Dashboard, click the icon for any of the widgets currently open on the Dashboard.
-
Page 41: Real Time Monitoring
Introducing Ruckus Wireless ZoneDirector Using the ZoneDirector Web Interface Figure 15. To remove a widget, click the corresponding red X icon Real Time Monitoring The Real Time Monitoring tool provides a convenient at-a-glance overview of performance statistics such as CPU and memory utilization, number of APs and clients on the network, and number of packets transmitted. - Page 42 Introducing Ruckus Wireless ZoneDirector Using the ZoneDirector Web Interface Figure 17. The Real Time Monitoring screen Select a time increment to monitor statistics by (5 minutes, 1 hour or 1 day) and click Start Monitoring to begin. Note that because the Real Time Monitoring process itself consumes a small amount of system resources, it should be used as a general overview tool rather than a precise measurement.
-
Page 43: Stopping And Starting Auto Refresh
The Refresh icon on all widgets is disabled when auto refresh is stopped Registering Your Product NOTE: Ruckus Wireless encourages you to register your ZoneDirector product to receive updates and important notifications, and to make it easier to receive support in case you need to contact Ruckus for customer assistance. - Page 44 5. Email the CSV file (which includes the serial numbers and MAC addresses of your ZoneDi- rector and all known APs, and your contact information) to register@ruckuswireless.com. Figure 20. Support Widget on the Dashboard Figure 21. The Product Registration page Your ZoneDirector is now registered with Ruckus Wireless.
- Page 45 Configuring System Settings In This Chapter System Configuration Overview ..........34 Changing the System Name .
-
Page 46: Configuring System Settings
Configuring System Settings System Configuration Overview System Configuration Overview The majority of ZoneDirector’s general system settings can be accessed from the Configure > System page in the Web interface. A basic set of parameters is configured during the Setup Wizard process. These parameters and others can be customized on this page. NOTE: When making any changes in the Web interface, you must click Apply before you navigate away from the page or your changes will not be saved. -
Page 47: Changing The Network Addressing
Configuring System Settings Changing the Network Addressing Changing the Network Addressing If you need to update the IP address and DNS server settings of ZoneDirector, follow the steps outlined below. CAUTION: As soon as the IP address has been changed (applied), you will be disconnected from your Web interface connection to ZoneDirector. -
Page 48: Ipv6 Configuration
Configuring System Settings Changing the Network Addressing IPv6 Configuration ZoneDirector supports IPv6 and dual IPv4/IPv6 operation modes. If both IPv4 and IPv6 are used, ZoneDirector will keep both IP addresses. Ruckus ZoneFlex APs operate in dual IPv4/v6 mode by default, so you do not need to manually set the mode for each AP. If you enable IPv6, you have the option to manually configure an IP address in IPv6 format (128 bits separated by colons instead of decimals) or to choose Auto Configuration. -
Page 49: Enabling An Additional Management Interface
Configuring System Settings Enabling an Additional Management Interface Figure 24. Enabling IPv6 automatically changes other fields to allow IPv6 addresses Enabling an Additional Management Interface The additional management interface is created for receiving or transmitting management traffic only. The management IP address can be configured to allow an administrator to access ZoneDirector remotely from a different subnet and VLAN from the AP network. - Page 50 Configuring System Settings Enabling an Additional Management Interface 4. If ZoneDirector needs to be accessible from a remote network, select Default gateway is connected with this interface, and enter the Gateway IP address in the field provided. Enabling this setting is only necessary if you need to access ZoneDirector from a remote network and there are two or more gateways in the network;...
-
Page 51: Creating Static Route Tables
Configuring System Settings Creating Static Route Tables Creating Static Route Tables Customizing static route tables may be necessary in cases where ZoneDirector needs to be managed from a remote network. By default, ZoneDirector management traffic is restricted to stations on the same VLAN and IP subnet as ZoneDirector to prevent unauthorized access. However, if you need to manage ZoneDirector from a remote network, you can create custom static routes to ensure management traffic will be able to reach ZoneDirector successfully. -
Page 52: Configuring Zonedirector For Smart Redundancy
NOTE: This feature is only available using two ZoneDirectors of the same model and number of licensed APs. You can not enable Smart Redundancy using a ZoneDirector 3000 as the primary and a ZoneDirector 1100 as the backup unit, for example. Configuring ZoneDirector for Smart Redundancy For management convenience, both ZoneDirectors in a Smart Redundancy deployment can be managed via a single shared IP address. - Page 53 Configuring System Settings Enabling Smart Redundancy Figure 27. Enable Smart Redundancy 5. Enable the check box next to Enable Smart Redundancy. 6. Enter the IP address of the backup unit under Peer IP Address (if known). If you have configured Limited ZD Discovery under Configure > Access Points > Access Point Policies, you must identify the IP address of both ZoneDirectors that the APs should connect to when Smart Redundancy is active.
-
Page 54: Forcing Failover To The Backup Zonedirector
Figure 28. Smart Redundancy status link NOTE: If you have two ZoneDirectors of the same model and license level, Ruckus Wireless recommends using the Smart Redundancy feature. If you have two ZoneDirectors of different models or different license levels, you can use Limited ZD Discovery to provide limited redundancy;... -
Page 55: Configuring The Built-In Dhcp Server
System Configuration page. Enabling the Built-in DHCP server NOTE: Ruckus Wireless recommends that you only enable the built-in DHCP server if there are no other DHCP servers on the network. The DHCP server in ZoneDirector can support only a single subnet. If you enable the built-in DHCP server, Ruckus Wireless also recommends enabling the rogue DHCP server detector. -
Page 56: Viewing Dhcp Clients
Configuring System Settings Configuring the Built-in DHCP Server 6. If your APs are on different subnets from ZoneDirector, click the check box next to DHCP Option 43 to enable Layer 3 discovery of ZoneDirector by the APs. 7. Click Apply. NOTE: If you typed an invalid value in any of the text boxes, an error message appears and prompts you to let ZoneDirector automatically correct the value. -
Page 57: Setting The System Time
Configuring System Settings Setting the System Time Figure 31. To view current DHCP clients, click the “click here” link Setting the System Time The internal clock in ZoneDirector is automatically synchronized with the clock on your administration PC during the initial setup. You can use the Web interface to check the current time on the internal clock, which shows up as a static notation in the Configure tab workspace. -
Page 58: Setting The Country Code
Configuring System Settings Setting the Country Code Figure 32. The System Time options Setting the Country Code Different countries and regions maintain different rules that govern which channels can be used for wireless communications. Setting the Country Code to the proper regulatory region ensures that your ZoneFlex network does not violate local and national regulatory restrictions. -
Page 59: Channel Optimization
Frequency Selection) channels in the 5 GHz band should be available for use by your APs. Note that these settings only affect Ruckus Wireless APs that support the extended DFS channel list. Channel Optimization settings are described in the following table. -
Page 60: Channel Mode
Configuring System Settings Setting the Country Code Table 14. Channel Optimization settings for US Country Code Setting Description Use this setting when Optimize for Performance ZoneFlex APs can use all available You have only DFS-capable APs in DFS and non-DFS channels, without your network, you are not concerned regard for compatibility or with DFS compatibility of client... - Page 61 Configuring System Settings Setting the Country Code ZoneFlex Outdoor APs to use channels regulated as indoor use only. If you have a dual- band ZoneFlex Indoor AP functioning as a RAP with dual-band ZoneFlex Outdoor APs functioning as MAPs, the mesh backhaul link must initially use a channel allowed for outdoor use.
-
Page 62: Changing The System Log Settings
Configuring System Settings Changing the System Log Settings Changing the System Log Settings ZoneDirector maintains an internal log of current events and alarms. This file has a fixed capacity; at a certain level, ZoneDirector will start deleting the oldest entries to make room for the newest. -
Page 63: Setting Up Email Alarm Notifications
Configuring System Settings Setting Up Email Alarm Notifications 1. Go to Configure > System. 2. Scroll down to Log Settings. 3. Make your selections from these syslog server options: • Event Log Level: Select one of the three logging levels: “Show More,” “Warning and Critical Events,”... - Page 64 Configuring System Settings Setting Up Email Alarm Notifications Table 15. SMTP settings for email notification SMTP Setting Description Email address Type the email address to which ZoneDirector will send alarm messages. You can send alarm messages to a single email address. From email address Type the email address from which ZoneDirector will send alarm messages.
- Page 65 Configuring System Settings Setting Up Email Alarm Notifications 4. To verify that ZoneDirector can send alarm messages using the SMTP settings you config- ured, click the Test button. • If ZoneDirector is able to send the test message, the message Success! appears at the bottom of the Email Notification page.
-
Page 66: Customizing Email Alarms That Zonedirector Sends
Enabling Management via FlexMaster If you have a Ruckus Wireless FlexMaster server installed on the network, you can enable FlexMaster management to centralize monitoring and administration of ZoneDirector and other supported Ruckus Wireless devices. This version of ZoneDirector supports the following FlexMaster-deployed tasks: •... - Page 67 Configuring System Settings Enabling Network Management Systems • Performance monitoring When the FlexMaster management option is enabled, you will still be able to access the ZoneDirector Web interface to perform other management tasks. By default, FlexMaster management is disabled. To enable FlexMaster management 1.
-
Page 68: Enabling Northbound Portal Interface Support
Configuring System Settings Enabling Network Management Systems Monitoring ZoneDirector Performance from FlexMaster If you want to monitor ZoneDirector’s performance statistics from FlexMaster, select Enable Performance Monitoring, enter an update interval, and click Apply. This option is disabled by default. Enabling Northbound Portal Interface Support The Northbound Portal interface allows the use of DPSKs on open authentication WLANs meant for public access. -
Page 69: Configuring Snmp Support
ZoneDirector with SNMPv3 enabled. NOTE: For a list of the MIB variables that you can get and set using SNMP, check the related SNMP documentation on the Ruckus Wireless Support Web site at http://support.ruckuswireless.com/documents. - Page 70 Configuring System Settings Enabling Network Management Systems Figure 39. Enabling the SNMPv2 agent If your network uses SNMPv3 To enable SNMPv3 management: 1. Go to Configure > System. Scroll down to the bottom of the page and click the Network Management link to open the Network Management section.
-
Page 71: Enabling Snmp Trap Notifications
Configuring System Settings Enabling Network Management Systems Figure 40. Enabling the SNMPv3 agent Enabling SNMP Trap Notifications If you have an SNMP trap receiver on the network, you can configure ZoneDirector to send SNMP trap notifications to the server. Enable this feature if you want to automatically receive notifications for AP and client events that indicate possible network issues (see “Trap Notifica- tions That ZoneDirector Sends”... - Page 72 Configuring System Settings Enabling Network Management Systems Figure 41. Enabling SNMPv2 trap notifications Figure 42. Enabling SNMP trap notifications with SNMPv3 Trap Notifications That ZoneDirector Sends There are several events for which ZoneDirector will send trap notifications to the SNMP server that you specified.
- Page 73 Configuring System Settings Enabling Network Management Systems Table 16. Trap notifications Trap Name Description An AP has joined ZoneDirector. The AP’s ruckusZDEventAPJoinTrap MAC address is included in the trap notification. An SSID-spoofing rogue AP has been ruckusZDEventSSIDSpoofTrap detected on the network. The rogue AP’s MAC address and SSID are included in the trap notification.
- Page 74 Configuring System Settings Enabling Network Management Systems Table 16. Trap notifications Trap Name Description A client has roamed away from an AP. The ruckusZDEventClientRoamOut client's MAC address, AP's MAC address and SSID are included. A client has roamed in to an AP. The client's ruckusZDEventClientRoamIn MAC address, AP's MAC address and SSID are included.
-
Page 75: Configuring Dhcp Relay
Configuring System Settings Configuring DHCP Relay Configuring DHCP Relay ZoneDirector’s DHCP Relay agent improves network performance by converting DHCP broad- cast traffic to unicast to prevent flooding the Layer 2 network (when Layer 3 Tunnel Mode is enabled -- DHCP Relay only applies to Tunnel Mode WLANs.) Typically, when mobile stations acquire IP addresses through DHCP, the DHCP request and acknowledgement traffic is broadcast to any devices in the same Layer 2 environment. - Page 76 Configuring System Settings Configuring DHCP Relay Figure 43. Enabling DHCP Relay agent for a Tunnel Mode WLAN...
-
Page 77: Configuring Security And Other Services
Configuring Security and Other Services In This Chapter Configuring Self Healing Options ..........66 Configuring Wireless Intrusion Prevention . -
Page 78: Configuring Self Healing Options
Configuring Security and Other Services Configuring Self Healing Options Configuring Self Healing Options ZoneDirector has the capability to perform automatic network adjustments to enhance perfor- mance and improve coverage by dynamically modifying power output and channel selection settings for each AP, depending on the actual RF environment. These features are called “Self Healing.”... - Page 79 Configuring Security and Other Services Configuring Self Healing Options Disadvantages of ChannelFly Compared to Background Scanning, ChannelFly takes considerably longer for the network to settle down. If you will be adding and removing APs to your network frequently, Background Scanning may be preferable. Additionally, if you have clients that do not support the 802.11h standard, ChannelFly may cause significant connectivity issues during the initial capacity assessment stage.
-
Page 80: Background Scanning
Configuring Security and Other Services Configuring Self Healing Options Background Scanning Using Background Scanning, ZoneDirector regularly samples the activity in all Access Points to assess RF usage, to detect rogue APs and to determine which APs are near each other for mesh optimization. - Page 81 Configuring Security and Other Services Configuring Self Healing Options Figure 45. Background scanning options NOTE: You can also disable Background Scanning on a per-WLAN basis from the Configure > WLANS page. To disable scanning for a particular WLAN, click the Edit link next to the WLAN for which you want to disable scanning, open Advanced Options, and click the check box next to Disable Background Scanning.
-
Page 82: Aeroscout Rfid Tag Detection
Configuring Security and Other Services Configuring Self Healing Options Figure 46. Viewing whether Background Scanning is enabled for an AP AeroScout RFID Tag Detection AeroScout Tags are lightweight, battery-powered wireless devices that accurately locate and track people and assets. AeroScout Tags, which can be mounted on valuable equipment or carried by personnel, send periodic data to the AeroScout Engine, the software component of the AeroScout visibility system that produces accurate location and presence data. -
Page 83: Active Client Detection
Configuring Security and Other Services Configuring Self Healing Options Figure 47. AeroScout Tag detection option NOTE: Tag locations are not accurate if the 2.4 GHz band is noisy or if the AP setup is not optimal (according to AeroScout documents). For more information on AeroScout Tags and the AeroScout Engine, refer to your AeroScout documentation. -
Page 84: Tunnel Configuration
Configuring Security and Other Services Configuring Self Healing Options Figure 48. Enabling active client detection A low severity event is now triggered each time a client connects with an RSSI lower than the threshold value entered. Go to Monitor > All Events/Activities to monitor these events. Tunnel Configuration Only WLANs with Tunnel Mode enabled are affected. -
Page 85: Packet Inspection Filter
Configuring Security and Other Services Configuring Self Healing Options receives a broadcast ARP request for an unknown host, it will forward it to the tunnel to all APs according to the rate limit threshold set in the Packet Inspection Filter (see “Packet Inspection Filter”... -
Page 86: Configuring Wireless Intrusion Prevention
Configuring Security and Other Services Configuring Wireless Intrusion Prevention Figure 50. Packet Inspection Filter Configuring Wireless Intrusion Prevention ZoneDirector has built-in intrusion prevention features called WIPS (Wireless Intrusion Preven- tion System) to protect the wireless network from security threats such as DoS attacks and intrusion attempts. -
Page 87: Rogue Dhcp Server Detection
Configuring Security and Other Services Configuring Wireless Intrusion Prevention box is enabled), the Ruckus AP automatically begins sending broadcast de-authentica- tion messages spoofing the rogue’s BSSID (MAC) to prevent wireless clients from connecting to the malicious rogue AP. This option is disabled by default. 4. - Page 88 3. Click the Apply button that is in the same section. You have completed enabling rogue DHCP server detection. Ruckus Wireless recommends checking the Monitor > All Events/Activities page periodically to determine if ZoneDirector has detected any rogue DHCP servers. If ZoneDirector detected any rogue DHCP server, you...
-
Page 89: Controlling Device Permissions: Blocking And Acls
Configuring Security and Other Services Controlling Device Permissions: Blocking and ACLs Controlling Device Permissions: Blocking and ACLs Access controls can be configured to control access to both your wireless network and to the ZoneDirector interface itself. For network access, ZoneDirector features a block list as well as access control lists (ACL) to control access to the network. - Page 90 Configuring Security and Other Services Controlling Device Permissions: Blocking and ACLs L2/MAC Access Control Using the Access Controls configuration options, you define Layer 2/MAC address ACLs, which can then be applied to one or more WLANs (upon WLAN creation or edit). ACLs are either allow-only or deny-only;...
- Page 91 Configuring Security and Other Services Controlling Device Permissions: Blocking and ACLs L3/L4 Access Control In addition to L2/MAC based ACLs, ZoneDirector also provides access control options at Layer 3 and Layer 4. This means that you can configure the access control options based on a set of criteria, including: •...
- Page 92 Configuring Security and Other Services Controlling Device Permissions: Blocking and ACLs Figure 54. Configuring L3/L4 access control list ZoneDirector Management ACL Additionally, ZoneDirector also includes an access control feature for controlling access to ZoneDirector’s management interface. The Management Access Control interface is located on the Configure >...
-
Page 93: Blocking Client Devices
Configuring Security and Other Services Controlling Device Permissions: Blocking and ACLs Figure 55. Management Access Control Figure 56. Creating a new ZoneDirector management ACL Blocking Client Devices When users log into a ZoneDirector network, their client devices are recorded and tracked. If, for any reason, you need to block a client device from network use, you can do so from the Web interface. - Page 94 Configuring Security and Other Services Controlling Device Permissions: Blocking and ACLs Monitoring Client Devices 1. Go to the Dashboard, if it's not already in view. 2. Under Devices Overview, look at # of Total Client Devices. Figure 57. The Device Overview widget 3.
- Page 95 Configuring Security and Other Services Controlling Device Permissions: Blocking and ACLs Figure 58. Click the Delete button to temporarily delete a client. The client will be able to reconnect. NOTE: The user can reconnect at any time, which, if this proves to be a problem, may prompt you to consider Permanently Blocking Specific Client Devices.
- Page 96 Configuring Security and Other Services Controlling Device Permissions: Blocking and ACLs Figure 59. Click the Block button to permanently delete a client Reviewing a List of Previously Blocked Clients 1. Go to Configure > Access Control. 2. Review the Blocked Clients table. 3.
-
Page 97: Configuring Device Access Policies
Configuring Security and Other Services Configuring Device Access Policies Configuring Device Access Policies In response to the growing trend of employees and students bringing their personally owned devices into the network, IT departments are requiring more sophisticated control over how devices connect, what types of devices can connect, and what they are allowed to do once connected. - Page 98 Configuring Security and Other Services Configuring Device Access Policies Figure 61. Creating a Device Access Policy To apply a Device Access Policy to a WLAN 1. Go to Configure > WLANs. 2. To edit an existing WLAN, click Edit next to the WLAN you want to edit. 3.
- Page 99 Configuring Security and Other Services Configuring Device Access Policies Figure 62. Selecting a device policy for a WLAN...
-
Page 100: Configuring Precedence Policies
Configuring Security and Other Services Configuring Precedence Policies Configuring Precedence Policies Use the Precedence Policy settings to define rate limiting and VLAN precedence of AAA server, device and WLAN policies. To configure Precedence Policies 1. Go to Configure > Access Control. 2. -
Page 101: Using An External Aaa Server
Configuring Security and Other Services Using an External AAA Server Using an External AAA Server If you want to authenticate users against an external Authentication, Authorization and Accounting (AAA) server, you will need to first configure your AAA server, then point ZoneDi- rector to the AAA server so that requests will be passed through ZoneDirector before access is granted. - Page 102 Configuring Security and Other Services Using an External AAA Server 5. Enter the Windows Domain Name (e.g., domain.ruckuswireless.com). 6. Click OK. Figure 64. Enable Active Directory for a single domain For single domain authentication, admin name and password are not required. Multi-Domain Active Directory Authentication For multi-domain AD authentication, an Admin account name and password must be entered so that ZoneDirector can query the Global Catalog.
-
Page 103: Ldap
Configuring Security and Other Services Using an External AAA Server NOTE: Do NOT enter anything in the Windows Domain Name field. If you enter a Windows Domain Name, the search will be limited to that domain, rather than the whole forest. 4. - Page 104 Configuring Security and Other Services Using an External AAA Server To enable LDAP user authentication for all users 1. Click the Edit link next to LDAP on the Configure > AAA Servers page. The Editing LDAP form appears. 2. Enter the IP address and Port of your LDAP server. The default port (389) should not be changed unless you have configured your LDAP server to use a different port.
- Page 105 Configuring Security and Other Services Using an External AAA Server Advanced LDAP Filtering A search string in LDAP format conforming to RFC 4515 can be used to limit search results. For example, objectClass=Person limits the search to those whose “objectClass” attribute is equal to “Person”.
-
Page 106: Radius / Radius Accounting
Configuring Security and Other Services Using an External AAA Server • Go to Configure > AAA Servers • Click Edit next to LDAP • Enter IP address, Port number, Admin DN and Password 2. Enter the Key Attribute (default: uid). 3. - Page 107 Configuring Security and Other Services Using an External AAA Server A RADIUS/RADIUS Accounting server can be used with 802.1X, MAC authentication, Web authentication (captive portal) and Hotspot WLAN types. To configure a RADIUS / RADIUS Accounting server entry in ZoneDirector 1.
- Page 108 Configuring Security and Other Services Using an External AAA Server Figure 69. Enable backup RADIUS server Figure 70. Test authentication settings against backup RADIUS server...
- Page 109 Configuring Security and Other Services Using an External AAA Server MAC Authentication with an External RADIUS Server To begin using MAC authentication: 1. Ensure that a RADIUS server is configured in ZoneDirector (Configure > AAA Servers > RADIUS Server). See “Using an External AAA Server”...
- Page 110 Configuring Security and Other Services Using an External AAA Server Using 802.1X EAP + MAC Address Authentication With the 802.1X EAP + MAC Address authentication method, clients configured with either “open” or EAP-MD5 authentication methods are both supported on the same WLAN. The encryption method is limited to “none,”...
-
Page 111: Radius Attributes
Configuring Security and Other Services Using an External AAA Server RADIUS Attributes Ruckus products communicate with an external RADIUS server as a RADIUS client. Packets from Ruckus products are called “access-request” or “accounting-request” messages. The RADIUS server, in turn, sends an “access-challenge“, “access-accept” or “access-reject” message in response to an access-request, and an “accounting-response”... - Page 112 Configuring Security and Other Services Using an External AAA Server RADIUS Authentication attributes Table 17. RADIUS attributes used in authentication WLAN Type Attributes 802.1X / MAC Sent from ZoneDirector in Access Request messages: Auth • (1) User name • (4) NAS IP Address (optional; prefer sending NAS ID) •...
- Page 113 Configuring Security and Other Services Using an External AAA Server Table 17. RADIUS attributes used in authentication WLAN Type Attributes Sent from RADIUS server in Access Accept messages: 802.1X / MAC Auth • (1) User name • (25) Class • (27) Session-timeout &...
- Page 114 Configuring Security and Other Services Using an External AAA Server Table 17. RADIUS attributes used in authentication WLAN Type Attributes WISPr / Web Additional attributes supported in WISPr WLANs (**generic attributes NOT Auth / Guest the same as non-WISPr/802.1X) Access •...
- Page 115 Configuring Security and Other Services Using an External AAA Server RADIUS Accounting attributes The following table lists attributes used in RADIUS accounting messages. Table 18. RADIUS attributes used in Accounting WLAN Type Attribute 802.1X / MAC Common to Start, Interim Update, and Stop messages Auth •...
- Page 116 Configuring Security and Other Services Using an External AAA Server Table 18. RADIUS attributes used in Accounting WLAN Type Attribute 802.1X / MAC Sent from RADIUS server in Accept messages: Auth • (1) User name • (25) Class • (85) Acct-interim-interval •...
- Page 117 Configuring Security and Other Services Using an External AAA Server Table 18. RADIUS attributes used in Accounting WLAN Type Attribute WISPr / Web Specific to Interim Update and Stop messages: Auth / Guest • (42) Acct input octets Access • (43) Acct output octets •...
- Page 118 Configuring Security and Other Services Using an External AAA Server Figure 73. On the Microsoft IAS page, right-click the user/group and select Properties. Figure 74. On the Properties page, click Edit Profile...
-
Page 119: Tacacs
Configuring Security and Other Services Using an External AAA Server Figure 75. On the Authentication tab of the Edit Dial-in Profile dialog, select Unencrypted authentication (PAP, SPAP) You have completed configuring Microsoft IAS for PAP authentication. TACACS+ Terminal Access Controller Access-Control System Plus (TACACS+) is an Authentication, Authorization and Accounting protocol used to authenticate ZoneDirector administrators. - Page 120 Configuring Security and Other Services Using an External AAA Server 5. In TACACS+ Service, enter a string of up to 64 characters. This name must match the name of the service configuration table on the TACACS+ server. Click OK to save your changes. Figure 76.
-
Page 121: Testing Authentication Settings
Configuring Security and Other Services Testing Authentication Settings Figure 77. Select TACACS+ for ZoneDirector administrator authentication Testing Authentication Settings The Test Authentication Settings feature allows you to query an AAA server for a known authorized user, and return Groups associated with the user that can be used for configuring Roles within ZoneDirector. - Page 122 Configuring Security and Other Services Testing Authentication Settings If ZoneDirector was able to connect to the authentication server and retrieve the configured groups/attributes, the information appears at the bottom of the page. The following is an example of the message that will appear when ZoneDirector authenticates successfully with the server: Success! Groups associated with this user are “{group_name}”.
-
Page 123: Managing A Wireless Local Area Network
..........112 About Ruckus Wireless WLAN Security. -
Page 124: Overview Of Wireless Networks
The maximum number of WLANs configurable per ZoneDirector controller are as follows: Table 19. Max WLANs by ZoneDirector model Model Max WLANs ZoneDirector 1100 ZoneDirector 3000 1024 ZoneDirector 5000 2048 The maximum number of WLANs deployable per AP radio is eight. If an AP is in mesh mode, the maximum number of WLANs deployable per radio is six, since the mesh uses two SSIDs (this applies to both radios on dual-band APs). -
Page 125: About Ruckus Wireless Wlan Security
This task can be automated by using the Ruckus Wireless Zero-IT Activation, which significantly reduces the amount of setup required. -
Page 126: Creating A Wlan
Managing a Wireless Local Area Network Creating a WLAN Creating a WLAN 1. Go to Configure > WLANs. The first table displays all WLANs that have already been created in ZoneDirector. 2. In the top section (WLANs), click Create New. The Create New workspace displays the following: Figure 78. - Page 127 Managing a Wireless Local Area Network Creating a WLAN Table 20. Create new WLAN options Option Description Options Select whether Web-based authentication (captive portal) will be used, and which type of authentication server will be used to host credentials (local database, Active Directory, RADIUS, LDAP).
-
Page 128: Authentication Method
Encryption choices include WPA, WPA2, WPA-Mixed, WEP and none. WPA and WPA2 are both encryption methods certified by the WiFi Alliance and are the recommended encryption methods. The Wi-Fi Alliance will be mandating the removal of WEP due to its security vulnerabilities, and Ruckus Wireless recommends against using WEP if possible. Method •... - Page 129 Managing a Wireless Local Area Network Creating a WLAN • None: No encryption; communications are sent in clear text. CAUTION: If you set the encryption method to WEP-64 (40 bit) or WEP-128 (104 bit) and you are using an 802.11n AP for the WLAN, the WLAN will operate in 802.11g mode. Algorithm (Only for WPA or WPA2 encryption methods) •...
- Page 130 Managing a Wireless Local Area Network Creating a WLAN “Local Database”), you will need to point ZoneDirector to the proper authentication server configured on the Configure > AAA Servers page (see “Using an External Server for User Authentication” page 212). •...
-
Page 131: Advanced Options
Managing a Wireless Local Area Network Creating a WLAN Advanced Options The advanced options can be used to configure special WLANs; for example, you might want to create a special WLAN for VoIP phone use only, or create a student WLAN that should be time-controlled to provide access only during school hours. - Page 132 • Load Balancing: Client load balancing between APs is disabled by default on all WLANs. To disable load balancing for this WLAN, check this box. Ruckus Wireless recommends disabling load balancing on WLANs used for voice. For more information, see “Load...
- Page 133 Managing a Wireless Local Area Network Creating a WLAN • DHCP Option 82: When this option is enabled and an AP receives a DHCP request from a wireless client, the AP will encapsulate additional information (such as VLAN ID, AP name, SSID and MAC address) into the DHCP request packets before forwarding them to the DHCP server.
- Page 134 Managing a Wireless Local Area Network Creating a WLAN • Auto-Proxy: The Auto-Proxy feature automatically configures client browsers with Web proxy settings when the user joins the wireless network. Clients locate the proxy script according to the Web Proxy Autodiscovery Protocol (WPAD). WPAD uses discovery methods such as DNS and DHCP Option 252 to locate the configuration file.
- Page 135 Managing a Wireless Local Area Network Creating a WLAN Figure 79. Advanced options for creating a new WLAN Figure 80. Configuring WLAN service schedule...
-
Page 136: Creating A New Wlan For Workgroup Use
Managing a Wireless Local Area Network Customizing WLAN Security Creating a New WLAN for Workgroup Use If you want to create an additional WLAN based on your existing default WLAN and limit its use to a select group of users (e.g, Marketing, Engineering), you can do so by following these steps: 1. -
Page 137: Fine-Tuning The Current Security Mode
Managing a Wireless Local Area Network Customizing WLAN Security Figure 81. The Monitor > WLANs page Fine-Tuning the Current Security Mode To keep the original WPA security mode and fine-tune its settings 1. Go to Configure > WLANs. 2. In the Internal WLAN row, click Edit. 3. -
Page 138: Using The Built-In Eap Server
7. When you are finished, click OK to apply your changes. Replacing your WPA configuration with 802.1X requires the users to make changes to their Ruckus wireless connection configuration—which may include the importation of certificates. Using the Built-in EAP Server (Requires the selection of “Local Database”... -
Page 139: Authenticating With An External Radius Server
Managing a Wireless Local Area Network Customizing WLAN Security IT Wireless Activation, certificates are automatically generated and installed on the end user's computer. Users simply follow the instructions provided during the Zero-IT Wireless Activation process to complete this task (see “Self-Provisioning Clients with Zero-IT”... -
Page 140: Working With Wlan Groups
Managing a Wireless Local Area Network Working with WLAN Groups 4. To manually configure 802.1X/EAP settings for non-EAP capable client use, use the wireless settings generated by ZoneDirector. Working with WLAN Groups WLAN groups are used to specify which APs provide which WLAN services. If your wireless network covers a large physical environment (for example, multi-floor or multi-building office) and you want to provide different WLAN services to different areas of your environment, you can use WLAN groups to do this. -
Page 141: Creating A Wlan Group
Managing a Wireless Local Area Network Working with WLAN Groups Figure 82. Maximum number of WLAN groups by ZoneDirector model ZoneDirector Model Max WLAN Groups ZoneDirector 1100 ZoneDirector 3000 1024 ZoneDirector 5000 2048 Creating a WLAN Group 1. Go to Configure > WLANs. -
Page 142: Assigning A Wlan Group To An Ap
Managing a Wireless Local Area Network Working with WLAN Groups Figure 83. WLAN group Assigning a WLAN Group to an AP 1. Go to Configure > Access Points. 2. In the list of access points, find the MAC address of the AP that you want to assign to a WLAN group, and then click Edit. -
Page 143: Viewing A List Of Aps That Belong To A Wlan Group
Managing a Wireless Local Area Network Deploying ZoneDirector WLANs in a VLAN Environment Figure 84. Assign a WLAN group to an AP Viewing a List of APs That Belong to a WLAN Group 1. Go to Monitor > WLANs. 2. Under Currently Active WLAN Groups, click the WLAN group name for which you want to view the member AP list. - Page 144 Managing a Wireless Local Area Network Deploying ZoneDirector WLANs in a VLAN Environment For example, if an 802.1Q port has VLANs 1, 20, and 30 enabled with VLAN 1 being the native VLAN, frames on VLAN 1 that egress (exit) the port are not given an 802.1Q header (i.e., they are plain Ethernet frames).
-
Page 145: Tagging Management Traffic To A Vlan
Managing a Wireless Local Area Network Deploying ZoneDirector WLANs in a VLAN Environment The following factors need to be taken into consideration: • Default/Native VLAN configuration • Where the DHCP/DNS servers sit in the architecture • If tunneling is used for WLANs •... - Page 146 Managing a Wireless Local Area Network Deploying ZoneDirector WLANs in a VLAN Environment 6. Go to Administer > Restart, and click Restart to reboot ZoneDirector. CAUTION: When configuring or updating the management VLAN settings, make sure that the same VLAN settings are applied on the Configure > Access Points > Access Point Policies >...
-
Page 147: How Dynamic Vlan Works
Managing a Wireless Local Area Network Deploying ZoneDirector WLANs in a VLAN Environment Figure 87. Configuring management VLAN for APs How Dynamic VLAN Works Dynamic VLAN can be used to automatically and dynamically assign wireless clients to different VLANs based on RADIUS attributes. Dynamic VLAN Requirements •... - Page 148 Managing a Wireless Local Area Network Deploying ZoneDirector WLANs in a VLAN Environment Figure 88. Enabling Dynamic VLAN Priority of VLAN, Dynamic VLAN and Tunnel Mode If the VLAN, Dynamic VLAN and Tunnel Mode features are all enabled and they have conflicting rules, ZoneDirector prioritizes and applies these three features in the following order: 1.
- Page 149 Managing a Wireless Local Area Network Deploying ZoneDirector WLANs in a VLAN Environment • Tunnel-Private-Group-ID: Set this attribute to the VLAN ID to which you want to segment this user. Depending on your RADIUS setup, you may also need to include the user name or the MAC address of the wireless device that the user will be using to associate with the AP.
-
Page 150: Working With Hotspot Services
Managing a Wireless Local Area Network Working with Hotspot Services Working with Hotspot Services A hotspot is a venue or area that provides Internet access to devices with wireless networking capability such as notebooks and smartphones. Hotspots are commonly available in public venues such as hotels, airports, coffee shops and shopping malls. - Page 151 Managing a Wireless Local Area Network Working with Hotspot Services • Only WISPr Smart Client allowed: Choose this option to allow only clients that support WISPr Smart Client login to access this hotspot. If this option is selected, a field appears in which you can enter instructions for clients attempting to log in using the Smart Client application.
- Page 152 Managing a Wireless Local Area Network Working with Hotspot Services • Under Advanced Options, enable Intrusion Prevention to temporarily block hotspot clients that fail repeated authentication attempts. 9. Click OK to save the hotspot settings. The page refreshes and the hotspot service you created appears in the list. You may now assign this hotspot service to the WLANs that you want to provide hotspot internet access, as described in Assigning a WLAN to Provide Hotspot...
-
Page 153: Creating A Hotspot 2.0 Service
Managing a Wireless Local Area Network Working with Hotspot Services 3. In Type, click Hotspot Service (WISPr). 4. In Hotspot Services, select the name of the hotspot service that you created previously. 5. Click OK to save your changes. Figure 90. Assigning a Hotspot service to a Hotspot WLAN Creating a Hotspot 2.0 Service “Hotspot 2.0”... - Page 154 Managing a Wireless Local Area Network Working with Hotspot Services • Create a Hotspot 2.0 WLAN Create a Service Provider Profile To create a Service Provider Profile 1. Go to Configure > Hotspot 2.0 Services. 2. Click Create New under Service Provider Profiles. 3.
- Page 155 Managing a Wireless Local Area Network Working with Hotspot Services Figure 91. Creating a Service Provider Profile Create an Operator Profile To create an Operator Profile 1. Go to Configure > Hotspot 2.0 Services. 2. Click Create New under Operator Profiles. 3.
- Page 156 Managing a Wireless Local Area Network Working with Hotspot Services Table 23. Hotspot 2.0 Operator profile configuration options Option Description Internet Option Specify if this HS2.0 network provides connectivity to the Internet. Access Network Type Access network type (private, free public, chargeable public, etc.), as defined in IEEE802.11u, Table 7-43b.
- Page 157 Managing a Wireless Local Area Network Working with Hotspot Services Figure 92. Creating a Hotspot 2.0 Operator Profile Create a Hotspot 2.0 WLAN After you create a HS2.0 service, you need to specify the WLANs to which you want to deploy the hotspot configuration.
-
Page 158: Setting The Venue Name For A Hotspot 2.0 Ap
AP venue names for individual APs. Working with Dynamic Pre-Shared Keys Dynamic PSK is a unique Ruckus Wireless feature that enhances the security of normal Pre- shared Key (PSK) wireless networks. Unlike typical PSK networks, which share a single key amongst all devices, a Dynamic PSK network assigns a unique key to every authenticated user. -
Page 159: Enabling Dynamic Pre-Shared Keys On A Wlan
Managing a Wireless Local Area Network Working with Dynamic Pre-Shared Keys • Every device on the WLAN has its own unique Dynamic PSK (DPSK) that is valid for that device only. • Each DPSK is bound to the MAC address of an authorized device - even if that PSK is shared with another user, it will not work for any other machine. -
Page 160: Setting Dynamic Pre-Shared Key Expiration
Managing a Wireless Local Area Network Working with Dynamic Pre-Shared Keys Figure 94. Enabling Dynamic PSK for a WLAN Setting Dynamic Pre-Shared Key Expiration By default, dynamic pre-shared keys do not expire. You can control when the PSK expires, at which time the users will be prompted to reactivate their wireless access. -
Page 161: Generating Multiple Dynamic Psks
Managing a Wireless Local Area Network Working with Dynamic Pre-Shared Keys Figure 95. The Dynamic PSK option NOTE: If you change the dynamic PSK expiration period, the new expiration period will only be applied to new PSKs. Existing PSKs will retain the expiration period that was in effect when the PSKs were generated. -
Page 162: Creating A Batch Dynamic Psk Profile
Managing a Wireless Local Area Network Working with Dynamic Pre-Shared Keys To download the new DPSK record, click here 7. Click the click here link in the message to download a CSV file that contains the generated dynamic PSKs. You have completed generating the dynamic PSKs for your users. Using a spreadsheet application (for example, Microsoft Excel), open the CSV file and view the generated dynamic PSKs. - Page 163 Managing a Wireless Local Area Network Working with Dynamic Pre-Shared Keys 5. Go back to the Dynamic PSK Batch Generation section, and then complete steps 4 to 6 in “Generating Multiple Dynamic PSKs” above to upload the batch dynamic PSK profile and generate multiple dynamic PSKs.
- Page 164 Managing a Wireless Local Area Network Working with Dynamic Pre-Shared Keys...
- Page 165 Managing Access Points In This Chapter Adding New Access Points to the Network ........154 Working with Access Point Groups .
-
Page 166: Managing Access Points
NOTE: If using Gigabit Ethernet, ensure that you use Cat5e or better Ethernet cables. 4. Connect each AP to a power source. NOTE: If the Ruckus Wireless APs that you are using are PoE-capable and power sources are not convenient, they will draw power through the Ethernet cabling if connected to a PoE-ready... - Page 167 Managing Access Points Adding New Access Points to the Network Verifying/Approving New APs 1. Go to Monitor > Access Points. The Access Points page appears, showing the first 15 access points that have been approved or are awaiting approval. If ZoneDirector is managing more than 15 access points, the Show More button at the bottom of the list will be active.
-
Page 168: Working With Access Point Groups
Figure 98. Maximum number of AP groups by ZoneDirector model ZoneDirector Model Max AP Groups ZoneDirector 1100 ZoneDirector 3000 ZoneDirector 5000 Modifying the System Default AP Group If you want to apply global settings to all access points that are controlled by ZoneDirector, you can modify the settings of the System Default AP group and apply them to all ZoneDirector- controlled APs at once. - Page 169 Managing Access Points Working with Access Point Groups 2. In the Access Point Groups section, locate the System Default access point group, and click the Edit button on the same line. The Editing (System Default) form appears. 3. Modify any of the settings in Table 24 that you want to apply to the System Default AP group, and click OK to save your changes.
-
Page 170: Creating A New Access Point Group
Managing Access Points Working with Access Point Groups Figure 99. Editing the System Default access point group settings Creating a New Access Point Group To create a new AP group with custom settings 1. Go to Configure > Access Points. 2. -
Page 171: Modifying Model Specific Controls
Managing Access Points Working with Access Point Groups 3. Click OK to save your changes. To move an AP from the current AP group to another group 1. Click the check box next to any AP you want to move (to select all APs in the group, click the check box at the top of the column). -
Page 172: Configuring Ap Ethernet Ports
Managing Access Points Working with Access Point Groups NOTE: If your ZoneDirector country code is set to United Kingdom, an additional “Enable 5.8 GHz Channels” option will be available for outdoor 11n APs. Enabling this option allows the use of restricted C-band channels. These channels are disabled by default and should only be enabled by customers with a valid license to operate on these restricted channels. - Page 173 Managing Access Points Working with Access Point Groups 8. (If Smart Mesh is not enabled), choose whether this port will serve as an 802.1X Authenti- cator or Supplicant, or leave 802.1X settings disabled (default). (See “Using Port-Based 802.1X” page 164 for more information.) 9.
-
Page 174: Dhcp Option 82
Managing Access Points Working with Access Point Groups Figure 102. The ZoneFlex 7025 has four front-facing Ethernet ports and one rear port DHCP Option 82 The “DHCP Relay Agent Information Option” (Option 82) allows a DHCP Relay Agent to insert specific identification information into a request that is being forwarded to a DHCP server. -
Page 175: Designating Ethernet Port Type
Managing Access Points Working with Access Point Groups Ethernet example: CIRCUIT ID - ETH:’eth0’:123:N/A:ZF7762-S:Coffee-Shop- AP:04:4F:AA:34:96:50 Designating Ethernet Port Type Ethernet ports are defined as one of the following port types: • “Trunk Ports” • “Access Ports” • “General Ports” Trunk links are required to pass VLAN information between switches. Access ports provide access to the network and can be configured as members of specific VLANs, thereby separating the traffic on these ports from traffic on other VLANs. -
Page 176: Using Port-Based 802.1X
Managing Access Points Working with Access Point Groups The following table describes the behavior of incoming and outgoing traffic for Access Ports with VLANs configured. Table 26. Access Ports with VLANs configured VLAN Settings Incoming Traffic (from the Outgoing Traffic (to the client) client) Access Port, Untag All incoming traffic is native... - Page 177 Managing Access Points Working with Access Point Groups AP Ethernet port as authenticator The Access Point is fundamentally a wireless switch. On APs with two or more wired ports, the AP acts as a network edge switch and can be configured to authenticate downstream wired stations (which can even be another edge switch).
- Page 178 Managing Access Points Working with Access Point Groups Figure 104. Enabling Guest VLAN and Dynamic VLAN on a MAC-based 802.1X Authenticator port AP Ethernet port as Supplicant You can also configure a port to act as a supplicant and force it to authenticate itself to an upstream authenticator port.
-
Page 179: Viewing Ap Ethernet Port Status
Managing Access Points Working with Access Point Groups Figure 105. Configuring an AP Ethernet port as an 802.1X Supplicant Viewing AP Ethernet Port Status You can view the status of an AP’s port configuration by going to Monitor > Access Points and clicking on the MAC address of the AP. - Page 180 Managing Access Points Working with Access Point Groups Figure 106. Viewing an AP’s Ethernet port configuration...
-
Page 181: Reviewing Current Access Point Policies
ZoneDirector. NOTE: If you have two ZoneDirectors of the same model and license level, Ruckus Wireless recommends using the Smart Redundancy feature. If you have two ZoneDirectors of different models or different license levels, you can use Limited ZD Discovery to provide limited redundancy;... - Page 182 Managing Access Points Reviewing Current Access Point Policies – VLAN ID: Enter a valid VLAN ID to segment management traffic into the VLAN specified. Valid VLAN IDs are 1-4094. NOTE: If you change the Management VLAN ID here, you also need to set the Management VLAN ID that ZoneDirector needs to use on the Configure >...
-
Page 183: Using Limited Zd Discovery For N+1 Redundancy
Managing Access Points Reviewing Current Access Point Policies Figure 107. Setting global AP policies on the Configure > Access Points page Using Limited ZD Discovery for N+1 Redundancy ZoneDirector’s Smart Redundancy feature (see “Enabling Smart Redundancy”) can only be used with two ZoneDirectors of the same model and license number. If you want to deploy one ZoneDirector as a backup controller for multiple primary controllers (for example, using a ZD3000 as a backup for several ZD1100s in remote locations), you can use Limited ZD Discovery to achieve limited N+1 redundancy. - Page 184 AP will be placed in the System Default AP Group/WLAN Group. Additionally, you must make sure that the maximum number of APs is not exceeded. Table 27. Max APs by ZoneDirector model Model Max APs per controller ZoneDirector 1100 ZoneDirector 3000 2250 ZoneDirector 5000 2250...
-
Page 185: Managing Access Points Individually
Managing Access Points Managing Access Points Individually Managing Access Points Individually You can add a description, or change the channel selection, transmit power and Ethernet port settings of a managed access point by editing the AP’s parameters. Additionally, you can manually assign an IP address or disable WLAN service entirely for a specific radio. - Page 186 Advanced Options section lets you define the role this AP should play in the mesh network- -Auto, Root AP, Mesh AP, or Disable (default is Auto). In most cases, Ruckus Wireless recommends leaving this setting on Auto to reduce the risk of isolating a Mesh AP. Select Disable if you do not want this AP to be part of your mesh network.
-
Page 187: Configuring Hotspot 2.0 Venue Settings For An Ap
Managing Access Points Managing Access Points Individually 10. Click OK to save your settings. Figure 109. Ethernet port configuration - Override Group Config Configuring Hotspot 2.0 Venue Settings for an AP If this Access Point will be serving a Hotspot 2.0 hotspot, you can set the Venue Name for the venue at which the AP will be operating. -
Page 188: Optimizing Access Point Performance
Managing Access Points Optimizing Access Point Performance Figure 110. Setting the Venue Name for a Hotspot 2.0 service AP Optimizing Access Point Performance ZoneDirector, through its Web interface, allows you to remotely monitor and adjust key hardware settings on each of your network APs. After assessing AP performance in the context of network performance, you can reset channels and adjust transmission power, or adjust the priority of certain WLANs over others, as needed. -
Page 189: Improving Ap Rf Coverage
Managing Access Points Optimizing Access Point Performance 5. Look at the floorplan and evaluate the current coverage. You can make adjustments as detailed in the following procedure. Improving AP RF Coverage 1. Click and drag individual AP markers to new positions on the Map View floorplan until your RF coverage coloration is optimized. -
Page 190: Prioritizing Wlan Traffic
Managing Access Points Optimizing Access Point Performance • Uplink Selection: Use this setting to manually define which APs can serve as an uplink for this Mesh AP. 5. Click OK. The adjusted AP will be automatically restarted, and when it is active, will be ready for network connections. - Page 191 Managing Access Points Optimizing Access Point Performance • Can be disabled on a per-WLAN basis; for instance, in a voice WLAN, load balancing may not be desired due to voice roaming considerations. • Background scanning must be enabled on the WLAN for load balancing to work. To enable Load Balancing globally: 1.
- Page 192 Managing Access Points Optimizing Access Point Performance Figure 112. Disable load balancing on a specific WLAN...
- Page 193 Monitoring Your Wireless Network In This Chapter Reviewing the ZoneDirector Monitoring Options ....... 182 Importing a Map View Floorplan Image .
-
Page 194: Monitoring Your Wireless Network
You can import an unlimited number of floorplan images to ZoneDirector. However, the total file size of all imported floor maps is limited to 2MB on ZoneDirector 1100 and 10MB on ZoneDirector 3000/5000. An error message appears when these file size limits are reached. -
Page 195: Requirements
Monitoring Your Wireless Network Importing a Map View Floorplan Image Requirements • A floorplan image in .GIF, .JPG or .PNG format • The image should be monochrome or grayscale. • The file size should be no larger than 200kb in size. •... -
Page 196: Placing The Access Point Markers
Monitoring Your Wireless Network Importing a Map View Floorplan Image Figure 113. The Create New form for importing a floorplan image Placing the Access Point Markers After using the Configure > Maps options to import your floorplan image, you can use the Monitor tab's Map View to distribute markers that represent the APs to the correct locations. -
Page 197: Using The Map View Tools
Monitoring Your Wireless Network Using the Map View Tools Using the Map View Tools If your worksite floorplan has been scanned in and mapped with APs, the Map View will display a graphical image of your physical Ruckus network AP distribution. Figure 114. -
Page 198: Ap Icons
Monitoring Your Wireless Network Using the Map View Tools 5. Search text box: Enter a string, such as part of an AP's name or MAC address, and the map is filtered to show only the matching results. Clearing the search value returns the map to its unfiltered view. - Page 199 Monitoring Your Wireless Network Using the Map View Tools A “bug” icon with a lock on it indicates a rogue AP with security enabled. In a Smart Mesh network, an isolated AP displays a red “X” above the icon. When Smart Mesh is enabled, a circled number appears next to the AP icon to indicate that it is a Mesh AP.
-
Page 200: Reviewing Current Alarms
Monitoring Your Wireless Network Reviewing Current Alarms Reviewing Current Alarms If an alarm condition is detected, ZoneDirector will record it in the events log, and if configured, will send an email warning. To review the current alarms and clear all resolved alarm records, follow these steps: 1. -
Page 201: Reviewing Recent Network Events
Monitoring Your Wireless Network Reviewing Recent Network Events Reviewing Recent Network Events You have two options for reviewing events in your network: [1] open a complete list of all events, or [2] look at specific lists of events in each Monitor tab workspace, such as the WLANs workspace “Events/Activities”... -
Page 202: Monitoring Individual Clients
Monitoring Your Wireless Network Reviewing Current User Activity Monitoring Individual Clients You can monitor individual wireless clients by clicking on the MAC address of any connected client from the Currently Active Clients page, the All Events/Activities page and other tables where client information is displayed. -
Page 203: Monitoring Wired Clients
Monitoring Your Wireless Network Monitoring Access Point Status Figure 116. Viewing individual client information and performance statistics Monitoring Wired Clients You can also monitor currently connected wired clients using the Monitor > Active Wired Clients page. Note that connected devices will only be displayed when 802.1X is enabled on the Ethernet port to which they are connected. -
Page 204: Using The Ap Status Overview Page
Monitoring Your Wireless Network Monitoring Access Point Status • Go to Monitor > Access Points and review the usage and coverage of your APs. Click the MAC address link of any listed APs to see more details. Using the AP Status Overview Page The Monitor >... - Page 205 Monitoring Your Wireless Network Monitoring Access Point Status External IP: Port This column displays the public IP and port number for APs connected via Layer 3 behind a NAT device. VLAN The VLAN ID, if configured. Channel Displays the channel number and channel width. On dual band APs, details for each radio are shown.
-
Page 206: Monitoring Individual Aps
Monitoring Your Wireless Network Monitoring Individual APs Monitoring Individual APs When you click on the MAC address of any AP, the Monitor > Access Points page changes to a detailed view of information related to that AP. The Monitor > Access Points > [MAC Address] page provides the following details on the specific AP: Table 30. -
Page 207: Neighbor Aps
Monitoring Your Wireless Network Monitoring Individual APs Figure 117. Viewing an individual AP’s information Figure 118. Monitoring an AP’s performance Neighbor APs ZoneDirector uses several calculations to determine which APs are in proximity to one another. This information can be useful in planning or redesigning your Smart Mesh topology or in troubleshooting link performance issues. -
Page 208: Access Point Sensor Information
Access Point Sensor Information If your APs include internal sensors, ZoneDirector will display the AP’s status in this section. Temperature and orientation sensors are available on most Ruckus Wireless outdoor APs, and orientation sensors are available on the ZoneFlex 7962 indoor AP. -
Page 209: Monitoring Mesh Status
LAN posing a security risk. Rogue APs also interfere with nearby Ruckus Wireless APs, thus degrading overall wireless network coverage. Your ZoneDirector rogue detection options include identifying the presence of a rogue AP, and locating it on your worksite floorplan prior to its removal. -
Page 210: Evaluating And Optimizing Network Coverage
Monitoring Your Wireless Network Evaluating and Optimizing Network Coverage Figure 122. Rogue devices indicator 2. When the Monitor > Rogue Devices page appears, two tables are listed: • The Currently Active Rogue Devices table • The Known/Recognized Rogue Devices table. 3. -
Page 211: Moving The Aps Into More Efficient Positions
Monitoring Your Wireless Network Evaluating and Optimizing Network Coverage 2. If Map View displays a floorplan with active device symbols, you can assess the performance of individual APs, in terms of coverage. (See “Importing a Map View Floorplan Image” page 182 for information on setting up the Map View.) 3. - Page 212 Monitoring Your Wireless Network Evaluating and Optimizing Network Coverage...
- Page 213 Managing User Access In This Chapter Enabling Automatic User Activation with Zero-IT ....... 202 Adding New User Accounts to ZoneDirector .
-
Page 214: Managing User Access
Enabling Automatic User Activation with Zero-IT Enabling Automatic User Activation with Zero-IT Ruckus Wireless Zero-IT Activation allows network users to self-activate their devices for secure access to your wireless networks with no manual configuration required by the network administrator. Once your ZoneFlex network is set up, you need only direct users to the Activation URL, and they will be able to automatically authenticate themselves to securely access your wireless LAN. -
Page 215: Clients That Support Zero-It
Managing User Access Enabling Automatic User Activation with Zero-IT Figure 123. Enabling Zero-IT for a WLAN You have completed enabling Zero-IT for this WLAN. At this point, any user with the proper credentials (username and password) and running a supported operating system can self- provision his/her computer to securely access your wireless LANs. -
Page 216: Self-Provisioning Clients With Zero-It
Managing User Access Enabling Automatic User Activation with Zero-IT • HKLM\SYSTEM\CurrentControlSet\Control\Class\{4D36E972-E325-11CE- BFC1-08002BE10318} > Allow user to define value and create subkey • HKLM\SOFTWARE\Microsoft\WZCSVC\Parameters\Interfaces > Add total rights permission Additionally, you must enable permission to modify WZC (Windows Zero Configuration) for the users/groups by creating a new security template and applying the template to the account using MMC (Microsoft Management Console). -
Page 217: Self-Provisioning Clients Without Ethernet Ports
Managing User Access Enabling Automatic User Activation with Zero-IT Figure 125. Corporate WLAN configuration You have completed Zero-IT configuration for this user. Repeat this procedure to automatically configure all additional users of your internal WLAN. Self-Provisioning Clients without Ethernet Ports Many mobile devices such as iPhone, iPad, Windows Phone and Android smartphones can also use Zero-IT Activation. - Page 218 Managing User Access Enabling Automatic User Activation with Zero-IT 3. Give the WLAN a Name/ESSID that is easy for users to recognize. Example: “Zero-IT Activation.” 4. Under WLAN Usages: Type, select Hotspot Service (WISPr). 5. Select the Hotspot service that you created in step 1 from the Hotspot Services drop-down menu.
-
Page 219: Provisioning Clients That Do Not Support Zero-It
Managing User Access Adding New User Accounts to ZoneDirector NOTE: There is a known issue with certain versions of the iPhone Safari browser that results in browser crash when redirected by the Hotspot service. If you encounter this problem, disable auto-fill in the Safari browser settings or upgrade your iOS software to the latest version. -
Page 220: Internal User Database
Confirm Password: Re-enter the same password for this user. NOTE: ZoneDirector 1100 can support up to 1,250 combined total users and guest passes in the internal database. ZoneDirector 3000 licensed up to 250 APs can support up to 5,000 total users and guest passes, while ZoneDirector 3000 licensed from 300 to 500 APs can support up to 10,000. -
Page 221: Managing Current User Accounts
Managing User Access Managing Current User Accounts Figure 127. The Create New form for adding users to the internal database Managing Current User Accounts ZoneDirector allows you to review your current user roster on the internal user database and to make changes to existing user accounts as needed. Changing an Existing User Account 1. -
Page 222: Creating New User Roles
Managing User Access Creating New User Roles 4. Click the now-active Delete button. 5. When the Deletion Confirmation dialog box appears, click OK to save your settings. The records are removed from the internal user database. Creating New User Roles ZoneDirector provides a “Default”... -
Page 223: Managing Automatically Generated User Certificates And Keys
Managing User Access Managing Automatically Generated User Certificates and Keys 6. If you want to create additional roles with different policies, repeat this procedure. Figure 128. The Create New form for adding a role Managing Automatically Generated User Certificates and Keys With Ruckus Zero-IT wireless activation, a unique key or certificate is automatically generated for a user during the activation process. -
Page 224: Using An External Server For User Authentication
Managing User Access Using an External Server for User Authentication Using an External Server for User Authentication Once your wireless network is set up, you can instruct ZoneDirector to authenticate wireless users using your existing Authentication, Authorization and Accounting (AAA) server. The following types of AAA servers are supported: •... -
Page 225: Activating Web Authentication
Managing User Access Activating Web Authentication NOTE: If you want to test your connection to the authentication server, enter an existing user name and password in the Test Authentication Settings panel, and then click Test. If testing against a RADIUS server, this feature uses PAP or CHAP depending on the RADIUS server configuration and the choice you made in RADIUS/RADIUS Accounting. - Page 226 Managing User Access Activating Web Authentication To activate Web authentication 1. Go to Configure > WLANs. The WLAN page appears. 2. Look for the WLAN that you want to edit, and then click the Edit link that is on the same row. 3.
- Page 227 Managing Guest Access In This Chapter Configuring Guest Access ..........216 Creating a Guest WLAN .
-
Page 228: Managing Guest Access
Policies in ZoneDirector. NOTE: ZoneDirector 1100 can support up to 1,250 combined total users and guest passes in the internal database. ZoneDirector 3000 licensed up to 250 APs can support up to 5,000 total users and guest passes, while ZoneDirector 3000 licensed from 300 to 500 APs can support up to 10,000. -
Page 229: Configuring System-Wide Guest Access Policy
Managing Guest Access Configuring Guest Access Figure 131. Create a Guest Access WLAN Configuring System-Wide Guest Access Policy The Enable Guest Access options enable the administrator to define the system-wide guest access policy. You can require guests to validate their guest pass, accept terms of use, and be redirected to a URL you specify. -
Page 230: Working With Guest Passes
Managing Guest Access Working with Guest Passes Figure 132. The Guest Access page Working with Guest Passes Guest passes are temporary privileges granted to guests to access your wireless LANs. ZoneDirector provides many options for customizing guest passes, controlling who is allowed to issue guest passes, and controlling the scope of access to be granted. - Page 231 Managing Guest Access Working with Guest Passes • Effective from the creation time: This type of guest pass is valid from the time it is first created to the specified expiration time, even if it is not being used by any end user. •...
-
Page 232: Controlling Guest Pass Generation Privileges
Managing Guest Access Working with Guest Passes Controlling Guest Pass Generation Privileges To disable the guest pass generation privilege granted to all basic “default” role users, follow these steps: 1. Go to Configure > Roles. When the Roles and Policies page appears, a table lists all existing roles, including “Default.”... -
Page 233: Assigning A Pass Generator Role To A User Account
Managing Guest Access Working with Guest Passes Figure 134. Create a guest pass generator Role Assigning a Pass Generator Role to a User Account This procedure details the procedure for assigning a guest pass generator role to a user account. 1. -
Page 234: Generating And Printing A Single Guest Pass
Managing Guest Access Working with Guest Passes Generating and Printing a Single Guest Pass You can provide the following instructions to users with guest pass generation privileges. A single guest pass can be used for one-time login, time-limited multiple logins for a single guest user, or can be configured so that a single guest pass can be shared by multiple users. - Page 235 Managing Guest Access Working with Guest Passes • Full Name: Type the name of the guest user for whom you are generating the guest pass. • Valid for: Specify the time period when the guest pass will be valid. Do this by typing a number in the blank box, and then selecting a time unit (Minutes, Hours, Days or Weeks).
- Page 236 Managing Guest Access Working with Guest Passes Figure 137. Sample guest pass printout...
-
Page 237: Generating And Printing Multiple Guest Passes At Once
Managing Guest Access Working with Guest Passes Generating and Printing Multiple Guest Passes at Once You can provide the following instructions to users with guest pass generation privileges. NOTE: The following procedure will guide you through generating and printing multiple guest passes. - Page 238 Managing Guest Access Working with Guest Passes Figure 138. Generating multiple guest passes at once If you want to be able to identify the guest pass users by their names (for monitoring or auditing purposes in a hotel setting, for example), click Choose File, and upload a guest pass profile instead.
-
Page 239: Monitoring Generated Guest Passes
Managing Guest Access Working with Guest Passes 5. Using a spreadsheet application, open the CSV file and edit the guest pass profile by filling out the following columns: • #Guest Name: Type the name of the guest user (one name per row). •... - Page 240 Managing Guest Access Working with Guest Passes 2. In the Restricted Subnet Access section, click Create New. Text boxes appear under the table columns in which you can enter parameters that define the access rule. 3. Under Description, type a name or description for the access rule that you are creating. 4.
-
Page 241: Customizing The Guest Login Page
Managing Guest Access Working with Guest Passes Customizing the Guest Login Page You can customize the guest user login page, to display your corporate logo and to note helpful instructions, along with a “Welcome” title. If you want to include a logo, you will need to prepare a Web-ready graphic file, in one of three acceptable formats (.JPG, .GIF or .PNG). -
Page 242: Creating A Custom Guest Pass Printout
Managing Guest Access Working with Guest Passes Creating a Custom Guest Pass Printout The guest pass printout is a printable HTML page that contains instructions for the guest pass user on how to connect to the wireless network successfully. The authenticated user who is generating the guest pass will need to print out this HTML page and provide it to the guest pass user. - Page 243 Managing Guest Access Working with Guest Passes Table 32. Tokens that you can use in the guest pass printout Token Description Guest pass user name {GP_GUEST_NAME} Guest pass key {GP_GUEST_KEY} {GP_IF_EFFECTIVE_FROM_CREATION_TIME} If you set the validity period of guest passes to Effective from the creation time (in the Guest Pass Generation section), this token shows when the guest pass was created and when it will expire.
- Page 244 Managing Guest Access Working with Guest Passes...
- Page 245 Deploying a Smart Mesh Network In This Chapter Overview of Smart Mesh Networking ......... 234 Smart Mesh Networking Terms .
-
Page 246: Deploying A Smart Mesh Network
A Smart Mesh network is a peer-to-peer, multi-hop wireless network wherein participant nodes cooperate to route packets. In a Ruckus wireless mesh network, the routing nodes (that is, the Ruckus Wireless APs forming the network), or “mesh nodes,” form the network's backbone. -
Page 247: Supported Mesh Topologies
Deploying a Smart Mesh Network Supported Mesh Topologies Table 33. Mesh networking terms Term Definition Mesh Tree Each Mesh AP has exactly one uplink to another Mesh AP or Root AP. Each Mesh AP or Root AP could have multiple Mesh APs connecting to it. -
Page 248: Wireless Bridge Topology
Deploying a Smart Mesh Network Supported Mesh Topologies Figure 142. Mesh - standard topology Wireless Bridge Topology If you need to bridge isolated wired LAN segments, you can set up a mesh network using the wireless bridge topology. In this topology, ZoneDirector and the upstream router are on the primary wired LAN segment, and another isolated wired segment exists that needs to be bridged to the primary LAN segment. -
Page 249: Hybrid Mesh Topology
Deploying a Smart Mesh Network Supported Mesh Topologies Figure 143. Mesh - wireless bridge topology Hybrid Mesh Topology A third type of network topology can be configured using the Hybrid Mesh concept. Ethernet-connected Mesh APs (eMAP) enable the extension of wireless mesh functionality to a wired LAN segment. - Page 250 Deploying a Smart Mesh Network Supported Mesh Topologies Figure 144. eMAP - Hybrid Mesh topology Use the Monitor > Mesh page to see a tree diagram of your Smart Mesh network. Table 34. Mesh View icons Icon Meaning Root AP (RAP) Mesh AP (MAP) eMesh AP (eMAP) You can also view the role of any AP in your mesh network from the Monitor >...
-
Page 251: Deploying A Wireless Mesh Via Zonedirector
“Step 4: Verify That the Wireless Mesh Network Is Up” Step 1: Prepare for Wireless Mesh Deployment Before starting with your wireless mesh deployment, Ruckus Wireless recommends performing a number of tasks that can help ensure a smooth deployment. •... - Page 252 Deploying a Smart Mesh Network Deploying a Wireless Mesh via ZoneDirector Figure 145. Enable Mesh in Configure > Mesh To enable mesh capability 1. Log into the ZoneDirector Web interface. 2. Click the Configure tab. 3. On the menu, click Mesh. 4.
-
Page 253: Step 3: Provision And Deploy Mesh Nodes
Deploying a Smart Mesh Network Deploying a Wireless Mesh via ZoneDirector Optional Mesh Configuration Features The following settings are disabled by default and are not necessary for standard mesh configuration. These settings can be used to fine-tune your mesh network to prevent issues such as excessive broadcast ARP (Address Resolution Protocol) requests, traffic looping and excessive number of mesh hops. -
Page 254: Step 4: Verify That The Wireless Mesh Network Is Up
Deploying a Smart Mesh Network Deploying a Wireless Mesh via ZoneDirector 2. If Auto Approval is enabled, continue to Step 3. If Auto Approval is disabled, log into ZoneDirector, check the list of currently active access points for the AP that you are attempting to provision, and then click the corresponding Allow link to approve the join request. - Page 255 Deploying a Smart Mesh Network Deploying a Wireless Mesh via ZoneDirector 3. Verify that a mesh network has been formed by checking if dotted lines appear between the mesh nodes. These dotted lines identify the neighbor relationships that have been established in the current mesh network.
-
Page 256: Understanding Mesh-Related Ap Statuses
Deploying a Smart Mesh Network Understanding Mesh-related AP Statuses Understanding Mesh-related AP Statuses In addition to using the Map View to monitor the status of the mesh network, you can also check the Access Points page on the Monitor tab for mesh-related AP statuses. The table below lists all possible AP statuses that are related to mesh networking, including any actions that you may need to perform to resolve mesh-related issues. -
Page 257: Using The Zoneflex Leds To Determine The Mesh Status
Deploying a Smart Mesh Network Using the ZoneFlex LEDs to Determine the Mesh Status Using the ZoneFlex LEDs to Determine the Mesh Status In addition to checking the mesh status of ZoneFlex APs from the ZoneDirector Web interface, you can also check the LEDs on the APs. The LED behaviors that indicate the AP's mesh status vary depending whether the AP is a single-band or a dual-band model. -
Page 258: On Dual-Band Zoneflex Aps
Deploying a Smart Mesh Network Using the ZoneFlex LEDs to Determine the Mesh Status Signal/Air Quality LED Figure 149. Behavior of the Signal/Air Quality LED LED Color/Behavior Root AP / eMAP Mesh AP Solid green • Connected to a Root AP or another Mesh AP •... -
Page 259: Using Action Icons To Configure And Troubleshoot Aps In A Mesh
Deploying a Smart Mesh Network Using Action Icons to Configure and Troubleshoot APs in a Mesh ZoneFlex 7962, 7982 and 7363 APs On ZoneFlex 7962, 7982 and 7363 APs, the 5G LED indicates the AP's mesh status. See the table below for more information. Figure 151. -
Page 260: Setting Mesh Uplinks Manually
Smart Uplink Selection and manually set the mesh nodes to which an AP can connect. Note that in most situations, Ruckus Wireless recommends against manually changing the roles of APs in a mesh, because it can result in isolated Mesh APs. -
Page 261: Troubleshooting Isolated Mesh Aps
Deploying a Smart Mesh Network Troubleshooting Isolated Mesh APs To set the mesh uplink for an AP manually 1. On the ZoneDirector Web interface, click the Configure tab. 2. On the menu, click Access Points. 3. In the Access Points table, find the AP you want to restrict, and click Edit under the Actions column. - Page 262 No APs with matching radio type The AP is unable to find an uplink AP with the same radio type. Ruckus Wireless Smart Mesh APs must use the same radio type to be able connect to each other via the mesh network. For example, an 802.11n Mesh AP will only connect to another...
-
Page 263: Recovering An Isolated Mesh Ap
Deploying a Smart Mesh Network Troubleshooting Isolated Mesh APs Recovering an Isolated Mesh AP When a Mesh AP becomes isolated, it begins broadcasting a recovery SSID (named “island- <last 6 digits of AP’s MAC address>”), which you can use to connect directly to the AP and make configuration changes. -
Page 264: Best Practices And Recommendations
Please wait at least 15 minutes (to allow the mesh network to stabilize), and then try managing this AP again via ZoneDirector. Best Practices and Recommendations For recommendations and best practices in planning and deploying a Ruckus Wireless Smart Mesh network, refer to “Smart Mesh Networking Best Practices”... - Page 265 Setting Administrator Preferences In This Chapter Changing the ZoneDirector Administrator User Name and Password ....254 Changing the Web Interface Display Language ....... . 255 Upgrading ZoneDirector and ZoneFlex APs.
-
Page 266: Setting Administrator Preferences
Setting Administrator Preferences Changing the ZoneDirector Administrator User Name and Password Changing the ZoneDirector Administrator User Name and Password You should change your ZoneDirector administrator login password on a monthly basis, but the administrator user name should be changed only if necessary. NOTE: If authentication with an external server is enabled and the Fallback to admin name/ password if failed check box is disabled, you will be unable to edit the user name and password. -
Page 267: Setting Administrator Login Session Timeout
Setting Administrator Preferences Changing the Web Interface Display Language Figure 154. The Preferences page Setting Administrator Login Session Timeout By default, administrators logged into the Web interface are automatically logged out after 30 minutes of inactivity. This timeout can be configured with a value between 1 and 1440 minutes (24 hours). -
Page 268: Upgrading Zonedirector And Zoneflex Aps
Upgrading ZoneDirector and ZoneFlex APs Upgrading ZoneDirector and ZoneFlex APs Check the Ruckus Wireless Support Web site on a regular basis for updates that can be applied to your Ruckus Wireless network devices — to ZoneDirector and all your ZoneFlex APs. After... -
Page 269: Performing An Upgrade With Smart Redundancy
Setting Administrator Preferences Upgrading ZoneDirector and ZoneFlex APs Figure 155. The Upgrade page Performing an Upgrade with Smart Redundancy If you have two ZoneDirectors in a Smart Redundancy configuration, the procedure is similar. Note however, that the active and standby ZoneDirectors will reverse roles during an upgrade. To upgrade both ZoneDirectors in a Smart Redundancy configuration 1. -
Page 270: Working With Backup Files
Working with Backup Files Working with Backup Files After you have set up and configured your Ruckus wireless network, you may want to back up the full configuration. The resulting archive can be used to restore your ZoneDirector and network. And, whenever you make additions or changes to the setup, you can create new backup files at that time, too. - Page 271 ZoneDirector configuration settings. This feature can be useful in deploying N+1 redundancy. For example, if three ZoneDirector 1100 controllers are deployed in different locations and with one ZoneDirector 3000 serving as a backup, you can use this feature to export AP lists from the three ZD1100s and import them one by one into the ZD3000.
-
Page 272: Restoring Zonedirector To Default Factory Settings
Setting Administrator Preferences Restoring ZoneDirector to Default Factory Settings • To import this file and continue importing AP lists from other backup files, select Import this backup file and additional backup file(s). Then click Import. When the import is complete, you will be prompted to import AP configurations from additional backup files. -
Page 273: Alternate Factory Default Reset Method
Setting Administrator Preferences Restoring ZoneDirector to Default Factory Settings NOTE: A complete set of instructions is available in the ZoneDirector Quick Start Guide (QSG). Before restoring ZoneDirector to factory default settings, you should open and print out the QSG pages. You can follow those instructions to set up ZoneDirector after restoring factory defaults. -
Page 274: Working With Ssl Certificates
(e.g., by device name such as “ZoneDirector”). NOTE: Ruckus Wireless recommends using the FQDN as the Common Name if possible. If your network does not have a DNS server, you may use ZoneDirector’s IP address instead. - Page 275 IP addresses or alternate DNS names. • Organization*: Type the complete legal name of your organization (for example, Ruckus Wireless, Inc.). Do not abbreviate your organization name. • Organization Unit: (Optional) Type the name of the division, department, or section in your organization that manages network security (for example, Network Manage- ment).
-
Page 276: Importing An Ssl Certificate
Setting Administrator Preferences Working with SSL Certificates Importing an SSL Certificate If you already have an SSL certificate, you can import it into ZoneDirector and use it for HTTPS communication. To complete this procedure, you will need the SSL certificate file and the key pair password that you set when you created the certificate signing request (CSR) file. - Page 277 Setting Administrator Preferences Working with SSL Certificates Figure 160. Install certificate and reboot, or install intermediate certificates 7. If the SSL certificate you imported does not match ZoneDirector’s private key, you can try another certificate, or click the click here link to import a private key. Figure 161.
- Page 278 Setting Administrator Preferences Working with SSL Certificates Figure 164. Importing intermediate certificates 11. Once you have finished importing the new signed certificate and any intermediate certifi- cates, click Import to complete the installation and reboot ZoneDirector. Figure 165. Click Import to install all intermediate certificates and reboot 12.
-
Page 279: Ssl Certificate Advanced Options
Setting Administrator Preferences Working with SSL Certificates Figure 167. Loading certificate screen You have completed installing a new signed SSL certificate to ZoneDirector. This allows you to connect to ZoneDirector securely using HTTPS without encountering browser security warn- ings. SSL Certificate Advanced Options ZoneDirector also provides four features for managing SSL certificates/private keys easily through the Web interface: •... - Page 280 Setting Administrator Preferences Working with SSL Certificates Figure 168. SSL Certificate advanced options 4. Log in to the peer ZoneDirector, and import the certificate as described in “Importing an SSL Certificate” page 264. 5. After the certificate has been imported, ZoneDirector checks for private key match. 6.
-
Page 281: Using An External Server For Administrator Authentication
To authenticate ZoneDirector administrators using an AAA server 1. Set up Group Attributes on the AAA server. • RADIUS: • Ruckus Wireless private attribute – Vendor ID: 25053 – Vendor Type/Attribute Number: 1 (Ruckus-User-Groups) – Value Format: group_attr1,group_attr2,group_attr3,... • Cisco private attribute (if your network is using a Cisco access control server) –... - Page 282 Setting Administrator Preferences Using an External Server for Administrator Authentication 4. Test your authentication settings (Configure > AAA Servers > Test Authentication Settings). 5. Specify AAA server to use (Administer > Preferences > Authenticate with Auth Server). • Verify that the Fallback to admin name/password if failed check box is selected. Keeping this check box selected ensures that administrators will still be able to log into the ZoneDirector Web interface even when the authentication server is unavailable.
-
Page 283: Upgrading The License
Upgrading the License Upgrading the License Depending on the number of Ruckus Wireless APs you need to manage with your ZoneDirector, you may need to upgrade your license as your network expands. Contact your authorized Ruckus Wireless reseller to purchase an upgrade license. Once you load the license via the Web interface, it takes effect immediately. - Page 284 Setting Administrator Preferences Upgrading the License 3. After both have been upgraded and the license levels match, the Smart Redundancy indicator displays “Active - Connected” or “Standby - Connected”.
- Page 285 Troubleshooting In This Chapter Troubleshooting Failed User Logins ......... . 274 Fixing User Connections.
-
Page 286: Troubleshooting
Troubleshooting Troubleshooting Failed User Logins Troubleshooting Failed User Logins SUMMARY: This troubleshooting topic addresses the problems that network users might have with configuring their client devices and logging into your ZoneFlex WLAN. Upon the completion of the Setup Wizard, ZoneDirector automatically activates a default internal WLAN for authorized users. -
Page 287: If Wlan Connection Problems Persist
Troubleshooting Fixing User Connections 3. The client will be immediately disconnected from the WLAN. (Be sure not to block the client. If you do accidentally block a client, go to Configure > Access Control to unblock.) 4. From the client computer, refresh the list of wireless networks and attempt to log in again. 5. -
Page 288: Measuring Wireless Network Throughput With Speedflex
Troubleshooting Measuring Wireless Network Throughput with SpeedFlex At the end of this process, the user should be reconnected. If problems persist, they may originate in Windows or in the wireless network adapter. Measuring Wireless Network Throughput with SpeedFlex SpeedFlex is a wireless performance tool included in ZoneDirector that you can use to measure the downlink throughput between ZoneDirector and a wireless client, ZoneDirector and an AP, and a wireless client and an AP. - Page 289 Troubleshooting Measuring Wireless Network Throughput with SpeedFlex NOTE: If ZoneDirector is unable to determine the IP address of the wireless client that you want to test (for example, if the wireless client is using a static IP address), the SpeedFlex link for that client does not appear on the Currently Active Clients page.
- Page 290 Troubleshooting Measuring Wireless Network Throughput with SpeedFlex Figure 174. Click the download link for the target client’s operating system Figure 175. A progress bar appears as SpeedFlex measures the wireless throughput...
-
Page 291: Using Speedflex In A Multi-Hop Smart Mesh Network
Troubleshooting Measuring Wireless Network Throughput with SpeedFlex Figure 176. When the test is complete, the tool shows the uplink and downlink throughput and packet loss percentage Using SpeedFlex in a Multi-Hop Smart Mesh Network SpeedFlex can also be used to measure multi-hop throughput between APs and ZoneDirector in a mesh tree. -
Page 292: Allowing Users To Measure Their Own Wireless Throughput
Troubleshooting Measuring Wireless Network Throughput with SpeedFlex Figure 177. Running Multi-Hop SpeedFlex in a mesh tree Figure 178. Multi-Hop SpeedFlex test results Allowing Users to Measure Their Own Wireless Throughput ZoneDirector provides another version of the SpeedFlex Wireless Performance Test application that does not require authentication. - Page 293 How to Measure the Speed of Your Wireless Connection The following instructions describe how you can use SpeedFlex, a wireless performance test tool from Ruckus Wireless, to measure the speed of your wireless connection to your access point. 1. Make sure that your wireless device is connected only to the wireless network. If your wireless device is also connected to the wired network, unplug the network cable.
-
Page 294: Diagnosing Poor Network Performance
Troubleshooting Diagnosing Poor Network Performance Diagnosing Poor Network Performance You can try the following diagnostic and troubleshooting techniques to resolve poor network performance. 1. Go to Monitor > Map View. 2. Look on the map for rogue APs. If there is a large number, and they belong to neighboring networks, proceed to the next task. -
Page 295: Using The Ping And Traceroute Tools
Troubleshooting Using the Ping and Traceroute Tools Figure 179. The Diagnostics page Using the Ping and Traceroute Tools The ZoneDirector Web interface provides two commonly used tools that allow you to diagnose connectivity issues while managing ZoneDirector without having to exit the UI. The Ping and Traceroute tools can be accessed from anywhere in the UI that you see the icon. - Page 296 Troubleshooting Using the Ping and Traceroute Tools Figure 180. Launching the Ping/Traceroute Troubleshooting window from the Dashboard The Network Connectivity window opens. Click Ping to ping the IP address or Trace Route to diagnose the number of hops to the IP address. Figure 181.
-
Page 297: Generating A Debug File
8. When the Download Complete dialog box appears, click Close. After the file is saved, you can email it to the technical support representative. NOTE: The debug (or diagnostics) file is encrypted and only Ruckus Wireless support representatives have the proper tools to decrypt this file... - Page 298 Troubleshooting Viewing Current System and AP Logs Figure 182. Viewing System and AP logs Figure 183. UI display of current system and AP logs...
-
Page 299: Packet Capture And Analysis
Troubleshooting Packet Capture and Analysis Packet Capture and Analysis The Packet Capture feature puts one or more APs into packet sniffer mode, allowing them to capture packets and either save them to a local file or stream them to a packet inspection program such as Wireshark for later analysis. - Page 300 Troubleshooting Packet Capture and Analysis 4. Launch Wireshark. 5. Go to Capture Options. 6. Under Capture: Interface, select Remote. A Remote Interface dialog appears. 7. In Host, enter the IP address of the AP you want to view. Leave the Port field empty and click OK.
-
Page 301: Importing A Script
Troubleshooting Importing a Script 1. The PPI:802.11-Common Header antenna signal and antenna noise fields of packets transmitted by the AP contain the next-to-lowest byte and the lowest byte, respectively, of the antenna pattern used to transmit the packet. On some APs, the pattern value may contain more significant bits, which are not stored in this header. -
Page 302: Enabling Remote Troubleshooting
Troubleshooting Enabling Remote Troubleshooting Enabling Remote Troubleshooting The Remote Troubleshooting feature allows Ruckus support personnel to connect directly to a ZoneDirector deployed at a customer’s site for troubleshooting purposes. Do not enable this feature unless instructed to do so by Ruckus support. Figure 186. - Page 303 Troubleshooting Restarting ZoneDirector NOTE: If you have made any configuration changes, Ruckus Wireless recommends shutting down ZoneDirector to ensure that all configuration changes are saved and remain after reboot. Performing a Restart may cause ZoneDirector to lose configuration changes if you forgot to click Apply after making changes and navigate away from a configuration page, for example.
- Page 304 Troubleshooting Restarting ZoneDirector...
- Page 305 Smart Mesh Networking Best Practices In This Appendix Choosing the Right AP Model for Your Mesh Network ......294 Calculating the Number of APs Required.
-
Page 306: Smart Mesh Networking Best Practices
Choosing the Right AP Model for Your Mesh Network Ruckus Wireless supports both 802.11g and the newer, faster 802.11n APs with which to form a mesh network. Because mesh throughput degrades with the number of hops, the best performance can be achieved using the newer, faster 802.11n APs (ZoneFlex 7962, 7762, 7982, etc.). -
Page 307: Placement And Layout Considerations
Smart Mesh Networking Best Practices Placement and Layout Considerations statistical multiplexing (just like the phone system - the fact that not all users are using the network concurrently), if you use an oversubscription ratio of 4:1, such a network could actually support 40 users at 1Mbps. -
Page 308: Signal Quality Verification
Smart Mesh Networking Best Practices Signal Quality Verification Figure 188. Root Placement • If the customer's network utilizes a wireless backhaul technology for broadband access, it is recommended to not mount the broadband wireless modem right next to a Ruckus Wireless AP. - Page 309 Smart Mesh Networking Best Practices Signal Quality Verification • Ensure Minimum 2 Uplink options for every MAP: In addition, under Neighbor APs, it is best practice that there exists an alternate path for this mesh uplink. This alternate path should also have a Signal of 25% or better.
-
Page 310: Mounting And Orientation Of Aps
Smart Mesh Networking Best Practices Mounting and Orientation of APs Mounting and Orientation of APs ZoneFlex APs are very tolerant to a variety of mounting and orientation options due to Ruckus Wireless' use of its unique BeamFlex technology, in which the RF signal is dynamically concentrated and focused towards the other end of the RF link. -
Page 311: Indoor Aps - Vertical Orientation
Smart Mesh Networking Best Practices Mounting and Orientation of APs Indoor APs - Vertical Orientation A less typical vertical orientation may be used in certain cases where it is not possible for mechanical or aesthetic reasons to use the typical horizontal orientation. In such cases, indoor APs may also be wall mounted vertically. -
Page 312: Outdoor Aps - Typical Horizontal Orientation
Smart Mesh Networking Best Practices Mounting and Orientation of APs Outdoor APs - Typical Horizontal Orientation Outdoor APs are typically mounted in a horizontal orientation, as shown in Figure 192. A less typical orientation would be vertically mounted. Figure 192. Outdoor AP typical horizontal orientation Elevation of RAPs and MAPs In addition to orientation, it is important to also pay attention to the elevation of an AP for reliable mesh operation. -
Page 313: Best Practice Checklist
Smart Mesh Networking Best Practices Best Practice Checklist Best Practice Checklist Following the mesh best practices will ensure that your mesh is well-designed, and have the capacity and reliability required for your enterprise applications. The best practices are summa- rized below as a checklist for quick review. 1. - Page 314 Smart Mesh Networking Best Practices Best Practice Checklist...
- Page 315 Index Numerics option values , 117 11n Only Mode , 157 Alarms 802.11d , 120 activating email notification , 51 802.1X Algorithm authenticator , 165 New WLAN creation , 117 client authentication option , 207 All Events/Activities (Logs) , 50 supplicant , 166 AP Groups...
- Page 316 Creating a new WLAN Access VLAN , 119 Background Scanning , 68, 120 Algorithm , 117 Backup/Restore ZoneDirector , 258 Description , 115 Band Selection (ZoneFlex 7321) , 160, 173 Hide SSID , 120 Blocked clients Method , 116 reviewing a list , 84 Name/ESSID , 115...
- Page 317 DNS Server Group Extraction , 93 Registering ZoneDirector Group Settings , 17 , 157 downstream group-addressed frame for- Guest Access Customization , 229 warding , 146 Guest Pass Dynamic PSK , 118, 202 custom , 230 expiration , 148 Guest Pass Access Dynamic VLAN , 119, 165 managing...
- Page 318 Language Model Specific Control , 157 changing the Web interface language Monitor overview , 182 LDAP , 91, 99, 212 Monitoring LEDs , 4, 6 individual clients , 190 License Upgrade , 271 Real Time , 29 Limited ZD Discovery , 169 Monitoring AP status , 191...
- Page 319 Placing the Access Point markers Restoring AP configuration settings only , 184 PoE Out Ports Restoring archived settings , 258 enabling , 159 Reviewing AP policies , 169 Policies Reviewing current alarms , 188 Access Point-specific , 169 Poor network performance see also 'Radio frequencies' diagnosis , 282...
- Page 320 SNMPv2 , 57 SNMPv3 , 58 Upgrading Spectralink VIEW certification , 157 with Smart Redundancy , 257 SpeedFlex , 276 ZoneDirector software , 256 SSL Certificate ZoneFlex APs , 256 importing , 264 Upgrading the license , 271 Status LEDs Uplink Selection , 178 disabling...
- Page 321 Web interface buttons WPA2 , 116 explained WPA-Mixed , 24 , 116 Web interface Dashboard explained , 24 Web interface tabs Zero IT , 12, 112, 126, 211, 259 explained , 24 enabling , 202 Web interface workspaces Zero IT Activation explained , 24 New WLAN creation...
Need help?
Do you have a question about the ZoneDirector 1100 and is the answer not in the manual?
Questions and answers