Sign In
Upload
Manuals
Brands
Sun Microsystems Manuals
Server
Enterprise 3500
Sun Microsystems Enterprise 3500 Manuals
Manuals and User Guides for Sun Microsystems Enterprise 3500. We have
4
Sun Microsystems Enterprise 3500 manuals available for free PDF download: Reference Manual, Installation Manual
Sun Microsystems Enterprise 3500 Reference Manual (258 pages)
Brand:
Sun Microsystems
| Category:
Computer Hardware
| Size: 4 MB
Table of Contents
Table of Contents
3
Product Overview
25
Standard Features
25
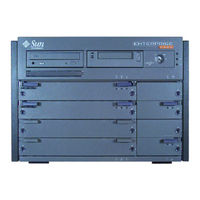
FIGURE 1-1 Enterprise 3500 System
25
FIGURE 1-2 Enterprise 3500 Components
26
Internal Options
27
Safety Precautions and Tools Requirements
29
Safety Precautions
29
Symbols
30
FIGURE 2-1 Symbols, Part
30
System Precautions
31
Tools Required
32
Cpu/Memory+ Boards and Components
33
Handling Boards and Assemblies
34
Filler Panels
35
FIGURE 3-1 Filler Panel
35
Hot-Plug Feature
36
Dynamic Reconfiguration for Hot-Pluggable System Boards
36
Cpu/Memory+ Boards
37
FIGURE 3-2 Unlocking and Locking Quarter-Turn Access Slots
38
FIGURE 3-3 Cpu/Memory+ Board
38
Installing a Board
39
FIGURE 3-4 Board Slot Locations
40
Ultrasparc II Modules
42
Handling Precautions
42
FIGURE 3-5 Ultrasparc II Module Connector Detail
42
FIGURE 3-6 Ultrasparc II Module Connector Detail
43
FIGURE 3-7 Ultrasparc II Module Removal and Replacement
44
FIGURE 3-8 CPU Module Torque Tightening Sequence
46
FIGURE 3-9 Tightening Compression Bar Screws
46
Memory Modules (Dimms)
47
FIGURE 3-10 Layout of Cpu/Memory+ Board
47
FIGURE 3-11 Ejecting a DIMM
48
FIGURE 3-12 Orienting a DIMM
50
FIGURE 3-13 Installing a DIMM
51
I/O+ Boards and Components
53
Handling Boards and Assemblies
54
Filler Panels
55
FIGURE 4-1 Filler Panel
55
SCSI Termination
56
Hot-Plug Feature
56
FIGURE 4-2 SCSI Terminator
56
Dynamic Reconfiguration for Hot-Pluggable System Boards
57
I/O+ Boards
57
Gbic
57
FIGURE 4-3 Sbus+ I/O Board with 100 Mbyte/Second Fibre Channel
58
FIGURE 4-4 Graphics+ I/O Board with 100 Mbyte/Second Fibre Channel
58
FIGURE 4-5 PCI+ I/O Board
59
FIGURE 4-6 Unlocking and Locking Quarter-Turn Access Slots
61
FIGURE 4-7 Extraction Lever in Extract Position
61
FIGURE 4-8 Board Slot Locations
63
FIGURE 4-9 Sbus+ I/O Board Sbus Slots
65
FIGURE 4-10 Graphics+ I/O Board Sbus Slots
66
FIGURE 4-11 Locking and Unlocking Standoffs
66
FIGURE 4-13 Sbus Card Rear Panel with Adapter
68
FIGURE 4-14 Card Retainer
69
FIGURE 4-15 Graphics (UPA) Card Connector Location
70
FIGURE 4-16 Removing or Installing a Graphics (UPA) Card
71
Removing a GBIC
73
FIGURE 4-17 Sbus+ I/O Board GBIC Connector Locations
74
FIGURE 4-18 Graphics+ I/O Board GBIC Connector Locations
74
Installing a GBIC
75
FIGURE 4-19 Removing or Installing a GBIC
75
FIGURE 4-20 PCI and Riser Card Removal
77
FIGURE 4-21 PCI Card Removal
78
FIGURE 4-22 JTAG Test Jumper
79
FIGURE 4-23 PCI Card Installation/Replacement
80
FIGURE 5-1 Clock+ Board
89
FIGURE 5-2 Clock+ Board Location
91
FIGURE 6-1 Interface Board Location
95
FIGURE 6-2 Interface Board
96
TABLE 6-1 GBIC Controllers for Disk Drive Ports
96
Power Supplies
101
TABLE 2-1 Safety Precautions
101
Power Supply Types
102
TABLE 7-1 Power Supply Summary
102
Safety Precautions
103
Distribution
103
Peripheral Power Supplies
103
Peripheral Power Supply Leds
104
FIGURE 7-1 Peripheral Power Supply/Ac Input
104
FIGURE 7-2 Auxiliary Peripheral Power Supply (PPS1) and Thermal Protection Module
104
(Pps 0)
105
FIGURE 7-3 Unlocking and Locking Quarter-Turn Access Slots
105
FIGURE 7-4 Replacing the Peripheral Power Supply/Ac Input
106
Replacing the Thermal Protection Module or Auxiliary Peripheral
107
Power Supply (PPS1)
107
FIGURE 7-5 Replacing the Auxiliary Peripheral Power Supply (PPS1)
109
Power/Cooling Module (PCM)
111
Requirements for Redundant Power
111
Figure 7-6 Pcm
111
Cooling Requirements
112
Troubleshooting a PCM
112
TABLE 7-3 Minimum and Redundant Working Power Supplies Required to Power Active Boards
112
Replacing a PCM
113
FIGURE 7-7 Quarter-Turn Access Slots
113
FIGURE 7-8 Replacing a PCM in the Enterprise 3500 System
114
Internal SCSI and FC-AL Devices
117
Figure
117
Tape and DVD-ROM Drives
118
FIGURE 8-1 Internal SCSI and FC-AL Device Locations
118
Removing/Replacing a Tape or DVD-ROM Drive
119
FIGURE 8-2 Front Bezel
119
FIGURE 8-3 Media Tray Removal and Replacement
120
Disk Drives
121
Removing a Disk Drive
122
FIGURE 8-4 Disk Drive Access
122
FIGURE 8-5 Disk Drive Bays
123
Installing a Disk Drive
124
FIGURE 8-6 Disk Drive with Retainer Unlatched and Extended
124
FIGURE 8-7 Interface Board GBIC Ports
126
TABLE 8-1 GBIC Controllers for Disk Drive Ports
126
Troubleshooting Overview
127
Using a Terminal
127
Reset Switches
128
FIGURE 9-1 Details of the Clock+ Board
128
Hardware Indicators
129
LED Symbols
129
Figure
129
Clock+ Board Leds
130
TABLE 9-1 System Front Panel LED Codes
130
Cpu/Memory+ and I/O+ Board Leds
131
TABLE 9-2 LED Codes for the Cpu/Memory+ and I/O+ Boards
131
Power Supplies
132
Disk Tray Indicators
132
TABLE 9-3 PCM LED Codes
132
Card Cage Slot Information
133
Slot Numbers for the Card Cage
133
Figure
133
Diagnosing Problems
134
Servicing Obvious Problems
134
Troubleshooting Less Obvious Problems
134
Diagnosing AC/DC Power Problems
134
POST and Openboot
136
Sun Management Center
137
Specific Problems and Solutions
138
Failure of Network Communications
138
Using a Remote Console
140
TABLE 9-4 Remote Console Commands
140
Flow Diagrams for Troubleshooting
141
No AC/DC Power
142
System Cannot Boot
143
Defective Cpu/Memory+ Board
144
Defective I/O+ Board or Interface Board
145
Defective Disk Drive
146
Defective Power Supplies
147
Defective Clock+ Board
148
Powering off and on
149
Powering off the System
149
FIGURE 11-1 Key Switch Standby Position
150
FIGURE 11-2 AC Power Switch and AC Connector
150
Removing the External Cables
151
Restarting the System
151
Reading Boot Messages
153
FIGURE 11-3 System Reset Switch on Clock+ Board
153
FIGURE 11-4 Front Panel Status Leds
154
TABLE 11-1 LED Status Indicators
154
Preparing for Service
155
Servicing Hot-Pluggable Components
155
Powering off the System
155
Internal Access
156
Front Bezel
156
FIGURE 12-1 Removing the Front Bezel
156
Media Tray
157
FIGURE 12-2 Removing the Media Tray
157
Powering on the System
158
Specifications
159
Physical Specifications
159
TABLE A-1 System Physical Specifications
159
Electrical Specifications
160
TABLE A-2 Clearance and Service Access
160
TABLE A-3 Shipping Specifications
160
TABLE A-4 Server Electrical Specifications
160
Environmental Requirements
161
Functional Description
163
System Overview
163
FIGURE B-1 Enterprise 3500 System- Front View
164
Board Types
165
FIGURE B-2 Enterprise 3500 System-Rear View
165
Cpu/Memory+ Board
166
FIGURE B-3 Enterprise System Logical Organization
166
FIGURE B-4 Cpu/Memory+ Board
167
CPU Modules
168
TABLE B-1 Locations for Five Cpus on Three Boards - Example Only
168
Dimms
169
FIGURE B-5 DIMM Slot Locations
169
I/O+ Boards
170
Sbus+ I/O Board
171
Graphics+ I/O Board
172
FIGURE B-7 Graphics+ I/O Board
172
PCI+ I/O Board
173
FIGURE B-8 PCI+ I/O Board
173
Power Supplies
174
Power/Cooling Modules
174
Figure B-9 Pcm
174
FIGURE B-10 Peripheral Power Supply/Ac
175
Peripheral Power Supply/Ac
176
Peripheral Power Supply
176
FIGURE B-11 Auxiliary Peripheral Power Supply and Thermal Protection Module
176
Clock+ Board
177
Network Interfaces
178
Internal Disk Drives
178
Media (DVD-Rom/Tape Drive) Tray
178
Expansion Cabinets
178
SCSI and FC-AL Devices
179
SCSI Target ID Number Addressing
179
Media Tray
179
TABLE C-1 Media Tray Default SCSI ID Numbers
179
Internal Disk Drives
180
Device Naming Conventions
180
TABLE C-2 Internal Disk Drive Default ID Numbers
180
TABLE C-3 Examples of Alias Names
180
SCSI Cable Length
181
Onboard SCSI
181
Sbus SCSI Cards
182
SCSI Termination
182
Fiber Cable Length
182
Rules for System Configuration
183
Card Cage
183
I/O+ Boards
184
FIGURE B-12 Clock+ Board
184
FIGURE D-1 Board Slots and AC Power Supply
184
Interface Board
185
Cpu/Memory+ Boards
185
Power Supplies and Fan Cooling
186
Filler Panels
186
Sbus Cards
187
CPU Modules
187
Memory Modules
188
Cabling
188
Scsi
188
Fiber Optic
188
Ethernet
189
Video Interface
189
DVD-Rom/Tape Drive Media Tray
189
Disk Drives
190
FIGURE D-2 Disk Drive Bay Numbers
190
Non-Chassis Field Replaceable Units (Frus
191
FRU List
192
Fan Tray Assembly
192
Removing the Fan Tray Assembly
193
Replacing the Fan Tray Assembly
193
FIGURE E-1 Removing the Fan Tray Assembly
193
Auxiliary Fan Tray Assembly
194
Removing the Auxiliary Fan Tray Assembly
194
FIGURE E-2 Unlocking and Locking Quarter-Turn Access Slots
194
Replacing the Auxiliary Fan Tray Assembly
195
FIGURE E-3 Removing the Auxiliary Fan Tray
195
Removing the Front and Side Panels
196
Removing the Side Panels and Front Bezel
196
FIGURE E-4 Removing the Side Panel
197
Removing the Media Tray and Front Decorative Panel
198
FIGURE E-5 Removing the Front Bezel
198
FIGURE E-6 Removing the Media Tray
199
Media Tray Data and DC Power Cable Assemblies
200
Key Switch PWB Centerplane Cable Assembly
201
FIGURE E-7 Cable Connectors on the Centerplane
201
FIGURE E-8 Key Switch PWB Centerplane Cable
202
FIGURE E-9 Locking Tabs on the LED Board
203
Key Switch Lock Cable Assembly
204
FIGURE E-10 Removing the Key Switch Lock Cable Assembly
205
LED Board
206
Centerplane
208
FIGURE E-11 Enterprise 3500 System Without the Front Chassis
209
FIGURE E-12 Centerplane Guide Pins
210
Replacing the Front and Side Panels
212
Replacing the Media Tray and Front Decorative Panel
212
Replacing the Front Bezel and Side Panels
212
Illustrated Parts Breakdown
213
Finding Part Numbers
213
Replaceable Components
214
Illustrations
216
FIGURE F-1 Front View
216
FIGURE F-2 Rear View
217
FIGURE F-3 Key Switch Lock Cable Assembly
218
FIGURE F-4 Key Switch PWB Centerplane Cable Assembly
219
FIGURE F-5 Key Switch Tray, LED Board
220
FIGURE F-6 Centerplane Assembly
220
Figure F-7 Pcm
221
FIGURE F-10 Cpu/Memory+ Board Assembly
222
FIGURE F-11 Sbus+ I/O Board Assembly
223
FIGURE F-12 Graphics+ I/O Board Assembly
224
FIGURE F-13 PCI+ I/O Board Assembly
225
FIGURE F-14 Clock+ Board Assembly
226
FIGURE F-15 Filler Board Panel Assembly
227
FIGURE F-16 Media (SCSI) Tray Assembly
228
FIGURE F-17 Disk Drive
229
FIGURE F-18 Fan Tray Assembly
230
FIGURE F-21 Interface Board
232
Connectors
233
Cpu/Memory+ Board
234
Centerplane Connector
234
FIGURE G-1 Cpu/Memory+ Board Connector Locations
234
FIGURE G-2 Centerplane Connector Detail
235
CPU Module Connectors
236
Section G.2 "I/O+ Boards
236
FIGURE G-7 Sbus I/O+ Board Sbus Connectors
238
Centerplane Connector
238
Sbus Connectors
238
FIGURE G-8 Graphics+ I/O Board Sbus Connectors
239
UPA Connector Location
239
FIGURE G-10 Sbus I/O+ Board GBIC Slots
240
Ethernet and MII Connectors
240
GBIC Connectors
240
FIGURE G-11 Graphics+ I/O Board GBIC Slots
241
FIGURE G-12 PCI+ I/O Board Slots
241
PCI Connectors
241
FIGURE G-13 Clock+ Board Connectors
242
SCSI Connector
242
Centerplane Connector
242
FIGURE G-16 GBIC Slots
244
Advertisement
Sun Microsystems Enterprise 3500 Installation Manual (60 pages)
Brand:
Sun Microsystems
| Category:
Computer Hardware
| Size: 1 MB
Table of Contents
Table of Contents
3
Preparing for Installation
15
Unpacking and Preparing the System
16
FIGURE 1-1 Enterprise 3500 System
16
Shipping and Storing the System
17
Preparing the Electrical Circuits
17
Preparing the Air Conditioning
18
Preparing the Ethernet Network
18
Preparing the Area
20
Using the User Naming Area
21
FIGURE 1-4 Enterprise 3500 Server Access Areas - Top View
21
Cabling the System
23
Preparing the System for Cabling
23
Installing the Fiber Cable Organizer
23
FIGURE 2-1 Fiber Cable Organizer Mounted on Support Bracket
24
Connecting the Power Cord
25
FIGURE 2-2 Key Switch Standby Position
25
FIGURE 2-3 AC Power Switch, AC Connector, and Retainer Clip
26
Connecting the Network Cable to the System
27
FIGURE 2-4 Network Cable
27
Connecting the System to the Network
28
FIGURE 2-5 10/100BASE-T Ethernet Connection
28
Figure
29
FIGURE 2-6 Connecting Twisted Pair Ethernet to N-Type Coaxial Cable
29
Connecting an ASCII Terminal
30
FIGURE 2-8 Clock+ Board
31
Connecting the Fiber Cable to the I/O+ Board
32
FIGURE 2-9 Fiber Cable and Fiber Card Connectors and Ports on the I/O+ Board
33
Connecting the Fiber Cable to the Interface Board and the I/O+ Board
34
Wrapping the Fiber Cable on the Organizer
35
FIGURE 2-10 Interface Board
35
FIGURE 2-11 Fiber Cable Ports on the Interface Board
35
FIGURE 2-12 Fiber Cable in "Figure 8" Pattern
36
Connecting External SCSI Devices
37
FIGURE 2-13 Onboard Single-Ended SCSI Connector on the I/O+ Board
38
Powering the System on and off
39
Using Jumpstart Automatic Installation
39
Powering on the System
40
FIGURE 3-1 Key Switch Positions
41
FIGURE 3-2 AC Power and Clock+ Board
42
Reading Boot Messages
43
FIGURE 3-3 CPU Reset Switch on Clock+ Board
43
Interpreting Status LED Patterns
44
FIGURE 3-4 System Status LED
44
Powering off the System
45
Software
47
Operating System Software and Patches
47
Software Patches for Solaris Operating Environment and Sun Storedge Products
48
Sun™ Management Center Software
48
Dynamic Reconfiguration for Hot-Pluggable System Boards
49
CPU Over-Temperature Safeguard (COS)
49
Regulatory Agency Compliance Statements
51
Sun Microsystems Enterprise 3500 Installation Manual (53 pages)
Server System
Brand:
Sun Microsystems
| Category:
Server
| Size: 0 MB
Table of Contents
Table of Contents
5
Preface
7
Typographic Conventions
7
Related Documentation
9
Sun Welcomes Your Comments
11
1 Preparing for Installation
13
Unpacking and Preparing the System
14
Shipping and Storing the System
15
Preparing the Electrical Circuits
15
Preparing the Air Conditioning
15
Preparing the Ethernet Network
16
Preparing the Area
17
Using the User Naming Area
18
2 Cabling the System
21
Preparing the System for Cabling
21
Installing the Fiber Cable Organizer
21
Connecting the Power Cord
23
Connecting the Network Cable to the System
26
Connecting the System to the Network
27
Connecting an ASCII Terminal
30
Connecting the Fiber Cable to the I/O+ Board
32
Connecting the Fiber Cable to the Interface Board and the I/O+ Board
33
Wrapping the Fiber Cable on the Organizer
34
Connecting External SCSI Devices
37
3 Powering the System on and off 27
39
Powering the System on and off
39
Using Jumpstart Automatic Installation
39
Powering on the System
40
Reading Boot Messages
43
Interpreting Status LED Patterns
44
Powering off the System
45
4 Software
47
Operating System Software and Patches
47
Solaris 2.6 - Patch
47
Solstice Symon Software
47
Dynamic Reconfiguration
48
Cpu over Temperature Safeguard (Cos)
48
FCC, DOC, and VCCI Class Notices
49
Fcc Class a Notice
49
Doc Class a Notice – Avis Doc, Classe a
50
VCCI
51
Declaration of Conformity
52
Index
53
Advertisement
Sun Microsystems Enterprise 3500 Installation Manual (12 pages)
for 464-MHz 8-Mbyte CPU Module
Brand:
Sun Microsystems
| Category:
Computer Hardware
| Size: 0 MB
Advertisement
Related Products
Sun Microsystems Fire 3800
Sun Microsystems Ultra Enterprise 3000
Sun Enterprise 3 00 Series
Sun Microsystems Enterprise 250
Sun Microsystems Enterprise 420R
Sun Microsystems Enterprise 6 00 Series
Sun Enterprise 5 00 Series
Sun Enterprise 4 00 Series
Sun Microsystems StorEdge 3510
Sun Microsystems StorEdge 3511
Sun Microsystems Categories
Server
Storage
Desktop
Computer Hardware
Adapter
More Sun Microsystems Manuals
Login
Sign In
OR
Sign in with Facebook
Sign in with Google
Upload manual
Upload from disk
Upload from URL