Table of Contents
Advertisement
Quick Links
Download this manual
See also:
Installation Manual
Advertisement
Table of Contents

Related Manuals for GCC Technologies Elite 21DN


Summary of Contents for GCC Technologies Elite 21DN
- Page 1 GCC Elite 21 Series User’s Manual Elite 21 Elite 21...
-
Page 2: Table Of Contents
Table of Contents Introduction .............v How to Use this Manual . - Page 3 3. Using the Elite 21 with Mac OS X .........3-1 Software Installation .
- Page 4 7.The Elite 21 Control Panel ..........7-1 The LCD Display Window .
- Page 5 ......H-1 Appendix I: Contacting GCC Worldwide ........I-1 Appendix J:Warranties and Licenses .
-
Page 6: Introduction
Introduction Thank you for your purchase of a GCC Elite 21 Series Laser Printer. You now have a high-quality, versatile solution to all of your printing needs. The purpose of this manual is to show you how to set up and use your new printer. -
Page 7: Using This Manual
Using this Manual This manual is presented as an Adobe Acrobat portable document format (.pdf) file. If you are reading this page, you have successfully installed Acrobat or Acrobat Reader on your computer and opened this document. The Acrobat Screen The Acrobat screen is divided into two parts, with bookmarks on the left and pages on the right. - Page 8 The GCC manual also contains hyperlinks, marked by the use of Blue text within the manual. Click on any of these links to go to that location. Finding Text To find specific information in the manual, use the Find command within Acrobat. This command takes the place of a traditional index.
-
Page 9: Hardware Setup
1. Hardware Setup This Chapter of the user’s manual covers setting up the Elite 21 printer. This information is also available in the printed Elite 21 Getting Started Guide which shipped with your printer. Installation Checklist For proper installation, please complete each section in order: Step 1 Check Package Contents Step 2... -
Page 10: Check Package Contents
GCC Warranty Registration Card Note: No printer cables are included with the printer. For information on ordering cables, contact GCC Direct Sales at 800-422-7777 (North America only, outside of North America refer to the back cover) or visit our web site at:... -
Page 11: Prepare Printer Location
Step 2. Prepare Printer Location Place the printer on a flat, level surface in a well-ventilated area away from direct sunlight or areas where the air temperature and humidity can vary widely. Do not obstruct the fan vent on the right side of the printer. Minimum Recommended Clearances: Top View 7.87”... -
Page 12: Locate Printer Parts
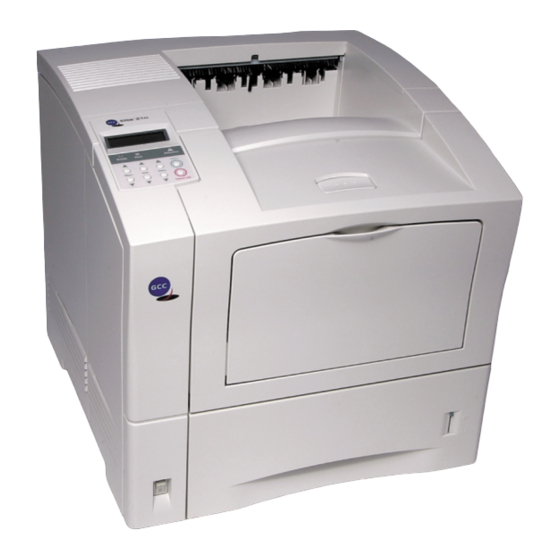
Step 3. Locate Printer Parts Front View Paper Output Tray Paper Exit Slot Control Panel Front Cover Multi-Purpose Feeder (Tray 1) Tray Extension Power Switch 550-sheet Universal Cassette (Tray 2) Rear View Rear Cover Top Cover Connectivity Ports (see next page for details) Ventilation Slots Power Cord Receptacle... - Page 13 Connectivity Ports With the printer’s all ports active feature, all the interfaces are simultaneously active. This means you can connect more than one interface at a time. You don’t have to select a port; this Ethernet 10/100BaseT feature works automatically. Bi-directional Parallel Universal Serial Bus (USB)
-
Page 14: Remove Tape
Step 4. Remove Tape Remove packaging tape from the front and rear covers of the printer. - Page 15 Step 5. Install Toner Cartridge Press down on the release button at the top of the printer to open the front cover. Remove the two orange plastic spacers inserted in the printer by pulling them out of the printer as shown. Note: The toner cartridge contains a microfine plastic powder that is fused to the paper during the printing process.
- Page 16 Unwrap the toner cartridge and remove the protective sheet of paper from under the front flap of the cartridge. Shake the cartridge from side to side several times as shown to distribute the toner. Place the toner cartridge on a flat surface and hold the cartridge securely with one hand.
- Page 17 Close the front cover. Press on the center part of the front cover until the cover locks securely.
- Page 18 Step 6. Load Paper Tray The standard paper tray holds up to 550 sheets of 20 lb. copier-type paper. It can handle the following sizes of paper: • US Letter • US Legal 13” • A4 • A5 • US Executive •...
- Page 19 For sizes larger than Letter/A4, press down on the grey square at the bottom of the tray. This will release the rear section of the tray and the section can be adjusted outward to extend the tray’s length. The rear section of the tray adjusts to three different positions.
- Page 20 Squeeze the right side paper guide as shown. Lift the guide slightly and slide it towards the paper stack until it touches the paper. Do not set the guide too tightly against the paper stack, as this could cause paper feed jams. Squeeze the paper length guide at the rear of the tray as shown.
- Page 21 Gently slide the paper tray all the way into the printer. 10. The paper level indicator on the front of the tray will rise to show the remaining level of paper in the tray. Replenish paper as necessary. 1-13...
-
Page 22: Connect Printer Cables
Step 7. Connect Printer Cables Connecting Cables Correctly Most cables come with some kind of locking device to insure that the connection is made. Be sure to use these locking devices, otherwise you may experience intermit- tent errors or the printer will fail to operate altogether. •... -
Page 23: Ethernet Network Connection
Ethernet Network Connection The Ethernet interface on your printer lets you connect to an Ethernet network via standard 10 BaseT or 100 BaseT cabling. 1-15... - Page 24 Step 8. Attach Power Cord Insert the power cord into the AC power connector on the back of the printer as shown. Check the power switch at the front of the printer to confirm that it is in the Off (O) position.
- Page 25 Step 9. Install Printing Software Driver software for the printer must be installed on every computer that will print to the unit. This section includes installation instructions for Macintosh,Windows 95/98/Me,Windows 2000/XP and Windows NT 4.0. Please refer to the chapter of this manual relating to the operating system being used on your computer(s) for detailed software installation instructions, as follows: Mac (OS 9.x or earlier) .
-
Page 26: Install Accessories
• Additional Memory (RAM) Accessories can be ordered through GCC Printers via our web site at: http://www.gccprinters.com You can also contact GCC Sales at 800-422-7777 (North America Only, outside North America, refer to the back cover) or your local GCC authorized dealer. 1-18... - Page 27 Step 10a. Paper Feeder Installation Part One - Instructions for installing one additional paper feeder and tray Place the paper feeder on a sturdy, level surface. Switch off the power to the printer and disconnect the power cord from the AC outlet and the printer.
- Page 28 Remove the paper tray from the printer. Lift the printer up vertically and lower it onto the optional paper feeder. Align the five posts on the feeder with the corresponding holes on the bottom of the printer. Be sure to lower the printer gently, as lowering it too quickly may damage the printer or feeder.
- Page 29 Load paper into the tray, then insert both trays into the printer. Reconnect the AC power cord to the printer and outlet, then restart the printer. 1-21...
- Page 30 Part Two - Instructions for installing two additional paper feeders and trays Place the second paper feeder on a sturdy, level surface. Align the five posts on the second paper feeder with the holes on the bottom of the first feeder and stack the two feeders up together.
- Page 31 Switch off the power to the printer and disconnect the power cord from the AC outlet and the printer. Close the Multi-Purpose Feeder and remove any printouts left in the paper output tray. Remove the cassette from the printer. 1-23...
- Page 32 Lift the printer up vertically and lower it onto the optional paper feeders. Align the five posts on the first feeder with the corresponding holes on the bottom of the printer. Be sure to lower the printer gently, as lowering it too quickly may damage the printer or feeders.
- Page 33 Configuring Printer Drivers for use of the Additional Paper Feeder(s) Once one or more additional feeders are installed, you will need to change settings within the driver software on all the computers that use the printer. This will allow Tray 3 and/or Tray 4 to show up as options when selecting a paper source for your print jobs.
- Page 34 Step 10b. Duplex Unit Installation Note: These instructions apply to users of the Elite 21 model who are adding the Duplex Unit as an option. The Elite 21 ships with the Duplex Unit pre-installed. Switch off the power to the printer. Remove the paper cassette from the printer (if installed).
- Page 35 Slide the green tabs on the left and right of the Duplex Unit outward to secure the unit to the printer. Close the rear cover, making sure it latches completely. 1-27...
- Page 36 Configuring Printer Drivers for use of the Duplex Unit Once the Duplex Unit is installed, you will need to change settings within the driver software on all of the computers that use the printer. This will allow the Duplex Unit to show up as an option when sending your print jobs.
- Page 37 Step10c. Upper Output Bin Installation Switch off the power to the printer. Remove the paper cassette from the printer (if installed). Squeeze the latch at the upper left of the rear cover and pull towards you to open the rear cover. Locate the two plastic tabs which hold the top cover in place, as shown.
- Page 38 Gently lower the front edge of the Upper Output Bin into position, inserting the tab at the front of the tray into the slot on the printer as shown. Lower the rear of the tray into position, making sure that the two plastic tabs at the rear of the tray match up with the slots in the printer.
- Page 39 Lift up the paper stopper arm and open the tray, as shown. Extend the paper tray all the way out and lift up the paper stopper. Adjust the tray to match the paper size being output. 1-31...
- Page 40 Configuring Printer Drivers for use of the Upper Output Bin Once the upper output bin is installed, you will need to change settings within the driver software on all of the computers that use the printer. This will allow the Upper Output Bin to show up as an option when selecting an output location for your print jobs.
- Page 41 Step 10d. Envelope Feeder Installation Switch off the power to the printer. Open the Multi-Purpose Feeder at the front of the printer. Remove the gear cover at the left rear of the feeder opening by pushing it inward while lifting up on its front edge with your finger, as shown.
- Page 42 Configuring Printer Drivers for use of the Envelope Feeder Once the envelope feeder is installed, you will need to change settings within the driver software on all of the computers that use the printer. This will allow the Envelope Feeder to show up as an option when selecting a paper source for your print jobs.
-
Page 43: Specifications
Why would I need to add memory to the printer? GCC printers ship with enough standard RAM to handle most print jobs at the largest page size and resolution supported by the printer. Some print jobs, however, may be more complex than the standard RAM is able to handle and therefore require additional RAM. - Page 44 RAM Installation Steps Set the printer’s power switch to the Off (O) position and unplug the power cord from the wall. Removing the side cover of the printer while the unit is turned on may result in damage to the printer. Loosen the two thumbscrews at the top and bottom of the left side cover.
- Page 45 This will expose the main controller board of the printer. The DIMM slot is mounted vertically near the right of the board. DMM Slot Remove DRAM DIMM: If replacing existing memory with a larger capacity DIMM, remove the existing DIMM as shown. Open the clips at the ends of the slot (1) and gently pull the DIMM straight out of the slot (2).
- Page 46 Replace the side cover by matching up the top of the cover with the slot at the top of the printer (1) and the small tab at the bottom of the cover with the slot in the printer (2). Slide the cover forward to lock it into place, as shown.
- Page 47 Configuring Printer Drivers for use of Additional Memory Once the additional memory is installed, you will need to change settings within the driver software on all of the computers that use the printer. This will allow the drivers to properly account for the amount of installed RAM in the printer when sending print jobs.
-
Page 48: Verify Printer Setup
If the job fails to print, confirm that Steps 1-10 in this manual have been performed correctly. If the printer still will not print, repeat Steps 1 -10. If you still have difficulty getting a document to print, contact GCC Technical Support by phone at (781) 276-8620 (North America only; outside North America, refer to... -
Page 49: Additional Installation Notes
Additional Installation Notes Configuring Startup Page The Elite 21 printer will print a Configuration Page each time that the printer is started up. This page serves as a hardware test at startup, to make sure that all printer systems are working properly and that the printer is able to print a page successfully. - Page 50 2. On the shipping carton: The serial number is printed on a label marked “Serial Number” on the outside of the printer’s shipping carton. 3. On the configuration page: When you set up and switch on your printer, it will print a configuration page.
- Page 51 2. Using the Elite 21 with Mac OS 9.x and Earlier This Chapter will cover the installation, configuration and use of the Elite 21 Series printer with Apple Macintosh systems running Mac OS versions 9.x and earlier. This includes: • Software Installation •...
-
Page 52: Software Installation
Installing the Elite 21 with Mac OS 9.x and Earlier Software Installation You will need to set up your Macintosh computer to use the Elite 21 Series by installing the Elite 21 software for Macintosh. This software is on the Elite 21 Series CD-ROM. - Page 53 Part 1- Installing the GCC Printing Software and Fonts Insert the Elite 21 Series CD-ROM into the computer and double-click the CD icon to open the disk. Double-click the “Elite 21 Installer” icon within the disk window An introduction screen marked “Elite 21 Series Installer”...
- Page 54 A window will open displaying the ReadMe file for the software. Read the information in this file and click Continue to proceed. A window will appear listing the components that will be installed and asking for an Install Location. Choose the disk that you wish to install the software onto (the startup disk of the Mac in most cases) and click Install.
- Page 55 Installation of the files will begin. A status window will appear showing the progress of the installation. When the installation is complete, a dialog box will appear asking if you want to setup a Desktop Printer. Click Yes to setup the printer. A dialog box asking how the printer is connected will appear.
- Page 56 Clicking the “Setup Printer” button will open either Apple’s Desktop Printer Utility (USB or LPR connections) or the Chooser (AppleTalk connections) in order to setup the printer. Refer to the instructions for Creating a Desktop Printer, covered in Part 2 of the Macintosh installation instructions in this guide as follows: Connecting via AppleTalk: Part 2a, Page 2-7...
-
Page 57: Creating A Desktop Printer
Due to potential incompatibilities between Apple’s Desktop Printer Utility and certain AppleTalk networks, GCC does not recommend using the Apple Desktop Printer Utility to set up the Elite 21 Series printer over AppleTalk. As a result, the Elite 21 Series software uses the Chooser to set up the printer over AppleTalk rather than the Desktop Printer Utility. - Page 58 This will open up the Chooser window. Click on the LaserWriter 8 icon in the lefthand Chooser window. A list of AppleTalk compatible printers will appear on the right. Click on the name of your printer from the list. The default printer name will be “Elite 21 Series”...
- Page 59 The Setup process will continue. A status bar will show the progress of the setup. A window will appear asking for any options on the printer to be configured. The first page of options sets the Memory Configuration, Additional Trays, Envelope Feeder and Upper Bin status.
- Page 60 The setup will finish. A status window will indicate that a Desktop Printer is being built. 10. When complete, a Desktop Printer icon for the Elite 21 will appear on the Mac’s desktop. The setup is now complete. If this is the only printer installed on the Mac, it will appear with a bold outline around it, indicating that this is the default printer for the computer.
-
Page 61: Via Usb
Part 2b - Creating a Desktop Printer (via USB) (Note: USB connection requires Mac OS 8.6 or higher) Make sure that all steps in the Hardware Setup section of this manual have been followed. Follow the Macintosh installation steps in Part 1 of this section. In Step 9, select “USB”... - Page 62 The “USB Printer” dialog box will appear. Click on your printer model from the list, then click OK. The “Untitled 1” dialog box will return. Click on the Auto Setup button at the top right of the box. A status window appears, showing the progress of the installation.
- Page 63 The “Untitled 1” dialog box returns again. The icon in the “PostScript Printer Description (PPD) File” box now shows your printer. Click Create to create the new desktop printer. A Save dialog box opens, asking you to save the desktop printer. Type in a name for the desktop printer, or leave the default name.
-
Page 64: Via Lpr
Part 2c - Creating a Desktop Printer (via LPR) (Note: LPR connection requires a PowerPC-based Mac and LaserWriter 8.5.1 or higher) Pre-Installation Note: Macintosh LPR Printing requires that the computer be able to send data to the printer in Binary format. The default format on the printer, however, is set to ASCII rather than Binary. Before attempting to send LPR jobs from the Macintosh, you should set the IP Data Format setting on the printer to Binary, as follows: •... - Page 65 A dialog box called “Untitled 1” opens, containing two printer icons. Double-click the bottom icon, in the “LPR Printer Selection” box. A dialog box called “Internet Printer” appears. Enter the printer’s IP address in the “Printer Address” field. The Queue field is not required for this printer.
- Page 66 The “Untitled 1” dialog box will return. Click on the Change button at the top right of the box. The “Select a PostScript Printer Description File” box will open. Choose your printer model from the list of printers and click Select. The “Untitled 1”...
- Page 67 A Save dialog box opens, asking you to save the desktop printer. Type in a name for the desktop printer, or leave the default name. Click Save. A new Desktop Printer icon will appear on the desktop with the name that you assigned.
-
Page 68: Printing From A Macintosh
This section of the manual will cover the basics of printing from a Macintosh to the GCC Elite 21 Series printer. Most printing options within a Macintosh application are found within the Page Setup or Print dialog boxes, under the application’s File menu. - Page 69 Format for: Selects the printer being printed to. If more than one printer has been set up using the Desktop Printer Utility or the Chooser, each printer will be listed on this pull- down menu. Make sure that the Elite 21 printer is selected. Paper: Selects the Paper Size being printed to.
- Page 70 The PostScript Options section contains the following options for selection: Visual Effects: Allows the following selections to be made: Flip Horizontal: Flips the document horizontally. Flip Vertical: Flips the document vertically. Invert Image: Reverses the black and white areas in the document. Image and Text: Allows the following selections to be made: Substitute Fonts:...
- Page 71 The Custom Page Sizes section of Page Setup brings up the following window: To define a new paper size, click the New button. The following window will appear: 2-21...
- Page 72 This section allows the definition of custom page sizes for the document. Type in the dimensions and default margins for the paper size to be created, then type a name for the paper size and click OK. The new paper size will show up on the list of sizes in the Custom Paper Sizes window, and will also appear as an option on the Paper pull-down menu in the Page Attributes section of Page Setup.
-
Page 73: The Print Dialog Box
The Print dialog box The Print command is used to send the print jobs to the printer and to set certain options for the print job. Going to the File menu and selecting Print will bring up the following dialog box: This dialog allows the following to be selected: Printer: Selects the printer that the job is to be sent to. - Page 74 Auto Select - Sends job to the tray on the printer holding the paper size specified in the document. Tray 1 - Sends the job to the Multi-Purpose Feeder (Tray 1) of the printer Tray 2-4 - Sends the job to the standard lower paper tray of the printer (Tray 2) or an additional lower paper tray (Tray 3-4), if present.
- Page 75 Clicking on the General pull-down menu will bring up a list of menu categories, as follows: These menus control the following settings: Background Printing allows you to enable or disable Background Printing. This is the feature that allows the print job to be sent in the background while you continue to use the computer for other tasks.
- Page 76 Job Logging determines how the Macintosh should report printer errors (no reporting, summarize on screen or print detailed error report). This section also allows you to enable or disable Job Copy (a copy of the printer file for each job is saved on the computer) and/or Job Log (a log of all print jobs is generated and saved on the computer).
- Page 77 Elite 21 Options is the last menu item. This section contains selections for Print Resolution for the job (600 or 1200 dpi) and Output Bin. The selections for Output Bin are: Use Current Printer Setting - Uses the default output bin specified in the printer’s Paper Handling submenu.
-
Page 78: Additional Macintosh Information
GCC Elite 21 Folder on your hard drive. Using NIManage To start the NIManage utility, open the GCC Elite 21 Folder on your hard drive and double-click the NIManage icon. This will bring up the “Select Printer” window. Click your printer name from the list of available printers, then click Select. -
Page 79: Online Driver Updates
Updater into the Elite 21 Folder on your hard drive. This Updater is a utility which automatically checks GCC’s web site for newer driver software and installs the new software onto your system as needed. You should not need to run this Updater during or immediately following the initial software installation onto your Macintosh. -
Page 80: Printing Binary Data (Usb Or Lpr)
LPR users should see the note on Page 2-14 configuring the printer’s IP Data Format setting. GCC has also developed a printing plug-in called a TBCP (Tagged Binary Communications Protocol) Filter which resolves this problem, however users must be using MacOS 9.0 or higher with LaserWriter driver version 8.7 or higher for this file to work. - Page 81 Options for users of Mac OS 9.x (using LaserWriter 8.7 or higher) Enable the TBCP Filter software, as follows: • Make sure the Elite 21 printer is set as the default printer for the Mac. • From the Desktop, go to File and Print Desktop. •...
-
Page 82: Using The Elite 21 With Mac Os
3. Using the Elite 21 with Mac OS X This Chapter will cover the installation, configuration and use of the Elite 21 Series printer with Mac OS X. This includes: • Software Installation • Selecting a Printer • Printing from Mac OS X •... - Page 83 Installing the Elite 21 with Mac OS X Software Installation You will need to set up your Macintosh computer to use the Elite 21 Series by installing the Elite 21 software for Macintosh. This software is on the Elite 21 Series CD-ROM.
- Page 84 Part 1- Installing the GCC Printing Software and Fonts Insert the Elite 21 Series CD-ROM into the computer and double-click the CD icon to open the disk. Double-click the “Elite 21 Installer” icon within the disk window An OS X window may appear asking for an administrator password in order to install this software.
- Page 85 A window will open displaying the ReadMe file for the software. Read the information in this file and click Continue to proceed. A window will appear listing the components that will be installed and asking for an Install Location. Choose the disk that you wish to install the software onto (the startup disk of the Mac in most cases) and click Install.
- Page 86 Installation of the files will begin. A status window will appear showing the progress of the installation. When all files are installed, a dialog will appear informing you that installation was successful. Click Quit to exit the installer. Proceed to Part Two of the instructions to select your printer.
- Page 87 Part 2 - Selecting your Printer Install the GCC OS X software onto the Macintosh following the steps in Part One of this chapter (“Installing PPD Files and Fonts.”) After the installation is complete, open the Print Center utility. Print Center is found in the Utilities folder, within the Applications folder of your OS X system.
- Page 88 (AppleTalk, LPR Printers using IP, or USB.) Select the connection method being used for your GCC printer. USB Connections: Proceed to Step 5a LPR Connections: Skip to Step 5b...
- Page 89 5c. If AppleTalk is selected, make sure the printer is turned on and connected to the network. A list of available AppleTalk printers will appear. Click on the name of your printer from the list. Click “Add.” Note: AppleTalk is disabled by default within OS X.
-
Page 90: Printing From Mac Os X
Printing from Mac OS X This section is intended as a brief overview of printing from Mac OS X. For more detailed information regarding printing and Mac OS X, consult the Mac OS X documentation or the documentation for the application you are using. As with previous Mac OS versions, most printing options within a Macintosh application are found within the Page Setup or Print dialog boxes, under the application’s File menu. -
Page 91: The Print Dialog Box
The Print dialog box The Print command is used to send the print jobs to the printer and to set certain options for the print job. Going to the File menu and selecting Print will bring up the following dialog box: The “Printer”... - Page 92 Summary - Displays a summary listing of all the current settings for the other options in the Print dialog. Save Custom Setting - Allows a set of printer options to be saved and added to the “Saved Settings” pull-down menu for future use. Each of these windows also has three buttons at the bottom.
-
Page 93: Additional Mac Os X Information
Additional Mac OS X Information Configuring Printer Options Older versions of Mac OS X (prior to OS X 10.2 “Jaguar”) do not allow for or require manual configuration of printer options. When the printer is installed and selected in Print Center, the OS takes configuration information from the PPD file and polls the printer to determine which options are present. -
Page 94: Using The Elite 21 With Windows 95/98/Me
4. Using the Elite 21 with Windows 95/98 and Windows ME (Millennium Edition) This Chapter will cover the installation, configuration and use of the Elite 21 Series printer with a Windows 95/98 or Windows ME computer. This includes: • Software Installation •... - Page 95 Installing the Elite 21 with Windows 95/98/ME Software Installation The software required to set up your Windows 95/98 or Windows ME computer is located on the Elite 21 Series CD-ROM. You can install the Elite 21 software on your computer using Plug and Play. This will work if you are installing the software on a computer which is connected to the printer through the parallel or USB (Win98/ME only) port.
- Page 96 Series printer. The steps for these installations are as follows: If a previous version of GCC’s USB Monitor software has been installed on your PC, you must uninstall the software before installing your USB printer. To do this, run the “Uninstall GCC USB”...
- Page 97 The system will then ask where to look for new drivers. Make sure that the Elite 21 Series CD-ROM is in the drive. Check off “Specify a Location.” Use the Browse button to select your Elite 21 CD-ROM. Open the folder on the CD that corresponds to the language being used (English, French, German, Italian or Spanish.) Open the ‘Win95-98-ME’...
-
Page 98: Windows 95/98 Plug And Play Installation (Via Parallel)
Windows 95/98 Software Installation - Plug and Play via Parallel If the computer is running, shut it down. With the computer and printer both powered off, attach the printer cable to the computer and printer. Make sure that there is paper in the printer’s tray. - Page 99 The system will then ask where to look for new drivers. Make sure that the Elite 21 Series CD-ROM is in the drive. Check off “Specify a Location.” Use the Browse button to select your Elite 21 Series CD- ROM. Open the folder on the CD that corresponds to the language being used (English, French, German, Italian or Spanish.) Open the ‘Win95-98-ME’...
- Page 100 Series printer. The steps for these installations are as follows: If a previous version of GCC’s USB Monitor software has been installed on your PC, you must uninstall the software before installing your USB printer. To do this, run the “Uninstall GCC USB”...
- Page 101 The system should locate the USB printing software and install it automatically A window will appear informing you that Windows has finished the installation. If a message appears that the drivers cannot be found, click Back, then click “Specify the location of the drivers.” Click Next.
- Page 102 Windows ME Software Installation - Plug and Play via Parallel If the computer is running, shut it down. With the computer and printer both powered off, attach the printer cable to the computer and printer. Make sure that there is paper in the printer’s tray. Turn on the printer and wait for the LCD display to read “Ready.”...
- Page 103 The system will then ask where to look for new drivers. Make sure that the Elite 21 Series CD-ROM is in the drive. Click “Search for the best driver for your device” and check off “Specify a Location.” Use the Browse button to select your Elite 21 Series CD-ROM, then the folder on the CD that corresponds to the language being...
-
Page 104: Using The Add Printer Wizard
Windows 95/98/ME Software Installation - Using the Add Printer Wizard Go to the Start menu of Windows 95/98/ME, then up to Settings and select Printers. In the Printers window, double- click the Add Printer icon to start the Add Printer Wizard. Click Next to start the Wizard. - Page 105 PostScript (PS) or PCL driver for the Elite 21 Series. Most users will want to use the PostScript driver exclusively under Windows. Choose “GCC Elite 21 Series PS” unless you have a specific reason to use the PCL driver.
- Page 106 A list of ports will appear. Select the appropriate local parallel or USB port for the printer and click Next. If installing as a TCP/IP network printer, select LPT1: during this step.. After the installation, refer to the Windows 95/98/ME instructions in Chapter 8 of this Manual (Networking the Elite 21 Printer) for instructions on configuring the printer as a network device.
- Page 107 A dialog box may appear asking you to insert the Windows 95 or 98 CD. Insert the CD and click OK. 10. A dialog box may appear telling you that necessary files on the CD cannot be found. Make sure the Windows CD is inserted, then use the Browse button to access the Windows CD.
- Page 108 12. When finished, the test page will be generated (if you chose to print a test page in Step 8). If the page prints, click Yes in this window. If not, click No and follow the Windows troubleshooting steps that appear. 13.
-
Page 109: Printing From Windows 95/98/Me
This section of the manual will cover the basics of printing from Windows 95/98/ME to the GCC Elite 21 Series printer. Most printing options within a Windows application are found within the Page Setup or Print dialog boxes, under the application’s File menu. - Page 110 The Page Setup Window contains the following options for selection: Paper Size: Selects the Paper Size being printed to. This pull-down menu brings up a list of paper sizes supported by the Elite 21 printer Paper Source: Specifies which paper tray the paper is to be drawn from. The options on the pull- down menu are as follows: Auto Select - Sends job to the tray on the printer holding the paper size specified in the document.
-
Page 111: The Print Dialog Box
The Print dialog box The Print command is used to send the print jobs to the printer and to set certain options for the print job. Going to the File menu and selecting Print will bring up the following dialog box: This dialog allows the following to be selected: Name: Selects the printer that the job is to be sent to. - Page 112 Clicking on the Properties button in the Print window will bring up additional printer options. Changes made within this section will apply only to the current document. The Paper window within the Print Properties section allows the following options to be set: Paper Size: Selects the Paper Size being printed to.
- Page 113 Auto Select - Sends job to the tray on the printer holding the paper size specified in the document. Envelope Feeder - Sends the job to the envelope feeder. Greyed out unless the feeder is installed. Manual Feed - Sends the job to the Multi-Purpose Feeder (Tray 1). Tray 1 - Sends the job to the Multi-Purpose Feeder (Tray 1) of the printer Tray 2-4 - Sends the job to the standard lower paper tray of the printer (Tray 2) or an additional lower paper tray (Tray 3-4), if present.
- Page 114 Use Current Printer Setting - Uses the default output bin specified in the printer’s Paper handling submenu. Standard Bin - Uses the standard output bin at the top of the printer. Upper Bin - Offset - Uses the optional Offset Catch Tray, with collated copies offset. Upper Bin - No offset - Uses the optional Offset Catch Tray, without any offset.
- Page 115 Halftoning allows you to use custom halftone values, or use the printer’s defaults. Print as Negative Image reverses the black and white areas in the document. Print as Mirror Image switches the output to a mirror image of the original. Scaling selects page scaling for the document.
- Page 116 The following can be selected in this window: Collation in Sets whether job collation is handled by the printer or by the computer. Printer: This setting should match the Collation Mode setting on the printer’s Configuration menu. To change these settings, click on the item you wish to change on the list at the top of the window. The lower window will then allow you to change the options for the particular feature you have selected.
-
Page 117: Setting Defaults Using Driver Properties
Setting Defaults Using Driver Properties Typically, changes made within the Page Setup, Print or Print Properties dialog windows will only take effect for the particular document that you are printing. Changes to the default settings used by the driver are made from the Driver Properties section of Windows 95/98 and Windows ME. To access these settings, go to the Start menu in Windows 95/98/ME, go up to Settings and select Printers. - Page 118 Clicking on the Details tab will bring up the following window: This window allows the printer port to be changed, or a new port to be added for the printer. It also allows for a new driver to be selected, and for Job Timeout settings to be made. 4-25...
- Page 119 Clicking on the Paper tab will bring up the following window: This window allows the default settings for Paper Size, Layout, Orientation, Paper Source and Number of Copies to be set. Clicking on Restore Defaults will reverse any changes made to this section and restore the settings to their original defaults.
- Page 120 Clicking on the Device Options tab will bring up the following window: This window configures various printer options, as follows: Available Printer Memory controls the memory setting used by the printer driver. This value should be adjusted automatically when the VM Option setting is changed in the Printer Features section below.
- Page 121 Installable Options controls the following settings: Additional Trays: Sets whether additional trays are present or not. Envelope Feeder: Sets whether the envelope feeder is present or not. Offset Bin: Sets whether the upper output bin is present or not. Duplex Unit: Sets whether the duplex unit is present or not. Internal Hard Disk: Sets whether an internal hard disk is present or not.
-
Page 122: Additional Windows 95/98/Me Information
Additional Windows 95/98/ME Information Printing Binary Data (USB or LPR connection) Users may experience problems printing files with binary data to the Elite 21 printer using a USB or LPR-based connection due to the way that binary information is processed via these protocols. Using a protocol called TBCP (Tagged Binary Communications Protocol) will avoid problems of this sort. - Page 123 Elite 21 Series software CD-ROM. To locate this file, insert the CD into the computer, double-click "My Computer" and double-click the CD icon to open the disk. On the GCC disk, open the folder that corresponds to the language being used (English, French, German, Italian or Spanish), then open the ‘Win9xMe’ folder. The 'gce21_1.ppd' file is located within this folder.
-
Page 124: Using The Elite 21 With Windows 2000/Xp
5. Using the Elite 21 with Windows 2000/XP This Chapter will cover the installation, configuration and use of the Elite 21 Series printer with a Windows 2000/XP computer. This includes: • Software Installation • Printing from Windows 2000/XP • Setting Defaults Using Driver Properties •... -
Page 125: Software Installation
Installing the Elite 21 with Windows 2000/XP Software Installation The software required to set up your Windows 2000 or Windows XP computer is located on the Elite 21 Series CD-ROM. You can install the Elite 21 software on your computer using Plug and Play. This will work if you are installing the software on a computer which is connected to the printer through the parallel or USB port. -
Page 126: Plug And Play
Windows 2000/XP Software Installation - Plug and Play If the computer is running, shut it down. With the computer and printer both powered off, attach the parallel or USB cable to the computer and printer. Make sure that there is paper in the printer’s tray. - Page 127 The next window will ask what you want the Wizard to do. Check “Search for a suitable driver for my device” and click Next to continue. The system will then ask where to look for new drivers. Make sure that the Elite 21 Series CD-ROM is in the drive.
- Page 128 The Wizard will automatically copy the driver files to their correct locations. A status window will show the progress of the installation. If a “Files Needed” dialog box appears, use the Browse button to select your Elite 21 Series CD-ROM. Open the folder on the CD that corresponds to the language being used (English, French, German, Italian or Spanish).
-
Page 129: Using The Add Printer Wizard
Windows 2000/XP Software Installation - Using the Add Printer Wizard Go to the Start menu of Windows. In Win2000, go to Settings and select Printers. In WinXP, go to Printers and Faxes. In the Printers window, double-click the Add Printer icon (Win2000) or click the Add a Printer icon (WinXP) to start the Add Printer Wizard. - Page 130 A ports window will appear. Click "Use the following port and select the appropriate local port for the printer (Parallel, USB) from the list (Win2000) or pull-down menu (WinXP) and click Next. If installing as a TCP/IP network printer, select “LPT1:” at this point After the installation, refer to the Windows 2000/XP section...
- Page 131 PostScript (PS) or PCL driver for the Elite 21 Series. Most users will want to use the PostScript driver exclusively under Windows. Choose “GCC Elite 21 Series PS” unless you have a specific reason to use the PCL driver. Click Next.
- Page 132 If you chose to share the printer in Step 8, the next window allows you to specify the location of the printer. This will allow users to more easily identify the printer on a large network. You can also enter comments to specify the printer’s capabilities, etc.
- Page 133 12. In Windows XP, an error message may appear informing you that the software has not passed Windows Logo testing and advising to stop the installation. Despite the strong wording within this dialog box, there are no potential compatibility or system problems that can be caused by continuing the printer installation.
-
Page 134: Printing From Windows 2000/Xp
This section of the manual will cover the basics of printing from Windows 2000 or Windows XP to the GCC Elite 21 Series printer. Most printing options within a Windows application are found within the Page Setup or Print dialog boxes, under the application’s File menu. - Page 135 The Page Setup Window contains the following options for selection: Paper Size: Selects the Paper Size being printed to. This pull-down menu brings up a list of paper sizes supported by the Elite 21 printer Paper Source: Specifies which paper tray the paper is to be drawn from. The options on the pull- down menu are as follows: Automatically Select - Sends job to the tray on the printer holding the paper size specified in the...
-
Page 136: The Print Dialog Box
The Print dialog box The Print command is used to send the print jobs to the printer and to set certain options for the print job. Going to the File menu and selecting Print will bring up the following dialog box: The General tab of the Print dialog allows the following to be selected: Select Printer: Selects the printer that the job is to be sent to. - Page 137 Find Printer: Allows the network to be browsed for printers. Page Range: Selects either “All” to print the whole document, or “From” to specify a range of pages to print. Copies: Selects the number of copies of the document to be printed. Clicking on the Layout tab in the Print window will bring up additional printer options, as follows: Orientation selects the page orientation, Portrait or Landscape, by clicking on the appropriate radio button.
- Page 138 Page Order determines the order that the pages are printed in. “Front to Back” will print the first page first, “Back to Front” will print the last page first. Clicking on the Advanced button in the Layout window will bring up additional paper options, as follows: Paper Size: Selects the Paper Size being printed to.
- Page 139 Output Bin: Determines where the paper will be output from the printer. The selections for Output Bin are: Use Current Printer Setting - Uses the default output bin specified in the printer’s Paper handling submenu. Standard Bin - Uses the standard output bin at the top of the printer. Upper Bin - Offset - Uses the optional Upper Output Bin, with collated copies offset.
- Page 140 Paper Source: Specifies which paper tray the paper is to be drawn from. The options on the pull- down menu are as follows: Auto Select - Sends job to the tray on the printer holding the paper size specified in the document. Envelope Feeder - Sends the job to the envelope feeder.
-
Page 141: Setting Defaults Using Driver Properties
Setting Defaults Using Driver Properties Typically, changes made within the Page Setup, Print or Print Properties dialog windows will only take effect for the particular document that you are printing. Changes to the default settings used by the driver are made from the Driver Properties section of Windows 2000/XP. To access these settings, go to the Printers window (Win2000) or Printers and Faxes window (WinXP). - Page 142 Clicking on the Printing Preferences button in the General window will allow you to set defaults for the Layout and Paper Quality windows under the Print window (see previous section). The Sharing tab controls sharing settings for the printer. Sharing can be enabled or disabled from here, and the printer can be assigned a Share Name to identify it to the client PCs accessing the printer over the Windows 2000 server.
- Page 143 Clicking on Device Settings brings up the following window: 5-20...
- Page 144 Installable Options sets the status of GCC’s options for the Elite 21 printer, as follows: Memory Configuration: Sets the amount of memory installed in the printer.
-
Page 145: Additional Windows 2000/Xp Information
Additional Windows 2000/XP Information Printing Binary Data (USB or LPR connection) Users may experience problems printing files with binary data to the Elite 21 printer using a USB or LPR-based connection due to the way that binary information is processed via these protocols. Using a protocol called TBCP (Tagged Binary Communications Protocol) will avoid problems of this sort. - Page 146 Elite 21 Series software CD-ROM. To locate this file, insert the CD into the computer, double-click "My Computer" and double-click the CD icon to open the disk. On the GCC disk, open the folder that corresponds to the language being used (English, French, German, Italian or Spanish), then open the ‘Win2000’ folder. The 'gce21_1.ppd' file is located within this folder.
-
Page 147: Using The Elite 21 With Windows Nt
6. Using the Elite 21 with Windows NT 4.0 This Chapter will cover the installation, configuration and use of the Elite 21 Series printer with a Windows NT 4.0 computer. This includes: • Software Installation • Printing from Windows NT 4.0 •... - Page 148 Installing the Elite 21 with Windows NT 4.0 Software Installation The software required to set up your Windows NT 4.0 computer is located on the Elite 21 Series CD-ROM. Windows NT 4.0 uses a Wizard to help you install printer software. A Wizard is a series of dialog boxes.
- Page 149 Windows NT 4.0 Software Installation Go to the Start menu of Windows NT 4.0, then up to Settings and select Printers. In the Printers window, double- click the Add Printer icon to start the Add Printer Wizard. The first window of the Add Printer Wizard will ask if the printer is connected to the local computer (“My Computer”) or to a Network Printer Server.
- Page 150 A list of ports will appear. Select the appropriate local parallel port for the printer and click Next. If installing as a TCP/IP network printer, select “LPT1:” at this point. After the installation, refer to the Windows NT 4.0 section in Chapter 8 of this Manual (Networking the Elite 21 Series Printer) for instructions on configuring the printer as a...
- Page 151 Elite 21 Series. Most users will want to use the PostScript driver exclusively under Windows. Choose “GCC Elite 21 Series PS” unless you have a specific reason to use the PCL driver. Click Next. The next window will ask for a name for the printer.
- Page 152 10. A dialog box may appear informing you that some of the files needed for the installation are located on the Windows NT 4.0 CD-ROM. Eject the GCC Elite 21 CD and install the Windows NT 4.0 CD. If the blue Windows NT CD window appears, close this window.
- Page 153 12. When the installation is complete, you will be returned to the Printers window and a new icon for the printer will appear. If installing a local printer, you are now ready to print to the Elite 21 printer. If installing as a stand-alone Ethernet network device, proceed to the Windows...
-
Page 154: Printing From Windows Nt 4.0
This section of the manual will cover the basics of printing from Windows NT 4.0 to the GCC Elite 21 Series printer. Most printing options within a Windows application are found within the Page Setup or Print dialog boxes, under the application’s File menu. - Page 155 The Page Setup Window contains the following options for selection: Paper Size: Selects the Paper Size being printed to. This pull-down menu brings up a list of paper sizes supported by the Elite 21 printer Paper Source: Specifies which paper tray the paper is to be drawn from. The options on the pull- down menu are as follows: Auto Select - Sends job to the tray on the printer holding the paper size specified in the document.
-
Page 156: The Print Dialog Box
The Print dialog box The Print command is used to send the print jobs to the printer and to set certain options for the print job. Going to the File menu and selecting Print will bring up the following dialog box: This dialog allows the following to be selected: Name: Selects the printer that the job is to be sent to. - Page 157 Clicking on the Properties button in the Print window will bring up additional printer options. The Page Setup window within the printer’s Properties section allows the following options to be set: Paper Size: Selects the Paper Size being printed to. This pull-down menu brings up a list of paper sizes supported by the Elite 21 printer.
- Page 158 Paper Source: Specifies which paper tray the paper is to be drawn from. The options on the pull-down menu are as follows: Auto Select - Sends job to the tray on the printer holding the paper size specified in the document. Envelope Feeder - Sends the job to the envelope feeder.
- Page 159 6-13...
- Page 160 Media Type: Defines the type of paper being used. Options include plain paper, prepunched, letterhead, transparencies and labels. If a Paper Type has been defined for one or more of the printer’s trays (using the front panel of the printer), this selection can be used to send the job to the appropriate tray.
-
Page 161: Setting Defaults Using Driver Properties
Setting Defaults Using Driver Properties Typically, changes made within the Page Setup, Print or Print Properties dialog windows will only take effect for the particular document that you are printing. Changes to the default settings used by the driver are made from the Driver Properties section of Windows NT 4.0. To access these settings, go to the Start menu in Windows NT 4.0, go up to Settings and select Printers. - Page 162 Clicking on the Ports tab will bring up the following window: This window allows the printer port to be selected or changed. You can also add a new port or configure an existing port. The Scheduling tab allows a network administrator to control scheduling of the printer. This includes when the printer is available, and the priority that is given to individual print jobs.
- Page 163 Clicking on Device Settings brings up the following window: 6-17...
- Page 164 Installable Options sets the status of GCC’s options for the Elite 21 printer, as follows: Memory Configuration: Sets the amount of memory installed in the printer.
-
Page 165: Additional Windows Nt 4.0 Information
Elite 21 Series software CD-ROM. To locate this file, insert the CD into the computer, double-click "My Computer" and double-click the CD icon to open the disk. On the GCC disk, open the folder that corresponds to the language being used (English, French, German, Italian or Spanish), then open the ‘WinNT’ folder. The 'gce21_1.ppd' file is located within this folder. -
Page 166: The Elite 21 Control Panel
7. The Elite 21 Control Panel This Chapter will cover the various functions of the Elite 21 Series control panel. This includes the following: • LCD Display Window • Status Lights • Function Keys • The Elite 21 Menu System •... -
Page 167: The Lcd Display Window
Introduction to the Elite 21 control panel The Elite 21 Control Panel is used to get information about the printer and to adjust specific printer functions. It includes an LCD display window, three LEDs that show the status of the printer at all times, and eight pushbuttons. Control panel (LCD) display window The LCD display window has several functions. - Page 168 The Attention light flashes when the printer requires attention. A message will appear in the LCD display panel explaining what the printer requires. Control panel function key Menu keys The Menu keys are used to scroll through the printer’s various internal menus. When the printer is displaying “Ready”...
-
Page 169: The Elite 21 Menu System
The Elite 21 menu system The menu system consists of a number of main menus. Some main menus contain submenus. Some menus only give you information, while others let you change settings. Depending on the printer’s configuration, some menu items may not appear. For example, if “Hold Last Job”... -
Page 170: Main Menu Items
Main Menu Items 1. Held Job This menu controls the handling of Held Jobs within the printer. If “Hold Last Job” is enabled in the Configuration menu of the printer (see #6), the printer will hold the last job printed. This is useful for proofing a job before sending multiple copies; as you can check the first copy at the printer and send the remaining copies through this print menu. -
Page 171: Paper Handling
3. Paper Handling This menu controls all the options related to the paper trays of the printer. The items in this menu are as follows, with the default settings in bold: • Default Bin: Sets the default output bin for the paper. This item only appears if the optional Offset Catch Tray (Upper Bin) is installed. -
Page 172: Print Quality
3. Paper Handling (continued) • Tray 3 Size/Tray 3 Type: Same as options for Tray 1 and 2. These items only appear if one optional lower paper feeder (Tray 3) is installed. • Tray 4 Size/Tray 4 Type: Same as options for Trays 2 and 3. These items only appear if two optional lower paper feeder (Trays 3 and 4) are installed. -
Page 173: Configuration
5. Printing (continued) • Edge To Edge: Specifies whether edge-to-edge printing is Enabled or Disabled. See Chapter 10 for more details on edge-to-edge printing. • Vertical Shift:Allows the top-to-bottom alignment of the page to be adjusted up or down in intervals of one point (1/72”, 0.35mm). •... -
Page 174: Input/Output
7. Input/Output This menu controls items related to communications between the printer and the computer or network it is connected to. The items are as follows: • I/O Timeout: Sets the amount of time that the printer will wait for more information when communicating with the computer or network before flushing the job and timing out. -
Page 175: Resets
8. Resets This menu allows items on the printer to be reset to their original factory defaults. The items are as follows: • Restore Defaults: Sets all menu items in all menus back to their factory defaults. This change requires an immediate restart to take effect. •... -
Page 176: Networking The Elite 21 Printer
8. Networking the Elite 21 Series Printer Each Elite 21 printer ships with a standard 10/100BaseT Ethernet connection and supports networking with Macintosh,Windows 95/98/ME,Windows 2000/XP,Windows NT 4.0, Novell NetWare and Unix networks. This Chapter will cover the steps necessary to access the printer on a network, including: •... -
Page 177: Assigning An Ip Address
Assigning an IP address In order to access the printer over most networks and also to access printer management controls such as WebAdmin, the printer should be assigned an IP address. The printer can be assigned an IP address through the front panel, or also using Dynamic Host Configuration Protocol (DHCP). - Page 178 Assigning TCP/IP address and parameters through the printer’s front panel: • Turn on the printer and press either Menu key until Input/Output appears. • Press either Item key until TCP/IP appears. • Press either Value key to set TCP/IP to Enabled. Press Select to confirm. •...
- Page 179 Assigning TCP/IP Parameters Using DHCP: The Elite 21 printer also supports IP configuration via a Dynamic Host Configuration Protocol (DHCP) server. DHCP is a protocol which delivers IP address configuration information to devices on a network. A DHCP server manages a pool of available IP addresses and grants requests for addresses from devices on the network.
- Page 180 • Make sure the printer is turned on, connected to the network and assigned an IP address. • Go to any computer on the same TCP/IP network as the printer and open a web browser window.. • Type the IP address of the printer into the Address field of the browser (i.e. - “http://1.2.3.4”...
-
Page 181: Macintosh Configuration
Macintosh Configuration The Elite 21 printer can be accessed by a Macintosh network using either the EtherTalk (AppleTalk via Ethernet) protocol, or directly over TCP/IP by using Apple’s Desktop Printer Utility (OS 9.x and earlier) or Print Center (OS X) to select the printer via LPR. - Page 182 Windows 95/98 and Windows ME Configuration The Elite 21 CD-ROM contains software to allow the printer to be accessed as a peer-to- peer device on a Windows 95/98/ME Ethernet network. This includes software to allow the printer to be accessed as a peer-to-peer device using TCP/IP, or using IPX/SPX. We recommend using the TCP/IP option for most users, if you prefer to use IPX, see instructions on Page...
- Page 183 • Make sure the printer is turned on and is showing “Ready” in its display window. • Go to the Windows Start menu, then to Applications and down to “IP-P2P.” Select the IP-P2P program within that folder. • The IP-P2P program will run, bringing up the following window: The “Max Hops for”...
- Page 184 • Press either Menu key until Information appears. • Press either Item key until Print Net Status appears. • Press Select to print the page. At the bottom of the page will be a listing for TCP/IP Connection Information, Port Number.
- Page 185 • Click on “Find Printers” to locate all available printers on the network. A list of compatible printers will appear at the bottom of the window. • Click on the name of the printer you wish to access via TCP/IP from the list and click on “Select.”...
- Page 186 • If the printer driver has not yet been installed for the printer, install it according to the instructions in Chapter 4 of this manual, “Using the Elite 21 with Windows 95/98 and Windows ME.” • Click on the Start button. Select Settings and then Printers. •...
- Page 187 Configuring a peer-to-peer connection via IPX First, make sure that IPX is enabled and configured within Windows. To do this, go to the Start menu, then to Settings, Control Panels, and select Network. Click on Protocols, and make sure “IPX/SPX Compatible Protocol” is present on the list of supported protocols.
- Page 188 Once the IPX-P2P software is installed, you can run the program to create the IPX port for the printer, as follows: • Make sure the printer is turned on and is showing “Ready” in its display window. • Go to the Windows Start menu, then to Applications and down to “IPX-P2P.” Select the IPX-P2P program within that folder.
-
Page 189: Windows 2000/Xp Configuration
Windows 2000/XP Configuration Setting Up LPR Printing If the printer driver has not already been installed, please install it before continuing. Instructions for installing the printer are found in the “Installing the Elite 21 with Windows 2000/XP” portion of this manual. Install the printer as if it were a local printer connected to the parallel (LPT1) port. - Page 190 • A summary page will appear showing all the settings that were made within the Add TCP/IP Port Wizard. Double-check these settings and click Finish. • The Printer Ports window will re-appear, click Close. Under the Ports tab, the newly created TCP/IP port will be displayed and selected (listed by its Port Name as entered in the TCP/IP Port Wizard).
-
Page 191: Windows Nt 4.0 Configuration
Windows NT 4.0 Configuration There are several options for setting up printing in a Windows NT environment. We recommend using the built-in LPR protocol within Windows NT 4.0 to access the printer. LPR print services may be used via TCP/IP by following the instructions in this section. - Page 192 Setting Up LPR Printing If the printer driver has not already been installed, please install it before continuing. Instructions for installing the printer are found in Chapter 6 of this manual, Using the Elite 21 with Windows NT 4.0. Install the printer as if it were a local printer connected to the parallel (LPT1) port.
- Page 193 Selecting a Shared Printer This section briefly describes the steps for setting up client access to a shared printer. This will allow other PCs on the network to print to the printer over the Windows NT 4.0 server. Windows 95/98/ME: In the Printer Properties on the Details tab.
-
Page 194: Novell Netware Configuration (Via Nwsetup)
Novell NetWare Configuration The GCC Elite 21 printer includes standard support for NetWare peer-to-peer networking. Before configuring the NetWare server to access the printer, however, NetWare support must be enabled on the printer, as follows: • Start the printer and wait for the LCD display to read Ready. - Page 195 Installing NWSetup NWSetup can be installed from the Elite 21 Series CD-ROM as follows: • Insert the Elite 21 Series CD-ROM into the PC. • Open the “My Computer” icon from the desktop, and double-click the CD-ROM icon to open the CD window. •...
- Page 196 Field Description Enable NetWare Print Indicates whether the NetWare printer has Server been enabled. If the box is not checked, the printer has not been enabled for NetWare. All other fields on the screen will be shaded. If the box is checked, the printer has been enabled for NetWare and you can make entries in the other fields.
- Page 197 Field Description Preferred NDS Context Enter a text string to set the NDS directory context for which the printer will use to login to the network. The maximum field length is 128 characters. NOTE: Make sure you enter the whole context, whether typed or typeless.
- Page 198 Field Description Queues Serviced by Lists all the queues which are to be serviced by Printer the printer. Queues associated with bindery connections are listed in the format bindery server name: queue name. Queues associated with NDS connections are listed by their distinguished names.
- Page 199 Field Description Add Queue/ Use the Add and/or Delete queue buttons to Delete Queue make changes. Adding a Queue:When the user clicks on the [Add Queue] button, a dialog box appears (see above) where the user can add a queue to the printer. Below is a description of each field: Connection/Server: Use to select a server connection.
- Page 200 Field Description Add User/Delete User Press the [Add User] or [Delete User] buttons to add or remove Users/Groups for notification. Adding Users/Groups: Connection: Select a connection from this field. This list includes the NDS connection and all of the bindery file servers connections which a user has access to.
- Page 201 Field Description Add User/Delete User Delay in minutes for first message: Indicates how long the (con’t) printer should wait before sending a notification message that an error condition has been detected. The field is set to 5 minutes by default. Its minimum value is 1 minute and maximum value is 60 minutes.
- Page 202 4 Configuring the Notify Settings The Notify Settings screen appears when you double-click on an entry in the Users/Groups Notified by Printer field on the Print Server screen. Use this screen to set up the notify function for the users or groups. Note:The printer supports the Notify function only in Bindery mode Below is a description of each field: Field...
-
Page 203: Novell Netware 2.X/3.X Configuration
Novell NetWare 2.x & 3.x Configuration The GCC Elite 21 printer can also be configured for use with NetWare 2.x/3.x using Novell’s standard PCONSOLE utility. Before configuring the NetWare server to access the printer, however, NetWare support must be enabled on the printer, as follows: •... - Page 204 4. Define the Printer. • Press ENTER with the new Print Server Highlighted, select Print Server Configuration, then select Printer Configuration. • Select Printer 0 and define a more meaningful name for the printer if desired. The printer name is displayed in various NetWare printing messages such as when notifying users that their job is completed.
-
Page 205: Novell Netware 4.X Configuration
Novell NetWare 4.x Configuration The GCC Elite 21 printer includes standard support for NetWare 4.x peer-to-peer networking. Before configuring the NetWare server to access the printer, however, NetWare support must be enabled on the printer, as follows: • Start the printer and wait for the LCD display to read Ready. - Page 206 Setting Up the Elite 21 Using Bindery Emulation Mode 1. Confirm Bindery Context Before installing the printer on a Novell NetWare 4.x server in Bindery Emulation mode, check that the server has a Bindery Context (name for the server under Bindery Services mode).
- Page 207 Note:The print server name is printed under the Novell Network Information on the printer’s Network Status Page. The factory default name consists of GCC, an underscore and a six-digit number (i.e. - GCC_123456). • Press the ESC key to move to the New Printer field. Enter a name and press the Return key.
- Page 208 Setting up the Elite 21 Using NetWare Directory Services (NDS) Introduction to NDS NetWare Directory Services (NDS) offers a different, more advanced approach to network management than previous NetWare versions. Generally, it stores and tracks all network objects. As a rule, all 4.x servers must have NDS loaded in order to function. In this way, every NetWare 4.x server is a Directory Server, because it services named Directory Objects such as printers, print servers and print queues.
- Page 209 For those who prefer, NetWare does offer PCONSOLE as an alternative to NWADMIN. PCONSOLE can be used to set up static information about print servers such as: which queues to service, and whom to notify in the event of a problem.
- Page 210 • At the Create Print Queue screen, click on the Directory Service Queue button, then type in values for Print Queue Name and Print Queue Volume and click on the Create button. If you don't know the Print Queue Volume name (the hard drive you will be accessing), click on the icon to the right of the volume field.
- Page 211 IPX SNMP. 3. The default name for the NetWare Print Server is GCC and a six-digit number (i.e. GCC_123456). This is also the default name of the printer in peer-to-peer mode.
- Page 212 6. If the Print Server is to be operated under Novell Directory Services, type in a Context entry and Preferred NDS Tree entry in the appropriate fields. Be sure to give the whole context, whether typed or typeless, and do not begin your context path with a trailing period (.).
-
Page 213: Unix Configuration
UNIX Configuration The Elite 21 printer can support UNIX TCP/IP printing in two modes: • Host-based lpd where a supplied line printer daemon is run on one or more workstations and print data is communicated to the printer via a TCP/IP port, or, •... - Page 214 Solaris: Version 1.1.3 (SunOS 4.1.3), Version 2.3 (SunOS 5.3), Version 2.4, and Version 2.5 HP-UX Series 700 and 800 Version 9.01 and Version 10.0 IBM AIX Version 3.2.5 SCO UNIX Version 3.2 AS400 The TCP/IP directory also includes source code that you can recompile into host- based code for configuring on other System V platforms.
- Page 215 Setting Up a BSD Remote Printer to Use lpd/lpr To set up a remote printer on the host that sends jobs to the Elite 21 using printer resident lpd, add an entry to the /etc/printcap file on your host for each printer you use. The steps are described as follows: •...
- Page 216 Setting Up an AIX Version 2.5 Remote Printer to Use lpd/lpr Set up a remote printer on the host that sends jobs to the Elite 21 using the printer's lpd. Use the following procedures to do this: • At the prompt, type: #smit spooler <cr>...
- Page 217 Setting Up an AIX 4.0 System Use the following procedures to install a printer in an AIX 4.0 system: • Run SMIT Printer. • Select Print Spooling. • Select Add a Print Queue. • Select Remote. • Use Standard Processing. •...
- Page 218 Setting Up an HP/UX Remote Printer to Use lpd Set up a remote printer on the host that sends jobs to a Print Server Card using the Print Server Card lpd. To do this: • At the prompt, type: sam •...
- Page 219 Setting Up an AS/400 Systems to Use lpd/lpr When working with the output queue description (WORKOUTQD), there are several fields that must be defined for the printer to function properly as a remote printer device. Use the following procedures to do this: •...
- Page 220 Setting Up a DEC ULTRIX 4.3 RISC or OSF1/ALPHA Remote Printer Set up a remote printer on the host that sends jobs to a printer. • At the prompt, type: lprsetup • Select add. • Enter a name for your printer and press [Enter]. •...
- Page 221 Setting Up a SCO UNIX Remote Printer to Use lpd/lpr Set up a remote printer on the host that sends jobs to a printer using lpd. Use the following procedures to do this: • At the prompt, type: mkdev rlp Note:You cannot run mkdev rlp twice.
- Page 222 Setting Up System V Release 4 and Solaris 2.X to Use lpd/lpr If your system recognizes the LPSYSTEM command, you can use lpd/lpr. Another option is the admintool if your system supports it. LPSYSTEM Installation Use the following procedures to install LPSYSTEM: Note: The following must be executed from the Bourne Shell.
-
Page 223: Setting Ip Parameters Using Telnet
Setting IP Parameters using Telnet The Elite 21 printer contains a Telnet utility which uses the standard remote terminal protocol to configure the IP address, lpd/lpr printers, and other parameters for the printer. Use the following guidelines to run Telnet. You have the same functionality with the HTML pages accessed by MAP or WebAdmin, as described in Chapter 9. -
Page 224: Using Webadmin
9. Using WebAdmin WebAdmin is GCC’s remote printer management software, which allows a user to monitor and control printer settings using a standard Web browser. WebAdmin can be used to access and change many of the same settings from the printer’s control panel, and can also be used to configure network settings for the printer. -
Page 225: Accessing Webadmin
Address field: http://1.2.3.4 If the IP address of the printer is not known, or if there are multiple GCC printers on the network, you can also use the MAP (Management Access Program) software included with the printer. This software is a Windows-based utility which locates GCC printers on the network. - Page 226 If using TCP/IP, de-select the option to “Search for IPX-based printers.” If using IPX (NetWare), de-select the option to “Search for IP-based printers.” Error messages may appear if both boxes are selected and one of the protocols is not available on the The “Max Hops for IP Search”...
- Page 227 You can access WebAdmin by clicking on the IP address of the printer as displayed on this list. If using IPX, you can also click on the printer name on the “IPX/SPX” list. This will bring you to a limited version of WebAdmin, showing only the Network settings as outlined on Page 9-6.
- Page 228 Using WebAdmin Each WebAdmin page contains a Printer Status display at the top of the page. This tells the current status of the printer and whether paper is present in the printer’s trays. This information is automatically updated every 60 seconds. Each page also has frames showing a listing of categories to the left and an area for information to be displayed on the right.
- Page 229 Printer Information (shown on previous page) will bring up configuration and revision information about the printer. This page also allows you to print out information pages from the printer by clicking the Information Pages link at the bottom of the page.
- Page 230 The System category contains the following items: •Restart Networking - Restarts the printer’s network card •Networking Factory Defaults - Restores network settings to factory defaults. •Networking Status - Displays current network status. •Network Address - Displays printer’s ID and Ethernet address. •Change Password - Allows the WebAdmin password to be changed.
- Page 231 The Protocols category contains the following items: •Setup NetWare - Brings up the following window: This section allows NetWare settings to be selected for the printer. Enter any applicable settings for your NetWare network and click Accept Settings. The printer may require a restart for some settings to take effect. •Setup TCP/IP - Allows the settings found in the TCP/IP section of the Input/Output menu to be modified.
- Page 232 WebAdmin that pertains to that item. GCC Home Page will bring you directly to GCC’s Web site. This will allow you to access all of GCC’s on-line resources in the event that you require support or sales...
-
Page 233: Using The Printing Features Of The Elite 21
10. Using the Printing Features of the Elite 21 This Chapter outlines the procedures for performing some specific printing tasks with the Elite 21 printer. These tasks include: • Double-sided (Duplex) Printing • Specifying Paper Source and Fusing Temperature by Paper Type •... - Page 234 Double-Sided (Duplex) Printing The Elite 21 printer has the ability to print on both sides of the page, provided that the Duplex Unit is installed. The Duplex Unit ships standard with the Elite 21 can be added as an option to the Elite 21 model.
- Page 235 Windows NT 4.0: • Open the document you wish to print. Go to the File menu and then down to Print. • Click on the Properties button in the Print window. • Click the “Page Setup” tab in the Properties window. •...
- Page 236 Sending Jobs and Adjusting Fuser Temperature by Paper Type The Elite 21 printer allows a paper type to be defined for each of the paper sources, using either the printer’s front control panel or WebAdmin to access the Paper Handling options on the unit. This feature serves two purposes. First, it allows users to send jobs to the printer by selecting the paper type they wish to print on, rather than knowing specifically which tray that type is in.
- Page 237 Windows 2000/XP: • Open the document you wish to print. Go to the File menu and then down to Print. • Click on the Paper/Quality tab at the top of the Print window. • Set the “Media” setting to “Letterhead.” •...
- Page 238 The other function served by the Paper Type settings on the printer is fuser temperature adjustment. Most of the paper types use the standard fusing temperature, but some of the selections will not only define the paper type in the tray, but also set the fusing temperature to an appropriate level for the media being used.
-
Page 239: Using The Multi-Purpose Feeder (Tray 1)
Using the Multi-Purpose Feeder (Tray 1) Loading Paper into the Feeder Open the Multi-Purpose Feeder by pulling at the latch at the top center of the feeder cover. Pull outward on the clear plastic tray extension within the cover to extend the tray to hold larger paper sizes. - Page 240 Load the paper into the tray, with the side to be printed on facing up and the top of the page feeding into the printer first. Setting the Paper Size There are no paper size sensors on the Multi-Purpose Feeder (Tray 1), so the printer depends on the user to manually enter the paper size for the tray using the printer’s front menu.
- Page 241 The printer is loaded with Letter sized paper in Tray 1, and the Tray 1 Size setting is set to “Letter.” John sends a print job to the printer which specifies Legal sized paper. The printer pauses and the LCD display displays “Load Tray 1 Legal.” John places a sheet of Legal sized paper on top of the tray and presses Select.
-
Page 242: Printing Envelopes
Printing Envelopes Envelopes can be printed on the Elite 21 using either the Multi-Purpose Feeder (Tray 1) of the printer, or with the optional Envelope Feeder. Supported envelope sizes are as follows: •Commercial #10•Monarch •DL •C5 To print an envelope from Tray 1 of the printer, follow these steps: 1. - Page 243 To print envelopes using the optional envelope feeder, follow these steps: 1. Load the envelope into the envelope feeder: • Install the envelope feeder according to the instructions in Step 10d of Chapter 1 of this manual. • Adjust the paper size guides to the correct size for the envelopes being used. •...
-
Page 244: Sending Jobs To The Rear (Face Up) Output
Sending Jobs to the Rear (Face Up) Output Tray When sending thicker stock through the Elite 21 printer, we recommend using the rear (face up) paper output tray. This allows the paper to follow a more straight- through path through the printer and avoid potential jams. There are no specific software settings necessary to send jobs to the rear output tray. - Page 245 Holding and Printing Jobs The Elite 21 printer has the ability to hold a copy of the last print job sent to the printer and print additional copies of the job directly from the front panel of the printer. This feature is useful for job proofing, as a single copy of the job can be sent to the printer and, assuming the printed copy is correct, more copies can be generated directly from the menu of the printer.
- Page 246 • Press either Menu key until “Held Job” appears. • Press either Item key until “Delete Held Job” appears. • Press Select to delete the job. As long as “Hold Last Job” is enabled in the Configuration menu of the printer, the printer will automatically hold a copy of the last job printed until another print job is sent to the printer.
- Page 247 Specifying Transmit Once Collation Mode The Elite 21 printer can operate in two different collation modes: • Transmit Once Collation Mode:When multiple copies of a single document are sent, the print driver on the computer sends the job once, then subsequent copies are processed directly by the printer.
- Page 248 Macintosh (Except OS X*): • Click once on the desktop printer icon for your printer to highlight it. • Go to the Printing menu at the top of the screen, then down to “Change Setup...” • In the Setup window, click on the “Change” pull-down menu and go down to “Collation Mode.” •...
- Page 249 Offsetting Copies of Collated Output The Elite 21 printer has the ability to sort collated documents by offsetting alternating copies of the document as they are output from the printer. This makes it easier to separate individual copies from each other, as each copy will be output slightly to the side of the copies above or below it.
- Page 250 Windows NT 4.0: • Go to the File menu, then down to Print. • In the Print dialog box, click on the “Properties” button. • Click on the “Advanced” tab in the Properties window. • Under “Printer Features,” click on “Output Bin.” •...
-
Page 251: Edge-To-Edge Printing
Printing Edge-to-Edge Important Note: Edge-to-Edge Printing Printing to the edge of the page may cause excess toner to be deposited on rollers or other internal parts within the printer’s paper path. This toner may then cause undesired lines or marks on subsequent pages. Use of edge-to-edge printing is therefore only recommended by those users who specifically require this feature, and is done at the user’s own risk. - Page 252 Edge-to-Edge Pringing Software Installation Instructions for both Mac OS 9.x/earlier and Mac OS X Make sure the printer software has been installed onto your Mac system following the instructions in Chapter 2 (Mac OS 9.x or earlier) or Chapter 3 (Mac OS X). Insert the Elite 21 Series CD into the computer and double-click the “Elite 21 Installer”...
- Page 253 A disclaimer will appear, explaining the potential print quality issues that edge-to- edge printing may cause (as outlined on Page 10-19.) Click “Agree” to proceed. A status bar will appear informing you of the status of the installation. When complete, click “Quit” to leave the installer.
-
Page 254: Fine-Tuning Page Alignment
Fine-Tuning Page Alignment Due to variances between printer engines, some users printing edge-to-edge jobs may notice a small amount of misalignment between the printed image and the edge of the page. This would appear as a small amount of unprinted white space at the edge of the page. -
Page 255: Maintenance And Troubleshooting
11. Maintenance and Troubleshooting This Chapter of the manual covers periodic maintenance steps and troubleshooting information for the Elite 21 printer. The following topics are covered in this chapter: • Cleaning the printer • Transporting the printer • Replacing the Toner Cartridge •... -
Page 256: Cleaning The Printer
The Elite 21 printer should always be packed in its original shipping carton to minimize the risk of damage during shipping. Replacement shipping cartons are available through GCC if needed. The Elite 21 printer should be prepared for transportation as follows: •... -
Page 257: Replacing The Toner Cartridge
Replacing the Toner Cartridge The toner cartridge contains the image drum and toner supply of the printer. It should be replaced after approximately 15,000 sheets have been printed (rated at Letter/A4 size, single-sided, 5% black coverage). Depending on operating conditions and the type of print jobs being output, however, the cartridge may need to be replaced before or after that interval is reached. - Page 258 Make sure the printer is in its “Ready” state. Open the front cover all the way until it stops. Note: Remove any printouts from the top output tray before opening the cover. Do not touch any internal components of the printer. Grasp the old toner cartridge and slowly pull it out of the printer.
- Page 259 Place the toner cartridge on a flat surface and hold the cartridge securely with one hand. Grasp and pull the sealing tape straight out from the side of the cartridge, as shown. Pulling the tape out at an angle may cause it to break. Do not shake the cartridge or subject it to shocks once the tape is removed.
-
Page 260: Replacing The Btr Roller
Replacing the BTR Roller The Backup Transfer Roller (BTR) is used for transferring toner onto the paper. It should be replaced after approximately 200,000 sheets have been printed. Depending on operating conditions, however, the roller may need to be replaced before or after that interval is reached. Instructions for replacement of the BTR Roller are as follows: Check the printer’s display to make sure the unit is in the Ready mode. - Page 261 Grasp the toner cartridge and slowly pull it out of the printer. Set the toner aside. The BTR roller is the black foam-rubber roller beneath the toner cartridge. Press the yellow plastic levers on either side of the plate behind the BTR roller as shown to raise the roller.
- Page 262 Position the new BTR roller with the gear on the right side. Insert the left side of the shaft into the printer first, then the right. Make sure the shaft is seated securely into the notches inside the printer. Press down on both ends of the BTR roller until it locks into place.
- Page 263 Close the front cover, making sure it latches securely. Plug the printer back into the AC power supply and turn on the printer. The display should come to “Ready” and the printer will be ready to resume printing. 11-9...
-
Page 264: Replacing The Fuser
Replacing the Fuser The Fuser is used for fixing toner onto the paper. It should be replaced after approximately 200,000 sheets have been printed. Depending on operating conditions, however, the fuser may need to be replaced before or after that interval is reached. Instructions for replacement of the fuser are as follows: Check the printer’s display to make sure the unit is in the Ready mode. - Page 265 Remove the duplexing unit of the printer (if equipped) by pushing inward on the green tabs to the left and right of the unit (as shown). Grasp and pull the duplexing unit out of the printer. Remove the two screws that secure the fusing unit, as shown.
- Page 266 Slide the new fuser into the printer, making sure that the unit slides all the way into the unit and is seated securely. Secure the new fuser in place with the two screws, as shown. Close the rear cover, making sure it latches securely.
-
Page 267: Error/Status Messages
Error/Status Messages In the event that a printer error occurs, the Elite 21 printer will display an error message on its LCD display. The display may also show other status or warning messages alerting you as to the status of the printer. - Page 268 Error/Status Messages (continued) Error Message Description Paper has jammed while exiting the printer. See “Paper Jams,” next section. Paper exit jam Paper has jammed in the duplex unit of the printer. See “Paper Jams,” next Paper duplex jam section. Paper has jammed in the upper bin of the printer. See “Paper Jams,” next Upper bin jam section.
- Page 269 Error/Status Messages (continued) Error Message Description The envelope feeder is out of paper. Env feeder empty The paper path from Tray 3 is blocked. Usually caused when the tray Tray 3 blocked above has been removed. The paper path from Tray 4 is blocked. Usually caused when one of Tray 4 blocked the trays above has been removed.
-
Page 270: Clearing Paper Jams
Clearing Paper Jams Paper jams within the Elite 21 printer will be reported using a number of different messages on the LCD display of the unit, depending on where the paper is jammed. This section covers procedures for clearing the following jam messages: •... - Page 271 If multiple trays are in use, remove each tray and inspect each feeder for jammed pages. Check each cassette and remove any wrinkled or creased paper. Push each paper cassette back into the printer, making sure that the cassette(s) are firmly pushed all the way in. 11-17...
-
Page 272: Paper Path Jams
Close the Multi-Purpose Feeder (if open) and open and close the front cover of the printer to reset the printer and remove the “Paper Feed Jam” message. The display should return to “Ready” and the printer will be ready to resume printing. - Page 273 Open the front cover all the way until it stops. Remove any printouts from the top output tray before opening the cover. Do not touch any internal components of the printer. Grasp the toner cartridge and slowly pull it out of the printer. Set the toner aside. Locate the tab on the inside left of the printer’s internal compartment (as shown).
- Page 274 Reinsert the toner cartridge into the printer, making sure the tabs on the left and right of the cartridge match up with the channels within the printer (as shown). Make sure the cartridge is inserted all the way into the printer and is seated properly.
-
Page 275: Paper Exit Jams
Paper Exit Jam A “Paper Exit Jam” message indicates that paper has jammed in the paper exit area. Paper Exit Jams can be cleared as follows: Squeeze the latch at the upper left of the rear panel and pull towards you to open the rear cover of the printer. - Page 276 Remove the duplexing unit of the printer (if equipped) by pushing inward on the green tabs to the left and right of the unit (as shown). Grasp and pull the duplexing unit out of the printer. If paper is jammed around the fusing unit, lift up on the fuser release levers (#1 in the diagram) and remove any jammed paper from the fuser by pulling up and out...
-
Page 277: Duplex Unit Jams
Close the rear cover, making sure that it latches securely. The display should return to “Ready” and the printer will be ready to resume printing. Duplex Unit Jam A “Duplex Unit Jam” message indicates that paper has jammed in the optional duplex unit of the printer. Duplex Unit Jams can be cleared as follows: Squeeze the latch at the upper left of the rear panel and pull towards you to open... - Page 278 Look for and remove paper jammed in the space directly behind the rear cover. Caution: The fusing unit of the printer will be very hot directly after printing. Be careful not to touch the fusing unit while clearing any duplex unit jams. Remove the duplexing unit of the printer by pushing inward on the green tabs to the left and right of the unit (as shown).
- Page 279 Remove any jammed paper from inside the duplexing unit. Reinsert the duplexing unit into the printer, as shown. Be sure to latch the duplexing unit back into place by sliding the two green tabs outward. Close the rear cover, making sure that it latches securely.
-
Page 280: Upper Bin Jams
Upper Bin Jam An “Upper Bin Jam” message indicates that paper has jammed in the optional upper output bin of the printer. Upper Bin Jams can be cleared as follows: Pull on the recessed area at the rear of the upper output bin to open its cover, as shown. - Page 281 Close the rear cover, making sure it latches securely. Close the Multi-Purpose Feeder (if open) and open and close the front cover of the printer to reset the printer and remove the “Upper Bin Jam” message. The display should return to “Ready” and the printer will be ready to resume printing.
-
Page 282: Print Quality Problems
This section of the manual describes possible print quality problems. Consult the list below to identify the example that most resembles your print quality problem and follow the recommendation(s) in the Solution column. If the print quality problem persists, contact GCC Technical Support, your dealer or an authorized GCC service center. - Page 283 Close the front cover closed. properly. Black page The toner cartridge is old or Replace the toner cartridge. damaged. The high voltage power Contact GCC Technical supply may be defective. Support, your dealer or an authorized GCC service center. 11-29...
- Page 284 Replace the toner cartridge. damaged. The toner in the toner Replace the toner cartridge. cartridge is low. The high voltage power Contact GCC Technical supply may be defective. Support, your dealer or an authorized GCC service center. Partial blanks The paper is moist.
- Page 285 Description Possible Cause Solution Plotted print The paper is out of Replace the paper with specification. recommended media. The paper is moist. Remove the moist paper and load new, dry paper. The toner cartridge is old or Replace the toner cartridge. damaged.
-
Page 286: Appendix A: Specifications
Appendix A: Printer Specifications Marking Engine: Print Engine: Fuji Xerox P752 (Hakuba) Print Method: Dry type laser printing Engine Resolution: 600/1200dpi (software selectable) Maximum Printable Area: 8.33”x13.83” (211.6x351.3 mm) default, 8.5”x14” (215.9x355.6mm) using optional Edge-to-Edge setting Maximum Print Speed: Letter: 21 pages per minute (ppm) (Simplex) / 7.5 ppm (Duplex) A4: 20 ppm (Simplex) / 7 ppm (Duplex) Legal 13”: 17 ppm (Simplex) / 6.25 ppm (Duplex) Legal: 17 ppm (Simplex) / 6 ppm (Duplex) - Page 287 Controller: Processor: 333MHz PowerPC 405 GPr Memory: 64MB minimum, 320MB maximum Interfaces: 10/100BaseT Ethernet, USB 2.0, Bi-directional parallel Languages: Xionics PostScript Level 2, Xionics PCL 6 (PCL 5e + PCL XL) and PJL Font Renderers: Bitstream TrueDoc, Adobe Type-1 Compatible,TrueType Built-in Fonts: 136 PS Level 3 Compatible / 80 PCL Physical:...
-
Page 288: Appendix B: Paper Specifications
Appendix B: Paper Specifications Supported Paper Sizes: Universal tray/550 sheet capacity (Tray 2/3/4): • US Letter • US Legal 13” • A4 • A5 • US Executive • US Legal • JIS B5 •Transparencies (US Letter/A4, 100 sheets maximum) •Label stock (US Letter/A4, 100 sheets maximum) Multipurpose feeder (Tray 1): Sizes as above with 100 sheets of paper, 30 transparencies, postcards or label stock maximum capacity.The multipurpose tray can also be used with the following envelope sizes (10 envelopes... - Page 289 Envelopes Commercial #10: 4.125 x 9.5 (104.8 x 241.3 mm) Monarch: 3.875 x 7.5 (98.4 x 190.5 mm) DL: 4.33 x 8.66 in. (110 x 220 mm) C5: 162 x 229 mm (6.38 x 9.02 in.) Print alignment Skew:The amount by which a supposedly horizontal printed line may vary from being parallel with the edge of the paper.
-
Page 290: Appendix C: Pinouts
Appendix C: Interface connector pinouts Use the following pinouts and descriptions of the various printer interface connectors for purchase or assembly of a new cable. Bi-directional Parallel (nybble mode) SIGNAL DESCRIPTION DIRECTION /STROBE Data Strobe In to Printer Data Bit 1 Data Bit 2 Data Bit 3 Data Bit 4... - Page 291 Ethernet (UTP): PIN SIGNAL DESCRIPTION DIRECTION Transmit+ Transmit- Receive+ Not Used Not Used Receive- Not Used Not Used...
-
Page 292: Appendix D: Radio And Tv Interference
GCC’s instructions. This GCC printer was certified under test conditions that included the use of shielded cables and connectors between system components. It is mandatory that you use shielded cables and connectors to reduce the possibility of causing interference to radio, television, and other electronic devices. -
Page 293: Appendix E: Pcl
PCL to be used; the printer will automatically sense PCL jobs and switch to PCL mode accordingly. GCC has also included a PCL 5e Windows driver with the Elite 21 series software, which will allow all of the printer’s specific features to be accessed using PCL from Windows (using a HP LaserJet driver may not offer all paper handling options available on the Elite 21). - Page 294 The table below shows some frequently-used PCL printer commands (escape sequences) that can be useful when sending a PCL print job from DOS to your GCC printer. PCL commands tell the printer which actions to perform or which fonts to use.
-
Page 295: Appendix F: Fonts
Users of Windows systems will need to install them using the separate Font Installer on the Elite 21 Series CD-ROM, as follows: • Insert the GCC Elite 21 Series CD-ROM into the Windows PC. • Click on My Computer, then double-click the CD icon to open the CD. - Page 296 Follow the on-screen installer intructions. This will install all the screen fonts onto the system. The Bitstream screen fonts provide equivalent typefaces to traditional PostScript fonts, however the Bitstream font names are typically different from traditional PostScript font names. The tables on the following pages provide a cross-reference of the different font names between the traditional PostScript font names (“Equivalent font”) and the Bitstream fonts.
- Page 297 Equivalent font family Bitstream font family Albertus MT Flareserif 821 Antique Olive Roman Incised 901 Apple Chancery Cataneo Arial Swiss 721 SWM AvantGarde Geometric 711 Gothic Bodoni Modern 421 Bodoni Bodoni Poster Modern 721 Poster Bodoni Bodoni PosterCompressed Onyx Bookman ITC Bookman Carta Elemento...
- Page 298 Bitstream font family Equivalent font family Aldine 430 Garamond StempelGaramond Roman Cataneo Apple Chancery Century 702 Schoolbook NewCenturySchlbk Clarendon 701 Clarendon Classical Hoefler Text Copperplate Gothic Copperplate Daly Sans 350 Chicago Draftsman Casual Tekton Dutch 801 SWA Times Dutch 801 SWM Times New Roman Elemento Carta...
- Page 299 Macintosh Font Equivalency Tables Bitstream font Macintosh equivalent Printer font Aldine 430 Garamond SWA StempelGaramond Roman StempelGaramond-Roman Aldine 430 Garamond SWA (italic) StempelGaramond Italic StempelGaramond-Italic Aldine 430 Garamond SWA (bold) StempelGaramond Bold StempelGaramond-Bold Aldine 430 Garamond SWA (bold, italic) StempelGaramond BoldItalic StempelGaramond-BoldItalic Cataneo SWA Apple Chancery...
- Page 300 Bitstream font Macintosh equivalent Printer font Incised 901 SWA (bold) Antique Olive Bold AntiqueOlive-Bold Incised 901 Compact SWA (bold) Antique Olive Compact AntiqueOlive-Compact ITC Bookman SWA Bookman Bookman-Light ITC Bookman SWA (italic) Bookman LightItalic Bookman-LightItalic ITC Bookman SWA (bold) Bookman Demi Bookman-Demi ITC Bookman SWA (bold, italic) Bookman DemiItalic...
- Page 301 Bitstream font Macintosh equivalent Printer font Swiss 721 SWM (italic) Arial (italic) Arial-ItalicMT Swiss 721 SWM (bold) Arial (bold) Arial-BoldMT Swiss 721 SWM (bold, italic) Arial (bold, italic) Arial-BoldItalicMT Swiss 742 SWA Univers 55 Univers Swiss 742 SWA (italic) Univers 55 Oblique Univers-ObliqueUnivers-Condensed Swiss 742 Cn SWA (italic) Univers 57 CondensedOblique...
- Page 302 Windows Font Equivalency Tables Bitstream font Style File name Windows equivalent Printer font Aldine 430 Garamond SWA ALDIGSR_.TTF StempelGaramond Roman StempelGaramond-Roman Aldine 430 Garamond SWA (Italic) Italic ALDIGSI_.TTF StempelGaramond Roman StempelGaramond-Italic Aldine 430 Garamond SWA (Bold) Bold ALDIGSB_.TTF StempelGaramond Roman StempelGaramond-Bold Aldine 430 Garamond SWA (Bold Italic) Bold Italic...
- Page 303 Bitstream font Style File name Windows equivalent Printer font ITC Lubalin Graph SWA (Demi Oblique) Bold Italic ITCLGSDO.TTF LubalinGraph LubalinGraph-DemiOblique ITC Zapf Chancery SWA (Medium Italic) ITCZCSMI.TTF ZapfChancery ZapfChancery-MediumItalic ITC Zapf Dingbats SWA ITCZDS__.TTF ZapfDingbats ZapfDingbats Jilli Open SWA JILLOS__.TTF Mona Lisa Recut MonaLisa-Recut Laguna Sans SWA...
- Page 304 Bitstream font Style File name Windows equivalent Printer font Venetian 521 Goudy SWA VENEGS__.TTF Goudy Goudy Venetian 521 Goudy SWA (Italic) Italic VENEGSI_.TTF Goudy Goudy-Italic Venetian 521 Goudy SWA (Bold) Bold VENEGSB_.TTF Goudy Goudy-Bold Venetian 521 Goudy SWA (Bold Italic) Bold Italic VENEGSBI.TTF Goudy...
-
Page 305: Appendix G: Service And Support
Internet email: support@gccprinters.com GCC’s World Wide Web site GCC’s Web site offers a wealth of information. The most recently updated documentation for the Elite 21 Series of printers is here, along with technical bulletins that deal with any problems that arise over the life of your printer. Check www.gccprinters.com... -
Page 306: Appendix H: Ordering Accessories And Consumables
Appendix H: Consumables and Accessories The following consumables and optional accessories are available for the GCC Elite 21 printer. To order, contact GCC Direct Sales at 800-422-7777 or visit our web site at www.gccprinters.com (North America only). Outside North America, contact your local GCC office, dealer or distributor. -
Page 307: Appendix I: Contacting Gcc Worldwide
Appendix I: Contacting GCC Worldwide GCC Technologies can be reached through a number of methods. Customers in North America should contact GCC’s corporate offices, as follows: GCC TECHNOLOGIES, INC. 209 Burlington Rd. Bedford, MA 01730 Tel: (781) 275-5800 Fax: (781) 275-1115 Web: http://www.gccprinters.com... - Page 308 GCC Technologies United Kingdom 729 Hounslow Rd. Hounslow, Middlesex England TW3 1SE Tel: +44 208 754 6000 Fax: +44 208 754 6060 GCC’s International Sales and Support departments can also be reached via e-mail at the following addresses: Sales: isales@gccprinters.com Tech Support: isupport@gccprinters.com...
-
Page 309: Appendix J:warranties And Licenses
Software media and the Documentation to GCC. The License and your right to use the Software will automatically terminate upon your failure to comply with any provision of this License Agreement or upon GCC’s election to terminate the License as set forth below. You agree upon such termination to destroy all copies of the Software which you have and to mail your original Software disk(s) and the Documentation to GCC. - Page 310 “Software”) to be free from defects in materials and workmanship. If you discover physical defects in the medium on which the Software is distributed, GCC will, at its option, replace the medium at no charge to you or terminate the License and require the return of your Product, and upon such return, refund to you the purchase price thereof.
- Page 311 It is important that you use shielded cables and connectors to reduce the possibility of causing interference to radios, television sets, and other electronic devices. You can obtain the proper shielded cables from GCC Technologies or from an Authorized GCC Technologies dealer.
Need help?
Do you have a question about the Elite 21DN and is the answer not in the manual?
Questions and answers