Table of Contents
Advertisement
Quick Links
Download this manual
See also:
User Manual
Advertisement
Table of Contents

Related Manuals for GCC Technologies Elite 21DN+


Summary of Contents for GCC Technologies Elite 21DN+
- Page 1 GCC Elite 21 Series Getting Started Guide Elite 21 Elite 21...
- Page 2 GCC product manuals, software installation instructions, the most current printer drivers, FAQs, technology updates and a searchable database for technical questions are all located in the Support Central section of GCC’s web site. Support Central can be accessed directly at: http://www.gccprinters.com/support...
-
Page 3: Installation Checklist
Installation Checklist For proper installation, please complete each section in order: Step Check Package Contents Step Prepare Printer Location Step Locate Printer Parts Step Remove Tape Step Install Toner Cartridge Step Load Paper Tray Step Connect Printer Cables Step Attach Power Cord Step Configure Network Settings Step 10... -
Page 4: Step 1. Check Package Contents
(On CD-ROM) GCC Warranty Registration Card Note: No printer cables are included with the printer. For information on ordering cables, contact GCC Direct Sales at 800-422-7777 (North America only, outside of North America refer to the User’s Manual on the CD-ROM) or visit our web site at: http://www.gccprinters.com... -
Page 5: Step 2. Prepare Printer Location
Step 2. Prepare Printer Location Place the printer on a flat, level surface in a well-ventilated area away from direct sunlight or areas where the air temperature and humidity can vary widely. Do not obstruct the fan vent on the left side of the printer. Minimum Recommended Clearances: Top View 7.87”... -
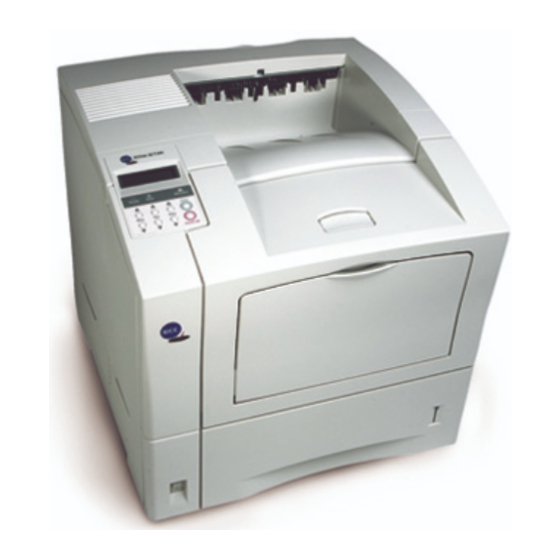
Page 6: Step 3. Locate Printer Parts
Step 3. Locate Printer Parts Front View Paper Output Tray Paper Exit Slot Control Panel Front Cover Multi-Purpose Feeder (Tray 1) Tray Extension Power Switch 550-sheet Universal Paper Tray (Tray 2) Rear View Rear Cover Top Cover Connectivity Ports (see next page for details) Power Cord Receptacle Ventilation Slots... -
Page 7: Connectivity Ports
Connectivity Ports With the printer’s all ports active feature, all the interfaces are simultaneously active. This means you can connect more than one interface at a time. You don’t have to select a port; this feature works automatically. Ethernet 10/100BaseT Bi-directional Parallel Universal Serial Bus (USB) -
Page 8: Step 4. Remove Tape
Step 4. Remove Tape Remove packaging tape from the front and rear covers of the printer. -
Page 9: Step 5. Install Toner Cartridge
Step 5. Install Toner Cartridge Press down on the release button at the top of the printer to open the front cover. Remove the two orange plastic spacers inserted in the printer by pulling them out of the printer as shown. Note: The toner cartridge contains a microfine plastic powder that is fused to the paper during the printing process. - Page 10 Unwrap the toner cartridge and remove the protective sheet of paper from under the front flap of the cartridge. Shake the cartridge from side to side several times as shown to distribute the toner. Place the toner cartridge on a flat surface and hold the cartridge securely with one hand.
- Page 11 Close the front cover. Press on the center part of the front cover until the cover locks securely.
- Page 12 Step 6. Load Paper Tray The standard paper tray holds up to 550 sheets of 20 lb. copier-type paper. It can handle the following sizes of paper: • US Letter • US Legal 13” • A4 • A5 • US Executive •...
- Page 13 For sizes larger than Letter/A4, press down on the grey square at the bottom of the tray. This will release the rear section of the tray and the section can be adjusted outward to extend the tray’s length. The rear section of the tray adjusts to three different positions.
- Page 14 Squeeze the right side paper guide as shown. Lift the guide slightly and slide it towards the paper stack until it touches the paper. Do not set the guide too tightly against the paper stack, as this could cause paper feed jams. Squeeze the paper length guide at the rear of the tray as shown.
- Page 15 Gently slide the paper tray all the way into the printer. 10. The paper level indicator on the front of the tray will rise to show the remaining level of paper in the tray. Replenish paper as necessary.
-
Page 16: Step 7. Connect Printer Cables
Step 7. Connect Printer Cables Connecting Cables Correctly Most cables come with some kind of locking device to insure that the connection is made. Be sure to use these locking devices, otherwise you may experience intermit- tent errors or the printer will fail to operate altogether. •... -
Page 17: Step 8. Attach Power Cord
Step 8. Attach Power Cord Insert the power cord into the AC power connector on the back of the printer as shown. Check the power switch at the front of the printer to confirm that it is in the Off (O) position. -
Page 18: Step 9. Configure Network Settings
Step 9. Configure Network Settings Users wishing to access their printer using TCP/IP should configure the network settings on their printer before installing software. Users connecting via a local port or non-TCP/IP network can skip to Step 10. Assigning an IP address In order to access the printer over most networks and also to access printer management controls such as WebAdmin, the printer should be assigned an IP address. - Page 19 obtaining best results using DHCP can be found in the “Assigning TCP/IP Parameters Using DHCP” section of this section, starting on Page 8-4. Assigning TCP/IP address and parameters through the printer’s front panel: • Turn on the printer and press either Menu key until Input/Output appears. •...
- Page 20 Assigning TCP/IP Parameters Using DHCP: The Elite 21 printer also supports IP configuration via a Dynamic Host Configuration Protocol (DHCP) server. DHCP is a protocol which delivers IP address configuration information to devices on a network. A DHCP server manages a pool of available IP addresses and grants requests for addresses from devices on the network.
- Page 21 • Make sure the printer is turned on, connected to the network and assigned an IP address. • Go to any computer on the same TCP/IP network as the printer and open a web browser window.. • Type the IP address of the printer into the Address field of the browser (i.e. - “http://1.2.3.4”...
- Page 22 Step 10. Install Printing Software Driver software for the printer must be installed on every computer that will print to the unit. This section includes installation instructions for Macintosh,Windows 95/98/ME and Windows 2000/XP.
- Page 23 Step 10a. Install Macintosh Software Overview You will need to set up your Macintosh computer to use the Elite 21 Series by installing the Elite 21 software for Macintosh. This software is on the Elite 21 Series CD-ROM. The CD-ROM includes customized PostScript Printer Description (PPD) files for the Elite 21 Series and screen fonts for each of the resident PostScript printer fonts.
- Page 24 Installing the Elite 21 with Mac OS 9.x and earlier Software Installation This section details installation instructions for installing software for Mac OS versions 9.x and earlier. Instructions are also included for creating a Desktop Printer on the Mac in order to send jobs to the printer. Important: Read the release notes contained in the Read Me file before installing the printer software.
- Page 25 Part 1- Installing the GCC Printing Software and Fonts Insert the Elite 21 Series CD-ROM into the computer and double-click the CD icon to open the disk. Double-click the “Elite 21 Installer” icon within the disk window An introduction screen marked “Elite 21 Series Installer”...
- Page 26 A window will open displaying the ReadMe file for the software. Read the information in this file and click Continue to proceed. A window will appear listing the components that will be installed and asking for an Install Location. Choose the disk that you wish to install the software onto (the startup disk of the Mac in most cases) and click Install.
- Page 27 Installation of the files will begin. A status window will appear showing the progress of the installation. When the installation is complete, a dialog box will appear asking if you want to setup a Desktop Printer. Click Yes to setup the printer. A dialog box asking how the printer is connected will appear.
- Page 28 Clicking the “Setup Printer” button will open either Apple’s Desktop Printer Utility (USB or LPR connections) or the Chooser (AppleTalk connections) in order to setup the printer. Refer to the instructions for Creating a Desktop Printer, covered in Part 2 of the Macintosh installation instructions in this guide as follows: Connecting via USB: Part 2a, Page 27...
- Page 29 Part 2a - Creating a Desktop Printer (via USB) (Note: USB connection requires Mac OS 8.6 or higher) Make sure that all steps in the Hardware Setup section of this manual have been followed. Follow the Macintosh installation steps in Part 1 of this section. In Step 9, select “USB”...
- Page 30 The “USB Printer” dialog box will appear. Click on your printer model from the list, then click OK. The “Untitled 1” dialog box will return. Click on the Auto Setup button at the top right of the box. A status window appears, showing the progress of the installation.
- Page 31 The “Untitled 1” dialog box returns again. The icon in the “PostScript Printer Description (PPD) File” box now shows your printer. Click “Create...” to create the new desktop printer. A Save dialog box opens, asking you to save the desktop printer. Type in a name for the desktop printer, or leave the default name.
- Page 32 Due to potential incompatibilities between Apple’s Desktop Printer Utility and certain AppleTalk networks, GCC does not recommend using the Apple Desktop Printer Utility to set up the Elite 21 Series printer over AppleTalk. As a result, the Elite 21 Series software uses the Chooser to set up the printer over AppleTalk rather than the Desktop Printer Utility.
- Page 33 This will open up the Chooser window. Click on the LaserWriter 8 icon in the lefthand Chooser window. A list of AppleTalk compatible printers will appear on the right. Click on the name of your printer from the list. The default printer name will be “Elite 21 Series”...
- Page 34 The Setup process will continue. A status bar will show the progress of the setup. A window will appear asking for any options on the printer to be configured. The first page of options sets the Memory Configuration, Additional Trays, Envelope Feeder and Upper Bin status.
- Page 35 The setup will finish. A status window will indicate that a Desktop Printer is being built. 10. When complete, a Desktop Printer icon for the Elite 21 will appear on the Mac’s desktop. The setup is now complete. If this is the only printer installed on the Mac, it will appear with a bold outline around it, indicating that this is the default printer for the computer.
- Page 36 Part 2c - Creating a Desktop Printer (via LPR) (Note: LPR connection requires a PowerPC-based Mac and LaserWriter 8.5.1 or higher) Pre-Installation Note: Macintosh LPR Printing requires that the computer be able to send data to the printer in Binary format. The default format on the printer, however, is set to ASCII rather than Binary. Before attempting to send LPR jobs from the Macintosh, you should set the IP Data Format setting on the printer to Binary, as follows: •...
- Page 37 A dialog box called “Untitled 1” opens, containing two printer icons. Click the “Change...” button to the right of the “LPR Printer Selection” box. A dialog box called “Internet Printer” appears. Enter the printer’s IP address in the “Printer Address” field. The Queue field is not necessary with this printer.
- Page 38 The “Untitled 1” dialog box will return. Click on the “Change...” button at the top right of the box. The “Select a PostScript Printer Description File” box will open. Choose your printer model from the list of printers and click Select. The “Untitled 1”...
- Page 39 A Save dialog box opens, asking you to save the desktop printer. Type in a name for the desktop printer, or leave the default name. Click Save. A new Desktop Printer icon will appear on the desktop with the name that you assigned.
- Page 40 Installing the Elite 21 with Mac OS X Software Installation This section details installation instructions for installing software for Mac OS X. Instructions are also included for selecting the printer within the Print Center utility on the Mac in order to send jobs to the printer. Important: Read the release notes contained in the Read Me file before installing the printer software.
- Page 41 Part 1- Installing the GCC Printing Software and Fonts Insert the Elite 21 Series CD-ROM into the computer and double-click the CD icon to open the disk. Double-click the “Elite 21 Installer” icon within the disk window. An OS X window may appear asking for an administrator password in order to install this software.
- Page 42 A window will open displaying the ReadMe file for the software. Read the information in this file and click Continue to proceed. A window will appear listing the components that will be installed and asking for an Install Location. Choose the disk that you wish to install the software onto (the startup disk of the Mac in most cases) and click Install.
- Page 43 Installation of the files will begin. A status window will appear showing the progress of the installation. When all files are installed, a dialog will appear informing you that installation was successful. Click Quit to exit the installer. Proceed to Part 2 of the instructions to select your printer.
- Page 44 Part 2 - Selecting your Printer Install the GCC OS X software onto the Macintosh following the steps in Part 1 of this section (“Installing PPD Files and Fonts.”) After the installation is complete, open the Print Center utility. Print Center is found in the Utilities folder, within the Applications folder of your OS X system.
- Page 45 IP address. Fill in the IP address under the “LPR Printer’s Address” field. Select your specific GCC printer model from the Printer Model pull-down menu. Click “Add.” Proceed to Step 6.
- Page 46 5c. If AppleTalk is selected, make sure the printer is turned on and connected to the network. A list of available AppleTalk printers will appear. Click on the name of your printer from the list. Click “Add.” Note: AppleTalk is disabled by default within OS X.
- Page 47 Step 10b. Install Windows Software Overview You will need to set up your Windows computer to use the Elite 21 Series by installing the Elite 21 software for PC-compatible computers. This software is on the Elite 21 Series CD-ROM. The CD-ROM includes customized Windows PostScript printer software for Windows 95/98/ME,Windows 2000/XP, and Windows NT 4.0.
- Page 48 Installing the Elite 21 with Windows 95/98/ME Software Installation The software required to set up your Windows 95/98 or Windows ME computer is located on the Elite 21 Series CD-ROM. You can install the Elite 21 software on your computer using Plug and Play. This will work if you are installing the software on a computer which is connected to the printer through the parallel or USB (Win98/ME only) port.
- Page 49 Series printer. The steps for these installations are as follows: If a previous version of GCC’s USB Monitor software has been installed on your PC, you must uninstall the software before installing your USB printer. To do this, run the “Uninstall GCC USB”...
- Page 50 The system will then ask where to look for new drivers. Make sure that the Elite 21 Series CD-ROM is in the drive. Check off “Specify a Location.” Use the Browse button to select your Elite 21 Series CD- ROM. Open the folder on the CD that corresponds to the language being used (English, French, German, Italian or Spanish.) Open the ‘Win95-98-Me’...
- Page 51 Windows 95/98 Software Installation - Plug and Play via Parallel If the computer is running, shut it down. With the computer and printer both powered off, attach the printer cable to the computer and printer. Make sure that there is paper in the printer’s tray. Turn on the printer and wait for the LCD display to read “Ready.”...
- Page 52 The system will then ask where to look for new drivers. Make sure that the Elite 21 Series CD-ROM is in the drive. Check off “Specify a Location.” Use the Browse button to select your Elite 21 Series CD- ROM. Open the folder on the CD that corresponds to the language being used (English, French, German, Italian or Spanish.) Open the ‘Win95-98-Me’...
- Page 53 Series printer. The steps for these installations are as follows: If a previous version of GCC’s USB Monitor software has been installed on your PC, you must uninstall the software before installing your USB printer. To do this, run the “Uninstall GCC USB”...
- Page 54 The system should locate the USB printing software and install it automatically A window will appear informing you that Windows has finished the installation. If a message appears that the drivers cannot be found, click Back, then click “Specify the location of the drivers.” Click Next.
- Page 55 Windows ME Software Installation - Plug and Play via Parallel If the computer is running, shut it down. With the computer and printer both powered off, attach the printer cable to the computer and printer. Make sure that there is paper in the printer’s tray. Turn on the printer and wait for the LCD display to read “Ready.”...
- Page 56 The system will then ask where to look for new drivers. Make sure that the Elite 21 Series CD-ROM is in the drive. Click “Search for the best driver for your device” and check off “Specify a Location.” Use the Browse button to select your Elite 21 Series CD-ROM, then the folder on the CD that corresponds to the language being used (English, French,...
- Page 57 Windows 95/98/ME Software Installation - Using the Add Printer Wizard Go to the Start menu of Windows 95/98/ME, then up to Settings and select Printers. In the Printers window, double- click the Add Printer icon to start the Add Printer Wizard. Click Next to start the Wizard The first window of the Add Printer Wizard will ask if the printer is connected...
- Page 58 PostScript (PS) or PCL driver for the Elite 21 Series. Most users will want to use the PostScript driver exclusively under Windows. Choose “GCC Elite 21 Series PS” unless you have a specific reason to use the PCL driver.
- Page 59 A list of ports will appear. Select the appropriate local parallel or USB port for the printer and click Next. The next window will ask for a name for the printer. You can type in a new name, or keep the default name. Click Next. If more than one printer is installed on this computer, this window will also ask if you wish to make this printer the default...
- Page 60 A dialog box may appear asking you to insert the Windows 95 or 98 CD. Insert the CD and click OK. 10. A dialog box may appear telling you that necessary files on the CD cannot be found. Make sure the Windows CD is inserted, then use the Browse button to access the Windows CD.
- Page 61 12. When finished, the test page will be generated (if you chose to print a test page in Step 8). If the page prints, click Yes in this window. If not, click No and follow the Windows troubleshooting steps that appear. 13.
- Page 62 Windows 95/98 and Windows ME Network Configuration The Elite 21 CD-ROM contains software to allow the printer to be accessed as a peer-to-peer device on a Windows 95/98/ME Ethernet network. This includes software to allow the printer to be accessed as a peer-to-peer device using TCP/IP, or using IPX/SPX.
- Page 63 • Make sure the printer is turned on and is showing “Ready” in its display window. • Go to the Windows Start menu, then to Applications and down to “IP-P2P.” Select the IP-P2P program within that folder. • The IP-P2P program will run, bringing up the following window: The “Max Hops for”...
- Page 64 • Press either Menu key until Information appears. • Press either Item key until Print Net Status appears. • Press Select to print the page. At the bottom of the page will be a listing for TCP/IP Connection Information, Port Number.
- Page 65 • Click on “Find Printers” to locate all available printers on the network. A list of compatible printers will appear at the bottom of the window. • Click on the name of the printer you wish to access via TCP/IP from the list and click on “Select.”...
- Page 66 • If the printer driver has not yet been installed for the printer, install it according to the instructions starting on Page 55 of this guide. • Click on the Start button. Select Settings and then Printers. • Locate the icon for the Elite 21 printer that you have installed. Right-click on the printer icon and select Properties.
- Page 67 Installing the Elite 21 with Windows 2000/XP Software Installation The software required to set up your Windows 2000 or Windows XP computer is located on the Elite 21 Series CD-ROM. You can install the Elite 21 software on your computer using Plug and Play. This will work if you are installing the software on a computer which is connected to the printer through the parallel or USB port.
- Page 68 Windows 2000/XP Software Installation - Plug and Play If the computer is running, shut it down. With the computer and printer both powered off, attach the parallel or USB cable to the computer and printer. Make sure that there is paper in the printer’s tray.
- Page 69 The next window will ask what you want the Wizard to do. Check “Search for a suitable driver for my device” and click Next to continue. The system will then ask where to look for new drivers. Make sure that the Elite 21 Series CD-ROM is in the drive.
- Page 70 The Wizard will automatically copy the driver files to their correct locations. A status window will show the progress of the installation. If a “Files Needed” dialog box appears, use the Browse button to select your Elite 21 Series CD-ROM. Open the folder on the CD that corresponds to the language being used (English, French, German, Italian or Spanish).
- Page 71 Windows 2000/XP Software Installation - Using the Add Printer Wizard Go to the Start menu of Windows. In Win2000, go to Settings and select Printers. In WinXP, go to Printers and Faxes. In the Printers window, double- click the Add Printer icon (Win2000) or click the Add a Printer icon (WinXP) to start the Add Printer Wizard.
- Page 72 This will open the Windows TCP/IP Printer Port Wizard. Make sure the PC and printer are both properly connected to the Ethernet network and that the printer is powered on. Also, make sure your printer has been assigned an IP address according to the instructions in Step 9 of this guide.
- Page 73 This will bring up the Port Settings window. The printer can be used under either the Raw or LPR protocol. Consult your network administrator for the preferred connection protocol on your network. If using Raw: Under “Protocol,” select the radio button next to “Raw.” Under “Raw Settings,”...
- Page 74 7a. If using LPR: Under “Protocol,” select the radio button next to “LPR.” Under “LPR Settings,” set the Queue Name as follows: For the Elite 21 printers, enter “Elite” as the Queue Name. Click on the checkbox next to “LPR Byte Counting Enabled.”...
- Page 75 PostScript (PS) or PCL driver for the Elite 21 Series. Most users will want to use the PostScript driver exclusively under Windows. Choose “GCC Elite 21 Series PS” unless you have a specific reason to use the PCL driver. Click Next.
- Page 76 12. The next window will ask for a printer name. You can type in a new name, or keep the default name. If more than one printer is installed on the system, this window will also ask if you want to use this printer as the Default Printer.
- Page 77 15. A window will appear asking if you wish to print a test page. Click Yes if you are installing a local printer. Click No if you are installing the driver and will be setting up the printer as a network device later. Click Next.
- Page 78 18. When the installation is complete, you will be returned to the Printers window (Win2000) or Printers and Faxes window (WInXP) and a new icon for the printer will appear.
-
Page 79: Step 11. Verify Printer Setup
Steps 1-9. If you still have difficulty getting a document to print, contact GCC Technical Support by phone at (781) 276-8620 (North America only; outside North America, refer to the User’s Manual) or http://www.gccprinters.com/support or contact your authorized... - Page 80 TRADEMARKS GCC Technologies is a registered trademark of GCC Technologies, Inc. GCC Printers, the GCC Printers logo and Elite are trademarks of GCC Technologies, Inc. Apple, AppleTalk, LaserWriter, Mac, Macintosh, and the Apple logo are registered trademarks of Apple Computer, Inc.Windows is a registered trademark of Microsoft, Inc.
Need help?
Do you have a question about the Elite 21DN+ and is the answer not in the manual?
Questions and answers