GCC Technologies Elite 12/1200N Installation Manual
Elite12 series
Hide thumbs
Also See for Elite 12/1200N:
- Software installation (9 pages) ,
- Ram installation manual (14 pages) ,
- Using manual (12 pages)
Table of Contents
Advertisement
Quick Links
Advertisement
Table of Contents

Related Manuals for GCC Technologies Elite 12/1200N


Summary of Contents for GCC Technologies Elite 12/1200N
- Page 1 Elite12 S ERIES INSTALLATION GUIDE...
-
Page 2: Federal Communications Commission
1374. IMPORTANT: Changes or modifications to this product not authorized by GCC Technologies Inc. could void the FCC Certification and negate your authority to operate the product. This product was tested for FCC Com- pliance under conditions that included the use of shielded cables and connectors between system compo- nents. - Page 3 NTRODUCTION Congratulations on your purchase of a GCC Technologies Elite 12 Series laser printer. You now have a high-quality, versatile solution to all of your printing needs. The purpose of this guide is to show you how to set up your printer and install the software on the computer(s) that will be using it.
-
Page 4: Where To Look For More Information
Several references are available for use with this printer. For additional copies of this guide, contact GCC direct at 1.800.422.7777 (North America only, outside of North America refer to the back cover) or contact your GCC authorized dealer. Additional information is available at www.thevirtualprinterstore.com/support... -
Page 5: Installation Checklist
NSTALLATION For proper installation please complete each section in order: HECK REPARE OCATE EMOVE NSTALL TTACH THE ONNECT THE NSTALL ERIFY HECKLIST ACKAGE ONTENTS RINTER OCATION RINTER ARTS NTERNAL ACKAGING ONER ARTRIDGE OWERCORD RINTER ABLES RINTING OFTWARE RINTER ETUP... -
Page 6: Step 1. Check Package Contents
The Elite 12/600 USB ships with a USB cable. A printer cable is not included with any other 12 series model. For information on ordering cables contact GCC at 1.800.422.7777 (North America only. Outside of North America refer to the back cover) or www.thevirtualprinterstore.com... -
Page 7: Step 2. Prepare Printer Location
2. P REPARE Place the printer on a flat level surface in a well-ventilated area away from direct sunlight or areas where the air temperature and humidity can vary widely. Do not obstruct the fan vent on the right side of the printer. -
Page 8: Step 3. Locate Printer Parts
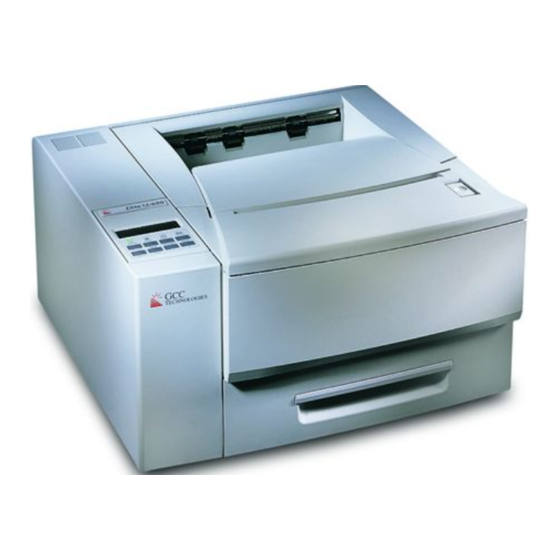
3. L OCATE RONT Top output tray Control panel Power switch Power outlet RINTER ARTS I E S Cover release Multi-purpose tray Paper tray Connectivity ports Rear output... -
Page 9: Connectivity Ports
B: HD30* (for font hard drive) C: Parallel D: Ethernet 10 BaseT [top], 10 Base2* [bottom] 1212 model only With the printer’s all ports active feature, all the interfaces are simultaneously active, which means you can connect more than one interface at a time. - Page 10 12/600U ECHNOLOGIES IE S IE S Save all packaging material, you may need to repack the printer at a later date. NTERNAL ACKAGING 1. Remove the tape from the printer’s top cover. 2. Press the release button on the top right of the printer.
-
Page 11: Step 5. Install Toner Cartridge
ARTRIDGE 1. Press the release button on the top right of the printer. 2. Lift open the printer cover. 3. Move the yellow plastic slider from left to right a few times to remove any dust or particles, then position back to the far right. - Page 12 7. There is an arrow on the left side of the cartridge. There is a similar arrow on the left of the printer. Align these two arrows and insert the cartridge down and into the printer. 8. Close the top cover. If the cartridge is installed...
-
Page 13: Step 6. Load Tray
50 transparency or label sheets in Letter or A4 size. •Legal 13" •Legal 14" 1. Pull the tray completely out of the printer. 2. Adjust the guides at the rear of the paper tray to accommodate the length of the paper you intend to use. - Page 14 5. Place the paper in the paper tray and move the paper width guide (D) so that it lies next to the paper. Don’t move the guide so close that it holds the paper tightly, because this may cause jams. 6. Replace the tray in the printer.
-
Page 15: Step 7. Attach The Powercord
OWERCORD 1. Locate the power switch on the side of the printer. Make sure the printer is switched off. 2. Connect the power cord to the printer and a grounded power strip or AC outlet. 3. Switch the printer on. -
Page 16: Step 8. Connect Printer Cables
All USB cables are the same. One end of the cable fits into the computer or hub only and the other end fits into the printer only. You cannot connect the cable incorrectly. -
Page 17: Ethernet Network Connection
2 meters or 6.5 feet. THERNET NETWORK CONNECTION (E The Ethernet interface on your printer lets you connect to an Ethernet network via one of two types of Ethernet cables: 10 BaseT, and 10 Base2 (Elite 1212 only). 10 B... -
Page 18: Serial Connections
Important: You need a connector kit for each device on the network. Therefore, you need two connector kits to connect the printer to one computer, and so forth. To plug in LocalTalk cables:... -
Page 19: Supported Network Protocols
TCP/IP is a networking protocol used by various vendors of network software. If you need to know more about these protocols, refer to the Elite 12 Series CD-ROM. You’ll also see how to connect your printer to make it available on other networks. - Page 20 9. I NSTALL PRINTING SOFTWARE Once you have the printer physically set up, you’ll install software on every computer that will use it. This includes: •Installing the printer driver on a Macintosh or Windows computer. •Installing PPD (PostScript Printer Description) and other files, if necessary.
-
Page 21: Macintosh Printing Software
SING THE LITE You must install GCC printer software on your Macintosh to use your Elite 12 printer. This software is on the Elite 12 Series CD-ROM that shipped with your printer. Follow the software installation instructions that correspond to your printer connection. - Page 22 7. The Elite 12 Software Installer window opens. • Unless you have special printing requirements, GCC recommends that you leave the setting at "Easy Install." Click the "Install" button at the bottom right of the dialog box and go to step 8.
- Page 23 10. A dialog box will ask you to restart your Macintosh. Click the Restart button. 11. Your Macintosh restarts. You’ve now completed the software installation. Continue to Part Two RINTER 12. In the "Elite 12 ppm Installer" window on your Macintosh screen, double-click the "Setup your GCC Printer" icon.
- Page 24 13. The "New Desktop Printer" dialog box opens. 14. Highlight the "Printer (USB)" item in the list. Click OK. 15. A dialog box called "Untitled 1" opens. 16. You will see two printer icons. Double-click on the icon in the "USB Printer Selection"...
- Page 25 17. A dialog box called "USB Printer" opens. Click on your printer model then click the "OK" button. 18. You will be returned to the "Untitled 1" dialog box. 19. Click on the "Auto Setup" button. 20. A window opens showing you the progress...
- Page 26 The installation is complete and you can now print to your GCC printer. 21 You return to the "Untitled 1" dialog box. The icon in the top section of the dialog box now shows your printer. 22. Click the "Create" button.
- Page 27 NSTALLATION FOR RINTERS Before installing this software, be sure that the printer is connected to the Mac using an appropriate cable and that both the printer and Mac are powered on. Also confirm that all the steps in the Hardware Setup section of this manual have been followed.
- Page 28 3. In the window on your Macintosh screen, double click the "Set up your GCC Printer" icon. 4. The "New Desktop Printer" dialog box opens. 5. Click on the "Printer (AppleTalk)" item in the list. Click OK.
- Page 29 7. There are two buttons marked "Change." Click on the lower "Change" button. 8. A dialog box called "AppleTalk Printer" opens. If you do not see your printer in the list choose the correct Zone. Click on your printer, then click the "OK" button.
- Page 30 The installation is complete and you can now print to your GCC printer. 11. A window opens showing you the progress of the installation. 12. You return to the "Untitled 1" dialog box. The icon in the top section of the dialog box now shows your printer.
- Page 31 NSTALLATION FOR RINTERS If you intend to use LPR, your GCC printer must be configured through its control panel. Your System Administrator may need to perform the installation. Before installing this software, be sure that the printer is connected to the Mac using the appropriate cable and that both the printer and Mac are powered on.
- Page 32 8. If a queue name is being used, contact your network administrator. 9. Click on the "Verify" button. If the printer is configured and the IP address is correct, the message "The printer is located at [the IP address you entered]"...
- Page 33 13. A dialog box opens, called "Select a PostScript Printer Description File." Choose your printer model from the list. 14. Click the "Select" button. 15. You return to the "Untitled 1" dialog box. The icon in the top section of the dialog box now shows your printer.
- Page 34 The installation is complete and you can now print to your GCC printer. 17. A dialog box opens which displays "Save desktop printer as:". You may rename the printer or accept the default name. Click the "Save" button. 18. Go to the menus at the top of the screen.
-
Page 35: Printing Software
Elite 12 Series CD-ROM. The CD-ROM includes customized Windows PostScript printer drivers for Windows 3.1 (and Windows for Workgroups), Windows 95/98 and Windows NT 3.51 and 4.0. It also has printer description files that let you use all the printing and paper handling features of the Elite 12 Series. - Page 36 “Using Add Printer” immediately following Plug and Play instructions. Windows 98 uses a Wizard to help you install printer software. A Wizard is a series of dialog boxes. In each dialog box you make configuration choices then click the Next button to move to the next dialog box.
- Page 37 4. You will see a dialog box saying that Windows 98 has found new hardware. The Add New Hardware Wizard appears showing the printer model to be installed. Insert Elite 12 Series CD-ROM. Click Next. 5. The Wizard will ask “What do you want Windows to do?”...
-
Page 38: Using Add Printer
SING RINTER To install the printing software without using Plug and Play, make sure that the printer is switched on, has paper, and is connected to the computer or network. Start your computer. 7. The Wizard will display the driver that it found. - Page 39 • If you select Local, click Next and go to step 4. • Select Network only if your printer is not attached directly to your computer. • If you selected Network, click Next and go to the next step.
- Page 40 • Click Next. 4. You’ll see the manufacturer/model selection dialog box. • This dialog box contains lists of printer manufacturers and their printer models. • Put the Elite 12 Series CD-ROM into the CD-ROM drive of your computer, wait for a few seconds.
- Page 41 6. You’ll see a dialog box with the names of one or more Elite 12 Series printers. • Select your Elite 12 Series printer model from the list. • If you selected Network in step 2, click Next and go to step 8. If you selected Local, click Next to go to the next step.
- Page 42 8. You will see the name printer dialog box. • You can enter a new name for your printer if you wish, or you can accept the default name. If there are printers currently installed on your system, you will be asked if you want to make this your default printer.
- Page 43 The installation is complete and you can now print to your GCC printer. 10. The software installation will now commence. You may be asked to insert either the Windows 98 CD-ROM, floppy disk or the Elite 12 Series CD-ROM. The kind of disk you need...
-
Page 44: Plug And Play Installation
“Using Add Printer” immediately following the Plug and Play instructions. Windows 95 uses a Wizard to help you install printer software. A Wizard is a series of dialog boxes. In each dialog box you make configuration choices then click the Next button to move to the next dialog box. - Page 45 Insert Elite 12 Series CD-ROM. Click Next. 5. The Wizard searches for your printer software and indicates that an updated driver has been found. Click Finish. 6. Go to step 8 in the “Using Add Printer” section.
- Page 46 SING RINTER To install the printing software without using Plug and Play, make sure that the printer is switched on, has paper, and is connected to the computer or network. Start your computer. 1. Click on the Start button in Windows 95.
- Page 47 • If you select Local, click Next and go to step 4. • Select Network only if your printer is not attached directly to your computer. • If you selected Network, click Next and go to the next step.
- Page 48 • Click Next. 4. You’ll see the manufacturer/model selection dialog box. • This dialog box contains lists of printer manufacturers and their printer models. • Put the Elite 12 Series CD-ROM into the CD-ROM drive of your computer, wait for a few seconds.
- Page 49 8. You’ll see the name printer dialog box. • You can enter a new name for your printer if you wish, or you can accept the default name. If there are printers currently installed on your system, you will be asked if you want to make this your default printer.
- Page 50 9. You’ll see the Print a Test Page dialog box. • Select “Yes” to print a test page now. • Click Finish.
- Page 51 10 The software installation will now commence. You may be asked to insert either the Windows 95 CD-ROM, floppy disk or GCC Elite 12 Series CD-ROM during this step. The kind of disk you need depends on whether Windows 95 was originally installed from a CD-ROM or from floppy disks.
- Page 52 • In some cases you may find that after you have inserted the Windows 95/98 CD- ROM in the drive and clicked OK, the printer installation does not continue and you’re prompted to insert the Windows 95/98 CD-ROM again. The installation process requires you to install files that are found on the Windows 95/98 CD-ROM or disks.
- Page 53 F YOU DO NOT HAVE YOU MAY BE ABLE TO COMPLETE THE INSTALLATION IN THIS WAY The pictures shown are specific to Windows 95 however, will apply to Windows 98. 95/98 INDOWS ON DISK OR 1. Click on the Browse button at the bottom right of the Copying Files dialog box.
- Page 54 F YOU DO NOT HAVE A You’ll see the Copying Files dialog box again. Make sure that you have the Windows 95/98 CD-ROM in the drive and continue the installation: 95/98 CD-ROM INDOWS 1. Click on the Browse button at the bottom right of the Copying Files dialog box.
- Page 55 GCC’s LPR utility configures your computer to send jobs by way of an LPR Port to your GCC Printer on the network. You no longer need to connect the printer using a parallel port. You can connect multiple printers on your network, as long as each printer has a unique IP address.
- Page 56 5. Press the On Line button to take the printer back on line. 6. If the printer already has an IP address you will see it in the TCP/IP part of the Interfaces section of the Configuration Page. If the IP address is 0.0.0.0 then an IP address has not been assigned.
-
Page 57: Lpr Utility
If you have installed an earlier version of the LPR utility, you must deinstall it before upgrading to a newer version. Use the deinstall.exe program in the GCC LPR folder on the Elite 12 Series CD-ROM, then restart the computer. - Page 58 Check connection button. 4. If the printer is recognized you will see a dialog box saying “Remote printer respond- ed.” Click OK in that dialog box. 5. Click OK in the Add LPR port dialog box. You will see a dialog box that tells you that the port was successfully created.
- Page 59 Windows. In order to print through the LPR Port you must restart Windows first. • You have now created an LPR printer port (assuming that you chose Yes in step 2). You will need to make changes in the printer’s properties before print jobs will be correct.
- Page 60 10. Choose the LPR port you created. 11. Click on the PostScript tab at the top of the dialog box. 12. Click on the Advanced button at the bottom of the dialog box. 13. In the Data format section of the dialog box, click on the button marked “Pure binary data.”...
- Page 61 15. Click on the General tab at the top of the dialog box. Click the “Print test page” button. 16. Click OK. After a few seconds, the printer will produce a test page. If you wish to add further printers using LPR see the next section.
- Page 62 DDING PRINTER PORTS USING THE If you did not create a printer port when you installed the LPR utility or you want to add another LPR port for an additional printer, you can do this in the Printer Properties dialog box.
-
Page 63: Printing With Dos
This DOS application is now ready to print. You can either print the job directly to the Elite 12 Series or print it to a disk file; later, you can send this file to the printer directly from DOS. - Page 64 The port you configure must be the same as the port that is specified in the DOS application. If you have used another printer to print from DOS, you may find that your AUTOEXEC.BAT file already includes one of the commands shown in the next sections.
- Page 65 DTR flow control is preferred because DOS has better support for it, as it matches the flow control preferred by Windows and thus provides more reliable communication when sending PCL jobs to the printer. To use DTR flow control, type the following MS-DOS command before printing: Note: You will need to change the Elite 12 Series’...
-
Page 66: Selecting A Printer Driver
Elite 12 Series at all available resolutions. We recommend that you use the LaserWriter II NTX printer driver if it is available with your applica- tion. If not, use LaserWriter II NT, LaserWriter Plus, or LaserWriter. Refer to the application’s documentation for more information. - Page 67 The binary mode switch /B is needed so that all control characters are sent to the printer as data. : GCC recommends that you don’t use the DOS PRINT command. Although this command can allows you to continue using DOS while the file is printing, it can not print files that contain certain control characters.
- Page 68 Maintenance and Troubleshooting section on page 87 of this guide. If you still have difficulty getting a document to print contact GCC technical support at 781.276.8620 (U.S. only; outside the U.S. refer to the back cover) or...
- Page 69 DDITIONAL 12 S LITE ERIES ONTS DDING EMORY CD-ROM W SING SING THE ULTI AINTENANCE NFORMATION ONTROL ANEL RINTER DOBE CROBAT URPOSE EEDER ROUBLESHOOTING...
-
Page 70: Ontrol Panel
LITE NTRODUCTION TO THE You use the Elite 12 Series control panel to get information about your printer and to adjust specific printer functions. It includes an LCD display window, four LED's that show the status of the printer at all times, and eight push buttons. For more detailed information on the control panel, see the Elite 12 Series CD-ROM. -
Page 71: Control Panel Function Keys
ONTROL PANEL FUNCTION KEYS INE KEY You use the On Line key to switch the printer between being on line or off line. The printer is normally on line – that is, ready to receive data from computers and print it. If you need to use the control panel menu system, you must set the printer off line. - Page 72 ENU KEY You use the Menu key to get to the menu system. First, you must press the On Line key to take the printer off line. You can only get to the menu system when the printer is off line.
- Page 73 Enter key to access the submenus, and then press the Menu key repeatedly to cycle through the submenus. Press the On Line key at any time to exit the menu system and place the printer on line. 12 S LITE ERIES MENU SYSTEM The menu system consists of nine main menus.
-
Page 74: Using True Type Fonts
Fonts come in several formats. You can use PostScript (Type 1 format), TrueType PCL 5 fonts with your printer. There are 35 PostScript fonts and 15 PCL fonts in the printer’s hardware. The Elite 12 Series CD-ROM installs these fonts onto your computer when you install the rest of the printer software. -
Page 75: Downloading Fonts
When fonts are manually downloaded to the printer, they remain in the printer’s RAM and available for all print jobs sent to the printer for as long as the printer is switched on; the fonts are removed from RAM when the printer is switched off. For more information on downloading fonts, see the Elite 12 Series CD-ROM. -
Page 76: Adding Memory To Your Printer
GCC. Use only EDO (extended data out) or FPM (fast page mode). You cannot use DIMMs, SDRAM, or other special RAM technologies. Do not use gold plated connectors. - Page 77 (A). If these are tight, you may need to use a #2 Phillips screwdriver. 7. Reach inside the case. Pull the edge of the cover (B) toward you, then move the cover away from the rest of the printer to prevent it from latching again.
- Page 78 (C). Lift the edge of the cover next to the top cover; this unlatches the cover, and you should be able to slide the cover away from the printer. 9. IMPORTANT: Attach a grounding wrist strap to the perforated metal chassis, or touch the chassis regularly to dissipate static electricity from your body.
- Page 79 SIMM Socket Notch Remove SIMM 10. The ROM and RAM cards are at the right of the controller board. Remove the ROM card to get better access to the RAM slots. (Your controller board may vary from the one shown) SIMM a.
- Page 80 SIMM. Warning: If the RAM SIMM and ROM card are not correctly inserted completely into the socket, your printer may display an error message when you turn it on, and it will not operate. 13. If you are having trouble inserting the SIMM or ROM card: •...
- Page 81 Don’t tighten the thumbscrews. Turn on the printer and wait to see if the control panel shows the “Ready” message. If it does, turn the printer off and go on to the next step. • If the “Ready” message doesn’t appear, turn off the printer and remove the cover.
- Page 82 If this figure is not the same as the total amount of RAM, turn the printer off, and remove the side cover. Now carry on from step 14 in the previous steps, starting from “If the ready message doesn’t appear .
-
Page 83: Updating Windows Drivers
4. You’ll see the Properties tabbed dialog box; click on the Device Options tab. 5. At the top of the dialog box is a section marked Available printer memory (in KB). Enter the suggested virtual memory into this box, and click OK. - Page 84 You’ll see the Properties tabbed dialog box; click on the Device Options tab. In the window, click on Virtual Memory. Enter the suggested virtual memory figure into the box, and click OK. Repeat the preceding six steps on every Windows NT 4.0 computer that uses the printer.
-
Page 85: Opening Documents With Acrobat Reader
CD-ROM SING THE This installation guide is intended for you to set up your printer. The CD-ROM contains more information about your printer, in Adobe Acrobat format files. The CD-ROM comes with Macintosh and Windows versions of the Adobe Acrobat Reader program; you can install this program on your computer and read the documents on the CD-ROM. - Page 86 You can also use the tool bar buttons to move from page to page. The GCC manual has a table of contents with underlined entries in red; click on these to go to that section of the manual.
-
Page 87: Using The Multipurpose Feeder
SING THE MULTIPURPOSE FEEDER The multipurpose feeder holds up to an extra 80 sheets of 20 lb. copier-style paper, 40 trans- parencies, 40 sheets of labels, 10 envelopes or 25 postcards. You can also manually feed single sheets of paper or other media. The multipurpose feeder handles the following paper sizes that can also be placed in the main paper tray: •... - Page 88 IE S GCC strongly recommends that you use the straight-through paper path when printing envelopes (see next section). When you close the multipurpose feeder, first move the paper guide back to the right side. Then fold the extension and slide it back into the main part of the feeder. Now close the cover;...
-
Page 89: Maintenance And Troubleshooting
Paper path jam • Paper exit jam You must clear the jam, and open and close the printer’s top cover to reset the printer and resume printing. APER FEED JAM This usually happens when paper is misfed from the paper tray. If you remove the paper tray you should see a loose sheet of paper. - Page 90 5. Check the “Paper Jam Checklist.” below. 6. Replace the paper tray in the printer (if necessary) and close the top cover of the printer. After a minute or so the printer will warm up and resume printing.
- Page 91 IF THIS PRINTS SUCCESSFULLY F NOT TRY PRINTING FROM ANOTHER APPLICATION THE PRINTER SOFTWARE IS NOT INSTALLED CORRECTLY CHECK THE CONTROL PANEL TO MAKE SURE THAT THE PRINTER IS TRY REPLACING IT INSTALL THE PRINTER FONTS THIS PROBABLY MEANS IF THIS PRINTS...
-
Page 92: Service And Support
GCC’ ORLD GCC’s Web site offers a wealth of information. The full manual for the Elite 12 Series of printers is here, along with technical bulletins that deal with any problems that arise over the life of your printer. Check www.thevirtualprinterstore.com to see if your problem has a solution. -
Page 93: Software License Agreement
Software will automatically terminate upon your failure to comply with any provision of this License Agreement or upon GCC’s election to terminate the License as set forth below. You agree upon such termination to destroy all copies of the Software which you have and to mail your original Software diskettes and the Documentation to GCC. -
Page 94: Limited Software Warranty
GCC and you with respect thereto. Should you have any questions concerning this License Agreement, the Software or the Documentation, you may contact GCC by writing to Customer Service, GCC Technologies Inc., 209 Burlington Road, Bedford, MA 01730-9143. For the name of the nearest GCC service center or representative, call (800) 422-7777. - Page 95 GCC Technologies, Inc. (“GCC”) warrants, for the limited period of one year from the date of original purchase, the Elite 12 Series sold by GCC and any accompanying media on which GCC software is recorded (the “Product”) to be free from defects in materials and workmanship.
- Page 96 O ORDER SUPPLIES OR ACCESSORIES VISIT OUR WEBSITE THEVIRTUALPRINTERSTORE GCC S 1.800.422.7777 ALES AT OUTSIDE ORTH MERICA CONTACT YOUR LOCAL OFFICE INTERNET & SALES SUPPLIES SUPPORT THEVIRTUALPRINTERSTORE AUSTRALIA 5/585 Blackburn Road Notting Hill, Melbourne, VIC, 3168 Tel: +61 3 9562 1800...
Need help?
Do you have a question about the Elite 12/1200N and is the answer not in the manual?
Questions and answers