Table of Contents
Advertisement
Quick Links
8/31/22, 1:52 PM
User Guide
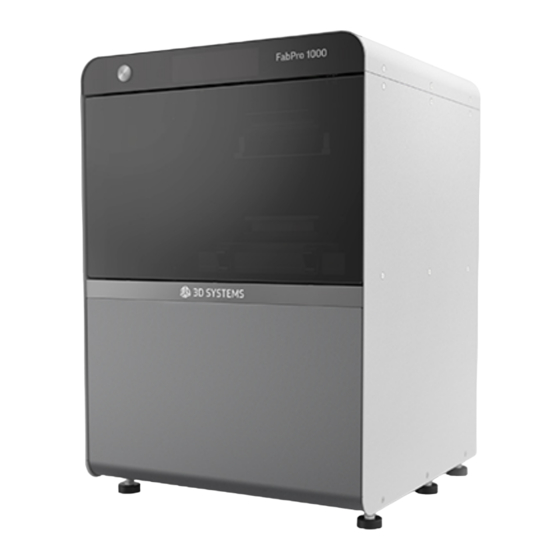
F a b P r o 1 0 0 0 ®
User Guide
Rev. D, P/N 45-D32
Original Instructions
NOTE: Use this page to print the User Guide as a whole. Scroll down to the bottom of the page and click the
document.
NOTE: Please refer back to
infocenter.3dsystems.com/fabpro1000/print/book/export/html/526
button. On the page in the new tab, press ctrl+P (cmd+P on Mac) to print the
support.3dsystems.com/fabpro/
User Guide
for the most up-to-date User Guide
1/111
Advertisement
Table of Contents

Related Manuals for 3D Systems FabPro 1000


Summary of Contents for 3D Systems FabPro 1000
- Page 1 8/31/22, 1:52 PM User Guide User Guide F a b P r o 1 0 0 0 ® User Guide Rev. D, P/N 45-D32 Original Instructions NOTE: Use this page to print the User Guide as a whole. Scroll down to the bottom of the page and click the button.
- Page 2 Under the copyright laws, this user guide may not be copied, in whole or in part, without the written consent of 3D Systems. The FabPro™ logo is a trademark of 3D Systems and is registered in the U.S. Use of this logo without the prior written consent of 3D Systems may constitute trademark infringement and unfair competition in violation of federal and state laws.
- Page 3 8/31/22, 1:52 PM User Guide The Licensed User also undertakes to notify 3D Systems promptly in the event that it considers any of the data contained in this document to be incomplete or erroneous in any respect, in connection with Licensed User’s particular or general use.
-
Page 4: Important Safety Information
Certi ed Service Personnel Certi ed service personnel are those who have completed the 3D Systems service training package, and are certi ed to perform service tasks on the NextDent 5100 Printer. Certi cation may occur at various levels, and certi ed service personnel should only perform tasks they are authorized and certi ed to complete. -
Page 5: Environmental Safety
This can be done by unplugging the machine. Safety Symbols and De nitions The following are safety symbols that are common to 3D Systems guides. Some or all of these symbols may appear in this guide and/or in other FabPro 1000 documentation. -
Page 6: Safety Sensors
It is recommended to wear safety glasses and protective clothing. Protective clothing includes, but is not limited to: closed-toed shoes, full-length pants, and splash-resistant lab coats or equivalents. 3D Systems recommends using 100% nitrile gloves; however, other chemical-resistant gloves will su ce. Do NOT use latex gloves, as they do not provide complete chemical protection. - Page 7 Give the disposal service provider a copy of the material’s SDS to help them determine your disposal needs. 3D Systems assumes no liability or responsibility for proper disposal of the uncured material. Proper disposal of the uncured material is the sole responsibility of the user.
- Page 8 The expiration date of the product is mentioned on the product label. Expired material may not perform as expected, and in some cases loses its certi cation as a medical device for its printed parts. 3D Systems is not responsible for losses incurred as the result of improper storage of print material.
- Page 9 NextDent prints. For non-Dental materials, use of very old material, or material past its expiration date, is possible; but it may shorten your in-service material life (see below). Use of expired materials may also result in suboptimal printing results. 3D Systems does not assume responsibility for failed builds due to use of expired material.
-
Page 10: Electrical Safety
8/31/22, 1:52 PM User Guide Care should be taken when cleaning windows, panels, and other parts of the printer. Cleaning products that contain ammonia should not be used because they can contaminate the material. Instead, use a small amount of recommended solvent on a paper towel to clean up spills. Accidental contamination of materials may change the material’s performance characteristics to such an extent that acceptable parts can no longer be reliably created. -
Page 11: Safety Notice
All service to the projector process machine, the embedded optical system, and other components requiring removal of printer panels shall only be performed by 3D Systems Corporation service personnel, their authorized agents, or personnel who have been service trained by 3D Systems Corporation. - Page 12 8/31/22, 1:52 PM User Guide The numbers in Item column below correspond to the numbers in the images that follow. Item Description Label System Label, printer - Contains system information and certi cation symbols UV-Warning Sticker/Moving Parts Sticker UV Light - Do not look directly in the light. May be harmful to the eyes Moving Parts - Hazardous moving parts.
- Page 13 8/31/22, 1:52 PM User Guide Item Description Label Remove print tray and glass base before moving printer. Printer Label Placement infocenter.3dsystems.com/fabpro1000/print/book/export/html/526 13/111...
-
Page 14: Build Chamber
8/31/22, 1:52 PM User Guide Overview Printer Door - This door must be closed during printing. It has UV-resistant glass to protect the observer from the UV radiation emitted by the projector. It also prevents outside light from getting in the build chamber during printing. Power/Navigation Button - Turns machine on/off and serves as the control for printer functions. -
Page 15: Print Tray
8/31/22, 1:52 PM User Guide Elevator Arm - Moves the print platform up and down the elevator during printing Print Platform - The platform on which the printed part attaches during printing Elevator Lead Screw - Moves the elevator arm up and down when it turns Elevator Rails - Guide the elevator arm on a straight path Print Tray... -
Page 16: Part Cleaning
8/31/22, 1:52 PM User Guide Toggle Case Locks - These four locks keep the print tray in place during part building, and also tension the print-tray lm over the glass print base. The female ends of these locks are on the print tray. The males ends are on the tilt tray. - Page 17 8/31/22, 1:52 PM User Guide Plastic tubs with lids, ultrasonic cleaner. The image of the ultrasonic cleaner is for sample purposes only and is not a recommendation or endorsement of any brand of ultrasonic cleaner. Part Drying After cleaning the part(s), it necessary to dry them of any solvent used in the cleaning step. This may be done in several ways, but a few recommended methods follow: For all parts, be sure there is an absorbent cloth/paper towels or container underneath the part to catch the solvent being dried off.
- Page 18 8/31/22, 1:52 PM User Guide Power Button - Switches machine on/off Front Panel - Graphical User Interface for oven. This shows information about the lamps, the time left for curing, and error messages. Oven Lid - Insert a printed part through this top opening. The lid has a safety interlock that stops the oven when the lid is open.
- Page 19 8/31/22, 1:52 PM User Guide LC-3DMixer front LC-3DMixer back Mixing Timer - Shows the duration of material mixing Time Increase - Increases the duration of mixing Time Decrease - Decreases the duration of mixing Start/Stop Button - Starts and stops bottle mixing Bottle Rollers - Rest the material bottles in between each of the pairs of rollers (please see the image below) Power Button...
- Page 20 8/31/22, 1:52 PM User Guide Speci cations and Requirements Printer Total Printer Footprint (xyz) 43 x 43 x 61.2 cm (16.9 x 16.9 x 24.1 in) Printer Weight 37.5kg (82.7 lbs) Net Build Volume (xyz) 125 x 70 x 120 mm (4.92 x 2.76 x 4.72 in)* Native Resolution (xy) 65 micron (390.8 effective DPI) Layer Thickness...
- Page 21 8/31/22, 1:52 PM User Guide The table below lists the FabPro print materials that are currently supported on the FabPro 1000 printer, as well as the properties of cured parts printed with these materials. Please note that not all properties in the table below apply to every material.
- Page 22 8/31/22, 1:52 PM User Guide Material Property FabPro™ FabPro™ FabPro™ FabPro™ FabPro™ Proto JewelCast GRN Tough Elastic Flexible BLK Please see Special Considerations for Flexible Izod Notched 23 J/m 36 J/m 43 J/m (0.8 ft- Impact Strength (0.4 ft- (0.7 ft- lb/in) lb/in)
- Page 23 8/31/22, 1:52 PM User Guide NOTE: The printed-part mechanical properties will return to standard when parts dry completely (back into the 10-65% RH range) and are at standard room temperature. In the case of the effects of exposure to high humidity, return to standard properties could take a day or two. ...
- Page 24 8/31/22, 1:52 PM User Guide The table below lists the NextDent print materials that are currently supported on the FabPro 1000 printer, as well as the properties of cured parts printed with these materials. Please note that not all properties in the table below apply to every material.
- Page 25 8/31/22, 1:52 PM User Guide Material Expiration Date The following images show you where you can nd the expiration date on your material bottle. NextDent Material FabPro Material infocenter.3dsystems.com/fabpro1000/print/book/export/html/526 25/111...
-
Page 26: Facility Requirements
Material - gives you guidelines for proper storage, handling, and safety for FabPro/NextDent materials. Third-Party Equipment and Supplies - provides a summary of the optional equipment and supplies that 3D Systems recommends for e cient and complete part building, part processing, and nishing. 3D Sprint Software Included with the system is Sprint™ part preparation software. 3D Sprint™ is installed on a separate, customer-... - Page 27 NOTE: Starting the application through a remote connection does not utilize OpenGL hardware acceleration. Site Selection - FabPro 1000 This section provides the requirements and recommendations to determine the most appropriate location for a highly functional, e cient printer workspace, with room for other equipment and supplies. To help you choose a location, the Initial Site Survey Checklist...
- Page 28 8/31/22, 1:52 PM User Guide Part 1 Space Requirements User preferences, building codes, and equipment con guration will help you to de ne the total platform area that your printer will need. The FabPro system should be located in an environmentally controlled room. Locate the secondary post-processing equipment and supplies in the same room or in an adjoining room, if possible. The gure below shows an ideal site con guration that minimizes the required movement of parts after part building.
- Page 29 8/31/22, 1:52 PM User Guide printer dimensions Floor Area and Surface You will need to place the printer on a table or countertop that is at a comfortable level for working with the printer. The printer has been designed to work will with normal table and countertop heights. Floors and counter spaces in the FabPro work area should be non-porous and suitable for cleaning with solvents.
- Page 30 8/31/22, 1:52 PM User Guide Printer: 24VDC, 3.75A, 90W With Adapter: 100-220 VAC, 50/60Hz, 2A Power for the printer must be on a surge-protected circuit. UPS (Uninterruptible Power Supply) usage, while not required, is recommended in areas where power uctuations are frequent, as surges and spikes can cause damage to electronic components, and loss of power can result in failed builds or potential damage to the FabPro system. For speci c information on a suitable UPS, contact a UPS manufacturer and provide the voltage rating, current draw, and desired backup time.
- Page 31 Dedicated telephone lines are not required for normal operation of an FabPro system. However, you may wish to install a dedicated telephone line in the FabPro system installation area to facilitate discussions with 3D Systems Customer Service personnel while the machine is in operation, should the need arise.
- Page 32 8/31/22, 1:52 PM User Guide 1. The further the distance the build part is being moved from the printer to the post-processing area, the longer the opportunity for the build part to get damaged by dropping, bumping into objects, and other environmental factors. 2.
-
Page 33: System Delivery
54.9kg (121 lbs). If moving the package by hand, rst remove the boxed printer from the pallet. You will then need to team-lift it. NOTE: While some printers from 3D Systems require a certi ed eld technician for installation, the installation of the FabPro 1000 is performed by the customer. -
Page 34: Shipment Arrival
8/31/22, 1:52 PM User Guide Shipment Arrival Shipment Contents The printer will arrive in a single box on a pallet. Before opening the shipping box, you should visually inspect the packaging for any damage it might have incurred during shipping. Please see the section Setting Up Your Printer for photos and descriptions of what comes in the printer box. -
Page 35: Third-Party Supplies And Equipment
Third-Party Supplies and Equipment 3D Systems™ provides this partial list of equipment and supplies/accessories that are useful for handling, processing or nishing FabPro parts. You should keep a list of preferred vendors for any 3D-print-related products you may order. Equipment and supplies are not limited to this list, as you may nd other products and methods that more suit your needs. -
Page 36: System Installation
8/31/22, 1:52 PM User Guide Cleaning Solvent - Cleaning solvents are used in cleaning printed parts, printer components, and areas where material has spilled. Please refer the Cleaning Chart to determine which solvent(s) to order. Safety Glasses (405 nm radiation blocking) with side shielding - The printer operator should not be exposed to hazardous radiation from the printer or curing oven. - Page 37 8/31/22, 1:52 PM User Guide regulatory requirements and laws, particularly those that relate to usage of hazardous chemicals, UV radiation, and disposal of regulated material. The printer complies with CE requirements. NOTE: You are responsible for determining whether additional supplies and equipment are necessary according to local, state, federal or other regulatory laws that govern your location.
- Page 38 8/31/22, 1:52 PM User Guide Each material has a different chemical makeup that gives it the desired properties as a solid 3D part. As such, each material has its own set of instructions regarding safety, usage in the printer, post-processing, and usage of parts printed with it. Please read the SDS and Instructions for Use that came with each of your material bottles to ensure that you understand each material's unique needs.
-
Page 39: Setting Up Your Printer
8/31/22, 1:52 PM User Guide Setting Up Your Printer The following items and accessories are contained in the printer package. Printer Print Tray - This contains the print material during part building. It has a transparent membrane at the bottom of it that allows UV radiation to shine through and cure the print material. - Page 40 8/31/22, 1:52 PM User Guide Print Platform - The 3D-printed part adheres to the print platform during building Catch Tray - Prevents material spills from entering the lower build chamber Glass Print Base - This transparent plate sits under the print tray to keep tension across the membrane at the bottom of the print tray.
- Page 41 8/31/22, 1:52 PM User Guide FabPro™ Proto GRY Material (1kg) Contents of Finishing Kit Item Image Rinse Tanks and Lids - These containers are used for cleaning build parts of uncured material. each Putty Knife - Used to remove build parts from the print platform Scrapers - Used to scrape any residual cured material off the print-tray Tweezers...
- Page 42 8/31/22, 1:52 PM User Guide Flush Cutters - Used to cut supports off the printed part Rinse Bottle - 500mL - used to store the recommended solvents used in part cleaning. Also used to squirt solvent onto a printed part or printer component.
-
Page 43: Necessary Accessories
Optional Accessories LC-3DMixer - If your material requires machine mixing, this is the recommended bottle mixer and is supplied by 3D Systems. Please see the section Stir the Material for more information. infocenter.3dsystems.com/fabpro1000/print/book/export/html/526... -
Page 44: Unpacking The Printer
Low Workbench - To sit your printer on top of and store frequently used tools. Work benches are not supplied by 3D Systems. Please purchase this from your local supplier. This image is for example purposes only and is not a recommendation or endorsement of any brand of... - Page 45 8/31/22, 1:52 PM User Guide 1. Remove plastic, packing belts, and packing tape using a razor. Open top of package (1) 2. Observe the contents in the top of the box: a. Documents in the box b. Finishing kit c. Power cord (country speci c) 3.
- Page 46 8/31/22, 1:52 PM User Guide 4. Remove the nishing kit and open it up. Inspect the contents against the items listed below. Ensure that all items are accounted for in their expected quantities. a. Rinse Tank 1 - contains diagonal cutting pliers, nitrile gloves, and resin mixer b.
- Page 47 8/31/22, 1:52 PM User Guide 7. Inspect the printer for any damages. If you observe any damages, cease unpacking and contact your authorized print-material provider immediately. If the printer does not have any damage, proceed to Step . Team-lift printer off pallet and move it to its staging area. 9.
-
Page 48: Install Print Platform
8/31/22, 1:52 PM User Guide 10. Open printer door. Remove foam from underneath the tilt tray. 11. Connect power cord and adapter together and connect to printer. Plug adapter into wall outlet. 12. If you wish to send jobs to the printer over a network, connect the Ethernet cable to the printer. - Page 49 8/31/22, 1:52 PM User Guide 1. Install the print platform in the machine, using the guides on either end of the elevator platform to guide the print platform into place. 2. Push down the handle to lock the print platform in place. NOTE: The printer checks if the print platform is present and if the handle is locked down.
- Page 50 The lm in the bottom of the print tray will wear out over time, even if it is not speci cally damaged. When this happens, the lm cannot be replaced by itself; the whole tray must be replaced. In 3D Systems testing, the expected life of the print tray has been determined to be whichever of these events comes rst:...
- Page 51 8/31/22, 1:52 PM User Guide After the printer powers on for the rst time, you may use the Power Button to switch it on and off. Please see the section Power the Printer On/Off for more information. infocenter.3dsystems.com/fabpro1000/print/book/export/html/526 51/111...
- Page 52 IP address (showing on the printer display) in the Find by printer IP eld and press Enter. 4. Click the FabPro 1000 icon. Click Next. 5. Click the icon of the print material you will use in your build. Click Next.
- Page 53 8/31/22, 1:52 PM User Guide . Click the icon of the print mode you will use in your build. Click Next. 7. Click the icon of build style you will use in your build. Click Set. Update Printer Firmware Whenever you open 3D Sprint, as long as the FabPro 1000 is set as your default printer, the system will always check to see if your printer has the most up-to-date rmware.
- Page 54 8/31/22, 1:52 PM User Guide 3D Sprint Tutorial Videos This section provides instructional videos for common functions you will perform in 3D Sprint for the FabPro 1000. Videos not available o ine. Accuracy Wizard To help ensure exact scaling of your printed parts, you may use the Accuracy Wizard in 3D Sprint.
- Page 55 8/31/22, 1:52 PM User Guide 4. In the Wizard, you will see the following buttons, depending on whether 3D Sprint is connected to the printer: a. If you are using the Standard Build Style, click Add Reference Build to Queue. Doing this will automatically create a .pxl le with four standard parts and submit it to the print queue.
- Page 56 8/31/22, 1:52 PM User Guide . Open 3D Sprint again and click the Scale & Offset Wizard button to open it. This time, instead of adding a reference build le to the queue, you will click the Next button. 7. Measure the parts printed in Step 6 with calipers or a micrometer in the X and Y directions.
- Page 57 Material Updates From time to time, 3D Systems will launch new FabPro Print Materials. The material will launch alongside a 3D Sprint database update, which will allow for selection of that material in 3D Sprint. The update will also add a new Build Style for the material, custom-made by 3D Systems for optimum printing results.
-
Page 58: Printing Process
8/31/22, 1:52 PM User Guide Printing Process This section describes the printing process, from powering on the machine through to starting a print job. Power Button The power button on the printer not only powers the printer on, but also: 1. Uses LEDs of different colors to indicate different system conditions 2. - Page 59 8/31/22, 1:52 PM User Guide NOTE: If this is the rst time you have used the printer, you will see a message on the printer screen asking you to activate your printer. In 3D Sprint, ll out your information and click Submit. ...
- Page 60 CAUTION: If you use expired material of any kind, the integrity of the build might be compromised. 3D Systems is not responsible for failed builds or damage to equipment resulting from expired print-material use. CAUTION: If you are disposing of the expired print material, do so according to all local, state, and federal regulations.
- Page 61 8/31/22, 1:52 PM User Guide 7. Before pouring the material into the print tray, be sure you do the following: a. Shake the bottle vigorously in an up-and-down motion for 2- 5 minutes (1) OR mix the material on the NextDent LC- ® 3DMixer (2). Which mixing method to use for a material, as well as how long it must be mixed, can be found in the material's Instructions for Use.
- Page 62 8/31/22, 1:52 PM User Guide . Pour material into the print tray. Use the steps etched in the side of the print tray as a guide, with the bottom step being the minimum ll amount and the top step being the maximum ll amount.
- Page 63 8/31/22, 1:52 PM User Guide Submit job via USB? 1. Insert USB drive into the USB port on the left side of Hold button to the printer. You will see the message at the right. You continue may cancel the job submission at this point by pressing the power button once.
- Page 64 8/31/22, 1:52 PM User Guide Job ready 5. If you submitted a build le in Step 4a, this will begin Hold button to start the printing process. You will see the screen at the right. . Continue with Step 4 from the previous section Print via 3D Sprint. ...
- Page 65 8/31/22, 1:52 PM User Guide the print tray, and post-curing time. The curing time is included so the chart may be a quick reference guide for stirring and curing materials. Please read your material's label to be sure whether or not the material requires mixing and stirring.
- Page 66 8/31/22, 1:52 PM User Guide NOTE: Instead of using the bottle mixer, you may opt to mix the material bottle by hand, shaking it vigorously in an up-and-down motion. Shake it for ve minutes for a new material or for one you are treating as new (see above note).
- Page 67 8/31/22, 1:52 PM User Guide Holding the mixer slanted, run it back and forth through the material, careful not to put too much pressure on the print- tray lm. Do this for the time prescribed in the Material Stirring and Curing Chart. CAUTION: Putting too much pressure on the print-tray lm can dent or puncture the lm, rendering the tray unusable.
-
Page 68: Post Processing
8/31/22, 1:52 PM User Guide Post Processing Introduction Once your 3D build has completed, the part on the print platform is considered green until it has been through post- processing. A green part must be handled with 100% nitrile gloves at all times. This section describes how to post- process the part, rendering it safe to handle without nitrile gloves. You will need lint-free paper towels to catch material that may drip from the part, recommended solvent, and two cleaning tubs (included). -
Page 69: Cleaning Chart
8/31/22, 1:52 PM User Guide 1. Using included platform scraper or similar tool, carefully scrape the part off the print platform. 2. Using your hands, pliers, or dental/jewelry tools, remove the base and other supporting architecture from the part. Clean Printed Parts - Introduction The following equipment is needed to clean parts produced on the printer: 1. - Page 70 Then you must discard the dirty solvent according to all local, state, and federal regulations. NOTE: For FabPro branded materials: for the rst bath, 3D Systems' EZ Rinse C solvent is also suitably effective.
- Page 71 8/31/22, 1:52 PM User Guide TIP: The clean IPA that becomes saturated according to the number of builds in the chart above should then be used for the rst ("dirty") IPA bath until the max number of builds has been reached again. WARNING: ETHANOL AND IPA ARE FLAMMABLE AS BOTH LIQUID AND VAPOR.
- Page 72 8/31/22, 1:52 PM User Guide . Inspect the part(s) closely to make sure no liquid material remains. Pay particular attention to shiny areas, as they may indicate the presence of liquid material. If you are unsure if liquid material remains, it is best to repeat Step 7. You may also need to use the included Part-Cleaning Brush, dipped in solvent, to clean part surfaces and ne features.
- Page 73 8/31/22, 1:52 PM User Guide 3. Place 1st Bath container inside the ultrasonic cleaner. 4. Follow the instructions in your ultrasonic cleaner's User Guide to power it on and begin cleaning. Follow the instructions in the Cleaning Chart for how much time is required for this rst bath.
- Page 74 8/31/22, 1:52 PM User Guide NOTE: Solvents must be disposed of according to all state, local, and federal regulations. Dry the Build Parts For information on the different methods for drying build parts, please see the section Air-Drying Parts. For any drying method, please use the following guidelines: 1.
- Page 75 8/31/22, 1:52 PM User Guide 1. After the part is completely dry, insert the part into your UV oven in the same orientation it was printed in, as if the bottom of the curing oven is the print platform. Please see the image below for reference. CAUTION: Use nitrile gloves whenever touching or operating the LC-3DPrint Box.
- Page 76 8/31/22, 1:52 PM User Guide WEAR GLOVES: ALWAYS WEAR 100% NITRILE GLOVES WHENEVER HANDLING A PRINTER COMPONENT THAT HAS BEEN IN CONTACT WITH LIQUID MATERIAL, EVEN IF YOU HAVE CLEANED THE COMPONENT. IF THE COMPONENT MUST BE HANDLED WITHOUT GLOVES, YOU MUST FIRST PLACE IT IN A UV- CURING OVEN FOR THE TIME SPECIFIED FOR THE MATERIAL IT HAS BEEN IN CONTACT WITH.
- Page 77 8/31/22, 1:52 PM User Guide 2. Lift the print tray up and out of the printer, careful not to spill any material that is inside. Clean Print Tray If you are not building again for a long period of time, it is best to empty the print tray and clean it to prolong the life of the tray.
- Page 78 8/31/22, 1:52 PM User Guide Change Material Type ® The FabPro 1000 can print with many different FabPro™ and NextDent materials. Please see the sections FabPro Print Materials NextDent Print Materials for a full list of supported materials. This section describes the steps that are necessary to cease using one material type in the printer, and to begin using another material type.
- Page 79 8/31/22, 1:52 PM User Guide 3. Remove, clean, and reinstall the glass print base, as per the section Clean Glass Print Base. CAUTION: Ensure the glass print base is properly seated when you reinstall it. Failure to do so risks damaging the print-tray lm.
-
Page 80: Service And Support
UK and EMEA: +44 1442 279883 International: +1 803-326-3930 General Printer service procedures must only be performed by 3D Systems or an authorized printer reseller, unless this guide explicitly states otherwise. If your 3D printer system needs service, contact your authorized print-material provider. -
Page 81: Preventative Maintenance
To keep the printer in proper working order, it is necessary to perform certain procedures for preventative maintenance, procedures which you can perform and do not need to be performed by a certi ed 3D Systems eld engineer. The following section describes the most up-to-date preventative maintenance procedures. Any service procedures outside the scope of this document would need to be performed by your authorized print-material provider. - Page 82 8/31/22, 1:52 PM User Guide 2. After cleaning, be sure that the base is completely dry before inserting it back into the machine, so as not to contaminate the printer with cleaning solvent. Dry it with shop air or micro ber cloth. 3.
- Page 83 8/31/22, 1:52 PM User Guide 2. Wearing nitrile gloves, grab the back of the catch tray with one hand, and the front with the other. Lift the tray up (1) and then pull it slightly toward the front of the printer, until it rests on the chassis (2). ALWAYS WEAR 100% NITRILE GLOVES WHEN HANDLING THE CATCH TRAY, EVEN IF IT APPEARS THERE IS NO MATERIAL ON THE OUTSIDE OF IT.
-
Page 84: Cleaning The Printer
8/31/22, 1:52 PM User Guide 1. Place the catch tray on the middle of the chassis so that the concave part faces the back of the printer. 2. Slide the tray toward the back of the printer until the concave part drops into the opening and the at part of the tray is ush with the chassis. - Page 85 Please see the full list of user-replaceable parts in the Welcome Letter that came with your printer. NOTE: This list is subject to change at the discretion of 3D Systems. Please see fabpro.3dsystems.com for the most-up-to-date list of customer-replaceable components for the printer. Inspect All Cables and Connections 1.
- Page 86 8/31/22, 1:52 PM User Guide Run all printer diagnostics, as described in the section Printer Diagnostics. Running the Test-Print Diagnostic is optional during regular preventative maintenance. infocenter.3dsystems.com/fabpro1000/print/book/export/html/526 86/111...
-
Page 87: Troubleshooting
8/31/22, 1:52 PM User Guide Troubleshooting There are unique situations you may encounter when operating the printer. This section has compiled a partial list of these situations and methods of troubleshooting them. NOTE: Unless troubleshooting steps require the printer to operate, shut down the printer and unplug it before performing troubleshooting steps. - Page 88 In this case, remove the print tray and glass print base, and clean both components. Inspect the lower print chamber to see if material has spilled inside. If so, the printer must be returned to 3D Systems for cleaning.
- Page 89 8/31/22, 1:52 PM User Guide Issue Description Customer Troubleshooting Steps Shifting - layers on the printed This can be caused by: part have shifted in the X or Y Hardware direction Run elevator diagnostics. Observe the elevator motion throughout the whole process.
- Page 90 8/31/22, 1:52 PM User Guide Issue Description Customer Troubleshooting Steps Voids in printed part - holes or This can be caused by: empty spaces where there 1. Not enough material in the print tray. To prevent this, be sure to ll material shouldn't be back up to the minimum level speci ed in this guide before building.
-
Page 91: Hardware Issues
Wizard. Part not accurate in the Z In 3D Sprint, change the Scaling Factor Z eld under Build Styles. For direction assistance in testing the Z scale of your parts, contact 3D Systems Customer Service. Hardware Issues Issue Description... -
Page 92: Printer Diagnostics
Running these diagnostics can help both you and 3D Systems in determining the cause of potential issues with the printer. The following sections describe the different functions of Printer Diagnostics. You infocenter.3dsystems.com/fabpro1000/print/book/export/html/526... -
Page 93: Motor Diagnostics
8/31/22, 1:52 PM User Guide can enter this mode whenever the printer is powered on and in idle mode (not printing). Open Printer Diagnostics Printer Message Translation Press the power button twice to enter the "Printer Diag" Printer Diagnostics screen. - Page 94 8/31/22, 1:52 PM User Guide Moving Elevator 4. The elevator will move to its Home position and then Hold to abort hit its upper and lower limits. During this process, you will see the screen at the right. Diagnostic complete 5.
- Page 95 8/31/22, 1:52 PM User Guide Exit menu? Press the power button to see the the screen Hold button to exit at the right. Hold down the power button to exit. NOTE: Please see the section Diagnostics Messages for a full list and description of messages you may see during this process.
- Page 96 8/31/22, 1:52 PM User Guide Scan test a. If you see the "Scan Test Failed" message, press the failed power button to exit the diagnostic. This message could mean one of three things: i. The barcode you printed out from this page is corrupted.
- Page 97 8/31/22, 1:52 PM User Guide Printer Diagnostics 1. On the Printer Diag screen, hold down the power Hold button to button to get to the Motor Diag screen. continue Motor Diagnostics 2. On the Motor Diag screen, press the power button to Hold button to get to the Test Scan...
- Page 98 2. You are sending the printer back to 3D Systems for repairs. If this is the case, 3D Systems will send a replacement printer to you.
- Page 99 8/31/22, 1:52 PM User Guide 2. Remove and clean the print tray, as seen in the section Remove and Clean Print Tray. a. If you received and advanced-exchange printer, install the tray inside it, as per the section Install Print Tray. b. If you are moving your working printer to another facility, do not reinstall the print tray yet. You will need to remove and clean some other components rst.
- Page 100 8/31/22, 1:52 PM User Guide 5. On the damaged printer, or on the printer you are transporting, pour recommended solvent onto a nonabrasive cloth and wipe down all interior printer surfaces, even if it seems there is no material on them. Use the following as a checklist for cleaning the inside of the printer: Door...
- Page 101 8/31/22, 1:52 PM User Guide Repackaging Printer for Movement to Another Facility The following instructions describe how to repackage your printer with its original packaging for movement to another facility. For instructions on repackaging the printer for advanced exchange, please see the section Repackaging Damaged Printer for Advanced Exchange.
- Page 102 8/31/22, 1:52 PM User Guide 2. Place the outer box (1) over the printer and base packaging. 3. Place packing foam (2) over the printer in the orientation shown at right. One piece should go on the front of the printer and the other piece should go on the back of the printer.
- Page 103 8/31/22, 1:52 PM User Guide . Seal the outer box with packing tape, packing belts, and plastic if desired. Loop the packing belts through the planks on the pallet. Your New Printer Location When determining the best place for your printer in your new location, please remember to follow the guidelines outlined in the Facility Requirements section of this guide.
- Page 104 8/31/22, 1:52 PM User Guide If you are sending your printer to your authorized print-material provider for advanced exchange, please contact that provider to determine exactly what you need to package in with the printer for repair purposes. In general, you will only need to send back the printer itself.
- Page 105 8/31/22, 1:52 PM User Guide Printer Message Glossary This glossary summarizes all the messages you may see on the display of the printer, during the print process and printer diagnostics. Printer-Activation Messages These are messages related to activating your printer with 3D Sprint. For more information, please see the section Print via 3D Sprint.
- Page 106 8/31/22, 1:52 PM User Guide End of jobs list This message occurs when you skip over the last valid Hold button to exit build le in the list of print jobs on the USB device. QR Code Scanning Messages These are messages you may get related to the QR code scanning process. For more information, please see the section Begin Your Print Job.
- Page 107 However, you may choose to continue printing with the expired material at your own risk. CAUTION: 3D Systems is not responsible for poor print quality or for failed builds when expired print material of any kind is used.
- Page 108 8/31/22, 1:52 PM User Guide User stopped print This message occurs if you hold down the power Aborting button to con rm cancelation of a print job, as in the message above. If you abort the print job, you must: 1. Remove the print platform from the machine. 2.
-
Page 109: Diagnostics Messages
8/31/22, 1:52 PM User Guide Print complete Print has nished. Proceed to the steps in the section Post Processing. Clear platform Build le error Occurs when the print job is aborted due to a build le error. Diagnostics Messages These are messages that may occur during operation of printer diagnostics. For more information, please see the section Printer Diagnostics. - Page 110 8/31/22, 1:52 PM User Guide Warning This message occurs when the printer's tilt motor is moving during Tilt Motor Diagnostics. Moving tilt motor This message occurs when the elevator does not hit its Diagnostic complete upper and lower limits during testing. Press the power Elevator error...
- Page 111 [IP Address] 3D Systems, Inc. 333 Three D Systems Circle | Rock Hill, SC | 29730 www.3dsystems.com © 2022 3D Systems, Inc. All rights reserved. Rev. D, P/N 45-D32 infocenter.3dsystems.com/fabpro1000/print/book/export/html/526 111/111...
Need help?
Do you have a question about the FabPro 1000 and is the answer not in the manual?
Questions and answers