Table of Contents
Advertisement
Quick Links
Advertisement
Table of Contents

Related Manuals for GCC Technologies T500


Summary of Contents for GCC Technologies T500
- Page 1 232002080G(09)
- Page 2 Dear Madam and Sir, Thank you for choosing GCC and the LaserPro T500. You can be assured that this machine meets all of the highest safety standards while using technological innovations shared by no other laser engraver. The T500 is backed by GCC, a truly international company that is dedicated to help your business grow.
-
Page 3: Table Of Contents
Chapter IV - Setup and Installation ..........24 4.1 Machine Setup ..................25 4.1.1 Powering Up the Machine ..............25 4.1.2 T500 Power Cable Connection ............26 4.1.3 Exhaust Pipe Connector Installation ..........26 4.1.4 Air Compressor Installation ..............27 4.1.5 Water Chiller Installation (Only for 150/ 200W Models) ...... - Page 4 4.3.5 Using Autodesk Inventor with GCC LaserPro machine ...... 82 4.3.6 Using eCut with GCC LaserPro machine ........... 86 Chapter V - Operating the LaserPro T500 ........87 5.1 Using the Hardware ................87 5.1.1 Adjusting the LCD Display Screen’s Contrast Setting ......87 5.1.2 Laser Key Switch ................
- Page 5 8.3 Mirrors and lenses ................184 8.3.1 Cleaning the mirrors ................. 185 8.3.2 Cleaning the lens ................188 Chapter IX - Basic Troubleshooting ..........190 Chapter X - Appendix ..............191 10.1 Glossary .................... 191 10.2 LaserPro T500 Specifications ............192 232002080G(09)
-
Page 6: Chapter I - Safety
One of the key safety features found on the LaserPro T500 is a Class 2 red beam safety guidance pointer (similar to a laser-pointer presentation pen), allowing the operator to see the exact location where the laser beam will fire. - Page 7 In compliance with CDRH standards, the required warning labels are affixed at the time of manufacture to the LaserPro T500 in the appropriate locations. These labels are not to be modified in any way or removed for any reason. Please familiarize yourself with the specific labels and their locations on the machine.
- Page 8 232002080G(09)
- Page 9 CDRH Label This label indicates the class level of CDRH. Laser Path Warning Label LaserPro machines are very safe under normal functioning conditions. However, in case of any accident, Laser Path Warning Label will be affixed on the possible laser path. When operators are near by these paths should be careful of possible injury while machine is working.
- Page 10 Emergency Stop Label This label indicates the emergency stop button. You can find this label on the right upper side of the machine. Warning Label Warning Label is written with all the necessary information to be aware of in every operation. 232002080G(09)
- Page 11 Aperture warning stickers (mirror): This label indicates the laser path. Normally you can find this label inside of machine or laser exit. Please take extra caution of this area when you conduct maintenance or operate machine. Door open warning labels Protection Window Label This label indicates the protection wavelength.
-
Page 12: Safety Measures
1.5 Safety Measures 1.5.1 General Safety LASER RADIATION WARNING: Exposure to laser radiation may result in physical burns and severe eye damage. Proper use and regular maintenance of this machine is important to the safety of all people in the immediate area. ... -
Page 13: Safety Notice For Class 4 Machine
NOTE Each LaserPro laser machine is shipped with a single pair of safety goggles. If additional safety goggles are required, please contact GCC directly or an authorized GCC distributor. If you wish to purchase one on your own, please make sure the safety goggles meet these requirements: 9000-11000nm OD5+ Visible Light Transmission: 92.9%... -
Page 14: Operating Environment
1.6 Operating Environment Please follow the guidelines when considering a suitable location to set the LaserPro T500. Improper work environments may lead to operational malfunction and/or unsafe working conditions. The LaserPro T500 should be placed and operated in a standard office-type environment. -
Page 15: Operating Procedure For Water Cooled Model (150/ 200W)
1. Turn on the laser purge air compressor to make sure that air inside of laser source dry 2. Turn on water chiller and ensure laser source temperature steady. 3. Until water chiller temperature reach specified temperature, turn on the GCC laserPro T500 machine. -
Page 16: Chapter Ii - Unpacking & Contents
Chapter II - Unpacking & Contents 2.1 Unloading and Unpacking The LaserPro T500 is shipped in one crate that contains the machine, the software, and all of the necessary accessories. The following section contains detailed step-by-step instructions for unpacking and assembly of the machine. - Page 17 Step 4 Take out the wooden holding stick Step 5 Loosen the pink packing strips and remove them. Firstly push the lock on the strip down, and then pull it out to the top before you can loosen the strips. 232002080G(09)
- Page 18 Step 6 Unscrew the two step boards, take them out of the crate, and then turn them upside down. Step Boards Step 7 Place the two step boards at one end of the crate base to form a slope. 232002080G(09)
- Page 19 Step 8 Screw them to the crate base, and then unscrew the four holding stands of laser machine so that the machine can be moved with rollers. 232002080G(09)
- Page 20 Holding stand Step 9. Finally roll the machine out of the crate base Step 10. Remove the X-axis restraining strips Step 11. Save the crate for shipping in case any return service is needed. 232002080G(09)
-
Page 21: Contents And Accessories Checklist
Air Compressor 220V ( for T500 150/ 200W models only) Water chiller pipe - 7M (diameter:1/2 inch) * Only for 150SR/ 200F water cooled model Air Nozzle for 2” & 4” focal lens (only for T500 150/ 200W models) 232002080G(09) -
Page 22: Chapter Iii - Mechanical Overview
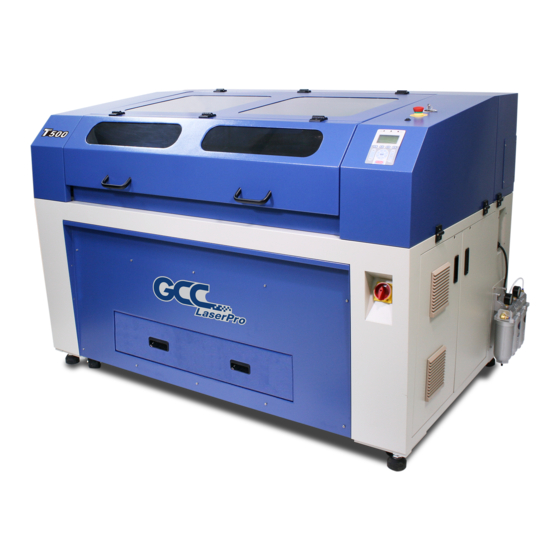
Chapter III - Mechanical Overview Please take some time to familiarize yourself with this section regarding the mechanical overview of the LaserPro T500. References will be made back to the different parts of the LaserPro T500 in later sections. 3.1 Front View... -
Page 23: Top View
3.3 Top View Laser Key Switch Emergency Stop Button SmartLight™ Switch Control Panel 3.4 Right (Profile) View Y Motor Access Panel Power Control Module Data Interface Main Board Module Water and Oil Filter Module Power Supply Module 232002080G(09) -
Page 24: Left (Profile) View
3.5 Left (Profile) View Access Panel Mirror #2 8” Exhaust Port Access Panel Mirror #1 1” Exhaust Port 3.6 Rear View SmartEXT™ Pass-Through Door (Rear) Air Pressure Adjust Valve Air/Water Laser Tube Connectors Module Water Pressure Regulator 232002080G(09) -
Page 25: Chapter Iv - Setup And Installation
Make sure both the laser machine and computer are turned off before connecting either to a power source. 1) Connect T500 laser system power cable to a quality surge protector and then connect the surge protector into a properly grounded outlet. -
Page 26: T500 Power Cable Connection
4.1.2 T500 Power Cable Connection T500 machine is equipped with the following power cord which is marked separately with G-Ground, N-Neutral, and L-Live. Please have professional technician to perform the power installation. Connect the Y shaped power cable to Electricity Outlet on the wall 4.1.3 Exhaust Pipe Connector Installation... -
Page 27: Air Compressor Installation
INSTALLATION T500 default design an 8” exhaust port for laser system down vacuum purpose along with a 1” port for the lens carriage exhaust suction. 1” pipe 8” pipe NOTE Powerful fume extraction system is helpful to cutting edge quality and reduces the maintenance frequency. - Page 28 (indicated by 2b). 3) Connect a ¼” tubing to the air tube fastener valve on the air compressor. 4) On the rear right side of T500 to locate both the Air-Assist Valve and Internal Power Sockets, as indicated below: Air Assist Valve for “Air...
- Page 29 Turn Counter- Clockwise to Air Tube decrease Connector airflow 7) Congratulations, you have finished setting up the air compressor. 8) Refer to PEN Page of T500 print driver in Chapter 5 for air assist control through print driver. 232002080G(09)
- Page 30 2. The purged air to laser tube is required to reach 0.34bar (0.34kg) for 200W laser source, and 0.21bar (0.21kg) for 150W laser source. There is extra air compressor unit comes with T500 150W and 200W models, this 2 compressor is used to prevent 150 & 200W laser tube from condensation.
-
Page 31: Water Chiller Installation (Only For 150/ 200W Models)
LaserPro T500 print driver and hardware control panel. Please refer to the LaserPro T500 print driver Pen Page setting in section 5.2.3.2 of this manual for details on how to enable and configure air-assist functionalities. - Page 32 NOTE 1. Water chiller setups need to be handled by professional technician. End users cannot process by themselves. 2. It is recommended to change the cooling water once every month. 3. Remove water from the water chiller if machine will not be operated for an extended period of time.
- Page 33 Step 5. Connect the outlet pipe from water pressure regulator to water in port on laser machine. Step 6. Connect the outlet pipe from laser machine to inlet port of water chiller Step 6 Step 5. Step 3 Step 4 232002080G(09)
- Page 34 WATER FILTER CONSUMABLE MAINTENANCE The water filter is suggested to change when it turns yellow or brown. Change water when replacing filter together. Use the plastic wrench from water chiller accessory to remove the bottom cap of the filter module when replacement is needed. III.
- Page 35 condensation). This is harmful not only to the electronic components but also bad for the optics inside the laser source and may cause damage. 4. WARRANTY CLAIM CONDITION Warranty will be voided if the laser source becomes defective due to improper operation of the cooling system by the conditions stated above.
- Page 36 CAUTION 1. DO NOT power on laser system without turning on water chiller and air compressor when operating T500 150 and 200W models. 2. Condensation will damage the 150W and 200W laser source, operate the water chiller and temperature setting according to manual.
- Page 37 Water Chiller Operation: Turn on the chiller power switch, wait until the chiller compressor finished operation, and go for following setting and operation. Step 1. Press ▲ then SET button for 5 seconds, the screen will show “0”, adjust the number to “8”. Step 2.
- Page 38 Step 6. Press RST button to save all the parameter settings and go back to the working display. How to restore the chiller to factory default setting? Turn off the chiller, press ▲▼ together and turn on the chiller at the same time till the screen shows “rE”, release all buttons now.
-
Page 39: Smartpoint
4.1.6 SmartPOINT LaserPro T500 SmartPOINT is a nice design for users to locate material when working on repeat jobs. With four red beam pointers, everyone can easily place the material right on the same place as they did before. 1) After completing the first job, do not remove your work on the table. -
Page 40: Adjustable Air Nozzle
NOTE T500 150 & 200W models comes with 6” focal lens and no air nozzle assembled on the lens carriage. The air nozzle is included in the accessory box to work with 2” or 4” focal lens when you purchase the lens as optional. -
Page 41: Manual Focusing Tool
4.1.8 Manual Focusing Tool Before starting a laser job, make sure correct focus distance is critical to a quality laser job. For this purpose, a focus tool is available in the accessory box. Using the focusing tool can help you to adjust the appropriate focusing distance. -
Page 42: Knife-Shaped Cutting Table
Unique cutting table with tipped bars that can be easily adjusted without tools to create different levels of working depths. The cutting table of T500 reduces laser reflections and delivers clear cutting edge. Five levels of supporting slots design on cutting table for Supporting bars. - Page 43 Place the Supporting Bars on different slot along with different focal lens, the acceptable maximum working piece will be varied. Please refer to below list. Without Aluminum Grid Cutting Table: Max. Working Piece Height 2"/4" Lens 6" Lens Slot #1 1"...
-
Page 44: Supporting Bar Spacer Option
4.1.10 Supporting Bar Spacer Option Optional Supporting Bar Spacers (228039960G) are developed to reduce the cutting slot depth and create more slots in same depth level which allow to install more supporting bars in same depth when supporting heavy working piece is required. NOTE ... -
Page 45: Supporting Pin Kit
4.1.11 Supporting Pin Kit Cutting job without the Supporting Pin Kit may have laser reflections to damage your art work while powerful laser hit the supporting table or the art work that cuts off may fall down and being damaged. Mount the cutting table bars, and lower the bars that you expect your laser cutting job will across. - Page 46 ========================================================== The supporting pin kit is exactly 1 level high to keep the material at the same height level. ========================================================== Mount your material on the supporting bars 232002080G(09)
- Page 47 Apply the Position Mode in the LaserPro driver to process your cutting job at where you expect to be. Material that cuts off has no reflections and will not damage by fell down. 232002080G(09)
-
Page 48: Aluminum Grid Cutting Table
4.1.12 Aluminum Grid Cutting Table LaserPro T500 laser machine comes with aluminum cutting table which helps to lift the work piece off the work table and support the piece with reinforced aluminum grid. The dust and vapor created during laser cutting are then taken away effectively through the grid by down vacuum exhaust. Rather than handling rigid materials, aluminum grid cutting table also helps to fix flexible materials with the aid of down vacuum to keep constant focus distance and consistent cutting result. - Page 49 Place the aluminum grid cutting table on the arranged supporting bars When cutting thick materials with T500 laser system, cover the aluminum grid cutting table with thin film over the whole work area which will create an excellent down vacuum for better cutting edge, place the work piece on top of the film with 10mm height spacer in between.
- Page 50 How to remove the aluminum cutting table: Utilize the Allen wrench in the T500 accessory box to lift up the aluminum grid cutting table from the work area. DO NOT use hand directly to take out the aluminum grid cutting table, you might get hurt by the edge.
-
Page 51: Connecting The Computer
4.2. Connecting the Computer The LaserPro T500 can communicate with a computer through a USB Port or LAN Port connection interface. Regardless of the connection method chosen, you will need to connect the respective connection cable from the LaserPro T500 to your computer. - Page 52 Step 3. Go to Windows <Control Panel> <Hardware and Sound> <Printer>, and right click on T500 printer to check printer properties. Step 4. Go to <Ports> tab of T500 printer properties, and select <Add Port>, and follow the instruction to enter the TCP/IP information received from laser machine control panel in step...
- Page 53 232002080G(09)
- Page 54 232002080G(09)
- Page 55 232002080G(09)
-
Page 56: Ethernet Connectivity Setup
4.2.2 Ethernet Connectivity Setup GCC laser engraver is built-in with LAN port to transmit data from PC to laser engraver with ease and higher speed instead of USB port option. Step 1. Connect LAN cable to the LAN port of GCC laser engravers and turn on machine Step 2. - Page 57 Step 5. Go to <Control PanelNetwork and InternetNetwork Connections> of computer, right click mouse on the connected internet device, and choose <Properties> Step 6. Choose the <Internet Protocol Version 4(TCP/IPv4)> and click <Properties> to open up the setting window. 232002080G(09)
- Page 58 Step 7. Enter the IP address and Subnet mask setting values, and choose <OK> Note the IP address 192.168.3.X (X value can be 1~255, while can’t be the same number as machine control panel setting in step 4) Step 8. Go to <Control Panel> <Device and Printers> of computer and right click on the laser machine printer, choose <Printer Properties>.
- Page 59 Step 9. Select <Add Pot> under Ports tab, and follow the instruction to enter the TCP/IP information in laser machine’s control panel in step 4. 232002080G(09)
- Page 60 232002080G(09)
- Page 61 232002080G(09)
- Page 62 Troubleshooting While users configure the Ethernet setting precisely with DHCP = OFF (assign the machine a static IP) referring to the manual, sometimes the communication might still not be able to work, at this time you can refer to below actions to have a basic troubleshooting with IT technician. Verify the IP addresses you are using to see if they are valid.
- Page 63 Type “ping x.x.x.x –t” after the prompt symbol, (x.x.x.x is the IP address you set on the laser machine, ie: 192.168.100.101)., press “Enter” to run the “Ping” tool. If the communication is OK between your PC and Laser machine, you will see reply from the destination IP.
- Page 64 Diagnostics a. For cases the communication is not ok (can’t get response, just have “Request timed out” from destination IP), you can look for two PC/Laptops which are original set in the LAN environment and work ok (they can get normal response from each other by the command “PING”), note down the TCP/IP configurations by running “ipconfig”...
-
Page 65: Usb Storage Setup
8G / 32G ADATA Step 1. Make sure the page setup and orientation is match GCC LaserPro T500. Please refer to Chapter 5.2.2 for page setup and orientation. Step 2. Open the file in graphics software and click File Print from menu bar, and the Print... - Page 66 Step 3. From the navigation bar Printer. Click T500. Step 4. Checking the Print to file checkbox and click the Print button. 232002080G(09)
- Page 67 Step 5. Select the save folder and define file name, then click “Save” to convert Step 6. Move the file to the USB flash drive Step 7. Insert USB flash drive to the USB Storage port of GCC laser engravers. 232002080G(09)
- Page 68 NOTE • USB storage function only supported for the PRN format, you can convert the file to PRN format from the GCC LaserPro printer driver. Step 8. Navigate the control panel through <F4> Function <File Management> <USB Drive File> Step 9. Choose the file and press Enter button from control panel to transmit the file to laser engraver. Step 10.
-
Page 69: Graphics Software Setup
4.3 Graphics Software Setup The LaserPro T500 is compatible with graphics software that can output HPGL commands, such as CorelDraw, Adobe Photoshop, AutoCAD, Illustrator etc. Supported Graphic Software Photoshop CorelDraw Illustrator AutoCAD Other software such as EngraveLab and PhotoGrav may work with the LaserPro T500, but these are not supported. -
Page 70: Installation Of The Laserpro Print Driver
Software The LaserPro T500 drivers are designed for Windows 2000, Vista, 7, 8, or newly developed operating systems. 4.3.2 Installation of the LaserPro Print Driver One Click Driver for 32bit and 64bits Insert the LaserPro CD. From the auto run menu, select T500 LaserPro Driver to start the LaserPro Print Driver installation. -
Page 71: Parallels Desktops (For Mac Os)
4.3.3 Parallels Desktops (for MAC OS) MAC users can use GCC LaserPro machines by purchasing the Parallels Desktop software which allows you to install Windows OS in MAC computers and run Windows based software under MAC computer and output with GCC print driver. (1) Purchase Parallels Desktops on its official website. - Page 72 (3) Read Software License Agreement and press “Accept” to continue installation (4) Enter your Mac OS X User Name and Password then press “OK” 232002080G(09)
- Page 73 (5) Press “Active” (6) Press “OK” when activation is complete. (7) Register Parallels Desktop 232002080G(09)
- Page 74 (8) Press “Register” and “OK” to complete the installation of Parallels Desktop. (9) Open Parallels Desktop (in the Applications folder) then choose File → New 232002080G(09)
- Page 75 (10) Press “Install Windows from DVD or image file” then press “continue” to install windows OS Select CD-ROM drive with the Windows installation CD (11) 232002080G(09)
- Page 76 (12) Enter the Windows OS product key Select how you would like to run your Windows program. (13) 232002080G(09)
- Page 77 (14) After the prior setting is complete the windows OS installation procedure will start automatically. Windows OS installation is complete then you can refer to “4.2. (15) 5 Installation of the LaserPro Print Driver” to install GCC LaserPro Print Driver. (16) Install the AP that you want to use after the above installation is complete.
-
Page 78: Using Adobe's Ap With Gcc Laserpro Machine
4.3.4 Using Adobe’s AP with GCC LaserPro machine The Adobe’s AP (e.g. Illustrator, Photoshop or Acrobat reader) processes files via its Advanced Printing Features; users should firstly deselect Enable Advance Printing Features; otherwise the machine is unable to recognize or read general files when uploaded. ... - Page 79 The click the Advanced tab, then deselect Enable Advanced Printing Features, now all files can be recognized and uploaded. File Transfer 1) Select your working object, and then at the upper toolbar please choose File Print. 232002080G(09)
- Page 80 2) At the print setup screen, at Print Preset please select Custom, and choose your printer (e.g. Spirit) 3) Then click on the lower left tab of Setup to enter Preferences settings. 232002080G(09)
- Page 81 4) After all preferences are set, click Print to send file to the machine for print out. 232002080G(09)
-
Page 82: Using Autodesk Inventor With Gcc Laserpro Machine
4.3.5 Using Autodesk Inventor with GCC LaserPro machine 1. Start drawing. 2. Delete border and title block by right clicking on sheet1 and selecting delete. 232002080G(09) - Page 83 3. Set sheet size to match working area of engraver. Engraver working area can be found on the paper tab of the windows driver. 4. Start sketch. 232002080G(09)
- Page 84 5. Engraving a. Finish sketch. b. Right click on sketch and select properties. c. Line Type: By Layer d. Line Weight: By Layer e. Set color to match one of the 16 colors available in the pen tab of the windows driver. 232002080G(09)
- Page 85 6. Cutting a. Finish sketch. b. Right click on sketch and select properties. c. Line Type: Continuous d. Line Weight: .001 in. e. Set color to match one of the 16 colors available in the pen tab of the windows driver. NOTE All objects created in one particular sketch will have the same properties meaning all will engrave or all will cut.
-
Page 86: Using Ecut With Gcc Laserpro Machine
4.3.6 Using eCut with GCC LaserPro machine eCut is an inexpensive and powerful plugin work under CorelDRAW or Illustrator software with GCC laser systems. It increases the functions Corel Draw or Illustrators doesn’t have or simplifies the operations workflow. eCut details and operation videos can be found on http://eng.e-cut.ru/ eCut unique feature list: - Nesting... -
Page 87: Chapter V - Operating The Laserpro T500
LaserPro T500 to your computer, you will need to familiarize yourself with the LaserPro T500’s control panel and LaserPro Print Driver. The print driver will be where you spend most of your time configuring specific laser parameters for your jobs, while the control panel will allow you to set repeat times, manipulate the file order, perform auto / manual focusing, configure the start point, and more. -
Page 88: Laser Key Switch
5.1.3 Graphic Control Panel Overview (Description) The Control Panel The control panel on the LaserPro T500 provides an easy access to all the manual controls needed for cutting and engraving. The LCD screen, functional, directional and selection buttons make navigating through the machine’s manual controls easy to do. - Page 89 LED INDICATOR LIGHTS Three indicator lights on the LaserPro T500’s control panel are part of the system’s safety interlock system. DOOR - The door light will illuminate when either the top lid or external pass through doors on the LaserPro T500 are open or improperly closed.
- Page 90 Start / Stop – Allows you to start or stop engraving jobs, once those jobs have been successfully loaded onto the system. Delete - Provides quick access to delete the current job. Pause – Pauses the current engraving process. Press again to resume the current process.
-
Page 91: Graphic Control Panel Navigation Chart
5.1.4 Graphic Control Panel Navigation Chart Carriage / Work Table Main Work Page Adjustment Page Functions Page Machine Information Page Advanced Option Page File Management Page Machine Settings Page System File Red Beam Page SmartGUARD Page AAS Calibration Page USB Drive File Carriage Free Page Command Mode Page File Save Mode Page... - Page 92 Main Work Page The main work page is the page that the LaserPro T500 will default to upon startup and will be the “home base” for when navigating through the various functions of the control panel. This will be the page that is displayed when you are processing your jobs.
- Page 93 Carriage Moving Page ☼ Navigating to this page: Main Work Page Press , , , , or F3 Carriage Moving Page The Carriage moving page allows you to manually increase and decrease the height of the work table (Z-axis). In addition, you can manually adjust the Y-axis and X-axis of the laser carriage. Carriage Moving Page Relevant Buttons Function...
- Page 94 SmartCenter Page ☼ navigating to this page: Main Work Page Press F3 SmartCenter Page Under SmartCENTER mode the job will begin after the system positions the carriage to the center position between two points or four points indicated by the user. The SmartCENTER mode has to be enabled through the driver Enter SmartCENTER page by pressing the F3 button.
- Page 95 File Management, Machine Setting, and Machine Information pages. File Management Page – this page allows you to manage the files that you have loaded onto the LaserPro T500. Machine Setting Page – this page allows you to access and modify various machine settings,...
- Page 96 File Management Page ☼ Navigating to this page: Main Work Page Press F4 Functions Page Select <File Management> from the menu File Management Page The File Management Page allows you to manage the files from system or USB drive. File Management Page Relevant Buttons Function F1 (Back)
- Page 97 System File The System File Page allows you to manage the files that you have loaded onto the LaserPro T500. You can scroll through your jobs, delete a selected job, delete all jobs, and go to the Link / DLink Page to set and arrange multiple loaded jobs into a single job queue for processing.
- Page 98 USB Drive File Page ☼ Navigating to this page: Main Work Page press F4 Functions Page Select<File Manage- ment>from the menu File Management Page Select<USB Drive File>from the menu USB Drive File The USB Drive File Page allows you to load file from USB storage. You can scroll through your job to processing.
- Page 99 Link/DLink Page ☼ Navigating to this page: Main Work Page Press F4 Functions Page Select<File Manage- ment>from the menu File Management Page Select<System File>from the menu System File Press F2 Link / DLink Page The Link/DLink Page allows you to set, arrange, and remove loaded jobs to and from a job queue for processing.
- Page 100 File Information Page ☼ Navigating to this page: Main Work Page Press F4 Functions Page Select <File Management> from the menu File Management Page Select a job file and press Enter File Information Page The File Information Page allows you to view the speed, power, DPI, and PPI settings of the selected job.
- Page 101 File Management Edit Page ☼ Navigating to this page: Main Work Page Press F4 Functions Page Select <File Management> from the menu File Management Page Select <System File> from the menu System File Page Select a job file and press Enter File Information Page Press F4 File Management Edit Page...
- Page 102 SmartACT for the selected job. These settings correspond to the same settings found on the LaserPro T500 print driver. This page allows you to easily adjust these values to make immediate adjustments while processing your loaded jobs, even when you have disconnected your computer from the LaserPro T500.
- Page 103 PPI, and power ramp settings for the selected job. These settings correspond to the same settings found on the LaserPro T500 print driver. This page allows you to easily adjust these values to make immediate adjustments while processing your loaded jobs, even when you have disconnected your computer from the LaserPro T500.
- Page 104 / Directional Scroll through the menu selections / Directional Adjust the value for that selection Start / Stop Back to Main Work Page 232002080G(09)
- Page 105 Machine Setting Page ☼ Navigating to this page: Main Work Page Press F4 Functions Page Select <Machine Setting> from the menu Machine Setting Page The Machine Setting Page allows you to access and modify a variety of your machine settings, including: Set Lens, Tune Auto Focus, Set Table Down, Set Red Beam, Carriage Lock, Set Command Mode, Save Position, Set File Save Mode, Set Vector Mode, Tune Image Power, Set Laser Wattage, Set Fine Mode, Other, and Reset.
- Page 106 Machine Setting- Red Beam Page ☼ Navigating to this page: Main Work Page Press F4 Functions Page Select <Machine Setting> from the menu Machine Setting Page Select <Red Beam> from the menu Red Beam Page The Set Red Beam Page allows you to turn on or off the red dot laser pointer on the lens carriage. Enabling this function will indicate the exact area the engraving laser will fire upon.
- Page 107 Machine Setting- Carriage Free Page ☼ Navigating to this page: Main Work Page Press F4 Functions Page Select <Machine Setting> from the menu Machine Setting Page Select <Carriage Free> from the menu Carriage Free Page The Carriage Lock Page allows you to set whether the laser carriage is locked or free. If the Carriage Free setting is set to <YES>, then you will be able to manually move the laser carriage along the X and Y axis by hand with the top door open.
- Page 108 ☼ Navigating to this page: Machine Setting- Set Command Mode Page Main Work Page Press F4 Functions Page Select <Machine Setting> from the menu Machine Setting Page Select <Set Command Mode > from the menu Set Command Mode Page The Set Command Mode Page allows you to configure vector settings when outputting in Default or HPGL mode.
- Page 109 Setting File Save to <NO> will automatically and immediately delete each job file from the LaserPro T500 after the engraving or cutting process. Setting File Save to <YES> will retain all job files on the LaserPro T500, even after each job has been processed. ...
- Page 110 Machine Setting-Set Standby Mode Page ☼ Navigating to this page: Main Work Page Press F4 Functions Page Select <Machine Setting> from the menu Machine Setting Page Select <Set Standby Mode > from the menu Set Standby Mode Page The Set Standby Mode page allows you to configure the laser machine automatically enter into power saving if machine is idle for a specified time.
- Page 111 ☼ Navigating to this page: Machine Setting-Save Position Function Main Work Page Press F4 Functions Page Select <Machine Setting> from the menu Machine Setting Page Select <Save Position > from the menu The Save Position Function allows you to save the current X-axis and Y-axis positions of the laser carriage and sets this position to be the origin for subsequent jobs.
- Page 112 Recall Position Navigating to this page: Main Work Page press F4 Functions Page Select<Recall> by pressing F4 To recall the saved position, simply go to Functions page and press F4 again to recall the saved position. The laser carriage will be moved to the saved position. 232002080G(09)
- Page 113 Machine Setting- Vector Mode Page ☼ Navigating to this page: Main Work Page Press F4 Functions Page Select <Machine Setting> from the menu Machine Setting Page Select <Vector Mode> from the menu Vector Mode Page The Vector Mode Page allows you to adjust and balance vector mode’s quality and speed settings based on your specific job.
- Page 114 request to run in high speed. We recommend you leave Smoothing to <YES> when cutting such designs. Disable the Smoothing when precise output scale is required. 232002080G(09)
- Page 115 Machine Setting-LAN Setup Wizard Page ☼ Navigating to this page: Main Work Page press F4 Functions Page Select<Machine Setting>from the menu Machine Setting Page Select<LAN setup wizard> from the menu LAN Setup Wizard Page The LAN Setup Wizard Page allows you to connect the laser machine with ethernet to transmit files from computer to laser machine for processing jobs.
- Page 116 Start / Stop Back to Main Work Page 232002080G(09)
- Page 117 Machine Setting-Scaling Page ☼ Navigating to this page: Main Work Page Press F4 Functions Page Select <Machine Setting> from the menu Machine Setting Page Select <Scaling> from the menu Scaling Page The Scaling Page allows you to fine tune the laser machine output scale to precisely fit the original graphic file design scale when precision output is requried to your application.
- Page 118 Machine Setting-Other Page ☼ Navigating to this page: Main Work Page Press F4 Functions Page Select <Machine Setting> from the menu Machine Setting Page Select <Other> from the menu Other Page The Other Page allows you to change various settings that correspond to the control panel. The Language setting will allow users to change available languages displayed by the control panel.
- Page 119 Machine Setting- Reset Page ☼ Navigating to this page: Main Work Page Press F4 Functions Page Select <Machine Setting> from the menu Machine Setting Page Select <Reset> from the menu Reset Page The Reset Page will restore machine settings back to factory default. Press ENTER to confirm the change, and restart the machine.
- Page 120 Advanced Option- SmartGUARD Page Navigating to this page: Main Work Page press F4 Functions Page Select<Advanced Options>from menu Advanced Option Page Select<SmartGUARD> from the menu SmartGUARD Page After optional SmartGUARD hardware installation, please enter the function menu on the control panel to enable the SmartGUARD fire alarm.
- Page 121 Advanced Option- AAS Calibration Page Navigating to this page: Main Work Page press F4 Functions Page Select<Advanced Options>from menu Advanced Option Page Select<AAS Calibration> from menu Select<SmartGUARD> from the menu AAS Calibration Page Select<SmartGUARD> from the menu After optional AAS (Accu-Align System) contour cutting hardware installation, please enter the function menu of control panel to perform AAS Calibration before using AAS to do contour cutting job.
- Page 122 AAS Calibration Page Relevant Buttons Function F1 (Back) Back to previous page / Directional Scroll through the menu selections / Directional Adjust the value for that selection Enter Perform the selection Start / Stop Back to Main Work Page 232002080G(09)
- Page 123 Machine Information Page ☼ Navigating to this page: Main Work Page Press F4 Functions Page Select <Machine Information> from the menu Machine Information Page The Machine Information Page allows you to view information regarding the system such as the GCC logo, machine name, firmware version, and other information.
-
Page 124: The Laserpro T500 Print Driver
5.2 The LaserPro T500 Print Driver With the LaserPro T500 print driver successfully installed, you will need to adjust the printer and page size default settings before you can begin editing and completing jobs. By doing so, you will be setting the work area in your graphics software to match the LaserPro T500’s worktable area. - Page 125 Wizard> IP Address. Step 3. Go to Windows <Control Panel> <Hardware and Sound> <Printer>, and right click on Spirit series printer to check printer properties. Step 4. Go to <Ports> tab of Spirit series printer properties, and select <Add Port>, and follow the instruction to enter the TCP/IP information received from laser machine control panel in step 2.
- Page 126 232002080G(09)
- Page 127 232002080G(09)
- Page 128 232002080G(09)
-
Page 129: Page Setup And Orientation
5.2.2 Page Setup and Orientation The first thing you must do before working with the LaserPro T500 Print Driver will be to make sure the page and layout settings are properly configured within your graphics software. You will need to access and edit the Page Setup or Layout page of your graphics software to set your graphics software’s page... -
Page 130: Color Management
Page Setup and Orientation properly set in your graphics software, you will also need to make sure Color Management is DISABLED prior to working with the LaserPro T500 Print Driver. From your graphic software’s Color Management page: ... -
Page 131: Using The Laserpro T500 Print Driver
Now after you have properly set the Page and Layout and Color Management of your graphics software, you are ready to configure the details of your actual job through the LaserPro T500 Print Driver. The LaserPro T500 print driver allows you to adjust your engraving / cutting options. After you have setup your image, design, or text to be engraved in your software application, you can access the LaserPro T500 print driver by going to FILE ... - Page 132 Note For this screenshot example, CorelDraw was used as the software application. The LaserPro T500 Print Driver consists of seven primary sections (pages) in which you will be able to choose various engraving / cutting options and settings: Option Page ...
-
Page 133: Laserpro T500 Print Driver >> Option Page
5.2.4.1 LaserPro T500 Print Driver >> Option Page Mode Setting (OPTION PAGE) [DEFAULT SETTING: Black & White] You can select from four primary mode settings, depending on your application or results you would like to achieve. Black & White: Select this mode when using clipart images or drawings with several colors, shades of gray, or many outlines. - Page 134 Black & White mode. NOTE Selecting the Black & White mode will enable the Raster page on the LaserPro T500 Print Driver, allowing you to adjust advanced stamp-related settings. Manual Color Fill: Specify laser type to different color pens.
- Page 135 The stamp mode is one of the more dynamic functions of the LaserPro laser engravers by applying 200 power leve to create different steps. NOTE Selecting the Stamp mode will enable the Stamp page on the T500 Print Driver, allowing you to adjust advanced stamp-related settings. Raster & Stamp Mode: Select this mode when you would like to engrave image on stamps.
- Page 136 DPI options: 125, 250, 300, 380, 500, 600, 760, 1000, and 1500, experiment with different settings to get your desired effect. Below is a chart for your convenience detailing the Set DPI (your input setting) vs. Actual DPI (your output results).
- Page 137 Checking this will instruct the LaserPro T500 to immediately begin the laser engraving process, when you select Print from your graphic software program. If Print Immediately is not checked, then selecting Print will transfer the job file to the LaserPro T500 system and will need to be initialized from the LaserPro T500 control panel.
- Page 138 A filename will be prompted. After entering the filename and pressing <ok>, the Preview screen will be shown. 232002080G(09)
- Page 139 The output file can be previewed and an estimated working time of the job is also displayed. File Function (Option Page) The file function section allows you to manage various laser parameters. This section is useful when performing duplicate jobs on a variety of objects, allowing you to save your frequently used laser parameters and load them in the future.
- Page 140 232002080G(09)
- Page 141 232002080G(09)
-
Page 142: T500 Print Driver >> Pen Page
5.2.4.2 T500 Print Driver >> Pen Page The LaserPro T500 incorporates the use of 16 different colors to represent 16 different laser power and speed settings when cutting and engraving. These colors are referred to as “Pens”. Think of each pen as a designated laser setting, rather than as a color. - Page 143 and instead of modifying your image, you simply assign the laser settings based on the existing colors based on your current image. 232002080G(09)
- Page 144 NOTE The T500 print driver cannot store more than 16 pen colors or different laser parameter settings per file. Speed (Pen Page) [DEFAULT SETTING: 50] The speed slider controls the laser’s speed during operation (engraving speed) with settings ranging from 0.1 –...
- Page 145 Cutting / engraving depth are determined by a combination of power and speed. Slower speed at higher power will produce deeper cuts and engravings, whereas higher speeds at lower power will produce more shallow cuts and engravings. PPI (Pen Page) [DEFAULT SETTING: 400] PPI (pulses-per-inch) represents the pulsing frequency of the laser pulse (fire) numbers within an inch exclusive for vector cutting.
- Page 146 Vector Checked Vector Unchecked Raster Checked Processes both Vector and Raster Processes only the Raster functions functions for that particular color for that particular color (Vector functions ignored) Raster Unchecked Processes only the Vector functions Does not process Vector or Raster for that particular color (Raster functions for that particular color functions ignored)
-
Page 147: T500 Print Driver >> Advance Page
(If Pen 1 is selected for bridge cutting, Pen 9 will be reserved to e the length of the connected lines of the perforation. If Pen 2 is selected, Pen 10 will be reserved and so on…) 5.2.4.3 T500 Print Driver >> Advance Page 232002080G(09) - Page 148 Center: Sets the current position of the lens carriage as the center point for your subsequent job. As an example, if the subsequent job is to vector cut a circle and you have the Position Mode set to Center, then the T500 will vector cut a circle around the initial position of the lens carriage. ...
- Page 149 (front end to rear end of the work table) (Normally, the LaserPro T500 engraves from left to right, top to bottom. Selecting Bottom Up will force the machine to start from the bottom and work its way to the rear of the working table.
- Page 150 border, you will first need to Invert your design from the Option Page, then check Use Border and specify a value for the thickness of the border you would like to add to your design. This mode is useful for engraving rubber stamps, as it allows you to create the outline around your stamp image.
- Page 151 Optimization Sorting: This is a setting that will minimize your process time. When selected, the print driver will analyze your image and automatically determine the most efficient processing path to process your image. Decal Cutting: this function is developing to reduce material weeding job after laser cutting for multiple layers adhesive materials, such as lettering vinyl, heat transfer film, and twill film.
- Page 152 Use Cluster (Advance Page) [DEFAULT SETTING: Unselected] This setting allows you to change how the T500 interprets and processes individual / independent areas of an image in order to minimize job-processing times. The Cluster function is only applicable when multiple areas of an image are broken down and isolated from each other (areas not touching each other, blank space in-between).
- Page 153 An example of an image that would benefit from the Cluster function would be: 2 squares to be engraved, side-by-side on the X-axis with a 20 cm gap in between them. In this scenario, you would want to enable the Cluster setting and set the distance to a value less than 20. By doing so, the laser will completely process one square and “leap-frog”...
- Page 154 232002080G(09)
-
Page 155: T500 Print Driver >> Paper Page
The paper size represents your total work area. Ensure that the paper size is never set greater than the T500’s worktable area of 51.18” x 35.63” (1300mm x 905mm) The X value represents the length and the Y value represents the width. - Page 156 first and every other consecutive line protrude to the right of the square’s ideal edge, you will want to set the image tuning to a positive value. The further the protruding lines are from the square’s ideal edge, the larger you will need to set the Image Tuning value to compensate. Square’s Left Edge (Ideal) Square’s Right Edge (Ideal) The following is an example that has the proper image tuning, and demonstrates this significance...
- Page 157 5.2.4.5 T500 Print Driver >> Language Page This page allows you to specify the language displayed by the T500 Print Driver. Current language options allow for: English, Spanish, French, and Chinese (Simplified, Traditional), Japanese, and German. Remember to select “Save to Default” on Options Page to save the specified language.
-
Page 158: T500 Print Driver >> Raster Page
5.2.4.6 T500 Print Driver >> Raster Page NOTE The Raster Page is only available when Black & White Mode Setting is selected from the Option Page; this page offers a number of advanced Raster Engraving output options. Contrast (Raster Page) [DEFAULT SETTING: 0] This provides a quick and easy way to immediately adjust the contrast of an engraved image. - Page 159 Halftone (Raster Page) [DEFAULT SETTING: Dithering] This option controls the way a raster-engraved image is processed. The “digital image to engraved output” process can be processed via two methods: Dithering or Error Diffusion. Each offer additional output options yielding different output effects, style, and quality. ...
- Page 160 Enhance Dithering [DEFAULT SETTING: Unselected] Selecting this will produce a finer dithering output. Error Diffusion (Raster Page): Interprets and outputs the raster engraving via the error diffusion method. This mode will allow you to select from three diffusion types: Floyd, Stucki, and Jarvis.
-
Page 161: T500 Print Driver >> Stamp Page
5.2.4.7 T500 Print Driver >> Stamp Page Producing stamps require different operational steps than your standard engraving or cutting jobs. The Stamp page offers dynamic options allowing you to customize your stamp production process. NOTE The Stamp page will only appear and be accessible when you have selected the Stamp Mode from the Option Page. - Page 162 NOTE The visual representations of the Pitch and Shoulder Levels in the T500 driver are an exaggerated representation to allow for easy visual guidance and precise input. Remember we are working with distances less than 1 mm here.
-
Page 163: Chapter Vi - Engraving And Cutting Techniques
The T500 Print Driver determines which sections should be raster engraved or vector cut based on the outline width of that particular area or section of the design. In order to prep a particular section... -
Page 164: Vector And Raster
Now your string of characters has been properly designated as an area to be vector cut. Simply “print” your job (output the file to the T500) and watch as your string of characters is vector cut. 6.3 Vector and Raster In some cases, you will want to process both raster engraving and vector cutting tasks within a single project. -
Page 165: Tips
6.4 3D Tips 3D Mode is one of the functions of LaserPro laser engraver. Instead of traditional two dimensional graphic processing, 3D Mode allows the naked eyes to visualize the curvatures of the 3D effect by applying 200 power levels technology to create different depth of engraving. Although it is easy to produce 3D samples with LaserPro Engraver, production of the 3D graphic can be a hassle for our users Principle for 3D production by laser 3D processing uses degrees of the gray level to adjust the output energy of the laser. - Page 166 Laser Professional AP Currently, quite few laser professional application softwares like Laser Type, 3D studio, EngraveLab are available in the market. You can not only create all kinds of vector images with these AP but also convert these vector images into 3D module, which is a great way to produce 3D graphics. As illustrated in the figure below, all you need to do is to choose the direction of the vector and then set the length and shape of the convex or concave surface.
- Page 167 A way to produce 3D graphics For the production of 3D graphics, in addition to the requirement of having great familiarity with the software, a significant amount of time is required to design and arrange the layout. Thus, we use a relatively simple graphic for illustration so that you would understand how to produce 3D graphics better.
- Page 168 232002080G(09)
- Page 169 LaserPro requests your attention If you need to produce circular 3D graphics, you only need to select Radial as the gray level type in the pull-down menu of Type. Then, a circular 3D graphic may be produced. Step 2. Produce three-dimensional characters 232002080G(09)
- Page 170 Step 3. Edit the characters for the website 232002080G(09)
- Page 171 Step 4. Combine the 3D images After finishing the production for each of the objects, you may proceed with the combination of the objects. The combined graphic may be output with the laser engraver. Output the 3D graphic After selecting the graphic to be output, set the Mode as 3D Mode in the driver. After setting the engraving parameters, output the 3D graphic.
- Page 172 Tips for engraving 3D graphics LaserPro Application Lab provides a few reminders that may require your attention during the 3D engraving in order to improve the result of the engraving. Turn on the Air Assist function When the engraving is done along with Air Assist, the depth of the engraving would be deeper. Set Air assist inside the driver by checking the box.
-
Page 173: To Modified Image Settings Of A Picture For Better Quality
6.5 To modified image settings of a picture for better quality Connect your digital camera to the computer by USB cable. Download the picture from the digital camera to the computer Select the picture that you want to engrave. Import the image from the folder where the picture is located by selecting File/Import 232002080G(09) - Page 174 Convert the image to Bitmap by selecting the image and click on Bitmaps/Convert to Bitmap Change the Bitmap settings by setting “Color” to Grayscale (8-bit) and “Resolution” to 300 dpi and click OK. 232002080G(09)
- Page 175 Finally, Invert the image by selecting Effects/Transform/Invert Now you are ready to output the modified image by clicking File/Print NOTE This instruction is a simple example for general use. There are many tips and tricks to achieve a good engraving quality. It takes a lot of practice and experience to achieve a good engraving quality. Different 232002080G(09)
- Page 176 picture may need different modifications and different material may need different parameters. 232002080G(09)
-
Page 177: Chapter Vii - Optional Items
Mount the exhaust system in an obvious and accessible location, not too far from the T500, so it can be routinely switched on prior to laser engraving. The maximal distance you should mount the exhaust system away from the T500 depends on the blower’s vacuum capacity. - Page 178 Connect rigid and smooth walled tubing such as PVC or sheet metal with a 8” diameter to the ventilation opening located on the rear side of the T500. Try to keep this tubing as straight as possible as bends reduce the exhaust efficiency. Use the appropriate sized tube clamps and sealants to ensure a tight and secure attachment.
-
Page 179: Smartguard Fire Alarm Option
OPERATION: The SmartGUARD fire alarm is installed on the bottom inner side of the T500 located beneath the top primary door (as shown in the picture below). There is a Sensor Delay Switch and Reset Button. -
Page 180: Pass-Through Door Options
Warning Light Pass-Through Door Switch Key GCC T500 laser system are designed to be Class II safety requirement, the laser would stop firing if any door open during operation to protect operator safety. For users installed optional Pass-Through Door switch module, GCC laser system will be converted to Class IV safety machine, operators must follow the safety notice stated in Chapter 1.5 of this manual. - Page 181 Step 2. Locate the Pass-Through Door switch key connector at the rear of machine chassis Step 3. Plug the Pass-Through Door switch key to the female connector Step 4. Locate the external signal connector on the right side of laser system, and plug the warning light to this port.
-
Page 182: Chapter Viii Basic Maintenance
Electrical Shock may occur if you do not turn off and unplug the T500 before cleaning. Damage may occur to the system if you do not turn off and unplug the T500 before cleaning. Always turn off and unplug the T500 before cleaning! ... -
Page 183: Routine Cleaning
*The recommended lens cleaner is Eclipse Cleaning System Solution from Photographic Solutions or HPLC grade Methanol. Search “Eclipse Cleaning System Solution” on Amazon or eBay website to get this solution locally. http://www.amazon.com/Photographic-Solutions-ECDCS-Cleaning- Solution/dp/B0000AUR1I Eclipse Cleaning System Solution 8.2 Routine Cleaning 8.2.1 Cleaning the inside of the system Open the front cover, and the shoulder cover. -
Page 184: Mirrors And Lenses
Always clean and lubricate the rails after working with materials that produce lots of debris (such as wood). Too much oil applied to the X / Y rails will speed up the accumulation of debris. 8.3 Mirrors and lenses The mirrors and the focus lenses are the two components most likely to require cleaning periodically. -
Page 185: Cleaning The Mirrors
8.3.1 Cleaning the mirrors For mirror 1 that is located inside the door at the left hand side of the machine. Mirror 1 For mirror 2, at the left hand side of working table, take the two screws off and remove the cover Mirror 2 232002080G(09) - Page 186 For mirror 3, at the left hand side of X-axis, take the two screws off and remove the cover. Mirror 3 For mirror 4, at the top of carriage, take the two screws off and remove the cover Mirror 4 NOTE ...
- Page 187 Put a lens tissue on the mirror and drop an little lens cleaner on the part of the tissue that covers the mirror After the fluid has been absorbed evenly, pull the tissue one direction gently to clean the mirror Allow the mirror to dry before re-installing it.
-
Page 188: Cleaning The Lens
8.3.2 Cleaning the lens 1) Unscrew and remove the front cover of the lens carriage. Pull out the focus lens carefully. 232002080G(09) - Page 189 2) Flood the lens with lens cleanser on both sides, and use a cotton swab or lens tissue to dry off the remaining solution gently. 3) Cover the front cover, tighten screw and cover the top cover of the lens carriage. NOTE ...
-
Page 190: Chapter Ix - Basic Troubleshooting
Please check if the laser power connector is loose. For safety purposes, the laser beam will not be generated when the top or front door is opened. Check water level or temperature of water cooler for T500 200W only. If over-heated, laser beam will shut down automatically. -
Page 191: Chapter X - Appendix
Chapter X - Appendix 10.1 Glossary Color Fill – Term within the awards and engraving industry used to describe the variety of techniques used to add color or contrast to engraving. DPI – Dots Per Inch or Pixels Per Inch. The resolution of an image as defined by the amount of dots/pixels included in an inch. -
Page 192: Laserpro T500 Specifications
10.2 LaserPro T500 Specifications T500 Laser Source 60 W 80 W 100W 150 W 200 W Sealed CO2 Laser Cooling Air-cooled Water-cooled Work Area 51 x 35 in. (1300 x 905 mm) Max. Part Size w/o cutting table 53 x 36 x 5 in. (1346 x 916 x 127 mm) with 2"/4" lens (W x L x H)
Need help?
Do you have a question about the T500 and is the answer not in the manual?
Questions and answers