Table of Contents
Advertisement
Quick Links
Advertisement
Table of Contents
Troubleshooting

Related Manuals for Develop ineo 25e


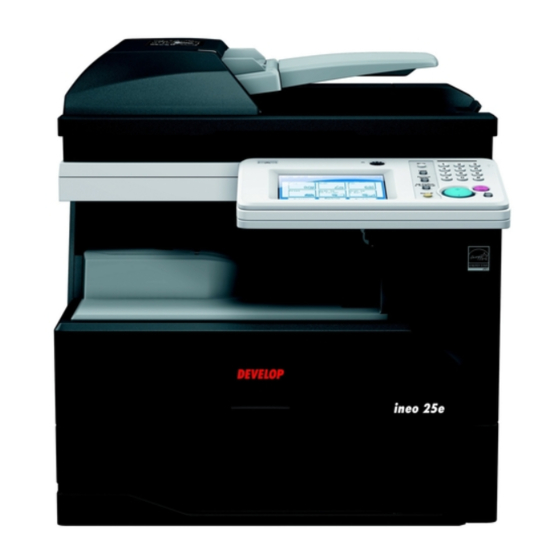
Summary of Contents for Develop ineo 25e
- Page 1 Dynamic balance www.develop.eu Scan and Fax ineo 25e...
-
Page 3: Table Of Contents
4.1.3 Redialing ............................4-5 4.1.4 Broadcasting (Broadcast) ........................4-6 4.1.5 Basic transmission settings ....................... 4-7 4.1.6 Canceling / Checking faxes ......................4-11 4.1.7 Receiving faxes..........................4-15 4.1.8 Operations during reception ......................4-17 4.1.9 Storing received documents......................4-18 ineo 25e Contents-1... - Page 4 Checking the transmission report....................7-3 7.1.1 Issuing the transmission report......................7-3 7.1.2 Reading the transmission report......................7-5 Printing journals ..........................7-6 7.2.1 Printing the journal manually ......................7-7 7.2.2 Printing the journals automatically..................... 7-7 7.2.3 Reading the journals .......................... 7-9 Contents-2 ineo 25e...
- Page 5 Registering / Editing file names ....................... 8-40 8.4.3 Registering / Editing domain names ....................8-41 Troubleshooting Error messages ..........................9-3 9.1.1 Communication errors ........................9-3 Troubleshooting ..........................9-8 9.2.1 Cannot transmit faxes........................9-8 9.2.2 Cannot receive faxes ......................... 9-9 9.2.3 Cannot scan............................. 9-10 ineo 25e Contents-3...
- Page 6 Contents-4 ineo 25e...
-
Page 7: Introduction
Introduction... -
Page 9: How To Read This Manual
Descriptions for paper and documents symbol : This shows that paper should be set with the shorter side positioned at the top. symbol : This shows that the document should be set with the shorter side positioned at the top. ineo 25e... -
Page 10: Screens
How to read this manual 1.1.4 Screens This manual uses the screens of the ineo 25e standard model, unless otherwise stated. The screens you see may differ, depending on the options installed. ineo 25e... -
Page 11: Basic Scan Functions
Basic scan functions... -
Page 13: Basic Scanning
Press [Scan] on My MFP Menu screen. % If My MFP Menu screen is not displayed, press <Mode> repeatedly until "Scan Ready" screen is displayed. Set the resolution and color, as necessary. % For details, see page 2-17 and Color. ineo 25e... - Page 14 Load the next document, and press [Next Doc]. % To finish scanning, press [Complete]. Repeat step 7 to scan all the documents. % To finish scanning, press [Complete]. ineo 25e...
-
Page 15: Scanning To Shared Pc Folders
Press [Scan] on My MFP Menu screen. % If My MFP Menu screen is not displayed, press <Mode> repeatedly until "Scan Ready" screen is displayed. Set the resolution and document type, as necessary. % For details, see page 2-17 and page 2-18. ineo 25e... - Page 16 Load the next document, and press [Next Doc]. % To finish scanning, press [Complete]. Repeat step 9 to scan all the documents. % To finish scanning, press [Complete]. ineo 25e...
- Page 17 % When you have loaded the document on the document glass, the following message will appear when the first page of the document is scanned. Load the next document, and press [Next Doc]. % To finish scanning, press [Complete]. Repeat step 10 to scan all the documents. % To finish scanning, press [Complete]. ineo 25e...
-
Page 18: Scanning To Ftp Servers
Press [Scan] on My MFP Menu screen. % If My MFP Menu screen is not displayed, press <Mode> repeatedly until "Scan Ready" screen is displayed. Set the resolution and document type, as necessary. % For details, see page 2-17 and page 2-18. ineo 25e... - Page 19 % If My MFP Menu screen is not displayed, press <Mode> repeatedly until "Scan Ready" screen is displayed. Set the resolution and document type, as necessary. % For details, see page 2-17 and page 2-18. Press [PC/USB], and then [FTP]. ineo 25e...
- Page 20 Load the next document, and press [Next Doc]. % To finish scanning, press [Complete]. Repeat step 13 to scan all the documents. % To finish scanning, press [Complete]. 2-10 ineo 25e...
-
Page 21: Scanning To Usb Memory Device
% If My MFP Menu screen is not displayed, press <Mode> repeatedly until "Scan Ready" screen is displayed. Set the resolution and document type, as necessary. % For details, see page 2-17 and page 2-18. Press [PC/USB], and then [USB]. ineo 25e 2-11... - Page 22 When the message "Scan Ready" is displayed, disconnect the USB memory. If you connect USB memory when the machine is in the ready state, the following display will appear. Select [Scan To USB]. Then follow the procedures from step 6. 2-12 ineo 25e...
-
Page 23: Scanning To An Evernote Address
% To apply tags, enter a space, then "#" and enter the tag at the subject. % Notebook and tag can be entered up to 20 characters in- cluding spaces and symbols. ineo 25e 2-13... - Page 24 % When you have loaded the document on the document glass, the following message will appear when the first page of the document is scanned. Load the next document, and press [Next Doc]. Repeat step 9 to scan all the documents. % To finish scanning, press [Complete]. 2-14 ineo 25e...
-
Page 25: Scanning To A Printer
% If My MFP Menu screen is not displayed, press <Mode> repeatedly until "Scan Ready" screen is displayed. Set the resolution and document type, as necessary. % For details, see page 2-17. Press the [Apps] tab, and then [Scan to Print]. Select the printer. ineo 25e 2-15... - Page 26 Load the next document, and press [Next Doc]. % To finish scanning, press [Complete]. Repeat step 9 to scan all the documents. % To finish scanning, press [Complete]. 2-16 ineo 25e...
-
Page 27: Basic Scan Settings
If you set a high resolution, the document will be scanned clearly, but the size of the created file will be large. You cannot select 600 dpi when both color scan (page 2-17) and duplex scan (page 3-13) are set. ineo 25e 2-17... -
Page 28: Color
Mono: Select this setting to scan the document in black and white. Color: Select this setting to scan the document in color. You cannot select color scan when both 600 dpi resolution (page 2-17) and duplex scan (page 3-13) are set. 2-18 ineo 25e... -
Page 29: Scanning With A Twain Driver
If the "Windows Security Alert" screen is displayed, click [Unblock] or [Allow access], and then click [Refresh] again. Select the device name from the list, and click [OK]. (The "Windows Security Alert" screen is not displayed from the second time you perform this operation.) % Enter the HTTP port number, if necessary. ineo 25e 2-19... - Page 30 Click to save the current settings. This cannot be clicked unless the settings have been changed. [Exit] Click to close the screen. [Realtime Scan] tab See the former step. [Information] tab Displays the version information for the scanner driver. Click [Scan]. 2-20 ineo 25e...
-
Page 31: Advanced Scan Functions
Advanced scan functions... -
Page 33: Introduction To Advanced Functions
Batch scan When the "Batch Scan" function is on, it means that all scanned pages will be saved as one file. If you turn this function off, each scanned page will be saved as an individual file (page 3-16). ineo 25e... - Page 34 Mail history For details, see page 6-13. Group transmission (Group Tx) For details, see page 6-6. DocIndex The DocIndex feature allows you to enter and send a metadata tag automatically to a network computer. For details, see page 3-25. ineo 25e...
-
Page 35: Document Type (Doc.type)
Select this when you want to scan text. Auto: Select this when you want to set the document type automatically. Photo: Select this when you want to scan photos. Specify the destinations, and press <Start>. % For details on the procedure, see page 2-3. ineo 25e... -
Page 36: Contrast
% If [Contrast] is not displayed, press [Advanced] and then [Contrast]. Select the desired contrast, and press [Enter]. Normal Lighter Darker Lightest Darkest Specify the destinations, and press <Start>. % For details on the procedure, see page 2-3. ineo 25e... -
Page 37: File Name
% For details on entering the characters, see chapter 2 in the Administrator’s Guide. % To check the entered text, press [File Name] and then [ViewText]. To close the screen, press [Edit]. Specify the destinations, and press <Start>. % For details on the procedure, see page 2-3. ineo 25e... - Page 38 % For details on entering the characters, see chapter 2 in the Administrator’s Guide. % To check the entered text, press [File Name] and then [ViewText]. To close the screen, press [Edit]. Specify the destinations, and press <Start>. % For details on the procedure, see page 2-3. ineo 25e...
-
Page 39: Scan Size
Press [Scan] on My MFP Menu screen. % If My MFP Menu screen is not displayed, press <Mode> repeatedly until "Scan Ready" screen is displayed. Press [Advanced]. Press [Scan Size]. % If you loaded the document in the automatic document feeder, "Auto" is selected. ineo 25e... -
Page 40: Stamp (Option)
% If My MFP Menu screen is not displayed, press <Mode> repeatedly until "Scan Ready" screen is displayed. Press [Advanced]. Select [Stamp]. Select [ON], and press [Enter]. % Select [OFF] to deselect the setting. Press [Close]. Specify the destinations, and press <Start>. % For details on the procedure, see page 2-3. 3-10 ineo 25e... -
Page 41: Next Document Setting (Next Doc.)
The next document settings can be set separately for the automatic document feeder (ADF) and the docu- ment glass (FBS). Press [Scan] on My MFP Menu screen. % If My MFP Menu screen is not displayed, press <Mode> repeatedly until "Scan Ready" screen is displayed. Press [Advanced]. Press [Next Doc.]. ineo 25e 3-11... - Page 42 % For details on the procedure, see page 2-3. % The display shows "Set next document." when scanning is over. Load the next document, and press [Next Doc]. Repeat step 7 to scan all the documents. To finish scanning, press [Complete]. 3-12 ineo 25e...
-
Page 43: Duplex Scan
% Refer to the display and set the document in the right di- rection. Press [Close]. Specify the destinations, and press <Start>. % For details on the procedure, see page 2-3. % The display shows "Set next document." when scanning is over. ineo 25e 3-13... - Page 44 Advanced scan functions Refer to the illustration below to select the binding position. Image Binding position Long edge Short edge 3-14 ineo 25e...
-
Page 45: Broadcast
% To specify a folder, see page 2-7. % To specify a FTP, see page 2-9. Repeat step 2 to specify all the destinations. % You can confirm or delete the specified destinations. For details, see page 6-14. ineo 25e 3-15... -
Page 46: Batch Scan
Press [Advanced]. Press [Batch Scan]. Select [OFF], and press [Enter]. % If you select [ON], the batch scan setting is enabled. Press [Close]. Specify the destinations, and press <Start>. % For details on the procedure, see page 2-3. 3-16 ineo 25e... -
Page 47: File Format
(PDF 1.5) or later, and 128-bit AES is supported by Acrobat 7.0 (PDF 1.6) or later. Press [Scan] on My MFP Menu screen. % If My MFP Menu screen is not displayed, press <Mode> repeatedly until "Scan Ready" screen is displayed. Press [Advanced]. Press [File Format]. ineo 25e 3-17... - Page 48 % If you do not want to set a permissions password, press [Enter] without entering a password. Enter the password set in step 13 again, and press [Enter]. % If you did not enter a password in step 13, this screen is not displayed. 3-18 ineo 25e...
-
Page 49: E-Mail Subject
% If you selected "A1:Auto Subject + Text", you cannot edit the subject and mail text. Proceed to step 10. % If you selected "A2:Auto Subject", you can only edit the mail text. Proceed to step 8. ineo 25e 3-19... - Page 50 % Press [ViewText] to confirm the mail text that has been entered. After confirming, press [Edit] to re- turn to the entry screen. Press [Enter]. Press [Close]. Specify the destinations, and press <Start>. % For details on the procedure, see page 2-3. 3-20 ineo 25e...
-
Page 51: Color Adjustment (Color Adjust)
+ :The light parts become lighter, and the dark parts darker. Press [Scan] on My MFP Menu screen. % If My MFP Menu screen is not displayed, press <Mode> repeatedly until "Scan Ready" screen is displayed. Press [Advanced]. Press [Color Adjust]. ineo 25e 3-21... - Page 52 Press [Advanced]. Press [Color Adjust]. Press [Sharpness]. Select the sharpness, and press [Enter]. Press [Close] repeatedly until the "Scan Ready" screen is displayed. Specify the destinations, and press <Start>. % For details on the procedure, see page 2-3. 3-22 ineo 25e...
- Page 53 % For details on the procedure, see page 2-3. Adjusting the RGB You can set the ratio of R (red) to seven different levels, from -3 to +3. –: Lessens red, and enhances cyan. +: Enhances red, and lessens cyan. ineo 25e 3-23...
- Page 54 Select [R], [G], or [B] you want to adjust, select the color ratio, and press [Enter]. Press [Close] repeatedly until the "Scan Ready" screen is displayed. Specify the destinations, and press <Start>. % For details on the procedure, see page 2-3. 3-24 ineo 25e...
-
Page 55: Using Docindex
Change the value (if needed) and then press [Enter].) % If the tag entry was set to character entry, enter the appro- priate text string manually, and then press [Enter]. ineo 25e 3-25... - Page 56 Press [Yes] to scan another document using the tag settings in step 4. % Press [No] to complete the operation or specify different tag settings. % When you are logged in, the log out screen is displayed. Press [Yes] to log out. 3-26 ineo 25e...
-
Page 57: Basic Fax Functions
Basic fax functions... -
Page 59: Basic Faxing
% To finish scanning and start the transmission, press [Tx Start]. For details on canceling the transmission, see page 4-11. Transmissions can be reserved while the machine is communicating. The reserved transmission will start when the current job is completed. Up to 30 transmissions can be reserved. ineo 25e... -
Page 60: Manual Transmission
% For details on specifying the destinations, see page 6-3. % If you want to set advanced functions such as file format, press [Advanced] and then set the function as necessary. When you hear the beep from the other fax machine, press <Start>. ineo 25e... -
Page 61: Redialing
Redialing cannot be performed with real time transmission (page 4-10). The automatic redialing frequency and interval can be set from 0 to 14 times and 0 to 5 minutes, respectively. For details, see page 8-36. For details on canceling the transmission waiting for redialing, see page 4-12. ineo 25e... -
Page 62: Broadcasting (Broadcast)
Press [Tx Start] to start transmission. For details on canceling the transmission, see page 4-11. When the broadcast function is prohibited by security communication setting (page 5-25), or when you send- ing a fax by manual transmission, you cannot use the broadcast function. ineo 25e... -
Page 63: Basic Transmission Settings
Load the next document, and press [Next Doc]. Press [Tx Start] to start transmission. The "Super Fine" mode may not be supported by the destination machine. In this case, the optimal resolution will be automatically selected. The communication time differs according to the selected resolution. ineo 25e... - Page 64 % If you loaded the document on the document glass, the message "Set next document." is displayed when the loaded documents have been scanned. Load the next document, and press [Next Doc]. Press [Tx Start] to start transmission. ineo 25e...
- Page 65 % If you loaded the document on the document glass, the message "Set next document." is displayed when the loaded documents have been scanned. Load the next document, and press [Next Doc]. Press [Tx Start] to start transmission. ineo 25e...
- Page 66 To send the fax using real time transmission, load the document into the auto document feeder. Even if real time transmission is set, the machine will automatically switch to memory transmission for broadcast or when the document is loaded on the document glass. 4-10 ineo 25e...
-
Page 67: Canceling / Checking Faxes
When you broadcasting, "Broadcast" is displayed on the screen. When you want to delete all the broadcasting destinations at once, press [Delete]. To individually check or delete destinations for the broadcast, press [Detail]. For details, see page 4-12. ineo 25e 4-11... - Page 68 You also can review or cancel certain numbers within a broadcast. Press <Job Confirm. Fax Cancel>. When you want to cancel a reserved job, press [Delayed job]. Select the broadcast job you want to delete, and press [Detail]. 4-12 ineo 25e...
- Page 69 % If there are no fax job currently being transmitted, proceed to step 3. Press [History]. Select the item to display the communication history for. % The transmission history is displayed in order from the lat- est to oldest. ineo 25e 4-13...
- Page 70 % To print a transmission result, press [Print] and then [Yes]. % For details on reading the transmission results, see page 7-9. You can automatically print or specify a time for printing the latest communication history. For details, see page 7-7. 4-14 ineo 25e...
-
Page 71: Receiving Faxes
You can set the machine to ring between 0 and 10 times. For details, see page 8-36. You can pick up the external phone handset while the machine is ringing to talk on the phone. ineo 25e 4-15... - Page 72 % You will hear a beeping sound or hear nothing, it signifies a fax. Press <Start>. To sound the beep tone, press [Setting] on My MFP Menu screen [Default Settings] [Sound Settings] [Beep] [ON]. For details, see chapter 2 in the Administrator’s Guide. 4-16 ineo 25e...
-
Page 73: Operations During Reception
When the machine has not enough memory, you cannot receive faxes. Clear the memory by printing out doc- uments or in other ways. If printing cannot be performed due to a device error such as a paper jam or running out of paper, the infor- mation lamp illuminates orange. ineo 25e 4-17... -
Page 74: Storing Received Documents
Received in each original size, the area which does not size, the area which does not fit on one sheet will be print- fit on one sheet will be print- ed separately on another ed separately on another sheet. sheet. 4-18 ineo 25e... - Page 75 Paper saving settings In order to save paper, you can set the duplex printing. Two documents received in succession can be printed on both sides of the paper. For details on setting the duplex reception, see page 8-36. ineo 25e 4-19...
-
Page 76: Making A Phone Call
When the machine rings, pick up the external phone handset. When the connection is established, talk with the other party. % If you hear a beeping sound from the other party or hear nothing, it signifies a fax. Press <Start> to receive the fax. 4-20 ineo 25e... -
Page 77: Adjusting The Speaker Volume
Press [Fax] on My MFP Menu screen. % If My MFP Menu screen is not displayed, press <Mode> repeatedly until "Fax Ready" screen is dis- played. Press [Monitor]. Press [Volume]. Select the desired volume, and press [Enter]. Press [Monitor] to hang up. ineo 25e 4-21... -
Page 78: Transmitting Faxes From A Computer
Create and edit the document to transmit. Execute a print command. Select "BW MF25-1 Fax" as the printer. Click [Preferences] to open the printing preference screen. % When you do not change the default settings, proceed to step 9. 4-22 ineo 25e... - Page 79 In such cases, printing may be able to be performed cor- rectly by enabling this setting. However, it is recommended that you usually use the ma- chine with this setting disabled because it may cause print- ing to not be performed correctly. ineo 25e 4-23...
- Page 80 % When you click [Select User], a list of users will be displayed. Select the desired user, enter pass- word in box under the list, and click [OK]. Click [OK] to close the printing preference screen. Click [Print]. % The "BW MF25-1 Fax" screen is displayed. 4-24 ineo 25e...
- Page 81 [Other Setting] tab. This is useful for saving settings that you use frequently. [Clear] Erases the current settings in the [Destination Settings] tab and the [Other Setting] tab. [Send] Click [Send] to start transmission. [Cancel] Click this to close the screen. ineo 25e 4-25...
-
Page 82: Receiving Internet Faxes
% If My MFP Menu screen is not displayed, press <Mode> repeatedly until “Fax Ready” screen is dis- played. Press [Advanced]. Press [CheckMail]. Automatic reception For details on setting to automatically receive e-mail at a specified interval, refer to Chapter 4, in the User’s Guide Message Board Operations. 4-26 ineo 25e... -
Page 83: Advanced Fax Functions
Advanced fax functions... -
Page 85: Introduction To Advanced Functions
Since it is necessary to enter a passcode to print the documents, this prevents received documents from being taken away (page 5-26). You can select from three types of sender names registered in advance. You can also transmit without adding a sender name (page 5-16). ineo 25e... -
Page 86: Scan Size
E-mail gateway (E Gateway) You can transmit to a fax server as if you were transmitting to a regular telephone line. For details, see page 5-17. Location You can check or delete the specified destinations at transmission. See page 6-15. ineo 25e... - Page 87 Transmission is allowed only when the first and second numbers match. Enter- ing the destination twice enables you check whether there has been a mistake when entering the number. This prevents faxes from being transmitted to the wrong destination by mistake (page 5-24). ineo 25e...
-
Page 88: Scanner Related Settings
The whole length of the document is scanned. Document glass Automatic document feeder Reference setting position Reference setting position A5‰ A: A4 / A5 ‰ / F4 Reference setting position Reference setting position Half- letter ‰ Letter Legal A: Legal / Letter / Half-letter ‰ ineo 25e... - Page 89 Press [Scan Size]. % If you loaded the document in the automatic document feeder, "Auto" is selected. Select the scan size, and press [Enter]. Specify the destinations, and press <Start>. For details on specifying the destinations, see page 6-3. ineo 25e...
-
Page 90: Next Document Setting (Next Doc.)
% If My MFP Menu screen is not displayed, press <Mode> repeatedly until "Fax Ready" screen is dis- played. Press [Advanced]. Press [Next Doc.]. Select [ON], and press [Enter]. % Select [OFF] to deselect the setting. Press [Close]. ineo 25e... - Page 91 % When the loaded documents have been scanned, the message "Set next document." is displayed. Load the next document, and press [Next Doc.]. Repeat step 7 to scan all the documents. When you have finished scanning all the documents, press [Tx Start]. ineo 25e...
-
Page 92: Duplex Scan
% To confirm the binding type of your document, see (page 3-14). Select [OFF] to deselect the setting. Press [Close]. Specify the destinations, and press <Start>. % For details on specifying the destinations, see page 6-3. 5-10 ineo 25e... -
Page 93: Stamp (Option)
% If My MFP Menu screen is not displayed, press <Mode> repeatedly until "Fax Ready" screen is dis- played. Press [Advanced]. Press [Stamp]. Select [ON], and press [Enter]. % Select [OFF] to deselect the setting. Press [Close]. Specify the destinations, and press <Start>. % For details on specifying the destinations, see page 6-3. ineo 25e 5-11... -
Page 94: Transmission Related Settings
% To insert a line break, press . A line break is counted as two characters. % You can check the entered message by pressing [ViewText]. After checking, press [Edit] to return to the entry screen. Press [Close]. 5-12 ineo 25e... - Page 95 Press [Yes]. % Select [ON] to enable duplex printing, or [OFF] to disable it. The name and fax number that are registered in the initial setup will be printed. For details on the initial setup, see page 8-3. ineo 25e 5-13...
- Page 96 Select [ON]. % Select [OFF] to deselect the setting. Select document number you want to use, and press [Enter]. Press [Close]. Specify the destinations, and press <Start>. % For details on specifying the destinations, see page 6-3. 5-14 ineo 25e...
-
Page 97: Delayed Transmission (Delayed Tx)
After scanning the document, you can check or delete the reserved transmission by pressing <Job Confirm. ) Fax Cancel> (page 4-12). To change the specified time after scheduling the transmission, you need to delete the delayed transmission and then set transmission date again. ineo 25e 5-15... -
Page 98: Sending The Sender Name (Tti)
Press [Advanced]. Press [TTI]. Select [ON]. % Select [OFF] to deselect the setting. Select the sender name, and press [Enter]. Press [Close]. Specify the destinations, then press <Start>. % For details on specifying the destinations, see page 6-3. 5-16 ineo 25e... -
Page 99: E-Mail Gateway (E Gateway)
% If My MFP Menu screen is not displayed, press <Mode> repeatedly until "Fax Ready" screen is dis- played. Press [Advanced]. Press [E Gateway]. Select [ON], and press [Enter]. % Select [OFF] to deselect the setting. Press [Close]. Specify the destinations, then press <Start>. % For details on specifying the destinations, see page 6-3. ineo 25e 5-17... -
Page 100: Security Fax Functions
When using manual transmission (page 4-4), the closed transmission function is disabled, even if you set it to ON. Even if this setting is ON, you can set the closed transmission OFF only for one transmission when you set the setting off from the advanced settings. 5-18 ineo 25e... - Page 101 If a passcode is set, faxes can only be received from the same model that also have a security function and have the same passcode registered. For the passcode setting, see page 5-20. For details on the communication range using closed communication and passcodes, see page 5-21. ineo 25e 5-19...
-
Page 102: Registering A Passcode
% If an administrator password is set, enter the password and press [Enter]. Press [Security Communication]. Press [Passcode]. Enter the four digit passcode using the numeric keys, and press [Enter]. % Enter a number other than "0000". If you enter "0000", the passcode setting is disabled. Press [Close]. 5-20 ineo 25e... - Page 103 (Example: 1234) error This model Communication (Without security function) error This model Does not match with the Communication (With security function) passcode set on your ma- error chine Match with the passcode Communication set on your machine ineo 25e 5-21...
-
Page 104: Id Check Tx
% If an administrator password is set, enter the password and press [Enter]. Press [Security Communication]. Press [ID Check Tx]. Select [ON] to perform ID check transmission, and press [Enter]. % Select [OFF] to deselect the setting. Press [Close]. 5-22 ineo 25e... -
Page 105: Destination Confirmation Function
Select desired setting, and press [Enter]. Item Description OFF : Do not display the confirmation screen. ON : Display the confirmation screen every time at transmission. Broadcast Only : Display the confirmation screen when there are two or more destinations. Press [Close]. ineo 25e 5-23... -
Page 106: Confirmation Dial
% If an administrator password is set, enter the password and press [Enter]. Press [Security Communication]. Select [Confirm Speed-Dial] or [Confirm Numeric keys] you want to set. Select [ON] to perform the confirm dial function, and press [Enter]. % Select [OFF] to deselect the setting. Press [Close]. 5-24 ineo 25e... -
Page 107: Prohibiting Broadcasting
% If My MFP Menu screen is not displayed, press <Mode> repeatedly until My MFP menu screen is displayed. Press [Management]. % If an administrator password is set, enter the password and press [Enter]. Press [Security Communication]. Press [Broadcast Tx]. To allow broadcasting select [ON], or [OFF] to prohibit, and press [Enter]. Press [Close]. ineo 25e 5-25... -
Page 108: Security Reception
% Press [OFF] to deselect the setting. Proceed to step 8. Set the security reception starting time, and press [Enter]. % Enter the time in 24 hour format. % You can use [ ], [ ], [ ], [ ], and numeric keys. Press [Close]. 5-26 ineo 25e... - Page 109 % The function is turned off even there are no documents stored. When the documents are printed, the security reception is turned off, and is turned on automatically when the start time comes. To cancel this function, Press [OFF] to deselect this function. For details, see page 5-26. ineo 25e 5-27...
-
Page 110: Useful Reception Function
When the received document matches multiple distributing conditions, this condition is given priority if no other matching conditions are set to [High]. When the received document matches multiple distributing conditions, this condition is given priority if no other matching conditions are set to [High] or [Middle]. 5-28 ineo 25e... - Page 111 % If My MFP Menu screen is not displayed, press <Mode> repeatedly until My MFP menu screen is displayed. Press [Register]. Press [Auto Distribute]. Press [Add]. % When editing, select the distributing condition you want to edit, and press [Edit]. Press [Setting]. ineo 25e 5-29...
- Page 112 Enter the fax number using the numeric keys, and press [Enter]. % Press [Clear] to delete one of the entered digits. % Press [All Clear] to delete all of the entered digits. Press [Matching Method]. Select the matching method, and press [Enter]. Press [Enter]. Press [Schedule]. 5-30 ineo 25e...
- Page 113 Press [Register]. Press [Auto Distribute]. Press [List]. Press [Yes]. % Select [ON] to enable duplex printing, or [OFF] to disable it. The distribution condition list can also be printed from [Setting] % [List] % [Auto Distribute] % [Yes]. ineo 25e 5-31...
- Page 114 Press [Fax] on My MFP Menu screen. % If My MFP Menu screen is not displayed, press <Mode> repeatedly until "Fax Ready" screen is dis- played. Press [Advanced]. Press [AutoDist.]. Select [ON] to enable auto distribution or [OFF] to disable, and press [Enter]. 5-32 ineo 25e...
-
Page 115: Specifying Destinations
Specifying destinations... -
Page 117: Selecting From The Address Book
In the address book, an icon is displayed at the head of each destination, indicating the type of destination that is registered. : Fax number or fax number group : E-mail address or e-mail address group If you enable the broadcast function in advance, you can specify multiple destinations (page 3-15 and page 4-6) ineo 25e... - Page 118 % When you are logged in, the address book switches between "Shared" and "Personal" each time you press <Personal Mode>. If you enable the broadcast function in advance, you can specify multiple destinations (page 3-15 and page 4-6.) ineo 25e...
- Page 119 When you are logged in, press <Personal Mode> to switch the address book between "Shared" and "Personal". Press [Advanced]. Press [Speed-Dial]. Enter the speed-dial number, and press [Enter]. % You can enter the number using [+], [-], and the numeric keys. ineo 25e...
- Page 120 % For details on logging in, see chapter 2 in the Administrator’s Guide. When you are logged in, press <Personal Mode> to switch the address book between "Shared" and "Personal". Press [Advanced]. Press [Group Tx]. Select your desired group and press [Enter]. ineo 25e...
-
Page 121: Searching For Server Destinations
% If there are no corresponding destinations, no destinations are displayed. % To further search within the search results, press [NarrowList], and repeat steps 2 to 3. % To perform another search, press [NewSearch], and repeat steps 2 to 3. ineo 25e... - Page 122 Press [Scan] or [Fax] on My MFP Menu screen. % If My MFP Menu screen is not displayed, press <Mode> repeatedly until "Scan Ready" or "Fax Ready" screen is displayed. On scan ready screen, press [e-mail] to display the address book. Press [Search]. Press [Advanced]. ineo 25e...
- Page 123 % If there are no corresponding destinations, no destinations are displayed. % To further search within the search results, press [Nar- rowList], and repeat steps 5 to 10. % To perform another search, press [NewSearch], and repeat steps 5 to 10. ineo 25e...
-
Page 124: Entering The Destination Directly
4-9. When there are multiple destinations, repeat step 2. When you press [Register] after entering a fax number, you can register the displayed fax number in the ad- dress book. For details, see page 8-6. 6-10 ineo 25e... - Page 125 % For details on entering the characters, see chapter 2 in the Administrator’s Guide. When there are multiple destinations, repeat the procedures from step 3. When you press [Register] after entering an e-mail address, you can register the displayed e-mail address in the address book. For details, see page 8-7. ineo 25e 6-11...
-
Page 126: Selecting Destination From The History
To change the fax number, edit the number, and press [Enter]. % To use the displayed fax number as it is, press [Enter] without editing it. When there are multiple destinations, repeat the procedures from step 2. 6-12 ineo 25e... - Page 127 % To use the displayed e-mail address as it is, press [Enter] without editing it. % For details on entering the characters, see chapter 2 in the Administrator’s Guide. When there are multiple destinations, repeat the procedures from step 2. ineo 25e 6-13...
-
Page 128: Checking Specified Destinations
% You can change the destination from "To" to "Cc" or "Bcc". Press [To] to switch to a "To", "Cc", or "Bcc" des- tination. % Press [Sort] to sort the destinations in order of "To", "Cc", or "Bcc". 6-14 ineo 25e... -
Page 129: Checking Specified Destinations Manually
% You can change the destination from "To" to "Cc" or "Bcc". Press [To] to switch to a "To", "Cc", or "Bcc" des- tination. % Press [Sort] to sort the destinations in order of "To", "Cc", or "Bcc". ineo 25e 6-15... - Page 130 Checking specified destinations 6-16 ineo 25e...
-
Page 131: Communication Management
Communication management... -
Page 133: Checking The Transmission Report
% If My MFP Menu screen is not displayed, press <Mode> repeatedly until "Fax Ready" screen is dis- played. Press [Advanced]. Press [Tx Report]. Press [Tx Report Setting]. Select the method for checking the transmission result, and press [Enter]. % If you selected "OFF" or "Print", press [Enter] and proceed to step 8. ineo 25e... - Page 134 Specify the destinations, and press <Start>. % For details on specifying the destinations, see page 6-3. You can change the transmission report settings while scanning. Press [Tx Report] on the screen displayed while scanning. Continue the procedure from step 5. ineo 25e...
-
Page 135: Reading The Transmission Report
The user name (only when a user is logged in) − The date and time the report was printed When a communication error code and error message is printed, confirm the content of the error and perform the transmission again. For details, see page 9-3. ineo 25e... -
Page 136: Printing Journals
If the machine is holding the journal of the former day when the job of the day reaches 500, the journal of the former day will also be printed at that time and not at the spec- ified time. ineo 25e... -
Page 137: Printing The Journal Manually
Press [Setting] on My MFP Menu screen. % If My MFP Menu screen is not displayed, press <Mode> repeatedly until My MFP menu screen is displayed. Press [Default Setting]. Press [Fax Settings]. Press [Other Settings]. Press [Auto Print Journal]. ineo 25e... - Page 138 % Enter the time in 24 hour format. Select the type of journal to print. Select [ON], press [Enter]. % If you select [OFF], the type of journal will not be printed. % To continue selecting types of journal, repeat from step 9. Press [Close]. ineo 25e...
-
Page 139: Reading The Journals
The date and time that the journal was printed, or the date and time that communication history was prepared for reserve printing When a communication error code is printed, confirm the content of the error and perform the transmission again. For details, see page 9-3. Only printed at reserve print. ineo 25e... - Page 140 The date and time that the journal was printed, or the date and time that communication history was prepared for reserve printing When a communication error code is printed, confirm the content of the error and perform the transmission again. For details, see page 9-3. Only printed at reserve print. 7-10 ineo 25e...
- Page 141 The date and time that the journal was printed, or the date and time that communication history was prepared for reserve printing When a communication error code is printed, confirm the content of the error and perform the transmission again. For details, see page 9-3. Only printed at reserve print. ineo 25e 7-11...
- Page 142 When a communication error code is printed, confirm the content of the error and perform the transmission again. For details, refer to page 9-3. Only printed at reserve print. 7-12 ineo 25e...
- Page 143 The date and time that the journal was printed, or the date and time that communication history was prepared for reserve printing When a communication error code is printed, confirm the content of the error and perform the transmission again. For details, see page 9-3. Only printed at reserve print. ineo 25e 7-13...
- Page 144 Printing journals 7-14 ineo 25e...
-
Page 145: Machine Settings
Machine settings... -
Page 147: Registering Destinations
Super G3 Either a fax number or e-mail address must be registered. You can register the shared address book destinations using the control panel. To register destinations in your personal address book, see chapter 2 in the Administrator’s Guide. ineo 25e... - Page 148 % Also register dialing options if you want to use them (page 4-9). Press [e-mail]. % If you do not want to register an e-mail address, proceed to step 11. Enter the e-mail address, and press [Enter]. Press [Super G3]. ineo 25e...
- Page 149 On scanner screen, press [e-mail]. % For the fax screen, proceed to step 3. Press [Add/Edit]. Select a free number. The procedure is then the same as for registering an address book destination. % Continue from step 6 of page 8-4. ineo 25e...
- Page 150 Press [Register]. Select a free number and, press [Yes]. % The lowest available number will be displayed. The procedure is then the same as for registering an address book destination. % Continue from step 6 of page 8-4. ineo 25e...
- Page 151 Press [Register]. Select a free number and, press [Yes]. % The lowest available number will be displayed. The procedure is then the same as for registering an address book destination. Continue from step 6 of page 8-4. ineo 25e...
- Page 152 Press [Number] or [Alphabet]. % Number: The destinations will be printed in speed-dial number order. % Alphabet: The destinations will be printed in alphabetic order. Press [Yes]. % Select [ON] to enable duplex printing, or [OFF] to disable it. ineo 25e...
-
Page 153: Registering Or Editing Groups
% Press [Search] to search a destination from address book. For details, see page 6-7. % You can confirm or delete the specified destinations by pressing [Location]. Press [Enter]. % To continue to register or edit groups, repeat the procedure from steps 4. ineo 25e... - Page 154 % Alphabet: The destinations will be printed in alphabetic order. Press [Yes]. % Select [ON] to enable duplex printing, or [OFF] to disable it. The distribution condition list can also be printed from [Setting] [List] select your desired group [Yes]. 8-10 ineo 25e...
-
Page 155: Registering / Editing Folder Shortcuts
% If My MFP Menu screen is not displayed, press <Mode> repeatedly until My MFP menu screen is displayed. Press [Register]. Press [Folder Shortcut]. Press [Add]. % To change a shortcut that is already registered, select the name of the shortcut you want to change, and press [Edit]. ineo 25e 8-11... - Page 156 Press [Automatic Network Login]. Select [ON] to set the automatic network login function or [OFF] to disable it, and press [Enter]. Press [Enter]. % To continue to register or edit shortcuts, repeat the procedure from step 4. 8-12 ineo 25e...
- Page 157 % For details, see page 2-7 step 1 to 8. Press [Register]. Press [Yes] to proceed. % Press [No] to close the screen without registering the shortcut. Refer to the procedure from step 5 of page 8-11. ineo 25e 8-13...
-
Page 158: Registering / Editing Ftp Server Shortcuts
% To change a shortcut that is already registered, select the name of the shortcut you want to change, and press [Edit]. Press [Shortcut Name]. % If you do not want to register or edit the shortcut name, proceed to step 7. 8-14 ineo 25e... - Page 159 Select the name of the shortcut to delete, and press [Delete]. Press [Yes] to proceed with the deletion. % Press [No] to close the screen without deleting the shortcut. % To continue deleting shortcuts, repeat the operation from step 4. ineo 25e 8-15...
- Page 160 Specify an FTP Server. % For details, see page 2-9 step 1 to 11. Press [Register]. Press [Yes]. % Press [No] to close the screen without registering the shortcut. Refer to the procedure from step 5 of page 8-14. 8-16 ineo 25e...
-
Page 161: Registering Favorite Destinations
To continue to register or edit favorites, repeat the procedure from step 4. You can press [Add/Edit] in the [Faves] tab to jump to the procedure for registering or editing favorites. Per- form steps 4 and 5 to register the favorite destinations. ineo 25e 8-17... -
Page 162: Registering A Color Printer
Click [Start] on your computer. If you created a shortcut to the Scan to Print Monitor when installing it, you can double-click the short- cut icon to start the print monitor. Select "Scan to Print Monitor" from "All Programs". 8-18 ineo 25e... - Page 163 % If the message "Cannot connect to the server." is displayed, specify the "Network Settings" first. For details, refer to p. 8-22. % To change registered information, select the item you want to change, and click [Register/Edit]. ineo 25e 8-19...
- Page 164 Click [Margin] and register the margin, if necessary. Click [OK] to close the screen. Place the cursor in the "Name" entry box, and register the printer name. Change the account name, as necessary. Change the password, as necessary. Click [OK]. 8-20 ineo 25e...
- Page 165 If "Delete printed document" is not selected, printed image files will remain in the program installation folder (normally "C:\Program Files\Develop\Message Board\ScantoPrintMonitor\Temp"). In this case, delete the images in the above folder periodically to prevent the disc space of the computer from becoming full.
- Page 166 IP address of this machine from the search results, and click [OK]. Edit the HTTPS port and HTTP port numbers. % To edit the HTTP port number, deselect "Perform secure communications" first. % To edit the HTTPS port number, select "Perform secure communications" first. Click [OK]. 8-22 ineo 25e...
- Page 167 Registering destinations Closing the scan to print monitor Right-click the task tray icon of the Scan to Print Monitor, and select "Exit". To use the Scan to Printer function, the Scan to Print Monitor must be started. ineo 25e 8-23...
-
Page 168: Initial Setup (User Install)
A time zone is a region that adopts the same time differences as the ones from the Royal Observatory, Green- wich, England (from– 12 hours to + 13 hours), usually regarded as standard time around the world. 8-24 ineo 25e... -
Page 169: Opening The User Install Screen
Press [Setting] on My MFP Menu screen. % If My MFP Menu screen is not displayed, press <Mode> repeatedly until My MFP menu screen is displayed. Press [Management]. If an administrator password is set, enter the password and press [Enter]. Press [User Install]. ineo 25e 8-25... -
Page 170: Registering The User Install
Select whether to start transmission when registered destination is selected ("OFF"), or when <Start> is pressed with all destinations selected ("ON"). The broadcast setting is enabled for both scan to e-mail and fax transmission. Open the user install screen (page 8-25). Press [Broadcast]. Select [ON] or [OFF], and press [Enter]. 8-26 ineo 25e... - Page 171 % You can enter up to 22 characters for the sender name. % For details on entering the characters, see chapter 2 in the Administrator’s Guide. To register TTI 2 and TTI 3, select [TTI 2] or [TTI 3] in step 3, and repeat step 4. ineo 25e 8-27...
- Page 172 To make long numbers easier to read, press [–] to enter it. % To erase a number, press [Clear]. % To change just one number, move the cursor using [ ] or ] then press [Clear] to erase the number. Then re-enter the correct number. 8-28 ineo 25e...
- Page 173 (GMT) Greenwich Mean Time: Dublin, Edinburgh, Lisbon, London (GMT +01:00) Amsterdam, Berlin, Bern, Rome, Stockholm, Vienna (GMT +01:00) Belgrade, Bratislava, Budapest, Ljubljana, Prague (GMT +01:00) Brussels, Copenhagen, Madrid, Paris (GMT +09:00) Osaka, Sapporo, Tokyo, Seoul (GMT +10:00) Guam ineo 25e 8-29...
-
Page 174: Specifying Default Settings
% If My MFP Menu screen is not displayed, press <Mode> repeatedly until My MFP menu screen is displayed. Press [Default Setting]. Press [Scanner Settings]. Press [Default Settings]. Select the function to set, and press [Enter]. % For details, see page 8-31. Select the default value, and press [Enter]. Press [Close]. 8-30 ineo 25e... - Page 175 / +1 / +2 / +3 B -3 / -2- / -1 / / +1 / +2 / +3 Sort Set the default setting for whether to perform No Sorting sorting with the Scan to Print function. Sort ineo 25e 8-31...
- Page 176 Decreases the compression rate. This option reduces image degradation, but the data size will be larger. Normal : Normal compression rate. High : Suppresses the data size and shortens the forwarding time, but increases the level of image degradation. Press [Close]. 8-32 ineo 25e...
-
Page 177: Specifying Default Scan To E-Mail Settings
% If My MFP Menu screen is not displayed, press <Mode> repeatedly until My MFP menu screen is displayed. Press [Default Setting]. Press [e-mail Settings]. Select the function to set. Select the item to set. % For details, see page 8-34 and page 8-34. Select the default value, and press [Enter]. Press [Close]. ineo 25e 8-33... - Page 178 Default Template Settings templates 1 to 10. For details, see A1: Auto Subject + Text page 8-38. A2: Auto Subject Template 1 to Template 10 Highlighted values are the default settings specified at the time of shipment. 8-34 ineo 25e...
-
Page 179: Specifying Default Fax Settings
% If My MFP Menu screen is not displayed, press <Mode> repeatedly until My MFP menu screen is displayed. Press [Default Setting]. Press [Fax Settings]. Select the function to set. Select the item to set. % For details, see page 8-36 and page 8-36. Select the default value, and press [Enter]. Press [Close]. ineo 25e 8-35... - Page 180 This sets the number of times the machine rings until fax re- 0 - 10 time(s): ception starts when the reception mode is set to Fax. The 2 time(s) number of rings becomes more than the set number when the machine is in the sleep mode. 8-36 ineo 25e...
- Page 181 Reserve print Duplex: Journal Line Up You can select whether to arrange printed journal reports in order of job or in order of communication number. Highlighted values are the default settings specified at the time of shipment. ineo 25e 8-37...
-
Page 182: Registering Other Settings
% If My MFP Menu screen is not displayed, press <Mode> repeatedly until My MFP menu screen is displayed. Press [Register]. Press [Template]. Press [Add]. % To edit a registered template, select the template you want to edit, and press [Edit]. 8-38 ineo 25e... - Page 183 % If My MFP Menu screen is not displayed, press <Mode> repeatedly until My MFP menu screen is displayed. Press [Register]. Press [Template]. Select the template you want to delete, and press [Delete]. Press [Yes]. % To continue deleting templates, repeat the operation from step 4. ineo 25e 8-39...
-
Page 184: Registering / Editing File Names
% For details on entering characters, see chapter 2 in the Administrator’s Guide. % To continue to register or edit file names, repeat the procedure from step 4. Deleting Delete all the characters in step 4 of "Registering / Editing", and press [Enter]. 8-40 ineo 25e... -
Page 185: Registering / Editing Domain Names
% For details on entering characters, see chapter 2 in the Administrator’s Guide. % To continue to register or edit domain names, repeat the procedure in steps 4 to 5. Deleting Delete all the characters in step 4 of "Registering / Editing", and press [Enter]. ineo 25e 8-41... - Page 186 Registering other settings 8-42 ineo 25e...
-
Page 187: Troubleshooting
Troubleshooting... -
Page 189: Error Messages
T.1.1 Confirm the remote fax. Check the correct fax number and transmit the document again. T.1.4 Fax job was cancelled by user. Transmit the document again. T.2.1 Confirm the remote fax. Check the settings on the other machine. ineo 25e... - Page 190 Cannot send a fax in Super G3 mode. T.8.10 T.8.11 R.1.1 Confirm the remote fax. The sending party may have made an opera- tional mistake. If you know who the sending party is, ask them to transmit the document again. ineo 25e...
- Page 191 No reply from the email server. Check the network connection. Not able to transmit. Mail server cannot Check the DNS settings. be found. 1002 Not able to transmit. Stopped. The <Stop> key was pressed during transmis- sion. ineo 25e...
- Page 192 Check whether the destination FTP server has 218, 221 writing prohibited. 7, 220, 222 Not able to log in. Check whether the user name and password for logging in to the FTP server specified as the destination are entered correctly. ineo 25e...
- Page 193 Message Board. Mail Size Over Error The e-mail could not be received because the size was too large. A notice was trans- mitted to the sender. Mail Deleted The received e-mail was erased. ineo 25e...
-
Page 194: Cannot Transmit Faxes
Is "BW MF25-1 Fax" se- Select "BW MF25-1 Fax" as the printer in the lected as the printer? print menu of the application. Is the port setting of "BW Check that the port is correct. MF25-1 Fax" incorrect? ineo 25e... -
Page 195: Cannot Receive Faxes
For details, see the Quick Guide. Is the modular cable Make sure the line is connected correctly. For connected to both the details, see the Quick Guide. main unit and the wall outlet? Is the memory full? Check the memory. ineo 25e... -
Page 196: Cannot Scan
Is "BW MF25-1 Scan" or Select "BW MF25-1 Scan" or "BW MF25-1 "BW MF25-1 NScan" se- NScan" as the scanner device in the application lected as the scanner de- software. vice in the application software? 9-10 ineo 25e... - Page 197 Operations during reception ......................4-17 4.1.9 Storing received documents......................4-18 Making a phone call........................4-20 4.2.1 Making a phone call......................... 4-20 4.2.2 Receiving a phone call ........................4-20 4.2.3 Adjusting the speaker volume......................4-21 Transmitting faxes from a computer................... 4-22 ineo 25e...
- Page 198 Registering or editing groups......................8-9 8.1.3 Registering / Editing folder shortcuts ....................8-11 8.1.4 Registering / Editing FTP server shortcuts ..................8-14 8.1.5 Registering favorite destinations...................... 8-17 8.1.6 Registering a color printer........................ 8-18 Initial setup (User Install)......................8-24 ineo 25e...
- Page 199 Registering / Editing file names ....................... 8-40 8.4.3 Registering / Editing domain names ....................8-41 Troubleshooting Error messages ..........................9-3 9.1.1 Communication errors ........................9-3 Troubleshooting ..........................9-8 9.2.1 Cannot transmit faxes........................9-8 9.2.2 Cannot receive faxes ......................... 9-9 9.2.3 Cannot scan............................. 9-10 ineo 25e...
- Page 200 25e...
Need help?
Do you have a question about the ineo 25e and is the answer not in the manual?
Questions and answers