Avaya Scopia XT7100 Deployment Manual
Scopia xt series
Hide thumbs
Also See for Scopia XT7100:
- User manual (108 pages) ,
- Quick setup manual (2 pages) ,
- Deployment manual (306 pages)

Related Manuals for Avaya Scopia XT7100


Summary of Contents for Avaya Scopia XT7100
- Page 1 ® Avaya Scopia XT Series Deployment Guide Release 8.3.2 For Solution 8.3 April 2015...
- Page 3 Software at any given time. A “Unit” means the unit on which AS “YOU” AND “END USER”), AGREE TO THE TERMS OF USE. IF Avaya, at its sole discretion, bases the pricing of its licenses and can YOU ARE ACCEPTING THE TERMS OF USE ON BEHALF A...
- Page 4 Instance of the Software on one Server or on multiple Servers written consent of Avaya can be a criminal, as well as a civil offense provided that each of the Servers on which the Software is installed under the applicable law.
- Page 5 Avaya), scroll to the bottom of the page, and select Contact Avaya Support. Trademarks The trademarks, logos and service marks (“Marks”) displayed in this site, the Documentation, Hosted Service(s), and product(s) provided by Avaya are the registered or unregistered Marks of Avaya, its affiliates, or other third parties.
-
Page 6: Table Of Contents
.................. 31 Opening Ports for the XT Series ® ...... 40 Configuring the TCP or UDP Port Range on the Avaya Scopia XT Series Chapter 4: Setting Up the XT Series Hardware.............. 42 .................. 42 Planning the Optimal Room Setup ®... - Page 7 Updating the XT Series ................ 153 Upgrading the Software Using a PC ® ...... 155 Upgrading the Avaya Scopia XT Series Software Using a USB Drive Chapter 8: Securing your XT Series.................. 156 .................. 156 Setting PIN Codes for the XT Series .................
- Page 8 Deleting XT Series Certificates .............. 167 Enabling the TLS Connection in XT Series ............... 169 Enabling Encryption for Videoconferences ® Chapter 9: Troubleshooting the Avaya Scopia XT Series.......... 172 .............. 172 Viewing System Information for Customer Support .................... 175 Retrieving XT Series Logs ..............
-
Page 9: Chapter 1: About The Xt Series
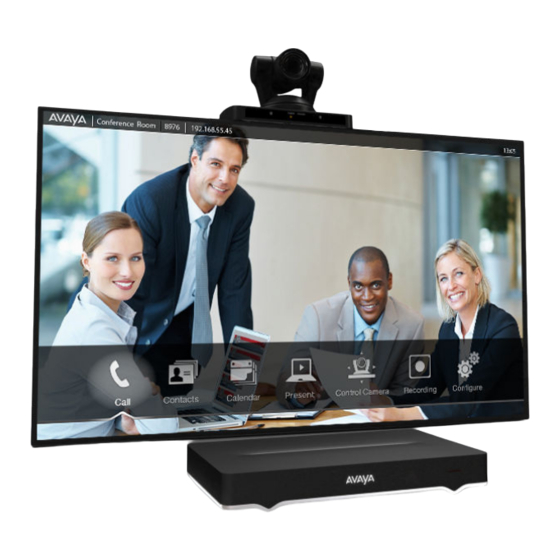
Chapter 1: About the XT Series ® The Avaya Scopia XT Series is a set of dedicated videoconferencing endpoints which incorporate state-of-the-art video technology for high definition (HD) conferencing. You can also locally host videoconferences with the built-in MCU on most XT Series models. The XT Series seamlessly ®... -
Page 10: About The Models In The Xt Series Product Line
21 About the Models in the XT Series Product Line ® The Avaya Scopia XT Series is a set of dedicated videoconferencing endpoints which incorporate state-of-the-art video technology for high definition (HD) conferencing. You can also locally host ®... - Page 11 Mobile devices, and ISDN endpoints (via Scopia 100 Gateway). This section provides an overview of each model in the XT Series product line. To easily compare ® the different Avaya Scopia XT Series endpoints, see Comparing Between XT Series Models page 15.
- Page 12 Experience cost-effective HD videoconferencing with the Avaya Scopia XT4000 Series, which ® was designed specifically for small meeting rooms. The Avaya Scopia XT4300 offers HD resolution of 1080p at 60 fps and 5x optical zoom, with the option to upgrade to 15x total zoom ®...
- Page 13 About the Models in the XT Series Product Line ® Figure 5: Models in the Avaya Scopia XT4000 Series ® • Avaya Scopia XT Telepresence ® Experience the immersive feeling of telepresence using the Scopia XT Telepresence platform. The excellent video quality in each of the three cameras, combined with high-quality audio, give the feeling of an in-person meeting.
- Page 14 9 participants. Important: ® ® The Scopia XT Executive and Avaya Scopia XT4300 can host up to four participants. Depending on your deployment and the model, you can locally host videoconferences with other ® ® endpoints (including H.323, SIP, Scopia...
-
Page 15: Comparing Between Xt Series Models
About the XT Series on page 9 Comparing Between XT Series Models ® This section provides a comparison between the models of the Avaya Scopia XT Series product line. For an overview, see About the XT Series on page 9. - Page 16 Optional Optional Optional — Optional for XT5000 720 Keyboard — — — — — and mouse control ® (Scopia Control) Related Links About the XT Series on page 9 ® Avaya Scopia XT Series Deployment Guide April 2015 Comments? infodev@avaya.com...
-
Page 17: About The Built-In Mcu
XT Series during the meeting. ® For the best experience when using the Avaya Scopia XT Series MCU Edition, we recommend activating the license known as High Bandwidth Option (12Mbps total for all participants) to avoid ®... -
Page 18: Technical Specifications
9 Technical Specifications ® This section details the system specifications of the Avaya Scopia XT Series. Refer to this data when preparing system setup and afterwards as a means of verifying that the environment still complies with these requirements. - Page 19 1024 x 576 at 25, 30fps: w576p 768 x 448 at 25, 30fps: w448p 704 x 576 at 25, 30fps: 4CIF 704 x 480 at 25, 30fps: 4SIF Table continues… ® April 2015 Avaya Scopia XT Series Deployment Guide Comments? infodev@avaya.com...
- Page 20 • Apple Safari version 5 or later • Opera version 11 or later Table 4: Network and security capabilities on page 21 lists the XT Series's network interface and firewall traversal information. ® Avaya Scopia XT Series Deployment Guide April 2015 Comments? infodev@avaya.com...
-
Page 21: Checking The Product Shipment
Report any damage or missing items to your distributor or reseller. Keep the package and its contents for inspection if required for loss or damage claim. Related Links About the XT Series on page 9 ® April 2015 Avaya Scopia XT Series Deployment Guide Comments? infodev@avaya.com... -
Page 22: Chapter 2: Initial Workflow For Deploying The Avaya Scopia ® Xt Series
Avaya Scopia XT Series About this task ® To safely set up and perform the required initial settings to start using the Avaya Scopia XT Series, follow the recommended workflow described below. Procedure 1. Decide how to incorporate the XT Series into your deployment, as described in Planning the ®... - Page 23 Planning the Topology of the Avaya ® ® Scopia XT Series Deployment on page 24 and the Avaya Scopia Solution Guide. 11. (Optional) If necessary for your organization, you can secure videoconference sessions via encrypted connections and TLS certificates (see Securing your XT Series on page 156).
-
Page 24: Xt Series Deployment
® As you add more XT Series endpoints, you can manage them centrally with Avaya Scopia Management. This would enable centralized updating, backing up and control. Related Links ®... -
Page 25: Planning The Topology Of Avaya Scopia ® Xt Series With Scopia ® Xt Desktop
® XT Desktop ® Figure 9: Avaya Scopia XT Series as Endpoints Related Links ® Planning the Topology of the Avaya Scopia XT Series Deployment on page 24 ® Planning the Topology of Avaya Scopia XT Series with ® Scopia XT Desktop ®... - Page 26 Planning the Topology of the Avaya Scopia ® XT Series Deployment ® The Avaya Scopia XT Series SMB Edition includes the following options: • Full SMB4 - Basic MCU level with up to four participants: one local and three remote endpoints or PC clients.
-
Page 27: Planning Nat And Firewall Traversal With Avaya Scopia Xt Series
NAT and firewall traversal with XT Series: • Using a Avaya HTTP server or a STUN public server for NAT and firewall traversal When the XT Series hosts a videoconference with endpoints outside the enterprise... - Page 28 Planning the Topology of the Avaya Scopia ® XT Series Deployment in the private network via the traversal server if there is an open connection through the firewall. A dedicated PathFinder server offers external endpoints a static address when joining conferences hosted in your organization.
-
Page 29: Supporting Isdn Connectivity
IP addresses. Without a gatekeeper, all endpoints must be referenced using IP addresses. Related Links ® Planning the Topology of the Avaya Scopia XT Series Deployment on page 24 Supporting ISDN Connectivity About this task ®... -
Page 30: Implementing External Api Control
® You can control the XT Codec Unit using the Avaya Scopia XT Series API (requires integration with AMX, Creston, or Extron control devices). Contact Avaya customer support to receive the ® Reference Guide for Avaya Scopia XT Series API, which includes the list of commands over the Ethernet interface. -
Page 31: Implementing Port Security For The Avaya Scopia
Solution components within the organization's network, you need to open firewall ports between the external XT Series endpoint ® and the organization. This section details the ports used for the Avaya Scopia XT Series and the relevant configuration procedures: Related Links ®... - Page 32 Planning the Topology of the Avaya Scopia ® XT Series Deployment ® Figure 15: Standard topology for Avaya Scopia XT Series ® ® In contrast, in the Avaya Scopia XT Series SMB Edition topology, Scopia Desktop Clients join the ®...
- Page 33 Implementing Port Security for the Avaya Scopia ® XT Series Figure 17: XT Series deployment with PathFinder In each of the topologies, the XT Series can be located either inside or outside the enterprise. You need to open different ports depending on the topology, and the location of the endpoints. The source for a port is the sender of data packets, and the destination is the receiver.
- Page 34 Planning the Topology of the Avaya Scopia ® XT Series Deployment Depending on the location of the XT Series, a unidirectional port might be inbound to the organization or outbound from the organization. For example: ® • Port 161 is an outbound port from Scopia Management or an SNMP management server to an external XT Series.
- Page 35 Implementing Port Security for the Avaya Scopia ® XT Series Port Protocol Source Destination Functionality Result of Required Range Blocking Port Enables you to manually activate Mobile Link to transfer a meeting from a mobile device to an XT Series endpoint.
- Page 36 Planning the Topology of the Avaya Scopia ® XT Series Deployment Port Protocol Source Destination Functionality Result of Required Range Blocking Port LDAP information from information from directory the LDAP server. the remote directory. HTTPS Web client XT Series Enables you to...
- Page 37 Implementing Port Security for the Avaya Scopia ® XT Series Port Protocol Source Destination Functionality Result of Required Range Blocking Port gatekeeper gatekeeper services. services. ® 3336 XML (TCP) XT Series Scopia Enables an XT XT Series Recommended Management Series endpoint to endpoints cannot ®...
- Page 38 Planning the Topology of the Avaya Scopia ® XT Series Deployment Port Protocol Source Destination Functionality Result of Required Range Blocking Port determine their configuration is public IP address. available). ® 8554 RTSP XT Series Scopia Enables you to You cannot share...
- Page 39 Implementing Port Security for the Avaya Scopia ® XT Series Port Protocol Source Destination Functionality Result of Required Range Blocking Port ® Software XT Series using Scopia Series software Upgrade software. Management or a remotely. application standalone XT Series software upgrade application.
-
Page 40: Configuring The Tcp Or Udp Port Range On The Avaya Scopia ® Xt Series
XT Series on page 31 ® Configuring the TCP or UDP Port Range on the Avaya Scopia Series About this task You can configure the TCP or UDP port range by setting the base port, which is the lower end of the port range (if, for example, port 3230 is busy). - Page 41 Implementing Port Security for the Avaya Scopia ® XT Series Before you begin If configuring from the endpoint, you must first enable advanced configuration, as described in Enabling Advanced Maintenance on the XT Series on page 112. Procedure 1. Access the port settings. From the XT Series web interface, select Administrator Settings >...
-
Page 42: Chapter 4: Setting Up The Xt Series Hardware
59 Connecting a Computer to the XT Series on page 65 Planning the Optimal Room Setup Follow the recommended guidelines described in this section when setting up a room with an Avaya ® Scopia XT Series endpoint. ®... -
Page 43: Planning The Optimal Room Setup
The room should be air-conditioned to avoid the XT Codec Unit activating its fan. • Camera positions Ensure the camera's view captures all the seats in the room (Figure 21: Camera scope covers all seats on page 44). ® April 2015 Avaya Scopia XT Series Deployment Guide Comments? infodev@avaya.com... - Page 44 If you deploy the One-way Microphone Pod, note it has a limited three meter 180° range, so be sure to place all participants on one side of the microphone. The Three-way Microphone Pod picks up sound up to three meters away at all angles (360°). ® Avaya Scopia XT Series Deployment Guide April 2015 Comments? infodev@avaya.com...
-
Page 45: Planning The Optimal Room Setup
Leave enough space around the XT Codec Unit for air circulation and for connecting cables easily. • Configuring the monitors Configure the monitors while the cameras are in self-view mode to ensure the correct levels of contract, brightness and sharpness. ® April 2015 Avaya Scopia XT Series Deployment Guide Comments? infodev@avaya.com... -
Page 46: Connecting Avaya Scopia ® Xt Series To The Network
For example, a small business can use the XT Series as a firewall traversal system (see Planning ® NAT and Firewall Traversal with Avaya Scopia XT Series on page 27), where the XT Series hosts a call on its built-in MCU, and endpoints from both the public and private networks can access the same videoconference. -
Page 47: Connecting Monitors To The Xt Series
Connecting Monitors to the XT Series About this task ® Connect one or two monitors to the Avaya Scopia XT Series to use it as a videoconferencing endpoint, and to view the interface (menus) of the endpoint itself. Use the XT Remote Control Unit to navigate these menus. -
Page 48: Connecting Cameras Or Dvd Players
Connecting Cameras or DVD players ® You can connect one or more PTZ (pan, tilt, zoom) cameras directly to the Avaya Scopia Series, and also connect a DVD player or media player to the DVI port. On the XT7000 Series and ®... -
Page 49: Connecting The Ptz Camera
Connecting the PTZ Camera About this task ® This procedure describes how to connect the main PTZ camera to the Avaya Scopia XT Series. The XT7000 Series and the XT5000 Series use the XT Premium Camera. The XT4300 uses the XT Flex Camera, while the XT4200 uses the XT Standard II Camera. - Page 50 • Connect the other plug (power) to the horizontal socket. We recommend keeping the DVI socket available for a computer connection (for example, to share content in a videoconference). ® Avaya Scopia XT Series Deployment Guide April 2015 Comments? infodev@avaya.com...
-
Page 51: Connecting An Additional Ptz Camera Directly
Switch on page 54). The additional PTZ camera kit contains the camera itself, remote control, power supply, HDMI to DVI adapter, five-meter DVI-HDMI cable, and a ceiling mount kit. ® April 2015 Avaya Scopia XT Series Deployment Guide Comments? infodev@avaya.com... - Page 52 1080p at 30fps or 720p at 60fps, add a repeater every 10 meters. Compatible HDMI repeaters are ® listed in Third-Party Accessories for Avaya Scopia XT Series. To control both cameras of the same model using one XT Remote Control Unit (on the XT7000 Series and XT5000 Series only), use the supplied 10-meter VISCA cross cable, or for large room setups, buy a longer third-party cable, or create your own.
- Page 53 (Figure 28: Connecting an additional camera directly to the XT Series on page 52). 7. Apply power to the camera. Related Links Connecting Cameras or DVD players on page 48 ® April 2015 Avaya Scopia XT Series Deployment Guide Comments? infodev@avaya.com...
-
Page 54: Connecting Multiple Hdmi Devices Or Cameras Via The Scopia ® Xt Camera Switch
DVD or other media player. Only use cameras of the same model. Connected cameras can be controlled from an XT7000 Series or XT5000 Series endpoint. Important: ® ® The Avaya Scopia XT4000 Series, Scopia XT Executive, and XT1200 do not support the ® Scopia XT Camera Switch. -
Page 55: April
• The 8-pin connector to the IN RS232C socket • The power connector to the DC IN 12V socket Figure 31: Connecting cables to the back of the camera ® April 2015 Avaya Scopia XT Series Deployment Guide Comments? infodev@avaya.com... - Page 56 Figure 33: Connecting cables to the XT7000 Series 5. Connect the second camera (Figure 34: Connecting the second camera on page 57): a. Connect the 10-meter VISCA crossed cable supplied with the camera kit. ® Avaya Scopia XT Series Deployment Guide April 2015 Comments? infodev@avaya.com...
- Page 57 9. Connect one end of the power supply cable to the DC IN 12V connector on each camera, and the other end into one of the power sockets on the wall. 10. Configure the cameras' settings (see Configuring Cameras on page 100.) ® April 2015 Avaya Scopia XT Series Deployment Guide Comments? infodev@avaya.com...
-
Page 58: Connecting A Dvd Or Blu-Ray Player Or Other Analog Video Equipment
Connecting a DVD or Blu-ray Player or Other Analog Video Equipment About this task ® You can add a DVD or Blu-ray player to the Avaya Scopia XT Series to share its content during a videoconference by connecting it to either the vertical camera port or the DVI port... -
Page 59: Connecting Microphones And Speakers To The Xt Series
Choosing a Microphone for Your XT Series This section provides an overview of the different types of microphones which are shipped with the ® various models in the Avaya Scopia XT Series. You can add more microphones to your XT Series depending on the room setup. - Page 60 - A computer audio-out connection or line audio connection. Table 8: Types of microphones on page 60 describes the most common types of microphones ® used with an Avaya Scopia XT Series. Table 8: Types of microphones Type of Optimal Room...
-
Page 61: Connecting Microphones And Speakers To The Xt Series
Series, you cannot transmit PC audio Multiple Very large Comprehensive Higher cost Depends on the Avaya ® Microphon meeting rooms coverage specifications of Scopia es with the third-party XT5000 Table continues… ® April 2015 Avaya Scopia XT Series Deployment Guide Comments? infodev@avaya.com... -
Page 62: Connecting A Microphone To The Xt Series
- Audio mixers like those from Clear One. An audio mixer connects multiple microphones (or other audio inputs) to generate a single audio stream. - A computer audio-out connection or line audio connection. ® Avaya Scopia XT Series Deployment Guide April 2015 Comments? infodev@avaya.com... -
Page 63: Connecting Microphones And Speakers To The Xt Series
104). You then cancel the echo either in the audio mixer's settings, or (ideally) on each microphone. Related Links Connecting Microphones and Speakers to the XT Series on page 59 ® April 2015 Avaya Scopia XT Series Deployment Guide Comments? infodev@avaya.com... -
Page 64: Connecting Headphones Or An Amplifier With Loudspeakers
Connecting Headphones or an Amplifier with Loudspeakers About this task ® By default, you hear the sound of your Avaya Scopia XT Series from the monitors' speakers. The monitors are connected to the XT Codec Unit using HDMI, which sends both audio and video. -
Page 65: Connecting A Computer To The Xt Series
Desktop Client and is on the same network as the XT Series. If they are in different networks, verify there is no NAT or firewall between them. For more information about using the Avaya Screen Link feature, see the Avaya ®... - Page 66 3. Set the computer's resolution by accessing the operating system graphics settings. 4. Select your screen resolution and refresh rates from the list of supported settings (see Table 10: Supported computer monitor resolutions and refresh rates on page 67). ® Avaya Scopia XT Series Deployment Guide April 2015 Comments? infodev@avaya.com...
- Page 67 60, 72, 75 60, 72, 75 640x480 72, 75 72, 75 ® 5. To share content from your computer, continue with User Guide for Avaya Scopia Series. Related Links Setting Up the XT Series Hardware on page 42 ® April 2015...
-
Page 68: Chapter 5: Controlling The Xt Series
Chapter 5: Controlling the XT Series ® There are a number of ways to interact with the Avaya Scopia XT Series: • Use the XT Remote Control Unit locally on the endpoint itself to navigate the menus and perform user functions and advanced configuration. You view the results on a connected monitor. - Page 69 4. The system home page appears on the monitors. When you access the system for the first time only, the Quick Setup wizard is displayed (see Configuring Basic Settings with the Quick Setup Wizard on page 83). ® April 2015 Avaya Scopia XT Series Deployment Guide Comments? infodev@avaya.com...
-
Page 70: About The Xt Remote Control Unit
About the XT Remote Control Unit ® There are several ways to control the Avaya Scopia XT Series. This section explains how to use the XT Remote Control Unit to navigate the endpoint's menus which are displayed on the endpoint's monitor. -
Page 71: About The Xt Remote Control Unit
Figure 46: Entry method displayed to the right of an input field Related Links Controlling the XT Series on page 68 Pairing an XT Remote Control Unit on page 72 ® April 2015 Avaya Scopia XT Series Deployment Guide Comments? infodev@avaya.com... -
Page 72: Pairing An Xt Remote Control Unit
2. Enter a two-digit numeric code between 01 and 99 in the Remote Control Code field. 3. From the web interface only, select Save. 4. On the XT Remote Control Unit, press the * and # keys simultaneously until its red light blinks twice. ® Avaya Scopia XT Series Deployment Guide April 2015 Comments? infodev@avaya.com... -
Page 73: Navigating Menus With The Keyboard And Mouse
XT Control. It also allows you to seamlessly switch between your computer screen and the system menus. By default, your computer screen is always displayed when you are not in a call. ® April 2015 Avaya Scopia XT Series Deployment Guide Comments? infodev@avaya.com... -
Page 74: About The Xt Remote Control Unit
. Move the mouse all the way to the edge of the screen to ensure the square icon follows its movements. ® Avaya Scopia XT Series Deployment Guide April 2015 Comments? infodev@avaya.com... -
Page 75: Accessing Xt Series Web Interface
68 Accessing XT Series Web Interface About this task ® This procedure describes how to access the Avaya Scopia XT Series web interface, which supports the following internet browsers: • Internet Explorer version 8 or later • Google Chrome version 11 or later •... -
Page 76: Managing Avaya Scopia ® Xt Series From Scopia ® Management
About this task ® ® Scopia Management can manage all endpoints in a video network, including the Avaya Scopia XT Series. Remote management is used for: ® • Viewing Scopia Management meeting schedules which include this endpoint as a participant. - Page 77 For more information on adding, removing and upgrading the system remotely in Scopia Management, or for details on synchronizing contacts for the endpoints in your organization, see ® Administrator Guide for Avaya Scopia Management. Before you begin If configuring from the endpoint, you must first enable advanced configuration, as described in Enabling Advanced Maintenance on the XT Series on page 112.
-
Page 78: Chapter 6: Initial Configuration Of The Xt Series
Avaya Product Licensing and Delivery System (see Getting Started with Avaya PLDS). Once you have the license keys, you activate the XT Series and any optional features you purchased, as described below the table. You can do this from the endpoint itself or from its web interface. - Page 79 Description and name Bandwidth and 55111-00904 XT7000 Series Increases total bandwidth to provide the best ® Network Avaya Scopia videoconferencing experience by sending XT5000 Series Series 12Mbps video at a higher rate. This is especially useful ® Option Scopia when hosting meetings on your endpoint, to...
- Page 80 On some XT Series models, the extra port is already enabled and does not require a license ® (see the 55111-00916 Avaya Scopia Series 2nd GLAN Port license, above). 55111-00952 Full XT7000 Series Enables hosting videoconferences with up to...
- Page 81 On some XT Series models, the extra port is already enabled and does not require a license ® (see the 55111-00916 Avaya Scopia Series 2nd GLAN Port license, above). Video Resolution 55111-00937 Full XT5000 720...
- Page 82 You can find the LAC in the customer letter shipped with the product, or the email you received when you purchased the product or optional license. Procedure 1. Obtain the product’s license keys from the Avaya Product Licensing and Delivery System, as follows: a. Access the Avaya Product Licensing and Delivery System.
-
Page 83: Configuring Basic Settings With The Quick Setup Wizard
Configuring Basic Settings with the Quick Setup Wizard About this task ® To start using your Avaya Scopia XT Series, first define basic settings with the quick setup wizard, such as the system's name, language, and network settings. This is relevant for both new installations, or after restoring default settings. -
Page 84: Setting The System Name, Language, And Call Method
About this task ® The first screen in the Quick Setup wizard enables you to define the name of your Avaya Scopia XT Series, the country, the menu language, and the protocol the system uses for calls. The unit's name is displayed on the system's title bar and to other meeting participants. For example, Hong- Kong, 9th-Floor-Room, or NY-Office. - Page 85 SIP server. For more information, see Configuring Basic Gatekeeper Settings on page 89 and Configuring Basic SIP Settings on page 90, or contact your administrator. Table continues… ® April 2015 Avaya Scopia XT Series Deployment Guide Comments? infodev@avaya.com...
-
Page 86: Adjusting The Image Position
About this task You can center the endpoint's image correctly on its monitor in this stage of the Quick Setup Wizard. ® This is for deployments with a monitor connected to your Avaya Scopia XT Series. Procedure 1. Access the Quick Setup Wizard from the endpoint, as described in... -
Page 87: Configuring Basic Network Settings
Procedure 1. Access the Quick Setup Wizard from the endpoint, as described in Configuring Basic Settings with the Quick Setup Wizard on page 83, and skip to this step. ® April 2015 Avaya Scopia XT Series Deployment Guide Comments? infodev@avaya.com... - Page 88 Gatekeeper Settings on page 89. • If you are only registering your endpoint to a SIP server (and not a gatekeeper), continue with Configuring Basic SIP Settings on page 90. ® Avaya Scopia XT Series Deployment Guide April 2015 Comments? infodev@avaya.com...
-
Page 89: Configuring Basic Gatekeeper Settings
Configuring Basic Gatekeeper Settings About this task ® Configure the gatekeeper settings if your Avaya Scopia XT Series works with one. A gatekeeper routes audio and video H.323 calls by resolving dial strings (H.323 alias or URI) into the IP address of an endpoint, and handles the initial connection of calls. -
Page 90: Configuring Basic Sip Settings
1. Enter information for the SIP server, as described below. In redundant SIP deployments, the XT Series uses this server as the default SIP server. Figure 58: Configuring basic SIP settings ® Avaya Scopia XT Series Deployment Guide April 2015 Comments? infodev@avaya.com... -
Page 91: Installing Scopia ® Xt Control To Use Keyboard And Mouse
Yosemite operating system. For more information, see Resolving download problems on page 198. ® The Scopia XT Control utility can only be installed from the endpoint's web interface. ® April 2015 Avaya Scopia XT Series Deployment Guide Comments? infodev@avaya.com... - Page 92 5. For Mac users only, copy the setup package to a folder on your computer, and launch the ® Scopia XT Control: You may need to follow the steps in Resolving download problems on page 198. ® Avaya Scopia XT Series Deployment Guide April 2015 Comments? infodev@avaya.com...
-
Page 93: Setting Date And Time
General > Date & Time. From the XT Series web interface, select Basic Settings > Date - Time. 2. Set the date and time, as described in Table 17: Configuring date and time settings page 94. ® April 2015 Avaya Scopia XT Series Deployment Guide Comments? infodev@avaya.com... -
Page 94: Setting The Time Zone
You need to enter the PIN required to access the Advanced settings. The default PIN is 1234. 2. Configure settings as described in Table 18: Configuring time zone related settings page 95. ® Avaya Scopia XT Series Deployment Guide April 2015 Comments? infodev@avaya.com... -
Page 95: Configuring The Screen Saver To Start Automatically
Procedure 1. Access the screen saver settings. From the endpoint's main menu, select Configure > General. From the XT Series web interface, select the Basic Settings tab. ® April 2015 Avaya Scopia XT Series Deployment Guide Comments? infodev@avaya.com... -
Page 96: Configuring Monitors
Configuring Monitors About this task ® After you connect one or two monitors to the HDMI ports on the Avaya Scopia XT Series, you can configure the number of monitors, their resolutions, and the allowed video layouts. However, the ®... - Page 97 Advanced > I/O connections > Monitor. 2. Select General to access the general settings. Figure 65: Configuring the general monitor settings from the web interface 3. Configure the general settings: ® April 2015 Avaya Scopia XT Series Deployment Guide Comments? infodev@avaya.com...
- Page 98 • 1080p forces 1080p resolution at 25, 30, 50 or 60 frames per second (fps) if the monitor supports it. • 720p forces 720p resolution at 50 or 60fps if the monitor supports it, even if the received resolution is higher. Table continues… ® Avaya Scopia XT Series Deployment Guide April 2015 Comments? infodev@avaya.com...
- Page 99 Limit the video layouts available to users: • auto enables PIP, PaP and PoP layouts. Press the Layouts key to switch between PIP, PaP and PoP. • PIP enables only PiP. Table continues… ® April 2015 Avaya Scopia XT Series Deployment Guide Comments? infodev@avaya.com...
-
Page 100: Configuring Cameras
1. Access the camera settings. From the XT Series web interface, select Administrator settings > I/O connections > Cameras > General. From the endpoint's main menu, select Configure > Advanced > I/O connections > Cameras > General. ® Avaya Scopia XT Series Deployment Guide April 2015 Comments? infodev@avaya.com... - Page 101 • HD1( or HD1/HD2 in the case of the XT7000 Series): Select if you connected the PTZ camera to the HDMI input of the XT Codec Unit. This is the most common configuration. Table continues… ® April 2015 Avaya Scopia XT Series Deployment Guide Comments? infodev@avaya.com...
- Page 102 4. Configure the details of each connected camera, by selecting its port, such as HD1. From the XT Series web interface, select Administrator settings > I/O connections > Cameras. From the endpoint's main menu, select Configure > Advanced > I/O connections > Cameras. ® Avaya Scopia XT Series Deployment Guide April 2015 Comments? infodev@avaya.com...
- Page 103 • Indoor sets color compensation for artificial light. Table continues… For the XT4300 (XT Flex Camera), there are additional settings, such as Ceiling Mount, IR Receivers, Picture, and Wide Dynamic Range. ® April 2015 Avaya Scopia XT Series Deployment Guide Comments? infodev@avaya.com...
-
Page 104: Configuring Microphones
78 Configuring Microphones About this task ® After connecting your microphones to the Avaya Scopia XT Series, you must enable the relevant audio connection and configure its settings. There are several connections available to input audio to the XT Series: •... - Page 105 Configure > Advanced > I/O connections > Audio - Input. 2. Select the type of audio input you want to configure. Figure 73: Choices of audio input to configure ® April 2015 Avaya Scopia XT Series Deployment Guide Comments? infodev@avaya.com...
- Page 106 XT Series built-in echo cancellation. Typically, you use the default echo cancellation settings. To configure the advanced settings, such as disabling Automatic Gain Control, see Configuring Advanced Echo Cancellation on External Microphones page 137. Table continues… ® Avaya Scopia XT Series Deployment Guide April 2015 Comments? infodev@avaya.com...
-
Page 107: Registering The Xt Series To A Sip Server
Initial Configuration of the XT Series on page 78 Registering the XT Series to a SIP Server About this task This section explains how to register your XT Series to the SIP server. ® April 2015 Avaya Scopia XT Series Deployment Guide Comments? infodev@avaya.com... - Page 108 1. Access the SIP settings. From the XT Series web interface, select Administrator Settings > Protocols > SIP. From the endpoint's main menu, select Configure > Advanced > Protocols > SIP. ® Avaya Scopia XT Series Deployment Guide April 2015 Comments? infodev@avaya.com...
- Page 109 SIP servers. The XT Series uses Server 1 as the default SIP server. If Server 1 fails, the system uses Server 2, and so on. Table continues… ® April 2015 Avaya Scopia XT Series Deployment Guide Comments? infodev@avaya.com...
- Page 110 For example, when sharing content to others in the meeting, one participant is designated as the presenter, and is granted the floor for presenting. All endpoints must Table continues… ® Avaya Scopia XT Series Deployment Guide April 2015 Comments? infodev@avaya.com...
- Page 111 5. (Optional) If you are securing SIP connections using TLS certificates, continue with Securing Connections to the XT Series Using TLS on page 160. Related Links Initial Configuration of the XT Series on page 78 ® April 2015 Avaya Scopia XT Series Deployment Guide Comments? infodev@avaya.com...
-
Page 112: Chapter 7: Advanced Configuration Of The Xt Series
Chapter 7: Advanced Configuration of the XT Series ® While the Quick Setup Wizard and some other settings enable you to deploy the Avaya Scopia Series in your organization, it has a significant array of advanced features which enable powerful customization. - Page 113 5. We recommend changing the default administrator password, as described in Setting PIN Codes for the XT Series on page 156. Related Links Advanced Configuration of the XT Series on page 112 ® April 2015 Avaya Scopia XT Series Deployment Guide Comments? infodev@avaya.com...
-
Page 114: Configuring Advanced System Name Settings
1. Access the system name settings. From the XT Series web interface, select Administrator Settings > System > Location. From the endpoint's main menu, select Configure > Advanced > System > Location. ® Avaya Scopia XT Series Deployment Guide April 2015 Comments? infodev@avaya.com... - Page 115 84). If you selected this option from the System Name Display Mode list, you can modify the display name (optional). You can only enter alphanumeric characters. Table continues… ® April 2015 Avaya Scopia XT Series Deployment Guide Comments? infodev@avaya.com...
-
Page 116: Configuring Advanced Network Settings
(see Activating the XT Series and its Optional Features on page 78). Both small ® businesses and large enterprises may require both network ports (see Connecting Avaya Scopia XT Series to the Network on page 46). ® Avaya Scopia... - Page 117 4. Access the IP address. From the endpoint's main menu, select either GLAN 1 or GLAN 2. From the XT Series web interface, select GLAN 1 or GLAN 2 > Addresses. Figure 81: Configuring IP addresses from the web interface 5. Enter the following fields: ® April 2015 Avaya Scopia XT Series Deployment Guide Comments? infodev@avaya.com...
-
Page 118: Configuring Advanced Network Connectivity
(see Activating the XT Series and its Optional Features on page 78). Both small ® businesses and large enterprises may require both network ports (see Connecting Avaya Scopia XT Series to the Network on page 46). ® Avaya Scopia... - Page 119 From the XT Series web interface, select Administrator Settings > Networks > GLAN1/GLAN2 > Parameters. From the endpoint's main menu, select Configure > Advanced > Networks > GLAN1/GLAN2 > Parameters. Figure 83: Configuring advanced network connection from the web interface ® April 2015 Avaya Scopia XT Series Deployment Guide Comments? infodev@avaya.com...
- Page 120 Enter the ID of the VLAN to which this unit belongs, between 1 and 4094. 9. To configure the XT Series for 802.1x compliant authentication, select GLAN1/GLAN2 > 802.1x. 10. Set the fields as described in the following table: ® Avaya Scopia XT Series Deployment Guide April 2015 Comments? infodev@avaya.com...
-
Page 121: Configuring Nat And Firewall Traversal
IP address to all endpoints you invite to the meeting. This is known as STUN auto-discovery. This also works for HTTP public servers. ® • Use a dedicated firewall traversal solution like the Avaya Scopia PathFinder server and set it as your gatekeeper (see Configuring Advanced Gatekeeper Settings on page 124). -
Page 122: Defining Qos Priority Of Types Of Network Traffic
NAT Discovery Enter the method used for the XT Series to discover its public IP address: • HTTP discovery uses an Avaya HTTP server to return the public IP address. The endpoint must be directly connected to the internet. • Manual lets you set the public IP address manually in the Public IP Address field. - Page 123 2. Set the fields as described in Table 32: Configuring QoS settings on page 123. Table 32: Configuring QoS settings Field Name Description Use QoS Select whether to enable or disable QoS. Table continues… ® April 2015 Avaya Scopia XT Series Deployment Guide Comments? infodev@avaya.com...
-
Page 124: Configuring Advanced Gatekeeper Settings
Configuring Advanced Network Settings on page 116 Configuring Advanced Gatekeeper Settings About this task ® As part of H.323 network setup, the Avaya Scopia XT Series must be registered to a gatekeeper, ® like Avaya Scopia ECS Gatekeeper. A gatekeeper routes audio and video H.323 calls by resolving dial strings (H.323 alias or URI) into the IP address of an endpoint, and handles the initial connection of calls. - Page 125 Select Yes to allow only endpoints registered to the gatekeeper to call your endpoint, using your alias or dial number. 3. From the web interface only, select Save. 4. Select H.323 > Gatekeeper. ® April 2015 Avaya Scopia XT Series Deployment Guide Comments? infodev@avaya.com...
- Page 126 Select MD5 for the gatekeeper to verify the identity of the endpoint (one-way integrity check) using MD5 checksums. Table continues… ® Avaya Scopia XT Series Deployment Guide April 2015 Comments? infodev@avaya.com...
-
Page 127: Setting Call Bandwidth In Xt Series
Setting Call Bandwidth in XT Series About this task ® You can set the maximum bandwidth used by the Avaya Scopia XT Series when participating in a meeting, measured as the maximum bitrate. Bitrate is the speed of data flow. Higher video resolutions require higher bitrates to ensure the video is constantly updated, thereby maintaining smooth motion. - Page 128 1. Access the call settings. From the XT Series web interface, select Administrator Settings > Calls > Preferences > General. From the endpoint's main menu, select Configure > Advanced > Calls > Preferences > General. ® Avaya Scopia XT Series Deployment Guide April 2015 Comments? infodev@avaya.com...
- Page 129 Local audio-video If using the system as an endpoint which also hosts meetings on its built-in MCU, select Yes to include local video and audio in videoconferences. Table continues… ® April 2015 Avaya Scopia XT Series Deployment Guide Comments? infodev@avaya.com...
-
Page 130: Setting A Time Limit For Videoconferences
The meeting automatically closes if there is no response to the alert after 30 seconds. ® Avaya Scopia XT Series Deployment Guide April 2015 Comments? infodev@avaya.com... -
Page 131: Configuring Advanced Sound (Audio Output) Settings
Configuring Advanced Sound (Audio Output) Settings About this task ® In most cases, the Avaya Scopia XT Series sound output is transparent and works with the default settings. However, for complex room setups, the XT Series allows you to carefully merge different ®... - Page 132 You may also want to record computer audio shared in the meeting. ® Avaya Scopia XT Series Deployment Guide April 2015...
- Page 133 Administrator settings > I/O connections > Audio - Outputs > Tracks. From the endpoint's main menu, select Configure > Advanced > I/O connections > Audio - Outputs > Tracks. ® April 2015 Avaya Scopia XT Series Deployment Guide Comments? infodev@avaya.com...
- Page 134 Refers to a monitor or other HDMI device connected to the or HD2 port. Outputs > Digital Audio Refers to a digital audio output device like an external speaker connected to the port via its mini-TOSlink connector. Table continues… ® Avaya Scopia XT Series Deployment Guide April 2015 Comments? infodev@avaya.com...
- Page 135 3. To remove the connection on the web interface, select the connection's x in the track box. 4. From the web interface only, select Save. Related Links Advanced Configuration of the XT Series on page 112 ® April 2015 Avaya Scopia XT Series Deployment Guide Comments? infodev@avaya.com...
-
Page 136: Configuring Advanced Regional Audio And Video Settings
The video refresh frequency depends on the country, and may be 50Hz or 60Hz. If you set it to <auto>, the system assigns the standard of the chosen country. Table continues… ® Avaya Scopia XT Series Deployment Guide April 2015 Comments? infodev@avaya.com... -
Page 137: Configuring Advanced Echo Cancellation On External Microphones
Microphones About this task ® The Avaya Scopia XT Series has its own built-in echo cancellation for external microphones (or other audio input) without an audio mixer. You can hear an echo when a remote endpoint's external speaker (not headphones) picks up your voice in addition to their own audio, and re-broadcasts your own audio back to you and others in the meeting. - Page 138 3. From the web interface only, select Save. Related Links Advanced Configuration of the XT Series on page 112 ® Avaya Scopia XT Series Deployment Guide April 2015 Comments? infodev@avaya.com...
-
Page 139: Configuring Xt Series To Use Ldap Directory
The contacts of a third party LDAP are read-only from the endpoint. The LDAP tree must have the following specific structure and naming conventions: - The Root DN must be defined. For example, dc=company, dc=com. ® April 2015 Avaya Scopia XT Series Deployment Guide Comments? infodev@avaya.com... - Page 140 Management as the LDAP directory also from the Avaya Scopia Management ® administrator portal (for details, see the Administrator Guide for Avaya Scopia Management). Before you begin If configuring from the endpoint, you must first enable advanced configuration, as described in Enabling Advanced Maintenance on the XT Series on page 112.
- Page 141 Description Preferred Select Yes to view this LDAP's contacts in the Contacts page. Select No to define the LDAP server but hide it from the Contacts page. Table continues… ® April 2015 Avaya Scopia XT Series Deployment Guide Comments? infodev@avaya.com...
-
Page 142: Configuring Advanced Dtmf Settings
® For a Scopia Management LDAP directory, if you defined the Root DN in Scopia ® Management, enter it here. For details, see the Administrator Guide for Avaya Scopia Management. For XT Series LDAPs, this field is not displayed. Filter The filter applied to the LDAP tree, so you view only the relevant contacts. - Page 143 Select Yes to send DTMF tones in this way for H.323 calls. By default, this is standard for SIP calls and disabled for H.323 calls, since not all H.323 devices Table continues… ® April 2015 Avaya Scopia XT Series Deployment Guide Comments? infodev@avaya.com...
-
Page 144: Enabling And Configuring Recording
AAC-LC format. You can view recordings saved to the network via the Scopia ® Desktop Web Portal (see User Guide for Avaya Scopia Desktop Client). If using a USB device to record a videoconference hosted by your built-in MCU, up to six remote endpoints can join the meeting (if your license is MCU 9). - Page 145 Solution includes a recording server, the XT Series is managed by Scopia ® Management, and the meeting is hosted by an external Scopia Elite MCU (or an older model). For details, contact your administrator. Table continues… ® April 2015 Avaya Scopia XT Series Deployment Guide Comments? infodev@avaya.com...
- Page 146 Table 45: Typical file sizes based on the bitrate on page 147. You can see how much recording time is available on your target disk when you access the Recording menu (see User Guide for Avaya ® Scopia XT Series).
-
Page 147: Saving Ptz Camera Positions
• From the XT Series web interface, select More Actions located just under the tabs, then select Control Camera, and press Select on the row of the position number. ® April 2015 Avaya Scopia XT Series Deployment Guide Comments? infodev@avaya.com... - Page 148 (0-99). To save positions 100-109, press * then 0-9. For 110-119, press # then 0-9. • From the XT Series web interface, select select Store on the row of the new position number. ® Avaya Scopia XT Series Deployment Guide April 2015 Comments? infodev@avaya.com...
-
Page 149: Remotely Controlling The Xt Series With At Commands
112 Remotely Controlling the XT Series with AT Commands About this task ® For complex room setups, you can remotely control your Avaya Scopia XT Series from controllers like AMX, Creston or Extron devices which use a proprietary API known as AT commands. It has ®... - Page 150 TCP and serial cable. Select IP only to restrict it to a TCP connection only, or RS232 serial port only to restrict AT control to an RS232 serial cable connected to the USB port on the XT Series. Table continues… ® Avaya Scopia XT Series Deployment Guide April 2015 Comments? infodev@avaya.com...
-
Page 151: Sending Status With Snmp
1. Access the SNMP management settings. From the XT Series web interface, select Administrator Settings > Utilities > Remote Access > SNMP. From the endpoint's main menu, select Configure > Advanced > Utilities > Remote Access > SNMP. ® April 2015 Avaya Scopia XT Series Deployment Guide Comments? infodev@avaya.com... - Page 152 Enter the Subnet mask to modify the Address field into a range of addresses allowed to send the unit AT commands. 3. From the web interface only, select Save. Related Links ® Avaya Scopia XT Series Deployment Guide April 2015 Comments? infodev@avaya.com...
-
Page 153: Updating The Xt Series
155 Upgrading the Software Using a PC About this task ® This section describes how to upgrade the software running on the Avaya Scopia XT Series by downloading the upgrade package to a computer on the network. Before you begin •... - Page 154 Verify the computer can reach the XT Series, and that a firewall does not block TCP port 55099. Figure 107: GLAN1 port 2. Download the upgrade package (for example, XT5000_Vxxx.exe) from the Avaya site to the computer. ® This can be used to upgrade any Avaya Scopia XT Series.
-
Page 155: Upgrading The Avaya Scopia
Your Avaya Scopia XT Series comes with a USB drive containing the latest firmware version available at the time the system was shipped. We recommend that you always access the Avaya site to check if a later version is available. -
Page 156: Chapter 8: Securing Your Xt Series
Chapter 8: Securing your XT Series ® You can secure access to the basic and advanced settings of your Avaya Scopia XT Series by setting a PIN code to access these sections of the endpoint interface. You can also secure web logins and limit remote upgrades to the system if required. -
Page 157: Securing Web Access To The Xt Series
About this task ® By default, you can connect remotely from the web to your Avaya Scopia XT Series. You can disable remote web management of the XT Series completely, or restrict it so that only a range of IP addresses can access this device. - Page 158 (only relevant if you set the Enable all addresses field to No). User Name, Enter the remote web access username (requires HTTPS to be set to Yes). Password Table continues… ® Avaya Scopia XT Series Deployment Guide April 2015 Comments? infodev@avaya.com...
-
Page 159: Enabling And Securing Remote Upgrades
Enabling and Securing Remote Upgrades About this task ® ® You can remotely upgrade your Avaya Scopia XT Series with new firmware either from Scopia Management or from a remote Windows computer running the XT Series upgrade program. Important: While you can enable this setting from the web interface, you cannot perform the actual upgrade ®... -
Page 160: Securing Connections To The Xt Series Using Tls
Securing Connections to the XT Series Using TLS ® You can configure your video network devices, both Scopia Solution and third-party, to support Transport Layer Security (TLS) for the SIP protocol. ® Avaya Scopia XT Series Deployment Guide April 2015 Comments? infodev@avaya.com... - Page 161 4. If you used a different CA for XT Series from the one used for Scopia Management, upload ® the XT Series's CA root and intermediate certificates into Scopia Management as described ® in Administrator Guide for Scopia Management. ® April 2015 Avaya Scopia XT Series Deployment Guide Comments? infodev@avaya.com...
-
Page 162: Generating And Uploading A Certificate Signing Request For Xt Series
Generating and Uploading a Certificate Signing Request for XT Series About this task ® This section explains how to generate and upload the TLS certificate for Avaya Scopia XT Series that is used for encrypting communications with other video network devices. Important: Using encryption is subject to local regulation. - Page 163 Enter the name of your specific department within the organization. Email Enter your email address. 4. Select Create to create the CSR. 5. Select Download > Download CSR to save the CSR. ® April 2015 Avaya Scopia XT Series Deployment Guide Comments? infodev@avaya.com...
- Page 164 10. Import the signed certificate you received from the CA, as follows: Figure 117: Uploading the signed certificate a. Select Choose File (next to Step 4) and browse to the signed certificate you received from the CA. b. Select Upload. ® Avaya Scopia XT Series Deployment Guide April 2015 Comments? infodev@avaya.com...
-
Page 165: Backing Up And Restoring Xt Series Certificates
1. Connect a USB key to the upper USB port of the XT Codec Unit (Figure 119: Connecting a USB Key to the XT Codec Unit on page 166). ® April 2015 Avaya Scopia XT Series Deployment Guide Comments? infodev@avaya.com... -
Page 166: Deleting Xt Series Certificates
• The system generated errors while creating the CSR and you want to replace it with a new one. • You want to use a different CA for signing your certificates. • You changed the system's IP address. ® Avaya Scopia XT Series Deployment Guide April 2015 Comments? infodev@avaya.com... -
Page 167: Enabling The Tls Connection In Xt Series
TLS enables network devices to communicate securely using certificates, to provide authentication of the devices and encryption of the communication between them. ® April 2015 Avaya Scopia XT Series Deployment Guide Comments? infodev@avaya.com... - Page 168 Certificate Authority (CA) as the XT Series. No to connect to a device whose certificate has not been validated. 3. Select Save. ® Avaya Scopia XT Series Deployment Guide April 2015 Comments? infodev@avaya.com...
-
Page 169: Enabling Encryption For Videoconferences
1. Access the security settings. From the XT Series web interface, select Administrator Settings > Calls > Encryption. From the endpoint's main menu, select Configure > Advanced > Calls > Encryption. ® April 2015 Avaya Scopia XT Series Deployment Guide Comments? infodev@avaya.com... - Page 170 5. Access the IP settings. From the XT Series web interface, select Administrator Settings > Calls > Preferences > IP. From the endpoint's main menu, select Configure > Advanced > Calls > Preferences > IP. ® Avaya Scopia XT Series Deployment Guide April 2015 Comments? infodev@avaya.com...
- Page 171 6. Set RTP Firewall to Yes to check the source of the received audio video and presentation (RTP packets) to verify it matches the remote endpoint's IP address. Related Links Securing Connections to the XT Series Using TLS on page 160 ® April 2015 Avaya Scopia XT Series Deployment Guide Comments? infodev@avaya.com...
-
Page 172: Chapter 9: Troubleshooting The Avaya Scopia ® Xt Series
Chapter 9: Troubleshooting the Avaya ® Scopia XT Series This section covers troubleshooting problems that may occur when setting up and using the Avaya ® Scopia XT Series. Related Links Viewing System Information for Customer Support on page 172 Retrieving XT Series Logs... - Page 173 Figure 125: Viewing system information 2. To view additional system information from the web interface, such as the host ID or the expiration date of the license, select Enable License from the homepage. ® April 2015 Avaya Scopia XT Series Deployment Guide Comments? infodev@avaya.com...
- Page 174 Troubleshooting the Avaya Scopia ® XT Series Figure 126: Viewing additional system information from the web interface 3. To view additional system information from the endpoint, such as IP addresses and the gatekeeper's registration status from the endpoint, press the Back key and select System Status.
-
Page 175: Retrieving Xt Series Logs
Retrieving XT Series Logs Related Links ® Troubleshooting the Avaya Scopia XT Series on page 172 Retrieving XT Series Logs When reporting a problem to customer support, you may be asked to retrieve and send logs of ® Avaya Scopia XT Series. - Page 176 Troubleshooting the Avaya Scopia ® XT Series Figure 128: Enabling importing and exporting configuration files from the web interface 2. Set the fields as required. Field Name Description ® Enable import Enable/disable import of configuration files from Scopia Management. ®...
-
Page 177: Retrieving Network Traffic Logs
Figure 129: Retrieving netlog files 2. Start retrieving logs by selecting Start Netlog. 3. Reproduce the problem you want to report to customer support. 4. Stop retrieving logs by selecting Stop Netlog. ® April 2015 Avaya Scopia XT Series Deployment Guide Comments? infodev@avaya.com... -
Page 178: Retrieving System Logs
175 Retrieving System Logs About this task ® This procedure explains how to retrieve system log files of the Avaya Scopia XT Series internal system activities and memory dump. Before you begin Enable the system log and profiler functionality (see... -
Page 179: Resolving Problems Connecting Calls
116. Incoming SIP or H.323 video call Cannot receive a SIP or H.323 video call. Solution • Verify the number/address used to connect to you is correct. ® April 2015 Avaya Scopia XT Series Deployment Guide Comments? infodev@avaya.com... - Page 180 Troubleshooting the Avaya Scopia ® XT Series • Recheck the Network Configuration, Network Preferences and H.323/SIP Proxy settings, described in Configuring Advanced Network Settings on page 116. • Make sure the Do Not Disturb (DND) function is not enabled. DND is indicated by the icon in the top bar on the menu screens.
-
Page 181: Resolving Audio Problems
Resolving Audio Problems 5. Redial the same contact. Related Links ® Troubleshooting the Avaya Scopia XT Series on page 172 Resolving Audio Problems Problem I cannot hear audio after setting up the system. Volume setting Solution Make sure the system volume is not set to 0 by pressing the volume keys on the XT Remote Control Unit. - Page 182 Troubleshooting the Avaya Scopia ® XT Series Figure 134: The audio test completed successfully from the web interface 3. Select Tx tone to check the audio output sent from the local endpoint to the connected endpoint. If the test is completed successfully, the Done message is displayed.
-
Page 183: Cancelling The Echo On Hdmi Monitors
2. Disable specific audio codecs by selecting No from the lists. 3. From the web interface only, select Save. Related Links ® Troubleshooting the Avaya Scopia XT Series on page 172 Cancelling the Echo on HDMI Monitors About this task An HDMI monitor might insert a delay in the audio, causing an echo. - Page 184 Troubleshooting the Avaya Scopia ® XT Series Figure 136: Configuring echo cancellation settings 2. Set the Audio delay automatic estimation field to Yes. This enables the endpoint to constantly measure the audio delay. 3. Set the Apply audio delay value field to Yes.
-
Page 185: Resolving Monitor Display Problems
If necessary, refer to Adjusting the Image Position on page 86 for operational information. Menus or remote presentation cropped The system menus or the remote presentation appears to be cropped. ® April 2015 Avaya Scopia XT Series Deployment Guide Comments? infodev@avaya.com... - Page 186 Troubleshooting the Avaya Scopia ® XT Series Solution Adjust the way the image appears on the monitor. To see your adjustments in real-time, we recommend performing this procedure from the endpoint itself. If configuring from the endpoint, you must first enable advanced configuration, as described in Enabling Advanced Maintenance on the XT Series on page 112.
-
Page 187: Improving Call Video Resolution
Remote system resolution limits Solution Make sure the remote system also supports your desired resolution. Remote systems that are ® limited to 720p or less negotiate lower resolutions with the Avaya Scopia XT Series. VISCA cable Solution Make sure the VISCA cable is properly connected to the IN RS-232C port of the camera. - Page 188 Troubleshooting the Avaya Scopia ® XT Series Figure 139: Enabling the Moving setting from the web interface 2. Make sure that the Moving field is set to Yes. 3. From the web interface only, select Save. Receiving resolution The resolution you can receive has not been configured correctly.
- Page 189 XT Codec Unit from setting the camera to the necessary resolution. For details, see Connecting the PTZ Camera on page 49. Related Links ® Troubleshooting the Avaya Scopia XT Series on page 172 ® April 2015 Avaya Scopia XT Series Deployment Guide Comments? infodev@avaya.com...
-
Page 190: Resolving Problems With Displaying Video
Troubleshooting the Avaya Scopia ® XT Series Resolving Problems with Displaying Video Problem You cannot send or receive video during a call. If the Web Video feature is enabled, you can monitor video remotely from the XT Series web interface by selecting More Actions > Web Video:... -
Page 191: Resolving Lip Sync Problem
The video codecs available depend on your XT Series model. 3. From the web interface only, select Save. Related Links ® Troubleshooting the Avaya Scopia XT Series on page 172 Resolving Lip Sync Problem There is a lack of synchronization between audio and video. - Page 192 Troubleshooting the Avaya Scopia ® XT Series Figure 143: Configuring lip sync settings 2. Set the fields as described in Table 54: Configuring video quality settings on page 192 Table 54: Configuring video quality settings Field Name Description NetSense Set to Yes to enable NetSense.
-
Page 193: Resolving Camera Issues
Cannot see camera output I cannot see the PTZ camera’s output after setting up. Solution If the Web Video feature is enabled, you can check the camera's output remotely from the Avaya ® Scopia XT Series web interface by selecting More Actions > Web Video:... - Page 194 Troubleshooting the Avaya Scopia ® XT Series 2. Press ok/menu again. 3. Select Video Source. Connectivity Solution Ensure the camera is correctly connected to the system, including the VISCA cable connected to the IN RS-232C connector on the camera. Moving setting The Moving setting may not be enabled.
-
Page 195: Resolving Ip Address Problems
112. 1. From the endpoint's main menu, select Configure > Quick Setup. 2. Press Next several times until the Configure TCP/IP screen appears. Figure 146: Configuring IP address ® April 2015 Avaya Scopia XT Series Deployment Guide Comments? infodev@avaya.com... -
Page 196: Cannot Control With Keyboard And Mouse
Troubleshooting the Avaya Scopia ® XT Series 3. Enter the IP address. 4. Select Next. 5. Select Done. No calls due to network error The system does not make calls due to a network error. The network is based on IPv6 and the endpoint is configured to support only IPv4. -
Page 197: Resolving Problems Viewing Computer Content
® Connect to Scopia XT Control as described in User Guide for XT Series. Related Links ® Troubleshooting the Avaya Scopia XT Series on page 172 Resolving Problems Viewing Computer Content Problem I cannot sshare a presentation from my computer or view its content. -
Page 198: Resolving Xt Remote Control Unit Problems
Low battery power Solution ® Replace the battery, as described in Avaya Scopia XT Series Installation Guide. When the XT Remote Control Unit's battery power is low, an icon appears in the system menus letting you know that you should replace the battery: •... -
Page 199: Usb Software Upgrade Failure
The software upgrade from the USB drive fails. Send the log file to your local customer support representative. ® 1. Remove the USB drive from the USB port of the Avaya Scopia XT Series 2. Connect the USB drive to a computer. - Page 200 Troubleshooting the Avaya Scopia ® XT Series Procedure 1. From the endpoint's main menu, select Configure > Advanced > Utilities > Restore System > Factory Defaults. Figure 149: Restoring factory default settings 2. Confirm you want to remove all configurations.
-
Page 201: Glossary
A balanced microphone uses a cable that is built to reduce noise and Microphone interference even when the cable is long. This reduces audio disruptions resulting from surrounding electromagnetic interference. ® April 2015 Avaya Scopia XT Series Deployment Guide Comments? infodev@avaya.com... - Page 202 Control is communicated via H.245 in H.323 endpoints, or by SDP in SIP endpoints. Control occurs within the framework of an established call, after signaling. Continuous Presence on page 202. ® Avaya Scopia XT Series Deployment Guide April 2015 Comments? infodev@avaya.com...
- Page 203 Endpoints include dedicated endpoints, like Scopia ® Executive, software endpoints like Scopia Desktop Client, mobile device ® endpoints like Scopia Mobile, room systems like XT Series, and ® telepresence systems like Scopia XT Telepresence. ® April 2015 Avaya Scopia XT Series Deployment Guide Comments? infodev@avaya.com...
- Page 204 Gatekeepers also implement the dial plan of an organization by routing H.323 calls depending on their dial prefixes. ® ® Scopia Management includes a built-in Avaya Scopia Gatekeeper, while ECS is a standalone gatekeeper. Gateway A gateway is a component in a video solution which routes information between two subnets or acts as a translator between different protocols.
- Page 205 This is different from SVC which is an adaptive technology working to improve quality even when only one side supports the standard. ® April 2015 Avaya Scopia XT Series Deployment Guide Comments? infodev@avaya.com...
- Page 206 (KBps). LDAP LDAP is a widespread standard database format which stores network users. The format is hierarchical, where nodes are often represented ® Avaya Scopia XT Series Deployment Guide April 2015 Comments? infodev@avaya.com...
- Page 207 Media is transmitted via the RTP and RTCP protocols in both SIP and H.323 calls. The parallel data stream of both live video and presentation, is known as dual video. ® April 2015 Avaya Scopia XT Series Deployment Guide Comments? infodev@avaya.com...
- Page 208 NetSense is a proprietary Scopia Solution technology which optimizes the video quality according to the available bandwidth to minimize packet loss. As the available bandwidth of a connection varies depending on data traffic, ® Avaya Scopia XT Series Deployment Guide April 2015 Comments? infodev@avaya.com...
- Page 209 Q.931 Q.931 is a telephony protocol used to start and end the connection in H.323 calls. ® April 2015 Avaya Scopia XT Series Deployment Guide Comments? infodev@avaya.com...
- Page 210 RTP. RTP or Real-time Transport Protocol is a network protocol which supports video and voice transmission over IP. It underpins most videoconferencing ® Avaya Scopia XT Series Deployment Guide April 2015 Comments? infodev@avaya.com...
- Page 211 Session Initiation Protocol (SIP) is a signaling protocol for starting, managing and ending voice and video sessions over TCP, TLS or UDP. Videoconferencing endpoints typically are compatible with SIP or H.323, ® and in some cases (like Avaya Scopia XT Series), an endpoint can be ® April 2015...
- Page 212 (like wireless networks) which deliver low quality video. It splits the video stream into layers, comprising a small base layer and then additional layers on top ® Avaya Scopia XT Series Deployment Guide April 2015 Comments? infodev@avaya.com...
- Page 213 UC, or unified communications deployments offer solutions covering a wide Communications) range of communication channels. These include audio (voice), video, text (IM or chat), data sharing (presentations), whiteboard sharing (interactive annotations on shared data). ® April 2015 Avaya Scopia XT Series Deployment Guide Comments? infodev@avaya.com...
- Page 214 For example,<endpoint name>@<server_domain_name>. When dialing URI ® between organizations, the server might often be the Avaya Scopia PathFinder server of the organization. URI Dialing Accessing a device via its on page 214.
- Page 215 XGA defines a Video resolution of 1024 x 768 pixels. ® Zone Gatekeepers like Avaya Scopia ECS Gatekeeper split endpoints into zones, where a group of endpoints in a zone are registered to a gatekeeper. Often a zone is assigned a dial prefix, and usually corresponds to a physical location like an organization's department or branch.