Sign In
Upload
Manuals
Brands
Grandstream Manuals
Network Hardware
UCM6208
Grandstream UCM6208 Manuals
Manuals and User Guides for Grandstream UCM6208. We have
7
Grandstream UCM6208 manuals available for free PDF download: User Manual, Security Manual, Manual, Quick Installation Manual, Configuring
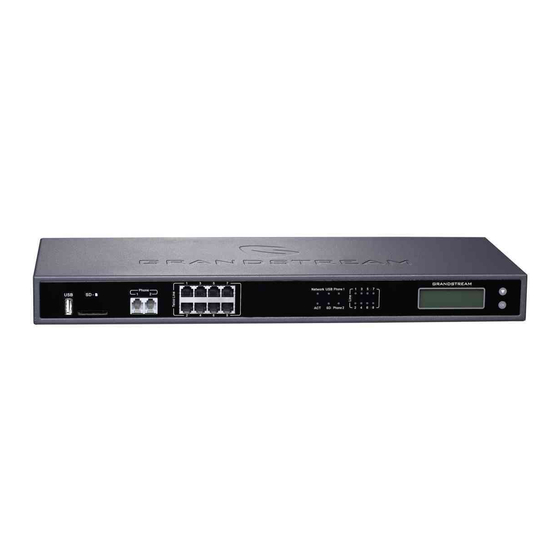
Grandstream Networks UCM6208 User Manual (355 pages)
UCM6200 Series IP PBX
Brand:
Grandstream Networks
| Category:
PBX
| Size: 10.04 MB
Table of Contents
Table of Contents
4
Document Purpose
22
Change Log
23
Firmware Version 1.0.14.23
23
Firmware Version 1.0.14.21
23
Firmware Version 1.0.13.14
24
Firmware Version 1.0.12.19
24
Firmware Version 1.0.11.27
25
Firmware Version 1.0.0.7
26
Welcome
27
Product Overview
28
Technical Specifications
28
Table 1: Technical Specifications
28
Installation
31
Equipment Packaging
31
Connect Your UCM6200
31
Connect the UCM6202
31
Table 2: UCM6200 Equipment Packaging
31
Figure 1: UCM6202 Front View
31
Connect the UCM6204
32
Figure 2: UCM6202 Back View
32
Figure 3: UCM6204 Front View
32
Connect the UCM6208
33
Figure 4: UCM6204 Back View
33
Safety Compliances
34
Warranty
34
Figure 5: UCM6208 Front View
34
Figure 6: UCM6208 Back View
34
Getting Started
35
Use the LCD Menu
35
Table 3: LCD Menu Options
36
Use the LED Indicators
37
Table 4: UCM6202/UCM6204 LED Indicators
37
Table 5: UCM6208 LED Indicators
37
Use the Web GUI
38
Access Web GUI
38
Figure 7: UCM6202 Web GUI Login Page
38
Figure 8: Default Random Password
39
Setup Wizard
40
Web GUI Configurations
40
Figure 9: UCM6200 Setup Wizard
40
Web GUI Languages
41
Save and Apply Changes
41
Figure 10: UCM6200 Web GUI Language
41
Make Your First Call
42
System Settings
43
Network Settings
43
Basic Settings
43
Table 6: UCM6200 Network SettingsBasic Settings
43
Figure 11: UCM6202 Network Interface Method: Route
47
Figure 12: UCM6202 Network Interface Method: Switch
47
DHCP Client List
48
Figure 13: UCM6202 Network Interface Method: Dual
48
Figure 14: DHCP Client List
48
Figure 15: Add MAC Address Bind
49
Figure 16: Batch Add MAC Address Bind
49
Figure 17: UCM6200 Using 802.1X as Client
50
Figure 18: UCM6200 Using 802.1X EAP-MD5
50
Static Routes
51
Table 7: UCM6200 Network Settings802.1X
51
Table 8: UCM6200 Network SettingsStatic Routes
51
Figure 19: UCM6204 Static Route Sample
52
Port Forwarding
53
Table 9: UCM6200 Network SettingsPort Forwarding
53
Figure 20: UCM6204 Static Route Configuration
53
Figure 21: Create New Port Forwarding
54
Openvpn
55
Figure 22: UCM6200 Port Forwarding Configuration
55
Figure 23: GXP2160 Web Access Using UCM6202 Port Forwarding
55
Table 10: UCM6200 System SettingsNetwork SettingsOpen VPN
56
Figure 24: Open VPN Feature on the UCM6200
56
DDNS Settings
57
Figure 25: Register Domain Name on Noip.com
57
Figure 26: UCM6200 DDNS Setting
58
Figure 27: Using Domain Name to Connect to UCM6200
58
Security Settings
59
Static Defense
59
Table 11: UCM6200 FirewallStatic DefenseCurrent Service
59
Table 12: Typical Firewall Settings
60
Figure 28: Create New Firewall Rule
60
Dynamic Defense
61
Table 13: Firewall Rule Settings
61
Table 14: UCM6200 Firewall Dynamic Defense
62
Figure 29: Configure Dynamic Defense
62
Fail2Ban
63
Figure 30: Fail2Ban Settings
63
SSH Access
64
Table 15: Fail2Ban Settings
64
LDAP Server
65
Figure 31: SSH Access
65
Figure 32: LDAP Server Configurations
66
Figure 33: Default LDAP Phonebook DN
66
LDAP Server Configurations
66
Figure 34: Default LDAP Phonebook Attributes
67
Figure 35: LDAP ServerLdap Phonebook
67
LDAP Phonebook
67
Figure 36: Add LDAP Phonebook
68
Figure 37: Edit LDAP Phonebook
68
Figure 38: Import Phonebook
68
Figure 39: Phonebook CSV File Format
69
Figure 40: LDAP Phonebook after Import
69
Figure 41: Export Selected LDAP Phonebook
70
LDAP Client Configurations
70
Figure 42: LDAP Client Configurations
71
Figure 43: GXP2170 LDAP Phonebook Configuration
72
HTTP Server
73
Time Settings
73
Auto Time Updating
73
Table 16: HTTP Server Settings
73
Table 17: Time Auto Updating
74
Set Time Manually
75
NTP Server
75
Office Time
75
Figure 44: Set Time Manually
75
Table 18: Create New Office Time
76
Figure 45: Create New Office Time
76
Holiday
77
Figure 46: SettingsTime SettingsOffice Time
77
Figure 47: Create New Holiday
77
Table 19: Create New Holiday
78
Figure 48: SettingsTime SettingsHoliday
78
Email
79
Email Settings
79
Table 20: Email Settings
79
Email Templates
80
Figure 49: UCM6200 Email Settings
80
Figure 50: Email Templates
81
Figure 51: Conference Schedule Template
81
Email Send Log
82
Table 21: Email Log
82
Figure 52: Email Send Log
82
Recordings Storage
83
Figure 53: Email Logs
83
Figure 54: SettingsRecordings Storage
83
Figure 55: Recordings Storage Prompt Information
84
Figure 56: Recording Storage Category
84
Google Service Settings Support
85
Figure 57: Google Service SettingsOauth2.0 Authentication
85
Figure 58: Google ServiceNew Project
86
Figure 59: Google ServiceCreate New Credential
86
Figure 60: Google ServiceOauth2.0 Login
87
Provisioning
88
Overview
88
Configuration Architecture for End Point Device
88
Auto Provisioning Settings
89
Figure 61: Zero Config Configuration Architecture for End Point Device
89
Figure 62: UCM6200 Zero Config
90
Table 22: Auto Provision Settings
91
Figure 63: Auto Provision Settings
91
Discovery
92
Figure 64: Auto Discover
93
Figure 65: Discovered Devices
93
Global Configuration
94
Global Policy
94
Figure 66: Managing Discovered Devices
94
Table 23: Global Policy ParametersLocalization
95
Figure 67: Global Policy Categories
95
Table 24: Global Policy ParametersPhone Settings
96
Table 25: Global Policy ParametersContact List
97
Table 26: Global Policy ParametersMaintenance
99
Table 27: Global Policy ParametersNetwork Settings
101
Table 28: Global Policy ParametersCustomization
101
Global Templates
102
Table 29: Create New Template
102
Figure 68: Edit Global Template
103
Model Configuration
104
Model Templates
104
Table 30: Create New Model Template
104
Figure 69: Edit Model Template
105
Model Update
106
Figure 70: Template Management
106
Device Configuration
107
Create New Device
107
Figure 71: Upload Model Template Manually
107
Manage Devices
108
Figure 72: Create New Device
108
Figure 73: Manage Devices
108
Figure 74: Edit Device
109
Figure 75: Edit Customize Device Settings
111
Figure 76: Add P Value in Customize Device Settings
112
Figure 77: Modify Selected Devices - same Model
113
Figure 78: Modify Selected Devices - Different Models
114
Sample Application
115
Figure 79: Device List in Zero Config
115
Figure 80: Zero Config Sample - Global Policy
116
Figure 81: Zero Config Sample - Device Preview 1
117
Figure 82: Zero Config Sample - Device Preview 2
118
Figure 83: Zero Config Sample - Device Preview 3
119
Extensions
120
Create New User
120
Create New SIP Extension
120
Figure 84: Create New Device
120
Table 31: SIP Extension Configuration ParametersBasic Settings
121
Table 32: SIP Extension Configuration ParametersMedia
122
Table 33: SIP Extension Configuration ParametersFeatures
123
Create New IAX Extension
127
Table 34: SIP Extension Configuration ParametersSpecific Time
127
Table 35: IAX Extension Configuration ParametersBasic Settings
128
Table 36: IAX Extension Configuration ParametersMedia
129
Table 37: IAX Extension Configuration ParametersFeatures
129
Create New FXS Extension
131
Table 38: IAX Extension Configuration ParametersSpecific Time
131
Table 39: FXS Extension Configuration ParametersBasic Settings
132
Table 40: FXS Extension Configuration ParametersMedia
133
Table 41: FXS Extension Configuration ParametersFeatures
134
Batch Add Extensions
136
Batch Add SIP Extensions
136
Table 42: FXS Extension Configuration ParametersSpecific Time
136
Table 43: Batch Add SIP Extension Parameters
136
Batch Add IAX Extensions
139
Table 44: Batch Add IAX Extension Parameters
139
Search and Edit Extension
141
Figure 85: Manage Extensions
142
Export Extensions
143
Import Extensions
143
Figure 86: Export Extensions
143
Figure 87: Import Extensions
143
Table 45: SIP Extensions Imported File Example
144
Figure 88: Import File
144
Table 46: IAX Extensions Imported File Example
146
Table 47: FXS Extensions Imported File Example
148
E-Mail Notification
150
Figure 89: Import Error
150
Figure 90: E-Mail Notification - Prompt Information
150
Figure 91: Account Registration Information and QR Code
151
Figure 92: LDAP Client Information and QR Code
151
Multiple Registrations Per Extension
152
Figure 93: Multiple Registrations Per Extension
152
Figure 94: Extension - Concurrent Registration
152
SMS Message Support
153
Figure 95: SMS Message Support
153
Extension Groups
154
Configure Extension Groups
154
Figure 96: Edit Extension Group
154
Using Extension Groups
155
Figure 97: Select Extension Group in Outbound Route
155
Analog Trunks
156
Analog Trunk Configuration
156
Table 48: Analog Trunk Configuration Parameters
156
PSTN Detection
159
Figure 98: UCM6200 FXO Tone Settings
159
Figure 99: UCM6200 PSTN Detection
159
Figure 100: UCM6200 PSTN Detection: Auto Detect
160
Figure 101: UCM6200 PSTN Detection: Semi-Auto Detect
160
Table 49: PSTN Detection for Analog Trunk
161
Voip Trunks
162
Voip Trunk Configuration
162
Table 50: Create New SIP Trunk
162
Table 51: SIP Register Trunk Configuration Parameters
163
Table 52: SIP Peer Trunk Configuration Parameters
167
Table 53: Create New IAX Trunk
169
Table 54: IAX Register Trunk Configuration Parameters
170
Table 55: IAX Peer Trunk Configuration Parameters
171
Direct Outward Dialing (DOD)
172
Figure 102: DOD Extension Selection
172
Figure 103: Edit DOD
173
Sla Station
174
Create/Edit SLA Station
174
Table 56: SLA Station Configuration Parameters
174
Figure 104: SLA Station
174
Sample Configuration
175
Figure 105: Enable SLA Mode for Analog Trunk
175
Figure 106: Analog Trunk with SLA Mode Enabled
175
Figure 107: SLA Example - SLA Station
176
Figure 108: SLA Example - MPK Configuration
176
Call Routes
177
Outbound Routes
177
Configuring Outbound Routes
177
Table 57: Outbound Route Configuration Parameters
177
Outbound Blacklist
180
PIN Groups
180
Figure 109: Country Codes
180
Table 58: Outbound Routes/Pin Group
181
Figure 110: Create New PIN Group
181
Figure 111: PIN Members
182
Figure 112: Outbound PIN
182
Inbound Routes
183
Figure 113: CDR Record
183
Inbound Rule Configurations
184
Table 59: Inbound Rule Configuration Parameters
184
Figure 114: Inbound Route Feature: Prepend
186
Inbound Route: Multiple Mode
186
Inbound Route: Prepend Example
186
Figure 115: Inbound Route - Multiple Mode
187
Blacklist Configurations
188
FAX Intelligent Route
188
FAX with Two Media
188
Figure 116: Inbound Route - Multiple Mode Feature Codes
188
Figure 117: Blacklist Configuration Parameters
189
Figure 118: Blacklist Csv File
189
Conference Bridge
190
Conference Bridge Configurations
190
Table 60: Conference Bridge Configuration Parameters
190
Join a Conference Call
192
Table 61: Conference Settings
192
Figure 119: Conference
192
Invite Other Parties to Join Conference
193
Figure 120: Conference Invitation from Web GUI
193
During the Conference
194
Table 62: Conference Caller IVR Menu
194
Record Conference
195
Figure 121: Conference Recording
195
Conference Schedule
196
Conference Schedule Configuration
196
Table 63: Conference Schedule Parameters
196
Figure 122: Conference Schedule
199
Ivr
200
Configure IVR
200
Figure 123: Create New IVR
200
Table 64: IVR Configuration Parameters
201
Black/White List in IVR
203
Figure 124: Key Pressing Events
203
Create Custom Prompt
204
Figure 125: Black/White List
204
Figure 126: Click on Prompt to Create IVR Prompt
205
Language Settings for Voice Prompt
206
Download and Install Voice Prompt Package
206
Figure 127: Language Settings for Voice Prompt
206
Figure 128: Voice Prompt Package List
207
Figure 129: New Voice Prompt Language Added
207
Customize Specific Prompt
208
Figure 130: Upload Single Voice Prompt for Entire Language Pack
208
Voicemail
209
Configure Voicemail
209
Figure 131: Voicemail Settings
209
Table 65: Voicemail Settings
210
Access Voicemail
211
Table 66: Voicemail IVR Menu
211
Extension Voicemail Count
212
Voicemail Email Settings
212
Figure 132: Voicemail Count
212
Configure Voicemail Group
213
Table 67: Voicemail Email Settings
213
Figure 133: Voicemail Email Settings
213
Table 68: Voicemail Group Settings
214
Figure 134: Voicemail Group
214
Ring Group
215
Configure Ring Group
215
Table 69: Ring Group Parameters
215
Figure 135: Ring Group
215
Remote Extension in Ring Group
217
Figure 136: Ring Group Configuration
217
Figure 137: Sync LDAP Server Option
218
Figure 138: Manually Sync LDAP Server
219
Figure 139: Ring Group Remote Extension
219
Paging and Intercom Group
220
Configure Paging/Intercom Group
220
Figure 140: Paging/Intercom Group
220
Table 70: Paging/Intercom Group Configuration Parameters
221
Figure 141: Page/Intercom Group Settings
221
Call Queue
222
Configure Call Queue
222
Table 71: Call Queue Configuration Parameters
222
Figure 142: Call Queue
222
Figure 143: Static Agents Limitation
225
Call Center Settings and Enhancements
226
Figure 144: Agent Login Settings
226
Table 72: Call Center Parameters
227
Queue Statistics
228
Figure 145: Call Queue Statistics
228
Switchboard
229
Table 73: Switchboard Parameters
229
Figure 146: Call Queue Switchboard
229
Pickup Groups
231
Configure Pickup Groups
231
Configure Pickup Feature Code
231
Figure 147: Edit Pickup Group
231
Figure 148: Edit Pickup Feature Code
232
Music on Hold
233
Figure 149: Music on Hold Default Class
233
Figure 150: Play Custom Prompt
234
Figure 151: Information Prompt
234
Figure 152: Record Custom Prompt
235
Fax Server
236
Configure Fax/T.38
236
Figure 153: Fax Settings
236
Table 74: FAX/T.38 Settings
237
Receiving Fax
238
Sample Configuration to Receive Fax from PSTN Line
238
Figure 154: Configure Analog Trunk Without Fax Detection
238
Figure 155: Configure Extension for Fax Machine: FXS Extension
239
Figure 156: Configure Extension for Fax Machine: Analog Settings
239
Sample Configuration for Fax-To-Email
240
Figure 157: Configure Inbound Rule for Fax
240
Figure 158: Create Fax Extension
240
Figure 159: Inbound Route to Fax Extension
241
Figure 160: List of Fax Files
241
FAX Sending
242
Figure 161: Fax Sending in Web GUI
242
Figure 162: Fax Send Progress
242
Busy Camp-On
243
Presence
244
Figure 163: SIP Presence Configuration
244
Table 75: SIP Presence Status
245
Figure 164: SIP Presence Feature Code
245
Follow Me
246
Figure 165: Edit Follow Me
246
Table 76: Follow Me Settings
247
Table 77: Follow Me Options
247
Speed Dial
248
Figure 166: Speed Dial Destinations
248
Disa
249
Figure 167: Create New DISA
249
Table 78: DISA Settings
250
Advertisement
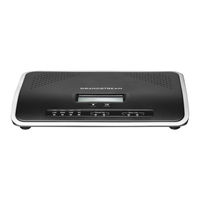
Grandstream Networks UCM6208 User Manual (308 pages)
UCM6200 series IP PBX
Brand:
Grandstream Networks
| Category:
PBX
| Size: 8.92 MB
Table of Contents
Table of Contents
2
Gnu Gpl Information
19
Change Log
20
Firmware Version 1.0.11.27
20
Firmware Version 1.0.0.7
20
Welcome
21
Product Overview
22
Technical Specifications
22
Table 1: Technical Specifications
22
Installation
25
Equipment Packaging
25
Connect Your UCM6200
25
Connect the UCM6202
25
Table 2: UCM6200 Equipment Packaging
25
Figure 1: UCM6202 Front View
25
Connect the UCM6204
26
Figure 2: UCM6202 Back View
26
Figure 3: UCM6204 Front View
26
Connect the UCM6208
27
Figure 4: UCM6204 Back View
27
Safety Compliances
28
Warranty
28
Figure 5: UCM6208 Front View
28
Figure 6: UCM6208 Back View
28
Getting Started
29
Use the LCD Menu
29
Table 3: LCD Menu Options
30
Use the LED Indicators
31
Use the Web GUI
31
Access Web GUI
31
Table 4: UCM6202/UCM6204 LED Indicators
31
Table 5: UCM6208 LED Indicators
31
Figure 7: UCM6204 Web GUI Login Page
32
Setup Wizard
33
Web GUI Configurations
34
Figure 8: UCM6200 Setup Wizard
34
Web GUI Languages
35
Save and Apply Changes
35
Make Your First Call
35
Figure 9: UCM6200 Web GUI Language
35
System Settings
37
User Management
37
User Privileges
37
Figure 10: User Management Page Display
37
Create New WEB UI User
38
Figure 11: Create New User
38
User Portal
39
Table 6: User Management->Create New User
39
Figure 12: User Management - New Users
39
Figure 13: Edit User Information by Super Admin
40
Figure 14: User Portal Login
40
Concurrent Multi-User Login
41
Operation Log
41
Figure 15: User Portal Layout
41
Figure 16: Multiple User Operation Error Prompt
41
Table 7: Operation Log Column Header
42
Figure 17: Operation Logs
42
Change Password
43
Figure 18: Operation Logs Filter
43
Change Binding Email
44
Figure 19 : Change Password
44
Figure 20: Change Binding Email
44
Network Settings
45
Basic Settings
45
Table 8: Change Binding Email Option
45
Table 9: UCM6200 Network Settings->Basic Settings
45
Figure 21: UCM6200 Network Interface Method: Route
48
Figure 22: UCM6200 Network Interface Method: Switch
49
DHCP Client List
50
Figure 23: UCM6200 Network Interface Method: Dual
50
Figure 24: DHCP Client List
50
Figure 25: Add MAC Address Bind
51
Figure 26: Batch Add MAC Address Bind
51
Table 10: UCM6200 Network Settings->802.1X
52
Figure 27: UCM6200 Using 802.1X as Client
52
Figure 28: UCM6200 Using 802.1X EAP-MD5
52
Static Routes
53
Table 11: UCM6200 Network Settings->Static Routes
53
Figure 29: UCM6204 Static Route Sample
54
Port Forwarding
55
Table 12: UCM6200 Network Settings->Port Forwarding
55
Figure 30: UCM6204 Static Route Configuration
55
Figure 31: UCM6200 Port Forwarding Configuration
56
Open VPN
57
Table 13: UCM6200 Settings -> Network Settings -> Open VPN
57
Figure 32: GXP2160 Web Access Using UCM6202 Port Forwarding
57
DDNS Settings
58
Figure 33: Open VPN Feature on the UCM6200
58
Figure 34: Register Domain Name on Noip.com
59
Figure 35: UCM6200 DDNS Setting
59
Firewall
60
Static Defense
60
Figure 36: Using Domain Name to Connect to UCM6200
60
Table 14: UCM6200 Firewall->Static Defense->Current Service
61
Table 15: Typical Firewall Settings
61
Table 16: Firewall Rule Settings
62
Figure 37: Create New Firewall Rule
62
Dynamic Defense
63
Table 17: UCM6200 Firewall Dynamic Defense
63
Fail2Ban
64
Table 18: Fail2Ban Settings
64
Figure 38: Configure Dynamic Defense
64
LDAP Server
65
LDAP Server Configurations
66
Figure 39: LDAP Server Configurations
66
Figure 40: Default LDAP Phonebook DN
66
LDAP Phonebook
67
Figure 41: Default LDAP Phonebook Attributes
67
Figure 42: LDAP Server->LDAP Phonebook
67
Figure 43: Add LDAP Phonebook
68
Figure 44: Edit LDAP Phonebook
68
Figure 45: Import Phonebook
69
Figure 46: Phonebook CSV File Format
69
LDAP Client Configurations
70
Figure 47: LDAP Phonebook after Import
70
Figure 48: Export Selected LDAP Phonebook
70
Figure 49: LDAP Client Configurations
71
HTTP Server
72
Figure 50: GXP2200 LDAP Phonebook Configuration
72
Email Settings
73
Table 19: HTTP Server Settings
73
Table 20: Email Settings
73
Email Templates
74
Figure 51: UCM6200 Email Settings
74
Time Settings
75
Auto Time Updating
75
Figure 52: Email Templates
75
Figure 53: Conference Schedule Template
75
Table 21: Time Auto Updating
76
Set Time Manually
77
Office Time
77
Figure 54: Set Time Manually
77
Table 22: Create New Office Time
78
Figure 55: Create New Office Time
78
Holiday
79
Figure 56: Settings->Time Settings->Office Time
79
Figure 57: Create New Holiday
79
Table 23: Create New Holiday
80
Figure 58: Settings->Time Settings->Holiday
80
NTP Server
81
Recordings Storage
81
Figure 59: Settings->Recordings Storage
81
Figure 60: Recordings Storage Prompt Information
82
Figure 61: Recording Storage Category
82
Login Settings
83
Figure 62: Login Timeout Settings
83
Google Service Settings Support
84
Figure 63: Google Service Settings->Oauth2.0 Authentication
84
Figure 64: Google Service->New Project
85
Figure 65: Google Service->Create New Credential
85
Figure 66: Google Service->Oauth2.0 Login
86
Provisioning
87
Overview
87
Configuration Architecture for End Point Device
87
Auto Provisioning Settings
88
Figure 67: Zero Config Configuration Architecture for End Point Device
88
Figure 68: UCM6200 Zero Config
89
Table 24: Auto Provision Settings
90
Figure 69: Auto Provision Settings
90
Discovery
91
Global Configuration
92
Global Policy
92
Figure 70: Auto Discover
92
Figure 71: Discovered Devices
92
Table 25: Global Policy Parameters->Localization
93
Figure 72: Global Policy Categories
93
Table 26: Global Policy Parameters->Phone Settings
94
Table 27: Global Policy Parameters->Contact List
95
Table 28: Global Policy Parameters->Maintenance
97
Table 29: Global Policy Parameters->Network Settings
98
Table 30: Global Policy Parameters->Customization
99
Global Templates
100
Table 31: Create New Template
100
Figure 73: Edit Global Template
101
Model Configuration
102
Model Templates
102
Table 32: Create New Model Template
102
Figure 74: Edit Model Template
103
Model Update
104
Figure 75: Template Management
104
Device Configuration
105
Create New Device
105
Figure 76: Upload Model Template Manually
105
Manage Devices
106
Figure 77: Create New Device
106
Figure 78: Manage Devices
106
Figure 79: Edit Device
107
Figure 80: Edit Customize Device Settings
109
Figure 81: Add P Value in Customize Device Settings
110
Figure 82: Modify Selected Devices - same Model
111
Figure 83: Modify Selected Devices - Different Models
112
Sample Application
113
Figure 84: Device List in Zero Config
113
Figure 85: Zero Config Sample - Global Policy
114
Figure 86: Zero Config Sample - Device Preview 1
115
Figure 87: Zero Config Sample - Device Preview 2
116
Figure 88: Zero Config Sample - Device Preview 3
117
Extensions
118
Create New User
118
Create New SIP Extension
118
Figure 89: Create New Device
118
Table 33: SIP Extension Configuration Parameters->Basic Settings
119
Table 34: SIP Extension Configuration Parameters->Media
120
Table 35: SIP Extension Configuration Parameters->Features
121
Table 36: SIP Extension Configuration Parameters->Specific Time
123
Create New IAX Extension
124
Table 37: IAX Extension Configuration Parameters->Basic Settings
124
Table 38: IAX Extension Configuration Parameters->Media
125
Table 39: IAX Extension Configuration Parameters->Features
126
Table 40: IAX Extension Configuration Parameters->Specific Time
127
Create New FXS Extension
128
Table 41: FXS Extension Configuration Parameters->Basic Settings
128
Table 42: FXS Extension Configuration Parameters->Media
129
Table 43: FXS Extension Configuration Parameters->Features
130
Batch Add Extensions
132
Batch Add SIP Extensions
132
Table 44: FXS Extension Configuration Parameters->Specific Time
132
Table 45: Batch Add SIP Extension Parameters
132
Batch Add IAX Extensions
135
Table 46: Batch Add IAX Extension Parameters
135
Search and Edit Extension
137
Figure 90: Manage Extensions
137
Export Extensions
138
Import Extensions
138
Figure 91: Export Extensions
138
Email to User
139
Figure 92: Import Extensions
139
Figure 93: Email to User - Prompt Information
140
Figure 94: Account Registration Information and QR Code
140
Figure 95: LDAP Client Information and QR Code
141
Multiple Registrations Per Extension
142
Figure 96: Multiple Registrations Per Extension
142
Figure 97: Extension - Concurrent Registration
142
SMS Message Support
143
Figure 98: SMS Message Support
143
Trunks
144
Analog Trunks
144
Analog Trunk Configuration
144
Table 47: Analog Trunk Configuration Parameters
144
PSTN Detection
147
Figure 99: UCM6200 FXO Tone Settings
147
Figure 100: UCM6200 PSTN Detection
148
Figure 101: UCM6200 PSTN Detection: Auto Detect
148
Table 48: PSTN Detection for Analog Trunk
149
Figure 102: UCM6200 PSTN Detection: Semi-Auto Detect
149
VOIP Trunks
150
Table 49: Create New SIP Trunk
151
Table 50: SIP Register Trunk Configuration Parameters
152
Table 51: SIP Peer Trunk Configuration Parameters
155
Table 52: Create New IAX Trunk
157
Table 53: IAX Register Trunk Configuration Parameters
158
Table 54: IAX Peer Trunk Configuration Parameters
159
Direct Outward Dialing (DOD)
160
Figure 103: DOD Extension Selection
161
Figure 104: Edit DOD
161
Sla Station
162
Create/Edit SLA Station
162
Table 55: SLA Station Configuration Parameters
162
Figure 105: SLA Station
162
Sample Configuration
163
Figure 106: Enable SLA Mode for Analog Trunk
163
Figure 107: Analog Trunk with SLA Mode Enabled
164
Figure 108: SLA Example - SLA Station
164
Figure 109: SLA Example - MPK Configuration
164
Call Routes
165
Outbound Routes
165
Table 56: Outbound Route Configuration Parameters
165
Country Codes
167
Inbound Routes
168
Inbound Rule Configurations
168
Table 57: Inbound Rule Configuration Parameters
168
Figure 110: Country Codes
168
Inbound Route: Prepend Example
170
Inbound Route: Multiple Mode
171
Figure 111: Inbound Route Feature: Prepend
171
FAX Intelligent Route
172
Figure 112: Inbound Route - Multiple Mode
172
FAX with Two Media
173
Blacklist Configurations
173
Figure 113: Blacklist Configuration Parameters
173
Figure 114: Blacklist Csv File
174
Conference Bridge
175
Conference Bridge Configurations
175
Table 58: Conference Bridge Configuration Parameters
175
Join a Conference Call
177
Invite Other Parties to Join Conference
177
Figure 115: Conference Invitation from Web GUI
177
During the Conference
178
Table 59: Conference Caller IVR Menu
178
Record Conference
179
Figure 116: Conference Recording
180
Conference Schedule
181
Conference Schedule Configuration
181
Table 60: Conference Schedule Parameters
181
Figure 117: Conference Schedule
183
Ivr
185
Configure IVR
185
Table 61: IVR Configuration Parameters
185
Create Custom Prompt
187
Record New Custom Prompt
187
Figure 118: Click on Prompt to Create IVR Prompt
187
Upload Custom Prompt
188
Figure 119: Record New Custom Prompt
188
Figure 120: Upload Custom Prompt
188
Language Settings for Voice Prompt
189
Download and Install Voice Prompt Package
189
Figure 121: Language Settings for Voice Prompt
189
Figure 122: Voice Prompt Package List
190
Figure 123: New Voice Prompt Language Added
190
Customize Specific Prompt
191
Figure 124: Upload Single Voice Prompt for Entire Language Pack
191
Voicemail
192
Configure Voicemail
192
Table 62: Voicemail Settings
192
Access Voicemail
193
Table 63: Voicemail IVR Menu
193
Voicemail Email Settings
194
Table 64: Voicemail Email Settings
194
Configure Voicemail Group
195
Figure 125: Voicemail Email Settings
195
Table 65: Voicemail Group Settings
196
Figure 126: Voicemail Group
196
Ring Group
197
Configure Ring Group
197
Table 66: Ring Group Parameters
197
Figure 127: Ring Group
197
Remote Extension in Ring Group
199
Figure 128: Ring Group Configuration
199
Figure 129: Sync LDAP Server Option
200
Figure 130: Manually Sync LDAP Server
200
Figure 131: Ring Group Remote Extension
201
Paging and Intercom Group
202
Configure Paging/Intercom Group
202
Table 67: Paging/Intercom Group Configuration Parameters
202
Figure 132: Paging/Intercom Group
202
Figure 133: Page/Intercom Group Settings
203
Call Queue
204
Configure Call Queue
204
Figure 134: Call Queue
204
Table 68: Call Queue Configuration Parameters
205
Figure 135: Agent Login Settings
207
Extension Groups
208
Configure Extension Groups
208
Figure 136: Edit Extension Group
208
Using Extension Groups
209
Figure 137: Select Extension Group in Outbound Route
209
Pickup Groups
210
Configure Pickup Groups
210
Configure Pickup Feature Code
210
Figure 138: Edit Pickup Group
210
Figure 139: Edit Pickup Feature Code
211
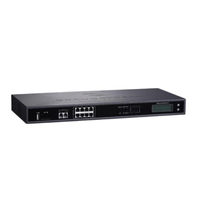
Grandstream Networks UCM6208 Manual (31 pages)
Analog Trunks
Brand:
Grandstream Networks
| Category:
Telephone
| Size: 1.16 MB
Table of Contents
Table of Contents
2
Introduction
4
Ucm6Xxx Setup Overview
5
Figure 1: UCM6202 Front and Back Panels
5
Configuring Analog Trunks
6
PBX Status
6
Configure a New Analog Trunk
6
Figure 2: FXO Port Connected but Not Configured
6
Create a New Analog Trunk
7
Figure 3: Create a New Analog Trunk
7
Figure 4: Analog Trunk Configuration Page
7
Create Outbound/Inbound Rules
11
Create Inbound Routes
11
Figure 5: Analog Trunk Created
11
Figure 6: Create New Inbound Rule
12
Figure 7: Inbound Rules with Time Condition
12
Create Outbound Routes
13
Figure 8: Inbound Routes Created
13
Figure 9: Create a New Outbound Rule
13
Using Analog Trunk as Failover
14
Figure 10: Outbound Rule Created
14
Figure 11: Add Analog Trunk as Failover
15
Figure 12: Analog Trunk Added as Failover
16
Acim and Pstn Detection
17
ACIM Settings
17
Figure 13: Ports Config Page
17
PSTN Detection
18
Automatic Detection of PSTN Parameters
18
Figure 14: ACIM Settings
18
Figure 15: UCM6XXX FXO Tone Settings
19
Figure 16: UCM6XXX PSTN Detection: Auto Detect
19
Figure 17: UCM6XXX PSTN Detection: Semi-Auto Detect
20
Figure 18: Answering Call Prompt
20
Manual Configuration of PSTN Parameters
21
Figure 19: Hangup Call Prompt
21
Figure 20: PSTN Parameters Detected
21
Figure 21: Custom Tone Parameters
22
Figure 22: Download Analog Trace
23
Figure 23: a Key Dial-Up FXO
24
Figure 24: Import Raw File to Audacity
24
Figure 25: Import Raw Data Parameters
25
Figure 26: Raw Data Imported
25
Figure 27: Measuring Cadence
26
Figure 28: Busy Tone Frequencies
27
Monitoring Analog Lines
28
Enabling SLA Mode
28
Create/Edit SLA Station
28
Figure 29: Enable SLA Mode for the Analog Trunk
28
Figure 30: SLA Station Page
28
Figure 31: Create New SLA Station
29
Sample Configuration
30
Figure 32: Enable SLA Mode for Analog Trunk
30
Figure 33: Analog Trunk with SLA Mode Enabled
30
Figure 34: SLA Example - SLA Station
30
Figure 35: SLA Example - MPK Configuration
31
Advertisement
Grandstream Networks UCM6208 Security Manual (32 pages)
IP PBX
Brand:
Grandstream Networks
| Category:
Network Hardware
| Size: 1.61 MB
Table of Contents
Table of Contents
2
Overview
5
Web Ui Access
6
UCM HTTP Server Access
6
Protocol Type
6
User Login
7
Figure 1: UCM6202 Web UI Login
7
Figure 2: Default Random Password
8
Login Settings
9
Figure 3: Login Settings
9
User Management Levels
10
Figure 4: Creating Custom Privilege Levels
11
Extension Security
12
SIP/IAX Password
12
Strategy of IP Access Control
12
Example: Local Subnet Only
12
Figure 5: Strategy - Local Subnet Only
13
Figure 6: Registration Failed from Subnet Not Allowed for Registration
14
Figure 7: Registration Successful from Allowed Subnet
14
Srtp
15
Figure 8: Enabling SRTP
15
Trunk Security
16
Outbound Rule Permissions
16
Privilege Level
16
Figure 9: Outbound Rule Permissions
16
Source Caller ID Filter
17
Password Protection
17
Figure 10: Source Caller ID Filter
17
PIN Groups
18
Figure 11: Password Protection
18
Figure 12: Adding PIN Groups
18
Figure 13: Outbound Route with PIN Group
19
IVR Dial Trunk
20
Figure 15: IVR Dial Trunk
20
Allow Guest Calls
21
Tls
22
Figure 16: PBX SettingsSip SettingsTcp/Tls
22
Firewall
24
Static Defense
24
Static Defense Example: Blocking TCP Connection from a Specific Host
25
Figure 17: Firewall Rule Custom Configuration
25
Figure 18: Static Defense Blocking Host 192.168.40.142 Using TCP Connection
25
Static Defense Example: Blocking SSH Connection to UCM
26
Figure 19: Host Blocked by UCM
26
Figure 20: UCM SSH Access
27
Figure 21: Block SSH Connection
28
Figure 22: Putty Setup for SSH Connection
28
Dynamic Defense
29
Figure 23: SSH Connection Blocked by UCM
29
Figure 24: Fail2Ban Default Configuration
30
Figure 25: Asterisk Service Fail2Ban Setting
31
Grandstream Networks UCM6208 Manual (28 pages)
Analog Trunks
Brand:
Grandstream Networks
| Category:
Office Equipment
| Size: 1.31 MB
Table of Contents
Table of Contents
2
Introduction
4
Ucm6Xxx Setup Overview
5
Figure 1: UCM6202 Front and Back Panels
5
Configuring Analog Trunks
6
PBX Status
6
Configure a New Analog Trunk
6
Figure 2: FXO Port Connected but Not Configured
6
Create a New Analog Trunk
7
Figure 3: Create a New Analog Trunk
7
Figure 4: Analog Trunk Configuration Page
7
Create Outbound/Inbound Rules
11
Create Inbound Routes
11
Figure 5: Analog Trunk Created
11
Figure 6: Create New Inbound Rules
11
Create Outbound Routes
12
Figure 7: Inbound Rules with Time Condition
12
Figure 8: Inbound Rules Created
12
Figure 9: Create a New Outbound Rule
13
Figure 10: Outbound Rule Created
13
Using Analog Trunk as Failover
14
Figure 11: Add Analog Trunk as Failover
14
Acim and Pstn Detection
15
ACIM Settings
15
Figure 12: Analog Trunk Added as Failover
15
Figure 13: Ports Config Page
16
Figure 14: ACIM Settings
16
PSTN Detection
17
Automatic Detection of PSTN Parameters
17
Figure 15: UCM6XXX FXO Tone Settings
17
Figure 16: UCM6XXX PSTN Detection: Auto Detect
18
Figure 17: UCM6XXX PSTN Detection: Semi-Auto Detect
18
Figure 18: Answering Call Prompt
19
Figure 19: Hangup Call Prompt
19
Figure 20: PSTN Parameters Detected
19
Manual Configuration of PSTN Parameters
20
Figure 21: Custom Tone Parameters
20
Figure 22: Download Analog Trace
21
Figure 23: a Key Dial-Up FXO
21
Figure 24: Import Raw File to Audacity
22
Figure 25: Import Raw Data Parameters
23
Figure 26: Raw Data Imported
23
Figure 27: Measuring Cadence
23
Figure 28: Busy Tone Frequencies
24
Monitoring Analog Lines
25
Enabling SLA Mode
25
Create/Edit SLA Station
25
Figure 29: Enable SLA Mode for the Analog Trunk
25
Figure 30: SLA Station Page
25
Figure 31: Create New SLA Station
26
Grandstream Networks UCM6208 Configuring (13 pages)
Brand:
Grandstream Networks
| Category:
Offroad Vehicle
| Size: 0.59 MB
Table of Contents
Table of Contents
2
Overview
4
Connect Ucm6Xxx to Gxw410X Using Peer Sip Trunk
5
Create IVR on UCM6XXX
5
Figure 1: Create IVR 7002 on the UCM6XXX
5
Create Peer SIP TRUNK on UCM6XXX
6
Configure Outbound Rule on UCM6XXX
6
Figure 2: Create Peer SIP Trunk on the UCM6XXX
6
Configure Inbound Rule on UCM6XXX
7
Figure 3: Configure Outbound Rule on the UCM6XXX
7
Configure FXO Port on GXW410X When Peered with UCM6XXX
8
Figure 4: Configure Inbound Rule on UCM6XXX
8
Figure 5: Configure FXO Port on GXW410X: General Settings
8
Figure 6: Configure FXO Port on the GXW410X - SIP Settings
9
Figure 7: Configure FXO Port on the GXW410X - DTMF Method
9
Figure 8: Configure FXO Port on the GXW410X - DTMF Payload Type
9
Figure 9: Configure FXO Port on the GXW410X: FXO Termination
9
Register Gxw410X on Ucm6Xxx as an Extension
10
Create SIP Extension on UCM6XXX
10
Figure 10: Configure FXO Port on the GXW410X: Call Progress Tones
10
Figure 11: Configure FXO Port on the GXW410X - FXO Termination
10
Configure GXW410X User Setting as an Extension Registered on UCM6XXX
11
Figure 12: Create SIP Extension on UCM6XXX
11
Figure 13: GXW410X User Settings
11
Figure 14: GXW410X User Settings: General Settings
12
Figure 15: GXW410X SIP Settings
12
Figure 16: UCM6XXX - SIP Extension Status
12
Gxw410X Call Settings
13
Configure Unconditional Call Forward on GXW410X
13
How to Dial
13
Figure 17: GXW410X - Call Forwarding
13
Grandstream Networks UCM6208 Quick Installation Manual (22 pages)
IP PBX Appliance
Brand:
Grandstream Networks
| Category:
PBX
| Size: 6.72 MB
Table of Contents
Package Contents
3
Información General
7
Contenido del Paquete
7
Contenu du Pack
9
Contenuto Della Confezione
13
Меры Предосторожности
15
Общий Обзор
15
Комплект Поставки
15
Conteúdo Do Pacote
17
Środki OstrożnośCI
19
Opis Urządzenia
19
Zawartość Opakowania
19
Advertisement
Related Products
Grandstream Networks UCM Series
Grandstream UCM6202
Grandstream UCM6204
Grandstream Networks UCM6202
Grandstream Networks UCM6204
Grandstream Networks UCM6208
Grandstream Networks UCM6200 Series
Grandstream Networks UCM62 Series
Grandstream Networks UCM6206
Grandstream Networks UCM6116
Grandstream Categories
IP Phone
Telephone
Telephone Accessories
Gateway
Wireless Access Point
More Grandstream Manuals
Login
Sign In
OR
Sign in with Facebook
Sign in with Google
Upload manual
Upload from disk
Upload from URL