Table of Contents
Advertisement
Quick Links
Advertisement
Table of Contents
Troubleshooting

Related Manuals for Nordson ProBlue Flex


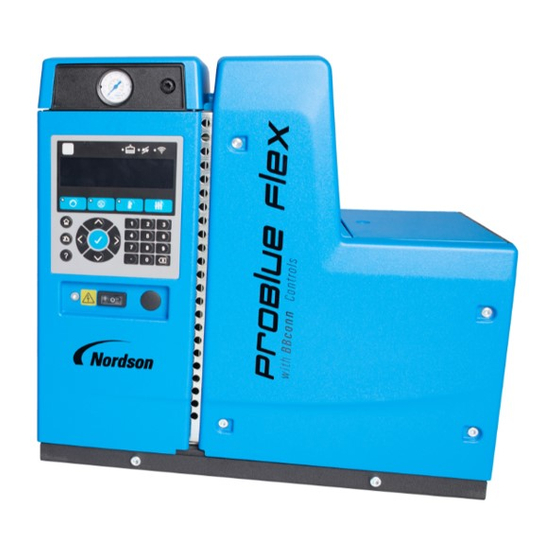
Summary of Contents for Nordson ProBlue Flex
- Page 1 User's Guide Customer Product Manual Part 1129255_01 Issued 06/20 This document contains important safety information. Be sure to read and follow all safety information in this document and any other related documentation. NORDSON CORPORATION DULUTH, GEORGIA USA www.nordson.com...
- Page 2 This is a Nordson Corporation publication which is protected by copyright. Original copyright date 2020. No part of this document may be photocopied, reproduced, or translated to another language without the prior written consent of Nordson Corporation. The information contained in this publication is subject to change without notice. Trademarks 4800 INTEGRA, Allegro, Apogee, Artiste, Asymtek, Automove, Avex, BaitGun, BKG, Blue Box, BM-32, BM-58, BM-63, Bowtie, Build‐A‐Part, CF, Century, CleanSleeve, CleanSpray, Color‐on‐Demand, ColorMax, Conexis, Connections to Life, Contour, Control Coat,...
-
Page 3: Table Of Contents
ProBlue Flex OEM User’s Guide Table of Contents Overview ........... - Page 4 ProBlue Flex OEM User’s Guide Basic Melter Operation ........
- Page 5 ProBlue Flex OEM User’s Guide Defining System Settings ........
- Page 6 ProBlue Flex OEM User’s Guide Tool Settings ..........
-
Page 7: Overview
OEM interface is selected when the primary control of the melter is through communication with a Programmable Logic Controller (PLC). ProBlue Flex melters with an OEM interface are set up using the PLC mapping capability of BBconn Cloud, a web application that runs in a browser on any desktop computer or handheld device. -
Page 8: Safety
ProBlue Flex OEM User’s Guide Safety Read this section before using the equipment. This section contains recommendations and practices applicable to the safe installation, operation, and maintenance (hereafter referred to as “use”) of the product described in this document (hereafter referred to as “equipment”). Additional safety information in the form of task‐specific safety alert messages, appears as... -
Page 9: Responsibilities Of The Equipment Owner
ProBlue Flex OEM User’s Guide Responsibilities of the Equipment Owner Equipment owners are responsible for managing safety information, ensuring that all instructions and regulatory requirements for use of the equipment are met, and for qualifying all potential users. Safety Information Research and evaluate safety information from all applicable sources, including the owner‐specific safety policy, best industry practices,... -
Page 10: User Qualifications
Do not modify the equipment. Do not use incompatible materials or unapproved auxiliary devices. Contact your Nordson representative if you have any questions on material compatibility or the use of non‐standard auxiliary devices. E 2020 Nordson Corporation... -
Page 11: Instructions And Safety Messages
Familiarize yourself with the location and meaning of the safety warning labels and tags affixed to the equipment. Refer to Safety Labels and Tags at the end of this section. If you are unsure of how to use the equipment, contact your Nordson representative for assistance. Installation Practices Install the equipment in accordance with the instructions provided in this document and in the documentation provided with auxiliary devices. -
Page 12: Operating Practices
Read and comply with the manufacturer's instructions and the SDS supplied with equipment cleaning compounds. NOTE: SDSs for cleaning compounds that are sold by Nordson are available at www.nordson.com or by calling your Nordson representative. Confirm the correct operation of all safety devices before placing the equipment back into operation. -
Page 13: Equipment Safety Information
ProBlue Flex OEM User’s Guide Equipment Safety Information This equipment safety information is applicable to the following types of Nordson equipment: hot melt and cold adhesive application equipment and all related accessories pattern controllers, timers, detection and verification systems, and all... -
Page 14: Disabling The Applicators
General Safety Warnings and Cautions Table 1 contains the general safety warnings and cautions that apply to Nordson hot melt and cold adhesive equipment. Review the table and carefully read all of the warnings or cautions that apply to the type of equipment described in this manual. - Page 15 WARNING! Hazardous vapors! Before processing any polyurethane reactive (PUR) hot melt or solvent‐based material through a compatible Nordson melter, read and comply with the material's SDS. Ensure that the material's processing temperature and flashpoints will not be exceeded and that all requirements for safe handling, ventilation, first aid, and personal protective equipment are met.
- Page 16 WARNING! Risk of fire or explosion! Nordson adhesive equipment is not rated for use in explosive environments and has not been certified for the ATEX directive or as nonincendive. In addition, this equipment should not be used with solvent‐based adhesives that can create an...
- Page 17 CAUTION! Nordson hot melt equipment is factory tested with Nordson Type R fluid that contains polyester adipate plasticizer. Certain hot melt materials can react with Type R fluid and form a solid gum that can clog the equipment.
-
Page 18: Other Safety Precautions
5. Seek expert medical attention immediately. Give the SDS for the hot melt to the medical personnel providing treatment. Safety Labels and Tags Refer to the ProBlue Flex Core Customer Product Manual, P/N 1128350. E 2020 Nordson Corporation Part 1129255_01... -
Page 19: Where To Find Information
ProBlue Flex OEM User’s Guide Where to Find Information Getting your melter into operation is a 2-step process: Step Refer to… Description Install and connect power to the melter. Connect your melter to a PLC. Runtime, system settings, and troubleshooting... -
Page 20: Theory Of Operation
ProBlue Flex OEM User’s Guide Theory of Operation Since the ProBlue Flex OEM melter does not have a user interface, you must use the BBconn Cloud web-based application to do the following: Generate, maintain, and manage .NOR files which contain the daily operational and system settings required for melter operation and production, as well as for PLC setup and connectivity. -
Page 21: Creating A Bbconn Cloud Account
ProBlue Flex OEM User’s Guide Creating a BBconn Cloud Account BBconn Cloud is a web application that you can use from most any browser- enabled device. Supported browsers include: Browser Macintosh Windows Version Iphone Droid Devices Version Apple Safari 10.12 Sierra and Not available 10.12 Sierra and... - Page 22 The Configuration Code field auto-populates after you enter the Serial and UID Numbers. You must Agree to Nordson Terms of Service and Privacy Policy to create your account. Click on the links to view details. 4. To complete the registration, select Accept and Sign UP. An email will be sent to you.
-
Page 23: Melter Operation
PLC, only limited operations are possible. Before proceeding, make sure the melter is fully installed and connected as described in the Installation Guide (P/N 1128353) and in the ProBlue Flex Core Customer Product Manual (P/N 1128350). -
Page 24: About The Control Panel
ProBlue Flex OEM User’s Guide About the Control Panel The OEM control panel is located on the E-Box door. Master Controls The Master Controls provide On/Off control and status LEDs for the pump, heaters, wireless operation, and remote control operation. -
Page 25: System Status Led Indicators
ProBlue Flex OEM User’s Guide System Status LED Indicators The system status LEDs provide information about the melter's operational status. Figure 3 System status and LED indicators Table 3 System Status and LED Indicators Component Function Indicates at a glance the system status. Refer to Table 4 for the System Status LED LED color indications. -
Page 26: System Status Led Colors
ProBlue Flex OEM User’s Guide System Status LED Colors The system status LED shows at a glance the status of the system. Table 4 System Status LED Color Indications System Color Description State System status LED No Alert or Fault condition exists. -
Page 27: Melter Front Panel Led Behavior
ProBlue Flex OEM User’s Guide System Status LED Colors (contd) Table 4 System Status LED Color Indications (contd) System Color Description State An issue exists with one or more of the subsystems, causing production to temporarily stop. When a stop occurs:... -
Page 28: Basic Melter Operation
ProBlue Flex OEM User’s Guide Basic Melter Operation Starting the Melter Before starting the melter for the first time, confirm that the melter is fully installed, including any required inputs and outputs, hoses, and applicators. By default, all connected hoses and applicators are disabled, and the Master Heater control is OFF. -
Page 29: Switching The Master Heater And Pump Controls On/Off
ProBlue Flex OEM User’s Guide Switching the Master Heater and Pump Controls On/Off When you power-up the melter, by default, the Master Heaters and Pump controls are switched Off. You must manually switch them On. 1. Master Pump control 2. Master Heat control... -
Page 30: Monitoring The Tank Adhesive Level
ProBlue Flex OEM User’s Guide Monitoring the Tank Adhesive Level The melter has a built-in sensor in the tank. You can purchase the optional Light Tower Kit (part number 1129090) to get a visual and/or audible horn notification using an available output. -
Page 31: Manually Filling The Melter Tank
ProBlue Flex OEM User’s Guide Manually Filling the Melter Tank Before filling the tank, confirm that the hot melt material is compatible with the melter. NOTE: You should never have to manually fill a Melt-on-Demand system, but if you must manually fill the tank, never go above the sensor. -
Page 32: Manually Adjusting The System Air Pressure
ProBlue Flex OEM User’s Guide Manually Adjusting the System Air Pressure The following table describes the default and optional pressure monitoring and adjustment options. Pressure Type What you can do… Manually adjust the system pressure using a 5mm hex wrench. Use the gauge Manual pressure to help define the system air pressure you want. -
Page 33: Setting Up The Melter
FAT or FAT32. No other format, such as NTFS and exFAT are supported. You have the option to use BBconn Cloud or you can use the Nordson touch screen Touch Screen developed user interface to setup and monitor your melter. -
Page 34: Defining Runtime Settings
ProBlue Flex OEM User’s Guide Defining Runtime Settings The following sections detail the common operator tasks: Temperature settings Pressure settings Defining Temperature Runtime Setting There are two types of heated zones: Internal Zones: Tank and Manifold External Zones: Connected hoses and applicators... -
Page 35: Manually Adjusting System Air Pressure
ProBlue Flex OEM User’s Guide Manually Adjusting System Air Pressure You can manually adjust the system pressure using a 6mm Hex wrench. Use the gauge to help define the system air pressure you want. Using a 6mm Hex wrench, turn clockwise to increase pressure and counterclockwise to decrease pressure to best suit your production requirements. -
Page 36: Defining Electronic/Runup Pressure Runtime Settings
ProBlue Flex OEM User’s Guide Defining Electronic/Runup Pressure Runtime Settings You can purchase the following optional pressure kits by contacting your local Nordson representative: For manual pressure monitoring, you will need part number 1128344. For electronic pressure monitor and control, you will need part number 1128345. -
Page 37: Defining Electronic Pressure Settings And Monitoring Alert Settings
ProBlue Flex OEM User’s Guide Defining Electronic Pressure Settings and Monitoring Alert Settings Use Electronic Pressure Adjust to remotely change and monitor system melter pressure. You can optionally decide if you want to receive pressure alerts when the system pressure-hydraulic or pneumatic-exceeds the defined thresholds. - Page 38 ProBlue Flex OEM User’s Guide 6. Select Low Pressure Alert Threshold, then enter the amount of pressure offset below the set point before the melter enters into an Alert condition. Pressure Default Minimum Maximum (-)10 from (-)5 from (-)70 from...
-
Page 39: Defining Pressure Runup Settings And Monitoring Alert Settings
ProBlue Flex OEM User’s Guide Defining Pressure Runup Settings and Monitoring Alert Settings Use Pressure Runup to allow the system pressure to automatically adjust to maintain the same adhesive output when the line speed changes. You can optionally decide if you want to receive pressure alerts when the system pressure, hydraulic or pneumatic exceeds the defined thresholds. -
Page 40: Pressure Runup Output Settings
ProBlue Flex OEM User’s Guide Press the to toggle (enable or disable) the Zero Line Speed Pressure option. Setting Description Enabled Allows the system pressure to remain at the user-defined Minimum Pressure setting Allows the system pressure to Disabled drop to 0 (zero) 4. -
Page 41: Pressure Runup Alert Threshold Settings
ProBlue Flex OEM User’s Guide High Line Speed Pressure Default Minimum Maximum Meter/ 30.5 300.2 Minute Feet/ Minute 3. Select SAVE. Select Alert Threshold Settings to continue. Pressure Runup Alert Threshold Settings the maximum/minimum pressure thresholds you want the system to... -
Page 42: Pressure Runup Pressure Limits
ProBlue Flex OEM User’s Guide Pressure Runup Pressure Limits Enter the maximum/minimum pressure you want the system to use for production. 1. Log into your BBconn Cloud account, then do the following: Select SETUP TOOL - create or load a .NOR file. -
Page 43: Defining System Settings
ProBlue Flex OEM User’s Guide Defining System Settings WARNING! Allow only personnel with appropriate training and experience to operate or service the equipment. The use of untrained or inexperienced personnel to operate or service the equipment can result in injury, including death, to themselves and others, and damage to the equipment. -
Page 44: Defining System Temperature Settings
ProBlue Flex OEM User’s Guide Defining System Temperature Settings This section of the manual details the following Temperature System Settings: SmartMelt (Melt-on-Demand only) Global (Temperature) Settings Setback Ready Delay Defining SmartMelt Settings SmartMelt is for Melt-on-Demand systems and allows the system to automatically reduce the tank temperature by 17 C (31 F) if the fill system is inactive for a user‐specified amount of time, thereby preventing adhesive... -
Page 45: Defining Global Temperature Settings
ProBlue Flex OEM User’s Guide Defining Global Temperature Settings You can define the following global temperature settings: Enable/Disable Heaters On Upon Startup Define Over/Under Temperature Thresholds before receiving alarms Define the Temperature Setback for all Setback options The following sections detail each global temperature setting in more detail. -
Page 46: Defining The Over/Under Temperature Thresholds
ProBlue Flex OEM User’s Guide Defining the Over/Under Temperature Thresholds Use this setting to define the maximum/minimum temperature offsets from any heated zone set point before the system goes into an Alert condition. If the condition is not resolved within 2 minutes, the system goes into a Fault condition. -
Page 47: Defining Temperature Setback
ProBlue Flex OEM User’s Guide Defining Temperature Setback Use this setting to define the number of degrees by which all heated components will be decreased (offset from current set point) when the controller is placed into Heat Schedule and Manual/Automatic Setback. -
Page 48: Defining Setback Settings
ProBlue Flex OEM User’s Guide Defining Setback Settings Setback, also known as Standby, reduces the temperature by a user-defined temperature offset from all enabled external zones. There are three types of Setback options, including: Manual Enter/Exit Setback Automatic System Setback... -
Page 49: Defining Automatic System Setback
ProBlue Flex OEM User’s Guide Defining Automatic System Setback Use Automatic Setback to allow the melter to enter into Setback mode based on the user-defined time of inactivity based on one of the following: A hose/applicator # is assigned to an input. The melter will enter into Setback if that assigned applicator is not dispensing adhesive for the amount of time you define. -
Page 50: Defining Manual Setback - Auto Exit Time
ProBlue Flex OEM User’s Guide Defining Manual Setback - Auto Exit Time Use Manual Setback - Auto Exit time to define the amount of time to elapse before the melter exists Setback mode after you manually place it into Setback. -
Page 51: Defining Ready Delay
ProBlue Flex OEM User’s Guide Defining Ready Delay Use Ready Delay to prevent the melter from immediately exiting out of Heating when the tank reaches its set point temperature, thereby allowing enough time for adhesive to melt that is sufficient for production. -
Page 52: Defining Level Sensing Settings
ProBlue Flex OEM User’s Guide Defining Level Sensing Settings This section of the manual details the following: Enable/Disable Low Level Alert and Settings Empty Stop Enable/Disable Lid Open Alert and Settings Enabling/Disabling Low Level Alerts and Settings Use the Level Sensing settings to fine-tune the low/empty adhesive messaging. -
Page 53: Enabling/Disabling Empty Stop
ProBlue Flex OEM User’s Guide Enabling/Disabling Empty Stop Use the Empty Stop option to prevent air from getting into the system, thereby causing the pump to cavitate or pump erratically and potentially damaging the pump. This option also temporarily stops production just before the adhesive output goes out of production specifications, preventing defective product production. -
Page 54: Enabling/Disabling Lid Open Alerts And Settings
NOTE: A lid switch is standard for (MOD) Melt-on-Demand systems. However, you can purchase the optional lid switch kit, part number 1128173. Contact your Nordson field or sales representative. 1. Log into your BBconn Cloud account, then do the following:: Select SETUP TOOL - create or load a .NOR file... -
Page 55: Defining Fill Settings
ProBlue Flex OEM User’s Guide Defining Fill Settings Melt-on-Demand systems include the Fill System, but it is optional on tank-based systems. The following section details Fill and Level settings. Melt-on-Demand (MOD) and Tank Systems with Optional Fill Settings Melt-on-Demand and tank systems with the optional Fill System include the... -
Page 56: Enabling And Disabling Auto Pump
ProBlue Flex OEM User’s Guide Enabling and Disabling Auto Pump To toggle the Master Pump control On, press . The Pump LED flashes. If AutoPump is enabled, then the pump button will flash, indicating that the Master Pump control will be toggled On as soon as system temperature ready is achieved. -
Page 57: About Adhesive Tracking System (Ats)
ProBlue Flex OEM User’s Guide About Adhesive Tracking System (ATS) Adhesive Tracking System (ATS) monitors adhesive consumption and add‐on weights, including the total amount of adhesive dispensed and the average adhesive dispensed per product, referred to as add-on weight, or just add-on. -
Page 58: Theory Of Operation
ProBlue Flex OEM User’s Guide Theory of Operation A geared flow meter is installed on top of the hose manifold. A product trigger senses products from leading edge to leading edge as it moves along the production line. Adhesive is measured over the product... -
Page 59: Enabling Flow Monitoring
ProBlue Flex OEM User’s Guide Enabling Flow Monitoring You must have the Adhesive Tracking System option enabled before you can define and make use of the flow feature. 1. Log into your BBconn Cloud account, then do the following: SETUP TOOL Select SETUP TOOL - create or load a .NOR file. -
Page 60: Calibrating The Flow Meter
ProBlue Flex OEM User’s Guide Calibrating the Flow Meter Although the default settings were determined by using typical adhesive specific gravity values, if you want the most accurate adhesive output readings, it is strongly recommended that you calibrate the flow meter. You... -
Page 61: Defining Product And Trigger Settings
ProBlue Flex OEM User’s Guide Defining Product and Trigger Settings You can make use of a PLC or the optional touch screen to use the Teach option, or you can enter the following Product Settings instead and by trial get the same adhesive output you want. - Page 62 ProBlue Flex OEM User’s Guide Setting Description Default Minimum Maximum Product Skip Number of products to ignore before teaching or Count monitoring products for out-of-tolerance adhesive output Products to The number of products the system averages to 1000 Average calculate the Target Add-on value...
-
Page 63: Trigger Settings
ProBlue Flex OEM User’s Guide Trigger Settings 1. Log into your BBconn Cloud account, then do the following: Select SETUP TOOL - create or load a .NOR file. SETUP TOOL Select SYSTEM SETTINGS | FLOW. 2. From the Trigger Settings section, enter the following information. -
Page 64: Defining Adhesive Tracking System Alarms
ProBlue Flex OEM User’s Guide Defining Adhesive Tracking System Alarms Use the Teach mode to automatically calculate the Target Add-On and Products to Average values. SETUP TOOL 1. Log into your BBconn Cloud account, then do the following: Select SETUP TOOL - create or load a .NOR file. - Page 65 ProBlue Flex OEM User’s Guide Setting Description Default Low Stop Threshold How much lower the add-on weight .3 * Target .05 * .5 * Target (mg) can be from the Target Add-On Add on Target Add on value before a Stop alarm is Add on generated.
-
Page 66: Troubleshooting Adhesive Tracking System
This section covers only the most common problems you may encounter. If you cannot solve a problem with the information given here, contact your local Nordson representative for help. Understanding the ATS PCA Board LEDs WARNING! Allow only personnel with appropriate training and experience to operate or service the equipment. - Page 67 ProBlue Flex OEM User’s Guide Figure 3: ATS PCA Board Part 1129255_01 E 2020 Nordson Corporation...
- Page 68 ProBlue Flex OEM User’s Guide Description Color 24V Enable for external devices Green: Enabled Amber: enabled with overload condition Red: Disabled with no load connected Off: Disabled CPU Reset Off: Normal operation Red: CPU reset in progress 3.3V Supply Status Green: Normal operation Amber or Red: Fault in 3.3V regulator...
-
Page 69: General And Flow Control Alarms
ProBlue Flex OEM User’s Guide General and Flow Control Alarms Alarm Possible Cause Corrective Action Detector Error Adhesive flowing but product detector Check the production line. Check the not sensing products product detector installation/position. Replace the product detector if failed. - Page 70 ProBlue Flex OEM User’s Guide General and Flow Control Alarms (contd) Problem Possible Cause Corrective Action Under limit alarm (Alarm Failed solenoid, module, or nozzle Refer to the applicator manual to Lower Limit) troubleshoot applicator problems. Repair or replace failed components as needed.
-
Page 71: About System I/O
ProBlue Flex OEM User’s Guide About System I/O The melter is equipped with one user‐configurable input and one user‐configurable output. Wire the inputs/outputs to the melter then configure the inputs and outputs through using the user interface. NOTE: You can expand the total number of inputs to a total of 5 and the total number of outputs to 4 by ordering the Legacy I/O kit, part number 1127717. -
Page 72: Assigning Remote Recipe Inputs
ProBlue Flex OEM User’s Guide Assigning Remote Recipe Inputs Using a PLC, you can toggle input bits high or low to “remotely” load a recipe. 1. Log into your BBconn Cloud account, then do the following: Select SETUP TOOL - create or load a .NOR file. - Page 73 ProBlue Flex OEM User’s Guide The following table details the input bits and their sequence required to remotely load a recipe. 4-bit 3-bit 2-bit 1-bit Selected Recipe No Recipe High Recipe 1 High Recipe 2 High High Recipe 3 High...
-
Page 74: Assigning Outputs
ProBlue Flex OEM User’s Guide Assigning Outputs 1. Log into your BBconn Cloud account, then do the following: Select SETUP TOOL - create or load a .NOR file. Select SYSTEM SETTINGS | SYSTEM IO. SETUP TOOL 2. Select Output. 3. Standard is the default output selection and has only one output that you can define. -
Page 75: Assigning Light Tower Outputs
ProBlue Flex OEM User’s Guide Assigning Light Tower Outputs 1. Log into your BBconn Cloud account, then do the following: Select SETUP TOOL - create or load a .NOR file. Select SYSTEM SETTINGS | SYSTEM IO. SETUP TOOL 2. Select Output, then select Light Tower. -
Page 76: Modifying External Zone Names
ProBlue Flex OEM User’s Guide Modifying External Zone Names You can only rename external zone names. Internal zones, Tank and Manifold cannot be renamed. External zone names can be up to 15 characters long and English only. 1. Log into your BBconn Cloud account, then do the following: SETUP TOOL Select SETUP TOOL - create or load a .NOR file. -
Page 77: Modifying User Management Access Rights
ProBlue Flex OEM User’s Guide Modifying User Management Access Rights Refer to the manual that came with your control system. Not all Nordson products or platforms support User Management. 1. Log into your BBconn Cloud account, then do the following: SETUP TOOL Select SETUP TOOL - create or load a .NOR file. -
Page 78: Defining And Modifying Shift Schedules
ProBlue Flex OEM User’s Guide NOTES: Click on the Green (heat Schedule) or Blue (Setback) area to modify the event time. Maximum number of event pairs is 6. You must enter an on/off time for each Heat or Setback Event. -
Page 79: Defining Network Access
ProBlue Flex OEM User’s Guide Defining Network Access The following section details how to connect this melter to your network, so you can remotely monitor and change melter settings. 1. Log into your BBconn Cloud account, then do the following: SETUP TOOL Select SETUP TOOL - create or load a .NOR file. -
Page 80: Defining Wifi Access
(enable or disable) the WiFi option. The default is Disabled. NETWORKING Note: If you have more than one ProBlue Flex melter in the same location, make sure each melter has a unique SSID name and that they are using different WiFi channel numbers. - Page 81 ProBlue Flex OEM User’s Guide 4. Enter or select the WiFi settings you want to use: Option Description Default Minimum Maximum Number of Number of WiFi Clients users you want to grant access to the melter at any one time...
-
Page 82: Defining Plc Access
ProBlue Flex OEM User’s Guide Defining PLC Access 1. Log into your BBconn Cloud account, then do the following: Select SETUP TOOL - create or load a .NOR file. SETUP TOOL Select SYSTEM SETTINGS | NETWORKING. 2. Select PLC. Please select how to load a configuration file 3. -
Page 83: Defining Plc Communications
ProBlue Flex OEM User’s Guide Defining PLC Communications Profinet, Ethernet/IP and Modbus TCP are natively supported and do not require you to install a communication card. SETUP TOOL Refer to Connecting Profinet, Ethernet IP and Mod BUS/TCP for more information. - Page 84 ProBlue Flex OEM User’s Guide Notes: Refer to the OEM and Field Bus Communications manual, part number 1128352 for more information about creating a Flexible map using BBconn Cloud application. If you change, for example from melter1 the OEM door to an...
-
Page 85: Connecting Profinet, Ethernet/Ip And Modbus Tcp
ProBlue Flex OEM User’s Guide Connecting Profinet, Ethernet/IP and Modbus TCP Profinet, Ethernet/IP and Modbus TCP requires a direct connection between your PLC and the melter. Only the Profinet requires the Station Name, which you can enter using BBconn Cloud or a touch screen. Refer to Defining PLC Communications on the previous page for more information. - Page 86 ProBlue Flex OEM User’s Guide 4. (Refer to Figure 3) Connect one end of the Ethernet cable to either (d) External 1 (X14) or (e) External 2 (X15) on the low voltage controller and the other to your PLC. When connected, the melter determines which protocol to use based on the packet information.
-
Page 87: Defining Web Access
ProBlue Flex OEM User’s Guide Defining Web Access 1. Log into your BBconn Cloud account, then do the following: Select SETUP TOOL - create or load a .NOR file. SETUP TOOL Select SYSTEM SETTINGS | NETWORKING. 2. Select WEB SERVER. -
Page 88: About System Preferences
ProBlue Flex OEM User’s Guide About System Preferences You can change any preference at any time. 1. Log into your BBconn Cloud account, then do the following: Select SETUP TOOL - create or load a .NOR file. SETUP TOOL Select SYSTEM SETTINGS | USER MANAGEMENT. -
Page 89: Uploading A .Plc File From Bbconn Cloud File To A Melter
The ProBlue Flex melter is designed for maximum backward compatibility with older Blue Series melters. For many melters using Ethernet/IP, it is possible to connect the ProBlue Flex melter where a Blue Series melter was connected and it will run automatically with no PLC programming required:... -
Page 90: Editing A .Plc File From Bbconn Cloud
ProBlue Flex OEM User’s Guide Editing a .PLC File from BBconn Cloud 1. Log into your BBconn Cloud account, then do the following: Select SETUP TOOL - create or load a .NOR file. SETUP TOOL Select SYSTEM SETTINGS | PLC COMMUNICATIONS. -
Page 91: Tool Settings
ProBlue Flex OEM User’s Guide Tool Settings WARNING! Allow only personnel with appropriate training and experience to operate or service the equipment. The use of untrained or inexperienced personnel to operate or service the equipment can result in injury, including death, to themselves and others, and damage to the equipment. -
Page 92: Managing Melter Data Files
(upgrading), .NOR files (system configuration) and .PLC (flex map). .DAT files contain the melter firmware and are used for upgrading the firmware on the melter. The ProBlue Flex melter internally retains knowledge of its current software version. .NOR files contain the data shown in Table 6. The .NOR file is used to transfer system settings, recipes, PLC maps, and event log data to/from a melter and BBconn Cloud. -
Page 93: How The Melter Processes Data Files
ProBlue Flex OEM User’s Guide How the Melter Processes Data Files When you insert a USB drive into a melter's USB port, or start the melter with a USB drive already inserted, the melter automatically does the following in sequential order: 1. -
Page 94: Setting Up Maintenance Reminders
ProBlue Flex OEM User’s Guide Setting Up Maintenance Reminders Use the Maintenance system to monitor and remind you when to inspect, perform maintenance or replace the following components. Component What you need Based on Default/hrs Minimum / hrs Maximum / hrs... -
Page 95: Managing The Maintenance System
ProBlue Flex OEM User’s Guide Managing the Maintenance System 1. From BBconn Cloud, do the following: SETUP TOOL - create or load a .NOR file. TOOLS, then select MAINTENANCE SCHEDULE. SETUP TOOL 2. Press the to toggle (enable or disable) the Maintenance System option. -
Page 96: Setting Up And Viewing Component Maintenance Status
ProBlue Flex OEM User’s Guide Setting Up and Viewing Component Maintenance Status 1. From BBconn Cloud, do the following: SETUP TOOL - create or load a .NOR file. TOOLS, then select MAINTENANCE SCHEDULE. SETUP TOOL 2. Select View Maintenance Status. -
Page 97: Defining A Custom Maintenance Component Item
ProBlue Flex OEM User’s Guide Defining a Custom Maintenance Component Item 1. From BBconn Cloud, do the following: SETUP TOOL - create or load a .NOR file. TOOLS, then select MAINTENANCE SCHEDULE | View Maintenance Status. SETUP TOOL 2. Select ADD ITEM, then do the following:... -
Page 98: Changing The Melter Software Version
1. Log into your BBconn Cloud account and select MEDIA CENTER. 2. Under Software Updates, select the link for your ProBlue Flex. The default location is to your /Downloads folder. Copy the .DAT file to the root of a USB drive. -
Page 99: Backing Up Melter Settings
ProBlue Flex OEM User’s Guide Backing Up Melter Settings When you insert a USB drive into the melter while it is powered on, a backup is automatically performed and is saved to the root of the USB iF no other .NOR file is detected. -
Page 100: Restoring Saved Melter Settings
ProBlue Flex OEM User’s Guide Restoring Saved Melter Settings You can restore melter settings that were previously saved as a .NOR file and uploaded to BBconn Cloud. 1. Place on a USB drive the .NOR file that includes the settings you want to restore. -
Page 101: Restoring A Melter To The Factory Default Settings
ProBlue Flex OEM User’s Guide Restoring a Melter to the Factory Default Settings You can restore a melter's factory default settings by creating a new .NOR file on BBconn Cloud and then transferring the new file to a melter. 1. Log into your BBconn Cloud account. -
Page 102: Managing The System Configuration
ProBlue Flex OEM User’s Guide Managing the System Configuration The Tools menu includes the System Configuration menu and the Event Log: The System Configuration menu provides access to the screens you need to view your system information, accessories, and configuration code. -
Page 103: Viewing System And Configuration Information
ProBlue Flex OEM User’s Guide Viewing System and Configuration Information The System Information screen provides the application and boot version numbers and the hardware revision numbers for the following: 1. Log into your BBconn Cloud account. SETUP TOOL Select SETUP TOOL - create or load a .NOR file. -
Page 104: Viewing Installed Accessories
ProBlue Flex OEM User’s Guide Viewing Installed Accessories You can customize the melter with additional software and hardware features and options. Most accessories are automatically detected, but some are not. Typically, the instruction sheet that accompanies the accessory will indicate whether or not you need to manually update the melter accessories list. -
Page 105: Viewing The Configuration Code
ProBlue Flex OEM User’s Guide Viewing the Configuration Code You can view the configuration of each melter registered on BBconn Cloud. 1. Log into your BBconn Cloud account. Open the .NOR file of the applicable melter. SETUP TOOL 2. Select TOOLS | SYSTEM CONFIGURATION | CONFIGURATION CODE 3. -
Page 106: Managing Licenses
ProBlue Flex OEM User’s Guide Managing Licenses Contact your Nordson sales representative or call Nordosn directly to purchase additional licenses. 1. Log into your BBconn Cloud account. Open the .NOR file of the applicable melter. 2. Select TOOLS | SYSTEM CONFIGURATION | LICENSES. -
Page 107: Managing Recipes
ProBlue Flex OEM User’s Guide Managing Recipes 1. Log into your BBconn Cloud account, then do the following: SETUP TOOL Select SETUP TOOL - create or load a .NOR file. 2. Select RECIPE to do the following: Option\ Description Please select how to load a configuration file... -
Page 108: Performing Basic Melter Maintenance
ProBlue Flex OEM User’s Guide Performing Basic Melter Maintenance This section details the common maintenance procedures that you can do on the melter, such as: Drain adhesive from the melter View the Event Log AutoTune the heated zones Calibrate Full/Empty Tank CAUTION! Wear eye protection and long-sleeve shirt when draining the melter. -
Page 109: Draining Or Purging The Melter
ProBlue Flex OEM User’s Guide Draining or Purging the Melter Use the Drain feature to remove adhesive from the tank. The melter must be in a Ready State. 1. Using a 4mm Hex driver, remove the front panel (a). 2. Extend the drain pathway (b), and use a large enough pan to collect the adhesive from the tank. -
Page 110: Autotuning Heated Zones
ProBlue Flex OEM User’s Guide AutoTuning Heated Zones Use AutoTune to improve the regulation and control of the external heated zones. You must use a PLC or the touch screen version to perform this task. NOTES: The external zones that you want to tune must be enabled and at set point temperature for at least 15 minutes. -
Page 111: Troubleshooting
ProBlue Flex OEM User’s Guide Troubleshooting WARNING! Allow only personnel with appropriate training and experience to operate or service the equipment. The use of untrained or inexperienced personnel to operate or service the equipment can result in injury, including death, to themselves and others, and damage to the equipment. -
Page 112: Viewing The Event Log
ProBlue Flex OEM User’s Guide Viewing the Event Log The melter software includes a detailed Event Log for troubleshooting purposes. The Event Log keeps track of all melter events, including the time, day, and type of an event, such as an Alert, Fault, or Stop condition, as well as parameter changes. -
Page 113: Viewing An Event Log On Bbconn Cloud
ProBlue Flex OEM User’s Guide Viewing an Event Log on BBconn Cloud Event log files are contained in .NOR files. To view a melter's event log on BBconn Cloud, you must download the .NOR file from the melter and upload the file to BBconn Cloud. -
Page 114: Heater Sub System Alarms
ProBlue Flex OEM User’s Guide Heater Sub System Alarms The following table details the troubleshooting tips to resolve Alert and Fault conditions. Alarm Details Short Description Troubleshooting Tips Type The zone exceeds the Check heater connections programmed upper for intermittent wiring, open Zone Over Temperature temperature limit. - Page 115 ProBlue Flex OEM User’s Guide Heater Sub System Alarms (contd) Alarm Details Short Description Troubleshooting Tips Type RTD resistance is below the Check for intermittent or short circuit threshold. If Alert broken RTD connections. condition continues for 2 Verify the resistance. It minutes, a fault will occur.
-
Page 116: Fill System Alarms
ProBlue Flex OEM User’s Guide Fill System Alarms The following table details the troubleshooting tips to resolve Alert and Fault conditions. Alarm Details Short Description Troubleshooting Tips Type Calibration was never done. A new control board has been connected. Level sensor cable is... - Page 117 ProBlue Flex OEM User’s Guide Fill System Alarms (contd) Alarm Details Short Description Troubleshooting Tips Type Adhesive level in melter is Check the following; abnormally low. The system Check for loose or should have filled before disconnected level reaching this point.
-
Page 118: Electronic Pressure Adjust Alarms
ProBlue Flex OEM User’s Guide Electronic Pressure Adjust Alarms The following table details the troubleshooting tips to resolve Alert and Fault conditions. Alarm Details Short Description Troubleshooting Tips Type Pressure exceeds the High Check or do the following: Pressure Threshold.
Need help?
Do you have a question about the ProBlue Flex and is the answer not in the manual?
Questions and answers
fill level with an auto fill says its at 90% but tank has about 2 inches of molten glue at the bottom. how do i adjust this so i can have like 15 more scoops of glue in it.
To adjust the fill level on a Nordson ProBlue Flex to increase the amount of molten glue in the tank, you can perform a full calibration of the level sensor. Follow these steps:
1. Ensure the melter is in a Temperature Ready state, meaning the tank is at its set point temperature.
2. Make sure adhesive fully covers the level sensor in the tank.
3. Perform a full calibration to increase the accuracy of the level sensor.
This adjustment ensures the system recognizes a higher fill level, allowing more molten glue in the tank.
This answer is automatically generated